- PRO Courses Guides New Tech Help Pro Expert Videos About wikiHow Pro Upgrade Sign In
- EDIT Edit this Article
- EXPLORE Tech Help Pro About Us Random Article Quizzes Request a New Article Community Dashboard This Or That Game Popular Categories Arts and Entertainment Artwork Books Movies Computers and Electronics Computers Phone Skills Technology Hacks Health Men's Health Mental Health Women's Health Relationships Dating Love Relationship Issues Hobbies and Crafts Crafts Drawing Games Education & Communication Communication Skills Personal Development Studying Personal Care and Style Fashion Hair Care Personal Hygiene Youth Personal Care School Stuff Dating All Categories Arts and Entertainment Finance and Business Home and Garden Relationship Quizzes Cars & Other Vehicles Food and Entertaining Personal Care and Style Sports and Fitness Computers and Electronics Health Pets and Animals Travel Education & Communication Hobbies and Crafts Philosophy and Religion Work World Family Life Holidays and Traditions Relationships Youth
- Browse Articles
- Learn Something New
- Quizzes Hot
- This Or That Game New
- Train Your Brain
- Explore More
- Support wikiHow
- About wikiHow
- Log in / Sign up
- Computers and Electronics
- Operating Systems

How to Block and Unblock Websites on a Mac
Last Updated: September 29, 2023 Fact Checked
Enabling Parental Controls
Using apps, extensions, & router settings, blocking sites with the hosts file, expert q&a.
This article was co-authored by Yaffet Meshesha and by wikiHow staff writer, Megaera Lorenz, PhD . Yaffet Meshesha is a Computer Specialist and the Founder of Techy, a full-service computer pickup, repair, and delivery service. With over eight years of experience, Yaffet specializes in computer repairs and technical support. Techy has been featured on TechCrunch and Time. This article has been fact-checked, ensuring the accuracy of any cited facts and confirming the authority of its sources. This article has been viewed 1,088,809 times.
Blocking certain websites can keep you productive during the workday or minimize the chance of your child finding adult content. You can create a website "blacklist" for your Mac in several ways. The built-in Parental Control options are the easiest to use, but you can also block websites using the hosts file in Terminal with your administrator account, using third-party web browser extensions or apps, or even on your router. This wikiHow article teaches you how to block and unblock websites on a Mac.
Things You Should Know
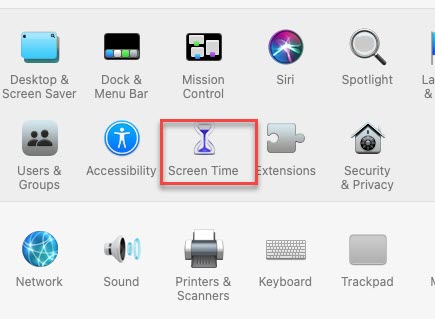
- macOS has its own built-in website blocker. It can be found in the "Screen Time" settings in "System Settings."
- You can use third-party apps and web browser extensions to block websites.
- You can also block websites on the administrative account by modifying the Hosts file in the Terminal.

- If you’re using a pre-Ventura version of macOS, this will be called System Preferences .

- If you are using an older version of macOS (pre-Catalina), click Parental Controls instead. You may need to set up a new account with parental controls.

- If you have an older macOS version, click the lock icon in the lower-left corner and enter your user password. Then click the user you want to restrict.
- Skip this step if you’re trying to restrict websites on your own account.

- If you want to disable all web and content restrictions, click the toggle switch or the Turn Off button to turn content restrictions off.

- On pre-Catalina versions of macOS, click the Web tab at the top of the Parental Controls menu.

- Alternatively, you can select Allowed Websites Only . This will block all websites except for the ones you allow.

- Alternatively, if you block all but allowed websites, you can enter the websites you want to allow by clicking the "+" button below the "Allow" box.

- If you want to remove a website from the restricted website, click the website you want to remove and click the " - " button below the box.

- In some versions of macOS, click OK instead.

- Add specific websites to the Allow box or remove them from the Restricted box to unblock them.
- Toggle off Content & Privacy in the main Content & Privacy menu of Screen Time to turn off all restrictions.

- You can access the Google Chrome store at https://chrome.google.com/webstore/category/extensions . You can access the Firefox extension store by typing "about:addons" in the address bar. You can download extensions for Safari in the App Store.
- Some extensions you can use to block websites include "BlockSite," "Stay Focused," "Simple Blocker," and more.
- Be careful of apps with low ratings or too few reviews to judge accurately. Untrustworthy extensions may install malware on your computer.
- This will only block websites on the browser the extension is installed on.
- Once the extension is installed, you can go into the settings and add or remove websites from your block list.

- Some of these apps block websites completely, while others allow you to block certain sites for a specific period of time.
- You will be able to block and unblock websites from within the app.

- For earlier versions of macOS, click Advanced , then click the TCP/IP tab.
- Copy the IP address listed after "Router" or "IPv4" and paste it into your browser's address bar. This should take you to your router settings.
- Enter the username and password to log in to your router. If you have never set these, look up the default password for that router model. (User "admin" and password "password" are common defaults.)
- Browse the router settings for site-blocking options. Each router brand has a different set of options, but most allow you to block sites in an area labeled "Access," "Content," "Rules," "Blocked Domains," or something similar.
- Add any websites you want to block. There will most likely be an option to click to add websites. Click this option and then add the website URL you want to block. Remove websites from the list to unblock them.

- This method does not have a 100% success rate, and is not too difficult to bypass. It's a quick way to block a website on your personal computer for productivity reasons. While not recommended as the only way to block other users' access, you can try it alongside another method for greater effect.

- To back up the host file, type sudo /bin/cp /etc/hosts /etc/hosts-original in the Terminal exactly as it appears. Then press Enter .

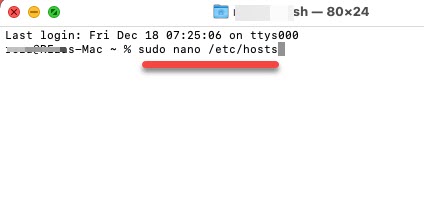
- Alternatively, you can edit the hosts file in the main Terminal window using the command sudo nano -e /etc/hosts .
- Enter your administrator password again if prompted to do so.

- Don’t edit any other text that comes before this line.

- Do not copy-paste from another document. This can introduce invisible characters that prevent the text from working.

- In theory, you can include multiple URLs on one line (entering the IP address only once), up to a maximum of 255 characters. [1] X Research source However, this may not work on all versions of Mac OS X. [2] X Research source

- If editing in the main Terminal window, press Control + O to save, then Control + X to close the file.

- If you’re using Ventura or Monterey, type or paste in the command sudo dscacheutil -flushcache; sudo killall -HUP mDNSResponder , then press return or enter .
- For earlier versions of macOS, check out our guide to flushing your cache .
- You may restart your computer instead to get the same effect. In many cases, the sites will be blocked even without this step.

- 127.0.0.1 (URL) without the "www"
- 127.0.0.1 m.(URL) will usually block the mobile version of the site
- 127.0.0.1 login.(URL) or apps.(URL) are a couple common variations of home pages. Visit the website and check your address bar for the exact variation.
- Entering "fe80::1%lo0 (URL)" blocks IPv6 access to the site. Most sites do not automatically connect you via IPv6, but Facebook is a notable exception.
- If none of these variations work, there is probably no hosts file workaround. Try one of the other block methods on this page.

- To undo all changes and restore from your backup, enter sudo nano /etc/hosts-original in Terminal. Press Control + O , delete the "-original" in the name, and confirm the save.
- For example, you would write #127.0.0.1 www.facebook.com to unblock Facebook.

- If websites are blocked in your region or by your internet service provider, you may be able to get around the blocks by installing a VPN on your Mac. Thanks Helpful 0 Not Helpful 0

You Might Also Like

- ↑ https://www-01.ibm.com/support/knowledgecenter/ssw_aix_71/com.ibm.aix.files/hosts.htm
- ↑ https://github.com/smdahlen/vagrant-hostmanager/issues/60
About This Article

1. Open System Preferences . 2. Click the Screen Time icon. 3. Click Content & Privacy . 4. Click Turn on in the upper-right corner. 5. Select Limit adult websites . 6. Click Customize . 7. Click + below the "Restricted" box. 8. Enter the website you want to block and click Ok . 9. Click Ok . Did this summary help you? Yes No
- Send fan mail to authors
Reader Success Stories
Vivian West
Dec 30, 2018
Is this article up to date?

Jun 15, 2016

Featured Articles

Trending Articles

Watch Articles

- Terms of Use
- Privacy Policy
- Do Not Sell or Share My Info
- Not Selling Info
wikiHow Tech Help Pro:
Level up your tech skills and stay ahead of the curve
- Editorial Process
- Why Trust Us?
- Affiliate Linking Policy
- Privacy Policy
- Terms of Service
Weekly Must-Reads View All
7 things to do if you spilled water on your macbook.
Quick steps to save your MacBook from water damage
How to Boot Your Mac Into Verbose Mode: 4 Best Ways
Boot your Mac into Verbose Mode with this step-by-step guide
How to Fix Your Mac Shutting Down Randomly: 16 Fixes to Try
Troubleshoot random shutdowns on Mac with effective solutions
How Much Space Does macOS Take On Your Mac?
Understand macOS size and analyze your Mac's storage usage
Popular Topics
- What to Do With Your Old MacBook? 13 Useful Ways to Reuse an Old Mac
- What Is the MacBook Flexgate Issue and How to Fix It
- What Is the MacBook Flexgate Issue
- Uninstall Java
- Safely Transfer Files from Mac to Mac
- Safari Bookmarks Disappeared on Mac: 10 Best Ways to Restore Them
- Repairing disk permissions
- Old MacBook
Trending Now View All

- Mac Maintenance
How to Block Websites on Safari on Mac: 5 Best Ways
Hashir Ibrahim
Reviewed by
Last updated: December 22, 2023
Expert verified
To block websites on Safari on a Mac, use one of the following methods:
- Set up Screen Time in System Settings and choose Content & Privacy to limit adult websites or specify only allowed websites .
- Access your router’s settings via its IP address and use the Access Restrictions or Parental Controls to block specific websites.
- Install a web blocker extension from the App Store.
- Download and use third-party web blocker apps.
- Use the sudo nano /etc/hosts command to edit the host file via Terminal to block specific websites.
I know how easy it is to get distracted online, especially when trying to work or study on a Mac. That’s why I put together this guide with simple, straight-to-the-point steps that I use myself to keep focused. These methods really work whether you’re aiming to stay focused, manage your online activities, or just streamline your browsing.
Before We Begin
Besides blocking websites on your Mac, you should also remove adware and unwanted programs. Download MacKeeper and use its Adware Cleaner to avoid annoying pop-ups that send you to websites you don’t want to visit.
How to Block a Website on Safari on Mac
There are different solutions for blocking websites on Safari. Below, I’ve shared some quick ways to block websites on Safari.
1. Use Screen Time
Screen Time is a feature in macOS, iOS, and iPadOS that allows you to set limits on app usage, including Safari. You can use Screen Time to block specific websites or categories of websites during certain times of the day. You can also use it to block all websites and whitelist some specific ones.
For macOS 10.15 Catalina or Later
Here’s how to use Screen Time to block websites on Safari on your Mac:
- Open the Apple menu and click System Settings .
- Click Screen Time in System Settings and select Content & Privacy .

- Click Content Restrictions .

- A new window will appear. Click the drop-down icon next to Access to Web Content and select Limit Adult Websites .

If you want to manage your time on specific websites using Safari, you can do that with Screen Time. Here are the steps for setting a time limit for certain websites on Safari on a Mac:
- Click Screen Time in System Settings and select App Limits .

- In the App Limits section, toggle on the App Limits switch and click the Add Limit button to create a new restriction.

- Scroll down to the end of the list until you find the option for Websites .

- Click the dropdown arrow next to Websites to specify which websites you want to set time limits for.
- Select a website from the list or add a URL.
- In the Time section, specify the time you wish to allow for this site. This is the duration for which you can access the site each day.
- Once you have set the time limit, click Done .

For iOS 12 or Later and iPadOS
Here’s how to use Screen Time to block websites on Safari on your iPhone or iPad:
- Open the Settings app on your iPhone.
- Tap Screen Time .
- If Screen Time isn’t already enabled, tap Turn On Screen Time , then tap Continue . If it’s for your iPhone, select This is My iPhone .
- Tap Content & Privacy Restrictions and toggle on the Content & Privacy Restrictions switch.
- Tap Content Restrictions and select Web Content .
- Select Limit Adult Websites .
- Tap Add Website in the Never Allow section.
- Type the website URL you want to restrict in the URL field and tap Done .
2. Change Router Settings
If you block websites through your router settings, it stops those sites on every device using your Wi-Fi. You just need to go into your router’s settings and choose the websites you want to block.
Here are the steps to block websites on Safari using router settings:
- Open your web browser and enter your router’s IP address in the address bar. You can usually find this information on the back of your router or in the manual.
- Enter your login credentials when prompted. The default username and password should be listed in your router’s manual if you need to change them.
- Look for the Access Restrictions or Parental Controls section in your router’s settings. It may be under the Advanced or Security tab.
- Choose the Website Blocking or Block Sites option.
- Enter the URL you want to block in the Website URL field. Some routers may also allow you to block websites based on keywords.
- Save the settings and exit the router’s interface.
3. Install A Web Blocker Extension
You can also add a browser extension to your web browser to do different things, including blocking websites. Safari doesn’t have a dedicated store for extensions, like Chrome. Instead, you have to download them from the App Store.
For Safari, I recommend a website-blocking extension called StayFree, a popular choice among Mac users.
For macOS 10.12 or Later
- Open Safari on your Mac.
- Click Safari in the menu bar and select Safari Extensions . This will open the App Store.

- In the App Store, type StayFree in the search bar and click Get > Install next to the app name in the results.

- Wait for the extension to install. Once it’s installed, you might get this notification in Safari. Click the Turn On Extensions button.

- Close Safari and reopen it. You should now see the extension’s icon near the address bar.
- To block a site, click the extension icon, and select Focus Mode Settings .
- It will open a new window. Click the Add Website button.

- Type the website URL and click Save . It will block the website and you won’t be able to reload it until you remove it from the Blocked Website list.

For iOS 15 or Later and iPadOS 15 or Later
iOS 15 and iPadOS 15 support web extensions for Safari. To add a Safari website blocker extension to your iPhone or iPad, follow these steps:
- Open Settings on your iPhone or iPad.
- Navigate to Safari .
- Select Extensions > More Extensions . This directs you to the App Store, showing compatible Safari extensions.
- Pick a web blocker extension for screen time control, and download it.
- Activate the Safari extension by going to Settings > Safari > Extensions .
- Find the web blocker extension you’ve installed and turn it on.
4. Use Third-Party Web Blocker Apps
Third-party web blocker apps offer another effective solution for managing online content access on Mac. These apps work by letting you make a list of websites you want to block. This stops you from accessing these sites for certain times you choose or all the time.
Here are some third-party web blocker apps that you might consider using:
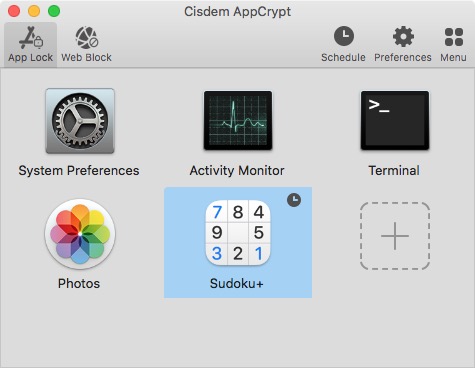
- Cisdem AppCrypt : Cisdem AppCrypt is not just a website blocker, it also locks apps with a password. For website blocking, you can create a blacklist or whitelist and set up a schedule to block sites during certain times.
- 1Focus : 1Focus lets you block distracting websites and apps. It’s simple to use and lets you set periods of focus during which specific sites and apps are inaccessible. You can also schedule recurring focus sessions, making it a handy tool for establishing a routine.
- Freedom : Freedom is a popular app for blocking distracting websites and apps across multiple devices. It lets you create blocklists and schedule distraction-free sessions, making it a great tool for improving focus and productivity.
- SelfControl : Specifically for macOS, SelfControl lets you block access to distracting websites, mail servers, or anything else on the Internet. Once you set a period to block for, not even restarting your Mac or deleting the app will disable the block.
5. Map Domain Using Host Files/Terminal
Blocking websites in Safari on your Mac can be done by using host files. These files connect website names to their internet addresses. You can change these files to stop your Mac from reaching certain websites.
Here are the steps to map domain using host files:
- Open the Terminal application on your Mac. You can do this by searching for Terminal using Spotlight or by navigating to Applications > Utilities > Terminal .

- In the Terminal window, type the following command to open the host’s file and press Enter :

- You will be prompted to enter your admin password. Enter it.
- Use the arrow keys to navigate to the bottom of the host’s file.
- To block a website, add the following line to the bottom of the file, replacing example.com with the URL of the website you want to block:
- You can add as many websites as you want by creating a new line for each website.
- Press Control ^ + O to save the changes to the host’s file.

- Press Control ^ + X to exit the editor.

- To make the changes take effect, flush the DNS cache on Mac by typing the following command in the Terminal:

- It will clear the cached DNS entries, forcing the Mac to use the updated host file.
Once you’ve completed these steps, Safari and other browsers on your Mac should no longer be able to access the websites you’ve blocked in the host file.
This method blocks the websites system-wide, so it will affect all users on your Mac. To unblock a website, remove the corresponding line from the host file and flush the DNS cache again.
How to Whitelist Specific Websites on Mac
Once you’ve set up Screen Time to limit websites, most adult websites will become inaccessible. But if you want to allow specific websites only, follow these steps:
- Follow the above steps from 1 to 3, and instead of Limit Adult Websites, select Allowed Websites Only in the Web Content window.

- Click the Customise button that appears.

- In the new window, click the + button in the bottom left corner.
- Type in the name and URL of the website you want to allow and tap Done .

- The website you add will appear in the list.

- Click Done to close the window.
Avoid Distractions While Browsing With MacKeeper
MacKeeper does not offer a feature to block websites on Safari. But it offers an Adware Cleaner that can detect and remove adware and potentially unwanted programs causing unwanted pop-ups or redirects to certain websites. This can indirectly help with blocking certain websites.
To use the Adware Cleaner feature in MacKeeper:
- Download and install MacKeeper on your Mac.
- Open MacKeeper and click Adware Cleaner in the left sidebar.

- Click Open .

- Click Start Scan to scan your system for adware and potentially unwanted programs.

- Once the scan is complete, review the list of detected items and select the ones you want to remove.
- If there are no malicious files, you’ll get a No items found message on your screen. Click Rescan to run the scan again or close the program.

While this may not directly block websites on Safari, removing adware and potentially unwanted programs can prevent unwanted pop-ups or redirects to those websites. So, it’s worth a try.
What Else Can MacKeeper Do?
Besides removing adware on your Mac, MacKeeper can block ads on your Mac , disable pop-ups on Safari and other browsers, and remove browser extensions . Check out my MacKeeper review to learn about these features.
Why Would You Need to Block Websites on Safari?
Blocking websites on Safari can be necessary for several reasons:
- 🎯 Focus and Productivity : If you find yourself frequently distracted by certain websites while working or studying, blocking them can help maintain focus and boost productivity.
- 👪 Parental Controls : For parents, blocking websites is a way to ensure children don’t access inappropriate content or spend too much time on entertainment sites.
- 🔒 Online Safety : Blocking websites that are known for phishing, scams, or malicious content helps protect your personal information and your device’s security.
- 📶 Bandwidth Management : In some cases, especially in a workplace, blocking websites that consume a lot of bandwidth (like streaming services) can help maintain network performance.
- 💆 Digital Well-being : Sometimes, blocking websites can be a part of a digital detox strategy, helping reduce time spent on addictive sites and improving overall well-being.
In each case, the goal is to create a safer, more focused, and more productive online environment.
Block Unwanted Websites on Safari and Be More Productive
Now that you know how to block websites on Safari, you may want to take your productivity up a notch. Here are some more tips to make your Safari experience better.
- Clear Safari cache on your Mac to improve its performance and prevent slow loading times.
- If your Safari is crashing on Mac , troubleshoot the problem by updating it and clearing the cache and cookies.
- Update Safari on Mac to prevent crashes and improve its security.
Frequently Asked Questions
Can i unblock websites that i’ve blocked on safari on mac.
Yes, you can unblock websites previously blocked in Safari on your Mac. The method to unblock depends on how you blocked the site initially, whether through browser settings, a parental control app, or system files.
Can I password-protect the blocked websites?
No, you cannot password-protect the blocked websites using the built-in website-blocking feature on Safari. If you want to password-protect your blocked websites, use a third-party app or software that offers this feature.
Will blocking websites on Safari prevent me from accessing them on other devices?
No, blocking websites on Safari will not prevent you from accessing them on other devices. Blocking websites on Safari only affects your Safari browser on the device you set it up on. You can access those websites easily on other devices.
Can I block websites based on specific keywords?
No, you cannot block websites based on specific keywords using the built-in website blocking feature on Safari. However, some third-party apps or browser extensions allow blocking websites based on keywords or phrases.

I'm Hashir, a tech journalist with a decade of experience. My work has been featured in some of the top tech publications like MakeUseOf and MakeTechEasier. I have a bachelor's degree in IT, a master's in cybersecurity, and extensive knowledge of Apple hardware, specifically MacBooks. As the senior writer at MacBook Journal, I write in depth guides that help you solve any issues you have with your mac and unbiased reviews that help you make the right buying decisions.

Hi there! I'm Ojash, a tech journalist with over a decade of experience in the industry. I've had the privilege of contributing to some of the world's largest tech publications, making my mark as a respected Mac expert. My passion lies in exploring, using, and writing about MacBooks, and I enjoy sharing my expertise to help others make informed decisions and get the most out of their MacBook experience. Join me as we delve into the fascinating world of MacBooks together!
You May Also Like

How to Flush DNS Cache on Your Mac
Written by Hashir Ibrahim Reviewed by Ojash Last updated: September 11, 2023

How to Check if Your MacBook Is Charging: 8 Best Ways
Written by Hashir Ibrahim Reviewed by Ojash Last updated: September 6, 2023

How to Kill Background Processes on Your Mac: 8 Best Methods
Written by Hashir Ibrahim Reviewed by Ojash Last updated: August 26, 2023 Expert

How to Catch and Remove Hidden LaunchDaemons on Mac: 2 Top Ways
How to block websites in Safari using Screen Time on your Mac
- To block a website on Safari, use Screen Time on your Mac.
- You can even block all websites and only allow specific, approved sites.
- Alternatively, you can install a third-party website blocker — but setup will vary from app to app.
The internet can be an incredible resource, but it can also be a dangerous place, particularly for young children. But there are options to limit which sites your computer can have access to.
If you have a Mac, there are built-in options, including blocking specific sites, limiting access to approved sites, or using a third-party website blocker.
Here's what you'll need to do:
How to block websites on Safari
You can block sites using Screen Time on Mac computers. Here's how:
1. Click the Apple icon, located in the top-left corner of the screen and select System Preferences .
2. Choose Screen Time .
3. Click Content and Privacy in the left sidebar.
4. Click Turn On , located towards the top-right corner of the window (unless you've already enabled the feature).
5. Choose Limit Adult Websites , then click Customize .
6. In the Restricted section, click the plus symbol.
7. Add the desired URL and hit Ok .
8. Hit Ok .
How to block everything and whitelist specific sites
1. Go into Screen Time through your Mac's System Preferences.
2. Choose Content and Privacy in the left sidebar.
3. Click Allowed websites only and then hit Customize .
4. Add your allowed websites and then hit Ok .
How to block websites with third-party blockers
If you prefer, you can use a third-party website blocker. However, the way you'd set those up will depend on the app you choose. Here are a few options:
- Main content
How to block a website on Safari
Block unwanted websites on Safari in just a few short steps

If you own a MacBook , iPad or iPhone , chances are that you’re using Safari . And if you have kids that use your Apple devices, they’re also using the web browser. However, while you might like to have free reign of your devices, there are some websites you would rather younger users even have access to due to inappropriate content. In those cases, it’s important to know how to block a website on Safari .
Since the internet can be an unpredictable place for even the most savvy of users, oftentimes it is best just to limit access to what children can and cannot view. In this tutorial, we will be showing you how to block a website on Safari.
- How to change Safari background on iPhone
- How to group tabs on Chrome, Firefox, Safari, and Edge
- iOS 15 tips: How to move the address bar back to the top of the Safari browser

1) Navigate to the top of your laptop screen and click on the Apple logo .

2) A dropdown menu will appear . Scroll down in the menu and click on the System Preferences tab.

3) Once in System Preferences, navigate to the bottom of your menu and click on the Parental Controls tab.

4) In the Parental Controls tab, select the account that you wish to make changes to by selecting the name on the right-hand side of the screen, as well as selecting the lock icon.

5) After selecting the lock icon, log into your computer’s administrator account and continue.
Stay in the know with Laptop Mag
Get our in-depth reviews, helpful tips, great deals, and the biggest news stories delivered to your inbox.

6) Next, select the account that you wish to make changes to on the left side of the screen. The account I will be accessing is called Demo 1.

7) At the top of the task bar, navigate over to the Web tab. Click on the Web tab . While in the tab, click on Try to limit access to adult websites and from there hit Customize.

8) In the Customize tab , scroll down to the bottom of the screen, and click the + icon under the Never allow these websites tab. From there, you may add any website that you wish to be blocked, and the access to that website will be restricted.

9) Log into the other account and attempt to view the blocked site. It should now be inaccessible.
How to convert PDF to JPG, PNG, or TIFF
How to add Outlook Calendar to Google Calendar
MSI Claw review: Shamefully declawed
Most Popular
- 2 Act fast! Meta Quest 2 just dropped to $199, includes free $50 Target gift card
- 3 Best Buy is having a big gaming laptop sale right now—here's my 7 favorite deals under $1,000
- 4 Google is removing one of my favorite iPhone and Android services
- 5 How to clean your keyboard: Tips, tricks, and hacks that won’t ruin your keyboard
How to Block Websites in Safari Browser on your Mac, iPhone, and iPad
If you’re planning to block websites in Safari, and are new to the Apple Ecosystem, then you’re certain to get confused. Whether you’re blocking the website because of annoyance or for your children , the reason could be anything. Albeit, blocking websites on Safari, Chrome, Firefox, Edge or any other browser in Apple devices like Mac, iPhone, and iPad is as easy as pie.
There are multiple ways to block websites in Safari and it’s a little different on Mac, iPhone, and iPad but almost similar. In this guide, we’ll show you how to block any website on your Mac, iPhone, and iPad if you’re using the Safari or any other browser.
Guide to Block Sites on Safari on iPhone, MacBook and iPad

Safari is a great web browser when it comes to browsing. But when you’ve to block certain websites for your employees or kids, it could be a little difficult for new Apple device owners.
However, Apple provides a system-wide solution to block websites on your device entirely whether it is Mac, iPhone, or iPad.
The method involves using the Screen Time feature on macOS, iOS, and iPadOS to block multiple websites. You can either choose to block only adult websites or choose custom sites to block.
So here’s how to block websites in Safari or any other browser on Mac, iPhone, and iPad.
When blocking websites with Screen Time, it works system wide and your machine can’t access the blocked URL anywhere. Be it in web browser or any installed apps. It acts like a system-wide parental control.
Steps to Block Websites on Safari in macOS
The easiest way to block websites on Mac is by using the new Screen Time feature. The Screen Time feature on macOS was introduced with the launch of macOS Catalina.
For this method to work, you need to be running macOS Catalina (version 10.15) or above. If you haven’t updated your Mac yet, then you should update it to the latest version for it to work. Once you update your macOS to the latest version, then follow these steps to block sites in Safari on Mac.
- Click on the Apple logo on the top-left corner of your screen.

- Select Content & Privacy from the options on the left.
- If it is not turned on by default, then you can click on the Turn On button.
- Under Web Content , choose Limit Adult websites option to block well known adult sites automatically.

- Type the URL of the website to block or restrict from viewing in Safari.

- Save the blocked list by clicking on OK

This is how you can block websites in Safari. On top of this, the websites are blocked on other browsers as well. Whether you use Google Chrome, Edge, Firefox, or any other browser, the restricted sites will not open on any of the browsers.
Also Read : How to Delete Apps on Mac That Won’t Delete
Furthermore, if any user knows how to unblock the blocked websites in Safari, then it’s best to use a passcode for Screen Time as well.
Also, the restriction popup contains an “Add Website” button which adds the website to whitelist but it requires the administrator password. Make sure the password is strong enough to guess.
Steps to Block Sites on iPhone and iPad
Blocking websites on iPhone and iPad are pretty similar to that of a Mac. However, you should be running iOS 13/iPadOS 13 or above to block websites on iPhone and iPad respectively.
If you aren’t running on iOS/iPadOS 13 or above, then you should update to the latest version. Once updated to the latest version of iOS and iPadOS, follow these steps to block websites in Safari on an iPhone and iPad.

- Now select Content Restriction .

- Under choose Never Allow , tap on Add Website to add custom sites.

After adding the websites list, they will be blocked and you can’t open them on the iPhone or iPad anywhere including Safari browser. Using Screen Time is the best method to block websites in Safari on iPhone and iPad. Similar to macOS, the websites will be blocked on other browsers as well including Chrome and other browsers.
Also Read : 2 Ways To Enter and Exit Recovery Mode on Any iPhone
You can swipe left on the website URL, and tap on Delete to unblock the website whenever you want.

Block Websites System-wise on macOS, iOS and iPadOS
Whatever the reason may be for your blocking, you’ll be able to block any site on macOS, iOS, and iPadOS. However, make sure that you don’t let anyone access the Screen Time feature without any passcode. If they know how to get past the blocking, the blocking will be of no use.
In addition to blocking websites on Safari whether it’s Mac, iPhone, or iPad, it also blocks them at system-level blocking. Hence you can’t access those sites anywhere inside your device with any tool. I guess blocking sites on Safari isn’t hard as you think.
Hope this guide helped you in blocking websites in Safari without any parental control apps and modifying your router setting. If you have any queries or suggestions related to this topic, make sure to leave them in the comments.
Be the Change!
Spread the word and help us create better tech content
Sajid Shaik
A 22-year-old Tech Enthusiast who is into tech more than you. New tech excites him moreover anything else. Apart from tech, he does Graphic Designing as well. He's well known for his Vector Avatar made for MKBHD.
Leave a Reply Cancel reply
The comments section is to assist our readers with any inquiries. Each comment undergoes rigorous moderation before it can be approved for publication. Your name and comment will be publicly visible. Your email address will not be published. Required fields are marked *
Save my details (Name, Email, and Website) in browser and automatically add them when I visit next time.
By commenting on ths website, you agree to our Privacy Policy and Terms and Conditions *
How to Block Websites in Safari on Mac: 3 Methods Explained

If you want to prevent your children from using any particular websites or your employee to be away from unnecessary websites, URL or Apps then there are some ways through which you can prevent them from using the web or app. To do so, you can configure Safari, set Parental Lock or there are some apps available for blocking websites. We have explained all three methods; block on Safari, Parental Lock and Lock through the app to block a website on safari.
How to Block Websites in Safari on Mac Running macOS Catalina or Earlier
Step #1. Launch the Terminal (Open Spotlight and search for the Terminal).
Step #2. In the Terminal type sudo pico /etc/hosts and press Enter. Pressing enter, you will be asked to enter the Administrator Password

Step #3. Once you enter Password, the Terminal text program will open on the host file. Scroll the cursor down to the bottom and press Enter. It will create a new line to type.
Step #4. Type the IP 127.0.0.1 followed by the URL or Site address. i.e: 127.0.0.1 www.yahoo.com And press Enter . Type another URL or Site following the same steps . Do not add more than one URL or Site in a single line , each entry should be in a separate line .

Step #5. Once you are done with the entry ( the sites or URL, you want to block ), press Ctrl+O and then Enter to save them and exit the editor.
Step #6. Then Flush your cache in order to take effect to the settings, type sudo dscacheutil -flushcache to flush your DNS and press Enter.
Now open the URLs or Sites you have blocked. If it is set up correctly you should not be able to open website/URL.
How to Unblock URLs or Websites you Have Blocked
Launch Terminal → type sudo pico /etc/hosts → remove the URL and Site → press Ctrl+O and Enter
How to Block Website/URL on Mac with Parental Controls
Step #1. First of all, make a separate User Account for your children.
Step #2. Then go to System Preferences on your Mac.

Step #3. Click on Parental Controls.

Step #4. Then click on the lock icon (shown at the bottom of the window.)
Step #5. Clicking on the lock icon, you will be asked to enter the password. Click to unlock.
Step #6. Then select the User account that you want to lock.
Step #7. Select the Web tab.
Step #8. Then select Try to limit adult websites automatically .

Step #9. Click on Customize…
Step #10. Under Never allow these websites, click on “ +” icon and enter URLs/websites that you want to block.

After adding the websites or URL you can be sure that it cannot be accessed by the banned user.
Block Website on Mac Through App

There is an app, called Self Control, an open-source application for Mac OS X. Through the app, you can block the websites, URL, mail, and so on. The best thing about the app is when you block the sites/mail/URL, you cannot access the blocked sites unless and until the date you have added gets expired.
To Block, set a period of time and add sites to the blacklist and click Start. Once you click on start, it will be blocked for the period of time you have set. Until the timer expires, you cannot access those sites even if you delete the app.
Price: Free Download
That’s all, mate!
You would like to read these posts as well:
- How to Preview Web Page in Safari on Mac
- Safari for Windows: Feel the Apple Touch on Windows PC
- How to update Safari on Mac
Do share your feedback with us in the comment below.
🗣️ Our site is supported by our readers like you. When you purchase through our links, we earn a small commission. Read Disclaimer .

Leave a Reply Cancel reply
Your email address will not be published. Required fields are marked *
Save my name, email, and website in this browser for the next time I comment.
- Entertainment
- Beebom Gadgets
How to Block Websites in Safari on iPhone and Mac
How to Block Websites in Safari on iOS, iPadOS, and macOS (June 2021)
How to block websites in safari using screen time on iphone and ipad.
- Open the Settings app on your iPhone or iPad.

4. Next up, turn on the switch next to “ Content & Privacy Restrictions ” and tap on the “ Content Restrictions ” option.

Going forward, if someone tries to access the website through Safari, it will show you an “ Access Restricted ” error message. Besides, there will also be a warning saying, “You can’t browse this page at www.xyz.com because it’s restricted.”

How to Block Websites in Safari Using Screen Time on Mac
- Launch “ System Preferences ” from the dock on your Mac. Alternately, click on the Apple icon at the top left corner and click on System Preferences from the drop-down menu.

2. Now, choose Screen Time.

7. That’s it! Now onwards, Safari won’t open this website. Whenever someone tries to open any of the blocked websites, the browser will show a warning saying, “Oops! You can’t see pages on this website. You can’t see the page “https://www.xyz.com/” because it’s not on the approved list in Screen Time.”

How to Block Websites in Safari Using AppCrypt on Mac
- First off, download Cisdem AppCrypt ( Free , in-app purchases available) on your Mac and set a password. Make sure to remember your AppCrypt password as you cannot reset or retrieve it in the future. Click on “Submit” once you are done.

3. Next, click the “+” button at the bottom left and add the URL of the website you want to block in Safari on your Mac. If you want to block all sites except a few, use the Allowlist feature.

How to Block Websites in Safari Using a Third-Party App on iPhone and iPad
- Download the website blocker app ( Free ) on your iPhone or iPad. Then, launch the app and set a login password and log in.

Note : Ensure that the website blocker is enabled in Safari. Open Settings app -> Safari -> Content Blockers (in iOS 14) or Extensions (in iOS 15 or later) and then make sure that the toggle next to the website blocker app is turned on.

Block Websites in Safari with ease on iOS and macOS

Rajesh Mishra
An old school bibliophile who turned a tech nerd out of obsession. When he is not digging into hacks and tracking down stories that are breaking the internet, you may find him reciting poems.
Add new comment


How To Block Websites On Your Mac
Check out How To Block Websites On Your Mac at YouTube for closed captioning and more options.
No related posts.
Comments: 3 Responses to “How To Block Websites On Your Mac”
I usually update my computer within a week of the release of an update. After the most recent update I started having problems acessing websites I had not previously visited. The error message was similar to the one at the 2:34 mark of your video. I tried numerous fixes and nothing worked. Since the error was coming via Screen Time I simply turned it off and no more problem. Some Screen Time setting had been change by the update, which seems to be happening with recent updates.
Informative and easy to follow. I’d love to see an episode geared towards setting rules in the Mail app.
Jim: I would start with this one, using iCloud rules instead of doing them on one machine only: https://macmost.com/why-you-should-use-icloud-email-rules-and-not-mail-rules-on-your-mac.html But if you are using something else for email, like Gmail, then obviously you'd need to use their rules system.
Welcome to MacMost
Free weekly newsletter.
- MacMost Online Courses

- macOS Sonoma
- Mac Shortcuts
- Mac Numbers
- Mac Keynote
- Final Cut Pro
Keyboard Shortcuts PDF

Connect with MacMost
- Free Email Newsletter
- YouTube Channel
- Follow Gary on Threads
- Follow Gary on Mastodon
- Follow Gary On Bluesky
- MacMost @ Apple News
- iPhone/iPad App
MacMost Sections
- The Practical Guide To Mac Security
- Videos by Category
- Video Archive
- Virus and Malware Information Center
- Protect Yourself From Online Scams
- A Graphical Guide To iCloud
- Free iPhone Ringtones
- Recommended Products
- Printable Mac Keyboard Shortcuts PDF
- macOS System Requirements List
Popular Tutorials
- 15 Mac Settings To Make Your Mac More Secure
- Common Misconceptions About the Desktop
- 13 Tips For Getting the Most From the Safari Sidebar
- 21 Things You Can Do With Images In Preview
- Shortcuts To Help You Organize Your Files
- 10 Places You Can Use Quick Look To Preview Files
- How To Use the FN/Globe Key On Your Mac Keyboard
- 5 Ways To Trim Audio On a Mac
Information
- About MacMost
- Support MacMost
- Contact MacMost
- MacMost Video List
- MacMost Site Map
- MacMost Site Policies
Copyright © 2006-2024 CleverMedia, Inc. All Rights Reserved.
How to Block a Website in Any Browser on a Mac
Need to block a website on your Mac? Whatever browser you're using, you can follow these steps to do so.
The internet allows us to access the wealth of human knowledge with a single click. On the other hand, it also allows kids to access potentially harmful content. You can use website blockers to restrict harmful or time-wasting websites, like adult sites or social media.
However, there are easier methods to block websites on your Mac, especially using Screen Time. We’ll cover how to do this below, so keep on reading.
What Is Screen Time?
Screen Time is Apple’s method of helping users control their Mac or iPhone usage. It can be also be used to control and restrict specific websites, whether you’re restricting adult websites, addictive games, or YouTube channels.
Related: How to Use Your Mac’s Screen Time Feature
You can also use Screen Time controls to limit social media use throughout your workday to help you focus on the task at hand instead.
How to Use Screen Time to Block a Website
No matter what your intended use is, blocking a website is very easy in Screen Time. This applies to all browsers you may use on your Mac: Safari, Google Chrome, Firefox, and so on.
To block a website on your Mac, just follow these steps:
- Open System Preferences and go to Screen Time .
- Select App Limits from the left-hand pane. Turn them on if they’re disabled.
- Click the plus ( + ) sign. You’ll see different categories here, which you can choose to limit access to.
Once you have all your restricted websites set up, make sure you set up a Screen Time password to ensure no one can change the settings you made without your permission. To do this, go to Options and choose to Use Screen Time Passcode .
Enable Share across devices to share these settings for all the devices signed in to your iCloud account.
You can choose to block all adult websites through Screen Time. To do this, click on Content & Privacy > Turn On . Select either Limit Adult Websites or Allowed Websites Only , depending on what your requirements are. You can switch to the Apps tab and uncheck any internet apps or browsers that you want to disable.
How to Use Terminal to Block a Website
If you are not a fan of the Screen Time method to control web access on your Mac, another method to block websites is by editing the Hosts file in Terminal. This may seem a bit more complicated than Screen Time since it involves the command line. However, it is very easy and straightforward once you get the hang of it.
Related: How to Report Inappropriate Content on YouTube
An advantage of editing the Hosts file for blocking websites rather than using specific browser plugins or extensions is that this method remains valid across all browsers and does not depend on any third-party plugin. On the other hand, extensions can sometimes stop working or may become outdated over time.
The advantage of Terminal over Screen Time is that it would be harder for a child to undo these changes if they gained access to your Screen Time passcode.
To create a block list using a Hosts file, follow the steps below:
- Open up Terminal on your Mac. You can do this by searching for Terminal in Spotlight, or by navigating to Finder > Applications > Utilities > Terminal .
- We’ll be backing up the hosts file first. This will allow us to restore the original file in case something goes wrong. To do this, enter the following line of code into Terminal, and press Return on your keyboard: sudo /bin/cp /etc/hosts /etc/hosts-original
- Type in your administrator password and press the Return key. Note that the cursor will not move from its position as you type your password.
- Once done, type in the command below and press Return on your keyboard. This will open the hosts file. sudo nano -e /etc/hosts
- Type each website on a separate line. Once you’re done, press Control + O followed by Return on your keyboard to save the file, and then Control + X to close the file.
- Type the following command to flush the cache, which will enforce these changes across the browsers. Press Return to enter the command: sudo dscacheutil -flushcach
Blocking Websites in a Specific Browser
There may be some specific cases where you want to block access to certain websites on a specific browser only. For example, you may only use Google Chrome for your work-related stuff, which is why you might want to block social media websites on Chrome only. In such cases, the Screen Time or Terminal method won’t work, as it blocks website access for all browsers. An alternate to this is choosing to block specific websites directly through the browser instead.
Since every browser is different, the method for blocking websites through the browser can be different. Safari blocks websites using Screen Time, whereas you can use blocking extensions , such as Block Site and StayFocusd, to block websites on Google Chrome.
Screen Time vs. Browser-Based Blocking
While you can block websites specifically in any browser, it makes more sense to block sites using Screen Time. Screen Time applies uniformly to all your browsers (even if someone installs a new browser to circumvent your measures), and can also be synced across devices. Terminal is also another good measure to keep specific websites blocked on your browsers.
Using browser-specific plugins to block websites may fall prone to hacks and outdated software. That’s why we recommend using Screen Time or Terminal for blocking websites on your Mac.
How to Permanently Block Websites on Safari on Mac
You can access just about any website on Safari, but there are times when you’d want to block some websites for one reason or another. Maybe you share your Mac with your family, or your kids use it for school and entertainment. Maybe you just prefer not to access certain websites. Whatever the reason, Mac allows you to block websites from launching on Safari.
There are several ways to block websites on Safari on your Mac, the obvious being third-party website blocker apps. But you can also block websites using Mac’s Screen Time feature, and in Safari through your router. Not sure how that works? We’ve got you covered. This article will show you all the ways to block websites on Safari on your Mac.
Before we start Browser extensions can be useful for blocking ads and overall convenience. However, having too many of them can slow down your Mac’s performance. Consider disabling some browser extensions on your Mac. Of course, you can do this manually, but if you want to save time, you can let MacKeeper do it for you in a whim. That’s just a fraction of what MacKeeper can do for your Mac. Check it out and see for yourself. Download MacKeeper now to keep your MacBook in optimal condition.
Let’s have a look at all the ways you can block websites on Safari on your Mac.
In this article you will find the following:
- How to block websites on Safari on Mac
You might already know how to block undesirable websites on Google Chrome , but did you know you can also do the same on Safari? You can block unwanted sites on Safari on your Mac in four ways.
How to block websites in Safari on a Mac using Screen Time

Apple’s Screen Time helps you manage and track usage on apps and websites on your Mac. In addition to scheduling downtime and setting limits, it allows you to block unwanted websites on your Mac.
The first way to do this is by choosing the websites you want to access on Safari:
- Open System Preferences on your Mac, then click on Screen Time
- Click on Content & Privacy on the left of the screen
- In the top-right corner, click Turn On Content & Privacy Restrictions
- Now click on Allowed Websites Only , followed by Customize … to choose a list of websites you want to access through Safari on your Mac. This will block any website not listed from opening. Your Mac will let you know each time it blocks those websites in the background
The second method is to block particular websites.

- Open System Preferences , then click on Screen Time
- Click on App Limits on the side bar on the left of the screen
- Click Turn On App Limits in the top-right corner
- Now click on the plus icon in the bottom-left corner of the App Limits box
- Scroll down to Websites and click on the arrow on the left to see a list of possible websites to block. You can also add more websites to the list by clicking on the green plus icon and paste or type the URL of the website in the text box . If you want to block that website completely, leave the Time field as is at 0h 0m. Alternatively, you can choose the amount of time you want to spend on the website each day using the arrows next to Every Day . You can also set a custom time by clicking on Custom , followed by Edit . Now choose your daily time limit by checking the boxes
That’s it, you will now only be able to browse the websites you prefer.
How to block websites in Safari on a Mac with Terminal

Terminal is Mac’s interface that allows you to block websites without parental controls. It works by blocking websites from opening on the local IP address. As this is a more technical method, only attempt it if you’re comfortable with using command-line prompts.
Launch Finder on your Mac:
- Click on Applicatons , then double-click on the Utilities folder
- Double-click on Terminal to launch it
- Start by backing up the host file. This is an important step, in case anything goes wrong. To back up the host file, type “sudo /bin/cp /etc/hosts /etc/hosts-original” on a new line and press the Return key
- Enter your Mac’s admin password when prompted, then press the Return key again.
- Type “sudo nano /etc/hosts”, followed by the Return key
- Using the down arrow key on your Mac, go to a new line and add the URL of the website you want to block, with the local IP address “127.0.0.1” before it, separated by a space. Be sure to add all the versions of the website on a new line, For example, “127.0.0.1 onlyfans.com” and “127.0.0.1 www.onlyfans.com”. Do this for every website you want to block
- When you’re done, press Control-O . Now press the Return key. Your blocked websites are now saved
- To exit Terminal, press Control-X
If you’re uncomfortable with using this method, there are more ways to block websites on Safari.
Related reading: How to use Terminal command line on your Mac
How to block websites in Safari on a Mac through router
Another way to block websites on your Mac is through your router’s settings:
1. Find your IP address on your router; it’s usually at the bottom. Alternatively, you can go to your Mac’s System Preferences > Network > Wi-Fi > Advanced… > TCP/IP . Your IP address will be shown next to Router

2. Type the address of the website you want to block in Safari
3. Now type your router’s admin name and password upon request
4. On the Settings page, find the options to block websites, and add each website you want to block
You’re all set. Just remember to do this again if you get a new router in the future.
How to block websites in Safari on a Mac using third-party website blocker apps
Up until now, we’ve showed you multiple ways to block websites on a device level. The final way to block websites on your Mac is with the help of third-party apps. Here are three apps we recommend:

As the name suggests, 1Focus helps you stay focused on any work or task you’re busy with by eliminating distractions, like websites. This is one of the more popular focus apps. Blocking websites on 1Focus is easy.
1Focus allows you to block websites on the free version, but you can do more with in-app purchases. The free version lasts for 14 days, after which you’ll have to pay around $2/month or $10/year, unless you cancel your trial before the trial period is up.

Session allows you to work in 25-minute sessions. What makes it unique is that it has a wellness element to it — the app prompts you to breathe before you start a new session and take a break when you’re done. You can block websites to limit distractions while you work or study. The app is free, but to use the Website Blocker feature, you’ll have to upgrade to the Pro version.
If you’re impressed with the free version of the app and are willing to upgrade, you’re looking at paying around $4/month.

This focus app helps you limit distractions across all your devices simultaneously, unlike other website blockers which are device-specific. Like other apps, Freedom allows you to create a list of blocked websites. Checking the optional Locked Mode box locks in your sessions by not allowing you to edit your blocklists while you work.
Freedom offers you six free sessions. When you’ve used them up, you’ll have to pay $7/month to continue using the app.
- Block unwanted websites easily on your Mac
Mac offers multiple ways to block websites in Safari. Most of these are built-in solutions, but you can also block websites through apps found on the App Store and online. Choose the method that is most suitable to you from the options laid out in this article.
Read more:
- Why Is Safari Running Slow on Mac? 9 Ways to Fix
- How to Clear Cookies on Mac in Safari, Chrome & Firefox
- How to Delete History in Safari on a Mac in 4 Easy Steps
You’ll love exploring your Mac with us.
Oops, something went wrong.
Try again or reload a page.

- Delete unnecessary system files and caches
- Free up GBs of storage space
- Easily find and delete duplicate files
Remove unneeded Safari extensions with MacKeeper.

MacKeeper - your all-in-one solution for more space and maximum security.

We respect your privacy and use cookies for the best site experience.
Privacy Preferences Center
We use cookies along with other tools to give you the best possible experience while using the MacKeeper website. Cookies are small text files that help the website load faster. The cookies we use don’t contain any type of personal data meaning they never store information such as your location, email address, or IP address.
Help us improve how you interact with our website by accepting the use of cookies. You can change your privacy settings whenever you like.
Manage consent
All cookies
These cookies are strictly necessary for enabling basic website functionality (including page navigation, form submission, language detection, post commenting), downloading and purchasing software. The website might malfunction without these cookies.
Download MacKeeper when you're back at your Mac
Please enter your email so we can send you a download link
Check your email on your Mac
Install MacKeeper on your Mac computer to rediscover its true power.
Run Application

Click Continue

Click Install

Your macOS version is lower than OS 10.11. We’d like to offer you MacKeeper 4 to solve the cleaning, privacy, and security issues of your macOS.

How to Block Websites on Mac (Catalina & Big Sur)

In this tutorial, we are going to show you how to block websites on Mac (macOS Catalina & macOS Big Sur) using Terminal and Screen Time . Most web browsers provide plugins to help you stay productive and not open the websites on which you are wasting time, but you can go a step further by simply blocking your computer from accessing specific websites altogether.
Nowadays, there will still be a few distractions that will pull you out of work. You can check your emails on a regular basis, reading your Instagram, Facebook, or watch YouTube videos, etc. Blocking these websites will keep you productive while you’re working, and here are some methods that can help you block websites on Mac.
How to Block Websites On Mac using Screen Time
The Mac Screen Time feature is a recent feature and is available in macOS Catalina or macOS Big Sur . If your Mac is running an older version, you won’t be able to use the Screen Time option. By using Screen Time, restricting users to accessing the web, blocking websites can be useful if you don’t want those who use your Mac to access websites such as social media, social networking, adult content, and more. Here’s how to block Mac websites.
Here’s how to block websites on Mac with the Screen Time option:
Note: To make use of Screen Time, make sure your Mac is up-to-date, otherwise it won’t work, it requires the macOS Catalina or later updates. Once you’ve upgraded to macOS Catalina and Big Sur, follow the below steps .
Step 1 . Click the Apple logo at the top left-hand corner and then select System Preferences to enter the system preferences.

Step 2 . Click on Screen Time.
Step 3 . On the next window, click on the Content & Privacy option located on the left side. Meanwhile, i f the Content & Privacy Restrictions is turned off, turn it on by clicking on the ‘ Turn On.

Step 4 . Now, choose the option Limit Adult Websites and click Customise to automatically block a bunch of adult websites that are on Apple’s database .

Step 5 . Under the Restricted section at the bottom, click on the (+) icon.

Step 6 . Type the URL of the website to block or restrict from viewing and click OK . However, you can add as many websites to your choice. Once you have done it, visit the website by launching the Safari browser, you won’t be able to access it.

Step 7 . Click OK at last once again.
That’ it. Notice that this also extends to third-party browsers such as Google Chrome and Mozilla Firefox. If you feel the user knows how to delete blocked websites by visiting Screen Time, it is easier to use a passcode for Screen Time.
- Set, change, or remove a Screen Time passcode on Mac
Unblock Websites On Mac using Screen Time
- Click the Apple logo > System Preferences > Screen Time .
- Click on Content & Privacy.
- Now, choose the option Limit Adult Websites and click Customise.
- Click on the blocked site under the Restricted section at the bottom, click on the (-) icon to unblock.
- Click OK to save the changes.

Block a Website Using Terminal
Meanwhile, if you are using an older Mac version like macOS Mojave or earlier then it’s better to block certain websites on your Mac using the Terminal app.
Step 1. Open the Terminal . You can find the Terminal app by using the Spotlight.
Step 2 . Type the command line below and hit Enter:
sudo nano /etc/hosts
Step 3 . Enter the administrator password .
Step 4 . Once you enter the password successfully, the hosts file will be opened by Terminal.
Step 5 . Create a new line by pressing the up or down arrow button and then type the IP “1 27.0.0.1 ” + “ Space ” + “ URL or Website address .” And type another URL or Website address following the same steps.
For example: 127.0.0.1 www.facebook.com 127.0.0.1 www.instagram.com

Step 6 . When you have done the list of sites or URLs, you can save the hosts file by pressing the Ctrl + O and then hit the Return button. Finally, press the Ctrl + X to exit the screen.
To unblock, just delete the sites or URLs which you have added to the hosts file, press the Ctrl + O , and then hit the Return button. Finally, press the Ctrl + X to exit the screen.
Final Words
This is how you can block websites on Mac (Catalina and Big Sur) by using built-in features like Terminal and Screen Time. However, Screen is only available for macOS Catalina and macOS Big Sur. We hope that by using the Terminal app and Screen Time, you can block all unnecessary and inappropriate websites for the safety of your children, and doing so this is the easiest way for blocking websites on your Mac.
How to Screen Record on macOS Big Sur & macOS Catalina
How to Screen Record on macOS Big Sur & macOS Catalina
How to get emojis on laptop in windows 10, one comment.
- Pingback: How to Block Ads on Safari Brower on Mac with AdBlock Extension in 2021
Leave a Reply Cancel reply
Your email address will not be published. Required fields are marked *
Save my name, email, and website in this browser for the next time I comment.

Safari User Guide
- Change your homepage
- Import bookmarks, history, and passwords
- Make Safari your default web browser
- Go to websites
- Find what you’re looking for
- Bookmark webpages that you want to revisit
- See your favorite websites
- Use tabs for webpages
- Pin frequently visited websites
- Play web videos
- Mute audio in tabs
- Pay with Apple Pay
- Autofill credit card info
- Autofill contact info
- Keep a Reading List
- Hide ads when reading articles
- Translate a webpage
- Download items from the web
- Share or post webpages
- Add passes to Wallet
- Save part or all of a webpage
- Print or create a PDF of a webpage
- Customize a start page
- Customize the Safari window
- Customize settings per website
- Zoom in on webpages
- Get extensions
- Manage cookies and website data
- Block pop-ups
- Clear your browsing history
- Browse privately
- Autofill user name and password info
- Prevent cross-site tracking
- View a Privacy Report
- Change Safari preferences
- Keyboard and other shortcuts
- Troubleshooting
Block pop-ups in Safari on Mac
You can prevent webpages from displaying pop-up windows.
Open Safari for me
Click Pop-up Windows.
Block pop-up windows for:
A website in the list: Select the website in the right column, then choose the option you want.
All websites that aren’t currently customized: Click the “When visiting other websites” pop-up menu in the bottom-right corner of the pane, then choose the option you want.
You can see all websites you’ve customized under Configured Websites. If you don’t see Configured Websites, either you haven’t customized a website yet, or you’ve cleared the list. See Change Websites preferences in Safari on Mac .
All websites: Make sure no websites are listed under Configured Websites (to clear the list quickly, select the websites, then click Remove). Click the “When visiting other websites” pop-up menu, then choose the option you want.
If you choose Block and Notify for pop-up windows on a website, click the icon in the Smart Search field to display the pop-up windows.
Note: Blocking pop-ups might also block some content you want to see.

{[ bar_title ]}
How to block safari on mac or set time limit on safari.

The Safari web browser is included with Mac computers. Many people want to know how to block Safari on Mac. Blocking access to Safari can help keep your Safari bookmarks, history and other information private. Also, you can set time limits on Safari by blocking Safari during certain times. This article will show you how to do the blocking easily.
- How to restrict Safari on Mac
- Bonus tips: How to block websites and ads on Safari for Mac
Method 1. How to block Safari on Mac in an easy way
I would like to disable opening Safari on my Mac. I don’t want to delete or modify it in any way. I only want to prevent myself from opening the application itself. Is there any way to stop Safari from opening?
The easiest way to block Safari on MacBook Pro, MacBook Air or iMac etc. is to use Cisdem AppCrypt , the best app and website blocker for macOS. With this tool, you can easily control access to Safari for Mac.
AppCrypt main features:
- Block Safari and other apps with password
- Record failed attempts to open blocked apps with date, time and photo
- Block websites with password on Safari, Google Chrome and other browsers
- Let you block websites by category
- Offer a schedule feature to block apps and websites at certain times
- Easy to use
- Hard to bypass
- Help with privacy protection, parental controls and productivity etc.
- Support macOS 10.12 or later
Steps: How to block Safari on Mac
1. Download AppCrypt and install it.

2. When you first open the tool, set a password.

3. In the menu bar, click its icon and choose Open Main Window .

4. Enter the password, and you are in the main window. Click the App Lock tab.

5. Select the Safari app and click Open .

Now Safari is blocked on Mac with password. When you or others such as your child try to open Safari, it won’t open, and the “Safari is locked” message will appear.

If one enters the correct password and then click OK, Safari will open successfully.
To unblock Safari on Mac, enter the password to open AppCrypt’s main window, select Safari and then click Remove App.
Tip 1. Put time limit on Safari by blocking access to Safari during certain hours
With AppCrypt, you can easily block (or password protect) Safari. The same tool also allows you to set time limit on Safari. Under the App Lock tab, select Safari and click the small clock icon that appears. Enable Custom Schedule and click Add Schedule.
Tip 2. Block Safari websites on Mac
Click Web Block in the main window. Add specific websites to block. Or, click the Import dropdown menu and select a category of websites to block.

Cisdem AppCrypt
The best website blocker for computer.
- Block apps with password
- Block specific sites or categories of sites with password
- Let you block all sites except a few
- Let you schedule blocking of apps and sites
- Easy to use and customize
- Help you block Safari or put time limit on it
- Can be used to protect privacy, put a parental lock or increase productivity etc.

Method 2. How to block Safari on Mac during downtime on Screen Time
If your Mac is running macOS 10.15 Catalina or later, Screen Time is available to help you restrict Safari access. Screen Time is a set of tools included with Mac.
1. On your Mac, go to System Preferences and choose Screen Time .
2. Click Downtime on the left.
3. Click Turn On to turn it on.
4. Set up the downtime schedule(s) based on your needs.

5. Click Always Allowed on the left.
6. From the Always Allowed list, deselect the box next to the Safari app.
During downtime, the Safari app, which is blocked, will dim. If you or some else tries to use Safari, the Time Limit warning will show up. But the Ignore Limit option makes it easy to bypass the blocking.
Want to block Safari more effectively? You can select the box next to Block At Downtime in Step 4. This option is available only if you have set a Screen Time passcode. Note that enabling Block At Downtime will block your Mac during downtime.
Now you know how to block or lock Safari on Mac. This part shares some tips that may be helpful.
Tip 1. How to block websites on Safari on Mac
1. Download and install AppCrypt.
2. Set a password.
3. Click Open Main Window and enter the password.
4. In the main window, click Web Block .
5. Add the URL of a website (such as youtube.com) to block. Or, you can block a category of websites.

As you can see, AppCrypt can not only block Safari on a Mac but also restrict websites on Safari.
Tip 2. How to block ads on Safari Mac
1. On your Mac, open App Store.
2. Search for AdGuard for Safari . Install it.
3. Relaunch the Safari app.

Now the AdGuard icon should appear next to the Smart Search field. And it should start blocking Safari ads. The blocking applies to both the normal and private browsing modes.
Tip 3. How to block pop ups on safari on Mac
1. Open Safari on Mac. Go to Preferences .
2. Go to the Websites tab.
3. Select Pop-up Windows on the left.

4. From the When visiting other websites dropdown menu, choose Block and Notify or Block .
You can allow pop-up windows on certain websites if needed.
Tip 4. How to get rid of Safari on Mac
With Method 1, you can password protect Safari on Mac to block Safari use. Some people may also want to know how to delete Safari on Mac.
The fact is that there is no legitimate way to uninstall Safari for Mac. And it’s recommended not to delete any pre-installed apps. If you want to not use Safari on Mac, just stop using it or block access to it.
By blocking the Safari app, you can prevent other people from seeing your browsing history or changing your settings. Or, you can schedule blocking during certain hours to prevent yourself or your children from spending too much time browsing the web with Safari. This article mainly talks about how to block Safari on Mac. I hope it can help you stop access to Safari or set a time limit on it.
Rosa has worked in Mac software industry for more than eight years. She believes that the purpose of software is to make life better and work more productively. In addition to writing, Rosa is also an avid runner.
Hot Articles
How to manage all web browser notifications on your Mac
In this tutorial, we will show you how to allow, block, customize, and turn off website notifications in popular browser apps like Safari, Chrome, and Firefox on your Mac.

These tips will be helpful if you’re getting too many notifications or not receiving alerts from sites that are important to you.
But before you do that, remember that not all websites are designed to send notifications. And ones that do have this feature will probably show you a banner to allow notifications when you visit them for the first time, after a few weeks, or after clearing all your web browser data .
Allow browser notifications
When you install a browser app like Chrome, Firefox, Brave, or Opera, you will get an alert in the top right corner of your Mac’s screen asking your permission to allow notifications from this app. Click Options to Allow (or block) alerts.

If you don’t get that automatic alert, visit a website like bennish.net , Slack , or something similar that can send notifications. Then, you may see the macOS notification asking your permission to send browser notifications.
- Visit bennish.net and click Authorize > Allow .
- Now, if you see the macOS notification for browser notification, click Options > Allow and confirm if prompted.
Manage browser notifications for a specific website
Once the browser app in question is permitted to send notifications, you can decide which websites can send you notifications and which cannot.
Allow notifications
When you visit a website that is designed to send notifications, you will see a popup. Allow that and then confirm if prompted. Remember that websites use different popup styles.

Block notifications
You can prevent a website from sending notifications when it asks for the first time. If you have already allowed it, you can block it later by following these steps.
Open the app and click Safari > Settings from the top menu bar. Now, go to the Websites tab and select Notifications . Here, you’ll see all the websites that you have allowed or blocked from sending notifications. Click the dropdown menu next to an allowed site to block it.

Visit the website that sends you notifications and click the settings icon from the top address bar. Now, turn off the Notifications switch. If you don’t see it, that means you did not permit this site to send notifications, or it does not have that feature.

Additionally, you can go to chrome://settings/content/notifications or click Chrome > Settings from the top menu bar and then go to Privacy and security > Site settings > Notifications . From here, click the three dots icon next to a website under the “Allowed to send notifications” and block it.

Visit the website that sends you notifications. Now, click the settings icon and hit Allowed next to Send notifications to block it. Don’t forget to reload the page for changes to take effect.

In addition to that, you can click Firefox > Settings from the top menu bar. Then select Privacy & Security and scroll down to the Permissions heading. From here, click Settings next to Notifications to see all allowed or blocked sites. Click the dropdown menu next to a site listed here to block (or allow) notification privileges for it.

Customize browser app notifications
A third-party web browser does not offer many per-website notification customization options. You are pretty much limited to allowing or blocking alerts from that site.
However, macOS offers handy notification settings for web browser apps. Furthermore, when you allow a website to send you notifications in Safari, macOS treats that website as an app in its notification settings. So, you can customize that website’s notifications as if it were an app.
Here’s how to mute, change style, block previews, and do other personalizations for your web browser notifications on Mac:
1) Open System Settings and click Notifications .
2) You will see your browser apps like Safari , Chrome , Firefox , etc. Additionally, as mentioned, websites that are permitted to alert you in Safari may also be listed here. Click a browser app or Safari website.

3) Now, you can customize it like you would with a regular Mac app.
You can change the notification style, block it from appearing on the locked Mac screen, prevent it from stacking in your Notification Center , turn off the red number badge on the app’s icon in Launchpad and Dock, turn off the notification sound, display or hide the preview, and decide a grouping style.

Turn off all browser notifications
Go to Mac’s System Settings > Notifications and select the browser app. Now, turn off the Allow notifications switch from the top. After this, you won’t receive notifications from this browser at all. It will even block alerts from websites you had previously allowed to send notifications.
Check out next: Not getting app notifications, banners, or sound on Mac? Here’s how to fix it
To revisit this article, visit My Profile, then View saved stories .
- Backchannel
- Newsletters
- WIRED Insider
- WIRED Consulting
David Nield
It’s Time to Switch to a Privacy Browser

Google's admission that, yes, it does track you while you're in Chrome's Incognito mode , is just the latest in a long line of unsettling revelations about just how keenly Big Tech keeps an eye on our movements every time we connect to the internet. Billions of data records will now be deleted as part of a settlement to a class action lawsuit brought against Google.
As we've written before , Incognito mode and the equivalent modes offered by other browsers aren't as secure as you might think, particularly if you start signing into accounts like Google or Facebook. Your activities and searches as a logged-in user on large platforms can still be recorded, primarily to create advertising that's more accurately targeted toward your demographic.
Google, for its part, says it’s transparent about what data it’s storing and why—and in recent years it has made it easier for users to see and delete the information held about them. To really lock down your privacy and security, though, it’s best to switch to a browser not made by a company that earns billions of dollars selling ads.
And there are alternatives: Below we recommend several browsers built with user privacy and security as a priority. Even better, in many cases they can import data such as bookmarks and passwords from your current browser—Google Chrome, for example.
DuckDuckGo ( Android , iOS , Windows , macOS )

The DuckDuckGo browser blocks trackers at their source.
You might know DuckDuckGo as the anti-Google search engine, but the parent company has branched out to make its own browsers too. They keep you well protected online and at the same time give you plenty of information about the tracking technologies being proactively blocked.
DuckDuckGo starts by enforcing encrypted HTTPS connections when websites offer them, and gives each page you visit a grade based on how aggressively it's trying to mine your data. It'll even scan and rank site privacy policies for you.
When it comes to browsing data, this can be cleared automatically at the end of each session or after a certain period of time. Pop-ups and ads are snuffed out, and of course the DuckDuckGo search engine is built in, free of the Google trappings.

Brian Barrett

Adrienne So

Stephen Clark, Ars Technica
You also get extras like throwaway email aliases you can use in place of your real email address to protect your privacy, and everything about the browser and its features is simple to use: You don't really need to do anything except install them, so you're getting maximum protection with minimal effort.
Ghostery ( Android , iOS , Windows , macOS )

Ghostery comes with a range of tools to protect your privacy.
Install Ghostery on your mobile device or your computer, and straight away it gets to work blocking adverts and tracking cookies that will attempt to keep tabs on what you're up to on the web. There are no complicated setup screens or configurations to manage.
Like DuckDuckGo, Ghostery tells you exactly which trackers and ads it's blocking and how many monitoring tools each website has installed. If you do come across certain sites that are well behaved, you can mark them as trusted with a tap.
Or, if you find a site that's packed full of tracking systems, you can block every single bit of cookie technology on it (for commenting systems, media players, and so on), even if the site ends up breaking. A simple, private search engine is built in to replace Google too.
Ghostery's tools are a little more in-depth and advanced than the ones offered by DuckDuckGo, so you might consider it if you want to take extra control over which trackers are blocked on which sites—but it's simple enough for anyone to use.
Tor Browser ( Android , Windows , macOS )

Tor connects you to the Tor network, to keep your online activities more private.
Tor Browser markets itself as a browsing option "without tracking, surveillance, or censorship." It is worth a look if you want the ultimate in anonymized, tracker-free browsing—unless you're on iOS, where it isn't available (Tor recommends the Onion Browser instead).
The browser is part of a bigger project to keep internet browsing anonymous: Use Tor and you use the Tor Project network, a complex, encrypted relay system managed by the Tor community, making it much harder for anyone else to follow your activities online.
As well as this additional layer of anonymity, Tor Browser is super-strict on the background scripts and tracking tech that sites can run. It also blocks fingerprinting, a method where advertisers attempt to recognize the unique characteristics of your device.
At the end of each browsing session, everything gets wiped, including cookies left behind by sites and the browsing history inside the Tor Browser app itself. In other words, private browsing that leaves no trace is the default—and indeed the only option.
Brave ( Android , iOS , Windows , macOS )

Brave gives you a clean, speedy browsing experience.
Brave comes with all the tracking protection features you would expect: Ads are completely blocked, there are tight restrictions on the data that sites can gather through cookies and tracking scripts, and you're always kept informed about what's happening.
The browser comes with an optional built-in VPN, though it costs extra ($10 a month). You can also, if you want, use Brave to access the Tor network we mentioned with the Tor browser and take advantage of its anonymizing relay service that hides your location and browsing data.
There's no doubt about the effectiveness of Brave's tracker-blocking technologies, and getting around the web in Brave is quick and snappy. It's a comprehensive package and one that strikes a well-judged balance between simplicity and power for the majority of users.
Brave has regularly pioneered features related to innovative web technologies, including cryptocurrencies, NFTs, and (most recently) artificial intelligence; there's actually a new AI assistant built into it. In other words, it's not exclusively focused on security and privacy.
Firefox ( Android , iOS , Windows , macOS )

Firefox is part of a suite of privacy products from Mozilla.
Firefox has long been at the forefront of online privacy—blocking tracking cookies across sites by default, for example—and it continues to be one of the best options for making sure you're giving away as little data as possible as you make your way across the web.
Firefox also gives you a ton of information on each website you visit regarding the trackers and cookies that pages have attempted to leave, and which ones Firefox has blocked. Permissions for access to your location and microphone can be easily managed as well.
Aside from looking after the interests of its users, Firefox also scores highly for user customization. You can change the look and behavior of the browser in a variety of ways, and there are useful integrations like the built-in Pocket utility that saves web stories on your device so you can read them later.
Firefox developer Mozilla offers plenty of extras, including a free data-breach monitor that tells you when your usernames and passwords may have been exposed somewhere online, a free email alias system to keep your actual email address protected, and a VPN that costs $10 per month. It all adds up to a comprehensive package for keeping you safe online.
Safari (iOS, macOS)

Safari has been blocking tracking cookies for some time.
Apple continues to add privacy tech to Safari with each release on iOS and macOS—like requiring user authentication (such as a Face ID scan) when returning to a browsing session—though it's obviously not a browsing option if you're on Android or Windows.
Safari has long been blocking third-party tracking cookies that try to connect the dots on your web activity across multiple sites. It also blocks device fingerprinting techniques that try to identify your devices, and it reports back on the trackers it has disabled.
The browser can now also warn you when you try to use a password that's too weak on a new website or service, and it will make a suggestion of a stronger password if needed. Recent browser updates added support for logging in with passkeys too.
Safari operates against the backdrop of Apple's commitment to collect as little information about you as possible and to keep most of that information locked away locally on your device rather than on Apple's servers.
Update: April 6, 2024, 8:30 am: This guide was updated to include new guidance for DuckDuckGo and Ghostery, as well as to bring some descriptions of browser providers' data collection policies up to date.
You Might Also Like …
In your inbox: Will Knight's Fast Forward explores advances in AI
Hackers found a way to open 3 million hotel keycard locks
A couple decided to decarbonize their home. Here's what happened
A deepfake nude generator reveals a chilling look at its victims
Are you noise sensitive? Here's how to turn the volume down a little

Matt Burgess

Kate O'Flaherty

Amanda Hoover

Dell Cameron

Andy Greenberg

- Apple Watch
- Accessories
- Digital Magazine – Subscribe
- Digital Magazine – Log In
- Smart Answers
- M3 MacBook Air
- New iPad Air
- iPad mini 7
- Next Mac Pro
- Best Mac antivirus
- Best Mac VPN
When you purchase through links in our articles, we may earn a small commission. This doesn't affect our editorial independence .
That scary Safari malware that infected your Mac? There might be a very simple fix

I was recently visiting my parents when I got the dreaded question: I think my Mac has a virus but I thought Macs didn’t get viruses? They were obviously a little concerned and somewhat embarrassed that they could have allowed something to happen to their Mac.
First off: yes, your Mac can get a virus , though it is still somewhat rare. After all, there are far fewer viruses in the wild to attack macOS than Windows, and way more PCs than Macs in the world. But there are Mac attacks in the wild and many of them originate within a web browser.
There are plenty of ways to scan your Mac for viruses and protect it from incoming attacks. Apple even has its own built-in antivirus tech called XProtect that constantly scans for known malware. But even with all that protection, things can get through.
Still, if you’re getting messages popping up on your Mac warning you about a critical virus with scary emoji, it’s probably not a virus. There’s a good chance it’s just an application notification masquerading as a critical system alert.

In the Safari settings, you can turn individual website notifications on and off.
Here’s what happened. While browsing with Safari, my parents either clicked on an ad or were served a pop-up that brought them to the updates-mac.com site. When they got there, another box asked them if they wanted to receive notifications from the site. In a fit of clicking to get away, they somehow clicked “Allow” when asked whether they wanted to receive notifications. That told Safari that it was OK to spam them with scary-looking alerts.
Thankfully there’s an easy fix—head over to the Websites tab in the Safari Settings in the menu bar and deny permission for the site to send alerts under the Notifications tab—but had they clicked the alert, there might not have been. The truth is, these alerts aren’t just designed to annoy, they’re hoping to fool you into clicking the wrong thing or signing into the wrong box and giving access to your accounts or computer.
Apple also has a malware tracker built into macOS called XProtect and is constantly updating the OS to patch any known vulnerabilities. To limit any further damage, you can download an antivirus app , which will protect you from inadvertently installing something malicious and help you get rid of it if something gets through. But for everything else, just check your Safari notifications first.
Author: Michael Simon , Executive Editor

Michael Simon has been covering Apple since the iPod was the iWalk. His obsession with technology goes back to his first PC—the IBM Thinkpad with the lift-up keyboard for swapping out the drive. He's still waiting for that to come back in style tbh.
Recent stories by Michael Simon:
- Apple silicon is killing the desktop Mac
- How to type the Pi (π) symbol on a Mac or iPhone
- It’s not too late to exchange the new Mac you just got for something better
Sentry - Blocker for Safari. 4+
Block websites in your browser, igor nazarov, designed for ipad.
- Offers In-App Purchases
Screenshots
Description.
Sentry for Safari is a powerful and simple-to-use content blocker. The app tells Safari in advance what kinds of websites to block based on a list of domains. The list of blacklisted domains is taken from the best tracker investigation platforms. You can edit the list and activate only a limited set of domains. Terms of use: https://docs.google.com/document/d/1dcS07VfugNzpAPxjz2zzBKpVSYU_AqL3-2aFPDZP69A/edit. Privacy policy: https://docs.google.com/document/d/1g4AJwB-TGF7GQRJCIfcPhEp6MVNO3M6n1eIgx-lQ7V8/edit#heading=h.o9blb4yr19il. Note. If you subscribe via Apple, payment will be charged to App Store Account at confirmation of purchase. Subscription automatically renews unless auto-renew is turned off at least 24 hours before the end of the current period. Account will be charged for renewal within 24 hours prior to the end of the current period at the rate of the selected plan. Subscriptions and auto-renewal may be managed by going to Account Settings after purchase.
Version 1.1
Bug fixes and performance improvements
App Privacy
The developer, Igor Nazarov , indicated that the app’s privacy practices may include handling of data as described below. For more information, see the developer's privacy policy .
Data Not Collected
The developer does not collect any data from this app.
Privacy practices may vary, for example, based on the features you use or your age. Learn More
Information
- SENTRY MAX $19.99
- SENTRY PRO $1.99
- App Support
- Privacy Policy
More By This Developer
Digital Speedometer App
Dating app for VK - Search people by photo for VK
Social Scanner - Analysis of social accounts
Activity for VK - Track your social page activity
Message Filter - Unwanted SMS
You Might Also Like
Linkvite Safari Extension
Device Pulse
BlockZilla: Content Filter
PiP for YouTube - PiPTube
Search Ninja for Safari
IMAGES
VIDEO
COMMENTS
Open the hosts file. To do so, type sudo nano /etc/hosts and press Enter. This command will open your Mac's hosts file in TextEdit. Alternatively, you can edit the hosts file in the main Terminal window using the command sudo nano -e /etc/hosts. Enter your administrator password again if prompted to do so. 5.
To block a website, add the following line to the bottom of the file, replacing example.com with the URL of the website you want to block: 127.0.0.1 example.com. You can add as many websites as you want by creating a new line for each website. Press Control ^ + O to save the changes to the host's file.
Type or paste sudo nano /etc/ hosts and press Return. Type in your admin password. Look for the line that starts 255.255.255.255. Use the down arrow key to move the cursor to that line and press Return to create an empty line above it. Type: 127.0.01 followed by the tab key and the URL of the site you want to block.
How to block websites on Safari . You can block sites using Screen Time on Mac computers. Here's how: 1. Click the Apple icon, located in the top-left corner of the screen and select System ...
How to block websites on Safari on your Mac using Terminal. If you want to block specific websites in Safari, or any other browser you use on your Mac, you'll need to try a different approach. If you're comfortable using Terminal, you can use Unix commands. IMPORTANT. The following method edits the host file on your Mac.
Make sure the kids aren't looking at porn, and your employees aren't reading Facebook: here's how to block (and unblock) unwanted, adult or unsavoury websites on a Mac, covering Safari, Chrome ...
To block access to a website in Safari once it has been used for a period of time, follow these steps in macOS: Click the Apple Menu, then go to System Settings > Screen Time . Next, click App Limits and toggle on App Limits . Click Add Limit. Scroll down to find Websites.
7) At the top of the task bar, navigate over to the Web tab. Click on the Web tab. While in the tab, click on Try to limit access to adult websites and from there hit Customize. 8) In the ...
When blocking websites with Screen Time, it works system wide and your machine can't access the blocked URL anywhere. Be it in web browser or any installed apps. It acts like a system-wide parental control. Steps to Block Websites on Safari in macOS. The easiest way to block websites on Mac is by using the new Screen Time feature.
In the Safari app on your Mac, use Websites preferences to customize how you browse individual websites. To change these preferences, choose Safari > Preferences, then click Websites. The settings you can customize (such as Reader and Content Blockers) are listed on the left. To apply a setting to a website on the right, first select the ...
Step #1. First of all, make a separate User Account for your children. Step #2. Then go to System Preferences on your Mac. Step #3. Click on Parental Controls. Step #4. Then click on the lock icon (shown at the bottom of the window.) Step #5.
sudo pico /etc/hosts. Enter your Mac user password and hit Return. Enter the hosts file in Terminal. Go to the bottom using your arrow key and type: 127.0.0.1 followed by a space and then the website you want to block. Hit Return. List each site on a separate line.
Click on "Submit" once you are done. 2. Now, click on " WebBlock " at the top right corner. 3. Next, click the "+" button at the bottom left and add the URL of the website you want to block in Safari on your Mac. If you want to block all sites except a few, use the Allowlist feature. That's it.
Any site you want to block just want to type 127.0.0.1. That is just the local address of your Mac. So of course if you try to go to a website it is not on your Mac, it's out on the internet. So setting it to this will mean that it simply won't work. Then you're going to Tab and then put the name of the site.
This applies to all browsers you may use on your Mac: Safari, Google Chrome, Firefox, and so on. To block a website on your Mac, just follow these steps: Open System Preferences and go to Screen Time . Select App Limits from the left-hand pane. Turn them on if they're disabled. Click the plus ( +) sign.
Hit Enter to create a new line. Type 127.0.0.1, hit the tab key to create a space, and enter the URL of the website you'd like to block. Repeat steps 4 and 5 to add more websites. Press Control + O to save the changes you've made to the Hosts file. Press Control + X to close the file.
Easy to follow tutorial on blocking websites on Safari for Macbook and Mac. Want to block specific websites from working on your Mac? or maybe you want to bl...
Enter your Mac's admin password when prompted, then press the Return key again. Type "sudo nano /etc/hosts", followed by the Return key. Using the down arrow key on your Mac, go to a new line and add the URL of the website you want to block, with the local IP address "127.0.0.1" before it, separated by a space.
Unblock Websites On Mac using Screen Time Block a Website Using Terminal. Meanwhile, if you are using an older Mac version like macOS Mojave or earlier then it's better to block certain websites on your Mac using the Terminal app. Step 1. Open the Terminal. You can find the Terminal app by using the Spotlight. Step 2. Type the command line ...
Part 3. Alternatives to Blocking Websites on Safari. Even if you block a site on Safari, your child may use a different browser or move to an Android device and continue to visit the site you blocked. If that's the case with you, we recommend using some alternatives, such as; Search Engines for Children
In the Safari app on your Mac, choose Safari > Preferences, then click Websites.. Click Pop-up Windows. Block pop-up windows for: A website in the list: Select the website in the right column, then choose the option you want. All websites that aren't currently customized: Click the "When visiting other websites" pop-up menu in the bottom-right corner of the pane, then choose the option ...
Under the App Lock tab, select Safari and click the small clock icon that appears. Enable Custom Schedule and click Add Schedule. Tip 2. Block Safari websites on Mac. Click Web Block in the main window. Add specific websites to block. Or, click the Import dropdown menu and select a category of websites to block.
Block notifications. You can prevent a website from sending notifications when it asks for the first time. If you have already allowed it, you can block it later by following these steps. Safari. Open the app and click Safari > Settings from the top menu bar. Now, go to the Websites tab and select Notifications. Here, you'll see all the ...
Apple continues to add privacy tech to Safari with each release on iOS and macOS—like requiring user authentication (such as a Face ID scan) when returning to a browsing session—though it's ...
Here's what happened. While browsing with Safari, my parents either clicked on an ad or were served a pop-up that brought them to the updates-mac.com site.
Sentry for Safari is a powerful and simple-to-use content blocker. The app tells Safari in advance what kinds of websites to block based on a list of domains. The list of blacklisted domains is taken from the best tracker investigation platforms. You can edit the list and activate only a limited set of domains.