Pre-Trip Inspection
- 1 What do you have to do in the Pre-trip inspection?
- 2 Light Motor Vehicles
- 2.1 Exterior Inspection
- 2.1 Interior Inspection
- 3 Heavy Motor Vehicles and Vehicles Towing a Trailer over 750kg
- 3.1 Exterior Inspection
- 3.1 Interior inspection
Learn about how to conduct a Pre-trip inspection for your car and truck driver’s licence test.
The Pre-trip inspection is to show the examiner that your vehicle is roadworthy. Make sure you go over the pre-trip inspections with your driving instructor – they will be able to explain any specific terms you are having trouble with. You should practice with your instructor before your driving test so that they can assess how well you did.

What do you have to do in the Pre-trip inspection?
You have to conduct an interior and exterior check on the vehicle in order to show that it is roadworthy for the driving test. You should know which items need checking and what order they need to be checked in: start on the right hand side mirror and work your way around the vehicle in a counter-clockwise circle (remember to repeat items which occur both on the right and left hand side of the vehicle, such as mirrors).
Leave a Reply
You must be logged in to post a comment.

- Register / Login
- Trucker's Forum
- Paid CDL Training
- Truck Driving Jobs
- CDL Practice Tests
- High Road Training
Pre-Trip Inspection Study Guide

Our Pre-Trip Inspection Study Guide has everything you need to prepare for the Class A CDL Pre-Trip Inspection Exam . Our study guide will cover the pre-trip inspection terminology as well as a thorough list of all of the parts you will be inspecting on the vehicle. For each part you will be inspecting there will also be a list of items you will be checking for. Our study guide is broken down into the following sections:
- What You Need to Know About Pre-Trip Inspection
Pre-Trip Inspection Practice Questions
- Pre-Trip Inspection Checklist
Pre-Trip Inspection Videos
Pre-trip inspection printable resources, what you need to know about the pre-trip inspection.
The Pre-Trip Inspection is a thorough inspection of the vehicle and all of its major systems. Inspecting the vehicle before driving each day is a Federal requirement and normally takes about 15 minutes. It must be logged in your logbook as "on duty not driving."
You will have to do thorough safety inspections of the coupling system, the vehicle lights, engine compartment, tires and brakes, the chassis, the fuel tanks, and an in-cab inspection.
The following information is a brief summary of Daniel's Complete Pre-Trip Inspection taken from our oustanding free PDF download:
Engine Compartment

You will be checking the engine compartment for any sort of leaks. You will also be checking to see if all components are properly mounted and secured. None of the mounts must be cracked, bent, or broken.
You will be checking all hoses to make sure they aren't leaking, frayed, or sliced and the fluid levels including the oil level, the coolant, and the power steering fluid.
You must check the components like the water pump, the power steering pump, and the alternator to make sure nothing is leaking, the belts are not frayed, and that everything is properly mounted and secured.
From inside the engine compartment you will also find the steering system, the front suspension system, and the front brake system. All components of these systems must be properly mounted and secured without anything being cracked, bent, or broken. Finally you will be checking the tires, rims, and axle seals to make sure the tires are properly inflated, the rim isn't bent or cracked, and the axle seals are not leaking.
Fuel Tank And Battery Area

You will be standing along the side of the tractor doing a series of checks on the mirrors, fuel tanks, batteries, exhaust system, and more. You will check to make sure nothing is bent, cracked, broken, or leaking.
Check the mirrors, door hinges, door handle to make sure nothing is cracked, bent, or broken. Check to make sure there is no fuel leaking and that the fuel cap is secured and the gasket is not missing.
Check the exhaust system to make sure nothing is cracked, bent, or broken. Check the driveshaft, cat walk, and steps to make sure nothing is cracked, bent, or broken.
Check the frame and crossmembers for structural integrity. Check the air lines going to the trailer to make sure they're properly connected and that there are no abrasions, bulges, or cuts. Make sure the gaskets are present.
Check the suspension system and brakes on the drive axles, making sure nothing is cracked, bent, or broken. Make sure the brake linings are the proper thickness and that the air bags and properly inflated. Inspect the brake chambers, slack adjusters, and pushrods are properly mounted and secure. Not Cracked, Bent, or Broken. With the brakes released and pulled by hand, the Push Rod should not move more than 1 inch.
Check the rims, tires, and axle seals of the drive tires for proper inflation, no leaks around the seal, and the lugs are all present and secured.
Coupling System

You will be standing where the tractor and trailer are connected and you'll start by checking the electrical line and air lines to make sure they're properly mounted and secure at both ends. No abrasions, bulges or cuts. Not leaking air. Make sure the electrical line has no wires exposed. Check the gladhands to make sure the seals are in good condition, no cracks or signs of dry rotting. Not leaking air.
Check the skid plate of the fifth wheel and the apron of the trailer to make sure there is no debris and nothing is cracked, bent, or broken. Make sure the fifth wheel is properly greased. Also make sure there is no gap in between the fifth wheel and the trailer apron once the tractor and trailer are coupled. Make sure the kingpin of the trailer is properly mounted and not cracked, bent, or broken and that the locking jaws of the fifth wheel are properly secured when the tractor and trailer are coupled.
Check the mounting bolts where the fifth wheel attaches to the tractor frame. Make sure there are no missing bolts and that everything is secured properly. Check the locking pin if you having a sliding fifth wheel to make sure it's properly locked into place.
Make sure that there is the proper clearance space between the tractor mudflap and the trailer landing gear so that they don’t hit each other when making a turn.

You will start inspecting the trailer at the head board, which is the front wall of the trailer. Make sure there are no holes or missing rivets. Check the landing gear to make sure it is properly mounted and secure. Not cracked, bent, or broken. Make sure the fully raised and the handle is secure in the cradle when the tractor and trailer are coupled.
Check the frame and crossmembers under the trailer to make sure they're not cracked, bent, or broken. Check the tandem frame and release pins to make sure the frame is in good condition and the release handle and locking pins are in the fully locked position.
You will check the entire suspension and brake system for the trailer tandems the same way you did for the drive axles of the tractor. You will also make sure the mudflaps are properly secured. For dual tires check to see that there is proper space between the tires and there is nothing stuck between the tires.
Check the rear door and hinges to make sure they are properly mounted and nothing is cracked, bent, or broken. Make sure the door seals are not worn, torn, or dry rotted.
Light Check

You will be checking all of the lights and reflectors on both the tractor and the trailer. Check the reflectors and reflective tape to make sure they are properly mounted and secure, not cracked, bent, or broken, and clean and illuminated. Check that you have the proper color of amber to the front and sides, and red to the rear.
Start by turning on your marker lights and headlights. Now walk around the entire truck and trailer and point out the lights. Give the function of the light and the location. You should then ask your examiner to help you check your five functions.
While you're sitting in the drivers seat, the examiner will stand to the front of the truck, then behind the trailer. He will then check your Turn Signals, Four Way Flashers and Brake Lights. You must do each function at every location.
The five locations that you must check your lights:
- Front of the Truck
- Both sides of the Truck
- Rear of the Truck
- Both sides of the Trailer
- Rear of the Trailer
The Five Functions you are checking for:
- Left Turn Signal
- Right Turn Signal
- Four Way Flashers
- High Beams/Low Beams
- Brake Lights
In-Cab Inspection

The in-cab inspection and air brake check will cover the various gauges and systems inside the cab along with several tests to make sure you air brake system is working properly.
You will start by checking the following:
- Seat Belt- Properly Mounted and Secure. Not ripped or frayed Adjusts and latches properly.
- Fire Extinguisher- Properly Mounted and Secure. Fully charged
- Three Red Reflective Triangles- My three red reflective triangles are GIVE LOCATION
- Spare Electrical Fuses- My spare electrical fuses are GIVE LOCATION
- Volmeter, Oil Pressure Gauge, Water Temperature Gauge, and Air Pressure Gauge all show proper operation
- City horn and air horn functioning properly
- The windshield and mirrors are clean, no cracks or breaks, no obstructions. The mirrors are in proper adjustment.
- Windshield Wipers and Washers - Demonstrate that the washers work by spraying the windshield. The Wipers are: Properly Mounted and Secure and operate smoothly. The blades aren't cracked or dry rotten.
- Heater and Defroster - Demonstrate that both the Heater and Defroster are working properly.
- Lighting Indicators - Left Turn, Right Turn, Four Way Flashers, and High Beams.
Trailer Parking Brakes - Set the Trailer Brake, release the tractor brake, and then tug lightly on the trailer.
Tractor Parking Brakes- Then set the Tractor Brake, release the trailer brake, and then tug lightly on the tractor.
Service Brake Check - Release both Tractor and Trailer Brakes. Now drive at idle speed. Apply the Service Brake to make sure you come to a complete stop, and that it doesn't pull to the left or right when applying the brakes.
Air Brake Test

The air brake test will consist of a leakdown test to make sure your air brakes aren't leaking air and losing pressure. It will also test the warning lights and buzzer to make sure the driver gets the proper warning if the air pressure drops too low.
There are three stages to an Air Brake Test
#1: Applied Pressure Test
#2: Warning Light and Buzzer
#3 Tractor/Trailer Protection Valve Pop Out
Applied Pressure Test: Build the air pressure to governor cut out. Put the truck in the lowest gear. Then turn off the engine Immediately turn the engine back on. Push in both the tractor and trailer valves. (This will release the parking brakes.) Push and hold the Brake pedal fully. Allow the gauges to stabilize. Announce the gauges have stabilized and the Primary and Secondary PSI. With the Brakes fully pressed, you should not lose more than 4 PSI in one minute. Announce that you are listening for air leaks during that minute.
Warning Light and Buzzer Test: Pump down on the Brake pedal until the warning light and buzzer comes on, at or before 60 PSI.
Tractor/Trailer Protection Valve Pop Out Test: Pump down on the brake pedal until both the tractor and trailer protection valves pop out. They should both pop out between 40 and 20 PSI.
We have a ton of Pre-Trip Inspection Practice Questions along with the answers and a complete scoring system in our Free Online CDL Practice Tests :
The Engine Compartment Section will include questions about checking the oil level and coolant levels, inspecting belt-driven engine components (like the water pump, alternator, and air compressor), and the safety devices required in the cab. There will also be questions regarding the windshield wipers and free play in the steering wheel.
The Lights And Brakes Section will include questions about dashboard indicator lights, inspecting the parking brakes, and doing a leakdown test on the air brakes. It will also include questions about the low air pressure warning signal and testing your air horn and city horn.
The Suspension And Steering Section will include questions about the tractor protection valve, inspecting the steering box, and inspecting many suspension system parts. It will also include questions about welds being present on tire rims and the minimum tread depth required on steering axle tires.
The Tires And Coupling Devices Section will include questions about shiny trails or rusty threads on lug nuts, inspecting the battery box and cover, and inspecting electrical lines. It will also contain questions about inspecting the coupling devices and the fifth wheel skid plate.
The Emergency Equipment And Fifth Wheel Section will include questions about additional emergeny equipment required by school buses, inspecting the gap between the kingpin apron and the fifth wheel skid plate, and the landing gear securement. It will also contain questions about inspecting driver mirrors and the trailer frame.
Pre-Trip Inspection Checklist - Class A
Our pre-trip inspection checklist covers every part of the truck from front to back, both inside and outside of the truck. It covers the air brakes, suspension parts, steering components, wheels and rims, fuel tanks, batteries, lights, and more. It also covers the air brake tug test and checks for everything under the hood including alternator, water pump, fuel pump, fluids, and more.
This is a super handy checklist to study anytime you have a few minutes to spare:
Pre-Trip Inspection Checklist - Free Word Document Download (Editable Version)
Pre-Trip Inspection Checklist - Free PDF Download (Print Version)
Pre-Trip Inspection Video By Apex CDL Institute
Jeff from Apex Institute does an in-depth explanation of the entire pre-trip inspection process. This video is loaded with tips that go beyond the CDL test to help drivers really understand how to identify problems.
Pretrip Inspection Self-Test By CDL College
The Pretrip Inspection Self-Test By CDL College is really unique. It's a silent video which will show you the part you're inspecting and then gives you a few seconds to figure out what you should be checking for before giving you the answer. Definitely check this one out. Great for practicing before the CDL exam.
Pre-Trip Inspection Video By Averitt Express
This is a complete back to front pre-trip inspection of a truck and trailer by Averitt mainentance associate Kevin Breeding. This thorough pre-trip inspection covers all inportant points of inside the cab, lights, engine, the tractor itself and the trailer.
We have included two print versions of the pre-trip inspection process from Daniel. The first is the entire pre-trip inspection and the second is an abbreviated checklist for the inspection.
- PDF: Daniel's Pre-trip Inspection (Print Version)
- PDF: Daniel's Pre-trip Inspection Checklist (Print Version)

Why Join Trucking Truth?

- The High Road Training Program
- The High Road Article Series
- The Friendliest Trucker's Forum Ever!
- Email Updates When New Articles Are Posted
Apply For Paid CDL Training Through TruckingTruth
Did you know you can fill out one quick form here on TruckingTruth and apply to several companies at once for paid CDL training? Seriously! The application only takes one minute. You will speak with recruiters today. There is no obligation whatsoever. Learn more and apply here:
- Privacy Policy

The Federal Register
The daily journal of the united states government, request access.
Due to aggressive automated scraping of FederalRegister.gov and eCFR.gov, programmatic access to these sites is limited to access to our extensive developer APIs.
If you are human user receiving this message, we can add your IP address to a set of IPs that can access FederalRegister.gov & eCFR.gov; complete the CAPTCHA (bot test) below and click "Request Access". This process will be necessary for each IP address you wish to access the site from, requests are valid for approximately one quarter (three months) after which the process may need to be repeated.
An official website of the United States government.
If you want to request a wider IP range, first request access for your current IP, and then use the "Site Feedback" button found in the lower left-hand side to make the request.
Complete pre-trip inspection checklist for truck drivers

By The Schneider Guy
Estimated reading time: 4 minutes
As a truck driver, performing a CDL pre-trip inspection is one of the most common and repeated tasks you will complete. Pre-trip inspections help truck drivers ensure their tractor and trailer are safe to operat e before hitting the road.
Keep reading to learn what a p re -trip inspection is and what should be on a p re -trip inspection checklist .
What is a pre-trip inspection?
A pre-trip inspection includes checking over the tractor and trailer a truck driver will be operating . A pre-trip should be completed before the operation of a vehicle :
- At the beginning of a driver’s shift.
- Any time a new trailer is picked up.
- After a 10-hour break.
A thorough inspection usually takes anywhere from 30 minutes to one hour and should be logged as on-duty, not driving (line 4) .
How to complete a CDL pre-trip inspection
CDL pre-trip inspection checklist
1. passenger-side engine: .
- Air filter housing: Secure mounting, cover in place.
- Windshield washer fluid reservoir: No leaks, proper fluid level.
- Turbocharger: No oil or exhaust leaks.
- Engine air ductwork: No cuts, clamps secured.
- Alternator: Mounting secured, no broken or loose wire.
- Accessory drive belt: Not cracked or frayed.
- Air conditioner compressor: Secure m ounting .
2. Front brakes (covers all five brake components):
- Brake drum: No cracks.
- Brake lining: No cracks or damage.
- Slack adjuster: Proper angle to the brake chamber, clevis and cotter pin intact.
- Brake air line: No bulges or cuts, fitting tight .
- Brake chamber: Mounting bolts secured, band clamp secured.
3. Front wheel:
- Tire: ABCs (abrasions, bulges, cuts), pressure = 120 PSI, tread depth = 4/32 min ( DOT ) .
- Wheel: Not cracked or bent.
- Hub oil: Not leaking, at proper level – if it’s a sealed unit, can’t check level.
- Oil seal (outer): Not leaking.
- Valve cap: Not missing.
- Lug nuts: None missing, no streaks or shiny areas, none loose.
4. Driver side of engine:
- Radiator brace: No cracks or missing bolts.
- Radiator: Not leaking, secure mounting.
- Water pump: No cracks, not loose or leaking.
- Fuel water separator/filter: Not leaking, secure mounting.
- Pitman arm/drag link: Not cracked, castle nut secured with cotter pin.
- Steering gear box: Secure to frame, not leaking.
- Power steering reservoir: Secure mounting , no leaks, proper level.
- Dipstick: Right level, secured after check.
- Steering shaft: Secure, not loose or damaged.
- Fuel pump: No cracks, not loose or damaged.
- Oil filler cap: Secure, no cracks.
- Engine coolant reservoir: No leaks, proper fluid level.
5. Steer axle suspension:
- U-bolts: No cracks, no loose or missing nuts.
- Leak spring: No cracks, not loose or shifting.
- Tie rod: Secured with castle nuts and cotter pins.
- Shock absorber: Secure mounting, not leaking oil.
- Axle: Not cracked.
6. Rear suspension:
- Spring mount: No cracks, secure mounting.
- Tire: ABCs (abrasions, bulges, cuts), pressure = 110 PSI, tread depth = 2/32 min ( DOT ) .
- Airbag (bellows): Fully inflated, secure mounting, not ruptured.
7. Side of cab:
- Mirrors: Secure m ounting , no broken glass.
- Doors: No damage, glass not broken, hinges secured, opens and closes well.
- Lights and turn signals: Working, not cracked.
- Steps: Mounted, secured to skirting.
- Battery box: Secure m ounting , cover latched.
- DEF cap: Cap secured.
- Fuel cap/tank: Gasket in place, vent in place, chain secures the cap to the tank.
- Side skirting: No damage, panels secure.
- Side box: Secured, safety triangles present.
- Side of sleeper berth: No body damage.
- Sleeper berth window: No cracks.
8. Rear of cab:
- Electrical cord: No bare wire, no corrosion, check the plug at the end of the cord.
- Air line: Not tangled or worn, rubber grommets not worn, fittings tight.
- Cab shock absorber: Secure mounting, not leaking oil.
- Cab airbag (bellows): Not ruptured, securely mounted.
9. Driveshaft/rear frame:
- Driveshaft: Not cracked.
- Universal joint: Not cracked, not missing bolts, no shiny areas.
- Differential: Not leaking oil.
- Frame: Straight, no non-factory welds.
10. Fifth wheel area:
- Pivot pin: Keeper pin and cotter key intact.
- Slider lock pins: Fully engaged.
- Release arm: Not bent.
- Slider rail: No broken welds or missing bolts.
- Slider stop blocks: Welds not broken, not missing bolts.
- 5th wheel platform: Well-greased, tilted down.
11. Front of trailer:
- Top rail: No cracks or collision damage.
- Clearance lights: Not broken, working properly.
- Registration: Not missing, readable.
- Document box: Not missing or loose.
- Air line /glad hands: No bulges or cuts in air lines, rubber grommets not damaged on glad hands.
- Electric hook up: No broken pins, cover intact.
- PM sticker: Current, legible.
- Height sticker: Legible, legal for route.
- Placard holder: Not broken or missing rivets.
- Tracking device: No cracks or collision damage.
12. Side of trailer:
- Top rail: Not cracked, no collision damage.
- Clearance light: Not broken, operational.
- Bottom light: Not cracked, no collision damage, no missing bolts.
- Landing gear: Legs straight, no broken welds in bracing, sand pads secured and clean handle in cradle.
- Reflector tape: Clean.
- Side panels: No holes or cuts, no missing rivets.
13. Rear of trailer:
- Latches: Secured, not damaged.
- Lights: Not broken or missing, operational.
- Splash guard: Brackets and guard secured.
- License plate: Secure and clean, light is working.
- Bumper: Not damaged, no broken welds.
- Door hooks: Not loose, no missing bolts.
- Hinges: Not cracked, no missing bolts on both sides.
- Door seals: No separation, no rubber tubing sticking out.
14. Trailer suspension:
- Air line: No bulges or cuts, fittings are tight and not rubbing.
- Axle: Not bent or broken.
- Clevis pin/cotter key: Not missing.
- Slack adjuster: Proper angle, clevis pin and cotter pin intact.
- Brake linings: Minimum of ¼ inch thick, not cracked.
- Brake drum: Not cracked.
- Tire: (ABCs), tread depth = 2/32 , air pressure = 110 PSI.
- Spring: Not broken, not shifted.
- Spring mount: No broken welds.
- U bolts: Not loose, not cracked.
- Torque rod: Secure mounting, bushings intact.
- Spring brake chamber: Secure m ounting , band clamp secure.
15. Gauges/inside the truck:
- Fuel: Matches visual when looking in the tank.
- Def level: Maintain a minimum of one light bar.
- Oil pressure: 25-50 PSI.
- Speedometer: 0-60 MPH.
- Air pressure: 90-120 PSI.
Please note that the list above is just an example. It is important to remember the type of driver you are, the company you work for and the type of truck you drive can impact your CDL pre-trip inspection . Be sure to consult your company guidelines or speak with your leader for more information on your post-trip inspection requirements.
Get more great driving tips and guides.
Schneider Guy loves the "Big Orange." He's passionate about the trucking industry and connecting people to rewarding careers within it. He's been the eyes and ears of our company since our founding in 1935, and he's excited to interact with prospective and current Schneider associates through "A Slice of Orange."
Related posts

8 CDL Road Test tips to help you pass

How hard is it to get a CDL?

How to get your CDL – 7 simple steps for new truck drivers

Join 100,000+ Drivers
- Sponsorship
- Thinking of Becoming a Truck Driver?
- Getting a CDL License
- Trucking Driving Jobs Guide
- Trucking Company Guide
- Trucker Life
- Paid CDL Training
- CDL Schools
- Professional Driving Skills + Knowledge
- Owner Operator
- Latest Articles
- Truck Driver Skills
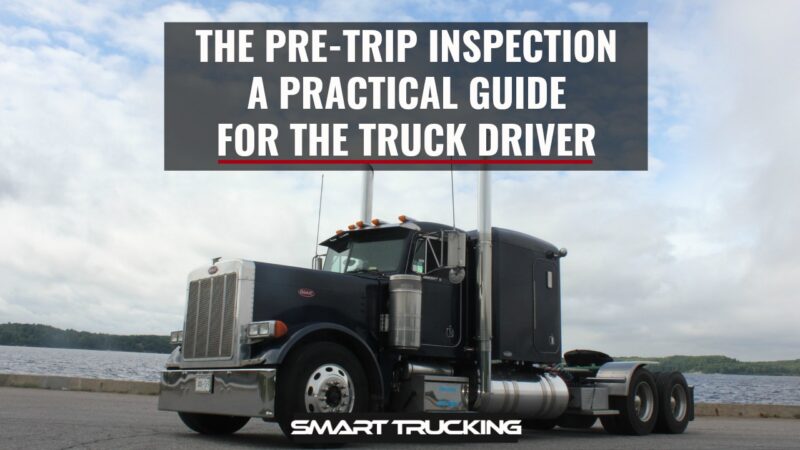
The Pre-Trip Inspection: A Practical Guide For the Truck Driver
Updated February 24th, 2022

- Facebook 426
- Pinterest 1
The pre-trip inspection is an integral part of every road trip for a trucker.
It’s probably the most disliked and most often overlooked part of the job of the professional truck driver in the trucking industry.
This inspection is meant to be a thorough check of the truck, trailer and load.
The check is to ensure that everything is in correct working order, prior to the truck and driver, departing on a trip.
Any damage or issues found during the pre-trip inspection which needs attention, must be addressed before departure.
CDL Test Pre-Trip Inspection
If you just came through the process of getting your CDL, you can breathe a sigh of relief.
You don’t have to check all 500 or so items that you had to memorize for the test every single day.
Out on the road, a thorough pre trip shouldn’t take more than 10 to 15 minutes.
DVIRs – Daily Vehicle Inspection Report
According to federal law ( FMCSR Section 396.11 ), every day, a driver must submit a Daily Vehicle Inspection Report (DVIR) for each power unit he operates. Multiple trailers can go in one report.
DVIRs are either paper or electronic.
Not every trucking company (ahem) enforces this policy, so some truck drivers can go months or years without submitting a DVIR.
Minimum DOT Pre-Trip Inspection Requirements
- Service brakes including trailer brake connections
- Parking brake
- Steering mechanism
- Lighting devices and reflectors
- Windshield wipers
- Rear vision mirrors
- Coupling devices
- Wheels and rims
- Emergency equipment
Your trucking company’s DVIR might be more thorough.
This is a thorough Q&A on DVIRs which you can refer to.

Inspecting a New Truck
When you are assigned a new truck (either daily or just once), there are a few additional things you need to check for on the pre-trip inspection.
Truck Compliance
- Cab card and book – This is a book containing the registration, inspection, permits, cab cards, IFTA paperwork, and any other important papers for the truck. Make sure it is in the truck and all the paperwork is up to date.
- Inspection sticker – This is outside the truck. Find it and make sure the truck is not overdue.
- IFTA stickers – These are the fuel tax compliance stickers. They are on both sides of the truck. Make sure the current year is displayed.
- Elog device – Most trucks are required to have a working elog device.
- Required permits – These are in the cab card book. The most common permits are Heavy Motor Vehicle Trip Permit (Oregon) and the Weight Distance Tax Permit (New Mexico).
- New York HUT sticker – This is usually on the front of your truck. It’s a type of permit.
- License plate – Make sure the license plates on the front and back of the truck match.
- FMCSA Safety Regulations and Hazardous Materials book – These will be given to you by your company. They must stay in your truck within arms reach from the driver’s seat.
- Paper logbook – If your e-log stops working, you must log your hours in a paper logbook, which must be kept in your truck.
- Medical card – You must keep your current medical card in your truck. Always have your CDL on you as well.
- Orange triangles – You must have 3 triangles for when you break down.
- Fire extinguisher – Must be charged and secured to the truck. No rolling around on the floor.
- Extra fuses – If your truck doesn’t use circuit breakers, you must have spare fuses.
- Load bars and/or straps
- Extra oil, coolant, and windshield washer fluid
- Line antifreeze and diesel anti-gel
- Chains and bungees
- Gladhand seals
- Hammer, wrench, wire cutters, cable cutters, knife with glass-breaker
The Class A Pre-Trip Inspection Process
Unless I have to bobtail to pick up my trailer, I inspect my truck and trailer together.
The best way to memorize a thorough pre trip is to do it the same way each time.
Your process will look different from mine, but as long as you are consistent, you will be less likely to miss anything.
I do the inspection first thing each morning as well as every time I swap trailers.
Paperwork and Trailer
- Check the paperwork. It should be the first thing checked when you get to your truck.
- Match the trailer number to your paperwork. If your trailer has a seal, make sure it matches too.
- Unsealed trailer. If your trailer does not have a seal, open it and confirm the product matches the bills. If you are picking up an empty trailer, open it and make sure it’s actually empty.
- Confirm your destination. Ensure the destination is the same as on your trip sheet or load assignment. If there is a discrepancy, call your dispatcher.

I personally like to start with checking under the hood of the rig. Not everyone does, but I do.
Under the Hood of the Truck
I walk around the front of the truck, making sure all the lights work. Then I open the hood.

- Fluid levels – Check all fluids: coolant, oil, power steering fluid, and windshield washer fluid. Make sure caps are tight for the rad, oil filler, power steering fluid and the dip-stick is seated properly.
- Alternator, water pump, power steering pump –Make sure these are in good working order, and the belts are not worn or have too much slack.
- Observe at the engine block. Check for leaks, fluid running down the side of the engine. Check for wear, cracking or fraying. Inspect fan belts for proper tension and signs of wear.
- Hoses – Check all hoses for leaks, cracks, and tears.
- Wiring – Check wiring for wear.
- Steering linkage – Check linkage for worn or missing parts.
- Tires – Tires should be properly inflated and have decent tread. If there are flat spots on the tire, it needs to be replaced.
- Hub seal – Make sure it’s not leaking and wiped with oil if transparent.
- Brakes – Brake chambers should not be out of round and should be free of grease. Shoes should not be worn down too much.
- Slack adjusters – Pull slack adjuster. If it travels more than an inch, it needs to be adjusted.
- Suspension – Shocks should be in good condition, and not covered in grease or oil.
Back of the Truck
Next, I check the back of my truck because it’s easier to check this before hooking to a trailer.
- Tires – Tires should be properly inflated and have decent tread. If the tires have flat spots, the tire needs to be replaced.
- Suspension – Shocks and airbags should be in good condition, and not covered in grease or oil.
- Drive shaft – Driveshaft should be undamaged and free of grease. Make sure there is no debris in the u-joints.
- Frame – The frame should not have any welds and not cracked or significantly rusted.
- Fifth wheel – The fifth wheel should be properly greased and not broken.
- Fuel tanks – Fuel tanks should not be leaking.
- Stairs and catwalk – Stairs and catwalk should be free of debris and not broken.

Tires should be checked with a tire gauge.
Tip . This is especially if you are slip seating. Tire thumpers aren’t very accurate. If you use a tire thumper, still check with a tire gauge from time to time.
Drives and tandems should be inflated to 100-110 psi and have a minimum tread or 2/32in. Steer tires should be inflated to 110-120 psi and have a minimum tread of 4/32in.
Tires under 50 psi should be replaced, as they can’t retain enough air pressure.
Flat spots can occur from dragging tandems in the winter or when trying to slide the tandems. Tires with flat spots should be replaced.
Check tires for damage, nails, and punctures.

Next, I jump in my cab and start my truck.
- Gauges – Make sure air, oil, and water temperature gauges rise to normal levels.
- Mirrors – Adjust mirrors before moving your truck.
- Windshield wipers – Make sure they work and sit flat against the windshield.
- Horn – Make sure the city and air horns both work.
- Heat and A/C – Check to see if heat and/or air conditioning is working.
- Seat belt – Seat belt should not be frayed and should move freely.
Coupling and Air Lines
This is what could happen if you don’t do the tug test.
The pre-trip inspection is a pretty important thing to do.
Learn your pre-trip procedure and do it when required.
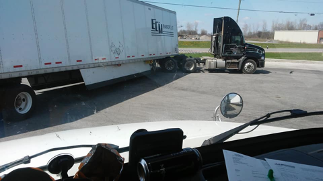
This is why you should always do a tug test when picking up a trailer. The passenger side of the front of the trailer is resting on the frame of the truck and NOT hooked up to the 5th wheel.

The front left corner of the trailer is supported by retracted landing gear only. (Not good!)
The truck driver in this photo (hopefully) learned how critical a pre-trip is. Don’t end up in a pickle like this guy.
Next, I hook up to my trailer.
- Tug test – I back under my trailer until I hear a click, and then immediately do a tug test.
A tug test tests both your coupling and your brakes. If you pull away from your trailer, you aren’t hooked properly.
If you pull your trailer with you, your trailer brakes are out of adjustment. Be absolutely sure to write it up and have it corrected before departure.
- 4 Ways + Headlights. I also turn on my four-way flashers and headlights.
- Airlines and pigtails – Next, hook up airlines and pigtails (electrical connection). Inspect to make sure they aren’t leaking or ripped.
- Visual check of Fifth wheel – Look at the fifth wheel arm under the trailer to make sure it is coupled. The arm should be in.
- Landing gear – Raise the landing gear and check for damage.

Next, I check the bulkhead (front of the trailer).
- Wall – Make sure the wall is not damaged.
- Inspection sticker – Check the DOT inspection sticker to make sure it’s not out of date.
- Registration paperwork – Check the front trailer box to make sure the registration is good.
- Reefer unit – If you are pulling a reefer, select the pre trip function on the unit and run it. It should be completed by the time you are finished your pre trip inspection.
Next step for the pre-trip inspection is to check the side of the trailer and the tandems.
- Lights – Lights should be on and flashing.
- Suspension – springs or airbags should be in good condition, and not covered in oil or grease.
- Tandem pins – Tandem pins should be locked in position, and slider arm should be in its cradle.
- Cables – Make sure the tandem cables aren’t dragging on the ground.
- Underbelly – Make sure there are no damaged beams under the trailer. Check the entire length.
- Mudflaps – Mud flaps should not be torn and hanging.
Back of Trailer
Next, I check the back of the trailer.
- Doors – Doors and hinges should not be damaged.
- Door latches – Doors should be closed and secured.
- Seal – Seal should be intact and match paperwork.
- DOT bumper – DOT bumper should not be damaged
- License plate – Check for the license plate. They tend to wear out and fall off.
Passenger Side
Next, I check the passenger side.
- Brakes – Brake chambers should not be out of round and should be free of grease.
- Suspension – Springs or airbags should be in good condition, and not covered in grease or oil.
- Mudflaps – Mud flaps should not be torn.
Ready to Roll

Finally, I jump in my truck and double check my paperwork and destination.
I release my air brakes, roll forward, and push the service brake.
If everything is good, I’m ready to roll.
Post-Trip Inspection
When I’m done for the day, and every time I swap trailers, I do a post-trip inspection. If I am swapping trailers, I do a pre-trip on the new trailer as well.
A post-trip includes:
- lowering the landing gear
- removing the airlines
- uncoupling, and walking around the trailer checking tires, lights, seal, and mudflaps
Then I finish my paperwork and go home.
Slip Seating
If you slip seat (meaning you are in a different truck each shift), your pre- trip check should be more thorough than if you are permanently assigned a truck.
This also applies to the first inspection after being assigned a truck.
Please be courteous and write up any problems or issues found, so the next driver of the vehicle doesn’t have to deal with it.
Side Note: Clean out your truck and throw away any trash. Common courtesy goes a long way in trucking, between drivers.
Pre-Trip Inspection F.A.Q.
Most breakdowns can be avoided with proper preventative measures, such as daily inspections.
Thorough inspections should be done at the start of each shift. Inspections of trailers should be done every time you swap trailers.
Each driver should do a thorough pre-trip every time they swap drivers.
It should take about 10-15 minutes to perform a pre trip inspection.
The DOT. Make sure you stay in compliance so you don’t end up with hefty fines and an out of service.
The best way to memorize your pre trip inspection routine, is to do it the same way every time. That way you’re less likely to miss something. If you have questions, ask your safety team at your company.
Fluids in the engine, engine hoses and wires, brakes and suspension, mudflaps, trailer registration and inspection paperwork, and license plates.
A Few Trip Planning Tips

- Buy and learn to read a trucker’s atlas. It’s useful to plan routes and avoid restricted roads. I find this road atlas a necessity as a professional truck driver.
- Buy a decent trucking GPS , but don’t rely on it 100%. Use common sense.
- Don’t use the GPS in your elog device. It will put you in a lake.
Please note that minimum requirements for the inspection are established by the FMCSA.
But these may vary by state, trucking company, truck type, and trailer type.
It is your duty as a professional truck driver to perform a thorough pre-trip inspection before each trip and before you drive.
You’ll save yourself from headaches, fines and unnecessary accidents.

More Articles You May Like
- Trucking Terms – A Guide to Our Industry’s Lingo
- The 18 Wheeler – A Comprehensive Guide to Big Rigs
CDL Truck Driver Skills – Tips, Tricks + Knowledge to Kick Your CDL Skills Up a Notch!
- The D.O.T. Physical- A Guide For the Truck Driver

Everything You’ll Want To Know About Paid CDL Training
Learn how to talk cb lingo like a trucker, c’mon.

Best Truck Engines + The Worst Truck Engines: A Trucker’s Guide
What you need to know about owner operator vs company driver jobs, twice a month we email you the best tips and new articles to help you better navigate the trucking industry..

10 Truck Driving Safety Tips Every Professional Driver Should Follow
A veteran 40+ years truck driver shares 10 of the all time, tried and true truck driving safety tips ALL professional truckers should know AND follow! If every driver of EVERY vehicle on the road followed these safety tips, our roads would be SO much safer.

Trucker Tips Master Guide: Expert Advice From Experienced Truck Drivers
A collection of trucker tips from million milers and experienced drivers. These are gold nuggets for the new truck drivers!

Instruction, clear advice, videos and photos for truck driver skills, maneuvers and information for all professional truck drivers.
A practical guide to paid CDL training programs. Recommended Company Sponsored Schools, Requirements, pros + cons, what to expect from company-sponsored cdl training programs.

How Witnessing a Fatal Accident Can Affect You: Forever
Truck driving can be a great career. But like any career, there are downsides and sometimes even a dark side. […]

10 Reasons Why Truck Drivers Quit Their Jobs
In the trucking industry, retaining drivers is a constant challenge for trucking companies. Understanding why truck drivers quit is essential […]

The Big Rush For More Truck Drivers To Put Behind the Wheel
It never ceases to amaze me how many regulations govern and control nearly every move we make as truck drivers. […]

Big Rigs, Bigger Dreams: The Best Heavy Haul Trucking Companies, U.S.
Heavy haul trucking is a specialized sector of the trucking industry. It’s a much more challenging driving job than hauling […]

The Fight Against Criminal Record Bias in the Trucking Industry
Truck driving is more than just a job. It’s a lifeline for our communities, delivering goods and keeping the wheels […]
Follow Smart Trucking

The K53 pre-trip inspection of the vehicle
- Which book should I use?
- isiZulu (ebook only)

- 255 multiple-choice questions
- Randomised tests
- Review your answers
- Covers light motor vehicles, heavy motor vehicles and motorcycles
- Pass your learner's licence test
- Pass your driver's licence test
- Motorcycle driving test
- Learner’s License
- Driver’s License
- Motor Vehicle Inspection
- Incline Start
- Alley Docking
- Left and Right Parallel Parking
- Three Point Turn
- Company Assessments
- Facebook Page
K53 Motor Vehicle Inspection
OBSERVE UNDERNEATH CAR (No oil leaks or obstructions) UNLOCK DOOR (Check wondow winder & seat belt) R REAR-VIEW MIRROR (Secure, undamaged & clean) R SIDE OF WINDSCREEN (Secure, undamaged & clean) R FRONT WHEEL (1mm thread or more, 4 nuts, valve cap, no brake fluid leak) R HEAD LIGHTS (Secure, undamaged & clean) BONNET (Mention only – Water, oil, brake fluid & fan belt) NUMBER PLATE (Valid, secure & corresponds) SAME PROCEDURE (On L side Tyres) L SIDE WINDSCREEN (Clean & undamaged) LICENCE VALID WIPER RUBBER (Soft & secure) remember to lift wiper blades off the windscreen LEFT MIRROR (Same procedure as for R side) L DOOR (Same procedure as for R side) L TYRES (Same procedure as for R side) L REAR TAIL LIGHT (Clean & secure) REAR WINDOW (Clean & undamaged) BOOT (Mention – Spare wheel, Jack, Wheel spanner, Triangle) REAR NUMBER PLATE EXHAUST (Secure) R REAR LIGHT (Secure & undamaged) PETROL CAP (Closed & no leaks) R REAR TYRE (Same as for R front wheel)
1. DOORS PROPERLY CLOSED 2. HANDBRAKE – NEUTRAL 3. NO OBSTRUCTIONS (In front or underneath) 4. ADJUST MIRRORS AND SEAT (No play steering wheel) 5. HOOTER, LIGHTS, INDICATOR, WIPER & BRAKE LIGHTS
- All Companies
- Driver Training
- All Freight Types
- Lease/Purchase
- Message Board
- Truck Driver Salary
- How to Become A Truck Driver
- Will I Be Successful?
- Truck Driving Schools
- CDL Practice Tests
- Get Your CDL
- Get Your First Truck Driving Job
- Your First 100,000 Miles
- Advanced Tips
- Sign Up Here
Select Location x
Please tell us your location.
Location not set
The Complete Pre-Trip Inspection Checklist

Due to heavy memorization, the pre-trip inspection is one of the hardest aspects of the CDL test. Also called the “Vehicle Inspection Test,” the pre-trip is one of the tests that trucking students fail the most.
With this pre-trip inspection checklist, we tell you everything you need to know and what you need to check for.
Engine Compartment – What to Check For:
When checking the engine compartment, you always want to make sure the following components are properly mounted and secured. You should also make sure they are not cracked, bent, or broken. The items you need to check for include:
Belt-Driven Alternator
All of the wires are connected. The belt is not cracked or frayed, and the free play on the belt is between ½ to ¾ of an inch.
Belt-Driven Water Pump
The free play on the belt is between ½ to ¾ of an inch, and all the hoses running to and from the water pump are tightly clamped. Ensure nothing is leaking.
Brake Chamber
The brake chamber is not leaking air.
The brake drum is properly mounted and secure.
The brake hose is rubber; it is not cracked and is not leaking air.
Brake Lining
Check for oil or debris on the lining. There should be at least ¼ of an inch of friction material.
Caste Nuts and Cotter Pins
All three caste nuts and cotter pins are present.
Coolant Reservoir

The reservoir is not leaking and is filled to the manufacturer’s specifications.
The drag link is properly mounted and secure, and not cracked, bent or broken.
Gear Box and Hoses
The gear box and hoses have no abrasions, bulges or cuts, and are not leaking.
Gear-Driven Air Compressor
The air compressor is properly mounted and does not leak.
Gear-Driven Power Steering Pump
The steering pump is properly mounted and not leaking.
General Hoses (Passenger and Driver’s Side)
The hoses are secure at both ends and are not leaking. There are no abrasions, bulges, or cuts.
The hub seal (or axle seal) is leaking and is filled to the manufacturer’s specifications.
Leaf Springs
None of the leaf springs have shifted or are bent or broken.
There are no signs of leaks under the truck.
There are no lug nuts missing. There are no rust trails, powder residue, or cracks around the bolt holes.
The oil level is filled to the manufacturer’s specifications.
The pitman arm is properly mounted and secure. It is not cracked, bent, or broken.
Power Steering Fluid Reservoir
The power steering reservoir is not leaking and is filled to the manufacturer’s specifications.
The rim does not have any unauthorized welds.
Shock Absorber
The shock absorber is not leaking. If it is leaking, the leak will be at the point where the top and bottom portion of the shock meet.
Slack Adjuster and Push Rod
With the brakes released and pulled by hand, the push rod does not move more than one inch.
Spring Hanger
The spring hanger is properly mounted and secure.
Steering Column
The steering column is properly mounted and secure. It is not cracked, bent, or broken.
There are no abrasions, bulges, or cuts on the tread or sidewalls. Tread depth should have a depth no less than 4/32 of an inch. Tires are properly filled to the manufacturer’s specifications. This can be checked with an air gauge.
The tie rod is properly mounted and secure, not cracked, bent, or broken.
Make sure all are accounted for.
Driver Door Fuel Area-What to Check For:
Remember – during the pre-trip inspection, you want to make sure these items are properly mounted and secure. Look for cracks, bends, and breaks.
The actual airbag has no abrasions, bulges, cuts, or leaks. The airbag is not missing mounting bolts.

The axle seal is not leaking and is filled to the manufacturer’s specifications.
The brake drum is secured properly and has no cracks, bends or breaks.
Check the brake hose at both ends to make sure it is not leaking air.
There is no oil or debris on the brake lining. There is at least ¼ of an inch of friction material.
Catwalk and Steps
The cat walk and steps are clear of any loose objects.
Door and Hinges
The doors open, close, and latch properly. Door seals should not be worn, torn, or rotten.
Drive Shaft
The drive shaft is not twisted, and the u-joints are free of any debris.
The tread and sidewalls have no abrasions, bulges, or cuts. The tread depth is no less than 2/32 of an inch. Tires are properly filled to the manufacturer’s specifications. This can be checked with an air gauge.
Exhaust System
The exhaust system shows no signs of leaks.
Frame and Cross Members
There are no unauthorized holes or welds. Bundle up the cross members to ensure none are missing.
Fuel is not leaking from the tank, and the cap is on tight.
There are no rust trails, loose bolts, powder residue, or cracks around the bolts.
Mirrors are clean, with no cracks or chips.
The mud flap is secured properly, with no cracks, bends and breaks.
There are no unauthorized welds.
The shock absorber is secure at both ends and not leaking. If it does leak, it is preferable to leak in the middle.
There is proper spacing between the tires and there is nothing stuck.
The spring arm is secure at both ends.
Spring Mount
The spring mount is secure at both ends.
The torque arm is secured properly, with no cracks, bends or breaks.
No u-bolts are missing.
Coupling Area-What to Check For:
Air lines should be secure at both ends with no abrasions, bulges, or cuts. They should not be leaking, dragging, or tangled.
Make sure the apron is properly mounted and secure. Look for cracks, bends, and breaks.
Make sure there is enough space between the tractor mud flap and the trailer landing gear, so that they don’t hit each other when making a turn.
Electric Line
The electric lines are secure at both ends. There are no abrasions, bulges, cuts, or exposed wires.
There is no space between the apron and the skid plate.
The seals are in good condition with no cracks, signs of rotting, or leaking air.
The king pin is properly mounted and secure, without cracks, bends and breaks.
Locking Jaws
Physically check that the locking jaws are fully locked around the king pin.
Mounting Bolts
No mounting bolts are missing.
The platform is properly mounted and secure, without cracks, bends and breaks.
Release Arm
The release arm is in the fully locked position.
The skid plate is properly lubed.
Sliding Fifth Wheel Locking Pin
The pin is in the fully locked position.
Trailer- What to Check For :
The airbag has no abrasions, bulges, cuts or leaks, not missing any mounting bolts.
The brake chamber is properly mounted and does not leak air.
The brake hose is secure at both ends with no abrasions, bulges, cuts, or leaks.
No oil or debris on the brake lining and at least ¼ of an inch of friction material.
No missing cross members.
Header Board
The header board does not have any holes or missing rivets.
Landing Gear
The landing gear is fully raised and the cradle handle secure.
No rust trails, powder residue, or cracks around the bolt holes.
The rims do not have any unauthorized welds.
Rear Door and Hinges
The rear door opens, closes, and latches properly. Door seals are not worn, torn, or dry rotten.
The shock absorber is secure at both ends with no leaks.
When the brakes are released and pulled by hand, the push rod does not move more than one inch.
Tandem Frame and Release
Release handle and locking pins are in the fully locked position.

Trailer Tire
There are no abrasions, bulges, or cuts to the tread or sidewalls. Tread depth is no less than 2/32 of an inch. The tire is properly filled to manufacturer’s specifications and checked with an air gauge.
Light Check
There are five locations where you must check your lights. These include:
- Front of the truck
- Both sides of the truck
- Rear of the truck
- Both sides of the trailer
- Rear of the trailer
The five functions are:
- Left turn signal
- Right turn signal
- Four way flashers
- High/low beams
- Brake lights
Inspection and Brake Tests-What to Check For: In-Cab
The last section is In-Cab Inspection and Brake Tests. For the In-Cab Inspection you once again want to make sure all of the following components are properly mounted and secure. As well as the following:
Air Brake Test
There are three stages to an air brake test:
- Applied Pressure Test – When doing the Applied Pressure Test, you want to build the air pressure to governor cut out. Put the truck in the lowest gear, turn the engine off and immediately turn it back on. Push in the tractor and trailer valves which then release the parking brakes. Push and hold the brake pedal, allowing the gauges to stabilize. When the gauges have stabilized, announce the Primary and Secondary PSI. Listen for air leaks while doing this.
- Warning Light and Buzzer – Pump down on the brake pedal until the warning light and buzzer comes on. This is typically at or before 60 PSI.
- Tractor/Trailer Protection Valve Pop Out – Pump down on the brake pedal until the tractor and trailer protection valves pop out, this will be between 20 and 40 PSI.
Air Pressure Gauges
The air pressure gauges build to governor cut out.
Emergency Equipment
Truck has a fire extinguisher, three red reflective triangles, and spare electrical fuses.
Heater and Defroster
Demonstrate both the heater and defroster are working properly.
Horns (Air Horn and City Horn)
Blow both horns to make sure they are working.
Lighting Indicators
Check the left turn, right turn, four way flashers and high beams; also point these out on the dashboard.
With the transmission in neutral, fully depress the clutch. Turn the key on, check the ABS light, announce when it comes on and off, and start the engine.
The seat belt is not ripped or frayed and adjusts and latches properly.
Oil Pressure Gauge
The engine oil pressure gauge should rise to normal operating range.
Parking Brake
- Trailer Parking Brakes – Set the trailer brake, release the tractor brake, and tug lightly on the trailer.
- Tractor Parking Brakes – Set the tractor brake, release the trailer brake, and tug lightly on the trailer.
Service Brake Check
Release both the tractor and trailer brakes. Drive at idle speed. Apply the service brake to make sure you come to a complete stop and that it doesn’t pull to the left or right when applying the brakes.
The voltmeter is charging between 13 and 14 volts.
Water Temperature Gauge
The water temperature gauge rises to normal operating range.
Windshield and Mirrors
The windshield and mirrors are clean, with no obstructions and in proper adjustment.
Windshield Wipers and Washers
Demonstrate the wipers and washers are working properly by spraying the windshield.

This is a really nice complete list, very useful.
Comments are closed.
Contact ClassADrivers.com
Please use the form below to contact our customer service or sales team.
You can also reach us at (888) 830-2326. Our normal business hours are Monday-Friday 8 a.m. to 5 p.m. (Pacific Time).
Our business address is: Attn: Class A Drivers MH Sub I, LLC dba Internet Brands 909 N Pacific Coast Highway, 11th Floor El Segundo, CA 90245
By clicking the ["Send"] button, you agree to our Terms of Use and Privacy Policy , and to the use of cookies described therein, and you also consent to the collection, storage, and processing of your data in the United States where the level of data protection may be different from that in your country.
- Invoice Generator
- Quotation Generator
- K53 Learners Material
- Community contributions
- My Questions
- My Comments
- Business Management
- Catalogue Catagories
- Business Settings
- Account Settings
- Invoice Settings
- Terms and Conditions
- Privacy Policy
- About / Get in touch
- Community Questions
Tips to pass my license code 8 K53
pass license driving school code 8 green point 106
Who are you inviting:
Be confident and prepared.
Know what lies ahead., driving lessons., the learner driver, your answer:.
- Only reply if you are confident in your answer.
- Check for spelling and grammar.
- Avoid in-appropriate remarks.
- If you need more information or clarity, post a comment first .
Use these fields to recommend a company or organisation, to quote a source or to reference your response.
By saving this content you are agreeing to our terms and conditions and privacy policy
- Avoid in-appropriate remarks and comments.
- If you'd like to thank the poster, you should cast a vote.
- News / News Blog
Drive Alert News Blog
- Driving Lessons - K53 Driver's License Test Pre-trip Inspection
Driving Lessons - Your K53 Pre-trip Inspection
The pre-trip inspection is a requirement for your driver's test and is usually tested before the parking and driving.

Learn the following steps and you'll create a good first impression in the eyes of the driving examiner.
Inspect the vehicle and recite the following:
- No leaks or obstructions under the car.
- Seat belt & door in working order.
- Mirror & windshield secure.
- Wiperblade un-perished.
- Tyre tread & pressure checked, wheel secure
- Headlights & bonnet secure.
- Water, oil, brake fluid & fanbelt checked.
- Left side of car same as previous.
- Licence disc valid & petrol cap secure.
- Back window & tail lights secure / not cracked, boot securely closed.
- Back door & tyre same as previous.
Additional tips for your pre-trip inspection
- Remember to speak clearly during your inspection.
- Start at the driver's side and then walk slowly and counter clockwise around the car. Doing so will make it easier to remember the steps.
Share this post
Possibly related posts:.
- Driver's License - South African Rules of the Road
- Driving Lessons - How to Pass Your K53 Driver's License Test
Subscription
Get the latest updates in your email box automatically.
Your nickname:
Email address:
- Driving Lessons (5)
- Driver License (5)
- March 2018 (1)
- February 2018 (4)
- driving lessons
- driving academy
- driving lessons Cape Town
- driving academy Cape Town
- driving school
- driving instructor
- driving school Cape Town
- Cape Town driving school
- Cape Town driving academy
- Cape Town driving lessons
- driving schools in cape town
- driving schools in Cape Town
- driver license lessons
- drivers lessons
- driving schools in cape town southern suburbs
Unit 14 Athlone Industrial Athlone Cape Town 7764
082 698 7362 [email protected]

Column Headline
A step-by-step guide to conducting effective pre-trip inspections.
.png "pre trip inspection code 8")
Whether you're a seasoned trucker or considering a career on the road, understanding the importance of pre-trip inspections is crucial. These inspections serve as your vehicle's health check before hitting the road, ensuring safety, efficiency, and compliance. I n this guide, we'll walk you through the step-by-step process of conducting effective pre-trip inspections, helping short haul drivers stay on top of their game. Let's dive in!
The Key to a Successful Journey
In the fast-paced world of short haul transportation, time is of the essence. Pre-trip inspections are your ticket to a smoother journey. This essential practice involves thoroughly checking your truck, trailer, and load for any potential issues that might jeopardize your trip. By dedicating time to a pre-trip inspection, you're setting the stage for efficient operations and, most importantly, a safe trip.
A Closer Look: The Pre-Trip Inspection Guide
Step 1: Essential Tools
Equip yourself with the necessary tools to conduct a thorough inspection, including a flashlight, tire pressure gauge, and reflective triangles.
Step 2: Visual Check
Begin by visually inspecting your vehicle for damages, leaks, or anomalies. Pay attention to tire condition, lights, mirrors, and overall vehicle appearance.
Step 3: Tire Check
Assess tire inflation, tread depth, and any signs of damage. Uneven wear can hint at potential alignment or suspension issues.
Step 4: Lights Examination
Inspect all lights, including headlights, taillights, turn signals, and brake lights. Promptly replace any burnt-out bulbs for optimal visibility.
Step 5: Fluid Level Verification
Check fluid levels like oil, coolant, and windshield washer fluid. Adequate levels are essential for smooth vehicle operation.
Step 6: Brake Test
Test your brakes for responsiveness and uniformity. Listen for unusual sounds or vibrations, and ensure the parking brake functions correctly.
Step 7: Mirror Assessment
Adjust mirrors for optimal visibility, minimizing blind spots. Keep them clean and properly positioned.
Step 8: Safety Gear Evaluation
Ensure safety equipment, such as fire extinguishers and reflective triangles, is present and in good condition.
Step 9: Documenting Findings
Take down any observed issues, damages, or irregularities in your notepad. These notes serve as a reference for addressing maintenance needs.
Pre-trip inspections are a must for short haul drivers, offering a blend of safety and efficiency. By committing to this routine practice, you're not only safeguarding your journey but also minimizing unexpected breakdowns that could disrupt your schedule.
What if there was an easier way to manage these inspections?
Traditionally, pre-trip inspections involved paper checklists that were prone to errors and often lost or damaged. Qv21 replaces these cumbersome checklists with digital versions accessible via tablets or smartphones. Drivers can quickly and accurately complete their inspections, reducing the risk of overlooking critical safety checks.
In the fast-paced world of short-haul trucking, every minute counts. A Transportation Management System (TMS) serves as an essential tool for short-haul drivers, enabling them to efficiently conduct pre-trip inspections. From real-time scheduling to digital checklists and data analytics, Qv21 streamlines the inspection process, enhances safety, and ensures compliance with regulations. Ultimately, Qv21's TMS helps short-haul drivers stay on the road, delivering goods safely and on time, while also prioritizing safety and compliance.
So, to all the short haul drivers out there, remember that a comprehensive pre-trip inspection is your gateway to a successful trip. Embrace it, master it, and hit the road with confidence knowing that you're well-prepared for whatever the journey brings. Safe travels!
Contact our team now to learn more and take your understanding to new heights.

Elevating Customer Success: Qv21 Technologies
The Customer-Centric Approach In a world where customer expectations continue to soar, the trucking industry is no exception. Customers seek more...

Overcoming TMS Implementation Challenges with Qv21
Change can be daunting, especially when it involves the adoption of new technology like a Transportation Management System (TMS). While the promise...

Embracing Change: Overcoming the Fears of Transitioning to a TMS
In the fast-paced world of logistics and trucking, the landscape is evolving at an unprecedented pace. With technology-driven advancements at the...
- Optimization
- Safety & Security
- Truck/Vehicle
- Dry Trailer
- INTEGRATIONS
- Utilization
- Reefer Container
- Dry Container
- AIS DATA SERVICES
- VESSEL MONITORING SYSTEMS (VMS)
- Maintenance
- Construction
- Agriculture
- Customer Experience
- Customer Success Stories
- ORBCOMM University
- Customer Care
1-800-ORBCOMM
+1-804-404-8681
- Smart Terminals
- Satellite Modems
- Tools and Apps
- CONNECTIVITY
- Vessel Monitoring Systems
- White Papers
- Success Stories
- In the Media
- CargoWatch®
- Coldchainview
- Device Cloud
- FleetManager.com
- ORBCOMMconnect
- ORBCOMM Platform
- ReeferConnect
- ReeferTrak®
- Everything you need to know about pre-trip inspection checklists
- Transportation
- Jan 18, 2024
- Cody Lirette

Embarking on a safe and efficient journey as a truck driver begins long before hitting the road. The cornerstone of every successful trip is a thorough pre-trip inspection. This guide delves into the essential aspects of a pre-trip inspection checklist. These critical checkpoints can make all the difference in your driver’s safety and the efficiency and success of the journey.
What is a pre-trip inspection?
A pre-trip inspection is a proactive measure taken by truck drivers to ensure their vehicles are in optimal condition and adhere to safety standards and other relevant regulatory requirements. This assessment checks for signs of wear, damage or malfunction on critical components like the engine, brakes, lights, tires, fluid and more.
The goal of a pre-trip inspection is two-fold: safety and compliance . A thorough vehicle examination helps identify potential issues so they can be addressed promptly, minimizing the risk of breakdowns and accidents. The inspection is crucial for compliance with industry regulations and standards. Failure to do so could result in fines, penalties or suspensions.
The importance of a pre-trip inspection
Pre-trip inspections are more than a regulatory requirement; they can help keep drivers and the public safe, maintain cargo integrity and improve vehicle longevity. Here’s why this practice is essential:
- Enhanced safety: Identifies potential mechanical issues before they escalate. This means reduced risk of breakdowns and roadside emergencies.
- Improved efficiency: Addresses issues before they happen on the road to ensure fleets deliver on time.
- Better compliance: Helps meet legal requirements, avoid unnecessary fines and penalties and comply with industry standards and safety protocols.
- Protected cargo: Ensures cargo is secure and adequately loaded, preventing damage during transit.
- Maintain equipment health: Identifies wear and tear on components, allowing for timely maintenance, reducing long-term repair costs and prolonging the longevity of the vehicle and its critical systems.
- Boosted reputation: Demonstrates a commitment to professionalism and responsibility. This enhances a fleet’s reputation and builds stronger customer relationships.
- Driver confidence: Following a standardized pre-trip inspection checklist reassures drivers that their truck is in optimal condition.
Main components of a pre-trip inspection checklist
To ensure drivers cover all the essential components of pre-trip inspections, here are the main checkpoints to keep in mind:
Tire inspection

- Tread depth: Measure tire tread depth . Inadequate tread depth can compromise traction and vehicle stability, especially in unfavorable road conditions.
- Tire inflation: Verify that all tires meet the manufacturer’s specifications. Improper inflation poses safety issues and can lead to uneven wear and reduced fuel efficiency.
- Visible tire damage: Inspect each tire for cuts, bulges or other visible damage. Address these issues promptly to prevent blowouts and other safety concerns.
- Valve stem integrity: Inspect valve stems for damage or leaks and ensure caps are in place. Damaged stems can lead to pressure loss.
Lights and reflectors
- Headlights: Ensure both high and low beams work. Check for proper alignment to maximize visibility without blinding other drivers.
- Taillights: Verify that taillights work, including brake lights and turn signals.
- Clearance lights: Ensure clearance lights work. These enhance the visibility of the vehicle’s dimensions, especially in low-light conditions.
- Reflectors: Confirm the presence and condition of reflectors on all sides of the vehicle.
- Hazard lights: Ensure hazard lights work.
- Turn signals: Ensure the turn signals work on both sides.
Brake check
- Air brakes: Check air brakes for leaks by listening for hissing sounds. Confirm that air pressure builds within a reasonable time after starting the engine.
- Parking brake: Test the parking brake to ensure it holds the vehicle securely.
- Brake fluid levels: Check the fluid reservoir for proper fluid levels. Low levels may indicate a leak or wear.
- Brake pads and shoes: Inspect brake pads and shoes for visible wear. They may need replacing if they are too thin or show uneven wear patterns.
- Brake drums and rotors: Examine brake drums and rotors for signs of scoring, grooves or heat-related damage.
- Brake lines and hoses: Pay attention to visible damage, corrosion, bulging or leaks.
- Anti-lock braking system: Check the dashboard for warning lights.
Engine compartment
- Engine oil: Check the engine oil level. Ensure it falls within the recommended range.
- Coolant: Ensure the coolant reservoir has the appropriate amount to prevent engine overheating.
- Drive belts: Examine for signs of wear, fraying or cracking.
- Hoses: Inspect hoses for leaks, bulges or soft spots. Replace any damaged hoses to prevent leaks.
- Battery: Check battery terminals for corrosion and ensure they’re securely connected. Loose or corroded connections can lead to electrical issues.
- Air compressor: Inspect the air compressor for visible damage and ensure proper functioning for optimal brake performance.
- Power steering fluid: Ensure power steering fluid levels are within the recommended range.
- Air filter: Check for decay and debris. A clogged air filter can reduce engine efficiency and fuel economy.
- Fuel levels: Ensure the fuel tank is full.
- Fuel cap: Verify the fuel cap is tightly secured to prevent spillage and contamination.
- Fuel tank integrity: Inspect the tank for visible damage, rust or signs of leakage
Fluid inspection
- Transmission fluid: Check transmission fluid levels, ensuring they’re within the recommended range.
- Windshield washer fluid: Keep the washer fluid full.
- Differential fluid: Check differential fluid levels. Low levels can lead to differential damage and affect vehicle performance.
Windshield inspection
- Cracks and chips: Inspect the windshield for any cracks or chips. Address any large ones that affect visibility.
- Windshield wipers: Ensure the windshield wipers are functioning. Replace worn or damaged blades.
- Windshield washer jets: Confirm the windshield washer jets spray fluid evenly. Malfunctioning jets can result in uneven cleaning.
Emergency kit
A well-equipped kit ensures drivers are ready to handle unexpected situations on the road, promoting safety and efficiency:
- First aid supplies: Essential medical supplies including bandages, antiseptic wipes, pain relievers and any necessary personal medications.
- Reflective triangles or flares: Confirm that you have reflective triangles or flares to enhance visibility in case of roadside breakdowns.
- Fire extinguisher: Ensure the fire extinguisher has a valid inspection tag and is not expired.
- Essential tools: Check for the basics like a wrench, pliers and screwdrivers.
- Flashlights and batteries: Test the functionality of flashlights and ensure spare batteries are available.
- Blankets or sleeping bags: Essential for unexpected delays or overnight stops.
- Communication devices: Test radios or cell phones.
- Side mirrors: Confirm side mirrors are correctly adjusted for the driver’s line of sight and are securely attached.
- Convex mirrors: Verify the alignment of convex mirrors to provide an optimal wide field of view. Ensure they are not loose.
- Motorized adjustment: If mirrors have motorized adjustment capability, ensure these work.
Front suspension
- Shock absorbers: Inspect for leaks, visible damage or signs of wear.
- Springs: Pay attention to signs of sagging, damage or cracks.
- Bushings and mounts: Ensure bushings and mounts are in good condition and don’t have any significant wear, deterioration or damage.
- Alignment: Test steering stability to identify any abnormal vibrations or wandering.
- Tie rods and ends: Examine tie rods for signs of looseness, wear or damage.
Driver door
- Door Latches: Verify that door latches engage and disengage smoothly to maintain safety while driving.
- Hinges: Inspect door hinges for signs of wear, rust or damage.
- Seals and weatherstripping: Pay attention to any gaps, tears or deterioration of seals and weatherstripping. Proper seals prevent leakage and maintain a comfortable cabin environment.
- Mud flaps: Should be securely mounted.
- License plate: Ensure the license plate is securely attached and visible. A properly displayed license is crucial for regulatory compliance.
- Exhaust: Note any damage to the exhaust system, like rust or loose components.
- Rear doors or gates: If applicable, test the operation of rear doors or gates.
Coupling system
- Fifth wheel: Inspect for damage or misalignment.
- Kingpin: Ensure there is no wear or damage. A well-maintained kingpin ensures a secure attachment to the fifth wheel.
- Locking mechanism and safety latch: Test the locking mechanism to ensure it engages securely to help prevent accidental uncoupling during transit.
- Release handle: A properly functioning handle facilitates efficient coupling and decoupling.
- Connection hardware: Confirm that all connection hardware, such as bolts and brackets, is secure. Loose components can compromise the coupling system.
- Air and electrical lines: Inspect these lines for damage or leaks and ensure the trailer brake and light systems work.
- Structural integrity: Inspect the trailer for signs of structural damage, including rust, dents or wear.
- Lights and reflectors: Check that all lights and reflectors are functional.
- Brake system: Test the trailer brake system, including service and emergency brakes.
- Suspension components: Inspect suspension components for signs of wear.
- Tires and wheels: Ensure proper tire tread depth and pressure.
- Cargo: Confirm that cargo is securely fastened and within legal limits.
- Landing Gear: Check for proper functioning to ensure stability during loading and unloading.
In-cab inspection
- Steering wheel: Ensure the steering wheel is aligned and stable.
- Seat and seatbelt: Adjust the seat for comfort and confirm the seatbelt is in good condition.
- Pedals: Test the functionality of gas, brake and clutch pedals.
- Instrument panel: Inspect gauges on the instrument panel for proper readings about the truck’s status.
- Documentation: Ensure necessary documents like permits are present and up to date. This is essential for regulatory compliance.
- Electronic devices: Test GPS and communication systems.
How to properly report a pre-trip inspection
Reporting a pre-trip inspection is not just an industry requirement. It’s also a critical communication tool between drivers and fleet management . To effectively report results, it’s important to:
- Use a standardized form provided by the company or regulatory body.
- Record observations in an organized manner.
- Be specific and descriptive.
- Prioritize safety concerns in the report.
- Include suggestions for corrective actions.
- Submit the report promptly to allow swift resolution of issues and minimize the risk of operational delays.
- If available, leverage digital reporting platforms for efficiency. Digital reports can transmit information in real-time, streamlining communication between drivers and management.
- Confirm that the report has been received and acknowledged by the appropriate personnel.
What to do if there are issues in the pre-trip inspection
Encountering issues during a pre-trip inspection is common, and educating drivers on the importance of reporting is crucial for ensuring road readiness and compliance.
If issues arise, ensure they are documented thoroughly and reported promptly. If problems are safety-related, communicate these concerns to management immediately. Always practice clear communication, like concise and descriptive language, to ensure a shared understanding and quick resolution.
Frequently Asked Questions
When should a driver perform a pre-trip inspection.
A driver should perform a pre-trip inspection before embarking on each journey. This proactive examination of the vehicle’s mechanical and safety components ensures it’s in optimal condition for the road. Conducting an inspection daily or before the start of each trip is a regulatory requirement in many jurisdictions. Plus, it can enhance driver safety, limit the risk of mechanical failures and contribute to overall road safety.
What is the first step of the pre-trip inspection?
The first step of a pre-trip inspection should involve an external assessment of the truck or commercial vehicle. This includes visually inspecting the vehicle’s overall condition, ensuring no visible defects or safety hazards. Start with a walkaround to identify any significant issues. Then, break the inspection down into components. For example, start with the tires, then move on to the lights, brakes, mirrors, and under the hood.
What is the most overlooked part of pre-trip inspection reports?
Drivers may focus on more visible components, like tires and lights, neglecting critical elements like brake lines, suspension and the exhaust system. Checking for signs of leaks, loose parts, or damage underneath the vehicle is crucial for identifying hidden issues that could compromise safety and performance. Completing every part of the checklist ensures a comprehensive assessment, reducing the risk of overlooking these critical components.
What happens if I don’t perform the inspection?
Failing to perform a pre-trip inspection can have serious consequences, both legally and in terms of safety. Regulatory bodies often mandate these inspections, and non-compliance can lead to fines, penalties or even the suspension of driving privileges.
Beyond legal implications, neglecting the inspection jeopardizes safety. Without identifying potential issues before hitting the road, there’s an increased risk of mechanical failures, accidents, and breakdowns, posing a danger to the driver and others on the road.
Additionally, failure to perform pre-trip inspections may impact insurance claims and the overall reputation of the driver and transportation company.
What is a DOT pre-inspection checklist?
A DOT pre-inspection checklist is a comprehensive list of items and components that commercial vehicle drivers must inspect before embarking on their trip, as mandated by the United States Department of Transportation (DOT).
Where should the ignition key be during the pre-trip inspection?
During a pre-trip Inspection, the ignition key should be in the “off” position. This is a standard safety practice to prevent accidents during the inspection. Keeping the ignition key off allows the driver to thoroughly examine various components without the risk of moving parts or unexpected vehicle movement. This includes checking the vehicle’s lights, brakes, tires and other essential elements. It’s a precautionary measure that promotes the safety of the driver and those in the vicinity during the inspection process.
How long should a pre-trip inspection reports take?
The duration of a pre-trip Inspection can vary depending on factors such as the driver’s familiarity with the vehicle, the complexity of the truck itself, and the thoroughness of the inspection. On average, a comprehensive pre-trip inspection typically takes around 15 to 45 minutes.

Cody Lirette is Senior Content Marketing Manager at ORBCOMM. With over seven years of marketing and communications experience for both the public and private sector, he uses his passion for innovative technology and plain language to build compelling content that provides value.

- Jul 02, 2024
ORBCOMM has launched what it claims is an easier-to-install version of its reefer container monitoring system, CT 3600. Having recently branched out into dry container tracking, in agreements with container lines such as Hapag-Lloyd, ORBCOMM is revisiting its offering for the reefer industry, where container tracking began.

- Container Shipping
- Jun 26, 2024
Building a connected container fleet is easier said than deployed. With complex technology stacks, third-party installation costs and the sheer device count in some cases, there are real repercussions when maritime IoT deployments aren’t done right. Plus, there’s certifications to consider across different countries, potential container damage or downtime and high installation costs. We’ve designed…

- Value-Added Resellers
- Jun 19, 2024
We sat down with David Roscoe, ORBCOMM’s EVP and GM of Satellite IoT to learn more about OGx, the idea behind its creation and how it will drive the future of satellite for years to come.

Get started with ORBCOMM
What is a Pre-Trip Inspection Checklist for Class A CDL
October 22, 2021

Get Started With Samsara
Key Takeaways
Drivers who have a class A commercial driver’s license (CDL) usually have to complete a pre-trip inspection on their non-passenger commercial vehicles. Having a pre-trip inspection checklist handy helps driver’s know what to expect when they pass their CDL examination and what parts of their vehicle the will need to inspect before heading out on the road.
What is a CDL pre-trip inspection checklist?
A pre-trip inspection checklist helps truck drivers remember all the major systems and parts to inspect before heading out on a route. Knowing how to complete a pre-trip vehicle inspection is an important part of trucking.
Pre-trip inspections for class A licensees
The class A commercial driver’s license (CDL) typically covers non-passenger commercial vehicles . These might include tractor-trailers, tankers, livestock carriers, flatbeds, and more.
The Department of Transportation (DOT) requires drivers to perform a pre-trip inspection before driving a commercial vehicle. Similar to Class B CDL holders, the actual daily pre-trip inspection takes about 15 minutes or less. Typically, the inspection includes the following, with some employers making their own variations.
Brakes and air system
Steering mechanism
Lights and reflectors
Tires, wheels, and rims
Windshield wipers
Rearview mirrors
Emergency equipment
Drivers complete a driver vehicle inspection report (DVIR) recording the completed inspection.
Class A CDL pre-trip inspection checklist
When getting a CDL, drivers need to pass a pre-trip inspection test. It’s more intensive than the inspection drivers perform daily. This pre-trip inspection checklist for a Class A CDL gives drivers an overview of performing an inspection. Check your state’s CDL manual for a complete list of inspection requirements.
Click here for a Class B pre-trip inspection list.
Engine compartment
Fluids - coolant, oil, and power steering : Reservoirs and tanks should not leak. Check hoses for splits or cuts and that they are securely mounted on both ends. Verify proper fluid levels with a dipstick.
Belts - alternator, pumps, compressor : All belts should be securely mounted without cracks or frays. Belt should have no more than 1/2" to 3/4" of play.
Hoses (passenger and driver’s sides) : All hoses, including power steering and coolant hose, should be secured on both ends. They should not have splits, cuts, or leaks.
Air compressor: May be difficult to see. Ensure it’s securely mounted, not broken, cracked or leaking.
Alternator : All wires are properly connected.
Water pump : All hoses are properly connected and not leaking.
Front of tractor/truck
Steering gearbox and hoses : No damage or leaks. Hose should be secured on both ends. They should not have splits, cuts, or leaks.
Steering shaft/steering column : Not bent or broken.
Pitman arm : All caste nuts and cotter pins are present and tight.
Drag link : Rubber is not split and properly greased.
Upper and lower control arms and tie rod : Tie rod should be secure, not cracked or bent.
Front suspension
Spring mounts/spring hanger : Not cracked or broken.
Leaf springs : None are cracked, broken, or shifted.
U-bolts : All accounted for.
Shock absorber : No visible leaks. Leaks will show at the point where the top and bottom of the shock meet. Rubber is not split or shows signs of dry rot.
Airbag : Check rubber for abrasions, cuts or audible leaks plus any missing mounting bolts.
Driver door and fuel area
Mirrors and bracket: Hardware attached properly. Mirror should be clean and not broken.
Door and hinges : Demonstrate door operations, latching properly, hinges intact. Door seals should not be torn or rotten.
Steps : Mounted properly and can hold weight.
Fuel tank: Not leaking; cap is tight with seal intact.
Rear of tractor/truck
Drive shaft : Not twisted, U-joints not broken and free of debris.
Exhaust system: Not loose, no sign of leaks (exterior soot).
Frame : Nothing broken or unauthorized welds.
Catwalk and steps : Properly mounted and clear of loose objects.
Mudflap : Secured, not missing or broken. At the right height.
Coupling area
Air connector: Secure on both ends, no abrasions, cuts, or audible leaks. Connectors should not drag or tangle.
Electric lines : Secure on both ends, no abrasions or cuts. Safety latches in place. Lines should not drag on the catwalk or tangle.
Glad hands : Seals should be in good condition with no cracks, signs of rotting, or leaking air.
Fifth wheel platform : Secure to frame, not cracked, bent or broken. No unauthorized or illegal welds.
Mounting bolts : No missing bolts and mounted tight.
Skid plate: Properly greased.
Release arm : Secure in fully locked position.
King pin : Mounted and secure. No cracks, bends, and breaks.
Locking jaw : Fully locked around the king pin.
Apron : Mounted and secure. No cracks, bends, and breaks.
Sliding 5th wheel locking pins : Pin must be in the fully locked position.
Brake system (both tractor and trailer)
Brake hose : Securely mounted on both ends. No splits, cuts, and not audibly leaking air.
Brake chamber : Not audibly leaking air.
Slack adjuster and push rod : When brakes are released and pulled by hand, the push rod should have no more than 1” of play. It should stay at a 90° angle to the brake chamber.
Brake drum : No bluing from excessive heat.
Brake pads/brake lining : Check for oil and debris on the lining. Minimum brake pad thickness is ¼.”
Wheel system (both tractor and trailer)
Wheel rims : No unauthorized or illegal welds.
Steer tires : Look for cuts, bulges, and abrasions on the tread and sidewalls. Tread depth should be a minimum of 4/32”. Tread should be evenly worn. Check inflation levels on tires with an air gauge, filled to manufacturer’s specifications.
Drive tires : Look for cuts, bulges, and abrasions on the tread and sidewalls. Tread depth should be a minimum of 2/32”. Tread should be evenly worn. Check inflation levels on tires with an air gauge, filled to manufacturer’s specifications.
Valve stem . Properly secured, metal cap in place. Not audibly leaking air.
Lug nuts : All accounted for. Check for rust or cracks.
Hub seal/axle seal : Should not be loose. No visible leaks.
Spacing : If equipped with duals, there must be proper spacing between the tires.
Frame and cross members : Secure, not cracked, bent or broken and none missing.
Header board : Secure and not excessively damaged. No holes or missing rivets.
Landing gear : Must be fully raised and the cradle handle secured. Not cracked, bent or broken.
Doors and hinges: Secured and should open, close and latch properly. Door seals have no separation, no rubber tubing sticking out.
Tandem release : Release handle and locking pins should be fully locked.
Trailers airbag : Check rubber for abrasions, cuts or audible leaks, plus any missing mounting bolts.
Trailer spring mounts/spring hanger : Not cracked or broken
Trailer leaf springs : None are cracked, broken, or shifted.
Trailer u-bolts : All accounted for.
Trailer shock absorber : No visible leaks. Leaks will show at the point where the top and bottom of the shock meet. Rubber is not split or shows signs of dry rot.
Torque arm/radius rod : Secure mounting, bushings intact.
Check all lights on the front, both sides of tractor, truck rear, both sides of trailer, and trailer rear. Turn on to ensure lights and reflectors are working.
Running lights : Walk around the truck and trailer to examine all.
High beams/low beams: Walk around the truck and trailer to examine all.
Turn signals : Signal both right turn and left turn. Walk around the truck and trailer to examine all.
Hazards/4-way flashers : Walk around the truck and trailer to examine all.
Brake lights : Ask the examiner to watch brake lights. Confirm they worked using the side mirror.
License plate lights : Walk around the truck and trailer to examine all.
Reflector tapes : Clean and not worn. Walk around the truck and trailer to examine all.
In-cab inspection and air brake test
Seat belt: No rips or frays and should adjust and latch properly.
Lighting indicators : See lights and reflectors section
Oil pressure indicator : Demonstrate normal operating range.
Water temperature gauge : Demonstrate normal operating range.
Air pressure gauges : Build to governor cut out.
Ammeter/voltmeter : Charging between 13 and 14 volts.
Mirrors : Secure, not cracked or broken. No obstructions and properly adjusted.
Windshield : No more than a 1” crack is permitted. Clean and free of debris.
Windshield wipers and washers: Turn on to show they are working properly.
Horns (city and air) : Show they are working properly.
Heater/defroster : Turn on to show they are working properly.
Safety/emergency equipment : Must have a fire extinguisher, three red reflective triangles and spare electrical fuses. Extinguisher must be fully charged and secured.
Steering wheel : Secured to steering column.
Foot pedals : Free of grease and debris. No obstructions.
Hydraulic brake check : Pump the brake pedal several times. Apply pressure to the pedal and hold for five seconds. The pedal should not move.
Air brake check : Air brake devices vary. Drivers must test three components of the air brake check correctly: applied pressure, warning lights and buzzers, and valve pop-outs.
Parking brake:
Trailer parking brake : Set the trailer brake, release the tractor brake. Put truck in low gear and tug.
Tractor parking brake : Set the tractor brake, release the trailer brake. Put truck in low gear and tug.
Service brake : Release both the tractor and trailer brakes. Drive 3 – 5 mph. Apply the service brake and come to a complete stop. Ensure steering does not pull to the left or right when applying the brakes.
Watch the video below to see how All Aboard America uses the Samsara Driver App to become nearly 100% paperless and save 30 minutes per trip, totaling 500 hours saved weekly.

Watch Video
An official website of the United States government Here's how you know
Official websites use .gov A .gov website belongs to an official government organization in the United States.
Secure .gov websites use HTTPS A lock ( Lock A locked padlock ) or https:// means you’ve safely connected to the .gov website. Share sensitive information only on official, secure websites.
pre-trip inspection
This page shows Department of Transportation content pertaining to a specific tag. If you cannot find what you’re looking for on this page, please use the search box in the top right of our website.
Question 1: Must a driver prepare a written report of a pre-trip inspection performed under §392.7?
§392.7 Equipment, inspection and use.
Guidance: No.
IMAGES
VIDEO
COMMENTS
Before you start with your yard test , you must first do your pre trip inspection, first the exterior ( out side inspection ) and the interior (inside inspec...
After the exterior inspection you will enter the vehicle, check that the handbrake is engaged, the car in neutral and then put on your ignition so you can operate the instruments. The examiner will stand at the front of the vehicle and will instruct you to operate the following: Indicate right. Indicate left. Headlights on.
3.1.1 Pre-trip inspection A physical pre-trip inspection shall be executed irrespective of the weather conditions on instruction and under supervision of the examiner for every test. Exterior (Module 1) (a) The examiner shall accompany the applicant to his/her vehicle, where a pre-trip exterior inspection shall be conducted, prior to entering ...
The Pre-trip inspection is to show the examiner that your vehicle is roadworthy. Make sure you go over the pre-trip inspections with your driving instructor - they will be able to explain any specific terms you are having trouble with. You should practice with your instructor before your driving test so that they can assess how well you did.
Our Pre-Trip Inspection Study Guide has everything you need to prepare for the Class A CDL Pre-Trip Inspection Exam. Our study guide will cover the pre-trip inspection terminology as well as a thorough list of all of the parts you will be inspecting on the vehicle. For each part you will be inspecting there will also be a list of items you will ...
The Code of Federal Regulations ... Pre-trip inspection. Before the beginning of any driveaway-towaway operation of motor vehicles in combination, the motor carrier shall make a careful inspection and test to ascertain that: (1) The tow-bar or saddle-mount connections are properly secured to the towed and towing vehicle;
What is a pre-trip inspection? A pre-trip inspection includes checking over the tractor and trailer a truck driver will be operating. A pre-trip should be completed before the operation of a vehicle: At the beginning of a driver's shift. Any time a new trailer is picked up. After a 10-hour break. A thorough inspection usually takes anywhere ...
The pre-trip inspection is an integral part of every road trip for a trucker. It's probably the most disliked and most often overlooked part of the job of the professional truck driver in the trucking industry. This inspection is meant to be a thorough check of the truck, trailer and load. The check is to ensure that everything is in correct ...
The K53 pre-trip inspection of the vehicle. The examiner will accompany you to the vehicle, where a pre-trip exterior inspection will be conducted prior to entering the vehicle. The examiner may allow minor defects to be rectified; however, no extra time will be allowed for this. If any of the items indicated on the test report under the ...
2. HANDBRAKE - NEUTRAL. 3. NO OBSTRUCTIONS (In front or underneath) 4. ADJUST MIRRORS AND SEAT (No play steering wheel) 5. HOOTER, LIGHTS, INDICATOR, WIPER & BRAKE LIGHTS. Inside and outside motor vehicle inspection checklist for K53 Drivers test.
Push and hold the brake pedal, allowing the gauges to stabilize. When the gauges have stabilized, announce the Primary and Secondary PSI. Listen for air leaks while doing this. Warning Light and Buzzer - Pump down on the brake pedal until the warning light and buzzer comes on. This is typically at or before 60 PSI.
Tips to pass my license code 8 K53 Im looking for pointers on the drivers test for code 8. Ill be driving a Hyundai Atoz manual and im doing the test in Greenpoint. ... On your pre-trip inspection the examiner needs to see that you understand what basic measures to take that determines the overall safety of a vehicle, speak clearly and point to ...
A pre-trip truck inspection is a thorough check of the truck and its major systems to maintain safety on the road. Inspections need to occur before the start of a driver's shift and at least once every 24 hours while on the road. Truck pre-trip inspection needs to be performed by the driver while on duty, but before driving starts.
Driving Lessons - Your K53 Pre-trip Inspection. The pre-trip inspection is a requirement for your driver's test and is usually tested before the parking and driving. Learn the following steps and you'll create a good first impression in the eyes of the driving examiner. Inspect the vehicle and recite the following:
A pre-trip inspection checklist is a list of vehicle items that truckers must thoroughly examine before starting a trip. It helps identify and address mechanical and maintenance issues early on and prevent unexpected delays, breakdowns and severe accidents. Performing thorough pre-trip inspections promotes safety, ensures compliance and reduces ...
pre-trip inspection FMCSA Information Line. 1200 New Jersey Avenue SE Washington, DC 20590 United States. Phone: 800-832-5660. If you are deaf, hard of hearing, or have a speech disability, please dial 7-1-1 to access telecommunications relay services. Question 1: Must a driver prepare a written report of a pre-trip inspection performed under ...
A Closer Look: The Pre-Trip Inspection Guide. Step 1: Essential Tools. Equip yourself with the necessary tools to conduct a thorough inspection, including a flashlight, tire pressure gauge, and reflective triangles. Step 2: Visual Check. Begin by visually inspecting your vehicle for damages, leaks, or anomalies.
A pre-trip inspection is a proactive measure taken by truck drivers to ensure their vehicles are in optimal condition and adhere to safety standards and other relevant regulatory requirements. This assessment checks for signs of wear, damage or malfunction on critical components like the engine, brakes, lights, tires, fluid and more.
Slack adjuster and push rod: When brakes are released and pulled by hand, the push rod should have no more than 1" of play. It should stay at a 90° angle to the brake chamber. Brake drum : No bluing from excessive heat. Brake pads/brake lining: Check for oil and debris on the lining. Minimum brake pad thickness is ¼.".
Pre-trip inspecting your bulkhead. The next step in your pre-trip inspection is to check the front of your trailer, also known as the bulkhead. Wall - Check for any damage on the wall. Inspection Sticker - Check for a DOT inspection sticker. Make sure it's up to date to meet the DOT requirements for trailers.
Truck Pre Inspection Checklist. Download free template. Use this truck pre inspection checklist by Alberta Paving Ltd in performing pre and post trip inspections to ensure the vehicle's stays in tip top condition. Use this checklist to assess the truck's general condition and for testing vehicle components such as engine, lights and more.
Question 1: Must a driver prepare a written report of a pre-trip inspection performed under §392.7? Guidance: No. U.S. DEPARTMENT OF TRANSPORTATION. Federal Motor Carrier Safety Administration. 1200 NEW JERSEY AVENUE, SE. WASHINGTON, DC 20590. 1-800-832-5660. Subscribe to email updates. About. About FMCSA; Regulations; Safety;
On October 27, 2022, FMCSA granted a two year exemption from "Under-the-Hood" CDL skills testing for school bus drivers, which will help those states seeking more time. But, many people remain confused about what existing law requires regarding a driver's inspection of a commercial motor vehicle ("CMV"). Continue reading below for a ...