- What's new New posts Latest activity
- Search forums
- Members Current visitors
- Expedition Vehicles
- Toyota: Tacoma, 4Runner, FJ, Tundra and Lexus GX

3rd Gen Toyota Tacoma Safari Snorkle Install Thread - How-To Article
- Thread starter Hodakaguy
- Start date Apr 8, 2018

- Apr 8, 2018

- Apr 9, 2018
Wow. Much appreciated!!

screwball48
Excellent write up. Well done sir. Sent from my iPhone using Tapatalk
- May 4, 2018
I’ll be using these well written instructions here on sunday to install my snorkel to the truck! I’ll report back on my success!! Sent from my iPhone using Tapatalk
- May 6, 2018

aaen said: And install completed. I’ve hummed and hawed about doing this until i saw the instructions Don’t forget to put the damn hose clamp on first. Its a pain to get it on afterwards. Ugh. Sent from my iPhone using Tapatalk Click to expand...

Casual Observer
- May 9, 2018
Probably one of the best write-ups, hands-down, that I’ve ever seen in an automotive forum. Thank you very much for this guide. It has given me the confidence to try and do this on my own.
JSimmons said: Probably one of the best write-ups, hands-down, that I’ve ever seen in an automotive forum. Thank you very much for this guide. It has given me the confidence to try and do this on my own. Click to expand...
Hodakaguy said: Thanks, I enjoy writing these kind of articles and seeing others perform their own work. Post up some pics when you get it mounted up Hodakaguy Click to expand...

- Aug 31, 2018
The only thing I would add is the fact that the VHB tape does not hold that well. I’ve had my snorkel installed for a week now and the tape has broken free. I guess it does like being on washboard roads, or I got some bad tape. Cheers.
Forum statistics
Members online.
- OutsideAnalyst
- Eightysix45
- godfather82
- Zombie2hundo
- Vermontgravel20
- Todd n Natalie
- destructomatt
- forty5thparallel
- Imgoingonanadvencha
- canyonrider
- Jeep or Tacoma
- dieselcruiserhead
- OffToTheSide

Site Navigation

- Today's Posts
- Register Now
- Mods 1 – Getting Started
- Mods 2 – Tire Size Guide
- Mods 3 – Tire Buying Guide
- Mods 4 – Performance
- Mods 5 – Lift & Level Kits
- Mods 6 – Grille Kits
- Mods 7 – Headlights
- Mods 8 – Fog Lights
- Mods 9 – Rock Sliders
- Mods 10 – Roof Racks
- Mods 11 – Front Bumpers
- Mods 12 – Rear Bumpers
- Mods 13 – Skid Plates
- Mods 14 – Wheels
- Switch Systems
- Rooftop Tents
- Acc Lighting
- Tail Lights
- Rock Sliders
- Skid Plates
- Front Bumpers
- Rear Bumpers
- Accessories
- Recovery Gear
- Refrigerators
- Trail Tested
- Maintenance
5th Gen Mods , Accessories , Comparison , Install , Overland , Performance , Reviews
Sy-klone series 9001 snorkel pre-cleaner on arb safari snorkel – install & overview.

Sy-Klone Series 9001 Snorkel Pre-Cleaner Overview and Install on an ARB Safari Snorkel For the 5th Gen 4Runner
In a previous article, I covered the installation of ARB’s Safari Snorkel on my 5th Gen 4Runner, where I discussed the benefits of a raised intake over the stock intake that hides inside the fender.
One thing a raised air intake does is reduce the number of particulates that enter the intake box, however, it’s certainly not the end-all solution. The forward-facing ram-style intake that comes on the Safari Snorkel also allows for any incoming particulates to head straight down the pipe and into the air filter.
Find it Online
- Sy-Klone Series 9001 (gas motors under 4.8 liters) 4-inch Inlet Size: Check Price
- Sy-Klone Series 9001R (gas motors over 4.8 liters) 3.5-inch Reducer Adapter: Check Price
- ARB Safari Snorkel: Check Price
Why You Need a Pre-Cleaner

Bugs, dust, and vegetation are the common infiltrators with the standard top and over time they can cause a premature replacement of the air filter. Some solutions to this problem include reversing the snorkel head to have it face backward which is only advised for low-speed operation in heavy dust or using an oiled “sock” over the intake to collect incoming dust. Both of these options may help slightly, but neither solve the problem entirely.
Why the Snorkel Upgrade (Sy-Klone)

To improve air quality, and remove additional particulates, we look to a product that has aided the military and commercial operations for decades. The product is the Sy-Klone Series 9001 pre-cleaner available exclusively for the off-road market through Snorkel Upgrade . The Series 9001 is a dome-shaped snorkel intake replacement that uses the power of centrifugal force to separate solid particulates from clean air.
This is the final solution to the dirty filter problem that plagues so many expedition-style vehicles that promise to:
- Increase your air filter service life
- Decrease potential blockages from snow and other debris
- Keep your engine as healthy as it can be as far as air is concerned
How it Works

Inside the dome, the housing is a series of blades set on a sealed bearing assembly. As your engine creates a vacuum in the intake/snorkel, fresh air is drawn into the bottom of the dome through a set of louvers. These louvers force the entering air to circulate upwards into a rotating impeller creating a “Sy-Klone” effect within the dome. This cyclone uses the power of physics and centrifugal “force” to force any airborne particulates with mass greater than air to the outside of the dome as it’s being whirled around. But where does all of that stuff go? The Series 9001 has a small slit in that dome with an opening to allow those trapped particulates out of the dome and away from your air intake. Science!
For a complete explanation of the trickery behind the 9001, click here for an overview from Snorkel Upgrade!
Install Overview

Installing the Sy-Klone onto the snorkel is a simple process.
Measure your snorkel inlet to make sure you have the correct Series 9001 snorkel (the ARB snorkel has a 4” inlet). Once you know you have the correct model, remove the standard forward-facing snorkel head with whatever hardware it came with.

Set the supplied stainless steel t-bolt band clamp on the neck of the Sy-Klone and snug it up to keep it from falling off when you place it on the snorkel.

Set the pre-cleaner on the snorkel top with the slot facing straight back towards the rear of the 4Runner. This allows debris to exit the dome without turbulent interference.

Tighten the clamp until the pre-cleaner is snug on the snorkel body and grab your cold beverage to celebrate your victory in the battle against dirty air!

Now that you’ve installed and admired your new Series 9001 pre-cleaner, I’ll cue you in on a couple more bonus design details.
Sy-Klone Details

With a downward-facing inlet, the Sy-Klone skirts one of the known issues with forward-facing snorkel inlets, snow/ice accumulation. Those that have driven through heavy wet snow know that the grille on the face of a standard snorkel can quickly clog and ultimately require clearing to function properly.
Pulling air from below reduces the likelihood of clogging due to ice build-up, keeping you moving forward even in the worst storms. In severe conditions where snow build-up occurs on the lower grid is unavoidable, the first grid can be unscrewed and removed. From here, any snow that enters the dome will be ejected out the back just like any other particulate. Pretty rad!

Trails are full of trees, rocks, bushes, and other items that are right at the height of your snorkel inlet. In a scenario where a tree branch impacts your standard snorkel head, the force could damage your a-pillar where it connects to the top of the snorkel, maybe even your fender! The Sy-Klone has built-in relief points in the main structure that are designed to break if there is a large impact. This sacrificial design keeps your snorkel and bodywork intact if something unexpected happens when you’re out having fun!
Final Thoughts

You installed a snorkel on your 4Runner for a reason (or a few), why not take it to the next and end-all level? The addition of the Sy-Klone Series 9001 pre-cleaner to your snorkel adds protection to your motor, increases your filter service life, and provides a few key design advantages over the typical forward-facing snorkel head.
The only thing I wish was addressed with this product is the gap between the bottom of the pre-cleaner and the “step” on the top part of the ARB snorkel. You can cut down the top of the snorkel to mate the pre-cleaner to that ridge, but with limited clearance to the a-pillar, there isn’t really any room to trim it shorter. Other snorkels (Dobinsons) may vary , but I’ll likely add a black sleeve to this small section for appearances’ sake.
From the driver’s seat, the Sy-Klone isn’t really noticeable, unless you lean down a bit like in this photo. There isn’t an increase in wind noise that’s noticeable to me, even with the window down. The only thing you will note is an increase in “intake growl” under load with the passenger window down. I’m more than OK with that, especially in low-range plowing through the snow at high RPM!
I am very excited to give this product a go and really test how well it performs in the Central Oregon dust this summer. I’ll be back after some trips and miles to report back on how the Series 9001 has faired and how dirty my air filter looks… OR DOESN’T!
To order yours head over to Snorkel Upgrade , the exclusive retailer of the Sy-Klone for the overland/off-road market!

Max Sheehan
Freshly rooted in Central Oregon, I have always had an eye for the outdoors and the vehicles that get you there. As a gateway to the wild, I have spent weekends exploring the best that the west coast has to offer in my expedition style 4Runner.

I cant wait to get one!

I’ve been using the Sy-Klone 9001 for almost a year and love it. When I check my air cleaner filter, it always clean now.
- Get Free Parts & Get Paid! Apply to Write
GET 20% OFF
Take up to 20% off at the trail 4runner store.
80 Series Snorkel
The following page shows the installation steps for the Safari Snorkel (old style) - with some updated info for the new style.
The snorkel is a nice addition to provide cleaner air to the engine - it also looks good ;-)
The 'great snorkel' installation started with 5 guys doing a group buy - we installed two on a Saturday afternoon and three on the Sunday afternoon (with the rain gods actively hindering us).
The following is a picture of the installed snorkel - black certainly looks good against the definitive white body!
Some basic tips after 5 installations worth of experience:
Trust the template for the big hole only (3 1/4" Hole saw - deburr and file a bit larger to not bind). The new style snorkel requires a 3 1/2" Hole saw!
Use a spring loaded center punch to mark all holes prior to drilling - this will prevent the drill bit from skating on the body. Also, apply masking tape on/around every hole you will drill.
Use a good quality hole saw and a reasonably powerful 1/2" electric drill. Remove the airfilter assembly completely, three bolts attach it to the fender. Remove the lid, undo the hose clamp that connects the mass air flow sensor to the air inlet manifold hose. Remove the airbox 'stuff' from inside the fender, three nuts on the inside of the fender hold it all together - it comes out as two pieces (place in rubbish/trash bin). Using the template, drill a pilot hole for the hole saw. Then use masking tape & cardboard to protect the body. Engage the hole saw on the top & bottom of the fender if possible - grip the drill SECURELY - keep the speed up (1/2 to 2/3 speed on my DeWalt 1/2" drill) and try to not stall the drill, if it slows down apply 'more power' - if it stalls it WILL try and kick back - pull the hole saw back away from the body, get it back up to speed and then re-engage the metal.
You DON'T need to do this for the new style snorkel! AFTER the big hole, you need to heat and press in the snorkel around the US antenna - so the snorkel can fit right against the body. To do this, mark the position that needs to be pressed in. Then using a torch, slowly heat the plastic and using a 1" diameter (or similar) pipe press the plastic. Go slow and try to not melt a hole in the snorkel (as happened to one of ours - epoxy resin to the rescue). You will need to press in the plastic about 1/2" or so - refit as necessary till you get it right. Try to keep the heat only on the back side - otherwise it will smooth the plastic texturing.
Don't trust the template for the other holes too much - the template stud holes are 'nearly' correct. The way we chose to get it right was to drill the big hole and then with the template taped down fit the snorkel (with fresh paint around the stud holes on the snorkel) - press against the template to determine actual hole positions. You may be tempted to install the studs and then fit the snorkel against the body and use the stud positions on the body to drill the holes - this is NOT accurate since the snorkel slides into the big hole at an angle , i.e. the stud holes you measure this way will be a bit higher than they should be. The best method would be to have short dummy studs that would screw in and protrude only 1mm or so with a dab of paint on each one to mark the right spots.
Use a step drill to do all the stud holes on the fender - nice clean holes. We drilled 1/2" holes or a little less - the studs are 8mm diameter - Safari recommends 16mm holes - probably to speed up shop installation time. We preferred to do the job 'right'.
Paint all drilled holes - you don't want the metal rusting - touch up paint works well and dries fast.
Install the studs into the snorkel and install the A pillar bracket onto the snorkel. With the snorkel fitted against the body in it's final (hopefully correct position...) mark the A pillar bracket outline on the pillar. Remove the bracket from the snorkel (and the snorkel) - position the bracket on the A pillar and mark the three mounting holes. We used Rivnuts instead of the stupid Safari plastic inserts. The top two holes are easy, the bottom hole can be an issue. There is an inside metal skin behind the lowest hole - if your bracket locates such that it's edge is close or right on the windscreen rubber surround then you will have clearance to fit a Rivnut in the lower hole. If instead the bracket is away from the rubber such that the holes would be in the center or towards the outside of the A pillar then you will have very little room - not enough for a Rivnut - on one install we ended up plugging the bottom hole, on another we didn't even drill the hole. 2 Rivnuts will be a lot more secure than the original Safari plastic inserts - even double sided tape would be ;-)
Use some adhesive (we used liquid tape) on the large backing washers (for the studs) inside the fender to prevent the washers falling off into no man's land. The stud at the top, behind the antenna is the hardest one - removing the antenna is one option - undo the nut where the antenna extends out of the body and one bolt on the inside fender to release the antenna assembly. Either way getting to the far studs is a challenge - long skinny arms are an advantage! On the new snorkel the stud right next to the antenna is no longer there, but their are 2 studs further back towards the door - even longer arms are useful here ;-)
To tighten the hose clamp on the rubber pipe that mates to the snorkel (inside the fender) - remove the one screw that holds on the USPS amber indicator (screw is accessible from above and screws into the light assembly) - then just pull the indicator straight forward and it will just slide out. Now you can get into the fender with a nut driver to tighten the hose clamp.
We did two snorkels on a Saturday afternoon, started at 1:30pm and finished at 7pm. We did three the next day, started at 1pm and finished two by 5pm and the 3rd by 7:30pm - fighting the rain most of the afternoon. The Safari instructions claim 70 minutes install time - don't plan on it! I think 3 hours is probably a better estimate, mainly because you WILL measure and re-measure and fit and refit many times before you are happy. I'm sure 70 minutes is 'feasible' if you are working on someone else's 4wd - not your own!
The guinea pig for the first big hole was Amando's 80. I was happy to volunteer to drill the hole - I was next up... The left picture shows the progress - I was tentative at first - the others were pretty well drilled in one shot. Note the masking tape and cardboard - I had been informed that if the hole saw kicks back it tends to go for the flare. The right picture shows the finished damage - a perfect hole. For the new style snorkel the center hole (seen below) will be about 3/4" lower - i.e. it is below the crease in the fender.

Phil looks happy drilling into Amando's 80 - what a sick man! I didn't notice him smiling when he was drilling into his though ;-)

The next picture is Amando showing happiness that all the damage to his 80 is now complete - note he is sitting, i.e. he is taller than 4'. Notice his 'modified' ARB roobar - the jury is still out regarding the thought process that was required to come to the decision to hack off the top part.

A similar set of holes drilled into my 80 after application of touch up paint.

The complete set of fender holes in my 80. Looks very nice - no huge gouges into the side of the fender!

Sunday saw the drilling of the remaining three 80's. Manuel's was the first one on the block - he is assessing how well I drilled his hole. At this point I am considered the 'master' driller for the big hole - the odds are now in my favour that I may know what I'm doing ;-)

Step drill works really well for opening out the stud holes - no risk of any sheet metal distortion. A step drill is the correct way to drill bigger holes in thin metal. We drilled 1/8" pilot holes first and then used the step drill to open them up. Notice Manuel wearing his high performance safety goggles ;-)

Left picture shows me heating the area that requires to be pressed in to fit the USPS antenna. The right picture shows the wrong way - the last snorkel and Phil manages to melt a small hole into it - epoxy resin to the rescue... Manuel looks on with relief knowing that his is already installed ;-) This step is not required for the new style snorkel since Safari has changed the design to totally clear the US antenna.

Did I mention it was wet on Sunday? A large tarp came to the rescue and allowed us to continue working. Though it doesn't appear that we actually are doing any work...

David drilling the pilot hole into his 80 in preparation for the 'master' ;-)

Time for David's 80 - I'm getting good at this now. Of course the odds of me screwing up are also increasing... But my luck continued and another perfect hole was drilled.

The installed 10x32 Rivnuts in my pillar. Definitely better than Safari's little plastic squares. We did manage to break a part of the installation tool when doing Amando's (he broke it!) - but fortunately Phil had an alternative tool that we then used to do the rest.

A picture of the pillar bracket. We used 10x32 1/2" long black plated hex drive screws. We drilled out the original holes in the bracket to the correct diameter and then ran a countersinking bit to prep the holes.
- Get Started
- Accessories
- Acc Lighting
- Front Bumpers
- Rear Bumpers
- Rock Sliders
- Skid Plates
- Trail Tested
- Maintenance
3rd Gen , Accessories , Install , Off-Road , Overland , Review
Arb safari snorkel 3rd gen tacoma review.

Alright, here we go… a mod that I probably waited too long to do. The snorkel.
Before my Tacoma, I had a 4th Gen 4Runner. That truck ran a snorkel for two, call it main reasons.
- 1. It sealed up my exposed air box (missing fender liners) and lifted the air intake to the roof line.
- 2. It looked super rad (in my opinion).
However, that snorkel was a cheap Amazon find. It was for an 80 series (I think). It worked ok. Got the job done. Didn’t sit well or really have any instructions or anything. It also needed a ton of modification. For example, I had to cut into the body to make room for the new tubing – there was no way it was going to fit any other way. The point is.. it worked, but not in a very calculated fashion.
This time, I knew what I wanted (needed). A tried and true, tested system with EVERYTHING I needed, right off the bat. And the ARB warranty and support – which has always been good to me.
Enter the ARB Safari Snorkel. Let’s run through a quick installation guide (ARB also provides one) and review.
ARB is currently sold only through retailers. I got this one from Mudify. These guys stock a ton of ARB products for fast shipping, and also have good customer service.
Find It Online
- ARB Safari Snorkel (3rd Gen Tacoma): Check Price
Table Of Contents
Why should you add a snorkel.

What Is A Snorkel?
A snorkel is a series of tubing, connections, and airways that takes the point of air intake from a lower point on the vehicle (passenger wheel well, under fender liner) and moves it closer to the roof line. The result is a sealed system that allows temporary exposure to water that may have otherwise been taken into the intake, and immediately into the motor. This would cause catastrophic failure in the form of hydro-lock. Yes, that means a new motor. Not cheap.
Think of it as cheap insurance – especially if you wheel your truck. Exposing your intake to water, especially as a newer driver, is easier than you might think. And freak accidents can happen. Investing in a snorkel is a great preventative measure.
Why Would You Want One?
I’m not going to go into anything crazy complicated here. There are a few main reasons to add a snorkel, and a few secondary reasons that I’m sure are up for debate.
First, and most obviously, as described, is moving the air intake out of harm’s way from potential water intrusion. This can protect your vehicle and decrease the likelihood of water getting into your motor. It can also allow you to risk doing deeper water crossings. This can be expanded to include dust, since the fenders are typically more exposed to dust off-road than the roof. So you are avoiding unnecessary dust intake. This can further be improved upon with a snorkel pre-cleaner.
Many would argue that a snorkel is a sort of “cold air intake” where air in the fender can potentially be warmer than the ambient air outside. I would guess this applies more to slower driving, as the air movement as you drive 50, 60, 70+ mph on the highway may negate that. However, I still think there is somewhat of a valid point here.
A different line of thinking could also suggest that since the new intake head on the snorkel is bigger than the factory opening, and that it usually faces the rushing air as you drive, that is allows the motor to “breathe” easier. Don’t quote me. I’m not saying you’re getting any true forced induction. But another idea I’ve seen discussed.
Key takeaway – snorkels have value relative to their cost to the decreased risk involved with off-road and overland travel. With some secondary effects. Pretty simple.
This is all reinforced the harder you wheel, and the more water/dust you see. And a snorkel is especially useful if you lose your fender liners like I did, when I trimmed my fenders/flare for tire clearance.
Installation

Install is not as bad at you might think. The right tools are important. You should have a good understanding of hand tools. But there is some room for error when it comes to cutting and drilling. Just move carefully, and really make sure everything lines up. Check it ten times if you have too. Worst case – you can buy a new fender. But we don’t want to do that. So use this guide and take your time.
ARB also gives you detailed instructions.
Required Tools
- Mechanic’s toolset
- Drill + bits
- Cutting tool (jig saw, or similar)
- Dremel (or some kind of smaller saw/cutting tool)
- Screwdrivers
- Utility knife
- Painter’s tape
- Double-sided exterior automotive molding tape (optional)
Step 1. Remove Air Box

To start, I’ve seen people get really into removing extra components. Wiring, separating the top of the airbox from the intake, etc.
While you can do that for peace of mind, there is plenty of slack to work with, and you should be able to save some time.
Unclip and open the airbox. Pull out your filter. Check to see if it needs replacing.

Next, take out the bottom portion of the airbox. There are three screws total. Two are pictured here. One is to the left of the box.
Step 2. Remove Air Inlet & Trim Air Box

Once you have the airbox out, remove the inlet, seen in the picture above on the bottom. You can dispose of this.

You will need to trim the mounting tabs for the inlet you just removed. I used a Dremel. Simple and easy. Final cuts seen above.
Step 3. Apply Template & Mark Holes

Now apply the provided template to your passenger’s side fender. Make sure that all the lines are evenly matched to the ends of the fender.
Carefully tape it into place. Second set of hands here is nice.
Take a marker and mark all the holes.
Step 4. Drill & Cut Holes

Now drill the holes. Use a step bit, or step up your drill bit size for a clean hole. I used two drill bits to make the smaller holes.
I also make a hole in the larger circle with enough room to get my jigsaw into. Then I made the entire cut. This helps to make it look cleaner.
You don’t have to use a handheld jigsaw, but it is quick and easy.
DO NOT use a hole saw here. It’s a terrible mistake and you will do damage.

Clean up any burrs. I also used a Q-tip dipped in a small cup of some black spray paint to protect the bare metal on all my cuts. I would not skip this step.
Step 5. Install & Secure Flexible Tube

It’s important to note, if you don’t have an aftermarket bumper or cut fenders/flares like I do, you will need to remove your liner beforehand. There are several clips and a few screws to pop the liner out.
Once the liner is removed, take the large rubber connector tube and insert it through the factory intake inlet hole. There is a notch on the tubing so you understand its orientation. A good reference photo is seen above.

A shot from the inside of the engine bay. Make sure to put the hose clamp on before you reinstall the airbox.

Attach the airbox to the new intake tubing. This can be tedious. Install the tube before you secure the airbox again.
The hose clamp might give you a hard time. Make sure it is sitting in the groove on the tube all the way around. You will have to feel around to make sure. This is crucial because you need a good seal here.
Once that is done, you can reattach the airbox, and reassemble the filter, cover, etc.
Step 7. Prepare Snorkel Body

Prepare the snorkel body with blue thread locker and the threaded studs.

This is another key step. Above you can see the bracket that ARB wants you to bolt to the snorkel, and rivet to the A-pillar.
I chose to use double sided exterior 3M automotive tape. I found it at my local auto parts store. Added a piece along the bracket, and trimmed to fit.
Not necessarily recommended, and not that I am afraid to drill into my truck, I did not want to this time and wanted to test this alternative.
Note: This fitment works okay. I could have done a better job lining it all up with the truck, but there is some movement above 30-40 mpg and at highway speeds. I’m not currently bothered, but know that this is a risk. You can always go back and add rivets. You can’t undo drilling the holes and placing rivets as easily. I do think I could get it a little tighter though, and get less movement – the tape could have better contact.
Step 8. Attach Snorkel Body To Fender

Take your snorkel body and align with the holes. Depending on how well you did, it may slide right in. It may not. You might need to drill out some of the smaller holes. This did happen to me, but no big deal. Only a small delay.
Eventually, with a little physical persuasion (lol), we got it all to line up nicely. Don’t panic if it doesn’t work the first time. Again, some margin for error here.
Obviously be mindful that you also need to get the plastic intake end to meet the new tube. Another set of hands will help here.

Take all the washers and nuts and tighten the snorkel down to the fender.

Add the other hose clamp to the connection between the new tubing and snorkel body.

Bam! Almost there.
Step 9. Mount Snorkel Head

Finally, take the snorkel head and the black clamp, and attach the snorkel appropriately to the body. That’s it! Not so bad.
Finished Install

I love it! I’ve done this before, and become more comfortable with cutting trucks. But even with documentation, this was pretty straightforward and we were able to move along.

A quick close up shot of the 3M tape and bracket. It attaches relatively well, but again, the contact could be better. I could easily redo the tape though. We will see.

The real question…? Have I crossed any super deep water? The answer… Not yet! However, I don’t need to submerge the truck under a huge amount of water to note that this system fits great, seals really well, and will do the job when expected to.
I’ve used a snorkel before, and I can tell you that I certainly felt better on the occasions where we were wheeling along, many states from home, and unexpectedly dropped into a deeper than anticipated river. The same goes for nights where we saw flooding and I accidentally hit massive pools of water late at night, that could have ended badly.
The fit and finish is awesome. ARB stands behind their products. And to top it off, I absolutely love how it looks. How could you go wrong?
Final Thoughts

Bottom line? Protect your engines. Invest in a snorkel if you plan on wheeling and adventuring hard to remote places.
I’m stoked with how this turned out – no complaints whatsoever. Let me know if you have any questions!

Konrad Chojnowski
Nothing like a day on the trails and a night under the stars! I'll drive just about anywhere to disconnect and have a rad experience.

Self tapping stainless screws and RTV on the pillar. Honestly will you ever remove your snorkel? If you do you have to replace your fender and filling two small holes and blending in your fender to match the door and pillar you would paint anyway is not a big deal. Best to have a secure fitment so nothing vibrates loose or rubs paint away leading to rust. Last note, deburr all the holes. Installing a cyclone greatly improves dust performance otherwise you are literally scooping it up. Sure, the intake is higher and helps but it’s really not effective without. … Read more »
You’re not wrong about mounting the snorkel directly. And as I mentioned, I’m not opposed to drilling into my truck. I was in part experimenting with this alternative, since I know many people have had the same idea. I agree with what you are saying in general. I did mention under the photo about painting the holes to remove all burrs. A pre-cleaner surely helps to eliminate the majority of dust exposure. But the idea of getting less dust is considering that there is much more dust at wheel/fender level than there is at the roof line. I can say … Read more »

It might be worth noting that snorkels aren’t as useful for fording water in the Tacoma as many think without additional and extensive modifications in the engine bay. The Tacoma (and most Toyota trucks) have a critical [and incurable] design flaw for water fording, which is the location of the alternator below/at the level of the top of the tire. Adding a snorkel to the Tacoma to put your intake at six feet high (or thereabout) without extensive waterproofing to the engine, and carrying a spare alternator for the almost certain contamination of bearings and destruction of most of the … Read more »
Man. A lot to unpackage here, haha. To start, while I understand the textbook logic behind this answer, the real-world application is a bit different and may relay the wrong message to someone reading it. You absolutely can ford water in a Tacoma, relatively safely (albeit there is always risk) despite the concerns you mentioned. I’ll explain why. While the alternator (and other components) may be exposed, the only time that this will be a concern is if the vehicle (unfortunately) gets stuck in the water and there is no motion. With the proper technical approach, even if the water … Read more »
Right! And I don’t disagree with what you say here. To be clear, I’m not saying that crossing water deeper than your alternator will damage it immediately and in the moment; I’m saying: (a) that could happen, and (b) the damage will be there and will more likely manifest over the longer-term. As in, you submerge a bunch of unprotected electrical connections and your spinning alternator, it will diminish the life of your alternator and other components in ways most users will not understand is connected to a prior decision to float their Tacoma/Toyota truck. Notice how many caveats there … Read more »
Totally. I think we are on the same page. We certainly want to present as much information as possible. Only so much that I can put into a quick install and review without losing the user in the technicalities. Ultimately, we should cover this to every length possible under – “everything you need to know” – like everyone else, I invite you to write a post for us. I think you would be a good fit for this post and other technical ones. Shoot me an email! We pay for this kind of stuff. [email protected] The only thing I want … Read more »

Now you have me thinking a snorkel would have been a good investment for my last build. I was on the fence about weather to snorkel or not. This article has opened my eyes to things never considered before. With the amount of snow runoff this year a snorkel would almost be an essential element for river crossings. I’m not sure if the new build would benefit from one though. Going a different direction this time. Thanks again for expanding my knowledge of useful Tacoma products. Great site, really enjoy it
I would say that anyone who spends any time near dust or water could benefit. Ultimately, it’s for peace of mind and insurance in case something happens. I’d be lying if I didn’t account for the looks too, haha. Thanks for commenting and being involved!
GET 20% OFF
Take up to 20% off at the 4runner store.

- Remember me Not recommended on shared computers
Forgot your password?
- Defender Forum (1983 - 2016)
How do I remove safari snorkel?

By Disty June 2, 2010 in Defender Forum (1983 - 2016)
- Reply to this topic
- Start new topic
Recommended Posts
What parts to i need to replace after removing a cheap safari snorkel copy? I don't like it and don't think i'll use it!
Link to comment
Share on other sites.

should just be the intake vent only. Shame cos I chucked one in the bin last week, sorry.

Retroanaconda
There'll also be three 10mm-ish holes in the wing around the vent and some smaller ones up the windscreen pillar to sort out, if you so desire.

JJB Serenity

I've just taken mine off, remove the five bolts around the air intake and any holding it onto the windscreen pillar, simple job really.
as for the vent:
if you don't have one to hand, either use some kind of small holed mesh (not pretty but will do the job)
make one out of some flat ally sheet, making sure there are plenty of holes in it (as i've just done)
buy one from a local shop or off the net, shouldn't be too much.
if you want to fill the holes i've just used some Unibond liquid metal, stuck really well, dried in five minutes and was easy to sand and paint.
Unlike a genuine Safari Snorkle which replaces the original intake & hose I suspect you are only missing the grill and have a few holes to fill?
As already stated fill the holes & paint (you could use rivets if you don't mind the look) and buy a new grill, very cheap and not worth sourcing a S/H one.
Haha thanks guys. Looks like Romford is the cheapest/easiest option.. i'm off!
I thought i'd need a replacement gasket/seal too, but looks like the grille is enough. Anybody got one they took off to add a snorkel?
Like I said in my earlier post, they are so cheap you might as well just buy new from your local dealer.
Part No. BTR6188. New/genuine £2.87 inc VAT.
- 11 years later...
I want to remove mine, it’s playing havoc with my Engine Management Light coming on. Never had the problem with past 4 Landy’s How do I cover the holes in the pillar ??

Anderzander
Fill them with a sealer, filler, put a rivet through or if they were drilled and tapped you could get a couple or grub screws ? Whatever you fancy ?
Join the conversation
You can post now and register later. If you have an account, sign in now to post with your account. Note: Your post will require moderator approval before it will be visible.

× Pasted as rich text. Paste as plain text instead
Only 75 emoji are allowed.
× Your link has been automatically embedded. Display as a link instead
× Your previous content has been restored. Clear editor
× You cannot paste images directly. Upload or insert images from URL.
- Insert image from URL
- Submit Reply
- Existing user? Sign In
- Online Users
- All Activity
- Leaderboard
- Forum Charter
- Donating & Supporters Titles
- Privacy Policy & GDPR
- Create New...
Important Information
We use cookies to ensure you get the best experience. By using our website you agree to our Cookie Policy
0 items in your cart
Subtotal: $0.00
CHECKOUT NOW
800-533-2210
We're available now or Email Us
- Belts & Hoses
- Body & Chassis
- Diagnostics
- Differentials
- Driveline & Axles
- Emissions Control
- Engine Cooling
- Fuel System
- Heating & Air Conditioning
- Instruments
- Transmission
- Wheels & Tires
- Comprehensive Service Kits
- B-Stock Items
- Books, Magazines & Videos
- Cleaning Supplies
- Exterior Accessories
- Gifts & Toys
- Interior Accessories
- Interior Trim, Seats, & Mirrors
- Off-Road Accessories
- Shop All Overland
- Accessories for Off-Road
- Awnings & Accessories
- Camp Kitchen
- Camping & Accessories
- Fuel | Propane | Water
- Recovery Gear
- Roof Racks & Accessories
- Rooftop Tents
- Storage Solutions
- Towing Accessories
- Travel Fridges & Slides
- How-To Videos
- Vehicle Maintenance
- Product Instructions
- Rover Resources
- ROVERLOG News Blog
- Land Rover Discovery I 1994-'99 Parts Catalog
- Range Rover Classic 1987-'95 Parts Catalog
- Land Rover Series 1948-'74 Parts Catalog
Sign in to my account
I forgot my password. Checkout as a Guest
- Shop Parts Belts & Hoses 366 Body & Chassis 1344 Brakes 926 Clutch 58 Comprehensive Service Kits 132 Diagnostics 10 Differentials 171 Driveline & Axles 225 Electrical 791 Emissions Control 113 Engine 1080 Engine Cooling 221 Exhaust 141 Filters 141 Fuel System 280 Heating & Air Conditioning 124 Instruments 31 Manuals 8 Steering 607 Suspension 542 Transmission 405 Wheels & Tires 120
- Shop Accessories Books, Magazines & Videos 18 Cleaning Supplies 14 Clothing 24 Exterior Accessories 464 Gifts & Toys 54 Interior Accessories 329 Interior Trim, Seats, & Mirrors 72 Off-Road Accessories 163 Tools 10
- Shop Overland Accessories for Off-Road 29 Awnings & Accessories 9 Camp Kitchen 7 Camping & Accessories 14 Fuel | Propane | Water 33 Pet Travel 2 Recovery Gear 47 Roof Racks & Accessories 22 Rooftop Tents 3 Storage Solutions 27 Towing & Accessories 97 Travel Fridges & Slides 24
- Land Rover Discovery I 1994-'99
- Range Rover Classic 1987-'95
- Land Rover Series 1948-'74
- Shopping Cart
- Call 800.533.2210
- Land Rover Part Info
Discovery II Safari Snorkel
Applies to:.
Item: SS395HF Fits: Discovery Series II | '99 - '04
Kit Includes
(#1) 1 -Body/Snorkel; (#2) 1 -3” Air Ram Assembly; (#3) 1 -Upper Mounting Bracket; (#4) 6 -S/S 8mm x 1.25mm x 25mm O/L; (#5) 6 -8mm x 30mm Body Washers; (#6) 6 -8mm x 1.25mm Nyloc Nuts; (#7) 3 -6mm x 1.0mm x 14mm (SEMS) Hex Bolts; (#8) 5 -4mm x 16mm Pop Rivets; (#9) 1 -Air Entry Adaptor; (#10) 1 -Inner Template; (#11) 1 -Template; (#12) 1 -Size 48 Hose Clamp
Fitment to: Left hand side Fitting time: Approx. 120 minutes Special Tools: 70mm Hole-saw; Air hacksaw; Step drill; Pop rivet gun; Sensor safe silicone sealant
Remove left hand front wheel arch liner and air entry duct.
Tape the template to the upper rear corner of the left hand guard. Using a felt tip pen mark the hole positions on the guard, remove template.
Drill a 4.5mm pilot hole for each hole position. Using the step drill, drill the 6 snorkel mounting holes to 16mm, drill the two main holes to 70mm with the hole-saw. Mark a straight line top and bottom between the two holes, cut away the remaining piece of panel between the two holes using the air hacksaw.
Deburr and paint all holes.
Place the inner template over the air entry duct-mounting studs. Using a felt top pen mark the hole position, remove template and drill a 4.5mm hole, deburr and paint hole.
Bolt upper mounting bracket to the snorkel body, screw the 6 mounting studs into the snorkel body inserts, position air entry adaptor into position in the inner guard, carefully position the snorkel body onto the guard, guiding the snorkel snout into the air entry adaptor. Fasten snorkel body to the guard with a couple of nuts and washers. Ensure that all mounting studs have adequate clearance to mounting holes. (Filing of holes to gain clearance may be necessary).
Holding the air adaptor in position, mark the hole position through the inner guard onto the adaptor, remove snorkel body, air entry adaptor from vehicle. Drill the hole position marked on the air entry adaptor to 4.5mm.<
Apply a liberal amount of sensor safe silicone sealant to the sealing surface of the air entry adaptor, install the air entry adaptor into position and secure using pop rivet supplied.
Apply a liberal amount of sensor safe silicone sealant around the end of the snorkel snout and air entry adaptor inlet. Carefully position the snorkel body onto the guard, guiding the snorkel snout into the air entry adaptor. Using necessary hardware secure the snorkel body to the guard. Apply more sealant if required to ensure the snorkel snout to inner guard has a watertight seal.
Line the upper mounting bracket up with the inside edge of the plastic “A” pillar molding (to achieve bracket to molding edge alignment, the top of the snorkel body may need to be pushed towards the “A” pillar) mark the 4 hole positions on the “A” pillar molding, remove bracket and drill a 4.5mm hole for each hole position.
Refasten upper mounting bracket onto the snorkel body, fasten upper mounting bracket to the “A” pillar using pop rivets supplied.
Install air ram assembly to snorkel body and fasten. Refit wheel arch liner. Refit air entry duct.
N.B – Sealing of air ducting joints and air cleaner housing.
Sealing of ALL air ducting joints, air cleaner housing entry snout and cleaner housing drains is at the owner/installer discretion.
Failure to use a sensor safe silicone sealant will cause sensor contamination.

Complete Product Instructions List Page
- Belts & Hoses 366 Body & Chassis 1344 Brakes 926 Clutch 58 Comprehensive Service Kits 132 Diagnostics 10 Differentials 171 Driveline & Axles 225 Electrical 791 Emissions Control 113 Engine 1080 Engine Cooling 221 Exhaust 141 Filters 141 Fuel System 280 Heating & Air Conditioning 124 Instruments 31 Manuals 8 Steering 607 Suspension 542 Transmission 405 Wheels & Tires 120
- Books, Magazines & Videos 18 Cleaning Supplies 14 Clothing 24 Exterior Accessories 464 Gifts & Toys 54 Interior Accessories 329 Interior Trim, Seats, & Mirrors 72 Off-Road Accessories 163 Tools 10
- Accessories for Off-Road 29 Awnings & Accessories 9 Camp Kitchen 7 Camping & Accessories 14 Fuel | Propane | Water 33 Pet Travel 2 Recovery Gear 47 Roof Racks & Accessories 22 Rooftop Tents 3 Storage Solutions 27 Towing & Accessories 97 Travel Fridges & Slides 24
What Our Customers Are Saying

Great product selection, great customer service!
Jose V. El Paso, TX
Every time I have ordered parts for my 2008 Range Rover Sport, my sales rep has been so helpful and gets my order sent out quickly.
Anita B. Newport News, VA
A wide variety of LR parts, very responsive and congenial customer service, and fast turn around from order to shipping.
James C. APO, AP, CA
You’re my go to for D2 parts and the repair videos
Adam P. GARDNER, KS
Professional customer service and excellent delivery on orders.
JEFFREY F. GROVETOWN, GA
Great service and great parts
Jay M. Verona, VA
You guys have great customer service and have always been able to get me the parts I need.
Derrick C. Dallas, TX
Professional and knowledgeable sales representatives, quick shipping, reasonable selection, and competitive pricing.
Michael S. Mesa, AZ
My sales rep is very knowledgeable and very pleasant to work with
Roy V. Middletown, NY
Item was delivered as described, shipped out immediately, I had my parts in 2 days.. Very Much Recommended !!
MR S. BURR OAK, MI
Over 11,000 Parts In Stock!
From floor mats to filters to complete engines, we carry the widest range of parts and accessories for your Land Rover you will find anywhere!
...And the important word here is stock. We simply don't list part #'s that we can buy - we stock them. We operate over 50,000 square feet of warehouse space at two warehouse locations on both the East and West coast.
Fast Delivery
We ship same-day on orders placed before 12:00pm eastern time, Monday - Friday (excluding holidays) from both our East and West Coast Warehouses.
We ensure timely processing of your order, quick delivery times and very competitive shipping rates from UPS, FedEx and the US Postal Service
Our Guarantee On Low Prices!
Atlantic British strives to bring you the BEST QUALITY parts at the BEST PRICE!
Show us a better retail price on the same brand part/item and style advertised on any other website or catalog and...
We'll match it! Plus, we'll even take an additional 5% Off the matched price
Quality & Service
We appreciate your business - buy with confidence!
Reviews from our Customers...
FAST Shipping! Call these Folks they have all the answers to your part installation.
-Bill M. (Boydton,VA)
Great customer service, very knowledgeable staff. Everyone I have worked with are Land Rover owners- which is a big help for knowing the vehicles.
You always have the parts I need at a great price and everyone Ive ever spoken to has a great knowledge of all Land Rovers
-Keith B. (Blue Ridge,VA)
Professionalism. My sales rep is a rock star, and I value both his technical expertise and his knowledge of your product line.
-Alan R. (N. Chelmsford,MA)
SIGN UP for Exclusive Offers and Latest Deals
- Store Policies
- Shipping Information
- Core Refunds
- International Orders
- Privacy Policy
- Price Match Policy
- B-Stock Products
- Gift Certificates
- Take our 30 Second Customer Survey
- East & West Coast Warehouses
- New! Clearview Towing Mirrors USA
- Defender Octa Eyes July 3rd Debut
- Range Rover Electric Undergoes Testing
- JLR Could Build Vehicles in India
- Defender Octa Coming in 2024
- Range Rover Location Editions
- Shop Overland
- Maintenance Service Schedules
- How-To-Videos
- Affiliate Marketing
- Atlantic British Ltd. 800-533-2210 M-Th 8am-7pm (Fri 6pm) Eastern 6 Enterprise Avenue Clifton Park, NY 12065 - USA
- British Pacific 800-533-2210 M-F 8:30am-5:30pm Pacific 4109 Guardian Street Simi Valley, CA 93063 - USA
- Range Rover
- Range Rover Sport
- Range Rover Sport Supercharged
- Range Rover Classic
- Range Rover Full Size
- Range Rover Supercharged
- Range Rover Evoque
- Range Rover P38
- Range Rover Velar
Discovery / LR3 / LR4
- Discovery I
- Discovery Series II
- Discovery 5
- Discovery Sport
Defender / Series
- Defender 110 New Generation L663
- LR2 / Freelander
- Land Rover Series I
- Land Rover Series II/IIA
- Land Rover Series III
Customer Service
- Clearview Towing Mirrors USA
Resources Center
- How-To-Videos
- Atlantic British Ltd.
- Toll free: 800-533-2210
- Direct: 518-664-6169
- M-F, 8am-6pm Eastern (Sales & Order Pickup)
- East Coast - Map
- 6 Enterprise Avenue
- Clifton Park, NY 12065 - USA
- British Pacific
- M-F, 8:30am-5:30pm Pacific (Order Pickup) 8:30am-3pm (Sales)
- West Coast - Map
- 4109 Guardian Street
- Simi Valley, CA 93063 - USA
Questions? Call 1-800-533-2210 or Email Your Question
© 2024 Atlantic British Ltd. - 6 Enterprise Avenue - Clifton Park - NY - 12065 - USA - Phone: 800-533-2210
Site Version 2.0 2020 AWS

My Toyota FJ Cruiser
Expedition gear , gear reviews , how tos , mechanical, safari snorkel installed on datoy, by tomas • february 25, 2009.
After careful consideration and discussion with other Toyota FJ Cruiser owners I decided to install a Safari Snorkel on DaToy. I do not anticipate deep water fords, rather, I installed the snorkel to provide a clean air intake . We use our Toyota FJ Cruiser as an expedition vehicle in the southwest. Many of the roads that we tour on are dry and dusty. The FJ cold air intake is at the front of the right wheel well and when traveling on dusty roads the intake is engulfed in dust so you can just imagine what the air in the intake looks like.
The Snorkel moves the air intake out of the wheel well and up to the roof line of the FJ which in most cases will be out of the dust. I don’t mind the added security knowing that if we end up in a deep water crossing the engine will be safe from hydraulic seize.
The Safari Snorkel is available from many of the ARB dealers in the USA.
Time Required for install: 3 hours Difficulty: Requires little mechanical knowledge. Need to be comfortable with cutting the intake hole in the fender. Special Tools Required: 4 1/8″ Bi-metal Hole Saw, Stepping bit.
The installation is very straight forward, however, care must be taken when lining up the template and drilling the holes.
Installation steps:
Check the inventory sheet and be sure that you have all parts required for the install. You may also want to pick up 5 new retaining clips for the fender liner as these get damaged during removal.

The instructions state that the inner fender liner must be removed, however, I was able to remove most of the bolts and a few of the clips to gain access to the back side of the fender and the factory air intake:

Remove the factory intake from inner fender:

Remove the factory pre-cleaner from fender and detach from the air intake:

This is the most critical step of the entire installation. Attach the template to the FJ fender following the detailed instructions. The template will dictate where the holes are to be drilled. If you do not get it placed in the correct location the whole install will be off. Once you are happy with the location of the template mark the holes.

Drill a small pilot hole in the center of each mark. The pilot hole will ensure that larger bits stay centered.

Get you drill and hole saw ready and drill/saw the large intake hole. BE SURE YOU ARE IN THE CORRECT LOCATION.

Once you have the hole saw you need to deburr the edges with some sand paper:

Then touch up the edges with some paint to prevent rust:

The completed hole:

Drill the rest of the holes using your stepping bit. I drilled to 11/32″ but you may need to go up one more size if the bolts do not quite line up.

Prep the snorkel by installing all the studs. Be sure to apply Loctite to all the studs to ensure they stay tight.

Install the mounting bracket on the snorkel.

The put masking tape on the A pillar as shown:

Now fit the Snorkel in place and mark the location of the bracket:

Remove the bracket from the snorkel and mark the location of the holes:

Drill the holes and install the white inserts:

Once the inserts are install use the self tapping screws to install the bracket:

Now that the bracket is installed we are ready to place the Snorkel and install the nuts. I used a little silicon around each stud to help prevent any rust:

Once all the nuts are started I found it easiest to 3rd set of nuts first then move towards the back and then forward. Then install the bolts to attach the snorkel to the bracket.
I my case I am installing the snorkel with the Vortex Off-Road filter. The Pre filter needs to be modified by removing the rubber fitting and grinding the lugs off:

We are now ready to install the rubber air entry hose. Take one of the silver clamps and put it on the hose. The hose is then attached to the intake from the snorkel:

Do not tighten the hose clamp yet. Take the other silver clamp and place it over the other end of the intake hose. The take in the prefilter and attach it to the hose. You will need to rotate the hose until you get the best alignment for the prefilter. Once you fill comfortable with the alignment bolt the prefilter back into place. You can then tighten the silver clamps at both ends of the intake hose.

Reattach the intake to the prefilter being sure to align the small tab:

Install the air ram to the top of the snorkel using the black clamp.
Reinstall the fender lining
NOTE: If you are planning on using the system for deep water fords be sure to deal with the small water drain holes mention in the Snorkel install document. It is the installer’s responsibility to ensure that all connections are watertight.
Step 17: Check all connections and you are ready to roll.

3 comments for “ Safari Snorkel Installed on DaToy ”
- Pingback: working on the fj today MAR6 in hermosa if anyone wants to come by
Leave a Reply Cancel reply
Your email address will not be published. Required fields are marked *
Save my name, email, and website in this browser for the next time I comment.
This site uses Akismet to reduce spam. Learn how your comment data is processed .
Select your vehicle
- Price List Go Clear Download
- Find Stockist Go Clear View
Safari Snorkels
- Toyota Landcruiser 200 SERIES (2015 – 2020)
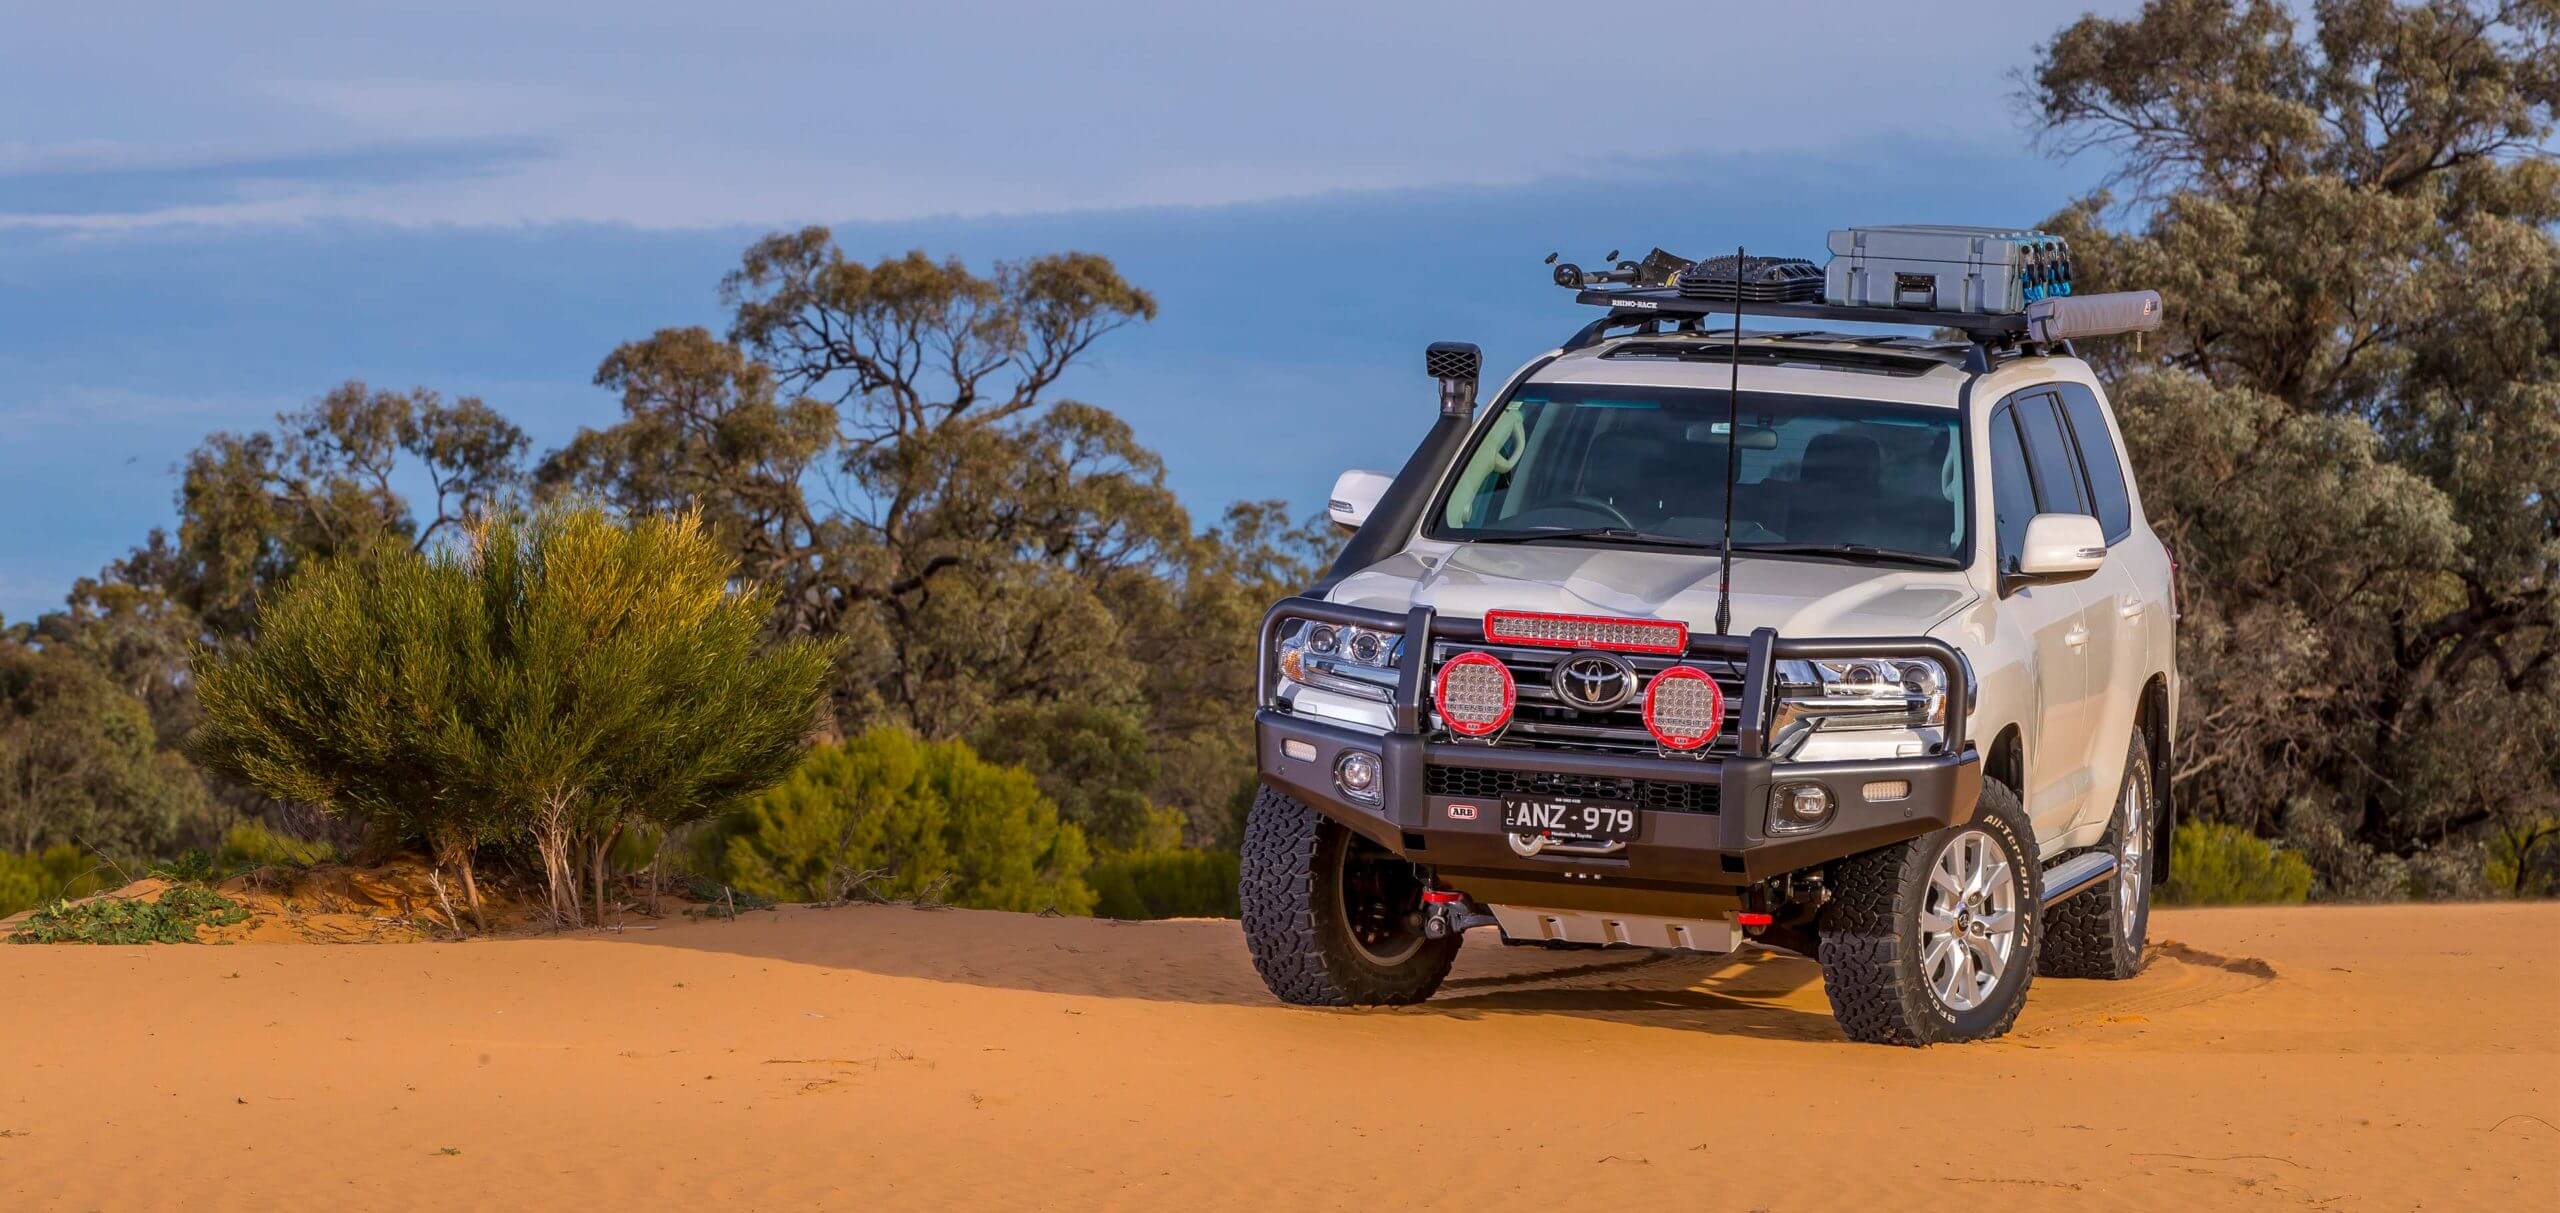
Protecting your engine from dust, snow and water ingestion is essential for keeping your 200 Series on the tracks and not the side lines. A Safari snorkel will ensure that clean, dry air is always available, regardless of the conditions.
Manufactured in Australia from premium quality polyethylene, Safari snorkels are UV stable and incredibly resilient to withstand the harsh Australian environment. All systems are individually designed and undergo thorough research and testing prior to being tooled for production.
Safari snorkels are positively sealed to provide the ultimate in engine protection during river crossings and dusty conditions, while the quality fixtures and fittings ensure superior appearance and long term durability.
Install one before your next trip and breathe easier knowing that your engine is protected by a Safari snorkel.
Clever Design

Safari’s Air Ram system is a pivotal and functional attribute of the snorkel; CAD and lab tested, the Air Ram is designed to simultaneously remove the maximum volume of water from the incoming air stream, while delivering the maximum airflow to your vehicle’s engine.
Durable Materials

Safari snorkels utilise a UV stable polyethylene body which ensures a strong and robust fitting to the outside of your 4×4, complemented by high-grade stainless steel and plated hardware for corrosion resistance on all internal and external fittings and fixtures. All Safari connection ducting is custom designed and tooled and is manufactured from EPDM moulded rubber, rated to a continual 130°C operating temperature. There is nothing better!
Vehicle Specific

Nothing fits like Safari. As a result of the intricate design process, working with a combination of CAD modelling and actual vehicles, Safari snorkels are manufactured to integrate seamlessly. Where other products might look similar, none are developed with such attention to detail from the air-box back to the Air Ram to work perfectly with your vehicle.
Safari Snorkel Features

Reduces dust intake in Outback conditions
Safari snorkels are ideal for convoy driving where severe dust can have a detrimental effect on your engine’s performance.

Protects Your Engine From Water
Keep your engine dry and your 4WD moving during water crossings, Safari snorkels reduce the likelihood of engine damage.

Pre Cleaner Compatible
Safari snorkels are fully compatible with optional 7″ or 10″ pre cleaners on some models.

Maintains Fresh Air For Your Engine
High flow air ducting and body ensures air supply is in excess of engine requirements.

Armax Performance Snorkels
Providing increased power for today’s high output engines, Safari Armax snorkels are primarily designed to deliver greater fuel economy and engine performance.
Featuring a 4″ air ram and larger cross section body, the Armax range has been developed to flow 30% more air over a standard intake or traditional Safari snorkel. Armax is suited for drivers seeking the maximum output from their vehicle, and will work in tandem with other performance modifications, such as high flow exhausts or engine remapping.
Armax snorkels are available for LandCruiser 200 series models (4.5L Diesel)

Uncover the gear as well as some tips you'll need for your next adventure off grid!

Discover ARB's all-new Slide Kitchen and more

View online or pick up in store
Your Preferred Store ARB Store Search Find Your Nearest Store View Details Australia International --> Find Closest Search or --> or located km away View Details View all Stockists

Subscribe to ARB to receive your regular 4x4 CULTURE magazine, exclusive ARB promotional news and new product release information.
- first_name *
- last_name *
- Country * Afghanistan Albania Algeria American Samoa Andorra Angola Anguilla Antarctica Antigua and Barbuda Argentina Armenia Aruba Australia Austria Azerbaijan Bahamas Bahrain Bangladesh Barbados Belarus Belgium Belize Benin Bermuda Bhutan Bolivia Bonaire, Sint Eustatius and Saba Bosnia and Herzegovina Botswana Bouvet Island Brazil British Indian Ocean Territory Brunei Darussalam Bulgaria Burkina Faso Burundi Cambodia Cameroon Canada Cape Verde Cayman Islands Central African Republic Chad Chile China Christmas Island Cocos Islands Colombia Comoros Congo, Democratic Republic of the Congo, Republic of the Cook Islands Costa Rica Croatia Cuba Curaçao Cyprus Czech Republic Côte d'Ivoire Denmark Djibouti Dominica Dominican Republic Ecuador Egypt El Salvador Equatorial Guinea Eritrea Estonia Eswatini (Swaziland) Ethiopia Falkland Islands Faroe Islands Fiji Finland France French Guiana French Polynesia French Southern Territories Gabon Gambia Georgia Germany Ghana Gibraltar Greece Greenland Grenada Guadeloupe Guam Guatemala Guernsey Guinea Guinea-Bissau Guyana Haiti Heard and McDonald Islands Holy See Honduras Hong Kong Hungary Iceland India Indonesia Iran Iraq Ireland Isle of Man Israel Italy Jamaica Japan Jersey Jordan Kazakhstan Kenya Kiribati Kuwait Kyrgyzstan Lao People's Democratic Republic Latvia Lebanon Lesotho Liberia Libya Liechtenstein Lithuania Luxembourg Macau Macedonia Madagascar Malawi Malaysia Maldives Mali Malta Marshall Islands Martinique Mauritania Mauritius Mayotte Mexico Micronesia Moldova Monaco Mongolia Montenegro Montserrat Morocco Mozambique Myanmar Namibia Nauru Nepal Netherlands New Caledonia New Zealand Nicaragua Niger Nigeria Niue Norfolk Island North Korea Northern Mariana Islands Norway Oman Pakistan Palau Palestine, State of Panama Papua New Guinea Paraguay Peru Philippines Pitcairn Poland Portugal Puerto Rico Qatar Romania Russia Rwanda Réunion Saint Barthélemy Saint Helena Saint Kitts and Nevis Saint Lucia Saint Martin Saint Pierre and Miquelon Saint Vincent and the Grenadines Samoa San Marino Sao Tome and Principe Saudi Arabia Senegal Serbia Seychelles Sierra Leone Singapore Sint Maarten Slovakia Slovenia Solomon Islands Somalia South Africa South Georgia South Korea South Sudan Spain Sri Lanka Sudan Suriname Svalbard and Jan Mayen Islands Sweden Switzerland Syria Taiwan Tajikistan Tanzania Thailand Timor-Leste Togo Tokelau Tonga Trinidad and Tobago Tunisia Turkey Turkmenistan Turks and Caicos Islands Tuvalu US Minor Outlying Islands Uganda Ukraine United Arab Emirates United Kingdom United States Uruguay Uzbekistan Vanuatu Venezuela Vietnam Virgin Islands, British Virgin Islands, U.S. Wallis and Futuna Western Sahara Yemen Zambia Zimbabwe Åland Islands
Subscribe to ARB
- Bull Bars & Protection Equipment
- Drawers & Cargo Solutions
- Ute Lids & Tub Accessories
- Portable Fridge Freezers
- Air Lockers
- Air Compressors & Tyre Accessories
- Rooftop Tents
- General Accessories
- Fuel Tanks and Storage
- Driving Lights
- Dual Battery and Solar Systems
- Recovery Equipment
- The Low Down
- Destinations
- Reader Writes
- Travel Tips
- 4wding Abroad
- 4×4 Fit Outs
- At ARB, We Get It
- Vehicle Weights
- Kids Corner
- 4X4 For Beginners
- Service and Parts Manual
- Store Locator
- Join our Mailing List
- ARB Catalogue
- ‘Just Gotta Ask’
- Merchandise
- Sponsorship Requests
- ARB Off Road Racing Series
- News And Releases
- Calendar of Events
- Investor Relations
- New Zealand
- Latin America
- Old Man Emu
- Dealer Portal
Share this page


- Forum Listing
- Marketplace
- Advanced Search
- General Technical Discussion Forums
- DIY Modifications & Accessories
Snorkel Install - Step by step Instructions + Pics and Vid

- Add to quote
Rob4800 said: Click to expand...

WOW! THis is EXCELLANT! Better than the articles in 4WD Action for explaination and pictures! Mate you can teach them a thing or two! 10 out 10!

thanks for the heads up as my mate is gunna fit his up shortly.:bigthumb: hey aksniss , worth adding to "the doc"?

Well Done Good write up Rob Hey - those clips are not so expensive - only about a dollar or two.. I got a whole lot from Nizzbits Marc
MarcusParcus said: Good write up Rob Hey - those clips are not so expensive - only about a dollar or two.. I got a whole lot from Nizzbits Marc Click to expand...

Good job ,just what I needed to know, Now Ill get someone else to fit it.....

great timing for this post to pop back up. My snorkel arrived today. Very good write up. Just got to find the correct silicone to use now.
Thank you for this great post!! it helped me install a snorkel in my S1 GU TB45E. I started with a new, sharp, hole saw, but then decided to do the job with a jig saw and metal cutting blase. I used a felt pen to draw the two hole saw circles then connected the top and bottom tangents. I finished in a very short time, no need to use tin snips or dremel and a lot less metal dust to clean.... Also I did remove the wheel and managed to do the job without removing the aereal (I have a couple of extra scratches on my hand....

- ?
- 86.9K members
Top Contributors this Month


4X4 SNORKEL suitable for the Toyota 76, 78 & 79 Series Wide Front Landcruiser 03/2007 to 2023 4.2L Diesel 1HZ (Factory Snorkel Replacement) (International)
- Turbocharger
- Intercooler
- Engine Management
- Drive Train
- Installation Guides
add remove Overview
Safari armax performance overview:.
Safari Performance Products suitable for Toyota Land Cruiser 70 Series Wide Front 1HZ Diesel 4x4 include turbocharger, intercooler, engine management, exhaust, snorkel, oil cooler and drivetrain systems. Safari 4x4 Engineering ARMAX products are a combination of durable components and thoroughly engineered systems designed to enhance Toyota Land Cruiser 70 Series Wide Front 1HZ Diesel 4WD performance, durability and driveability - particularly vehicles that tow heavy loads or with increased duties ranging from four-wheel driving anywhere across the globe to the added GVM of the Armouring Industry.
ARMAX Products suitable for the Toyota Land Cruiser 70 Series Wide Front 1HZ Diesel include:
- Turbocharger System
- Intercooler System
- Exhaust System
- Drivetrain components.

*Safari ARMAX Performance Products suitable for Toyota Land Cruiser 70 Series 1HZ dyno graph shown.
add remove Snorkel
Part number: ss79hfz.
- Australian designed, moulded and manufactured
- Raised air intake to prevent your engine from ingesting harmful elements
- Increased airflow for your 03/2007 to 2023 4.2L Diesel 1HZ engine
- Water separating air ram design to remove water from the air stream
- Durable and UV stable snorkel and air ram for added strength
- Comprehensive Safari Snorkel fitting guide suitable for Toyota 70 Series Land Cruiser 4WD with an accurate template for installation.
- Lifetime Warranty
The SS79HFZ Safari Snorkels suitable for Toyota 70 Series Land Cruiser 4x4 is designed to deliver a huge volume of the coolest and cleanest air possible into the stock air cleaner assembly of 03/2007 to 2023 4.2L Diesel 1HZ engines.
With the huge air flow demands of each engine in the Toyota 03/2007 to 2023 4.2L Diesel 1HZ 70 Series Land Cruiser, Safari took the decision to design a snorkel system that raised the air intake to prevent ingesting harmful elements to the vehicles air cleaner.
Huge air flow is but one aspect of the ultimate in snorkel design suitable for Toyota 70 Series Land Cruisers. The Safari snorkel air ram is designed to perform two very important roles. The most obvious is to funnel cool clean air into the snorkel body - but just as importantly, the Safari air ram acts as a highly efficient water separator to remove rain water from the incoming air stream - thus ensuring safe engine operation through even the most torrential tropical storms.
The genuine Safari Snorkel suitable for Toyota 70 Series Land Cruiser 4x4 Snorkel body and air ram is manufactured to the highest standards in durable, UV stable, cross linked polyethylene material. In addition, the substantial material wall thickness delivers huge physical strength to ensure that the Safari Snorkel suitable for Toyota 70 Series Land Cruiser snorkel breezes through the toughest off-road conditions on the planet.
V-Spec snorkels are identified with a ‘HF’ at the end of the part number. These snorkels are manufactured in Australia from Safari’s own industrial specification UV stabilized polyethylene material. A life time warranty is included for peace of mind when it comes to your vehicle.
add remove Turbocharger
Safari armax turbocharger suitable for toyota land cruiser 70 series wide front 1hz, safari turbocharger suitable for toyota land cruiser 70 series wide front 1hz part number:.
STHZJ70W - Safari Turbocharger System suitable for the 70 Series Wide Nose Body Toyota LandCruiser - 1HZ 4.2L Diesel Engine Diesel engine efficiency for Toyota's 1HZ engine is legendary but as most diesel owners know only too well, the downside is somewhat leisurely performance especially when towing and or driving in off-road conditions. The professionally developed and engineered Safari 4x4 ARMAX Turbocharger suitable for 1HZ Toyota Land Cruiser delivers amazing performance. With Safari Turbochargers on roads and tracks all over the planet, you can be certain that Safari 4x4 Engineering has a deep understanding of the 70 Series Diesel Wide Nose 1HZ Diesel engine and the expertise required to manufacture the most reliable and powerful turbo enhancement for your Toyota 4x4 engine. With a Safari ARMAX Turbocharger suitable for Toyota 4x4s, you not only get a huge boost in power and torque, you get it with the added bonus of improved fuel economy under load. Why? Because under extreme conditions when you really need, that extra power you get from Safari means more efficiency. Better power to weight. Less stress and strain all through your engine.

Safari 4x4 Engineering ARMAX Turbocharger suitable for 70 Series Diesel Wide Nose 1HZ Engine
add remove Intercooler
Safari armax intercooler suitable for 70 series diesel wide nose 1hz engine, safari intercooler suitable for 70 series diesel wide nose 1hz engine part number:.

add remove Engine Management
Safari armax engine management suitable for 70 series diesel wide nose 1hz engine, safari armax engine management suitable for 70 series diesel wide nose 1hzpart numbers:.
330-087-000 - Safari ARMAX Boost Compensator suitable for 70 Series Diesel Wide Nose 1HZ Engine
Details Available Soon
Safari 4x4 Engineering - ARMAX Boost Compensator suitable for 70 Series Diesel Wide Nose 1HZ
add remove Exhaust
Safari armax exhaust suitable for 70 series diesel wide nose 1hz engine, 70 series diesel wide nose 1hz engine exhaust part numbers:.
SEHZJ76W - 3" Diameter mandrel formed High Output Exhaust system suitable for the 76 Series Wide Nose Body Toyota LandCruiser fitted with Safari Turbo System (STHZJ70W) - 1HZ 4.2L Diesel Engine SEHZJ78W - 3" Diameter mandrel formed High Output Exhaust system suitable for the 78 Series Wide Nose Body Toyota LandCruiser fitted with Safari Turbo System (STHZJ70W) - 1HZ 4.2L Diesel Engine SEHZJ79N - 3" Diameter mandrel formed High Output Exhaust system suitable for the 79 Series Wide Nose Body Toyota LandCruiser fitted with Safari Turbo System (STHZJ70W) - 1HZ 4.2L Diesel Engine

Unlike intercooling which lowers the intake charge air temperature, a highly efficient exhaust system evacuates hot exhaust gasses quickly from the exhaust manifold and promotes cooler combustion chamber temperatures.
Safari 4x4 Engineering has developed what is arguably the ultimate in maximum efficiency exhaust systems suitable for the 70 Series Diesel Wide Nose 1HZ Engine 4WD. Precision manufactured in true 3" tube for high gas flow capacity, aluminised steel for corrosion resistance, mandrel bent for maximum flow efficiency and 4-bolt flanged exhaust connections for high strength, unmatched fatigue resistance and a lifetime of leak-free operation. Moreover, this Safari ARMAX Toyota exhaust system has been designed for the maximum clearance to vital components, zero contact with body and suspension and installation is a breeze.
The increase in maximum gas flow through the removal of the standard 1HZ diesel system's restrictions results in a significant power increase for your 70 Series Diesel Wide Nose 1HZ Engine without the usual increases in exhaust gas/cylinder head temperatures. The result is a superb Safari ARMAX exhaust system that delivers almost 100% improvement in exhaust gas flow capacity suitable for Toyota Land Cruiser 70 Series 4x4's.
Safari 4x4 Engineering - ARMAX Exhaust suitable for 70 Series Diesel Wide Nose 1HZ Engine
add remove Oil Cooler
Safari armax oil cooler suitabler for 70 series diesel wide nose 1hz engine, safari armax oil cooler suitable for 70 series diesel wide nose 1hz engine part number:.
SOHZJ70W - ARMAX Oil Cooler suitable for 70 Series Diesel Wide Nose 1HZ Engine (Left Hand Drive Only)
The Safari ARMAX Oil Cooler is a comprehensive and highly effective engine oil cooling system significantly that lowers 1HZ engine oil temperatures during the most arduous high load driving conditions.
This Safari ARMAX extreme duty oil cooler core has huge flow and cooling capacity and is strategically mounted on vibration damping mounts inside the 70 Series Diesel Wide Nose 1HZ engine compartment. Tough and durable custom Safari ARMAX oil lines, complete with highly robust connections transfer oil to and from the Safari ARMAX engine oil cooler. This avoids any possibility of cheap 'push on' fittings failing and stranding the vehicle.
In fact, each and every component included in the Safari ARMAX oil cooling system suitable for 70 Series Diesel Wide Nose 1HZ Engine 4x4's are engineered tough to support the greatest durability possible, whether it be a high horsepower engine or standard.

Safari 4x4 Engineering - ARMAX Engine Oil Cooler suitable for 70 Series Diesel Wide Nose 1HZ Engine
add remove Drive Train
Safari armax drivetrain products suitable for 70 series diesel wide nose 1hz.
Part Numbers: SGHZJ70C - High Speed 5th Gear Assembly suitable for the 70 Series Land Cruiser (Gen 2 & 3) SDHZJ70CHD - Heavy Duty Clutch System suitable for the 70 Series Land Cruiser (Gen 2 & 3) - 60% increase in torque capacity SDHZJ70C - Clutch System suitable for the 70 Series Land Cruiser (Gen 2 & 3) - 40% increase in torque capacity
Safari ARMAX 5th Gear Replacement suitable for Toyota 1HZ.
Many manual transmission, diesel powered vehicles, suffer from high RPM loads in 5th gear. This makes a vehicle far less economical and puts more strain on the engine.
With the replacement of the standard 1HZ Engine 5th gear for the Safari ARMAX 5th gear, your engine does not need to run at such high RPM when in 5th gear. The Safari ARMAXGearset suitable for 70 Series Diesel Wide Nose 1HZ Engine is a direct replacement of the relative stock components. The Safari ARMAX 5th Gear Replacement results in a 20% decrease in engine RPM at any given speed when in 5th gear.

Safari ARMAX Extreme Duty Clutches
Standard Toyota 70 Series Diesel Wide Nose 1HZ Engine clutches are often well matched to torque and power outputs of standard vehicles being used in standard conditions. Once you have increased power and/or torque or increased GVM or towing capacity for your Toyota 4x4, the clutch becomes the weak link in utilising all that your vehicle has to offer.
Safari have stepped up to the plate and engineered clutch assemblies suitable for the 1HZ Engine that have 40% or 60% higher torque capacity as required. That is a huge improvement and best of all, maintains stock drivability characteristics.
The Safari ARMAX clutch assembly suitable for your Toyota 70 Series Diesel Wide Nose 1HZ Drivetrain allows you to fully utilise the torque of your vehicle with unsurpassed driveability and durability.

Safari 4x4 Engineering - ARMAX Drivetrain Products suitable for Toyota 70 Series Diesel Wide Nose 1HZ
add remove Installation Guides
picture_as_pdf Safari Snorkel SS79HFZ Installation Guide
picture_as_pdf Safari ARMAX STHZJ70W Turbocharger Installation Guide 1.48 MB
picture_as_pdf Safari ARMAX SOHZJ70WL Engine Oil Cooler Kit Installation Guide 2.97 MB
Click & Collect Availability
- No results found
By continuing to use the site, you agree to the use of cookies. Find out more
X Find out more
Call now on +7 495 796 93 25
- Advice Centre
- Change Country
Whatever your requirements, Pickfords offers a comprehensive menu of moving services, which means we personalise the entire move to suit your needs, your timescale and your budget.
- Get a quote
- Home moving Local and national moving
Moving abroad? As part of the largest international removals network, Pickfords moves customers to every country across the world, delivering a range of overseas services to suit your requirements.
- International storage Flexible, secure, storage when you move overseas
- Moving in Europe Find out about our European destinations
- Moving overseas Going a little further afield?
Whether you are a small company office moving across town or a multi-national corporation moving across the country, Pickfords has the expertise to deliver the most effective office removal.
- IT Relocation Take control of your IT assets
- Business relocation Why choose Pickfords for your company move?
- Business storage Flexible, secure storage for your business.
A complete move management service to support your employees moving to new posts anywhere in the world.
- Our commitment to quality We always strive for excellence
- Our people The team dedicated to you and your employees.
- Our resources Relocating your employees nationally and globally.
Pickfords provide safe and secure furniture storage for thousands of households and businesses throughout the world.
- International storage Flexible, secure storage when you move overseas
- Short-term storage Store your goods for a short period until you're ready to receive
- Long-term storage Flexible storage for as long as you need it
- Furniture storage Keeping your belongings safe
- Home moving
- International storage
- Moving in Europe
- Moving overseas
- IT Relocation
- Business relocation
- Business storage
- Our commitment to quality
- Our resources
- Short-term storage
- Long-term storage
- Furniture storage
- Pickfords Russia /
- Removals in Moscow
Moving Company in Moscow
If you are looking for a removals and storage company in Moscow, Pickfords can offer you flexible, personal service to suit your needs. Our experienced removals teams will help you plan and manage your move to your new home.

Moving in Moscow
Pickfords are a local moving company, operating across the world. We have a comprehensive range of moving services to suit all requirements and preferences.
International moving
Are you moving abroad? Pickfords are the experts. As part of the largest international moving network, we relocate customers from Moscow to countries across Europe and beyond. Our international moving services , including packing, shipping and customs, can be picked and chosen to suit your needs.
Storage in Moscow
Pickfords can provide storage for customers in Moscow, enabling them to free up space more space when moving home. Our storage facilities can accommodate both short-term and long-term storage.
If you require more information for removals to or from Moscow, contact Pickfords .

Whether you're moving your home, business or your employees, our Moving Advice Centre has some great advice to help your move run as smoothly as possible.
Contact your local branch:
- Home Moving
- Local and National Moving
- International Moving
- Moving Overseas
- Moving your Employees
- Our Technology
- Moving your Business
- Business Relocation
- Business Storage
- Furniture Storage
- International Storage
- Pickfords History
- Our Approach
- Moving Advice Centre
- Privacy Policy & Cookies
- Modern Slavery Statement
- Anti-Bribery and Anti-Corruption
- Terms & Conditions
© Pickfords Registered No. 8044368 Pickfords Move Management Limited trading as Pickfords
IMAGES
VIDEO
COMMENTS
Once the snorkel is secured from inside the fender, add the upper mount bolts on the A-pillar and tighten them until they're snug. Step 25. Tighten Hose Clamps. With the snorkel fully secured, tighten the hose clamps with a 7mm socket on both the snorkel and the intake side of the adapter. Step 26. Install Airbox.
Bryan McMeikan from Safari 4x4 Engineering covers the benefits of fitting a quality snorkel to your vehicle. Safari's signature lies in the quality and durab...
In this video I share how to install the ARB Safari Snorkel. I show you a few tips and tricks to make this install easy. ARB SS450HP Snorkel https://amzn.to/...
Installing The Snorkel: Place a very thin layer of lubricant on the edge of the snorkel to air boot connection. Install the snorkel onto the truck making sure that the air boot slides into the snorkel during assembly. Reach up under the fender and install the supplied washers and lock nuts.
File and paint all the nice holes you've made! Install the studs in the snorkel body with some blue Loctite. Install the A-Pillar bracket onto the snorkel body; hand tight. Put some tape on the A-Pillar itself so you can mark the bracket location. Carefully place the snorkel body onto the fender.
Installing the Sy-Klone onto the snorkel is a simple process. Measure your snorkel inlet to make sure you have the correct Series 9001 snorkel (the ARB snorkel has a 4" inlet). Once you know you have the correct model, remove the standard forward-facing snorkel head with whatever hardware it came with. Set the supplied stainless steel t-bolt ...
The selection and step-by-step installation of a Safari Snorkel on to a Toyota Landcruiser 200 turbo-diesel. ( Part number SS87HF )Read more detail at: https...
The following page shows the installation steps for the Safari Snorkel (old style) - with some updated info for the new style. ... Remove the bracket from the snorkel (and the snorkel) - position the bracket on the A pillar and mark the three mounting holes. We used Rivnuts instead of the stupid Safari plastic inserts. The top two holes are ...
Once that is done, you can reattach the airbox, and reassemble the filter, cover, etc. Step 7. Prepare Snorkel Body. Prepare the snorkel body with blue thread locker and the threaded studs. This is another key step. Above you can see the bracket that ARB wants you to bolt to the snorkel, and rivet to the A-pillar.
snorkel body mounting insert. 7 Place a strip of masking tape along the A-Pillar panel. Carefully install the snorkel body (Item 1) to the guard panel. With the snorkel body correctly positioned, mark the outline of the upper mounting bracket (Item 3) onto the masking tape. (If upgrading from a SS86HF to a SS86HP, remove the 3
2. Tape the template to the rear edge of the guard and the extended part of the template to the top edge of the guard. Using a felt tip pen, mark all hole positions, remove template. 3. Drill a pilot hole for each hole position. Using the step drill, drill the 4 snorkel mounting hole positions to 16mm. Using the 89mm holesaw, drill the 2 main ...
Location:West Yorkshire. Posted June 2, 2010. I've just taken mine off, remove the five bolts around the air intake and any holding it onto the windscreen pillar, simple job really. as for the vent: if you don't have one to hand, either use some kind of small holed mesh (not pretty but will do the job)
Tape the template to the upper rear corner of the left hand guard. Using a felt tip pen mark the hole positions on the guard, remove template. Drill a 4.5mm pilot hole for each hole position. Using the step drill, drill the 6 snorkel mounting holes to 16mm, drill the two main holes to 70mm with the hole-saw. Mark a straight line top and bottom ...
Prep the snorkel by installing all the studs. Be sure to apply Loctite to all the studs to ensure they stay tight. Step 10: Install the mounting bracket on the snorkel. The put masking tape on the A pillar as shown: Now fit the Snorkel in place and mark the location of the bracket: Remove the bracket from the snorkel and mark the location of ...
Safari's Air Ram system is a pivotal and functional attribute of the snorkel; CAD and lab tested, the Air Ram is designed to simultaneously remove the maximum volume of water from the incoming air stream, while delivering the maximum airflow to your vehicle's engine.
Fitted mine on sunday - the guinea pig. Heres the result - $396 for snorkel + $60 for holesaw + ~ $30 in silicon/drillbits and other parts. Sorry if ive missed something. Some more tips from others on the net - but I didn't do either. "Use rubber grommets in the 3 bolt holes in the front quarter panel to stop vibration it you are keen to use ...
Safari Snorkels move the air intake to a higher position to give you the ability to navigate off road conditions that involve water and dust in the vehicle's path. The Safari Air Ram simultaneously removes the maximum volume of water from the incoming air stream with its unique water separating technology, while efficiently flowing the ...
The Safari snorkel air ram is designed to perform two very important roles. The most obvious is to funnel cool clean air into the snorkel body - but just as importantly, the Safari air ram acts as a highly efficient water separator to remove rain water from the incoming air stream - thus ensuring safe engine operation through even the most ...
Join Max Taylor in this 2014 video as he gets a snorkel installed on his 80 series Landcruiser by Safari Snorkel. The expert installer takes you through the ...
The «Tank Ride» company offers you an exclusive opportunity to take a part of programs with tanks T-80 and T-62M. Service: 1) Riding special tank race. 2) A tank driving and shooting with tanks. At our polygon we offer you a full service. Comfortable conditions of staying. More information.
If you are looking for a removals and storage company in Moscow, Pickfords can offer you flexible, personal service to suit your needs. Our experienced removals teams will help you plan and manage your move to your new home. Get a Quote. CALL US: +7 495 796 93 25.
#Sancharam #Siberia #SafariTV #Santhosh_George_Kulangara #Lal_JoseStay Tuned : https://www.safaritvchannel.com Enjoy & Stay Connected With Us !!---...
last winter in Moscow around Kremlin