2-FOR-1 GA TICKETS WITH OUTSIDE+
Don’t miss Thundercat, Fleet Foxes, and more at the Outside Festival.
GET TICKETS
BEST WEEK EVER
Try out unlimited access with 7 days of Outside+ for free.
Start Your Free Trial
Powered by Outside

Level Up From Scenic Dayhikes to Awe-Inspiring Overnight Adventures
Ready to spend your first night out but don’t know where to start we've got you covered..
Heading out the door? Read this article on the new Outside+ app available now on iOS devices for members! >","name":"in-content-cta","type":"link"}}'>Download the app .
Backpacker wants to be your guide to the wilderness: Join Outside+ today and get access to all of our skills stories, gear reviews, hike reports, and much more.
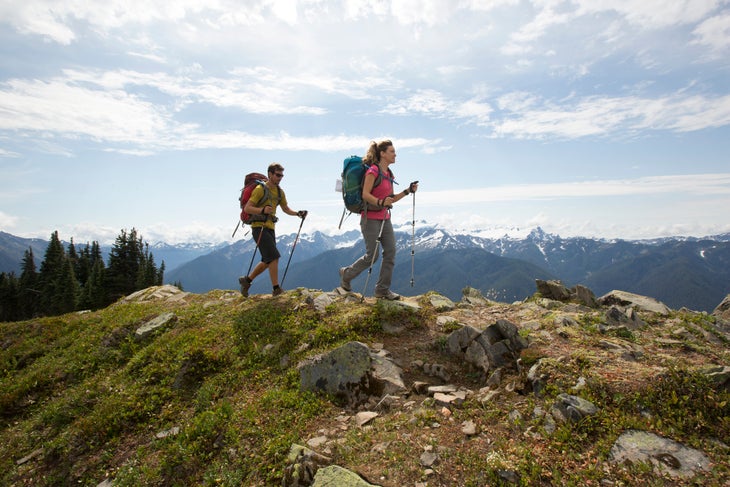
Dayhiking is a marvelous way to experience nature; it’s approachable, a low time commitment, and easy to get into with little gear or experience. If you’re an avid dayhiker, you may be curious about taking the next step into overnight hikes. You should: Backpacking takes all the joys of dayhiking to the next level. You can go further, see more, and test your limits while connecting with yourself and your hiking partners off the grid.
Spending your first night in the backcountry can be intimidating. If you’re nervous, try car camping first—you’ll be able to practice using all of your gear, but can easily bail if you become uncomfortable. Then, level up to a short overnight, starting with just a couple of miles. Backpacking requires more planning than a dayhike, but fear not—here’s everything you need to know to make the leap.
A lot of your dayhiking gear will be useful for backpacking, too: your boots, navigation tools, hiking clothes, first aid kit, and more. You will need additional equipment for sleeping and feeding yourself in the backcountry. But you don’t have to shell out: First-timers should consider renting overnight gear such as a tent, backpack, and sleeping bag before making big purchases, or borrowing from a friend. For hikers who only backpack a few times a year, rented gear can be more economical than owning gear, and doesn’t require storage space. In addition to your regular hiking kit, here’s what you’ll need:
You’ll be carrying more gear than usual, so you need an appropriately sized pack. For one-night trips, look for a 40 to 60 liter pack, and make sure it’s sized for you. If you’re just starting out, prioritize comfort and support over weight. Sales associates at rental or retail stores can help fit a pack to your body. Ready to buy your own? Here’s how to choose the right one.
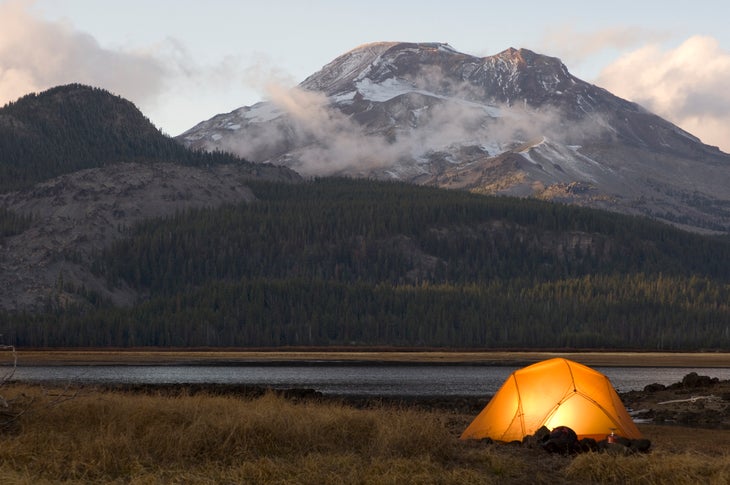
Your shelter is your home away from home when you’re on the trail. Keep in mind that tents made for car camping are often too heavy and bulky to carry on longer backpacking trips: you may be able to press your car camping gear into service for short overnights, but if you’re buying a tent, spend the extra money to get one that’s light enough to carry, preferably no more than 3 lbs. per person. Consider how many people will sleep inside the tent, and what kind of weather you might encounter. Purchasing your first tent can be overwhelming; we broke it down for you .
Sleep System
Your sleeping bag and pad are essential to your comfort and safety while backpacking. No matter what, you won’t have a good time if you don’t have a good night’s sleep. Just like tents, sleeping bags designed for frontcountry use (think the one you used to take to middle school sleepovers) aren’t always suitable for backcountry camping. You’ll need a bag whose temperature rating matches the kind of weather you’ll encounter. Take a 40° summer-weight bag for a 30° night, and you’ll be miserable. Unless you get claustrophobic easily, your best bet is probably a mummy bag—the narrow cut will help trap heat and keep you toasty all night long, and takes up less pack space. There are many other considerations when it comes to choosing a bag: synthetic fill versus down, packability, and more. Read more about choosing the right sleeping bag here .
Your sleeping pad is just as important for keeping you warm and comfortable, but is a lot more straightforward. Inflatable pads are comfortable and packable (look for an insulated model for three-season use); foam pads work great for budget-conscious beginners and those wishing to cut pack weight.
Extra Clothes
In addition to the layers you normally take hiking, you’ll want extra clothing for around camp or in case of an emergency. Pack a set of baselayers to sleep in, extra socks, and warm layers for hanging around camp at night and in the cool morning. Unless you’re in a hot climate, hat and gloves are never a bad idea, even in summer. On a dayhike, you may be able to get away with mild discomfort, but on an overnight, it’s imperative to be prepared for any weather scenario you may encounter.
Stove and Food
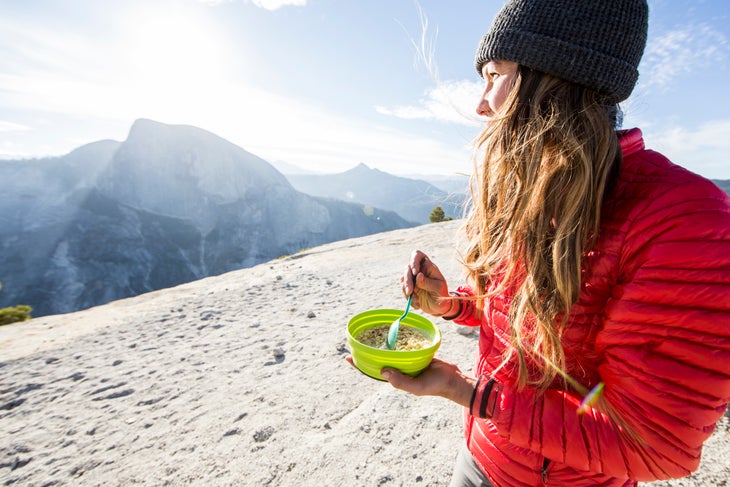
Nothing satisfies like a hot meal at the end of a long day of hiking. You have a couple options here: Freeze-dried backpacking meals are lightweight and only require boiling water to prepare. Alternatively, try cheffing it up . For cooking, a canister stove is your best, cheapest bet: You can grab a decent, direct-from-manufacturer model for less than $30 on Amazon. Practice operating your stove at home before bringing it into the backcountry, and make sure you have plenty of fuel.
The number of calories you need to consume each day of your trip depends on a number of factors: pack weight, bodyweight, altitude, how strenuous the hiking is, temperature and more. For a hard day of hiking, use this as a general rule of thumb: 25 to 30 calories per pound of bodyweight. It’s also never a bad idea to pack extra food for an overnight trip. Don’t forget the spork!
Water Treatment
If you’re experienced with long dayhikes in hot weather, you may already have your water filtration system dialed. Instead of chemical treatments or UV light, most beginner backpackers will be best off with a lightweight filter like a Sawyer Squeeze or Katadyn BeFree. Any of these can take care of bacteria and other common backcountry contaminants; purifiers, which also filter out viruses and heavy metals, will be overkill for most hikers in North America. Need to learn more? Read up on what type of water purification is right for you .
Additional Gear
A headlamp, trowel and TP or WAG bags, bear canister or bear bag, toiletries, and a repair kit should also be in your overnight kit. Make sure you always carry the ten essentials on a backpacking trip. Some additional items might help you enjoy your time in the backcountry. Consider packing a camping pillow, book or journal, deck of cards, camp chair, and comfy shoes to wear around camp.
Now that you’ve assembled all of your gear, it’s time to get it all on your back. Packing your backpack might seem straightforward, but a proper pack job can make the difference between a comfortable hike and a sore back, misplaced gear, and a general bad time. When packing your backpack, think about keeping your essential gear, like your sleeping bag, dry; filling dead space; prioritizing balance and access to items you’ll need while hiking; and weight distribution. Read our comprehensive guide to packing your bag here.
Trip Planning
For your first overnight, choose an easy route with low mileage and manageable elevation gain. Remember, you’ll hike slower with a full pack than you might on a regular dayhike. Apps like Gaia GPS are useful for finding route suggestions, trail info, and maps. Scope out camping spots ahead of time by talking to friends or rangers, reading online, or making a campsite reservation. Check before setting out that camping is permitted in the area you’re going to, and secure any necessary permits through the appropriate land management office.
Always leave a copy of your itinerary with a friend or family member at home, along with your expected return time. Let that person know when they should call for help if you haven’t come home.
On The Trail
Pace yourself.
When you’re carrying your entire home, wardrobe, and pantry on your back, you’re going to get tired. Take lots of breaks, and remember to refuel with plenty of water and snacks (200 calories per hour is a good baseline).
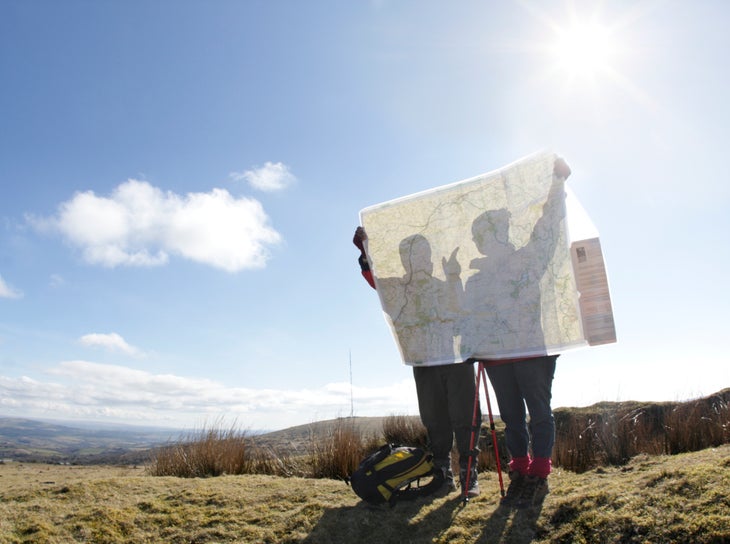
You may have been able to get away with minimal navigation on well-marked, shorter dayhikes, but staying on route is all the more important the further you hike. Keep in mind that as you progress deeper in to the backcountry, it will take longer for help to reach you in case of an emergency. Brush up on your map and compass and GPS skills before setting out, and carry a map of the area where you’ll be hiking. For your first overnight, it’s a good idea to choose a well-established trail where other hikers may be present.
Finding Water
You’ll need about a gallon of water per person per day, more in extremely hot weather. It’s unrealistic to assume you’ll carry all of the water you need for an overnight or multiday trip. Most backpackers carry one to three liters and refill throughout the day. For beginners, picking a trail that goes alongside a river or encounters lakes makes refilling water a cinch. In areas where water is more scarce, scope out sources on a map beforehand, and check in with local rangers or guiding services to ensure they’re currently available (some water sources are seasonal). It’s a good idea to choose a campsite with easy access to water.
Campsite Selection
As noted before, scoping out campsites ahead of time helps make for a stress-free experience your first time on the trail. If you’re looking out for campsites as you hike, keep the following in mind: An ideal campsite is sheltered from the wind and elements. Look for a stand of trees or a flat spot in the lee of a hill or some boulders. Easy access to water is useful, but make sure to pitch your tent at least 200 feet from the shore. Good campsites are well off the trail, both for your own privacy and for the experience of other hikers. Look for a flat spot where water won’t pool in case of a rainstorm. Before pitching your tent, always look up for dead branches that could crash down on your shelter during the night.
It’s always best to camp in impacted campsites—that is, where someone else has camped before. Look out for packed dirt, areas where the vegetation is visibly cleared, and established fire rings. Only camp where permitted, and avoid trampling plants (see Leave No Trace, below).
Backcountry Bathroom
If you’re spending a night or two outdoors, you’re gonna have to go at some point. With a little practice, pooping in the woods can be quite pleasant. Read up on the area you’re visiting—some wilderness zones require you to pack out all waste in WAG bags , while others allow you to bury it in a cathole . If you’re using toilet paper, you’ll either need to bury it or carry it out, depending on how dry the climate is; alternatively, leave it at home and use leaves (check to make sure they’re not poison ivy), smooth sticks, rocks, or snowballs instead.
Always go to the bathroom at least 200 feet from water sources and away from the trail. Many backpackers carry a pee cloth to stay clean on the trail.
Food Storage
When it’s time to rest your head, you’ll want to protect your food from hungry critters who might sniff out your extra trail mix. Some areas, like Yellowstone National Park, require you to store food overnight in bear canisters . In others, where trees are abundant, you can hang your food . It’s a good idea to practice this skill ahead of time and determine which food storage method is best for you and your destination.
Leave No Trace
When traveling in the backcountry, it’s important to minimize impact on the land. Read up on the 7 principles of Leave No Trace and make a plan for packing out trash, reducing your footprint, and being a good steward of the trail.
Remember that a lot of learning will occur on the trail. The more you get out, the more comfortable you’ll become with your overnight gear and systems, your individual backpacking style, and enjoying life in the backcountry. You’re likely to make some mistakes on your first overnight; consider your own safety, always have a bailout plan, and remember that it only gets more fun with practice. There’s nothing more satisfying than becoming self-sufficient in the outdoors for extended periods of time.
Want to learn more about getting into backpacking? Sign up for our Backpacking 101 online course, where you’ll learn everything from navigation to backcountry cooking.
Popular on Backpacker
>", "path": "https://www.backpacker.com/stories/people/profiles/your-sober-pal-is-fighting-addiction-with-hiking-adventures/", "listing_type": "recirc", "location": "list", "title": "‘your sober pal’ is fighting addiction with hiking adventures"}}'> ‘your sober pal’ is fighting addiction with hiking adventures, >", "path": "https://www.backpacker.com/stories/thru-hikes/thru-hikers/semester-a-trail-appalachian-trail-college-hikers/", "listing_type": "recirc", "location": "list", "title": "these students are hiking the appalachian trail—for college credit"}}'> these students are hiking the appalachian trail—for college credit, >", "path": "https://www.backpacker.com/gear/apparel/womens-apparel-reviews/best-womens-hiking-shirts/", "listing_type": "recirc", "location": "list", "title": "the best women’s hiking shirts for sweat, sun, and wind"}}'> the best women’s hiking shirts for sweat, sun, and wind, >", "path": "https://www.backpacker.com/gear/apparel/womens-apparel-reviews/best-womens-hiking-pants-leggings-shorts/", "listing_type": "recirc", "location": "list", "title": "the best women’s hiking pants for fit, stretch, and durability"}}'> the best women’s hiking pants for fit, stretch, and durability, navigation – desert, related content from the outside network, what’s it like to go on a 200-person hike better than you think., how to pack for backcountry skiing, the original yosemite firefall, hiker charges mountain lion.

Love this post? Give it a share!
FIRST BACKPACKING TRIP IN 2024? HERE’S THE ULTIMATE BEGINNERS GUIDE & CHECKLIST!

HEADING OUT ON YOUR FIRST BACKPACKING TRIP IN 2024?
Check out our ultimate beginners guide below, perfect for those heading out on their first backpacking trip in 2024! Includes: The best backpack type and size, must-have backpacking accessories, Top 10 tips and best travel destinations and much more!
THE BEST BACKPACK FOR BEGINNERS
From our own personal experience, the best backpack brand is Osprey. This worldwide brand are an expert in their field, providing a huge range of backpack types, sizes and design configurations for people to choose their perfect backpack.
We personally use the Osprey Farpoint 70L Backpack with a detachable 13L daypack, which we both absolutely love and couldn’t recommend enough.
ALL BACKPACK SIZES EXPLAINED
Bizarrely, backpack sizes are measured by their volume capacity, listed in litres. For example, you will see backpack sizes listed as 30L, 50L, 70L.
Sometimes the description may not even show the ‘L’, just the number. But what does this mean for you? Here is a rough backpack size guide to follow:
Small backpacks (6-10 Litres) : Ideal for days out. Daypacks (10-30 Litres) : Ideal for a day walks or hiking trails Medium backpacks (30-50 Litres) : Overnight camping & hikes. Large backpacks (50+ Litres) : Long-term travelling.
BEST BACKPACK SIZE FOR TRAVELLING
If you are planning on doing a few months of continuous travelling, we would recommend investing in a larger backpack size, ideally between 50 to 70 litres.
We would not recommend a backpack that is more than 70 litres. While we fully understand it is tempting to pack everything you can including the kitchen sink “just in case you need it”, when you’re travelling, you realise you do not need much at all.
The key thing to remember is, you will be carrying this backpack around the entire time. You don’t want to feel like a carthorse with a broken back due to your panic packing.
BEST BACKPACK TYPE FOR TRAVELLING
The most important thing is to buy the type of backpack that opens from the side. We cannot stress this enough!
During our travels, we have seen first-hand poor travellers with backpacks that open only from the top, desperately rummaging to the bottom of their bags to find something super small. It really was the definition of looking for a needle in a haystack.
Avoid the frustration of pulling all of your personal contents out in public every time you need to grab one thing, by buying a side opening backpack.
Luckily, our recommended Osprey Farpoint 70L Backpack (that we personally own) is not only the perfect size at 70L, it also opens from the side! See below for further key details:

OSPREY FARPOINT 70L BACKPACK

BENEFITS OF THIS OSPREY FARPOINT 70L BACKPACK :
- It opens from the side.
- It comes with an additional 13L detachable daypack, which is ideal to use for day trips out.
- Multiple straps and harnessing points to help distribute the weight evenly on your back. These straps can be zipped away by a protection flap at the back when not in use.
- Deceivingly spacious inside. Lots of different internal compartments for organising.
- Very hardwearing – ours have been through the ringer and still have no tearing or marks on them!
Want to decorate your new backpack with your new travel memories? Check out how to put a patch on a backpack !

THE BEST BACKPACK ACCESSORIES
Meshed packing cubes.
Once you own packing cubes, you will never go back! These handy little luggage organisers will make packing, unpacking and your life so much more organised and easier when travelling.

BENEFITS OF PACKING CUBES :
- The best for housing all those small items that usually go all over the place like electronics and chargers, toiletries, underwear and socks!
- They’re incredibly light, but made with very durable material with a tough zip. No ripping!
- Breathable mesh on the front for freshness and visibility.
- Come in a range of sizes.
Click for product link to packing cubes ! 🧦🩲
A MEDICAL FIRST AID KIT
One thing you must take travelling is a medical first aid kit. With all the epic destinations and activities you will experience, this also opens up possibility for bad stomachs, potential dehydration, sunburn and minor injuries. Have your medical bag packed for all eventualities.
We highly recommend to pre-pack the basics for all key eventualities that you might encounter. Not only will it be cheaper to buy your medication back home, but it also gives you peace of mind that you know exactly what you are taking.
A few ideas of what to consider are below:

Injuries – Plasters and small bandages. – Small scissors / toenail scissors. – Antiseptic creams. – Cotton wool pads. – Muscle pain relief gels.

Insect bites – Antihistamine creams and tablets. – Allergy tablets for allergic reactions. – Deet free mosquito repellent (i.e. Incognito ). – Insect bite anti itch gel.

Feeling poorly – Diarrhoea relief tables. – Or, mild laxatives for constipation relief. – Headache tablets. – Vitamins (especially Vitamin C) in case of lowered immune system. – Throat lozenges for sore throats. – Decongestant nasal sprays / creams. – Pain and fever medicine. – Vapour rub – One for the girls – Cystitis relief tablets and creams. – Bonjela for mouth ulcer pain relief.

Sunburns – Aloe-based after sun to apply to burns. – Waterproof suncream (with high UVA and UVB protection) to prevent burns. Ideally 30+.

BENEFITS OF THIS 2 PCS FIRST AID MEDICAL BAG :
- Stylish, compact shape.
- Waterproof exterior.
- Comes in a variety of different colours to suit your aesthetic.
- Built in compartments for organisation.
- Very affordable (two items for under £10)!
Click for product link to this 2 Pcs First Aid Medical Bag! 🩹💊
HIKING BOOT BAG
Undoubtedly, the most annoying thing to pack up every time are your bulky hiking boots. Delighting in getting down and dirty travelling adventures will leave your boots filthy!
To avoid having to make them squeaky clean every time to not ruin the innards of your backpack and all your other belongings, a boots bag is perfect to keep them separate.
Likewise, if you are struggling for space in your backpack, simply carry your boots separately with the strong webbing carry handle whilst moving from place to place!

BENEFITS OF A HIKING BOOTS BAG :
- Waterproof design made from tough 600D polyester.
- Comes in multiple colour ways!
- Reinforced base with rubber stud feet.
- Strong webbing carry handle.
- Dimensions: 33 x 21 x 20 cm.
Click for product link to this hiking boots bag! 🥾
MICROFIBRE TOWEL
Two words that’ll change your travel life – Microfibre towels! The second most annoying thing to pack everyday are your towels.
Towels are usual a bulky item that you’ll constantly be worrying about getting dry to not stink out the rest of your clothes. This where microfibre towels come in, they really are a lifesaver.

BENEFITS OF MICROFIBRE TOWELS :
- Insanely thin and lightweight, making them a dream to pack in your backpack.
- The microfibre material means this towel dries out incredibly quickly – 3x faster than a regular towel!
- Brace yourself – sand does not stick to these towels! With just a shake down, your towel (and the rest of your backpack) will remain sand free!
- Can have multifunctional uses, from beach towels to a bath towel.
- Comes in a range of bold designs!
Click for product link to Nomandia microfibre towels! 🧖

UNDERCOVER MONEY BELT
Another incredibly helpful accessory to buy for your first backpacking trip is a flat undercover money belt.
Not only will it give you immediate access to items without taking off your daypack, the flat nature of the product means you can wear it underneath your clothes tight to your body.
This means you can easily keep any valuables i.e. phone, cash, passport close to you at all times without being on display.

BENEFITS OF AN UNDERCOVER MONEY BELT :
- Thin and lightweight, easy to conceal against your skin underneath your clothing.
- RFID Blocking technology.
- Multiple pockets inside to compartmentalise phone, loose money, credit cards, etc.
- Premium and durable material.
Click for product link to undercover money belt! 🥋
TOOTHBRUSH SILICONE CAPS
Who knew something so small could make such a difference? A few toothbrush silicone caps are a must-have to protect your toothbrush from picking up germs or getting bits stuck to it from your backpack.
We quite like these breathable silicone caps, nice colours and super affordable :

BENEFITS OF A TOOTHBRUSH SILICONE CAP :
- Breathable silicone caps, keeps toothbrush fresh.
- Comes in a range on colour ways.
- Super affordable (just over £3 for a pack of 5).
Click for product link to toothbrush silicone caps! 🪥
PORTABLE BATTERY CHARGER
Constantly using your phone for capturing photos, videos and using offline maps (for example), you will be running your phone battery down very quickly.

Don’t caught out and make sure you always carry a fully charged battery-pack charger in case of emergencies!
Click for product link to battery power banks! 🔋📲
10 TIPS FOR YOUR FIRST BACKPACKING TRIP
Tip 1: pack your backpack, then take out half of it.
This is the most common mistake most people make on their first backpacking trip (including us)!
No matter how many times people tell you ‘don’t pack too much’, that inner nagging voice – the one telling you to fill every spare crevice until your backpack is bulging – always seems to win!
After you’ve settled into travelling, you will get in this wonderful non-materialistic mindset where you don’t really care what you wear, and you’ll find you will wear 2 or 3 comfortable outfits over and over.
Not convinced? Think of it like this:
- You can always wash your clothes out there! Most hostels or accommodations have on-site washing and drying facilities for a small fee!
- Use the local laundrettes! Your clothes will come back smelling divine, all folded and ironed for a very small fee, and you will be supporting local businesses! Or, if you’re on a tight budget, you can always wash your own clothes in the bath / sink, especially small items, such as undies and socks.

- The less you pack, the less your back suffers unnecessarily and the more room you’ll have for epic souvenirs!
- Unless you’re going off the face of the Earth, you can always buy clothes or most essential items when you are out there.

TIP 2: PACK CORRECTLY FOR THE CLIMATE
Make sure you do your quick research on the expected temperatures across all the places you intend to visit. If you are heading to toasty and humid South East Asia, a thick coat and scarf are going to be a waste of time!
It’s also worth finding out if your destination has a ‘rainy season’ to make sure you are fully prepared for all weathers (i.e. a lightweight travel raincoat ).
We always recommend bringing just one spare jumper or fleece if you encounter a cold night!

TIP 3: INVEST IN GOOD TRAVEL INSURANCE
Travel insurance is one thing you should never go cheap on when you go travelling. Make sure you invest in a premium package that covers you for all eventualities, including sickness and major injury.
It’s incredibly likely you will not need it, but if you did, you’ll have the peace of mind you’ll be safely insured and correctly covered.
Make sure you specify the correct dates of travel, even adding a few days extra from start to finish in case of airport delays etc.
Likewise, if you decide to extend your backpacking trip, be sure to extend your insurance to match. It would be sod’s law that something will happen when you are not insured.
TIP 4: TRY NOT TO HAVE A RIGID TRAVEL ITINERARY
This one I am very guilty of, who doesn’t love a good itinerary? We would recommend of course researching top things to do in certain areas and book some trips in advance to avoid disappointment (i.e. Uluru tours in the Outback for example).
However, we would leave the rest of your trip relatively loose and see what spontaneous events each day brings!

TIP 5: CREDIT CARD WITH NO INTERNATIONAL CHARGES
This one is also incredibly important. Travelling for a long period of time to multiple places, it’s going to become problematic having wads of different currencies stuffed in your backpack.
Of course, we would recommend having a small amount of each currency in cash for emergencies, or for more remote areas where an ATM isn’t easily accessible (i.e. remote islands). Collect this money before you travel, as international banks usually charge you every time you withdraw money from a bank!
You will find most “non-remote” places however should mostly accept card anywhere. When we visited Australia and New Zealand for example, we had no cash on us whatsoever! We always used our card.
It is important to sign up for a credit card that is specifically set up to have no international travel fees. This privilege however does usually come with a price, a much higher interest rate if you were to not pay the required balance back on time.
The key takeaway is as long as you are sensible, stick within your budget and pay the full monthly balance required back in time via online banking – it is a great and simple tool to have!
TIP 6: SAVE SO MUCH MONEY BY COOKING YOUR OWN FOOD
One way to save an incredible amount of money on your first backpacking trip (particularly when travelling to more expensive countries such as Australia and New Zealand) is by buying your own food from local supermarkets.
Most hostels have shared kitchen facilities to use for free, likewise you could treat yourself to an accommodation with a private kitchenette, or at least a kettle and microwave.
This means, when you do go out for dinner it will be a special occasion, and you won’t be resentful for the amount of money you would have otherwise wasted!
This is less applicable to places like South East Asia or Indonesia (i.e. Bali for example), where to eat out is actually very cheap and by doing so, you will be helping out local businesses.

TIP 7: AVOID TAP WATER & ICE IN LESS DEVELOPED COUNTRIES
Travelling to less developed countries (again, like Indonesia or South East Asia) comes with a slight cost of untreated tap water.
Drinking this tap water, or equally consuming frozen ice made from tap water could make you incredibly sick and has the potential to ruin a good chunk of your first backpacking trip.
To avoid this as much as you can we suggest:
- Always have a bottle of water on you, ideally a re-usable one. It is important you do keep fully hydrated day to day, and having a bottle on you allows you to fill up with treated drinking water.
- Brush your teeth using bottled drinking water. No really, don’t even use the water to brush your teeth, as you will still be putting yourself at risk.
- Try not to swallow the water when showering. Of course this water is fine to shower in (it’s not acid!) but just try not to swallow any, for the same reasons above.
- Do not eat fruit that have been washed in tap water. We did accidentally in Bali and well, the few days that ensued after we still try to fully erase from our memory! Your safest bet is eating fruit with a protective skin (i.e. bananas, oranges).
This tip is less relevant in developed countries such as Australia and New Zealand, whose water mains are predominantly treated and safe to drink, like in the UK.
TIP 8: OCCASIONALLY TREAT YOURSELF TO NICE ACCOMMODATION
Though hostels are great for budgeting on your first time backpacking, be sure to book a nicer hotel room every 4 to 5 days if you can.
It doesn’t have to be The Ritz by any means, but you will be so grateful for the privacy and added bit of comfort, giving you a night or so to rest properly. After all, always being on the go can also be very tiring!
After all, while of course being budget conscious is important, you want to enjoy every aspect of your first backpacking trip!

TIP 9: STAY VIGILANT AND KEEP PERSONAL SAFETY IN MIND
Backpacking for the first time can be a thrilling and enlightening experience, though if you are not careful, can also be dangerous.
To avoid putting yourself in these types of situations, try not to excessively drink or make yourself vulnerable, especially if you are a solo traveller or not travelling with trusted friends.
Likewise, always keep all your super valuable items close to you and concealed. This is where our previously mentioned undercover money belt comes in handy!
TIP 10: PICK A TRAVELLER FRIENDLY DESTINATION
If this is your first backpacking trip, it is best to start with a country that is very accommodating to backpackers.
This will save you from coming face to face with an overwhelmingly unaccommodating culture shock.
Destination ideas great for first time backpackers:
- New Zealand
- Bali, Indonesia
- Gili Islands, Indonesia
GUIDED GROUP TOURS FOR FIRST TIME BACKPACKERS
Heading out solo and feeling nervous about your first backpacking trip? If you are finding the idea of doing it alone daunting, you don’t have to!
There is the option to join guided backpacking trips for beginners, where you will experience an amazing travel itinerary with a group of other travellers with an experienced local guide. This is a great way to experience a country with no stress and easily meet new friends!
From our own personal experience, the tour company we highly recommend is TruTravels .
We went on their 9 Day “Komodo Island Hopping” tour during our first backpacking trip, and had a brilliant time with them!
TruTravels offer tours across South East Asia, Europe, Latin America and now Oceania to people of all ages, though the majority are a younger crowd between 18 to mid 30’s, with a good mix of solo travellers, groups of friends and couples.
Some of their best tours that we think you would love are:

CONCLUSION: YOUR FIRST BACKPACKING TRIP IN 2024
In conclusion, if you are heading out on your first backpacking trip abroad this year, this of course might feel slightly alien to you or out of your comfort zone. We know we felt the same before we embarked on our backpacking trip!
However, believe us when we say your first time backpacking is a freeing and revolutionary experience. You truly realise that you really don’t need half of what you think you do in life, and whatever is in your backpack is all you need!
Again, we highly recommend our personally used Osprey Farpoint 70L Backpack (with detachable daypack), as this is all you really need. They really are great and reliable backpacks.
Whether you are heading out by yourself, with friends or as a couple, an easier backpacker friendly destination is recommend at the very start just to get your confidence up!
A guided group tour is a brilliant way to warm yourself up to the backpacking life, complete with that added security and the chance to meet lots of new backpacking friends who are in the same boat. asyou!
We truly hope you have the most incredible time backpacking for the first time. We love to hear your travel stories, so if this post has been helpful in any way, do get it contact and let us know. We would love to hear from you!

This blog post was written by… Jordie Flain! Founder of TheFlainsTravel.com, Travel Itinerary Creator & Wildlife Enthusiast
LOOKING TO BOOK YOUR NEXT TRIP? CHECK OUT OUR FAVOURITE SUPPLIERS BELOW:
Share this:
- Click to email a link to a friend (Opens in new window)
- Click to share on Facebook (Opens in new window)
- Click to share on WhatsApp (Opens in new window)
- Click to share on Pinterest (Opens in new window)
- Click to share on LinkedIn (Opens in new window)
- Click to share on X (Opens in new window)
- Click to share on Twitter (Opens in new window)

Jordie Flain is the owner and author of The Flains Travel, a travel blog with emphasis on ethical wildlife experiences, "seen to be believed" natural beauty and "real magic" phenomena, such as the northern lights. Jordie crafts every itinerary and post to perfection for travellers to follow and get the very most out of their time in a destination.
Backpacking for Beginners: A Detailed Starter’s Guide
Published by sarah vaughan on april 11, 2023 april 11, 2023.
In this guide to backpacking for beginners, we’ve outlined everything we wish we knew when we started our backpacking careers. Covering everything from planning your first trip, to necessary gear, and how to go to the bathroom, we’ve compiled all the information you need to start backpacking as a beginner!

Two Outliers may contain affiliate links – we only recommend products we personally use and love. As an Amazon Associate I earn from qualifying purchases at no extra cost to you. For more information, see our privacy policy.
backpacking for beginners
You’ve probably heard the term “backpacking” thrown around in various contexts and never quite understood what it really entails. The reality is that it means a few different things and they’re kind of similar, hence why the term can be confusing.
In the outdoor world, backpacking refers to any multi-day hike in which you load up all your gear into a backpack and spend the night camping in the backcountry. You may also hear the term backcountry camping, which generally means the same thing.
This is different from day hiking, which is when you leave and return for a hike on the same day. Many people who love to day hike will progress to backpacking, as it allows you to spend more time on the trail, explore areas deeper in the wilderness, and certainly pushes you to the next level of adventure.

Why should you go backpacking?
If the idea of lugging a heavy bag around for miles and adventuring far from civilization is giving you some hesitation, that’s totally understandable! When we were backpacking beginners, we definitely felt the same way. It’s not easy and honestly, it’s a little scary!
But trust us, if you enjoy day hiking, then you’ll love backpacking. There is nothing better than spending a warm afternoon lounging by an alpine lake, deep in the wilderness or watching the sunset over a mountain peak as you enjoy dinner, with nothing but the sound of nature surrounding you.
If you want to truly experience nature, away from other people and the constant distractions of everyday life, then you’ll love backpacking.
We love backpacking because it’s the perfect combination of physical challenge, outdoor adventure, natural beauty, and solitude. We love being alone deep in the wilderness, where you can truly enjoy the beauty of the world.
Only backpacking can give this feeling of deep connection!
Why you should trust us
So you’ve decided to take the leap and learn how to get into backpacking! Why should you trust us to help you!?
First, we’re avid backpackers! We travel all over the US and spend every summer in different locations, with the primary goal of maximizing our ability to backpack and tackle outdoor adventures.
We’ve backpacked everywhere from the desert of Joshua Tree to canyon country in Utah to the rocky mountains of Wyoming to the Andes mountains in Peru. We’ve spent countless nights sleeping under the stars in the backcountry in all types of conditions and environments.
And second, we didn’t grow up backpacking – everything we know, we’ve learned ourselves in the last few years. We were beginners to backpacking just a few years ago so we know what it’s like!
So keep on reading if you want to learn everything you need to begin your backpacking career!

You may also like
Planning a beginners backpacking trip.
Because backpacking trips are multi-day adventures and most backcountry campsites require advance reservations, you will need to spend some time planning out your backpacking trips, especially as beginners.
Unlike most day hikes, you typically can’t just show up at a trailhead the day you’d like to start your backpacking trip and head out.
In this section, we’ve outlined each of the pre-trip planning activities you should do before embarking on your first backpacking trip.
- Pick a beginner friendly backpacking trail
- Plan your itinerary
- Secure a backcountry permit
- Invest in and test out your backpacking gear
- Pick out and pack your clothes
- Plan your backpacking meals
- Check local rules
- Check the weather
- Tell someone your plans
- Hit the trail!

1. pick a beginner friendly backpacking trail
This is probably obvious but the first thing you need to do when planning your first backpacking trip is to choose a beginner friendly trail! It can be fun to look at sweet pictures of different trails but it can also be overwhelming – there are so many great trails!
But here are a few tips for choosing a backpacking trail:
- Distance | Remember that you’ll be carrying a heavy bag, so do not expect to move at the same speed as you typically do when day hiking. For reference, we like to tackle about 8-10 miles in a typical day backpacking. Anything above 14 miles really pushes our limits.
- Daylight | Remember that daylight can be a limiting factor. You do not want to be trying to find your campsite, setting up your tent, and making dinner after dark. Not only does darkness make everything more complicated, you’ll also miss our favorite part of backpacking – enjoying some late afternoon/early evening relaxation!
- Elevation | Similar to our note about trail distance above, do not expect to be able to tackle the same amount of elevation gain at your normal day hiking pace. That bag will feel extra heavy and elevation gain is a real time and energy killer. No your limits before you choose a trail!

How to find the right trail
You may now be asking, well, where can I find good backpacking trails to choose from? Anywhere you’d find day hiking trails! The internet is littered with endless information about the best backpacking trails wherever you’d like to backpack.
In places like national parks, they typically have a section of their website dedicated to backcountry camping, where they have more information about backpacking trails and camping options in the backcountry.
Below are a few beginner friendly backpacking trips that we love!
- Panamint Dunes in Death Valley | 7 miles roundtrip, 860 feet elevation gain
- Sawtooth Lake in Idaho | 10 miles roundtrip, 1900 feet elevation gain
- Cracker Lake in Glacier National Park | 12 miles, 1650 feet elevation
- Coyote Gulch in Grand Staircase Escalante | 6 – 27 miles (depending on the trailhead and route)

2. plan your Itinerary
Okay, so you’ve scoured the internet and have the perfect trail picked out for your first backpacking trip. Next, you need to finalize your itinerary. How many miles will you hike each day and where will you camp?
If the trail you’ve chosen is a simple one-night out and back hike, congratulations! This step is done.
If you’re tackling a multi-night trip or your trail has multiple campsite options, you’ve got a bit more work to do! Itinerary planning can end up being one of the more logistically challenging parts of planning a backpacking trip. But it’s also fun and exciting!
In most places, backcountry camping is only permitted in designated areas or specific spots. You will need to review the available information for your desired trail to figure out where you can camp along that trail, and then map out hiking distances in between.
For instance, let’s say you’ve found a 16-mile loop that you want to tackle as a two-day, one-night trip. However, it’s unlikely that you’ll be able to camp right in the middle of the 16 miles; maybe there is one site that’s 5 miles in and one that’s 12 miles in.
Maybe one site is right on a picturesque lake and permits are in high demand, whereas the other is not as pretty. You’ll need to figure these things out before choosing a site!
Tips for planning an itinerary
If planning an itinerary feels a little overwhelming, we get it! This is definitely one of the hardest parts of planning your backpacking trip as a beginner. Here are a few tips to help you plan:
- Purchase a paper map . This may sound old-school and outdated, but trust us, spreading out a big paper map on the floor makes itinerary planning much easier (and more fun)!.
- Read blogs. In a lot of cases, a blogger will have already done the itinerary planning for you! You can often find information about common backpacking itineraries for your chosen trail on blogs.
- Visit the park website. If your chosen hike is located in a national park or national forest, you can often find useful resources on their websites. Or better yet, call and speak with a ranger about your trip options!

3. secure a backcountry Permit
At this point, you have the perfect backpacking trip planned. You have your trail picked out and you’ve mapped out your perfect itinerary. Now, the hard part…getting a permit.
In most backpacking destinations across the United States, you will need to get a permit for your backpacking campsite.
At first, it may feel a bit frustrating to hear that your ability to do the trip you’ve chosen will be left to some random lottery or how quickly you can add a reservation to your cart, but it’s important for a few reasons:
- First, permits help protect the fragile backcountry environment and preserve it for future generations. By limiting the number of visitors to any given area, permits are an important means to reduce our impact on the environmental.
- Second, permitted backcountry campsites can help keep backpackers safe in certain areas by ensuring a campsite is available for use. Imagine you’ve been hiking all day through the desert or up the side of a mountain and just as you turn the final switchback you see that your planned campsite is already taken. Now, you’d need to scramble to find somewhere else to camp. With a permit, there’s no risk that you won’t be able to find a spot to camp before sundown.
- And finally, permits help the park keep track of whose in the backcountry. When you get a permit, you’ll need to provide your personal information and details about your trip. This allows the park to know where you’ll be and be able to look for you should something go wrong.
So, while permits may feel annoying, they are very important (and actually, kind of nice).
How to get a permit
That being said, it is pretty frustrating that each park has its own rules for applying for backpacking permits.
In some parks, you need to enter a lottery to get a permit. In other parks, permit reservations will open up at specific times each year. And in some parks, you can’t even reserve permits in advance – you just need to fill out a form at a ranger station.
No matter the reservation method, permits for many popular backpacking trails in the US are highly competitive so make sure you do your research well in advance.

5. Purchase & Test out your backpacking Gear
There is a ton of backpacking gear out there, and as beginners, it can be incredibly overwhelming to sort through what gear you really need and what you don’t!
There are endless different options and brands available for each item, making it even more confusing and overwhelming to know what you really need.
Luckily, we’re already written extensively about our favorite backpacking gear, complete with a downloadable spreadsheet for you to easily make sure you have all the gear you need!

Our Essential Backpacking Gear List & Spreadsheet
Our biggest piece of advice for picking out your backpacking gear as a beginner is to make sure you t est everything out before hitting the trail! You don’t want your first time using anything to be 10 miles into the backcountry. Set up your tent, blow up your sleeping pad, practice using your water filter , test out your Jetboil stove , and figure out how to use your GPS device .
Additionally, it’s a good idea to test out packing your backpack in advance. You’ll want to check that everything fits in your bag and make sure your pack is a reasonable weight. A good rule of thumb is that your pack shouldn’t exceed 20% of your body weight.

6. pick out and pack your Clothes
Luckily, if you’re already an avid hiker, you likely don’t need to purchase many additional clothing items to round out your backpacking closet.
Much like hiking, the key things to consider when purchasing clothes for backpacking are layers and versatility. Even if you start your hike with bluebird skies and warm temperatures, not only can the weather change quickly the farther you go into the backcountry, but it’s also likely that nighttime temps will drop significantly.
Make sure you have plenty of layers to keep you warm no matter where and when you are backpacking (except maybe if you’re in the desert during the summer) and be prepared for any type of weather. Don’t underestimate the need for sturdy, water-proof gear!
Perhaps the only other consideration to be aware of related to backpacking gear is weight and packability. Remember that you’ll be carrying all the clothes you need in your bag, along with all your other gear.
Meaning, that items that are lightweight and can be packed down small are more valuable. Don’t plan on bringing that large ski jacket or bulky sweatpants!

Best Hiking Clothes for Women
7. plan out your meals.
One of the most common questions we get about backpacking for beginners is what to eat. To the surprise of many, you’ll actually be able to eat quite well while on the trail if you plan it right!
As you surely know, breakfast is the most important meal of the day and this feels doubly true when you’re in the backcountry. You don’t want to get your day started on the wrong foot!
In terms of backpacking breakfasts, our go-to meal is oatmeal , usually with a peanut butter packet to add some extra calories and protein. We love oatmeal because the individual packets are lightweight, pack down small, and it’s super easy to make in the backcountry. Even better, you can eat it right out of its packet for easy cleanup!
Waking up on a chilly morning, bundled up in our sleeping bags, enjoying some warm oatmeal is a perfect way to start the day!

When we’re backpacking, we typically don’t stop and eat a big lunch. Usually, we prefer to just snack throughout the day while we’re hiking so we can keep moving and don’t need to unpack a bunch of equipment from our bags.
But, when we do bring something for lunch on a backpacking trip, our go-to is a chicken bacon ranch wrap, which consists of a packet of chicken , tortilla, a little powdered ranch mix, and if we’re feeling fancy, some bacon to sprinkle on top.
Our backcountry chicken bacon ranch wrap is perfect for backpacking because everything is pre-packaged, lightweight, and will last in any conditions.

12 Best Day Hiking Lunch Ideas
Alright, let’s cut right to the chase – backpacking dinners are way better than you’d think!
There are many different brands that make tons of tasty meals such as chicken pad thai, chicken alfredo pasta, yellow curry, and lasagna with meat sauce. There is a meal for every palate!
If you’re a bit skeptical about the quality of these meals, we’ll put it this way: no, you won’t be eating 5-star, perfectly cooked lasagna with meat sauce on the side of a mountain, but it’s definitely better than you think!

Besides the insane variety and high-quality of backpacking meals, we also love them for their simplicity and packability. Just boil water, pour it into the self-contained cooking bag, let it sit for the prescribed amount of time, mix it all together, and enjoy!
Importantly, be sure to check how many calories or servings are in each packet. Many brands will have two meals in each packet, which takes the convenience to another level. But even if the package says its two servings, make sure you’ll actually have enough food for two people.
For example, many brands will say that each pouch has two servings, but if each serving is only 400 calories, that’s not enough to sustain you in the backcountry. Dinner is usually our biggest meal of the day so we like to squeeze in as many calories as possible. We usually look for something that’s at least 600 calories per person.
We prefer Backpacker’s Pantry meals because they are on the cheaper side, actually include two full meals, and have tasty flavors like three cheese mac and cheese and chicken pad thai.
Other snacks
In our opinion, proper snacking is the key to good nutrition on the trail.
Breakfast and dinner are a bit easier because you can take the time to boil water and make something of more sustenance like oatmeal or a backpacking dinner. But when you’re hiking up a mountain in the intense sun with a heavy pack, you’ll be burning through calories like it’s nothing. Having good snacks available to keep you moving throughout the day is crucial.
Typically, we trying to keep our bodies fueled with lots of carbs and some protein. Here are a few of our favorite backpacking snacks:
- Bars | Clif bars , Lara bars , Kind Bars etc. I love these Pro Bar s, which not only taste great, but are lower in sugar, high in fiber, and squeeze in a lot of calories to keep you full.
- Cheese crackers | Cheez-its , Goldfish , etc.
- Pretzels or crackers
- Dried fruit
- Nuts and trail mix
Separate from snacking on the trail, we are huge proponents of what we like to call “backcountry charcuterie.” We always pack some form of hard sausage, such as salami, pepperoni, or summer sausage and pair it with some hard cheese like extra sharp cheddar, parmesan, or asiago to enjoy as a tasty appetizer before dinner.
Now technically, you’re supposed to keep all of the items listed refrigerated, but we’ve always been okay with eating them, as long as it’s during the first few days of a trip and hasn’t been too hot outside.
Sometimes Sarah even likes to pack a little serving of red wine to pair with her backcountry charcuterie: It’s the simple things!

8. Check local rules and regulations
Before departing on your first backpacking trip, make sure you spend some time reviewing any rules specific to the area you’ll be visiting.
These rules can cover everything from where you need to pick up your permit (yes, some parks will make you pick up your permit in-person), to bear safety, water regulations, bathroom etiquette, choosing a campsite, and waste disposal.
This is a super important step for beginner and seasoned backpackers alike. Make sure you do your part to help keep the area you are visiting safe and well-preserved!
9. Check the weather
When we say to “check the weather,” we mean two different things.
First, before spinning up grand plans for an epic backpacking trip, make sure it’s a good time to hike in the area which you’ve selected . This often takes more research than you’d imagine.
For instance, we’re originally from Virginia and one of the first big backpacking trips we did was in the Grand Tetons in Wyoming. We booked our trip to be during the first week of July, which in Virginia is the middle of the summer. Surely, we’d have no concerns about the weather, or so we thought!
But little did we know that parts of the trail would be covered in snow well into July!
Every area has their own peak season, which can vary slightly year-to-year based on precipitation, heat waves, and wildfires. Make sure you do your research well in advance!
And second, closer to the actual departure date of your trip, make sure to keep a close eye on the weather forecast in the area . Remember, you’ll be far from civilization, so weather can change quickly and temperatures can often be much colder than expected at night, especially in higher elevations. Be prepared for anything!

Hiking Gear For Rain + Tips for Hiking in the Rain
10. tell someone your plans.
Before you hit the trail, it’s super important to leave your detailed backpacking plans with a trusted friend or family member.
Let them know where you’re headed and when you expect to return to civilization. If something does happen to you, it’s crucial that someone not only knows you’re missing but will also have a general idea of where to look for you.
It’s really easy to get wrapped up in the excitement of planning a backpacking trip, but in the event that you should encounter trouble out on the trail, it’s so important that someone knows exactly where you’re planning to hike.
11. Hit the trail!
After extensive planning and preparation, it’s finally time to hit the trail! As a beginner to backpacking, you’ll surely be feeling a wild mixture of excitement and anxiety as you prepare to head out.
Continue reading to make sure you’re prepared with all the skills and knowledge you’ll need out it the backcountry.

Backpacking for beginners FAQS
Now that you’ve planned the perfect beginner backpacking itinerary, gotten your permits, and selected the best pieces of gear, you’ve likely still got a lot of questions about life on the trail! It’s time to make sure you are fully prepared for your big adventure in the backcountry. In this section, we’ll answer some frequently asked questions that cover key backpacking skills for beginners and share a few of our best tips to help your trip go smoothly!
- How fit do I need to be to backpack?
- How do I choose a campsite?
- How do I find my way on the trail?
- How do I get fresh water?
- What do I do if something goes wrong?
- What do I do if I encounter wildlife (bears)?
- How do I handle inclement weather?
- What do I do with waste?
- How do I go to the bathroom?
1. How fit do I need to be to backpack?
If you’re an avid day hiker, then this may seem obvious to you but backpacking does require a high level of physical fitness. Even if you’re just going for one night, your bag is going to be loaded down with food, clothes, a tent, and sleeping equipment.
Do not underestimate the level of physical fitness needed for backpacking! It’s important to plan on less elevation gain and mileage that you are used to day hiking.
That being said, there are backpacking routes of all different difficulty levels. As a beginner to backpacking, pick an easy trail with minimal elevation gain . Once you’ve got your first trip under your belt, reassess how much your body is able to handle and perhaps step it up a notch on your next adventure.
2. How do I choose a campsite?
In most parks, when you get a backpacking permit, you’ll be assigned a specific campsite, which means you won’t be responsible for choosing a campsite once you’re out in the wilderness. Most of the time, the campsites will be marked with a little sign on the trail.
But if aren’t assigned a specific campsite, you’ll be on your own to find a place to lay your head for the night. This can be harder than it sounds!
You’ll need to find an area that has enough soft (not on rock) flat ground to fit a tent that’s close to a water source (ideally), and is cleared of all underlying brush and shrubs. This may sound easy but when you’ve already hiked 10 miles and just want to rest, finding a good campsite can be a real pain in the butt!
Be sure to check local regulations regarding where you are allowed to set up camp . In some areas, you must camp a certain distance from water sources and trails.
One piece of advice – don’t let good be the enemy of perfection. If you find a good campsite, take it. We often pass up good campsites in the hopes of finding an even better one. News flash: we very rarely find a better one.

3. How do I find my way around?
Navigation is one of the most important backpacking skills for beginners.
New devices, such as the Garmin InReach Mini 2 , and services, such as the AllTrails App , have made backcountry navigation much easier than it’s historically been, but that doesn’t mean you can forgo important navigational skills. Make sure you have hard copies of relevant maps and know how to use a compass in case something goes terribly wrong.
We also recommend investing in the Pro version of AllTrails. It’s only $5 per month and allows you to download trails for offline use, meaning you can track your progress on the map even without cell service.
AllTrails Pro makes navigating in the backcountry significantly easier, but keep in mind that AllTrails maps can often be inaccurate and require keeping your phone charged! It’s best not to rely solely on AllTrails.

4. How do I get fresh water?
There are many different ways to get fresh water in the backcountry and it’s critical you understand where your water sources will be located before you leave on your backpacking trip.
Do not assume water will be readily available no matter where you are backpacking. If you are unsure about water sources, talk to a park ranger familiar with the area.
We’ve done backpacking trips through the desert where there is no water available anywhere. In these areas, you’ll need to pack in all the water you need for multiple days (using bladders like these Platypus bottles ) or figure out a way to cache water along the trail.
In areas where you expect fresh water to be available, remember that just because you see a small pond or stream on a map, do not assume it is still there! Especially late in the summer, small ponds and streams have a tendency to dry up.
how to filter water
If you’ll be in an area where freshwater is readily available, you’ll still need to filter the water to remove any parasites, bacteria, or dirt. To make one thing abundantly clear: you need to filter any water you find in the backcountry!
On very rare occasions, you can drink right out of a natural spring or from glacial runoff, but these circumstances are very, very rare. In the overwhelming majority of cases, you’ll be drinking water from a pond, lake, stream, river, or puddle. And no matter how clear or fresh the water looks, you still need to filter it!
There are a handful of different methods for filtering water and we’ve tried all of them! Our favorite method using a Katadyn BeFree or Sawyer Squeeze, as they are easy to use, durable, and reliable.

5. What do I do if something goes wrong?
When you’re in the backcountry, your safety is your responsibility. You will generally not have cell service and you’re often very far from other humans. If something bad happens, you will be responsible for assessing the situation and deciding what to do. Help is not around the corner!
We always recommend carrying a first aid kit and a GPS device like the Garmin InReach which can be used to call for help even when you’re not in range of cell service. The Garmin InReach with a subscription allows you to track your route, communicate without cell service, and call for emergency services no matter where you are in the world.
But do not let carrying a GPS device give you a false sense of security. You are still ultimately on your own! Calling for help using a GPS device should only be done as an absolute last resort, as the resources and cost (that you will need to pay) to get you help can be exorbitant.
Staying flexible in the backcountry
There’s probably a better way to phrase this but backpacking requires what we’re calling mental flexibility. When you’re in the backcountry, something will inevitably go wrong, whether you are an experienced or beginner backpacker.
Usually, it’s something minor like you forgot your favorite fleece or maybe your water source is a long walk from camp. But of course, sometimes really bad or unsafe things can happen in the backcountry. Whatever happens, you’ll need to keep a positive attitude and be adaptable on any backpacking trip.
Of course, thorough preparation is always the best way to minimize the chances of encountering any serious problems in the backcountry.

6. What do I do if I encounter wildlife (bears)?!
Whether you’re in the desert of southern Utah or the alpine terrain of Glacier National Park, you should be aware of wildlife common to the area and what species may pose a risk to your safety.
In the desert, this is mainly snakes and scorpions. But in most of the forested mountainous terrain, this means bears, which require some advanced planning and education.
Bear safety and food storage
If you will be backpacking in bear country, you’ll need to have a plan to safely store any food or scented items overnight while camping. We are big fans of Bear Vault’s bear cans , as they are easy to use and safe.
You should always store your bear can at least 100 yards from your campsite. Keep it away from steep hills or drop-offs so that a determined bear isn’t able to roll it away. Remember that all scented items must be properly stored, and yes, this even includes toiletries like deodorant and toothpaste.
There are other methods of proper bear food storage, such as hanging your food between trees, but many wilderness areas require the use of bear cans, so be sure to check local regulations when planning your trip.
- You can read more about bear safety from the National Park Service .

7. How do I deal with inclement weather?
Having as much knowledge as possible about the upcoming weather before you leave on a backpacking trip is very important.
It’s critical to remember that weather can change rapidly in the backcountry and just because your Weather App is predicting warm temps and clear skies in the town near the trailhead, that doesn’t mean it will be the same as the weather deep in the backcountry.
Also remember that if you’ll be gone for multiple days, you won’t be able to see an updated forecast once you’re out of cell service. Stay alert, keep an eye out for threatening weather, and be prepared for anything.
If you’re hiking in an area prone to thunderstorms, you may want to brush up on what to do in case of lighting in the backcountry.

8. What do I do with waste?
These last two items – trash and going to the bathroom – are two of the most popular questions we get about backpacking from beginners. What do you do with your trash? And where do you go to the bathroom?
Let’s get into some of the messy details.
Dealing with waste is actually quite simple. You need to pack everything out!
Typically, we bring a plastic grocery bag and use it to collect all of our trash over the course of the trip. We also stuff smaller pieces of trash into larger pieces of trash to help keep things compact and organized.
Do not, under any circumstances, leave trash in the backcountry. Please do your part to help keep these beautiful wilderness areas pristine for fellow backpackers and generations to come.

9. How do I go to the bathroom?
If it wasn’t already clear, we’re talking about number 2 here. And the answer to the question, “Where do you go to the bathroom?” depends on the area where you’re hiking.
Digging a hole
In most wilderness areas, you’re required to dig a small cat hole about 6-inches deep, do your business, and then cover it back up. However, you must always pack out your toilet paper!
Contrary to popular belief, toilet paper does NOT decompose quickly! It can between 1 to 3 years to decompose completely. Leaving your toilet paper behind can damage fragile backcountry ecosystems, pose a danger to the animals who live here, and impairs the experience for other hikers.
We recommend making some “bathroom bags” before you leave. We roll up some toilet paper in small sandwich bags and then use the toilet paper and put it back in the bag once we’re done before packing it back out. We typically bring one “bathroom bag” bag per day on the trip.
Using a wag bag
In certain areas, it’s required that you pack everything out. Yes, that means even your #2! This is most likely to be required in fragile desert environments or areas that get excessive backpacking traffic.
We prefer to use Toilet Kit Waste Bags in places that require backpackers to pack everything out. They come with a resealable bag and toilet paper.
To use them, open up the bag, tie it around your waist so it rests under you when crouching, and let it fly. You can throw your used toilet paper right in the bag as well. When you’re done, seal up the bag (side note: it’s worth double and triple checking the bag is closed) and throw it in with the rest of your trash to pack out.

Other useful resources
Looking for more backpacking and hiking resources? You may also be interested in these articles!
- Our Must Have Backpacking Gear List with Downloadable Spreadsheet
- What Do You Really Need to Pack for a Day Hike
- Best Hiking Clothes for Summer: Men’s & Women’s
- Complete Guide to the Best Hiking Clothes for Women
We hope this guide to backpacking for beginners has been helpful! If you have any questions, drop them in the comments below and please don’t hesitate to reach out!
Save this article to Pinterest!

Sarah Vaughan
Hello! I'm Sarah, one half of the couple behind Two Outliers! In 2023, I quit my job as a Data Scientist to travel around the world on an epic 15-month journey in search of the world's greatest hikes and outdoor adventures. Matt and I started Two Outliers in 2021 as a place for visitors to find concise, accurate, and honest information to plan their own adventures. We hope our experiences inspire you to hit the trail! Happy Hiking! Sarah
Leave a Reply Cancel reply
Related posts.

Hiking Gear
There are so many options for women’s hiking clothes out there that sorting through it all to find something you’ll actually be comfortable (and reasonably stylish…) in can be a challenge. As an avid hiker Read more…

As both foodies and hikers, we’ve compiled a list of twelve of the best day hiking lunch ideas! Heading out on the trail but sick of the same boring snacks and lunch options? Luckily for Read more…

Guide to the Best Hiking Shorts for Men
I know how overwhelming it can be to choose a pair of hiking shorts so I’ve put together a comprehensive guide to the best hiking shorts for men. For something as simple as a pair Read more…
Discover more from TWO OUTLIERS
Subscribe now to keep reading and get access to the full archive.
Continue reading
How to Plan a Backpacking Trip in 12 Simple Steps
Learn how to plan a backpacking trip! From how to pick a trail to what gear to pack, this guide covers all the important planning steps.

Whether you are a beginner backpacker or have been tramping around the woods for years, there are a number of questions to ask when you are planning an overnight backpacking trip. Where should I go? Do I need a permit? What should I eat? What do I need to pack? I’ve been there. When I first started hiking and spending time outdoors, I had no idea how to plan a backpacking trip. Now, years later, planning a backpacking trip is one of my favorite parts of the whole process. If you’re new to it though, it can feel a little overwhelming, but we’ve got you covered.
In this blog post, we break down how to plan a backpacking trip into 12 simple steps so you can feel more organized and confident (and less overwhelmed) as you get ready for your adventure. By following this step-by-step backpacking guide, you will be able to easily plan your backpacking trip from start to finish, knowing that you aren’t forgetting any important details.
Ready to plan your next adventure? Here’s our guide to planning a backpacking trip so you can get out and enjoy the great outdoors with confidence
The 12 steps of planning a backpacking trip
1) pick dates for your backpacking trip.
Figuring out when you want to go on your overnight adventure is the first step in how to plan a backpacking trip. Your dates will dictate where you can go due to the weather (unless you want to snow camp). If you want to go in January, then you’ll be limited to warmer places like Southern California, Arizona, and Florida for example. If it’s summer, then you’ll want to hit the mountains where the temperatures are cooler.
If you are a newbie, 1-2 nights is a good length of time for you to get a trip under your belt. You’ll be able to answer a lot of questions after that first hike. What gear worked, what gear didn’t. What you really need to bring vs what you can leave at home to shave off some weight. Whether you brought the right amount of food. What pace you like to hike at, etc. If you are more seasoned and have the time off, then consider going for a longer trip. The longer you’re out there, the more time you have to decompress and reap all the benefits of being in the wilderness.
2) Pick a trail for your backpacking trip
When you plan a backpacking trip, picking a trail can be a little challenging with so many awesome trails and destinations to choose from. Ask yourself:
- How far do you want to hike? If you are new to backpacking, 5-7 miles a day is a good target. Remember, if you aren’t used to carrying a lot of weight, then backpacking will be more challenging than a regular day hike. The average confident backpacker can usually cover somewhere in the range of 8-12 miles or more depending on how much elevation gain there is.
- How difficult of a trail do you want?
- What major features are you looking for? Big mountain landscapes? A lake? Hiking along a river? Waterfalls?
- Is solitude a must? If you’re looking to get out into the Wilderness, be sure to read through our Backpacking 101 Guide for Planning a Wilderness Trip .
Get an idea in your head of what kind of experience you want to have. Then start checking out trail descriptions and plan a backpacking trip that aligns with your requirements.
Not sure where to start? Here are a few good beginner backpacking trips:
- West Rim Trail in Zion National Park
- Havasu Falls in Arizona
- Red Pine Lake in Salt Lake City
- Cutler Coast Trail in Maine
- San Jacinto Peak in California
- Trans Catalina Trail

3) Check permit requirements & get a permit if you need one
So you found a trail that looks awesome for the time of year you want to hike. Before you get too excited and start making plans, check to see if a permit is required. Many trails, especially popular trails in National Parks, require wilderness permits that need to be reserved months in advance. Many of the more popular backpacking trails (like in the Grand Canyon or Yosemite) are allocated by lottery up to 4 or 5 months in advance. If you google the trail, you can usually find permit requirements on the federal or state agency’s website.
Depending on where you are backpacking, your permit may have additional requirements. For instance, if you are traveling in bear country such as the Eastern Sierras, Montana, or Wyoming, it’s likely that you’ll be required to carry your food and scented items in a bear-proof container or bag .
4) Invite your friends (or commit to going solo)
If you want company, try to round-up a few friends who want to join you. Give them a call or put a note out on Facebook. If that doesn’t work and you are unable to find anyone you know to go with, you have a couple of options.
Check to see if there are any Facebook groups in your area for hikers or outdoor enthusiasts. In Utah, there is a Utah Outdoor Women’s Alliance group and there are always folks looking to link up for a hike. MeetUp can also be a great website as well for finding like-minded friends who love outdoor adventures and trips. Are you part of a yoga studio or climbing gym? Those are also great places to meet active people and maybe you can make a new friend who might be interested in your trip.
If you can’t find anyone, don’t let that discourage you. Backpacking alone is an empowering experience and is worth trying at least once. Check out my tips for hiking alone here .

5) Make your transportation plan
The next step in how to plan a backpacking trip is to make plans for getting to and from the trailhead. If your trail is a loop, you can typically leave your car at the trailhead parking area (check to see if there is an overnight fee or parking permit required). If you’re doing a one-way hike, you have a few options. If you’re hiking with friends, you can set up your own shuttle by leaving a car at the end and driving a second car to the start. If two cars aren’t an option, you can ask a friend or family member to drop you off or reserve transportation with a taxi service or shuttle company. Many hotels and outfitters in popular hiking destinations will offer shuttle services, so do a quick google search to see what’s available if you go this route.
6) Get the necessary gear for your first backpacking trip
Maybe you already have your backpacking gear dialed. If so, great! If not, a good place to start is with my 3-day backpacking checklist . In addition to that detailed post, we’ve also got several more outdoor gear guides here on Bearfoot Theory including:
- What to Wear Hiking
- The Best Backpacking Packs
- The Best Tents for Backpacking
- The Best Sleeping Pads for Backpacking
- The Best Sleeping Bags for Backpacking
- The Best Water Filters for Backpacking
- The Best Lightweight Bear Canisters
- The Best Backpacking Stoves
- The Best Cheap Backpacking Gear
Ok, so what if this gear is way too expensive? Don’t let that deter you from planning a backpacking trip. Ask your friends if anyone has gear you can borrow. But be sure to check that a borrowed backpacking pack fits comfortably before you set out and that the gear you’re bringing along isn’t super heavy or else you may not enjoy your trip.
REI offers gear rentals, and if you’re an REI member you get a discounted rate. If there’s not an REI in your area, check your local university recreation center and local outdoor stores to see if they rent backpacking gear. If you want to buy your own gear, but are looking for discounted prices, check out our post on the Best Places To Buy Discounted Outdoor Gear . Buying gently used outdoor gear is another great way to save money, and it’s better for the planet too!

7) Test your gear
Not testing your gear is a common beginner backpacking mistake that’s easy to avoid. Make sure you know how to use all of your gear before you set out.
Set up your tent in your living room and take your backpack and hiking boots for a spin up your local hill before setting out on an overnight trip. If something doesn’t feel right, it’s probably not and you want to catch it before heading out into the wilderness.
If your pack is the right size but it is still giving you trouble (it’s weighing down on your shoulders or seriously hurting your back), you probably need to make some simple adjustments to the straps. Or perhaps you need to make some adjustments to the way you pack it. Check out this guide on how to pack a backpacking pack for more on this topic.
As far as your hiking boots , unless you choose a heavy-duty leather pair that are suited for mountaineering, most standard trail hiking boots should be fairly comfortable right out of the box, but you still want to take them on a few hikes before your backpacking trip to make sure. If you take them for a short hike and come home with blisters, they might not be a good fit. The point of testing your gear all out beforehand is to get everything dialed so faulty gear doesn’t ruin the epic backpacking trip you’ve been planning.
Testing your gear beforehand also offers the opportunity to train before the big hike .

8) Shop for Food
Planning food is a big part of planning a successful backpacking trip. You want to eat well, but you also want it to be easy and lightweight. I’ve written a detailed post on some of my favorite lightweight backpacking food options and I also especially love Good To-Go’s backpacking meals . Their Mexican Quinoa Bowl is one of the best dehydrated backpacking meals I’ve ever tried! It’s filling, yet vegan and gluten-free, and it has half the sodium of most backpacker food brands.
Also, be sure to check the requirements for food storage for the trail. If you are in bear country, you’ll need to pack your food in a bear-proof canister.

9) Brush up on Leave No Trace Principles
Leave No Trace is a set of guiding principles to help you reduce your impact when you are spending time outdoors. It covers everything from pooping outdoors to how to safely enjoy campfires and even where to set up your tent . If you are not familiar with Leave No Trace, make sure you brush up on how to be a good camper before you hit the trail so we can all do our part to keep the places we recreate in as pristine as possible.

10) Get a Map & Check Water Availability
Don’t want to get lost? ALWAYS bring a paper map with you and check out these navigation tips while you’re at it . Even if you think the trail is going to be straightforward and well-marked, a paper map should be non-negotiable. While you can download hiking and navigation apps you always want a backup in case your phone dies. I am a huge fan of the National Geographic Maps which exist for most National Parks and other popular hiking areas. If you can’t find a map to purchase online or at your local REI, stop by the nearest rangers station on the way to the trail and see if they have a map.
11) Tell a friend or your family your plans
It’s important for safety to share your plans with a friend or family member. Ensure they know the date and general time you plan to check in with them at the end of your trip and make sure they know the details of the trail you will be hiking.
I also like to carry some sort of backcountry communication device if I’m hiking solo or going somewhere really remote. The SPOT Gen4 and the Garmin InReach Mini are the top satellite communication devices for sending texts to family back home and calling emergency responders if you get into trouble.
12) Check the weather
It’s important to always check the weather starting at least a few days before your start state. Bearfoot Theory community member Kim once drove 10 hours to hike the Lost Coast only to learn there was a large storm front rolling in that closed the trail. Checking the weather ahead of time will help you adjust your plans as needed and prepare by packing the correct clothing and gear like a rain jacket and even rain pants. In case there’s the possibility of wet weather in the forecast, here are some of our tips for hiking in the rain .

AND FINALLY, GO!
The last and final step is to hit the road and have a good time! Know that most people experience a couple of minor mishaps on their first backpacking trip. On my first backpacking trip, I forgot my hiking boots and ended up hiking 20 miles in Chacos (with a lot of blisters to boot) and I didn’t pack nearly enough food. It also made me realize I was a little more out of shape than I thought.
But watching the sunset over that lake where I camped was a turning point in my life. That first backpacking trip changed my whole relationship with the outdoors….so get ready 😉

Where was your first backpacking trip? What other advice do you have on how to plan a backpacking trip? Share your comments, questions, and experiences below!

With two decades of hiking and seven years of van life under her belt, Kristen has dedicated her life to helping people experience the positive effects of nature. As a pioneer in the outdoor blogging space, she founded Bearfoot Theory in 2014 and has since authored more than 350 blog posts about outdoor travel, hiking, camping, and van life. Her work has been featured in National Geographic, Outside Magazine, and Backpacker, and when she’s not on the road, she lives in Park City, Utah with her partner Ryan, their son, and two adventure pups.
Leave a Reply Cancel reply
Your email address will not be published. Required fields are marked *
Save my name, email, and website in this browser for the next time I comment.
Tip #11 is clutch, and so easy to forget. Thanks for the reminder. Great post!
Thanks for this awesome guide! I’ve always wanted to go on a camping trip but it always feels intimidating, so I’ve only done short hiking trips. This list somehow makes proper camping trips feel much more manageable with some simple steps, saving it and hoping to be able to use it soon!
Awesome Aaron! Good luck on your first backpacking trip and come back and tell us how it goes!
Hi! I love your site, so many great articles and pieces of advice. I have one question I have searched for an answer on your site and elsewhere and can’t seem to find… when you plan for an overnight backpacking trip 4+ days, what is you advice on parking? Where and safety. Thank you!
Hi Ally – it really depends on what trail you’re doing. Some trailheads are safe and secure enough to leave your car for a few days (just make sure you take out all valuables). If you don’t feel comfortable leaving your car, you could ask a friend to drop you off or take public transportation to the trailhead if available. Many cities will have short or long-term parking lots that you can leave your car at for a fee. For Kristen’s 22-day JMT hike, she left her car at the Ranger Station in Tuolumne Meadows.
Thank you. Even though this will not be my first time hiking, you advice just made me double check my check/packing list.
This is very empowering! I’ve wanted to go backpacking for years and have felt intimidated and didn’t know where to start. We just completed our first backpacking adventure last weekend and had a blast. You break things down and help me feel like I can do this!!!!
That’s awesome Dana, congrats!
How to Plan Your First Backpacking Trip
By Josh Laskin

All products featured on Condé Nast Traveler are independently selected by our editors. However, when you buy something through our retail links, we may earn an affiliate commission.
Lying in my warm-weather sleeping bag , I watched frost slowly build on the outside of my tent for hours before realizing I wouldn’t be able to sleep that night. I tried to control my chattering teeth, and thought back to just hours earlier when sunshine and 70-degree temperatures welcomed me and my brother to the summit of Algonquin Peak, just outside of Lake Placid , New York. It was our first time backpacking—carrying our gear to camp over a multi-day hiking trip —and it was obvious we had a lot to learn.
And learn I would: In the following years I came to love backpacking, while working as an occasional weekend guide for New York City-based Destination Backcountry Adventures . I backpacked in national parks across the U.S. , became a wilderness-therapy guide in Maine , and eventually relocated to a small town in New Hampshire’s White Mountains. Over the years, I collected knowledge I was missing on that first night at the base of Algonquin Peak—the importance of using a sleeping pad (not just that sleeping bag) for insulation, how to dress properly, and what to bring and leave behind. With a little more research ahead of time, though, I could have avoided learning the hard way.
From a novice-turned-pro, here are a few things to consider before spending your first night in the backcountry—for a much better first try than mine.
All products featured in this story are independently selected by our editors. However, when you buy something through our retail links, we may earn an affiliate commission.

A lightweight, durable tent is a must-have for your first backpacking experience.
Bring the appropriate gear
These days, there’s no shortage of gadgets designed to make your time outdoors as comfortable as possible. But when you’re halfway up the side of a mountain with a 65-liter backpack full of stuff, you’ll likely realize you would’ve been more comfortable if you had left some at home.
There are a number of companies, such as Outdoor Research , MSR , and Big Agnes , to name a few, that make lightweight, backpacking-specific gear. While you might shell out a little more for it, you’ll be much happier than if you choose to haul around that heavy Coleman tent and sleeping bag you've had in the attic for years.
Basic things you’ll need are a lightweight backpacking tent and sleeping bag , which come rated for specific temperatures—pick one that’s designed for 15 to 20 degrees lower than the weather you expect to encounter—a camp stove with fuel and something to cook in . You’ll also need a sleeping pad to provide insulation from the ground, a headlamp with extra batteries, storm-proof matches , water treatment filter , iodine tablets or a small dropper of bleach , and a backpack to carry it all in.

The right outerwear is just as important as solid base layers.
Dress accordingly
Showing up to the trail in jeans and a cotton T-shirt might not be huge a problem on a three-mile day hike, but it can quickly become dangerous for overnight backpacking when you spend the day sweating and evening temperatures drop significantly. Cotton is heavy, absorbs water, and doesn’t dry easily, which can lead to hypothermia in extreme cases. In general, avoid cotton for backpacking: Companies like Arc’teryx and Patagonia make synthetic, lightweight, and packable clothing better designed for the task at hand.
It’s also a good idea to bring even more layers than you think you’ll need, especially to mountainous regions. Nights tend to get significantly colder than days—and a fleece or puffy jacket with a rain shell goes a long way during cool nights on windy summits. You’ll also never regret having an extra pair of socks to change into at camp.

Shannon McMahon

CNT Editors

Hannah Towey
Footwear is a matter of preference. Some prefer the support and durability of full-grain leather hiking boots when carrying a heavy pack, while others prefer lightweight synthetic boots or even trail-running shoes . Regardless of what you prefer for hikes, also bring a pair of lightweight camp shoes to change into at the end of a long day—your feet will thank you.
Plan ahead for every step
“Plan ahead and prepare” is the first of the seven Leave No Trace principles, which every backpacker should follow. These principles are designed to keep users of natural spaces safe, while also minimizing human impact in the outdoors, with guidelines on respecting wildlife, traveling and camping on durable surfaces, and disposing of waste properly, to list a few. In addition to learning the “LNT’s,” familiarize yourself with reading a topographic map to determine your mileage, spot water sources, decide where to set up camp, and map your overall route and evacuation routes for each day on paper. Gaia GPS is a helpful interactive map tool for plotting out your course, and can offers insights about elevation, water sources, and the length of a route so you can plan rest stops. The app also has the ability to download maps for offline use, if your phone GPS will work during the journey—but it's crucial to plot out the route on a paper topographic map in case you lose service.

Map out your journey, step by step.

Don't forget to bring (and know how to use) a compass.
It’s also helpful to make a meal plan so you don’t over- or underpack. The simplest way to go is to bring dehydrated meals, like the ones by Good To-Go , which are lightweight and require nothing more than hot water. Eventually, as your comfortability with backpacking increases, you can start getting creative with different campsite recipes you can make yourself.
Ensure you have emergency essentials, as well. The quickest and easiest option is to purchase a prepared first-aid kit designed for backpacking, although you can put one together yourself. In addition to the map you used to plan the trip, bring a compass (and know how to use it), whistle, an emergency bivy or mylar thermal blanket , a knife, gear-repair kit or simple duct tape, and extra clothes and food. A satellite phone or personal locator beacon (PLB) can also be useful in remote areas where cell reception is hard to find.

Going with an expert can be a worthwhile investment for your very first trip.
Hire a guide
While research is helpful, no amount of preparation can equate to actual experience. Backpacking with a guide isn’t a necessity, but it can help you avoid some of the discomfort that is inevitably going to occur during your first few trips. An experienced backpacker knows how to properly dispose of waste, where (and where not) to set up camp, how to choose a backpacking route based on available water sources and fitness level, and other skills that can only be sharpened by spending time in the field.

REI Adventures offers a number of group and private backpacking trips in the U.S. and beyond perfect for learning the ropes. In fact, they’ve recently added 17 new domestic itineraries, including a five-day backpacking trip in Yosemite that incorporates an ascent of the famous Half Dome. And 57 Hours , an online platform that connects outdoor enthusiasts with certified guides, also offers a number of backpacking itineraries.
No matter when you start backpacking, know that the learning continues, and that's part of the adventure. Every time I venture into the backcountry, I find a new skill or trick to make the experience more fun and comfortable. For example, in recent years, I replaced my water filtration pump and iodine tablets with a bleach dropper—an easier method than pumping that provides better tasting results than iodine tablets. Those lessons come with experience. But you don’t need to be a pro with perfected methods and systems to hit the trail; you just need to be prepared, so you can safely get that crucial firsthand experience of your own.
By signing up you agree to our User Agreement (including the class action waiver and arbitration provisions ), our Privacy Policy & Cookie Statement and to receive marketing and account-related emails from Traveller. You can unsubscribe at any time. This site is protected by reCAPTCHA and the Google Privacy Policy and Terms of Service apply.
10 expert tips for your first backpacking trip
Our 10 tips for your first backpacking trip make sure you steer clear of common fails, and learn to love overnight expeditions for life

1. Build up to it
2. start with a one-nighter, 3. borrow gear, 4. go with an experienced friend, 5. check permits, 6. test your gear, 7. don’t go too far..., 8. or too high, 9. pick a well-established trail, 10. research your destination.
Who doesn't love the romantic notion of slinging everything you need to survive into a pack and heading out into the backcountry for adventure? Well, actually plenty of people would raise an eyebrow at the suggestion. But, as you've made it here, to this page among all of the pages on the internet, you're probably quite interested by the idea.
Backpacking is brilliant. Though like many forms of outdoor adventure, prepare poorly and it can be a nightmare. This is why we're here to help you take your burgeoning steps into this exciting new world.
Yes, your first backpacking trip will be an adventure you'll never forget. If you’ve been hiking for a while now and you know you love the outdoors, there’s no reason why you’re not going to love it. Perhaps you did some car camping as a kid and you remember that lovely feeling of drifting off to sleep swaddled in your sleeping bag , and the feeling of the sun streaming through the tent walls in the morning?
Read on for 10 tips for your first backpacking trip to make sure you avoid common backpacking fails, and learn to love overnight adventure for life.
Meet the expert

Julia's first big backpacking trip was to Turquoise Lake, just outside of Vail, CO about fifteen years ago. She can still remember every detail of preparing, hiking in and camping in the beautiful bowl of Mount Jackson. These days, she's a veteran and one of Advnture's backpacking experts.
Today's best deals
- Train for your backpacking trip by taking a heavier pack on day hikes
- Practise walking with trekking poles too

If you’re planning on a backpacking trip, you probably already hike a lot, but hiking with a daypack containing your water bottle and a fleece jacket is a lot different than hiking with a 20lb pack. It’s harder work on your legs, for starters, and can make it more cumbersome to retain your balance on trickier sections of the trail. You can start to add weights to your daypack as you walk, and even try a day hike or two wearing your packed backpacking pack in order to build your stamina and get used to the sensation of hiking with a load. Walking with trekking poles for balance can really help, too.
- A one-night trip is easier to plan and execute
- You'll get a sense of what will be required for a longer trip

A one-night backpacking trip can seem like a lot of work for a single night, but trust me, it’s easier to plan and prepare for. In addition to your overnight gear, you’ll need food and it’s quite enough to plan for lunch on the hike, one dinner when you arrive, breakfast in the morning and perhaps another lunch if it’s a long way back to the trailhead . One night is easier to plan and execute, and lets you get a feel for the whole backpacking experience before you throw yourself into a weeklong adventure or a thru-hike .
- Borrowing kit is a great option for that first trip
- This stops you from making large investments before you know if you'll enjoy backpacking

If you’re not already kitted out – and there’s no reason why you should be – borrow as much gear as you can for your first trip. This can mean temporarily purloining a tent and sleeping pad from a friend back home, or in my case it means going with a friend who had the essentials, and sharing their tent, camping stove and first aid kit . That way I just had to bring my sleeping bag and pad. This cuts down on the initial investment, or at least delays it, until you figure out if you really like backpacking and want to do loads more of it.
Advnture Newsletter
All the latest inspiration, tips and guides to help you plan your next Advnture!
Hot tip: if borrowing a sleeping bag seems gross, get yourself a sleeping bag liner .
- Your first trips will go smoother with an experienced friend
- You can learn the tricks of the trade from them

Solo backpacking trips really can be a thing of great beauty, but for your first few, it’s strongly advised that you go with someone else, and ideally with someone who has done a bit of backpacking themselves. They can help you get to grips with finding the perfect spot to pitch your tent as well as operating all your gear. In my case, it was super helpful to have someone teach me how to hang a bear bag , because that wasn’t something I learned growing up in Scotland. He also helped me stay calm when we met a bear the following morning on our descent. After a few adventures, it all becomes second nature, but it’s a lot to learn your first time out!
- Check if the region you plan to camp in requires a permit

Sure, you can camp legally anywhere in Scotland, but elsewhere you may need a permit to go backpacking. Most National Parks require a permit, for example, while BLM land , Wilderness Areas and National Forests may be fair game to everyone who follows the principles of Leave No Trace . Make sure you know your permissions before you hike six miles in with a heavy pack.
- Test your gear to check everything is in working order
- This will also help you to be more efficient on the trail

For any gear that you’re personally bringing, make sure you test it out at home first. That means you need to pitch your tent in your living room and practice using your stove in the back garden. Sleeping in a collapsed tent and eating a cold camping meal will definitely ruin your fun, fast. Plus, by the time you're on the trail, you'll be efficient when setting up camp if you've practised at home first.
- Choose a site that's not too far from the car – around 3 miles away is ideal
- Don't forget you have to hike back out the next day!

Because backpacking can be a fair sight more difficult than day hiking, it’s a good idea to pick somewhere that’s not too much more than three miles down the trail. It might not sound like very far, but that’s plenty of mileage to get lost in the mountains, and you can ensure that you don’t tire yourself out before arriving. My first trip was actually six miles, but we were able to cheat a little and ride a ski lift up the mountain, which shaved off the first couple of miles, and the steepest section.
If you keep things on the enjoyable side, you’re much more likely to give backpacking another chance than if you try to tackle a ten-miler and fail. And remember, you have to hike out again tomorrow!
- Gaining too much elevation can be tiring and expose you to cold or lightning risk
- Camp in sheltered areas and check the forecasted wind direction before planning where to pitch

If you’re backpacking in an alpine area, also take care with vertical feet. It can be easy to want to head up a mountain for the best views, and that can be amazing with the right training and gear, but it gets a lot colder overnight at high altitude , and if you’re above treeline then the risk of lightning strikes is higher too. It's also very tiring to gain loads of vert while carrying a heavy pack.
Check the forecast to see which direction the wind is going to be coming from and plan to camp where there'll be a barrier in the way of the wind. Seek out sheltered lakes that are cradled in mountain bowls and lower elevation areas where you won’t need your winter tent and 4-season sleeping bag even in summer.
- When carrying a heavy backpack, a well-established trail is much preferable to bush whacking

If you’re going much more than a mile or two, because the backpack can make the walking more burdensome, it’s a better idea to pick a well-defined, easy-to-travel trail than try to bushwhack or do a lot of scrambling . We got a little adventurous on our way out and tried a different route, which resulted in a long bushwhack, a fall and a stick in the eye for me, the aforementioned bear sighting and being late for work. It was memorable, but if I could go back in time I’d tell 2009 Julia to go back the way she came.
- Research your chosen destination by studying maps, reading blogs etc.

Examine a topo map and read trip reports to get a feel for the area where you intend to set up camp for the night. What’s the elevation? Is there a water supply? And what kind of terrain can you expect – is it rocky ground and are there clearings where you can camp away from trees? Are fires allowed? Ideally, you can find some flat areas of dirt that have previously been camped on, near a water source and with lovely views.

Julia Clarke is a staff writer for Advnture.com and the author of the book Restorative Yoga for Beginners . She loves to explore mountains on foot, bike, skis and belay and then recover on the the yoga mat. Julia graduated with a degree in journalism in 2004 and spent eight years working as a radio presenter in Kansas City, Vermont, Boston and New York City before discovering the joys of the Rocky Mountains. She then detoured west to Colorado and enjoyed 11 years teaching yoga in Vail before returning to her hometown of Glasgow, Scotland in 2020 to focus on family and writing.
This must be the steepest skiing you’ll ever see
Tourist caught clambering onto cliffs over roaring Yellowstone waterfall, to horror of onlookers
Watch dramatic rescue of two young mountain lions from reservoir release that "likely would have drowned them"
Most Popular
- 2 Jack Wolfskin 3D Prelight Rise 35 backpack review: a sustainable waterproof pack that lets you move like a mountain goat
- 3 “One mistake people make is thinking nothing can go wrong” – why do hikers get lost and how do some survive?
- 4 "Last summer, we saw hundreds of people die" – Phoenix gears up for trail closures after heat-related rescues
- 5 Red 30L Waterproof Roll Top Dry Bag Backpack review: a seemingly simple dry bag that's worth a closer look
A Beginner’s Guide to Planning a Backpacking Trip
The question of how to plan a backpacking trip is one you should never be afraid to ask! Even the most seasoned Everest climber started somewhere!

The question of how to plan a backpacking trip is one you should never be afraid to ask! Planning your first backpacking trip can be very overwhelming. From deciding on how much to take with you on your hike, to deciding which route to take, there’s a lot to think about. Before you get too overwhelmed, just remember that even the most experienced backcountry hikers and campers all started somewhere and have likely felt the same way that you do now.
We know how daunting the prospect of planning your first trip can be so we’ve put together this handy guide that will tell you everything you need to know about heading out into the backcountry for the first time so that your backpacking trip will be a success!
Every adventure starts with a plan!
Heading out into the great outdoors can be daunting. But don’t worry, we’ve got your back! Our world-renowned scavenger hunts include more than 400 different activities in hundreds of cities around the globe. Every hunt is hand-crafted and includes trivia and challenging games to entice you along. Whether you’re in the mood for cheeky bar crawls , creepy ghost tours , or classy art walks , our Let’s Roam app has an adventure that will help introduce you to your new location!
How to Plan a Backpacking Trip
Below you’ll find a step-by-step guide to planning a backpacking trip. You can do these in order or jump around a little bit based on what works for you. The most important thing is that you cover all the steps and are adequately prepared for your big adventure. Not bringing the right gear or enough food and water can make even the easiest trail significantly harder and it can even make the trip dangerous.
Decide where you want to go.
This should be your very first step as it can have a big impact on everything else. For example, planning a backpacking trip high into the Rockies where you’ll be staying at rustic campsites is going to be very different from trekking in Patagonia where you have plenty of hostels and refugios to choose from. These will both be different from hiking through waterfalls in the Amazon jungle or going down into the Grand Canyon and the gear that you’ll need will be drastically different for all of these adventures.
If this is your first hike you must do as much research as possible on a destination before deciding that this is where you want to go. We highly recommend starting with an easy destination. Short, two to three-day trips that are close to home are ideal to start with and as you become more comfortable, you can start doing longer trips a bit further away. You may also want to start by doing fewer miles each day than you would normally do on a day hike. It’s very different hiking with a heavy backpack than it’s a light daypack and it’s better to cover shorter distances so that you don’t overdo it
Also, think about how far off the beaten track you want to go. While it may seem dreamy to be completely away from the hustle and bustle of daily life, surrounded by breathtaking nature, and feeling like it’s just you against the elements, this can quickly turn into a nightmare if anything goes wrong. And when you’re backpacking, something can always go wrong. If you truly want to go off-grid, you need to be both mentally and physically prepared for the experience.
Research the logistics.
Once you have decided roughly where you want to go, you now need to figure out the logistics (I.e. how you’ll make it work). Some questions that you should ask yourself at this point include:
- What will the weather be like?
- Is this the right time of year to go to this destination?
- How many hours of daylight can you plan for?
- Are there any dangerous wild animals that I need to be aware of?
- Do you need permits? If so, how long do they take to acquire?
- Is there potable water available?
- What is the terrain like?
- How do you get to the trailhead?
- What will the elevation gain be?
- Are there any mosquito-born diseases prevalent in the area such as malaria or dengue?
- Are you going into bear country?
All of the answers to these questions will have a big impact on how long you can hike, what you need to take with you, and where you can go. You can use guidebooks, backpacking websites, social media, backpacking, and thru-hiking forums, etc to find information as well as navigation websites like Gaia which will help you get more familiar with the terrain of your destination and help you find both free camping spots and established campsites.
When you’re compiling the answers to these questions, make sure that you jot down where you found particular information. During your research, you may run into contradictory information, and knowing where you found things can help you decide which one is more accurate.
During this phase, don’t forget to reach out to your fellow adventurers to ask for their advice. There are also many Facebook groups that you can join where people share general advice on backpacking as well as location-specific information. Read as many trip reports as you can about a particular area and have a list of questions ready that will cover anything that seems questionable. Remember, there are no dumb questions and it’s important to get clarification on anything that you’re confused about or want to get clarification on to have the safest and most enjoyable backpacking trip possible.
Also, do not forget to check the website of the park that you’re going to for weather updates, trail updates, and other useful information. There’s no point in planning an entire trip around a particular section of a national park and then finding out it’s closed.
Invite some friends along.
Once you have a rough idea of where you’re going and how difficult it will be, it’s time to invite some friends to join you! If you know people who love backpacking, they are an obvious first choice. Having a few people with you has many benefits. Not only is it safer and more fun to hike in a group but it can also help you divide the weight of the gear that you’ll be carrying. For example, a two-person tent weighs significantly less than two one-person tents and you can easily divide up things like cooking equipment, food, and so on.
Just a warning, be careful who you invite and consider whether or not they will be able to handle the hike that you’re expecting to do. Having someone with you that is not physically able to do the hike can slow you down and cause some major logistical issues, especially if it’s a multi-day hike. If you do invite someone who is a bit of a newbie, make sure to check with them what their longest hike has been, whether they enjoy camping, etc. Although it may feel a little like you’re vetting your friends, this can save you a huge amount of hassle and stress in the long run. Even better, you can even do a few practice hikes together before you go on your big adventure. This will give you an idea of whether or not you’re compatible and what you need to look out for if you decide to go together.
Choose your gear.
Once you have an idea of where you’re going and what the weather will be like, you can start choosing suitable gear and creating your “gear list”. This includes things like tents, sleeping bags, a sleeping pad, cooking equipment, water bottles and water filters, food and snacks, clothing, jacket, sunhat, shoes, rain gear, headlamps, bear canisters, power banks, first aid kit, hygiene products, etc as well as odds and ends like duct tape, a knife, and medical tape. Don’t ignore the importance of having a headlamp. It may seem like your cell phone flashlight will work just as well when you’re at a campsite but when you’re out on the trail hiking in the dark, you want to have both of your hands-free. This will come in handy (pun intended) in case you stumble and need to catch yourself or if you find yourself on rough terrain and have to rely on walking sticks.
If you’re a beginner backpacker, don’t panic. There are plenty of backpacking checklists and gear guides that you can find online that can serve as useful guides when you’re putting together your gear. Before you go crazy trying to check every item off the packing list, think carefully about what you’ll actually need. It’s easy to go overboard when you’re at home worrying about every possible predicament but keep in mind that you’re likely to be carrying all of this equipment on your back at some point so make every pound of it count.
If you aren’t sure what is “too” heavy, a good rule of thumb is that your pack shouldn’t be more than 20% of your body weight. Anything heavier than that is going to be very challenging even for the strongest of hikers. Don’t forget that most hikes and campsites follow a leave-no-trace policy which means that anything you bring with you, you need to take with you. This includes human waste, used toilet paper, and feminine hygiene products. You’ll need to consider this when it comes to your gear and what you’ll use to carry your trash and waste out with you.
When you have picked out all of your gear, make sure to try packing it all into your backpack. Make sure that there’s plenty of space for water, especially if you may be covering long distances between water sources. Practice walking around with the full pack on your back to make sure that it’s sitting correctly on your back and hips and that it’s comfortable. If you’re unsure of how a backpack is supposed to fit, there are plenty of online guides available. Alternatively, you can take your bag to an outdoor shop like REI and ask one of the staff members to check for you. (if you go this route, try to buy something while you’re there.)
You should also make sure to break in your hiking boots if you bought new ones. Ideally, this would be done through a series of shorter hikes that allow you to identify any trouble spots where blisters are forming and either find a way to fix them (insoles, pads, etc) or buy a new pair of boots that work better for you. Never, ever rely simply on reviews when choosing boots. Everyone’s feet are shaped differently as your height and weight can also play a role in how your boots fit.
Figure out how you’ll get back home.
When it comes to planning your trip, it’s easy to get lost in the details of the hike itself and forget that at some point it will come to an end! This means that you’ll need to figure out a way to get home afterward. If you’re starting and ending at the same spot, this should be relatively easy. However, if you’re hiking from point to point, things are likely to get way more complicated.
This is the time when you need to figure out exactly how you’ll get to the starting point and back to your car or another form of transport that you may be using. Keep in mind that some national parks do not allow private vehicles and offer shuttle services instead as a way to ease traffic congestion. If this is the case, you’ll need to figure out how frequently the shuttles run and what time the last shuttle of the day is. The last thing you want is to finish a long day of hiking and find out that you have no way to get back to your car.
Plan your food.
When it comes to planning your food, it’s very easy to overdo it. Many people are worried about being hungry so they find themselves packing too much food and then regretting it when they are carrying around excess weight in their bag (or their stomach!).
One of the best ways to plan what food to pack is to base it on a certain amount of calories per day. The average consumption level is around 2,250 to 2,750 calories per day depending on the intensity of your hike as well as the size of your body. Sadly, hiking doesn’t burn off nearly as many calories as we often think it does so you probably won’t need as much food as you think you will.
When putting together your “meal plan”, you can choose from either DIY meals and snacks or fancy store-bought backpacking meals . These tend to be very expensive so if you’re looking for ways to cut down costs, this is definitely one of them! This can also be helpful if you’re vegetarian since although it seems like more and more pre-packaged backpacker meals are coming onto the market, very few of them are actually vegetarian-friendly.
Get your mind and body shape.
Hiking is great for our physical and mental health but you certainly don’t want to injure yourself at the beginning of your trip (or anytime during your trip to be fair) or not be able to finish the trip because it’s too tough. It’s important to make sure that you’re up to the task physically and mentally before setting out on your backpacking trip. This can greatly help increase your chances of being able to complete it.
One good way to do this is to go on a few tough day hikes or some overnight weekend trips. You can also try car camping with a few long hikes mixed in. This will give you an idea of what equipment you need and what you may be able to leave behind. If this isn’t possible, try to hit the gym as often as you can and focus on working muscle groups that you would normally use during a hike. This will usually be very different from yoga classes or running on a treadmill. While those are both great for you, they don’t help strengthen the muscles that you need them to.
While you’re building up your strength and stamina physically, it’s just as important to build yourself up mentally. Unless you’re doing a technical hike, you’re probably more likely to run into a mental block than a physical one. To “practice”, try to hike when you’re really tired. Throw in some early morning hikes and a few nighttime hikes to see how it goes. You may be surprised at how much this can help when you set out for your backpacking trip.
Check and recheck everything.
Before you set out on your backpacking adventure, make sure that you check and recheck everything. This includes your backpacking gear list, your food, the weather, and everything and anything else you can think of. Reread trip reports, double-check the website of the park you’re visiting, and log onto their Facebook page for any additional updates. This is your final chance to make sure that you have everything ready and that the weather will cooperate with you. If you learn something that can impact your trip, this is your time to try and resolve it before it becomes a bigger issue. This step is just as important as when you did your initial research so make sure that you tie up any loose ends before they begin to unravel!
Don’t leave anything until the last minute.
There are always jokes about people who pack last minute for a vacation. You know the ones, someone is running around two hours before their flight throwing stuff into a suitcase. This is what you definitely don’t want to do when backpacking. Packing last minute makes it easy to forget something and this can mean the difference between life and death. Instead, try packing everything into your backpack at least a week before the trip. This will give you time to change anything (take stuff out, put stuff in) and still be able to repack in plenty of time for your departure.
Share your itinerary.
Before you head out, make sure that you share your itinerary with someone that you trust. Ideally, this would be someone who has also backpacked before and understands some of the issues that could arise, and, most importantly, knows how to help if anything goes wrong. Leave their contact details and your itinerary stashed somewhere in your car near the trailhead or campsite as well so that in the event you don’t return at your intended time, someone near the trail may be able to help. You can also stop by any ranger station and inform them of your route and how long you expect it to take.
Ready for the world?
We hope that this guide has left you ready to pack your backpack and set off into the wilderness on your next adventure. As always, we would love to have your feedback and please let us know if there’s anything that we may have missed. This will help our readers be as prepared as possible!
If you need any additional information about destinations around the world, don’t forget to check out our travel guides . These were written by our own in-house travel experts who have roamed around the globe from Acadia to Yosemite and everywhere in between! You can also download the Let’s Roam app which is full of great user-generated content for destinations all around the world as well as our fun-filled scavenger hunts. They’re a great way to learn more about a destination and have a wonderful time doing it.
Frequently Asked Questions
The first thing you need to do when planning a backpacking trip is deciding where to go! This will impact the gear you take and how you will start and end the trip.
If this is your first backpacking trip , it is a good idea to do a short trip close to home. Once you feel comfortable, you can start going on longer trips.
If you are looking for more info on towns near your destination, download the Let’s Roam app . This app is full of useful, user-generated content that will help you find the best restaurants and hotels.
Featured Products & Activities
You are using an outdated browser. Please upgrade your browser or activate Google Chrome Frame to improve your experience.

- Trip Styles
- Destinations
15 Best Beginner Backpacking Trips in the U.S.
- All Inspiration and Destinations
- Canadian Rockies
- New Hampshire
- New Zealand
- North Carolina
- Vancouver Island
- Washington State

If you’re new to backpacking, you may have a lot of questions , like what to pack , what to eat , and — most excitingly — where to go. In the US, you have dozens of beginner backpacking trips at your fingertips. Whether you want to plan an epic hiking vacation to your favorite national park or you want to hit the trails closer to home, you’ll have options.
When planning your first backpacking trip, you can either, 1) choose a trip within your comfort zone and go with family, friends, or a partner or 2) join a guided trip so you can learn new skills, develop friendships, and take on a more difficult challenge. Some people try to fit too much into their first backcountry trip and end up ditching the pack for good after their adventure is over. Or, they don’t set their sights high enough and end up underwhelmed, wondering why anyone would willingly lug 30 pounds of gear into the backcountry.
We know that if you’re backpacking, you want to escape the crowds, take in stunning views, and put in some effort. So, we want to help you plan a trip that will make you fall in love with the sport so that every time you dust off your backpack, a smile spreads across your face. If you’re looking for inspiration for your first backpacking trip (or your second, third, or seventieth), we’ve compiled a list of 15 beginner-friendly backpacking trips and trails across the United States that will immerse you in wild environments and challenge you just the right amount.
Explore Your World with Award Winning Guides
how to choose an appropriate trail
While each new backpacker is entering into the sport with a different set of skills and fitness levels, we’ve crafted a list of trips with all beginner backpackers in mind. These trips fit a few criteria:
- You’ll hike relatively low-mileage for the length of the trip.
- The trails don’t have extreme elevation gain for the region.
- They travel on well-maintained trails and avoid tricky terrain like boulder fields.
- You’ll get a lot of bang for your buck, whether in the form of peaks, alpine lakes, or lush meadows.
However, backpacking is never easy (or else we’d never do it!) — so, if you want to maximize your fun, be sure to train for your backpacking trip .
1. Point of Arches, Olympic National Park

Mileage: 8 miles out-and-back | Length: 2 – 3 days | Elevation Gain/Loss: 200 feet
Point of Arches is a perfect beginner backpacking destination on the edge of Olympic National Park, accessed via the Makah Reservation. You can hike this trail as an overnight, but if you have a third day to spare, you won’t be disappointed by the abundance of tidepools to explore and wildlife to observe. The sea-stack studded coastline is complemented by lush forests, which are home to banana slugs, Roosevelt elk, and black bears. Each night, as the sun sets over the Pacific Ocean and you fall asleep to the sound of crashing waves, you’ll start scheming up your next trip.
Why is it great for a beginner?
This relatively-flat trail gives you quick access to a stunning beach environment, without much hard hiking or elevation gain. In fact, we offer this as a family-friendly trip option. You’ll get the pay-off of a bigger backpacking trip, but without all the work. So, pack a chair and relax on the beach as seals play in the coastal waters and eagles fly along the bluffs hunting for fish.
Unlike many beach destinations, the campsite near Point of Arches sits along a creek, so you don’t have to pack in water for your whole trip — just a water filtration device.
logistics and permits
You’ll need to secure two permits to make this trip a reality. First, you’ll need to pick up a Makah Recreation Pass ; it costs $10 and is good for an entire year. You can get one in Neah Bay at the marina, the general store, the mini-mart, and the tribal center, among other areas. Also, as this trail enters into Olympic National Park, you will need a Wilderness Camping Permit for any overnight stays in the park. Make sure you reserve this in advance. However, if you join a guided trip, we take care of all permits and reservations for you!
As of February 2021, this trail is closed due to COVID-19, as are many of the coastal areas of the park because they are on tribal lands. If you’re looking for an alternate route in Olympic National Park, the Seven Lakes Basin backpacking loop is a great — yet more difficult — alternative.
Guided Trip Options
Wildland Trekking offers this trip as a guided backpacking adventure package with expert guides, gear, meals, transportation and more all included! Click here to learn more!
2. Shining Rock Wilderness, North Carolina

Mileage: 22 miles roundtrip | Length: 4 days | Elevation Gain/Loss: 2,300 feet with backpacking packs (plus 1,700 ft with a day pack)
The Shining Rock Wilderness in the Blue Ridge Mountains of North Carolina is one of the most spectacular East Coast backpacking destinations. The name comes from a unique geologic outcropping of quartzite rock that guards the summit of Shining Rock. Not only will these rocks dazzle you with their beauty, but they also provide a great perch to look out across the sweeping views of the surrounding peaks. On your trek, you’ll hike past cascading waterfalls and swimming holes that are perfect for a dip in the right season.
Relatively short-mileage days lead to exciting destinations. And while many beginner-friendly backpacking trails are packed with crowds, you can find mountain solitude in the Shining Rock Wilderness. Plus, a two-night backcountry basecamp lowers the number of miles you need to hike with a full pack. One of the hardest parts of backpacking is fine-tuning your pack packing routine, so you’ll appreciate the layover day when you get to leave your tent set up.
You don’t need to obtain a permit to backpack in Pisgah National Forest. However, due to the prevalence of black bears in the area, you must carry all your food and scented items in bear canisters .
This trail is in a wilderness area , so as with all backpacking trips, please leave no trace and minimize signs of human impact. We recommend first hiking in this area with a guiding company because the trails are not signed or blazed, unlike more popular destinations such as Great Smoky Mountains National Park. However, if you do choose to backpack alone in this region, carry and map and compass so you can navigate the trails.
3. Golden Cathedral, Grand-Staircase, Utah

Mileage: 10 miles roundtrip | Length: 3 – 4 days | Elevation Gain/Loss: 1.100 feet
The Golden Cathedral is a stunning display of geologic processes set in Neon Canyon. On this trip, you set up a basecamp along the Escalante River so you get to enjoy both the lush desert oasis and impressive slickrock features, like the pothole arch pictured above. While camping is not permitted in Golden Cathedral to protect the fragile environment, you’ll enjoy your sandstone surroundings as you explore the labyrinth of canyons during the days. Plus, southern Utah is known for its endlessly dark night skies. So as you peer out of your tent at night, be sure to gaze up between the canyon walls to see a smattering of stars.
This low-mileage trip is doable as a day hike, but spending the night between the narrow canyon walls in red rock country is quite the experience. You’ll carry a pack on the first and last day of your trip, setting up basecamp once you arrive in the canyon. Then, on your layover days, you’ll have time to explore slot canyons and washes without the weight of your pack. Unlike some desert hikes, this destination has plenty of water, so while you’ll need to stay hydrated, you won’t weigh your pack down with a trip’s worth of H20.
While this is a great first beginner backpacking trip with a guiding company, it can be a challenging trail to navigate on your own. However, if you plan to go solo, follow the cairns (piles of rocks) and keep your senses engaged so you don’t get lost. Don’t forget the map and compass!
Stop by a ranger station to obtain a free backcountry permit. Study up on desert leave no trace procedures, as this unique environment requires that you travel mindfully.
Also, check the forecast before you go because flash floods can be an incredible danger in canyon country. During certain times of the year, you may need to wade through thigh-deep water in the canyons. Bring along a pair of hiking sandals and trekking poles to make the journey more fun!
4. Tuolumne Meadows area, Yosemite

Mileage: 20 miles roundtrip | Length: 3 – 4 days | Elevation Gain/Loss: 1,300 feet with a pack ( + 1,700 as a day hike)
The Tuolumne region of Yosemite National Park is defined by expansive green meadows, dome-shaped mountains, and the pinnacle spires of the Cathedral Range. Water flows freely through the Grand Canyon of the Tuolumne, where you can witness cascades tumbling down silver slabs of granite. On our Yosemite Alpine Meadows and Waterfalls Trek , you can see some of the best that it has to offer on a moderate trip.
Unlike the Yosemite Valley, Tuolumne Meadows has high-elevation trailheads with relatively flat relief landscapes and far fewer crowds. Water is plentiful and the views are outstanding. Up in Tuolumne, wildlife is less accustomed to humans, so you’ll have fewer concerns about a hungry bear sneaking into camp.
The campsite along this route (where you’ll stay for two nights) has treated water and solar-powered outhouses for ultimate backcountry comfort. Plus, unlike many areas in Yosemite National Park, you’ll have access to bear boxes at camp, so you won’t have to carry bear canisters which are heavy and inconvenient.
You’ll need to obtain a permit to stay overnight in the backcountry of Yosemite National Park. We recommend you reserve a permit in advance, however, some first-come-first-served permits are available if you visit the ranger station the morning before your intended trip. If you’re traveling during the weekends or holidays, don’t expect to get a last-minute permit.
5. Havasupai Garden, Grand Canyon

Mileage: 15 miles roundtrip | Length: 3 days | Elevation Gain/Loss: 3,000 feet with a pack ( + 1.500 ft as a day hike)
Okay, no backpacking trip in the Grand Canyon is exact beginner-friendly because of the nature of the terrain. However, if you’re set on hiking Arizona ‘s Grand Canyon for your first backpacking trip, the Havasupai Garden backpacking trip is a solid choice. Instead of backpacking to the bottom of the canyon, you’ll hike down the iconic Bright Angel Trail and stay at Havasupai Garden (a lush oasis with plenty of shade). The next day, you’ll hike down to the Colorado River without a big pack on your back. This three-day excursion allows you to experience the canyon beyond the rim — something not a lot of visitors can say. And as you enjoy dinner and panoramic views at Plateau Point, you’ll feel glad you put in the effort.
Havasupai Garden is a bit of an oasis, offering hikers more shade and water than other areas along the canyon. Potable water is available year-round to hikers. These qualities are important because heat and dehydration are two of the most dangerous factors for visitors. Additionally, this trail has less elevation gain and loss than other Grand Canyon trips. You’ll still get the expansive views and magic feelings that come along with an overnight stay in the Grand Canyon , without the knee-pounding descent to the bottom. Plus, this campground has toilets, so you don’t have to worry about properly burying or packing out your waste.
You must reserve and obtain a permit to backpack in Grand Canyon National Park. Because of the popularity of this park, these permits can go quickly! A few permits for Corridor campgrounds (including Havasupai Garden) are available for walk-ups at the Backcountry Information Center in the park.
Just because the Havasupai Garden Campground is more accessible than many backcountry campsites doesn’t mean you shouldn’t take it seriously. Anytime you’re hiking below the canyon rim, you need to carefully consider the conditions, your water capacity, and your fitness level. In the hot seasons, start early to avoid mid-day heat; this is an unforgiving climate and many hikers have died by setting out unprepared. Hiking with a guide can ensure that you have the tools you need to successfully backpack in the Grand Canyon .
6. White Mountain Hut to Hut, New Hampshire

Mileage: 15 miles point-to-point | Length: 3 – 4 days | Elevation Gain/Loss: 3,600 feet
Traversing an alpine ridgeline and staying at high mountain huts — you expect that in Europe, but not in the U.S., right? But in the White Mountains of New Hampshire, you can enjoy the luxury of backcountry accommodations with the adventure of the alpine. Similar to the popular Presidential Peaks Traverse but less daunting, the High Peaks of the Pemigewasset Hut to Hut Trek offers the same appeal for a fraction of the difficulty. Staying along the Appalachian Trail (AT), you’ll bag peaks during the day and settle into cozy mountain huts at night. These trails offer a sense of camaraderie that is often hard to find when backpacking. As travelers from all over the world stay at the mountain huts, you’ll be able to chat about your hike over dinner.
On a hut-t0-hut trek , you’ll get to leave the tent and sleeping pad behind, shedding some of the heavy weight required for backpacking trips. If you’ve always wanted to spend the night in the backcountry, but aren’t ready to give up the luxuries of a bed, toilets, and running water, this will be a great introductory trip.
Also, you’re hiking above treeline for most of your trek, so the views per mile are exceptional. But, the terrain is a bit rougher than some of the other trails on this list.
Because this trek takes place primarily above the treeline, you should check the forecast , have good decision-making skills, and stay aware of thunderstorm conditions. The White Mountains are notorious for their erratic weather, so make sure to be prepared for some wild winds and weather.
You should book your stays in the AMC huts in advance. If you plan a point-to-point traverse, check out the shuttle system to ensure you can get back to your car at the end of your journey. The Appalachian Mountain Club strongly recommends reserving your shuttle; walk-ons are only accepted when space is available.
7. Lake Blanche, Wasatch Range, Salt Lake City

Mileage: 7 miles out-and-back | Length: 2 days | Elevation Gain/Loss: 2,700 feet
Lake Blanche is a popular day hiking destination in Big Cottonwood Canyon outside of Salt Lake City. Those that pack a bag to spend the night near the lakeshore (well, 200 feet from the water’s edge) will be rewarded by dwindling crowds and dazzling alpenglow on Sundial Peak. As you approach the photogenic basin, keep an eye out for moose grazing on aspens. Once you’ve set up camp, hike the spur trail to explore Lake Florence and Lake Lillan.
This backpacking trip can be completed as a quick overnight, as it is incredibly accessible from Salt Lake City, Utah. While the trail has a fair amount of elevation gain, the low mileage (3.5 one-way) makes this trip achievable for most first-time backpackers. Once you set up camp, you’ll have access to water. Also, while solitude can be desirable, you probably won’t be alone if you camp near Lake Blanche. Some first-time backpackers may feel reassured at the presence of other humans.
You do not need any permits for this backpacking trip. Check out the Uinta-Wasatch-Cache National Forest backcountry regulations before you go.
However, no swimming or campfires are allowed. Respect the watershed and don’t wash your dishes in the lake.
All-inclusive Backpacking Adventures
8. Heart Lake and Mount Sheridan, Yellowstone

Mileage: 23 miles roundtrip | Length: 3 days | Elevation Gain/Loss: 900 feet (+ 1,800 as day hike from camp)
This remote region of Yellowstone is teeming with wildlife, rolling meadows, expansive lakes, and geothermal features. So what more could you ask for? Well, when you backpack to the shores of Heart Lake, you won’t want to miss Mount Sheridan. Adding on a summit attempt to an already fantastic hiking trail really elevates this itinerary. This area is so classically Yellowstone that you’ll fall in love with the subtleties, like a pine marten running through the trees, the feeling of the wind as you approach the ridgeline, and the rising steam of the hot springs along Witch Creek.
The Heart Lake Trailhead in Yellowstone National Park is a great jumping-off point for many backpacking trips, including our Heart Lake and Mount Sheridan and Heart Lake/Snake River trips. While they are both great options for a new backpacker, the Heart Lake/Mount Sheridan trip doesn’t require a shuttle, making it easier to execute for non-guided hiking parties.
You’ll set up a basecamp for two days near Heart Lake. There, you’ll get to relax along the lakeshore in the evenings. On your layover day, you’ll hike into the alpine during your summit attempt of Mount Sheridan. If you make it to the top (and even if you don’t), you’ll get sweeping views of the Absaroka Range, the Tetons, and Yellowstone Lake.
The rewards are big for a relatively flat 8-mile hike in to camp. This itinerary gives you plenty of downtime to enjoy the leisurely pleasures of backpacking, while also ensuring you work hard to get a well-rounded experience in Yellowstone.
When it comes to the Greater Yellowstone Ecosystem (Yellowstone, into the Tetons and beyond), you’ll have one big safety consideration when backpacking. Grizzly bears. This not-so-small detail is one of the only reasons this isn’t an ideal beginner trip. However, the elevation gain and mileage are very achievable by most beginners. So, if you like the idea of this trip but aren’t keen on hiking in grizzly country, join us on a guided trip and we’ll help you build the skills you need to travel with confidence.
If you do decide to hike in grizzly country without a guide, be sure to read up on safety protocol, hike smart, carry bear spray, and keep a bear-safe camp. You’ll also need to be prepared to hang all of your food at the designated bear hangs in the Park. We’ve written all about in this blog post .
If you want to stay overnight in Yellowstone National Park, you’ll need to obtain a permit . Heart Lake is one of the more popular backpacking destinations in the park, so you should make an advanced reservation. However, permits are also available for walk-ups up to two days before your trip date. If you do decide to chance your trip with a last-minute permit, you should have a backup itinerary in place in case you can’t secure your ideal campsite.
9. Ancient Lakes, Eastern Washington

Mileage: 4 miles out-and-back | Length: 2 days | Elevation Gain/Loss: minimal
If you’re searching for the perfect early-season overnighter, look no further than Ancient Lakes near Quincy, Washington. This desert oasis is close enough to Seattle that you can squeeze in a quick weekend trip even if you only have Saturday and Sunday to play. As you wander among the columnar basalt rocks, you’ll watch waterfalls splash over the edges and create green streaks of life on the walls. Once you arrive at the lake, you’ll find many paths to explore the area. And nearly every campsite you can find has great views of the dark night sky.
Low-mileage and minimal elevation gain make this a great trip for beginners, kids, and the pup. While you do need to pack in all your water, you shouldn’t be deterred because you only have a 2-mile hike to the lake.
logistics and permits’
Pack in all the water you’ll need for your overnight trip! Even though you are hiking to lakes, all of the water is irrigation water from nearby farmlands. Agricultural runoff pollutes these water sources, so you’re better off bringing potable water from home. Also, you may want to avoid this one during the hot summer season. If you do backpack in this area during the summer, keep an eye out for rattlesnakes.
You do not need a permit to camp overnight in the Quincy Wildlife Recreation Area. However, you’ll need a Discover Pass to park at the trailhead.
10. Superior Hiking Trail, Minnesota

Mileage: varies (10+ mile one-way) | Length: varies (2+ days) | Elevation Gain/Loss: varies
We’re not recommending that you hike all 310 miles of this thru-hike for your first backpacking trip (not that we’d stop you…), but the Superior Hiking Trail (SHT) in Minnesota has many trail sections that you can complete in a weekend or on a three-to-four-day trip. Weave in and out of deciduous forests as you follow the shore of Lake Superior. You’ll cross deep gorges, pass fairytale-esque waterfalls, and even find your fair share of swimming spots. In the autumn, you’ll hike to vistas to see a sea of reds, oranges, and yellows. While the entire trail is stunning, some standout sections are from Caribou Falls State Wayside to Lutsen and from Two Harbors to Silver Bay .
The SHT hiker’s shuttle makes it easy to customize your route for your timeline and hiking ability, without having to do an out-and-back hike. Just choose one of 50 different trailheads and hike north or south! Most hikers travel from south to north. The trails are well-marked with a blue blaze.
When you’re on the trail, you encounter designated campsites very frequently. So, you never have to hike far to find a place to rest your head (unless you want to pack in the miles!) Additionally, some sections of the trail pass through towns. If you’re considering your first thru-hike or week-long trip, restocking supplies is incredibly easy.
No permits or reservations are required to hike and camp along the SHT. During busy weekends, you may have to share campsites with other hiking parties.
The trail does pass through state parks. In these areas, you can only camp with a reservation and fee. If you don’t want to make reservations, plan your itinerary so you camp in the other numerous campgrounds.
11. Glacier Gorge, Rocky Mountain National Park

Mileage: 10 miles roundtrip | Length: 2 – 3 days| Elevation Gain/Loss: 1,700 feet
If you don’t mind the company of other hikers, Glacier Gorge is a fantastic destination for a first backpacking trip in Rocky Mountain National Park . It’s hard to snag a backcountry permit for this coveted area, but if you do, you’ll stay in one of two designated campsites — either in the Glacier Gorge Valley or along Andrews Creek. If you’re staying at Andrews Creek, establish your basecamp and set out on a hike to Sky Pond , a sparkling alpine lake nestled beneath Taylor and Powell Peaks. Spend an extra day exploring the area and head up to Andrews Glacier. If you’re at the Glacier Gorge site, bring a fishing rod and test the waters at Jewel Lake. Or, hike up to Black Lake and Ribbon Falls.
The campsites are relatively close to the trailhead. Once you set up camp, you’ll have opportunities to explore stunning high mountain lake basins without the weight of a heavy pack. Starting from the Glacier Gorge Trailhead, you don’t have to gain much elevation to get some pretty impressive views.
You’ll need to reserve a wilderness camping permit if you plan to spend the night in Rocky Mountain National Park. As there are only two designated campsites in this area, the spots fill up quickly. If you plan to fish, you’ll need a valid Colorado fishing license .
In Rocky Mountain National Park, you must carry and store all your food and scented items in a bear canister. This is the only food storage method permitted in this park.
12. Observation Peak Trek, Yellowstone National Park

Milage: 10MI / 16KM roundtrip | Length: 2-3 days | Elevation Gain/Loss: 1300 ft
If you’re looking for an introduction to backpacking that will have you deep in the backcountry without having to hike for days, then a trek to Observation Peak is an excellent option. In the heartland of wild Yellowstone National Park, this relatively popular trail can be done in 2 or 3 days and gives you some of the most stunning scenery in the park. You can either chose to day hike to Observation Peak with a basecamp at Cascade Lake or include this summit on the first day of your trek before setting up camp. With moderate elevation gain and well maintained trails coupled with stunning lakes and vistas, this trail is one of the best extended weekend options in Yellowstone.
Why is it Great for a beginner?
An Observation Peak trek is a great option for first time backpackers as there are so many options for customizing the trip to what you want. Depending on if you are going for 2 or 3 days, you have options to hike to Observation Peak and take in the views, stroll to Grebe Lake and fish for trout, or simply relax at Cascade Lake if you want to rest your legs. Plus, the milage is minimal and doesn’t leave you exhausted by the time you reach camp. This trail is popular enough to make first time backpackers feel comfortable with others around, but doesn’t have so many people as to spoil the wilderness effect.
Logistics and Permits
The biggest logistical concern of hiking in Yellowstone is the wildlife. Grizzly bears are very active in this area and other wildlife such as bison and elk can also pose danger to hikers. This is one of the only downsides to embarking on this trip as an introduction to backpacking. However, with the moderate elevation and easy milage, you’ll be able to prepare for the possible dangers of wildlife and still complete this trip safely. If the wildlife seems like a bit much but the hike sounds appealing, Wildland Trekking offers this trip in both 2 and 3 day options so that you can get your feet wet before going out there on your own.
Like everywhere in Yellowstone, permits are required for overnight camping. Yellowstone’s traditional backpacking season is shorter than other national parks, mostly limited to summer, so you’ll want to make advanced reservations to ensure you get the route you want. Walk up permits are available at ranger stations 1 or 2 days before you begin your trek, but they go quickly each morning. It’s a good idea to have a back up itinerary in case you don’t get the permit you want. Permits are included on guided trips
Wildland Trekking offers this trip as an all-inclusive guided hike with meals, gear, transportation, permits, and an expert mountain guide all included. Guided trips are a great way to find out what backpacking is like before getting out there on your own. Click here to learn more!
13. Little Lakes Valley, Inyo National Forest, California

Milage: 8-10MI / 13-16KM Roundtrip | Length: 2-3 days | Elevation Gain/Loss: 1218 ft
Just north of Bishop on California’s Highway 395 is a blink-and-you’ll-miss-it turnoff with one of the Eastern Sierra’s best short distance hiking destinations: Little Lakes Valley. This valley, accessed from Mosquito Flats , is a great destination for a first time backpacking trip. With over a dozen serene alpine lakes, this valley is overflowing with campsite options, day hiking, fishing, and stunning views. While the trail is easily assessable, it’s no overly crowded and with the abundance of campsites, hikers may get an opportunity to have a lake to themselves. Located in the Inyo National Forest, there’s much less competition for permits compared to national park trails, but the scenery is no less spectacular.
Little Lakes Valley is great for beginner backpackers because of the big bank for your buck (or view for your step) that you get on this short and relatively flat trail. There is some elevation gain on the way into the valley, but that means it’s downhill on the way back! The abundance of lakes and streams make finding water a breeze and the pristine lakes with a back drop of snow capped, jagged peaks is unbeatable. Plus, the trail is easily accessible from Highway 395 and Tom’s Place at the turnoff is a great place to spot at for a burger on the way out!
Logistics for backpacking in Little Lakes Valley are pretty minimal as the short trail is out and back and there is only one access point. Your biggest concern is going to be the elevation as the trailhead is over 10,000 ft above sea level. All backpackers (not just beginners) who don’t live at elevation should spend at least one night (if not two) at a nearby campground that’s around 7,000 to 8,000 ft in order to acclimate to the elevation. Convict Lake is a good, close-by option for this.
Only attempt this hike in summer and early fall and make sure to check the weather before you go to assess road and snow conditions. Permits are required to spend the night here, but there is much less competition for them compared to national parks. You can make reservations online or get walk up permits at Inyo National Forest’s backcountry permit office.
This is bear country and you will need to use bear resistant containers for all food and smelly items. There are no campfires allowed anywhere in the valley and water collected from lakes and streams should be filtered.
14. Half Dome, Yosemite National Park

Milage: 16MI / 26KM Roundtrip | Length : 4 days | Elevation Gain/Loss: 2845 ft
First, a disclaimer: this trip is hard. Hiking to and up Half Dome is a challenge with large elevation gains and lots of exposure to heights. Beginning with the Mist Trail and ending with hiking the cables , this hike is not to be underestimated. But the views from the top are worth it. While many people do this hike in a single day, backpacking to the base of Half Dome and then summiting in the morning before any day hikers arrive is a great option, allowing you to skip the extremely long and strenuous milage day. It is notoriously difficult to get permits to hike Half Dome, but the backpacking permit is separate from the day hiking permit and will be easier to get.
So if this trip is so hard, why is it included in this list of best trips for beginner backpackers? Well, beginner trips don’t necessarily mean easy trips. If you are already an avid outdoors person, in good physical condition, and accustomed to hiking, you might want your first backpacking trip to be a bit of a physical (if not a technical or logistical) challenge. In this case, Half Dome may be a great option for you, especially if you’ve already done it as a day hike.
While the elevation is still hefty even for avid hikers, backpacking to the monolith cuts down the milage to reasonable days, making a backpacking trip arguably easier than a day hike. Of course, you might consider going with a guiding company due to the somewhat technical terrain on the granite and to avoid the hassle of getting permits.
Hiking Half Dome comes with some logistics to work out. The cables on the last miles of the climb are only up from late May through early October when there won’t be snow and ice on the granite. In addition, you won’t be able to hike on a rainy day (or even a day that is threatening rain) as the granite becomes extremely slippery when wet. Most accidents happen in wet weather. Check the forecast and make sure there are no storms brewing.
Permits are notoriously difficult to obtain for Half Dome, but backpacking permits are a little bit easier as you are not competing against all the day hikers for a spot. You can reserve permits on the National Park Service’s website.
The trail is in and back, so you won’t have to worry about transportation if you park your car at the trail head. Remember, this trail is commonly done as a day hike, so don’t expect to have backcountry solitude on this trek.
Backpacking to Half Dome with a guiding company can be a great way to challenge yourself physically, but have an expert guide to show you the ropes of backpacking before you get out there on your own. We offer this trek as a guided tour for anyone wanting a bit of a challenge with great rewards. All of our trips are all-inclusive with meals, gear, transportation, permits, and an expert mountain guide all included. Click here to learn more!
15. West Rim, Zion National Park

Milage: 16MI / 27KM Point to Point | Length: 2 days | Elevation Gain/Loss: 1700 ft
Beginning far from the gorgeous yet busy canyon that is Zion’s main attraction, the West Rim trail is a scenic, mostly downhill, 2 day backpacking trip that will knock the socks off any first time backpacker. Even seasoned backpackers will be kept interested on this moderate trail with non-stop views of Zion’s majestic red rock canyons and some campsites from which you can see both the sunset and the sunrise. Beginning at Zion’s highest point at Lava Point and hiking down toward the canyon, this trip takes hikers up to the alpine portions of Zion and then down into traversing through the classic canyons. And to top it all off, you’ll end at Scout Lookout with some of the most famous views in the park.
The West Rim in Zion is a great trip for first time backpackers because it is simply loaded with gorgeous views and isn’t too strenuous. You’ll be able to take leisurely mornings when hiking this trail over two days and if you start at Lava Point, it’s almost entirely downhill! (You will want to bring trekking poles however, all that downhill hiking can be hard on the knees). The elevation and milage are moderate and you simply can’t beat the views down into the canyon. While Zion is known for its crowds, you won’t find this trail overly crowded, giving first time backpackers a chance for some solitude on the trail.
Zion’s West Rim comes with a few logistical issues, but none that a first time backpacker can’t figure out. The trail is out and back so you will need to either park a car at the end of the trail and drive a second one to the trail head or use a shuttle service. Shuttles can be arranged from town easily.
Another logistical concern is water. There are seasonal springs along the trail, but the only one that flows year round is Cabin Spring. Water from streams and rivers may be impacted by a recent bacteria bloom that contain cyanotoxins, making the water unsafe for drinking and swimming. Please see the Zion’s official website for current updates on the cyanobacteria bloom.
Permits are required for overnight use and they double as campsite reservations for one of the 9 campsites along the trail. Walkup permits are available, but it’s best to reserve them online to make sure you get the permit you want. Zion has stricter regulations about backpacking compared to other national parks, so make sure to read the trail rules before setting out.
About Hannah Singleton

Hannah is a content strategist, writer, and guide for Wildland Trekking Company. She was born and raised on the East Coast but currently resides in Salt Lake City, UT where she spends her time exploring the wonders of the Rocky Mountain West. You can check out more of her freelance writing at www.hannah-singleton.com.

wildland Wires
Sign up to receive our exclusive Wildland Wire emails and stay up to date with Wildland Trekking's promotions, discounts, contests, outdoor tips and tricks, trip reports and more!
- Conditionally
- Newsletter Signup
11 Pro Tips for Packing for Your First Backpacking Trip
By Colleen Stinchcombe

All products are independently selected by our editors. If you buy something, we may earn an affiliate commission.
I’d consider myself a pretty experienced backpacker—last summer, I spent more than three months backpacking 1,000 miles. But it was only two years before that I went on my first backpacking trip. It was 10 miles one way, I didn’t prepare properly, and I hadn't really hiked before. I could barely lift my pack, it was so heavy, and my sleeping pad swayed precariously every time I took a step.
Despite being wildly unprepared, this trip started me on the path toward some incredible outdoor experiences . But I do wish I had known a little about packing before I took my first trip.
To help you get started on the right foot, I asked a couple of experts for their best packing tips for beginner backpackers. Here’s what they (and I) want you to know.
Navigation, sun protection, insulation, lighting, first aid, fire, tools, food, water, and shelter make up the standard list of The 10 Essentials , which was created by The Mountaineers, a Seattle-based organization for outdoor adventurers.
“As long as you have these—they’re 10 categories of items that you should have with you—you’re going to be pretty well prepared,” Lindsay McIntosh, an REI Outdoor School backpacking instructor in Portland, Oregon, tells SELF. REI gives a good break down of the importance of each item here .
The major pieces you’ll need while backpacking fall into these categories, like a sleeping bag (insulation), a headlamp (lighting), and a tent or tarp (shelter). Of course, you’ll also need a pack to put everything in.
With water, you may pack all of your own clean water (if it’s a short trip or there aren’t any water sources where you’re going) or you may need to purify your own water from a backcountry source. If you’re looking for a filter, McIntosh recommends the MSR SweetWater Microfilter or the Sawyer Squeeze , both of which are lightweight. Marina Fleming, program director at Women’s Wilderness , prefers a chemical purifier called Aquamira .
It's not covered in the 10 essentials, but you do have to consider it when you pack. McIntosh suggests carrying biodegradable soap, though she’s quick to point out you should always be at least 100 feet away from any water source—you should never wash your body or your clothes in a river or lake. You can also bring a little bottle of hand sanitizer.
When it comes to backcountry bathroom tactics, make sure you’re familiar with leave-no-trace principles . Bring an appropriate amount of toilet paper (no need to bring the whole roll.) Depending on the area you’re in, you’ll probably have to either bury toilet paper or bring it back with you (known as packing it out). If you’re just peeing, a popular option for women backpackers is to bring a “pee rag”—usually a bandana or half of a quick-drying cloth. You use it to wipe with and then hang it off your pack to dry in the sun. Some women might choose to use a urination device (basically a funnel). And make sure you have a good trowel for digging holes to go number two—even if you think you’ll have access to a toilet or won’t need to go. It’s no fun to get stuck with your pants down and nothing to dig a hole with. I like the The Deuce .
Last but not least, menstruating. Your method of managing your period can be the same as at home. If you’re using tampons or pads, you will need to pack them out, so be sure to bring an extra plastic, sealable bag to put used items.
Keep all of your bathroom necessities—toilet paper, trowel, hand sanitizer—in a single bag that you can grab quick when nature calls.
Cost can be a big barrier for people to start backpacking, but that doesn’t need to be the case, Fleming says. She recommends repurposing things you already have at home instead of investing in specialized items right off the bat—a nifty folding lightweight spork seems legit, but a spoon you already have will suffice. If you have friends who backpack, see if they’d be open to letting you borrow some of their gear.
Otherwise, look into renting gear, at least until you decide backpacking is something you want to continue doing. REI offers gear rentals for bigger-ticket items like backpacks, sleeping pads, sleeping bags, and tents. You can also check with your local outdoor retailer to see if they offer a similar program. But do be sure to ask how things work, and practice setting up camp at home before you hit the trail. I rented gear for my first backpacking trip and didn’t realize the sleeping pad I had actually inflated until I was rolling it up to go home.
Backpacks, tents, and sleeping bags are all big things that are necessary, so it’s key to find ones that are lightweight.
For packs, Fleming suggests looking at Deuter and Osprey models like the AirContact 70 or the Talon 44 . I backpacked for three months last year using the ULA Circuit and loved it. But packs are personal, and it comes down to the right pack that fits you and your needs. It’s definitely worth going into an outdoor retailer and trying on packs to make sure you find one that’s comfortable on your body.
When it comes to a tent, McIntosh likes the REI Quarterdome 2 . “It gives you a nice amount of space but is really quite light,” she says. Fleming has had luck with the Big Agnes Copper Spur 2 . On my trip last year, I opted for a super compact one-person tent, the NEMO Hornet 1 .
Sleeping bags can surprisingly get very expensive. Generally speaking, prices go up as both the temperature limit and weight decrease. A bag made with synthetic fill is usually less expensive but will take up more room in your pack. McIntosh recommends the REI Lyra for an inexpensive synthetic option. For down, she likes the REI Joule . I started with a Teton synthetic bag and later invested in an Enlightened Equipment quilt that was lighter and took up less space in my pack.

By Jenna Ryu

By Julia Ries

Most importantly, make sure you’re getting a bag that is warm enough for the conditions you’ll be in. There’s often a “comfort rating” and a “lower-limit rating” on bags, the latter of which refers to the lowest temp that a warm sleeper would be comfortable with—so not necessarily you. A good rule is to use a bag that can handle a temperature that is at least 10 degrees lower than what the lowest temp while you're backpacking will be.
And it’s also important to note that when it comes to big brands (like REI and Osprey) and common styles, you can often find them lightly used on eBay, CraigsList, or at used gear stores.
Do you want do spend all day hiking and get deep into the backcountry, or do you plan to walk a few miles and spend the rest of the day lounging at camp? The former hiker might want to bring less (since they won’t have time for extra entertainment items anyway), where the latter hiker might want to pack a good book or a more elaborate meal.
Either way, start small. That goes for both what you put in your pack and the length of your first trip. Try to keep the amount of stuff in your backpack to a minimum (beyond items from the 10 necessary categories), and then take a one-night trip and see if you miss anything.
And remember, figuring out how to pack just right is a process. “There’s a huge learning curve to figuring out what you do and don’t need,” McIntosh says.
In my experience, people have a tendency to keep adding to their packs until they’re completely full—so try to stick to the necessities and make note of what you wish you had for next time and adjust accordingly.
Even if you want a more luxurious packing trip and want to bring lots of extras, keep this in mind: A heavier backpack is more challenging to hike with. “Your backpack should never weigh more than 40 percent of your body weight,” Fleming says. “If you’re going more than that you’re really running the risk of hurting yourself.”
Ultimately, how much weight feels “worth it” for you will be a personal decision. And while I recommend starting light and adding stuff that you miss, I should also say that I’ve never met a first-time backpacker who didn’t bring way too much heavy gear with them. I myself brought three books and an extra fuel canister I didn’t need on my first trip.
Going into bear country? You might need bear spray and a bear canister, or a bag you can hang out of a bear’s reach—many parks even require these items. Will you be walking through miles of desert? You may need more bottles to fill with water for dry stretches. If you know you’ll be doing river crossings, you may decide to bring sturdy sandals so you don't get your boots wet.
Researching the terrain, wildlife, and regulations can go a long way to keeping you safe and comfortable. Check the website of whatever park or trail system your visiting to get all the information you need so that you can adjust your gear accordingly.
It sounds so simple, but it’s actually a really helpful strategy to make sure you’re packing everything you need but not too much that you don’t.
Put all of your gear on the floor and separate it into three categories: need, really want, and bonus items. “That can help you make the decision on what to bring based on how big and heavy that “need” pile is already feeling,” McIntosh says. The other categories may start to feel less and less important when you realize how much you’ll already be carrying.
Some people organize their clothing into separate bags based on what its purpose is (i.e. sleeping, layering) and others bury it loose in with their sleeping bag. “It’s up to preference,” McIntosh says. But it’s probably not a bad idea to put any loose odds and ends in a bag so you can easily find them in your pack when you need them. For example, I have a Ziploc bag for electronics where I keep things like a personal locator beacon , headlamp, and charger for my phone. Also, it’s a good idea to bring an extra bag (even just a plastic bag, doesn’t need to be fancy) to put anything that gets wet so that the rest of your stuff stays dry.
Fleming recommends following these guidelines when it’s time to start packing:
A - Accessibility: Place items you’ll need to access while hiking—like snacks, lunch, your first aid kit, and a rain jacket—in hip belt pockets or toward the top of your pack.
B - Balance: Try to have your pack evenly distributed on both the sides and front and back. That means if you’re carrying a liter of water in a side pocket—which weighs 2.2 pounds—you’ll want to make sure you even out your other side pocket with something that weighs similarly, or you could start feeling the pack tug uncomfortably to the heavier side.
C - Compression: Backpacking isn’t the time to neatly fold your clothes. Roll your things up tightly so that they take up as little space as possible, and consider using a compression or stuff sack for things like clothes (and of course, your sleeping bag).
D - Dry: Most backpacks aren’t waterproof, and you’ll want to keep your essential items, if not all of your items, dry. Fleming recommends trash compactor bags —just open one up inside your backpack and then pack everything inside it as normal.
E - Everything inside: Don’t let stuff hang off your pack. This can throw off your balance and also cause you to get caught on branches you pass, not to mention it’s an easy way to lose things.
Also, pack the heaviest items in the middle—it's a good way to keep your pack balanced and distribute the weight across your core and back. “What you want to be putting at the bottom of the pack is lighter, fluffier stuff that you don’t want quick access to. So things like your sleeping bag, and your extra layers for when you’re at camp,” McIntosh says. Once you’ve stuffed that inside, put medium- to heavy items like your tent, water bladder, cooking gear, and food (that you won’t be eating while you hike) on top of the lightweight items. And then place any leftover light items, or items you need quick access to, at the top.
It takes a while to learn how to efficiently packing your pack and using your gear. “Don’t do it for the first time at 10 P.M. the night before your trip. Practice packing your backpack a couple of times,” McIntosh recommends.
If you get on the trail and something doesn’t feel right, be prepared to adjust. There’s no award for making it an extra mile with a pot sticking into your back. Stop and move items around until it feels good. And then? Go have some fun.

SELF does not provide medical advice, diagnosis, or treatment. Any information published on this website or by this brand is not intended as a substitute for medical advice, and you should not take any action before consulting with a healthcare professional.

Cookie policy

Planning Your First Backpacking Trip
By: Author Adam Cheshier
Posted on Last updated: June 6, 2022
Imagine this; you've just landed in Europe for your first backpacking trip. You make your way out of the airport, and suddenly, street signs and store-front ads are all in a foreign language.
You try to order a coffee at a spot in town, but the barista responds in the local language. You smile. You've made it.
After all of your research, all the time you spent saving up your money, and after all of the nerves of traveling alone for the first time, you've finally made it to Europe, and now it's all yours.

You're a backpacker now. You travel on a budget. You sacrifice comfort for experiences. You meet other backpackers and share stories over a few drinks.
You hang out at coffee shops to watch the local people go about their day. You wear infinite combinations of the same wardrobe and don't care who judges.
You're a backpacker, and you are about to have the ride of your life. So, buckle in, turn on your senses and get ready to remember it all.
Here are some of the most important things you'll want to think about while planning for the trip of a lifetime.
Table of Contents
Where are you going?
How much is this trip going to cost me, what's your budget, how do i find a cheap flight, how long should your trip be, who are you traveling with, what to pack, what documents do you need, how to stay connected with home, where to begin.
Your first backpacking trip starts long before you touch down on foreign soil. A lot of planning goes into a journey of this extent, and you will worry about it often.
But try not to worry. Everyone feels nervous on their first backpacking trip. Hopefully, by covering all of the information we'll give you in this new series, you'll be able to feel a little more relaxed.
The world is a vast canvas waiting for you to make your mark. Every trip you take will open the door to many more places and adventures that come onto your radar.
That is the advantage of being a backpacker. Backpackers are inspirational, and you'll want to follow their lead. You'll become one of them before you know it.
Eventually, however, you'll have to pick a destination, and that is where the process begins.
You must consider several things when picking a destination that we will get into later in this article, such as your budget, who you are traveling with, which countries you're allowed to visit, etc.
For now, the best way to get started is to find inspiration and seek motivation to travel the world.
There are plenty of places to look for inspiration, including blogs like this one, travel books , travel movies , and shows on Netflix.
There are many expenses to take into account when calculating a rough estimate of the cost of your trip.
Everyone is aware of some expenses, such as airfare, accommodation, and that attractive waterproof backpack you have your eye on.
Then, some costs will surprise you while you're traveling. Death, taxes, and surprise expenses while traveling are the three certainties in life.
It's good to have money set aside for the unexpected before every trip.
To put it straight, you'll never be able to account for every expense on your trip. This will scare the life out of you, but don't be discouraged.
Generations of backpackers have managed their way across the world with the same fears and made it back home just fine. You will, too, and we will teach you how to build a reliable budget in this series.
How much money do you have saved? How much of your savings are you willing to spend on this trip? These are the main questions you need to consider when calculating your budget.
Every backpacker's budget will vary. We'll show you the secrets to saving money for travel so that you can get that extra gelato when your new friends in Italy want to stop for an afternoon treat.
If you are going to spend a lot of time abroad, you may also want to know how to keep money coming in as it is going out. Working abroad can be scary at first, but people do it all the time.
Related: Plan a Family Vacation on a Budget

Ah, airfare. The lion's share of any backpacker budget.
Here's a tip: Once you figure out how to reduce airline expenses , suddenly, your entire trip will become much cheaper, and you will be able to travel longer and further.
A few things go into answering this question. First, you have to understand your travel budget, and you also have to understand yourself. Many backpackers plan trips that become too short.
However, it might be better to plan a short experience for your first backpacking trip rather than a trip that becomes too long and you get homesick.
We will walk you through the essential things to ask yourself when planning the length of your trip to ensure you don't overcommit.
There are pros and cons to all types of travel. Some backpackers swear traveling solo is the way to go.
Others might argue that traveling with a group of friends is the experience of a lifetime.
Then, couples will say traveling together is the most romantic thing you can do. Each can be incredibly fun and equally trying.
Who you are traveling with is a crucial assessment to make before planning your trip.
We'll assist in giving you the information you need to know about each kind of style to make your own decision.
Packing like a backpacker takes a particular type of soul. Luckily, you can adopt that soul as you go. You might like the minimalist mindset and adapt to what you have.
You might even bring that mindset home with you. However, one thing is certain. Packing for weeks or months in an expandable 45-liter bag can become tricky.
Here at Go Backpacking, we publish stories to help you with what you do and don't need.
Technicalities are invariably dull. Where are you allowed to go? What documents do you need? This is the frustrating part of planning a long trip.
Keeping track of your itinerary is also important, but luckily we have a way to keep you organized even in the most hectic circumstances on the road.
Related: Best Travel Insurance for Backpackers
Home? Who misses home when you're in paradise?
Well, newsflash, you might. Most people do, and it's all a part of the backpacking experience. A long trip will always test your character, and you will become bigger and stronger for it.
Overcoming all sorts of emotions is only a part of the journey, and homesickness is one of those emotions. So, how do you keep in touch with home?
Today, there are plenty of resources and unique ways to show your friends and family at home what you're up to and also keep up-to-date with the on-going back home, so you aren't blindsided upon returning.
Today's travelers are spoiled for accessible communication, so let's take advantage of all there is to help us.
If you take your time planning your first backpacking trip, it is almost sure to be more enjoyable.
You will see places you've only seen on Instagram or in movies. You will become friends with strangers all around the world.
You will experience situations that make you downright uncomfortable, which will be the most memorable.
You will have the time of your life and, if you're like the rest of us, it won't be long before you end up on a plane to your next foreign country shortly after returning home.
We'll be answering all the questions posed in this article, and more, in the coming weeks. Stay tuned!

Adam is the Community Manager at Go Backpacking . You can find more of his writing on his own blog, Wanderway . Read his debut travel fiction novel, Summer of '92 , on Amazon now!
Planning a trip? Go Backpacking recommends:
- G Adventures for small group tours.
- Hostelworld for booking hostels.
- Meet the Team
- Work with Us
- Czech Republic
- Netherlands
- Switzerland
- Scandinavia
- Philippines
- South Korea
- New Zealand
- South Africa
- Budget Travel
- Work & Travel
- The Broke Backpacker Manifesto
- Travel Resources
- How to Travel on $10/day
Home » Europe » Moscow
EPIC MOSCOW Itinerary! (2024)
Moscow is the heart of Mother Russia. Just the mention of this city conjures images of colorful bulbous pointed domes, crisp temperatures, and a uniquely original spirit!
Moscow has an incredibly turbulent history, a seemingly resilient culture, and a unique enchantment that pulls countless tourists to the city each year! Although the warmer months make exploring Moscow’s attractions more favorable, there’s just something about a fresh snowfall that only enhances the appearance of the city’s iconic sites!
If you’re a first-time visitor to Moscow, or simply wanting to see as much of the city as possible, this Moscow itinerary will help you do just that!

Unlock Our GREATEST Travel Secrets!
Sign up for our newsletter and get the best travel tips delivered right to your inbox.
Best Time To Visit Moscow
Where to stay in moscow, moscow itinerary, day 1 itinerary in moscow, day 2 itinerary in moscow, day 3 and beyond, staying safe in moscow, day trips from moscow, faq on moscow itinerary.
Here is a quick look at the seasons so you can decide when to visit Moscow!
The summer months (June-August) are a great time to travel to Moscow to take advantage of the enjoyable mild temperatures. This is considered peak travel season. Bear in mind that hotel prices rise along with the temperatures!

If you’re planning a trip to Moscow during fall (September-November) try to plan for early fall. This way the temperatures will still be pleasant and winter won’t be threatening.
Russian winters (December-February) are not for the faint of heart as Napoleon learned to his peril. Some days the sun will be out for less than an hour, and snow is guaranteed. Although winters are exceptionally cold, this is when you’ll get a true glimpse of the Moscow experience!
The best time to visit Moscow is during spring (March-May). The temperatures will begin to creep up and the sun begins to shine for significant portions of the day. Hotel rates will also have yet to skyrocket into peak ranges!
With a Moscow City Pass , you can experience the best of Moscow at the CHEAPEST prices. Discounts, attractions, tickets, and even public transport are all standards in any good city pass – be sure invest now and save them $$$ when you arrive!
Moscow is a large city with many accommodation options to choose from. Staying in a location that fits with your travel plans will only enhance your Moscow itinerary. Here is a brief introduction to a few great areas of the city we recommend checking out!
The best place to stay in Moscow to be close to all the action is Kitay-Gorod. This charming neighborhood will put you within walking distance to Moscow’s famous Red Square, thus cutting down on travel time. This will allow you to see more of the city in a shorter amount of time!

It’s surrounded by restaurants, cafes, bars, and shops. If you’re a first-time visitor to Moscow, or just planning a quick weekend in Moscow, then this area is perfect for you!
Another great area to consider is the Zamoskvorechye district. This area of the city offers a blend of new and old Moscow. It has an artsy vibe and there are plenty of fun sites you can explore outside of the main touristy areas of Moscow.
Of course, as in all areas of Moscow, it’s close to public transportation that will quickly connect you with the rest of the city and make your Moscow itinerary super accessible!
Best Airbnb in Moscow – Exclusive Apartment in Old Moscow

Modern and cozy, this apartment is in the heart of Old Moscow. Bordering the Basmanny and Kitay-Gorod districts, this two-bedroom flat is walking distance to the Kremlin and Red Square. Safe, quiet, and comfortable, this is the best Airbnb in Moscow, no question!
Best Budget Hotel in Moscow – Izmailovo Alfa Hotel

The Izmailovo Alfa Hotel is a very highly rated accommodation that provides all the components necessary for a comfortable trip to Moscow. There is an on-site restaurant, bar, fitness center, and an airport shuttle service. The rooms are modern and spacious and are equipped with a TV, heating/air conditioning, minibar, and more!
Best Luxury Hotel in Moscow – Crowne Plaza Moscow World Trade Centre

If you’re touring Moscow in luxury, the Crowne Plaza Moscow World Trade Centre is the hotel for you! Elegantly furnished rooms are equipped with a minibar, flat-screen TV, in-room safes, as well as tea and coffee making facilities! Bathrooms come with bathrobes, slippers, and free toiletries. There is also an onsite restaurant, bar, and fitness center.
Best Hostel in Moscow – Godzillas Hostel

Godzillas Hostel is located in the center of Moscow, just a short walk from all the major tourist attractions and the metro station. Guests will enjoy all the usual hostel perks such as self-catering facilities, 24-hour reception, Free Wi-Fi, and security lockers. This is one of the best hostels in Moscow and its wonderful social atmosphere and will make your vacation in Moscow extra special!
Godzillas Hostel is one of our favourites in Moscow but they’re not taking guests right now. We’re not sure if they’re closed for good but we hope they’ll come back soon.
An important aspect of planning any trip is figuring out the transportation situation. You’re probably wondering how you’re going to get to all of your Moscow points of interest right? Luckily, this sprawling city has an excellent network of public transportation that will make traveling a breeze!
The underground metro system is the quickest and most efficient way to travel around Moscow. Most visitors rely exclusively on this super-efficient transportation system, which allows you to get to pretty much anywhere in the city! It’s also a great option if you’re planning a Moscow itinerary during the colder months, as you’ll be sheltered from the snow and freezing temperatures!

If you prefer above-ground transportation, buses, trams, and trolleybuses, run throughout the city and provide a rather comfortable alternative to the metro.
Moscow’s metro, buses, trams, and trolleybuses are all accessible with a ‘Troika’ card. This card can be topped up with any sum of money at a metro cash desk. The ticket is simple, convenient, and even refundable upon return to a cashier!
No matter which method you choose, you’ll never find yourself without an easy means of getting from point A to point B!
Red Square | Moscow Kremlin | Lenin’s Mausoleum | St. Basil’s Cathedral | GUM Department Store
Spend the first day of your itinerary taking your own self guided Moscow walking tour around the historic Red Square! This is Moscow’s compact city center and every stop on this list is within easy walking distance to the next! Get ready to see all of the top Moscow landmarks!
Day 1 / Stop 1 – The Red Square
- Why it’s awesome: The Red Square is the most recognizable area in Moscow, it has mesmerizing architecture and centuries worth of history attached to its name.
- Cost: Free to walk around, individual attractions in the square have separate fees.
- Food nearby: Check out Bar BQ Cafe for friendly service and good food in a great location! The atmosphere is upbeat and they’re open 24/7!
The Red Square is Moscow’s historic fortress and the center of the Russian government. The origins of the square date back to the late 15th century, when Ivan the Great decided to expand the Kremlin to reflect Moscow’s growing power and prestige!
During the 20th century, the square became famous as the site for demonstrations designed to showcase Soviet strength. Visiting the Red Square today, you’ll find it teeming with tourists, who come to witness its magical architecture up close!

The square is the picture postcard of Russian tourism, so make sure to bring your camera when you visit! No matter the season, or the time of day, it’s delightfully photogenic!
It’s also home to some of Russia’s most distinguishing and important landmarks, which we’ve made sure to include further down in this itinerary. It’s an important center of Russia’s cultural life and one of the top places to visit in Moscow!
In 1990, UNESCO designated Russia’s Red Square as a World Heritage site. Visiting this historic site is a true bucket-list event and essential addition to your itinerary for Moscow!
Day 1 / Stop 2 – The Moscow Kremlin
- Why it’s awesome: The Moscow Kremlin complex includes several palaces and cathedrals and is surrounded by the Kremlin wall. It also houses the principal museum of Russia (the Kremlin Armory).
- Cost: USD $15.00
- Food nearby: Bosco Cafe is a charming place to grat a casual bite to eat. They have excellent coffee and wonderful views of the Red Square and the Moscow Kremlin!
The iconic Moscow Kremlin , also known as the Kremlin museum complex, sits on Borovitsky Hill, rising above the Moscow River. It is a fortified complex in the center of the city, overlooking several iconic buildings in the Red Square!
It’s the best known of the Russian Kremlins – citadels or fortress’ protecting and dominating a city. During the early decades of the Soviet era, the Kremlin was a private enclave where the state’s governing elite lived and worked.
The Kremlin is outlined by an irregularly shaped triangular wall that encloses an area of 68 acres! The existing walls and towers were built from 1485 to 1495. Inside the Kremlin museum complex, there are five palaces, four cathedrals, and the enclosing Kremlin Wall with Kremlin towers.
The Armoury Chamber is a part of the Grand Kremlin Palace’s complex and is one of the oldest museums of Moscow, established in 1851. It showcases Russian history and displays many cherished relics. Definitely make sure to check out this museum while you’re here!

The churches inside the Moscow Kremlin are the Cathedral of the Dormition, Church of the Archangel, Church of the Annunciation, and the bell tower of Ivan Veliki (a church tower).
The five-domed Cathedral of the Dormition is considered the most famous. It was built from 1475–1479 by an Italian architect and has served as a wedding and coronation place for great princes, tsars, and emperors of Russia. Church services are given in the Kremlin’s numerous cathedrals on a regular basis.
The Grand Kremlin Palace was the former Tsar’s Moscow residence and today it serves as the official workplace of the President of the Russian Federation (Vladimir Putin seems to have bagged that title for life) .
Insider Tip: The Kremlin is closed every Thursday! Make sure to plan this stop on your Moscow itinerary for any other day of the week!
Day 1 / Stop 3 – Lenin’s Mausoleum
- Why it’s awesome: The mausoleum displays the preserved body of Soviet leader Vladimir Lenin .
- Cost: Free!
- Food nearby: Khinkal’naya is a charming Georgian restaurant with vaulted ceilings and exposed brick. It’s a popular place with locals and right next to the Red Square!
Lenin’s Mausoleum, also known as Lenin’s Tomb, is the modernist mausoleum for the revolutionary leader Vladimir Lenin. It’s located within the Red Square and serves as the resting place for the Soviet leader! His preserved body has been on public display since shortly after his death in 1924.
It’s located just a few steps away from the Kremlin Wall and is one of the most controversial yet popular Moscow attractions!
Admission is free for everyone, you’ll only need to pay if you need to check a bag. Before visitors are allowed to enter the mausoleum, they have to go through a metal detector first. No metal objects, liquids, or large bags are allowed in the mausoleum!

Expect a line to enter the building, and while you’re inside the building, you’ll be constantly moving in line with other visitors. This means you won’t be able to spend as long as you’d like viewing the mausoleum, but you’ll still be able to get a good look. Pictures and filming while inside the building are strictly prohibited, and security guards will stop you if they see you breaking this rule.
The mausoleum is only open on Tuesday, Wednesday, Thursday, and Saturday – unless it’s a public holiday or a day scheduled for maintenance. The hours it’s open for each day are limited, make sure to check online before you visit to make sure you can fit this into your Moscow itinerary for that day!
Insider Tip: The Lenin’s Museum is there for people to pay their respect; remember to keep silent and move along quickly, it’s not intended for people to congregate around. Also, men are not allowed to wear hats and everyone must take their hands out of their pockets when inside the building.
Day 1 / Stop 4 – St. Basil’s Cathedral
- Why it’s awesome: A dazzling designed cathedral that showcases Russia’s unique architecture. This cathedral is one of the most recognizable symbols of the country!
- Cost: USD $8.00
- Food nearby: Moskovskiy Chaynyy Klub is a cozy cafe serving food items and pipping hot tea; it’s the perfect place to go if you’re visiting Moscow during the winter months!
Located in the Red Square, the ornate 16th-century St. Basil’s Cathedral is probably the building you picture when you think of Moscow’s unique architecture. Its colorful onion-shaped domes tower over the Moscow skyline!
The cathedral was built from 1555-1561 by order of Tsar Ivan the Terrible. It was designed with an iconic onion dome facade and enchanting colors that captivate all who see it. Fun fact: If you’re wondering why Russian churches have onion domes, they are popularly believed to symbolize burning candles!
This iconic cathedral has become a symbol of Russia due to its distinguishing architecture and prominent position inside the Red Square. It’s one of the most beautiful, wonderful, and mesmerizing historical cathedrals in the world!

The interior of the church surprises most people when they visit. In contrast to the large exterior, the inside is not so much one large area, but rather a collection of smaller areas, with many corridors and small rooms. There are 9 small chapels and one mausoleum grouped around a central tower.
Visiting the inside is like walking through a maze, there are even small signs all around the cathedral tracing where to walk, and pointing you in the right direction! The walls are meticulously decorated and painted with intricate floral designs and religious themes.
The church rarely holds service and is instead a museum open for the public to visit.
Insider Tip: During the summer months the line to go inside the cathedral can get quite long! Make sure to arrive early or reserve your tickets online to guarantee quick access into the cathedral!
Day 1 / Stop 5 – GUM Department Store
- Why it’s awesome: This is Russia’s most famous shopping mall! It’s designed with elegant and opulent architecture and provides a real sense of nostalgia!
- Cost: Free to enter
- Food nearby: Stolovaya 57 is a cafeteria-style restaurant with a variety of inexpensive Russian cuisine menu items including soups, salads, meat dishes, and desserts. It’s also located inside the GUM department store, making it very easily accessible when you’re shopping!
The enormous GUM Department Store is located within the historic Red Square. It has a whimsical enchantment to it that sets it apart from your typical department store.
A massive domed glass ceiling lines the top of the building and fills the interior with natural sunlight. There are live plants and flowers placed throughout the mall that give the shopping complex a lively and cheerful feel! A playful fountain sits in the center, further adding to the malls inviting a sense of wonder and amusement!
The GUM department store opened on December 2, 1893. Today, it includes local and luxury stores, including Fendi, Louis Vuitton, Prada, and many more! There are numerous cafes, restaurants, and even a movie theater inside!

For a special treat, head into Gastronom 1. This 1950s-style shop sells gourmet food items, like wine, freshly-baked pastries, cheese, Russian chocolate, and of course, vodka! Also, be on the lookout for a bicycle pedaling ice cream truck with an employing selling ice cream!
The ambiance is simply amazing, a trip to this idyllic shopping mall is an absolute must on any Moscow itinerary!
Insider Tip: Make sure to carry some small change on you in case you need to use the restroom, you’ll need to pay 50 rubles – or about USD $0.80 to use the bathroom in GUM.

Wanna know how to pack like a pro? Well for a start you need the right gear….
These are packing cubes for the globetrotters and compression sacks for the real adventurers – these babies are a traveller’s best kept secret. They organise yo’ packing and minimise volume too so you can pack MORE.
Or, y’know… you can stick to just chucking it all in your backpack…
Novodevichy Convent | Gorky Park | State Tretyakov Gallery | All-Russian Exhibition Center | Bolshoi Theater
On your 2 day itinerary in Moscow, you’ll have a chance to use the city’s excellent public transportation service! You’ll explore a few more of Moscow’s historic highlight as well as some modern attractions. These sites are a little more spread out, but still very easily accessible thanks to the metro!
Day 2 / Stop 1 – Novodevichy Convent
- Why it’s awesome: The Novodevichy Convent is rich in imperial Russian history and contains some of Russia’s best examples of classical architecture!
- Cost: USD $5.00
- Food nearby: Culinary Shop Karavaevs Brothers is a cozy and simple place to have a quick bite, they also have vegetarian options!
The Novodevichy Convent is the best-known and most popular cloister of Moscow. The convent complex is contained within high walls, and there are many attractions this site is known for!
The six-pillared five-domed Smolensk Cathedral is the main attraction. It was built to resemble the Kremlin’s Assumption Cathedral and its facade boasts beautiful snowy white walls and a pristine golden onion dome as its centerpiece. It’s the oldest structure in the convent, built from 1524 -1525, and is situated in the center of the complex between the two entrance gates.
There are other churches inside the convent as well, all dating back from many centuries past. The convent is filled with an abundance of 16th and 17th-century religious artworks, including numerous large and extravagant frescos!

Just outside the convent’s grounds lies the Novodevichy Cemetery. Here, you can visit the graves of famous Russians, including esteemed authors, composers, and politicians. Probably the most intriguing gravestone belongs to Russian politician Nikita Khruschev!
The Novodevichy Convent is located near the Moscow River and offers a peaceful retreat from the busy city. In 2004, it was proclaimed a UNESCO World Heritage Site. The convent remains remarkably well-preserved and is an outstanding example of Moscow Baroque architecture!
Insider Tip: To enter the cathedrals inside the complex, women are advised to cover their heads and shoulders, while men should wear long pants.
Day 2 / Stop 2 – Gorky Central Park of Culture and Leisure
- Why it’s awesome: A large amusement area in the heart of the city offering many attractions!
- Cost: Free!
- Food nearby: Check out Mepkato, located inside Gorky Central Park for a casual meal in a cozy setting. There are indoor and outdoor seating options and the restaurant is child-friendly!
Gorky Central Park of Culture and Leisure is a large green space in the heart of Moscow. The park opened in 1928, and it stretches along the scenic embankment of the Moskva River. It covers an area of 300-acres and offers a lovely contrast from the compact city center.
You’ll find all sorts of wonderful attractions, from boat rides to bike rentals to tennis courts and ping-pong tables, and much more! there are an open-air cinema and festive events and concerts scheduled in the summer months. A wide selection of free fitness classes is also offered on a regular basis, including jogging, roller skating, and dancing!
Although many of the options you’ll find here are more suited for outdoor leisure during the summer, you’ll also a selection of winter attractions, including one of Europe’s largest ice rinks for ice-skating!

If you’re trying to decide what to do in Moscow with kids, the park also offers several venues designed specifically for kids. Check out the year-round Green School which offers hands-on classes in gardening and art! You can also feed the squirrels and birds at the Golitsinsky Ponds!
The park is very well maintained and kept clean and the entrance is free of charge, although most individual attractions cost money. There is also Wi-Fi available throughout the park.
With so many attractions, you could easily spend all day here! If you’re only planning a 2 day itinerary in Moscow, make sure to plan your time accordingly and map out all the areas you want to see beforehand!
Day 2 / Stop 3 – The State Tretyakov Gallery
- Why it’s awesome: The gallery’s collection consists entirely of Russian art made by Russian artists!
- Food nearby : Brothers Tretyakovs is located right across the street from the gallery. It’s a wonderfully atmospheric restaurant serving top quality food and drinks!
The State Tretyakov Gallery was founded in 1856 by influential merchant and collector Pavel Tretyakov. The gallery is a national treasury of Russian fine art and one of the most important museums in Russia!
It houses the world’s best collection of Russian art and contains more than 130, 000 paintings, sculptures, and graphics! These works have been created throughout the centuries by generations of Russia’s most talented artists!

The exhibits range from mysterious 12th-century images to politically charged canvases. The collection is rich and revealing and offers great insight into the history and attitudes of this long-suffering yet inspired people!
All pictures are also labeled in English. If you plan to take your time and see everything inside the museum it will take a good 3-4 hours, so make sure to plan your Moscow trip itinerary accordingly! This gallery is a must-see stop for art lovers, or anyone wanting to explore the local culture and history of Russia in a creative and insightful manner!
Insider Tip: When planning your 2 days in Moscow itinerary, keep in mind that most museums in Moscow are closed on Mondays, this includes The State Tretyakov Gallery!
Day 2 / Stop 4 – All-Russian Exhibition Center
- Why it’s awesome: This large exhibition center showcases the achievements of the Soviet Union in several different spheres.
- Food nearby: Varenichnaya No. 1 serves authentic and homestyle Russian cuisine in an intimate and casual setting.
The All-Russian Exhibition Center is a massive park that presents the glory of the Soviet era! It pays homage to the achievements of Soviet Russia with its many different sites found on the property.
The center was officially opened in 1939 to exhibit the achievements of the Soviet Union. It’s a huge complex of buildings and the largest exhibition center in Moscow. There are several exhibition halls dedicated to different achievements and every year there are more than one hundred and fifty specialized exhibitions!

The Peoples Friendship Fountain was constructed in 1954 and is a highlight of the park. The stunning gold fountain features 16 gilded statues of girls, each representing the former Soviet Union republics.
The Stone Flower Fountain was also built in 1954 and is worth checking out. The centerpiece of this large fountain is a flower carved from stones from the Ural Mountains! Along the side of the fountain are various bronze sculptures.
You will find many people zipping around on rollerblades and bicycles across the large area that the venue covers. It’s also home to amusement rides and carousels, making it the perfect place to stop with kids on your Moscow itinerary! Make sure to wear comfortable shoes and allow a few hours to explore all the areas that interest you!
Day 2 / Stop 5 – Bolshoi Theater
- Why it’s awesome: The Bolshoi Theater is a historic venue that hosts world-class ballet and opera performances!
- Cost: Prices vary largely between USD $2.00 – USD $228.00 based on seat location.
- Food nearby: Head to the Russian restaurant, Bolshoi for high-quality food and drinks and excellent service!
The Bolshoi Theater is among the oldest and most renowned ballet and opera companies in the world! It also boasts the world’s biggest ballet company, with more than 200 dancers!
The theater has been rebuilt and renovated several times during its long history. In 2011 it finished its most recent renovation after an extensive six-year restoration that started in 2005. The renovation included an improvement in acoustics and the restoration of the original Imperial decor.
The Bolshoi Theater has put on many of the world’s most famous ballet acts! Tchaikovsky’s ballet Swan Lake premiered at the theater in 1877 and other notable performances of the Bolshoi repertoire include Tchaikovsky’s The Sleeping Beauty and The Nutcracker!

Today, when you visit the theater, you can expect a magical performance from skilled singers, dancers, and musicians with the highest level of technique!
If you don’t have time to see a show, the theater also provides guided tours on select days of the week. Tours are given in both Russian and English and will provide visitors with a more intimate look at the different areas of the theater!
The stage of this iconic Russian theater has seen many outstanding performances. If you’re a fan of the performing arts, the Bolshoi Theater is one of the greatest and oldest ballet and opera companies in the world, making it a must-see attraction on your Moscow itinerary!

Godzillas Hostel
Godzillas Hostel is located in the center of Moscow, just a short walk from all the major tourist attractions and the metro station.
- Towels Included
Cosmonautics Museum | Alexander Garden | Ostankino Tower | Izmaylovo District | Soviet Arcade Museum
Now that we’ve covered what to do in Moscow in 2 days, if you’re able to spend more time in the city you’re going to need more attractions to fill your time. Here are a few more really cool things to do in Moscow we recommend!
Memorial Museum of Cosmonautics
- Hear the timeline of the ‘space race’ from the Russian perspective
- This museum is fun for both adults and children!
- Admission is USD $4.00
The Memorial Museum of Cosmonautics is a museum dedicated to space exploration! The museum explores the history of flight, astronomy, space exploration, space technology, and space in the arts. It houses a large assortment of Soviet and Russian space-related exhibits, and the museum’s collection holds approximately 85,000 different items!

The museum does an excellent job of telling the full story of the exciting space race between the USSR and the US! It highlights the brightest moments in Russian history and humanity and is very interesting and fun for all ages!
If you’re a fan of space or just curious about gaining insight into Russia’s fascinating history of space exploration, make sure to add this to your 3 day itinerary in Moscow!
The Alexander Garden
- A tranquil place to relax near the Red Square
- Green lawns dotted with sculptures and lovely water features
- The park is open every day and has no entrance fee
The Alexander Garden was one of the first urban public parks in Moscow! The garden premiered in 1821 and was built to celebrate Russia’s victory over Napoleon’s forces in 1812!
The park is beautiful and well maintained with paths to walk on and benches to rest on. The park contains three separate gardens: the upper garden, middle garden, and lower garden.

Located in the upper garden, towards the main entrance to the park is the Tomb of the Unknown Soldier with its eternal flame. This monument was created in 1967 and contains the body of a soldier who fell during the Great Patriotic War!
The park stretches along all the length of the western Kremlin wall for about half a mile. Due to its central location in the city, it’ll be easily accessible when you’re out exploring The Red Square.
It provides a bit of relief from the city’s high-energy city streets. Bring a picnic lunch, go for a walk, or just sit and people watch, this is one of the best Moscow sites to wind-down and relax!
Ostankino Television Tower
- Television and radio tower in Moscow
- Currently the tallest free-standing structure in Europe
- Make sure you bring your passport when you visit, you can’t go up without it!
For spectacular views of the city, make sure to add the Ostankino Television Tower to your itinerary for Moscow! This impressive free-standing structure provides stunning views of the city in every direction. The glass floor at the top also provides great alternative views of the city!

It takes just 58 seconds for visitors to reach the Tower’s observation deck by super fast elevator. The tower is open every day for long hours and is a great site in Moscow to check out! There is even a restaurant at the top where you can enjoy rotating views of the city while you dine on traditional Russian cuisine or European cuisine!
The tower is somewhat of an architectural surprise in a city that is not known for skyscrapers! To see the city from a new perspective, make sure to add this stop to your Moscow itinerary!
Izmaylovo District
- The most popular attractions in this district are the kremlin and the flea market
- Outside of the city center and easy to reach via metro
- Most popular during the summer and on weekends
Travel outside the city center and discover a unique area of the city! The Izmaylovo District is a popular destination for locals and tourists alike, and one of the coolest places to see in Moscow! The two main attractions we recommend checking out are the Kremlin and the flea market.
The Izmailovo Kremlin was established as a cultural center and molded after traditional Russian architecture. This colorful complex is home to several single-subject museums, including a Russian folk art museum and a vodka museum!

Next to the Kremlin is the Izmailovo open-air market, which dates back to the 17th century! The market is connected to the Izmailovo Kremlin by a wooden bridge. Pick up all your Russian souvenirs here, including traditional handicrafts, paintings, books, retro toys, and Soviet memorabilia!
You will find many hand-made and hand-painted options available at higher prices, as well as mass-produced souvenir options at lower prices!
Museum of Soviet Arcade Games
- Closed on Mondays
- Filled with old arcade games that visitors get to try out!
- The museum also includes a small cafe and burger shop
For something a little different, check out the Museum of Soviet Arcade Games! The museum features roughly 60 machines from the Soviet era, including video games, pinball machines, and collaborative hockey foosball! The machines inside the museum were produced in the USSR in the mid-1970s.

The best part is, most of the games are still playable! Purchase tickets and try the games out for yourself! The museum also has a neat little screening room that plays old Soviet cartoons and an area with Soviet magazines! This unique attraction is a fun addition to a 3 day itinerary in Moscow, and an attraction that all ages will enjoy!
Whether you’re spending one day in Moscow, or more, safety is an important thing to keep in mind when traveling to a big city! Overall, Moscow is a very safe place to visit. However, it is always recommended that tourists take certain precautions when traveling to a new destination!
The police in Moscow is extremely effective at making the city a safe place to visit and do their best to patrol all of the top Moscow, Russia tourist attractions. However, tourists can still be a target for pickpockets and scammers.
Moscow has a huge flow of tourists, therefore there is a risk for pickpocketing. Simple precautions will help eliminate your chances of being robbed. Stay vigilant, keep your items close to you at all times, and don’t flash your valuables!
If you’re planning a solo Moscow itinerary, you should have no need to worry, as the city is also considered safe for solo travelers, even women. Stay in the populated areas, try and not travel alone late at night, and never accept rides from strangers or taxis without a meter and correct signage.
The threat of natural disasters in Moscow is low, with the exception of severe winters when the temperature can dip below freezing! Bring a good, warm jacket if you visit in Winter.
However, please note that Russian views on homsexuality are far less accepting than those in Western Europe. Likewise, Non-Caucasian travellers may sadly encounter racism in Russia .
Don’t Forget Your Travel Insurance for Moscow
ALWAYS sort out your backpacker insurance before your trip. There’s plenty to choose from in that department, but a good place to start is Safety Wing .
They offer month-to-month payments, no lock-in contracts, and require absolutely no itineraries: that’s the exact kind of insurance long-term travellers and digital nomads need.

SafetyWing is cheap, easy, and admin-free: just sign up lickety-split so you can get back to it!
Click the button below to learn more about SafetyWing’s setup or read our insider review for the full tasty scoop.
Now that we’ve covered all the top things to see in Moscow, we thought we’d include some exciting day trips to other areas of the country!
Sergiev Posad (Golden Ring)

On this 7-hour guided tour, you’ll visit several scenic and historic areas of Russia. Start your day with hotel pick-up as you’re transferred by a comfortable car or minivan to Sergiev Posad. Admire the charming Russian countryside on your drive and enjoy a quick stop to visit the Russian village, Rudonezh!
You’ll see the majestic Saint Spring and the Church of Sergiev Radonezh. You’ll also visit the UNESCO World Heritage Site, Trinity Lavra of St. Sergius, one of the most famous Orthodox sites in Russia!
Lastly, you’ll swing by the local Matreshka market and enjoy a break in a nice Russian restaurant before returning to Moscow!
Day Trip to Vladimir and Suzdal

On this 13-hour trip, you’ll discover old Russia, with its picturesque landscapes and white-stoned beautiful churches! You’ll visit the main towns of the famous Golden Ring of Russia – the name for several cities and smaller towns north-east of Moscow.
Your first stop will be in the town of Vladimir, the ancient capital of all Russian principalities. The city dates back to the 11th century and is one of the oldest and the most important towns along the Ring! Next, you’ll visit Suzdal, a calm ancient Russian town north of Vladimir with only 13,000 inhabitants!
The old-style architecture and buildings of Suzdal are kept wonderfully intact. If you’re spending three days in Moscow, or more, this is a great option for exploring the charming areas outside the city!
Zvenigorod Day Trip and Russian Countryside

On this 9-hour private tour, you’ll explore the ancient town of Zvenigorod, one of the oldest towns in the Moscow region! As you leave Moscow you’ll enjoy the stunning scenery along the Moscow River, and make a few stops at old churches along the way to Zvenigorod.
Upon arrival, you’ll explore the medieval center, including the 14th-century Savvino-Storozhevsky Monastery. Next, you’ll take a break for lunch (own expense) where you’ll have the chance to try out the Russian cuisine! Next, you’ll visit the Museum of Russian Dessert and sip on tea at a Russian tea ceremony.
The final stop of the day is at the Ershovo Estate, a gorgeous place to walk around and enjoy nature!
Day Trip to St Petersburg by Train visiting Hermitage & Faberge

On this full-day tour, you’ll enjoy a a full round trip to St Petersburg where you’ll spend an exciting day exploring another popular Russian city! You’ll be picked up from your hotel in Moscow and be transferred to the train station where you’ll ride the high-speed train ‘Sapsan’ to St Petersburg.
Upon arrival, you’ll start the day by touring the Hermitage Museum and the Winter Palace. Next, you’ll visit the Faberge Museum, where you’ll explore the impressive collection of rare Faberge Eggs! In the afternoon, enjoy a sightseeing boat ride and a traditional 3-course Russian lunch.
If you’re spending 3 days in Moscow, or more, this is an excellent trip to take!
Trip to Kolomna – Authentic Cultural Experience from Moscow

On this 10-hour tour, you’ll escape the city and travel to the historic town of Kolomna! First, you’ll visit the 14th-century Kolomna Kremlin, home to the Assumption Cathedral and an abundance of museums!
Next, enjoy lunch at a local cafe (own expense) before embarking on a tour of the Marshmallow Museum – of course, a marshmallow tasting is provided! Your final stop is the Museum of Forging Settlements, where displays include armor and accessories for fishing and hunting.
Discover this beautiful Russian fairytale city on a private trip, where all of the planning is taken care of for you!

Stash your cash safely with this money belt. It will keep your valuables safely concealed, no matter where you go.
It looks exactly like a normal belt except for a SECRET interior pocket perfectly designed to hide a wad of cash, a passport photocopy or anything else you may wish to hide. Never get caught with your pants down again! (Unless you want to…)
Find out what people want to know when planning their Moscow itinerary.
How many days you need in Moscow?
We recommend that you spend at least two or three days in Moscow to take it all in.
What’s the best month to visit Moscow?
The best time to visit Moscow is over the spring, from March to May as temperatures are mild, crowds are thin and prices are reasonable.
What are some unusual things to do in Moscow?
I mean, queuing up to see an almost 100 year old corpse is pretty unsual! Check out Lenin’s Mausoleum if you fancy it!
What are some fun things to do in Moscow?
The Memorial Museum of Cosmonautics is a fun place to explore the famous space race from the perspective of the ‘other side’!
We hope you enjoyed our Moscow itinerary! We’ve made sure to cover all the Moscow must-sees as well as some unique attractions in the city! Our addition of insider tips, favorite food stops, and day trips from Moscow is an added bonus and will guarantee you make the most out of your exciting Russian vacation!
Immerse yourself in the modern and traditional Russian lifestyle! Get lost in museums, witness awe-inspiring architecture, and indulge in Russian cuisine! Spend the day strolling through all of the charming sites of Moscow, admiring the beautiful scenery and discovering the city’s fairytale-like enchantment!

And for transparency’s sake, please know that some of the links in our content are affiliate links . That means that if you book your accommodation, buy your gear, or sort your insurance through our link, we earn a small commission (at no extra cost to you). That said, we only link to the gear we trust and never recommend services we don’t believe are up to scratch. Again, thank you!

Alya and Campbell

Share or save this post
Leave a Reply Cancel reply
Your email address will not be published. Required fields are marked *
Save my name, email, and website in this browser for the next time I comment.
Notify me of followup comments via e-mail.

The 6 Best Shorter Backpacking Trips on the Appalachian Trail
Have you been interested in hiking the Appalachian Trail but you don't have the time or interest to hike the whole trail at once, or the finances for such a long journey?
Well, we have good news: You don’t need any of that. There are 2,200 beautiful miles of trail between Georgia and Maine that you can break up into shorter, more manageable backpacking trips. They can be tackled in sections themselves, one at a time, or in groups, depending on your endurance, time at hand, and finances available.
So, head out on these shorter sections and enjoy some of the highlights of this incredible trail. In this article, I'll share a description of six of my favorite sections and an example itinerary to help you create your own ideal route. Several of these can be turned into loop hikes using other trails that branch off the Appalachian Trail.
Soon, you'll see why these sections are trail highlights.
The Best Shorter Hiking Trips on the Appalachian Trail
Great smoky mountains national park in north carolina/tennessee.
The Appalachian Trail travels about 72 miles through GSMNP along the North Carolina and Tennessee border. Notable highlights include Shuckstack Tower, Clingman's Dome (the highest point on the trail at 6,643 feet), Charlies Bunion, and Mt. Cammerer Lookout Tower (0.6 miles off the AT).
Start : GSMNP Park Boundary, Fontana Dam
- Day 1: Mollies Ridge Shelter (10.2 miles)
- Day 2: Derrick Knob Shelter (12.1 miles)
- Day 3: Mt. Collins Shelter (13 miles + 0.5 miles off the AT)
- Newfound Gap (access to Gatlinburg, Tenn., or Cherokee, NC)
- Day 4: Icewater Spring Shelter (8 miles)
- Day 5: Tri-Corner Knob Shelter (12.6 miles)
- Day 6: Davenport Gap Shelter (14.6 miles, +1.2 miles to see Mt. Cammerer Lookout Tower
End: GSMNP Park Boundary, Davenport Gap, Tenn., 32, NC 284 (1.1 miles)
It’s a 2-hour drive to Fontana Dam, NC.
Additionally, there is one campsite (Birch Spring Gap) and six other shelters (Russell Field, Spence Field, Silers Bald, Double Spring Gap, Peck’s Corner [0.5 miles east], and Cosby Knob) along this section.
This is one of the sections on the Appalachian Trail where you will have to reserve camping and get a backpacking permit, which is $8 per person, per night. You can read more information here .
If you start your backpacking section 50 miles before the park boundary, travel only on the Appalachian Trail through the park, and finish 50 miles after the park boundary, you can apply for the $40 AT thru-hiker permit here .
Roan Highlands Area in Tennessee/North Carolina
This section along the border climbs over several grassy balds, like Beauty Spot Gap, Little Rock Knob, Round Bald, Jane Bald, and Hump Mountain, which provide views in all directions.
Start : Erwin, Tenn.
- Day 1: Beauty Spot Gap Campsite (11.9 miles)
- Day 2: Clyde Smith Shelter (14.5 miles)
- Day 3: Roan High Knob, the Highest shelter "on" the AT, 0.1 miles off the AT (8.5 miles), or Stan Murray Shelter (13.7 miles)
- Day 4: Apple House Tentsite (15.8 miles or 10.6 miles)
End: US 19 E (0.5 miles)
It’s a 40-minute drive back to Erwin, Tenn.
There are two other shelters (Curly Maple Gap and Cherry Gap); six campsites (Low Gap, Ash Gap, Yellow Mountain Gap, Little Hump Mountain, Bradley Gap, and Doll Flats); one group campsite (Wilder Mine), and four unnamed campsites along this section.
Damascus and Grayson Highlands State Park in Southern Virginia
This section starts from Damascus, Va., also known as "Trail Town U.S.A.," and host of the annual Appalachian Trail Days Festival, which takes place the weekend after Mother's Day.
The trail travels toward Grayson Highlands State Park providing expansive views, passing by the highest peak in Virginia, Mt. Rogers at 5,729 feet (0.5 miles off the trail if you want to say you've done it - but there's no view), and then enters the park where you'll find wild ponies.
Start : Damascus, Va.
- Day 1: Saunders Shelter (9.3 miles)
- Day 2: Lost Mountain Shelter (6.5 miles)
- Day 3: Thomas Knob Shelter (12.3 miles)
- Day 4: Wise Shelter (5.2 miles, more time to enjoy the ponies) or Old Orchard (11.9 miles)
End : Fox Creek, Va., 603 (8.4 miles or 1.7 miles)
It’s a 30-minute drive back to Damascus, Va.
There are seven other unnamed campsites along this section.
Virginia Triple Crown (Dragon’s Tooth, McAfee Knob, Tinker Cliffs)
This section starts by passing the Keffer Oak, which is over 300 years old and 18 feet around. The trail climbs up the ridge of Sinking Creek Mountain and to the Eastern Continental Divide. After Dragon’s Tooth, the trail is a bit of a rock climb down toward Catawba (which offers a gas station 1 mile away from the trail) and then goes up to McAfee Knob, the most photographed spot on the Appalachian Trail.
Set your tent up at the Campbell Shelter and then backtrack the 1 mile in the morning to see the sunrise because there's no camping allowed on McAfee Knob.
Tinker Cliffs is the third highlight because you'll walk along the cliffs for half a mile and experience amazing views of the valley.
Start: VA 42 (Newport, VA 8.0 E)
- Day 1: Niday Shelter (10.1 miles)
- Day 2: Pickle Branch Shelter (10.1 + 0.3 miles off trail)
- Day 3: John's Spring Shelter (13.6 miles)
- Day 4: Campbell Shelter (3.4 miles)
- Day 5: Lamberts Meadow (6 miles)
End : Daleville US 220 (9.4 miles)
An hour from VA 42, AT Crossing closest to Newport, Va.
There are two other shelters, Sarver Hollow (0.4 miles east) and Catawba Mountain, and two campsites, Pig Farm and Lamberts Meadow, along this section.
Franconia Ridge/White Mountains in New Hampshire
This section is one of the most well-known, popular, and enjoyable because of the incredible views from hiking above treeline. You'll start by hiking up and over the Kinsmans, and then by Lonesome Lake Hut where you can stop in for a baked good and see a beautiful view of Franconia Ridge.
The trail goes down into Franconia Notch and then back up to the ridge, which provides 2 gorgeous miles above treeline, and then two more huts, Galehead and Zealand Falls, and views on the final day.
Start : Kinsman Notch, NH 112
- Day 1: Kinsman Pond Shelter (11.5 miles)
- Day 2: Liberty Spring Campsite (7.4 miles) $10 per person
- Day 3: Garfield Ridge Shelter/Campsite (7.7 miles + 0.2 off trail)
- Day 4: Ethan Pond Campsite (14.5 miles + 0.2 off trail)
End: Crawford Notch, US 302
Around 50 minutes to drive back to Kinsman Notch.
There are two other shelters, Eliza Brook and Guyot (0.7 miles east) in this section.
These campsites are first come, first serve and cost $15 per person to camp at each of these places. The AMC huts are around $130 per person in the summertime. Dispersed camping is allowed, but it’s much harder to find because you're not allowed to camp in the alpine zone (where trees are 8 feet or less), within 200 feet of trails or water, within 0.25 miles of a shelter, campsite, or hut, or within 0.25 miles of a trailhead.
100 Mile Wilderness in Maine
This section is the final stretch of the Appalachian Trail and offers a mix of beautiful mountain views and long river walks. It starts from Monson, the last town, and you can schedule a food drop midway through this section. Notable highlights include Little Wilson Falls, Barren Ledges, the 1984 Chairback Mountain airplane crash, Gulf Hagas, White Cap Mountain, lovely lakes, and several river crossings.
Start : ME 15 (Monson, Maine 3.6 East)
- Day 1: Wilson Valley Lean-to (10.4 miles)
- Day 2: Cloud Pound Lean-to (8.4 miles + 0.4 off the AT)
- Day 3: Carl A. Newhall Lean-to (16.8 miles)
- Day 4: East Branch Lean-to (10.8 miles)
- Day 5: Antlers Campsite (16 miles)
- Day 6: Wadleigh Stream Lean-to (13.6 miles)
- Day 7: Rainbow Spring Campsite (11.9 miles)
End: Golden Road, Abol Bridge (10.9 miles)
There are nine other shelters - Leeman Brook, Long Pond Stream, Chairback Gap, Logan Brook, Cooper Brook Falls, Potaywadjo Spring, Nahmakanta Stream, Rainbow Stream, Hurd Brook - and one other campsite, Sidney Tappan, in this section.
It’s a 2-hour drive back to Monson from Abol Bridge.
If there are no rules or regulations stated for the area, you can typically camp along the Appalachian Trail as long as you're 200 feet from the trail, ideally not visible, and 200 feet from water. This creates more flexibility in planning a trip just for you and your group. If you want to break up a section of trail even more, this is an easy way to do it if you’ve got the time.
I recommend using the AWOL guide, which contains both northbound and southbound mileage for hiking in either direction. The FarOut app is another great tool. You can buy mapped regions by sections and show up-to-date comments from other users on water, animals, closures, etc.
The Final Word
Thru-hiking the Appalachian Trail is a huge commitment of time, money, and forethought. But it can be broken up into more manageable sections that provide plenty of opportunity for adventure along the way. This guide is meant to provide inspiration and ideas for you to break the trail up if that’s a better approach for you.
Just remember to check for the most up-to-date mileage, elevation change, permits, fees, and camping regulations before your trip. And if you want guidance on a list of budget-friendly hiking gear that will come in handy along the way, check out my Gear Under $75 I Used Every Day Thru-Hiking the Appalachian Trail .
This trail is 2,200 miles long, and these are some of my favorite sections. But you're sure to find a trip you'll enjoy anywhere along it. Happy trails!
Backpacking Tips: 7 Hacks From Thru-Hiking the 567-Mile Colorado Trail
Before you pack up and hit the trail, here are some useful backpacking tips, tricks, and hacks that can save you time, energy, and headaches while thru-hiking. Read more…
The post The 6 Best Shorter Backpacking Trips on the Appalachian Trail appeared first on GearJunkie .

No products in the basket.

The best things to do and places to visit in Moscow, Russia
Updated On 14th October, 2021
While Moscow isn’t always at the top of everyone’s Europe bucket list , it’s certainly one of the best places to visit in Europe if you’re looking for a more alternative adventure! In this blog post I plan on sharing some of the free things to do in Moscow, as well as the best places to visit in Moscow, so that you can enjoy some of the best things to do in Russia!
Moscow, the capital of Russia, sits in the European part of the country. It’s an incredibly beautiful city, which I personally found to be more beautiful than Saint Petersburg (which is often people’s preference). The capital is certainly a lot busier, and less laid back than Saint Petersburg , but it’s a much more colourful and vibrant city, full of stunning and unique architecture.
Visiting famous landmarks such as The Kremlin and St Basil’s Cathedral, enjoying some of the green space in Gorky Park, watching a ballet in the Bolshoi Theatre… these are just a few reasons that you should visit Moscow! On top of that, because of visa restrictions (we’ll get onto that later), it’s also one of the most unique destinations in Europe.
There is a common misconception that Moscow is a dangerous city, but now that I’ve visited, I don’t believe this to be true. I would say the same rules apply here as to other large cities: avoid walking in dark areas alone at night, keep an eye on your belongings on public transport, and be streetwise. There’s no reason to avoid visiting this energetic city and miss out on these amazing things to do in Moscow!
It would take months if you wanted to truly explore Moscow because it’s a huge city, but I’m going to share some of my favourite things to do in Moscow and places to visit in Moscow so that you can prepare for your upcoming adventure! Even if you’re only there for a few days, you should be able to fit in these highlights from my trip.
Other blog posts you might be interested in...
- The best things to do in St Petersburg
- A 2-week Norway road trip
- A complete guide to Helsinki
- A complete guide to Tallinn
- Europe: the ultimate travel guide
- The best capital cities to visit in Europe
- The best things to do in Europe: the ultimate Europe bucket list
Where is Moscow?
If you’re wondering ‘Where is Moscow, Russia?’ then you’ve come to the right place! Moscow in in west Russia, the European part, and it’s the capital city.
How do you get to Moscow?
Getting a visa for moscow:.
To get into Russia, you need to get a visa. The processing time is approximately 20 days, and you’ll need to have your fingerprints taken at a visa centre in London , Edinburgh or Manchester. You can find out more about getting a visa for Russia here.
Getting to Moscow:
Once you’ve got your visa, the easiest way to get to Moscow from the UK is by flying. Direct flights between London and Moscow take just under four hours, and with an airport layover you’re looking at a 6-7 hour trip. You can also fly in from many other major European and international cities.
Top tip: Check out flights to and from Copenhagen on Skyscanner here.
Check out how to pack a weekend away in a carry-on suitcase here.
16 best places to visit in Moscow...
1. st basil’s cathedral.
The most iconic building in Russia and one of the most iconic buildings in the world. St Basil’s Cathedral is one of the best places to visit in Moscow, if not the best!
St Basil’s is situated on Red Square, where you’ll also find many other popular places to visit in Moscow. In my opinion this still stands out against them all. There’s something about the multi coloured domes against the Moscow skyline that I found quite spectacular.
Although I’d already been in Russia for several days, it wasn’t until I was at this amazing piece of architecture that I really felt I was in Russia.
The cathedral was built by order of Ivan the Terrible, and apparently after the architect completed it, Ivan blinded him so that he could never build anything more beautiful. Whether or not this story is true, it certainly adds a bittersweet feeling as you stand admiring the beauty of St Basil’s Cathedral.
Inside is a museum displaying many historic items once used at the cathedral, which costs 700 rubles to enter. In my opinion it’s worth the entry fee, as simply seeing the ornate interior walls is a spectacle in itself.

2. The Kremlin
This historic fortress that sits on Red Square is probably the largest landmark and one of the most popular places to visit in Moscow. It’s the official residence of the President, although he doesn’t actually live there. It’s been rebuilt many times since it was first constructed in 1147 out of wood, before Ivan III the Great ordered it to be made from stone, which is the Kremlin you’ll recognise today.

This place is huge, and there’s quite a lot to see. The first problem I had was finding where the entrance was. Even though I had a pre-booked ticket, I was then told I still had to visit the ticket office to exchange it for another ticket. I also needed my passport, so make sure you have yours if you plan to visit the Kremlin. After a lengthy queue I finally had a ticket I could use to enter the Kremlin, and had to go through security. The security here is thorough, so make sure you don’t take too much in with you. I had my pockets full, and it was a nightmare emptying them and explaining each item, before I was finally allowed in. Once inside you can pay for extra tickets to visit the various museums, however there’s also quite a lot to see simply on the grounds if you don’t want to spend too much.
See more tips for travelling on a budget here.
There’s so much to see here, including The Assumption Cathedral, Ivan the Great Bell Tower Complex, the Grand Kremlin Palace, the Armoury Chamber and Diamond Fund. There is also the Tsar Cannon (a huge artillery cannon), and the Tsar Bell. The Tsar Bell is the largest bell in the world. An incident with a fire and water being poured over the bell caused it to crack and for a slab to break off from it, which can now be seen propped up next to it.

As you walk around the grounds you’ll hear the sound of whistles. The guards patrolling the area will blow a whistle at anyone walking where they shouldn’t. Even if it’s just on the grass, or towards more restricted areas. This can sometimes be funny to watch, as often the tourists will be in a world of their own whilst a guard is blowing a whistle at them. Sometimes a guard will be stood face to face with a tourist angrily blowing their whistle before the tourist realises they need to get back onto the main path.
This is perhaps one of the more unusual places to visit in Moscow! Gum is a huge department store situated on Red Square. It’s an interesting department store to walk around, with several levels, although the shops inside are certainly quite pricey. It’s a beautiful building when it’s lit up at night, and it seems to fit in nicely amongst the other famous sights on Red Square. Even if you don’t plan to buy anything here, one of the best things to do in Moscow is to take a quick look inside, although bear in mind there are usually security checks before entering.
4. State Historical Museum
The large crimson building on Red Square is now the State Historical Museum. It was originally the first pharmacy in Russia, and later a University before finally becoming the museum it is today.
Unfortunately I didn’t go inside as my time was limited and there was so much else I wanted to see, but if you have the time I think it would be one of the best things to do in Moscow. There are items dating back to the 6th century, and maybe even further. There’s also a library inside storing many ancient manuscripts and the largest coin collection in Russia.

5. Bolshoi Theatre
Bolshoi means big in Russian, so it roughly translates to large theatre. The Bolshoi Theatre is one of the foremost ballet companies in the world. The exterior of the building is an impressive sight, one of the most beautiful places to visit in Moscow, and it’s certainly worth admiring from the outside. There are guided tours of the interior, but if you really want to experience the theatre, one of the best things to do in Moscow is to watch a ballet here.
I was torn between booking a seat, but the ballets were very expensive. I’d have liked to have seen “Swan Lake”, (as at least I may have recognised some of the music). Unfortunately there were no performances on the days I was in Moscow, so I decided to pass. But if I return to Russia, then watching a ballet will be on my list of things to do.

6. Sparrow Hills
If you want a good view of the city, then Sparrow Hills is one of the best places to visit in Moscow. It’s a bit of a trek outside of the centre, but if you have the time then it offers an escape from the hustle and bustle of the busy city. There’s a viewing platform here which gives you fantastic panoramic views of Moscow.
Nearby you’ll see the magnificent Moscow State University building, which is one of the seven sisters of Moscow.
7. Seven Sisters
Whilst in Moscow, you’ll no doubt notice these magnificent soviet skyscrapers dotted around the city. At the time of construction they were the tallest buildings in Europe, Moscow State University being so until 1997. There are, as the name suggests, seven in total, which are: Hotel Ukraina, Kotelnicheskaya Embankment Apartments, the Kudrinskaya Square Building, the Hilton Moscow Leningradskaya Hotel, the Ministry of Foreign Affairs, Moscow State University, and the Red Gates Administrative Building.
If you visit Sparrow Hills, then you’ll come across Moscow State University, but I’m certain as you explore the city, you’ll see more of these giants against the Moscow skyline. One of the best things to do in Moscow is to see if you can locate all seven as you wander round the city!

8. Nikolskaya Street
The start of this street is found by Red Square. It’s one of the most prominent pedestrianised streets in Moscow, filled with shops, restaurants and bars, so one of the best places to visit in Moscow if you’re looking for a bite to eat or some souvenirs!
What makes this street extra special are the thousands of bright lights in the sky above. After dark it looks simply magical with the many colourful lights overhead as you walk beneath them. One of the best things to do in Moscow is to visit Nikolskaya Street after dark and see them for yourself. It almost feels like Christmas in London!
There is another street nearby which also features similar lights, “Kuznetskiy Most”, which is also quite beautiful, but I thought “Nikolskaya Street” was ever slightly more impressive.

9. Izmailovo Kremlin and Izmaylovskiy Bazar
Did you know that The Kremlin in Red Square is not the only Kremlin in Moscow? Kremlin actually means a type of fortress, so there are many in Russia.
The Izmailovo Kremlin is a fairly new addition to the city, having been built in 2007 as a cultural centre. With its multitude of colours and historic style, it has a real fairytale feel to it. There are several small museums here for you to explore, devoted to subjects such as Russian folk art, vodka and bread (yes, bread). Visiting these is definitely one of the more unique things to do in Moscow!
It’s a little way out of the centre, but it’s an interesting place to visit in Moscow to see something a little bit different, and it won’t be as overcrowded with tourists.
Next to the Izmailovo Kremlin is the best market in Moscow for souvenirs. You’ll find good and poor quality items, but you’ll certainly pick up a bargain if you take your time and haggle for a good price. Many of the items here you’ll get for half the price you would in souvenir shops in the city centre. It’s here that I picked up several Matryoshka dolls for a very good price. I think I’d have paid more than double, or possibly even triple if I’d have bought them elsewhere.

10. Izmailovsky Park
Not too far from Izmailovo Kremlin you’ll find this huge park, one of the prettiest places to visit in Moscow. It’s easy to get lost here, so try to make sure you keep track of where you entered if you plan to go back the same way. There’s a lot to see in this park, a round pond, ferris wheel, playgrounds and sports grounds, shooting galleries, cinemas and a skate park.
There are often festivals, concerts and exhibitions at the park, on top of firework displays and dance parties.
The main reason I chose to visit the park was to find the painted trees. A local artist “Yevgenia Khlynina” has been painting on trees in this park, and one of the best things to do in Moscow is to explore the park looking for them. One of the most famous pieces of hers is the “Hedgehog in the Fog” from a famous soviet cartoon.

11. Gorky Park
The most famous park in Moscow is named after the writer “Maxim Gorky”. Although it’s likely you’ve heard it mentioned in the song “Wind of Change” by “The Scorpions”.
There’s lots to do and see in the park with sports facilities and exhibitions. During the summer months this is one of the best places to visit if you’re looking for things to do in Moscow; there are often open air concerts and an open air cinema. There are many statues and sculptures in the park, including a small sculpture park area which features many interesting pieces.
One piece of advice: don’t visit Gorky Park or any other parks on 2nd August if you’re in Russia. 2nd August is Paratrooper day, which usually encourages a lot of drinking in the park, which is not always very welcoming.

12. Arbat Street
One of the oldest and busiest streets in Moscow, and the most famous pedestrian street in the city. Arbat is one of the most popular places to visit in Moscow. There are several shops including many dedicated to souvenirs, but although these will have a good range of goods, they will be quite expensive . You may see street performers and buskers, and there are often poets reciting famous works, if not their own works.
It’s within walking distance from the Kremlin, which should only take around 10 minutes.
There are actually two streets with this name, Old Arbat Street and New Arbat Street. Old Arbat Street is where you’ll find the pedestrianised area. New Arbat Street is a separate street which runs alongside a main road, filled with many bars and restaurants.

13. Metro station art
The best way to get around Moscow is by using the metro, and the metro is a tourist attraction in itself.
Although I obviously didn’t visit every metro station, I believe that every single station is unique in its own beautiful way. Many of the stations I passed through were impressive, quirky or simply jaw dropping. You’ll more than likely pass through many of them on the way to other sights, but I’d recommend the following: Komsomolskaya, Novoslobodskaya, Mayakovskaya, Teatralnaya, Arbatskaya, Prospekt Mira and Ploschad Revolutsii (be sure to pet the dog statue for good luck).
There are of course many others for you to explore, but these are the ones I considered to be some of the most impressive places to visit in Moscow (even if they’re only metro stations!).

VDNKh is an exhibition centre with many monuments and museums. Now that it’s combined with the Botanical Garden and Ostankino Park, one of the best things to do in Moscow is to spend the day at this recreational centre enjoying a mix of nature and culture. The most popular museum in the complex which you shouldn’t miss on your trip to Moscow is the Museum of Cosmonautics.
15. Lenin's Mausoleum
Despite requesting to be buried with his mum in St Petersburg, it is at the foot of the Kremlin on Red Sqaure that you will find Lenin’s Mausoleum, where Vladimir Ilych Lenin has been frozen in time since 1924. It’s only open for a few hours a few times per week. Photography is not allowed, and you should line up on the western corner of the square (near Alexander Garden) to wait you turn to see the embalmed body.
16. Novodevichy Convent
Novodevichy Convent, on the UNESCO World Heritage List, is one of the most beautiful places to visit in Moscow. Located south west of the centre you’ll find this stunning monastery. Inside you’ll find a cathedral and several churches, surrounded by high walls and 12 towers.
Where are your favourite places to visit in Moscow?
What about the best things to do in Moscow? Anything you’d add?
Love as always and happy adventuring…

I’m Spike! Solo traveller, cultural explorer and world adventurer! With 57 countries under my belt, I live and breathe travel. I never plan to stop exploring new destinations and experiencing new cultures.
Did you find this post helpful? I’d love you to share it for me.
Pin and save this blog post for later…

IT’S LOVELY TO MEET YOU
I’M MOLLIE AND I STARTED THIS BLOG BACK IN 2013 WHEN I HEADED OUT ON MY FIRST BACKPACKING ADVENTURE.
I’D LOVE TO SHARE THE JOURNEY WITH YOU, WE’VE GROWN A LOT SINCE THEN!

Shop the google map legends
Search by adventure type, active travel, backpacking, budget travel, love and relationships, once in a lifetime, packing tips, solo travel, weekend getaways, where's mollie newsletter, travel shop, search by destination, other posts that you may like....

A complete city guide to Stockholm, Sweden

15 budget-friendly things to do in Copenhagen

A Quick Guide to Pollença Town, Mallorca

Top tips for travelling Western Australia

A weekend guide to Brighton, England

Live music and an overnight stay at ibis Styles Manchester Portland Hotel, UK

Sunsail Yacht Floatilla – Anchors away! A day in the life :)

My week at the The Body Holiday resort, Saint Lucia
Privacy overview.

Travel Itinerary For One Week in Moscow: The Best of Moscow!
I just got back from one week in Moscow. And, as you might have already guessed, it was a mind-boggling experience. It was not my first trip to the Russian capital. But I hardly ever got enough time to explore this sprawling city. Visiting places for business rarely leaves enough time for sightseeing. I think that if you’ve got one week in Russia, you can also consider splitting your time between its largest cities (i.e. Saint Petersburg ) to get the most out of your trip. Seven days will let you see the majority of the main sights and go beyond just scratching the surface. In this post, I’m going to share with you my idea of the perfect travel itinerary for one week in Moscow.
Moscow is perhaps both the business and cultural hub of Russia. There is a lot more to see here than just the Kremlin and Saint Basil’s Cathedral. Centuries-old churches with onion-shaped domes dotted around the city are in stark contrast with newly completed impressive skyscrapers of Moscow City dominating the skyline. I spent a lot of time thinking about my Moscow itinerary before I left. And this city lived up to all of my expectations.

Travel Itinerary For One Week in Moscow
Day 1 – red square and the kremlin.
Metro Station: Okhotny Ryad on Red Line.
No trip to Moscow would be complete without seeing its main attraction. The Red Square is just a stone’s throw away from several metro stations. It is home to some of the most impressive architectural masterpieces in the city. The first thing you’ll probably notice after entering it and passing vendors selling weird fur hats is the fairytale-like looking Saint Basil’s Cathedral. It was built to commemorate one of the major victories of Ivan the Terrible. I once spent 20 minutes gazing at it, trying to find the perfect angle to snap it. It was easier said than done because of the hordes of locals and tourists.
As you continue strolling around Red Square, there’s no way you can miss Gum. It was widely known as the main department store during the Soviet Era. Now this large (yet historic) shopping mall is filled with expensive boutiques, pricey eateries, etc. During my trip to Moscow, I was on a tight budget. So I only took a retro-style stroll in Gum to get a rare glimpse of a place where Soviet leaders used to grocery shop and buy their stuff. In case you want some modern shopping experience, head to the Okhotny Ryad Shopping Center with stores like New Yorker, Zara, and Adidas.

Read Next: Things To Do on Socotra
To continue this Moscow itinerary, next you may want to go inside the Kremlin walls. This is the center of Russian political power and the president’s official residence. If you’re planning to pay Kremlin a visit do your best to visit Ivan the Great Bell Tower as well. Go there as early as possible to avoid crowds and get an incredible bird’s-eye view. There are a couple of museums that are available during designated visiting hours. Make sure to book your ticket online and avoid lines.
Day 2 – Cathedral of Christ the Saviour, the Tretyakov Gallery, and the Arbat Street
Metro Station: Kropotkinskaya on Red Line
As soon as you start creating a Moscow itinerary for your second day, you’ll discover that there are plenty of metro stations that are much closer to certain sites. Depending on your route, take a closer look at the metro map to pick the closest.
The white marble walls of Christ the Saviour Cathedral are awe-inspiring. As you approach this tallest Orthodox Christian church, you may notice the bronze sculptures, magnificent arches, and cupolas that were created to commemorate Russia’s victory against Napoleon.

How to Get a Decent Haircut in a Foreign Country
Unfortunately, the current Cathedral is a replica, since original was blown to bits in 1931 by the Soviet government. The new cathedral basically follows the original design, but they have added some new elements such as marble high reliefs.
Home to some precious collection of artworks, in Tretyakov Gallery you can find more than 150,000 of works spanning centuries of artistic endeavor. Originally a privately owned gallery, it now has become one of the largest museums in Russia. The Gallery is often considered essential to visit. But I have encountered a lot of locals who have never been there.
Famous for its souvenirs, musicians, and theaters, Arbat street is among the few in Moscow that were turned into pedestrian zones. Arbat street is usually very busy with tourists and locals alike. My local friend once called it the oldest street in Moscow dating back to 1493. It is a kilometer long walking street filled with fancy gift shops, small cozy restaurants, lots of cute cafes, and street artists. It is closed to any vehicular traffic, so you can easily stroll it with kids.
Day 3 – Moscow River Boat Ride, Poklonnaya Hill Victory Park, the Moscow City
Metro Station: Kievskaya and Park Pobedy on Dark Blue Line / Vystavochnaya on Light Blue Line
Voyaging along the Moscow River is definitely one of the best ways to catch a glimpse of the city and see the attractions from a bit different perspective. Depending on your Moscow itinerary, travel budget and the time of the year, there are various types of boats available. In the summer there is no shortage of boats, and you’ll be spoiled for choice.

Travel Itinerary for One Week in Beijing
If you find yourself in Moscow during the winter months, I’d recommend going with Radisson boat cruise. These are often more expensive (yet comfy). They offer refreshments like tea, coffee, hot chocolate, and, of course, alcoholic drinks. Prices may vary but mostly depend on your food and drink selection. Find their main pier near the opulent Ukraine hotel . The hotel is one of the “Seven Sisters”, so if you’re into the charm of Stalinist architecture don’t miss a chance to stay there.
The area near Poklonnaya Hill has the closest relation to the country’s recent past. The memorial complex was completed in the mid-1990s to commemorate the Victory and WW2 casualties. Also known as the Great Patriotic War Museum, activities here include indoor attractions while the grounds around host an open-air museum with old tanks and other vehicles used on the battlefield.
How I Planned My Trip to Vietnam
The hallmark of the memorial complex and the first thing you see as you exit metro is the statue of Nike mounted to its column. This is a very impressive Obelisk with a statue of Saint George slaying the dragon at its base.
Maybe not as impressive as Shanghai’s Oriental Pearl Tower , the skyscrapers of the Moscow City (otherwise known as Moscow International Business Center) are so drastically different from dull Soviet architecture. With 239 meters and 60 floors, the Empire Tower is the seventh highest building in the business district.
The observation deck occupies 56 floor from where you have some panoramic views of the city. I loved the view in the direction of Moscow State University and Luzhniki stadium as well to the other side with residential quarters. The entrance fee is pricey, but if you’re want to get a bird’s eye view, the skyscraper is one of the best places for doing just that.
Day 4 – VDNKh, Worker and Collective Farm Woman Monument, The Ostankino TV Tower
Metro Station: VDNKh on Orange Line
VDNKh is one of my favorite attractions in Moscow. The weird abbreviation actually stands for Russian vystavka dostizheniy narodnogo khozyaystva (Exhibition of Achievements of the National Economy). With more than 200 buildings and 30 pavilions on the grounds, VDNKh serves as an open-air museum. You can easily spend a full day here since the park occupies a very large area.

Places to Visit in Barcelona That Aren’t Beaches
First, there are pavilions that used to showcase different cultures the USSR was made of. Additionally, there is a number of shopping pavilions, as well as Moskvarium (an Oceanarium) that features a variety of marine species. VDNKh is a popular venue for events and fairs. There is always something going on, so I’d recommend checking their website if you want to see some particular exhibition.
A stone’s throw away from VDNKh there is a very distinctive 25-meters high monument. Originally built in 1937 for the world fair in Paris, the hulking figures of men and women holding a hammer and a sickle represent the Soviet idea of united workers and farmers. It doesn’t take much time to see the monument, but visiting it gives some idea of the Soviet Union’s grandiose aspirations.
I have a thing for tall buildings. So to continue my travel itinerary for one week in Moscow I decided to climb the fourth highest TV tower in the world. This iconic 540m tower is a fixture of the skyline. You can see it virtually from everywhere in Moscow, and this is where you can get the best panoramic views (yep, even better than Empire skyscraper).

Parts of the floor are made of tempered glass, so it can be quite scary to exit the elevator. But trust me, as you start observing buildings and cars below, you won’t want to leave. There is only a limited number of tickets per day, so you may want to book online. Insider tip: the first tour is cheaper, you can save up to $10 if go there early.
Day 5 – A Tour To Moscow Manor Houses
Metro Station: Kolomenskoye, Tsaritsyno on Dark Green Line / Kuskovo on Purple Line
I love visiting the manor houses and palaces in Moscow. These opulent buildings were generally built to house Russian aristocratic families and monarchs. Houses tend to be rather grand affairs with impressive architecture. And, depending on the whims of the owners, some form of a landscaped garden.
During the early part of the 20th century though, many of Russia’s aristocratic families (including the family of the last emperor) ended up being killed or moving abroad . Their manor houses were nationalized. Some time later (after the fall of the USSR) these were open to the public. It means that today a great many of Moscow’s finest manor houses and palaces are open for touring.

20 Travel Tips I’ve Learned From Travelling The World
There are 20 manor houses scattered throughout the city and more than 25 in the area around. But not all of them easily accessible and exploring them often takes a lot of time. I’d recommend focusing on three most popular estates in Moscow that are some 30-minute metro ride away from Kremlin.
Sandwiched between the Moscow River and the Andropov Avenue, Kolomenskoye is a UNESCO site that became a public park in the 1920’s. Once a former royal estate, now it is one of the most tranquil parks in the city with gorgeous views. The Ascension Church, The White Column, and the grounds are a truly grand place to visit.
You could easily spend a full day here, exploring a traditional Russian village (that is, in fact, a market), picnicking by the river, enjoying the Eastern Orthodox church architecture, hiking the grounds as well as and wandering the park and gardens with wildflower meadows, apple orchards, and birch and maple groves. The estate museum showcases Russian nature at its finest year-round.
12 Stunning National Parks and Regional Parks In France
If my travel itinerary for one week in Moscow was a family tree, Tsaritsyno Park would probably be the crazy uncle that no-one talks about. It’s a large park in the south of the city of mind-boggling proportions, unbelievable in so many ways, and yet most travelers have never heard of it.
The palace was supposed to be a summer home for Empress Catherine the Great. But since the construction didn’t meet with her approval the palace was abandoned. Since the early 1990’s the palace, the pond, and the grounds have been undergoing renovations. The entire complex is now looking brighter and more elaborately decorated than at possibly any other time during its history. Like most parks in Moscow, you can visit Tsaritsyno free of charge, but there is a small fee if you want to visit the palace.

How To Stop Procrastinating When Trip Planning
Last, but by no means least on my Moscow itinerary is Kuskovo Park . This is definitely an off-the-beaten-path place. While it is not easily accessible, you will be rewarded with a lack of crowds. This 18th-century summer country house of the Sheremetev family was one of the first summer country estates of the Russian nobility. And when you visit you’ll quickly realize why locals love this park.
Like many other estates, Kuskovo has just been renovated. So there are lovely French formal garden, a grotto, and the Dutch house to explore. Make sure to plan your itinerary well because the estate is some way from a metro station.
Day 6 – Explore the Golden Ring
Creating the Moscow itinerary may keep you busy for days with the seemingly endless amount of things to do. Visiting the so-called Golden Ring is like stepping back in time. Golden Ring is a “theme route” devised by promotion-minded journalist and writer Yuri Bychkov.
Having started in Moscow the route will take you through a number of historical cities. It now includes Suzdal, Vladimir, Kostroma, Yaroslavl and Sergiev Posad. All these awe-inspiring towns have their own smaller kremlins and feature dramatic churches with onion-shaped domes, tranquil residential areas, and other architectural landmarks.
Two Weeks In Thailand: The Perfect 14-Day Itinerary
I only visited two out of eight cities included on the route. It is a no-brainer that Sergiev Posad is the nearest and the easiest city to see on a day trip from Moscow. That being said, you can explore its main attractions in just one day. Located some 70 km north-east of the Russian capital, this tiny and overlooked town is home to Trinity Lavra of St. Sergius, UNESCO Site.

You Will Also Like: 3-Day London Itinerary
Sergiev Posad is often described as being at the heart of Russian spiritual life. So it is uncommon to see the crowds of Russian pilgrims showing a deep reverence for their religion. If you’re traveling independently and using public transport, you can reach Sergiev Posad by bus (departs from VDNKh) or by suburban commuter train from Yaroslavskaya Railway Station (Bahnhof). It takes about one and a half hours to reach the town.
Trinity Lavra of St. Sergius is a great place to get a glimpse of filling and warming Russian lunch, specifically at the “ Gostevaya Izba ” restaurant. Try the duck breast, hearty potato and vegetables, and the awesome Napoleon cake.
Day 7 – Gorky Park, Izmailovo Kremlin, Patriarch’s Ponds
Metro Station: Park Kultury or Oktyabrskaya on Circle Line / Partizanskaya on Dark Blue Line / Pushkinskaya on Dark Green Line
Gorky Park is in the heart of Moscow. It offers many different types of outdoor activities, such as dancing, cycling, skateboarding, walking, jogging, and anything else you can do in a park. Named after Maxim Gorky, this sprawling and lovely park is where locals go on a picnic, relax and enjoy free yoga classes. It’s a popular place to bike around, and there is a Muzeon Art Park not far from here. A dynamic location with a younger vibe. There is also a pier, so you can take a cruise along the river too.

How to Save Money While Traveling in Europe
The Kremlin in Izmailovo is by no means like the one you can find near the Red Square. Originally built for decorative purposes, it now features the Vernissage flea market and a number of frequent fairs, exhibitions, and conferences. Every weekend, there’s a giant flea market in Izmailovo, where dozens of stalls sell Soviet propaganda crap, Russian nesting dolls, vinyl records, jewelry and just about any object you can imagine. Go early in the morning if you want to beat the crowds.
All the Bulgakov’s fans should pay a visit to Patriarch’s Ponds (yup, that is plural). With a lovely small city park and the only one (!) pond in the middle, the location is where the opening scene of Bulgakov’s novel Master and Margarita was set. The novel is centered around a visit by Devil to the atheistic Soviet Union is considered by many critics to be one of the best novels of the 20th century. I spent great two hours strolling the nearby streets and having lunch in the hipster cafe.
Conclusion and Recommendations
To conclude, Moscow is a safe city to visit. I have never had a problem with getting around and most locals are really friendly once they know you’re a foreigner. Moscow has undergone some serious reconstruction over the last few years. So you can expect some places to be completely different. I hope my one week Moscow itinerary was helpful! If you have less time, say 4 days or 5 days, I would cut out day 6 and day 7. You could save the Golden Ring for a separate trip entirely as there’s lots to see!
What are your thoughts on this one week Moscow itinerary? Are you excited about your first time in the city? Let me know in the comments below!
JOIN MY FREE WEEKLY NEWSLETTER!
Email Address *
YOU WILL ALSO LIKE

10 Dishes You Must Try When Going To Moscow

15 Fantastic and Easy Day Trips Close to Moscow

When Is the Best Time To Visit Russia
24 comments.

Ann Snook-Moreau
Moscow looks so beautiful and historic! Thanks for including public transit information for those of us who don’t like to rent cars.

MindTheTravel
Yup, that is me 🙂 Rarely rent + stick to the metro = Full wallet!

Mariella Blago
Looks like you had loads of fun! Well done. Also great value post for travel lovers.
Thanks, Mariella!

I have always wanted to go to Russia, especially Moscow. These sights look absolutely beautiful to see and there is so much history there!
Agree! Moscow is a thousand-year-old city and there is definitely something for everyone.

Tara Pittman
Those are amazing buildings. Looks like a place that would be amazing to visit.

Adriana Lopez
Never been to Moscow or Russia but my family has. Many great spots and a lot of culture. Your itinerary sounds fantastic and covers a lot despite it is only a short period of time.
What was their favourite thing about Russia?

Gladys Parker
I know very little about Moscow or Russia for the\at matter. I do know I would have to see the Red Square and all of its exquisite architectural masterpieces. Also the CATHEDRAL OF CHRIST THE SAVIOUR. Thanks for shedding some light on visiting Moscow.
Thanks for swinging by! The Red Square is a great starting point, but there way too many places and things to discover aside from it!

Ruthy @ Percolate Kitchen
You are making me so jealous!! I’ve always wanted to see Russia.

Moscow is in my bucket list, I don’t know when I can visit there, your post is really useful. As a culture rich place we need to spend at least week.

DANA GUTKOWSKI
Looks like you had a great trip! Thanks for all the great info! I’ve never been in to Russia, but this post makes me wanna go now!

Wow this is amazing! Moscow is on my bucket list – such an amazing place to visit I can imagine! I can’t wait to go there one day!

The building on the second picture looks familiar. I keep seeing that on TV.

Reesa Lewandowski
What beautiful moments! I always wish I had the personality to travel more like this!

Perfect itinerary for spending a week in Moscow! So many places to visit and it looks like you had a wonderful time. I would love to climb that tower. The views I am sure must have been amazing!
I was lucky enough to see the skyline of Moscow from this TV Tower and it is definitely mind-blowing.

Chelsea Pearl
Moscow is definitely up there on my travel bucket list. So much history and iconic architecture!
Thumbs up! 🙂

Blair Villanueva
OMG I dream to visit Moscow someday! Hope the visa processing would be okay (and become more affordable) so I could pursue my dream trip!
Yup, visa processing is the major downside! Agree! Time and the money consuming process…
Save my name, email, and website in this browser for the next time I comment.
- Privacy Overview
- Strictly Necessary Cookies
My website uses cookies so that I can provide you with the best user experience possible. Cookie information is stored in your browser and performs functions such as recognising you when you return to my website and helping me to understand which sections of Mind The Travel you find most interesting and useful.
You can adjust all of your cookie settings by navigating the tabs on the left hand side.
Strictly Necessary Cookie should be enabled at all times so that I can save your preferences for cookie settings.
If you disable this cookie, I will not be able to save your preferences. This means that every time you visit my website you will need to enable or disable cookies again.

Planning a trip to Moscow? Our travel guide contains up-to-date, personal information on everything from what to see , to when to visit , where to stay , and what to eat !
- General Information
- What to see
- How to get to Moscow
- Where to stay
- Where to eat
Why visit Moscow?
Majestic churches, impressive historic fortresses, and palatial buildings: Moscow is a fascinating city whose emblematic architecture reflects the turbulent history that has defined Russia throughout the centuries.
The traces of the USSR can be found around every corner of the city , side by side with the iconic relics of Imperial Russia , like the mythical Red Square , the imposing Kremlin , and the beautiful St Basil's Cathedral .
Discover a fascinating world of Cold War bunkers, golden-domed basilicas, world-class art museums, and the legendary "palace of the people," as the Moscow Metro has been nicknamed. Whether you fancy watching a classical Russian ballet at the Bolshoi Theatre , perusing the fine arts at the Pushkin Museum , or marveling at the sheer size of the monuments to the Soviet state's achievements at the All-Russia Exhibition Centre , this travel guide will help you on your way!
Where to start?
If you're going to travel to Moscow and you don't know much about the city yet, the first thing to do is to dive into its legendary history - understanding the past will help you understand the present. Next, check out our practical hints and tips on traveling to the city before discovering which of its most important museums , monuments , and attractions pique your interest.
Looking for a place to stay?
Booking your accommodation in advance is the best way to get great discounts. Our detailed guide on where to stay in Moscow will help you decide which neighborhood you'd like to look for hotels or apartments in, and our hotel search engine will find you the best deals!
Why is our Moscow travel guide the best?
Introducing Moscow is a city guide written by travelers for travelers and contains personalized advice to help you make the most of your trip to the city.
All the information in this guide is valid as of December 2022. If you find any errors or have any comments, please feel free to contact us .

Our travel guides
- top attractions
- where to stay
- and much more
IMAGES
VIDEO
COMMENTS
Trip Planning. Photo: Peter Cade/Stone via Getty Images. For your first overnight, choose an easy route with low mileage and manageable elevation gain. Remember, you'll hike slower with a full pack than you might on a regular dayhike. Apps like Gaia GPS are useful for finding route suggestions, trail info, and maps.
Backpacking Half Dome Quick Facts: Location: Yosemite National Park, California Type of Trail: Out and back Total Mileage: ~ 14.5 miles via the Mist Trail, ~16.5 miles round trip via the John Muir Trail, or you can choose to go up the Mist Trail (7.25 miles) and down the John Muir Trail (8.25 miles) for a round trip of around 15.5 miles.Its easier on your knees to go down the John Muir Trail ...
Here is a rough backpack size guide to follow: Small backpacks (6-10 Litres): Ideal for days out. Daypacks (10-30 Litres): Ideal for a day walks or hiking trails. Medium backpacks (30-50 Litres): Overnight camping & hikes. Large backpacks (50+ Litres): Long-term travelling.
First, before spinning up grand plans for an epic backpacking trip, make sure it's a good time to hike in the area which you've selected. This often takes more research than you'd imagine. For instance, we're originally from Virginia and one of the first big backpacking trips we did was in the Grand Tetons in Wyoming.
1) Pick dates for your backpacking trip. Figuring out when you want to go on your overnight adventure is the first step in how to plan a backpacking trip. Your dates will dictate where you can go due to the weather (unless you want to snow camp). If you want to go in January, then you'll be limited to warmer places like Southern California ...
Check out a story about planning a solo backpacking trip for the first time: Places: I Finally Had to Plan a Backpacking Trip with No Help; Navigation doesn't just begin when you hit the trail, but when you have to get on the trail. Whether by bike or by bus, there are other ways to get to your trailhead. Places: Thinking Behind the Gate
Backpacking with a guide isn't a necessity, but it can help you avoid some of the discomfort that is inevitably going to occur during your first few trips. An experienced backpacker knows how to ...
You can start to add weights to your daypack as you walk, and even try a day hike or two wearing your packed backpacking pack in order to build your stamina and get used to the sensation of hiking with a load. Walking with trekking poles for balance can really help, too. 2. Start with a one-nighter.
Planning your first backpacking trip can be very overwhelming. From deciding on how much to take with you on your hike, to deciding which route to take, there's a lot to think about. Before you get too overwhelmed, just remember that even the most experienced backcountry hikers and campers all started somewhere and have likely felt the same ...
When planning your first backpacking trip, you can either, 1) choose a trip within your comfort zone and go with family, friends, or a partner or 2) join a guided trip so you can learn new skills, develop friendships, and take on a more difficult challenge. Some people try to fit too much into their first backcountry trip and end up ditching ...
Nonetheless, I showed up to my first backpacking trip with 45 lbs of backpacking gear strapped to my back (yes you read that right, 45lbs) and wearing a visor, gym shorts, high black socks (with liners!), twist-lock cheap hiking poles, and a cotton tank top. That first backpacking trip was an intense introduction to the world of backpacking.
Planning a backpacking trip - especially your first trip - can be really daunting. In this video, I share my steps for planning a backpacking trip! There are...
11. Do at least one packing practice run. It takes a while to learn how to efficiently packing your pack and using your gear. "Don't do it for the first time at 10 P.M. the night before your ...
First, you have to understand your travel budget, and you also have to understand yourself. Many backpackers plan trips that become too short. However, it might be better to plan a short experience for your first backpacking trip rather than a trip that becomes too long and you get homesick. We will walk you through the essential things to ask ...
EPIC MOSCOW Itinerary! (2024) Moscow is the heart of Mother Russia. Just the mention of this city conjures images of colorful bulbous pointed domes, crisp temperatures, and a uniquely original spirit! Moscow has an incredibly turbulent history, a seemingly resilient culture, and a unique enchantment that pulls countless tourists to the city ...
The Best Shorter Hiking Trips on the Appalachian Trail ... These campsites are first come, first serve and cost $15 per person to camp at each of these places. The AMC huts are around $130 per ...
1. St Basil's Cathedral. The most iconic building in Russia and one of the most iconic buildings in the world. St Basil's Cathedral is one of the best places to visit in Moscow, if not the best! St Basil's is situated on Red Square, where you'll also find many other popular places to visit in Moscow.
Day 6 - Explore the Golden Ring. Creating the Moscow itinerary may keep you busy for days with the seemingly endless amount of things to do. Visiting the so-called Golden Ring is like stepping back in time. Golden Ring is a "theme route" devised by promotion-minded journalist and writer Yuri Bychkov.
Why visit Moscow? Majestic churches, impressive historic fortresses, and palatial buildings: Moscow is a fascinating city whose emblematic architecture reflects the turbulent history that has defined Russia throughout the centuries. The traces of the USSR can be found around every corner of the city, side by side with the iconic relics of Imperial Russia, like the mythical Red Square, the ...