- Editorial Process
- Why Trust Us?
- Affiliate Linking Policy
- Privacy Policy
- Terms of Service

Weekly Must-Reads View All
7 things to do if you spilled water on your macbook.
Quick steps to save your MacBook from water damage
How to Boot Your Mac Into Verbose Mode: 4 Best Ways
Boot your Mac into Verbose Mode with this step-by-step guide
How to Fix Your Mac Shutting Down Randomly: 16 Fixes to Try
Troubleshoot random shutdowns on Mac with effective solutions
How Much Space Does macOS Take On Your Mac?
Understand macOS size and analyze your Mac's storage usage
Popular Topics
- What to Do With Your Old MacBook? 13 Useful Ways to Reuse an Old Mac
- What Is the MacBook Flexgate Issue and How to Fix It
- What Is the MacBook Flexgate Issue
- Uninstall Java
- Safely Transfer Files from Mac to Mac
- Safari Bookmarks Disappeared on Mac: 10 Best Ways to Restore Them
- Repairing disk permissions
- Old MacBook
Trending Now View All

- Mac Tips and Tricks
How to Use Mac Trackpad Gestures and Customize Them
Hashir Ibrahim
Reviewed by
Last updated: September 14, 2023
Expert verified
The Mac trackpad is an impressive piece of technology that is more than a tool for pointing and clicking. With the right knowledge, your trackpad can become a powerful ally in boosting your productivity and enhancing your user experience.
Surprisingly, many Mac users aren’t tapping into the full potential of their trackpad. Let’s change that today by learning to use Mac trackpad gestures and customize them to your liking.
Understanding the Basic Mac Trackpad Gestures
Apple’s trackpad, built with capacitive touch technology, is designed to respond to the electric charge produced by your fingers. Your Mac’s trackpad comes packed with various Multi-Touch gestures you can use immediately.
Multi-Touch gestures are actions using two or more fingers that your Mac trackpad understands. These gestures are more than just flashy tricks. They can dramatically maximize your productivity and save time doing recurrent tasks.
Here are some basic trackpad gestures built-in to your Mac:
1. Tap to Click
Single-finger tap functions as a click.

How to Turn On Tap to Click on Mac
To turn on Tap to Click on a Mac, which allows you to register a click by tapping the trackpad instead of physically pressing it down, you can follow these steps:
- Click the Apple menu and select System Settings .
- Scroll down in the left sidebar, click Trackpad , and navigate to the Point & Click tab.

- Toggle on the Tap to click switch.

Once you’ve enabled tap to click, you can register a click on the trackpad by simply tapping it with one finger without physically pressing the trackpad down. This can provide a more convenient and comfortable way to interact with your Mac.
The specific options and labels may vary depending on your macOS version or the customization options provided by your device manufacturer.
2. Right-click or Secondary Click
A two-finger tap or click performs a secondary click.

3. Smart Zoom
You can zoom in or out on a webpage or PDF by double-tapping with two fingers.

How to Turn On Smart Zoom on Mac
To turn on Smart Zoom on a Mac, which allows you to zoom in and out on your screen by using a gesture on the trackpad, you can follow these steps:
- Scroll down in the left sidebar, click Trackpad , and navigate to the Scroll & Zoom tab.

- Under the Scroll & Zoom tab, toggle on the Smart zoom switch.

Once you’ve enabled Smart Zoom, you can use the defined gesture (i.e., double tap with two fingers) on the trackpad to zoom in and out on your screen. This can be useful for reading small text, examining details in images, or navigating content more easily.
The specific options and labels may vary depending on the version of macOS you are using or the customization options provided by your device manufacturer.
To scroll, glide two fingers up or down.

How to Turn On Natural Scrolling on Mac
To turn on Natural Scrolling on a Mac, which changes the scrolling direction to mimic the movement of content on a touchscreen device, you can follow these steps:
- Under the Scroll & Zoom tab, toggle on the Natural scrolling switch.

Once you’ve enabled Natural Scrolling, the scrolling direction on your trackpad will be inverted. Instead of scrolling down to move the content up and scrolling up to move the content down as in traditional scrolling, Natural Scrolling mimics the movement of content on a touchscreen device.
So, scrolling up will move the content up, and scrolling down will move the content down, similar to how you would interact with a touchscreen.
5. Zoom In and Zoom Out
Use a two-finger pinch movement to zoom in or zoom out on Mac .

How to Turn On Zoom In or Out on Mac
To turn on Zoom In or Out on a Mac, which allows you to magnify the entire screen or a portion of it, you can follow these steps:
- Under the Scroll & Zoom tab, toggle on the Zoom in or out switch.

Once you’ve turned on Zoom, you can use the defined trackpad gesture (i.e., pinch with two fingers) to zoom in and out on your entire screen. The zooming effect allows you to magnify the content, making it easier to read text or view details.
6. Rotation
Twirl two fingers around one another to rotate an item like a photo.
How to Turn On Rotate on Mac
Here’s how to turn on rotation on Mac:
- Under the Scroll & Zoom tab, toggle on the Rotate switch.

7. Page Navigation
To swipe between pages, swipe two fingers, either left or right.

8. Notification Center Access
To open the Notification Center, swipe two fingers to the left from the right edge.

How to Turn On Notification Center Access Gesture on Mac
To turn on the Notification Center access gesture on a Mac, allowing you to access the Notification Center from your desktop quickly, you can follow these steps:
- Scroll down in the left sidebar, click Trackpad , and navigate to the More Gestures tab.
- Under the Scroll & Zoom tab, toggle on the Notification Center switch.

After enabling the Notification Center access gesture, you can perform the defined gesture (i.e., swiping left from the right edge of the trackpad) to reveal the Notification Center on your Mac. This allows you to view notifications, widgets, and other important information without leaving your current workspace.
9. Drag and Drop
Enable three-finger drag in Accessibility preferences to move items on your screen with three fingers, then tap or click to release them.

10. Word Lookup and Data Detectors
A three-finger tap lets you define a word or interact with dates, addresses, phone numbers, etc.
11. Desktop View
To see your desktop, spread your thumb and three fingers apart.

How to Turn On Show Desktop Gesture on Mac
To turn on the Show Desktop gesture on a Mac, allowing you to minimize all windows and show the desktop quickly, you can follow these steps:
- Under the Scroll & Zoom tab, toggle on the Show Desktop switch.

Once you’ve enabled the Show Desktop gesture, you can perform the defined gesture (i.e., spread with thumb and three fingers) to minimize all open windows and reveal the desktop. This allows you to access files, shortcuts, or other desktop elements without closing or minimizing individual windows.
12. Launchpad Access
Bring your thumb and three fingers together to open Launchpad.

How to Turn On Launchpad Access on Mac
To turn on Launchpad access on a Mac, which allows you to access and launch applications in a grid-like view quickly, you can follow these steps:
- Under the Scroll & Zoom tab, toggle on the Launchpad switch.
Once you’ve enabled the Launchpad access gesture, you can perform the defined gesture (i.e., pinching with your thumb and three fingers) to open Launchpad. Launchpad provides a grid-like view of all the applications installed on your Mac, making it easy to locate and launch apps without navigating through the Finder or the Dock.
13. Mission Control Access
Four-finger swipe upwards opens Mission Control.

14. App Exposé
To view all windows of the current app, swipe four fingers downwards.

15. Full-Screen App Navigation
Swipe four fingers left or right to switch between desktops and full-screen apps.

How to Customize Your Mac Trackpad Gestures
Your Mac allows you to tweak trackpad settings to suit your needs. Customizing your Mac trackpad gestures can greatly enhance your user experience and productivity. Whether you want to rotate photos with a simple twirl of your fingers or swiftly switch between full-screen apps with a four-finger swipe, the choice is yours.
Let’s see how you can customize your Mac trackpad gestures to work seamlessly on your system.
1. Adjust Tracking Speed
To adjust the tracking speed on a Mac, you can follow these steps:
- Click the Apple menu in the top-left corner of the screen and select System Settings .

- You will see a slider labeled Tracking speed . Adjust the slider to increase or decrease the tracking speed according to your preference. Moving the slider to the right will increase the speed, and moving it to the left will decrease the speed.
- As you adjust the slider, you will see a preview of the cursor speed in the window. Find a setting that feels comfortable for you.
2. Turn On Silent Clicking
To turn on silent clicking on a Mac, you can follow these steps:
- Toggle on the Silent clicking switch.

After enabling silent clicking, you should be able to click the trackpad without making an audible clicking sound.
3. Turn On Force Click and Haptic Feedback
To turn on Force Click and Haptic Feedback on a Mac, you can follow these steps:
- Toggle on the Force Click and haptic feedback switch.

Once you’ve enabled Force Click and haptic feedback, you can perform a Force Click by pressing down firmly on the trackpad with one finger or using a two-finger click, depending on your trackpad model. The haptic feedback will provide a subtle vibration or tactile response to simulate a physical click.
Not all Mac models or trackpads support Force Click and haptic feedback. The availability of this feature depends on the specific hardware and macOS version you are using.
4. Customize Look Up & Data Detectors Gesture
To customize the Look Up & Data Detectors gesture on a Mac, you can follow these steps:
- Look for the Look up & data detectors option.

- Click the dropdown menu or the associated settings button next to Look up & data detectors . You will see a list of available actions or gestures for this option.
- Select the desired gesture from the list or choose a custom gesture if available.

5. Customize Secondary Click
To customize the secondary click (also known as right-click) on a Mac, you can follow these steps:
- Look for the Secondary click option.

- Click the dropdown menu or the associated settings button next to the Secondary click .
- You will see a list of available options for the secondary click. The options typically include Click or tap with two fingers , Click in the bottom-right corner , or Click in the bottom-left corner .
- Choose the option that feels most comfortable and intuitive for you.

6. Customize Swipe Between Pages
To customize the swipe gesture for navigating between pages on a Mac, such as in Safari or other apps, you can follow these steps:
- Look for the Swipe between pages option

- Click the dropdown menu or the associated settings button next to Swipe between pages .

7. Customize Swipe Between Full-screen Applications Gesture
To customize the swipe gesture for switching between full-screen applications on a Mac, you can follow these steps:
- Locate the Swipe between full-screen applications option.

- Click the dropdown menu next to Swipe between full-screen applications .
- Select your desired gesture from the list.

8. Customize Mission Control Access Gesture
To customize the gesture for accessing Mission Control on a Mac , which provides an overview of open windows and spaces, you can follow these steps:
- Locate the Mission Control option.

- Click the dropdown menu next to Mission Control .
- You will see a list of available actions or gestures for Mission Control access. Select the desired gesture from the list.

9. Customize App Exposé Gesture
To customize the gesture for triggering App Exposé on a Mac, which shows all open windows of the active application, you can follow these steps:
- Look for the App Exposé option.

- Click the dropdown menu next to App Exposé .
- Select the desired gesture from the list.

Take Control of Your Mac Trackpad Gestures
The Mac trackpad is an underappreciated gem, full of potential to make your Mac experience more smooth, efficient, and enjoyable. While you can use Mac trackpad gestures to optimize your usage, there are many other ways to enhance your Mac experience.
Some tips to maximize your productivity on Mac are as follows:
- Learn Mac keyboard shortcuts to perform recurrent tasks quickly and save time.
- Knowing the keyboard commands can help you type special characters on Mac .
- Learn how to zoom out on your Mac to read tiny text easily.
Frequently Asked Questions
Why isn’t my mac trackpad working.
Your Mac trackpad may not work for several reasons, from hardware issues to misconfigured settings. Try restarting your Mac, checking your trackpad settings, or updating your macOS.
How do I clean my Mac trackpad?
To clean your Mac trackpad, turn off your Mac and disconnect the power adapter. Use a lint-free cloth slightly dampened with water to clean dust and debris. Don’t spray liquid directly onto the trackpad.
Can I use Mac trackpad gestures on a Windows laptop?
You may be unable to use Mac trackpad gestures on a Windows laptop. Some Windows laptops support gestures, but the range and functionality may not be as extensive as on a Mac. You can often customize these in the touchpad settings.
What do I do if my Mac trackpad is too sensitive?
If your Mac trackpad is too sensitive, adjust the trackpad sensitivity. To do that, open System Settings from the Apple menu and click Trackpad . Look for the Point & Click tab and adjust the Tracking speed slider to make the trackpad less sensitive.
I'm Hashir, a tech journalist with a decade of experience. My work has been featured in some of the top tech publications like MakeUseOf and MakeTechEasier. I have a bachelor's degree in IT, a master's in cybersecurity, and extensive knowledge of Apple hardware, specifically MacBooks. As the senior writer at MacBook Journal, I write in depth guides that help you solve any issues you have with your mac and unbiased reviews that help you make the right buying decisions.
Hi there! I'm Ojash, a tech journalist with over a decade of experience in the industry. I've had the privilege of contributing to some of the world's largest tech publications, making my mark as a respected Mac expert. My passion lies in exploring, using, and writing about MacBooks, and I enjoy sharing my expertise to help others make informed decisions and get the most out of their MacBook experience. Join me as we delve into the fascinating world of MacBooks together!
You May Also Like

How to Play PC Games on Mac: 10 Best Methods
Written by Hashir Ibrahim Reviewed by Ojash Last updated: October 5, 2023 Expert

How to Change Startup Programs on Your Mac: 4 Best Ways
Written by Hashir Ibrahim Reviewed by Ojash Last updated: October 10, 2023

How to Find Files on Your Mac: 5 Easy Methods
Written by Hashir Ibrahim Reviewed by Ojash Last updated: September 6, 2023

MacBook Users by Country: Mac Market Share Around the World
Written by Hashir Ibrahim Reviewed by Ojash Last updated: September 14, 2023
8 Mac Trackpad Gestures (And How to Customize Them)
Learn about all the cool gestures you can use with your Mac trackpad to easily switch between apps, access notifications, and more.
Apple’s trackpad is unlike typical laptop trackpads, which only come with a couple of standard features like scrolling and clicking. In contrast, the Apple trackpad has almost a dozen tricks and gestures that you can use for shortcuts and activating different features.
In this guide, we’ll explore what these gestures are, how you can use them, and how you can tweak them to suit your preferences. All of these are either from the Scroll & Zoom or the More Gestures tabs you can find by going to System Preferences > Trackpad . Let’s get going.
1. Scroll Direction
The Scroll Direction: Natural gesture is at the top of the Scroll & Zoom tab. When enabled, it makes pages or apps scroll in “natural” directions when you scroll using trackpad. This means that the page goes up when you slide two fingers up and goes down when you slide them down. If disabled, the scroll works in the opposite way—which is the unnatural direction.
This feature is enabled for users who (often or occasionally) switch between mouse and trackpad. With the mouse, the unnatural scroll direction is mostly used. Whereas, with the trackpad, natural makes more sense. To switch the scroll directions automatically when you change devices, read our scroll direction guide .
2. Zoom Features
Up next, we have the zooming features from the Scroll & Zoom tab: Zoom in or out and Smart Zoom . The first feature is quite simple: spread two fingers to zoom in and pinch two fingers to zoom out.
The second feature, Smart Zoom , also allows you to zoom in or out using the trackpad, but you use this by double-tapping with two fingers on browser pages or word processors. Smart Zoom simplifies and smoothens the zooming experience.
Though it’s possible to turn both these features off, they are not customizable.
3. Rotate Images
Below the zooming features, you have the option to rotate images using the trackpad. This feature is useful when using image manipulation software, either built-in (like Preview) or third-party (like Photoshop).
To do this, simply place your thumb and index finger with about an inch between them on the trackpad. Then, turn both clockwise or anticlockwise to rotate the image however you want. This gesture can’t be customized.
Read More: MacBook Trackpad Not Working? Troubleshooting Tips to Try
4. Swipe Pages and Apps
The Swipe between pages and Swipe between full-screen apps are the first two features on the More Gestures tab from System Preferences > Trackpad .
Swipe Between Pages
This gesture lets you swipe pages (go back or move to the next page) when you’re using apps like Apple Books or are browsing the web. To do this, swipe two fingers left or right on your trackpad.
You can change the gesture to Swipe with three fingers or Swipe with two or three fingers , by clicking the dropdown under the feature’s name.
Swipe Between Apps
This gesture lets you switch apps quickly when you’re using the full-screen mode on your Mac. You can do this by swiping three fingers horizontally on your trackpad, by default.
Though you can change it to swiping with four fingers, keeping it to three would allow you to swipe with either three or four fingers. This is because, with the three-fingers setting, the trackpad registers three fingers only, even if you swipe with four or five fingers!
5. Check Notifications
If you swipe left on your trackpad’s far-right edge with two fingers, you can access the Notification Center . This is the third option on the More Gestures tab.
You can look at all your alerts and notifications quickly this way, and hide the menu again by swiping right with two fingers. This feature can be turned off, but not customized.
6. Reveal Apps
Mission Control and App Exposé are perhaps the most useful trackpad gestures. Both let you view the active apps, but with a slight difference.
Mission Control
Apple’s Mission Control feature shows you all your opened apps and desktops. You can then choose to add more desktops, combine different apps in full-screen mode, and see which apps you’d like to close. This is a useful feature when you want to either organize your apps or declutter your Mac.
To access Mission Control using the trackpad, simply swipe up with three fingers. You can choose to disable this feature and also customize to make it four fingers instead of three.
App Exposé
This feature shows you all the opened windows of the active app (the app that you’re using). So, if you have two Google Chrome windows opened, and you want to switch between them, swipe down with three fingers on the trackpad. You’ll then see all the active windows. Simply click the one you want to work on, and it will become active.
You can choose to disable this feature or customize it to swipe with four fingers.
7. Open Launchpad
Launchpad helps you access your apps with a single-click. While you can access it from the Dock, your Mac’s trackpad has an easier gesture for it: pinch with thumb and three fingers.
Related: How to Remove Apps From the Mac Launchpad
You can disable this feature, but cannot customize it.
8. Show Desktop
The final gesture Apple’s trackpad has to offer is Show Desktop . It allows you to instantly access your desktop by hiding all the active apps. To do this, simply spread with thumb and three fingers. Reverse this gesture (or pinch) to bring back all the apps. Unfortunately, this gesture doesn’t work if you’re using an app in full-screen mode.
The Trackpad Is Magical
With this variety of gestures, Apple’s trackpad qualifies as one of the best peripherals on the market. Remember, to get the best use out of it, it’s important you tweak the settings of each feature to suit your usage and comfort.
By the way, have you used the Magic Mouse? It also offers a variety of gestures, making it another unique pointing device. But, we still think that the Magic Trackpad is better, primarily because it’s more comfortable and that you can use it while it’s charging.
Comprehensive Guide to Mac Trackpad Gestures and Force Touch
If you have a Magic Trackpad 2 or a built-in Multi-Touch trackpad, you might not be making the most of it. There are several Mac trackpad gestures that you can use to really speed up your workflow, whether you’re surfing the web or moving files around in the Finder. Let’s take a look in this comprehensive guide to Mac trackpad gestures.

Turning on Mac Trackpad Gestures
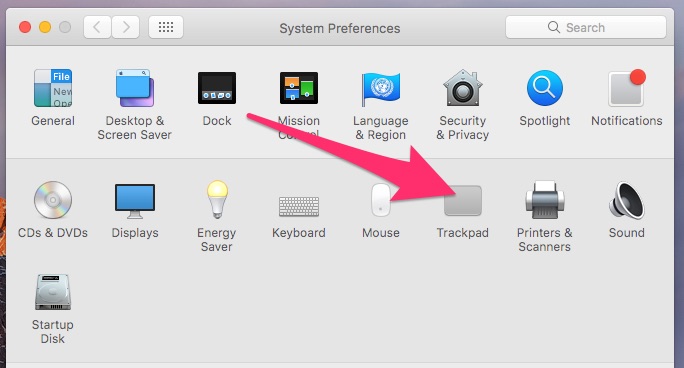
Turning on all of the possible Mac trackpad gestures will take a few moments. You’ll need to go to System Preferences -> Trackpad , and navigate through the various tabs enabling what you want to use. All of these are also covered by an Apple support page , but I’ve found it to be a bit out-dated with the changes in macOS Sierra.
Speaking of which, this guide assumes you are running macOS Sierra on a MacBook or MacBook Pro with a Force Touch trackpad, or any Mac with a Magic Trackpad 2.
The Point & Click Gestures
You probably already know about tap to click and secondary click. You can tap with just one finger, and it will register as a click. Or, click or tap with two fingers, and you get the Windows equivalent of a right-click (a secondary click, in Mac parlance).
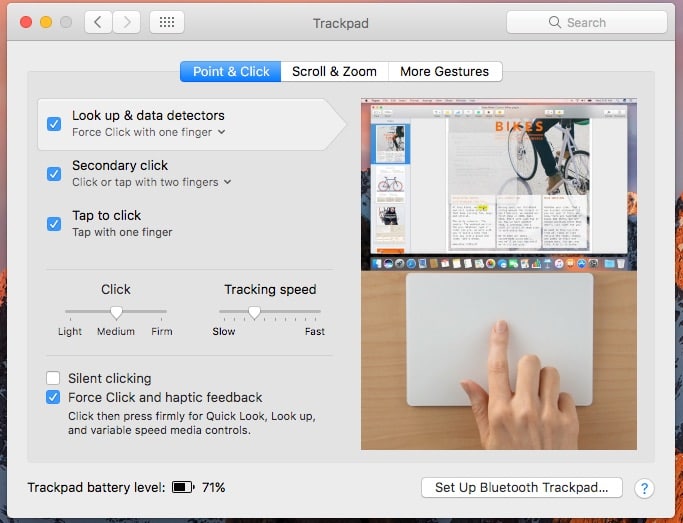
Here’s an interesting one that might have slipped your attention, though – Look up & data detectors . If you want to quickly get the definition of a word, for instance, you just have to Force Click with one finger (if it’s enabled). This also works with taking actions on dates, addresses, phone numbers, and more.
Up Next: Scrolling and Zooming Around
2 thoughts on “ Comprehensive Guide to Mac Trackpad Gestures and Force Touch ”
Yes, that’s true. Hence this statement:
The Force Click feature requires a Force Touch Trackpad. It is not available to earlier Trackpad versions.
Leave a Reply Cancel reply
You must be logged in to post a comment.
This site uses Akismet to reduce spam. Learn how your comment data is processed .

Apple Trackpad Gestures Cheat Sheet
The Mac trackpad is more than just a substitute for a mouse; it’s a gateway to enhanced productivity and a smoother user experience. With the right gestures, you can navigate your MacBook with ease, making your workflow more efficient and intuitive. This article delves into the world of Mac trackpad gestures, offering insights from both expert sources and the user community.
Trackpad Gestures For Mac & MacBook
Additional Notes:
- Customization: You can customize trackpad gestures in System Preferences > Trackpad.
- Trackpad Sounds: Consider enabling trackpad sounds for audible feedback.
- Keyboard Shortcuts: Combine trackpad gestures with keyboard shortcuts for even faster navigation.
Key Takeaways
- Understanding Basic and Advanced Gestures : Learn the essential trackpad gestures for daily use and explore advanced gestures for power users.
- Customization Tips : Discover how to tailor trackpad settings to your preferences.
- User Insights : Gain valuable tips from the Reddit community and other users.
- Enhancing Productivity : Utilize gestures to improve your workflow and efficiency.
Apple Touchpad Gestures
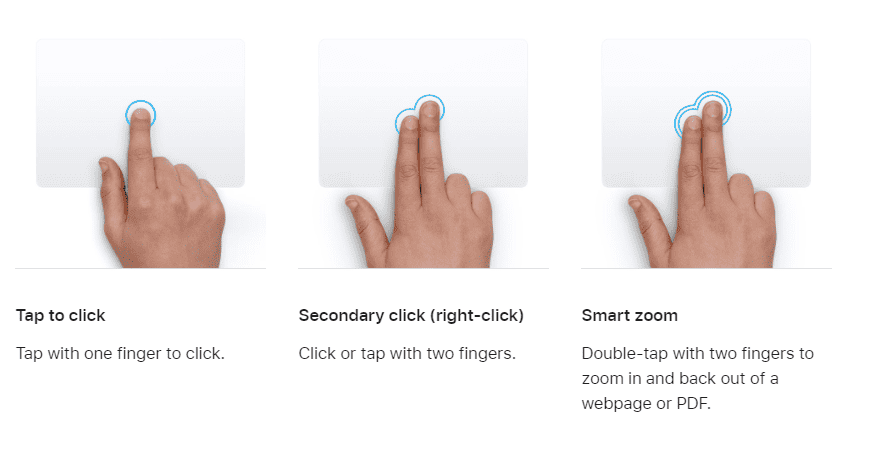
Source: Apple.com https://support.apple.com/en-us/102482
Introduction to Mac Trackpad Gestures
The Mac trackpad, with its Multi-Touch capabilities, is a hallmark of Apple’s design philosophy, blending functionality with simplicity. Whether you’re a new Mac user or looking to refine your skills, understanding these gestures can transform your interaction with your MacBook.
Overview of Mac Trackpad Capabilities
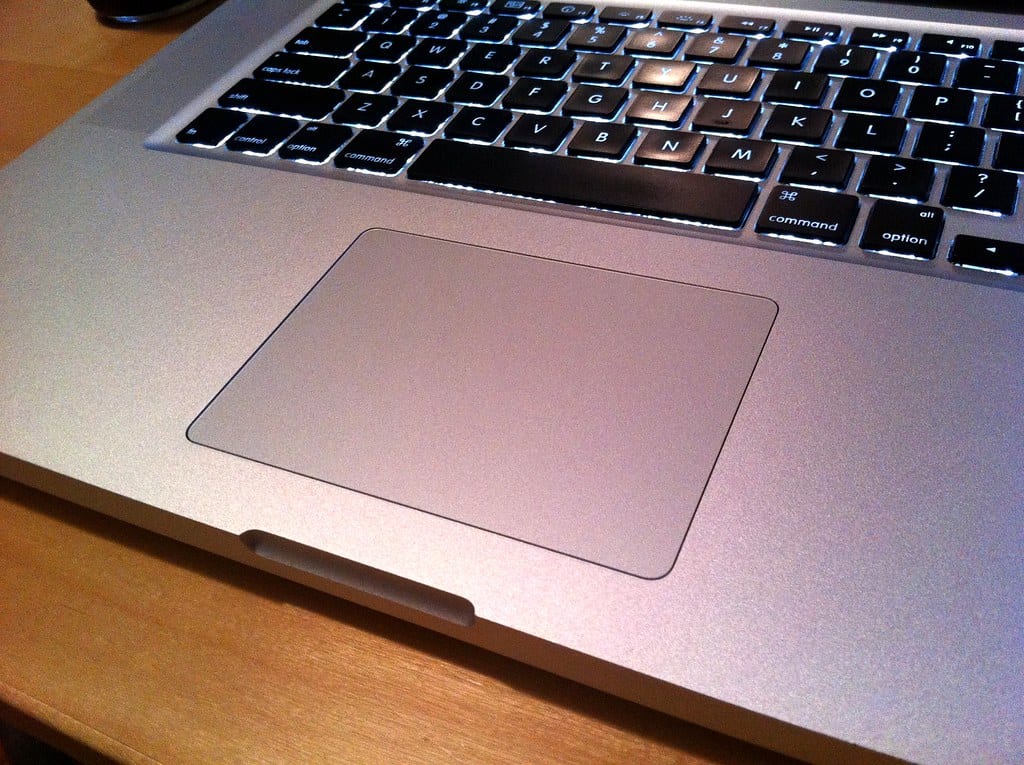
The trackpad on a MacBook offers a range of gestures, each designed to make navigation and interaction more fluid. From simple clicks to more complex gestures involving multiple fingers, the trackpad is a powerful tool for controlling your Mac.
Importance of Mastering Trackpad Gestures
Learning these gestures can significantly enhance your efficiency and productivity. It allows for quicker access to functions, smoother navigation, and a more enjoyable user experience.
Basic Gestures for Everyday Use
For those new to the Mac ecosystem or looking to brush up on the basics, here are some fundamental gestures to get you started.
Clicking and Right-Clicking
- Single Tap : A single finger tap equates to a left-click.
- Two-Finger Tap : This gesture serves as the right-click, offering contextual menus and additional options.
Scrolling and Zooming
- Two-Finger Scroll : Slide two fingers up or down to scroll through pages or documents.
- Pinch to Zoom : Pinching with two fingers lets you zoom in or out on photos, web pages, and documents.
Navigating Between Pages and Full-Screen Apps
- Two-Finger Swipe : Swipe left or right to navigate between pages in a browser or switch between full-screen apps.
Advanced Gestures for Power Users
Once you’re comfortable with the basics, these advanced gestures can further streamline your Mac usage.
Using Four-Finger Gestures for App Exposé
- Four-Finger Swipe Up : Reveals all open windows for easy switching.
- Four-Finger Swipe Down : Shows all windows of the current app.
Custom Gestures for Enhanced Productivity
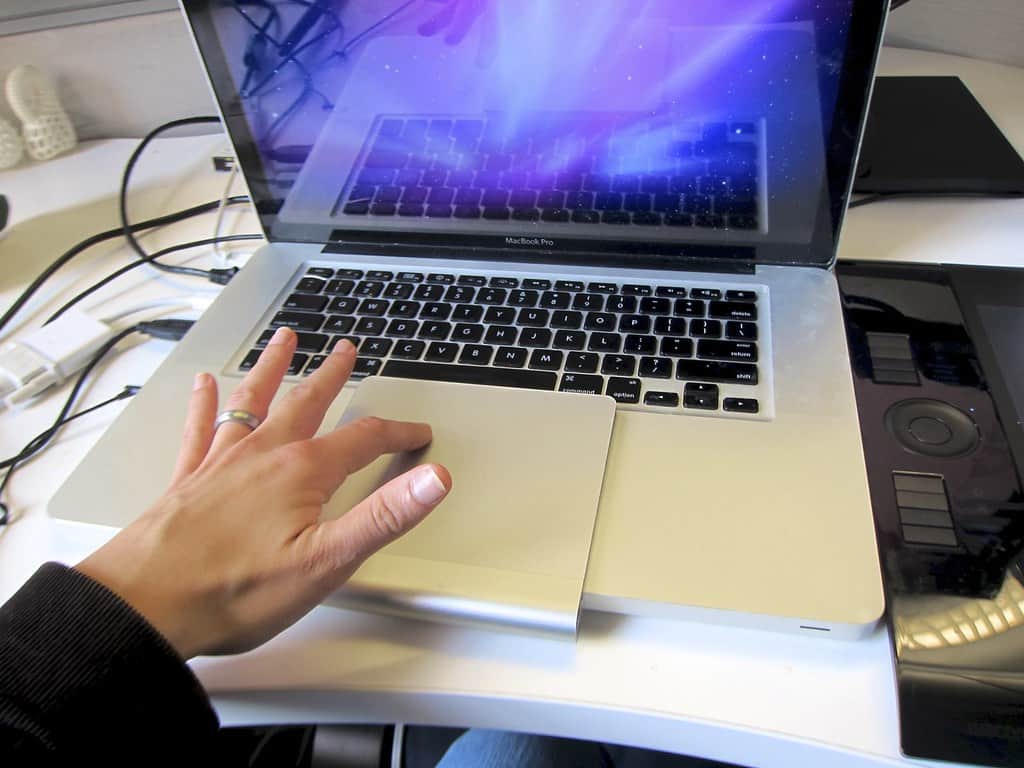
- Three-Finger Drag : Move windows and objects with a three-finger drag, a gesture that can be enabled in Accessibility settings.
Integrating Gestures with Specific Apps
Certain applications, like Final Cut Pro, offer unique gesture controls, enhancing the app’s functionality and your productivity.
Customizing Trackpad Gestures
Your Mac’s System Preferences allow you to customize these gestures to suit your needs.
Accessing Trackpad Settings
Navigate to System Preferences > Trackpad to view and modify gesture settings.
Adjusting Gesture Sensitivity and Feedback
You can adjust the click pressure, tracking speed, and other settings to make the trackpad feel just right.
Third-Party Apps for Additional Customization
For even more control, consider apps like Multitouch which allow for the creation of custom gestures.
Tips from Reddit Users
The Reddit community offers a wealth of knowledge for new and experienced Mac users alike. Here are some highlights from a Reddit discussion on Mac trackpad gestures:
Insights from the Reddit Community
- CheatSheet App : A recommended tool for learning shortcuts.
- System Preferences Exploration : Users suggest spending time in the Trackpad settings to familiarize yourself with available gestures.
Recommended Third-Party Apps and Tools
- BetterTouchTool : A popular app for creating and customizing gestures.
- Jitouch : Another app that expands the range of gestures available on your Mac.
Personal Experiences and Usage Tips
Users shared their favorite gestures, like the three-finger swipe up for Exposé and the use of Command-H to hide apps quickly.
Enhancing Productivity with Trackpad Gestures
Incorporating these gestures into your daily use can significantly boost your productivity. Here are some ways to make the most of your trackpad:
Streamlining Workflow
- Quick Access to Functions : Use gestures for faster access to frequently used functions.
- Efficient Navigation : Move between apps and pages seamlessly.
Customizing for Personal Preference
- Tailor Gestures : Adjust settings to match your usage patterns and preferences.
- Explore Third-Party Options : Expand your gesture repertoire with additional software.
Learning from Others
- Community Insights : Leverage the knowledge and experience of the Mac user community.
- Online Resources : Utilize tutorials and guides to deepen your understanding. For example, check out this YouTube video for a visual guide on MacBook trackpad gestures.
Advanced Customization of Trackpad Gestures
Customizing your trackpad can significantly improve your interaction with your Mac, making it more tailored to your personal workflow.
Fine-Tuning Trackpad Settings
- Adjusting Click Pressure : Modify the force needed for a click to register.
- Tracking Speed : Change how fast the cursor moves in response to your finger movement.

Utilizing Accessibility Features
- Three-Finger Drag : Enable this feature in Accessibility settings for easy window and object movement.
Exploring Third-Party Applications
- BetterTouchTool : Offers extensive customization options for gestures ( BetterTouchTool ).
- Jitouch : Expands the range of available gestures ( Jitouch ).
Leveraging Gestures for Specific Applications
Some applications, especially those designed by Apple, offer enhanced functionality when used with trackpad gestures.
Final Cut Pro
- Gesture-Based Editing : Use gestures for quick editing and navigation within Final Cut Pro.
- Navigating Web Pages : Utilize gestures for a smoother browsing experience in Safari.
Community Insights and Tips
Gathering insights from various user experiences can provide valuable tips for optimizing your trackpad usage.
Reddit Community Recommendations
- Experimentation : Users recommend trying out different gestures to find what works best for you.
- Custom Gestures : Explore creating your own gestures for frequently used actions.
Enhancing Productivity
- Workflow Efficiency : Use gestures to streamline your daily tasks and workflow.
- Quick Access : Customize gestures for quick access to your most-used functions.
For a practical demonstration, check out this YouTube video on using Mac trackpad gestures effectively.
Frequently Asked Questions
- Go to System Preferences > Accessibility > Pointer Control > Trackpad Options, and select “Enable dragging” with “three-finger drag.”
- Yes, using third-party applications like BetterTouchTool, you can create and customize your own gestures.
- Yes, gestures like two-finger swipe for back/forward and pinch to zoom are very useful in Safari.
- Go to System Preferences > Trackpad > Point & Click, and adjust the tracking speed slider.
- Yes, Final Cut Pro supports various gestures for editing and navigating within the application.
- Explore the Trackpad section in System Preferences and experiment with different gestures. Online tutorials and videos can also be helpful.
- Basic gestures are consistent across models, but some newer Macs support additional gestures like Force Touch.
Mastering the Mac trackpad gestures is a journey of discovery and personalization. By understanding and customizing these gestures, you can significantly enhance your MacBook experience, making it more intuitive and efficient. Whether you’re editing videos in Final Cut Pro, browsing in Safari, or simply navigating macOS, the right gestures can streamline your workflow and make your interactions more enjoyable.
Remember, the key to mastering these gestures is experimentation and customization. Don’t be afraid to try out new gestures or tweak your settings to find what works best for you. With the help of third-party tools and the insights from the Mac user community, you can transform your trackpad into a powerful tool that caters to your unique needs and preferences.
Similar Posts
Know When You Need to Replace Your MacBook Battery
Wondering when to replace your MacBook’s battery? It’s a question that every MacBook owner faces eventually. The…
Mac File Management: How to Save and Access Files on Your Computer
Saving files on a Mac might seem straightforward, but there’s a lot more to it than meets…
How to Reopen Windows When Logging Back In: Mac and PC
Do you find it frustrating when you have to reopen all your apps and documents after restarting…
How To Enlarge Text in Finder: Step-by-Step Guide for Mac Users
Finding text too small in Finder on your Mac? You’re not alone. Many users struggle with readability…

Mac Spotlight Search Tool: Precision Searches For MacOS
Spotlight is a powerful search tool built into Macs that allows users to quickly find documents, emails,…

How to Use Mac Parental Controls: A Step-by-Step Guide
Setting up parental controls on a Mac is a straightforward process designed to help parents and guardians…
6 Apple Multi-Touch Trackpad Gestures That Make Using Your Mac Or MacBook Easier

MacOS is constantly iterating , often leading to several features that may or may not be helpful individually, depending on personal preference and usage requirements. This also extends to your MacBook 's (or Mac's) trackpad, which has several built-in gesture functions that can act as a quick way to do all sorts of things.
Some of these gestures are turned on by default when you set up your Mac for the first time, while others must be manually activated. You may also want to turn some gestures off if you often find yourself accidentally using them when you don't mean to (tap to click is a frequent offender). Either way, there are quite a few ways you can adjust your trackpad to make day-to-day use of your Mac a little smoother and perhaps a little faster.
These gestures can be turned on, off, or adjusted from the Trackpad menu. If you aren't sure how they will work in practice, highlight them in the menu and check out the animated demonstration at the top of the window.
Secondary click
Right-clicking is a ubiquitous mouse function, and even though Apple's peripherals lack such a button, macOS still utilizes it. But how do you right-click when your trackpad only has one physical click option? Well, that's where secondary clicking comes into play.
- Select the Apple menu in the top-left corner of the screen, then choose System Preferences (or System Settings in macOS Ventura and later).
- Scroll down the menu on the left side of the window and select Trackpad, which you'll find grouped with Keyboard, Game Controllers, and the like.
- Select the Point & Click tab, then scroll down and find Secondary Click.
- Select the drop-down menu next to Secondary Click and choose a gesture that suits you — Click (or tap) with Two Fingers is the default.
With secondary click turned on, you can now click (or tap if tap to click is active) the trackpad with two fingers, and your Mac will act like you were right-clicking. It's then easier to access those handy right-click menu options like Save As, Open Link in New Tab, and so on.
Zoom and scroll
Anyone who uses a smartphone with regularity has likely gotten used to pinching their fingers to zoom in and out quickly and dragging their fingers along the screen to scroll through a web page or document. Well, your trackpad can do this, too!
- Open the Apple menu in the top-left corner of the screen and select System Preferences (System Settings in macOS Ventura and later).
- Scroll down the menu, select Trackpad, and then the Scroll & Zoom tab.
- Turn on Zoom in or out to allow zooming.
- Scrolling is always on, but you can turn on Natural scrolling (i.e., swipe up to scroll down and down to scroll up) or turn it off.
Zooming with the trackpad works very similarly to an iPhone: Make a pinching gesture on the screen with two fingers to zoom out (or spread two fingers out in a "reverse pinch" to zoom in). Scrolling is slightly different because you must slide two fingers up or down the trackpad to scroll rather than one.
Show Desktop
Jumping from an app to Finder isn't a difficult task, as you can usually select Finder from the Dock at the bottom of the screen or press Command + H to Hide the app entirely. But hiding an app won't necessarily take you straight to the desktop if you have multiple apps open at once, and viewing Finder on top of an app isn't quite the same as being on the desktop itself — no direct Macintosh HD access, for example. Fortunately, there's a trackpad gesture for that, too.
- Click the Apple menu in the top-left corner and select System Preferences (System Settings in macOS 13 and up).
- Scroll through the menu and select Trackpad towards the bottom and just below Keyboard.
- Select the More Gestures tab, then scroll down and find Show Desktop (it should be at the bottom of the menu).
- Turn the toggle next to Show Desktop on.
With Show Desktop on, put your thumb and three fingers on the trackpad, then spread them apart — keeping your thumb separate and your three fingers grouped. This will immediately move all apps out of the way and jump to the desktop. To return to the app you were using, perform the same gesture in reverse (i.e., with your thumb and three fingers separated, "pinch" them all together).
Swipe between apps
Another common action for anyone who uses multiple apps in full-screen simultaneously is jumping back and forth between them. You can do it by hiding (Command + H) an app you're currently in or by exiting full-screen and manually clicking on each app in the Dock at the bottom of the display. However, it's a bit faster to use the trackpad instead.
- Click on the Apple menu in the top-left corner of the screen and open System Preferences (System Settings in macOS 13).
- Scroll down the menu on the left and select Trackpad, which sits just below Keyboard.
- Select the More Gestures tab and find Swipe between full-screen applications.
- Open the drop-down menu and choose between using three fingers or four fingers.
Now you can place three (or four, depending on your chosen setting) and swipe left or right to quickly jump between the full-screen apps you currently have running.
Open Launchpad
Launchpad acts as a sort of glossary of installed apps, making it easier to locate and open software you don't have on your Dock or desktop. If it's a feature you find yourself using somewhat often (or all the time), then you should consider turning on the trackpad function that lets you call up Launchpad from anywhere at any time using a simple gesture.
- Open the Apple menu in the top-left and select System Preferences (or System Settings if you're using macOS 13 Venture and later).
- Scroll down to find Trackpad (just under Keyboard), then select it.
- Find and select the More Gestures tab, then scroll down and find the Launchpad option.
- Turn on the toggle next to Launchpad.
To use this particular gesture, place your thumb on the trackpad, followed by three fingers (grouped together). "Pinch" your thumb and three fingers together on the trackpad to instantly pull up Launchpad.
Show all app windows
Due to their nature, some apps may support (and even encourage) having multiple windows open at once. This could mean more than one project open at a time in graphical editing software, multiple text documents, a handful of different spreadsheets, etc. Of course, you can jump between them using the app's Window drop-down menu, but the more windows you have open, the more clunky and cumbersome that can be. So why not use a single trackpad gesture instead?
- Click the Apple menu in the top-left corner of the screen, then choose System Preferences (System Settings in macOS 13 Ventura).
- Scroll down past Keyboard and open the Trackpad menu.
- Select the More Gestures tab, then scroll down and look for App Exposé.
- Open the drop-down menu and choose whether to use three or four fingers.
With App Exposé active, you can swipe down on the trackpad using three or four fingers (based on the setting you chose) to view all of the open windows in the app you're currently using. Your Mac will automatically size them all to fit on the screen together. Then you just have to click on the specific window you want to jump to.
- Apple Watch
- Accessories
- Digital Magazine – Subscribe
- Digital Magazine – Log In
- Smart Answers
- New iPad Air
- iPad mini 7
- Next Mac Pro
- Best Mac antivirus
- Best Mac VPN
When you purchase through links in our articles, we may earn a small commission. This doesn't affect our editorial independence .
Best gestures to use on a Mac’s mouse and trackpad

While Microsoft has decided to implement a touch-based interface in Windows 8.1 (much to the ire of many Windows users), Apple has avoided this potential disaster and instead developed excellent solutions for OS X on its Trackpad and Magic Mouse. If you don’t know about the various gestures of which these devices are capable then you’re missing out on some of the quickest ways to navigate around OS X. Here we’ll show you our favourites and answer the perennial question of how you right click on a Mac.
Read: How to right-click on a Mac
See also: How to control your Mac with mid-air hand gestures
And Best Mac mouse
Control your Mac with gestures: Enabling gestures for the Magic Mouse and Magic Trackpad
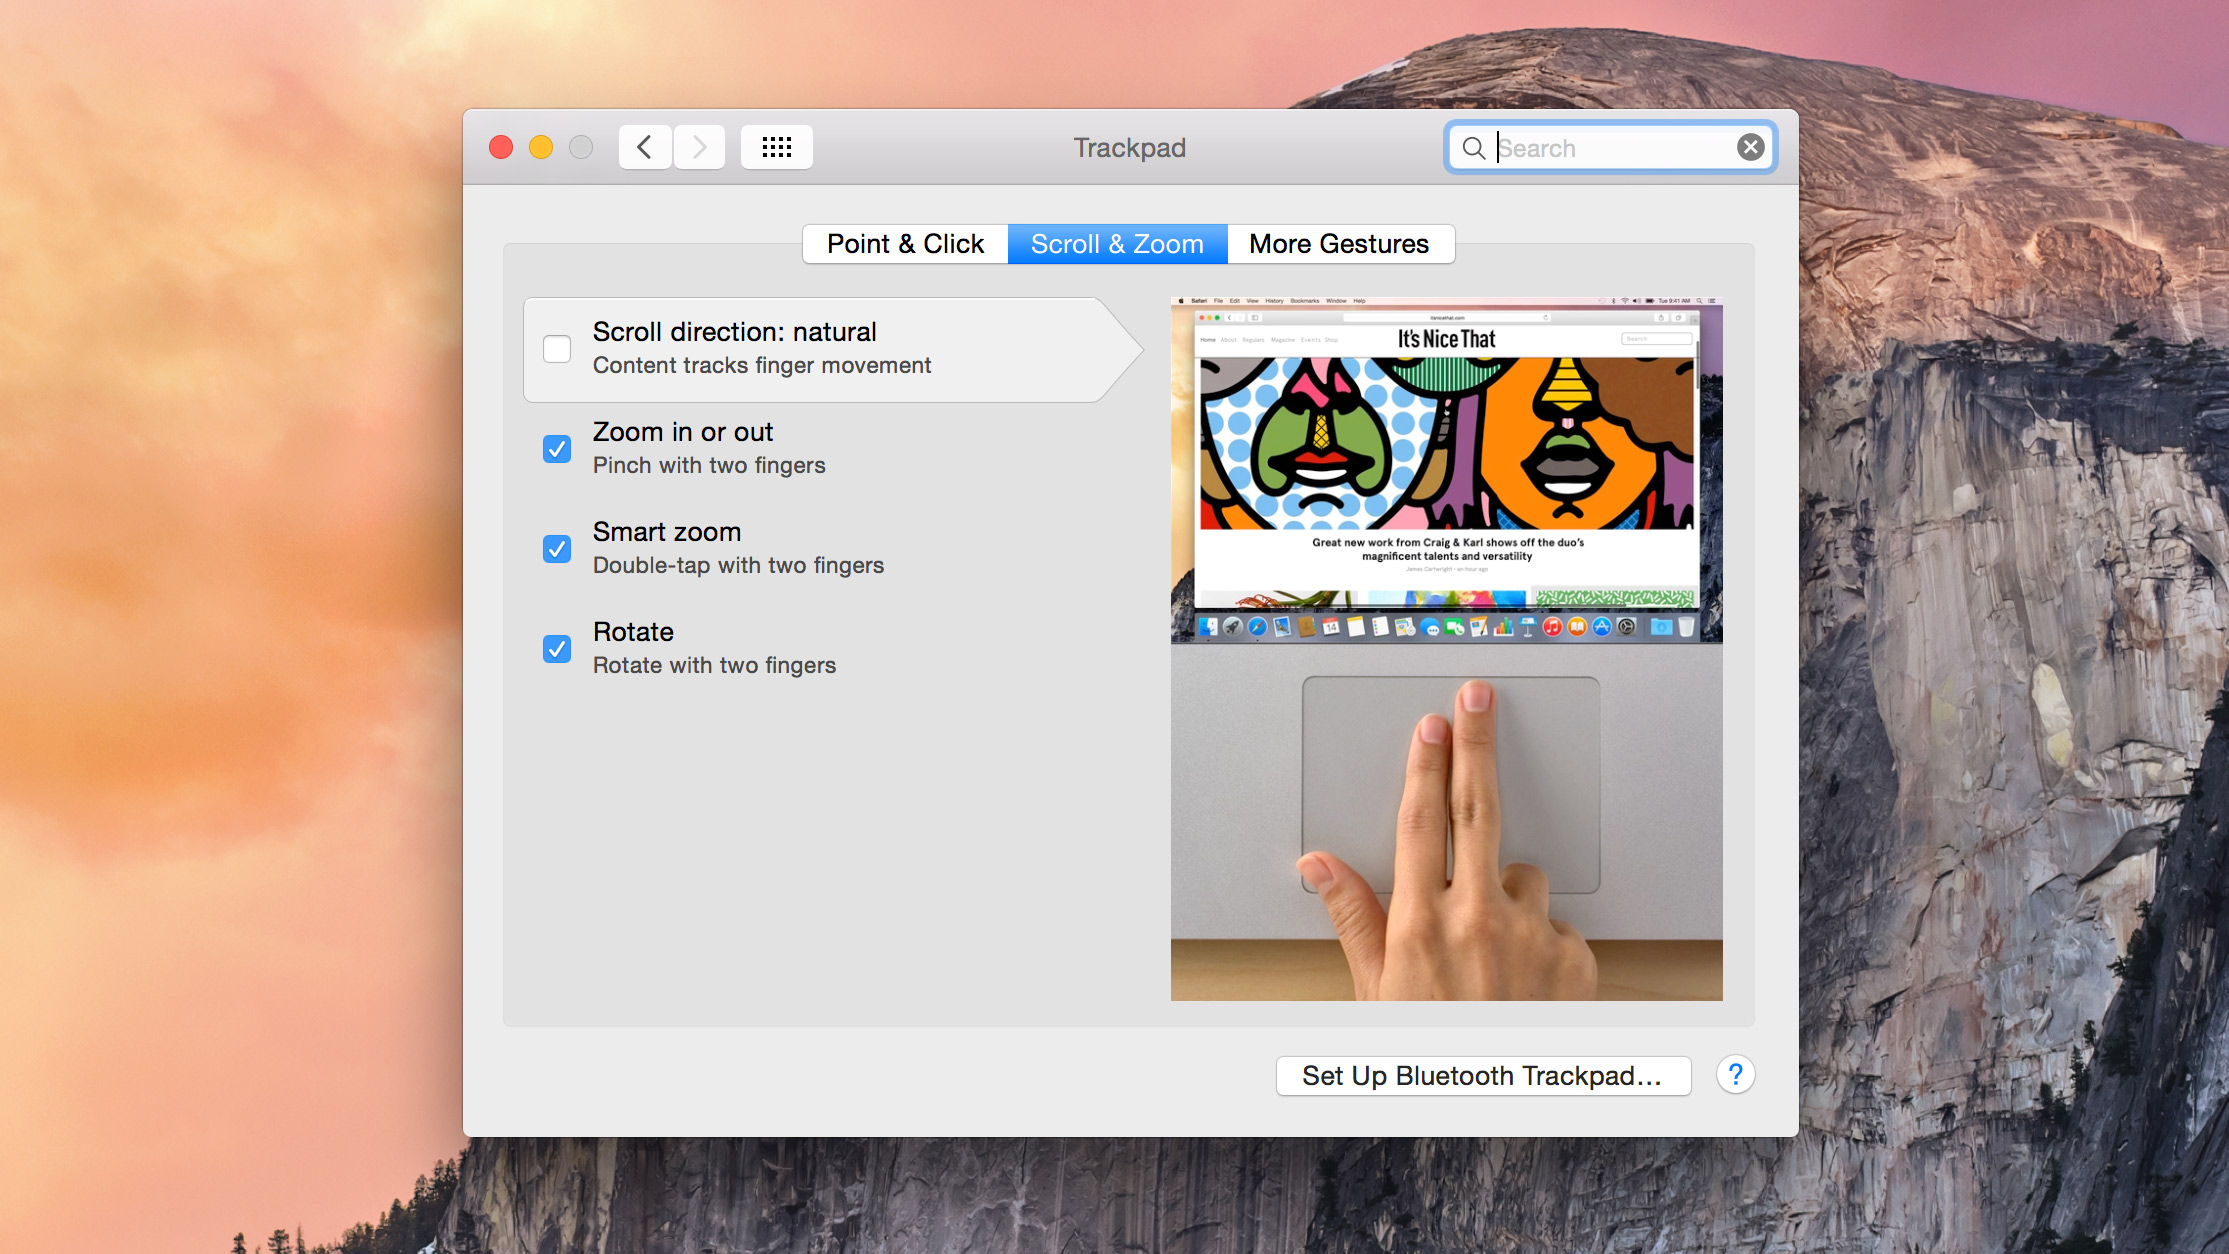
If you own a MacBook Air , MacBook Pro, or even use a Magic Trackpad or Magic Mouse with your iMac or Mac Mini , then there are a wealth of excellent multi-finger gesture commands available to you. To find them you’ll first need to go to System Settings>[Trackpad or Mouse] then peruse the list. Each command is also accompanied with a video demonstration that shows the gesture and what it does on your Mac. To the left of each command you’ll see a tick box, which you’ll need to click if you want the gesture to be enabled. Within the settings are various tabs – Point & Click, and More Gestures for the Mouse, with an additional Scroll & Zoom section for the Trackpad. Each of the commands listed below will be found in one of these.
Read: 10 tweaks for Mac OS X you didn’t know are possible
Control your Mac with gestures: Scrolling on a Trackpad
Two finger scrolling is a very useful gesture, and one you will use probably more than any other. These days its a default on any new Mac (or indeed Windows machine) and all it involves is using two fingers rather than one whenever you want the contents of a screen to move up or down. So when you point at something on a page you move one finger around the trackpad, but if you want to then scroll the document or webpage add a second finger and move them both in the direction you want the display to go. This saves you having to find the scroll bar on the right side of a window, or using the age old CTRL+[Arrow key] to make the contents leap up a page.
Read next: Magic Trackpad 2 review | Mac accessory reviews
Control your Mac with gestures: Disabling natural scrolling on Trackpad and Mouse
A few years ago Apple started using something it calls natural scrolling. This seeks to emulate the physical act of you moving content – i.e. if you push your fingers up on the trackpad the content on the screen will move up. Some people seem to like this, but as it’s essentially reversing the way most of use have used trackpads for a good number of years, it’s not always appropriate. To disable the feature go to the Scroll & Zoom tab and ensure the Scroll direction: natural option isn’t ticked. The same rules apply for the Mouse too.
Control your Mac with gestures: Right clicking on a Mac mouse
As Trackpads and Magic Mouse devices don’t have separate left and right buttons it can be a little confusing at first to know how to bring up the right-click menu. Within the Point & Click tab you’ll see the Secondary click command, this is the one that you’ll need to define how the right click function works. When you enable the command look to see the description written below ‘Secondary click’, this is actually a drop down menu. Click on this and you’ll have the option to either tap two fingers anywhere on your trackpad to right-click, or allocate the bottom left or right hand corner of the trackpad to open the menu when you click it. For the Magic Mouse you have settings that mean you either click the top right side of the mouse or the left, depending on what you prefer. Don’t forget that you can also hold down the CTRL button as you tap or click to give you similar results.
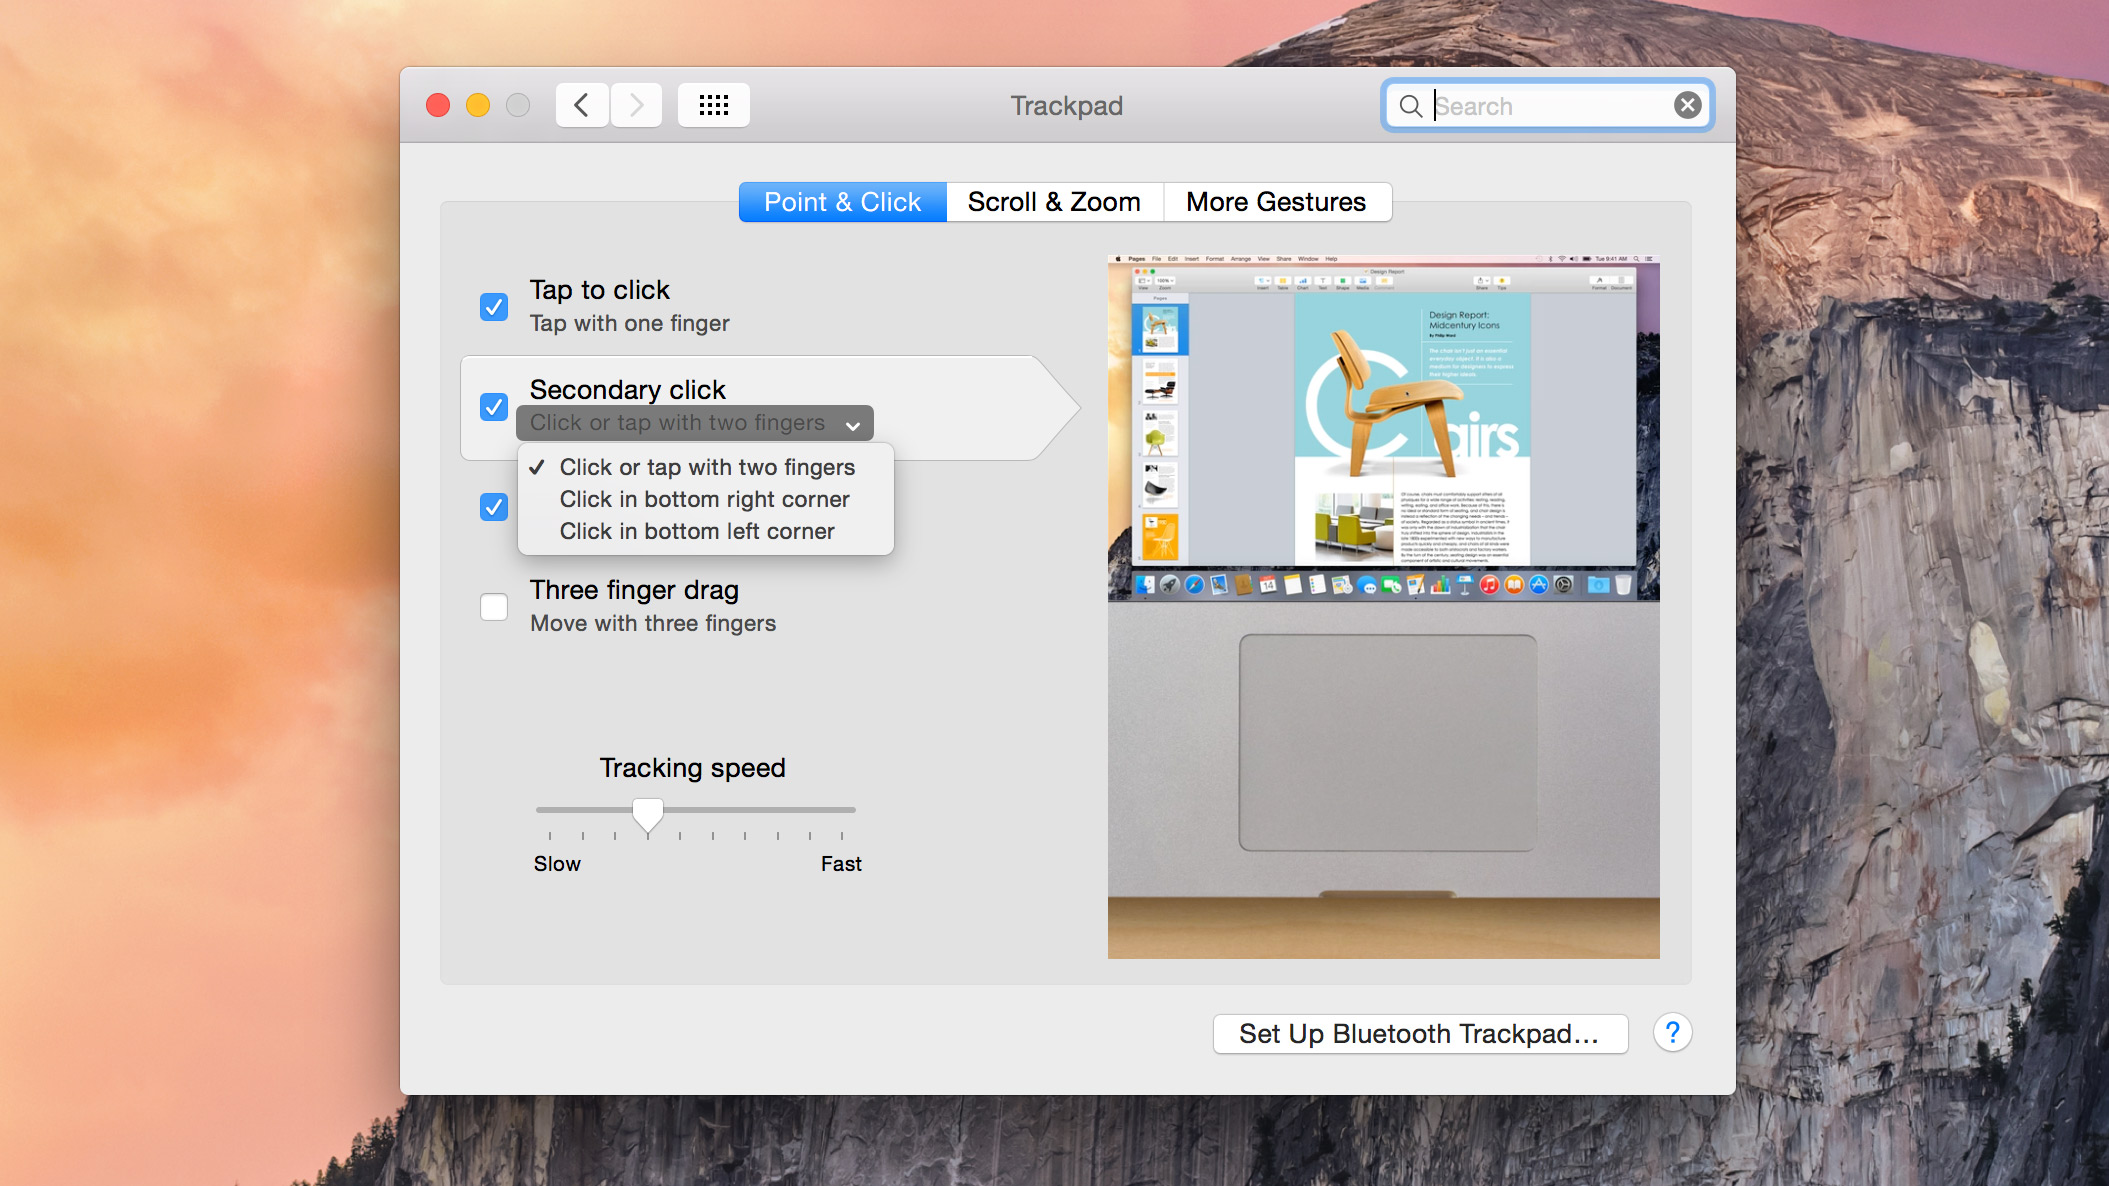
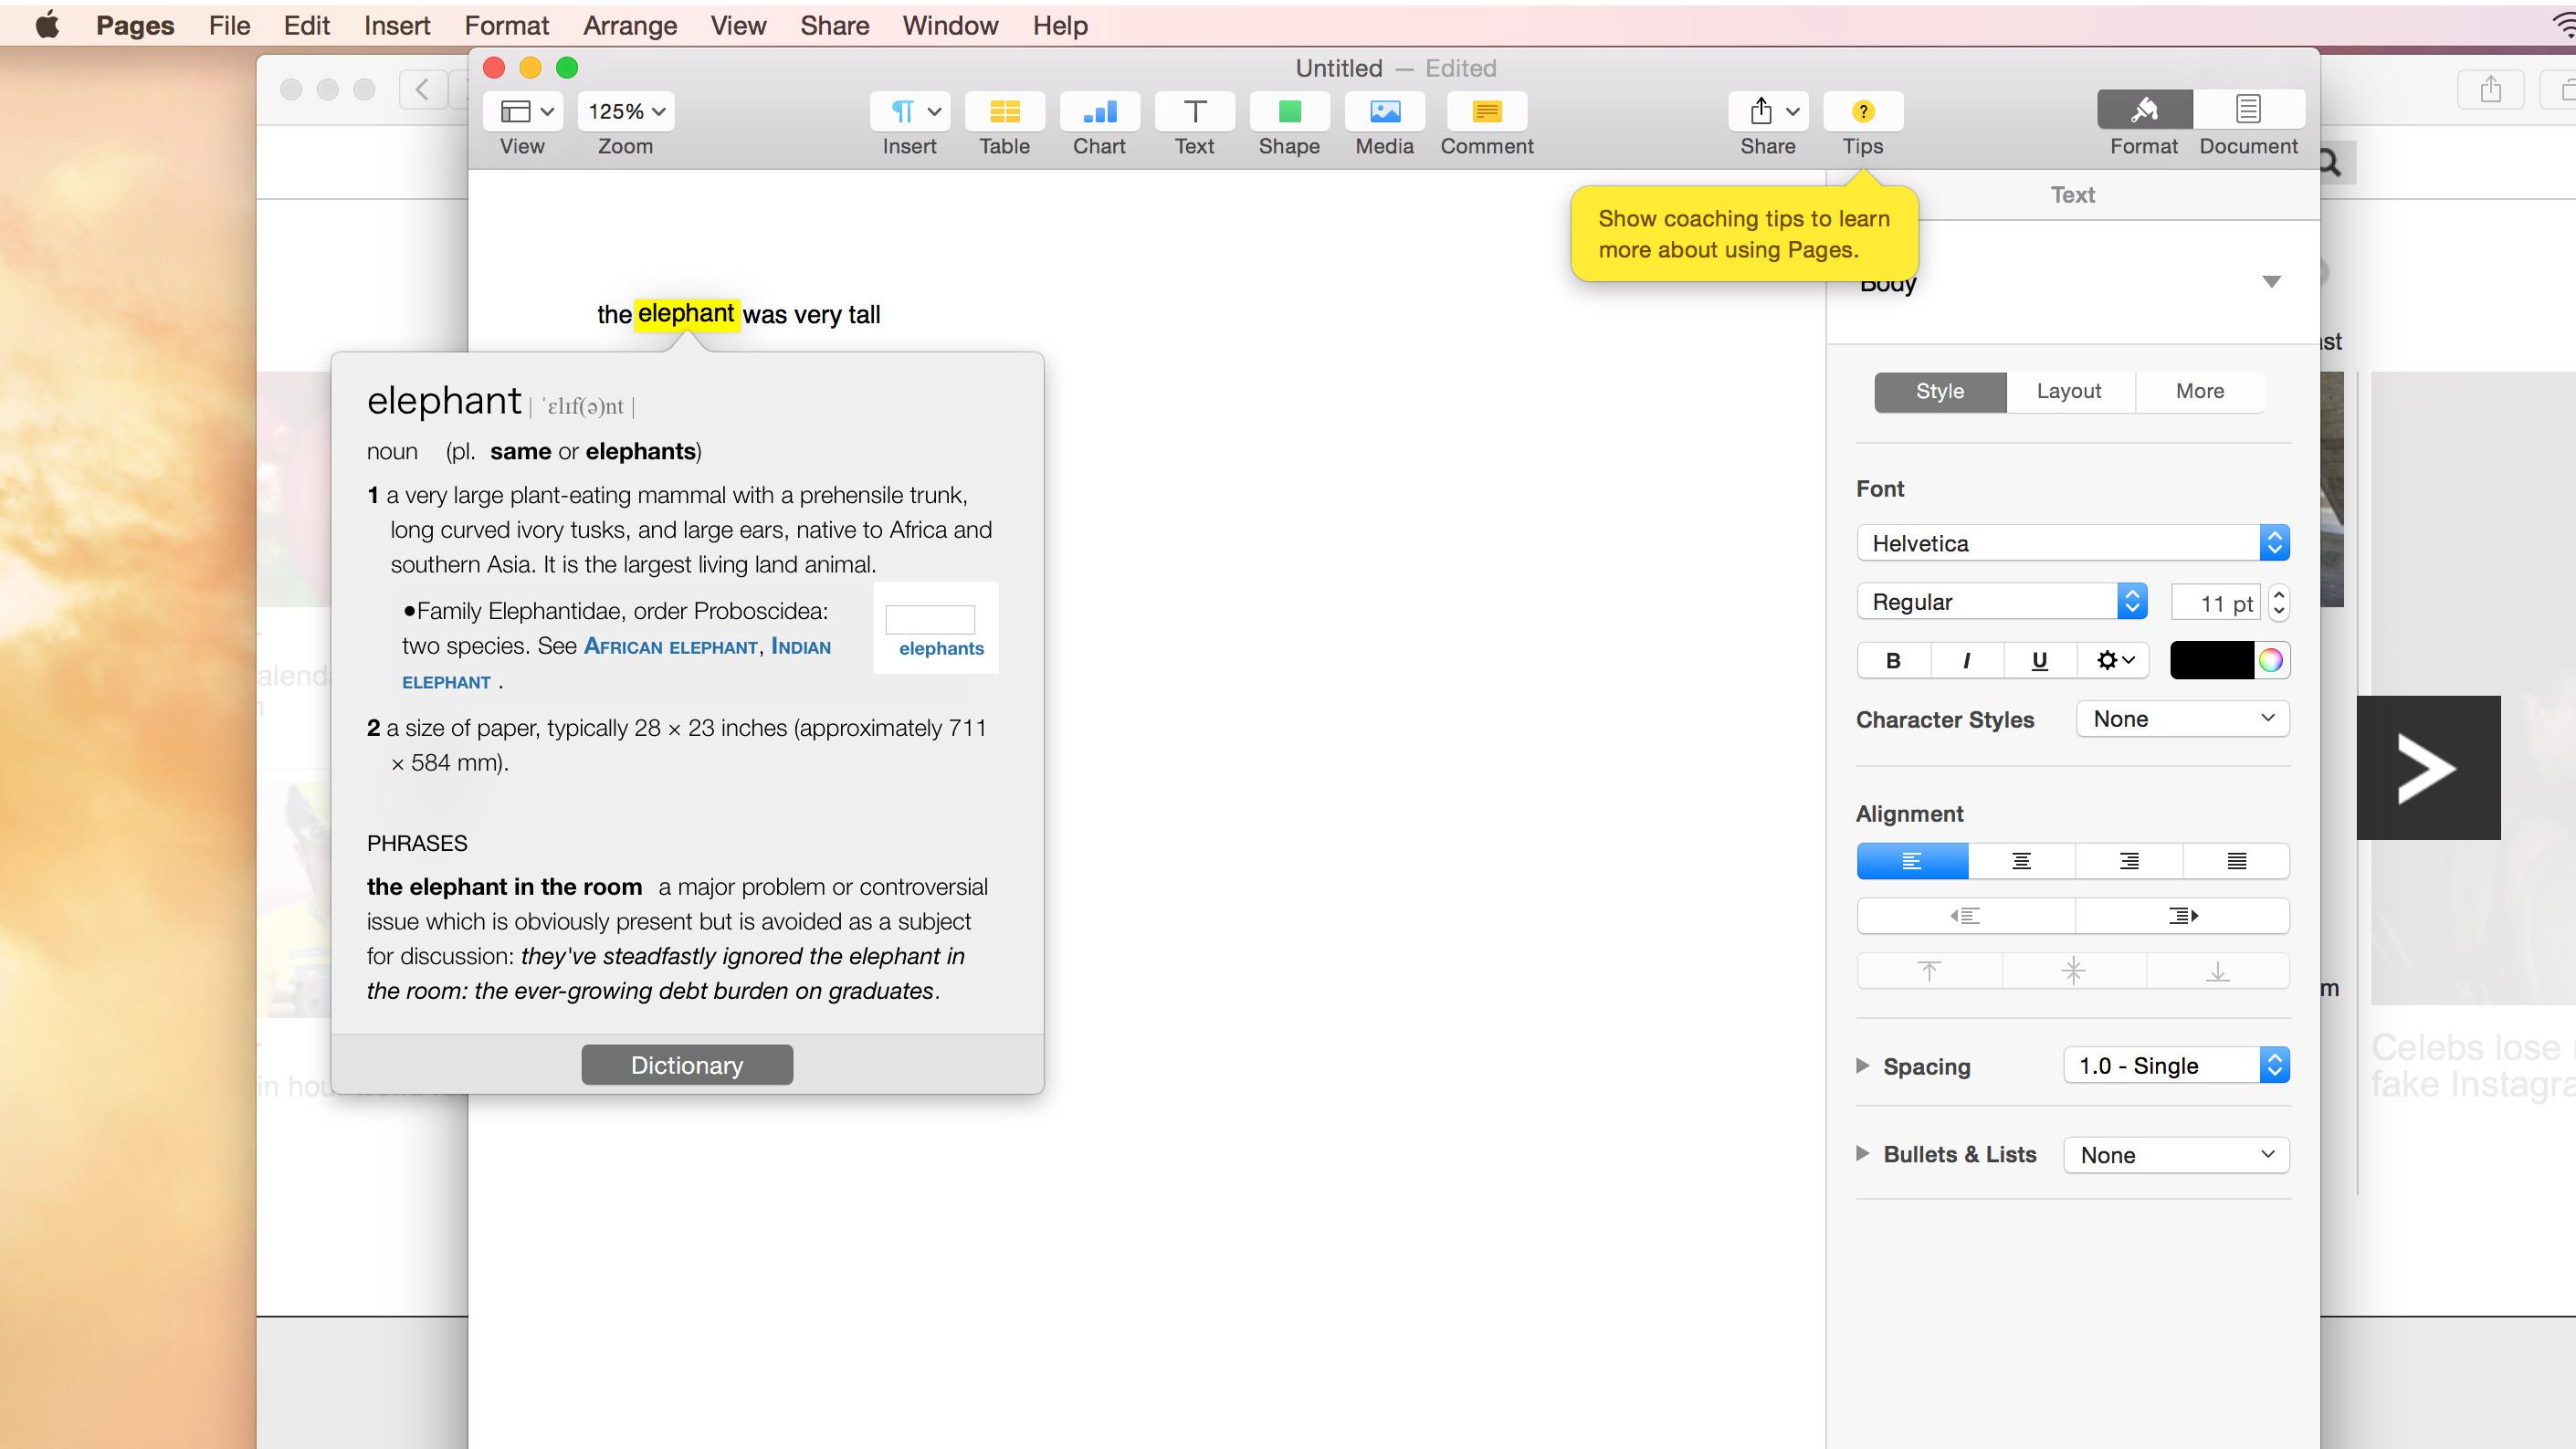
Control your Mac with gestures: Look up definitions on a trackpad
Another really useful gesture is ‘Look up’. This simple idea allows you to instantly search for dictionary definitions and wikipedia entries on any text when you tap on it with three fingers. The best part is that you won’t be taken to another app or browser, but instead a small pop-up window appears next to the word or phrase in which you were interested. To enable this excellent feature go to Point & Click and tick the Look up box.
Control your Mac with gestures: Navigate websites by swiping
One way to speed up interacting with websites is to use the Swipe between pages gesture. When enabled (you’ll find it at the top the list in the More gestures tab) you can move back to a previous page on a website simply by swiping two fingers to the left on a trackpad, or swiping one finger to the right on a Magic Mouse. To go forward again just reverse the process. This also works in other apps that have back/forward buttons, such as the App Store.
Control your Mac with gestures: Zooming on a trackpad or mouse
If you use iPhoto then the Zoom gesture is one you’ll want to learn. Just as you would on an iPad or iPhone, zooming on a trackpad involves putting pulling your thumb and one finger together in a pinching motion to make things smaller, or pushing them apart to make things larger. It also works in Safari for looking in more detail at webpages. Double-tapping on the trackpad with two fingers will also zoom within some apps, and repeating the tap will zoom out again. This double tap feature also works on the Magic Mouse, just remember not to click the top, just tap the middle of the device instead.

Control your Mac with gestures: Rotate images on a trackpad
By twisting a finger and thumb around each other you can rotate items in apps like Preview and iPhoto, although only 90 degrees each time. To rotate 180 degrees you’d have to rotate once, then repeat the gesture to rotate a second time.

Control your Mac with gestures: Mission Control and Exposé
Two of the most useful ways of navigating around OS X is by using the gestures for Mission Control and Expose. Swiping up with three fingers activates Mission Control, which displays all the apps currently running on your Mac, and allows you to quickly swap between them. Swiping down again cancels the command. This gesture also works on the Mouse by double tapping two fingers on the body of the device.
By ticking the box under the More Gestures tab in Trackpad’s System Preferences, you can swipe down with three fingers to activate App Exposé. This will show just the open windows related to the app you’re working on, which can be very useful if you’ve lost a pop up window somewhere behind your web browser.

Control your Mac with gestures: Quickly view the desktop on a trackpad
If you want to quickly clear all your open windows away and get back to the desktop, then you need to use the Launchpad gesture. To execute this place a thumb and three fingers apart together on the trackpad and then spread them apart. Everything on the screen will now disappear off to the sides and you’ll see the desktop. Reversing the gesture brings them all back, and if you bring them together again you’ll enter the Launchpad section with shows you all of your installed apps.

Control your Mac with gestures: Open the notification centre on a trackpad
If you want to respond to social network messages, check your schedule, or use any other notification widget you may have installed, simply swipe two fingers in from just outside the right hand edge of the trackpad to open the Notification centre.
And here’s what is coming in the next version of OS X…
Author: Martyn Casserly , Contributor

Martyn has been involved with tech ever since the arrival of his ZX Spectrum back in the early 80s. He covers iOS, Android, Windows and macOS, writing tutorials, buying guides and reviews for Macworld and its sister site Tech Advisor.
Recent stories by Martyn Casserly:
- How to edit a PDF on Mac
- How to find and delete duplicate files on Mac
- Best password managers for Mac and iPhone
- GTA 5 Cheats
- What is Discord?
- Find a Lost Phone
- Upcoming Movies
- Nintendo Switch 2
- Best YouTube TV Alternatives
- How to Recall an Email in Outlook
10 Mac trackpad gestures that everyone should be using

One of the best parts of macOS is learning and executing all of Apple’s many internal shortcuts . These are hidden commands built into the company’s hardware that are total godsends when it comes to things like click consolidation (one command instead of three clicks) and workflow optimization. Some of these commands you may already know, but we’re willing to bet there’s at least one or two we can introduce to you!
Zoom in or out
Swipe between pages, open notification center, how to open launchpad, how to show your desktop, how to drag files (the better way), how to force click, how to open mission control, how to hide all other apps, how to switch desktops.
That’s our goal at any rate, and we’ve gone ahead and created this roundup of several trackpad gestures you can use in macOS for all our readers. Even if you don’t use shortcuts all the time, one of these quick executables could come in handy down the line.
When one needs a digitized magnifying glass, you don’t have to resort to manual macOS controls for adjusting your page zoom (clicking View > Zoom In or Zoom Out repeatedly). Instead, you can just execute zoom-in and zoom-out gestures using your trackpad.
- The 5 best MacBooks for video editing in 2024
- MacBook Pro 16 vs. MacBook Pro 14: The important differences
- Does your Mac really need antivirus software? We asked the experts
To do so, simply pinch with two fingers anywhere on your trackpad. Spreading your fingers outward will zoom in, while pinching inward acts as a zoom out.
Let’s say you have a PDF open with multiple pages you need to sift through. On top of scrolling through the document, or inputting whatever page number you’d like to jump to, you can also turn pages using your trackpad.
Just put two fingers together and swipe from left to right for a a page forward command, or right to left to go back one page.
All of your macOS notifications are stored in a hidden menu called the Notification Center. It’s not all that hidden though, as Apple makes it pretty simple to pull up the column with one trackpad command.
Put two fingers together, position them to the right edge of your trackpad, and swipe left.
Whether you want to gain a quick overview of your installed Mac apps or just launch something quickly, this gesture is invaluable. It opens the Launchpad app, which shows all of your apps on a grid for swift access.
To perform it, just move your thumb and first three fingers together on your trackpad. To close Launchpad, simply move your fingers and thumb apart, or press the Esc key.
You can also do the reverse of the Launchpad gesture above. In macOS, spread your thumb and first three fingers apart and your open apps will be cleared out of the way, revealing your desktop.
This is a handy way to find files and folders on your desktop that would otherwise be obscured by an app window. It’s also a great way to drag a file from your desktop into an open app. Just move your fingers and thumb apart, then click and drag the file onto the app’s icon in the Dock until it starts flashing. The app will return and you’ll be able to drop the file in place.
If you’ve ever tried to drag a file from one side of your screen to the other using just your trackpad, you’ll know this can be tricky, especially if you reach the edge of your trackpad. Luckily, there’s a better way to do it.
Open the Settings app and select Accessibility > Pointer Control > Trackpad Options . Enable Use trackpad for dragging and choose Three-Finger Drag from the dropdown menu.
This lets you move a file by positioning the macOS pointer over it and moving it using three fingers at once, at which point the pointer ‘latches on’ and starts moving the file. The best part of this is you can let go of the trackpad, and then do another three-finger drag to move the file again. That means you can quickly do multiple swipes and move the file around without having to keep your fingers on the trackpad, which isn’t always easy.
Apple’s trackpads let you ‘Force click’ (or press a little harder) in order to get extra functionality. That works really well and is definitely worth incorporating into your daily routine.
For example, if you do a single-finger Force click on a word in Safari, you’ll see a pop-up window with a definition of the word. At the bottom of the window are other categories with extra info, such as relevant films, map data, Siri knowledge, and more.
This works on what Apple calls “data detectors.” These can be addresses, phone numbers, email addresses, web links — anything you can take subsequent action on in macOS. Force-click a link, for example, and you get a pop-up preview of the web page. The many different uses of this gesture make it a very useful one to have on hand.
Sometimes, you’ll find your macOS screen crowded with a bunch of apps and windows. That can make it hard to locate an app you used a while ago without minimizing every window to the Dock, one by one. However, a quick gesture solves this problem.
Swipe up on your trackpad with four fingers and you’ll open Mission Control, which shows every window that’s currently open, letting you click the one you’re after. This gesture also reveals any virtual desktops you have open (more on that shortly).
While swiping up with four fingers shows all of your open apps, sometimes you just want to focus on the app you’re using right now. To do that, it’s a four-finger swipe down. This gesture (called App Exposé) shows any open windows for the current app next to each other, with a list of recent documents running along the bottom of your screen.
To run this gesture, you need to enable App Exposé. Open the Settings app, then select Trackpad > More Gestures . Next to App Exposé, choose Swipe Down with Four Fingers from the dropdown menu (there’s also an option for swiping down with three fingers if you prefer).
Mission Control is a great way to manage multiple desktops, and you can access it by swiping up with four fingers. But there’s actually a quicker way to move through your desktops: swipe left or right with four fingers on your trackpad.
Note that if you have a number of apps open in full-screen mode, this same four-finger drag will incorporate them into your swipes through your desktops. For example, you might have Desktop 1, then a full-screen app, then Desktop 2, all linked by four-finger swipes.
Editors' Recommendations
- Don’t download the latest macOS Ventura update just yet
- How to take a screenshot on a Mac
- The best MacBook to buy in 2024
- Best refurbished MacBook deals: Get a MacBook Air for $140 and more
- The best Mac keyboard shortcuts for 2024

Apple products come loaded with software designed to work seamlessly with the macOS operating system. For example, Safari is the default software used to load websites, Preview is used to view pictures, and Pages will open documents. But if you're not a fan of the built-in software, Apple doesn't lock you into using it. However, you'll need to know exactly where to look if you want to change the default apps on a Mac.
Thankfully, the process is largely the same whether you're running macOS Sonoma 14, Ventura 13, or other macOS versions. It's also easy to reverse the process and go back to using default apps.
Apple has long been known to turn out some of the best laptops, with models like the MacBook Air and MacBook Pro regularly being among the most sought-after laptops. It can actually be difficult to land some decent Apple deals, as the brand's popularity keeps many of its products from seeing the bargain bin. Right now, however, Apple has a lot of options among the best laptop deals. The original Apple Silicon MacBook Air is seeing some of its lowest prices ever, and there’s even some newer MacBook Pros discounted right now. Whether you’re in search of a MacBook Air or a MacBook Pro, reading onward you’ll find the best MacBook deals currently available. Best MacBook Air (M1) deals
The Apple MacBook Air (M1) started a seismic shift for Apple being the first of its Airs to have an Apple-based processor. We took a look at the differences between the M2 and M1 and the M1 is still looking pretty great. It's also a touch nearer to affordable than anything else here. Fast yet fanless so it's silent to use, you gain an 18-hour battery life, a gorgeous looking 13.3-inch Retina display along with all the effortless style you'd expect from an Apple device. These laptops are best for students or those who want something stylish yet reasonably powerful to use on the move. Nowadays, deals are becoming a little harder to come by unless you're willing to consider a refurbished/renewed model.
The Apple Mac Mini is a unique desktop computing option, as it comes in a small form factor that won’t take up much space on a desk. It’s also part of Apple’s new Apple Silicon lineup, which means newer models will pack quite a punch when it comes to performance. Apple’s popularity usually keeps its products from seeing substantial discounts, but we’ve found some out there. A couple could be considered some of the best Apple deals you’ll come across today. If you’re simply looking for a deal on a Mac, consider some iMac deals or MacBook deals, but if you’re sold on some savings for a pint-sized PC that fits within the Apple software ecosystem, read onward for the best Mac Mini deals worth shopping today. Apple education pricing for new Macs and iPad -- multiple price points
Whether you're a newly accepted college student, returning student, faculty, staff, or homeschooling teacher, of any grade level, Apple offers its education pricing program for discounted hardware rates. That means you can grab an Apple Mac Mini for great prices that won't empty your wallet or bank account before the school year. A bevy of devices are included, not just the Mac Mini, such as MacBook Air, MacBook Pro, displays, and beyond.
How to Use Trackpad Gestures to Navigate macOS
One of the areas where Macs beats PCs is gesture support. The MacBook trackpad features a wide range of gestures that allow you to quickly perform actions, such as switching between apps, zooming and seeing all of your notifications. Use these gestures to start zipping around macOS like a pro:
View Mission Control: Swiping up on the trackpad with three fingers causes your open windows to explode outward, allowing you to see all of the windows simultaneously. Apple calls this Mission Control. Swiping back down with three fingers collapses the windows, placing the window you last viewed at the top.
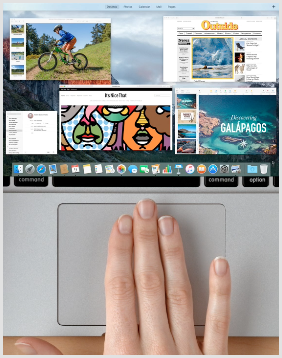
Swipe between full-screen apps: Swipe with three fingers to the left or right to switch between any apps that you have open in full-screen mode.
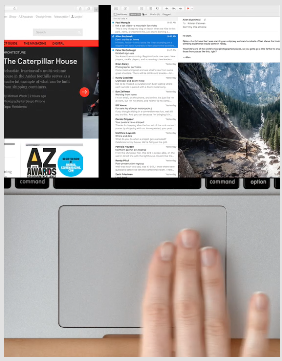
Tap to zoom : Tap the trackpad with two fingers simultaneously to zoom in on a page in Safari or a PDF.
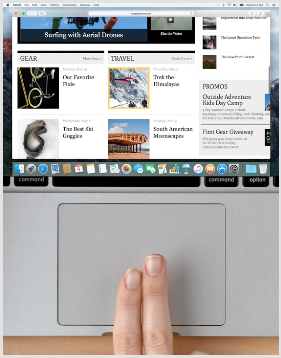
Swipe to navigate : Swipe with two fingers to the left or right to flip through Web pages and documents.
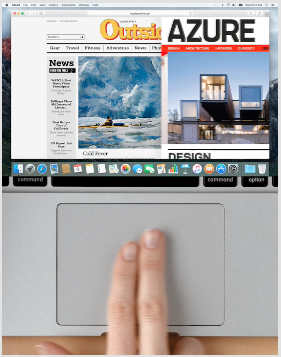
Open Launchpad : Pinch toward the center of the trackpad with your thumb placed in either the bottom left or bottom right corner and three fingers in the opposite corner above. The Launchpad lets you see your installed apps and launch them with a single click.
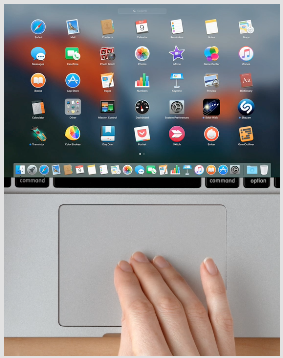
Show desktop : Spread your thumb and three fingers apart to show the desktop. This gesture is the exact opposite of the previous gesture.
Stay in the know with Laptop Mag
Get our in-depth reviews, helpful tips, great deals, and the biggest news stories delivered to your inbox.
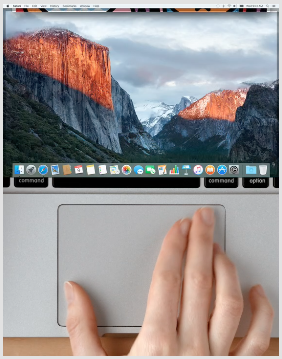
Look up : Tap a word with three fingers to immediately look up the word’s definition, synonym and more.
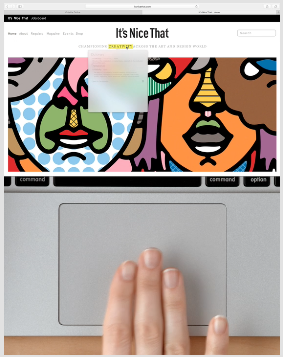
Three-finger drag : Slide three fingers around the trackpad when you've positioned the cursor at the top of the window to drag the window around the screen.
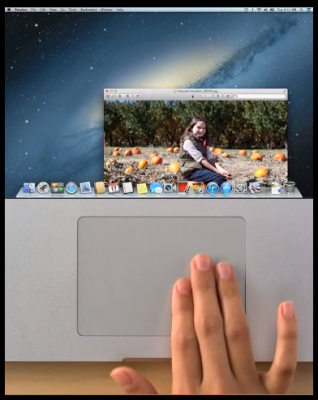
Notification Center : Swipe in with fingers from the left to open the Notification Center.
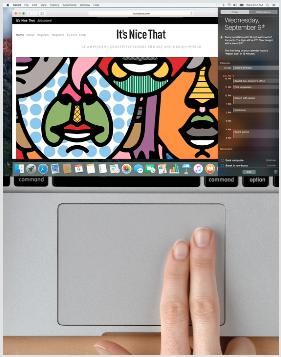
Show Safari tabs : Pinch with two fingers to see all of your Safari tabs simultaneously, and then swipe left or right with two fingers to scroll between the tabs.
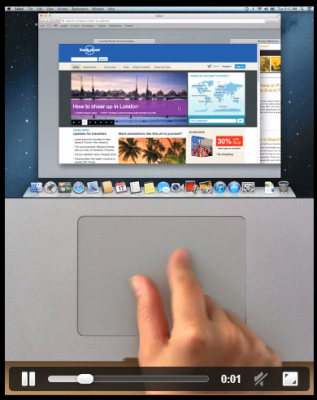
PC to Mac Guide: How to Make the Switch
- Previous Tip
- How to Use Keyboard Shortcuts in OS X
- Eject USB Devices in OS X
- How to Use Gestures to Navigate OS X
- How to Right Click in OS X
- Install Apps in OS X
- How to Find Files and Folders in OS X
- Take Screenshots in OS X
- Make Desktop Shortcuts in Mac OS X
- How to Browse Your Applications in OS X
- How to Force Close Frozen Applications in OS X
- Quit Applications in OS X
- How to Use Full Screen Apps in OS X
- Use Spotlight to Find Files in OS X
- Create an Apple ID
- Move Your PC files to a Mac
- How to set up Mail and Calendar accounts on OS X
- Use OS X El Capitan's Split Screen Mode
- Increase the Text Size on Mac
MacBook Pro M4 — everything we know so far
M4 MacBooks: A timeline of when to expect Apple's next-gen laptops
Samsung Mother's Day sale 2024: Top deals and gift ideas
Most Popular
- 2 New Windows 11 update injects ads in your Start menu — here's how to turn them off
- 3 Dynabook's new featherlight business laptop may challenge the best from Lenovo, Dell
- 4 Qualcomm reveals the Snapdragon X Plus along with three X Elite chipsets
- 5 Apple’s new iPads bore me, and I’m tired of pretending otherwise
Looks like no one’s replied in a while. To start the conversation again, simply ask a new question.
Trackpad gestures stop working randomly after monterey update
I have recently updated from Big Sur to Monterey version 12.0.1 on my Macbook Air M1. Randomly, the swipe gestures stop working. I have asked one of my friends who uses the same device and he too is facing the problem. I often work on applications kept in different windows and with not being able to swipe, I am constantly restarting to recover from the issue. Is it happening with anybody else? Will future updates help in solving the problem or do I need to re-install the OS, heck of a time taking process in later as we need to install the applications again.
Posted on Nov 1, 2021 9:45 PM
Posted on Nov 17, 2021 8:09 AM
Having this issue, too (i.e. trackpad gestures will randomly stop working).
@sivaprashantK's solution of quitting "Dock" process from Activity Monitor resolves without needing to reboot, works for me, too.
Get this fixed, Apple!
System: Monterey 12.0.1 | MacBook Pro (16-inch, 2021) | M1 Max | 64GB
Similar questions
- trackpad gestures not working new macbook air m2 (venture 13) hi, suddenly my trackpad gestures (especially three finger swipe between windows) isn't working anymore. Freaks me out! Please help soon! 1099 2
- MacBook Pro m1 Pro trackpad gestures stops working Does anyone know, if apple are working on a fix, that causes three and 4 finger gestures not to work on the trackpad? It seems to have gotten worse after updating to Monterey 12.1. -A fast temporary fix, is to stop the Dock process through activity monitor, but im getting a little tired of doing the ones or twice a day. Or do someone know what the cause is to why its suddenly stops working. 1660 1
- Loss of sensitivity in trackpad after upgrading to macOS Monterey Since upgrading to macOS Monterey, I now have to tap harder and scroll / swipe slower when I select items or navigate my MacBook. Anyone experiencing the same issue? 1052 1
Loading page content
Page content loaded
Nov 17, 2021 8:09 AM in response to sivaprashantK
Nov 8, 2021 12:35 AM in response to Scott Rose
Hey Rose thank you for joining in and sharing the same problem. I have got a temporary solution. Earlier I used to restart my mac to get the mission control functions work again. Now, when I quit "Dock" function from the activity monitor, I am able to regain mission control's functions. Even I have given the feedback. Hope this issue gets rectified soon.
Nov 26, 2021 10:27 AM in response to sivaprashantK
Same issue here... but mine is a Macbook Pro 13 2020, with the INTEL processor (Core i5)! The 'click' on the touchpad also randomly works and then doesn't. A reboot sometimes fixes that, but not always. Was perfect until the Monterey update. I expect this kind of sloppy behaviour with drivers etc on Windows, but Apple make both the hardware and software so this is inexcusable in my opinion.
Nov 17, 2021 7:55 AM in response to sivaprashantK
Same issue here.
Running "killall Dock" in the terminal fix the problem without having to reboot / logout.
Nov 6, 2021 1:00 PM in response to sivaprashantK
Yeah, this seems to be a really large bug with macOS Monterey version 12.0.1 that affects Apple Silicon machines.
It is also happening on my brand new 16" MacBook Pro (M1 Pro) as well.
Several times throughout the day, all of the trackpad gestures that are set underneath the "More Gestures" panel (in the Trackpad System Preference) stop working altogether.
For example, I've got Mission Control set to "Swipe up with 3 fingers". This will work for about an hour, and then it suddenly stops working altogether.
The only solution is to log out and log back in again.
Same thing with all of the other Trackpad options that are on the "More Gestures" panel. For example, I've got App Expose set to "Swipe down with 3 fingers", and that also stops working at the exact same time as all the other gestures stop working.
Hopefully Apple will fix this soon, or else I may need to return this new laptop because this laptop can't be downgraded to macOS 11.
Be sure to report this bug to Apple on their macOS feedback website here:
https://www.apple.com/feedback/macos.html
Nov 8, 2021 12:32 AM in response to Eric--F
Hey, thank you for replying back. I will definitely try this. But before, I may not have understood when this occurs and for that I would definitely follow the steps mentioned by you, but I found one solution other than restarting mac. When I quit the dock function from the activity monitor, I see I regain the access of mission control which is the only gestures set that stops working.
Nov 2, 2021 4:00 PM in response to sivaprashantK
Hello sivaprashantK,
Thanks for reaching out to Apple Support Communities. We've reviewed your question and it looks like you are having an issue with the trackpad on your Mac after updating to macOS Monterey. It's understandable that you'd want this resolved, so allow us to assist with that. Let’s start out by testing to see when this behavior occurs. We understand that this is an intermittent issue, but the following testing will be very beneficial to help narrow down this issue.
First, put your Mac into safe mode and test. Booting into safe mode will disable any startup and login items from automatically opening, which can help us to isolate the source of the issue further. When you do this, you’ll see some unusual behavior from the display; this is to be expected. Please follow the steps in this article: How to use safe mode on your Mac.
Next, let's see if this behavior persists in a second user account on your Mac. If you have a second account, please log into that and see how it works. If you don't have one you can use, please follow these steps to make a test account that can be deleted later: Set up users, guests, and groups on Mac.
Additionally, please let us know if you notice this behavior when charging, after going into or exiting from Sleep Mode, when using certain apps, etc. Anything you can identify that is consistent would be helpful.
If you have follow-up questions, please let us know. We're here for you. Have a fantastic day!
Mar 15, 2022 9:41 PM in response to sivaprashantK
I might have a fix you can try. After talking with some Apple Support people, they recommended I do a reinstall of OS Monterey. So far, that seems to have worked to fix the issue. I'm still holding my breath to be honest, but it's worth a shot. It was very easy to do the reinstall too. Here's a link to an article on how to do it (and make sure to back up your computer beforehand, of course): How to reinstall macOS - Apple Support
For context of my situation, when I switched to my 2021 MacBook Pro 14-inch with an M1 chip, I was coming from a 2015 MacBook Pro that was operating on Big Sur. There may have been a glitch that occurred when transferring files because of the difference in OS.
If I do end up having an issue with my trackpad gestures (or the F3 button or hot corners, as they were all connected for me) I will post an update on this thread. But for right now, the problem seems fixed.
Feb 14, 2022 7:21 AM in response to pk84
Same here, 16" Macbook Pro M1 max, clean system install a week ago, now updated to 12.2.1, rosetta not installed, I have added "Little Snitch", "1Password", "iStat Menus", "Firefox", "Final Cut, and "Handbrake" to the system. So far I have only gotten the locked up trackpad gestures while running "handbrake" when Screen Saver activates while it's running and if I then close the screensaver and reactivate it with a hot corner the trackpad then returns to normal operation. Handbrake uses a lot of resources while running and really fires up the processor much more so than other apps I've run so far. I am going to try a running something more intensive with "Final Cut" and see if that recreates the issue. I am including to screen grabs from iStat menus if it helps.
Mar 25, 2022 11:57 AM in response to AlDan
I wasn't able to share the actual shortcut because of security limitations on links in Discussions, but here's the quick way I can reset the gestures (I didn't know about activating the screensaver.
I agree that it ***** that Apple hasn't fixed this. I reported it, and I think that other users here should make sure that they do as well so they know how put out people are.
Mar 25, 2022 9:48 PM in response to rcostain
This has allowed my external to wake while the M1 macbook is in clamshell with just a single click of the wireless trackpad or a key on the external keyboard. This is only a work around however as it works MOST of the time for me. Every once in a while, I have to open the lid of my M1 just enough to wake it's screen and then my external wakes as well and shows as my main monitor.
The only other very strange issue I have with waking my external monitor seems to be tied to the many time machine backup external drive issues I've seen many people on the forums having (myself included). My external backup drive rarely (but not never) shows the "disc ejected improperly" window. I also finally found an external backup drive that didn't randomly eject itself (an issue I had when I first set up time machine on a different bus powered drive). The issue now is that when my M1 has been idle for some time, backups still happen, though sometimes at greater intervals than 1 hour). But, my external drive is supposed to shut down completely after it backs up (i.e. the blue light on the drive turns off/goes completely dark). That doesn't always happen - sometimes it does, sometimes it doesn't and it appears random at least as far as I can tell. When it does not turn off as it is supposed to. My first trackpad click to wake the machine and my external monitor actually only wake my backup drive which then immediately shuts down as it was supposed to do on its own. Once it DOES shut down, I can then click my trackpad or any key and wake my external monitor with one click. Phew!
I mean, I couldn't make this stuff up if I tried. Just looking at what I've typed makes me feel exhausted.
I've been on macs since OS6 and I've never had a buggier and literally weirder new machine than this. I'm sharing here in the hopes that even pieces of what I share helps someone else more easily work around their issues. This is how I found my work arounds, trying every little suggestion and piece of information I could find until I found some things that allow me to work with minimal restarting and down time.
It is disappointing and sad that this is what Apple has become. It's an expensive investment to be leaving users out on an island by themselves with only each other to try to find work arounds for a multitude of issues with apparently little to no help from Apple itself.
Nov 17, 2021 7:09 AM in response to sivaprashantK
Hi, I have the same issue with MBP 14". Today it happened for me and I just left the laptop and started to search for a solution with my cellphone. Meanwhile, my laptop was on the screen saver and when I just touched the trackpad all the gestures activated again.
I just sent feedback and reported this bug for Monterey version 12.0.1 and I suggest you do the same.
Nov 24, 2021 2:49 PM in response to sivaprashantK
Same story for me. I'm using the newest 2021 16" MBP with M1 Max. It happens super randomly that I can't use my trackpads gestures. I can still click around and use it in its basic functions, but all the swipes and gesture features are gone. Restarting is the only fix, at the moment. Hope this gets addressed in future OS updates.
Nov 27, 2021 1:39 AM in response to sivaprashantK
I have a work Imac 27 that is running Intel, and a Laptop which is the M1 MB Pro 13.3".
Both are using newest software version, and both have a Magic Mouse that are exclusive to each machine. The problem is the same on both machines, suddenly you cannot scroll in browser-pages with the swipe motion.
So this is BOTH machines, and with TWO different mice that have worked find until now, and now suddenly have the same error. So I think I can say pretty clearly that this is not an Apple Silicon error, or a problem with the pointing device - but a software error in the latest OS (Running 12.0.1).
My go-to fix is rather simple, which is to power off the mouse, and power it on again. Always works.
Nov 27, 2021 2:30 AM in response to Jesper Ryskin
On my Macbook Pro 2020 (Intel) it's completely random. A reboot does not always fix it. And it will work one moment, and not the next. It's infuriating! I've even wiped and cleanly-rebuilt it with Monterey, and the problem persists, so I think it's pretty obvious it's a bug in the Monterey operating system. Come on Apple - sort it out!

We explain and teach technology, solve tech problems and help you make gadget buying decisions.
10 Best Ways to Fix Trackpad Gestures Not Working on Mac
Sumukh has been simplifying tech for the masses and helping consumers pick the right gadgets with his in-depth insights and reviews. He decided to hide his engineering degree in the closet to pursue his passion for writing. Over the past 5 years, he has contributed with guides, reviews, and detailed opinions to notable publications like TechPP and XDA-Developers. When not jamming his fingers on thoccy mechanical keyboards, Sumukh is busy convincing people how VR Gaming is the next best thing after sliced bread.
MacBooks are widely regarded to have the best trackpads on any computer. This is mainly due to how smooth it is and how well the gestures work. Swiping away on the trackpad to switch between windows or bring up mission control is a breeze. However, you won’t be able to perform these actions if trackpad gestures are not working on your Mac.

You may face the issue where you’re unable to swipe up with three fingers to switch desktops. Or you may not be able to pinch to zoom. Regardless of the issue, here are some of the best ways to fix Mac trackpad gestures not working.
1. Clean the Trackpad Surface
The primary reason why your MacBook trackpad gestures are not working or your mouse cursor is stuck could be the accumulation of dirt and grime. Over time, dust, oil, and grease from our fingers settle over the trackpad. If not cleaned regularly, it can cause issues with your Mac’s trackpad.

So, it’s a good idea to regularly clean your Mac’s trackpad. Grab a microfiber cloth and gently rub it on the Mac trackpad. You can also use some rubbing alcohol if there’s a lot of gunk on the surface. It’s also a good idea to wash your hands thoroughly before you use the trackpad again.
2. Force Reboot Your Mac
Let’s now move to the customary solution for most problems – rebooting your Mac. Since your MacBook touchpad gestures are not working, there is a chance that a software glitch is causing it. Hence, a force reboot using the power button is a good way out.
Press and hold the power button or the Touch ID button (depending on which Mac you have) until you see the Apple logo. Let go of the button when the Apple logo appears and your Mac will reboot.
3. Restart the Service From Terminal
This method is mainly helpful when the three-finger swipe to bring up mission control or app exposé doesn’t work. You can try restarting the dock service on your Mac using the terminal to see if the gestures start working again. Here’s how to do it.
Step 1: Press the Command key on your Mac followed by the space bar. This will bring up Spotlight Search.
Step 2: Type in Terminal and hit the Enter Key.

Step 3: In the terminal window, input the below command and hit the enter key.

Reboot your Mac once and try using the trackpad gestures now.
4. Customize Gestures From Trackpad Settings
macOS gives you the ability to change and customize gestures. If you’re trying to perform a specific gesture but it’s not working, it’s possible that the gesture is assigned to do something else. Here’s how you can change it if that’s the case.
Step 1: Click on the Apple logo in the top-left corner of your screen. Select System Settings. If your Mac is running macOS Monterey or earlier, select System Preferences.
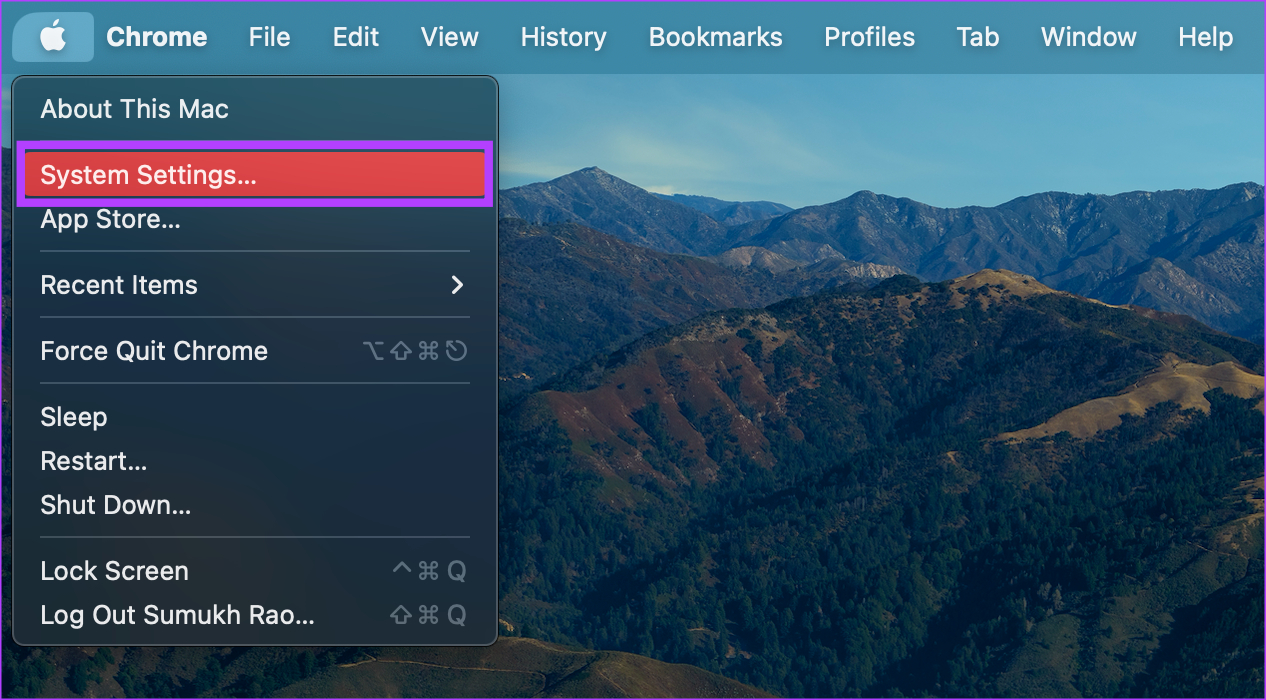
Step 2: Navigate to the Trackpad option in the left pane.
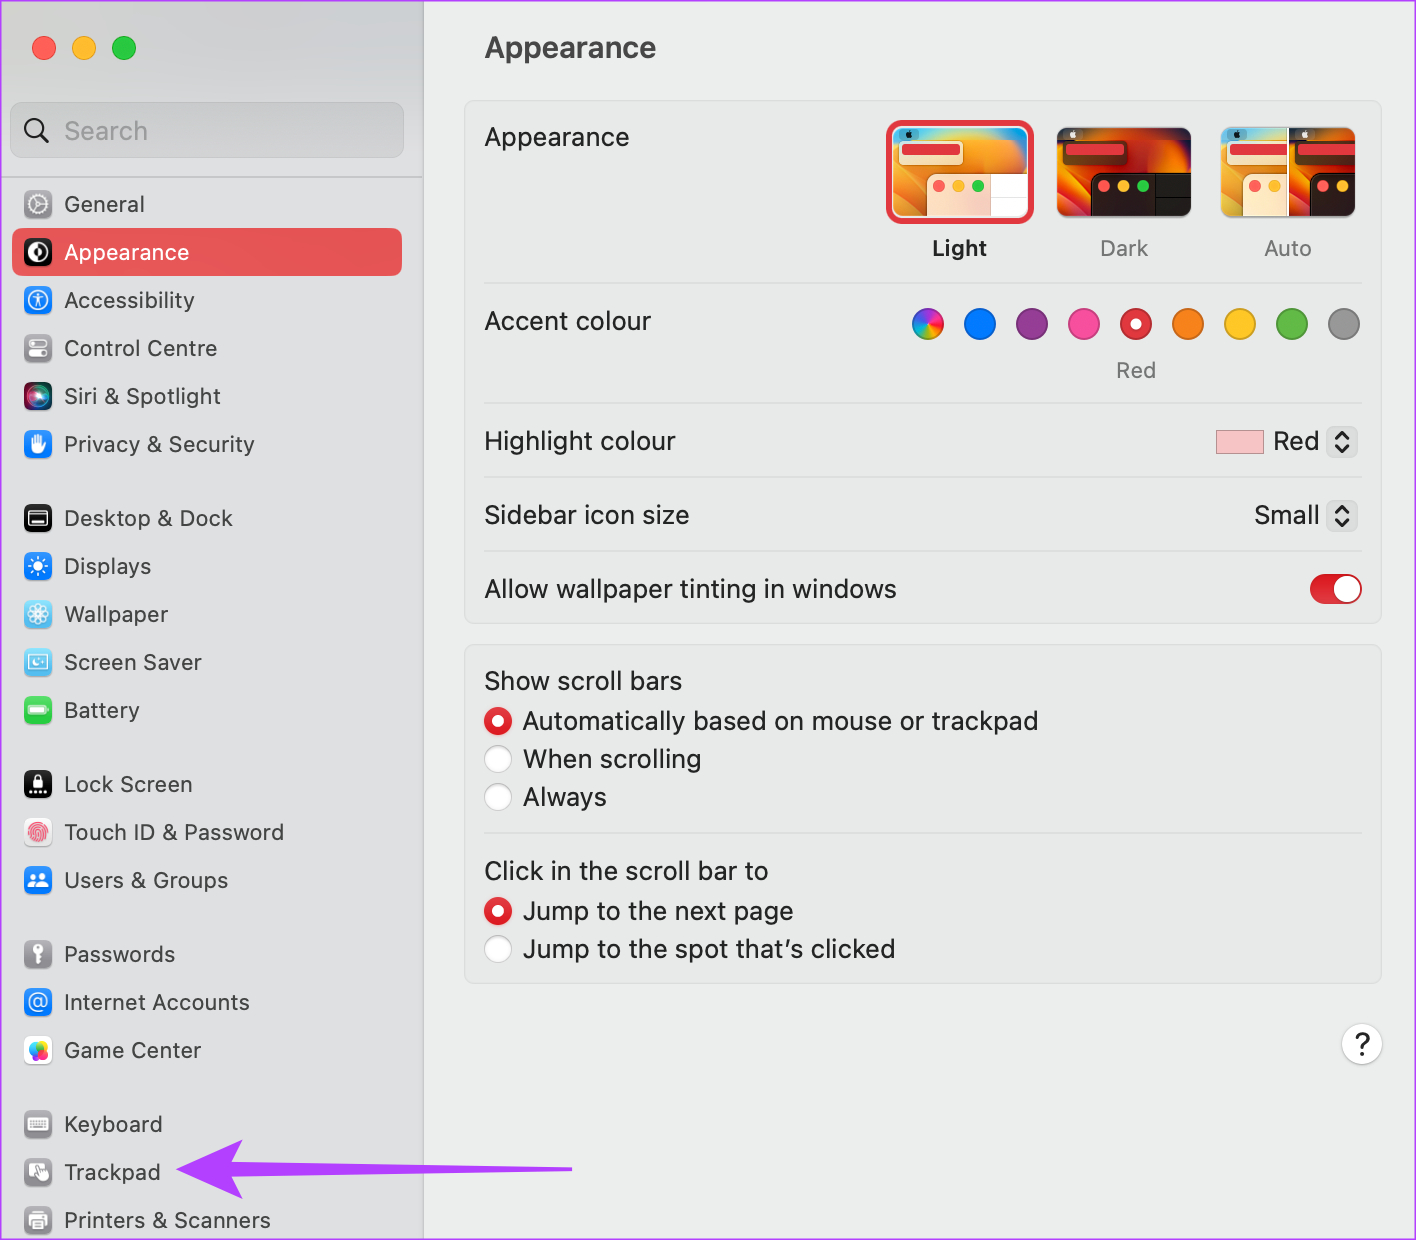
Step 3: Switch to the More Gestures tab. Here, you should see the description of various gestures.
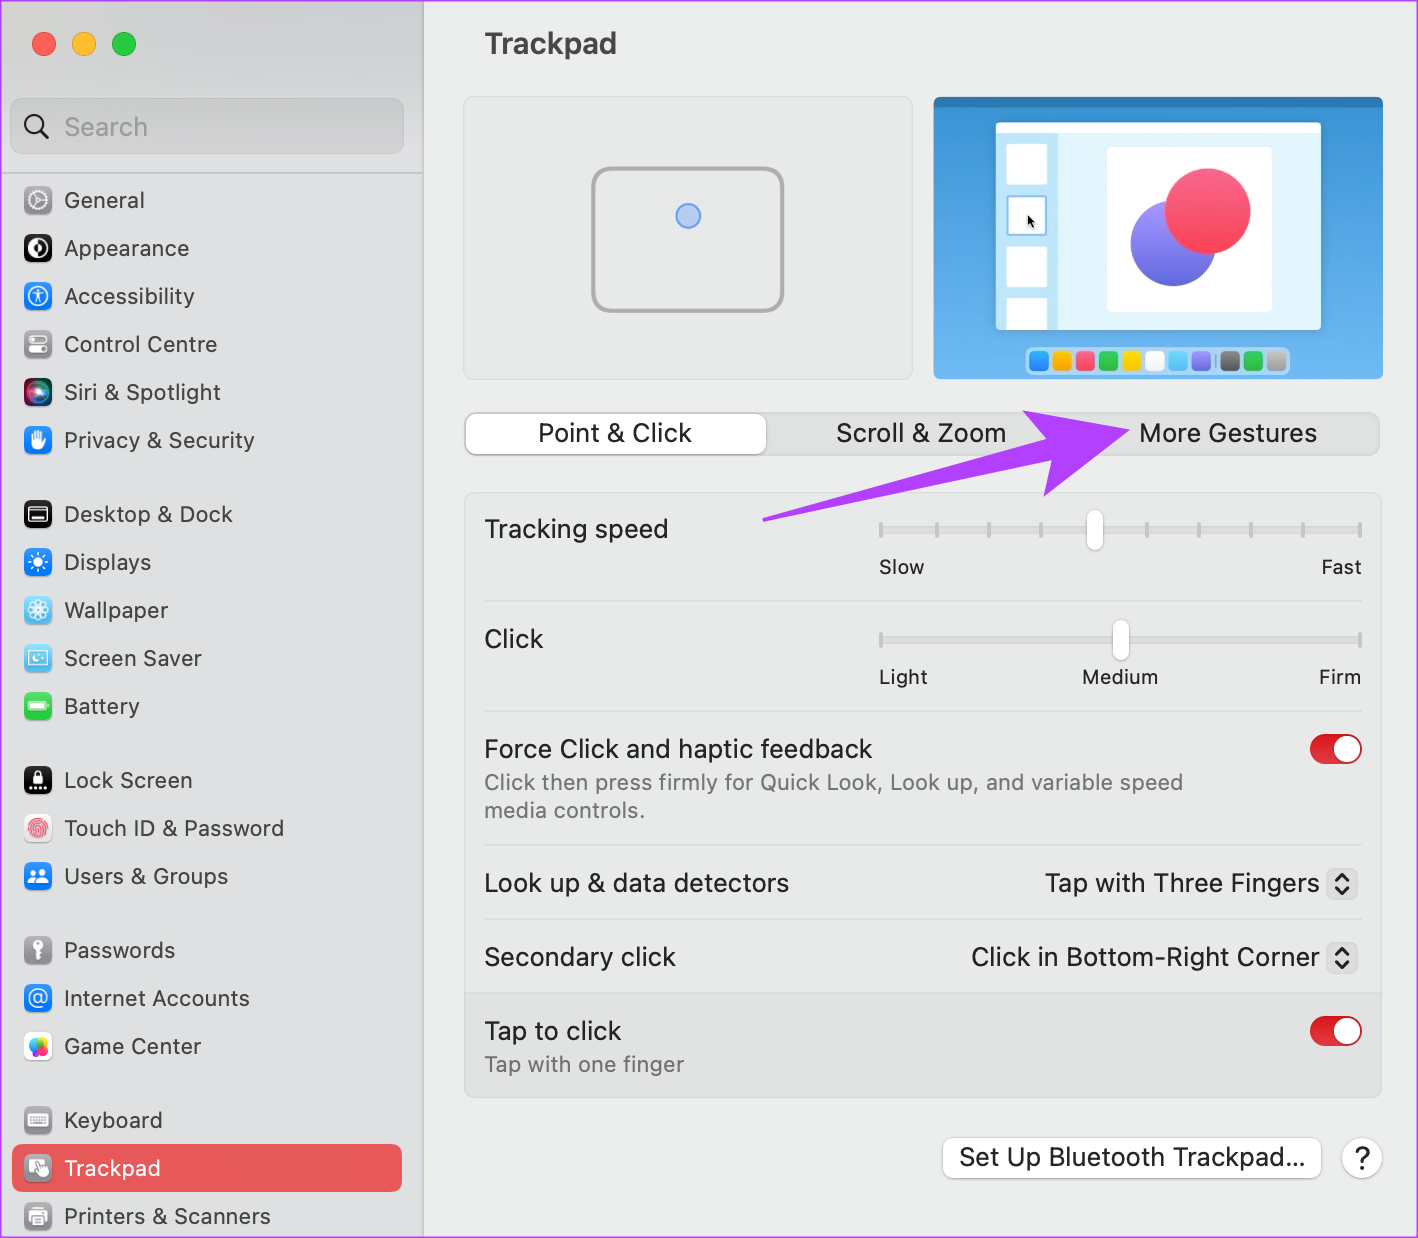
Step 4: Select the relevant action and click on the gesture next to it.

Step 5: Then, choose the trackpad gesture that you want to perform to trigger that action.
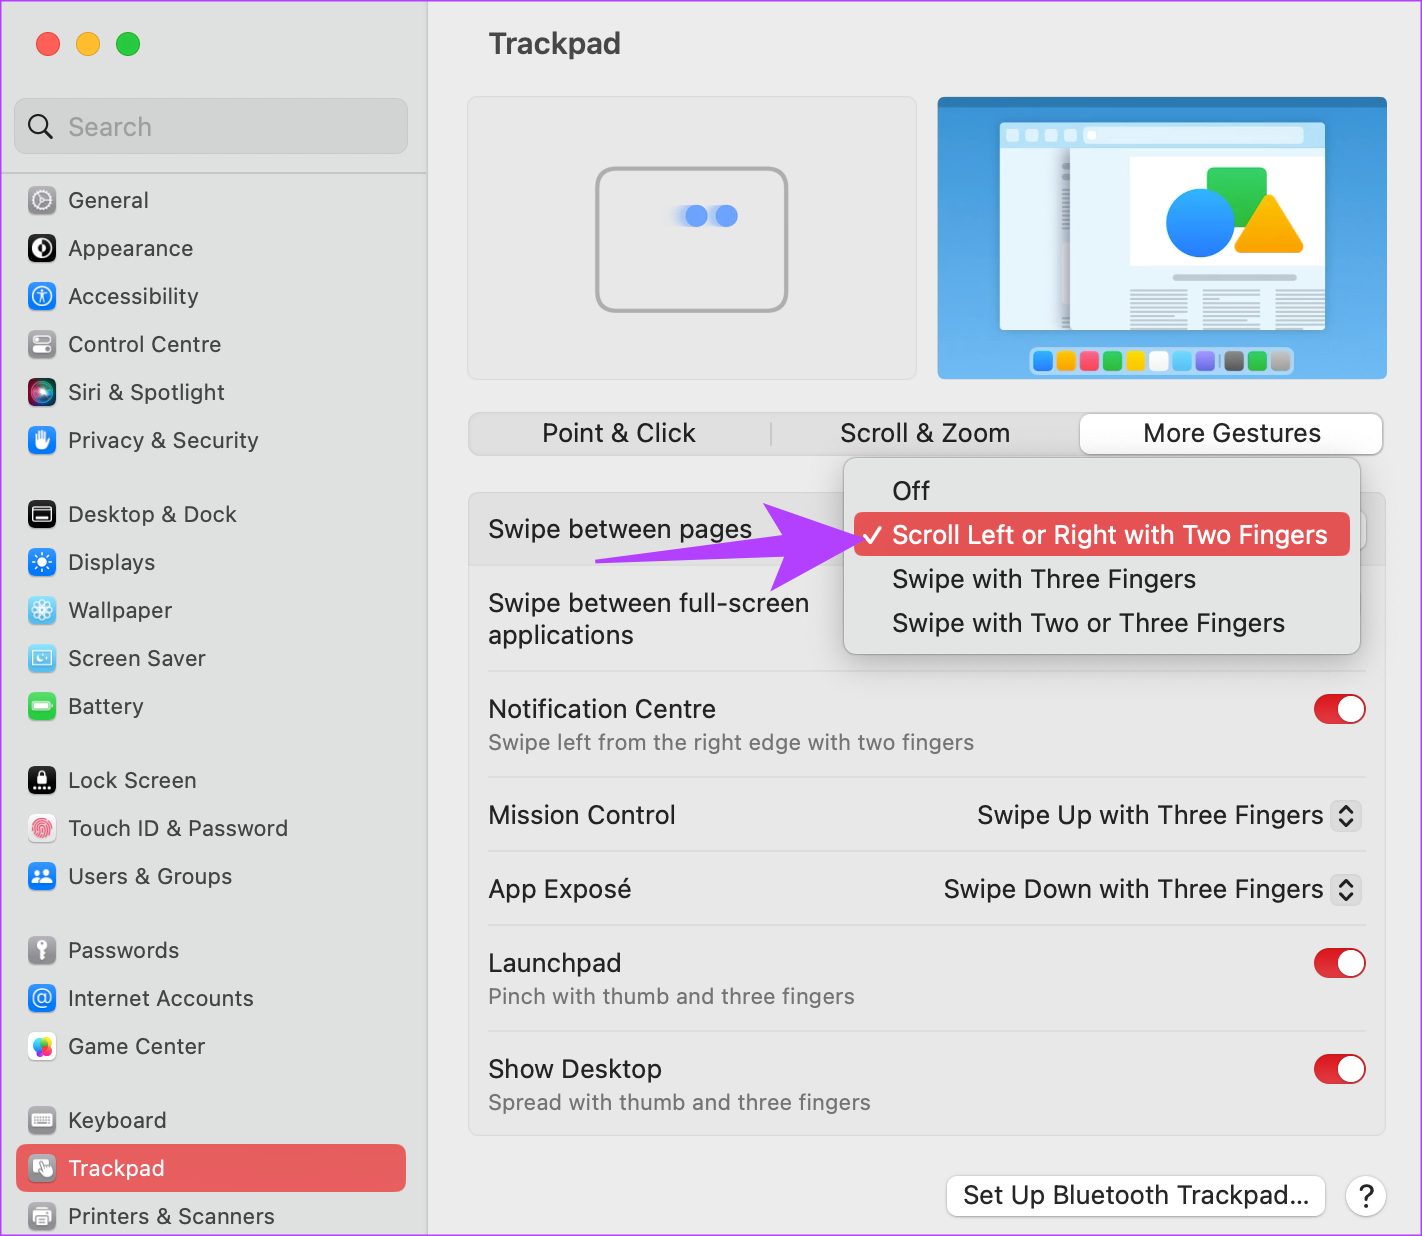
5. Disconnect Any External Mouse
Sometimes, an external mouse can interfere with the functioning of the trackpad. It can cause the MacBook trackpad to behave erratically and in such a case, you won’t be able to use the gesture either.
So, if you’re using an external mouse with your Mac, try disconnecting it to see if your trackpad works properly.
6. Disable Force Click
The Mac’s trackpad has the ability to detect different levels of pressure. As a result, you get the ability to force-click on the trackpad to perform certain functions. However, enabling a force click can interfere with some gestures at times. Try disabling it via the steps below to see if it makes a difference.
Step 1: Click on the Apple logo in the top-left corner of your screen. Select System Settings. If your Mac is running macOS Monterey, select System Preferences.
Step 3: In the Point & Click tab, disable the toggle next to ‘Force Click and haptic feedback’.
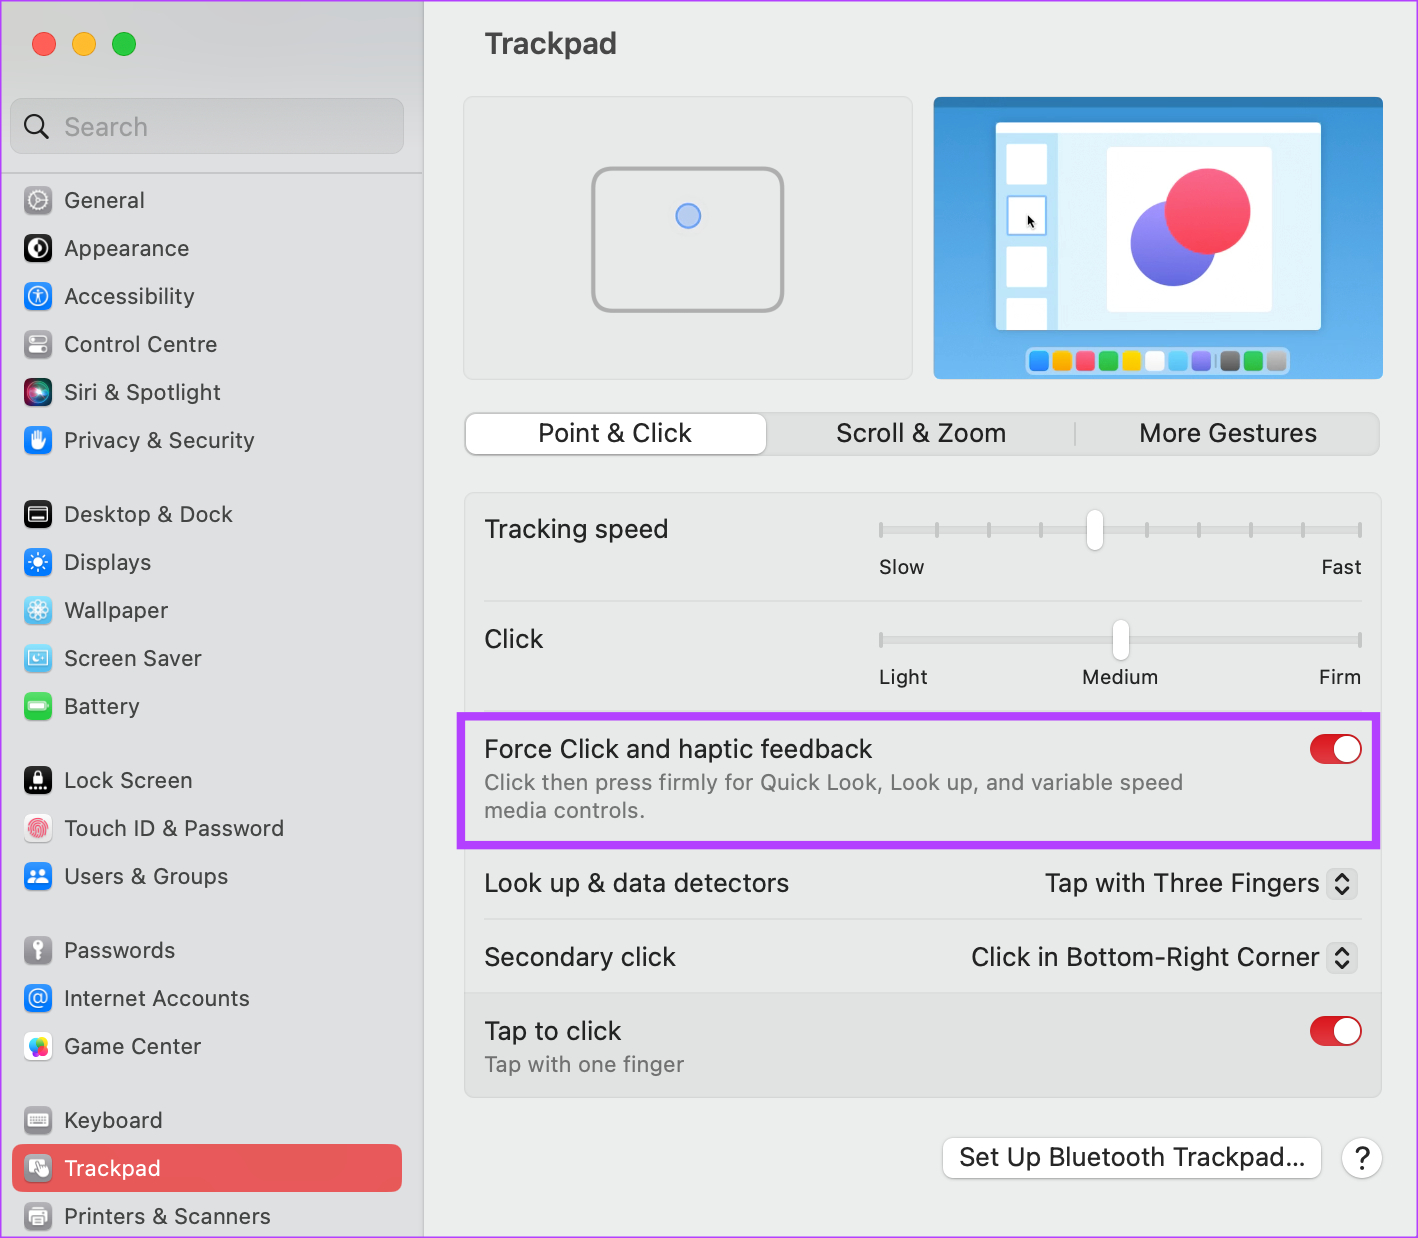
Try performing the trackpad gestures now to see if they work.
7. Reset NVRAM or PRAM
The PRAM (Parameter RAM) or NVRAM (Non-Volatile Random Access Memory) stores important data about your Mac, like the default values of the startup disk, virtual memory, and even some preferences of hardware components. Resetting the PRAM can help bring your touchpad gestures back to life. However, this is only for Intel-based MacBooks.
Refer to our guide on how to reset the PRAM on your MacBook for detailed instructions.
8. Update the Version of macOS
Some macOS versions can have peculiar issues . It’s possible that the current version of macOS you’re using is causing problems with trackpad gestures. So, update your Mac to the latest version of macOS to iron out any software bugs. Here’s how to do it.
Step 1: Click on the Apple logo on the top-left section of your screen. Select System Settings or System Preferences depending on your macOS version.

Step 2: Navigate to the General section.

Step 3: Head over to the Software Update tab. Your Mac will now search for updates to install.
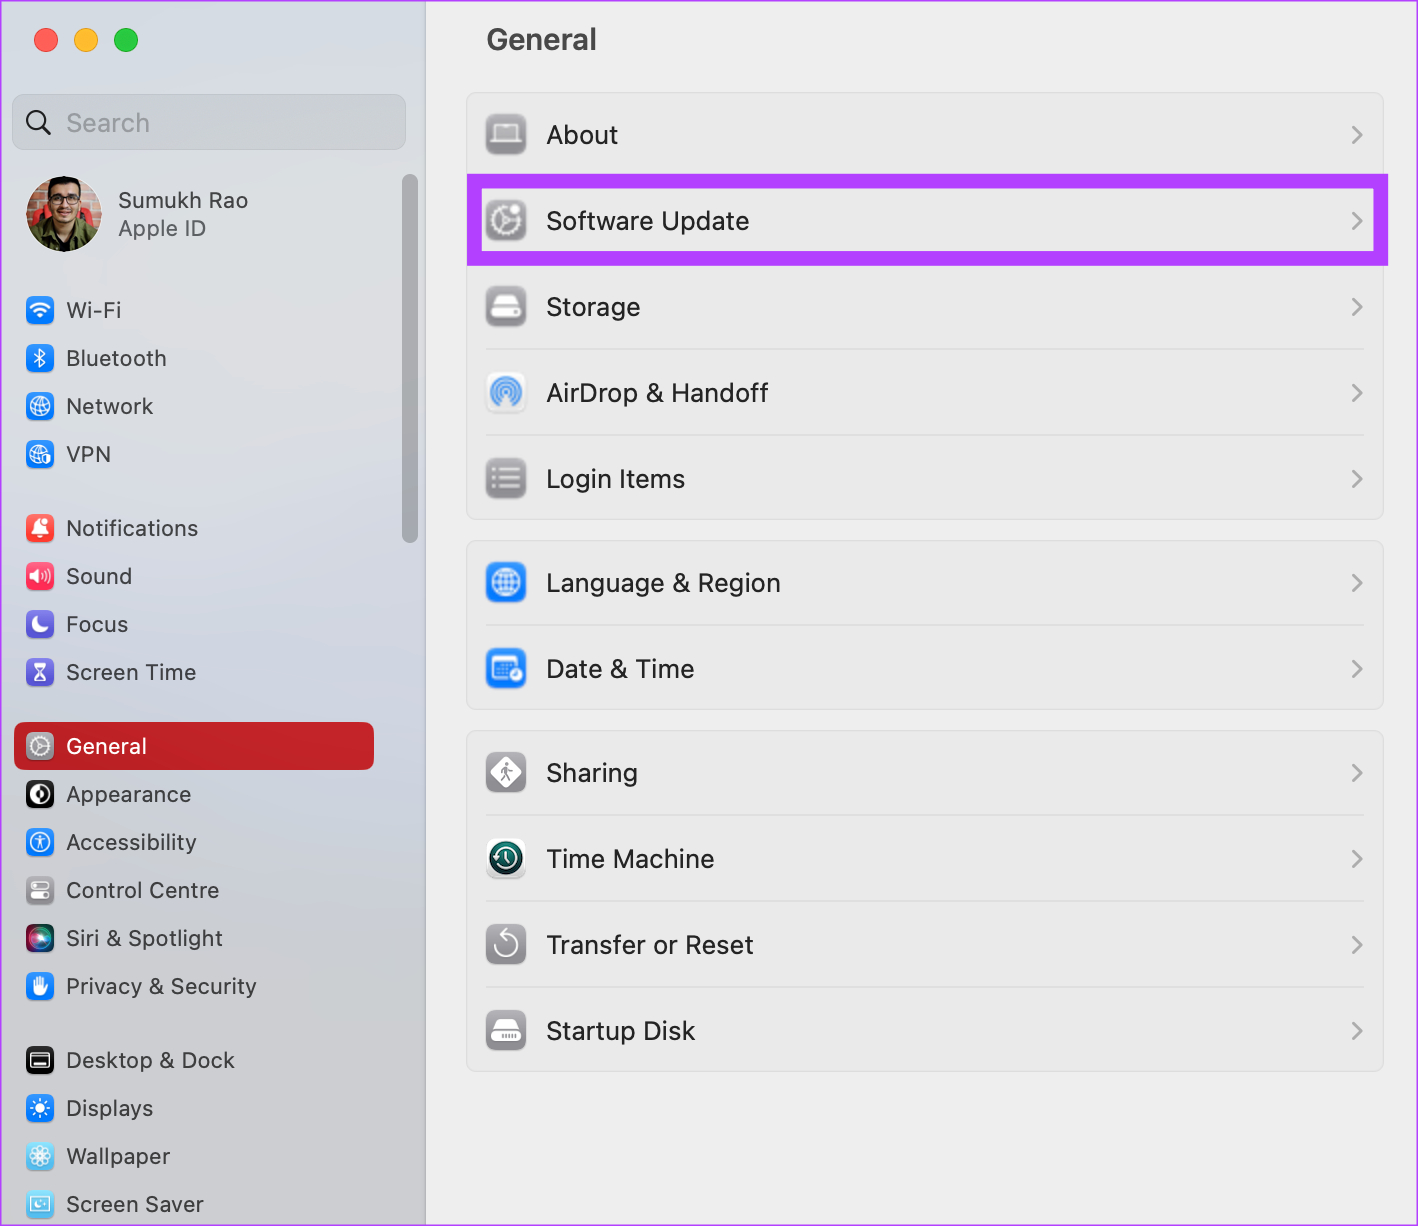
If there is an available update, hit the Update button and wait for it to install.
9. Factory Reset Your Mac
If none of the above solutions worked, it’s time to restore your Mac to the default settings — the way it came out of the box. A factory reset generally solves all problems so it should also help in case the trackpad for your MacBook isn’t working properly. Here’s how to do it.
However, note that this step wipes all the data on your Mac so ensure you have a backup before proceeding.
Note: This method is applicable only to Macs that run on Apple silicon (M series chips).
Step 1: Click on the Apple logo in the top-left and select System Settings.
Step 2: Navigate to the General option in the left pane.
Step 3: Select ‘Transfer or Reset’. This will give you the option to wipe your Mac.

Step 4: Hit the ‘Erase all Contents and Settings’ button. Enter your administrator credentials and click on Unlock.
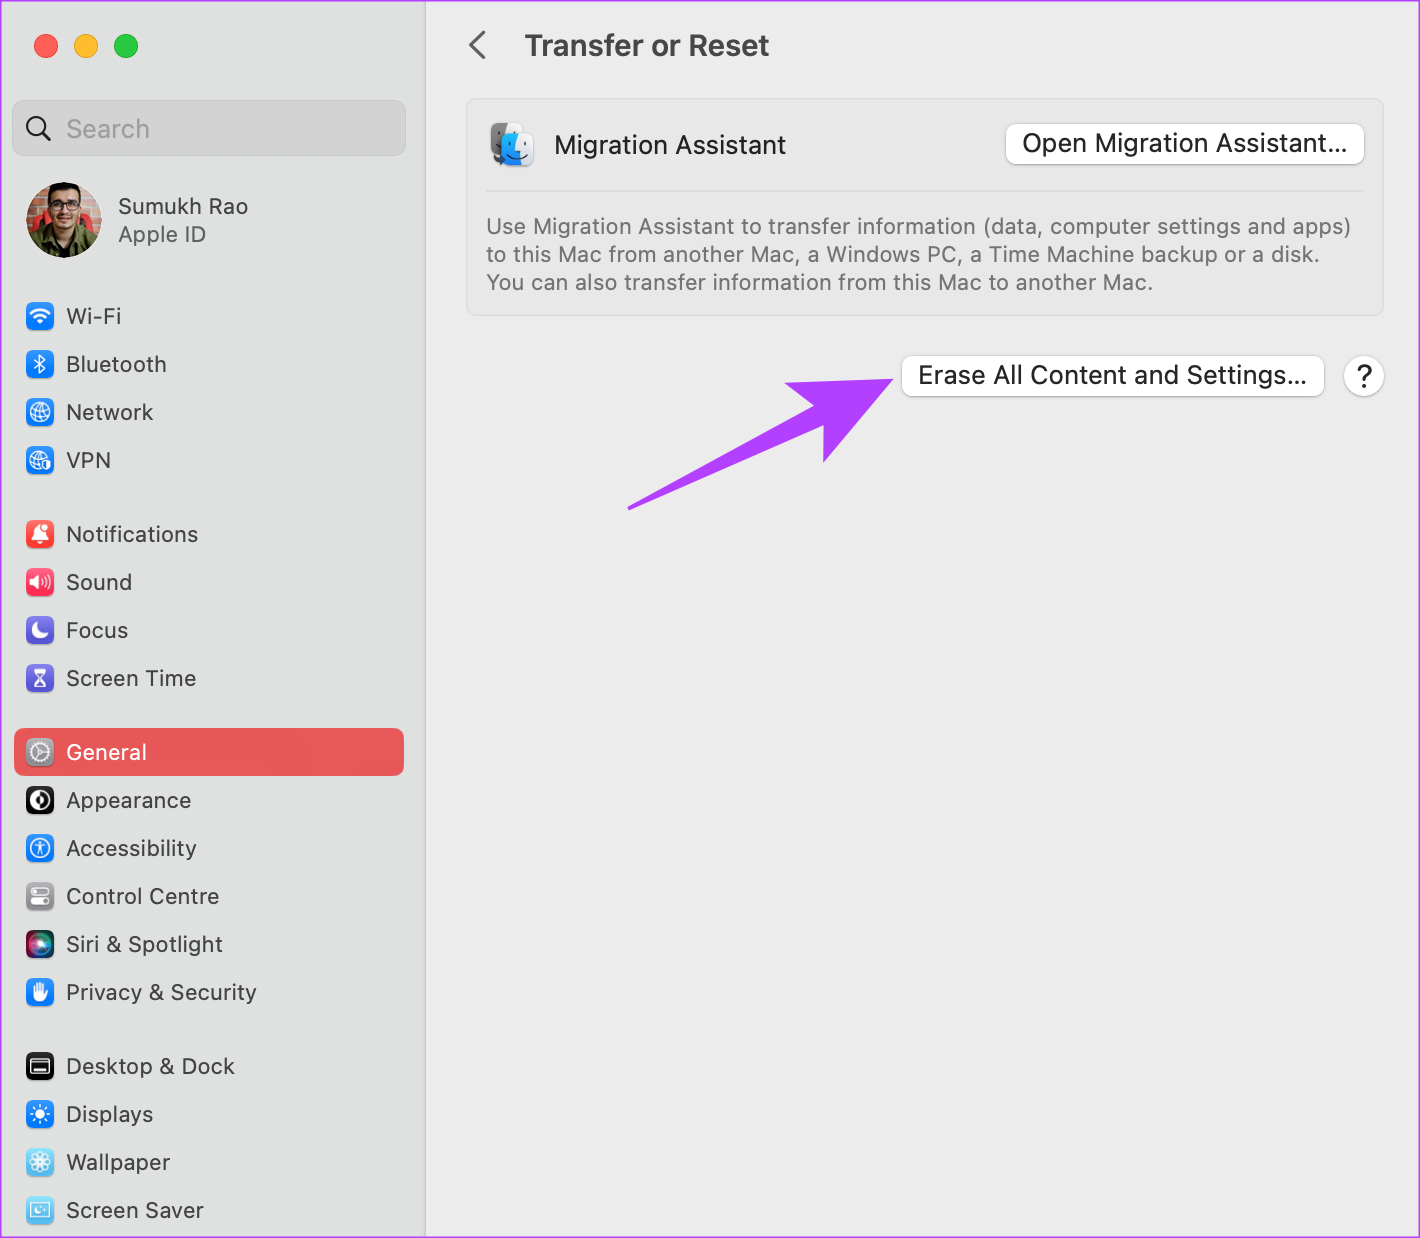
Now, follow the on-screen instructions to reset your Mac.
If you’re running on macOS Monterey, click on Apple menu > select System Preferences > click on System Preferences in the menu bar > select Erase All Content and Settings. Enter your credentials and follow the on-screen instructions.
10. Contact Apple Support
All the solutions mentioned above are related to software or basic hardware. So, if there’s a hardware issue that’s causing problems with the built-in trackpad, head over to the nearest Apple service center to get assistance from the Genius bar.
If your Mac is under warranty, you should ideally get a free repair.
FAQs for Mac Trackpad Gestures Not Working
Set the right gesture to trigger Mission Control from the trackpad settings. If one gesture doesn’t work, try setting something else. You can also use the Terminal method above to reset Mission Control.
Yes, Mac gestures are customizable from the System Settings section.
Restore Your Workflow With Gestures
If you’re accustomed to using gestures on your Mac trackpad, your workflow would surely take a hit if gestures are not working on your Mac. Don’t worry, though, as following these steps should help you restore the functionality.
Was this helpful?
Last updated on 17 February, 2023
The above article may contain affiliate links which help support Guiding Tech. However, it does not affect our editorial integrity. The content remains unbiased and authentic.
Leave a Reply Cancel reply
Your email address will not be published. Required fields are marked *

The article above may contain affiliate links which help support Guiding Tech. The content remains unbiased and authentic and will never affect our editorial integrity.
DID YOU KNOW
More in Mac
Top 3 Ways to Check Clipboard History on Mac
How To Set Up Out of Office Message in Mail App on Mac
Join the newsletter.
Get Guiding Tech articles delivered to your inbox.
How-To Geek
How to turn off the back and forward trackpad gestures on a mac.
If you use a Mac laptop to surf, you've probably noticed that lightly swiping two fingers left or right on the trackpad causes your web browser to go forward and back a page.
If you use a Mac laptop to surf, you've probably noticed that lightly swiping two fingers left or right on the trackpad causes your web browser to go forward and back a page. For some, this is a great. For others, it happens accidentally more often than it happens on purpose, which can be annoying.
Swiping to go back and forward does take some getting used to, and you need to be aware that this feature exists, or you're likely to quickly become frustrated. However, if you've simply no time or patience for this, then the feature can be turned off in just a few clicks.
To turn this off or change how this feature behaves, first open the System Preferences, then click on "Trackpad".
There are quite a few ways to use and change the Trackpad's behavior, and we provide a nice overview of them here. You can even use Trackpad gestures in the Finder's preview pane .
Today we want to click on the "More Gestures" tab, then uncheck the box next to "Swipe between pages" to disable the aforementioned feature.
Alternatively, if you like this feature but find you often activate it too often, then you can change it from two fingers to three, or you can change it to two or three fingers.
That's all there is to it. If you decide you do like this swipe feature and you want to restore it, simply go back into the Trackpad settings and turn it back on.
Related: How to Use Trackpad Gestures in Finder's Preview Pane
If you take the time to play around with the Trackpad settings, you'll find a lot of cool functionality, so don't be afraid to play around and see what best suits your personal user style. You may just find a function that really works well for you.

How to Zoom In and Out on a Mac: 4 Methods
Quick links, zoom in or out on your mac using keyboard shortcuts, zoom in and out in various apps on macos, zoom in and out using trackpad gestures on a mac, use your mac's built-in magnifier to zoom in.
Having difficulties viewing what's on your Mac? Zooming in will make everything a bit easier for you to see. macOS has several built-in methods to help you zoom in and out on your content. Let's look at them below.
The easiest way to zoom in and out is to use a keyboard shortcut on your Mac . There are three main keyboard shortcuts that will trigger the zoom feature in the vast majority of Mac apps:
- Cmd + Plus (+): Zoom in on your Mac.
- Cmd + Minus (-): Zoom out on your Mac.
- Cmd + Zero (0): Return to the default zoom level.
If you don't like using keyboard shortcuts, you can still access these common zoom options from the menu bar. Once you have the relevant app open, click the View tab and choose from Zoom In , Zoom Out , or Actual Size , depending on your needs.
Many built-in and third-party apps for macOS also have their own zoom features. You can use these options instead of the generic keyboard shortcuts mentioned earlier. Here are some examples of how to use the zoom feature in various popular apps for Mac:
- Safari: Go to Safari > Settings > Websites > Page Zoom from the menu bard. From the When visiting other websites dropdown menu, select your preferred zoom percentage.
- Google Chrome: Click the three-dot menu at the top-right corner and select the Plus ( +) or Minus (-) icons from the Zoom option.
- Preview: Click the plus (+) or minus (-) magnifier icon to zoom in and out on an image you opened.
- Photos: Press Z on your keyboard to zoom in or out on your photo by 100 percent, or use the zoom slider at the top to zoom in to a maximum of 400 percent.
There's also a way to zoom in and out using your Mac's trackpad gestures . You'll like this method if you're used to using the trackpad for all your tasks.
Click the Apple logo in the menu bar and go to System Settings > Trackpad . Select the Scroll & Zoom tab and ensure that Zoom in or out and Smart zoom are toggled on. This way, you can pinch or double-tap with two fingers on the trackpad to zoom in and out on your Mac.
In most cases, the general keyboard shortcuts and trackpad gestures mentioned above should be sufficient. However, you can't use them to zoom in on, say, the macOS menu bar or your Google Chrome tabs. If you need to zoom in on these parts of the macOS user interface, you can enable the built-in magnifier on your Mac.
Head to System Settings > Accessibility > Zoom and toggle on Use scroll gesture with modifier keys to zoom . For the Modifier key for scroll gesture option, choose Control from the dropdown menu. For Zoom style , choose Picture-in-Picture .
Now, to zoom in, press and hold the Control button on your keyboard. At the same time, use two fingers to swipe upwards on your trackpad for the magnifier window to appear. Swiping upwards multiple times will increase the zoom level.
To zoom out and exit the magnifier, swipe downwards with two fingers until the zoom level returns to default. The magnifier window will then disappear on its own.
You can customize this zoom setting in several ways. For instance, you can choose Full Screen or Split Screen to change how the zoomed-in parts of your Mac screen will appear. Instead of a small magnifier window, Split Screen will use a quarter of your Mac screen to display the zoomed section.
As another example, if you don't like swiping on your trackpad and using the modifier key to zoom, you can opt to enable Use Keyboard shortcuts to zoom . When this setting is enabled, you'll have three additional keyboard shortcuts that you can use to zoom in and out on your Mac:
- Option + Cmd + 8: Press this once to activate zoom. Press it again to deactivate.
- Option + Cmd + Equals(=): Press these keys to zoom in on your screen.
- Option + Cmd + Minus(-): Press these buttons to zoom out from your screen.
Overall, if you want to zoom in or out on your Mac, the easiest way is to use the three main keyboard shortcuts or the zoom options in the View tab. Popular apps such as Photos and Google Chrome also have their own zoom buttons that you can use.
If the generic options are not what you're looking for, there's still a built-in magnifier available. It's one of your Mac's Accessibility features for people with visual impairments . This function will allow you to zoom in anywhere on the user interface.
- a. Send us an email
- b. Anonymous form
- Buyer's Guide
- Upcoming Products
- Tips / Contact Us
- Podcast Instagram Facebook Twitter Mastodon YouTube Notifications RSS Newsletter
Apple Announces 'Let Loose' Event on May 7 Amid Rumors of New iPads
Apple has announced it will be holding a special event on Tuesday, May 7 at 7 a.m. Pacific Time (10 a.m. Eastern Time), with a live stream to be available on Apple.com and on YouTube as usual. The event invitation has a tagline of "Let Loose" and shows an artistic render of an Apple Pencil, suggesting that iPads will be a focus of the event.
During the event, Apple is expected to announce new iPad Pro and iPad Air models, along with updated Apple Pencil and Magic Keyboard accessories.
Here is everything that has been rumored:
- Two new iPad Pro models with the M3 chip, OLED displays, a thinner enclosure , thinner bezels , a matte screen option , a landscape-oriented front camera , other design changes, and possibly MagSafe wireless charging .
- Two new iPad Air models with the M2 chip and a landscape-oriented front camera , including a first-ever 12.9-inch iPad Air with a mini-LED display .
- A new Magic Keyboard for the iPad Pro with an aluminum enclosure , larger trackpad, and other design tweaks.
- A new Apple Pencil , which may have a new "squeeze" gesture for certain actions and support visionOS eventually .
Apple has not released any new iPads since late 2022, so this event has been a long time coming. The event will take place just over a month before Apple's annual developers conference WWDC, which runs from June 10 through June 14 .
Get weekly top MacRumors stories in your inbox.
Top Rated Comments
surprise Mark Gurman is dead wrong: [MEDIA=twitter]1764308680479265005[/MEDIA]
Popular Stories

Apple Cuts Vision Pro Shipments as Demand Falls 'Sharply Beyond Expectations'
Apple Reportedly Stops Production of FineWoven Accessories

iOS 17.5 Will Add These New Features to Your iPhone

Apple Finally Plans to Release a Calculator App for iPad Later This Year
PlayStation and SEGA Emulator for iPhone and Apple TV Coming to App Store [Updated]
Next article.

Our comprehensive guide highlighting every major new addition in iOS 17, plus how-tos that walk you through using the new features.

App Store changes for the EU, new emoji, Podcasts transcripts, and more.

Get the most out your iPhone 15 with our complete guide to all the new features.
A deep dive into new features in macOS Sonoma, big and small.

Revamped models with OLED displays, M3 chip, and redesigned Magic Keyboard accessory.
Updated 10.9-inch model and new 12.9-inch model, M2 chip expected.

Apple's annual Worldwide Developers Conference will kick off with a keynote on June 10.

Expected to see new AI-focused features and more. Preview coming at WWDC in June with public release in September.
Other Stories

1 day ago by Tim Hardwick

Get the most of your stay in Moscow

TOP-11 Moscow Parks to Visit
I have chosen the best 11 Moscow parks to visit and spend a beautiful time for you. Do not miss and choose one that you like the most – cycling, festivals, flowers, panoramic views and many other things are waiting for you!
Gorky Park (The Central Park of Culture and Leisure) – The main one of the Moscow Parks
In my opinion this park could be called the main park of the city. Why? Because of its huge territory, the central location and the amount of people visiting the park daily. It was founded in 1928 and in 2011 it was totally reconstructed. Now it pleases visitors with modern objects and soft green lawns.
- Oktybrskaya or Park Kultuty metro station, Krimsky Val, 9
The Gorky park is a the right choice for everyone! The youth will like a free WiFi, bicycles, skateboards and other rentals; the couples will enjoy spending time near the river, watching a sunset; parents will appreciate colorful playgrounds and a room for mother and child. Everyone can find something for themselves: from yoga classes to watching movies in a cozy summer cinema, from dance classes to volleyball playground. Gorky Park is also the venue for all kinds of exhibitions, festivals, events for children and adults. During the winter there is one of the biggest skating rinks in the park.
Museon Art Park – A Second Gorky they say
“Museon” is located on the opposite side of Krimsky Val street. And right now some people believe that Gorky and Museon together is a one space sharing the same beauty.
- Oktybrskaya or Park Kultuty metro station, Krimsky Val, 2
The Park of Arts was named this way because there is the largest composition of open-air sculptures in Russia. In its territory there are already more than 1000 unique exhibits: from monuments of the socialist realism era to various kinds of contemporary art. But this is not all the attractions of the park. In recent years, “Museon” has become an important cultural site of the city. The park regularly hold many different concerts, festivals, educational projects in the field of art and design. There is a Central House of the Artist, a comfortable summer cinema and other attractions on territory. Be sure to stroll pedestrian Crimean embankment, which looks like a modern park.
Neskuchny Garden – True Russian Nature is Here
Neskuchny garden is located on the right bank of the Moscow River. Today it is also seen as a part of the Gorky Park. This landscape park is one of the oldest in the city and is protected by the state. Its name was received from the Neskuchnoye Estate of Prince Trubetskoi which is still located in the park.
- Leninsky Prospekt metro station, Leninsky Prospect, 30
This park is famous mostly for its location close to the Gorky park. It is a quite place with true nature, lots of trees and squirrels and also ancient architecture. As in every park, there are sports and playgrounds, cafes and even a football field.
Zaryadye Park – 5 Steps Away From The Red Square
The area of this brand new park was opened only in September 2017 and located in the very heart of Moscow – right near the Red Square.
- Open from 10AM to 10PM
- Teatralnaya, Okhotnyi ryad, Ploschad Revolutsii
The park has 4 zones, each of them represent different parts of Russian landscapes. Above the river there is a floating bridge from where you get to see one of the best panoramic views on Moscow. Other attractions of the park are 5D cinema where you can take a flight above Moscow, few cafes and restaurants, pretty lakes with fishes and old preserved churches. In addition there is still being built a philharmonic hall, covered with a huge dome and an Ice cage where the temperature will always stay below zero degrees.
When you are on the Red Square do not miss it!
All-Russia Exhibition Center (VDNKh) – The Soviet Style Moscow Park
Park VDNKh – one of the most famous parks in Moscow. This park is one of the sights of the city as it hasn’t changed much since the Soviet era.
- VDNKh metro station, Prospect Mira, 119
The symbol of VDNKh is a fountain with 16 women symbolizing the friendship of the nations of the USSR. Around this fountain there are all the pavilions representing 16 republics. Now inside the pavilions you find various shops, cafes and exhibitions. If you go deep inside the park you will find a rocket Vostok and and an aircraft. What is funny the inside of the aircraft there is actually a photo exhibition. Near the northern entrance you there is a famous sculpture “Worker and Kolkhoz Woman”. It is extremely famous among Russians as all the movies by Mosfilm corporation used to start with the picture of this statue. But if you go further inside the park you will reach a very calm area. A lake is there, forest and birds singing. Since the park occupies a large area I suggest you to rent a bicycle.
Sokolniki Park – A Place For A Hunt Or For Leisure?
The park got its name because of the royal falconry, which took place there in the past when there was a dense forest. (Sokol means a falcon.) In 2011 it was significantly transformed: updated lawns, landscaped ponds and picnic areas, restored summer cinema and theater, a large rose garden, sports grounds, bicycle paths and other things.
- Sokolniki metro station, Sokolnichesky Val, 1, p. 1
From the main entrance along the alley you can walk to the Sokolniki circle, where 8 alleys form 9 sectors, in each of them you will find trees of the same breed. The park is famous for its rosary, as well as flower decoration. On the territory of the park there are concert halls, a library, amusement zone, dances zone and many many other attractions. In winter the park has a skating rink (a free of charge one) and ski runs. During the warm season you can rent a bicycle.
Tsaritsino Park – A Different World Inside Moscow
Here you can walk for hours, admiring the most beautiful nature and magnificent architecture.
- Open from 6AM to 12AM
- Tsaritsyno metro station, Dolsky, 1
The most amazing part of the park is the lake with a light and musical fountain. Every evening the fountain starts the show. Lights and music combined make you feel like you are not in Moscow but in a fairy tale. The park is also well equipped for sports lovers and healthy lifestyle. There are volleyball and basketball courts, a tennis court, sports facilities for acrobatics, bodybuilding equipment.
What I personally like about this park is the atmosphere. This place is actually far from the city center but I love going there anyway. Whenever I go there I feel like I left Moscow with all its hectic lifestyle. It is the place where I relax, enjoy myself or a company of my friends and feel kind of different. By the way totally suggested for a date!
Kolomenskoye Park – Combination Of Reserve and Architecture
The Kolomenskoye park is actually a Museum-Reserve. It is a former residence of Russian tsars and one of the most scenic places in Moscow.
- May to September – open from 8AM to 12AM, October to April – from 8AM to 9PM
- Kolomenskoye metro station, Andropov Ave, 39
Alike with Tsaritsino park Kolomenskoye park has its own special atmosphere with all the architecture, trees, ponds and even a river bank. The park regularly hosts various folk festivals and different fairs. In summer time you can play with kites or rent a bicycle and ride around the huge area of the park.
I love the view that you get on the city from one of the hills near the river. I love the apple trees alleys and the beautiful churches. It is also a bit far from the city center but yet worth going there. One of my best friends even celebrated her wedding there.
Aptekarsky Garden or Botanical garden of the Moscow State University – The Best Botanical Garden in The World
Aptekar in Russian language means a pharmacist so basically it is a pharmacist’s garden. It was founded in 1706 by Peter The Great for growing medicinal plants for the royal family. But later they moved it from under the walls of the Kremlin to the current location.
- Open from 10AM to 8PM
- Prospect Mira metro station, Prospekt Mira, 26
In the botanical garden there are no attractions and noisy crowds of tourists. The area of the garden is not as big as any other park in Moscow. And the entrance is not free. But this exactly what makes this park one of the most comfortable in the city. In the Aptekarsky garden they grow thousands of different plants, flowers and trees. Some of the trees are more than 300 years old. They held different festivals there: flowers festivals, sand and ice sculptures expositions.
For me it is one of the most beautiful parks not only in Moscow but in the world. I have never seen so many different flowers and plants anywhere else. And trust me I am a real park lover. And what is more the staff really takes care about every single tree or plant there, some of the trees have names and stories. I love it there and I think the price is really worth what you get.
Victory Park – A Park That Makes Us Remember The War
The park is located on the Poklonnaya Hill and it has one of the world’s largest memorial complexes dedicated to the World War II. The park was opened for the 50th anniversary of the Victory on May 9, 1995. It is also one of the main venues in the city for holding a variety of mass events.
- Park Pobedy metro station, Brothers Fonchenko, 7
On the main avenue of the park there are with 1418 fountains – exactly as long as the war lasted. Fountains make five water terraces, symbolizing five years of military operations. And in the center of the park there is the Museum of the Great Patriotic War. If you are interested in the history of the war do not miss it. The Poklonnaya Hill is a part of the park and from the hill you get one of the best views on the city of Moscow. And I could say this is the best place for watching the fireworks during the mass celebrations. But be aware it gets too crowded then. As in most of the other big parks you can rent a bicycle or rollers there.
Izmailovsky Park – A Mix of a Big Forest and Attractions
Izmaylovsky Park occupies a huge green territory, making up a large part of the Izmailovo district. The park consists of two parts: Izmaylovsky Park of Culture and Rest and the forest park of Izmailovo. First part is full of attractions and restaurants while the second one is like a real forest with pine trees, birch groves, beautiful clearings and ponds.
- Izmaylovskaya, Shosse Entuziastov or Partizanskaya metro stations, Izmaylovsky Park
It is easy to spend there a whole day. A large landscaped area and a lot of various entertainments for children and adults will help you not to get bored. An observation wheel, a boat station, children’s playgrounds, a dance floor, sports grounds, a skate park – all this is only a small part of the possible leisure activities. In the park there are bike paths and a rental services.
I don’t go there often to be honest. But the park is very very close whenever to a souvenir market on Partizanskaya metro station. And whenever the weather is nice and I have enough of free time I stroll through the alleys of the park and enjoy the nature. So if you are going to the souvenir market too and you have enough free time then do go to the park too.
5 thoughts on “TOP-11 Moscow Parks to Visit”
Pingback: Places to visit in Moscow – Sheran Bhattacharyya
Yes, sure 🙂 This is my top list 🙂
Yes, sure. These are my favorites!
I like this blog very much. Please keep sharing it in future too.
Thanks for sharing.
Thank you! 🙂
Leave a Comment Cancel Reply
Your email address will not be published. Required fields are marked *
macOS User Guide
- What’s in the menu bar?
- Work on the desktop
- Search with Spotlight
- Quickly change settings
- Get notifications
- Open apps from the Dock
- Organise your files in the Finder
- Connect to the Internet
- Browse the web
- Preview a file
- Take a screenshot
- Change your display’s brightness
- Adjust the volume
- Use trackpad and mouse gestures
- Use Touch ID
- Print documents
- Keyboard shortcuts
- Apps on your Mac
- Work with app windows
- Use apps in full screen
- Use apps in Split View
- Use Stage Manager
- Get apps from the App Store
- Install and reinstall apps from the App Store
- Install and uninstall other apps
- Create and work with documents
- Open documents
- Mark up files
- Combine files into a PDF
- Organise files on your desktop
- Organise files with folders
- Tag files and folders
- Back up files
- Restore files
- Change System Settings
- Choose your desktop wallpaper
- Add and customise widgets
- Use a screen saver
- Add a user or group
- Add your email and other accounts
- Automate tasks with Shortcuts
- Create Memoji
- Change your login picture
- Change the system language
- Make text and other items on the screen bigger
- Set up a Focus to stay on task
- Set up Screen Time for yourself
- Use Dictation
- Send emails
- Send text messages
- Make a FaceTime video call
- Edit photos and videos
- Use Live Text to interact with text in a photo
- Start a Quick Note
- Get directions
- Work across devices using Continuity
- Use iPhone as a webcam
- Use iPhone with Desk View
- Stream audio and video with AirPlay
- Use one keyboard and mouse to control Mac and iPad
- Hand off between devices
- Unlock your Mac with Apple Watch
- Make and receive phone calls on your Mac
- Sync music, books and more between devices
- Manage Apple ID settings
- Set your Apple ID picture
- What is iCloud?
- What is iCloud+?
- Store files in iCloud Drive
- Share and collaborate on files and folders
- Manage iCloud storage
- Use iCloud Photos
- What is Family Sharing?
- Set up Family Sharing
- Set up Screen Time for a child
- Share purchases with your family
- Watch and listen together with SharePlay
- Share a Photo Library
- Collaborate on projects
- Find content shared with you
- Find your family and friends
- Play games with your friends
- Listen to podcasts
- Watch TV shows and movies
- Read and listen to books
- Read the news
- Track stocks and the market
- Apple Music
- Apple Arcade
- Apple News+
- Podcast shows and channels
- Manage subscriptions in the App Store
- View Apple family subscriptions
- Guard your privacy
- Use Mail Privacy Protection
- Control access to your camera
- Use Sign in with Apple for apps and websites
- Set up your Mac to be secure
- Keep your data safe
- Create a passkey
- Understand passwords
- Keep your Apple ID secure
- Find a missing device
- Get started with accessibility features
- Connect an external display
- Use the built-in camera
- Connect a Bluetooth device
- Use AirPods with your Mac
- Optimise your Mac battery life
- Optimise storage space
- Burn CDs and DVDs
- Control accessories in your home
- Use Windows on your Mac
- Resources for your Mac
- Resources for your Apple devices
Use trackpad and mouse gestures on Mac
When you use an Apple trackpad or a Magic Mouse with your Mac, you can use gestures — such as click, tap, pinch and swipe — to zoom in on documents, browse through music or web pages, rotate photos, open Notification Centre and more.
Trackpad gestures
Use one or more fingers on the surface of your trackpad to click, tap, slide, swipe and more. For example, to move between pages of a document, swipe left or right with two fingers.
Open Trackpad settings for me
You can also turn off or customise gestures in Trackpad settings.
Mouse gestures
Use one or more fingers on the surface of your mouse to click, tap, slide or swipe items. For example, to move between pages of a document, swipe left or right with one finger.
Open Mouse settings for me
You can also turn off or customise gestures in Mouse settings.
- ALL MOSCOW TOURS
- Getting Russian Visa
- Top 10 Reasons To Go
- Things To Do In Moscow
- Sheremetyevo Airport
- Domodedovo Airport
- Vnukovo Airport
- Airports Transfer
- Layover in Moscow
- Best Moscow Hotels
- Best Moscow Hostels
- Art in Moscow
- Moscow Theatres
- Moscow Parks
- Free Attractions
- Walking Routes
- Sports in Moscow
- Shopping in Moscow
- The Moscow Metro
- Moscow Public Transport
- Taxi in Moscow
- Driving in Moscow
- Moscow Maps & Traffic
- Facts about Moscow – City Factsheet
- Expat Communities
- Groceries in Moscow
- Healthcare in Moscow
- Blogs about Moscow
- Flat Rentals
Moscow walking routes – streets, boulevards and more
To feel the magic atmosphere of the ancient and, at the same time, advanced Moscow you should discover the city with your own eyes and legs. We suggest you to walk around the famous places in the center of the city.
Arbat street walking route
Arbat is considered the oldest pedestrian street in Moscow. The name of this street was first mentioned in 1475. What is so special about this place – museum, theater scenes, marketplace, and a place for walking? Arbat is a kind of a cozy world where you can immerse yourself in the amazing creative atmosphere. The street became pedestrian in 1986. Soon, the renovated street attracted artists, musicians, street performers and vendors, creating custom creative world within Arbat. Contemporary Arbat is something like the ‘Montmartre’ where you can see people draw, sing, dance, recite poetry, oratory and much more. Perceiving its noble and intellectual traditions try to feel the uniqueness and charm of this corner of Moscow.

Restaurant «Prague»
1. Start a walk along Arbat at its eastern end – Arbatskaya Square. Here you can see a XIX century building – a famous restaurant – «Prague» . It has existed since the 1890s and always was a meeting place of the elite. The restaurant itself is now closed for a reconstruction.

«Khudogestvenniy» Cinema
2. The restaurant overlooks «Khudogestvenniy» Cinema – one of the oldest cinemas in Moscow. It was opened in 1909. Following the Arbat Street, you will see numerous beautiful buildings that represent mostly the XIX century architecture. However, the real treasures of Arbat hides in its lanes. Old building still preserve there

The Moscow State Museum «House of Burganov»
3. Turning to Bolshoy Afanasyevsky Lane you will find the beautiful Church of Athanasius and Cyril of Alexandria . Following the lane, go to the Moscow State Museum «House of Burganov» . A part of its exhibition, by the way, is clearly visible from the outside, so you can choose either to observe it from a distance or to visit this museum. Coincidentally, you will see many works of this artist travelling along this route. Next, go along the Sivtsev Vrazhek Lane all the way to Denezhny Lane, and from there, you will arrive to the Arbat.

The Melnikov House
4.If you turn left to the Krivoarbatsky Lane, you will find one of the city’s most remarkable examples of Constructivist architecture, an idealistic and futuristic movement that swept the Soviet Union in the 1920s. The Melnikov House is named after the architect who designed it in 1927. An experimental design, the house is formed from two connected cylinders and dotted with hexagonal windows. Plans to create a museum here exist, but even before that happens it is worth going to peer through the fence. Continue on Kirvoarbatsky Lane and turn right to go back to the Arbat. At the end of the lane, there will be the “Victor Tsoi Wall” , a one-of-a-kind tribute to the beloved musician.

The Vakhtangov Theater
5. At the Arbat Street you will see the Vakhtangov Theater and 6 a small fountain with golden figure of Princess Turandot, the title character of Carlo Gozzi play, and the most celebrated production of this theater.

Statue of Bulat Okudzhava
6. At the Plotnikov Lane, you will see bronze statue of Bulat Okudzhava , a famous Russian songwriter and singer, walks sure-footed to meet you. The sculptor G.V. Frangulyan did his best to recreate the spirit of the legendary Arbat so adored by the bard around this composition.

Church of the Savior on the Sands (Spasa-na-peskah)
7. Head straight up Spasopeskovsky Lane to see the pretty Church of the Savior on the Sands (Spasa-na-peskah) dating the 18th century. At the far end of the lane is the elegant Spaso House , home of the U.S. Ambassador to Russia. Make your way back to the Arbat, and turn right to continue walking west.

Statue of Russian poet, Alexander Pushkin and his wife Natalia Goncharova
8. On the right, you will notice a bronze statue of Russian poet, Alexander Pushkin, and his wife Natalia Goncharova. After their wedding at the nearby Great Ascension Church, the couple lived in the blue house on the left, which is now the Pushkin House-Museum .

Ministry of Foreign Affairs
9. The Arbat ends at Smolenskaya-Sennaya Square, which is dominated by the massive Ministry of Foreign Affairs . This is one of seven skyscrapers known as the Seven Sisters, which were built in 1947 to commemorate Moscow’s 800th anniversary.
Moscow boulevards walking route

Monument to Nikolai Gogol
1. Start the walk from Kropotkinskaya metro station and follow the boulevards clockwise. You will find yourself at Gogolevsky Boulevard , the symbolic start of the Boulevard Ring. It stretched from Prechistenskie Gate Square to Arbat Gate Square. A striking feature of this boulevard is that it is a three-tiered – external, middle and inner parts are at different heights. There are many houses and mansions of the late nineteenth century. Almost in the center of the boulevard is a monument to Mikhail Sholokhov. Two departments of Moscow Museum of Modern Art are located here. At the end of the boulevard, you can see a monument to Nikolai Gogol.

Fountain rotunda «Natalia and Alexander»
2. Coming over the Arbat Square, you will find yourself at Nikitsky Boulevard , with lots of beautiful buildings and nice cafes. The mansion of Count Alexander Tolstoy was situated here. The Niktitsky Gate completes the Boulevard. On your left, you will see fountain rotunda «Natalia and Alexander», established in honor of the 200th anniversary of Alexander Pushkin’s birth.

TASS Main Entrance
3. Moving forward you get to the longest boulevard of the Boulevard Ring – Tverskoy . At the beginning of the Boulevard, you will see the monument to Timiryazev. Also, note the TASS building on your right. In the center of the recently renovated Boulevard is a monument to Sergei Yesenin.

Monument to composer Sergei Rachmaninoff
4. Crossing the Tverskaya Street, you will get to the Pushkin square where you will see the writer’s monument. Right behind the Pushkinsky Cinema begins the Strastnoy Boulevard , the widest at the Boulevard Ring. Here you will find a monument to composer Sergei Rachmaninoff and a monument to the actor and poet Vladimir Vysotsky.

Petrovsky Boulevard
5. Strastnoy Boulevard ends by Petrovskiye Gate and Petrovsky Boulevard begins. Here you will find many architectural and historical monuments.

Female Rogdestvensky Monastery
6. Rogestvensky Boulevard starts from the Trubnaya Square. The history of this place begins with the appearance of female Rogdestvensky and men Sretensky Monasteries in the area. In 2012, worship the cross in honor of the patroness St. Euphrosyne of Moscow was established at the boulevard.

Monument to Nadezhda Krupskaya
7. Go further to Sretensky Boulevard , the shortest boulevard of the Boulevard Ring. In the beginning of the boulevard is a monument to Nadezhda Krupskaya.

Chistoprudny Boulevard
8. At the entrance to Chistoprudny Boulevard , you will see a monument to Alexander Griboyedov, and later – a monument to Kazakh poet Abai Kunanbayev. Chistoprudniy Boulevard is the only one at the Boulevard Ring where you will find the pond – “Pure ponds”(Chistie Prudi).

Pokrovsky Boulevard
9. Coming through Pokrovsky Gates Square and Khokhlovskaya Square you will appear at Pokrovsky Boulevard that flows into the Yauzsky Boulevard . They are not so well known as Tverskoy or Chistoprudniy Boulevard, but they are also quite remarkable.

Monument to Motherland Border Guards
10. Ustyinsky drive completes the Boulevard Ring. Here, in the Yauzskie Gate park area you will find a monument to Motherland Border Guards. Perhaps we have not told you everything about the Boulevard Ring. Just have a walk right at the border of unpreserved White City and see wonderful nowadays Moscow through one of its best parts.
Kitay-gorod walking route
Kitai-gorod is one of the oldest and the most interesting areas of Moscow. It was a commercial and business district in the years before the Revolution. Here you will see traces of medieval Moscow.

Fragments of the foundation and the base of the Varvarskaya tower
1. Start your walk right at the Kitay-gorod metro station . In the wall of the underpass, you will see fragments of the foundation and the base of the Varvarskaya tower of the Kitay-Gorod. Kitaygorodskaya Wall was built in Moscow in the 1530s by architect Petrok Maly. It had 14 towers and was more than 2.5 km length. The Wall began from the Arsenal Tower and ended at Beklemishevskaya Tower of the Kremlin. It was almost completely demolished in the 1930s – 1950s.

Temple of St. George on Pskov Hill
2. Go to Varvarka Street , into the area of the former medieval fortress.The street is real reserve of old Moscow: ancient temple of St. George on Pskov Hill, the cathedral of the former Znamensky Monastery and Chambers of the Romanov Boyars are situated in the street.

Temple of the Trinity in Nikitniki of XVII century
3. If you go to the Ipatievsky Lane on the opposite side of Varvarka, then at the corner of the Nikitinskiy lane you will see the beautiful temple of the Trinity in Nikitniki of XVII century.

Gostinniy Dvor
4. Return to Varvarka and continue. To your left you will see one of the oldest buildings in Moscow – Old English Court , built in the late XV century by merchant Ivan Bobrischevym. On your right, there is Gostinniy Dvor . The first mention of it dates to the beginning of the XVI century, and at the end of XVIII century, it was rebuilt by architect Quarenghi. Now it hosts an exhibition hall, shops, restaurants and cafes. Not far from Gostinniy Dvor, Barbara the Martyr Church, which gave its name to the street, is located.

Burse Square
5. Turn right to the Crystal Lane (as you might guess, there used to trade crystal and glass)and go on to Ilyinka Street . The street is named after the ancient Elias Monastery. It was abolished, and the Church of Elijah the Prophet was built in its place. Follow the Ilyinka Street to the Burse Square. Exchange building (now a CCI of Russia) is on your right. Like a hundred years ago, it is – one of the main business areas of the capital: ministries, banks, representative offices of various companies. Many buildings have preserved from pre-revolutionary times. Near the Burse Square a beautiful Epiphany Cathedral of the Epiphany Monastery – one of the oldest in Moscow is located.

Nikolskaya Street
6. Reaching the Big Cherkassky Lane , turn left and walk along the early XIX century buildings to Nikolskaya Street. It is, perhaps, the busiest street of Kitay-Gorod. At all times it was one of the main streets of Moscow. There is a wide variety of shops, malls, restaurants, cafes and clubs.

Shopping Center «Sheremetyevsky»
7. Nikolskaya Street has always been famous for many bookshops. In the beginning of the XIX century, there were 26 out of 31 Moscow bookstores!

Tretyakovsky Passage
8. Go by the street towards the Kremlin. Right in the arch – Tretyakovsky Passage – a street with fashionable shops of famous international brands. This passage was arranged in the 1870s Tretyakov brothers. The Building in the Gothic style, with a sundial, bas-relief images of a lion and the unicorn is a former Synod printing. The house was built in the 1810s. Here, in 1564 the first Russian printed book “The Apostle» was published. Russian State Humanitarian University is now located here. Walk along the Nicholskaya Street and get to the Red Square, from where you can start a wonderful study of the Moscow Kremlin.
Zamoskvorechye walking route
The Zamoskvorechye District, located at the lower bank of the Moskva River, has almost undergone any renovation. Varied in style, Moscow churches XVII – XIX centuries, the Exchequers and the homes of famous Moscow merchants retain the image of old Moscow.
The first mention of the Zamoskvorechye in the documents refers to 1365, when first settlements began to form here. Since the second half of the XIX century, the area was popular among intellectuals. Outstanding figures of Russian culture lived and worked here. For example, young Lev Tolstoy rented an apartment in the merchant’s house in 1854-1855 in Pjatnitskaya Street. Fyodor Dostoevsky often visited his aunt in a house on Bolshaya Ordynka (known as Kumaninskoe farmstead). This area is closely associated with the names of Anna Akhmatova, the famous Russian publisher and educator Ivan Sytina. The Soviet era did not cause serious damage to Zamoskvorechye and despite modern development, here preserved historical architecture.
In 2013, a new pedestrian zone near the Tretyakovskaya Gallery, and includes Pyatnitskaya street Klimentovskiy, Ordinsky, Lavrushinsky Lanes and Kadashevskaya embankment, appeared in Zamoskvorechye.

Pyatnitskaya Street
1. Start a walk from Novokuznetskaya metro station . Go through Pyatnitskaya Street to the vintage Klimentovskiy Lane that connects Bolshaya Tatarskaya and Bolshaya Ordynka streets.
Temple of the Holy Martyr Clement
2. Here you can see a wonderful piece of the XVIII century architecture – the Temple of the Holy Martyr Clement , Pope (1762-1774). The northern side of Klimentovskiy Lane forms a small district occupied by shops and cafes.

Church of All the Afflicted
3. Crossing Bolshaya Ordynka not forget to look in Ordynsky dead end , located right on your way.there you can see the Church of All the Afflicted.

The State Tretyakov Gallery
4. One of the main attractions of the pedestrian zone – The State Tretyakov Gallery is situated in Lavrushinsky Lane. The famous museum occupies the even side of the lane, called in the XVIII century by the name of the proprietor Lavrushina.

Sculptured composition by M. Shemyakin
5. Going to the Kadasheskaya Embankment , you will cross the drainage channel by Luzhkov Bridge and find yourself on Bolotnaya embankment. Nearby, at the Bolotnaya Square, you can find sculptured composition by M. Shemyakin and monument to the great Russian artist Repin. Then you can continue your walk and visit the «Red October», there are many restaurants, cafes and Lumiere Brothers Photography Center.
Our Private Tours in Moscow
Gastronomic moscow private tour, «day two» moscow private tour, layover in moscow tailor-made private tour, whole day in moscow private tour, all-in-one moscow essential private tour, moscow metro & stalin skyscrapers private tour, moscow art & design private tour, soviet moscow historical & heritage private tour, tour guide jobs →.
Every year we host more and more private tours in English, Russian and other languages for travelers from all over the world. They need best service, amazing stories and deep history knowledge. If you want to become our guide, please write us.
Contact Info
+7 495 166-72-69
119019 Moscow, Russia, Filippovskiy per. 7, 1
Mon - Sun 10.00 - 18.00

IMAGES
VIDEO
COMMENTS
You can turn a gesture off, change the type of gesture, and learn which gestures work with your Mac. Trackpad gestures require a Magic Trackpad or built-in Multi-Touch trackpad. If your trackpad supports Force Touch, you can also Force click and get haptic feedback. Tap to click. Tap with one finger to click.
Click the Apple menu and select System Settings. Scroll down in the left sidebar, click Trackpad, and navigate to the Scroll & Zoom tab. Under the Scroll & Zoom tab, toggle on the Natural scrolling switch. Once you've enabled Natural Scrolling, the scrolling direction on your trackpad will be inverted.
1. Scroll Direction. The Scroll Direction: Natural gesture is at the top of the Scroll & Zoom tab. When enabled, it makes pages or apps scroll in "natural" directions when you scroll using trackpad. This means that the page goes up when you slide two fingers up and goes down when you slide them down. If disabled, the scroll works in the ...
Turning on all of the possible Mac trackpad gestures will take a few moments. You'll need to go to System Preferences -> Trackpad, and navigate through the various tabs enabling what you want to ...
Tap to click. Apple. Tapping with one finger to click is a logical starting point for teaching someone how to use a trackpad. This most essential gesture allows the user to click on linked text ...
All of these gestures can be used on a built-in and an external trackpad. 1. Click or Select an Item. Let's start with basic Mac Trackpad gestures. Tap or click with one finger to click/select ...
Scrolling is simple -- place two fingers on your trackpad and move them up, down, left, or right to scroll in any direction. Zoom in our out in a browser or another document with a pinch-to-zoom gesture. Place two fingers on the trackpad and move them together to zoom in or move them apart to zoom out. Perform a "smart zoom" by double-tapping ...
Introduction to Mac Trackpad Gestures. The Mac trackpad, with its Multi-Touch capabilities, is a hallmark of Apple's design philosophy, blending functionality with simplicity. ... Are there any gestures specific to Safari? Yes, gestures like two-finger swipe for back/forward and pinch to zoom are very useful in Safari.
Click on the Apple menu in the top-left corner of the screen and open System Preferences (System Settings in macOS 13). Scroll down the menu on the left and select Trackpad, which sits just below ...
Control your Mac with gestures: Enabling gestures for the Magic Mouse and Magic Trackpad. If you own a MacBook Air, MacBook Pro, or even use a Magic Trackpad or Magic Mouse with your iMac or Mac ...
This gesture (called App Exposé) shows any open windows for the current app next to each other, with a list of recent documents running along the bottom of your screen. To run this gesture, you ...
Tap to zoom: Tap the trackpad with two fingers simultaneously to zoom in on a page in Safari or a PDF. Swipe to navigate: Swipe with two fingers to the left or right to flip through Web pages and ...
You can turn a gesture off, change the type of gesture and find out which gestures work with your Mac. Trackpad gestures require a Magic Trackpad or built-in Multi-Touch trackpad. If your trackpad supports Force Touch, you can also Force click and get haptic feedback. Tap to click. Tap with one finger to click.
For this example, pick Trackpad. In the pane on the left, you can choose which apps will support the new gestures. They can be Global, work just in the Finder or other specific apps (just click the plus icon to add them). Once you've chosen all apps, click the Add New Gesture button at the bottom of the main pane.
MacBook Pro m1 Pro trackpad gestures stops working Does anyone know, if apple are working on a fix, that causes three and 4 finger gestures not to work on the trackpad? It seems to have gotten worse after updating to Monterey 12.1. -A fast temporary fix, is to stop the Dock process through activity monitor, but im getting a little tired of doing the ones or twice a day.
Here's how you can change it if that's the case. Step 1: Click on the Apple logo in the top-left corner of your screen. Select System Settings. If your Mac is running macOS Monterey or earlier ...
To turn this off or change how this feature behaves, first open the System Preferences, then click on "Trackpad". There are quite a few ways to use and change the Trackpad's behavior, and we provide a nice overview of them here. You can even use Trackpad gestures in the Finder's preview pane . Today we want to click on the "More Gestures" tab ...
Use Keyboard shortcuts to zoom. When this setting is enabled, you'll have three additional keyboard shortcuts that you can use to zoom in and out on your Mac: Option + Cmd + 8: Press this once to ...
Losiny Ostrov. Losiny Ostrov (Elk Island Park) Losiny Ostrov (Elk Island Park) is located at the north of Moscow. It covers 22 km from the west to the east and 10 km from the north to the south and it's one of the most beautiful national parks in Moscow. Two rivers, Yausa and Pechorka begin here.
Apple has announced it will be holding a special event on Tuesday, May 7 at 7 a.m. Pacific Time (10 a.m. Eastern Time), with a live stream to be available on Apple.com and on YouTube as usual. The ...
The Kolomenskoye park is actually a Museum-Reserve. It is a former residence of Russian tsars and one of the most scenic places in Moscow. Free. May to September - open from 8AM to 12AM, October to April - from 8AM to 9PM. Kolomenskoye metro station, Andropov Ave, 39.
Moscow Wallpapers. Feb 16, 2018 3336 views 774 downloads. Explore a curated colection of Moscow Wallpapers Images for your Desktop, Mobile and Tablet screens. We've gathered more than 5 Million Images uploaded by our users and sorted them by the most popular ones. Follow the vibe and change your wallpaper every day!
To view the mouse gestures you can use on your Mac and a brief video demonstrating each gesture, choose Apple menu > System Settings, then click Mouse in the sidebar. (You may need to scroll down.) You can also turn off or customise gestures in Mouse settings. With an Apple trackpad or Magic Mouse, you can use gestures like pinch or swipe to ...
Moscow boulevards walking route. Monument to Nikolai Gogol. 1. Start the walk from Kropotkinskaya metro station and follow the boulevards clockwise. You will find yourself at Gogolevsky Boulevard, the symbolic start of the Boulevard Ring. It stretched from Prechistenskie Gate Square to Arbat Gate Square.