

RV With The Tanners
Congratulations on your pending rv purchase.
You can download our Pre-Delivery Inspection (PDI) document by clicking on the PDF icon below. Once you download the file, it might be helpful to send a copy to your dealer, so they know you will need ~4 hours to complete.
If this is your first RV and you're looking for a list of items you should purchase prior to picking up your RV, then just click here . These are some items we feel might make your RV life a bit more comfortable and enjoyable as you start your RV adventures.
Enjoy your RV!! Melinda & Jim
Disclaimer...I am not a Professional RV inspector nor am I licensed to do any RV repair. This document is simply a list of information I find helpful. By using this document, you take full responsibility for your RV's inspection. This list is not considered an exhaustive list of items to inspect.
Click the PDF icon to open PDI.
You can save or print from there., if you find the pdi helpful, please consider subscribing to our youtube channel, by clicking on our picture..

- Books & Merch
- Gear We Use
- National & State Parks
- Best RV Campgrounds in New Hampshire
- Best RV Campgrounds in NC Mountains
- Best Florida Beach RV Campgrounds
- South Dakota
- The Great Lakes
- Campers Swear By This Portable Device That Keeps Dogs Safe -The Best Portable Dog Fence for Camping (2024)
- Mosquitos and bugs
- Camping Clothes
- Camping Gifts
- Camping Internet
- 5 Best RV Backup Cameras for RV & Trailer
- 7 Best Screen Tents for Camping (2024)
- Best RV Campgrounds in California
- 5 Best Key West RV Parks
- 9 Best RV Campgrounds in New Jersey
- Camping Reservations
- Campground Comparisons
- Cheap or FREE RV Camping Sites
- Best RV Campground Memberships & Clubs
- Boondocking 101
- Boondocking Adventures
- RV Internet
- What Do Flamingos and Upside Down Pineapples Mean?
- Where to Find FREE or Cheap RV Sites Camping
- RV Winter Camping
- RV Show List for 2024
- 17 Best Camper Vans 2024 (New Class B RVs Available!)
35 Critical Things to Know Before You Take Delivery of a New RV
Delivery day for your rv is a time of great excitement, but before you drive off, here are 35 critical things to know before you take delivery of a new rv..
- 1 Delivery day for your RV is a time of great excitement, but before you drive off, here are 35 critical things to know before you take delivery of a new RV.
- 2 The first of our things to know before you take delivery of a new RV starts the night before
- 3 Who's doing the walkthrough?
- 4 Record the walkthrough
- 5 Things to know before you take delivery of a new RV
- 6 Curious about the gear, gadgets, accessories, and RV products Mike & Jennifer use and recommend?
This article was written to answer an email I received from one of our followers who asked if I had a checklist of things to ask at the dealership on the final walkthrough before taking delivery.
And although we have offered some suggestions from time to time about what to do during the walkthrough – that’s what dealers call it when they take you through the RV just before you drive off – it has never been in detail.
So I sat down at the computer and gave it some serious thought.
The result is this article, which will cover what we think are the key things to know before you take delivery of a new RV. These are all important items to ask about and get demonstrated on the lot.
The first of our things to know before you take delivery of a new RV starts the night before
My first suggestion is before you even get to the dealership and should be done at home, the night before the walkthrough.
Go to the manufacturer’s website or the dealer’s inventory post on your unit and read everything you can. Jot down anything that's not clear.
Who's doing the walkthrough?
Next, it’s important to know just who is giving you the walkthrough. Is it the salesperson who sold it to you, or just whoever was free on the lot that day?
Often, we’re sorry to say, once they get your signature on the bottom line, the salesperson moves on and some dealers have “walkthrough guys,” who are at best generalists, who know a little about all RVs or worse, somebody who may nothing about your RV model but was drafted for the job because they didn’t have anything to do when you showed up.
You'll want to know if they're RVers themselves. How familiar are they with your particular model? Don’t let them tell you they all work alike. They don’t. Yours is unique.
If you are not comfortable with the person you get, stop the walkthrough and say you will complete the purchase when you get someone who has more expertise in your model.
Dealers will hate me for saying this. You, though, will thank me in the long run. That’s what counts.
Record the walkthrough
The third tip we have is, assuming you have a knowledgeable “walkthrough” guy, get out your cell phone and video record it. Have them show you, not just tell you. After they do it, you do it. Get it all on video. Take notes, too. Don’t worry about it taking a long time. Make sure you know.
The video will come in very handy down the line as you get to know your new RV.
Lastly, here is my mega list of the key things to know before you take delivery of a new RV. These are the things we think you need to have explained and demonstrated. There may be more. But these will give you the basic background to get out there and use that RV.
Many of these things to know before you take delivery of a new RV will be detailed in the thick manuals and instructions that come with the RV. Review them when you can and frequently go back to anything that is confusing. But go over these questions, too, at the walk-through.
Ready? Here they are:
Things to know before you take delivery of a new RV
- Hot water heater – How does it turn on? What controls does it have? How should they be set? How long does it take for hot water to come out?
- Where do you fill the fresh water tank?
- Where and how do you drain the fresh water tank?
- Where and how do you attach to city water?
- Is there a water filter in the RV? How often should it be changed?
- How do you winterize the plumbing system?
- How do you dewinterize the plumbing system?
- How do you drain the black water tanks? Get the hose out and make sure you understand how it works.
- How do you drain the gray water tanks?
- Can you fill the fresh water tank from a jug? How so?
- How do you sanitize the water – black and grey – tanks?
- What should you use in the toilet to control odors?
- How do you plug into shore power?
- When on shore power, how should the battery switches and inverter be set?
- How do you start the generator?
- Is there an auto-start feature when the house batteries get low? How does it work?
- How often do you have to “exercise” the generator?
- How do you check the oil level in the generator, and what maintenance does it require?
- Do you have a slide? How does it work? Does the emergency brake have to be set for it to work? Does it have to be level before the slides go out?
- What if the slide sticks open?
- Is there a lock to keep the slide from opening while driving?
- How do you maintain the slide?
- What kind of refrigerator do you have, and what powers it – shore power, LP, generator, engine fuel? Does it automatically switch to whatever power is there? How does it work? How level does it have to be?
- How does your air conditioner work?
- If you have a microwave/convection oven, how is the convection oven different than the microwave?
- If you have automatic levelers, what do you do if one of them refuses to retract?
- Do you have surge protection for your RV’s electrical system to protect it from bad shore power at the pedestal?
- How does the bed work? Is it a sofa that makes into a bed or a Murphy bed? If so, have it demonstrated.
- Where are the fuses located? The breakers?
- How does the heater work?
- How do the rooftop fans work?
- How does the awning work? What happens if it sticks open?
- How does the TV work? Using the antenna? Hooking up to cable? Is there prewiring for a satellite system?
- Does your RV have an automatic sliding step? How and where do you lubricate it? How often? Where is the switch that allows it to stay out when you’re camped?
- Finally, what do you do if you have a problem on the road? Most manufacturers have free road service. Make sure you have the number and know what is covered and what isn’t.
Whew! That’s a lot of stuff. But, as I said, those are all really important things to know before you take delivery of a new RV so you understand and can properly operate your new RV.
It’s at the final walkthrough that you can best start to see and learn the answers.
If you are still trying to figure out which type of RV to purchase – take a look at a few of these posts.

Curious about the gear, gadgets, accessories, and RV products Mike & Jennifer use and recommend?
On this RV Lifestyle Travel blog , our RV Podcast and our RV Lifestyle YouTube Channel, we mention all sorts of RV-related products and gear that we use, So we created a special page that links to them. We update this all the time. CLICK HERE to go to it directly. Have you caught one of our Amazon LIVE events yet? Just go here and Follow us – to be notified every time we go live.
Published on 2024-01-06
Mike Wendland is a multiple Emmy-award-winning Journalist, Podcaster, YouTuber, and Blogger, who has traveled with his wife, Jennifer, all over North America in an RV, sharing adventures and reviewing RV, Camping, Outdoor, Travel and Tech Gear for the past 12 years. They are leading industry experts in RV living and have written 18 travel books.
One Response to “35 Critical Things to Know Before You Take Delivery of a New RV”
July 29, 2021at3:43 pm , 35 Critical Things To Know Before You Take Delivery Of A New RV - 2boomersandababy said:
[…] Source link […]
Leave a Reply Cancel reply
Your email address will not be published. Required fields are marked *
Related Posts

7 Best RV Kitchen Gadgets for Beverages

7 Reasons Why You Need to Do a Fall Camping Trip
 4")
5 Best Camping Chairs for Your RV (2024)
- January 2024
- December 2023
- September 2023
- August 2023
- February 2023
- December 2022
- November 2022
- September 2022
- August 2022
- Accessories
- Beginner’s Guide
- Buyers Guide
- Buyers Resource
- Comparisons
- RV Cleaning
- RV Maintenance
- Travel Guides
- Uncategorized
- Entries feed
- Comments feed
- WordPress.org
Here’s How To Paint Plastic RV Sink [Easy Tips Ahead]

Largest US RV Manufacturers & Brands They Own

Which RV Manufacturers Use Lippert Frames?
The essential pre-delivery inspection checklist for new rv owners.

Average Cost of New Travel Trailers: Detailed Analysis
Embarking on a new adventure with your RV can be thrilling, but before hitting the road, conducting a thorough pre-delivery inspection (PDI) is essential. A PDI ensures that your new RV is safe, comfortable, and tailor-made for your travels. By methodically inspecting your new RV’s exterior and interior, you can identify any potential issues that may arise and ensure everything is working as it should.
Understanding the various systems within your RV, such as the electrical, plumbing, and heating, is necessary for conducting a meaningful pre-delivery inspection. Additionally, familiarizing yourself with the required maintenance schedules and tips will prolong your RV’s life and allow you to enjoy smoother travels. Taking the time to assess every aspect of your new vehicle, from its safety features and tech connectivity to customization options and final documentation, will give you confidence in your purchase and set the stage for unforgettable RV adventures.
Key Takeaways
- Conducting a thorough pre-delivery inspection helps identify potential issues and ensures a safe, enjoyable RV experience.
- Familiarize yourself with your RV’s systems, maintenance schedules, and safety features for confidence on the open road.
- Assess customization options, tech connectivity, and final documentation for a well-rounded inspection before hitting the road in your new RV.
Understanding Your RV’s Systems
As a new RV owner, it’s crucial to understand your vehicle’s systems for a smooth and safe trip. In this section, I’ll discuss some key areas that you should inspect during the pre-delivery inspection.
Electrical System Checks
One of the essential systems to inspect is the electrical system. Start by checking the RV’s battery and ensuring that it’s in good condition and free from any corrosion. Test the lights, power outlets, and appliances to confirm that they are functioning properly. Verify that the fuse box and circuit breakers are easily accessible and properly labeled. Additionally, examine the RV vent pipe for possible clogs, affecting the efficiency of the electrical system.
Water System Evaluation
Another crucial aspect is the water system. You should thoroughly inspect all faucets in your RV, including the kitchen and bathroom, for any leaks or low water pressure. If you find low water pressure in your RV kitchen sink, review this guide to restore water pressure . Examine the water heater for any issues as well. A common problem with RV water heaters is intermittent starting and stopping, so review these fixes for intermittent issues if necessary. Moreover, check the wastewater tanks and hoses for leaks and ensure the valves work correctly.
Gas and Propane System Inspection
Lastly, it’s vital to inspect the gas and propane systems. Start by examining the propane tank for damage or leaks. Next, test all propane appliances, such as the stove, oven, and furnace, to ensure they’re functioning correctly. To further guarantee safety, confirm the presence of a propane detector in your RV. In addition to inspecting the gas system, check the carbon monoxide and smoke detectors to protect yourself and your family from possible emergencies.
Exterior Inspection

As a new RV owner, there are several essential steps to perform an exterior inspection before hitting the road. In this section, I’ll cover some vital areas for your pre-delivery inspection checklist.
Body and Roof
When inspecting your RV’s body and roof, check for any cracks, dents, or signs of water damage. Examine the sidewalls for delamination, which could indicate structural issues with the RV materials, such as Azdel or Luan .
While examining the roof, it’s essential to check for any signs of leaks or damage, especially around the vents, skylights, and seams. Make sure that all seals and caulking are in good condition and securely sealing the connections.
Windows, Doors, and Seals
As I move to the windows, doors, and seals, I pay close attention to their condition and functionality. Check for any cracks or chips in the windows, and ensure that they open and close properly. Inspect the door frames for any signs of water damage or leaks, which could lead to issues such as a leaky RV kitchen faucet or water leaking under your RV shower pan .
Inspect the rubber seals around the doors and windows for any wear, cracks, or other damage. Ensure they provide a tight seal to prevent unwanted drafts and moisture from entering your RV.
Tires and Chassis
Finally, it’s crucial to inspect your RV’s tires and chassis. Check the tire pressure and ensure that it meets the recommended PSI. Look for any signs of wear or damage on the tires, and make sure they have adequate tread.
Examine the chassis for any signs of rust, damage, or other issues that could impact the structural integrity of your RV. Additionally, check the suspension, axles, and brakes for any signs of wear or damage.
By following this essential pre-delivery inspection checklist, I can confidently enjoy my new RV and ensure that my travels are safe and enjoyable.
Interior Assessment
Appliances Functionality
During my pre-delivery inspection, I always check all appliances within the RV, verifying that they’re in good working condition. This includes items like the refrigerator, stove, oven, microwave, and air conditioning unit. To be thorough, I test each appliance and ensure they exhibit normal functioning. I also examine the RV’s plumbing system, ensuring that there are no leaks in the pipes or issues with the RV toilet and that it holds water.
Furniture and Storage Space
Regarding RV furniture and storage space, I closely inspect the quality of materials used, the security of any mounted fixtures, and the usability of the spaces. I open and close every cabinet, drawer, and storage compartment, making sure they work properly and do not present any safety concerns. For seating and bedding, I evaluate the comfort, stability, and overall integrity of the fixtures.
Ventilation and Heating
Ventilation and heating are essential to maintaining a comfortable living environment within an RV. I inspect the roof vents, air conditioning units, and furnace during my pre-delivery assessments to ensure they are in proper working order. I also assess the vent locations, confirming that they provide optimal airflow and temperature control throughout the RV. By checking the heating and cooling systems, I can be confident my RV will remain comfortable in various climates while on the road.
Safety Features Review
Smoke and carbon monoxide detectors.
As a new RV owner, I always prioritize reviewing the safety features during my pre-delivery inspection. One essential item on my checklist is to test the smoke and carbon monoxide detectors . I make sure they are properly installed, functioning, and have fresh batteries. If the detectors are missing or damaged, I request replacements immediately. According to RV Blogger , it’s crucial not to overlook this step, as it directly impacts my family’s safety during our adventures.
Emergency Exits and Fire Extinguishers
Emergency exits are another critical safety feature I pay attention to during the pre-delivery inspection. I ensure that all windows and doors can be easily opened and closed, creating a safe escape route during emergencies. Aside from these exits, I also ensure that a fire extinguisher is installed in an accessible location. To help me with this, I refer to The Definitive RV Pre Delivery Inspection Checklist for guidance.
First-Aid and Safety Equipment
Lastly, I double-check for a fully stocked first-aid kit inside the RV. Essential items like band-aids, gauze, and pain relievers could make a significant difference during emergencies. Additionally, I don’t forget to examine other safety equipment, such as:
- Reflective safety vests
- Road flares
- Emergency warning triangles
As I found on Camper Report before, completing the pre-delivery inspection with a keen eye on safety features helps me ensure that my RV is ready for the road, allowing my family and me to travel with peace of mind.
Tech and Connectivity

Internet and Satellite Services
One important aspect for most RV owners is having a reliable internet connection on the road. To achieve this, I recommend looking into RV classes explained to see which type of RVs come with built-in Wi-Fi capabilities. In addition to Wi-Fi, it’s crucial to have a strong satellite service for TV and radio. Most modern RVs have satellite antennas pre-installed, so be sure to inspect and test the connectivity during the pre-delivery inspection.
Navigation and Security Systems
When it comes to navigation and security, I cannot stress enough the importance of having a reliable GPS system. It’s not only for finding the best route to your destination but also for locating nearby campsites, gas stations, and other necessary stops. Ensure the RV’s built-in GPS is functioning properly, and run a few tests to check its accuracy during your pre-delivery inspection.
I advocate installing a sophisticated security system in your new RV for security purposes. Some systems include features such as keyless entry, remote locking/unlocking, and motion detectors. During the inspection, verify that all security features are working correctly to ensure the safety of your possessions and loved ones while you’re on the road.
Functional Road Test
Engine Performance and Brakes
During the pre-delivery inspection, it is crucial to test the engine performance and brakes of the RV. I like to start the engine and listen for any abnormal noises or vibrations. Then, I take the RV for a short test drive to check the overall performance, acceleration, and responsiveness. I also make sure the brake system is working properly, both on flat roads and while going downhill. Remember to verify that the parking brake is functioning correctly as well.
Steering and Suspension
While driving the RV, I pay close attention to the steering and suspension system. I ensure that the RV steers smoothly and responds well, without excessive play or stiffness in the steering wheel. Additionally, I check the ride quality and suspension by driving on uneven surfaces, looking for excessive noise, vibrations, or bouncing. Inspecting the suspension components and verifying that everything is securely fastened and in proper working condition is also a good idea.
Lighting and Electrical Features
Lastly, I examine the RV’s lighting and electrical features both inside and outside the vehicle. I check that all headlights, taillights, turn signals, and brake lights are functioning properly. Inside the RV, I test all interior lights, outlets, switches, and the control panel for the various electronic systems such as the air conditioner and water heater. It’s essential to ensure that all electrical systems are functioning correctly to avoid any issues while on the road.
By completing a thorough functional road test during the pre-delivery inspection, I can ensure that my RV is ready for any upcoming road trips and adventures.
Utility Setups
Hookups and disposal stations.
When setting up your RV at a campsite, ensuring proper connections to utilities is essential. I always check for leaks or damages to hoses and connections for water and sewer hookups. It’s also important to know the location of nearby disposal stations, as disposing of waste safely and responsibly is crucial. In some cases, unexpected problems may occur with water systems, so familiarizing yourself with potential issues can be helpful.
Power and Battery Management
Managing electricity in an RV is paramount, especially when dry camping or boondocking. I regularly monitor my RV’s battery levels, and whenever possible, I use power-saving appliances and switch off devices when not in use. Solar panels and generators can provide additional power, but some people also consider alternative energy sources like wind generators . Remember to keep all electrical connections secure and inspect them for signs of wear or damage.
When it comes to utility setups, being thorough and vigilant can save you from potential issues and ensure a smooth RV experience.
Customization Options
Upgrades and modifications.
When I first got my RV, I wanted to make it truly “mine,” so I considered various upgrades and modifications to enhance its functionality and comfort. Some of the popular functional upgrades include solar panels and kits and improved suspension systems . I’ve found these updates to be incredibly beneficial for long-term travel, providing energy efficiency and a smoother ride.
Now, here is a list of common functional upgrades to consider:
- Solar panels and kits
- Improved suspension systems
- Additional storage solutions
- Better tires and wheels
- Upgraded electronics and appliances
Decor and Personalization
Beyond functionality, I wanted to make my RV feel like a home away from home. This meant focusing on decor and personalization. My first step was selecting a color scheme – I opted for something neutral with pops of color to create a cozy atmosphere without it feeling cluttered. Then, I incorporated my favorite artwork and a few select family heirlooms to bring a sense of familiarity to my new space.
Here’s a brief checklist to help you personalize your RV:
- Select a color scheme
- Choose comfortable and stylish furniture
- Incorporate artwork and decorations
- Explore lighting options to set the mood
- Add personal touches, such as family heirlooms or collectibles
By following these steps, I created not only a unique space but also one that felt like home while I traveled. Remember, your RV should be a reflection of your personal style and needs, so don’t hesitate to customize it and make it your own.
Final Documentation

Warranty and Service Records
It’s crucial for me to review my RV’s warranty and service records during the pre-delivery inspection. I’ll confirm that they’re complete and up-to-date. I should also inquire about any transferable warranties and extended warranty options , if applicable. This way, I ensure that I’m fully aware of my RV’s present condition and any ongoing maintenance requirements.
Owner’s Manual Overview
I’ll take the time to familiarize myself with the owner’s manual, which typically provides essential information about my RV’s features, operation, and maintenance. By understanding the basics of my RV’s systems and components, I can better prevent potential issues and maintain my vehicle’s performance. Moreover, I make a list of any questions or concerns I have to address with the dealer before taking delivery.
Registration and Legalities
When taking delivery of my new RV, I must ensure that all the necessary paperwork and legal requirements are in order. This includes proper registration, vehicle identification numbers, and title transfers. I may also need to register my RV in a different state , depending on my preferences or logistical needs. It’s also essential to establish a valid address for my RV if I plan to live in it full-time or for extended periods. By staying on top of these legalities, I can avoid unnecessary obstacles down the road.
Maintenance Schedule and Tips

When it comes to maintaining your RV, there are two primary aspects to be mindful of, which I will be covering in this section: regular upkeep routines and seasonal care recommendations. Being diligent with these tasks can ensure your RV stays in excellent shape for years to come.
Regular Upkeep Routines
To keep your RV running smoothly, I recommend performing routine maintenance to various components. One crucial area is the RV’s slide-outs, as they significantly enhance living space while on the road. To ensure a smooth transition and longevity, it’s essential to use the best RV slide-out lubricant for your specific model. Regularly lubricating your RV’s slide-outs will help prevent wear and tear on the mechanism.
Another critical aspect of RV maintenance is proper lubrication of common areas that require it. Based on my own experience and research, here are seven common areas that require RV lube maintenance :
- Door hinges
- Window tracks
- Entry steps
- Stabilizer jacks
- Wheel bearings
- Slide-out rails
- Awning mechanisms
Keep these areas lubricated and inspect them regularly for any signs of wear or damage.
Seasonal Care Recommendations
Taking proper care of your RV also involves some seasonal maintenance tasks . Here are a few suggestions for each season:
- Spring : Inspect and clean the roof, check for any leaks or damage, and ensure all seals are intact. Don’t forget to examine the tires for wear or cracking and check the tire pressure.
- Summer : Regularly clean the exterior and interior of your RV, including the awning’s underside. Also, monitor the air conditioning system’s performance and replace filters when necessary.
- Fall : Check all seals and caulking around windows, doors, and the roof to ensure they’re in good shape before winter arrives. Clean gutters and downspouts and check for any potential leaks in the plumbing system.
- Winter : If you’re not using your RV, winterize it by draining the water system, removing the batteries, and protect any exposed pipes and tanks from freezing temperatures. Consider using an RV cover to protect it from the elements.
In conclusion, staying on top of maintenance means enjoying your RV trips without the worry of unexpected breakdowns or expensive repairs.

Exploring the Existence of Airstream 5th Wheels

Airstream Basecamp Review: Is It the Perfect Couple’s Getaway Camper?

Fifth Wheel Etymology: The History Behind the Name

13 Compelling Reasons to Consider Camper Trailer 1st

13 Essential Tips Before Buying a Pop-Up Tent Trailers

How to Score a Great Deal on a Travel Trailer – Insider Tips
300+ RV PDI Inspection Checklist (Updated 2022)
- June 16, 2021
Table of Contents
We may recommend products or services that our Readers will find helpful. Affiliate commissions are at no extra cost to you. And they don’t influence what we think! Thanks for supporting this website! For more information, please read our Privacy Policy and Terms of Use.
Thanks for “checking out” the Changing Gears family checklists, budgets and forms! Our online RV checklists are provided to you free of charge.
Other Changing Gears Checklists
- RV PDI Inspection Checklist
- Arrival & Setup Checklist – Motorhome
- Arrival & Setup Checklist – Towables
- Departure Checklist – Motorhome
- Departure Checklist – Towables
- RV Must-Have Accessories List
- New to RVing? – Getting Started
- Road Test Checklist – Motorhome
- Road Test Checklist – Towables
- RV Camping Gear List
- RV Types Pros & Cons Chart
- RV Basic Lifestyle Budget
All checklists are provided as-is. Use at your own risk. No merchantability for any use express or implied. See Website Terms & Conditions.
Download This Checklist!
We’ve developed an expanded, in-depth version of this checklist with over 300+ inspection points, inside and outside, front to back, for both motorhomes and towables!
It’s full of things to look out for and insider tips (such as downloading a decibel app on your smartphone to compare the loudness of different air conditioners).
It’s the most comprehensive RV PDI Inspection Checklist on the web. Download the expanded checklist at Etsy.com. Download it once – use it forever!
And it costs less than a cup of coffee. That’s cheap insurance against accidentally buying a lemon.
You can download the checklist PDF, no waiting, by clicking here. Thank you for helping to support this website and all the free information available at Changing Gears!
This checklist is intended as a guide for inspecting new and used RVs.
When buying a new RV , use this as your pre-delivery inspection (PDI) checklist. The dealer will provide their own pre-deliver inspection, but those tend to be less detailed and performed by someone other than you. In case you are not able to perform a detailed inspection before taking delivery, inspect the RV as soon after as possible, while still near the dealer to request warranty repairs.
When buying a used RV , consider running through this inspection checklist with several new RVs first, so that you will be able to spot problems on used units more easily.
Most items on this list can be inspected by an average person; for more specialized items such as brakes, engines, etc., consider having a qualified technician do the inspection.
Also see the RV Road Test: Motor Homes or RV Road Test: Trailers checklist.
You can download the checklist PDF, no waiting, right here. Thank you for helping to support this website and all the free information available at Changing Gears!

Andy Herrick is a blogging nerd, #8 Enneagram, wannabe bread baker, INTJ, RV industry professional, and small business entrepreneur. He can be found hanging out with his lovely wife and family, skiing, cycling, climbing, hiking, and convincing anyone who will listen why dogs aren’t really that great of pets. Also, he runs this website.
- Andy https://changingears.com/author/andrew-herrick/ RV Salvage Yards and Part Stores in Hawaii
- Andy https://changingears.com/author/andrew-herrick/ RV Salvage Yards and Part Stores in Ohio
- Andy https://changingears.com/author/andrew-herrick/ RV Salvage Yards and Part Stores in North Carolina
- Andy https://changingears.com/author/andrew-herrick/ RV Salvage Yards and Part Stores in New York

Get our best delivered!
First Name*
Email Address*
- Calculators
- Manufacturers Lists
- Affiliate Partners
- Clubs & Memberships
As an Amazon Associate, this site earns from qualifying purchases. We may recommend products or services that our Readers will find helpful and convenient. Affiliate commissions are at no extra cost to you. Thanks for supporting this website!
Copyright 2023 – Changing Gears (SRVS) ALL RIGHTS RESERVED
Need An RV Checklist?… Here Are All The Best Checklists For RVers
By lynnette, camping tips , checklists , fulltime rving , kitchen issues , motorhomes , tires , travel trailers , winter and snow.
There are a number of good resources for RV checklists out there.
We’ve spent some time researching them and We’ve compiled “the best of the best” below.
Some are our own. Others are from fellow RVers.
Need a checklist for your next RV trip? Start here…

What part of RVing are you currently seeking a To Do List for?
The following RV checklists cover every aspect of RVing — from packing and loading the RV to camping, driving, and performing RV maintenance .
Before You Buy An RV Camper, Motorhome, Or Travel Trailer…
Before you buy anything new, you should do a little homework first.
Here are the best checklists to make sure you cover all of the important things during the road-test, walk-around inspection, and what to look for before you take delivery of your new RV:
- Checklist for buying a used RV
- List of 10 things that increase the value of your RV
- List of 10 things that decrease used RV values
- RV inspection list
Supplies RVers Generally Like To Have On-Board At All Times…
From the most basic supplies to the extravagant luxury items, it’s all covered in these checklists:
- RV supplies checklist
- KOA’s ultimate RV camping pack list
- Good Sam’s ultimate RV travel packing list
- Universal RV packing list for RVers
To Do Before You Hit The Road…
Before you even leave home, these checklists will ensure that things are in order for the time that you will be gone:
- Everything to do before leaving home (or campground)
- 5th wheel departure checklist (here’s a list for other types of towables )
- A checklist to prep your RV for the next trip
- Things to do before departure RV checklist
If You Have Pets…
Whether you have a dog or a cat, here are some important reminders — pet camping checklists:
- Pet RV camping checklist
- Dog car & travel checklist
- RV camping with dogs checklist
- RVing with dogs ultimate guide
If You’ll Be Camping…
For the most part, your basic supplies will include shelter, bedding, seating, tools, safety & emergency equipment, cooking & eating supplies, fun & activities & entertainment, clothing, grooming & toiletries, cleaning supplies, and health care items. It’s all covered in these checklists:
- RV essentials checklist
- Essential camping gear list
- REI’s family camping essentials list
- RV camping list of what to pack
Before Arriving At & Departing From RV Camping Locations…
One of the most dangerous aspects of RVing is when you forget to do something before you leave (like pull in the slide-outs or turn off the levelers). Likewise, it’s sometimes hard to remember all of the little things you need to know when you decide to park somewhere overnight. These checklists will help:
- RV breakdown list of things you can’t forget to do
- Set-up & take-down RV camping checklist
- RV arrival & departure lists
- RV setup & departure lists
RV Maintenance To Do Lists…
You can prolong the life of your RV and make your road trips more enjoyable by sticking to a regular maintenance and repair schedule. These are the best maintenance lists for RVers:
- Spring RV trip prep & maintenance list
- Fall RV trip prep & maintenance list
- Checklist for winterizing your RV
- Boondocking RV maintenance checklist

READ NEXT: 7 Clever RV Storage Solutions …Things I’ve Done To Make The Most Of Limited Storage Space In An RV!

Over the past several years, I've been involved with transporting RVs, renting RVs, and fulltime RVing (months at a time). I'm fortunate to have had a number of different RVs available to me to try out — which has enabled me to experience the nuances of RVing firsthand. When I'm not RVing, you can find me at the corner of Good News & Fun Times as publisher of The Fun Times Guide (32 fun & helpful websites).

Featured articles

DIY RV Dinette Replacement: Make Better Use Of Your RV Living Space By Removing The RV Dinette Table
Need A Replacement RV Mattress? RV Mattress Sizes & Shopping Tips
RV Water & Waste 101 – Black Water, Gray Water & Potable Water Problems To Watch For
- Skip to primary navigation
- Skip to main content
- Skip to primary sidebar
- Skip to footer
She's Trippy
Female blogger sharing travel and daily life
The Definitive RV Pre Delivery Inspection Checklist
12/31/2021 · In: RV's
Buying a RV can happen in what feels like a moment. You fall in love with some features and amenities, as well as the freedom to travel where want, almost whenever you want. A pre delivery inspection of an RV helps you learn more about the vehicle you want to own, and might bring some reality back into the picture.
A pre delivery inspection is a thorough look through of everything in the RV before you sign papers and buy it. If you’ve ever had a frustrating moment where a switch that should work doesn’t work right after you buy, and you have no recourse but to spend money fixing it – this checklist is for you!

While we can’t get into every detail about what’s in the checklist in this paragraph, we’ll offer below many of the things you should look out for in your RV. This is a really good time to learn more about what your RV does and what features are a bit hidden. We will offer explanations for some items, too.
Why do a pre delivery inspection?
RVs can have issues. Issues that neither your eyes catch when you first set eyes upon the vehicle, and one’s that even mechanics overlook. If you are buying a pre-owned RV, this is especially important because it’s possible that the previous owner overlooked some problems, and might not say anything about them.
Inspection is an easy way of saying “check everything”.
If you are doing the inspection yourself, you should bring several tools
- Flathead and Phillips screwdriver
- Hoses for water tanks
- Potentially a ladder
- Tape measure
- A cup for the microwave
- A water, at least a couple bottles
- Tire Pressure Gauge
The outside of the RV
Amongst the most important features on the exterior to check are..

Make sure the ladder is properly fastened. Take a look at the screws or bolts that hold the ladder in place and ensure they are tight and not sticking out. Don’t try to climb the ladder unless you have taken a look first. The last thing you want is a fall during your pre delivery inspection.
Once on the roof, check all the seams and seals. A good RV shouldn’t have water leaking through and seams should be consistent with no signs of breaking.
Also, ensure that any covers for items like the air conditioner are properly sealed, aren’t loose, and don’t have cracks or breaks.
If the roof is rubber, check for any signs of hardware like screws or bolts poking through. It shouldn’t be lumpy.
Sealed and aligned windows are important. There should be very little to no gap between the window and the frame – it should be quite tight to prevent rain or wind from coming in. Open and close windows that are openable and ensure they open and close properly.
Gaskets and seals around the door should be solid, just like the roof.

Also, the door should be aligned correctly not appear at any sort of angle. An angled door is more difficult to close and can damage the door frame.
Water Tanks
Here’s the fun part! These tanks hold your critical fresh water, your drain water, and your toilet water.
One of the best ways to actually test these beyond a visual inspection is to pour something into the toilet and a sink. Come out and try to test the valves and see if water comes out.
Verify they are empty with the current owner first – and bring your hose.
The tanks should be free or cracks and deformities.
If there is a propane compartment or carrier, ensure all screws and bolts are tight.
Check the regulator and ensure it has no obvious problems.
Take the time to find the shut off valve for the propane system, too. It will be difficult to ensure this works without active propane, but at least locate it.
Paint and Siding
Just like you would a car, take a close look the paint across the entire RV.
You want to look for scratches, bubbles, and wear.

In addition, try to find any depressions or dents you might see in the side paneling. Dents in the side paneling are also indicators of other damage. Dents can be popped out, but don’t do it right now.
This is pretty important. Learn what tire pressure should be present in the tires. Use your tire gauge to verify that they tires are currently at that pressure. There isn’t a good way to check for a slow leak, but you can look at the side walls and treads for any signs of wear beyond the normal.
A tire depth gauge or penny can help here too. A penny inserted vertically into the tread with Lincoln’s head facing down – if you can see his whole head, the tread is too low. This is not a scientific method and we suggest using an actual tire gauge too. Anything less than 2/32 of an inch needs to be replaced.
Awnings are usually supported by extending bars, springs, and locks. Extend the awning out and inspect all of the above for wear and tear as well as noise. The awning might be a little bouncy, but this should be from the springs and not the locks working improperly.
Using your flashlight, take a look at air and hydraulic lines to see if they have cracks or are leaking.
Consider getting underneath your RV if physically able. If not, you should probably have someone else do it, because these are important parts!

Slideouts and Compartments
Slideouts and compartments should be relatively simple and easy. Ensure that all compartments are properly sealed. You can do this part by seeing if there are any holes in the seals – water damage inside would also be an indicator.
Open and close all compartments to ensure they are aligned properly and lock when open or down, if they have this feature.
Open and close all kitchen cabinets and storage cabinets. The purpose is to ensure hinges work properly. You can also rattle them a bit to simulate
Look at any cabinet linings to make sure they are fastened securely.
Cabinets can also give access to water pipes. Check for water leaks and loose connections back here.
Molding and Trim
If your RV has molding or trim, check all doors and cabinets that do. See if it’s attached properly.
Flip every switch! Verify that every light is currently working. A non working light is not something you should fix right now – let the current owner do it then reverify. The potential hidden issue is that the lighting wires might have problems.

Open and close closet doors to make sure that the connectors and hinges work properly. Squeaking can happen.
Attempt to lift furniture to make sure the bolts holding it down work properly, assuming you are keeping the furniture.
Look for stains, rips, and tears in the furniture too.
Many RV’s have blinds, and some have curtains. Learn how to use the blinds – withdrawing them and returning them to the top.
Blinds are also a bit finicky – ensure that all of them are straight. Blinds that are out of alignmen can cause headaches down the road.
Countertops
Just like a regular kitchen, check the countertops for proper fasteners. You could grab the ends of a countertop and attempt to lift. Screws or glue should be doing a good job of preventing you from moving anything.

Faucets and Sink installations
Faucets and sinks should be tightly sealed often with caulking.
The easiest way to try a faucet or sink is to turn it on, if there is water in the freshwater tank, which there should be for a test.
This isn’t in the same are as most sinks, but testing your faucets and sinks is a good time to test the water pump. Do you hear the water pump come on to build up more pressure after you turn off the sink?
Is it exceedingly loud? Try to turn on the water again, especially if you hear nothing, to see if the water pressure from the first round is maintained.
Connect shore or external power to your RV. Try to turn something on to ensure it runs.
For outlets, use an outlet tester. You should also push the test button on any GFCI plugs.
Plug in the converter. Check it’s operation by turning on and off several lights to see if it can handle a load of power.
Assuming someone is with you who knows, ask about what else the converter or surge protector do.
Water system
Turn off the water pump. Connect city or local water via a hose. Check the ports to make sure they work. Turn on a faucet to see if water comes out.

Water Heater
Have the person with you walk you through starting the water heater. You’ll want to check back on this to check the heat level and turn the water on later.
Inspect the bypass valves and pressure relief for cracks or problems.
Fire up the heater! Understand the operation too. Use your nose to sniff out any smells and check the RV vents or ports for heat actually coming out. Try to raise and lower the temperature too.
Air Conditioner
While this is usually on the roof, turn the thermostat to a temperature lower than the current ambient temperature. The air conditioner should start up right away. Check the vents and ports for air temperature – it should be cooler than your RV. The thermostat should also shut this off eventually.
Your smoke and carbon monoxide alarms are a small but important safety device. Touch the test buttons to make them beep.
Assuming you are keeping the fridge, check the exterior seals for wear and issues.
Turn the fridge on if it’s not, and see if it’s currently cool.
Look at the back of the fridge for any signs of excess dust or debris in the exhaust vents.
For a propane fridge, take a whiff and smell for ammonia.

Check the propane connection to make sure it’s on. Turn the stove burners on one at a time to check operation.
Look at the pilot light and check for excess debris or wear. Turn off the stove when done.
For your most basic check, put a cup of water in the microwave and let it run on high power for 5 minutes. The water should boil and some of it should evaporate – the microwave has demonstrated that it can build and contain heat.
Flush the toilet (if it’s not a compost toilet) and see if it drains quickly and completely. There should be no leaks coming out of the bottom or sides.
Now that you’ve used a few things inside the RV, try to drain the tanks on the exterior. This was mentioned in passing before – but now you can learn how to hook up the hose to a receptacle and actually do it. Not much will come out, but it’s a good time to learn.
A pre delivery inspection is your last chance to either ask the previous owner to make fixes to an RV, or decide if you want to buy it. Dealers will often do an inspection and provide it, but do one anyway so you can learn more about operation. The dealer can also miss things and not have the same standard as you.
A PDI can save you money from having to make fixes yourself – or help you avoid buying an RV that has more problems than you want to deal with.
You can also hire a mechanic for a PDI and give them this list as a checklist to complete.
you’ll also love

Stay in the Loop!
Join the E-News and get a FREE Travel Planner Drop Your Email Address Below and hit Subscribe *

RV Surge Protector Pros and Cons
- Shop the Boutique
- Shipping and Delivery
- Privacy Policy
- Refunds and Returns Policy
Stay in the Loop
Copyright © 2024 · Theme by 17th Avenue
Find the best travel related apparel and accessories at She's Trippy!! Dismiss
115 Point RV Inspection Checklist (New or Used)

Sharing is caring!
Thanks for your support! If you make a purchase using our links in this article, we may make a commission. And, as an Amazon Associate, I earn from qualifying purchases. See the full disclosure here .
We’ve mentioned before how vital an inspection checklist is in our important questions to ask when buying a new or used travel trailer, but many of our readers have had a hard time trying to find a good checklist. So, after hearing your concerns, we put our heads together and created our own RV Inspection Checklist.
Our RV Inspection Checklist is comprehensive and can be used for new and used motorhomes or towable RVs. We have 4 major categories with corresponding subcategories. Here’s the breakdown of items to inspect when you are purchasing a new or used RV.
E. Holding Tanks
L. stabilizer jacks, r. electronics and kitchen appliances, how to find cheap rv rentals under $100 a night, the importance of rv inspections.
One of the big myths concerning RVs is the belief that lemon laws apply to RVs. The closest example to the truth resides in the state of Florida. The lemon laws may apply if a motorhome has the same recurring problem to its AUTOMOTIVE components. Since Lemon Laws typically apply to the automotive parts of your RV, and not the living and storage areas , completing an RV inspection with a checklist is crucial, especially if you’re buying a pre-owned unit.
Every reputable RV manufacturer inspects their products before they leave the factory. The best RV dealers conduct their own PDI (pre-delivery inspection) when the coach hits their lot for the first time and right before it leaves with a customer. Unfortunately, things sometimes get missed.
Inspecting the RV you’re planning on purchasing allows you to learn about potential problems or the general condition of the specific coach. For example, the model you’re buying may have won awards from media authorities like RV Magazine , Trailer Life , or others, but that doesn’t mean someone didn’t tighten a screw correctly.
Once you leave the RV dealership with your RV, any problems that arise become your headache. The issue may be under warranty, but the time it takes for the service department to get the part from the manufacturer, repaired, and ready for you to pick up can take weeks or months in rare cases.
Come Prepared to Conduct an RV Self Inspection
After you’ve walked through the many different options and narrowed down your choices to your top two or three, this is the time to pull out your inspection tool kit. A proper self-inspection should take a couple of hours. The private seller or RV dealership will know how serious of a buyer you are when you request to complete an inspection and shouldn’t have a problem with it.
Read through the list ahead of time. Some of the tests take time to perform. For example, the refrigerator test and the air conditioner need about 20-30 minutes to get a good reading, so you want to set these up first while you’re working through the rest of the list.
The DOT (Department of Transportation) lighting tests require connection to a tow vehicle, and the holding tank test needs a safe place to dump the tanks. You can combine the road test with the holding tank test by driving to a dump station, making your testing process efficient. Use websites like RV Dumps or Sanidump to locate dump stations nearby.
Here is a list of everything you’ll need. Most of which you should have lying around your home. Some more specialized tools are very affordable and easy to purchase at Walmart or your local hardware store.
- A screwdriver with multiple head bits (flat and Phillips)
- A can of WD-40
- Needlenose pliers
- Tire pressure gauge
- Small flashlight
- Electric outlet tester
- USB charger station tester
- Liquid soap (or food coloring), water, dixie cup, wooden stir
- Empty gallon milk jug
- The checklist
- 2-3 pens of different colors
What Does an RV Inspection Consist Of?
Your inspection is primarily visual. You’ll need the screwdriver and flashlight to open panels to look over the various arterial structures like plumbing, electrical, and other components. Don’t be concerned about breaking anything; these panels are there for easy access to essential parts.
The water and food coloring make it easy to identify leaks. Choosing bright colors will quickly show you the path of the water leak. Stay away from red dyes since they are the worst stains to clean. Use soapy water when possible to avoid the stain issue, but if you have concerns about finding the path of a leak, food coloring works best.
The electric outlet testers will identify if there are any weaknesses in the electric system. In an RV, you’re dealing with both an AC (alternate current) and a DC (direct current) system. Consult the owner’s manuals for each tool, so you know how to use them properly.
You’ll want two or three different color pens for your notes. There are various methods, but you’ll want to have a notation system to help you identify more critical issues than others. For example, a red pen can signify vital issues, blue for relative concern problems, and black for non-issues.
RV Inspection Checklist
I. inspecting the rv nervous system.

A. RV Engine and Generator Inspection
- (Motorhome) Engine Battery: Check the engine’s battery for a healthy charge and condition. If it’s lead-acid, make sure the liquid in the battery is full.
- (Motorhome) Automotive Fuses: Look over the automotive fuses for burning, melting, or breakage. Notate which fuses need replacement.
- (Motorhome) Rubber Components: Look over the belts, gaskets, and other rubber components for excessive wear. Replace any bad parts.
- (Motorhome) Fluids: Write down the current levels of automotive fluids:
- Engine Oil: Find the date of the last oil change and notate it. Write down the current levels of each. If you’re buying the RV, a good practice is to get a complete oil change service to start with fresh oil once you take delivery.
- Brake Fluid (Yellow)
- Transmission Fluid (Red)
- Jack Fluid (All-Purpose ATF Transmission fluid: Red, or hydraulic fluid: clear or honey-colored)
- Power steering fluid (Red and sweet smell)
- Radiator/Antifreeze Coolant (Green)
- Windshield wiper fluid (Blue, Green, or Orange)
- (Motorhome) Generator Oil: Locate the date of the last oil change for the generator and check the current fluid level
- (Motorhome) Generator Spark Plug: Use the multimeter to check the spark plug. Notate any misfiring issues or replacement concerns.
- (Motorhome) Generator Overall Health: Use the flashlight to look over the generator parts. Notate any evidence of excessive wear, insulation problems, etc.
- (Motorhome) Startup the engine: Notate hesitations, weird sounds, or other strange items. Let it idle for a few minutes before you turn it off. Don’t turn on the generator. You want to listen to the main engine only.
- (Motorhome) Startup the generator: Turn off the main engine so that you can focus on the generator. Notate hesitations, odd sounds, or other strange items. As it runs, turn on various electric things inside the coach. The goal is to see if it matches its wattage rating. When one of the breakers pops, notate, the devices turned on to calculate the wattage later. Use a wattage table to help you figure out usage.
B. Electrical Items to Check During Your RV Inspection
- House Batteries: Check the house batteries for good power levels and overall condition with the multimeter
- Coach Fuses and Breakers: Inspect the AC and DC coach breakers for melting, burning, or breaking. Notate the date you replaced any fuses. Make sure you’re using the correct automotive fuses. American fuses are the rectangular style, and the European version has round edges. The fuses aren’t interchangeable.
- Electric Converter: Locate the electric converter and check it for irregularities. The converter turns your shore power into DC power. Look under or near your refrigerator behind cabinetry. You’ll probably have to pull out kitchen drawers to find it. When it’s working, it’ll make a slight fan noise and may warm up a bit. Make sure you check the device’s internal fuse.
- Electric Inverter: (If applicable) Locate the electrical inverter(s) for proper operation. Inverters turn DC power into AC. If the manufacturer provided the device, it could be located in an external storage bay or under cabinetry. Like the converter, you’ll listen for a good fan hum and a slight temperature rise. If the device is too hot, that means it’s working too hard. Residential refrigerators may have a separate inverter.
- Solar Panel System: (if applicable) Before you test the solar system, talk with the owner about how it’s connected. Use the multimeter on the voltage setting to check the connections. Solar panels don’t turn off, so be careful when testing the connections to see if they’re producing power.
Follow the system through at each connection point with your multimeter to test for power efficiency. Notate any oxidation (green colored corrosion) or other corrosion on the wiring that can hamper the electrical flow. Check the meter inside the RV to compare your readings for accuracy; they should match.
- Electric Outlets: Use the outlet tester on every 110v, USB ports, and DC outlet. Test the grounded outlets by pushing the reset button and turning it back on. Notate any outlets of concern.
- (Motorhome) DOT Lights: Check the headlights, turn signals, clearance lights, reflectors, and other lights. Notate any burnt-out lights and replace them. Use the multimeter on those new lights that won’t come on when activated to determine if it’s a faulty circuit.
- Exterior and Interior Lights : Turn all coach lights on and off, making sure they work. If they don’t, use your multimeter to see if the lighting fixture is receiving power. If not, it may be the circuit or the fuse.
- Backup Camera: (If applicable) Check the operation of the backup camera. If the camera was installed on a towable RV, ask and notate how the previous owner wired it into the RV. There’s more than one way to do it.
- Refrigerator & Entertainment System: Turn on all of the appliances. For the refrigerator, fill two paper cups with water and put a thermometer in each cup. Place one cup in the freezer and the other in the main refrigerator. Come back at the end of the inspection to see if there is a temperature difference. Do the same for the outdoor kitchen if applicable.
- Air Conditioning Effectiveness: Turn the A/C on and down to the lowest setting. Set up a room thermometer in the front and back of the RV. Take a reading of the current temperature. After 20- 30 minutes, take a new reading. Compare the reading to what you set the RV temperature control. They should line up.
- Furnace: Allow the RV to return to the outside temperature. Turn the furnace on (make sure the propane tank is open if the furnace runs on LP). Place an ambient thermometer in the front and rear of the RV. Notate the readings. Come back 20- 30 minutes later and notate the new readings. They should line up with the thermostat setting.
- Central Vacuum: (if applicable) Activate the vacuum system and test the suction by using some ripped-up paper. Turn off the device and open up the collection component. Clean or replace the filters. Check the gasket seals for damage. Look for any hair or debris that may hinder suction in the motor.
- Electric Power Cord: The shore power cord connects securely to the RV. The male/female connections don’t show signs of burning or melting. The cord fits nicely into the RV. The protective shielding doesn’t expose any of the internal wiring
C. Water Lines
- Water Lines: The water lines use color-coated PEX piping. You’ll see blue (cold), red (hot), and white (either) flexible tubing. Make sure they have a soft, pliable feel to them. Replace any lines that are dry and cracked.
- Water Pump: Make sure there is fresh water in the holding tank. Disconnect the RV from the shoreline. Turn on any faucet. You want to see a steady stream of water. You may hear the pump working. That’s okay as long as it doesn’t sound like it’s straining hard. The pump will turn on and off with the faucet.
- Water Feature Leak Check: use soapy water or food coloring to check the seams on the following features. Focus your attention on the seams of the drain and outer perimeter of the component.
- Kitchen sink
- Outdoor kitchen sink
- Bathroom sink
- Exterior shower
- Washer and Dryer
- Propane Lines: Check the propane lines for leaks. Open the tanks and rub soapy water over the lines. If you see any bubbling, that could be evidence of a leak.
- Propane Mounts: Make sure the propane tanks sit securely in their positions and are held securely in place.
- Propane Tanks: Make a note to yourself on the size of the removable tanks. If you’re buying a used RV, go to your local Walmart or hardware store and replace them with fresh tanks instead of refilling the old ones.
- (Motorhome) Permanent Propane Tanks: Inspect the built-in tank for any non-surface rusting, loose connections, or other issues that will compromise the tank. Notate if you smell the gas.
- (Motorhome) Propane Gauge: On your test drive, stop at a propane fill station and add a small amount to determine that the gauge works accurately
- Fresh Water Holding Tank: Disconnect the shore water line, Drain the freshwater tank, and partially refill it. Look for any leaks. Make sure the valves and lines are in good order. Once the RV is yours, it’s a good idea to sanitize the freshwater tank, but look at, taste, and smell the water from the faucet to see if there’s a significant contamination issue in the tank.
- Grey Water Holding Tank: Find out if the grey tank is empty first. Open and close the sewer release valve to make sure it works well. Pour one or two milk gallon jugs of water down the sink or bathroom sink. Check the sewer release valve area for leaking.
- Black Water Holding Tank: Make sure the black tank is empty first. Check the release valve for proper operation. Pour a gallon or two of water down the commode. Check the sewer release valve area for leaking.
- Black Tank Flush System: Hook up a garden hose to the flush system and run it for a minute or two. Make sure you’re running this test at a safe dump station. Never run the flush system while the black tank is closed. If you hear abnormal sounds, the sprayer may no longer work.
- City Water Connection: The shore water connection looks secure and undamaged
II. Exterior RV Inspection Items

F. Exterior Shell
- Sidewalls: Used RVs may have tiny knicks or dents. You want to look for cracks, open seals, or other loss of integrity that allows moisture through. Discoloration could be mold, mildew, or other contaminants forming.
- Front Cap/Rock guards: Notate any cracks, open seals, or issues of concern.
- (Motorhome) Hood Panel/Generator Bay: Make sure the panel or bay opens and closes smoothly. When closed, there aren’t any gaps due to misalignment.
- Windshield/Front bay window: The window shouldn’t have any cracks or open seals. Single pane motorhome windshields have an average cost of $10,000. RV insurance does not fully cover replacement. There are liquid sealers to fix small spider cracks.
- Back Cap: Notate any issues of concern like cracks, open seals, or other problems
- Roof Ladder: Check that the ladder is secure against the RV. Inspect the connections for open seals that will let moisture through. A layer of silicone caulk will fix this problem.
- Entry Steps: Open and close all entry steps. Older style steps that fold out from the chassis may need a shot of WD-40 to loosen the pivot points.
- (Motorhome) Motorized Steps: The entry steps should deploy every time the door opens. There should be a toggle switch near the door that keeps them deployed when your camping. Notate any problems with either system not working correctly.
- Awning: Open and close the awning. Older manual awning arms can warp with age, making folding up difficult. Inspect the fabric for significant rips or mold growth. Check the installed LED lighting for shorted-out lights.
G. Storage and Utility Bays
The RV has many doors besides the entry door. Check each of them for many of the common problems. Make a note next to the door that needs attention.
- Entry Doors
- Exterior Shower Door
- Fresh water fill
- Furnace Door
- Water heater
- Refrigerator Panels
- Clothes dryer exhaust vent
- Stove hood exhaust vent
- Open and Close: Make sure the doors open and close securely. They’re not off-center, and the hinges work well.
- Doors Stay Open: If the bay doors have struts or other mechanisms that keep them open, make sure they work correctly. Older RVs won’t have friction hinge doors.
- Latching System is Secure: The handles and locks aren’t loose or falling apart.
- Weather Seals are Maintained: The weatherstripping should be soft and pliable to create a good seal against the bay door. Use a rubber treatment spray at least 2-3 times a year. Replace dry and cracked stripping.
- Bay Lighting: Lights inside the bay work. The RV may have a master switch that turns off all the power to the lighting in the bays to prevent them from turning on while traveling.
- Damage Concerns: Look for evidence of damage due to water, pests, or other issues
H. Roof and Air Conditioner
- Roof Integrity: There isn’t any soft spots or dry rot on the roof
- Open Seals: All seals are solid or fixed with caulk
- Vent Covers: All vent covers fit nicely over the openings, aren’t cracked, and work properly
- Satellites and Antennas: All wireless inputs rotate, deploy, and fit into their cradles properly. None of the wiring is exposed or degraded.
- Air Conditioner: Start the A/C at the beginning of the inspection to give the compressor time to cool down. After 10-15 minutes, turn it off so you can open it up safely.
- Shroud: The protective cover is in good shape and secures well
- Seals: There aren’t any openings in the caulking around the A/C unit
- Wiring: There isn’t any exposed wiring outside the shroud. None of the wires inside the unit is loose or lost parts of its coating
- Intake: The intake is clean of dirt and other contaminants
- Coils: The coils are intact and straight. There are tools to straighten them out.
- Insulation: The insulation within the unit is in good shape
- Filter: A/C filters will need replacement, but there is evidence of regular filter usage.
- Compressor: The compressor is cold to the touch. It will make noise when working. If the compressor doesn’t work, it may be cost-prohibitive to replace the part.
- Fan: The fan should spin well with your finger.
- Rear Receiver: The receiver is in good shape, and the electronic connector is 7-pin (modern). There are adapters available if you have a 5 or 6 pin.
- Front Hitch/ Kingpin: The towable hitch isn’t significantly dented and may show surface rusting only
- Safety Chains: All safety chains are in place, and it’s in good working order. The law requires that safety chains are connected while traveling.
- Sway Bars: Sway control equipment looks good and operates well
- Tongue Jack: The tongue jack operates well. If it’s manual, you’ve located the cranking tool, and it’s in good repair. If electronic, the system powers up and operates when you activate it with the switches.
- Umbilical Cord: The electric cord that attaches to the tow vehicle is in good shape. Wires are not exposed, and none of the prongs are bent. Plug the umbilical cord into a running tow vehicle to test the DOT lights. All lighting should light up when you activate the tow vehicle’s lights.
- Brake Lights
- Left Turn Signal
- Right Turn Signal
- Hazard Lights
- Reverse Lights
- (if applicable) Back-Up Camera Activates
- Headlights and Clearance Lights
J. Slideouts
- Slideout Function: All slideouts deploy and retract smoothly on their tracks
- Manual Slideout Retractor: (if applicable) You’ve identified the manual slideout retraction port and tool. Manual retraction devices started showing up in the RV industry around the 2019-2020 model years. Many manufacturers place the device under the main entry door.
- Slideout Awnings: The slideout awnings roll easily when deployed. You may want to climb on the roof to get a “birds-eye” view to check for any tearing or mildew growth.
- Slideout Windows: The windows on the slideouts look good, and the weather stripping keeps its seal against the window. Perimeter seals don’t have any gaps.
- Slideout Seals: Make sure the rubber weather seals are soft and pliable. The stripping needs to form a tight seal against the slideout. There are spray rubber conditioners to bring them back, but you may have to replace them if they are severely dry.
K. Wheels and Underbelly
- Tires: The tires have the correct air pressure (PSI), and there aren’t any soft spots that indicate signs of decay. If you do need to replace the tires, there are discount programs through camping clubs like Escapees .
- Rims: The rims look good around the edges. Axles and ball bearings need to be regreased yearly during a preventive maintenance regime for towables. Pop-up campers may need this every six months. There will be a small tube to inject the grease through.
- Brakes and Pads: The brakes and pads are in good working order, and the pads are still thick enough to perform well. There isn’t irregular wear or scoring on the pads.
- Suspension: The components of the suspension are in good shape and only have surface rusting
- Axles: The axles aren’t bent and are tight in place. If the axles bow upwards, that means a previous owner overloaded the travel trailer beyond its gross vehicle weight rating much of the time. The axles need replacement; it’s not a repairable issue.
- Underbelly: (if applicable) The corrugated composite material under the RV isn’t torn, cut, or open. Denting due to road debris is expected. If the used RV you’re inspecting comes from a time before the underbelly was sealed, check for any damage to the components, including automotive parts, if you’re looking at a motorhome.
- Stabilizer Jack Functionality: The jacks deploy and fold in smoothly. Manual versions come with the cranking tool and don’t lock up in a partial position. Electronic systems don’t lag when activating the toggle switch. The jacks are tight against the RV
- (Motorhomes & Luxury Towables) Auto-Level: The auto-level feature works well and has a good accuracy
- (Motorhome) Jack Fluid: When fully extended, the hydraulic jacks don’t leak fluid after 20-30 minutes. This is due to a faulty internal gasket. You can use an all-purpose transmission fluid to replace the jack fluid.
III. Interior RV Inspection Items

- Ceiling Condition: The ceiling doesn’t show any evidence of staining, leaking, or damage
- Molding: All of the molding trim is in good shape, secure, and original
- Ceiling Decoration: Mirrors, LED lighting, and other aesthetics look good and don’t need any repair
- Fans, Sunroofs, and Vents: Ceiling and vent fans are in good working order. Vent screens aren’t ripped and clean. Vent covers open and close. Sunroofs aren’t cracked or leaking. All seals are secure.
- Air Conditioner Vents: All A/C vents are in place and work. Shine your flashlight inside for evidence of significant levels of contaminants
N. Flooring
- Flooring Condition: The vinyl or carpet doesn’t have any loose spots or missing sections. The carpet is whole and clean. The flooring is original, or the new flooring looks complete.
- Heat Ducting: Heat duct grills are in place and function. Shine your flashlight inside to look for a significant level of dust, mold, mildew, or other foreign material.
O. Windows
- Window Treatments : The window treatments are original, in good repair, and none are missing
- Window Shades : All shades function and are in great shape.
- Seals : The rubber seals haven’t shrunk and are in place. You don’t feel any air or temperature difference on the seal itself.
- Frameless Windows : (If applicable) The weatherstripping forms a good seal against the windows and its pliable
- Window Function : The windows are all in their tracks and slide smoothly to open
- Window Integrity : None of the windows are broken, cracked, or in need of repair. If they use mechanisms to open, all of the components are in good working order
P. Walls, Cabinetry, and Dashboard
- Interior Walls : The inside walls are in good condition, don’t show signs of water damage, and the wallpaper isn’t coming loose. The wallpaper tape is in place, and everything is original.
- Cabinetry : All of the cabinets are in place and look good. Hinges and struts work. Doors match, and there aren’t any missing hardware pieces. The cabinets aren’t loose, and you don’t see signs of wood stress.
- Cabinet Seals : The caulking between the wall and cabinets looks good, and you don’t see any gaps
- Drawers : None of the drawers are off their tracks, and they aren’t falling apart. All drawers pull out smoothly.
- Privacy Doors and Accordion Walls : All privacy components, including curtains, are on their tracks and slide well. They aren’t missing parts, and they lock in place easily.
- Deterioration : There isn’t any evidence of mold, mildew, pest, or other loss of structural integrity
- (Motorhome) Dashboard : The dashboard is secure in place. All of the gauges work accurately. The instrument panel lights up when the headlights are on.
- (Motorhome) Instrument Panel Function : Take a few minutes to learn all of the functions in the driver’s area. Test each one to verify it works
- Back-Up Camera Function : (If applicable) Spend some time learning how the camera works. Every model is different. Make sure it does what it’s supposed to do.
Q. Furniture and Driver’s Seats
- Furniture Integrity : All of the furniture pieces are original and in good condition.
- Furniture Mechanics : Folding furniture mechanisms operate smoothly. Metal parts don’t have any rust. Electronic controls function well.
- Master Bed : The platform lifts and stays in place. The mattress is in good condition and comes with the original decorative pillow covers and bedspread.
- Bunk Bed : (If applicable) The mattress is in good condition and original. Extra features like storage pouches, electric outlets, and other features work well. Top bunk ladders are stable
- Stove and Oven : The cooking appliance(s) operate normally. Don’t be surprised if the igniter doesn’t work. That component usually doesn’t last too long. You can use a lighter wand to light both the gas stove and oven.
- Microwave : The microwave works and its display reads well.
- RV Control Panel : The functions and level indicators work properly (black holding tank levels may not be accurate due to dirty sensors)
- Water Heater : The sink and shower water is hot after the water heater is on for 5-10 seconds.
- LED Fireplace : All LED lights work, the heating component works, and all of the additional features work.
- Safety Alarms and Equipment : All detectors, the fire extinguisher, and other required safety equipment are in place, tested successfully, and are original or better.
IV. Inspect the RV Paperwork

- Manual Binder : The RV document storage holder is available to you.
- Owner’s Manuals : The RV’s main manual and all the individual component documentation are inside.
- Updated Manuals : The owner’s manuals for upgraded/updated devices are in the binder.
- Sales Agreements : The original sales agreement and any other purchase documents are inside the binder.
- Title and Registration : Upon completion of the sale, you’ll receive the original copy of the title that’s clean of any liens or any other legal restrictions. The previous owners have shown you that the registration of the RV is in their name and the vehicle’s details match the information on the registration.
- All Warranty Documents : The binder contains all manufacturer and extended warranty documentation even if it’s expired (insurance companies and some states require these documents).
- Other Documentation : Any other relevant documentation is identified and in the folder
Should I Buy an Extended Warranty for My RV?
Yes – but not from a dealership! Unfortunately, your odds of suffering a major mechanical breakdown go up with every passing year. Based on RV Warranty claims records, more than 3 out of every 10 RVs will need major repairs in only their second year on the road. This skyrockets to 8 out of 10 in their fifth year, and virtually ALL of them in their eighth year! Today’s RVs are increasingly more complex, and with more things to go wrong, the need to protect your investment is more important than ever.
Our RV Warranty plans allow you to change your mind! If you’re looking to sell your RV to a private party, you can absolutely transfer the policy to the new owner. Additionally, if you are trading in your RV, or getting out of RVing altogether, you can cancel your policy for a pro-rated refund.
We bought a warranty through Wholesale Warranties for several reasons:
- We can cancel the warranty at any time and get a pro-rated refund
- We can transfer the warranty to the new owner if we decide to sell our RV
- There are no mileage caps on our policy
- We can use repair shops all across the country
- We can use a mobile repair company right at our campsite
- The price is way better than most dealerships
- We could finance the cost of the warranty
- With parts and labor prices increasing all the time, we have peace of mind
You owe it to yourself to at least check out a warranty and get a free quote to see if it is right for you. It just takes a few minutes and you will learn a ton about protecting your investment. We only recommend products we use ourselves and we highly recommend you get a free quote from Wholesale Warranties .
Conclusion: Getting A Professional RV Inspection
You should assume that you will find some issues, decide what concerns you can live with and what’s too problematic. Based on your skills and real free time, have an idea of what you are willing to fix yourself and what you’ll need a professional RV service technician to fix if you do decide to buy the coach. Also, have a general idea of how backed up the RV service center is or how soon the mobile RV repair company will need to complete the work.
If you don’t have a lot of time or are looking at an expensive luxury RV, hiring a professional RV inspector may be worth it. The National Recreational Vehicle Inspectors Association (NRVIA) trains and certifies RV inspectors across the United States. They even have a searchable database of their graduates. You can use the NRVIA Locator so you can find an inspector close to the RV you’re looking to buy.
These professional inspectors are licensed, bonded, and insured to inspect multimillion-dollar bus conversion Class A motorhomes down to teardrop campers. There’s usually a flat rate for a thorough level one inspection that covers everything in the RV. When they complete their task, they write up a report for you. The level two review sends fluid and other samples to a forensics lab to test for contaminants. A more detailed inspection is more expensive but can be valuable in certain situations.
If you’re looking to buy a new or used RV, we invite you to print this checklist out and take it with you to guide you through your RV inspection. We recommend narrowing your choices down to your favorite three before you inspect them, so you aren’t wasting your time on motorhomes or travel trailers you end up not buying.
Even before you decide which RV to buy we highly recommend that you rent the type of RV you are considering purchasing. “Try BEFORE You Buy” is advice we give all the time. Why…?
Because many people buy the wrong type of RV and discover they want to change to a new RV or camper after only a year or two. Since RVs experience most of their depreciation in the first several years you could end up losing a lot of money when you try to sell or trade-in your RV on the “right RV.” For example, if you are considering purchasing a Class C RV, rent one first to see how you like it!
To start your search for your perfect coach, learn the best RV shopping strategies and more through our RVBlogger Website and take a virtual tour through our weekly YouTube walk-throughs . In addition, you can check out our Amazon Gear Page to find the best essential accessories you’ll need to start your RV vacation on the right road to success.
If you want to get inspiration from the RV Community, join the conversation with our RV Camping for Newbies Facebook Group. It won’t take much scrolling to see how we all congratulate each other when someone takes delivery on their newly purchased motorhome or travel trailer. You can also see how we travel on our Instagram page.
Do you know what you want to do, where you want to go, or how you want to use your RV once you get it? Subscribe to our FREE digital magazine, RV Camping Magazine , to learn all that and more. Our guest authors explore the best destinations, show you fascinating remodels and restorations of vintage travel trailers. The National RV Training Academy writes an article and adds a video to customize your RV preventive maintenance checklist each month. You’ll also learn about new gadgets and the best recipes that are RV-friendly.
So, for Mike and Susan, remember to leave your campsite better than you found it, thanks for reading, and we’ll see you next time!
Related Reading:
12 best questions to ask when buying a new camper, 10 best questions to ask when buying a used camper, should i buy an rv or camper here’s how to decide…, best rvs and campers for beginners, about the author:, brian newman – author and full time rver.
Although he’s from Motown, Brian Newman is a legacy RVer that grew up on I-75. He, and his wife have enjoyed the full-time RV lifestyle since 2017.
Like John Madden, he hasn’t “worked” in years because he gets to write about his passion. When he’s not working, he supports his daughter’s dog rescue efforts and disability causes.

Leave a Comment Cancel reply
Save my name, email, and website in this browser for the next time I comment.
- Find a Location
Essential Checklist For Your RV Road Trip

Start with a Roadworthy Check-up (ideally, 3-6 months before your trip). Before you even think about heading out on the road, you need to check your RV’s condition and ensure it is safe and ready for travel. The last thing you want to do is end up stranded and have to deal with mechanical or electrical issues instead of enjoying your vacation. Consider having your RV inspected by a certified technician at least annually while you perform regular preventative and condition-based maintenance . Remember, an ounce of prevention outweighs a pound of cure.
The Big 4 in RV Trip Preparation
These top four checks will go a long way in avoiding costly repairs down the road. So, allow for plenty of time, a month or more, to check these items in case you find issues.
Check the roof as a part of your road trip checklist. UV and water deteriorate the roof sealant coating over time. Regular care, preventative maintenance, and periodic inspection can maximize your RV roof lifespan. RV roof replacement can cost $300+ per linear foot (labor and materials) while resealing your RV roof can cost $250-$500 total.
- If your RV roof is walkable, be sure to walk it so you can closely check for damage. Otherwise, use a ladder to inspect the condition of your roof from a safe vantage point. If you’re not comfortable at heights, have an expert do a roof check at your nearest Camping World Service Station.
- Make sure there are no cracks or broken seals around anything.
- Rub your hand over the roof surface to check the sealant for a chalk-like feeling. White residue on your hand indicates the roof coating is deteriorating. While this is normal wear, this means it’s time to reseal your RV roof.
- If needed, thoroughly wash your RV’s exterior to help with visual inspection and water leak detection .
Check those tires —on your RV and tow vehicle if you have one. Remember to check all spare tires, too. Tire blowouts are a leading cause of RV accidents. If your rig is in long-term storage, the tires should still be raised off the ground to reduce load weight stress and distortion.
- Look for wear and tear in the tread and sidewalls.
- Check tires for age. Even if the tire tread looks “like new” as a safety precaution replace tires past the manufacturer’s published lifespan. As mandated by the U.S. Department of Transportation (DOT), the manufactured date code is stamped into the sidewall as the last 4 digits after “DOT.” The first two digits are the week (out of 52 weeks per year) and the last 2 digits are the year it was made. Generally, RV tire lifespan is around 6 years. After that, tires are on borrowed time.
- Check for correct tire pressure as tires lose about 2-3 PSI per month in storage. Also, look for air leaks.
- Check tire lug nuts for tightness as well as wear.
Time-Saving Tip: While you’re checking this area, look under the RV for fluid leaks and holes housing unwanted little guests. Check the RV’s underbelly and look on the ground for evidence. Also pay attention to any rust or cracks on the chassis frame.
Mechanical Inspection
Mechanical inspection is a necessary part of your road trip checklist. Have your RV, from a fifth wheel to a travel trailer , completely mechanically checked, or do it yourself. It’s also wise to check your tow vehicle maintenance as well. Towing adds stress on the tow vehicle, increasing the frequency of routine maintenance.
If this is your first road trip of the RV season, you can bundle this pre-trip inspection with your RV’s annual maintenance technician check . If the technical manual recommends specific maintenance be done by a certified technician, then take it to a professional. Do not disregard warnings or suggestions in the manual and double-check the warranty requirements. Bottom-line, make sure these key components are checked:
- Brakes, Axles, and Differentials: As needed, adjust your brakes, grease your axles, and check your differential fluid level. If you don’t feel comfortable getting underneath your RV for this check, schedule a maintenance service appointment with your nearest Camping World Service Center. If you have already had an annual maintenance service check completed by a certified RV technician, then confirm that the service falls within the mileage guidelines recommended in your owner’s manual.
- Fluids: Fluids are the lifeblood of any motorized vehicle. As a part of your road trip checklist, inspect the level and condition of these essential automotive fluids by looking at the dipsticks and fluid reservoirs located under the hood—engine oil, radiator coolant/antifreeze, brake fluid, transmission fluid, power steering fluid, windshield washer fluid. To check your freon level, you’ll need an AC recharger with a gauge kit.
- Engine Air Filter: This filter is located inside of a housing connected to the engine block. When removing the engine air filter from its housing, remember its orientation—the orientation matters for some models.
- Cabin Air Filter: Although motorhomes are built on truck and bus chassis, when the outside air intake has been relocated to the enclosure containing the heater and AC evaporator core, the dash HVAC system may not come with a cabin air filter. Check your owner’s manual to confirm your configuration.
- Oil Filter: Remember to replace it when you change your engine oil. The oil filter is attached to the engine block.
- Fuel Filter : If your fuel filter has a clear window, visually inspect the condition of the filter paper and the color of the fluid. If the fuel filter is not see-through, then pay close attention to your engine performance. Watch for decreased fuel efficiency, rough idling, and engine stalling. The fuel filter is located along the fuel line in between the fuel tank and engine, sometimes underneath the vehicle and other times inside the engine compartment.
- Belts, Hoses, and Wiring: Since you’re already in the engine bay, perform a visual inspection of the condition of the belts, hoses, and wires—essentially, everything else visible under the hood. Check for looseness and material deterioration—such as cracking, holes, fraying, and exposed wires.
- Lights : Visibility is critical for safe driving. Test headlights, tail lights, turn signals, and hazard lights/flashers.
- Horn : The road, and even the trails, accommodate drivers of all skill levels. Your horn is a safety device to alert others of your approach, especially when the other driver seems unaware of your presence. When you’re traversing a winding grade, those you’re sharing the road with will appreciate the safe use of your horn.
RV Hitch and Tow
Make sure your hitch and towing equipment are in good order as a part of your RV road trip checklist. Your hitch and tow setup should be compatible with your load capacity . Check for corrosion, wear, and loose parts while inspecting the following items:
- Fifth wheel trailer kingpin and fifth-wheel components . Before hooking up to your tow vehicle you will need to install a lube plate or add grease to the fifth wheel hitch skid plate surface. Remember to lubricate the rest of the moving parts to protect the inner workings of your hitch as well as prevent a stuck hitch release.
- Conventional trailer hitch components and tow vehicle rear receiver opening. If your tow vehicle is equipped with an aftermarket frame mount hitch , inspect the bolts or welds.
- Weight distribution hitch components and sway control system components .
- Tow dolly components and accessories .
- Pay extra attention to the coupler mechanism and all hitch pins used in your hitch and tow setup. The hitch coupler and pins prevent your RV and tow vehicle from disconnecting during travel.
- Check all bolts because road vibrations can loosen bolts over time.
- Check all cables, electrical connections, and chains.
- RV bumper hitch . Although this hitch is not rated to tow a trailer or vehicle, if your RV uses this hitch mount attachment for hauling bicycles, cargo, or other accessories then remember to check the bumper fastener (clamp or bolt-on).

Inspect and Prep RV Systems
Next on the road trip checklist: inspect your systems. Check or have your RV’s internal functions completely checked. These inspection points can also be scheduled with your RV’s annual maintenance service. If you RV full-time, your RV systems should be regularly maintained and ideally, you’re already vigilantly monitoring these items.
Completing these checks also tests RV circuits for issues. Inspect for damage, corrosion, and loose or stuck parts. As needed, use the recommended compatible conditioners, lubricants, and fluids to protect and maintain these components:
- Open and extend steps , slideouts, slide toppers, awnings, windows, and any patio decks. These should be retracted and closed during storage. Note whether these items move freely. Pay attention to the condition of all latches, hooks, hinges, and any movable parts. This functional test also pre-checks your coach batteries.
- Check slideout seals , visible mounting points, and visible slide mechanism components.
- Check topper and awning fabric as well as arms, tubes, and visible wiring.
- Check window seals. Look for chips, cracks, and leaks in the glass.
- Check the seals around doors , storage compartments, and any patio decks.
- If you skipped washing your RV earlier, it’s a good idea to thoroughly wash your RV exterior to help with visual inspection and water leak detection around the windows and doors.
- If necessary, de-winterize your RV . You can test the campground/city water hookup as part of this step when you pressurize the water system.
- Inspect the water heater. Make sure to put that drain plug back in if you removed it. Check panel wiring for dry rot and debris.
- If you have a gas/electric refrigerator, remember to check the panel wiring for dry rot and debris as well.
- Check the condition of your HVAC system components .
- Sanitize the freshwater tank if it’s been six months or longer.
- Check for mold, mildew, and unwanted critters inside the refrigerator, bathrooms, under sinks, inside closets, and the rest of the RV interior.
- Check your batteries —coach, chassis, tow vehicle—for corrosion, fluid levels, and recharge (as needed).
- Safety checks on your propane system . Start with the propane system turned off. Pay attention to any propane odor. Look at your propane tank label to confirm whether it needs recertification. Inspect the propane hoses and seals for cracking. If no visible issues, then open your propane tank to bubble test for propane leaks. If no leaks, continue onto the next check.

Functional Test RV Systems
Before testing, inspect all exhaust and intake openings and remove any nests or debris found inside. Test run remaining RV systems.
- Inspect and run your generator. As needed, change filters and fluids according to the manufacturer’s technical manual. If you regularly use your generator while RVing, then plug it into your generator for testing the electrical appliances. This better simulates your real-world usage.
- Stove (Begin with the stove in case you need to bleed any air out of the propane lines .)
- Water heater (Start the water heater soon after so it can heat the water while you test other appliances.)
- Water pump (While testing the water heater, you’ll also test run the water pump .)
- Refrigerator
- Confirm any dual or 3-way gas/electric appliances run properly for every option.
- Lights (Check to make sure all lights work—interior lights and exterior auxiliary lights. Proper lighting helps with security and to deter theft .)
- If you did not have to de-winterize your RV, also test run the campground/city water hookup .
- Inspect your jacks for dents, bent or twisted metal, stripped threads, loose bolts, and corrosion. If your RV has electric or hydraulic jacks, also look at the motor, wiring, electrical connections, hydraulic hoses, and hydraulic fluid level depending on the jack type. As a precaution, refer to the jack manufacturer’s technical manual before performing preventative maintenance. Repair methods can vary across manufacturers of the same type of jack.
- Temporarily pull your RV out of its storage spot. This flexes the tires for oil dispersion within the rubber components. This also tests your jacks, hitch setup, and trailer brakes and lights. With the RV out of the way, recheck the storage parking space for evidence of leaks.
1 Week to Pull Chocks

About a week before your trip is where the bulk of the road trip planning needs to occur. It’s also the ideal timeframe for an RV Ready Check-In. Doing all this a week out gives you enough time to get it done without having to rush. It’s best to discover any issues and troubleshoot whether you need replacement parts before hitting the road.
Prep for Your Travel
- It’s smart to contact campgrounds at or near your destination and make a reservation. In some locations, drop-ins aren’t allowed. Many popular campgrounds fill up fast, and you need to plan well in advance.
- If you are a first-time RV owner , leverage Camping World’s expertise to fill in any knowledge gaps. In addition to online resources, there’s the Camping World YouTube channel . Plus, you can always visit the nearest store for professional advice on your specific RV model and lifestyle setup.
Preventative Measures
- Reconfirm fluid levels are satisfactory for your motorhome, tow vehicle, and generator. If something has changed since your Roadworthy Check-up, re-inspect for leaks.
- Recheck your battery holds a charge. If the battery charge indicator is not showing full/max, then re-inspect the battery for the root cause .
- Recheck the black tank level. The sensor should indicate empty . If it isn’t reading empty, then you know an issue with the sensor is at play—either something is stuck to it or the sensor needs replaced.
- Confirm the number of additional propane tanks and gas cans you think you’ll need for your destination plans if any. Make sure you have enough cargo straps to secure these flammable items. Check all propane and gas containers for leaks before filling up or stowing in your RV. Fill or exchange propane cylinders.
- Inspect your fire safety systems — smoke alarm, carbon monoxide detector, LP detector, fire extinguishers. Be sure to carry the recommended number of fire extinguishers. With towable RVs , keep one in an unlocked compartment of your tow vehicle.
- Optional: Add deodorizer to your black and grey holding tanks. This allows plenty of time for it to address any lingering or developing odors. This tip really depends on your preference and sensitivity to smells.
Restock and Stage
- Put together a meal plan and be ready to prepare food at the campground.
- Shop for food and supplies you’ll need on your trip.
- If this is your RV’s first outing, outfit it properly .
- Stage the gear you plan to use at your destination— hiking , hunting , fishing , boating , and more .
- Pack or stage laundry (remember the towels!). If needed, wash laundry that you plan to take with you.
- Check tools and spare parts inventory. Stage any tools until load-in.
- Check to make sure that your first aid kit is complete .
- Gather all of the important paperwork , like insurance and health documents, and have them in one place.
- Gather all required medications for your family as well as any pets.
- Prearrange any obligations to be covered while your gone—for example, bills, mail delivery, packages.
- Plan your route and print copies of maps and directions (in case you don’t have internet access or phone signal). Good Sam members can use the exclusive Trip Planner to research a travel route with height clearance search filters.
- As you gather and stage these items, build a cargo packing plan .
Day Before Hitting the Road with Your RV

It’s time to load supplies and gear. Doing these items the day before departure saves stress and gives you time to reconfigure your storage plan if needed. Also, time to do a double-check of the following:
- Double-check tire pressure on the tow vehicle and RV.
- Double-check awnings are secured .
- Double-check exterior-mounted cargo —bikes, kayaks, coolers are secure.
- Double-check walkie-talkies are charged.
Safe Load Limits
Avoid overloading and remember to account for any liquid weight.
- When loading and packing your RV and tow vehicle, take note of the Gross Axle Weight Rating (GAWR) . Try your best to balance the load weight evenly across the axles from front to rear and side to side.
- For driving and braking safety, do not exceed the Gross Combination Weight Rating (GCWR) .
Departure Day

You’re almost ready to get in your RV and hit the road, it’s essential to take some time and make sure you’re totally prepared for your trip.
Travel Safety Checks
Even if you checked these yesterday, it’s a wise practice and good habit to do a walk-around just in case anything changed. Because anything could happen, even in your own driveway. Run through the travel safety checks:
- Clean all windows, mirrors , and cameras . Everything you do to increase your visibility will help you maneuver more easily and safely.
- Verify all appliances are turned off and stored. Remember the fridge, and use safe settings for travel. Certain states prohibit RVers from operating propane refrigerators in transit. While this practice remains hotly debated, RV refrigerator manufacturers do not officially oppose these regulations.
- Verify hookup hoses/connections are closed. Remember to check your propane tanks, hoses, and valves.
- Final Walkthrough Verification. Walk through the interior of the RV to make sure stuff is secured. Check inside all cupboards and the refrigerator to secure items that might move or shift while traveling. Close all internal and external doors and cabinets and lock them if necessary. Secure any additional gas cans and propane tanks. Open any toy hauler garage exhaust vents.
- Avoid clearance issues . Check all antenna and vents to sure they aren’t up before pulling out. Close roof vents except those for ventilation. Make sure any moving parts are secured. Ensure all external RV items such as steps, decks, and handrails are properly stowed.
- Remember to remove wheel chocks as well as raise jacks and stabilizers before pulling out. Also, remember to grab your leveling blocks underneath the jacks and stabilizers.
- Final Walkaround Inspection . Do a thorough walkaround inspection of the RV, tow vehicle, and hitch pins. Touch everything to make sure it’s secure and ready to go.
Fueled and Ready to Go the Distance
Your journey is ready to begin. Here are a few things that will make your travels more comfortable with fewer inconvenient pitstops.
- Pack the fridge and the cooler . While it won’t derail your adventure, the meal plan you put together for the campground will be tastier if you packed the ingredients. Pack the cooler so you minimize opening the fridge until you reach your destination.
- Fill containers for drinking water. Keep them and the cooler within the passenger area for easy access.
- Fill the potable freshwater tank to your preferred level if you are boondocking, but remember that carrying a lot of water with you adds a considerable amount of weight to your rig. Try to do this closer to your campsite.
- Fuel up the vehicle if it isn’t already.
With every item on this RV road trip checklist marked off, you should have a safe and enjoyable trip. With this comprehensive checklist and some savvy RV hacks , you’ll be the smartest camper at the campground.
How do you prepare for your RV trips? Anything you’d add to this checklist?
- Comment (5)

My camper , a 2004 pioneer travel trailer has been setting outside in the weather for the last 5 years due to my health with cancer.
Now I am well enough to want to try and start using our travel trailer again but the top and sides has really gotten fiflty with black streaks, etc.
What would you suggest I use to get it back clean again ??

What states prohibit using propane to power your RV refrigerator while in transit? I’ve Googled this a number of times and several ways and have not found any information or states that prohibit it. Please provide a link to any such information if it actually does exist. I have always traveled with my RV refrigerator running on propane and so did my dad when I was growing up, well over 50 years doing so and never any problems. I never pull up to a gas pump with it on and don’t turn it back on until well clear of fueling pumps. I also make sure there is nothing electrical powered on and running while fueling including my cellphone and always ground myself before grabbing a fuel nozzle. This ought to be common sense but unfortunately it isn’t. It only takes a spark to ignite any potential gas fumes present and accidents involving ignition of gas or fumes from static, cellphone, or other electrical/electronic devices is well documented.

We have become avid tailgaters for concerts & festivals so we created “the tailgate bucket”. This large box contains it all: utensils, grilling items, spices paper towels, trash bags, toilet paper, koozies, etc etc. Now that we have our first camper, we just grab the tailgate bucket, throw it in the camper & go! I am now creating other task specific buckets for the camper (bed and bath, outdoor/patio/campfire, first-aid, etc). This way, we can prep the buckets in the house well in advance of our trips. So much easier and you do not forget essentials as they are always stocked in advance. We restock at the end of each trip so it’s pretty much ready to go for the next adventure! Since we have our camper stored at a location an hour away, we cannot just go in and out to check supplies & inventory. So this system is perfect!

I like using Find Friends app to share with family so they can track where we are at? Works great if are traveling as a group also.

Good check list. However I would do a final walk around inspection (especially if you are a full timer. Before I get all crazy and weight a bunch of stuff there is a check list in the cdl study guide provided by the DMV that will work very well. 1) pull your rig out of your current parking spot and to a safe spot in the park or street. 2) walk back to your parking spot and check the following; – you didn’t forget anything, chuck blocks, leveling blocks, hoses, chairs or anything else. – be sure you cleaned up after yourself, all trash… – inspect the ground for any signs of leaks from your rig ( puddles, drips, stains….) – be courteous and check out with the park host – do a final check of all lights, brakes, CB, Walkie Talkies, and all passengers to include pets – Make all last minute calls to family and friends where you are leaving from and where you are going to. This includes your next destination to give them a heads up if you are arriving after hours. -SAFE TRAVELS
Leave Your Comment Cancel Reply
Save my name, email, and website in this browser for the next time I comment.
Shop By RV Type

Your Adventure Awaits
Copyright © 2023 cwi, llc all rights reserved.
- RV Glossary |
- Privacy Policy |
- California Privacy Rights |
- Do Not Sell or Share My Personal Information |
- Targeted Advertising Opt Out |
- Terms of Use
- (904) 204-8547
- Get started
How To Ship My Travel Trailer: Trailers Transportation With MoveWheels In 2024
Get Free Instant Travel Trailer Hauling Quotes & Save Up To 49%
- Great Quotes
- Insured Drivers
- 5-Star Support
- No Payments Upfront
In 2024, more people than ever are catching onto the travel trailer trend. Why? Because it offers a comfortable, cost-effective way to satisfy the wanderlust that’s capturing the hearts of RV enthusiasts, vacationers, and new travel trailer owners across America.
But one question lingers: “How do I get my travel trailer from point A to point B?” Don’t worry, we’ve got you covered. This article is your go-to guide for everything about travel trailer transportation , from important factors you should consider when shipping, how to get your trailer road-ready, what to expect upon delivery, and savvy tips to ensure a hitch-free shipping experience. And for those seeking a dependable service provider, we’ll be spotlighting the remarkable travel trailer shipping services of Move Wheels. Buckle up, and let’s hit the road!
The Rising Trend of Travel Trailers in 2024

As we cruise into 2024, travel trailers are hitting an all-time high in popularity. They offer the ultimate trifecta – comfort, convenience, and cost-effectiveness, making them the preferred choice for those looking to roam the country without straining their wallet. In a world still reeling from the pandemic and a heightened need for safe and socially distant vacation options, travel trailers are emerging as a popular solution.
But that’s not all. Travel trailers offer a smorgasbord of choices to suit every traveler’s taste. Whether you’re seeking a compact trailer for an intimate escape, or a roomy rig to accommodate your family on a memorable road trip, there’s a travel trailer designed just for you.
Couple this with the ease of towing and setting up a travel trailer, and you’ve got a recipe for hassle-free exploration. As technology keeps pace with the rising demand, we’re seeing travel trailers equipped with modern amenities, from solar power capabilities and smart appliances to environmentally friendly designs.
The soaring trend of travel trailers in 2024 only amplifies their versatility and allure. With the aid of a reliable transportation service like Move Wheels , shipping your travel trailer to your dream destination becomes a breeze, ensuring your adventure starts without any hiccups.
Crucial Factors to Consider When Shipping a Travel Trailer
Shipping a travel trailer might initially appear daunting, but with adequate preparation and understanding, the process can be transformed into a seamless and worry-free experience. Here are some key elements to consider when you’re planning to transport a travel trailer:

By keeping these pivotal considerations in mind when shipping your travel trailer, you’re paving the way for a hassle-free transport experience. Let’s now dive into how to prepare your travel trailer for shipping, a step that plays a key role in the transportation process.
How to Prepare Your Travel Trailer for Transportation
Getting your travel trailer primed for transport is a vital step in safeguarding it against any potential mishaps during the journey. Here’s a rundown on some key steps to get your travel trailer ready for transport:

By adhering to these important steps, you’re setting the stage for a safe and secure transit for your travel trailer. Partnering with a trustworthy, experienced transport service like MoveWheels.com is also key to ensuring your travel trailer is handled with utmost care and reaches its destination promptly and safely. Next, let’s explore what you can expect when it comes to delivery.
Delivery Expectations: Timeframes, Conditions, and Post-Delivery Checklist
Grasping the delivery expectations for your travel trailer transportation is key to ensuring a seamless, stress-free process. Here’s what you need to know about delivery expectations:
The expected delivery timeframe for your travel trailer’s journey will hinge on several variables, including distance, the selected route, and the method of transport. Collaborating with a trustworthy transport service like MoveWheels.com is critical, as they can provide an estimated delivery window and keep you informed throughout the transit.
It’s essential to articulate the delivery conditions for your travel trailer. This includes specifying whether the delivery will be to your doorstep or another location. Make sure to mention any special requests, like offloading on uneven ground or tight spaces.
Post-Delivery Checklist
Once your travel trailer has arrived at its destination, it’s time to run a detailed post-delivery check to ensure everything is in order:

By getting a handle on these delivery expectations, you’re well on your way to a successful, stress-free transport experience for your travel trailer. So, with the delivery expectations in check, let’s move on to tips and best practices to further ensure a smooth shipping experience.
Ensuring a Smooth Shipping Experience: Tips and Best Practices
Navigating the transport of a travel trailer can be intricate, but a handful of guidelines can streamline the process and pave the way for a relaxed, stress-free experience. Here are some fundamental pointers to consider:

By embracing these tips and best practices, you’re setting the stage for a smooth and worry-free travel trailer shipping experience.
In wrapping up, the journey to successfully shipping your travel trailer encompasses a multitude of considerations, from acknowledging the burgeoning trend of travel trailers in 2023 to mastering the specifics of transportation. Diligent research, comprehensive preparation, and setting clear delivery expectations form the backbone of a smooth process.
While it might seem intimidating initially, remember that a seamless, worry-free experience is well within your reach with the right guidelines and an adept service provider. Choosing a company like MoveWheels , that stands on a reputation of reliability and expertise, makes the process even easier. Here’s to the thrill of the open road and the countless adventures waiting just beyond the horizon!
What is the maximum size of a travel trailer that can be transported on the road?
The maximum size of a travel trailer that can be transported on the road may vary by state and jurisdiction. It is essential to check the local regulations and obtain the necessary permits for oversized travel trailers.
What should I do if my travel trailer is damaged during transportation?
If your travel trailer is damaged during transportation, it is crucial to document the damages and notify the transportation service provider immediately. You should also work with the provider to file an insurance claim and seek compensation for any damages.
Can I transport my travel trailer myself?
It is possible to transport your travel trailer yourself, but it can be more challenging and risky than working with a transportation service provider. You may also need to obtain necessary permits and licenses, depending on the size and weight of your trailer.
What should I do if I have a problem with my transportation service provider?
If you have a problem with your transportation service provider, it is essential to communicate your concerns with them and try to resolve the issue. If you are unable to resolve the problem, you may need to seek legal recourse or file a complaint with the appropriate regulatory agency.
Similiar Articles
- Is Your RV Ready for Spring Travel? Pre-Transport Checklist
- Open Vehicle Transport: How it Works and How Much It Costs in 2024
- Secure and Sophisticated: Your Complete Guide to Enclosed Auto Transport with MoveWheels
- New Year, New Motorcycle: Top Motorcycles` Choice among Americans in 2024
- How Vehicle Type Impacts Transportation Costs: From Cars to Heavy Equipment
- Why You Shouldn’t Put Personal Items in Your Car During Shipping
- Top 5 Advices for Shipping a Classic Car
- Choosing the Right Trailer for Heavy Equipment Transport
- The Mom’s Guide to Buying a Car
- Smooth Sailing: A Comprehensive Guide to Boat Transportation
411 Walnut STR NUM 4179, Green cove springs, FL, 32043, USA
2007 - 2024 BWT Group LLC
Picking Up Your RV – The Dos and Don'ts of Taking Delivery
The following is an excerpt from our FREE guide The 4 Things RV Shoppers Must Know Before Purchasing a New RV . Click here to download your free copy now!
No matter if your brand-new motorhome was found on the lot or had to be ordered from the factory, it is essential that you plan to take some time examining your RV before you drive off on any trips or adventures.
Take the time to make sure everything on your new coach is in working order and all of your questions have been answered. You’ll be glad you did. Here is some helpful advice on what to do before you finish taking delivery:
Free resources for RVers
Where to stay, what to eat, and so much more!
- Do not schedule pick up on a day before the dealer will be closed. This way, if fixes need to be made, you wont be waiting several days. This is especially important if you’re taking delivery far from home.
- Make sure you receive all documentation and owners materials, as well as serial and model numbers related to your RVs warranties.
- Test everything. If you’re unsure of how to operate something, do not hesitate to consult with your sales associate.
- Do not leave the dealership until all of your questions have been answered to your satisfaction. A quality dealership will make sure you leave knowing everything you need to know to enjoy your new RV.
- Don’t skip the test drive. Make sure you are fully comfortable with how your new coach handles out on the road. New questions will almost certainly arise during your time behind the wheel.
- How to find the perfect RV for you
- The key differences between gas, diesel and luxury diesel RVs
- What you must consider when selecting an RV manfacturer
Click here to download your free copy now!
Mise en Place
The Last New York Winter It’s the Montes’ first...
His physical condition hasn’t impeded his personality....
Campsite Safety Tips for the Family RVer
RV Driving Safety Everyone has seen it: an RV speeding...
3 Tools to Find Safe and Open RV Boondocking Sites
What is Boondocking? Loosely defined, boondocking is...
Dog-Friendly Hiking Tips
Camping and Hiking with Dogs In an RV, you and your...
Cool Hiking Gear For The RV Enthusiast
Garmin vivoactive® 4 Hiking is a great way to shake...
Show 2020-18
Jeff Creates a ‘Just to Make Sure’ Pre-Delivery Checklist, RV Trends and Updates and 10 Common Things We Forget to Bring Camping!

rv HoW to Tips
Pick up your new rv with a 'just to make sure' checklist.
When you go to pick up your RV at the dealership, they’re gonna do a walk-around with you as part of their PDI. And the walk-around, they take you all around the vehicle, they show you all the systems, they make sure that you understand how everything works, and that’s great, but if it’s your first time buying an RV, there’s a lot to remember, a lot of new systems and things. So, Jeff’s created this ‘Just to Make Sure’ checklist for you!
rv Upgrades
Rv trends and upgrades.
Many people are buying new, and used, RVs and upgrading them. For example, dining booths in older RVs were common. They were functional and served a purpose, but comfortable? Not really, today’s new dining booths not only look great, but are comfortable, whether you’re using them for dining or an on-the-road office.
Many current RV owners are also upgrading and remodeling their RVs with some of the latest comfort and convenience items found in newer models.
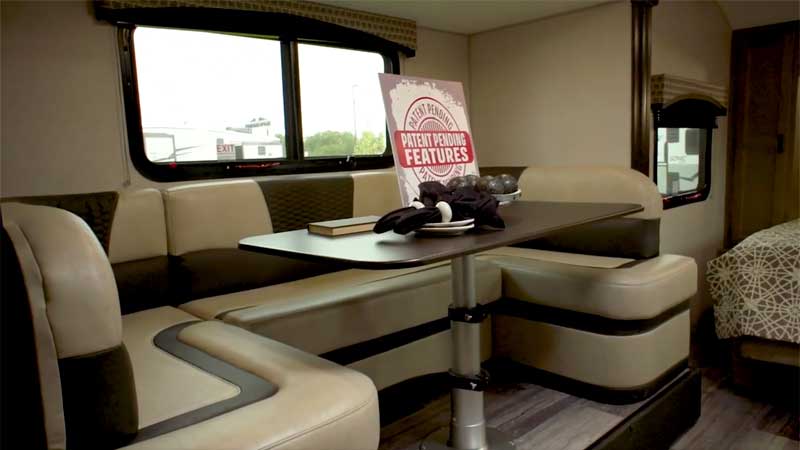
rv Education 101
Ten things to remember to bring.
Hi, I’m Mark Polk with RV Education 101 . I was talking to an RV owner the other day, and he told me no matter how well he thinks he packed his RV for a trip, every time they arrive at their destination, they’d need to buy something from the campground store that they forgot to take.
This has happened to us more than once, so I thought it would be fun to compile a list of ten items folks forget to pack for camping trips. Read on to see what those ten items are!
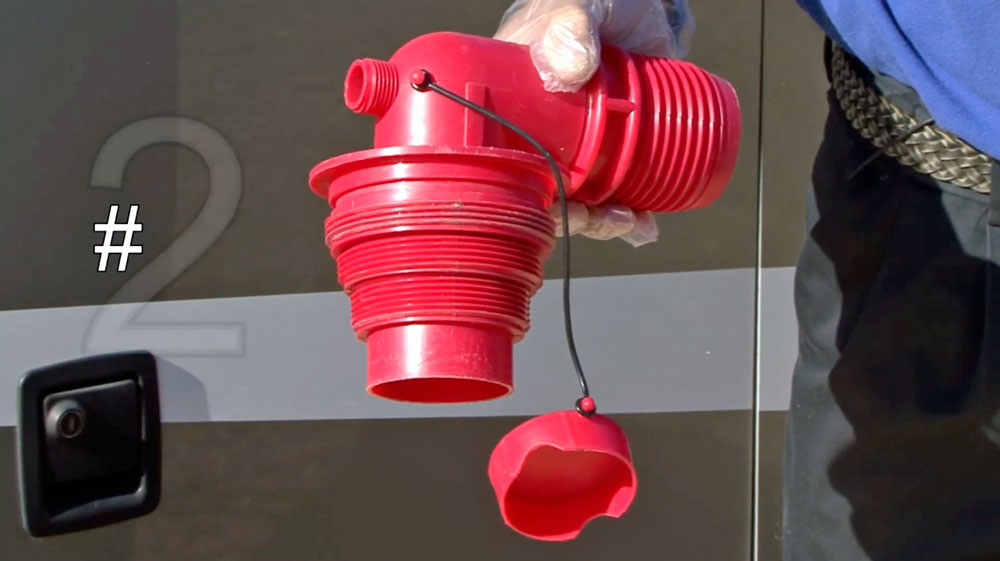
- Search in titles only Search in Tools, Parts and Other Essential Items only Search
- Advanced Search
- Disclaimer: In general, this forum is intended to be a place for Grand Design owners to gather and exchange ideas regarding their use of and experiences with Grand Design products. Any information contained in the forum should be independently verified by checking with Grand Design, one of its authorized dealers, or reviewing your owner’s manual. If this is your first visit, be sure to check out the FAQ by clicking the link above. You will need to to register before you can post: click the register link above to proceed. To start viewing messages, select the forum that you want to visit from the selection below. Thanks for visiting and your interest in Grand Design!
Announcement
Pre-delivery checklist.
- Latest Activity
- Time All Time Today Last Week Last Month
- Show All Discussions only Photos only Videos only Links only Polls only Events only
- Join Date: May 2019
- Posts: 12379
- PDI Checklist v2.pdf (60.3 KB, 672 views)
- Join Date: Jan 2021
- Posts: 4593
- Join Date: Feb 2021

- Couch was repaired by a mobile furniture repairman about four weeks later when we were back near the dealership to see the grandkids. The puncture is fixed and the couch looks almost new. On very close inspection you can still see what I'll call a "stain" from the original repair attempt, but it's good enough.
- Join Date: Jan 2022

Camper Outdoor
All about RVs & Campers
Buying a Used Travel Trailer Checklist
Are you looking to purchase a pre-owned travel trailer? Even if you are not a beginner when it comes to RVs and campers, you want to be 100% sure of the investment you are making. Whether it’s a new or used travel trailer, you must check every step of the process of selecting, inspecting, and purchasing the travel trailer to ensure complete satisfaction with the transaction you’re about to undertake. If you want to make sure you have a solid checklist for buying a used travel trailer and guide you through the process , you’re in the right place. In this article, we share our expert input for buying a used travel trailer checklist ( Free Printable PDF ) .
The Checklist for Buying a Used Travel Trailer should include items like budget, floor plan, towing capacity, and must-have features. For a used travel trailer , you’ll also want to factor in things like condition, age, and miles . No matter which route you go, be sure to do your research and inspect the travel trailer thoroughly before making your purchase. This way you can hit the open road with peace of mind, knowing you made the best decision for your needs.
There are so many factors to consider when purchasing a used travel trailer.
This self-inspection checklist before buying a used travel trailer has more than 150 inspection points, and it is based on the manufacturers’ RV PDI but modified to look for particular details since you will inspect a used RV. You can download the “buying a used travel trailer checklist” Free Printable PDF , print it out, and bring it to the self-inspection (8 pages) . It is perfect to guide you through the process and don’t miss any details when inspecting a used travel trailer before buying .

Also, I would recommend this checklist for a private seller trying to sell a used travel trailer (to the right trailer value) . It’s the last chance for the seller to improve the trailer before selling and get the most out of your trailer.
Now let’s take a closer look at each of these items in more detail.
Table of Contents
How to Buy a Used Travel Trailer Checklist
When buying a pre-owned travel trailer , your checklist should include:
- Budget: How much can you afford to spend on your new travel trailer? Keep in mind that there will be additional costs beyond the initial purchase price, such as insurance, maintenance, and repairs.
- Floorplan: What type of floorplan do you need to comfortably accommodate your family or group? Do you want a spacious living area or kitchen, or are you looking for more storage space?
- Towing capacity: What is the towing capacity of your vehicle? This is an important consideration, as you’ll need to make sure your vehicle can safely tow the travel trailer.
- Must-have features: What features are must-haves for your new travel trailer? Some examples might include awnings, slide-outs, or solar panels.
- When buying a used travel trailer , you’ll also want to factor in things like condition, age, and miles. For a used travel trailer , your checklist should also include:
- Condition: Is the travel trailer in good condition? Be sure to inspect it inside and out, looking for any signs of damage or wear and tear.
- Age: How old is the travel trailer? Older models may not have some of the same features and amenities as newer models.
- Miles: How many miles has the travel trailer been used? This can give you an idea of how much life it has left and how often it’s been used.
In this article, we prepared a Checklist for Buying a Used Travel Trailer covering in detail all the self-inspection step-by-step you need.
No matter which route you go, be sure to do your research and inspect the travel trailer thoroughly before making your purchase. This way you can hit the open road with peace of mind, knowing you made the best decision for your needs.
As you will see in the following paragraphs, the most important part of the process of purchasing a used travel trailer is the inspection checklist to prevent scams.
What to Look for When Buying a Used Travel Trailer
If you’re in the market for a used travel trailer, there’s a lot to consider. You’re about to embark on a whole new world of adventure. That’s why we create this “ buying a used travel trailer checklist” and as you can see it is just for used travel trailers.
However, before you make your purchase, it’s important to do your homework and make sure you’re getting the best possible deal. Let’s see What to Look for When Buying a Used Travel Trailer .
We spoke with industry experts to find out the greatest red flags and signs to look out for, plus summarize our years of experience as RVers and engineers designing and manufacturing RVs and RV parts, as well as everything else you should keep in mind when buying an RV to create the perfect checklist for a used travel trailer. This checklist is different from the inspection points you should have for a motorhome, a fifth wheel, or a new RV. Use this “Buying A Used Travel Trailer Checklist” to help guide you through the process of buying a used travel trailer.
Here’s a checklist of things to keep in mind as you shop to help ensure you find the perfect travel trailer for your needs.
Determine Your Budget Before Buying a Travel Trailer
The first step in buying a travel trailer is to determine your budget. It’s important to have a firm idea of how much you’re willing to spend on a travel trailer before you start shopping. This will help narrow your search and prevent you from overspending.
How much can you afford to spend on a travel trailer? Determine your budget and stick to it.
Once you have a number in mind, you should not start shopping around until cover the rest of this checklist.
Research Different Types of Travel Trailers
There are many different types of RVs on the market, and travel trailers are very popular, so the variety of models on offer is huge. Whether you are looking for a new or used travel trailer, researching which travel trailer is the most attractive for your budget will take a lot of time.
Beginner buyers sometimes purchase campers practically on impulse, relying only on the look or floor design. Take the time to study the components, such as a water pump, plumbing, cabinet kinds, and so on. You will have to live with these intricacies, and you will not want to work with low-cost components.
Don’t be overwhelmed by the abundance of accessories and components, and consider carefully and critically if you require the extra capabilities supplied. Take some time to consider what type of life you want to live in your travel trailer .
Do your research to find the used travel trailer that best suits your needs. Figure out what size of travel trailer you need, regarding a length easy to maneuver, the weight according to the towing capacity, and the sleeping capacity you will need . Travel trailers come in a variety of sizes, from small “teardrop” trailers to large fifth wheels. Consider how many people you’ll be traveling with and what kinds of amenities you’ll want to have in your trailer.
Choose the right floor plan suitable for your purpose. Are you looking to live in a travel trailer or vacation and go on weekend trips? How many people will be sleeping and what kind of beds do you need?
Just like with houses, there are a variety of floorplans available in travel trailers. Again, think about how you’ll be using the space and choose a layout that will work well for you.
Pick the right extras you will need for your purpose when choosing a travel trailer. From slide-outs to solar panels, there are a lot of optional features available on travel trailers. Decide which ones are must-haves for you and which you can live without. For example: Interested in using the travel trailer during the winter ? Boondocking or Moochdocking ?
Read reviews and compare different models to find the travel trailer that’s right for you.
- Size, sleeping capacity, and types of beds : What kind of floorplan for your travel trailer do you need?
- Think about how many people will be using it and what type of activities you’ll be doing.
- Towing capacity: Can your vehicle tow a travel trailer? Make sure to check your vehicle’s towing capacity before making a purchase.
- Features : What features are you looking for in a travel trailer? Make a list of must-haves.
Let’s review a few more things before diving into the buying a used travel trailer checklist. Let’s see the towing capacity you need to tow the used travel trailer and the right used value to prevent scams.
Towing Capacity to Tow the Used Travel Trailer You Want to Buy
Regarding the towing capacity to tow the used travel trailer, you want to buy be sure to check your number about your towing capability before starting to look for (highly recommended to not waste your time) or at least before buying a used travel trailer!
Always check the maximum towing capacity of your tow vehicle. Remember that you’ll be adding people, a lot of stuff, and water if you don’t reach 80% of your maximum! Check your vehicle identification number and the owner’s handbook. Do not purchase a used travel trailer if it puts you within 80% of your maximum!!!
If you’re not towing with a truck, be sure your car or SUV has an integrated brake controller . You must have a brake controller to tow a travel trailer. If you don’t have one, calculate you’ll have to spend an extra $400 to towing safely.
As you can see before any buying inspection, there are a lot of things to consider when looking for a used travel trailer.
There is so much to choose from in the market that it will probably take you weeks to choose the model and floor plan that best suits your expectations. There is a complete article about this that we recommend you read to help you in your choice and it is called What to Look at When Buying A Travel Trailer. You can access the article by clicking on the link. Believe me when I say this is the most important part of your final satisfaction. Following these tips, you’ll be sure to find the perfect travel trailer for your needs.
Determine the Value of the Used Travel Trailer You Are Looking For
Before moving on to the checklist for buying a used travel trailer , you should consider one more thing. Besides your budget, be sure the value of the used travel trailer you want to buy is aligned with the current market.
Whether you are going to a dealer or buying from a private owner, you want to have a fair market price for the used travel trailer , which in other words is the Private Party RV Value .
The best way is to appraise the used travel trailer by using the NADA RV Guide . If you have the value in advance, when you go to the inspection, you can easily discuss the appropriate value with the seller and adjust it according to the condition of the used trailer you just it during the inspection. That’s the great advantage of basing your trailer value expectation on the NADA Guide for RV instead of websites that don’t apply rational fundamentals. If you want to learn more about why the NADA RV guide offers you the best way to quote and take care of your investment follow the links in this paragraph and it will take you to our articles where we explain how to get free quotes, how to use the guide and how to determine the NADA RV value by VIN . Remember there is no Kelley Blue Book for RVs .
Regarding the best time of the year for the transaction, for a buyer , I would strongly recommend doing your research in advance but waiting until the prices fall down by the end of the year . If you want to understand why this is the best time of the year, here is the link to my article What to Know Before Buying an RV
Get a Thorough Inspection
Inspect the trailer thoroughly before you finalize your purchase. It’s important to inspect the trailer thoroughly. You can do your self-inspection or get a pre-purchase inspection before you finalize your purchase from a qualified technician.
Take your time. Don’t rush into a purchase. This is a big decision and you want to make sure you’re choosing the right travel trailer for you and your family.
Check for any damage or wear and tear. If you have any questions, don’t hesitate to ask the dealer. Before you finalize any purchase, be sure to have a professional inspect the trailer for any potential problems. This is especially important if you’re buying a used travel trailer.
This is the most important part of the purchasing process. The core of this buying process and to prevent scams is to understand the level of details you should check and look for during the inspection before buying a travel trailer and this is the checklist that will help you to be successful in your purchase. Now it is time to start with buying a used travel trailer checklist.

Travel Trailer Self-Inspection Before Buying A Pre-Owned Travel Trailer
It is important to do a thorough inspection of any travel trailer before making a purchase, especially if you are considering a pre-owned model.
Bring the Checklist for Buying a Used Travel Trailer, Pencil, Flashlight, Gloves, and Ladder. Dress comfortably
When you go to inspect the travel trailer be sure to take a notepad or write down on this printed checklist, a pencil to take your notes, a flashlight, gloves, and although it may seem like overkill, include a ladder.
I know that bringing a ladder to the inspection to buy a used travel trailer may sound a little over the top. But believe me, 15 or 20 years ago I wish someone had given me that advice on how to properly inspect a trailer roof. If you don’t feel like carrying the ladder, you may be able to check from above with a drone. I prefer the ladder, but it’s true that when I was in my 20s or 30’s I wouldn’t have shown up with a ladder to the inspection.
Dress comfortably because you will be looking for the information above and below the trailer. And lastly, if you wear glasses, please don’t forget them! You will inspect the details of this used travel trailer, save money and ensure our investment. Keep that in mind while you read this text.
Extra Tip! Over the years I have also learned to ask my wife to go with me. Because if the seller wants to talk to me and distract me from my self-inspection job, she’s the one who takes care of it, and I can inspect without distractions. So, try to bring someone else on the inspection day to follow the seller’s conversation, and you will see how useful it is for you not to be distracted and save you from the seller who is insistent and nagging you all the time.
Print out this “ Buying a Used Travel Trailer Checklist Free Printable PDF ” and bring it to the self-inspection day, to help ensure that you are buying a quality travel trailer that will serve you well for many trips to come.
In the following sections, we will go through how to evaluate a travel trailer before buying it, using the checklist, step-by-step.
How to Inspect A Travel Trailer Before Buying It?
If you’re in the market for a travel trailer, it’s important to know how to inspect one before making a purchase. Here’s a checklist to help you out.
Before buying a used travel trailer, from a dealer or private owner, follow these important inspection tips.
You should include the entire exterior and interior. First, observe and then touch, and finally test if it works.
I advise you not to do this check with the trailer owner or dealer constantly talking to you. You will want to do this alone, objectively, and not be distracted so as not to skip any points of interest . The most important points of this buying a used travel trailer checklist is the following bullet point:
- Look for any signs of damage, both inside and outside the trailer.
- Check all of the windows and doors to make sure they’re in good condition and fully functional.
- Inspect the plumbing and electrical systems to ensure everything is in working order.
- Make sure the tires are in good condition and have plenty of treads.
- Finally, test all the features of the trailer to make sure they’re working properly.
Some of the signs of deterioration we look for are not to haggle over price or because they are costly to repair. Rather, we look for them because they may be an indicator of other damage or give us an idea of how well the travel trailer has been cared for by its owners. Let’s see the buying a used travel trailer checklist (deep dive level!)
Inspection Looking for Water Damage
In the exterior of the travel trailer as well as in the interior we are going to look for any signs of water damage. During the inspection we are going to focus in:
- Roof inspection (exterior and interior)
- Floor inspection (exterior and interior)
- Walls inspection (exterior and interior)
- Doors, Windows, and Roof Vents from the inside of the trailer
Let’s see What to Look for When Buying a Used Travel Trailer .
Exterior Condition Inspection
Travel Trailer Exterior Condition Inspection. Take a good look at the outside of the travel trailer.
When inspecting the exterior the most important inspection covers the walls, floor, and roof. We are going to start with the less important exterior condition inspection to have the details related to walls, floor, and roof fresh in our minds when we go inside.
Exterior lights and reflectors
- Also, check to make sure that all of the lights and reflectors are in good exterior condition (cracks? or broken?).
You may want to inspect the condition of:
- Exterior Security cameras,
- Entertainment center,
- Outdoor kitchen,
- Exterior shower,
- Pass-thru storage or exterior storage compartments.
- Check for corrosion and rust by opening all of the external panels. Give the walls a nudge as well.
Stabilizers
- Inspect the stabilizers. Are they electric or manual? Are they in good condition and fully functional?
Only For 4 Season Used Travel Trailers
On 3 Season and 4 Season Travel Trailers, you should inspect the drain pipes, insulation on storage compartments, and heated and/or insulated underbelly of the travel trailer that must protect the water lines from bursting and provide a suitable winterization .
- Are the drain pipes completely encased?
- Is there insulation in the basement storage?
- Is the storage in the basement heated?
- Are the tanks heated with electricity or propane?
Roof: Look for any cracks, dents, bow spots, or other damage.
The roof inspection is one of the most critical parts on our checklist for buying a used travel trailer.
- Use the ladder for the roof check so you can observe it from every aspect.
- What I’m going to check for first is bending in the trailer’s skin, so if you’re in a place like this with a lot of snow or rain, if that snow stays up on the trailer and isn’t properly removed, you’ll have bowing between the framing and that skin will go down.
- Is this trailer covered with a tarp?
- If there isn’t a tarp on the trailer, does it look like the tarp has been there for some time?
- Is a trailer covered with pine needles and sap? or Does it appear to be reasonably clean?
- Is the roof in need of repair?
- I’d go around the roof, inspecting each section. Has there been any roof sealant applied?
- Are there any additional indications of roof repair?
- I’d then go to the trailer roof vents.
- Is there a lot of work going on near the vents?
- Are there any flaws or cracks?
- All of the objects you are inspecting on the trailer roof, even just the external examination with the ladder, will provide you with information about what to search for within the trailer.
- Keep anything up there that remotely rings a bell, any type of red flag in your thoughts mind because when we enter into the travel trailer, here’s where you’ll take a closer look.
Solar Panels over the Used Travel Trailer Roof
- Are solar panels installed? Are they in good condition and fully functional?
- Are the solar panels adjustable so that you may turn them toward the sun while boondocking for a few days?
Exterior Walls: Look for any cracks, dents, bow spots, or other damage.
- A similar process as it was described for the roof, should be replicated for the travel trailer walls during the inspection. Especially next to joints, and openings such as windows, doors, roofs, lights, reflectors, etc.
Floor Inspection from the Exterior
- I strongly advise you to look underneath the travel trailer , that’s why I suggest bringing comfortable cloth to the trailer inspection.
Now, you go inside and check every single thing that remotely may seem a red flag in the exterior inspections of this used travel trailer. You will search for evidence in the interior that correlates with the possible damage you find in the exterior.
Let’s move to the next phase of this buying a used travel trailer checklist: the interior inspection.
Interior Condition Inspection
Let’s start with the part of the checklist for buying a used travel trailer that covers the Interior Inspection. Take a look inside the travel trailer, smell it, jump and touch it!
Smell Inside
- Cigarette: What does the inside smell like?
- Storage smell/Mold smell: What does the inside smell like? Might it just be a musty odor that goes away shortly? Allow it to air out for 20 minutes while you look about, then smell it again.
Used Travel Trailer Walls and Ceiling
- Check for any signs of water damage, molds, or mildew. Also, check inside cabinets and drawers looking for signs of water damage.
- Examine the corners of the ceilings and floors, look up and down the walls, and especially inspect the corners and caulk around the fixtures in the bathroom. Also, uncover cupboards and closets and use a flashlight to check for mold growth.
- Inspect ceiling joints and wall joints.
- You will check around to see whether it has recently been painted. I’d look at least twice.
- Is the fresh paint covering up water damage?
- If the water damage in the walls has been covered up, it may be more difficult to discover.
- Water damage would be visible. You may look for water damage in mattresses, inside cabinets, damaged furniture, etc.
- Water damage appears brown or produces waves on surfaces like wood paneling on trailer walls.
- If you find molds in walls or ceilings, pay extra attention in the next step when checking the used travel trailer floor.
Used Travel Trailer Floor
- If the trailer has a spanking new floor, don’t get too thrilled. Think something like “What are they covering?”
- Even if the floor is brand new, I will thoroughly check it before purchasing the travel trailer.
- I mentioned how a travel trailer floor might conceal possible water damage; I would argue the same thing regarding paint. If the trailer was recently painted, there is a chance of water damage inside.
- How do you evaluate the travel trailer floor before purchasing one? I’m just going to push about on the floor, stepping in every single spot. Look for a bouncy floor. Search for humps and elevated spots.
- Examine the flooring’s joints. Was that flooring used to cover up water damage?
- If the water caused damage to the inside of the trailer, you should be able to detect it using the techniques in this article.
- Were the cabinets harmed by water? Check between the cabinets and the floor.
- Were the walls harmed by water? Return to the “Trailer Walls Inspection” bullet points if needed.
- Another suggestion for examining the trailer floor is to remove and elevate carpets and rugs. Use your gloves.
- What’s hidden beneath the trailer rugs? I would recommend taking some gloves with you to work comfortably throughout the trailer inspection checklist. Removing the rugs and carpets may not always be the most pleasant chore. Simply be prepared to get messy and shift things about to view what you need to see.
- You could overlook minor water damage on the floor. If you find molds of walls or ceiling, jump up and down in a few places, notably around the kitchen and bathroom, where water is used the most. All of the floors should feel strong and robust; any give might suggest deterioration.
- After evaluating the whole travel trailer inside, go back outside and check to see if there is any damage to the flooring. Check below the trailer.
The bathroom will be included when inspecting the plumbing system.
Openings (Windows, Doors, Roof Vents, etc.)
- Check all of the windows and doors. Are they in good condition and fully functional?
- Open and close each window to ensure that it is straight and that the latches are snug when closed. Make sure it’s not too sticky.
- Is there a day/night shade or simply curtains on the windows?
- Examine the windows and roof vents for water damage.
- Go up to the roof vents and inspect each window. Look for discolorations, mushy areas, and any other indications that water has been there.
- Check to see whether they’ve made any repairs.
- Look for cracks in there since water damage may not have arrived yet, but it will.
- Examine the gaskets on the windows and doors.
- Look for signs of deterioration, such as fractures and weak structures.
Lights, Reflectors, Electrical Outlets
- Make sure that all of the lights and reflectors are in good working condition.
Are awnings in good condition and fully functional?
- When the awning is fully opened, examine the fabric.
- Is it fading?
- Starting to drift apart?
Are slide-outs in good condition and fully functional?
- Open the slides and observe the course they take along the floor. Look for scratches on the floor, twisted floor vents, or other signs that the slide isn’t working properly.
- Inquire with the prior owner if the slide has ever become stuck.
- Examine the seals surrounding the slide.
- Check that they are not damaged.
- Close the slide and have someone shine a flashlight around its perimeter. Check that you can’t see the light from outside.
- Check all the cabinets, drawers, storage compartments, etc.
- Remove the cushions and inspect both sides. Are there any stains being concealed?
Let’s move to the next phase of this buying a used travel trailer checklist: electrical system, including appliances, plumbing, and gas system.
Electrical Inspection
- Let’s talk about electricity. Now take out the solar portable generator and connect it to the shore power; you’ll be able to power anything in the trailer.
- If possible, hook the travel trailer up to a power source and test everything out.
- Are the lights turned on?
- Is the refrigerator turned on?
- Is the shower pump operational?
- Consider everything that requires power and put it to the test right now.
- Examine the electrical appliances and the control panel.
Appliances Inspection
In this part of the checklist for buying a used travel trailer, the main idea is to test all the appliances, try them, inspect working conditions and write down notes to discuss with the owner. This will give you a good approach to whether you need to invest in new appliances (or not).
- Some points were included in the electrical inspection.
- When inspecting the kitchen, have the sink countertop coverings gone missing? Not all the models include a sink counter-top
- Turn on all of the appliances to make sure that they are in good working condition.
- This includes all the kitchen appliances such as the stove, oven, refrigerator, and microwave oven, and the cooling system such as the air conditioner, a heating system, etc.
Air conditioner or Cooling System inspection
- For 3 minutes, turn on the air conditioning. The air flowing out of your used travel trailer should be ice-cold throughout your examination.
- Is there just one air conditioner? If the used travel trailer you are inspecting is larger than 30 feet, you should be aware that one air conditioning unit will most likely not enough on 100-degree days unless you have plenty of shade surrounding you.
- Are the air conditioners noisy?
- Examine the ceiling vent fans.
Kitchen Appliances
- Place a cup of water in the travel trailer’s microwave and heat it. A microwave can turn on and appear to function while not producing heat.
- Will the fridge be large enough to meet the demands of your family? Is it in good working condition? Is the fridge just powered by electricity or by a combination of electricity and propane?
Plumbing Inspection
- Check all of the faucets and toilets to make sure during the plumbing inspection they are in good working condition.
- Also, test all of the drains to make sure that they are clear.
- Include the bathroom and shower tray in the inspection.
Check the toilet to ensure that the closing hatch completely seals.
- Pour a tiny amount of water into the toilet and ensure that it pools rather than drains.
- Return in 5 minutes to ensure the water is still present.
Although you have selected the floor plan and that is why you are inspecting the used travel trailer for buying, now you have the chance to understand if besides the floor plan you like the interior, spaces, and for example the space in the shower.
- Is the shower big enough for you? Taller people may need skylights.
- Is the toilet made of porcelain or plastic?
- Is the bowl long enough to accommodate men?
- Is there a nice head on the shower? This is one of the first improvements the RV owners make.
- Is there space for a bench in the shower so that women may conveniently shave their legs?
- Is there a nice size lip on the bottom of the shower so that water doesn’t run out?
- Is there any mold or mildew in the shower?
- If it is a wet bath, Am I comfortable with that? Is there a hand basin included or do I just realize there is not?
Water Supply System
- Fill up the fresh water tank before testing the gray and black tanks. Hookups must be included in your used travel trailer inspection checklist. This allows you to fill the gray tank by simply taking a shower.
- It’s a good opportunity to check to see whether the shower head is leaking.
- As you take a shower, check the status indicators to determine if it appropriately gauges the quantity of water in the gray tank.
- Check the water heater to ensure it is heating the water appropriately.
Gas Inspection
- Check that the heating on/off system works properly. At least five times, turn it on and off. Examine the plug distribution.
Gas Box and Gas Connection
- Examine the floor’s condition. The floor must be firm. The gas box must be spotless.
- If the floor is unstable and the gas box is dirty, this might suggest a problem. All gas lines should be in good condition.
- Now we’ll go to the gas. Check the propane connection, stove, oven, and heater/furnace.
- Is everything up and running?
- Is everything functional?
- If the gas system works, you will have saved a lot of time when you arrive home.
Refrigerator/Cooker
- In gas mode, the flame must ignite.
Connectivity Inspection
- Is the travel trailer equipped with a radio, antenna, Wi-Fi, cell phone booster, and satellite internet for RV antenna?
Finally, the last part of this buying a used travel trailer checklist: the test drive.
Used Travel Trailer Test Drive Inspection Before Buying
The test drive is essential for me. I strongly disagree with a seller who says I can’t test it out for a few kilometers and with the seller. A test drive, if possible, is one of the greatest methods to acquire a general sense of the trailer.
Request a test drive with the seller onboard to answer any queries, and allow the seller to perform some of the driving as well.
Tires Inspection
Tires Inspection. Inspect the condition of the tires.
- Check for any excessive wear or damage.
- Also, be sure to check the air pressure in all of the tires.
- Determine the age and depth of the track. If the tread wear is asymmetrical in different areas of the tire, this indicates a misalignment inside the wheels or poor inflation.
- The standard rule of thumb is to replace your camper tires when they reach the age of 5 years. Tires must be no more than six years old, regardless of the aesthetic examination.
- Look for the DOT label on the sidewall of the tire to determine its age. The four-digit code that follows will reveal the week and year that the tire was manufactured. The number 2022 indicates that the tires were made in the 20th week (May) of the year 2022.
Additional Inspection
- Check the Trailer Hitch
- Taillights within the Trailer
- Tongue Weight
Final Thoughts about Buying a Used Travel Trailer Checklist and The Purchase
Final thoughts after you complete the self-inspection and the “buying a used travel trailer checklist”.
Just because you encounter certain damage, doesn’t mean you shouldn’t buy the travel trailer . It is only an indicator that you should invest a certain amount of money if you want to leave the travel trailer in good condition . It will also allow you to haggle over the price based on the find.
On the other hand, if the investment is considerable, you may want to give up and look for another travel trailer in better condition .
After completing the used travel trailer inspection checklist before buying you should have a good idea of additional investments needed.
Some repairs can cost several thousand. Especially those that have their origin in the water systems, plumbing, leaks, etc. Not only will you have to repair leaks and water leaks, pipes, and connections, but you will also have to repair all the water damage such as the floors, insulation, carpeting, mattresses, etc.
Finally, take some time to talk to the previous owner . They’ll be able to tell you everything you need to know about the travel trailer. Pay close attention to how they’ve maintained it over the years. With this checklist in hand, you’ll be able to find the perfect travel trailer for your needs.
Once you have thoroughly inspected the travel trailer, you can then make an informed decision about whether or not it is the right one for you. By taking the time to do a self-inspection, you can be sure that you are getting a quality travel trailer that will serve you well for many trips to come.
RV insurance, like vehicle insurance, is generally required in your state. Before hitting the road with your new purchase, think about the insurance. The responsibility for a towable RV, such as a travel trailer, extends from the tow vehicle. It’s critical to get enough coverage to safeguard your assets in the event of a major accident or litigation. You risk going into debt or losing the things you’ve worked hard for, such as your house, car, RV, personal belongings, and life savings, if you don’t have enough liability coverage.
Self-Inspection Checklist Before Buying a Used Travel Trailer Free Printable PDF
You should download the Self-Inspection Checklist Before Buying a Used Travel Trailer Free Printable PDF . Print and bring it to the inspection day.
By following these simple tips, you can be sure you’re getting the best possible deal on your used travel trailer. As you can see, there are a lot of points to pay attention to. Take your time and use this buying a used travel trailer checklist (including a pdf free ). It should be very useful to you.

About John Smith
For more than 30 years I worked in the exciting world of RV manufacturing. I liked knowing that I could improve the campers with customer feedback and see the improvements and upgrades on floor plans, delivering the best designs and the best quality RVs, year after year. After traveling with my family in RVs and small rented campers across the USA, Europe, Australia, New Zealand, and even North Africa, I feel that I must share personal experiences, guidance, concerns, tips, and news. At Camper Outdoor, we share our biggest passion, weekend getaways in a camper, RV vacations, extended stays in RV parks, the quiet life of senior couples who choose to spend more time enjoying their RV, and boondocking experiences (which as in the beginning was unsuccessful, we have good tips to avoid the same thing happening to you!). Enjoy this website created just for you!
Leave a Comment Cancel reply
Save my name, email, and website in this browser for the next time I comment.
IMAGES
VIDEO
COMMENTS
Microsoft Word - PDI_V113_2.doc. The goal of this PDI narrative checklist is to give the new trailer owner "food for thought" for the time when they take delivery of their new RV. Many people don't think about these things in detail until months later, when a problem arises during their first camping trip and spoils the outing for everyone.
Worth the time spent now, vs having to bring RV back for service over and over. Pre Delivery Inspection (PDI) checklist to use when purchasing an RV. Worth the time spent now, vs having to bring RV back for service over and over. top of page. Tanner's Blog. Videos. Campgrounds.
The first of our things to know before you take delivery of a new RV starts the night before. My first suggestion is before you even get to the dealership and should be done at home, the night before the walkthrough. Go to the manufacturer's website or the dealer's inventory post on your unit and read everything you can.
Conducting a thorough pre-delivery inspection helps identify potential issues and ensures a safe, enjoyable RV experience. Familiarize yourself with your RV's systems, maintenance schedules, and safety features for confidence on the open road. Assess customization options, tech connectivity, and final documentation for a well-rounded ...
Pre-Delivery Check-List Ladder (jic) Old Cover Alls Inspect the ladder on the back of the rig. Check that all the mounting points are solidly attached to the body and the rungs are firmly fixed to the frame. Roof: inspect all seams, gaskets and any other place that the roof material has been cut or holes drilled.
This checklist is intended as a guide for inspecting new and used RVs. When buying a new RV, use this as your pre-delivery inspection (PDI) checklist. The dealer will provide their own pre-deliver inspection, but those tend to be less detailed and performed by someone other than you.
Before You Buy An RV Camper, Motorhome, Or Travel Trailer… Before you buy anything new, you should do a little homework first. Here are the best checklists to make sure you cover all of the important things during the road-test, walk-around inspection, and what to look for before you take delivery of your new RV: Checklist for buying a used RV
An RV Pre Delivery Inspection is precisely what the name implies. It's an examination of a new or used unit intended to make sure everything functions as it should before handing it over to the buyer. PDIs are meant to give the new owner reassurance and confidence in the RV they are buying. In addition, it highlights any repairs or damages ...
Pre-Delivery Walkthrough Checklist: Documentation: Gather all manuals, documentation, and warranties provided by the manufacturer. Have a notepad and pen for taking notes, or use your mobile phone to record. Power Source: Confirm you have a reliable power source by the RV (shore power, generator, or solar).
Inspection is an easy way of saying "check everything". If you are doing the inspection yourself, you should bring several tools. Camera. Flashlight. Flathead and Phillips screwdriver. Hoses for water tanks. Potentially a ladder. Tape measure. A cup for the microwave.
When you buy a new or used RV, it's important to verify everything is in good working order. You don't want to end up with a lemon. Although there's no certainty that you'll catch everything that could be wrong, a mediocre inspection is better than none at all. As fellow Canadian Wayne Gretzky said, "You miss 100% of the shots you don ...
Air Conditioning Effectiveness: Turn the A/C on and down to the lowest setting. Set up a room thermometer in the front and back of the RV. Take a reading of the current temperature. After 20- 30 minutes, take a new reading. Compare the reading to what you set the RV temperature control.
Use this comprehensive RV road trip checklist to cover everything needed to prepare your RV for travel as well as essential RV trip planning. ... mail delivery, packages. Plan your route and print copies of maps and directions ... a 2004 pioneer travel trailer has been setting outside in the weather for the last 5 years due to my health with ...
Post-Delivery Checklist. Once your travel trailer has arrived at its destination, it's time to run a detailed post-delivery check to ensure everything is in order: Examine the Exterior: Look for any damages or scratches on the trailer's exterior. Verify All Items: Ensure no components, like propane tanks or batteries, are missing.
The following is an excerpt from our FREE guide The 4 Things RV Shoppers Must Know Before Purchasing a New RV. Click here to download your free copy now!. No matter if your brand-new motorhome was found on the lot or had to be ordered from the factory, it is essential that you plan to take some time examining your RV before you drive off on any trips or adventures.
Close the valves. Run a few gallons of water into all the sinks and the shower. Now go out and open the black water drain valve. Nothing should come out. Open the grey water valve and completely drain the grey tank and close the valves again. Now run a few gallons of water through the toilet.
Curb Weight (GVW - fluids already in GVW + all tanks full): Expected personal cargo weight (items you will add to RV): Persons weight (avg. 150 lbs × # persons): Adjusted GVW (add above 3 items): Maximum tongue weight (lesser of [GVWR - Adj. GVW] or rating): For towing a trailer behind this RV.
When you go to pick up your RV at the dealership, they're gonna do a walk-around with you as part of their PDI. And the walk-around, they take you all around the vehicle, they show you all the systems, they make sure that you understand how everything works, and that's great, but if it's your first time buying an RV, there's a lot to remember, a lot of new systems and things.
Pre-Delivery Checklist. 02-26-2021, 07:32 PM. I spent a good part of a week prior to taking delivery of my camper assembling the attached checklist (from multiple sources). I read multiple sources and watched a lot of YouTube videos about what to check. My dealer, Campers Inn in Middle Georgia, was exceptionally accommodating.
The PDI checklist is a requirement imposed on the Dealer by the Manufacturer. It is meant ... TRAILERS AND BUSES 6 8 Pre-Delivery Inspection Checklist for a Commercial Truck LOCATION: X Signature Date 1.20 11.15 3.30 11.30 11.50 1.10 15.40 15.20 3.40 15.30 9.30 15.10 7.50 15.15 7.60 19.60 7.55
Hydraulic jack. Jumper cables. Large zip-close bag for documents (license, registration, insurance, rig dimensions/weight, reservation info, RV manual) Level. Leveling blocks. Needle nose pliers. Outdoor mat. Pocket knife. Portable grill and small propane tank.
required for a successful RV rental experience. This is for the sake of the RV rental business owner, as well as the RV renter. For delivered RV rentals there are three important functions to perform: Delivery, set up, and pick up. The following checklist will help you think through those tasks necessary for a great RV rental experience. RV ...
Travel Trailer Self-Inspection Before Buying A Pre-Owned Travel Trailer. It is important to do a thorough inspection of any travel trailer before making a purchase, especially if you are considering a pre-owned model. Bring the Checklist for Buying a Used Travel Trailer, Pencil, Flashlight, Gloves, and Ladder. Dress comfortably.