In order to keep your bike running at its absolute best, we recommend a regular maintenance schedule. While your local Trek store has the expertise, training, and equipment to take care of all of your service needs, there are a few easy things that you can do at home to keep the ride smooth and prevent further issues.. We recommend running your bike through these simple procedures every 25 hours of ride time or as you feel they are needed. If you are wary of doing any of these at home, a Service Technician at your local Trek store would be happy to assist you.

How to wash your bike
A clean bike is a happy bike. Bikes pick up all kinds of dirt, dust, and debris from the road and trail. Keeping your bike clean protects your investment by enhancing the life of your bike’s various parts as well as protecting its paint and ride quality.
Bontrager Bike Wash
Finish line easy-pro brush set , park tool pcs-10.2 deluxe home mechanic repair stand, how to clean and lube your chain.
Keeping your chain clean and lubed will keep things moving smoothly, enhance the life of your chain, and ensure your bike shifts as expected. A clean chain will not wear out a cassette as fast thus saving you money in the long run. Cleaner chains are also quieter chains thus resulting in you being invited on many more group rides.
Finish Line Pro Chain Cleaner
Bontrager chain lube, park tool nitrile mechanics gloves, pre-ride check.
A simple pre-ride performance check will give you an idea of exactly what you will want to adjust before riding and what may require a deeper look. This process is designed to be fast, simple, and easy to do before every ride.
How to pump your bike tires
Having the right tire pressure can make a huge difference in the quality of your ride. When your tires have just the right amount of air, you’ll feel more comfortable and have better grip and handling. Watch our video below to make pumping your tires a breeze.
- Trek Manuals
- Bicycle Computer
- Owner's manual
Trek Bicycle Owner's Manual
- Owner's manual (40 pages)
- Installation instructions (4 pages)
- Owner's manual (26 pages)
- page of 41 Go / 41
Table of Contents
- Bicycle Type and Use Condition
Chapter 1: Guide to Safe On-And-Off Road Operation
- Before a First Ride
- Examine the Frame and Fork
- Examine the Wheels
- Examine the Tire Inflation
- Examine the Brakes
- Examine the Chain
- Examine the Handlebar and Stem
- Examine the Saddle and Seatpost
- Rules to Ride Safely
- Know and Obey Local Bicycle Laws
- Examine the Suspension
- Examine the Lights and Reflectors
- Wear a Helmet and Bicycle Clothing
- Ride Safely in Wet Weather or Wind
- Make Sure Other People Can See You
- Think about Safety When You Ride
- Riding Instructions
- Use Your Brakes Carefully
- Change Gears Correctly
- Use Pedal Systems Carefully
- Safeguard Your Bicycle
- Prevent Theft of Your Bicycle
- Safely Park Your Bicycle
- Include Repair Items When You Ride
- Only Install Compatible Accessories
- Clean Your Bicycle
- Avoid Incidental Damage to Your Bicycle
Chapter 2: Maintenance
- Clean Your Bicycle with a Moist Cloth
- Each Three Months Clean and Polish Finish
Maintenance Schedule
Chapter 3: adjustment.
- A Word about Torque Specifications
- Examine Headset Bearing Adjustment
- Examine Cables for Wear
- Examine the Operation of Shift-Levers
- Examine Derailleurs
- Rear Derailleur
- Internal Gear Systems
- Examine the Internal Shift System
- Examine Brake-Pads
- Examine Brake Bolts
- Brake-Levers
- Examine for Loose Spokes
- Examine Wheel Bearing Adjustment
- Examine Rims for Wear
- Wheel Installation
- Tire Installation
- (Accessories)
- Examine Suspension Fork Bolts
- Examine Rear Suspension Bolts
- Examine Accessory Bolts
- Training Wheels
Chapter 4: Lubrication
- Bottom Bracket
- Apply Lubricant to Handlebar Stem
- Apply Lubricant to Seatpost
- Replace Grease in the Pedal Threads and Bearings
- Bracket Bearings
- Derailleurs
- Brakes and Brake-Levers
- Suspension Forks
- Rear Suspension
- Apply Lubricant to Derailleurs
- Apply Lubricant to Suspension Forks
- Examine the Crankarms and Bottom Bracket . 18 Apply Lubricant to Brake-Levers
- For more Instructions
Advertisement
Quick Links
- 1 Change Gears Correctly
- 2 Handlebar
- Download this manual
- Table of Contents 4
- Maintenance Schedule 18
Related Manuals for Trek Bicycle

Summary of Contents for Trek Bicycle
- Page 2 Complete the Registration Future Reference Bicycle registration is the only record we have of who owns this bicycle. If it is necessary to This manual shows how to ride your new give you new instructions, your registration Even if you have ridden a bicycle safely.
Page 3: A Word About Bicycles, Accidents, And Safety
Page 4: table of contents, page 5: bicycle type and use condition.
- Page 6 Condition 3 Condition 5 A bicycle made to ride on Conditions 1 and 2, plus A bicycle made to jump, ride at high speeds, rough trails, small obstacles, and smooth technical ride aggressively on rougher surfaces, or areas, and also areas where tires momentarily are complete jumps on flat surfaces.
Page 7: Chapter 1: Guide To Safe On-And-Off Road Operation
Page 8: checklist: check before each ride.
- Page 9 To examine for a change of rigidity (flex test) We offer a generous crash replacement program. Do not ride, but use the part in the usual If you crash your carbon bicycle or part, visit your manner while someone carefully examines dealer to learn more about this program.
Page 10: Examine The Wheels
Page 11: examine the chain, page 12: rules to ride safely, page 13: wear a helmet and bicycle clothing, page 14: riding instructions, page 15: change gears correctly, page 16: safeguard your bicycle, page 17: clean your bicycle, page 18: maintenance schedule, page 19: chapter 3: adjustment.
- Page 20 Minimum spacers with a direct-connect stem two to three turns. 2. The stem is held by the stem wedge. To On a bicycle with an aluminum steerer, there decrease the tightness of the stem wedge, should be at least one 5mm spacer under tap the top of the expander bolt with a mallet the direct-connect stem.
Page 21: Saddle
Page 22: headset, page 23: pedals, page 24: front derailleur, page 25: rear derailleur, page 26: internal gear systems, page 27: examine brake-pads.
- Page 28 To put a direct-pull, cantilever, or road brake in To release the brake for wheel removal the center • For most road calipers, lift the brake release 1. Turn the center-adjust screw (Figure 27, lever (Figure 29) to the UP position. To close, Figure 28, or Figure 29) in small increments.
Page 29: Brake-Levers
Page 30: wheels, page 31: wheel installation.
- Page 32 To remove a wheel with a FIGURE 40: Front lever position traditional quick-release 1. Release the quick-release lever; move it to the OPEN position (Figure 36). 2. For the front wheel, decrease the tightness of the adjustment-nut; turn it three turns. 3.
- Page 33 (the parts of • Lift your bicycle and hit the top of the tire with the fork that hold the wheel). a solid blow (Figure 49). The wheel should not FIGURE 44: come off, be loose, or move from side to side.
- Page 34 Make sure the lever does tire. The wheel should not come out of the not turn fork ends. If the Clix system does not pass this test, transport your bicycle to your dealer for repair. FIGURE 51: Adjustment position with marks in alignment 1.
Page 35: Tire Installation
- Page 36 FIGURE 52: 7. Push the second bead into the rim with your Tire beads in bottom of hands. Start at the valve stem. rim well • Be careful not to pinch the tube between the rim and the tire (Figure 55) when you mount the tire.
Page 37: Suspension
Page 38: training wheels, page 39: chapter 4: lubrication, page 40: derailleurs, page 41: for more instructions, rename the bookmark, delete bookmark, delete from my manuals, upload manual.
We're Hiring! Learn More and Apply Here.
- Account Account
- Stores Stores
- Subtotal : $ 0.00 Checkout Cart
Bike Maintenance Intervals
Keep your bike riding smoothly.
We want to keep you riding all day long. To help keep you in the saddle, we've put together the following information to keep your bike riding smoothly. Many of these tasks can be done at home with the proper tools. For the ones that can't, our service department is ready to be of assistance. Detailed charts are also available for download.
Taking Care of Your Bike
Pre-ride checklist.
Check Tire Pressure
Check Brakes & Brake Levers
Clean & Lube Your Chain
Check Wheels for Tightness
Check Quick Release Tension
MTB Wipe down fork stanchions & rear shock
MTB Check shift-levers and derailleurs
Post-Ride Checklist
Inspect Tires & Rims for Debris/Damage
Inspect Shift-Levers & Derailleurs
Check Wheels for Straightness
Wipe Down Bike Frame
Wipe Down Chain
Inspect Pedals
MTB Check shock pressure with a shock pump
Service Intervals
Wipe Down Chainrings, Cassette, Derailleur Pulleys
Inspect & Tighten Crankset
Check Brake Pads
Degrease & Lube Drivetrain
Lube Derailleur Pivots & Pulleys
Lube Brake & Shift Cables
Check Chain Wear
MTB Wipe down and lube suspension sliders
Complete Tune-Up
Bleed Hydraulic Brakes
True & Tension Wheels
Check Tubeless Tire Fluid Sealant
MTB Service suspension seals
MTB Clean and grease suspension pivots
Complete Overhaul
Replace Chain
Replace Cables & Housing
Replace Tires
Replace Brake Pads
Replace Bar Tape
Replace Tubeless Tire Sealant
Service Frame
MTB Replace shock oil
MTB Service frame and dropper post
Download Detailed Service Interval Charts Specific to Your Bike

- Stores Stores
- Account Account
- Subtotal : $ 0.00 Checkout Cart
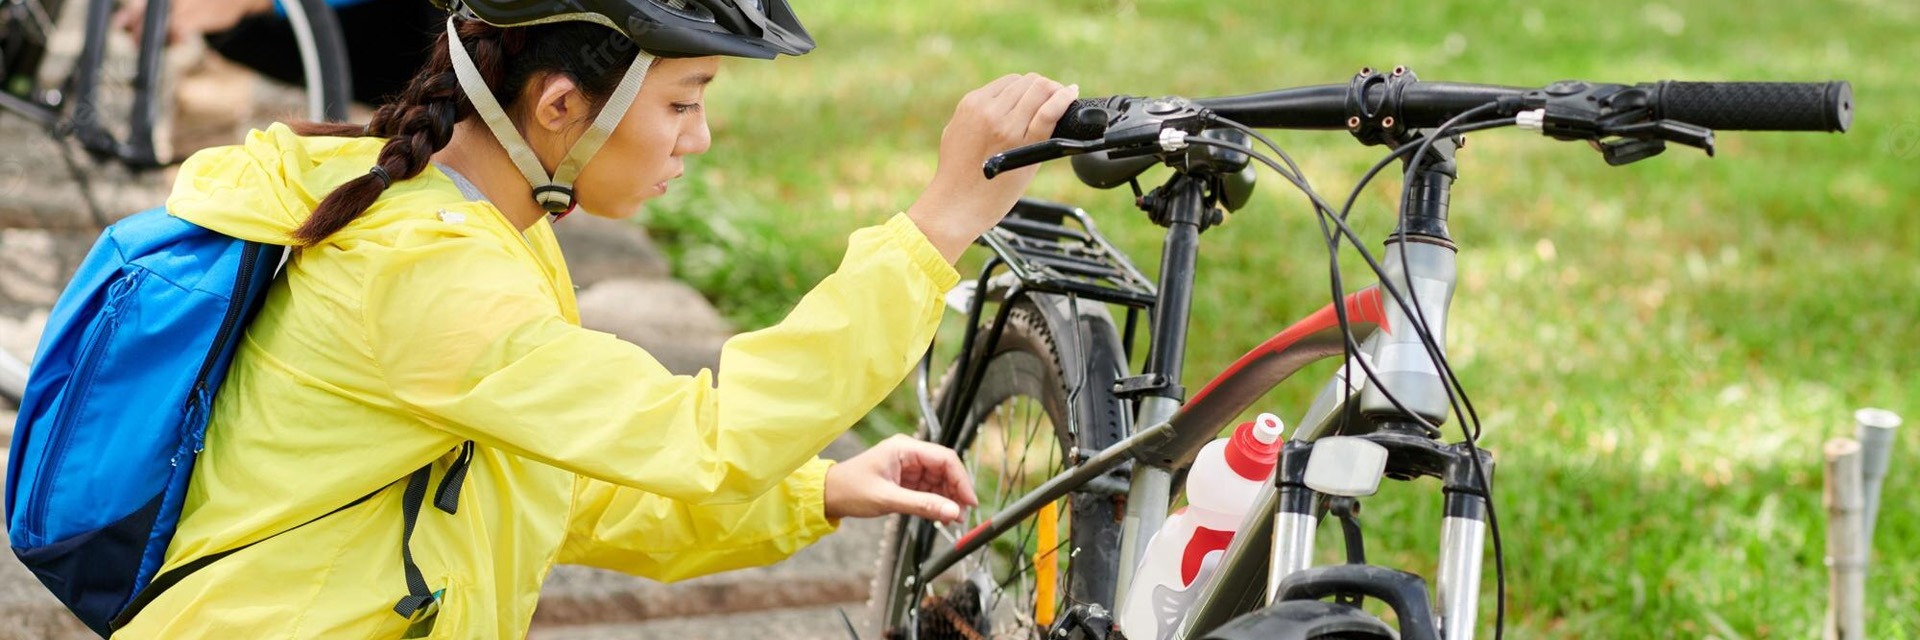
Bike Maintenance Basics - Inspection
Inspecting your bicycle is an important task to ensure that it is in safe and good working condition. It is also an opportunity to identify and fix any issues before they become a problem on a ride. Here's a checklist of what to inspect on your bicycle and what to look for.
- Handlebars and Stem:
- Pedals and Crankset:
- Chain and Gears:
- Frame and Fork:
- Lights and Reflectors:
- Accessories:
In conclusion, inspecting your bicycle is an important task that should be done regularly, before each ride. It ensures the safety and good working condition of your bike. Tires, brakes, gears, headset, crankset, bottom bracket, wheels, frame, and accessories should be thoroughly checked. It is recommended that you address any issues before hitting the road.
If you are unsure about how to inspect or fix any the issues listed above, consider taking your bike to our professional bike mechanics at any of our 17 locations, they will be happy to help you make sure your bike is safe and ready to ride.
Store Locator
Tailwind on every ride? – See e-bike trips
$250 off your first Cycling or Hiking Vacation – use code at checkout: Explore250
European Classic booking fast – see the trips
- Request a Catalog
- 866-464-8735
Select Date Range
Modal title, popular searches.

California Wine Country Bike Tour

Croatia and The Dalmatian Coast Bike Tour

Mallorca 7-Day Ride Camp Bike Tour

Tuscany Bike Tour
How to Maintain a Bike

Whether you’re training for your next trip or just going for casual rides with friends or family, keeping your bike in great working condition is a must. Luckily, there are plenty of quick and simple ways to take care of your bike at home. For our bike maintenance guide, we’ve rounded up some of the best advice and how-to videos from the pros to help you fine-tune your bike at home. We hope these helpful resources show you how to maintain a bike with ease.

Basic Bike Cleaning
Check out this video to see exactly how to clean your bike from start to finish, including what products to use and which areas need a little extra caution to keep things in working order. Learn more

Bike Chain Maintenance
If you’re noticing a noisy chain, it may be time to consider some at-home bike chain maintenance. From picking a bike chain cleaning tool to oiling a bike chain, this helpful article and video will walk you through all the steps you’ll need to keep your bike riding smoothly. Get more info

Bike Tire Maintenance
When you go by two wheels, your tires are undeniably important. From regularly checking tire pressure to changing a flat tire, bike tire maintenance is vital to enjoying a smooth, safe ride. We have three helpful videos to walk you through some of the most common maintenance you’ll do at home for your tires. Learn how to… Pump your bike tires Change a flat bike tire Remove or install wheels

Completing a Pre-Ride Check
Before your next ride, learn about the “M method” of completing a pre-ride check, which will help you uncover any potential issues with your bike that you may need to address before your ride. This helpful article and video will walk you through all aspects of the “M method,” so you can head out on your next adventure with confidence. Show me the method
Regularly cleaning your bike, checking your tires, and oiling your chain can extend that life of your bike and make every ride just a little more enjoyable! Have more questions about how to maintain a bike? We recommend reaching out to your local bike dealer to learn more about what you can do at home and what tasks are best left for a professional mechanic. Happy riding!

If a date is marked as Private, it is reserved for a private group.
Looking to travel with a small group or looking for a custom date? Call our trip consultants at 866-464-8735
What is the Difference?
Ultimate luxury:.
Savor some of the most spectacular, 5-star properties in the world. Exuding luxury and elegance, these one-of-a-kind accommodations offer the chance to rejuvenate at award-winning spas, dine at Michelin-starred restaurants, and more.
Enjoy luxurious accommodations handpicked for a refined experience. From signature spa treatments to delicious local cuisine, you’ll be more than provided for; you’ll be pampered.
These handpicked hotels provide relaxation and fun in a casual and comfortable environment. Delicious cuisine and great service mix perfectly for a memorable stay.
On select cycling vacations, you’ll stay at a mix of hotel levels, from Explorer to Luxury to Ultimate Luxury. Rest assured, no matter which level of hotel you’re at, our trip designers carefully select every accommodation.
Activity Level
Road : 1-3 hours of riding. Up to 25 mi (40 km). Up to 1,000 ft (300 m).
Gravel: 1-3 hours of riding. Up to 20 mi (35 km). Up to 1,000 ft (300 m).
Hiking: 1-3 hours of hiking. Up to 5 mi (8 km). Up to 1,000 ft (300 m).
Road : 2-4 hours of riding. 20-35 mi (35-60 km). Up to 2,500 ft (750 m).
Gravel: 2-4 hours of riding. 15-30 mi (25-45 km). Up to 2,000 ft (300 m).
Hiking: 2-4 hours of hiking. 4-8 mi (6-12 km). Up to 1,500 ft (450 m).
Road : 3-5 hours of riding. 25-55 mi (40-85 km). Up to 4,500 ft (1,500 m).
Gravel: 3-5 hours of riding. 20-40 mi (35-60 km). Up to 3,000 ft (900 m).
Hiking: 3-5 hours of hiking. 6-10 mi (9-16 km). Up to 2,000 ft (600 m).
Road : 4+ hours of riding. 40-70 mi (60-110 km). Up to 8,000 ft (2,400 m).
Gravel: 4+ hours of riding. 30-50 mi (45-80 km). Up to 4,000 ft (1,200 m).
Hiking: 4+ hours of hiking. 7-15 mi (11-24 km). Up to 4,000 ft (1,200 m).
What are your trip styles?
Classic - reserve:.
Savor the finer things as you relax in luxurious 5-star accommodations and wine, dine, and ride in some of the most unforgettable destinations around the world.
Classic - Signature:
Explore beautiful destinations by bike, enjoy extra inclusions, savor delicious local cuisine, and enjoy the perfect mix of accommodations.
Classic - Discover:
Enjoy a casual cycling vacation with fantastic routes and comfortable accommodations.
Train like the pros in some of their favorite riding destinations.
See the pros in action at the biggest cycling events of the year.
Cross Country:
Tackle an epic adventure that takes you point-to-point across mountains, countryside, and more.
Self-Guided
Enjoy a bike tour on your schedule with just your chosen travel companions.
Single Occupancy
Sometimes it’s more convenient and comfortable to have your own room while on vacation. We understand and that’s why we offer a Single Occupancy option. The additional price guarantees a private room all to yourself
This website uses cookies to ensure you get the best experience on our website.
Choose country
- United Kingdom
- United States
Find your repair guide
Other search options, simple bike maintenance intervals for keeping your ride timeless, you are here.

With proper care and maintenance your bike can age as timelessly as a French burgundy, or even Helen Mirren! Diligence, consistency and simply using the correct lubricants and care products at the right times will help keep your bike working smoothly and looking good.
Putting in the effort also makes it easier to maintain the components. Simply follow the schedule set forth in our infographic below and you’ll be well on your way making your bike last for years to come. And for in-depth tutorials on how to complete each task and more, don't miss our complete guide to bicycle maintenance !

Varnish, anodised finish, carbon
(Every six months, but more frequently when cycling in the rain)
Rub wax on all varnished, anodised and carbon surfaces, on aluminium and all metal parts, including screws, but with the exception of the brake contact surfaces. After allowing the polish to dry for a while, then polish the surfaces using a cotton cloth. Protect vulnerable areas such as hubs and cable guides using spray wax.
(Once a year)
Remove the saddle, seat post and seat post clamp and apply assembly grease to all screws. Only use assembly grease on the seat post if the frame and post are made of metal. If there is a carbon component involved, you need to use special carbon assembly paste.
Wash the brake assembly and allow it to dry. Apply penetrating oil to pivots, cable mechanisms and the contact and friction points of external springs. Allow the oil to soak in, then wipe off any excess lubricant.
Derailleurs and gear shifters
Clean all the components of the front and rear derailleurs and gear shifters, including the derailleur rollers. Apply penetrating oil to hinges and the contact and friction points of the springs. Allow the oil to soak in, then wipe off any excess lubricant.
(Every 100 to 200 miles, or after cycling in the rain)
Wipe the chain clean and evenly apply chain lubricant. Turn the cranks to move the chain through a full rotation, then allow the chain to absorb the oil for a while before wiping it off.
Cranks and inner bearings
Remove and clean cranks and bottom bracket assembly. Apply assembly grease to the threads, the sides of the bottom bracket housing and the bearing cups. Apply bearing grease to non-sealed bearings. Unless recommended otherwise, also apply assembly grease to the cranks and their securing bolts.
Handlebars and stem
Remove the handlebars and the stem and clean them. Where carbon components are fitted, apply carbon assembly paste to the steerer tube and its clamp and also to the handlebars and the handlebar clamp (in order to reduce the clamping torque). Apply assembly grease to screws.
Remove the stem, clean the bearing assembly and bearing seats and refit the assembly after applying bearing grease.
Remove the cassette, remove the bearings and clean the bearing seats, bearing units and also the freewheel. Similarly, remove and clean the front hub bearings. Apply bearing grease to bearing units and bearing seats and where necessary apply special freewheel lubricant to the freewheel components. Apply assembly grease to the outside of the freehub or freewheel body.
(Every six months, but more frequently when cycling in the rain or if pedals become noisy)
Grease exposed pedal springs using penetrating oil or spray wax. If you can hear squeaking or cracking noises coming from the cleats, apply grease to the contact points.
Final tips for maintaining your bike
- After removing components, check for scratches, cracks, discolouration, damaged areas, indentations or abrasions. Replace any suspect parts and ask your specialist dealer for advice where necessary.
- If you are planning a long ride or holiday, it‘s advisable to take care of maintenance jobs while preparing your bike for the trip.
- Always follow the manufacturer’s recommendations when using lubricants and cleaning fluids. Always tighten fixings to the specified torque, where given, and always use good-quality tools.
Recommended for you

Latest Tips & Tutorials

- Stores Stores
BIKE REPAIR
When you bring your bike to the Trek Bicycle Store for repair, you can expect a thorough assessment, accurate estimate and reliable completion of all service.
We take care of you. Period.
Tune Up Packages
Everything torqued, aligned and adjusted:
- Torque all fasteners
- Align and adjust brakes
- Align and adjust shifting
- Adjust headset
- Inspect bottom bracket
Everything cleaned, tensioned, aligned and adjusted
Includes everything in Level 1 plus:
- Remove and deep clean all drivetrain and components
- Lateral and vertical wheel true
- Adjust wheel bearings
The entire bike stripped, cleaned, lubed and tuned to perfection
Includes everything in Level 2 plus:
Disassemble entire bike and deep clean all parts
Flush and replace hydraulic fluid
Flush and replace hydraulic brakes
Replace and re-route all cables and housing
Advanced wheel true to manufacturer standard
Tune up and overhaul package prices reflect labor only, parts extra. $3 Shop Charge may apply on all Tune Ups and Select Services.
Featured Services
Flat Tire Repair (On Bike)* $16.15
Flat Tire Repair (Off Bike)* $11.90
Shifting System Adjustment (Per Derailleur) $25.00
Chain Replacement (Labor Only) $15.00
Drivetrain Removal Inspection & Cleaning $100.00
Braking System Adjustment (Per Brake) $25.00
Brake Bleed (Per Brake) $50.00
Hub Rebuild (Per Wheel) $30.00
Wheel Truing (Per Wheel) Starting from $15.00 and up
Headset Rebuild $40.00
Adjustable Bottom Bracket Rebuild $40.00
Tape Handlebar $20.00
Package Bicycle Starting from $100.00
Bicycle Storage (Per Day) ** $2.00
- MAGAZINE OFFERS
- BIKE INSURANCE
- Best Products
- Maintenance
- Accessories
- Long-Term Reviews
- BikeRadar Podcast
- First Look Friday
- Bike of the Week
- Tech Features
- Routes and Rides
- Bike Galleries
- BikeRadar Bargains
- Buyer's Guides
- Fitness & Training
- Sizing & Fit
- Mountain Biking UK
- Cycling Plus
How to maintain your electric bike, from servicing to washing electrical parts
How to wash an ebike, how to update a motor's firmware and other ebike maintenance basics explained
Russell Burton / Immediate Media
James McKnight
If you're thinking about buying an electric bike, you'll want to know how to take care of it. The best electric bikes can be expensive, so to keep yours in the best condition you'll need to have a regime of regular maintenance.
This guide explains how to look after your electric bike, including tips on washing the bike, applying lubricants, regular component checks, software and app updates, and looking after the battery. If you're not sure where to start, our beginner's guide to electric bikes will explain the ebike basics.
The essentials of electric bike maintenance are the same whether you're looking at an electric road bike , an electric hybrid bike or an electric folding bike .
Proper maintenance, particularly of the drivetrain, is even more important if you're riding off-road, whether that's on an electric mountain bike or an electric gravel bike , because dirt and debris can quickly take a toll on expensive components.
An electric bike, like any bike, needs regular maintenance. Cleaning and taking care of your ebike will keep it running smoothly, efficiently and safely, all of which can contribute to a longer lifespan for the bike and its battery and motor.
Electric bike maintenance basics
Before we dive into more detail, here are the basics of ebike maintenance to ensure your ebike will keep you grinning from ear to ear:
- Keep your bike clean, the drivetrain well lubricated and the tyres properly inflated
- Check regularly for loose bolts, spokes and broken parts
- Keep the battery partially charged and store it in a cool, dry place
- Avoid storing the bike with a flat battery
- Charge the battery only with the correct charger
- Check regularly for software updates
- Visit a dealership if there is a fault. Never try to take apart, or fix the motor or battery yourself
How often should you service an electric bike?

In many senses, electric bicycle maintenance is no different from that of a non-assisted bike. However, some components, and particularly the drivetrain (cranks, chain and sprockets), are subject to greater forces and increased wear.
Therefore, washing your ebike regularly and keeping it well maintained is of utmost importance if you want to get the most out of the bike.
First things first, a clean bike is a happy bike. Dirt and mud increase wear on components and, when mixed with water and grease, can form a paste that will, at best, decrease the efficiency of your bike and, at worst, quickly wear through consumable parts.
The smoother your electric bike runs, the more efficient it will be, and the longer your key components will last.
Keep the drivetrain clean and running well: battery life and power output are irrelevant if your gears are grinding and skipping all over the place. Riding a bike with a clean, efficient drivetrain, along with correctly adjusted gears , is ultimately a more pleasurable experience and will help you get the most from the bike in the long run.

If your drivetrain looks excessively dirty, you can give it a quick clean with a rag, or a deep clean with degreaser. We’ve got separate guides on how to clean a bike and how to clean a bike chain .
Electric bike chains tend to require more frequent lubrication than non-assisted bicycle chains. Regularly applying a quality lubricant to your chain will ensure the transmission runs efficiently. It’s a good idea to do this after every ride, and certainly after washing and drying the bike.
Otherwise, read our guide on how to choose and apply the best chain lube for your bike.
Applying lubricant to an ebike sometimes isn’t as simple as it seems. You can’t back-pedal most ebikes, so try putting the bike in a workstand so you can turn the pedals to let the lube drip onto the chain evenly. If you don't have a stand, you can ask a friend to hold the rear wheel off the ground.
If your bike has a ‘walk' mode, you can engage it so that the cranks (and rear wheel) spin around slowly, allowing you to lube the chain easily.

You should also regularly check your ebike's tyre pressures. Under-inflated tyres are potentially dangerous and can also waste power and reduce efficiency, meaning you’ll get less out of a battery charge. Equally, running ebike tyres at too high a pressure can compromise comfort and grip, especially if you’re riding off-road.
As a starting point, keep your tyres inflated to within the recommended pressures indicated on the sidewall but experiment to find the ideal pressure for you, balancing weight, comfort, grip and rolling resistance. Want to know more? We've got guides to road bike tyre pressure and mountain bike tyre pressure .
Component wear and tear

Many ebikes now use components developed specifically for assisted riding. This means stronger parts made to withstand the added forces that go through an ebike, due to the increased power output, speed and overall weight of the bike.
Electric bike drivetrains tend to be beefier and have different gear ranges from non-assisted bikes. Ebike-specific wheels and tyres are also sturdier, forks stronger, brakes more powerful, and so on.
Nonetheless, despite this additional reinforcement, you are still demanding a lot from an electric bike, whether pedalling, braking, turning, climbing or descending, so it’s a good idea to keep a keen eye on the components and frame for loose bolts or damaged parts.
Regularly safety check your bike to ensure that all bolts and axles are tightened to the manufacturer's recommended torque settings, check your tyres for anything that might cause a puncture and test for any loose spokes.
Watch out for excessive wear, too. If one part wears out, such as the chain, it can have a knock-on effect on other components – such as causing premature wear to the chainrings and cassette. We've got a guide to chain wear so you can spot any issues before they become a problem.
How to wash an electric bike

We’ve already covered the importance of keeping your bike clean to improve its efficiency and lifespan, but let’s take a closer look at how to wash an electric bike.
Electric bike motors and batteries are sealed units and, therefore, shouldn’t let in any water, but you should avoid washing any bicycle – electric or not – with a powerful jet wash because the power of the water could force its way through the bike's numerous seals.
Wash your ebike with water from a bucket or low-pressure hose, a brush and (optionally) a bike-specific cleaning product to quickly cut through dirt and grime.
Ensure that all connections remain sealed by leaving the battery in its housing, but turn the ebike system off before washing it (and unplug it from the charger).
Charging ports can accumulate dirt, so check inside and brush out any mud with a dry cloth or brush. Keep the port closed when washing the bike.
After washing the bike, dry it off with a clean cloth, and avoid the disc brakes. You don’t want to accidentally contaminate them with any oil or other cleaning products used elsewhere on the bike.
You might want to give the battery contacts a clean occasionally. You can do this with a soft, dry brush, a cloth and (optionally) switch lubricant.
If your bike has a range-extender battery (an optional second battery that can be connected for longer rides), you should always disconnect it before cleaning and clean the connections with a soft, dry brush.
Your ebike may have a speed sensor magnet on its wheel. Clean this with a soft cloth to avoid any problems.
Waterproofing and repairs

Despite ebike motors and batteries being sealed units, that doesn’t mean it’s absolutely impossible for water to get in, but with a certain level of common sense and care, you won’t need to worry.
Things to avoid with an electric bike include using a jet wash and fully submerging the bike. No lake jumps then, sorry!
The motor itself is in a factory-sealed unit and you should never attempt to take it apart for maintenance or to try and fix a problem.
If it seems like there is something wrong with the motor or system, visit the store where the bike was purchased or take the bike to a reputable dealer. Some electric bike insurance policies cover loss or damage to your ebike's battery.
Battery charging and storage

It may seem impossible to care for a sealed battery, but there are numerous ways to keep your ebike battery in tip-top condition.
All lithium-ion batteries gradually deteriorate and lose capacity over time. This might only amount to around 5 per cent of maximum charge per year, but is to be expected. Taking good care of the battery, storing it correctly and keeping it charged will help ensure a long life.
Ebike battery cleaning
If you disconnect your battery regularly, take the opportunity to clean it with a damp cloth and brush any dirt off the connections with a dry brush.
Clean and lightly grease the battery contacts occasionally, too. Never clean the battery with a high-pressure jet wash or high-pressure hose.
Charging and storing an ebike battery

Charge the battery at room temperature in a dry location. To improve the lifespan of your battery, avoid leaving the battery fully charged or fully discharged for long periods of time.
When the bike is out of use for an extended period, you can disconnect the battery. It will gradually lose charge, so still top it up every now and again.
As we've already said, avoid storing the bike for long periods of time with no charge – maintaining 30 to 60 per cent charge is ideal for long-term storage, according to ebike systems manufacturer Bosch.
Extreme heat and cold are the enemies of electric bike batteries. Store your ebike battery in a cool, dry place out of direct sunlight.
During winter, and particularly if the temperature is below 0°C, charge and store the battery at room temperature, and re-insert the battery into the bike immediately before riding.
Use the correct charger
While some battery chargers may seem compatible with several bikes, you should only use the charger specific to yours. Batteries don’t always charge in the same way, so using an incorrect charger could damage your ebike battery.
How to extend the range of your ebike battery
Want to extend the range of your battery on a ride? Here are a few tips for getting more out of your electric bike.
- Cadence – riding with a cadence above 50 revolutions per minute is more battery-efficient than riding with a lower cadence
- Weight – reduce the load on your bike, increased weight will put a greater strain on your battery
- Ride efficiently – reduce the amount you brake or stop
- Tyre pressure – like a regular bike, optimise tyre pressure to balance grip, comfort and rolling resistance
- Technology – some ebike computers will tell you how much battery power you are consuming, so you can adapt your riding style accordingly
- Temperature – riding in cold conditions will place more strain on a battery and reduce range as a result
Software and app updates

Most ebike system manufacturers release software and app updates; some occasionally, others frequently.
As well as logging ride statistics and other useful information, some proprietary ebike apps or built-in displays can allow you to tailor the performance of your bike.
This might mean adjusting the power settings (so that, say, the maximum assistance setting delivers less power and, therefore, uses less battery) or acceleration characteristics.
Reducing the output settings so the battery discharges more gradually can extend the battery’s life, although you’ll have to work harder to get up the hills.

You might also be able to get system health or maintenance updates from your ebike’s app or built-in display, which may show you information such as service intervals.
It may be possible to check if there are any firmware updates available through connected apps or by visiting the manufacturer’s website. Some brands recommend you visit an authorised dealership for any updates to be made.
Depending on the motor brand and system your bike is running, these firmware updates might help boost torque, extend battery life or provide other useful upgrades, so it’s well worth checking if there are any available updates for your ebike.
Finally, sometimes ebikes can display error codes that stop the motor from engaging. The reasons for these errors vary but can usually be easily fixed by a dealership.
Share this article

- Terms & Conditions
- Subscribe to our magazines
- Manage preferences
Electric bike maintenance: The ultimate guide to keeping your e-bike running smoothly
Everything you need to know about electric bike maintenance to keep your pride and joy in tip-top shape
In Association with

When it comes to electric bike maintenance, there can be a lot of working parts that require upkeep. Knowing what needs doing and when to do it can be a little overwhelming at first, but rest assured the basics of electric bike maintenance aren't difficult at all.
A lot of the maintenance that an electric bike needs is the same as any regular bicycle. It can feel overwhelming because of the extra components but if you look after things, it's unlikely you will experience any serious issues.
The electric-specific parts of an e-bike are almost completely off-limits to the home mechanic. There's a real danger of serious injury plus you risk voiding your warranty if you take things apart yourself.
Fortunately, the battery and motor are long-lasting components and require very little in the way of outright maintenance. Unlike the traditional parts of a bike, which are consumable items that wear out, the electronics should keep on working owing to the protective and waterproof housings. If there is an issue, check with the manufacturer to find out how to best proceed.
- Best e-bike motors : Everything you need to know
- Best electric gravel bikes : our pick of the best bikes for assisted off-road adventures
- Best electric bikes for commuting : Power up your ride to work
Clean your bike after every ride
Some of the best maintenance advice involves keeping your bike clean. The big wear items are the chain, the brakes, and the tyres but then most riders - even experienced cyclists - don't really know what to look for when it comes to component wear. Another way to slow down wear and tear is by avoiding riding in wet conditions where crud and other contaminants can get into the drivetrain. That said, you might live in wet climate which brings us onto our next point.
Anytime your bike is wet or dirty do your best to give a clean or even a hose down before storing it. Without ever hitting delicate components with high-pressure water, rinse off any caked-on dirt. Give the frame a gentle wipe and make sure the chain is clean and dry. During the cleaning process make sure you are paying attention to any irregulars or red flags.
Regular deep cleans and inspections
It's recommended that you spend some time giving your bike a deep clean every few weeks. Look for dirt stuck in the derailleur and in all the nooks and crannies around the wheels. Clean the chain and re-lube it. The frame should end up genuinely sparkly.
Get The Leadout Newsletter
The latest race content, interviews, features, reviews and expert buying guides, direct to your inbox!
During this more thorough cleaning process, check the tyres. Look for cuts, even if the tyres are holding air. If your tyres have substantial lugs, check to see that they aren't worn down and if you have road tyres make sure there isn't a flat spot in the middle of the otherwise round carcass. Don't be shy about replacing tyres. Good condition tyres are much less likely to experience a puncture.
- Best road bike tyres
- Best gravel tyres
- How to fit a bike wheel
- How to change a bike tyre
- How to repair an inner tube on your bike
If you ride your bike less than average due to inclement weather, then you can stretch out the cleaning intervals. The fact remains that a clean bike will perform better than one that's been neglected so don't stretch the cleaning intervals too far. It's a ritual after all and something that really let's get intimate with how everything works and bolts together.
Pay attention while you ride
You need to pay attention to the way your bike is performing while riding it, especially when it comes to electric bikes as there is more force placed on the components. When riding you want to be listening for any strange sound effects. One of the first, obvious signs that things aren't right is extra noise from a bike. Is there something that's rattling? Is the chain making noise? What about the brakes - are they squealing?
A well-maintained bike will be pretty quiet. There'll still be some noise coming from the chain and, with electric bikes, you may hear the motor but that's normal. Everything should be running smoothly. Listen out for clunky gear changes or skipping/slipping gears. If at any point your bike gets louder, or there is any kind of grinding noise, that's when you need to take a closer look.
One thing to look for is ensuring your thru-axles are tightly fastened. If you notice your wheel develops a slight wobble it will probably also make noise as your rotors rub against your brake pads. If the wobble persists, have the wheel checked as it's likely that it has become buckled from a pothole.
- Best folding electric bikes : Pedal-assisted folding e-bikes to simplify your commute
- Best women’s electric bikes : E-bikes for road, gravel, commuting and more
- Best electric road bikes : Ride faster and further for less effort
- Best electric bike conversion kits : give your current bike a power boost
Do periodic maintenance
No matter how clean and well lubed you keep your bike there is still a need for periodic maintenance. Cables stretch, brake pads wear - as do chains and tyres.
As far as the rest of the bike goes, Rad Power Bikes has some recommendations. Rad Power Bikes is the leading manufacturer of e-bikes in the United States, and suggest a basic tune-up every six months or 750-1,250 miles.
A basic tune-up should include adjusting and inspecting all the major systems. Gear cables should get an adjustment and may need replacement. Brake pads and rotors should be thoroughly checked and the system bled if deemed necessary by the mechanic. Have the chain checked for wear and possibly replaced. Check that the cassette is in good working order, too. Look for movement or noise in the bottom bracket and service as necessary.
- How to adjust disc brakes on a bike
- How to remove and fit a bike chain
- How to adjust bike gears
Don’t put things off
Parts are expensive and being without a bike is no fun at all. Wash your bike regularly and use that time to get familiar with the way it operates - this will help you pinpoint any areas of concern when things do eventually go awry. Grit on the brake pads or the chain will wear them out significantly faster. Worn brake pads will wear the rotors down faster and result in an expensive bill.
Small and easy-to-fix problems can become expensive if left unattended. This is even more true on an electric bike where the forces involved are higher. Brakes pads are inexpensive but rotors aren't. A chain is an inexpensive part but a worn chain will wear down the entire drivetrain (chainrings and cassette), which is another costly exercise. Pro tip: don't wait for a small problem to become a big one.

Josh hails from the Pacific Northwest of the United States but would prefer riding through the desert than the rain. He will happily talk for hours about the minutiae of cycling tech but also has an understanding that most people just want things to work. He is a road cyclist at heart and doesn't care much if those roads are paved, dirt, or digital. Although he rarely races, if you ask him to ride from sunrise to sunset the answer will be yes. Height: 5'9" Weight: 140 lb. Rides: Salsa Warbird, Cannondale CAAD9, Enve Melee, Look 795 Blade RS, Priority Continuum Onyx
Ridley launches three new versions of its Grifn all road bike
First Ride Review: The Ridley Grifn RS can do road and gravel well with seemingly few drawbacks
First ride review: Riding the Ridley E-Grifn, the brand's first e-bike
Most Popular
IMAGES
VIDEO
COMMENTS
At-home bicycle maintenance. In order to keep your bike running at its absolute best, we recommend a regular maintenance schedule. While your local Trek store has the expertise, training, and equipment to take care of all of your service needs, there are a few easy things that you can do at home to keep the ride smooth and prevent further ...
monthly. (<>500 miles) six months. (<> 2,500 miles) yearly. (<> 6,000 miles) check tire pressure & add air if needed. clean the bike with a rag (or soap and water if it's real dirty) and inspect the frame and components for signs of wear such as cracks. clean and wax the frame to protect the paint/finish (not necessary on bare titanium frames ...
clean and lubricated, and following the maintenance schedule outlined below. Keep up with this basic bike care, bring your ride in for regular service, and you and your bike are sure to have a long and happy life together. In addition to these basic pre-ride measures, we recommend regular preventative maintenance as well.
Training Wheels See other sections of this manual as needed. 1. Put the bicycle on a flat, smooth surface, with the tires correctly inflated. 2. Decrease the tightness of the rear-axle nuts. 3. Hold the bicycle up straight, and adjust the distance between the training wheels and the ground to approximately 1/4"...
Clean the tires with a hard-bristled brush, the wheels with a soft-bristled brush, and use the cone brush for cleaning your hubs. When cleaning your wheels, avoid contacting the brake system to avoid any chance of contamination. Once the entire bike is clean, rinse it with a light shower spray. Finally, wipe down the frame with a clean soft ...
Download Detailed Service Interval Charts Specific to Your Bike. Townie Bikes. Road & Cyclocross Bikes. Triathlon & TT Bikes. Full Suspension Mountain Bikes. Hardtail Mountain Bikes. Kids' Bikes. We want to keep you riding all day long. To help keep you in the saddle, we've put together the following information to keep your bike riding smoothly.
Check for any cuts, punctures or bulges on the tire. Check for any wear on the tread. Wheels: Check that the wheels are properly secured and not loose. Check for any damage or dents on the rim. Brakes: Test the front and rear brakes to ensure they are working properly. Check the brake pads for wear. Ensure the brake cables are not frayed or ...
i. Important: Keep for . Future Reference. This manual shows how to ride your new . bicycle safely. Even if you have ridden a bicycle for years, it is important for EVERY person t
This manual covers all Trek bicycle models. It contains useful information for the life of your bicycle. Read the fundamentals Read Chapter 1, Fundamentals, before you ride your bike. ... For a maintenance schedule, see the Caring for your bike section. Handle with care Some parts of your bicycle can injure you if mishandled. There are sharp
Bike Tire Maintenance. When you go by two wheels, your tires are undeniably important. From regularly checking tire pressure to changing a flat tire, bike tire maintenance is vital to enjoying a smooth, safe ride. We have three helpful videos to walk you through some of the most common maintenance you'll do at home for your tires.
Pedals. (Every six months, but more frequently when cycling in the rain or if pedals become noisy) Grease exposed pedal springs using penetrating oil or spray wax. If you can hear squeaking or cracking noises coming from the cleats, apply grease to the contact points. Final tips for maintaining your bike.
Wheel Truing (Per Wheel) Starting from $15.00 and up. Headset Rebuild $40.00. Adjustable Bottom Bracket Rebuild $40.00. Tape Handlebar $20.00. Package Bicycle Starting from $100.00. Bicycle Storage (Per Day)** $2.00. If you need services you don't see here, please contact us for a quote. Trek Bicycle Stores - Chicago Suburb's full-service bike ...
HOW TO Service your BICYCLE Yourself - DIY Bike Maintenance. Bike Maintenance and what to do if you don't know what you're doing. If you're like me, and boug...
How to wash an ebike, how to update a motor's firmware, electric bike battery health and other ebike maintenance basics explained.
Anytime your bike is wet or dirty do your best to give a clean or even a hose down before storing it. Without ever hitting delicate components with high-pressure water, rinse off any caked-on dirt ...
This manual covers all Trek bicycle models. It contains useful information for the life of your bicycle. Read the fundamentals Read Chapter 1, Fundamentals, before you ride your bike. If you purchased an electric-assist bicycle (e-bike), please also read the quick start guide, and the supplemental Electric Bicycle Owner's Manual. They are