How To Disable or Enable Safari on iPhone or iPad?
This article describes how to disable or enable Safari using the Screen Time feature on your child's iPhone or iPad. Please note that there is no option to delete Safari app from an iOS device - the app will be removed from the Home Screens, but will remain in the App Library.
Summary: Go to Settings > Screentime and turn Safari to ON or OFF.

Step-by-step
1. On your child's iOS device, open Settings.
2. Select Screentime > Content & Privacy Restrictions > Allowed Apps.
3. Enter your Screen Time Passcode. Depending on your iOS version, you may be required to enter your passcode in the previous step. (What if you forgot the passcode? ) Your children might also be looking for some screen time passcode hacks on the internet, it’s best to get to know them to stay a step ahead.
4. Toggle Safari to ON or OFF.

How does Mobicip help manage Safari browser on iOS devices?
Mobicip offers robust features to help parents regulate their children's online activities. Specifically, Mobicip provides comprehensive tools to manage Safari browser on iOS devices, ensuring a secure browsing environment for kids.
Here's how Mobicip can help manage the Safari browser on iOS devices:
1. Content Filtering
Mobicip allows parents to set up customized filtering levels based on age appropriateness and specific content categories. This ensures that children only have access to age-appropriate websites while using the Safari browser, blocking out potentially harmful or inappropriate content.
2. Safe Search
Mobicip integrates safe search functionality into the Safari browser, ensuring that search results are filtered to exclude inappropriate content. This feature helps to shield children from stumbling upon explicit or unsuitable material during online searches.
3. Time Limits and Usage Controls
Parents can set time limits on Safari browsing sessions or establish usage schedules to regulate the amount of time children spend online. This helps with managing screen time effectively and encourages a healthy balance between online and offline activities.
4. Activity Monitoring and Reporting
Mobicip provides parents with detailed insights into their child's browsing habits through activity monitoring and comprehensive reports. This includes information on websites visited, search terms used, and overall online activity within the Safari browser, allowing parents to identify any concerning patterns or behaviors.
5. Block/Allow Lists
Parents have the flexibility to create block and allow lists, enabling them to customize which websites are accessible through the Safari browser. This feature gives parents greater control over their child's online experience, allowing them to block specific sites deemed inappropriate or unsafe while permitting access to trusted resources.

6. Cross-Platform Compatibility
Mobicip's solutions are designed to work seamlessly across various iOS devices, including iPhones and iPads, ensuring consistent and effective management of the Safari browser regardless of the device being used.
In summary, Mobicip offers various features to help parents manage the Safari browser. By implementing the above listed features, Mobicip empowers parents to create a safe and secure online environment for their children, fostering responsible internet usage habits from an early age.
Try Mobicip for free for 7 days and check if it meet your requirements.
How To Disable Safari From IPad

- Software & Applications
- Browsers & Extensions

Introduction
Safari, the default web browser on iPad, offers a seamless browsing experience with its user-friendly interface and robust features. However, there are instances when users may want to disable Safari on their iPad, either to limit access to certain websites or to prevent unauthorized browsing. Fortunately, there are several methods to achieve this, each catering to different user preferences and needs.
In this article, we will explore three effective methods to disable Safari on your iPad. Whether you prefer using built-in features like Screen Time and Restrictions or leveraging the flexibility of Guided Access, you'll find a suitable approach to meet your specific requirements. By understanding these methods, you can gain greater control over your browsing experience and ensure a safer and more tailored usage of your iPad.
Now, let's delve into the step-by-step instructions for each method, empowering you to make informed decisions about managing Safari on your iPad. Whether you're a concerned parent, a diligent employer, or simply seeking to enhance your digital well-being, these methods will equip you with the tools to customize your browsing accessibility and security on your iPad.
Method 1: Using Screen Time
Screen Time, a powerful feature introduced in iOS 12, empowers users to manage and monitor their device usage effectively. By utilizing Screen Time, you can not only gain insights into your digital habits but also exert control over various aspects of your iPad, including the ability to disable Safari.
Step 1: Accessing Screen Time
To initiate the process, navigate to the "Settings" app on your iPad and tap on "Screen Time." Once inside the Screen Time menu, you will find a plethora of options to regulate your device usage and set specific restrictions.
Step 2: Enabling Content & Privacy Restrictions
Under the Screen Time settings, select "Content & Privacy Restrictions" to proceed with customizing the restrictions on your iPad. This section allows you to manage access to various apps and features, including Safari.
Step 3: Disabling Safari
Within the Content & Privacy Restrictions menu, tap on "Allowed Apps" and then toggle off the switch next to Safari. By doing so, you effectively disable Safari on your iPad, preventing its access and usage.
Step 4: Setting a Screen Time Passcode
For added security and control, consider setting a Screen Time passcode. This passcode ensures that only authorized users can modify the Screen Time settings, including the restrictions placed on Safari.
By following these steps, you can effectively disable Safari on your iPad using the Screen Time feature. Whether you're managing your own browsing habits or overseeing the device usage of others, Screen Time provides a convenient and intuitive method to tailor the accessibility of Safari to your specific needs.
Utilizing Screen Time to disable Safari not only promotes a safer browsing environment but also enables you to cultivate healthier digital habits. With the flexibility and control offered by Screen Time, you can seamlessly customize your iPad experience, ensuring that it aligns with your preferences and requirements.
Method 2: Using Restrictions
When it comes to managing the accessibility of various features and apps on your iPad, the Restrictions settings offer a comprehensive array of options. By leveraging Restrictions, you can effectively disable Safari, providing a tailored browsing experience that aligns with your specific requirements.
Step 1: Accessing Restrictions
To initiate the process, navigate to the "Settings" app on your iPad and tap on "Screen Time." From there, select "Content & Privacy Restrictions" and proceed to "Allowed Apps." Here, you will find the option to disable Safari by toggling off its switch.
Step 2: Disabling Safari
Once inside the "Allowed Apps" section, simply toggle off the switch next to Safari. This action effectively disables Safari on your iPad, preventing its access and usage. By implementing this restriction, you can ensure a more controlled and focused browsing environment, whether for personal use or when managing the device usage of others.
Step 3: Customizing Additional Restrictions
In addition to disabling Safari, the Restrictions settings offer a myriad of customization options to tailor the iPad experience. You can set specific limitations on web content, app installations, and other functionalities, further enhancing the control and security of the device.
Step 4: Setting a Restrictions Passcode
For added security and oversight, consider setting a Restrictions passcode. This passcode ensures that only authorized users can modify the Restrictions settings, including the disabled status of Safari. By implementing this additional layer of security, you can maintain greater control over the browsing accessibility on your iPad.
By following these steps, you can effectively disable Safari on your iPad using the Restrictions feature. Whether you're seeking to limit access to certain websites, create a more focused browsing environment, or manage the device usage of others, Restrictions provide a robust and versatile method to customize the accessibility of Safari to suit your specific needs.
Utilizing Restrictions to disable Safari not only fosters a more controlled browsing experience but also empowers you to establish tailored usage guidelines for your iPad. With the flexibility and customization offered by Restrictions, you can effectively shape the digital environment of your iPad, ensuring that it aligns with your preferences and promotes a safer and more focused browsing experience.
Method 3: Using Guided Access
Guided Access is a versatile feature that empowers iPad users to restrict the functionality of the device to a single app and control which features are available within that app. This functionality extends to Safari, allowing users to effectively disable the browser and create a more focused and controlled browsing environment.
Step 1: Enabling Guided Access
To initiate the process, navigate to the "Settings" app on your iPad and tap on "Accessibility." From there, select "Guided Access" and toggle the switch to enable this feature. Once enabled, you can proceed to customize the settings for Guided Access, including the specific restrictions you wish to impose on Safari.
Step 2: Initiating Guided Access for Safari
After enabling Guided Access, open the Safari app on your iPad. Triple-click the Home button (or the Side button, depending on your iPad model) to activate Guided Access. This action locks the iPad into the Safari app and prevents users from exiting to access other features or apps.
Step 3: Customizing Guided Access Settings
Within Guided Access, you have the flexibility to customize the restrictions and control various aspects of Safari. You can disable specific areas of the screen, restrict touch input on certain elements, and even set time limits for the Guided Access session. These settings allow you to tailor the browsing experience within Safari to align with your specific requirements.
Step 4: Exiting Guided Access
To exit Guided Access and return to the normal functionality of your iPad, triple-click the Home button (or the Side button) again and enter the passcode you set for Guided Access. This action seamlessly transitions the iPad back to its standard mode, providing access to all apps and features.
By following these steps, you can effectively utilize Guided Access to disable Safari on your iPad. Whether you're managing the browsing experience for yourself, your children, or other users, Guided Access offers a powerful and intuitive method to create a more controlled and focused environment within the Safari browser.
Utilizing Guided Access to disable Safari not only promotes a safer and more tailored browsing experience but also empowers users to establish clear usage guidelines for the iPad. With the flexibility and control offered by Guided Access, you can effectively shape the digital environment of your iPad, ensuring that it aligns with your preferences and promotes a more secure and focused browsing experience.
In conclusion, the ability to disable Safari on your iPad provides a valuable means of customizing and managing the browsing experience to align with specific needs and preferences. By exploring the three methods outlined in this article, users can gain a deeper understanding of the versatile features available for controlling Safari accessibility. Whether it's leveraging Screen Time, Restrictions, or Guided Access, each method offers a unique approach to tailoring the browsing environment on the iPad.
By utilizing Screen Time, users can not only disable Safari but also gain insights into their digital habits and exert control over various aspects of their iPad usage. This feature serves as a comprehensive tool for managing screen time and app access, promoting a healthier and more balanced digital lifestyle.
Similarly, the Restrictions settings provide a robust array of options to disable Safari and customize the browsing experience. With the ability to set specific limitations on web content and app installations, users can create a more controlled and secure environment on their iPad, whether for personal use or when managing the device usage of others.
Guided Access, with its versatile functionality, empowers users to restrict the iPad's functionality to a single app and control which features are available within that app. This feature offers a powerful method to disable Safari and create a more focused and controlled browsing environment, catering to the diverse needs of users seeking a tailored browsing experience.
In essence, the ability to disable Safari on the iPad not only promotes a safer and more tailored browsing experience but also empowers users to establish clear usage guidelines for the device. Whether it's for personal usage management, parental controls, or creating a more focused browsing environment, the methods outlined in this article offer valuable tools to shape the digital environment of the iPad.
By understanding and implementing these methods, users can effectively customize their browsing accessibility, ensuring that it aligns with their preferences and promotes a more secure and focused browsing experience. Ultimately, the flexibility and control offered by these features enable users to cultivate healthier digital habits and tailor their iPad experience to suit their specific needs.
Leave a Reply Cancel reply
Your email address will not be published. Required fields are marked *
Save my name, email, and website in this browser for the next time I comment.
- Crowdfunding
- Cryptocurrency
- Digital Banking
- Digital Payments
- Investments
- Console Gaming
- Mobile Gaming
- VR/AR Gaming
- Gadget Usage
- Gaming Tips
- Online Safety
- Software Tutorials
- Tech Setup & Troubleshooting
- Buyer’s Guides
- Comparative Analysis
- Gadget Reviews
- Service Reviews
- Software Reviews
- Mobile Devices
- PCs & Laptops
- Smart Home Gadgets
- Content Creation Tools
- Digital Photography
- Video & Music Streaming
- Online Security
- Online Services
- Web Hosting
- WiFi & Ethernet
- Browsers & Extensions
- Communication Platforms
- Operating Systems
- Productivity Tools
- AI & Machine Learning
- Cybersecurity
- Emerging Tech
- IoT & Smart Devices
- Virtual & Augmented Reality
- Latest News
- AI Developments
- Fintech Updates
- Gaming News
- New Product Launches
- AI Writing How Its Changing the Way We Create Content
- How to Find the Best Midjourney Alternative in 2024 A Guide to AI Anime Generators
Related Post
Ai writing: how it’s changing the way we create content, unleashing young geniuses: how lingokids makes learning a blast, 10 best ai math solvers for instant homework solutions, 10 best ai homework helper tools to get instant homework help, 10 best ai humanizers to humanize ai text with ease, sla network: benefits, advantages, satisfaction of both parties to the contract, related posts.

How To Get Rid Of Split Screen In Safari On IPad

How To Stop Pop-Ups On IPad Safari

How To Disable Javascript On Safari

How To Block Safari From IPad

Why Does My IPad Keep Shutting Down Safari

What Does It Mean When Safari Cannot Connect To The Server

How Do I Delete Safari From My IPad

How Do I Turn Off Safari Private Browsing
Recent stories.

How to Find the Best Midjourney Alternative in 2024: A Guide to AI Anime Generators

How to Know When it’s the Right Time to Buy Bitcoin

How to Sell Counter-Strike 2 Skins Instantly? A Comprehensive Guide

10 Proven Ways For Online Gamers To Avoid Cyber Attacks And Scams

- Privacy Overview
- Strictly Necessary Cookies
This website uses cookies so that we can provide you with the best user experience possible. Cookie information is stored in your browser and performs functions such as recognising you when you return to our website and helping our team to understand which sections of the website you find most interesting and useful.
Strictly Necessary Cookie should be enabled at all times so that we can save your preferences for cookie settings.
If you disable this cookie, we will not be able to save your preferences. This means that every time you visit this website you will need to enable or disable cookies again.
How to Quickly Disable or Delete Safari Extensions on an iPhone or iPad
Did you install one too many extensions on your iPhone and now Safari is really slow? Follow this quick guide to disable or delete them.
Safari extensions are a popular way to customize your browser. With the release of iOS 15 came the introduction of numerous new extensions Safari was compatible with on an iPhone, as well as on a Mac.
You can download extensions from the App Store, just like you do with any other app. However, if you ever get too many of them, it might slow down your browsing experience. Luckily, you can get rid of extensions easily.
Take a look below to learn how to disable or delete Safari extensions.
What Are Safari Extensions?
As the term itself indicates, Safari extensions are small apps that add specific functions to Safari so you can personalize your browser. It improves functionality and helps you get the most out of Safari.
Related: Finally, You Can Install Safari Extensions on iPhone With iOS 15: Here's How
Some examples of tasks that extensions do for you include automatically filling cookie forms, blocking ads, and improving privacy.
You can either toggle off Safari extensions or completely delete them.
How to Turn Off Safari Extensions on an iPhone or iPad
If you don't want an extension temporarily, but find it useful in the long run, you can just disable and enable it when you want it back. Here's how to do so:
- Open Settings and select Safari .
- Scroll down and tap on Extensions .
- Choose the extension you would like to disable.
- Tap the toggle next to it to disable the extension. Repeat for every extension you'd like to turn off.
How to Delete Safari Extensions on an iPhone or iPad
Have an extension that is just taking up space because you don't really use it? You can quickly delete it from your iPhone or iPad the same way you delete an app. Some extensions also tend collect personal data, so be careful which extensions you choose to download and keep.
Related: Browser Extensions You Should Remove Now Due to DataSpii
Follow these steps to delete an extension:
- Search for the app on your Home Screen or in the App Library . Once you find it, press and hold until the apps begin shaking.
- Press the minus (–) sign that appears and select Delete App from the popup that appears. Repeat for all extensions you want to delete.
- Tap Done in the top-right corner to return the screen to normal.
Declutter Your Browser by Disabling or Deleting Extensions
Safari extensions are quite helpful for plenty of different functions you may not even know you needed. You can browse through the App Store to download one whenever you want.
If you ever want to get rid of them, just open your Safari settings to toggle off an extension or just delete the relevant app like you would with any others on your device. Removing Safari extensions from an iPhone or iPad is really that simple.
- PRO Courses Guides New Tech Help Pro Expert Videos About wikiHow Pro Upgrade Sign In
- EDIT Edit this Article
- EXPLORE Tech Help Pro About Us Random Article Quizzes Request a New Article Community Dashboard This Or That Game Popular Categories Arts and Entertainment Artwork Books Movies Computers and Electronics Computers Phone Skills Technology Hacks Health Men's Health Mental Health Women's Health Relationships Dating Love Relationship Issues Hobbies and Crafts Crafts Drawing Games Education & Communication Communication Skills Personal Development Studying Personal Care and Style Fashion Hair Care Personal Hygiene Youth Personal Care School Stuff Dating All Categories Arts and Entertainment Finance and Business Home and Garden Relationship Quizzes Cars & Other Vehicles Food and Entertaining Personal Care and Style Sports and Fitness Computers and Electronics Health Pets and Animals Travel Education & Communication Hobbies and Crafts Philosophy and Religion Work World Family Life Holidays and Traditions Relationships Youth
- Browse Articles
- Learn Something New
- Quizzes Hot
- This Or That Game New
- Train Your Brain
- Explore More
- Support wikiHow
- About wikiHow
- Log in / Sign up
- Computers and Electronics
- Internet Browsers
- Safari Browser
How to Disable Private Browsing in Safari on iPhone or iPad: Quick Guide
Block or turn off Safari's private browsing feature on your iPhone
Last Updated: April 8, 2023 Fact Checked
Switching Back to Regular Browsing
Disabling private browsing permanently.
This article was co-authored by wikiHow staff writer, Kyle Smith . Kyle Smith is a wikiHow Technology Writer, learning and sharing information about the latest technology. He has presented his research at multiple engineering conferences and is the writer and editor of hundreds of online electronics repair guides. Kyle received a BS in Industrial Engineering from Cal Poly, San Luis Obispo. This article has been fact-checked, ensuring the accuracy of any cited facts and confirming the authority of its sources. This article has been viewed 94,694 times. Learn more...
Trying to disable the private browsing feature in Safari on an iPhone? You can do so easily by using the built-in content restrictions settings. If you're just trying to turn off private browsing and get back to normal browsing, you can switch modes directly in the Safari app. This wikiHow guide will show you how to turn off or permanently disable Private Browsing on an iPhone or iPad.
Things You Should Know
- To turn off private browsing, open Safari, tap the tabs button, and tap Private to switch to normal browsing.
- To disable private browsing, go to Settings > Screen Time > Content & Privacy Restrictions > Content Restrictions > Web Content.
- On the Web Content page, select "Limit Adult Websites" to disable private browsing.

- Private browsing is a great way to avoid cookies. When you switch to normal browsing, you'll need to manually delete cookies in Safari .

- This will be called Start Page if you don't have any tabs open in the normal browsing mode.
- Private mode doesn't record your browsing history. For normal browsing mode, you can delete your browsing history if needed.

- This method uses the built-in content and privacy restriction features to limit access to adult websites. This setting turns off the ability to use private browsing in Safari. Note that this will also prevent the user from accessing most websites with adult content.

- Note that this will also prevent you from accessing most websites with adult content.
Expert Q&A
- If you're trying to keep your browsing information off iCloud, you can turn off Safari iCloud syncing on your iPhone . Thanks Helpful 0 Not Helpful 0

You Might Also Like

- ↑ https://support.apple.com/en-us/HT203036
- ↑ https://support.apple.com/en-us/HT201304
About This Article

- Send fan mail to authors
Is this article up to date?

Featured Articles

Trending Articles

Watch Articles

- Terms of Use
- Privacy Policy
- Do Not Sell or Share My Info
- Not Selling Info
wikiHow Tech Help Pro:
Level up your tech skills and stay ahead of the curve
We explain and teach technology, solve tech problems and help you make gadget buying decisions.
How to Turn Off AdBlock in Safari on iPhone, iPad, and Mac
While ads are an excellent way to keep resources free, they can take up too much space or spoil the browsing experience. This is one of the reasons ad blockers are a welcome addition. However, some websites don’t work properly when ad blockers are used. In this case, you can turn off the AdBlock in Safari.

When you turn off ad block in Safari, you essentially disable anything that can stop the ads. This includes the built-in content blockers and any added extensions. But can you disable the ad blockers in Safari for a single website? Let’s find out.
Should You Disable AdBlock in Safari and What Happens When You Do
Before we go ahead and disable ad blockers in Safari, let us quickly look at what happens when the full force of ads is finally unleashed on your browser.
- Websites may load slowly: Ad blockers eliminate any extra ad content on the page, allowing sites to load faster. However, when they’re turned off, it might cause certain sites to load slowly as they load with the ads.
- Trackers enabled: Certain website ads and other page elements contain trackers that help websites track your activity. While most ad blockers usually disable them, they will be enabled again once you remove the ad blockers.
- Websites will load normally: Website elements might be picked up by ad blockers as ads, causing them to hide. This can cause websites to break or not load properly once the ad blockers are enabled.
- Lifting restrictions: Some websites actively check if you’re using ad blockers. Once detected, they keep asking you to support them or stop you from accessing the site content until you disable the ad blocker and reload the page.
- Support the Creators: While ads can be a nightmare, they can be extremely helpful in supporting the creator behind the website. Especially if they’re an independent entity. So, occasionally, it is good to turn off ad blockers to support your favorite websites.
While the reasons to enable or disable ad blockers can be many, it all comes down to your requirements. If the ad blockers are interfering with website content or are entirely blocked, you will have no option but to disable them.
How to Disable Safari AdBlocker on iPhone and iPad
The ease of using extensions in Safari on your iPhone and iPad to block ads helps make the online browsing experience easy. However, these extensions can also adversely affect and block important page elements. To prevent that, here’s how to disable ad blockers in Safari on your iPhone and iPad.
1. Using Individual Website Settings
Step 1: Open Safari on your iPhone. Then, tap on the aA icon in the address bar.
Step 2: Tap on Manage Extensions.
Step 3: Here, turn off the toggle for the relevant ad block extensions.
Step 4: Then, tap on Done.

This will disable the ad blocker in Safari and close the extension window. If you can’t see the option to manage extensions, turn off content blockers in Safari if they’re available. This will stop any ad blockers from running on the site.
2. Using the Settings Menu
Step 1: Open the Settings app on your iPhone. Scroll down and tap on Safari.
Step 2: Then tap on Extensions.

Step 3: Here, tap on the relevant ad block extension.
Step 4: Turn off the toggle for Allow Extension.

If your browser still blocks ads or other page elements, try turning off content and privacy restrictions. This will ensure your device’s settings are not interfering with Safari. Here’s how.
3. Turn Off Content and Privacy Restrictions
Step 1: Open Settings and tap on Screen Time.
Step 2: Here, scroll down and tap on ‘Content & Privacy Restrictions’.

Step 3: Turn off the toggle for ‘Content & Privacy Restrictions’.

How to Remove Ad Blocker in Safari on Mac
Similar to your iPhone and iPad, you can also use extensions in Safari on your Mac to block ads. Additionally, you can also use native content blockers to achieve the same feat. In this case, you must first turn off the content blockers and uninstall the extensions. This will help do away with ad blockers in Safari on your Mac. Here’s how:
1. Using Website Settings
Step 1: Open Safari and go to the menu options. Here, click on Safari.
Step 2: Then click on Settings.

Step 3: From the menu options, select Websites.
Step 4: Then click on Content Blockers from the left-side menu.

Step 5: Here, use the currently opened website’s drop-down menu and change it to Off. This will help you disable ad block on many websites at once.

Step 6: Or, if you wish to disable it for all the websites, go down and click on the ‘When visiting other websites’ drop-down.
Step 7: Then, select Off.

This will disable the native content blockers for all websites, regardless of whether they’re currently open. If you have any external ad block extensions installed, they will continue to function accordingly. In this case, use the extensions settings to disable them separately. Here’s how.
2. Disabling Extensions
Step 1: Open Safari on your Mac. Then, from the menu options, click on Safari.
Step 2: Here, click on Settings.
Step 3: Click on Extensions to see the currently installed extensions.
Step 4: Here, click on the ad blocker extension you wish to remove.
Step 5: Click on Uninstall.

Repeat these steps to uninstall any other ad blocker in Safari on your Mac.
3. For a Single Site
Step 1: Open Safari on Mac and go to the relevant website.
Step 2: Then, click on Safari from the menu options and click on Settings for the website.

Step 3: Here, uncheck the Enable content blockers option.

This should immediately remove the ad blocker for the selected site. You can reload the page if you still can’t see any ads or the website content doesn’t load properly.
Also Read: How to fix Safari keeps crashing on Mac
Remove Safari Ad Blocker
While ad blockers help remove unwanted ads, they can cause issues loading websites. So, we hope this article helped you turn off the ad blocker in Safari on your Apple device. You can also check our explainer to learn how to enable or disable Safari pop-up blocker on Mac .
Was this helpful?
Last updated on 17 February, 2024
The above article may contain affiliate links which help support Guiding Tech. However, it does not affect our editorial integrity. The content remains unbiased and authentic.

The article above may contain affiliate links which help support Guiding Tech. The content remains unbiased and authentic and will never affect our editorial integrity.
DID YOU KNOW

Ankita Sharma
A writer at heart, Ankita enjoys exploring and writing about technology. While she started as a script and copywriter, her keen interest in the digital world pulled her towards technology, and with GT, she has found her calling in writing about and simplifying the world of tech for others. On any day, you can catch her chained to her laptop, meeting deadlines, writing scripts, and watching shows (any language!).
More in iOS

How to Make Your Own Alarm Sound on iPhone for Free

How to Stop Photos From Messages Saving to iPhone’s Camera Roll
Join the newsletter.
Get Guiding Tech articles delivered to your inbox.
Disable "clear history" from safari?
I want to disable the "clear history" feature from my iPhone. How can I do this?
I have an iPhone SE. Thanks
iPhone SE (3rd generation)
Posted on Aug 29, 2023 5:06 AM

Posted on Aug 29, 2023 9:42 AM
The short answer is it can't be done, but it might help if you were to explain your need to do that. For example, perhaps Private Browsing will meet your requirements: Browse privately in Safari on iPhone - Apple Support
When you use Private Browsing, "Safari won't remember the pages you visit, your search history, or your AutoFill information." — Turn Private Browsing on or off on your iPhone - Apple Support
Loading page content
Page content loaded
Aug 29, 2023 9:42 AM in response to auldsport
Aug 29, 2023 12:16 PM in response to John Galt
I have one device, and it is shared among three. Two of the three are minors and they keep deleting history to hide whatever they are up to and it is screwing up my saved settings on my phone. Here is a silly example - it clears my history from Wordle and I can't see how many 3s I have accumulated :) - I am glad for wordle because that is how it came to my attention. I do not wish to deprive them of any device use, but my entreaties to stop deleting history have gone unheeded. I have limit adult content set up on my phone already, so either it doesn't work or they are hiding something that doesn't count as adult content. Luckily they don't know about private browsing.
Aug 29, 2023 1:28 PM in response to auldsport
auldsport wrote:
I have one device, and it is shared among three.
You are asking for trouble by doing that. Do not share your Apple ID. One person = one Apple ID:
Make sure that each family member has a unique Apple ID - Apple Support
Keep Apple IDs separate from one another. From https://appleid.apple.com/faq:
Can I share an Apple ID with someone else?
Your Apple ID should not be shared with anyone else.
There is no need to deprive anyone of anything. Use Family Sharing: Set up Family Sharing - Apple Support
Aug 29, 2023 3:53 PM in response to John Galt
Oh well, two more devices are not in the cards so they have to share mine for now.
Aug 29, 2023 5:32 PM in response to auldsport
There's alway another birthday coming up.
How to turn off Safari Private Browsing on iPhone and iPad

While Private browsing is great for maintaining anonymity, children and teenagers can take undue advantage of the same. So, it’s wiser to turn off or block Safari Private Browsing on their iPhone and iPad.
Though it won’t completely stop them from browsing explicit content or unwanted websites, it would allow you to check their browsing history and correct them if needed.
How to disable Safari Private Browsing on iPhone
To temporarily exit private browsing,
- Tap the two-square icon .
- Tap Private .

To permanently exit private browsing,
How to block Safari Private Browsing on iPhone and iPad

That’s all for now!
Besides this, you can also use parental control apps on your iPhone to monitor your child’s activity or you can simply hide apps on iPhone which you don’t want your child to open them.
If you want to turn off Private Browsing for Safari on Mac, check this out.
Wrapping Up…
So did you try disabling private browsing on your iPhone or iPad? If not, try it today and feel the difference. Would you wish to get more such iPhone hacks?
Recommended Hacks on Safari You Might Like!
- How to block websites in Safari on Mac
- How to disable Safari on iPhone? Easy ways to do it!
- How to customize Safari start page on iPhone or iPad
- How to lock Safari private tabs in iPhone and Mac
Let us know if you face any issues while following this guide in the comment section.
🗣️ Our site is supported by our readers like you. When you purchase through our links, we earn a small commission. Read Disclaimer .

Hi Arshmeet,
I appreciated the article on how to disable private browsing and, on the surface, the “Content Restrictions – Limit Adult Websites” method does eliminate one access point to private browsing. However, there is a very easy work around where my child can still get onto private browsing on the ipad. Nobody online is talking about this and it was not addressed in your article.
I already took all the steps you presented and it does in fact restrict access to Private Browsing via the Bookmarks Sidebar Icon and Tabs route. But, if I go to the upper right corner of an open Safari page and I hold down on the Tabs icon, a drop down menu appears with 6 different options: New Tab, New Window, New Private Window, Merge All Windows, Move to Tab Group, and Close this Tab. The 3rd option (New Private Window) opens exactly that: a new private browsing window separate from all the other Tabs in Safari and is completely unhindered by the “content restrictions – limit adult websites” method. This workaround completely eliminates the all the work I just did to set up a private-browsing-disabled experience. The iPad Pro M2 is running ios17.3.1, which is the latest version as of 2/27/24, so it’s not a software issue. Please help. I want to make Safari a safe environment for whoever picks up the ipad. I can send you screenshots if you would like. Please reach out to my email provided as the requirment for leaving a comment.
Sorry to hear that! If you can’t disable private browsing, you may try locking Private Browsing on your iPad so your child can’t access it. Go to Settings > Safari and toggle on Require Face ID to Unlock Private Browsing. Be sure to keep your iPad Passcode discreet. Also, under the Never Allow section, you can list the websites you don’t want your child to access.
Leave a Reply Cancel reply
Your email address will not be published. Required fields are marked *
Save my name, email, and website in this browser for the next time I comment.
How to Disable Private Browsing in Safari on iPhone or iPad
Private Browsing, also called incognito mode, offers a more private way of web surfing. While in Private Browsing, your browsing activity won’t be saved or remembered. For example, the websites you visit won’t be present the next time you open the Safari history. What you search for will be deleted when you close Safari. Furthermore, if you have multiple Apple devices using the same Apple ID, your Safari activities won’t be sent to other Apple devices. For example, Handoff won’t work for Safari in Private Browsing.
In this article, I explain what you can do to remove the Private Browsing option in Safari so that whoever is using the iPhone or iPad won’t be able to turn on the private mode. There can be several instances you may want to do this. For example, if your child is using your iPad or iPhone, you can disable the private mode so that they can’t find the option to turn it on.
How to disable Private Browsing
We will use Screen Time to do this. Let’s first talk about how you can turn on Private Browsing:
- Open Safari .
- Long press the tabs button (looks like two overlapping squares) and then tap New Private Tab .
After following the steps above, Safari will open a new page in private mode. In Private Browsing, the URL address bar will be black. If you want to exit private mode, then again tap the Tabs button and select Start Page .
Now, we will remove the option to start a new private tab or page. When the user taps the Tabs button, the Private option will not be shown. Here is how:
- Open Settings .
- Tap Screen Time .

- Tap Turn On Screen Time , then tap it again and follow the instructions. If you enabled Screen Time before, skip this step.
- Tap Content & Privacy Restrictions .

- Tap Content Restrictions . You will be asked to enter your Screen Time passcode.

- Tap Web Content .

- Tap Limit Adult Websites .

- Then exit Screen Time.
The next time you open Safari, you won’t be able to see the Private Browsing option in Safari. If you want to bring it back, again go back to Screen Time settings, and disable the Limit Adult Websites option, as you can see below:

Now you can follow your kid’s activities. Your child won’t be able to turn on the private mode. Too bad for them. An effect of this method is that now you have limited some adult websites; these can include porn, gambling, etc. You can play with Screen Time settings to allow certain websites.
Related articles
- How to Access Apple’s Private Relay Service
- Can Private Browsing be Traced on an iPhone, iPad or Mac?
- Safari Private Browsing Button Missing? Fix (iOS)
- Safari “This Connection Is Not Private” Warning
- 7 iPad Safari Tricks You Need to Know
Dr. Serhat Kurt worked as a Senior Technology Director specializing in Apple solutions for small and medium-sized educational institutions. He holds a doctoral degree (or doctorate) from the University of Illinois at Urbana / Champaign and a master’s degree from Purdue University. He is a former faculty member. Here is his LinkedIn profile and Google Scholar profile . Email Serhat Kurt .
Similar Posts

Apple Pencil Not Charging, How to Fix
So you attempted to charge your Apple Pencil, but your battery level does not pass a certain percent (e.g., 0, 3, 5, etc.), or you do not see any indication that your Pencil…

iPhone Died after Charging Overnight and Won’t Turn On
Some iPhone users have been waking up to dead iPhones. It seems that sometimes when an iPhone has been left to charge at night, it dies unexpectedly. Some of the features of this…
iPad Keyboard: How to Type the Greyed-Out Numbers and Symbols
If you have an iPad, you probably already know the basics of how to use the onscreen keyboard. There are, however, some keyboard features that aren’t so obvious – like how to enter…

Can’t Redeem Your 3-Month Free Trial of Apple TV+? Here Is What to Do
You can get 3 months of Apple TV+ for free when you buy a new iPhone, iPad, Apple TV, or Mac from Apple or an authorized seller. You can redeem this offer within…
iCloud Keeps Popping Up on Windows PC
Several Windows PC users have said that various iCloud alerts keep popping up. It further appears that users may see the followings: A continual prompt message asking users to sign into iCloud on…

iPhone Won’t Make Calls But Will Text, How to Fix
Sometimes you may experience an unusual problem where you cannot make or receive calls while texting still works. This is an unusual situation because it appears that your iPhone is still connected to…
Leave a Reply Cancel reply
Your email address will not be published. Required fields are marked *
Categories:
Clear the history, cache, and cookies from Safari on your iPhone, iPad, or iPod touch
Learn how to delete your history, cookies, and cache in Settings.
Delete history, cache, and cookies
Clear cookies and cache, but keep your history, delete a website from your history, block cookies, use content blockers.
Go to Settings > Safari.
Tap Clear History and Website Data.

Clearing your history, cookies, and browsing data from Safari won't change your AutoFill information.
When there's no history or website data to clear, the button to clear it turns gray. The button might also be gray if you have web content restrictions set up under Content & Privacy Restrictions in Screen Time .
To visit sites without leaving a history, turn Private Browsing on .
Go to Settings > Safari > Advanced > Website Data.
Tap Remove All Website Data.
When there's no website data to clear, the button to clear it turns gray. The button might also be gray if you have web content restrictions set up under Content & Privacy Restrictions in Screen Time .
Open the Safari app.
Tap the Edit button, then select the website or websites that you want to delete from your history.
Tap the Delete button.
A cookie is a piece of data that a site puts on your device so that site can remember you when you visit again.
To block cookies:
Go to Settings > Safari > Advanced.
Turn on Block All Cookies.

If you block cookies, some web pages might not work. Here are some examples:
You will likely not be able to sign in to a site even when using your correct username and password.
You might see a message that cookies are required or that your browser's cookies are off.
Some features on a site might not work.
Content blockers are third-party apps and extensions that let Safari block cookies, images, resources, pop-ups, and other content.
To get a content blocker:
Download a content blocking app from the App Store.
Tap Settings > Safari > Extensions.
Tap to turn on a listed content blocker.
You can use more than one content blocker. If you need help, contact the app developer .
Information about products not manufactured by Apple, or independent websites not controlled or tested by Apple, is provided without recommendation or endorsement. Apple assumes no responsibility with regard to the selection, performance, or use of third-party websites or products. Apple makes no representations regarding third-party website accuracy or reliability. Contact the vendor for additional information.

Related topics
Explore Apple Support Community
Find what’s been asked and answered by Apple customers.
Contact Apple Support
Need more help? Save time by starting your support request online and we'll connect you to an expert.
- a. Send us an email
- b. Anonymous form
- Buyer's Guide
- Upcoming Products
- Tips / Contact Us
- Podcast Instagram Facebook Twitter Mastodon YouTube Notifications RSS Newsletter
Review: Six Months With the iPhone 15 Pro
It's been a bit over six months since the iPhone 15 lineup came out in September, and MacRumors videographer Dan Barbera has been using an iPhone 15 Pro Max sans case since launch. Over on our YouTube channel, Dan did a long term review to demo how his phone has held up and his thoughts on the Action button, battery life, and camera features.
Battery health is at 98 percent and 174 cycles, and there have been some fluctuations in battery life with software updates. It's a little hard to get a solid read on battery because of day-to-day differences in usage.
Some people have had trouble finding a use for the Action button, but assigning it to the camera is one way to ensure that it gets used. With the camera setting, a quick press on the button launches the camera so there's no need to press on the Home Screen or open up the Camera app. Apple is rumored to be adding a dedicated Capture button for the camera with the iPhone 16 models, so the Action button might get less useful at that point for those who use it for the camera.
For iPhone 15 Pro owners, how's your battery life, and do you use the Action button? Let us know in the comments below.
Get weekly top MacRumors stories in your inbox.
Top Rated Comments

Popular Stories

When to Expect a New Apple TV to Launch

iPhone 16 Plus Rumored to Come in These 7 Colors

Alleged iPhone 16 Battery Details Show Smaller Capacity for One Model

Macs to Get AI-Focused M4 Chips Starting in Late 2024

Apple Event for New iPads Still Considered 'Unlikely' Following Delays

iOS 18 May Feature All-New 'Safari Browsing Assistant'
Next article.

Our comprehensive guide highlighting every major new addition in iOS 17, plus how-tos that walk you through using the new features.

App Store changes for the EU, new emoji, Podcasts transcripts, and more.

Get the most out your iPhone 15 with our complete guide to all the new features.
A deep dive into new features in macOS Sonoma, big and small.

Revamped models with OLED displays, M3 chip, and redesigned Magic Keyboard accessory.

Updated 10.9-inch model and new 12.9-inch model, M2 chip expected.

Apple's annual Worldwide Developers Conference will kick off with a keynote on June 10.

Expected to see new AI-focused features and more. Preview coming at WWDC in June with public release in September.
Other Stories

5 hours ago by MacRumors Staff

9 hours ago by Joe Rossignol

10 hours ago by Tim Hardwick

1 day ago by MacRumors Staff

1 day ago by Tim Hardwick
Tips & Tricks
Troubleshooting, how to disable chatgpt chat history & training data usage.
ChatGPT is a phenomenal artificial intelligence chatbot that uses the Large Language Model deep learning to provide incredibly useful, powerful, and human-like responses. By default, ChatGPT will keep a history of your chats with the chatbot, and also use your interactions with ChatGPT to train and improve the models.
Some users may wish to change these settings for privacy reasons, or for personal preference, and that can be done.
How to Disable ChatGPT Chat History & Training Data Use
- Go to https://chat.openai.com and login with your OpenAI account as usual
- Click on your name in the bottom corner of the ChatGPT window
- Click on “Settings”
- Choose “Data Controls”
- Look for the setting for “Chat history & training” and toggle that OFF

Your chat history with ChatGPT will no longer be stored or maintained (and the sidebar with chat history will be blank), and your data and chats will no longer be used as training data or to improve the LLM.
The text below the “Chat history & training” setting explains it as follows:
“Save new chats on this browser to your history and allow them to be used to improve our models. Unsaved chats will be deleted from our systems within 30 days. This setting does not sync across browsers or devices.”
Note this only works with ChatGPT interactions from the OpenAI apps ( for iPhone and iPad , or Android) or through using the ChatGPT website . Any setting adjustment made here will not have any impact on you if you use Microsoft Edge to access GPT 4 or Bing for the same purpose .
It’s really up to you whether or not this particular setting is appropriate to have enabled or disabled, and your individual privacy intentions and desires. But whatever your thoughts and perspectives, it’s good to have this setting and be aware of it, and how it impacts your ChatGPT usage.
Enjoy this tip? Subscribe to our newsletter!
Get more of our great Apple tips, tricks, and important news delivered to your inbox with the OSXDaily newsletter.
You have successfully joined our subscriber list.
Related articles:
- How to Opt Out of ChatGPT Using Your Training Data While Keeping Chat History
- How to Use Voice with ChatGPT on iPhone
- How to Use ChatGPT on iPhone
- How to Use ChatGPT, the AI Tool Everyone is Talking About
Leave a Reply
Name (required)
Mail (will not be published) (required)
Subscribe to OSXDaily
- - How to Opt Out of ChatGPT Using Your Training Data While Keeping Chat History
- - How to Check Disk Health on Mac with smartctl
- - How to Enable Do Not Disturb on Apple Watch
- - 3 Mac Tips for Working with International Teams
- - How to Disable ChatGPT Chat History & Training Data Usage
- - Opinion: Shiny Keys on MacBook Air & Pro Are Ugly and Shouldn’t Happen
- - MacOS Ventura 13.6.6 & Safari 17.4.1 Update Available
- - Using M3 MacBook Air in Clamshell Mode May Reduce Performance
- - First Beta of iOS 17.5, macOS Sonoma 14.5, iPadOS 17.5 Released for Testing
- - iOS 16.7.7 & iPadOS 16.7.7 Released for Older iPhone & iPad Models
iPhone / iPad
- - What Does the Bell with Line Through It Mean in Messages? Bell Icon on iPhone, iPad, & Mac Explained
- - Fix a Repeating “Trust This Computer” Alert on iPhone & iPad
- - Create a Resume with Pages on Mac, iPhone, iPad
- - How Secure are Personal Hotspot Connections from iPhone?
- - You Can Play Flappy Bird in the Mac Finder
- - Fix “warning: unable to access /Users/Name/.config/git/attributes Permission Denied” Errors
- - How to Fix the Apple Watch Squiggly Charging Cable Screen
- - NewsToday2: What it is & How to Disable NewsToday2 on Mac
- - Why Did My iPhone Alarm Stop Automatically & Turn Itself Off?

About OSXDaily | Contact Us | Privacy Policy | Sitemap
This website is unrelated to Apple Inc
All trademarks and copyrights on this website are property of their respective owners.
© 2024 OS X Daily. All Rights Reserved. Reproduction without explicit permission is prohibited.
How-To Geek
How to permanently disable incognito mode in your browser.
Deactivate private browsing mode.
Quick Links
Turning off vs. disabling incognito mode, how to disable incognito mode in chrome for windows, how to disable incognito mode in chrome for macos, how to disable private browsing in safari on iphone and macos, how to disable inprivate mode in edge for windows, can you disable private browsing in firefox, key takeaways.
- You can turn off private browsing in Chrome on Windows and macOS by running a command in Command Prompt and Terminal.
- In Microsoft Edge, you can turn off private browsing through Registry Editor. Unfortunately, there's no native way to turn it off in Firefox.
- You'll need to adjust content restriction settings to turn off private browsing mode in Safari on macOS and iOS.
If you share your phone or computer with children or minors and want to monitor their browsing activity, consider turning off the private browsing mode. Let's explore how you can turn it off in Google Chrome for Windows and macOS, Microsoft Edge for Windows, and Safari for iPhone and macOS.
If you've opened private browsing mode and only want to leave it, turning it off is simple in all major browsers on desktop and mobile devices . Just exit the browser completely, and you'll be out of incognito mode the next time you open it.
However, if you want to completely disable incognito mode to prevent others from using it on a device, you'll need to turn it off permanently, and that has a few more steps involved.
To turn off private browsing mode in Chrome on a Windows device, type CMD into the Windows Search bar, right-click the "Command Prompt" app, and select "Run as Administrator." Ensure you run the Command Prompt utility with administrative privileges to avoid encountering errors while turning off private browsing mode.
Once you've opened Command Prompt as an administrator, copy and paste the following command into the window, and then press the Enter key:
After executing this command, exit the Command Prompt window. You should now see that Incognito mode has been disabled (grayed out) in Chrome.
If you decide to re-enable private browsing later, use the above command again in Command Prompt, but replace the "1" with "0," like so:
To turn off private browsing in Chrome on a macOS device, first launch Terminal . Press Command+Space to open the Spotlight search window. Then, type Terminal and double-click "Terminal" in the search results to open it.
In the Terminal window, enter the following command:
Press Enter after typing the command.
After executing the command, close the Terminal window. You'll find that private browsing mode has been turned off in Chrome.
Safari doesn't offer a direct option to turn off private browsing mode. However, by adjusting content restrictions for web content, you can disable Safari's private browsing mode on both iPhone and macOS.
Disable Private Browsing on an iPhone
To adjust these permissions on an iPhone, open your device's settings and tap "Screen Time." If Screen Time isn't enabled, tap "Turn on Screen Time," then tap "Continue" on the following page to activate it.
Next, set up a passcode for Screen Time to prevent your child from making unauthorized changes. To do this, tap on "Use Screen Time Passcode," set a passcode, and confirm it on the next page. This will protect Screen Time with the passcode.
Now, navigate to "Content and Privacy Restrictions." Enable the toggle next to "Content and Privacy Restrictions" and tap on "Content Restrictions." You may need to enter the passcode to access the content restrictions settings.
In this menu, tap "Web Content" and select "Limit Adult Websites" from the available options. Once done, exit this menu, and you'll notice that the private browsing option is no longer available in Safari.
Disable Private Browsing on a Mac
To turn off private browsing mode on a macOS device, open System Preferences from the Dock, navigate to "Screen Time" in the left sidebar, and, under Restrictions, open "Content and Privacy" settings.
Enable the toggle next to Content and Privacy. Then, open the "Content Restrictions" settings and select "Limit Adult Websites" from the Access to Web Content menu. Once selected, click "Done" in the bottom-right corner.
Upon returning to Safari, you'll notice that the "New Private Window" option has now been grayed out, indicating that the private browsing mode has been successfully disabled.
If you use Microsoft Edge as your default browser on a Windows device, you can turn off private browsing mode via Registry Editor.
To open Registry Editor, press Win+R, type regedit , and press Enter. Then, click "Yes" in the User Account Control (UAC) window.
In the Registry Editor, navigate to HKEY_CURRENT_USER > Software > Policies > Microsoft > Edge.
If some of these keys don't exist already, you can create them by right-clicking and selecting New > Key. Then, rename the key accordingly.
Select "Edge," right-click in the right pane, select New > DWORD (32-bit) Value, and name it InPrivateModeAvailability . Double-click the value, set the Value Data to "1," and click "OK."
Now, close the Registry Editor and restart your Windows PC.
Misconfiguring Registry Editor can lead to severe consequences. Make sure to follow the above steps carefully when tweaking the keys. For added safety, you can make a backup of the Registry. .
Unlike other browsers, there's no browser or operating system-level solution to turn off private browsing in Mozilla Firefox. The only available method involves using an extension that turns off private browsing. However, due to the associated risks with third-party extensions, we strongly advise against using them.
If you use Firefox as the default browser, remove it from your computer, set Chrome or Edge as your default browser, and turn off private browsing for them. If you have a Windows laptop, you can use Microsoft's Family Safety app to restrict access to any browser other than Edge. Also, you can implement content filters within Edge to disable access to inappropriate content.
You can now prevent your child or other users from browsing privately.
While the above methods will turn off private browsing in browsers, keep an eye on your child whenever they browse the web. They may find ways to work around these restrictions.
IMAGES
VIDEO
COMMENTS
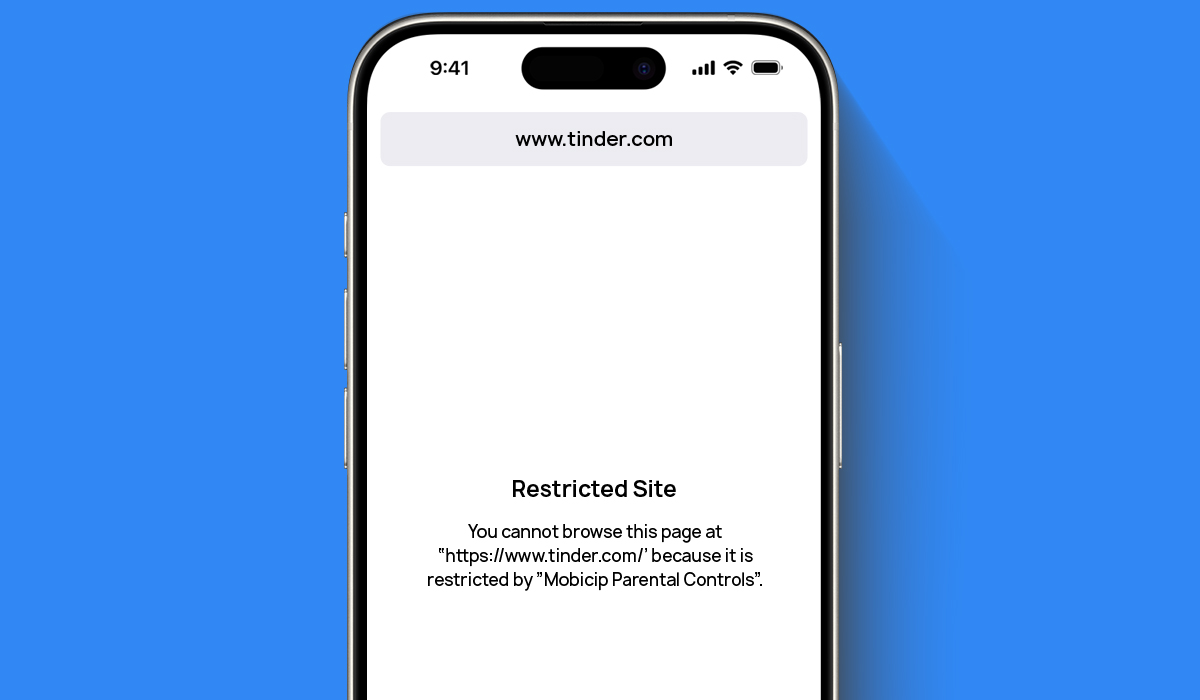
This article describes how to disable or enable Safari using the Screen Time feature on your child's iPhone or iPad. Please note that there is no option to delete Safari app from an iOS device - the app will be removed from the Home Screens, but will remain in the App Library. Summary: Go to Settings > Screentime and turn Safari to ON or OFF.
If your iPad has been updated to the most recent version supported by your iPad, then Safari is as up-to-date as is possible. If you wish to use an alternative browser in preference to Safari, you can do so - and configure the alternative browser as the default browser from iPad settings. Hello, safari cannot be uninstalled from an iPad. -Drake.
For added security and control, consider setting a Screen Time passcode. This passcode ensures that only authorized users can modify the Screen Time settings, including the restrictions placed on Safari. By following these steps, you can effectively disable Safari on your iPad using the Screen Time feature.
To delete Safari history on Mac: 1. Click on the three dots in the top right corner and choose "Settings". 2. Go to "Security and privacy". 3. Click "Clear browsing data", mark all the relevant options, and click "Clear data". You can also block and clear cookies in the "Cookies and other site data" section.
Change the display controls for a website on Safari. You can hide the search field, switch to Reader, and more. Open the Safari app on your iPad. Tap , then do any of the following: Hide the search field: Tap Hide Toolbar (tap the top of the screen to get it back). See a streamlined view of the webpage: Tap Show Reader (if available).
Option 1: Uninstall the App. Option 2: Long-Press on a Link. Option 3: Use Safari in Private Browsing Mode. Option 4: Lock Safari With Guided Access. Safari for iPhone and iPad will automatically open many web links in apps. For example, if you tap a LinkedIn, Reddit, or YouTube link on a web page, you'll be taken to the associated app.
Disabling Safari or removing it from your home screen or dock doesn't automatically remove its data. This includes your history logs, saved login details, and the cookies that websites use to track you. The good thing is, it's totally easy to wipe out your browser's stored information. 🍎 For iOS and iPadOS. Step 1.
To disable Safari from your iPhone and iPad, open the Settings option on your device, then open Restrictions. This will prompt you to enter your device's passcode. Enter it, and then you'll see a list of all your installed applications, and from there just toggle the off switch on Safari. To stop your iPhone and iPad from linking with ...
On your iPhone or iPad, open the Safari app and go to the start page. Find the Frequently Visited section and then press and hold on a website icon. From the popup, tap on "Delete." To disable the entire Frequently Visited section, we'll need to go to the Settings app. Open the Settings app and go to the "Safari" section.
You can't delete it, but you can disable and wipe out its data. It's like putting Safari into a dormant state — it's still there, but it won't get in your way. 3 Ways to disable Safari from iPhone. You can do several things to "remove" Safari's existence from your iPhone. 1. Disable Safari from your iPhone using Screen Time
To disable Safari's pop-up blocker on your iPhone or iPad, first, open the Settings app on your phone. Settings is where many of Safari's options are located. On the Settings page, scroll down and tap "Safari." On the "Safari" page that opens, you have various options to configure for your web browser. Here, at the bottom of the "General ...
How to Turn Off Safari Extensions on an iPhone or iPad If you don't want an extension temporarily, but find it useful in the long run, you can just disable and enable it when you want it back. Here's how to do so: Open Settings and select Safari. Scroll down and tap on Extensions. Choose the extension you would like to disable.
With iOS 14 or later, iPadOS, and watchOS 9.4 or later, you can delete some built-in Apple apps from your iPhone, iPad, or Apple Watch. When you delete a built-in app from your device, you also delete any related user data and configuration files. This can affect things like related system functions or information on your Apple Watch. Built-in ...
Safari won't remember the pages you visit, your search history, or your AutoFill information. How to turn on Private Browsing. Open Safari on your iPad. Touch and hold the Tabs button. Tap New Private Tab. While Private Browsing is on, the Safari address bar appears black or dark instead of white or gray, and the buttons are black instead of blue.
You can do so easily by using the built-in content restrictions settings. If you're just trying to turn off private browsing and get back to normal browsing, you can switch modes directly in the Safari app. This wikiHow guide will show you how to turn off or permanently disable Private Browsing on an iPhone or iPad.
Step 1: Open Safari on your iPhone. Then, tap on the aA icon in the address bar. Step 2: Tap on Manage Extensions. Step 3: Here, turn off the toggle for the relevant ad block extensions. Step 4 ...
Tap and hold on the Safari icon. Tap Remove app. In the dialog box that opens, tap Remove from Home screen. If Safari was in the Dock, you'll need to put another app there to replace it. Tap and hold on the app you want to take Safari's place in the Dock. Drag the app onto the Dock and let go.
The short answer is it can't be done, but it might help if you were to explain your need to do that. For example, perhaps Private Browsing will meet your requirements: Browse privately in Safari on iPhone - Apple Support When you use Private Browsing, "Safari won't remember the pages you visit, your search history, or your AutoFill information."— Turn Private Browsing on or off on your ...
If you can't disable private browsing, you may try locking Private Browsing on your iPad so your child can't access it. Go to Settings > Safari and toggle on Require Face ID to Unlock Private Browsing. Be sure to keep your iPad Passcode discreet. Also, under the Never Allow section, you can list the websites you don't want your child to ...
Of course, you might have personal reasons why you may want to do this. Regardless of the reason, let's explore how you disable Safari and also what you could use as an alternative. Disabling Safari on your iPhone. The easiest way to disable Safari on your iPhone is to set up Screen Time on your phone. Go into your Settings app, Screen Time ...
There can be several instances you may want to do this. For example, if your child is using your iPad or iPhone, you can disable the private mode so that they can't find the option to turn it on. How to disable Private Browsing. We will use Screen Time to do this. Let's first talk about how you can turn on Private Browsing: Open Safari ...
Below are the steps you should take; the process is identical for iPhones and iPads. Open the Settings app on your iPhone or iPad. Go to the Safari tab. Under the Search section, you'll see two options: Search Engine Suggestions and Safari Suggestions. Toggle these off so that they're no longer green.
Open the Safari app. Tap the Show Bookmarks button, then tap the History button. Tap the Edit button, then select the website or websites that you want to delete from your history. Tap the Delete button. Block cookies. A cookie is a piece of data that a site puts on your device so that site can remember you when you visit again. To block cookies:
100% capacity with 293 charge cycles and 80% limit enabled. I just wish there was an easy way to disable that mode for a day or week, rather than digging through settings.
iPhone / iPad - What Does the Bell with Line Through It Mean in Messages? Bell Icon on iPhone, iPad, & Mac Explained - iOS 16.7.7 & iPadOS 16.7.7 Released for Older iPhone & iPad Models - Fix a Repeating "Trust This Computer" Alert on iPhone & iPad - Create a Resume with Pages on Mac, iPhone, iPad
How to Disable Incognito Mode in Chrome for Windows To turn off private browsing mode in Chrome on a Windows device, type CMD into the Windows Search bar, right-click the "Command Prompt" app, and select "Run as Administrator."Ensure you run the Command Prompt utility with administrative privileges to avoid encountering errors while turning off private browsing mode.