The leading authority in photography and camera gear.
Become a better photographer.
12.9 Million
Annual Readers
Newsletter Subscribers
Featured Photographers
Photography Guides & Gear Reviews


Travel Photography Tips, Ideas, Examples & Jobs
Have a passion for travel photography but not sure how to take it further? This post covers careers, what gear is best, and tips for improving!
Learn | Photography Guides | By Ashley Darrow
Travel photography is one of the most exciting styles of photography, but it can also be one of the most intimidating to get started with.
I’m at my most inspired as a photographer when I’m on the road.
Even when I’m not headed to an exciting new location, I’ve started to think about all of my photography from the standpoint of travel.
This guide is going to give you everything you need to know to get started with travel photography.
I’ll be covering everything from the basics, to the equipment you need, to 20 travel photography tips that will improve how you approach taking photos.
When you’re ready to hit the road, we’ll start our adventure with some travel photography 101.
Table of Contents
What Is Travel Photography?
Defining travel photography can be a little bit challenging as this is one of the most open and free categories of photography.
In general, travel photography involves documenting people, landscapes, and cultures anywhere in the world.
Your travel photography counts whether you have to hike for thousands of miles or you took a 10-minute bus ride from your home.
Travel photography can be done by career professionals working for major magazines like National Geographic or it can be done as part-time freelance work.
Many travel photographers make their money by taking contract work from tourism departments or brands looking for product photography shot on location.
Travel photographers often find themselves working in challenging conditions. There’s a good chance that you’re going to be snapping pics in low light conditions , rough weather, or even half a world away from the comfort of your own bed.
- Related: 77 useful travel tips for photographers
What Does Travel Photography Include?

Image Credit: Sam Forson
Travel photography incorporates countless different styles.
Travel photographers often take landscape photographs, architectural photographs , as well as street photography. It’s also common to see food photography and documentary work being done by travel photographers.
As a travel photographer, your goal is to capture and express the story of a particular time and place. You’ll be giving people a taste of what’s happening in the moment while you’re in a particular location.
How Much Do Travel Photographers Make?
Travel photography is made up of a wide range of styles, but it’s also made up of a wide range of pay rates.
If you’re lucky enough to land a staff photography job with a major magazine, you could wind up with a six-figure salary. However, freelance travel photographers can make as little as around $18,000 a year.
Beginner travel photographers often make even less than that as they start to piece together their career.
Part of your pay as a travel photographer will come in the form of comped travel expenses. It’s pretty common for travel photographers to take a job with a tourism department that includes free transportation and lodging as part of their payment.
Is travel photography in demand?
Travel photography is in high demand.
How Much Do You REALLY Know About Photography?! 🤔
Test your photography knowledge with this quick quiz!
See how much you really know about photography...

Your answer:
Correct answer:
SHARE YOUR RESULTS
Your Answers
This demand is being driven by tourism departments, brands looking for more engaged lifestyle photography , and the rise of social media making travel photography a viable path for a content creator.
There are more people taking travel photos than ever before which means that you’re also going to have a lot more competition despite there being more job openings.
How Do I Become a Travel Photographer?

Image Credit: Kamaji Ogino
Becoming a travel photographer is pretty similar to how you would start up almost any photography career.
If you’re a total beginner, you want to start by mastering the craft of working behind the camera. This means learning how to stay in control of your exposure, frame captivating shots, and just get comfortable taking pictures wherever you go.
Here’s a basic outline of the steps you’ll take to start your travel photography career.
- Learn your photography basics
- Identify your travel photography niches
- Build your portfolio
- Grow a social media presence
- Begin reaching out to clients
- Publish your photography
- Grow your business by reaching out to bigger clients
- Continue to promote your work
- Have fun traveling!
I should note that plenty of travel photographers also crowdfund parts of their career.
Building a presence on social media sites like YouTube and connecting that to your crowdfunding platform of choice is a great way to bring in some additional money.
What Equipment is Needed for Travel Photography?

Image Credit: Hiren Lad
In all my years of photography, the one thing I’ve learned is that if there’s anything photographers love nearly as much as taking pictures, it’s talking about their gear.
Whether you see this equipment as the tools of your trade or the raw materials of your art, you’re going to need some equipment to get started with travel photography.
I’m going to cover the standard gear that most travel photographers will gravitate towards, but I’ll also be talking about different setups for film photographers and mobile photography.
I’m going to kick things off with the absolute must: a camera.
You’re not going to get very far in your career as a Travel Photographer without a camera. I’m being a little silly here, but it’s not just as simple as picking up any random mirrorless camera for travel blogging .
So, what camera is best for travel photography?
The absolute best cameras for travel photography are going to be, no surprises here, the latest mirrorless releases from the big-name brands like Sony, Camera, and Nikon.
Those cameras are packed full of the latest features and offer some of the best image quality.
You can also get amazing results, and save money, by picking up older cameras. My Sony a7s II is still my main camera body and my Canon 5D Classic, which was released way back in 2005, still takes pictures that get people asking me “How did you do that?”
You don’t need to spend a lot of money on your travel photography camera. A skilled photographer will be able to take amazing pictures using a point and shoot digital camera from the 90s. It’s craft that makes the photographer, not gear.
Travel photography can also be done with your smartphone. There are plenty of professional photographers out there primarily shooting on smartphones.
I also want to highlight film cameras. Film is the historic origin of our art form. Any film camera from a toy lomography camera to a professional large format camera can help us see our travels in a new way.
With all of that said, there are a few important features that you should look for in a travel photography camera.
- Weather sealed designs are much more important when you’re trekking through unknown territory than when you’re at home in the studio
- Your camera should also be ready for the road. Just like your car, you should take your camera in for a tune-up before a long trip
- Double-check for the specs that matter most to you. For me, that’s low-light performance and color science
Your camera is only half the equation which means we need to take a look at the lenses that will be going on this journey with you.
- Related: How to choose a camera and what is the best camera for travel photography?
I bet you’re wondering which lens is best for travel photography? You don’t need to worry, I’ll walk you through my top pics for a travel lens whether you’re shooting on a brand-new Sony mirrorless camera or you plan on taking a Canon 5D Classic on the road.
The first place you need to start is by asking yourself the most essential question in photography: What types of pictures do I plan on taking?
Here’s a quick breakdown of my recommendations for travel photography lenses based on my experience for a variety of photographic styles and budgets.
- Standard Zoom Lens —A standard zoom lens like the classic 24 to 70mm is the go-to travel lens for so many photographers I know. This lens easily handles street photographs, landscapes, and portraits. Pick this to make a flexible one-lens kit
- Wide Angle Zoom Lens —Wide angle zooms are better suited for photographers who know they’ll be shooting landscapes and architecture. If your wide angle zoom goes up to 35mm, then you can even get away with using that as your every-day lens
- Wide to Telephoto—These lenses have focal length ranges like 24 to 105mm. They are usually affordable alternatives to pro-level lenses that can still capture stunning images. You’ll want this lens if your main concerns are budget and stylistic flexibility
- Telephoto Zoom Lenses —These massive lenses typically top out at 200mm or 400mm focal lengths and are ideal for wildlife, bird, and sports photography. Their size, weight, and cost make them less flexible than other options, but these lenses are a must-have for photographers interested in the styles I just mentioned
- Pancakes and Nifty Fifties —Pancakes lenses have such a small profile they double as a body cap while the iconic Nifty Fifty is a budget 50mm with a huge fanbase. These lenses are perfect for photogs who want to stay ultralight or for anyone who wants an emergency backup lens.
- THAT lens —We all have a lens that, despite never getting much use, we just can’t seem to leave at home. Mine is the Helios 44-2. I take that lens on pretty much every trip even if it doesn’t get much use. Allow yourself a little room for that “fun” lens and you might be surprised by how much use it gets over time
I always have at least two lenses on me when I’m traveling—just in case.
I once dropped an expensive prime lens and watched it roll off the edge of a mountain in the desert. Luckily, I had a pancake lens in my bag so the photography trip wasn’t a total loss.
Ever since then, not only do I treat each of my lenses with the utmost care, but I also make sure but I’ve got backup options on hand.
- Related: How to choose a camera lens
Travel Photography Bag
Just like with lenses and camera bodies, you have a few options to consider when it comes to picking the right travel bag for your next adventure.
Before I get too far into talking about camera bags, here’s the five things I always consider when I’m packing a bag for my next trip.
- Camera Bag Size —Size is one of the most important things to look at when shopping for a new travel photography bag. You want to find a bag that’s going to comfortably fit all of your equipment without causing too much strain on your back. Sling bags are great for days out in the city with light gear, but you should look for a comfortable backpack if you plan on covering some serious distance with your gear
- Pack Weight —Here’s a quick piece of advice I picked up from hiking. Your maximum pack weight should only ever be 20% of your total body weight. This means that if you weigh 200 lb, the heaviest your camera bag should ever be is 40 lb. The lighter, the better
- Features —There are some features that I consider an absolute must have in any of my travel camera bags including rugged build quality, plenty of padding and protection for my gear, and easy access to at least my main camera body and lens so I can shoot on the fly
- Style —You could buy the most technically perfect travel camera bag, but if you don’t actually like the way it looks you’re never going to take it on a trip. I definitely believe that form should be second to function when it comes to camera bags, but I’d also be lying if I said it wasn’t a huge factor in my camera bag purchasing decisions
- Your Gear —Your gear is actually going to dictate the type of bag that you’ll be looking for. A travel photographer shooting on a Leica Q2 can get away with a much smaller bag than a photographer shooting with a Canon 1DX
I also typically bring a packable backpack with me as part of my kit. This could be a really lightweight sling bag or something like the Lowepro Runabout.
This lets me leave the bulk of my gear at my hotel when I just want to have a quick trip around a new city taking pictures.
- Related: How to choose a camera bag
Tripods for Travel Photography
Tripods are an interesting—and somewhat contested—piece of the travel photography puzzle. I never used to take a tripod with me while traveling and that’s because most of my photography was shot street style which means lightweight and handheld.
However, the more I get into film photography and more interesting exposures, the more I find myself relying on my travel tripod.
My absolute number one pick for an adventure tripod would have to be the Peak Design Travel Tripod . It’s fairly lightweight, intelligently designed, and packs down small enough to fit in most of my bags.
Depending on the type of photography you’re looking to capture, you can also use tripods like a gorilla pod or even just take the tripod you have—even though it might be a little larger and heavier than would be ideal for travel.
This roundup of the 7 best travel tripods is a great place to get started if you’re shopping for something designed for the road.
Do I Need a Tripod for Travel Photography?
I’m going to dig into this mild controversy for just a moment. The question of whether or not you need a travel tripod to begin with is the source of some debate for photographers.
Honestly, the answer is maybe. It really depends on the type of pictures that you’re hoping to capture and your personal style as a photographer.
If you like to run and gun while capturing slices of life on busy city streets, you probably don’t need to bring a tripod with you.
Styles of photography that are highly mobile and rely on fast composition changes typically ditch the added stabilization that a tripod brings because it just slows them down too much.
Tripods might also not work for certain events and organizations. Trying to set up a tripod during a rock concert is a recipe for disaster and some museums won’t even let you bring in a tripod unless you pay their professional photography fees.
Then again, there are a few types of photography that absolutely need a tripod in order to work. Long exposures, shooting in dimly lit situations, and using some telephoto zoom lenses pretty much mandate shooting on a tripod.
The long and short of this is that owning a tripod and learning how to use it will make you a better photographer, but it’s not quite a mandatory piece of your travel photography kit.
The Camera Accessories I Always Forget for Travel Photography!
There are so many small accessories that are vital for digital photography that I find myself constantly forgetting. Far from being little odds and ends, these are essential parts of my kit that I’ve started to just leave in my travel bag so I never have to worry about packing them.
I’m talking about SD cards , microfiber cloths, sensor cleaning kits, and all those other little things that you might not miss until you’re in the field and you’ve got a speck of sand on your sensor ruining your shots.
I’ve started making a checklist that contains all these little items before I pack out. There’s nothing more defeating than being in some beautiful destination and realizing you only have enough space on your memory card for a few dozen more shots.
This is the checklist that I use for your average trip. Feel free to adjust things based on the gear that you use.
- Sensor cleaning swab x 2
- Lens cleaning Spray
- Microfiber cloth
- Spare camera batteries for each camera
- Memory cards—one in each camera, extra in the bag
- External SSD if I’ll need to backup files while traveling
- iPad for editing, emailing, and posting pics on socials
- Camera strap
- Camera body cap and rear lens cap
- Remote shutter release
- Chargers and cables
Lighting for Travel Photography
Lighting is a bit of an interesting topic when it comes to travel photography. We don’t often associate this incredibly mobile genre of photography with the piece of equipment that defines studio work, but there’s some great reasons to take some lights with you on your next trip.
Photographers like Briscoe Park are doing incredible work mixing bold, almost giallo, lighting styles with travel photography. There’s also a wealth of photographers using the dark nights of remote locations as canvases for their light paintings.
I started taking a few small lights with me when I hit the road and it’s definitely pushing my abilities behind the camera.
Lights like the Aputure MC and MC Pro are great for adding lights to portraits, throwing splashes of color into images, or creating other-worldly scenes. The Infinibar or MT Pro, also from Aputure, are solid choices for light painting .
Even something small like the Lume Cube can help gain control over lighting while away from the studio. Just don’t try to haul around your old tungsten lights on your next trip!
Mobile Travel Photography Gear
Before you start thinking travel photography requires a mountain of expensive equipment, you might be reading this article on the only device you need to get started with travel photography.
That’s right, smartphone cameras have come a long way and they are perfectly capable of being your main camera body for traveling adventure photography .
Even though your smartphone is essentially a pocket camera that can surf the internet and make phone calls, you still might want to add some extra gear to make the most out of being a mobile travel photographer.
My biggest recommendation would be to pick up a Moment smartphone case and a few Moment lenses.
These lenses will dramatically change your composition and help make your images look a bit more professional and a bit less like a quick shot on a smartphone.
A lightweight Gorillapod, a photo editing app like Lightroom mobile, and a power bank to keep you charged are a few must-haves.
This might sound a little unconventional, but my smartphone is one of the cameras I use the most. It’s lightweight, can take high quality pictures, and it can be a great budget alternative to expensive cameras because you probably already own one.
I almost never leave the house without throwing one or two Moment lenses in my bag. This is true whether I’m going on a 10-minute walk to the store or I’m about to hop on a 10-hour flight.
Travel Film Photography Gear
Is there any sound more relaxing than the shutter of a film camera when you’re deep in the woods or on top of a mountain ridgeline?
I don’t think so and that’s one of the reasons why I tend to travel with film photography equipment.
Film photography is almost a completely different animal than digital photography. You have to be much more engaged with your subject, composition, and exposure since you only have a few frames before your roll is spent.
Here’s a quick list of the film photography gear that I travel with. Just as a quick note, I’m leaving out things like tripods and camera bags that overlap with digital photography.
- Gallon zip-top bag to store film
- Permanent marker to jot notes on the side of a film canister
- Light meter
- Film (I always try to bring one more roll than I think I’ll need—just in case)
Read our guide to film photography for more tips.
20 Tips to Help You Improve Your Travel Photography
Want to improve your travel photography? I’ve put together 20 travel photography tips to help you up your game the next time you take your camera on vacation.
These tips are going to cover everything from advice for total beginners to some really interesting things that caught me by surprise while I’ve been on tour with my camera.
Tip 1—Get Comfortable With Your Gear Before You Travel

Image Credit: Amar Preciado
This is my number one tip for travel photography because it applies to experienced photographers as well as beginners. Before you head out on your big trip, take some time to get comfortable with your equipment.
This means packing your camera bag just like you’re going to for your travel photography trip and wearing it around your home city or just walking around your neighborhood.
There’s nothing worse than being hundreds, or thousands, of miles from home only to find out that you actually don’t like that brand new camera bag you bought.
Giving all of your gear a comfortable trial run ahead of time ensures that you don’t run into any sudden surprises while you’re traveling.
I’ve started doing this with all of my travel photography gear and it’s hard to express just how much it’s helped me. Most of the time I’m just adjusting my backpack to make sure it’s got a comfortable fit for a long day of hiking, but there have also been times where I realized that piece of my equipment just wasn’t right for me.
This will also help make things easier when you’re out there taking pictures.
It can be a little stressful to try and line up the right composition in a busy downtown neighborhood of a foreign city. Knowing your gear inside and out will give you a huge confidence boost when you need it the most.
Tip 2—Set Your Travel Photography Intentions
This might seem like a silly question to ask, but why do you want to do travel photography?
Setting some intentions and being aware of your goals ahead of time is going to help improve your career as a photographer.
If you need some inspiration for your goals, here’s a few that I’ve used in the past.
- Have at least 5 new pictures that I can turn into prints once I’m home
- Spend two days on location, day one focuses on lifestyle photography while day two is all about landscapes
- Get out of my comfort zone and network with other travel photographers shooting the same location
Remember that goals are a lot like onions. They have layers.
Your ultimate goal might be to become a world famous travel photographer with National Geographic calling you every day, but you’ve got to start somewhere.
Let’s say that your goal is to start getting freelance travel photography contracts with tourism departments. You can start from scratch by pretending that you’re on contract to take photos of a particular location.
This will help you with your future goals as well as allow you to build your portfolio in the now.
Tip 3—Always Bring (Your) Camera

Image Credit: Ketut Subiyanto
Everything starts with the ABCs and for travel photographers this means to Always Bring (your) Camera and always be taking pictures.
You really never know when the right moment is going to strike for your photography. There have been countless moments where I wish I would have had a camera on me to capture a moment that was either beautiful or could have even been historic.
Whether you’re carrying your main camera body, a pocket camera, or even your smartphone, you should always have a camera on you when you’re traveling. Be ready to start snapping pics at a moment’s notice if you spot something that catches your eye.
Worst case scenario, you’ve got another few hundred pictures to sort through when you get home. Best case scenario, you’ve caught the once-in-a-lifetime shot that you might have otherwise missed.
Tip 4—Be Patient with Your Shots
Here’s something that’s happened to me nearly every single time I’ve gone on a travel photography trip.
I’ll be at a historic ruin or in a national park with the perfect shot framed only for there to be dozens of other tourists cluttering up my shot.
When I first started with photography, I didn’t have enough patience just to wait it out. I thought that I would have to spend hours standing at a particular spot waiting for people to disperse.
As it turns out, the longest I’ve really ever had to wait for a shot to clear up has been about a half hour. If you’ve got someone to talk to or a book to read, that’s no time at all.
Don’t pass up on the shots that you want to capture just because there’s something cluttering your frame. Patients will reward photographers every single time.
Pro travel photography tip: Using an ND filter on your camera can let you lower your shutter speed which will cause fast-moving cars and people to “vanish” from your shots!
Tip 5—Learn How to Photograph People
This travel photography tip can be one of the most challenging to incorporate. Getting comfortable cold approaching strangers takes a lot of social energy.
I know extroverted photographers that have a dozen model release forms printed and ready to go in their backpack. They have no problem chatting up strangers, but it took me some time to build up that confidence.
Here’s a quick template that you can use for approaching strangers for portraits.
Be cheerful and open about being a photographer. You can say something like “I’m a photographer taking portraits today in [Location] and I’d love to take your picture.”
If you’re on a freelance contract or working for a client, feel free to name drop them to give yourself some added credibility.
After snapping their pic, I like to give people my business card, email, or Instagram handle so they can contact me later if they’d like a copy of their photo.
If they say no photos, that’s just business.
It also really helps if you can speak just a little bit of the local language. You’ll be shocked how much more accommodating people can be if you can handle a few lines of the local tongue.
Tip 6—Study Local Laws and Customs
Photography laws and customs are different the world over. As a travel photographer, you’re going to need to familiarize yourself with local laws and customs—especially when you’re traveling abroad.
Remember that the letter of the law and the local customs might not necessarily be a one-to-one match.
I’m based in the United States and here it’s perfectly legal to take pictures of strangers as long as you’re in a public location. However, social customs dictate that it’s considered rude to take someone’s picture without asking their permission first.
When in doubt, always default to asking permission first. This means asking someone’s permission before taking their portrait or asking permission before taking pictures at a historic site or museum.
Tip 7—Get in Frame

Image Credit: Dominika Roseclay
This is something I’m still working on becoming more comfortable with.
When I’m in the studio, I’ve got no problem hopping in front of the lens and doing some self-portraiture. However, once I’m out in the field I’m a little bit reluctant to stand in as my own model.
Travel photography is about telling your story. This means that you’re going to need to get in frame for some of your photographs.
Even if it’s just a few shots of you setting up, traveling to your destination, or getting dinner after a long day of shooting, people want to see the photographer behind the camera.
If you’re traveling with other photographers, why not consider making this a game? Challenge each other to see who can take the most interesting photos of your fellow photographers.
You can even take some quick selfies on location to contrast your professional photography. This will make your self-portraiture a little more intimate and warm while your travel photos show off your full talent.
Tip 8—Scout Travel Photography Locations with Your Smartphone
A great way to dramatically improve your travel photography is to scout your locations ahead of time. Before you haul all of your gear on a quest for the perfect photo, go out there with just a day pack and walk around soaking up the scenery.
Location scouting gives you a strong understanding of what speaks to you as a photographer about this location before you even start pressing the shutter button.
I recommend carrying your smartphone or a point-and-shoot camera when you’re out scouting locations.
This lets you take some test shots of a travel location before bringing all your gear out.
Tip 9—How to Always Pack the Right Lenses
I used to be so worried about not bringing the right lenses on a trip, but it’s been years since I’ve felt like I picked the wrong lens for the job.
Part of this is knowing your lenses inside and out. You should learn the basics of your lenses like aperture, how their focal length compresses an image, and which focal lengths are ideal for different styles of photography.
Lenses like the Sony FE 24-70mm f/2.8 make a great choice for travel. The focal length options on that lens easily handle majestic landscape panoramas and street photography portraiture.
I also recommend taking at least two lenses with you for most travel photography trips. I’ll take one primary lens with me that I plan on doing most of my shooting with and a secondary lens for those “just in case” moments.
Tip 10—Staying Safe While Traveling with Camera Gear
Being a tourist always carries some risk when it comes to crime. Being a tourist that happens to be carrying $3,000 in photography equipment carries a little bit more risk.
Here’s a few tips that I stick with when it comes to staying safe while shooting with expensive camera equipment.
If you can, try to do your travel photography with a group. Even if you have one other person traveling with you, that company is usually more than enough to deter most would-be thieves.
This might seem a little obvious, but you always want to keep your gear in sight. Unless I know I’m alone in the wilderness, my camera bag is never further than an arm’s reach away.
I’ve got a tip for you that I don’t see a lot of people talking about when it comes to traveling safely with your camera equipment. I like to stay discreet when I’m traveling with my camera gear.
This means I leave the branded Sony strap at home and opt for a much more neutral Peak Design strap . I also throw a velcro patch over things like the LowePro logo on my backpack that might otherwise announce that there’s some expensive camera equipment in there.
If you stay smart and aware of your surroundings, your odds of having an unfortunate encounter while carrying camera equipment will be greatly reduced.
Tip 11—Shoot Some Short Format Video
We’re all photographers here. This means I can be a little honest with you about shooting short form video.
It might not be your main stay, but social media platforms are putting a lot of emphasis on TikTok style videos. If you can incorporate a little short form videography into your travel photography routine, you’ll have that much better performance online.
There are countless ways that you can build short form video production into your photography routine. You could record a 60 second video demonstrating your setup for the shot or even just an interesting voice over on top of a still image.
Shooting short videos can also be fun. Building this into your photography routine is a great way to improve your skill set while you’re also increasing your social media following.
Tip 12—Find Your Voice by Getting Lost
Some of the best travel photography stories happen because you get lost. Getting turned around is a great way to change your perspective on things and improve you or travel photography.
This is easily one of the most underrated travel photography tips. Best of all, you can do this from the comfort of your hometown.
Try getting lost on purpose by walking through a neighborhood you don’t usually go to or checking out a city that you might have otherwise overlooked.
While all the other travel photographers are gathered at the tourist traps we’ve all seen a thousand times on Instagram, you’ll be exploring something new while catching refreshing pictures of your travels.
Tip 13—How to Fly With Film
If you plan on doing some film photography while you’re traveling, you’re going to need to know how to transport your film while traversing through airports safely.
The x-rays used in airport security scanners can damage undeveloped photographic film. The more x-rays undeveloped film is exposed to, the more haze and distortion starts to pop up on the final image.
Film with an ISO 800 and above can be damaged by any airport X-ray machine. Expired and experimental films can also be damaged by x-ray equipment.
Some airports now use more powerful CT scanners. These are often used for checked baggage, but they can also be used for carry-on as well.
CT scanners put out enough x-ray radiation to damage film of any ISO. You should always bring your film with your carry-on luggage in its own zip-top bag.
When you’re traveling through security at an airport, you can ask the security personnel for a hand examination of your photographic film. In my experience, they almost always say yes no matter how busy the airport is.
However, it is at the discretion of airport security and I have had them turn down a hand examination of my film. One trip through an X-ray scanner won’t damage your film, but multiple trips will.
This is why I recommend buying film on location if possible. You can also have film mailed to your hotel or to a friend’s address who lives near where you’re traveling.
Tip 14—Become a Traveler at Home
Traveling is expensive and it’s not always available for us. However, this doesn’t mean that you have to stop your travel photography plans.
If you’re looking for the true zero-budget way of starting a travel photography career, you have to start in your home city.
While this might not seem exciting at first, keep in mind that the city that you live in is an exotic travel destination for someone else.
Try using all of the travel photography tips and tricks I’ve talked about in this article while taking pictures of your home city. Even if you live in a sleepy little town, there are compelling stories that you can tell by documenting the life and history of the place you live.
Tip 15—How to Find Travel Photography Inspiration
No matter what style of photography you’re in, it’s easy to get stuck in a rut. What should you do if you’re running out of inspiration before your next big travel photography trip?
Here are five quick ways I stay inspired and motivated as a photographer.
- Start following more photographers on social media to see what other people are doing
- Research historic photographers and get inspired by how they were shooting when our medium was still new
- Check out international photographers to see how people are shooting across the world
- Get experimental by looking into the weirder side of photography with things like film soup or databending
- When I’m heading to a new location, I like to look at the history, upcoming events, and what photographers are shooting for that local
Tip 16—Turn Regular Trips into Travel Photography Trips
If you’ve always got your camera with you, and you’re always shooting, every trip you go on is a travel photography trip.
A great way to stay active as a travel photographer who has yet to break into the full-time business is to transform every trip you go on into an opportunity for travel photography.
Whether you’re heading across town for a family dinner or going on a work trip, you’ve got an opportunity to do some trouble photography.
Not everything has to be a grand adventure. You could use that trip across town as an excuse to work on catching shots of yourself in transit, for example.
Tip 17—Becoming a Better Photographer
Every photographer has an area that they can improve on. Whether you’ve always wanted to be one of those photographers who only ever shoots on full manual mode or you’ve been hoping to add sports photography to your travel routine, now’s the time to start working on those skills.
Skills building exercises can be a great activity during your travel photography downtime. You’re not always going to be on the road to an exotic destination and that time in between trips is vital to your success.
Even if you’ve been a professional photographer for decades, there’s still countless things about this art form that you can learn.
Tip 18—Get Your Photos Seen
Now that you’ve got a portfolio of travel photography images, how do you get people to see them?
As with most freelancing gigs, the name of the game is networking. Here’s a few tips for getting your pics in front of more eyes.
- Be more consistent with social media by posting regularly and using hashtags strategically
- Enter into photography competitions
- Ask local shops if you can display your work
- Get your photos published
- Reach out to travel agencies, tourism boards, and parks departments for freelance work or partnerships
- Network with other photographers
As the old saying goes: It’s not what you know, it’s who you know.
Tip 19— Travel Photographer Tips for The Business Side of Things
Making it as a working travel photographer has gotten harder in recent years, but it’s not out of reach. Here’s a few business tips to help you stay on top of your budding photography career.
Always try reaching out to new clients. Keep in mind that bigger clients are harder to land, but there are plenty of smaller travel destinations that are ideal for a beginner photographer.
You should create a budget for your travel photography work. If you’re just starting out, you don’t need a fancy app. A simple spreadsheet is more than enough for you to stay on top of your money.
You can also try becoming a content creator while you’re working on landing clients. Building up a social media following and generating some income through a site like Patreon can help you stay on the road longer.
Tip 20—How to Tell Your Travel Photography Story

Image Credit: Ena Marinkovic
You’ve reached the end of my travel photography tips. The last tip, and the most important one, that I’m going to give you is some advice on how you can tell your story.
Travel photography is all about storytelling. This means documenting your journey, engaging your audience, and finding your voice.
Taking captivating pictures without context isn’t enough. Your travel photography needs to speak to people on a deeper level and communicate something yet untold about the experiences behind your journeys.
It’s going to take time to figure out how you want to represent your adventures. The best thing you can do is get started today.
Even if you’re just taking travel photos a few blocks from your home, you’ll be breaking the ice and taking those important steps in finding your voice as a storyteller.
What is the purpose of travel photography?
The purpose of travel photography is to share your journey with the world. Travel photographers help to tell the story of not only their adventures, but also the people and places they encounter whether they are traveling around the world or within a few miles of where they grew up.
Is travel photography a good career?
Travel photography can be an amazing career that is rewarding and potentially very lucrative. It can be challenging to get started, but there are countless photographers who do travel photography as both their main job as well as a side gig.
What is the single best lens for travel photography?
The single best lens for travel photography is the wide angle to telephoto zoom like the Sony FE 24-105mm f/4 G OSS Lens. This lens allows you to capture everything from sweeping landscape panoramas to sports and wildlife photography .
Is travel photography a job?
Travel photography can absolutely be a job. You can make money as a travel photographer by freelancing for clients, photographing destination weddings , or working as a photojournalist.
Is GoPro good for travel photography?
A GoPro can be great for travel photography especially if you’re interested in capturing video and using stills from that footage for your photography.
Even though a GoPro is a good choice for travel photography, you’re probably going to be better served by a dedicated camera if your main goal is photo rather than video.
Final Words
I hope this guide gives you everything you need to hit the ground running with travel photography. If you’re an experienced travel photographer, I hope you’ve picked up a few new tricks that can help improve your next adventure.
I’ve tried to cover travel photography from nose to tail in this blog, but I’m sure I left a few things out.
I want to hear your travel photography tips, tricks, and experiences in the comments. If you like this article, make sure to check out my other photography blogs .

Check out these 8 essential tools to help you succeed as a professional photographer.
Includes limited-time discounts.
You'll Also Like These:

Ashley is a photographer, writer, and film critic. When Ashley’s not writing essays on photography, cinema, and theory, he’s out taking pictures with retro film cameras.
Keep Sharing more impressive blogs.
Leave a Comment Cancel Reply
👋 WELCOME TO SHOTKIT!

🔥 Popular NOW:

Unlock the EXACT blueprint to capture breathtaking iPhone photos!
Shotkit may earn a commission on affiliate links. Learn more.
The Complete Guide to Travel Photography
By Megan Spurrell

As travelers, our cameras can feel like a fifth limb—an essential tool with which to move through the world and absorb new experiences. They make it possible to document the people we meet. They provide tangible memories of the remarkable beauty we travel so far to see. Ultimately, they help us communicate what words cannot.
In the digital era, the tie between travel and photography feels more innate than ever. Photography has become more accessible and affordable to dabble in (who even needs a real camera with phones these days? ). On the flip side, it can feel as if documenting and sharing our travel experiences has become half of the seeing itself. In her essay on pushing herself to take a photo-free trip , Allie Jones asks a question we can all relate to: “If you visit a trendy upstate New York museum and don’t take any photos, were you ever really there?”
As the routine of snapping and sharing becomes as habitual as rinse and repeat, others urge us to become more thoughtful with our travel photography. Just because we can photograph and share everything, in a matter of seconds, doesn’t mean we need to. In his feature, Tyler Moss explores the #nogeotag movement , and looks at just how our photo sharing can drastically alter a destination—and decide who gets to experience it. For professional photographers Gray Malin and Alex Strohl , the “how” of nailing their iconic travel photographs has relied more on patience, and analog techniques like driving massive props cross-country, or waiting for the perfect shot in sub-zero temps, than on any new developments.
And, just in case you were starting to let your Instagram feed convince you that you’ve seen it all, we’ve pulled in photo studies from photographers whose work we can’t help but ogle. Jessica Sarkodie shares a refreshing look at the unspoiled beaches of her native Ghana. Cedric Angeles flew to Mongolia for a peek inside the lives of the country’s famous eagle hunters (and yes, there are photos of the eagles in their hunting caps ahead). For Sandy Noto , photographing harvest season in the Dolomites while off-duty yielded gorgeous slices of life.
Of course, if you’re ready to step up your own game, we’ve also got the gear you need—from underwater cameras to camera bags that don’t look like camera bags. And, we’ve rounded up our favorite photographers to follow right now, because as much as we want to cut the social media umbilical cord, there is so much to admire there. You just need to know where to look.
Through the lens
Think before you shoot
Behind the scenes
The gear you need
Everything else you need to know
By signing up you agree to our User Agreement (including the class action waiver and arbitration provisions ), our Privacy Policy & Cookie Statement and to receive marketing and account-related emails from Traveller. You can unsubscribe at any time. This site is protected by reCAPTCHA and the Google Privacy Policy and Terms of Service apply.
21 TRAVEL PHOTOGRAPHY TIPS (Easy Ways to Improve Today)

- Last Updated: February 8, 2024
Here are our best travel photography tips for beginners and intermediates, based on our experience of going from complete beginners to professional travel photographers, and now working in the industry for 8 years.
Picture this.
You finally book a trip to your ultimate bucket list destination.
Antarctica, Iceland, Namibia, Bali, seeing the Aurora Borealis – wherever it is, you’ve waited your whole life to finally visit.
Naturally you are going to want to capture the best travel photos possible of this once-in-a-lifetime adventure to share with your portrfriends and family members, on social media, and maybe even print on the wall at home.
Moments in time or a travel experience that you always want to cherish.
So you’ve splashed out on a new camera based on expert recommendations , and you’re keen to hit the road.
But here’s the problem – you don’t have the faintest idea how to get the same kinds of images you see in postcards or on the internet.
The kinds of travel photos that just pop, stand out from the rest, inspire you to book a flight immediately.
Luckily that’s where we come in.
We’ve been fortunate enough to work as professional travel photographers for almost a decade now, being paid to fly around the world, running photography workshops, take pictures for the tourism industry and tell stories.
And now we want to share our knowledge, secrets and insights from our travel photography journey with you so you can take better travel photos.
In this post you’ll find many of our favourite travel photography tips you need to know to come home with shots you will be proud to show off.
Today is the time to learn. Let’s begin.

Table of Contents
1) Know Your Camera
2) focus on the golden and blue hours, 3) plan your shots, 4) learn about composition, 5) framing, framing and more framing, 6) move your feet, make them feel comfortable, 8) use a tripod, 9) find the right travel photography gear, 10) be unique, 11) find your voice as a photographer, 13) aperture, 15) shutter speed, 17) bonus – general ideas for camera equipment settings, 18) use manual mode, 19) shoot in raw (if available), 20) learn about post processing, save this pin for later, general travel photography tips for beginners.
To start with let me talk about the general travel photography tips that I feel are not only the most important, but also the most difficult to master.
Developing an eye for photography takes time. Years in fact. It’s a never-ending learning process, but I promise you with practice you will get much better.
And once you start to get the skills for framing and composing a shot, the rest is easy.
Whether you shoot on a dSLR, mirrorless, smartphone or an old film unit, the first travel photography tip is to get to know your camera equipment.
Whatever you have in your camera bag , take the time to read the instructions, play around with all the buttons and camera settings, and spend hours with it in your hand so that it becomes a part of you.
Study the menu so that if you need to change camera settings in the field you’re not spending minutes scrolling through it when timing is critical.
Also don’t forget to learn your camera’s limitations.
Does it perform well in low-light or does the image fall apart? Is it sharp wide open, or do you need to stop down to get the best clarity? Does it have inbuilt image stabilisation?
Ultimately when you pick up your camera you want to feel comfortable and know exactly how it works. Then getting better pictures will come faster and easier.

Light is everything when it comes to travel photography images, and there’s a good chance you’ve already heard about the golden and blue hours.
The Golden Hour is that time when the sun is low in the sky and it throws a magical, warm glow across the scene.
Think the first hour after the sun peaks in the morning, and the last hour or two before the sun drops over the horizon in the afternoon.
The Blue Hour is when the sun is below the horizon and the sky gives off a beautiful blue hue.
If you really want better travel photos, one of the best travel photography tips we can give is to get used to waking up early and stay out late to make the most of these two times of day.
If you’re not a morning person, get used to setting an alarm. Many of the great travel photos of the Taj Mahal and other tourist sites with no one in them for example were taken by people who got there early.
Taking photos in the middle of the day can still result in great shots, but in general you’ll find the blue sky too blown out unless there are some interesting clouds, and on a sunny day you’ll find the lighting conditions can be a bit harsh.
Instead use the middle of the day to get street photography, or scout out photo locations and a vantage point for your sunrise and sunset photos to come back later.
Bonus Tip – Even if it looks like the sunrise or sunset might not be so beautiful, wait around. You never know when the clouds might break or the sky randomly lights up in brilliant colours.

Before you arrive in your tourist destinations, spend a few hours planning out your shot list of images you want to photograph.
You can get inspiration from Instagram, Google Maps, travel guides, magazines and more.
Make a note of these pictures, and then plan your day around the optimum time to shoot (sunrise or sunset for example).
Doing this will help you nail the shots you want to go, and give you more purpose and direction.
You need to know that all of the best photographers use tools like Google Maps or social media to form a shot list, and you should get used to it too.

You’ve probably heard about how important it is to compose a shot properly, and I bet if you’ve ever read a photography manual you would have come across the ‘ rule of thirds ‘.
Good composition can be the difference between an average shot and award-winning travel photos.
There’s all kinds of ‘rules’ that theoretically make a photo look nicer, such as not putting your subject in the middle of the shot, don’t cut elements out of the frame, etc.
But right now let’s go a bit into the Rule of Thirds.
This concept is where you divide your image into 9 even squares (many cameras actually have this grid line feature built into their display options).
Then what you do is you place the subjects and points of interest such as a human element along those lines and squares.
Here’s an example of how this looks:

The idea of the rule of thirds is that this is a mathematical idea of what our eyes naturally find pleasing. So it’s good practice to incorporate this method into your shots.
Another thing to look for is leading lines that naturally draw your eye around the photo, as well as different angles and shapes.
Have a river flowing from the side of the shot up to a waterfall on the top left for example, or the foreground bending around, leading the eye towards a church at the top of the photo.
This is a skill that you’ll learn with more practice.
An important thing to remember is that rules are meant to be broken .
Get used to analysing your shots with the rule of thirds, but please don’t use it as gospel if you think a different composition would work.
Adding a human element also brings a lot of interest to a good shot, so place people in your frame.

When you look through the viewfinder or LCD screen, don’t just focus on the subject.
Make sure you run your eyes around the entire frame to make sure you’re not accidentally cutting off something important.
Double-check that the top of a mountain is fully inside the frame, or that your friend’s whole body is in the shot as an example.
This isn’t gospel, because sometimes having something cut off from the frame can be good for composition, but you’ll have to be the judge of that.
Also check to see if you can use something natural in the scene to create a frame inside your picture.
Think of looking out a window at a building, or a bent-over tree surrounding a pretty lake.
These can all help make better travel photos.

This is one of the most important travel photography tips I can give – Move your feet.
Don’t just arrive to a scene and take a shot from the place you’re standing.
Instead take a few minutes to walk around and see if there is a better frame or composition.
Go closer, move back, step to the side, consider your lens’ focal length, etc.
Imagine trying to take that iconic Taj Mahal photo, only to find out later that you were 2m to the left of centre, throwing off that perfect symmetry.
Or maybe if you walk to the river’s edge you’ll be able to incorporate some interesting rocks into the scene instead of just water.
Better yet, take multiple travel photos and fill up those memory cards from the same photo locations so you have lots of options when you get home to see which is your favourite.

7) Ask People for Permission
Travel photography isn’t all about capturing the most beautiful sunsets and gorgeous architecture around the world.
Travel photography is also about the people you meet. But if you’re a bit shy like me, how do you get those amazing portrait photos without feeling rude?
Simple – just ask for permission.
Asking someone for permission to take their photo is polite and respectful.
If you have had a great encounter with someone, or you just see a great opportunity and want to capture a wonderful portrait, give them a big smile and ask if it’s ok to take their photo.
You’ll find many people are more than happy to pose for a photo if you just ask (just make sure you respect them if they say no).

But what if you want to get a candid shot, with the subject looking natural?
There’s always another way to get these without annoying the person.
Don’t make it obvious that you are taking their photo. Act natural and take lots of photos of the environment around them.
You can also keep your camera down by your side and point the lens in their direction.
If you have a zoom lens, use it. This was you can be on the other side of the street or market and still photograph the person.
Interested in learning more? Join one of our exclusive photography workshops in Antarctica, Kyrgyzstan, Tajikistan or Mongolia !
Another one of my favourite travel photography tips for portraits is to bring in another element to the shot.
Some people will feel uncomfortable posing for a stranger, but if you can make it about something else they will feel much more at ease.
As an example, maybe ask if they can pose with something in their store like a rug, or ask them to show you their wedding ring.
This way they’ll realise there is more to your photo than just them. This will also add a lot more interesting elements to the shot!

A tripod is one of the best camera accessories you can have in your camera bag, and really essential for travel photography.
This will allow you to get excellent shots in low light, as well as get creative with your images (like taking long exposures).
These days you don’t always need a massive tripod to travel around with, especially if you want to travel light and are a hobbyist photographer. Look at some of the Joby Gorillapods .
Another good thing about using a tripod is that it will force you to slow down with your photography and put more thought into each shot.
Rather than just pointing and shooting, you will think carefully about where you want to set up your tripod and how you want to compose your shot.
Honestly if you want to become a better travel photographer, you’ll need to invest in at least a small tripod.

You don’t need to go out and spend tens of thousands of dollars on new travel photography gear to get the best shots.
In fact chances are you already have a perfectly adequate camera right next to you (your phone).
Instead just get what you an afford, and as you grow with your photography style, post production, etc, you’ll learn what camera gear you need as well.
Things like filters, tripods, flashes, prime lenses, zoom lenses, etc will come in time.
For now, all you really need is a camera, memory card and enthusiasm!
Check out our recommendations for the best travel tripods .
There’s nothing wrong with getting those iconic shots of the Eiffel Tower or Machu Picchu to share on social media.
They’re beautiful and are often amazing camera angles of famous places that everyone wants to visit.
But don’t forget to be unique as well! Find a different perspective that hasn’t been photographed a million times.
In fact make it your goal to get a few unique shots that you can be proud of.
Over-expose, under-expose, incorporate motion blue – the only limitation is your imagination!

Just like a writer or musician finds a particular style they like, as a photographer you need to discover your ‘voice’.
Travel photography is such a broad term that can cover just about anything.
Really just taking any travel photos will fit the description, whether it is landscape photography, wildlife photography, architecture, portraits, food or whatever.
Just find a style you love most, and focus on getting better at it.
If you really like black and white photography, then start shooting in black and white! Love taking images of crazy street markets? Then get out there and find them!
Experiment, learn, discover and nurture!

Technical Travel Photography Tips
While the technical side of using a camera is usually the most overwhelming thing for a new photographer to think about, it’s actually one of the easiest things to master. All it takes is a bit of study and practice.
If you’ve never looked into getting out of ‘Auto mode’ on your camera, then terms like ISO, aperture, white balance and shutter speed will seem completely foreign.
READ MORE: Check out our great article and blog posts featuring our best landscape photography tips !
12) Exposure Triangle of Photography
The Exposure Triangle is a metaphor to explain the 3 elements that allow light onto a sensor.
A camera captures light, and the right amount is needed so that your image isn’t too bright or too dark.
The 3 parts of the Exposure Triangle are aperture, ISO and shutter.
Each one affects how light reaches the sensor in different ways, and getting this combination right is essential to capturing a beautiful image.

If you want more information, I’ve put together this comprehensive guide to understanding the exposure triangle which you should really check out.
For now though I’ll explain these three things briefly, and how they relate to taking better travel photographs.
Aperture is how wide, or small, the blades in your lens are and how much light goes through the lens.
The aperture size is measured in ‘F Stops’, and displayed as numbers. f5.6, f8, f11, f16, etc
A wide aperture (small number – f1.8) lets in more light than a low aperture (big number – f22).
A wide aperture also has a shallowed depth of field than a low aperture. I know it can be a little confusing, but you’ll pick it up the more you play around with it.
If you want the background blurry in your photo, you’ll want a wide aperture. If you want everything in focus, you’ll want a low aperture.

ISO is how sensitive your camera sensor is to light. A small number, such as 100, means it’s not very sensitive and therefore needs more light to leave an impression.
A high number, like 6400, means it’s very sensitive and needs only a little bit of light to show up on the sensor.
The higher the ISO, the more noise shows up in a photo. Noise lowers the quality of your image, so in a perfect world you’ll want to keep this as low as possible (unless you’re going to stay out late doing astro and night photography ).
It’s also necessary to raise your ISO if you’re shooting moving subjects (or handheld) indoors.

Shutter speed is pretty straight forward – how long it takes for your shutter to open and close. This allows you to freeze a frame, or introduce motion blur.
Want to capture a bird in flight? You’ll want to have a fast shutter (1/4000th of a second for example).
Want to make a waterfall look silky smooth, like you see in so much Iceland photography? Go for slow shutter speeds (3 seconds for example), and check out our guide to waterfall photography tips while you’re at it!
Keep in mind that if you are holding your camera equipment rather than using a tripod, you’ll need to have a fast enough shutter to eliminate your own hand movement.
As a general rule 1/60 of a second is the slowest you should go so your picture doesn’t pick up hand movement. Any slower than that and you’ll probably need a tripod.

16) Combining All Three for Perfect Exposure
There is no ‘perfect setting’ for aperture, ISO and shutter. It all depends on what you are trying to photograph and the style you’re going for.
Luckily most decent digital cameras have two little tools that will let you play around figure out how all three work together – manual mode and histograms.
Manual gives you complete control over your camera’s ISO, aperture and shutter.
If you change one, nothing else will change, unlike in ‘aperture priority’ mode or ‘shutter priority’ mode.
The histogram is a visual display of light. When the bars are all the way to the left, the image is darker. When they are all the way to the right, the image is lighter.
When most of the bars are in the centre, this is perfectly exposed.

The best way to figure out what combinations work best when you’re a complete amateur is to put your camera on “manual” mode, activate the histogram, and play around with the settings.
Pick an aperture (f/8 for example) and point it at the scene. Now look at the histogram.
If the image is too dark, then you’ll need to let more light in. Let’s make the speed slower. See a change?
Now put the shutter back to where it was and instead change the ISO. Make the ISO higher. Is the image getting lighter?
Spend an hour or two playing around with different apertures, ISO and shutter so you get an idea of how each one affects the light hitting the display.
Take note at how drastically things can change if a cloud goes in front of the sun, or you take the camera inside.
This just comes with practice of course, and knowing what settings you want for a particular scene will become second nature
Keep in mind that not all travel photos needs to be perfectly exposed. Sometimes having a darker image looks much better than having one that is nice and bright. You can use your judgement for this.

This is very, very basic and by no means should be read as gospel. There are a million different things that can affect why you would want a faster shutter, or wider aperture. But if you are confused about what to pick for what here’s a quick idea.
- Landscapes – You’ll want your aperture around f8-f11. You’ll also want your ISO as low as possible. Slow down the shutter accordingly.
- Portraits – You’ll probably want to photograph your subject to be sharp, but the background blurry to bring focus on the person. Have a wider aperture (say f2.8 for example), and a faster shutter (around 1/160 at the absolute slowest) to freeze the subject. Adjust ISO accordingly.
- Indoors – Because it is darker inside than outside, you’ll need to let a lot more light into the sensor. Unless you’re using a tripod, keep the speed at around 1/60 as the slowest, and the aperture around f5.6 to start with. Adjust ISO and aperture accordingly.
Of course there’s a bunch of other styles of travel photography that would use different settings, such as astrophotography, architecture, street scenes photography, wildlife photography, etc.
In time you’ll learn what settings work best for each scene.
The best way to get to know your camera and how light works is to have complete control over what settings you choose.
The only way to do this is to shoot in manual mode (shown by the letter M on most cameras).
It will take months of practice, but I promise you that in time you’ll be able to look at a scene and instantly know what aperture, ISO and shutter to use to get the exact style of image you’re looking for.
You can also use aperture priority mode (the letter A on your camera) if you don’t want to make the big leap to manual just yet.
This way you can lock in the aperture you want (f8 for landscape photography, f2.8 for portraits, etc) and the camera will automatically adjust the ISO (although you can control this part too) and shutter to get perfect exposure.
I highly recommend focusing on learning manual settings though until you have it perfected.

When you take a photo on your digital camera, the computer chip inside it takes what you captured on the sensor and converts it into a format that can be easily read. For most cameras, these two formats are RAW and JPEG.
JPEG is a compressed format that the camera creates to save on space. In doing so it ‘locks in’ all the data that it picked up such as the colour and white balance.
RAW files actually saves all the data of what you took and doesn’t compress it.
Most decent digital cameras will give you the menu option of shooting in RAW, and I recommend you use it if you ever plan on editing your photos.
Keep in mind that the file sizes will be a lot bigger (for example on one of our cameras a RAW is 42, while a JPEG is just 20), so you’ll need to have extra memory cards and external hard drive storage.
If you have no plans on editing your photos then shoot in JPEG.

Some people think that editing your photo is ‘cheating’. But the truth is photographers have been editing their photos ever since photography was invented.
Yes, even your favourite photos in National Geographic have been manipulated in some way.
99% of photos you see in your favourite travel magazines have been edited. Every professional photographer edits their photos to some degree.
The reason is that not all cameras are great at capturing exactly what the eye saw in terms of colour and light.
If you really want to get the most out of your professional travel photography business, you should start playing around with post processing.
Many people have heard of Adobe Photoshop , but it’s a pretty advanced tool that most people wouldn’t ever need to use (until you get more experience).
To start with look at the free apps that you can get on your phone, such as Snapseed, or free editing programs on your computer, like iPhoto or GIMP.
Once you get serious about travel photography and you want to start editing all of your photos that are filling up your memory cards and external hard drive, we recommend purchasing Adobe Lightroom.
If you’re ready to make the jump to using Lightroom and Photoshop, Adobe have a great ‘Creative Cloud’ package, which is what we use for only $10 a month. You can buy it here with a 7-day free trial

21) Practice, Practice, Practice
Just like anything, becoming a great travel photographer takes time, and a lot of practice. The only way you can get better is by getting out there taking travel photos!
You don’t even have to travel the world to tourist destinations or have the most travel camera available to be a great photographer.
Borrow some family members to take their portraits, get a friend who is also interested in photography and push each other, or grab your smartphone and go shoot sunset.
Buy whatever you can afford, go for a walk around your city and snap away.
We hope that this general guide on travel photography tips for beginners has been helpful.
Please feel free to reach out to us if you have any other questions. We have a lot of experience working with tourism boards, and would be happy to help you too.
Good luck on your photographic journey, and maybe we’ll see you in National Geographic one day!
DISCLAIMER: Some of the links in this article are affiliate links, which means if you book accommodation, tours or buy a product, we will receive a small commission at no extra cost to you. These commissions help us keep creating more free travel content to help people plan their holidays and adventures. We only recommend the best accommodations, tours and products that ourselves or our fantastic editorial team have personally experienced, and regularly review these. Thanks for your support, kind friend!

Alesha and Jarryd
Hi, We’re Alesha and Jarryd!

We’ve been traveling the world together since 2008, searching for the planet’s best destinations and adventures.
Love Travel?
Sign up for our free weekly newsletter for the best travel tips, ideas and deals!
We respect your privacy. Unsubscribe at any time.
READ MORE...
GoPro HERO 12 Review – Is it Worth Buying in 2024?
Peak Design Everyday Messenger Review – My Honest Experience
GoPro HERO 11 Review – Is it Worth Upgrading in 2024?
Related posts, 15 waterfall photography tips – how to shoot epic cascade shots, gopro hero8 black review – is it worth buying in 2024, your guide to the top vivid sydney photography tips and locations, 73 thoughts on “21 travel photography tips (easy ways to improve today)”.
I indeed agree in Know your camera and Plan your shots. These tips would make a good start in achieving your socmed worthy travel shots. And ofcourse, the other tips will surely be useful too. Great post!
Good article but I need to say something about using Manual – it’s not that great. Manual is just a different mode of settings for exposure, little different from either shutter or aperture priority, except these two give you a leg up, to where you’re going anyway. At the end of the day whatever exposure setting you choose will be just a combination of the 3 on the ‘exposure triangle’. Instead of using manual try these other two in conjunction with exposure compensation, which overrides the exposure meter reading. You still need the meter for any exposure anyway, just not necessarily using the value it recommends. It amounts to the same thing, only easier, quicker, and still constraining one of the triangle sides that you want. I use manual for specific unusual objects, such as sun, moon, stars, but during general daytime subjects it’ll be very unusual to hamper yourself by not using the aid provided when there is no advantage.
Your blog has become my go-to source for insightful content.
Thank you so much. So glad to hear. 🙂
Before you go, research your destination and its culture. This will help you better understand the people, customs, and landscapes you’ll be photographing.
I benefited a lot from your post. Thank you
So glad you did. Thank you for stopping by. 🙂
Thanks for sharing all this amazing tips & information. Fabulous post !
You are welcome. We are happy to help. Happy photographing
nice summary of basic photo tips that will improve my shots, thanx!
You are rocking..keep it up your work
Thank you so much. We really appreciate it.
Great article with great tips and i also like the pictures
Thank you so much Alesha and Jarryd for these amazing photography tips! I look forward to putting into practice some of your wonderful ideas and tips! I do so appreciate any tips that I can get to improve my photography. :)) Cheers, Marilyn
I absolutely loved this article! Like you I received my first ‘proper’ camera at 14 and since then have been hooked. I recently purchased a Nikon D750 and am absolutely loving it. Although at the moment I only have two lenses for it I am hoping to be able to afford more soon. What are your favourite lenses?
In my photography I love capturing candid portraits of people I encounter during my travels. I always struggle with the dilemma of getting the perfect candid shot and feeling compelled to ask permission before taking the shot. As a very shy person directing people in images is daunting, but it is something I am striving to work on. It’s nice to read that you are also shy yet manage to capture such incredible images of people.
As I am mostly self-taught, I always love to read technical tips to improve my images. I found the technical side of your post incredibly helpful and wanted to say thank you for taking the time to write such a detailed post. I believe it really helps and inspires amateur photographers like myself.
Glad you liked the article. Thank you for your comment. Keep photographying Caitlyn 🙂
Great tips and awesome photos! I always tell people if they aren’t comfortable with their settings, the #1 way to make sure their images aren’t blurry is to shoot in TV/S (shutter) priority. That way you can prioritize having no hand shake.
Thank you so much. Great advice. Thanks for your comment. 🙂
Awesome tips for everyone and specially to me who loves capturing photos everytime i travel.This one also help me and give me more knowledge on how to make awesome photos and its good because you don’t need to buy expensive camera to have a good quality photos, just your iPhone or smartphone you can make a great photos.
Hi, you are so right. You can take great photos with your phone. Glad the article could help you.
Great article! Do you even bother carrying your camera with you during the day in broad sunlight? I find it’s not worth the hassle for such poor shooting conditions.
Hi Scott, It all depends what we are doing. If we are on a job, we always carry our cameras with us. The midday sun is harsh but you get used to working with it. Especially indoors with the sun coming through the cracks, it can work out really lovely sometimes. When we are travelling on our own time, we don’t usually carry the camera. Happy travels
I really enjoyed reading this post, as I am a beginner in photography as well and it’s always interesting to see what gear other people are using!
I have the Canon Rebel as well, and also love the 50mm lens. It’s just great and is so versatile!
Thanks for sharing.
Glad we could help. Thank you for your comment. Happy photographing,
Great tips guys! Photography is an art so it must be learned properly. A good guide can teach art in a great way. This article is similar to a guide because it is an eye-opener for blooming photographers and travel lovers.
Thank you so much!
Thank you for your comment Glorias. Glad the article could help.
Hello Alesha and Jarryd, not sure to whom I adresse the message to, but I’m guessing Jarryd took the pictures and Alesha wrote about it :p
Anyway, do you guys use any customized Firmware on your DSLR? like the CHDK or Magic Lantern. That’s one question, the other one will be: can’t find any Mobile Phone photography on your blog? can you please refer me to any article that provide valuable info around Mobile phone photography?
Hi Ayoub, The photos and words in the article are a combination of both of us. Usually Alesha is the photographer and Jarryd is the writer.
We use use no customise firmware at all. We haven’t ventured this way as it voids our warranty.
As for phone photography, maybe this is an article we should write. With our phone photos, we do use Snapseed to edit them. But do not take any photos through any apps. All the best
Thank you for the tip regarding phone photography, I mostly use the customized firmware to do timelaps and edit directly on the camera, keep me posted after publishing the new article. (Already subscribed to the weekly newsletter)
Definitely will do. Thank you so much. Happy photographing. 🙂
you are doing a great job
Thank you so much. 🙂
This was really an amazing list of tips, I am a hobbyist photographer and this would really helps me a lot
Glad we could help. Keep up the photographing. 🙂
Great tips Alesha and Jarred. I really liked your golden and blue hours tip. Will try it soon and hope get amazing pics 🙂
Glad we could help. Practise will get you on the right track and before you know it you will be taking amazing shots. We are still learning about photography everyday. We love that you can never stop learning. Thanks Linda.
Some of the best tips I have read so far. Amazing post and captures so much detail. Worth the read for every travel photographer. 🙂 Keep it up.
Thank you so much,. We really appreciate it. 🙂
Priceless tips for amateurs like me. Thanks for sharing. For a long while, I’ve tried to follow the rule of thirds, but the best shots came out when I finally dared to break it. You’re absolutely right about the rules are meant to be broken. Regarding the camera, I agree it doesn’t have to be the most expensive. But sometimes I have a feeling my shots would have been better had I owned a proper camera. What device is the best balance between price and quality?
HI Robin, you’re welcome. We are so happy we could help. Sometimes breaking the rules works out to be better. 🙂 We definitely know what you mean. You do not need to buy the most experience camera. A camera that you can use manual settings, is great as you can start using and playing with aperture, shutter speed and ISO. We started off with a Sony RX100ii and it was great. Compact and a great camera to learn. Here is some articles that may help. https://www.nomadasaurus.com/best-camera-for-travel-ultimate-photography-series/ https://www.nomadasaurus.com/best-camera-accessories-ultimate-photography-series/
Thanks a lot for the great advise! I especially like your explanations about the exposure triangle. I was a bit aware of it before, but never played around with it unless I wanted to change the depth of field (and even then, I did this very rarely). But thanks to focusing more on it, I am starting to get the hang of it. I have taken some very good hummingbird pictures, for example, which never would have been possible if I hadn’t raised the ISO so I can keep the shutter speed fast. Those birds zip around like crazy!
Also, I think one of the most important pieces of advise, and the one I’m struggling with most, is to always look at the whole frame. I am guilty of looking at the main subject and later finding out that I cut off important things on the side or that something weird is in the photo that shouldn’t have been there.
Hi Ilona, so happy the article could help you. That’s amazing you experiment with your hummingbird shots. They are fast birds. By practising photography, you will get better and better. No matter how experienced you are, there are always things to learn. When you come to a scene you want to photograph, stop for a minute look around, walk around and think about what shots you want to take. Obviously this is hard when the subject is moving but great for landscape and street photography. All the best and keep up the awesome work. 🙂
Hi, I took around 500 shots on a trip to Kyrgyzstan recently, some I think are pretty good, but now after reading your tips, I think I will make another trip to that part of the world again soon!
what a great tips especially the lighting part – i also agree that getting up earlier and shooting in the natural sunlight is so great for your photos. talking to the locals and knowing your camera, You guys covered it all
Thank you so much for reading Shama. Glad you liked our article. Natural lighting is the best. Even though sometimes that early morning is hard it is worth it. 🙂
u are absolutely right u don’t need an expensive camera or go to Bali ( although it’s a good idea) to get great photos. it’s just simple common sense and a good eye and you can master photography
Well said. Thank you for your comment and reading Shama. Have a great week.
Thanks a lot for the helpful tips on holiday photos. My partner and I are in Easter Island, irresistible place for photo opportunity. My Nikon D7000 will keep on taking photos on auto mode for the time being until I have had enough practice following your guidelines and the who knows what photos I might produce! Thanks.
Glad we could help Balu. Definitely when you have time, go out and take some photos on manual. Play with the different settings. Before you know it, you’ll only be on manual. At the beginning when I was still learning, I would take a shot on the manual settings I thought and then a shot of the same view on auto in case I messed up. Better safe than sorry. Have a great time in Easter Island. There is so much to do there and learning about the history is amazing. Take care. Alesha
Guys your advice are completely helped me. I was stressed before, i want to travelling at the moment but i hope i can take a good picture cause you know how annoying it will be when we take a picture and then when we are home they are completely bad. So then you have to comeback at the same place again just to take a picture. But this one is helpfull
Hi Fabio, Don’t stress. You are going to bring back amazing photos from your travels. It is all overwhelming at the beginning but it gets easy. When you are shooting, put some time aside and concentrate on what you have learned. It doesn’t matter if it takes you 20 minutes to an hour to get your shot. If their are other photographers around, most of the time that are happy to give you some advice. Let them know you are new. Maybe they will let you know their settings for ISO, aperture and shutter. When it comes to editing, take your time as well. There are many You Tube videos that can help you for free. Have a great time on your trip. Happy travels
Hey Guys, very useful tips especially the Bonus tips.
Keep Sharing!!!
Glad we could help. Thanks for reading.
P(Program) you set either the aperture or shutter and the camera adjusts the other one accordingly to maintain the right exposure. Thanks
Thanks Rezan
I love traveling around the world. I wish to capture some of the beautiful places that I enjoyed. The above tips helped me to improve my travel photography skills. It also helped me to click some of the memorable moments of my travel with my friends and relatives.
Hi Vivek, Glad we could help. It is all about practise. We love having a day to ourselves and just getting out and shooting anything – landscape, cityscape, people or animals. We try to give ourselves a challenge sometimes. It makes it interesting and we are enjoying ourselves. 🙂
Great tips to help out beginners like me. I need to work on to ask people for permission as I get shy sometimes. I love the quote “rules are meant to be broken”!
Thank you Mao. Don’t worry, “asking” will come. Alesha was so shy and I used to take all the people shots. Now she is more confident and really enjoys shooting people. All the best.
THANK YOU . Your very easy to read starter guide to photography was AMAZEBALLS I learnt so much .cheers LIZY
Thank you. Glad we could help. Happy shooting and get creative. 🙂
Hey guys, this is an amazing guide, thanks for writing this up in such detail. As an amateur, I always look for good travel photography tips from other travellers. I left my tripod behind in Thailand and I think this was a huge mistake, I need to get a new one, urgently 🙂
By the way, really enjoy your photos on your blog and Instagram, they are amazing! 🙂
Glad we could help guys. We never used to use a tripod in our early years until we discovered how amazing the shots can be with one in low light and now we have 3. You can rest your camera on something to get a shot but you are limited to positions. Thanks for reading guys. 🙂
thanks for the tips. i’d make one edit: instead of ‘move your feet’ i’d say “don’t be lazy”…move left or right. move forward or back. climb up on something or get down on your knees.
Love it Aaron. You are so right. A little to the left might be the perfect shot or a little to the right and crouching might be the perfect shot. thanks for the input. Have a good one.
I love this post. It is incredibly helpful to all beginner travel photographers like myself! I have only been shooting in manual mode for the past 5 months and have already seen a huge increase in the quality of my photos! But I am always looking to improve. Will definitely be sharing your post
It is crazy how you improve when you start shooting manual. I know Alesha did also. You learn so much about the camera and what it can do, it is incredible. Thank you for reading and all the best with your photography Hayley. 🙂
this guide is amazing, thank you so much for explaining everything in a way an amateur can understand 🙂
Bookmarking the post for future reference!
Cheers, Naddya
Thank you guys. We are glad it is useful for you. 🙂
Wow! Amazing Tips. These tips will help a lot to click great pictures with your camera. Love the point of Shutter Speed. and about RAW.
Thanks for Sharing Helpful Post.
Thank you so much Nitin. Glad we can help. Thank you for reading.
Yeah I agree with you buddy.
Thank you 🙂
Leave a comment Cancel reply
Save my name, email, and website in this browser for the next time I comment.

- X (Twitter)
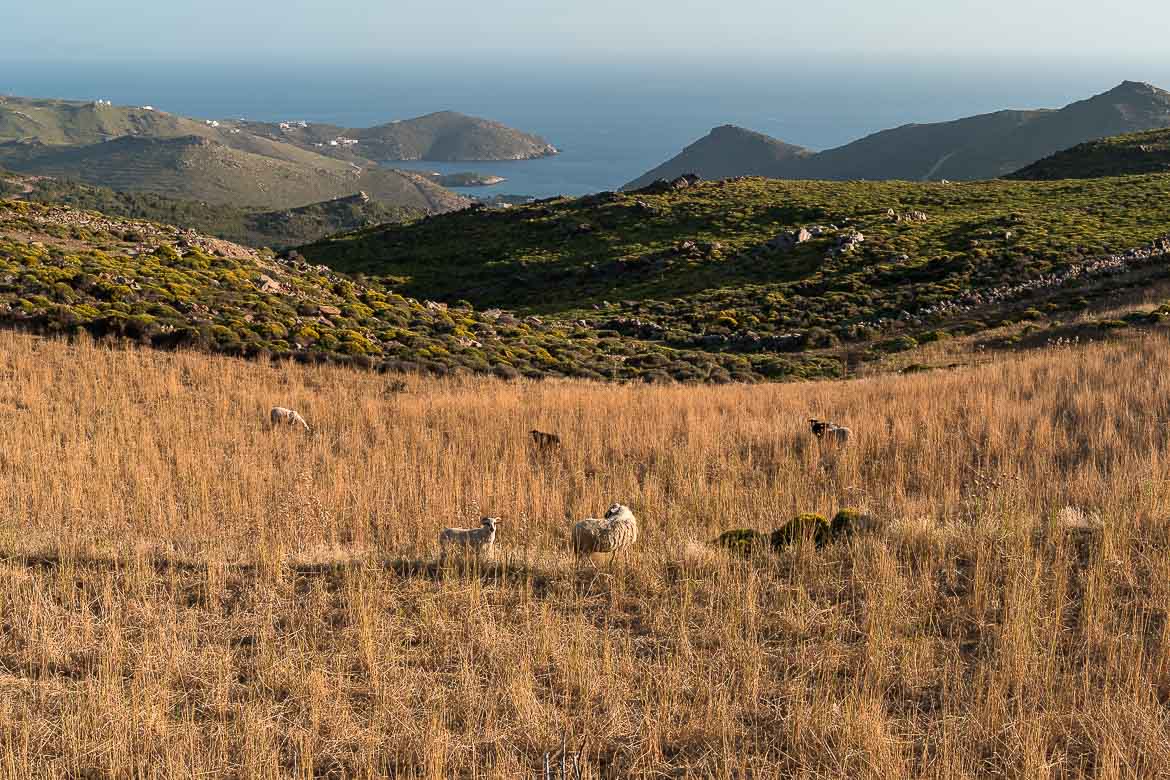
TRAVEL PHOTOGRAPHY A Journey Into The Realm of Light
There’s nothing we cherish more than our travels and if we had only one thing to say about travel photography it would be this: travel photography is the best way to capture our wanderful moments to eternity and use these memories to warm up our hearts even in the darkest of times.
Although Maria is our website’s main writer, photography-related pages and posts are researched, drafted and revised by Katerina . All Maria does is edit and proofread the copy before it goes live.
Some of the links on this page are affiliate ones. This means that if you click through them to make a purchase, we may earn a small commission at no extra cost to you. Learn more .
What Is Travel Photography
Photography (Φωτογραφία in Greek) is a compound of the Greek words φως (light) and γράφω (write or draw). Wikipedia defines photography as the art, application, and practice of creating durable images by recording light . It’s crazy to think that all we see when we look at photos is light. Crazy yet fascinating.
If we tried to give a definition of travel photography, it would be something along these lines: travel photography is the documentation of all those components that make up any given destination. These include the landscape, both natural and human-made, the people, the culture, the food, and, ultimately, the very history of this place.
Of course, tourism photography is part of the travel photography genre, too. It focuses on shooting hotels, resorts, restaurants, and any other businesses in the tourism industry.
“Photography is a form of time travel.” — Neil deGrasse Tyson
About Travel Photography As a Genre
Travel photography is the broadest photography genre in terms of all the different subjects it covers. It encompasses numerous other areas of photography, such as street, landscape, or architecture photography. This is why it takes a lot more than mere photographic knowledge to excel as a travel photographer.
A good travel photographer must be flexible, well-organised and outgoing. Flexible to adapt to time-related challenges (e.g. waking up early, staying up late). Well-organised to plan photographic trips to the last detail. Outgoing because, well, you can go a long way with a smile if you plan to, say, take portraits of total strangers in faraway lands. Learning a foreign language or three wouldn’t hurt either.
However, there’s something unique about travel photography that makes it stand out from all other photography genres. The purpose of travel photography goes beyond just shooting a spectacular image. Travel photography is a means to tell a story, to inspire, and, above all, to educate people on the diversity of our beautiful world.

Top 5 Travel Photography Tips
In the last decades, many factors have conduced to travel being accessible to more and more people. As a result, travel photography isn’t appealing to professional photographers alone. Pretty much everyone who suffers from wanderlust is keen to perfect their skills in travel photography. Here’s a handful of simple tips on travel photography to help you up your photography game.
1. Research Your Location
Your photographic trips should begin well before you even reach your destination. No matter if you are an amateur or a professional photographer, researching your location is vital if you want to snap those epic shots you’ve always dreamt of. Either you are on holidays or specifically travel for photography, a brilliant idea to help you keep track of all the places you want to visit is to create a personal map (e.g. with Google Maps ) with all the points of interest you want to shoot.
Equally important is to know in advance the best time to visit the photography locations on your list. For example, some places are best enjoyed at sunset, while others should be visited at dawn to avoid the crowds. Do your homework and adjust your day-to-day schedule accordingly.

2. Choose Your Gear Wisely & Learn How To Use It
Even if you’ve decided that you want to invest time and money in travel photography, you shouldn’t buy the most expensive gear right from the start. That’s because you may eventually realise that travel photography isn’t for you after all. Furthermore, it will be easier for you to master the basics of shooting while using entry-level equipment.
Start with an entry-level DSLR or mirrorless camera and keep practising until you’re confident with using the manual mode. Let’s be honest here. There’s no reason why you should spend so much money on a camera if you’re planning to use the Auto settings alone. You’d be better off with a good smartphone if that’s the case. Moreover, always shoot RAW, as it allows you to edit your images afterwards.
Once you know your camera well, start flirting with the various lenses you can buy to achieve diverse results. For instance, with a wide-angle lens, you will be amazed at how an entire village can be squeezed in a single frame. Or, perhaps, you’d like to experiment with a telephoto lens, especially if you are into wildlife photography. The possibilities are endless. It all comes down to your preferences and budget.
If after a certain time you’re still hooked on travel photography, you can start buying other accessories, too. These may include tripods, extra batteries, a flash, or even a drone. At some point, you will know that it’s time to upgrade your camera, too.

3. Keep Practising & Be Patient
If there’s one thing about travel photography that you must always remember, it’s this: you need to practise, practise and then practise a bit more.
Don’t wait until next time you travel to test your camera and its functions. Go on a photography trip around your neighbourhood and start shooting. Shoot indoors and shoot outdoors. Shoot in bright sunlight, shoot in low light, and shoot at night. Hold your camera and shoot, use your tripod and shoot. In a nutshell, play around with all of your camera’s settings and functions (on manual mode, don’t cheat).
Once you come to terms with the importance of practice, it’s time to embrace patience, too. You can’t expect to learn everything in one go. You must invest a lot of time to finally be able to shoot superb travel images.
Furthermore, photography can be a waiting game. Very often, you will find yourselves waiting for the right time to take the perfect shot. It may be the exact moment when the sun dives into the sea or when the high tide comes. Also, bear in mind that weather conditions won’t always be in your favour while waiting. So, it takes a lot of determination, but most of all, patience to make it as travel photographers.

4. Always Carry Your Camera With You
You’ve spent an entire day out shooting and now you feel it’s time you left your camera at the hotel room to go have dinner and maybe enjoy a drink or three. You’re right about the food and drinks part but think twice before you leave your camera behind. Why not experiment with night photography while taking your (probably much-needed) post-dinner stroll?
No matter how well you’ve planned your trip, you never know when an exceptional opportunity arises for a shot you won’t want to miss. It’s better to carry your camera and never take it out of your bag than to leave it behind and regret not capturing that perfect moment in time that unfolded before your eyes and then vanished for ever.

5. Respect Locals & Wildlife
Whether you’re travelling within your country or abroad, you should always respect the locals. Under no circumstances should you make anyone feel uncomfortable for the sake of snapping the perfect shot. Not even a one-billion shot is worth making another person feel uneasy. If you’re dying to take a close-up of locals (and, especially, their children) or shoot during a local event, always ask for permission first.
Similarly, you should be mindful of animals and their well-being at all times. If you’re planning to shoot wildlife, you must always keep a safe distance and avoid any noises or movements that may disturb the animals. This is when a telephoto lens comes handy. On a lighter note, you can get as close as you want to super cuddly kittens or puppies who are willing to pose for you. Just make sure you reward them with a hug and/or a treat after the photoshoot.

From Hobby To Dream Job: How To Become a Professional Travel Photographer
Making a living out of your passion is certainly the dream. That holds for many travel photography enthusiasts who pursue a career in this field. There are several factors in play when it comes to becoming a professional travel photographer. Here’s a list of the five most important steps to take if you’re after a career in travel photography:
- Understand that professional travel photography is all about commitment and hard work. Therefore, make sure you are genuinely passionate about it before taking any further steps in this direction.
- Learn photography. Attend travel photography courses, classes, and workshops. Watch tutorials, read travel photography books, and practise a lot.
- Create a portfolio to showcase your work to potential clients.
- Network and collaborate with photographers around the world and other content creators. Attend conferences and similar events to get in touch with travel brands and tourism boards.
- Remember that competition is hard. Be ready to step out of your comfort zone when pitching yourself for travel photography jobs.
“I love photography, I love food, and I love traveling, and to put those three things together would just be the ultimate dream.” — Jamie Chung
My Journey As a Professional Travel Photographer
Now a professional travel photographer, I started like any other traveller who wanted a few photos as keepsakes from our travels. I always liked photography but I needed a purpose to take it more seriously. When we started this website back in 2018, I found my purpose.
As our travels became more frequent and our website grew into a business, it was time we invested in good travel photography gear. It was then that I took the plunge and bought my first DSLR camera. From that point onwards, there was no looking back. I had found my true calling and I was hooked for life.
At first, I was into landscape travel photography alone, but I soon discovered the endless possibilities of travel photography. I studied a lot. From reading books and registering for online courses to watching video tutorials, attending photography classes and joining photography clubs, I never stopped expanding my photography skills and knowledge.
I patiently learnt the techniques of travel photography and I practised a lot. I still do. Learning about travel photography is an ongoing process. One that never fails to excite those who’ve chosen to be initiated to its secrets.
At some point, I inevitably started exploring the magical world of video, too. During the 2020 lockdowns, I found myself with a bit of extra time in my hands. Therefore, I dedicated most of it to learn the secrets of video-making and YouTube. After that, the sky was the limit. Or not? Soon, aerial photography won me over and I added a drone to my travel photography equipment.
I now work as a professional travel photographer, but it’s not just a job for me. Travel photography still is and always will be my life’s passion.
“Photographing is an emotional thing, a graceful thing. Photography allows me to wander with a purpose.” — Leonard Freed
Essential Travel Photography Gear: What’s in My Camera Bag
- Main Camera Body: Sony α7 III with 35-mm Full-Frame Image Sensor After months of tormenting thoughts and endless sleepless nights watching YouTube reviews and tutorials, I finally gave an end to two of the most haunting dilemmas I ever faced: 1. DSLR or Mirrorless? At first, I hated the idea of turning my back to DSLR cameras and entering the world of mirrorless technology. In the end, I saw the benefits of mirrorless cameras for travel photography. They’re way lighter and more compact than DSLR cameras. 2. Nikon or Sony? Once I decided to upgrade to a full-frame mirrorless camera, another dilemma started messing with my head. As a purist, I couldn’t imagine investing in any other camera brand than Nikon . However, after much thought, I succumbed to the siren call of the dark side and went for a Sony instead. I’m happy I did so and never looked back ever since. Featuring 4K video, fantastic focusing and impressive battery-life, the Sony α7 III is the camera I chose for being one of the best travel photography cameras in my budget for both photography and video.
- Camera Lens: Tamron 28-75mm f/2.8 Di III RXD Sony E-mount This all-in-one zoom lens has the ideal focal length range for travel photography, it’s lightweight and, most of all, quite affordable.
- Lens Filters: 1. Hoya UV Filter 67mm for protection. 2. Hoya Variable ND Filter 67mm for cinematic video and long exposure shots.
- Backup Camera For Video: DJI Osmo Pocket That’s hands down the best handheld camera for travel video out there. With exceptional 4K video and offering the simplest way to shoot motion lapse and time lapse, the DJI Osmo Pocket is a fantastic video camera that literally fits in your pocket. Most of all, it’s very easy to use. It’s the only piece of my travel photography equipment that Maria is allowed (and often assigned) to use.
- Drone: DJI Mini 2 Fly More Combo When I decided to buy a drone, I went for the DJI Mini 2 instead of a fancier one for two reasons. First, I considered it prudent to test my flying skills on a drone that wouldn’t cost a fortune. Secondly, I wanted to make sure I genuinely liked aerial photography before investing in one of the most expensive drones for travel photography. With 4K video and the option to shoot RAW, the DJI Mini 2 is great value for money. Especially if you buy the combo, which comes with two extra batteries, a stylish bag and lots of other goodies. I enjoy flying the DJI Mini 2 immensely. That’s probably because my feet never stop touching the ground. At last, I can admire spectacular views from above without all the negative emotions I get from my fear of flying when travelling by plane.
- Travel Camera Backpack: Thule Aspect DSLR Backpack I had been looking for a while for a travel backpack that would fit all my travel photography gear, my laptop and my personal items. While I researched, finding travel photography bags to love was the easy part. Finding one that wouldn’t break the bank was the hard part. The Thule Aspect ticks all my boxes and comes at a very reasonable price for what it offers.
- Small Camera Backpack: Benro Swift 100 That’s actually my first-ever travel photography backpack and it’s still my number one choice when I don’t need to carry all my equipment around.
- Travel Tripods: 1. Manfrotto Befree Advanced Alpha Travel Tripod This reliable travel tripod that features maximum stability and easy set-up is the best travel photography tripod you can buy without spending a fortune. 2. Manfrotto Pixi Mini Tripod Fitting literally in my pocket, I’m happy to carry this super lightweight tripod with me at all times. 3. Xiaomi Mi Selfie Stick Tripod This was bought as a mere selfie stick but it comes really handy when shooting a time lapse or motion lapse with the DJI Osmo Pocket.
- External Microphone: Rode VideoMicro When I was just starting with video, I needed an affordable and compact camera microphone to minimise noise interference when used outdoors. The Rode VideoMicro does the job just fine.
- Cleaning Kit : Trivial though it may sound, a cleaning kit for your camera lenses is of the utmost importance and it’s a purchase you should make right from the start. When it comes to cleaning kits, the sky’s the limit. I make sure the cleaning kits I buy include microfibre cleaning cloths, a cleaning pen and an air blower.
- Memory Cards : Shooting RAW and video means that I always carry several fast memory cards with me.
- Portable Hard Drives : I use fast SSD hard drives to store my images and video footage.
- Spare Batteries: There’s nothing I fear more than running out of battery in the middle of a photo shoot. That’s why I’m obsessed with having spare batteries for my camera and drone handy at all times. Fun fact: When I went to the camera store to buy the Sony α7 III, the guy at the counter told me that I wouldn’t need to buy a second battery for it. I ignored him and bought a spare battery anyway. Soon I realised that he was right. However, I have no regrets. It turns out that peace of mind can be bought after all.
Check out our minimalist photography gear list here!

What’s So Important About Travel Photography
As one of the most famous travel quotes goes, travel is the only thing you buy that makes you richer . Therefore, who’d want to let these precious memories go to waste? The importance of travel photography lies in its superpower to revoke those memories long after the smells, sounds and tastes that accompany them have worn off.
However, travel photography isn’t just about helping travellers keep the memories of their past trips alive. It’s about showing the world to people who haven’t travelled as far and wide as they’d like.
Not everyone has the privilege to travel as much as their heart desires. Travel photography has the noble mission of communicating the most exotic feelings to these people, making them travel with their minds and souls and inspiring them to roam the world if and when their circumstances allow it.
Last but certainly not least, the absolutely most significant thing about travel photography is that it’s the next most powerful tool in the fight against intolerance, second only to travel itself.
As a means to get a glimpse of cultures and people in faraway lands, this superior form of art can bridge the imaginary gaps that exist between people. It can provide proof that our world is a stunningly diverse wonder. Ultimately, it can teach people that there’s nothing wrong with being different. From North to South and from East to West, travel photography captures fleeting – yet meant to become timeless – moments in the lives of people from all four corners of the globe.
At the end of the day, it makes no difference if the light that goes through our camera’s shutter records joyful or sorrowful scenes. What matters is that it takes but a look at these travel photos to know that the light shines as bright on all of us, regardless of skin colour, age, or gender. And this is what we love about travel photography the most.
“Photography can light up darkness and expose ignorance.” — Lewis Hine
- PHOTOGRAPHY PORTFOLIO
- WRITING PORTFOLIO
- CZECH REPUBLIC
- TRAVEL PHOTOGRAPHY
- TRAVEL RESPONSIBLY
- SAVE TIME TO TRAVEL
- SAVE MONEY TO TRAVEL
- BOOK FLIGHTS ONLINE
10 great travel photography tips from a professional photographer
Want to be a travel photographer? We asked a pro photographer about the tips and secrets behind taking great travel shots

Getting paid to travel the world and capture incredible images of people, animals and landscapes is many people’s dream job, but it’s also one of the most competitive and challenging.
• The best cameras for Instagram: take your gram game to the next level!
• The best travel tripods you can get right now
Professional travel photographer Graeme Green gives his practical advice and insider knowledge for improving your photos and getting ahead.
1. Go the extra mile

Life as a travel photographer often means getting out of bed (if there is a bed) when it’s dark and cold. I’ve gone out taking photos while wiped out by illness or after getting no sleep on the wooden floor of a hut. There have been long trudges through snow, sand and swamp, and exhausting journeys on dusty tracks. The unexpected or disastrous often happens. Life on the road is hard to predict, but you still have to get the photos you need.
A big part of the lifestyle’s appeal is getting to travel to remote, often wild and fascinating locations, meeting new people and having experiences you just can’t get at home – but it takes effort and time. Early starts, tough journeys, and long, hard days in difficult environments are all part of the job. There might be times when you don’t feel like taking photos, when you just want to rest, but missed opportunities always come back to haunt you. You never know what you might miss.
2. Make a plan

One of my favourite ways to photograph is just to walk, to explore a city or a location without an idea of what I’m looking for or where I’m heading to. You never know what scenes wait just around the next corner for spontaneous photographs.
But sometimes it really pays to plan, especially if you need to get specific shots for an assignment. Think about what you’re trying to achieve, whether it's a close-up or a wider picture of a whole scene. If you’re photographing a festival or event, you need to take into account what time it will all kick off. If you have one, ask your guide or fixer for details on where exactly things will happen, then plan ahead to make sure you’re in the best possible location.
It’s especially worth looking around at where the light is coming from. It’d be frustrating to be present at a dramatic moment only to realise you should be on the other side of the room.
Get the Digital Camera World Newsletter
The best camera deals, reviews, product advice, and unmissable photography news, direct to your inbox!
3. Always be ready

Whether photographing people or wildlife, great photographic moments often pass by once and then they’re gone. You need to always be ready and alert to the action. That particularly means spending time getting to know your camera, experimenting with elements such as shutter speed.
With some photos, you’ll want what you’re photographing to be sharp and clear, whereas others might look good with a blurry suggestion of movement. Also consider focal points and depth of field; what you want to draw the eye to, and whether you want a person or animal to stand out or to be part of it’s environment.
You want to get familiar enough with your camera so that you can make changes quickly, almost instinctively. The last thing you want to be doing when something unmissable happens is struggling to find the right settings.
I usually test my camera in a location ahead of time, while there’s nothing happening, to make sure I have something close to the right settings if and when something does occur.
4. Take your time

Time and patience are often the key elements that make the difference between a good photo and a great one.
You can come across a building that’s going to look brilliant in few hours, when the light hits it right, or you might find a composition you like but it takes a while for all the key features, including people, to line up in just the right way. As tempting as it can be to take the photo as it is and move on, it pays not to accept compromise and to wait for the best possible picture.
Working in Morocco, I found plenty of compositions that I liked a lot, but it sometimes took an hour or more of waiting to get the photos I was really happy with, with people passing by at just the right moment.
5. Get in the thick of the action

Great photographs really give the viewer a sense of a place or people. They trigger their curiosity and make them want to know more.
With adventure travel photography, you need to capture the action and take people there. Whether it’s biking in Vietnam, snowshoeing in Japan or trekking in Mexico, people looking at your pictures have to feel that sense of adventure and excitement. You need to get in the thick of it.
If you’re spending time with local cultures, you need to communicate a sense of local character, how people live and the surrounding environment. If photographing a sombre religious event or a chaotic carnival, your photos need to capture that atmosphere.
6. Let people see the real world

For me, it’s a real turn-off when I see photos online that bear almost no relation to the real world. I don’t, of course, see anything wrong with post-production work to bring out the best in a photo, but I see pictures everyday in which photographers have clearly got carried away with Photoshop or Lightroom ’s settings.
Our eyes are pretty clever and detect when something doesn't add up. An over-manipulated photo instantly loses credibility, whether that’s intensely oversaturated colours, a lack of shadows, or oddly manipulated pictures with dark, cloudy skies but scenery bathed in sunlight. Pictures like that might get Likes on Instagram but they're likely to be rejected by newspapers and magazine editors.
For me, it’s more satisfying to capture something real. There are so many remarkable sights in the world without sprinkling digital magic all over them.
7. Think about the impact of your pictures

Wherever you go, always treat people with respect. I’ve been shocked by tourists swarming locals with cameras and iPads, treating them like an exotic curiosity, not a person. Whether I’m working with a person or a group for several days or just photographing someone I see on a street, I always check first. Quickly pointing at the camera and asking “OK?” usually does the trick.
You should also always stop and consider what you’re photographing from an ethical position. Photos can do a lot of good, communicating important stories, but they can also have a negative impact, especially if you become part of cruel or harmful practices. In parts of Asia, some tribal women wear heavy metal chains to give them unnaturally long necks, causing painful physical deformities. What was once a local tradition is now more about someone extracting money from tourists who come to take photos.
The same goes for wildlife too, whether it's drugged tigers, dancing bears or performing elephants. I don’t want pictures on my memory cards that helped cause any kind of suffering.
8. Think outside the box

It’s possible to get so focused on photographing one thing, the main event, that you miss what else is happening, including other details that tell a story or make for interesting photos. Remember to look away from the viewfinder; often, it’s small details that others might miss or walk by, rather than the obvious main attraction, that bring a story to life.
Looking around, you can often find interesting juxtapositions between the person or animal you’re photographing and features of the landscape, or perhaps a tower or tree, or even the moon. For one of my favourite wildlife photos from the Falklands, instead of coming in tight on a group of penguins, I zoomed out to show a tiny little cluster of the birds facing an approaching storm, which gave a completely different, and, in my view, more interesting result.
A travel story often requires variety, which means looking around at smaller details, and not just the big, key elements (people, landscapes, animals, buildings, and so on). Details, such as a funny street sign or a unique statue, can add layers to a set of photos and give a fuller idea of a place.
9. Challenge yourself to find new approaches

Photography should always be exciting. You never want to get stuck in a rut, repeating the kind of pictures you’ve taken before, or to be satisfied with pictures that are less than your best.
The more time you spend taking photos, the more rewarding it is to be creative and find your own way of doing things. Working for other people, especially demanding editors, is one way to push yourself further. But you should always be challenging yourself to produce photographs that excite you to look at. Study what other photographers do, including what you like and what you don’t like about their work.
Most of all, study and critique your work. How could it be improved? Try to push your photography in new directions, whether framing things differently, seeking out interesting light, or just getting yourself into more interesting situations.
10. Get paid

Given the sheer volume of photos produced each day, there’s a culture in the media of asking photographers to give away their photos for free. At some point, unless your landlord and local supermarket accept payment in smiles, you need to get paid for your work.
Getting a job or freelancing for newspapers, magazines and websites means competing against many other would-be professional photographers, so you need to work hard and your photos need to stand out. Build up a portfolio, improve your photography, and work for smaller publications, all of which puts you nearer the front of the line. Having a good social media following and a reputation for being enthusiastic, hardworking and reliable helps.
You can also work for advertising companies, or sell your pictures via online galleries such as Alamy and Flickr. Many photographers sell prints, give talks, teach photography classes, or lead photography tours and workshops.
You need to put a value on your work and your time. In every situation, ask: what am I getting out of this? Is it worth my time and expertise? Travel photography is a tough business but an incredibly rewarding one if you can navigate your way.
Read more: The 10 best travel cameras you can buy right now Best travel tripods in 2019 10 ultimate locations for wildlife photographers How to prepare for a safari or wildlife photography trip
Thank you for reading 5 articles this month* Join now for unlimited access
Enjoy your first month for just £1 / $1 / €1
*Read 5 free articles per month without a subscription
Join now for unlimited access
Try first month for just £1 / $1 / €1
Related articles


What is travel photography?
What is a good travel photo, aspects of travel photography, travel photography, a popular genre, travel photography is underestimated, travel photography explained, receive photography and travel tips, travel photography.
Travel photography is a form of photography that for example involves photography of landscapes, historical buildings, cultures, and people in a specific place and destination to document a certain place and make others make to wish they were there.
With a collection of travel photographs of amazing landscapes, wildlife, breathtaking nature, cultures, and people, you will have the possibility to showcase a place, country, or even the world through photos. Travel Photography goes further than just capturing an awesome image.
A good travel photo tells a story, inspires the viewer about other beautiful places in this big world, and educates them about a place or culture by showing them how they differ from their own.
There are travel photographers that specialize in a specific aspect of photography , for example, landscapes or travel portraits but I basically shoot all aspects of travel and I combine that with photographing properties, such as hotels and lodges. When I travel to a certain place or country I try to showcase that place at its very best using a variety of images including landscapes, nature, wildlife, and people from different cultures.
Travel Photography became popular through magazines like National Geographic Magazine . Since more people travel, more people photograph while traveling. Therefore, it's a popular genre among travel and photography lovers.
Travel photography is an underestimated photography genre . To shoot high-quality travel photos you have to do a lot of research on the subject you want to photograph, but you still can't control all shooting conditions. You have to deal with different conditions that affect the final result, such as low light, unpredictable weather conditions, and unexpected moments that sometimes make an ordinary photo a spectacular photo. Something, I experienced myself while photographing wildlife, where you come across moments that rarely recur.
I hope you got a better understanding of the travel photography genre, one of the many types of photography .
Check out the Travel Photography Guide to learn more about travel photography, including many useful travel photography tips to improve your travel images and learn how to make money with your images.
Related photography articles:
- How to take better travel photos? Follow this 4-step formula
- How I got published in National Geographic Magazine

- 1x Each Month! A newsletter with free photography & travel tips to help you make the most out of your trip
- Be the first to know about giveaways, for instance, free ebooks and downloadable travel images
Yes, I want to receive the newsletter 1x p/month

Photography
Travel photography tips for near or far.
Get travel photography tips from professional photographers so you can capture new landscapes, cityscapes, and portraits of people you meet on your journeys.
Not sure which apps are best for you?
Take a minute. We'll help you figure it out.
JUMP TO SECTION
Types of travel photography
Top tips for travel photography
Turn travel photography into a career
A 10,000-foot view of travel photography
- Travel photography can be pictures of landscapes, cities, architecture, or people on the street.
- You don’t have to go far to start practicing — photograph interesting places close to where you live.
- To make a career of it, build an online portfolio of your best work.
Types of travel photography.
Travel photography can stretch across genres because you can take any type of photo when you travel. Depending on where you go and what you do, you can touch on everything from astrophotography to wildlife photography . As you travel, consider which aspects of your journey you want to focus on.
Landscape photography.
The world is dotted with picturesque, compelling, and breathtaking sights. When you’re on a walk and you want to capture the feeling of the scenery you find, you can focus on landscape photography. Make sure to do your research before you go, be intentional about the time of day you want to shoot, and be sure to bring gear to protect yourself from the elements.

City photography.
Capture the cityscape . From vast skylines to everyday life on the street, cities present wonderful subjects for experiments with perspective, texture, light, and color. Play with framing and vantage points, from the tops of buildings down to street level and below.
Architecture photography.
With architecture photography , you can explore the universal features and specific quirks of human-made structures wherever you go. Study a still subject like a building or a bridge to highlight the effects of weather or time of day, or to play with different vantage points.

Street photography.
Once you’re on the street, you can focus less on the architecture and more on the people moving through the city. Capturing life on the ground is the goal of street photography — a style of visual storytelling that shows off and communicates the experience of everyday life. It’s vibrant and spontaneous, and you have to work with whatever light is available. Catch people as they move about their day to immerse yourself in the experience of a new city.
Top tips for travel photography.
Finding your way in the world of travel photography doesn’t have to be overwhelming or onerous. Discover how you can get started with these tips.

1. Follow your wanderlust.
No matter where your interest lies, if you travel for the shoot, it counts as travel photography. Like documentary photography , travel photography expresses some truth about the particular scene it captures. “For me, it’s just one way to share my perspective on the world,” says professional travel photographer Tiffany Nguyen. “I travel to different places, see the world through my lens, and tell stories through photography.”
2. Start where you are.
You don’t need to quit your day job and sell all your possessions to make travel photography. “I would just start in your own backyard,” Nguyen says. “I started small, doing short, weekend trips, and then when I got more comfortable traveling and better at photography, I wanted to take it to the next level and do more international locations.” Begin with a list of places nearby that might be interesting to shoot. Find locations you can get to in an afternoon.
3. Research the location.
You can save yourself time and effort, and get better pictures, if you plan ahead. “Having the right inspiration before you get there is really key,” says travel photographer Forrest Smith. “Before I go, I like to build a moodboard to try to find the exact shot that I want.”
Nguyen does a lot of internet research, looking at blogs, Google Earth, and Google images. She scouts Instagram for different angles and perspectives. “I also find that social media is a huge resource, especially using hashtags on Instagram,” she says. “They’re really helpful for finding live conditions at a certain location. For example, if I go to a waterfall, I don’t really want to waste my time trying to get water photos if the waterfall is dry. So I’ll search the hashtag of the waterfall name to get an idea of the water level.”
In addition to weather conditions, your internet research can tell you how popular the location is, how to get there, and what times might be the least crowded. “I’m looking for the length of the hike, the elevation gain, any obstacles or challenges that are going to come my way,” says Nguyen.

4. Bring the right equipment.
Make a checklist so you don’t forget anything as you pack your camera bag. Include things like extra batteries, an extra memory card, a headlamp, emergency snacks, rain gear, protective cover for your photographic equipment, and extra lenses . (If you know you’ll do a lot of walking, make sure you really want that telephoto lens before you bring it.)
“For me it’s important to have compact, lightweight equipment,” says Nguyen, who uses a mirrorless Sony camera. Unlike DSLR cameras , mirrorless cameras have no mirror to reflect the image to the optical viewfinder. “Their bodies and lenses are much smaller than the DSLR cameras, but they’re still super-high quality, super-high resolution,” Nguyen says. She uses several lenses, including a 24–70mm f/2.8 lens and a 16–35mm f/2.8 lens for wide-angle shots. She’ll bring a prime lens (a lens of fixed focal length ) for astrophotography or low-light photography, and a lightweight carbon-fiber tripod. If she’s going to be close to her car, she’ll bring a 70–200mm f/2.8 telephoto lens.
Both Nguyen and Smith will bring drones for aerial shots if they know they’re going somewhere drones are allowed to fly. (Drones are not allowed in US national parks.) The best camera for his work, Smith says, is a Canon 5D Mark IV DSLR. Like Nguyen, he uses a 24–70mm f/2.8 lens. “If I’m going out for the day, I like to have something wide and something more cropped, so I’ll bring my 24mm prime or my 100mm prime,” Smith says. He’ll also bring neutral density filters . “They’re really great to have if you’re photographing water.”

5. Get the timing right.
Part of your research should include finding the best times of day to shoot and factoring in travel time. “I like to take advantage of the light, so I like to shoot at golden hour or sunset,” Nguyen says. “I try to avoid shooting at midday because the harsh lighting doesn’t look good for photos and there are more people out.” If you want to shoot an empty landscape in a typically busy place like a national park, you may want to get to the location before sunrise.
Always be on the lookout for great shots that you haven’t planned. “You have to be in the right place at the right time with the right attitude,” says Smith. “Keep an eye out because there are always stories to be told. Whether you’re in the heart of New York City or the middle of nowhere in Utah, there are always things happening that, if you’re attentive to them, you can use to tell an incredible story.”
Smith recommends keeping a camera with you at all times, even if it’s just a Polaroid or the camera on your smartphone, and using it to develop your creative eye. “Whether you’re at an iconic location or you’re just walking around your neighborhood, look for compositions and good lighting. Those off-the-hip, spur-of-the-moment photographs often tell a more incredible narrative than the super-planned shots do,” he says.
6. Accept uncertainty.
Travel is all about unpredictability. You might stumble upon a once-in-a-lifetime shot, or you might get fogged in and rained on. Try to roll with the punches when you encounter frustrating weather, find a road closed, or miss a train.
It helps to have backup plans and even backup plans for your backup plans. That way, you’re never at a complete loss for what to do if things go wrong. “Be realistic with your expectations and with things that you can’t control; it’s just a lot easier to be flexible and try to find a different plan,” Nguyen says.

7. Focus on telling stories.
Every travel photograph has a story to tell about a time and place. “Being able to bring people along for your journey through your images is the most important part of travel photography for me,” says Smith. “You want to be able to not just show the location but breathe life into it and find those authentic moments.”
Don’t be afraid to tread the beaten path. Even if you travel to places that have been photographed by hundreds or thousands of people, your photos and your stories will be unique. “You can have ten different photographers go to the same location, but you’ll come back with ten completely different images, ten different edits, and ten different stories, because everyone sees the locations differently,” says Nguyen.

8. International travel photography tips.
International travel involves a lot of planning because you want to make the most of your time. But it’s also important to accept that you can’t plan every moment. “Part of the experience that’s so fun and rewarding is how spontaneous it can be,” says Nguyen. “You never know where you’ll run into things you just can’t plan out or predict, so you just have to just go with the flow and work with what you find around you.”
Approach local people and their customs with an open mind and heart, and try to participate in their culture instead of just observing it from outside. “The people make the big difference. They have their own stories to tell, and you can learn a lot from them,” says Nguyen.
Remember to always be respectful. If you want to take a photo of someone, talk to them. Get to know them a bit, and then ask for permission. “A majority of the time, they’re more than happy for you to take their photo and maybe talk, too,” Nguyen says. “People think it’s fun because it’s not something that happens every day.”
Edit, organize, store, and share photos from anywhere.
Adobe Photoshop Lightroom
View product details
9. Family travel photography tips.
You can apply all the tips above to the family photos you take on your travels. Just remember to be patient, do your best to cultivate patience in your family members, and be sure to pack a tripod and remote so you can capture the whole group at once.
If you have specific staged shots in mind, communicate your ideas ahead of time. It might help to share some inspirational photos from Pinterest or Instagram to get buy-in from every member of the family. If you have young children (or teenagers) be prepared to bribe them to cooperate.
Otherwise, focus on taking candid shots of your family members. Like people, candid photography can be unpredictable. You have to read the room, adapt, and give up control, but you might perfectly capture the experience of family travel with a mix of shots that cover everything from excitement to exhaustion, unfettered joy to unequivocal irritation.
10. Practice.
The best way to get better at travel photography is to keep going places and taking photos. “Put in the time and effort, show up and shoot as much as you can,” Nguyen says. Keep building your portfolio, and when you’re ready to look for work in the photography business, be selective about the photos you share. Be sure that you know why you’re including each photo and what skills you want to showcase with it.

11. Make the right moves in post-processing.
With Adobe Photoshop Lightroom photo editing software, you can take your photos from good to great. If a photo just needs a nudge toward the rule of thirds , or your horizon needs leveling, you can easily make those changes in Lightroom. You can also apply presets for fast fixes to urban photos and nature photos or follow step-by-step tutorials to learn how to do everything from image sharpening to removing unwanted objects.
Wherever you go with your camera, remember to embrace the adventure and the uncertainty that goes along with it. Be patient with yourself and your surroundings. With every photo you take, you’re practicing your photography skills and adding to your story.
Turn travel photography into a career.
To turn your passion for travel photos into a career, start by taking a lot of photos and collecting your best work. If you’re committed and willing to think outside the box, you can start your own photography business .
- Pay attention to costs. You may already have camera gear and a computer, but you’ll also have to spend money on photo editing software and travel.
- Create a portfolio. Clients have to see your work before booking, so create a portfolio specific to your audience and your niche.
- Market yourself. One key part of turning your photography into a business is paying attention to marketing and branding . Establish an aesthetic and a point of view, so potential clients can have a sense of what they’re getting when they work with you.
- Think unconventionally. Many tropical paradises are oversaturated with people who want to travel and take photos of picturesque landscapes. A great place to start is by contacting bed and breakfasts, smaller hotels, and other businesses trying to attract visitors. Link them to your portfolio and see if they’re interested in providing lodging or a small per diem to photograph their resort.
- Treat every trip as an opportunity. If you’re interested in travel photography, you've likely already been bitten by the travel bug. Whenever you take a trip, take some time to build your portfolio. Professional photography can be a nomadic lifestyle with inconsistent income, so embrace a mindset of working wherever you are and being open to new opportunities.
Finally, remember that careers are not made overnight, and every small step you take as a travel photographer is moving you closer to the goal of adopting it as your career. Good luck, and happy trails.
Contributors
Tiffany Nguyen , Forrest Smith
Share this article
Do more with Adobe Photoshop Lightroom.
You may also like
Language Navigation
What Makes a Great Travel Photo? Capturing Great Shots
Table of Contents
“Photography is the story I fail to put into words.” – Destin Sparks. This quote perfectly encapsulates what makes a great travel photo.
It’s all about capturing unique moments that tell a story, sparking emotions and reactions from those who view it.

A great photographer knows how to use contrast and aesthetics to bring out the spirit of a place or culture in their travel pictures. Travel photography isn’t just about snapping pretty views; it’s visual storytelling at its finest, conveying experiences and adventures in a way no other medium can.
Mastering Camera Settings for Travel Shots
Understanding aperture, shutter speed, and iso.
These three amigos are the basics of photography and form the backbone of any great travel photo. The aperture controls how much light enters your camera. A low aperture means more light and a blurry background. It’s perfect for those dreamy sunset shots.
Shutter speed is all about freezing or blurring motion. Fast shutter speeds freeze action, while slow ones create a silky water effect.
ISO is your camera’s sensitivity to light. High ISO allows you to shoot in low-light conditions but watch out! Too high an ISO can make your photos grainy.

Importance of White Balance in Different Lighting Conditions
Ever snapped a pic and wondered why everything looks blue or orange? That’s white balance messing with you. Your camera tries to guess what “white” looks like under different lighting conditions, but it doesn’t always get it right.
You can fix this by adjusting the white balance setting on your camera gear. Cooler settings (like “cloudy”) add warmth to overcast scenes, while warmer settings (like “shade”) cool down bright sunlight.
Using Manual Mode for Greater Control Over Shots
Auto mode is easy-peasy, but manual mode gives you full control over your shots. You decide the aperture, shutter speed, and ISO based on what you want in your shot.
Trust me; once you go manual, there’s no turning back!

Role of Lens Selection in Framing Your Shot
Your lens choice can make or break your shot. Wide-angle lenses capture epic landscapes while telephoto lenses bring distant subjects up close and personal.
Remember that expensive camera isn’t always better if it doesn’t have the right lens for the job!

Utilizing Camera Settings to Capture Movement
Capturing movement adds drama to your travel shots. Use a fast shutter speed to freeze action or a slow one with a tripod for that beautiful blur effect.
Importance of Composition Techniques
Ever wondered what makes a great travel photo? The secret lies in the composition techniques.
Rule of Thirds for Balanced Images
The rule of thirds is a classic. Your camera’s grid lines are your best friends here. Imagine breaking an image down into thirds, both horizontally and vertically. You’ll have nine parts in total.
- Place your subject at the intersections or along these lines.
- This technique creates more tension, energy, and interest than simply centering the subject.
A sunset photo with the horizon on the lower third line and a tree on one of the vertical lines is an example.

Leading Lines Directing Viewer’s Attention
Leading lines are all about guiding your viewer’s eyes. They lead to your main subject, making it stand out even more.
- These can be natural like rivers or man-made like roads.
- They create depth in a photograph and draw attention to specific parts of the frame.
A picture of a winding road leading towards a mountain peak showcases this technique perfectly.
Use of Symmetry and Patterns in Compositions
Symmetry brings balance to your photos while patterns provide rhythm. Both can make your images aesthetically pleasing.
- Look for symmetrical scenes during travels.
- Patterns can be found everywhere; from tiled floors to rows of windows on buildings.
An image with reflections on still water shows symmetry, while repeating patterns could be seen in fields of sunflowers or terracotta rooftops in an old town square view from above.

Framing Subjects Using Natural Elements
Framing helps isolate your main subject from its environment. It gives more context and depth to an image by using elements within it as borders around your main point of focus.
- Trees, archways, window panes can act as natural frames.
- This technique also guides viewers’ eyes towards what you want them to see most in your photo.
A shot through an archway that frames an ancient monument is a classic example.
Experimentation with Perspectives and Angles
A change in perspective can turn an ordinary scene into something extraordinary. It’s all about how you see things and then capture them.
- Try high-angle, low-angle, bird’s eye view, or worm’s eye view.
- These perspectives can add drama and intrigue and help you take better travel photos .

A photo taken from the ground looking up at a towering skyscraper or a bird’s eye view of a bustling market place can show this technique in action.
Capturing People and Cultures Respectfully
Travel photography is not just about beautiful landscapes . It’s also about the people, their cultures, and the interactions between them.
Ethical Considerations When Photographing People
When you are out there in the wild or on the bustling streets of a foreign city, you must remember to photograph people ethically . This means respecting their privacy and dignity. You wouldn’t want someone snapping pictures of you without your permission, right? So why do it to others?
- Avoid taking sneaky shots.
- Ask for consent before shooting portraits.
- Don’t exploit vulnerable individuals for likes on Instagram.

Remember, a great travel photo respects its subjects as much as it captivates its viewers.
Respecting Local Customs During Shoots
Every culture has its own set of customs and traditions. And when you’re capturing these unique aspects through your lens, it’s vital that you respect them.
If a particular community doesn’t like being photographed during certain ceremonies or rituals, honor their wishes. Make sure to research local customs beforehand so you don’t inadvertently offend anyone.
For instance:
- In some cultures, taking photos at sacred sites is considered disrespectful.
- Some communities may have specific dress codes for visitors.

Following these guidelines can help maintain harmony while ensuring an authentic photographic experience.
Communicating Effectively with Subjects for Candid Shots
Communication is key when capturing candid shots of people. It helps establish trust and makes your subjects feel comfortable in front of the camera.
Here are some tips:
- Learn basic phrases in the local language.
- Use non-verbal cues like smiles or gestures.
- Show them the photo after clicking it as a gesture of goodwill.
Effective communication can lead to more natural expressions and spontaneous moments – making your travel photos truly stand out!
Capturing Authentic Expressions Without Intrusion
A genuine smile or a candid laugh can make any photo come alive. But capturing these authentic expressions without intruding on someone’s personal space can be tricky.
Here’s how you can do it right:
- Use a longer lens for close-ups to maintain distance.
- Wait patiently for the right moment instead of constantly clicking.

Remember, the goal is to document, not disturb.
Importance of Consent While Shooting Portraits
Finally, we can’t stress enough on the importance of consent in travel photography. Without it, you’re just an unwelcome intruder with a camera.
Whether you’re shooting a portrait or a candid shot, always ask for permission. If they say no, respect their decision and move on. This simple act of courtesy can go a long way in making your travel photography experience more enjoyable and rewarding.
To summarize:
- Always ask for consent before taking photos.
- Respect the person’s decision if they decline.
Utilizing Natural Light in Travel Photography
Travel photography is all about capturing the essence of a place. And what better way to do that than by using natural light?
Golden Hour Magic
The golden hour, right after sunrise or just before sunset, provides warm and soft light effects. It’s like nature’s own filter. During this time, the sun is low on the horizon and casts long shadows. This adds depth and drama to your landscape photography .
Imagine you’re at a beach during sunset. The sky turns into an artist’s palette with hues of orange, pink, and purple. You capture this moment with your camera – it’s not just a photograph; it’s a memory frozen in time.

Midday Light Creativity
Midday light can be harsh and unflattering, but don’t let that stop you from taking photographs! Turn this challenge into an opportunity by using shadows creatively. On a sunny day, look for patterns formed by shadows or use them to highlight certain elements in your frame.
Consider this: you’re exploring a city on a bright day when you notice an interesting pattern of shadows cast by a building onto the street below. You snap away!

Blue Hour Brilliance
Then there’s the blue hour – that short period before sunrise or after sunset when the sky has a deep blue hue. This is perfect for dramatic landscapes or cityscapes with lights twinkling under the twilight sky.
Picture yourself on top of a hill overlooking Paris as evening sets in. The Eiffel Tower sparkles against the backdrop of the twilight sky – it’s breathtaking!

Shadows for Depth
Shadows are not just absence of light; they’re an essential part of any photograph providing depth and perspective. A landscape might look flat under uniform lighting but throw in some shadows, and it comes alive!
Imagine walking through dense woods where sunlight filters through leaves creating patches of light and shadow – it’s a perfect lightroom to capture!

Weather Adaptability
Finally, don’t forget that weather conditions can drastically change your light source. A cloudy day diffuses sunlight providing soft, even lighting – ideal for portraits. On the other hand, a stormy sky adds drama to landscapes.
Just think of standing on a cliff with storm clouds gathering over the sea – it’s an electrifying sight!
Adventure Embracing and Location Scouting
Traveling is not just about getting from point A to point B. It’s about the journey, the experience, and most importantly, capturing those experiences in a way that tells a story. So if you’re wondering “what makes a great travel photo?”, remember to focus on the journey as well as the final destination.
Research Before You Go
Before you start your trip, do some research on your location. Find out what makes it unique. Is there an iconic landmark or a hidden gem that you can capture?
- Google Maps is your best friend here.
- Look for vantage points that will give you a different perspective of the scene.
- Check out professional travel guides for tips on where to get the best shots.

Remember, knowledge is power. The more you know about a place before you visit it, the better your chances are of capturing an amazing photo.
Be Open to Unexpected Adventures
Sometimes, the best photos come from unexpected places. So be open to adventure during your trips.
- Take detours off the beaten path.
- Explore local markets and neighborhoods.
- Engage with locals – they might know some secret spots!
And remember: while safety should always be a priority, don’t let fear hold you back from exploring new places.
Balance Safety Concerns with Exploration Opportunities
While traveling can be fun and exciting, it’s also important to keep safety in mind. But don’t let this stop you from embracing new adventures!
- Always have an idea of where you’re going but be flexible enough to change plans if necessary.
- Use technology tools like Google Maps not only for scouting locations but also for ensuring safe travels.
Being aware of your surroundings and taking precautions doesn’t mean missing out on great photo opportunities; it simply means being smart about them.

Leverage Technology Tools During Scouting
In today’s digital age, we have numerous tools at our disposal that can enhance our travel experience significantly.
- Utilize apps like Google Maps or TripAdvisor when scouting for places to visit.
- Use weather apps to plan your trips according to the best lighting conditions.
Technology can be a great allySo make sure you’re leveraging it!
Timing According to Best Lighting Conditions
Timing is everything. The right light can transform an ordinary scene into something truly magical.
- Plan your visits during the golden hour – the time just after sunrise or just before sunset.
- If you’re visiting a popular tourist spot, try going early in the morning or late in the evening when there are fewer people around.

Remember: Great travel photos are not just about what you see but also about how you see it. And with careful planning and a sense of adventure, you can capture images that tell a compelling story of your journey.
Post-Processing and Photo Editing Skills
You’ve got your adventure snaps and location shots. Now, let’s spice them up!
Adobe Lightroom Basics
Adobe Lightroom is a lifesaver for professional photographers. It’s like the Swiss Army knife of photo editing software.
- You can tweak colors.
- Adjust lighting.
- Add effects.
It’s user-friendly, even for beginners. Plus, it syncs across devices. Edit on-the-go on your smartphone or sit down with your laptop.

Remember, practice makes perfect! So keep playing around until you get the hang of it.
Color Correction Importance
Color correction is key in post-processing . It ensures your photos look natural and realistic.
Ever noticed how some photos just pop on social media ? That’s color correction at work!
But remember:
- Don’t overdo it.
- Aim for balance.
- Keep it real.
A little goes a long way here!

Cropping for Better Composition
Sometimes, we don’t shoot perfectly framed pictures every time (we’re only human!). But that’s where cropping comes in handy.
Cropping lets you:
- Remove unwanted elements.
- Highlight key details.
- Improve composition after shooting.
So next time you’re reviewing your images, don’t be quick to trash those off-center shots! A little crop can do wonders!
Saturation and Contrast Balance
Saturation and contrast are like salt and pepper to a dish – they add flavor to your images!
Balancing these two can result in vibrant photos that catch the eye instantly.
Here’s how:
- Increase saturation for more vivid colors.
- Boost contrast to distinguish different elements better.
But again, moderation is crucial here – too much of either can make your image look unnatural!
Preserving Image Quality during Editing
Finally, preserving image quality during editing is critical.
Nobody likes pixelated or grainy pictures right?
Here are some tips to maintain quality:
- Don’t over-edit.
- Always work with high-resolution images.
- Save edits in a lossless format like PNG.
The goal is to enhance your photos without losing any detail or quality.

So, what makes a great travel photo?

Alright, so you’ve got the lowdown on nailing those travel shots. It’s not just about clicking a button; it’s about understanding your camera, composing your shot, respecting cultures, harnessing natural light, embracing adventure and honing your editing skills. You’re now equipped with the know-how to capture moments that tell a story – your story.
But remember mate, practice makes perfect. So get out there and start snapping! And don’t forget to share your stunning shots with us. We can’t wait to see the world through your lens!
The best camera for travel photography is subjective and depends on your personal preference and budget. However, mirrorless cameras are often recommended due to their lightweight design and high-quality images.
Improving composition comes with practice. Try using techniques like rule of thirds or leading lines. Experiment with different angles and perspectives until you find what works best for you.
Always ask for permission before taking someone’s photo. Be aware of local customs and traditions concerning photography. Remember that people aren’t props; they’re individuals with their own stories to tell.
Absolutely! Natural light can dramatically impact the mood and feel of a photo. The golden hours (shortly after sunrise or before sunset) often provide the most beautiful lighting conditions.
While not necessary, post-processing software like Adobe Lightroom or Photoshop can help enhance your photos and give them a professional touch.

I’m a professional travel photographer, and I’ve been living the digital nomad lifestyle since 2016. I make money by working on client assignments, selling stock photography and helping other photographers by sharing my experiences on this website. I move around at my own pace (I hate fast-paced travel) and like to spend a few months getting to know each place I base myself in.
My writing and photos have been featured on industry leading websites such as Digital Photography School , Atlas Obscura and the world’s leading underwater photography resource The Underwater Photography Guide . I authored an eBook called “ Breaking Into Travel Photography: The complete guide to carving out a career in travel photography ” that has been published on Amazon. My stock images have also appeared in ads promoting destinations and companies that sometimes has been a surprise, even to me. But I guess that’s the nature of stock photography, you never know who will license them!
I’m always happy to connect, so feel free to reach out!
Hand-Picked Top-Read Stories

OK, What’s Going on With This Blog?

Here Are The Official Finalists and Winner From This Year’s Worldwide Photo Walk™
- Worldwide PhotoWalk
The Final Guest Blog: Photographer and Mishap-Laden Adventurer Brad Moore
- Guest Blogger
Trending Tags
- Zoo photography
- Worldwide Photo Walk
- work from home
What is travel photography?
#TravelTuesday is here again, and travel photography is the whole reason I’m guesting on this blog every Tuesday, so I figured this week, I’ll tell you exactly what travel photography is in my eyes. I’m Dave Williams , a travel photographer from the UK – let’s get into it!
I started getting serious about photography around 12 years ago. I knew I enjoyed photography and wanted to find out what it was that I really liked. I tried everything – landscapes, flowers, portraits, architecture – and I couldn’t quite put my finger on exactly what I liked, all I knew was this journey was making me a little better at taking photos and it was making me move around. As part of this journey, I also discovered that I needed some new gear, and that was going to cost me. I knew I was good enough to make some money from my photography to pay for the new gear I wanted, so I started to venture into paid work. I still didn’t know what my niche was, though.

As I continued to explore in search of my niche, combined with a thirst to see the world as a result of some personal circumstances, I still wasn’t quite sure where I fit in among the photography genres. I was shooting paid work at events and weddings, but when it came to my personal photography I was shooting all kinds of things. I was still shooting architecture, nature, landscapes, macro, food, you name it, I was shooting it, but here’s the thing: – I was enjoying it! I was aware that in order to push forward with professional photography I needed to find my niche, but I was confused because I just wasn’t finding it – I was shooting everything.
I think it was around this point that I realised my niche was not so much the subject, but it was the feeling. I was travelling and taking photos, and I was shooting those photos with the purpose of showing off the location. I was shooting travel.
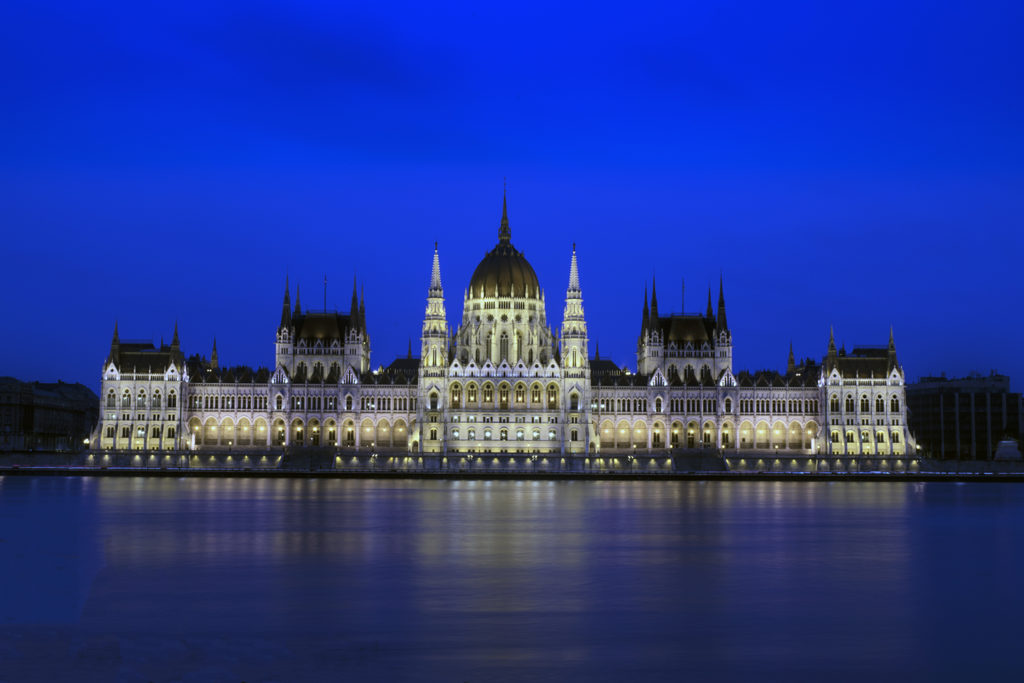
Travel photography isn’t a genre like any other, as I discovered. Travel photography takes landscapes, cities, street photography, night photography, and all other genres, and any or all of them can be travel photography if one thing is achieved, and that one thing is this: – it’s not a subject – it’s a feeling.
Travel photography is imagery that makes the viewer want to be there, at that place, at that time, experiencing that feeling. It’s any image that makes us want to be there.
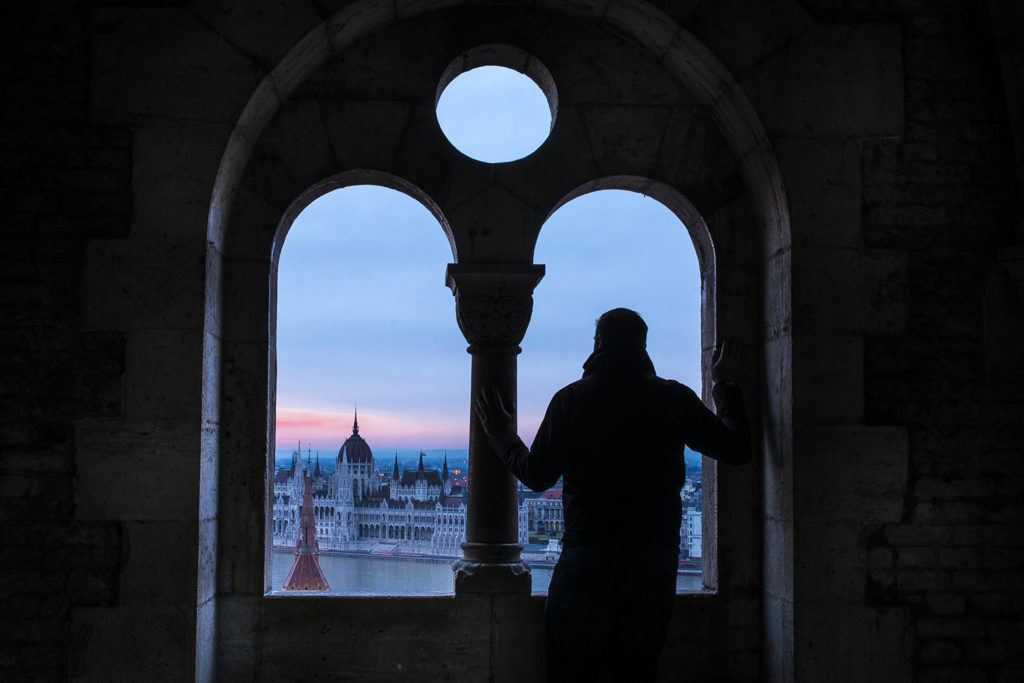
My niche was travel photography. I’d found it. And I absolutely love it.
Thanks for taking a moment with me today.

Leave a Reply Cancel reply
You must be logged in to post a comment.
Previous Post
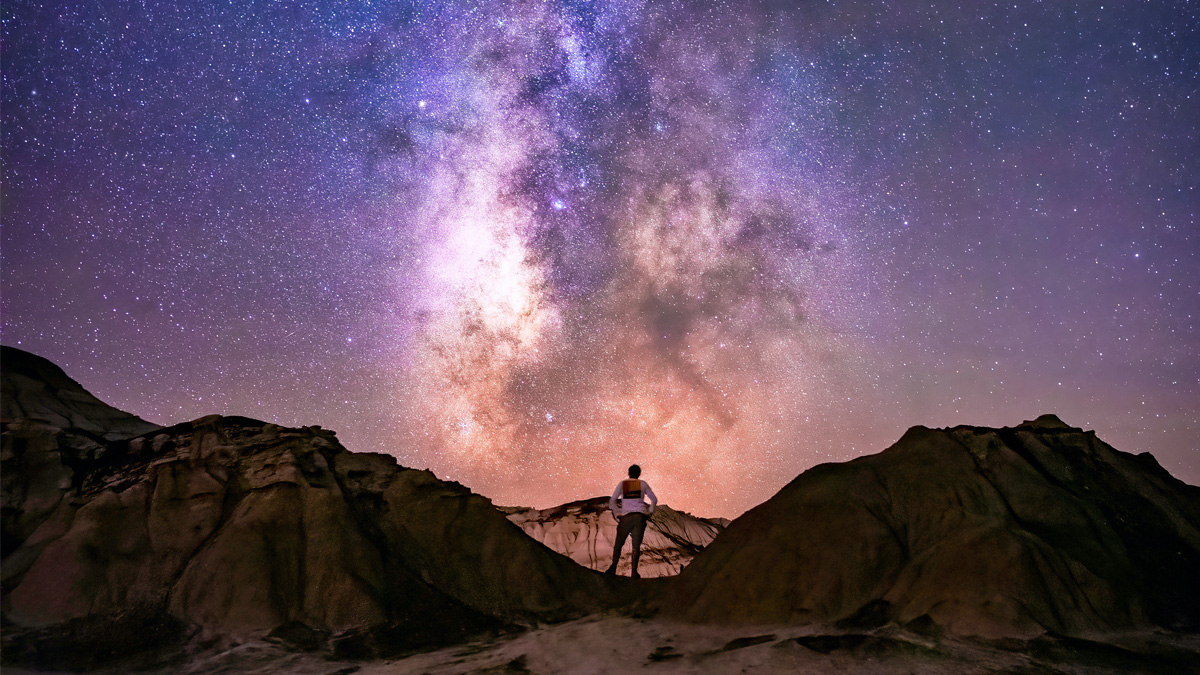
- Photography
Are You Willing to Put in The Work To Make Great Photos?
Guest Blog: Women of Photography

Travel Photography: Tips and Techniques for Capturing Unforgettable Moments
Travel photography captures the very essence of a destination, freezing moments that convey the beauty and uniqueness of places far and wide.
It’s an art form that combines adventure with storytelling, allowing us to bring back a piece of the world to share with others.
We’ll explore the techniques that make travel photography stand out, from the gear you’ll need to the creative eye that spots the extraordinary in the ordinary.
Whether you’re a seasoned traveler or just starting out, we’ve got the insights to take your travel photography to new heights.
The Importance Of Travel Photography
Travel photography goes beyond simple snapshots of exotic places.
It immerses us into diverse cultures and landscapes, telling stories that words often fail to express adequately.
These visual narratives evoke emotions and forge connections across continents, making viewers feel as if they have stepped into the frame themselves.
Travel photographs can incite wanderlust, inspire others to explore, and serve as powerful catalysts for change by bringing global issues to the forefront.
The impact of travel photography is undeniable.
Through our lenses, we have the opportunity to present the world in a light that might not be seen otherwise.
Consider how images of azure seas or bustling markets can kindle a desire to experience these destinations firsthand.
Or how a poignant portrait can foster empathy and understanding for people whose lives differ greatly from our own.
What Steve McCurry’s Afghan Girl did for National Geographic, countless other photographs do daily on social media platforms, giving rise to a new age of digital storytelling.

Essential to modern media, travel photography drives tourism and informs public perception.
Here are some key aspects:
- It fuels the travel industry by enticing potential travelers.
- It shapes impressions and creates awareness of lesser-known locales.
- It preserves fleeting moments and rapidly changing environments for posterity.
In an ever-connected world where physical borders seem less constraining, travel photography bridges the gaps between us.
It’s a craft that requires not just technical skill with a camera but also an open heart and inquisitive mind.
We’re not content with simply observing – we aim to experience and encapsulate the essence of a place, its people, and their stories.
Through our endeavors, we strive not only to document the world but also to interpret it, offering our unique perspective through the medium of photography.
How Travel Photography Captures The Essence Of A Destination
Travel photography does more than document a place we’ve seen.
It delves into the spirit of a location, capturing the unique qualities that define its essence.
Our role as photographers is to go beyond postcard imagery and unearth the layers that make each destination distinct.
It’s not just about the majestic landscapes or the iconic monuments that visitors queue to see.
True essence lies in the everyday moments and the subtleties of life that are often overlooked:
- The vibrant hustle of marketplaces,
- The serene ritual of a tea ceremony,
- The worn textures of aging architecture.
These aspects are what stitch the fabric of a place’s identity.
Our lenses focus on the emotions and stories that animate every alleyway and every face.
We capture moments that collectively paint a broader picture of what it means to inhabit these spaces.
With careful composition and a mindful approach, we translate the rhythms of a place into visual tales.
Through our photography, we give viewers a taste of the air, the sounds, and the energies that define a locale.
We’re not just showing pictures, we’re evoking experiences.
Essential to our craft is the ability to engage with our surroundings.
We become students of the light, the landscape, and the people, allowing us to:
- Anticipate the golden hour that casts a magical glow,
- Understand the narrative behind traditional customs,
- Recognize the significance of daily rituals.
We realize it’s in these details that the true essence of a destination is revealed.
Our images become a bridge, connecting cultures and breaking barriers, inviting curiosity and understanding.
Gear Requirements For Travel Photography
Travel photography demands a variety of gear options to meet diverse shooting scenarios.
At its core, the camera is the pivotal tool for capturing compelling images.

The choice between a DSLR, mirrorless, or a high-quality compact camera often hinges on the photographer’s need for quality versus portability.
We understand that balancing between image quality and luggage constraints is a key consideration.
Lenses play a crucial role in the final outcome of the photographs.
For versatility and to cover a broad range of subjects, we frequently recommend:
- A wide-angle lens – for expansive landscapes and street scenes,
- A decent zoom lens – for photographing distant details and candid moments,
- A fast prime lens – for low light conditions and creating beautiful bokeh.
Supporting gear such as tripods and camera cases protect your equipment and aid in capturing stabilized shots.
A lightweight tripod is invaluable, especially for sunrise or sunset photography where longer exposures are necessary.
also, memory cards and spare batteries are non-negotiable for ensuring a day’s shoot isn’t cut short by equipment failure.
Editing on the go is becoming increasingly prevalent, signifying laptops or tablets with photo editing software are soon becoming as essential as the camera itself.
Storage solutions, both physical hard drives and cloud services, are critical for backing up the work and preserving those fleeting moments captured.
Our recommendations serve as a solid foundation for both novice and experienced photographers alike.
The dialogue on gear is ever-evolving; we stay abreast of the latest tech developments to ensure our suggestions are current and conducive to creating stunning visual narratives.
Understanding the nuances of travel photography gear allows for a tailored approach to documenting diverse landscapes and cultures.
It’s about choosing the right tools that align with one’s artistic vision and practical needs while on the road.
Essential Techniques For Great Travel Photography
As experts in the field, we understand the techniques that can take travel photos from good to spectacular.
Composition is the cornerstone of photography, and for travel images, it’s essential to master the rule of thirds, leading lines , and framing.
These compositional elements help bring life to a place, telling its story in a compelling way.
In travel photography, lighting is a game-changer.
It’s not just about capturing the scene; it’s about doing so in the best light possible.
Golden hour , the time just after sunrise and just before sunset, provides a soft, diffused light that can add a magical quality to your images.
We also recommend experimenting with the dramatic light near dusk, or blue hour, which can give a serene and quiet mood to night scenes.
Capturing motion can convey the energy of a destination.
Here are key techniques for capturing motion effectively: – Use a slow shutter speed – this allows for creative effects like light trails or blurred water movement.
– Maintain stability with tripods or other stabilizers – it’s essential for shots with longer exposures.
– Practice panning – a technique where you move the camera along with the moving subject to keep them sharp against a blurred background.
Interacting with locals is more than just about manners.
It can lead to richer, more intimate shots.
By engaging with the community, you gain insight into the heart of the culture.
This interaction often opens doors to photographic opportunities that would otherwise be overlooked.
Remember that a smile and a respectful approach are your best tools for making connections.
Understanding the nuances of post-processing can also elevate your photography.
Tools like Lightroom offer a myriad of adjustments that can fine-tune color balance, sharpen details, and enhance the overall mood of your images.
We advocate for a subtle approach to editing – the aim is to enhance the photo without overpowering the natural elements that make it unique.
This means avoiding the temptation to over-saturate colors or over-sharpen images, keeping edits minimal for a more authentic representation of the scene.
Finding The Extraordinary In The Ordinary: Developing A Creative Eye
In our journey through the world of travel photography, we’ve realized that remarkable images often emerge from the most mundane scenes.
To unearth the extraordinary in the ordinary requires a creative eye – an ability to spot the sublime in the simplicity of everyday life .
Developing this skill isn’t just about snapping what’s in front of us; it’s about seeing the potential in a moment.
But how do we train our eyes to identify these hidden gems?
Here are some approaches we’ve found effective:
- Slow down and immerse ourselves in the environment – it’s not just about the destination but the details within it,
- Stay curious and open-minded – being prepared to explore angles and perspectives that others might overlook,
- Cultivate patience – sometimes, it’s about waiting for that serendipitous event to unfold within our frame.
Cultivating a creative eye is akin to engaging with the world as a storyteller.
We lean into the narratives woven within the landscapes and cityscapes, the expressions of people living their daily lives.
We seek stories that resonate with viewers and evoke a sense of place and time.
Harnessing the power of observation means looking beyond the obvious.
It involves examining shadows and reflections or the interplay between colors and textures.
It’s the way afternoon light filters through a bustling market or how age lines etched in a stranger’s face tell a story of resilience.
Every element can contribute to a compelling composition.
Our ethos is to elevate the ordinary to the extraordinary, transforming snapshots into statements.
We encourage our readers to practice this by engaging with their surroundings thoroughly:
- Observe interrelations rather than single elements,
- Find contrasts that create visual tension,
- Balance simplicity with complexity to craft images that linger in the viewer’s mind.
This approach to photography isn’t just about creating aesthetically pleasing images; it’s about instilling a sense of wonder and storytelling in our work.
We trust that as we continue to share our insights, we’ll inspire others to likewise capture the world with a renewed perspective.
Taking Your Travel Photography To New Heights
Elevating travel photography isn’t just about snapping what’s before us.
It’s about capturing the essence of a place and telling a story through our lenses.
We find that the best travel photos are those that convey a sense of place and time, connecting viewers emotionally to the location.
Mastering composition plays a critical role in enhancing our travel photos.
We’ve learned that adhering to the Rule of Thirds often leads to more balanced and engaging images.
The intersection points within the grid serve as prime spots to place elements of interest in our scenes.
Technical prowess is indispensable for highly dynamic and captivating travel photographs.
We don’t leave our settings to chance:
- We know our camera’s capabilities inside out,
- We adjust aperture, shutter speed, and ISO to match the light and motion conditions,
- We focus on sharp images, utilizing tripods and image stabilization when necessary.
Exploring different perspectives breathes new life into often-photographed landmarks.
Instead of capturing Eiffel Tower from its conventional angles, we look for reflections, silhouettes or frame it through doorways.
Narrative-driven photography imbues our travel images with deep storytelling elements.
We often ask ourselves, what’s the story here?
Whether it’s the bustling markets of Marrakech or the serene landscapes of Iceland, we strive to imbue each photograph with a narrative that begs the viewer to jump deeper into the story.
Editing is not merely about correcting; it’s about refining and bringing our photographic vision to reality.
With tools like Lightroom and Photoshop , we’re able to accentuate mood, fine-tune colors, and craft images that match our original intent.
By harnessing these techniques, our travel photography does more than document; it inspires.
Through our photographs, we offer escapes, invoke nostalgia, and spark a wanderlust for the beauty of our diverse world.
What Is Travel Photography – Wrap Up
We’ve journeyed through the art of travel photography, uncovering the skills that transform simple snapshots into profound stories.
It’s clear that a creative eye, honed through patience and curiosity, is key to capturing the essence of our travels.
By mastering composition, embracing technical skills, and exploring varied perspectives, we elevate our images from mere pictures to narratives that resonate with viewers.
Remember, it’s not just about the destination; it’s the story we tell through our lens.
Let’s keep pushing boundaries and editing with intention to inspire awe with every shot we take.
Our adventures await – camera in hand, ready to immortalize the world’s beauty in our unique photographic tales.
Frequently Asked Questions
What are the keys to developing a creative eye in travel photography.
The keys to developing a creative eye include slowing down, staying curious, observing your surroundings, and cultivating patience.
Focusing on hidden gems in ordinary scenes can lead to unique photographic compositions.
How Can A Photographer Train Their Eye To See Differently?
To train your eye, practice observation and look for interrelations, contrasts, and a balance between simplicity and complexity.
This helps in identifying unique perspectives and elevating the everyday to the extraordinary in your photography.
What Should Travel Photographers Focus On To Enhance Their Images?
Travel photographers should focus on mastering composition, gaining technical prowess, exploring different perspectives, creating narrative-driven images, and fine-tuning their work through editing.
These aspects contribute to capturing the essence of a place and telling a compelling story.
Why Is Editing Important In Travel Photography?
Editing is important in travel photography because it allows photographers to enhance their images, bring out details, adjust colors, and generally refine their narrative.
It’s a critical step for ensuring that the photographs convey the intended mood and message.
How Can Travel Photographers Capture The Essence Of A Place?
Photographers can capture the essence of a place by focusing on aspects that tell its story, such as the environment, people, culture, and unique details.
Incorporating these elements into their photography helps to create a sense of place and connect viewers to the location.
Ultraviolet Photography: Revealing the Hidden Beauty of the Invisible Spectrum
Lo-Fi Photography: Embracing Imperfections and Creative Limitations
Matt Crawford
Related posts, afocal photography: the art of capturing images without a lens, elevated photography: capturing stunning aerial views, what is circle of confusion in photography tips & techniques [with examples], star trail photography: capturing the night sky in motion, photovoice: empowering communities through visual storytelling, leave a reply cancel reply.
This site uses Akismet to reduce spam. Learn how your comment data is processed .
Username or Email Address
Remember Me
Registration is closed.
Pin It on Pinterest
- Canvas Backpacks
- Leather Backpacks
- Sustainable Backpacks
- Camera Backpacks
- Canvas Messenger Bags
- Leather Messenger Bags
- Canvas Duffle Bags
- Leather Duffle Bags
- Leather Guide
- Materials Guide
- Adventurers & Explorers
- The Traveller's Notebook
- American Express

Master the Art of Travel Photography: A Comprehensive Guide
Reading Time: about
Hello, fellow travelers and photography enthusiasts! I'm here to guide you on an exciting journey through the fascinating world of travel photography.
Whether you're planning to explore the charming streets of Paris, the grand temples of Angkor Wat, or the vibrant wildlife of the Serengeti, your camera is your best travel companion. With it, you can immortalize your experiences and share them with the world.
But, have you ever wondered how to transform your ordinary travel shots into captivating visual stories?
If you have, you're in the right place. In this comprehensive guide, we'll explore everything you need to know about taking awesome travel pictures and provide you with some tips on how to use post editing software (you can visit Vista Create for instance) to boost your travel pictures.
Let's get started, shall we?
- 1. Understand Your Camera Equipment
- 2. Essential Travel Photography Gear
- 3. Understanding the Basics of Photography
- 4. The Magic of Lighting in Travel Photography
- 5. Capturing Landscapes and Scenery
- 6. Urban and Street Photography
- 7. Photographing People During Your Travels
- 8. Capturing Movement and Action
- 9. Post-Processing: Adding the Final Touches?
- 9. Related FAQ
The Importance of Captivating Travel Photography
Why is travel photography so important, you might ask? Well, in my opinion, it's the best souvenir you can bring back from your journeys. Through a single photo, you can capture the essence of a place, relive your experiences, and share your adventures with others.
Let's consider a sunset over the ocean, for instance. As you look at the photograph, you don't just see the vibrant colors of the sky and the calm sea. You feel the cool breeze, you hear the waves lapping at the shore, and you relive the serenity of that moment. That's the power of captivating travel photography.
How a Picture can Elevate your Travel Experience
Now, let's delve a little deeper. I believe that travel photography isn't just about taking pretty pictures. It's about truly experiencing a place, connecting with its people, and immersing yourself in its culture.
When I travel, I often spend time observing my surroundings, looking for unique perspectives and compelling stories to capture. It's an incredible feeling to look through my camera's viewfinder, frame a shot, and click the shutter button at just the right moment.
Trust me, when you take the time to engage with a place through your lens, you gain a deeper appreciation for its beauty and complexity. It transforms your travel experience, making it richer and more meaningful.

I. Understand Your Camera Equipment
Believe me when I say that understanding your camera equipment can be a game-changer in travel photography. Don't worry, you don't need to be a tech wizard to master this. Trust me, a basic understanding of your camera's functionalities and settings can go a long way in improving your travel photos.
1. Different Types of Cameras for Travel Photography
Let's start with the basics - choosing the right camera for your travel photography. Remember, there isn't a 'one size fits all' solution here. From DSLRs to mirrorless cameras to the trusty smartphone, each has its pros and cons.
DSLRs offer high image quality and performance, but they can be bulky. Mirrorless cameras, on the other hand, provide similar quality in a smaller package. And then, we have smartphones that offer convenience and impressive camera features. It boils down to your preference, budget, and what you want to capture on your journey.
📷 Credit: Mitchell Kanashkevich's Youtube Channel
2. Understanding Camera Settings and Functions
Next, let's dive into camera settings. It can feel like navigating a labyrinth, but trust me, it gets easier with time. The key settings to familiarize yourself with are aperture, shutter speed, and ISO.
Aperture affects the depth of field, shutter speed influences motion blur or sharpness, and ISO determines the camera's sensitivity to light. Experiment with these settings, understand how they interact, and you'll soon have more control over your photos than you ever imagined.
3. The Benefits of Smartphone Photography
Lastly, let's not underestimate smartphone photography. I've seen some breathtaking travel photos taken on smartphones. They're compact, always with you, and their camera technology is rapidly evolving. Plus, they offer seamless editing and sharing options.
Remember, the best camera is the one you have with you. So, whether you have a high-end DSLR or a smartphone, what truly matters is your vision and your ability to capture the essence of your travel experiences.

II. Essential Travel Photography Gear
So you've got your camera of choice in hand. Now what? Let's talk about the essential gear you might want to consider to enhance your travel photography. Remember, it's not about having all the gear available, but the right gear that suits your needs.
1. Choosing the Right Lenses for Your Camera
First and foremost, let's discuss lenses. If you're using a DSLR or a mirrorless camera, investing in good lenses can make a world of difference. Wide-angle lenses are fantastic for landscapes and cityscapes, while telephoto lenses can capture distant details and wildlife.
But remember, versatility is key when traveling. You can't pack an arsenal of lenses without weighing yourself down. A zoom lens with a broad range can be your best friend on your journey. It offers flexibility, from wide-angle shots to zoomed-in details, all in one package.
📷 Credit: Josh Winiarski's Youtube Channel
2. Importance of Tripods in Travel Photography
Tripods, in my experience, are one of the most underrated accessories in photography. They're essential for stability, crucial for low light situations, long exposures, or when capturing that perfect sunrise or sunset.
Tripods can also give you freedom. With the camera steady, you can be in your photos, not just behind them. But remember, travel-friendly tripods should be lightweight and compact, yet sturdy enough to support your camera.
3. Additional Accessories: Memory Cards, Batteries, etc.
Lastly, don't forget the unsung heroes: memory cards, batteries, and cleaning equipment. More memory cards mean more photos, and trust me, you'll be taking plenty. Extra batteries are a lifesaver when you're out exploring all day. And a basic lens cleaning kit will keep your gear in top condition, because nothing ruins a photo faster than a smudge or a speck of dust on your lens.

III. Understanding the Basics of Photography
Now that you're armed with your camera and essential gear, let's delve into the heart of photography. The basics may seem simple, but mastering them can truly transform your images. Trust me, as you grow in understanding, you'll see the world through a different lens.
1. Mastering Composition Techniques
Firstly, let's talk about composition. Composition is all about arranging the elements in your frame to create a compelling image. One technique I often use is leading lines. These are lines within the image that lead the viewer's eye towards the main subject. It could be a winding road, a row of trees, or a flowing river - anything that draws the viewer into your photo.
📷 Credit: Jamie Windsor's Youtube Channel
2. The Rule of Thirds in Travel Photography
Next, we've got the rule of thirds, a classic principle in photography. Imagine dividing your frame into nine equal parts with two horizontal lines and two vertical lines. The idea is to place your subject along these lines or at their intersections. This technique can create a balanced, interesting composition.
Remember when I captured the Eiffel Tower at sunrise? By placing it at the intersection of the lines, I was able to include the beautiful morning sky and the city below, creating a more engaging image.
3. Utilizing Lines and Patterns in Your Images
Lastly, let's not forget lines and patterns. They're everywhere, once you start looking for them! Repeating patterns can create a rhythm in your image, while distinct lines can add structure. When I was photographing the Colosseum, the repeating arches created a fascinating pattern that added depth to the image.

IV. The Magic of Lighting in Travel Photography
I often say, "Photography is painting with light", and boy, do I mean it! Lighting can make or break your travel photographs. It's about more than just having enough light; it's about the quality, direction, and color of that light. Let's explore how you can work magic with lighting.
1. Understanding Natural Light and Its Effects
First, understanding natural light is crucial. The sun is a powerful light source, but it changes throughout the day. Ever noticed how colors change from dawn to midday to dusk? That's natural light at play.
Harsh midday sun can create strong shadows and overexposed spots. But the soft light during sunrise or sunset? It creates beautiful hues and softer shadows. I'll never forget the golden hues on the ancient temples of Angkor Wat at sunrise, it was a sight to behold.
2. The Golden Hour: Capturing the Perfect Shot
Which brings us to the Golden Hour, a photographer's best friend. This is the period shortly after sunrise or before sunset, where the light is softer and colors are warmer. Trust me, this magical light can transform an ordinary scene into a breathtaking photograph.
Remember, the golden hour doesn't last long. So plan your shots, be ready, and make the most of this beautiful light.
📷 Credit: Channel 8's Youtube Channel
3. Working with Difficult Light Conditions
Now, not all light conditions are ideal, and that's okay. You might encounter overcast skies or challenging indoor light. But don't let that stop you. Use these conditions to your advantage.
For instance, overcast days can bring out vibrant colors in a landscape, while indoor lights can create interesting shadows and highlights. When I was exploring the markets of Marrakech, the mix of shadow and light coming through the roof created a wonderful, dynamic scene.

V. Capturing Landscapes and Scenery
From serene beaches to majestic mountains, capturing landscapes and scenery is an integral part of travel photography. It's about conveying the spirit of a place, its scale, and beauty. So let's get into how you can create compelling landscape photographs.
1. Composing Your Landscape Photographs
Composing landscape photographs can be a fun challenge. Consider your frame - what elements do you include? What do you leave out? How do you arrange them?
Remember the composition techniques we discussed earlier? They're especially useful here. The rule of thirds can help balance your landscape shots. Leading lines can guide the viewer's gaze through the image. For instance, when I photographed the Great Wall of China, I used the wall as a leading line, guiding the viewer through the vast landscape.
📷 Credit: Mads Peter Iversen's Youtube Channel
2. Capturing the Vastness of the Landscape
A challenge in landscape photography is capturing the vastness of the scene. Here, a wide-angle lens can be your best friend. It allows you to capture a larger part of the scene. But don't forget to include elements in your foreground for a sense of scale and depth.
When I photographed the Grand Canyon, I included a person in the foreground. This not only added a human element to the photo but also gave a sense of scale to the grandeur of the canyon.
3. Understanding the Role of Weather and Time
Lastly, never underestimate the role of weather and time in landscape photography. Sunrises and sunsets can cast beautiful colors and long shadows. Fog can add a sense of mystery, and storm clouds can create drama.
I recall photographing the Scottish Highlands during an approaching storm. The dark clouds, the green hills, and the golden sunlight peeping through created an image I'll never forget.
VI. Urban and Street Photography
Urban landscapes and street scenes can be just as captivating as natural landscapes. From towering skyscrapers to vibrant markets, urban photography lets you capture the life and character of a place. So, let's delve into the exciting world of urban and street photography.
1. Composing Urban Landscape Shots
Just like with natural landscapes, composition is key in urban photography. Consider your elements - buildings, landmarks, people, vehicles. How do you arrange them in your frame? Remember, leading lines and rule of thirds can help you create balanced and intriguing compositions.
When I photographed New York's skyline, I used the Brooklyn Bridge as a leading line, drawing the viewer's gaze towards the skyscrapers.
📷 Credit: B&H Photo Video's Youtube Channel
2. Capturing the Pulse of the Street
Street photography is about capturing candid moments that reflect the pulse of the street. Be patient, observant, and ready to click. Trust me, sometimes the most mundane activities can make the most compelling photographs.
Once, in the bustling streets of Tokyo, I captured a moment between a sushi chef and his customer. The interaction, the details of the sushi bar, and the surrounding activity made the photograph one of my favorites.
3. Dealing with Low-Light Conditions
Urban environments often come alive at night, illuminated by neon signs and streetlights. But shooting in low light can be challenging. Here, a tripod can ensure stability, while adjusting your camera settings (aperture, shutter speed, ISO) can help you capture the scene effectively.
Remember the enchanting night markets of Bangkok? With the right settings and a steady tripod, I was able to capture the vibrancy and energy of the market in full swing.

VII. Photographing People During Your Travels
Portraying people in your travel photos can add a personal touch and bring a destination's culture to life. From candid street portraits to more formal photos, let's discuss how you can effectively photograph people during your travels.
1. Street Portraits: Capturing Candid Moments
Street portraits are all about capturing candid moments. It's about portraying people in their everyday environment, adding a narrative to your travel story. Remember, you need to be respectful and considerate when photographing people, and always seek permission when appropriate.
Once, in a Moroccan market, I spotted an artisan engrossed in his craft. His concentration, the colorful surroundings, the intricate details of his work – everything came together to create a captivating candid portrait.
📷 Credit: Pierre T. Lambert's Youtube Channel
2. Connecting With Your Subject
Connecting with your subject can add depth to your photographs. A brief conversation, a shared joke, a moment of understanding can reflect in your photos. Plus, it's a fantastic way to learn about the local culture and people.
I recall photographing a Maasai warrior in Kenya. Our brief conversation allowed me to capture not just his image, but a hint of his story, his culture, and his spirit.
3. Using Natural Light for Portraits
Lighting plays a crucial role in portrait photography. Soft, diffused natural light is ideal as it avoids harsh shadows and brings out the subject's features. Remember the golden hour we discussed earlier? It's perfect for portraits too!
During a trip to Vietnam, I photographed a rice farmer during the golden hour. The warm light highlighted her features and added a magical glow to the entire scene.

VIII. Capturing Movement and Action
Travel photography is not just about stills; it's also about capturing the dynamics of a place. From bustling cityscapes to vibrant festivals, let's talk about how you can incorporate movement and action into your photographs.
1. Using Shutter Speed to Your Advantage
Shutter speed is a powerful tool when photographing movement. Fast shutter speeds can freeze action, while slow shutter speeds can create motion blur, conveying a sense of speed.
For instance, during the San Fermin festival in Spain, I used a fast shutter speed to freeze the runners and bulls in mid-action, capturing the energy and chaos of the moment.
2. Panning Techniques in Travel Photography
Panning is a technique where you move your camera to follow a moving subject. This can create a sharp subject against a blurred background, emphasizing the motion. It takes some practice, but the results can be truly stunning.
In the streets of Havana, I used panning to photograph a vintage car zooming by. The car was in sharp focus, while the colorful streets blurred into streaks of color, effectively conveying the speed.
📷 Credit: DEvisuals's Youtube Channel
3. Capturing Action in Your Frame
Capturing action can add an exciting element to your travel photos. It can be anything, from a soaring bird to a bustling market scene. The key is to anticipate the action and be ready to capture it.
During a safari in Tanzania, I was able to photograph a lioness mid-leap. Anticipating her move and being ready to click resulted in one of my most memorable action shots.

IX. Post-Processing: Adding the Final Touches
After all the effort of capturing your travel photographs, post-processing is where you can truly make them shine. From simple adjustments to more intricate edits, let's discuss how you can add the final touches to your photographs.
1. Basic Adjustments: Exposure, Contrast, and Colors
Basic adjustments like tweaking the exposure, contrast, and colors can make a significant difference. Overexposed skies can be toned down, shadows can be lightened, and colors can be enhanced to reflect the scene as you saw it.
After a rainy day in London, I captured a vibrant double rainbow over the city. But the photo was a bit dull. A few adjustments in post-processing brought out the colors of the rainbow and the city, just as I had witnessed it.
📷 Credit: Todd Dominey's Youtube Channel
2. Crop and Straighten for Better Composition
Cropping and straightening can help improve your composition even after you've taken the photo. Perhaps you want to remove a distracting element, or maybe you want to emphasize your subject more. Post-processing allows you to make these adjustments.
A photo I took of the Leaning Tower of Pisa had a few tourists in the corner, distracting from the main subject. A simple crop in post-processing removed the distractions and brought the focus back to the iconic tower.
3. Advanced Techniques: HDR, Panorama, and More
For the more tech-savvy photographers, advanced techniques like High Dynamic Range (HDR) processing and creating panoramas can enhance your photos. HDR can help manage scenes with high contrast, while panoramas can capture a wider scene.
Remember the breathtaking view from Machu Picchu? By stitching together several photos in post-processing, I created a panorama that truly captured the scale and beauty of the site.

Wrapping Up
And there you have it! From choosing your gear to post-processing, this has been your comprehensive guide to taking awesome travel pictures. I hope you've found this guide helpful, and I can't wait to see the amazing photos you'll capture on your travels.
Now, let's move on to the FAQs, where I'll answer some common queries related to travel photography.

Now that we've gone through our extensive guide on taking awesome travel pictures, let's address some common questions that often arise in the realm of travel photography.
1. Q: What's the best camera for travel photography?
A: The best camera for travel photography is the one you're comfortable with. Whether it's a DSLR, mirrorless, compact, or even a smartphone, it's about how you use it. If you're looking for a new camera, consider factors like size, weight, image quality, and your budget.
2. Q: How can I protect my camera equipment while traveling?
A: Use a sturdy, padded camera bag for storage. Use lens caps and camera covers for protection. Be mindful of extreme temperatures and avoid water unless your gear is waterproof.
3. Q: How can I avoid blurry pictures?
A: Use a faster shutter speed to freeze motion, use a tripod for stability, or increase your camera's ISO setting for better low-light performance.
4. Q: How do I take pictures in bright sunlight?
A: Use a lower ISO setting, a faster shutter speed, or a narrower aperture to avoid overexposing your pictures. A lens hood can also help reduce lens flare.
5. Q: How do I photograph people without invading their privacy?
A: Always respect people's privacy and local customs. Ask for permission before taking a photo, especially if the person is the main subject.
6. Q: What is the best time of day to take photos?
A: The golden hour—shortly after sunrise or before sunset—offers soft, warm light that's perfect for photography.
7. Q: How can I make my travel photos more interesting?
A: Try different angles and perspectives, use composition rules creatively, include people or objects for a sense of scale, and try capturing motion for dynamic shots.
8. Q: How can I improve my photo composition?
A: Learn and apply basic composition rules like the rule of thirds, leading lines, framing, and symmetry. Experiment and practice to see what works best for your style.
9. Q: How do I manage my photos when traveling?
A: Invest in enough storage (memory cards, portable hard drives), back up your photos regularly, and consider using a photo management tool for organizing and sorting your images.
10. Q: What software should I use for photo editing?
A: There are many great options available, from free tools like Google Photos and GIMP, to professional software like Adobe Lightroom and Photoshop. Choose one that fits your needs and skill level.
Photo Credits : Jakob Owens | Mauro Sbicego | Kameron Kincade | NEOM | Marek Piwnicki | Tanner Boriack | Manek Singh | Patrice Bouchard | Glenn Carstens-Peters
📫 Related Blog Posts :
📌 Best Art Museums In Europe: A Comprehensive Guide
📌 A Guide to Planning a Comfortable Hiking Outfit
📌 Ignite the Spark: Plan the Perfect Couples Retreat [Guide]
📌 How to Plan a Fantastic Golf Holiday
📌 Air Travel 101: Master the Art of Comfortable Flight Journeys

Baptiste is an adventurer with a passion for urban and wilderness exploration and adventure, and a lover of vintage objects with timeless charm. As a Founding member of the Eiken team, he tries to share his passion and expertise for travel and vintage fashion through his articles.
Leave a comment
Please note, comments must be approved before they are published


- How to Become a Professional Travel Photographer
- Career Tips
- By Lisa Michele Burns
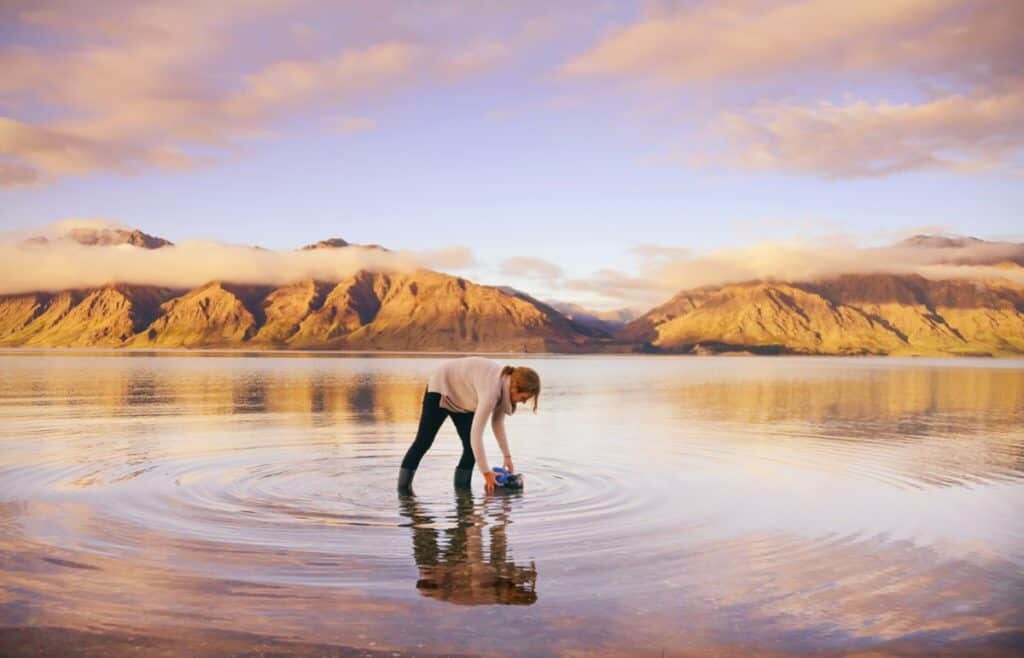
Travel Photography: A Guide to Getting Started as a Travel Photographer
The title of ‘Travel Photographer’ is the pinnacle for many creatives with that ever enduring sense of wanderlust.
You would think all you need is a camera and a plane ticket to become a travel photographer, right?
In theory, yes. But in practice, you’re competing with a world filled of talented creatives all vying for the opportunity to be a full time travel photographer.
That said, there is so much room in the industry for skilled photographers as the need for quality content is at an all time high.
Social media and online publications are soaking up visual content like a sponge. The urge to publish engaging and unique imagery, viral videos and inspiring posts means photographers are in demand right now!
Are you ready to get involved?
I’m writing this guide from over 17+yrs in the industry as a travel photographer, you’ll find my personal portfolio here at lisamicheleburns.com – there’s so much space in the industry if you can create photographs with a refreshing view of the world, and I hope this guide will help you discover how you can work as a travel photographer and join me in this exciting industry!
Read below to find information on the following steps to starting a career as a travel photographer:
– Setting Goals – Learn Photography – Create a Niche Style – Build a Portfolio – Create a Website – Finding Clients – Getting Published – Build Your Social Media Presence – Master the Art of Self Promotion
How to start a Career in Travel Photography
1. set goals.
Before you even look at your camera or think about the amazing places you’ll visit take a step back and look inside.
Write down exactly why you want to be a travel photographer. Is it to get your photo on the cover of National Geographic? To travel for free? To visit far away places and document them as a photojournalist? Or is it simply because you love taking photos and seeing new places?
Setting goals and thinking about the reason you want to be a travel photographer sounds like a pretty easy step to skip but believe me, you want those goals to look back at one day. When you’ve had a bad few months without work, when you’re knee deep in mud because you took the term ‘getting the shot’ a bit too far…you want to be reminded of why you’re doing it.
Writing a set of achievable goals will also give you a path to follow. Travel photography has no real set career path so be sure to write some short term goals and long term goals to work towards.
2. Learn Photography
So this step may seem obvious but you’ll be surprise how many fail to take it seriously. If you are really keen work in the travel photography industry and become a full-time travel photographer you need to know your camera inside out.
Having 500 people ‘like’ your photo on Instagram doesn’t cut it in the world of media and publishing if that photo doesn’t print sharp above 1000 pixels wide.
Knowing the right settings, image quality standards and having the eye to see and capture the world creatively will put you ahead of the pack.
I’m not a big believer in getting a formal education for a creative skill (different for everyone!) but if you prefer to learn from books there are a number of courses online that will help you out. There are various ways to learn photography and depending on your learning style, it’s usually best to find the method that suits you best as we’re all different! Take a peek at this quick guide I wrote about learning styles + 8 ways to learn photography.
Another way to learn photography is to take your camera out and use it until you know how it operates in various lighting conditions, landscapes, indoors, outdoors, upside down, underwater, looking up, looking down. You probably get my drift here.
Knowing how to use your camera is essential to success as a travel photographer because more often than not, it’s those spur of the moment shots that generate the goods. If you can quickly adapt to the surroundings and know what settings to change in a split-second in order to capture a moment, you’re in with a pretty good shot of becoming a professional photographer.
Practice taking photos of friends, pets, your local surroundings, basically anything and everything in order to expand your knowledge of photography.
LEARN MORE WITH THE WANDERING LENS
Creative Courses + Resources for Photographers: If you’re interested in discovering your creative vision and building a portfolio with the aim of finding work as a photographer, The Wandering Lens now offers self-study courses , eBooks and Workbook Bundles. The online courses and downloadable workbooks can be accessed at any time, from anywhere in the world – it’s about creating accessible resources to help you in your photography career. The bring together over 17+years of experience and lessons from working in the industry. I want to see others share their talents and get published, sell prints, find clients – to have the confidence to achieve whatever it is you want to within the field of photography.
Want to work as a travel photographer yourself?
To learn more about becoming a travel photographer, join me for an 8-week online course called The Freelance Travel Photographer Course , where I share anything and everything you need to know to succeed in the industry, based on my 17+yrs as a professional travel photographer. Alternatively, you can register to receive my free email series focused on travel photography as a career. Register for the free travel photography email series here.

Travel Photography Tips –
Some articles from my site that might help you out…all can be found in the Photo Tips section but here are some more specific posts – How To Creatively Compose Travel Images Landscape Photography: Tips for Wide Angle Landscape Photos Learn How to Take Underwater Split-Level Photographs
To develop a consistent style once you’ve got the hang of your camera, then you need to learn some editing skills to give your images a professional edge. Programs like Adobe Lightroom and Adobe Photoshop ( sign up for a free trial here ) work wonders in giving your images a little oomph. You can download my personal collection of presets here that allows you to do quick edits at the touch of a button.
I’m still learning 12 years after my first professional travel photography gig and that’s all part of the fun! Staying eager to learn means photography won’t ever get boring!
3. Create a Niche Style as a Travel Photographer
With the world of social media creating a never ending sea of content, standing out as a travel photographer is essential.
It’s not about risking your life in order to be the only one doing it, it’s about creating a consistent quality within your portfolio.
You want people to see a shot and say ‘I know who photographed that’, or at the very least to view your portfolio be wowed by your unique perspective of the world.
Creating a niche style is about developing a vision that portrays your view of the surroundings. Some people specialise in drone aerials, others underwater photography or travel portraits. Whatever your niche is, stick with it and find a way to stand out within the arena.
Putting together a list of things your interested in, then brainstorming a way to creatively capture them will kick things off. You’ll soon notice the way to capture them might blur together and become very similar, your niche style will then take on a mind of it’s own.
Developing a niche is a matter of trial and error. You want to be passionate about your niche and have a real desire to continue with it. The more effort you put into creating, the more results you’ll see appearing professionally.
Read more – ‘My current creative obsession’
4. Build a Portfolio
I’ve read before that it takes at least 10,000 photos before you can really start to call yourself a photographer. I don’t agree.
Building a professional portfolio is about compiling a collection of your best work, whether that was your first shot or 6,428th shot.
A portfolio is your go to link for sharing your work. You want it to highlight what you do and how good you do it.
It can be in the form of a PDF booklet that’s ready to email clients or publishers, an online gallery or you can use sites like Flickr or 500px.com
A few tips on creating a great portfolio: – Keep a folder of your best shots and curate regularly – Be your own worst critic – Sort images based on destination, colour or style
Having a folder of your best shots for each destination will allow you to quickly access them when you need to grab them for a client.
Personally I have a PDF booklet that contains just 20 of my best shots that I believe represents my style of photography. I find it’s quick for people to browse through and it gives them a good feel for what I shoot and what the results can be if we were to work together.
Online portfolios are also great as they can be nice and easy to link to in forums, social media and emails giving people fast access to your work. Just be sure to curate your online portfolio as much as possible, quality over quantity!
No matter how much we’d like to believe people get stuck spending hours gazing in awe through our portfolio, the reality is it takes a few seconds for someone to make a judgement. Make those few seconds count and wow them from the beginning.
Oh and don’t forget a logo.
Having an identifiable logo will help visitors to your portfolio relate with your work whenever that see the logo. Have you seen professional photographers sign the bottom of their printed images? Well to me that’s the perfect logo for a photographer and there’s a website that provides you with exactly that.
Photologo is a service that creates handwritten logos for photographers, meaning if your handwriting isn’t super fancy and calligraphic (is that a word!?), they’ll do the hard work for you and provide you with a set of files to use throughout your portfolio or to print on images!
You’ll find a gallery of sample logos on their website – Photologo
5. Creating a Website or Blog
Separate to having a portfolio, publishing your own content on a website or blog is a fantastic way to showcase your abilities.
By creating your own space online you can publish your content in the way you want it to be seen. Fancy becoming a photojournalist? Publish articles in that style on your own site!Having a collection of published articles, whether they are self published or not, is a great way to show editors and clients what you are capable of.
Even if you can’t write and only want to be a travel photographer, put together a photo feature article showcasing a particular destination or experience. Keep the words to a minimum and all eyes will be focused on your images.
With your own blog or website you have the ability to promote your unique photography style and perspectives to anyone, anywhere in the world. Tools like Google Analytics allow you to see who is checking out your site and where, giving you a great insight into how your photography is getting seen and what the most popular content is on your site!
To create your own website it’s simply a matter of registering a domain name, finding a host, signing up to a free site such as WordPress.org , deciding on a template and uploading your work. It sounds like a lot but you can get it going within a few hours.
Not a huge fan of fiddly code and want to create your portfolio NOW? Websites like wix.com or Squarespace.com actually do all the hard work for you and all you’ve got to do is supply the photos and select a layout style. I created my personal portfolio site using the Wix Premium plan which helps you obtain a domain name and they’re serves look after your site so you don’t have to pay and look after numerous subscriptions, it’s all in one. You can create a site with any layout style you like and Wix also has easy to use SEO, eCommerce and Blogging help so your site will be gracing the pages of Google in no time.
Squarespace is perhaps a little more artistic than Wix when it comes to layouts and available themes. I love the clean look of Squarespace and use it for my pri nt store , if it wasn’t so much work I’d probably transfer my entire site across to Squarespace! I currently use the Commerce plan which allows me to receive print orders and list products for sale but there are lower cost plans if you’re simply after a blog or portfolio site.
The sites I use and recommend are listed below if you’re keen to get started quickly –
All-in-One Web Design – Wix.com or Squarespace.com
Domain Registration – Crazy Domains (look for .com domains to rank better) Web Host – Bluehost (hosting from $3.95 per month) Wordpress Templates – Themeforest (look for themes with changeable features)
*Please note some links used are affiliate links to products I personally use and as such I will receive a small fee should you opt to use their services also. I’ll only ever share affiliate links to products I use for my own business and that I know work.
6. Finding Clients as a Travel Photographer
Once you’ve developed your photographic skills to the point where you believe it will benefit clients, it’s time to begin the approach.
Most travel photographers work on a freelance basis meaning they’ll have a variety of clients ranging from print media and stock libraries to local tour operators and businesses. There really is no limit to who your client can be because everyone needs images for visual marketing!
Think of all the hotel photos you browse through when choosing somewhere to stay. Someone has to take them and most of the time hotels are looking to update their image library, the same goes for tour operators and local tourism boards.
Approaching a new client can be a lot easier if you happen to be visiting that region, or if it’s where you are based. Start local and contact businesses who you regularly use or that have less than desirable images on their website…put together a proposal and they’ll more than likely say yes if it benefits them! If they’re just starting out on social media you can offer to create a library of social media images they can use over a 3-6month period to generate interest in their product/region.
Once you’ve got a client, be sure to over deliver and get creative in finding ways you can work together on an ongoing basis.

Travel Photography Stock Libraries
One way to generate a regular income as a photographer is via stock libraries. To be straight up, not all stock libraries will benefit you and are worth your time. Some pay out a teeny tiny 10cents per sale however others follow industry standards with professional pricing guidelines.
As an approved photographer on stock libraries, you can possibly get access to client briefs where you can submit your work direct to the client, meaning they’ll consider you for the project and see your profile. Otherwise there’s usually a marketplace type system for you to upload your images and have them added to collections based on themes, destinations and seasons.
Some stock libraries to check out include Getty Images , Adobe Stock , Shutterstock , Alamy and istockphoto, I haven’t had any person experience with these so can’t offer too much judgement on these.

7. Getting Published as a Travel Photographer
Now lets talk about the fun stuff. The part where you call your family and tell them to rush to the newsagent and buy every copy of the magazine because your photo is inside!
Having your photography published is one of the biggest achievements as a professional travel photographer. I think it’s a key sign that firstly, your work is worthy of publishing and secondly that you are being seen as a working professional.
Getting published isn’t actually as daunting or elusive as it sounds. It can be a matter of contacting an editor with a great story idea, self-publishing on sites like BoredPanda.com and having editors contact you to republish the article or you might find gigs on sites like freelancer.com.
Ever since I started out as a journalist 12years ago (yikes, old!), I dreamt of having my images published in Lonely Planet guidebooks. That was my goal and I was pretty narrow minded about it. I was so focused that I entered every competition, submitted author applications, photographer applications and compiled folders of my Lonely Planetesque images ready just incase they called me one day. Just to note, social media wasn’t around then…now you can totally just tag them or use a hashtag to get noticed, ha!
It took one competition entry to change my life one year after starting out as a journalist, a series of my photographs from Marrakech were published on lonelyplanet.com and the rest as they say is history. If I can do it, anyone can!
To start out, put together a list of the publications you want your work in. Take a note of the style of photography they publish, the amount of images per editorial and even go as far as checking out the photographers who get published in those magazines.
Most photographers who are published in travel magazines are regulars, they will have built up a reputation with the editor or a journalist and are someone they can call on for great shots. You want to be one of those people they call!
Contacting editors via email can be the best way to have your work seen. Be sure to know the publication before you approach them, and then send through an email with a story/photo feature idea that you believe will fit their publication perfectly. Make sure your pitch is relevant, straight to the point and time sensitive; most print publications will have issues ready months in advance so it’s worth checking their advertising cut-off dates in order to work out what type of content they’ll be after at what time of year. Pitching a summer photo feature when they’re working on winter destinations won’t get you very far!
I really can’t stress enough the importance of researching a publication BEFORE contacting them. You don’t want to be seen as unprofessional in your first email, you want to wow them and make them wonder why they’ve never heard of you before.
If you want to build a portfolio of published work before contacting the bigger publications, look at sites like Matador Network that allow you to submit stories or respond to requested articles. Or as noted above, create your own website and self-publish.
8. Build your Social Media Presence as a Travel Photographer
When I first started out in photography and journalism, social media didn’t exist. I know, crazy.
Now though, social media is actually an essential element to becoming a travel photographer and having your work seen.
It can be as simple as creating an Instagram account, sharing your work and tagging a tourism board so they can see what you’ve been photographing in the region. Simple little social media techniques will lead to future work and if you do it right, you might even find the work comes to you.
Social Media Tips:
– Curate your work, don’t publish every single photo ( read my guide to curating your own work here ) – Research destination relevant hashtags (#seeaustralia, #NZMustDo, #TravelFrance, #inspiredbyiceland) – Tag relevant brands, tourism boards or tour operators – Focus on building relationships with destinations or brands you want to work with (comment, like and share their content) – Build your social following by engaging with your audience. Ask questions in the caption, reply to every single comment you receive, follow other photographers!
Social Media Don’ts:
– Don’t obsessively tag brands and tourism boards if your work isn’t up to scratch yet. Wait until your content is professional enough to wow them. – Don’t ask for freebies if you don’t have an audience to benefit the brand, always think of how you can add value – Don’t get cocky because people start following, be humble, grateful and professional 🙂
Take a look at my post The Best 6 Social Platforms for Photographers , here you’ll find links to social platforms that work best to showcase your work.
Personally, Instagram and Steller are my favourites because they are all about the visuals and you’ll find a great community of creatives.
9. Master the Art of Self Promotion
This little section may be the most important part of all. It’s something I never realised was necessary when I had dreams of being a travel photographer and I wish someone had told me this so I’m sharing it with you all now…
You need to sell yourself.
I’m not talking about being a sell out, I mean you need to be confident in sharing your work, getting it seen and knowing who to show it to. No one is going to do it for you (unless you pay an agent!), mastering the art of self promotion will shape your career.
By using social media, your website, your portfolio, connections you meet, people you know through your mothers friend’s daughter…being confident to promote your work to anyone you meet is essential. You can even get crafty and make promotional products or postcards via sites like moo.com which allows you to print packs with multiple designs, perfect for sending out your portfolio in a fun and unique way!
A little tough love…if you aren’t confident that your work is good, why should anyone else be?
Own it. Be proud of the work you are creating and it will shine through.
Throughout your career you’ll find some people don’t take a liking to your work, and that’s totally fine. Photography is a subjective medium so not everyone is going to love every photo you take and I’m pretty sure you don’t like every photo you see on your Instagram feed either!
Knowing how to sell yourself and your photography portfolio is about finding how YOU can create the best content for a brand. How YOU can photograph the best shot of a hotel room. Whatever job you’re applying for, own your style and be confident in showing the client why they should hire you, try not to compare yourself to others too much.
Side note – I still get those anxious butterflies before a meeting, I still stumble my words when meeting a client for the first time and I still have doubts that maybe my work isn’t good enough. But masking those doubts has become easier over time and I can now put on a professional outside appearance, even if on the inside I’m shaking like a polaroid picture.
Read more – Self Promotion and Marketing for Photographers
Travel Photographer.
Just putting those two words out there so they’re really etched in your thoughts. You can do it!
So there you have it. If you’re serious about becoming a travel photographer I really think there’s nothing stopping you.
Set your goals, get studying on how to use your camera then begin creating your online portfolio to showcase your photography to the world!
While 1 in 1million may get catapulted to instant globe trotting glory, the road to becoming a full time travel photographer is long and at times frustrating. Success isn’t determined by how many likes you get or your follower count, it’s in whether or not you achieve your individual goals as a photographer.
Celebrating the small things will go a long way to creating happiness and the feeling of success in a creative industry!
Keen to learn more with The Wandering Lens?
If you’re eager to improve your photography, explore your creative talents and even perhaps work in the industry, you’ll find self-study courses and a library of eBooks and Workbooks via The Wandering Lens Store . I’ve developed online resources for photographers, creatives, dreamers, adventurers, travellers and freelancers. If that sounds like you, maybe we should connect and chat about your photography goals! These creative courses and resources bring together my 17+years of experience and lessons from working in the industry. I want to see others share their talents and get published, sell prints, find clients – to have the confidence to achieve whatever it is you want to within the field of photography. Get in touch via [email protected] if you’d like to chat about your photography!
JOIN THE FREE MINI COURSE VIA EMAIL – 3 DAYS X 3 EMAILS
Get Involved + Share Your Work!
Because social media is one of the important steps listed above, be sure to share your work using the hashtag #thewanderinglens so I can follow along on your journey! Join The Wandering Lens Facebook Group and share ideas, your work or ask questions amongst like-minded photographers! You’re welcome to leave a link in the comments section below to share your photography story and include a link to your portfolio…
– Please note there are Affiliate Links to my preferred websites/brands/editing programs in the above article. All links are for programs and sites I personally use and recommend!

Hello! I’m the founder and photographer behind The Wandering Lens. With 17+yrs experience as a professional travel and landscape photographer, all advice found on this site is from my personal experience on the road. I hope it’s useful for your own travels and would love to hear in the comments about your trips and experiences around the world.
Enjoyed reading? Share the article!
- 39 Comments
Keep Reading...
Columbia Icefields – Hiking on the Athabasca Glacier with IceWalks
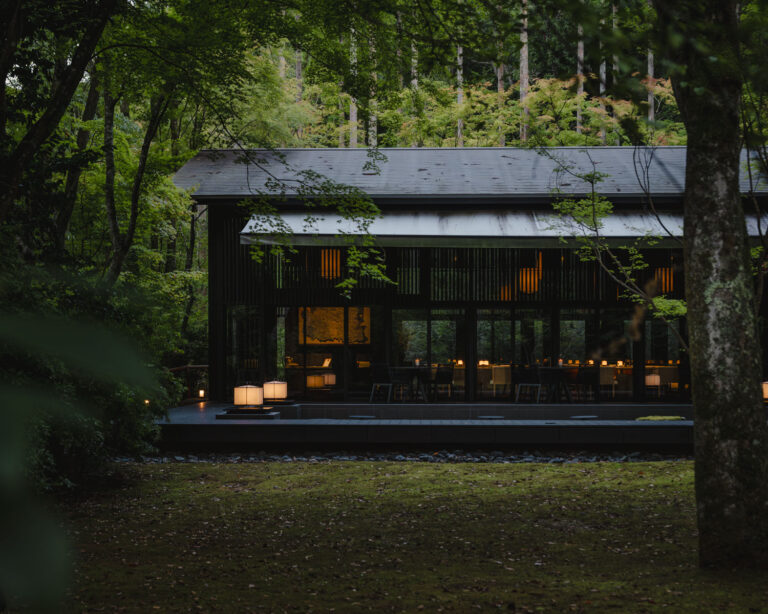
Aman Kyoto: A Tranquil Haven in Nature’s Embrace
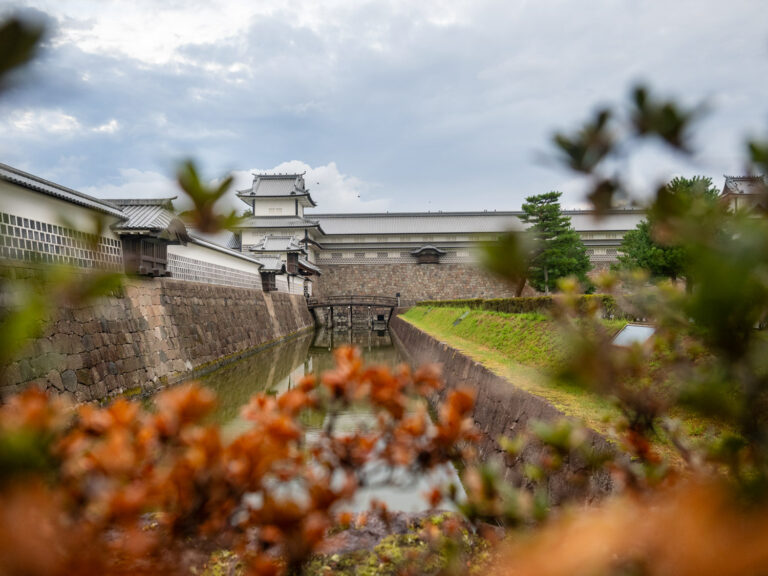
A Photographer’s Guide to Kanazawa, Japan
Blog comments.
November 30, 2016 at 11:14 pm
Thank you for sharing this, I have a wordpress site already but maybe this will help make me actually do something with it! Love your site by the way 🙂
thewanderinglens
December 1, 2016 at 11:28 am
So lovely to hear Lindsay, definitely keep going with the WordPress site, once the hard work is done it’s so easy to add content and make your work visible!
December 1, 2016 at 12:44 am
This is a great resource! It’s packed with so much info. Thanks for sharing!!!!
December 1, 2016 at 11:27 am
Great to hear Jess! Good luck with your photography 🙂
Thekiwifrog
December 1, 2016 at 4:58 am
Great article Lisa. Super informative and with a great progression.
Just a note on the side. There is a tiny typo for steller that you spelt stellar. I wouldn’t mention it normally but in that case people might get confused if they look for it.
Let me know if you are still around the South Island. We could go for a shoot or coffee.
Cheers Nico
December 1, 2016 at 11:24 am
Thanks Nico, just fixed that up…I always confuse myself into thinking it’s with an ‘a’ 🙂 I won’t be back in NZ until later in 2017, I’ll definitely let you know once I’m heading that way though, can’t go a year without photographing the beautiful South Island! Cheers, Lisa
December 8, 2016 at 8:28 pm
Wow, thanks for the Tips! These are incredibly useful to know and I have already started some of these!
After spending the last 6 years fiddling and learning photography, my wife and I are about to move to Cambridge, UK from Melbourne. We are planning to post and write about our European trips in a capacity that is more than just telling our family what we are doing with the goal of allowing our work to eventually pay for our travel. Our first real post will be up soon, looking at our short weekend trip into the Wimmera/Mallee to visit the new Silo Art in the region. My Wife is a much better writer than I am and is currently editing!
I guess the hardest thing is getting a consistent style in your photos but we’ll just keep at it!
Thanks again for the advice and the inspiration
Nick Zupancich
January 14, 2017 at 7:06 pm
Nice write-up! I’m in the middle of this journey myself. It has had it’s fair share of bumps in the road and every day is an adventure. You were spot on when you mentioned that there is no predetermined set path to follow in becoming a travel photographer. Maybe that’s why this career choice is so interesting 🙂
My work can be found on Instagram here: https://www.instagram.com/nazpicture/ and also here: NAZpicture.com
January 14, 2017 at 7:18 pm
Hi Nick, thanks for sharing, I absolutely agree, it’s definitely what makes it so interesting! Great to hear you’re on the same path, I just had a peek at your work and love the landscapes! Where are you based? Also…Mikko is adorable!!
January 15, 2017 at 10:47 am
Thank you! I’m currently based out of Colorado but will be moving into a custom sprinter van with my girlfriend in July. We will be living nomadically throughout the US and Canada after that! Should be a very exciting transition. Glad you love MIkko too! We just can’t get enough of him.
Jan Miřacký
February 24, 2017 at 9:14 pm
Another useful and very good content. This self-publishing on websites like Bored Panda is my greatest take-away from your article. Can you perhaps share how to manage your social media / business sites (like imagebrief.com) on a daily and weekly basis? What you do every day, what you check just let’s say once a week, etc. If you use any automation tools like Buffer or Later… That would be a great read without any doubts 😉
Cheers, Jan
March 1, 2017 at 3:57 am
Hi Jan, so happy to hear this article was useful. I’ll be sharing more on how I manage my photography business over the coming weeks in various articles…typically for Instagram I try to post once daily and for ImageBrief I simply respond to relevant briefs that suit images I already have on file. Keep an eye out for new posts weekly and hopefully I’ll cover something of interest to you 🙂
May 3, 2017 at 1:31 am
Hi, thanks for all the good information. For us beginners in social media, you fail to mention that it is not possible to upload photos from one’s computer to Instagram. That would be good information to know. I generally do not store my good images on my phone. Perhaps I should re-think the process.
May 3, 2017 at 1:56 am
Hi Claire, thanks for your message. That’s correct, it’s not possible to upload photos from your computer to Instagram however it’s quite popular to get around this by emailing the photos to yourself, then opening the email on your phone and storing the attached image in your phone’s library. This then allows you to post to Instagram. Alternatively there are a number of apps or plugins that allow you to upload to Instagram, most however will require payment. This is one I suggest looking at ‘ LR/Instagram ‘ but I can’t promise anything as I don’t personally use this method.
July 13, 2017 at 5:06 am
Hi Lisa, Great summary! It shows you that we travel photographers actually have to be jacks of all trades: sales agents, web designers, marketing and PR people, … and besides that we should find time to be photographers 😉 But in my opinion, this is what makes it so fun and interesting. Everyday is full of new challenges, and life doesn’t get boring. Keep up your great work, and maybe you are interested in following me along on my journey around the world as well: http://www.michaelaurban.com (you can find links to my facebook and instagram account in the top left corner of my homepage – can’t post them here as it’s considered spam 😉 ) Cheers, Michaela
July 19, 2017 at 6:40 am
Hi Michaela, Thanks for your comment! Photographers definitely have to be a jack of all trades, so much goes into each shoot before it’s even time to click the shutter! Your work is absolutely beautiful, I just had a peek at your website and Instagram. Really impressive! Where are you travelling to next?
July 24, 2017 at 8:03 am
I read in the comments that you will be on the south island of NZ later this year? I live in Alaska and will be moving there in just a couple months! Are you conducting any workshops while there? I am trying to take the next step in photography and currently enjoy shooting landscapes. It would be wonderful if our paths crossed! Cheers 🙂
Shirley Chio
June 17, 2018 at 6:49 pm
I am still learning photography using my phone camera. I am literally a beginner. Any tips for phone camera tricks?
Lisa Michele Burns
June 21, 2018 at 1:30 pm
Hi Shirley, if you’re starting out using your phone I’d definitely recommend thinking about creative composition instead of settings. Learning to see different angles and perspectives is a great way to take a step toward improving your photography.
Erin Douglas
February 6, 2018 at 3:41 am
This is a wonderful write-up. My wheels are turning and although you’ve told me just where to start, I feel overewhelmed already. I’ve been shooting for a while now, self taught, but have realzed the several areas I need to streghten, from techincal, to the business side of things. I have so many questions. Ultimately, i feel in love with travel photography when I took my first international and solo trip to the Philippines about 5 years ago. I love to just capture whats happening around me, the people, the culture, the food. And I absolutely love to talk to people about travel, inspire them to try it themselves. I just started taking myself seriously as a photographer 3 years ago. However, I feel lost on how to get the type of clients I want and the type of work I want. In the mean time I just shoot for me. who to reach out to, how to find them, what to say. And putting together that PDF portfolio. Are my best my best? and so on. This one page has already helped and Ill be reaching out to you via email. in the meantime here are some links to my work.
@aphotochick (IG): https://www.instagram.com/aphotochick/
http://www.erin-sha.com
Thanks again
David C. Hintz
February 10, 2018 at 2:11 pm
You have provided a great deal of information on a subject I am really interested in. I will be researching the websites on this list. I have started my own website at http://www.davidhintzphotography.com , I have sold some of my photos on microstock websites and now looking to sell directly from my own website. Thanks for all your work on this topic. I would be interested in your comments on my site if you had the time to look at it.
June 17, 2018 at 2:36 pm
This is a brilliant article on how to become a travel photographer and probably the most complete guide out there. I have read a lot of guides on how to take better pictures but there are very few that actually teach you how to go beyond that.
To be honest, I do not think I will ever make it as a travel photographer. I love travelling and I love capturing my adventures in pictures. And I know that I have some decent ones, but selling them seems like a daunting task. I think I might be better off as a travel journalist, to be honest, if only because that’s an area where I am more confident (and in a way, this article applies to becoming a travel journalist as well). I have, however, tried selling pictures through microstock sites. Getty Images, Shutterstock and Adobe Stock are the ones I have uploaded the highest number of images to. From my experience, these websites require you to spend a long time creating hashtags and correctly labeling your photos for very little reward. It is great because once the work is done, you can earn money forever. But chances are high that you will only get a few cents, if any at all. I think if you are serious about being a photographer, this one is not an option to consider.
June 26, 2018 at 2:24 pm
I am grateful to have the tips from Wanderinglens, the guide really helpful and give me lots of inspiration to get started become a travel photographer
Balamurugan.M.G
November 8, 2018 at 6:30 pm
Iam really impressed with the knowledge that you shared through your experience. Your guidance is awesome. Thanks a lot for your valuable information.
Michael Wahl
December 1, 2018 at 10:30 am
Love your site! How do you go about not needing work visas to do photography for tourism boards, hotels etc? I see a lot of travel photography in foreign places, but in most countries its illegal to work there and next to impossible to get a work visa as a photographer. Any advice on reaching out to brands/hotels/tourism boards etc overseas without finding myself being deported for working in their country?
Andrea Prunty
January 30, 2019 at 5:20 pm
After reading your article, it gotten me even more inspired to take up photograph again and back to actually using my degree for once (digital arts) and become a traveling photographer. Thanks, for getting me motivated and remember why I’ve became a art major in the first place.
January 30, 2019 at 5:21 pm
Oh my gosh Andrea this is the most amazing comment! I’m so happy my article inspired you back into the world of photography. Best of luck with your adventures, if you’re on Instagram or have a portfolio, feel free to leave a link so people can follow along! x
September 26, 2019 at 7:51 am
Hello Lisa,I’m so thankful for the break down on becoming a travel photographer.Your insight touch my soul.I will follow all steps on becoming the best photographer within meI’ll ,follow your daily blogs and FaceBook groups.I sometimes get caught in photo-block(something like a writer get when writing a book).I just created my first ever webpage,please stop by and leave a feedback.
Marco Joe Fazio
October 21, 2019 at 9:42 pm
I love photography and I captured lots of pictures while traveling in my life. You can also check my work by clicking on the link.
January 14, 2020 at 1:08 am
This is amazing blog, I learnt a lot about how to click mesmerizing pics while on travel.
Sara Sangalli
February 7, 2020 at 4:52 am
Thanks for the valuable informations, as a travel photographer wannabe myself I’ll try my best to use those suggestions in my path to “become a travel photographer”. Great article, thanks!
Emet Martinez
February 18, 2020 at 4:04 pm
Just wanted to thank you for this very informative guide and the inspiring images you’ve created. I’ve been following you in IG for about 2 yrs now. Wishing you all the best and hope to bump into you in Kyoto one of these days. Cheers!
March 26, 2020 at 11:37 am
Hi Emet, thanks so much for your lovely comment! Apologies for only seeing it just now, do you live in Kyoto? If so, you’re very lucky, it’s one of my favourite cities!
Talia shakespeare
April 24, 2020 at 11:07 pm
I’m 16 and i am trying to figure out what to do in college in September, i honestly love photography and travelling so i was doing research on if i could do both and this was the first and best website i came across. i hope i can become a successful photographer. I’m so proud that you have been able to inspire loads of people to follow their dreams.
Ranjay Mitra
May 26, 2020 at 12:33 pm
Very nicely written. It has to be a passion to keep doing, Ive seen many people who take up “travel photography” have this idea that once you get a camera, you have people flooding you with money to travel and get caught up in the dreams of becoming popular overnight. Selecting the right project, imho, is very essential to succeed in travel photography.
photographer
July 5, 2020 at 10:58 pm
Have been struggling to start my travel photography journey. I made a plan recently but with the COVID-19 situation all that planning is of no use anymore. What are your tips for travel photographers post the pandemic? How do you think this will affect them
July 6, 2020 at 7:32 pm
Thanks for your comment, Covid-19 has definitely made it difficult for those of us working in the tourism industry whether it’s in photography or hospitality. Now is definitely a time to assess your skills and try to create a plan for diversifying your income as a photographer. Who knows when travel will be possible again like it was before so it’s important to work on new ways of not only fulfilling your potential but for developing creative ideas and planning for the future. I definitely don’t think it’s all doom and gloom, challenges will always present themselves and it’s those who can adapt who will succeed. I wouldn’t throw that plan away just yet 🙂
Traveltourists
January 27, 2021 at 5:24 pm
That’s exactly what I was looking for, saving me a few hours of research, Thanks for sharing this for travelers.
Love Photography
June 26, 2021 at 9:51 pm
Very nice post and well explained, the main reason why i became a photographer is because i love it. i enjoy every single day at work, polishing my skills and learning about human nature
Leave a Comment Cancel Comment
Looking for something….

A Sincere Guide on How to Be a Travel Photographer
- By Nicholas Tinelli
- July 14, 2020
- Last Updated: May 19, 2023
How to Be a Travel Photographer and live off your passion?

This idea fascinated me since I was young, when I dreamt among the pages of National Geographic with the images and stories that led me to live exciting imaginary adventures in faraway places.
I’m sure that, If you’re reading this article, you probably feel the same emotions and want to develop your passion and go one step further as a Professional Travel Photographer .
I’ll tell you a secret: it’s not as simple as many people think, but it’s not impossible either. It is absolutely worth it and in this guide I will explain step by step how to get results and improve over time , with dedication and patience.
My photography journey began a long time ago, first as an amateur, in my spare time, and now as a professional.
It is a process of personal discovery, still in progress, that keeps generating emotions and changing my life, allowing me to combine my greatest passions.
After this brief introduction, we are ready to dive into the first part of this guide on How to Be a Travel Photographer . If you are not interested in reading the entire guide, use the table of contents below to move between topics.
What is Travel Photography?
Travel Photography is a very broad genre, including landscapes, portraits, wildlife,culture, food, architecture, documentary/reportage, events, and advertising related to the tourism industry.
From a more human point of view, we can consider it as a means to share moments, stories that tell the essence of a place , of a culture , that transmit emotions and take us on an imaginary journey.

Can you make a living from Travel Photography?
Of course, even if competence is higher than in the past and there are already many images in circulation, there is always a need for new material and creative people in the world.
The possibilities are two:
- Work for someone (for example a magazine or an agency);
- Start as a freelancer, independently.
In my case, I decided to opt for the second choice and build my own space.
For some time now I have been dedicating myself to travel stock photography, as a contributor for AWL Images , obtaining good results and publications.
I also began to propose myself with Photoshoot Buenos Aires , a portrait service for travelers, and started teaching through courses and tailor-made experiences in the capital with Photo Tours in Buenos Aires .
In addition, I offer Editorial & Commercial Photography services for hotels, resorts, personalities and tourism institutions.
All this with the warm support of my students and people close to me, which is fundamental on a mental plane and important to receive constructive feedback and continue to improve.
The key to growing your business and become a Professional Travel Photographer is first of all to diversify your services (staying in the same niche), without expecting everything to work at the beginning and setting yourself short term goals .
Slowly you will understand what works best and what doesn’t. The important thing is that what you do reflects you and your personality.
At first it is never easy, there is a lot to learn and some expenses to take into account, but if you stick to the guidelines that I will show you next, result of my personal experience, you can live this change with more awareness.
How much does a Travel Photographer make?
It is not easy to define the Travel Photographer’s salary in numbers. It really depends on the type of service you offer, the connections you manage to generate, how you promote your work, and who supports what you do.
If a great name like National Geographic sponsors your work, the results are guaranteed.
The Characteristics of a Travel Photographer
Usually, a Travel Photographer has certain characteristics that serve to deal with situations that can be very different from those in which one is accustomed to the everyday environment and help to relate to others.

Respect and Humility
The journey often involves meeting with situations of extreme poverty and people willing to offer us the few things they have to show hospitality.
As well as cultures and societies that live differently from us, with aspects that we may not agree.
The Travel Photographer must be able to approach these realities with humility and respect , not only because it is the right way to relate to others, but also because this attitude will open up many more possibilities.
It is a sign of great nobility and you will get the gratitude of the people you meet along the way.
Mental and Physical Strength
The Travel Photographer must get used to moving for hours and hours with different means of transport, on planes, trains, or a nice Tuk Tuk!
You will often have to complete the work in a limited time, without being able to take any breaks. In addition, you will have to deal with long queues, temperature changes, language barriers, health problems, etc..
All of which can be stressful in the long run.
For this reason you need a good physical and mental preparation , which will help you to live your profession with serenity.
Good Language Skills
A minimum knowledge of languages helps you move around better.
For sure, You could always rely on a translator, but many times the budget doesn’t allow it, so it’s convenient to be able to ” arrange ” in some other way.
Already with English, Spanish and French you will cover a good part of the world and on occasion you can rely on a local guide, which in any case, especially when it comes to ethnic photography, is always an ideal choice to approach another culture.
See also: Ethnic portrait in Travel Photography
Flexibility and Reliability
Get ready to cover a traveling event, a documentary assignment from a magazine, or any other task with a last-minute change.
In real life you get as organized as possible, but the unexpected is always around the corner.
Especially if you work as a freelancer , it won’t be enough to be a good photographer, you’ll also have to show flexibility in your schedule, reliability in the field and in the delivery of work.
It’s a quality that every photographer should have, not just a travel one. I’ll never get tired of repeating it, try to be creative.
There is always a high demand for original content and creativity is the most important skill , which also depends on your preparation and inspiration.
See also: 6 Helpful Exercises to Improve Your Photographic Eye
Get Up Early!
It’s not a quality, it’s a suggestion. Local life starts before dawn and you don’t know how many things you’re missing by staying under the blankets. Get used to getting up early and taking advantage of the best light hours .
See also: 10 mistakes that a travel photographer should not make
Below you will find a list of 16 steps , consider it as a “checklist”. Print it out and review it over time, keeping track of your progress.
There are many paths you can follow to Become a Travel Photographer and each one will add something extra to your experience.
Behind the success there is above all a great effort, dictated by passion, study, practice and experience .
A trial and error that depends on you, as well as other factors: your geographical location and the working relationships that you will develop along your career.
Step 1 - Ask Yourself Some Questions
What do I like? What kind of Travel Photographer do I want to be?
To understand How to Be a Travel Photographer and answer to these key questions it is important to move towards a choice that is a result of your personality, of what you really like.
Maybe you want to work as a Humanitarian Photographer or Photojournalist and cover events in difficult areas of the planet to tell a story.
Or maybe you want to photograph for large hotel chains or tourism-related businesses, be a Wedding Destination Photographer or even just share your passion with others.
There is an important difference between one case and the other, and you will have to take it into account from the beginning.
See also: Inspiring Interview with Gavin Gough, Humanitarian Photographer
Don’t You Have a Clear Idea?
Start working on what you’re most passionate about and gradually, with experience, you’ll understand what is the right path for you .
Step 2 - The Travel Photographer Gear
The weight of the equipment is a key element for the travel photographer. Less weight, less effort, and easier mobility when travelling.
The difficulty lies in maintaining a good balance between weight and quality, since in general, especially in optics, “weight” is also a synonym for quality .
Where do we store the equipment? What is the ideal bag for a Travel Photographer?
In my case, I’ve been traveling for a long time with a “Think Thank” photo trolley, custom-designed to be carried as hand luggage and indispensable to transport all the equipment I need.
Once at destination I choose only part of the necessary gear according to the type of activity I am going to do , placing everything in a Lowepro backpack, well-padded and with rain protection.

The type of equipment clearly depends on what photos you want to do.
If you’re into documentary photography, for example, you might want to go for a Mirrorless camera with a short focal length lens (like 50mm), a combination that’s not invasive when approaching people.
If you’re focused on landscapes and sell prints instead, you’ll probably need a camera with a large sensor to maintain high quality, a carbon tripod, solid and lightweight for travel, at least a wide-angle lens and a good set of ND filters.
Study your equipment and get to know it well to get the most out of it on journey.
If you’ve just dived into the world of travel photography, check the article below about the essential equipment to get started .
See also: Essential equipment for getting started with Travel Photography
Are you worried about safety during the trip with expensive equipment?
You’re right to think so.
In a place you don’t know you’ll have to be even more careful, ask the local people for advice before you go and perhaps insure your equipment .
I’ve been relying on World Nomads for a long time, which offers good coverage for photographers.
Step 3 - Learn Travel Photography
This point is often overlooked. The truth is that you never stop learning and even the best photographers always need to study and update in order to remain active in an ever-changing market.
Personally, I started training myself with photography manuals, on my own, by reading. Then, over time, I realized courses with other photographers, even those not related to travel photography, to have a wider vision of the topic.
I especially like to imagine, looking at a picture, what the photographer did to get it and I don’t give up until I understand it.
To date I continue to study, learn and teach through my courses, to try to convey my personal experience . From travel photography, to color theory, post-production, composition, portrait, the study of light. etc.

Study takes time, but it is fundamental, as well as practice . If you can’t travel that much, start photographing locally , maybe some festivals, portraits and landscapes around home.
You will be able to put what you have learned into practice and get to know your equipment better.
TIP : Taking part in a Travel Photography Workshop will exponentially increase your skills, with the practice, experience and support of a professional photographer. An amazing experience to learn photography.
Step 4 - Get Inspired By Other Travel Photographers
See also: 8 travel photography books to get inspired.
This will also help you realize what kind of travel photography you are looking for.
The Travel Photographer Job requires commitment and sacrifice, but first of all passion and inspiration for what you do.
The photos will speak for you!
Step 5 - Develop Your Own Style
To learn How to Become a Travel Photographer you will first have to understand what you like. That’s why it is important to study the work of other professionals.
Gradually decide how you want to show yourself to your audience : through the use of color or black & white, or maybe you want to make your portraits known only through the use of natural light, or on the contrary, with studio lights.
Whatever the case, this choice will help others to recognize your photos more easily, thanks to a Unique and Particular Style .
See also: Black and White vs Color Photography
Therefore, the study of technique and post-production is fundamental, in order to maintain a homogeneous work.
TIP : don’t worry so much about trends, they come and go. Do what you like, follow your own style.
Step 6 - Produce Content, Build An Effective Portfolio
To generate interest in a client and start earning money you will first have to produce content related to what you want to do and then organize it into a portfolio .
Consider it your business card. You will often need it and it will demonstrate, at least at first glance, your experience and professionalism as a photographer.
The portfolio represents the best of your work , choose a few images, but powerful. Try to be critical and improve it over time. Personally, I decided to divide it into themed galleries , but you can present it in different forms, depending on your style.
Nowadays it should be enough for you to present your portfolio in digital format, through a website or Instagram . If necessary, in any case, you can always create a physical copy, printed on paper.

In order to be able to improve your travel photography portfolio over time, try to keep your photos organized , as the number of images has increased considerably with digital photography and you may find it difficult to retrieve what you need when you need it.
TIP: when travelling, take a wide selection of your portfolio with you on an external drive or in the cloud.
It’s possible that a client will get in touch with you and need a quick response, and it’s convenient to have more material with you to show them before they look for another photographer.
See also: How to Build a Photography Portfolio
Step 7 - participate in travel photography internships.
You need to produce new content. You already photographed a lot around home and now, you feel ready to expand your vision.
You’re on your way!!
An interesting idea to grow your portfolio and at the same time live a wonderful experience abroad is to participate in a Travel Photography Internship .
In this way, you will be able to participate in different projects worldwide, ranging from community volunteering and conservation of flora, fauna, and environment, to teaching, human rights, and photojournalism.
Here are some example of companies that organize this kind of activity:
- Global Nomadic
- African Impact
- Global Leadership Adventures
- Intern Abroad HQ
- Frontier Gap
- Projects Abroad
You will be part of a team, meet new people, acquire new skills and make a great contribution to the community.
There are many projects and destinations available. Check carefully what best suits your needs and interests . You will approach situations that were previously just a distant dream.
It will be the beginning of a new adventure and an important step in your career as a professional travel photographer.
Once you have collected the material you will have a more solid portfolio and more chances to be accepted in large multimedia content agencies.
Step 8 - Create a Logo
A beautiful logo identifies your business , has an impact on the public and helps to show your professionalism .
Try to be creative and if you can’t design it yourself, rely on an experienced freelancer and not on a generic logo design service.
Step 9 - Build a Website
A simple and clear website, not only improves your presence as a professional , but is also the ideal way to show your portfolio .
Try to take care of the aesthetics, says a lot about you as a photographer .
Depending on the commitment you want to put into it and your interest in getting results, you will be faced with important choices:
What system do I use to build it?
Personally I chose WordPress (the .org version, be careful! wordpress.com is not the same thing), a development ecosystem that allows me a good dose of freedom .
I can do most of the “routine” work on my own and rely on a developer if I need to do something more complex.

Other platforms, like Wix , Squarespace or Weebly allow, through a “drag and drop” system, to build a website easily, but in reality the limitations are many and at a certain point you find yourself forced to a change.
Perhaps with the need to implement a function that is not yet available or continuous problems with the layout.
The third option is to rely on a web developer to build it directly in code and possibly a designer , two fundamental figures if you decide to take this path.
It may be a bit more expansive, but you will certainly get a completely customized job.
Where do I buy the domain?
Choosing the hosting for your website
Think about SEO
SEO (“Search Engine Optimization”) is an important factor if you want your customers to find you in organic form by entering keywords related to your business on Google or other search engines.
The choice of platform you use to build your site will also affect SEO. The advantage of WordPress.org is that you can optimize your OnPage SEO easily using plugins like Yoast or RankMath .
TIP: Search “Travel Photographer Website” on Google to find inspiration from the work of other professionals in your own niche.
Step 10 - Improve Your SEO
Now that you’ve got yourself in the game with a website, you’ll have to think about improving your SEO .
You can do this for example by creating valuable content for your blog or developing your social networks .
There’s a lot to learn on the subject and you’ll find interesting articles to start with in Yoast and RankMath’s blog.
Step 11 - Develop your presence in Social Media
Never before have social networks been so important. Don’t exaggerate trying to run many social profiles .
I recommend you to invest your efforts on Instagram and YouTube as a professional photographer. They’re two channels that can give you more results.
Remember that achieving success on social media is not easy, but it’s worth a try.
Instagram Tips:
- Don’t rely on services that promise paid followers, it’s an unfair and useless technique that doesn’t produce results. Instead, try to get them to follow you for who you are. You’ll have fewer followers, but obtained organically, of greater value .
- Search among your “Competitors” and find relevant “Hashtags” with your niche that can better position you with the Instagram algorithm.
- Reply to comments and engage with people related to your niche to build relationships.
- Tag travel and photography brands , as well as tourism agencies.
- Use the “Geo-Tag” in posts and stories.
- In addition to images, using quality video content in the feed and stories can increase your chances of success.
- Take care of your “Feed” style and optimize your “Bio” and “Highlight Stories”.

Don’t get obsessed!
Social Media requires great effort, just try to do your best and, if you really want to do things properly seek the advice of an experienced freelancer who can give you useful tips to organize your social strategy .
Step 12 - Promote Yourself, Search for New Clients
Now that you have everything in order and can present yourself professionally, it’s time to make yourself even more known and go looking for new customers.
Try to promote your work first among family and friends, and then with small local businesses.
Especially these days, with social networks, everyone is looking for a better way to introduce themselves to their audience and the need to renew their image.
Have a look at my commercial service for companies and individuals to get an idea.
Tip: Get a certification on Google My Business (you can do it even without having a physical direction).
Optimize your account properly to improve your local SEO , allowing more customers to discover your business. In addition to this, you can also register in some photographers’ directories.

Work on your website, SEO and social networks should already give you results and visibility.
If in any case you feel that this is not enough, you can promote your business through advertising on Facebook, Instagram, Youtube or Google Ads .
Tip: At least at the beginning you should rely on the advice of an expert in Digital Marketing . This way you will avoid throwing money away.
Optimizing a campaign without the necessary knowledge is not easy.
Step 13 - Enter a Travel Photography Contest
It takes time and concentration, but participating and achieving results in a travel photography contest can increase your visibility exponentially , with all the benefits that follow.
Photo Contest Insider is a source where you can stay up to date with the latest news from the competition front.
Tip: Read the rules well and make sure that the contest organizers respect the rights of the photographer and that by giving your consent you do not allow a perpetual and free use of your images.
Step 14 - Get Your Work Published
I remember the first time one of my pictures was published in National Geographic . As soon as I heard about it, I exploded with happiness.
As a photographer, there is no better recognition and it means that your work is considered professional .

Getting a publication is a great achievement and possibly the first of many.
Unless you work directly for a magazine or an agency, as a freelancer you will have two paths to follow to increase your chances of being published :
1. Contribute to Stock Agencies
Participating actively with your images in stock agencies will take up your time, you’ll need to make sure you offer quality images and “tag” them correctly.
Over time you will get important publications that will help you promote your business .
There are many image stock libraries on the market.
Generally divided into:
- Premium Stock

2. Pitch a Story to a Magazine
This is another effective method to obtain publications, although it takes a lot of time and preparation. In this case you will need to create a direct contact with a journalist or editor . So try to be prepared, friendly and professional.
Also keep in mind that a publisher receives a lot of emails a day and yours may get lost for some reason. Insist without exaggeration, let some time pass in the case and send it again. If at the second chance you don’t get a reply, forget it.
You’ll have to put together a sellable story , that includes text and photos. If writing is not your strong point, get help from a professional copywriter , you’ll find plenty on Fiverr.
Tip: Do an accurate research . This means reading other articles published by the magazine carefully, analyzing its style and the audience it addresses.
Take a look at Wanderlust Magazine’s guidelines to better understand how to move and create important and lasting working relationships.
Step 15 - Sell Prints
There’s nothing like seeing your artwork printed . Selling prints can help you earn more money and make your work more popular.
You can do it in different ways. Start by offering this service to family and friends, and then you can do it through your website and social networks. Have a look at my Fine Art prints page to get an idea.
Another option is to offer your work to local galleries , it will help you to create an important space as a photographer and artist .
Step 16 - Teach and Organize Travel Photography Workshops
Once you have reached maturity as a Travel Photographer , you will also be ready to pass on your knowledge and passion to others.
You will be able to teach and organize courses in person and online, and form a group that will grow over time.
You can also provide Photography Workshops.
I personally offer Travel Photography Workshops in Argentina . This allows me to travel even more, produce more content and give a unique experience to other enthusiasts like me.
TIP: There are already many groups of photographers who organize this kind of activity on the market, try to propose yourself showing them your solid experience , they might be interested in expanding their proposal.
See also: Travel Photography Workshops: Guide to the Best Choice
Step 17 - the importance of storytelling.
You have reached the final step of this guide on How to Be a Travel Photographer . You almost made it!
Last but not least: the importance of visual storytelling. A travel photographer must be able to convey emotion , through the use of composition, light, colors, and telling a story, involving the public .
It is the soul of this work and gives meaning to what we do.

Take example from photographers who dominate storytelling and capture the attention of their audience, such as GMB K Akash , who tells with extraordinary images the harsh street reality of Bangladesh or Ami Vitale , who has long been dedicated to the conservation of rhinos in Africa.
If you can communicate with your audience not only with images, but also through your experience and use of words, you will have achieved the greatest of results .
How to Be a Travel Photographer - Final Notes
Finally, I must say that I enjoyed writing this guide on How to Be a Travel Photographer , which I hope you found useful.
The references to external sites and photographers have no commercial purpose, they are the result of my personal experience and if I have included them is because I believe they are really valuable .
The Travel Photographer’s career is very attractive but certainly not easy to pursue. Think of it this way: you’re following your passion and it’s not a waste of time .
Don’t be in a hurry, try to understand what you want, put into practice the points I have described gradually and above all: Have fun on the way!
On my side, I will continue to keep this guide updated over time, so that I can always share relevant information and hopefully add a few more travel photography tips.
If you have any comments I’d love to read them.
Stay up to date with the latest articles and news from the blog.
- guide , travel , travel photographer , travel photography

Nicholas Tinelli
2 thoughts on “a sincere guide on how to be a travel photographer”.
I’ve been following your blog content with interest for a while. Until now, I have always been photographing as an amateur, but I would like to be able to pursue a professional career. Thank you for providing this guide and your experience. I was wondering, what camera and lenses do you use?
Thank you, Thomas, for taking the time to read it and leaving a comment. I really hope the guide will be helpful. Actually, I’m photographing with a Canon 5DSR, a great camera body. As for the lenses, I don’t separate myself from the 24-70 mm and the 70-200 mm, two optics that I always carry with me on travel.
Leave a Comment Cancel reply
You might also be interested in..

8 Travel Photography Books to Get Inspired

How to Build a Photography Portfolio

3 Movies with Extraordinary Travel Photography by Bernardo Bertolucci and Vittorio Storaro

5 Essential Travel Photography Apps – Updated 2021

Ethnic portrait in Travel Photography

Triassic Parks: What to Photograph in Talampaya and Ischigualasto
Welcome to my travel photography blog.

I’m Nicholas, a Travel and Portrait Photographer with a passion for writing.
In this blog, I share articles about Travel Photography, my personal experience, tips, and information about the activities I organize.
GET CONNECTED!

+54-9-11-27289416
© Nicholas Tinelli, 2016 - 2024
- Exhibitions
- Photo Tours in Buenos Aires
- Portrait Photoshoots
- Editorial & Commercial
- Argentina Photo Workshops
- Fine Art Prints
+54-911-27289416
Buenos Aires, Argentina
- Student Successes
- My Learning
Our Birthday Sale is ON! Click Here to Save 70%+ Off
How to Become a Travel Photographer (And Get Paid)
You can also select your interests for free access to our premium training:
If you have a passion for photography and dream of one day becoming a travel photographer, there are certain things you need to do in order to make that dream a reality. In this article, we will outline some steps on how you can become a travel photographer.
If you buy a product through one of our referral links we will earn a commission (without costing you anything). Prices last updated on .
As an Amazon Associate, I earn from qualifying purchases. Product prices and availability are accurate as of the date/time indicated and are subject to change. Any price and availability information displayed on Amazon at the time of purchase will apply to the purchase of this product.
How to Become A Travel Photographer and Get Paid Professionally
Travel photography is an all-encompassing field. It incorporates all sorts of photography styles and career paths within it. But what does professional travel photography look like? It’s incredible shots of rolling landscapes , captivating portraits , and exciting food!
And how do you get started? Like almost every unique photography style, you begin by creating! It might not make sense, but you need to get out there and start taking travel images.
Step 1: Determine if It’s the Right Photography Style For You
First, do you like to travel? How do you feel about long flights, stuffy airports, and unpacking and repacking your gear ? What about living out of a suitcase?
Travel photography is not for the faint of heart. Many see it as an easy career path, yet that is not the case. A freelance travel photographer has to deal with many demanding situations. Poor , aggressive locals, or long journeys are common difficulties. Traveling can suck away all your energy. And it makes it all the more difficult if you have limited time to capture the images you need. You may think, Oh, great… I get to go to Paris! But you may only have 36 hours to capture four different locations, leaving you little time to enjoy the area you are in.
There is a lot of stress involved… Not everyone speaks a language you know or understands your dietary constraints. It is a job like any other photography career and not always as glamorous as Instagram feeds portray it to be.
Travel photographers must be tolerant, flexible, and patient. And, of course, they must know how to work with a camera.

Step 2: Learn a Wide Range of Skills
Knowing how to use your camera is essential. Learning a wider variety of photographic skills is vital. And understanding how to capture landscapes, take portraits, or take a street scene with a long exposure will go a long way.
The more techniques you have under your belt, the better. Photography is a visual art and very hands-on, so you must show you can do it by showing you can do it.
Travel photographer education requirements vary. A photography course can help you learn photo basics and editing skills if you are starting from scratch.
But you do not need a degree to become a travel photographer. Some might find it easier to find work with a certificate or qualification, and having one might help open up some opportunities. Still, it is not a prerequisite if your images are strong and captivating.
Step 3: Define Your Travel Photography Niche
Becoming a freelance travel photographer requires a lot of hard work. Unfortunately, the photography business is highly competitive. Part of this hard work is finding a way to stand out.
Your work will reflect your vision of the world, which is unique for every travel photographer. It would help to find a way to show your viewpoint in your travel photographs. Create a signature style that stands out from your competitors.
To become a freelance travel photographer, you must define your niche. You can focus on a specific technique or subject within your travel photography journey. Ask yourself what you like to photograph the most or are good at taking pictures of, and stick to that.

Step 4: Build a Portfolio of Your Best Travel Images
A portfolio is a series of images that you have captured. It can be an online portfolio or a print version, letting clients see the kind of travel photos you take and how you take them. It is a visual guide of the photo quality they can expect from you. Without a portfolio to look at, clients will likely find it challenging to give you work based solely on your word.
If you do not have a lot of money to start traveling, you can start locally. Research photos clients are looking for, then capture them and present them. The images you do not sell could also work well on stock image libraries or websites as sellable prints.
As you start building a reputation as a travel photographer, clients will want to hire you. Keep creating a body of work until you start finding commissions, and then keep exploring. In the end, clients are looking for stunning images. Only a photography portfolio can show that.

Step 5: Create a Travel Website or Blog
Creating your website or blog to showcase your work is essential as a travel photographer. These tools will help you show your clients you are a professional photographer . Also, it makes it easier for potential clients to find you and reach out to you. Using one of these platforms will help you organize your work and display it in your preferred format and style. You can get creative and use a design that makes your content more appealing.
Creating a blog or website is very easy. You can use a free website builder like Wix or Weebly . All you have to do is sign up, select a pre-set template and upload your work. There are many travel bloggers you can follow and get tips from. Then you write your first travel blog post!
Step 6: Sell Your Images Digitally
Selling your travel photography can be a sustainable business idea. Many travel photographers sell their images on a digital platform. And it’s the bread and butter of their money-making machine.
To start, I recommend adding your images to an online platform. These will help put your name out there. Also, they serve well as a portfolio of travel photography for others to view. Potential clients are always searching for examples of work.
It might be challenging to sell your images when you start. But there are a few places to begin posting your pictures.
Stock Photography and Photo Websites
Unsplash is a free stock photography site that others can use for free content. The page is well known, so they receive lots of exposure. If someone uses your images, they can place them on their page with your link or name. You don’t get paid, but it can help spread your pictures and reputation.
You also can use a platform like 500px , where you can license your images with a few clicks. Plus, as mentioned before, you can sell your pictures through many stock photography websites . The site dropstock.io will even upload your photos to many stock websites for you!
Having images for sale on a stock photography website is beneficial. You can sell pictures while you eat, sleep, and travel by licensing your work. As the number of images grows, so does your chance to make money .
If you are still building up a reputation, you can sell travel photos through your website. That way, you don’t have to pay the commission to stock photography sites. If you build up a good network of companies or blogs that need images, they might even come to you first.

Step 7: Sell Your Travel Images in a Physical Format
You might be the kind of travel photographer who is not into the digital world. There is still a market for making money and a living from travel photography.
One way to do this is to create prints of your images and sell them through specific art websites. Etsy is one good example. Fine Art America is another one. Some travel photographers even use eBay due to the number of people who use the website and the low cost of hosting a print.
You could approach galleries when you have a series of works. There is a chance you find buyers through them. They will take a commission depending on the space. But in turn, they provide an outlet that many people have access to.
Selling Prints Yourself
The benefit of selling physical prints is that you can sell them online and in person. I have created photography books , postcards, and photo prints . And I sell them in art markets, art shops, and hostels.
You can sell prints on your own out on the street, but the money can come in dribs and drabs. There is no guarantee that you will sell enough of them to be worth your time standing out in the cold (or heat).
Unlike digital images, prints can’t be stolen or reused without your say-so. But they might need a lot of your time to produce, plus the initial capital required to print these can be high.

Step 8: Find Photography Work Where You Travel
As you travel to foreign places, you can offer your services to travel businesses. Many are in great need of images from the destination you are in. These could be travel magazines , newspapers, or local tourism boards. Anyone in the travel or tourism industry needs strong images. I have stayed in hostels for free by exchanging professional interior photographs for free accommodation.
Many businesses prefer working with the same person if they provide high-quality images. They might even commission you to capture the images they need. Be aware that this type of work may have to be under the table, depending on your visa. If you are going somewhere abroad, research opportunities each area might present. For example, a beautiful image in a tourism brochure can say a lot about a company. It can show that they will pay top dollar for images. You could also see if the area you’re traveling to has trending stock photography themes to take advantage of.

Step 9: Capture and Write Great Travel Content
The number one idea with travel photography, like any other niche, is to create strong content. Success is due to the quality, the post-processing, or the techniques you use. It could also be due to the uniqueness of your approach.
Strong content is crucial. Your images need to be top-notch if you want to sell your work through a gallery or online. The more compelling your travel photos are, the more people will search for them and your services.
One other area you can look at is photography writing. If there is an area of photography that you know about, why not write about it. It could be about time-lapse photography or your experience as a portrait photographer . The possibilities are endless.
There are many places you can do this, for yourself, a travel company, or a photography website. The benefit is that not only are people reading your helpful content, but you also get to share your images.

Step 10: Use Tours and Workshops as an Extra Income Source
When I first arrived in Budapest, I tried to find a job. I looked at all the photography possibilities I could. However, nothing seemed to fit my style, work ethic, mentality, photography style, or background. As a documentary photographer , I contacted newspapers and magazines but didn’t land a position. It was not an easy time.
So I started thinking outside the box. And I realized that, with a bit of marketing , I could host street photography workshops . It fitted with my travel photography passion and experiences. Luckily, I had a background in both photography and tutoring. It was a success, but it took a while for me to get my name out there. The good thing was that it only took a day or two to develop some free advertising online. It allowed me to start immediately.
For every travel photographer, there is something they can teach. It could be composition , landscape photography, or location scouting .

Step 11: Pick a Place to Travel and Go
Many resources can help you get started as a travel photographer. Yet, I believe in baptism by fire. If I were just getting started and had a small travel budget, I would pick a place to travel and go. That’s it. You can work out everything else once you have a place to go. You could do a documentary piece in India or capture the cloth-dying process in Morocco.
Once you have a destination, you can start researching. Learn about photography etiquette, what time the sun sets, and where to stay. Then, with a clear idea of the “where” and “what,” you can find who might be interested in the images you take.
As mentioned, if you can write, then your opportunities widen. GoNomad , for example, is always looking for stories to publish. Magazines and online publishers will pay for content because they do not need to do the research or find and commission someone else. It’s even better if you have images to go alongside your writing.
So, find paid photo projects, put some of your travel photos on stock photography websites, and sell a few physical prints—the more avenues of income you establish, the better chance to have a travel photographer salary successfully.

It doesn’t matter if your goal is to work for National Geographic or make a living from your prints and website. Becoming a professional travel photographer requires a lot of work. But don’t worry! Many travel photographers started with the basics, like a beginner’s photography course , and just went for it. You will get there!
We hope these travel photography tips help you figure out how to become a travel photographer and carve out a travel photography career!
Try out our Fantastic Photo Adventures course to learn unique and creative storytelling techniques and get out and start your journey into travel photography!
- Photographers

Going Deeper Underground: Photographer Alexey Fokin on the Moscow Metro
Moscow’s metro system is mainly known as being one of the most beautiful in the world, but photographer and actor-in-training Alexey Fokin (1995) is more interested in the gritty, human side of it. Born and raised in Russia’s hectic capital, he knows the city inside-out, and loves to go underground to capture the diverse faces of this metropolis.
Whereas most sane people would try to avoid the chaotic rush hour in the subway, Alexey enjoys getting up early, taking his camera, and capturing Muscovites making their way to work. “People are rude, everybody wants to sit down, and you’ll see faces looking like they want to kill somebody. And themselves,” he laughs, “but then suddenly, there’s a smile.” Preferring the busy stations in the city centre which connect two or more of the 14 lines, he walks through the tunnels, rides the escalators, and boards the trains – looking for scenes worth shooting.
It is hard to imagine that Alexey only took up photography two years ago. But his shots effortlessly show what life inside one of the world’s busiest metro systems is like. They display everything you expect, and more. The lovers, the cleaner, the babushka, the businessman, the tourist, the youngster, the beggar, the child. They tell you their stories with their eyes, their newspapers, their pets, their musical instruments, their flowers, their groceries, their phones, their clothes. Some with the stunning architectural backdrop of the famous stations, others in sober and at first sight unnoteworthy settings.
He likes to think of the Moscow subway as an underground metropolis in itself, as “another city with other rules”. Even though he considers it to be different from its actual streets, this subsurface universe reflects the many different faces of the capital: “Maybe poor, maybe homeless, maybe with money: all of them in one place, where they are just looking for each other, sometimes confused. So many lines of love you can find there.”
With over 200 stations and countless kilometres of underground streets, Alexey notices that people behave in ways they wouldn’t above ground. You can find people – and animals – who actually live in Moscow’s parallel world. They are smoking on the trains, drinking, getting very intimate, feeling like ‘normal’ behavioural codes do not apply to life underneath the surface.
As he is currently in his last year of acting school, Alexey is busy every day from early in the morning until late at night. But his free time is inseparable from his camera, and his intention is to make a collected photo essay about life in different metros worldwide.
Until then, he continues to show how the metro is quintessentially part of Moscow culture. He believes that everyone in Moscow has a metro story, and he does a damn good job in telling several of them through his captivating work.

©AlexeyFokin @fokinman
- TripAdvisor
- Testimonials
- Travel Tips
Moscow Metro

About Me in Short

My name's Arthur Lookyanov, I'm a private tour guide, personal driver and photographer in Moscow, Russia. I work in my business and run my website Moscow-Driver.com from 2002. Read more about me and my services , check out testimonials of my former business and travel clients from all over the World, hit me up on Twitter or other social websites. I hope that you will like my photos as well.
See you in Moscow!
- View full size
- Owner: Moscow Guide & Driver
- Date: June 3, 2012 06:12:00 am EDT
- File name: ALP-2012-0603-146-Entering-Moscow-Metro-Station-Komsomolskaya.jpg
- Tags: Russia , Moscow Metro , Komsomolskaya , Moscow Highlights , escalators , Moscow Famous Landmarks , underground palace , Moscow
GPS Location of the Photo
Google maps.
- GPS Map of this album
- GPS Map of Moscow Guide & Driver's pictures
Random image

Architectural Ensemble of Pokrovsky Convent Framed with Trees
Zoomed in view of the beautiful white towers, walls and churches with onion domes of Pokrovsky convent in the distance, shot from a high hill at Kamenka river, from a place where stands the largest of Suzdal's many monasteries, the St. Euthymius Monastery of Our Savior.
Featured Tags
- 273 photos are tagged with architecture
- 199 photos are tagged with cathedrals
- 305 photos are tagged with churches
- 294 photos are tagged with Dear Clients
- 260 photos are tagged with lights
- 1875 photos are tagged with Moscow
- 306 photos are tagged with Moscow by Night
- 194 photos are tagged with Moscow cityscapes
- 264 photos are tagged with Moscow Kremlin
- 326 photos are tagged with night moscow
- 426 photos are tagged with Orthodox Churches
- 226 photos are tagged with Red Square
- 2538 photos are tagged with Russia
- 209 photos are tagged with twilights
- 350 photos are tagged with Winter
Take one of these exciting tours:
- Moscow Highlights
- Discovering the Golden Ring of Russia
- Arts & Culture Tours
- Moscow by Night tour
Claudia Looi
Touring the Top 10 Moscow Metro Stations
By Claudia Looi 2 Comments

Komsomolskaya metro station looks like a museum. It has vaulted ceilings and baroque decor.
Hidden underground, in the heart of Moscow, are historical and architectural treasures of Russia. These are Soviet-era creations – the metro stations of Moscow.
Our guide Maria introduced these elaborate metro stations as “the palaces for the people.” Built between 1937 and 1955, each station holds its own history and stories. Stalin had the idea of building beautiful underground spaces that the masses could enjoy. They would look like museums, art centers, concert halls, palaces and churches. Each would have a different theme. None would be alike.
The two-hour private tour was with a former Intourist tour guide named Maria. Maria lived in Moscow all her life and through the communist era of 60s to 90s. She has been a tour guide for more than 30 years. Being in her 60s, she moved rather quickly for her age. We traveled and crammed with Maria and other Muscovites on the metro to visit 10 different metro stations.

Arrow showing the direction of metro line 1 and 2

Moscow subways are very clean
To Maria, every street, metro and building told a story. I couldn’t keep up with her stories. I don’t remember most of what she said because I was just thrilled being in Moscow. Added to that, she spilled out so many Russian words and names, which to one who can’t read Cyrillic, sounded so foreign and could be easily forgotten.
The metro tour was the first part of our all day tour of Moscow with Maria. Here are the stations we visited:
1. Komsomolskaya Metro Station is the most beautiful of them all. Painted yellow and decorated with chandeliers, gold leaves and semi precious stones, the station looks like a stately museum. And possibly decorated like a palace. I saw Komsomolskaya first, before the rest of the stations upon arrival in Moscow by train from St. Petersburg.
2. Revolution Square Metro Station (Ploshchad Revolyutsii) has marble arches and 72 bronze sculptures designed by Alexey Dushkin. The marble arches are flanked by the bronze sculptures. If you look closely you will see passersby touching the bronze dog's nose. Legend has it that good luck comes to those who touch the dog's nose.

Touch the dog's nose for good luck. At the Revolution Square station

Revolution Square Metro Station
3. Arbatskaya Metro Station served as a shelter during the Soviet-era. It is one of the largest and the deepest metro stations in Moscow.

Arbatskaya Metro Station
4. Biblioteka Imeni Lenina Metro Station was built in 1935 and named after the Russian State Library. It is located near the library and has a big mosaic portrait of Lenin and yellow ceramic tiles on the track walls.

Lenin's portrait at the Biblioteka Imeni Lenina Metro Station

5. Kievskaya Metro Station was one of the first to be completed in Moscow. Named after the capital city of Ukraine by Kiev-born, Nikita Khruschev, Stalin's successor.

Kievskaya Metro Station
6. Novoslobodskaya Metro Station was built in 1952. It has 32 stained glass murals with brass borders.

Novoslobodskaya metro station
7. Kurskaya Metro Station was one of the first few to be built in Moscow in 1938. It has ceiling panels and artwork showing Soviet leadership, Soviet lifestyle and political power. It has a dome with patriotic slogans decorated with red stars representing the Soviet's World War II Hall of Fame. Kurskaya Metro Station is a must-visit station in Moscow.
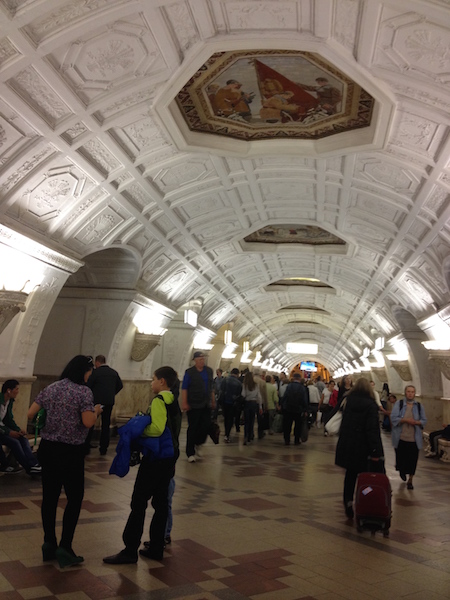
Ceiling panel and artworks at Kurskaya Metro Station

8. Mayakovskaya Metro Station built in 1938. It was named after Russian poet Vladmir Mayakovsky. This is one of the most beautiful metro stations in the world with 34 mosaics painted by Alexander Deyneka.

Mayakovskaya station

One of the over 30 ceiling mosaics in Mayakovskaya metro station
9. Belorusskaya Metro Station is named after the people of Belarus. In the picture below, there are statues of 3 members of the Partisan Resistance in Belarus during World War II. The statues were sculpted by Sergei Orlov, S. Rabinovich and I. Slonim.

10. Teatralnaya Metro Station (Theatre Metro Station) is located near the Bolshoi Theatre.

Teatralnaya Metro Station decorated with porcelain figures .

Taking the metro's escalator at the end of the tour with Maria the tour guide.
Have you visited the Moscow Metro? Leave your comment below.

January 15, 2017 at 8:17 am
An excellent read! Thanks for much for sharing the Russian metro system with us. We're heading to Moscow in April and exploring the metro stations were on our list and after reading your post, I'm even more excited to go visit them. Thanks again 🙂

December 6, 2017 at 10:45 pm
Hi, do you remember which tour company you contacted for this tour?
Leave a Reply Cancel reply
You must be logged in to post a comment.
Please go to the Instagram Feed settings page to create a feed.
IMAGES
COMMENTS
Find the right location and check the forecast to check the available light. Take images from a distance and also zoom in to capture details. Preparing your gear and thinking about your settings in advance are also essential here. Blue and golden hours might be the best time for these images.
Tip 8—Scout Travel Photography Locations with Your Smartphone. A great way to dramatically improve your travel photography is to scout your locations ahead of time. Before you haul all of your gear on a quest for the perfect photo, go out there with just a day pack and walk around soaking up the scenery.
Jessica Sarkodie shares a refreshing look at the unspoiled beaches of her native Ghana. Cedric Angeles flew to Mongolia for a peek inside the lives of the country's famous eagle hunters (and yes ...
A simple image, but one of my favourite travel photos. Table of Contents. General Travel Photography Tips for Beginners. 1) Know Your Camera. 2) Focus on the Golden and Blue Hours. 3) Plan Your Shots. 4) Learn About Composition. 5) Framing, Framing and More Framing. 6) Move Your Feet.
Travel photography is becoming a popular niche, and you're in the right place if you're thinking of giving it a try (or looking to take your current technique to the next level). Anyone can become a travel photographer in 2023, but creating award-winning, stunning images takes time and practice.
A hot-air balloon flying over a pagoda in Bagan, Myanmar.The photograph being taken by Christopher Michel.. Travel photography is a genre of photography that may involve the documentation of an area's landscape, people, cultures, customs, and history. The Photographic Society of America defines a travel photo as an image that expresses the feeling of a time and place, portrays a land, its ...
Travel photography is the art of capturing all aspects of a place to inspire others to go there. Travel photography captures and conveys the physical location, landscape, people, and culture. Travel photography educates people not able to visit a location by providing interesting and informative photographs that convey what a place is really like. Travel photography should make you want to be ...
What Is Travel Photography. Photography (Φωτογραφία in Greek) is a compound of the Greek words φως (light) and γράφω (write or draw). Wikipedia defines photography as the art, application, and practice of creating durable images by recording light. It's crazy to think that all we see when we look at photos is light.
1. Go the extra mile. Life as a travel photographer often means getting out of bed (if there is a bed) when it's dark and cold. I've gone out taking photos while wiped out by illness or after getting no sleep on the wooden floor of a hut. There have been long trudges through snow, sand and swamp, and exhausting journeys on dusty tracks.
Travel photography is a form of photography that for example involves photography of landscapes, historical buildings, cultures, and people in a specific place and destination to document a certain place and make others make to wish they were there. With a collection of travel photographs of amazing landscapes, wildlife, breathtaking nature ...
Those off-the-hip, spur-of-the-moment photographs often tell a more incredible narrative than the super-planned shots do," he says. 6. Accept uncertainty. Travel is all about unpredictability. You might stumble upon a once-in-a-lifetime shot, or you might get fogged in and rained on.
Conclusion. 1. Tell A Clear and Simple Story. A good photograph, at a glance, within seconds, the visual message should be immediately clear to the viewers. To achieve this goal, the story must be clear or easily understandable. A photograph, unlike a book, is a snap shot of a moment in time.
I'm a professional travel photographer, and I've been living the digital nomad lifestyle since 2016. I make money by working on client assignments, selling stock photography and helping other photographers by sharing my experiences on this website. I move around at my own pace (I hate fast-paced travel) and like to spend a few months ...
Travel photography takes landscapes, cities, street photography, night photography, and all other genres, and any or all of them can be travel photography if one thing is achieved, and that one thing is this: - it's not a subject - it's a feeling. Travel photography is imagery that makes the viewer want to be there, at that place, at ...
A fast prime lens - for low light conditions and creating beautiful bokeh. Supporting gear such as tripods and camera cases protect your equipment and aid in capturing stabilized shots. A lightweight tripod is invaluable, especially for sunrise or sunset photography where longer exposures are necessary.
Hello, fellow travelers and photography enthusiasts! I'm here to guide you on an exciting journey through the fascinating world of travel photography. Whether you're planning to explore the charming streets of Paris, the grand temples of Angkor Wat, or the vibrant wildlife of the Serengeti, your camera is your best travel companion. With it, you can immortalize your experiences and share them ...
Read below to find information on the following steps to starting a career as a travel photographer: - Setting Goals. - Learn Photography. - Create a Niche Style. - Build a Portfolio. - Create a Website. - Finding Clients. - Getting Published. - Build Your Social Media Presence.
Step 7 - Participate in Travel Photography Internships. Step 8 - Create a Logo. Step 9 - Build a Website. Step 10 - Improve Your SEO. Step 11 - Develop your presence in Social Media. Step 12 - Promote Yourself, Search for New Clients. Step 13 - Enter a Travel Photography Contest. Step 14 - Get Your Work Published.
Step 5: Create a Travel Website or Blog. Creating your website or blog to showcase your work is essential as a travel photographer. These tools will help you show your clients you are a professional photographer. Also, it makes it easier for potential clients to find you and reach out to you.
Moscow's metro system is mainly known as being one of the most beautiful in the world, but photographer and actor-in-training Alexey Fokin (1995) is more interested in the gritty, human side of it. Born and raised in Russia's hectic capital, he knows the city inside-out, and loves to go underground to capture the diverse faces of this metropolis.
The Moscow Metropolitan underground railway (known as the metro) is today the most efficient form of city transport. In present time, the subway system in Moscow consists from twelfth lines with total length of railways more than 300 km (190 mi) and more than 180 stations.
6. Novoslobodskaya Metro Station was built in 1952. It has 32 stained glass murals with brass borders. Novoslobodskaya metro station. 7. Kurskaya Metro Station was one of the first few to be built in Moscow in 1938. It has ceiling panels and artwork showing Soviet leadership, Soviet lifestyle and political power.
Along with the journey through the Golden Ring of Russia, every travel guide includes a trip to another interesting ring. The ring of Moscow metro stations. We have collected for you the best metro stations of Moscow. Just look for yourself at what amazing art is presented in underground area.