- Skip to primary navigation
- Skip to main content
- Skip to primary sidebar

How To Scrapbook Your Travel Memories
May 28, 2020 · 8 Comments
Need something creative to do in quarantine? Here are five ways to scrapbook your travel memories!
This post may contain affiliate links. Please see my disclosure page for more information. Thanks!

About This Blog Post
One of my favorite aspects of traveling is that it doesn't end when you come home. Scrapbooking is the perfect way to bring your travel memories to life, and an excellent way to embrace traveling from home!
I've been scrapbooking for many years now, putting together journals, diaries, binders, maps, and photo collages of my vacation memories since I was young. While I'm definitely not an artist (my drawings are absolutely terrible) , I find that scrapbooking allows me to be creative but also have a bit of fun!
I'm a firm believer that travel doesn't end when you come home. In fact, it's only the beginning. And by scrapbooking your travel memories, you can continue to bring the lessons and experiences you had in your vacations and exploring into your daily life. Scrapbooking is such a fun way to bring your travels to life, and there's no right or wrong way to do it! You are free to customize and create whatever floats your boat. I tend to go a little overboard on the stickers, myself, but to each their own.
In this post, I'm outlining five different ways you can scrapbook your travel memories, all of which are methods I use. If you're concerned that making an entire scrapbook seems a bit overwhelming, don't worry! I've listed other ideas too. You'll see real examples of scrapbook pages, materials, and tools that I use to bring my travels to life, as well as products I recommend, like acid-free tape squares (so your photos don't turn yellow over time).
Here are five ways to scrapbook your travel memories!

How to Scrapbook Your Travel Memories
Scrapbook product recommendations, invest in a commemorative travel map., scrapbooking materials & costs.
If you are planning to make one of the scrapbook ideas listed here, these are my recommendations for scrapbooking supplies, where to find them, and how much to budget.
Scrapbooking Supplies
I get most of my scrapbooking supplies at Michael's or Target , but as of late, Amazon has been helpful. In my experience, Michael's definitely has the most options for scrapbooks, paper, craft supplies, and stickers. As a teacher, I get 15% off my purchases at Michael's by showing my ID. Plus, they always have huge sales and tons of coupons, making Michael's a great place for scrapbooking supplies! Scrapbooking doesn't have to be an expensive hobby, but it can definitely become that way rather quickly. There are so many choices out there that it's easy to get carried away! If you are working on your first scrapbooking project, I recommend starting small. Only buy what you need, and then later, if you decide to make more, you can add to your supplies. Budget about $75 for your first scrapbook, which should cover the scrapbook, paper, photos, and decorative materials, such as stickers and pens.
Paper in different sizes & colors You'll want plenty of paper to create your own pages, paper to cut it out and use for photograph backgrounds, paper for written excerpts and journal entries, or even to test out certain color combinations. I recommend having 8x10 printer paper, as well as 10x10 or 12x12 scrapbook paper if you are making a large binder.
Having multiple colors and patterns give you more creative options and choices. Based on the theme of my scrapbook, I choose 75% solid colors, and then 25% with patterns. For my Ireland scrapbook, I chose the plain colors green, orange, and gold for my pages, and then added a few extra patterns with green and white stripes, shamrocks, and gold lines. Michael's has an entire aisle devoted to paper. Go crazy, my friends , but be sure to recycle what you don't use!
Markers/Special Pens/Pencils The more, the better! You'll want plenty of colors and different types. Try calligraphy pens, sharpies, markers, colored pencils, and of course, a good eraser and white-out, in case you make a mistake. I use these Faber-Castell pens and Tombow dual-brush markers on a regular basis for bullet journaling and scrapbooking, and absolutely love Prismacolor colored pencils .
Acid-Free Tape Squares Don't use regular tape for scrapbooking purposes - make sure it's acid-free to reduce brown edges and so you don't ruin your pictures. I use these acid-free tape squares that are perfect for adhering photographs to pages. They come in a dispenser that you can keep, and you only need to buy replacement squares.
Stickers (you can never have too many) Give me alllll the stickers! Even my Spanish students know about my sticker obsession - and I use any excuse to give them out! Stickers for scrapbooking are filled with possibilities, and you can easily spend your entire scrapbooking budget on them. So, stick to a few favorites - letters in a color you like, stickers that reflect where you went on vacation, or perhaps some fun flowers or outdoor items. My favorite sticker brands are Jolee's Boutique and Recollections, which you can find online from Michael's , Amazon , or Target .
Pictures For most scrapbooks, you'll want to have photographs to commemorate your travels! But before you print them out, make sure you've decided which of the following options you're going to be focusing on. At best, make sure your photos are in one place, such as Google Photos, or perhaps an SD card or album. That way, you can easily print out or upload the ones you need, and they are somewhat organized.
Five Ways to Scrapbook Your Travel Memories
Create a traditional travel scrapbook.

The first and most common way to scrapbook your travel memories is to create a proper scrapbook in binder form.
I typically use a 12x12 binder like this one with plastic page inserts where you can add pages that you design, giving you more creativity and freedom than a notebook.
The first thing to decide is organization and layout. For our honeymoon scrapbook, I chose to commemorate each destination along our 3-week road trip , rather than every individual day. You can see an example of this in the photo above for San Francisco. We spent 3 days in San Fran but I only devoted 2 pages to it, to save room for other destinations. You can choose to organize your scrapbook by day, by destination, by week, or however else you like! I refer to my travel journal to help with this part. Next, I gather the photos I want to use in the scrapbook, and print them out usually at CVS or Walmart, depending on who has the best deals at the moment. With photos in hand, I'm ready to begin!
I gather my photos, plus all any ticket stubs, paper, postcards, mementos, or other travel-related souvenirs related to the trip, and begin to organize everything into piles/pages. I'll usually do this on the floor of my living room or bedroom. Then, for each destination, I go back to my travel journal, social media posts, and personal memories to write a short "blurb" about what we did, where we went, any funny stories or travel fails, or memorable moments. I choose anywhere from 2-5 photos to include on the pages and then decide on the arrangement. Don't start taping anything down until you are positive it all fits and looks good! Lastly, I add themed stickers for decoration.
You can add as much or as little as you want to your scrapbook pages - it's completely up to you. If you'd rather not write a lot of text, no problem! Use the space for more photos. If you want to include all of your ticket stubs from the concerts you attended on your trip, add them! Have fun playing around with different arrangements, styles, and layouts. There's no right or wrong way to do it.
*Pro Tip: If you have too many pages but not enough room in the scrapbook, you can buy these extensions to give you more space, or just make a second one. I have 2 scrapbooks for my semester abroad - there were too many memories to fit into one book!
Scrapbook With A Travel Coloring Book or Another Collective Item.

After making multiple scrapbooks to commemorate our travel adventures, I was inspired to try something new when coloring books started making a comeback. To this day, I am still obsessed with Johanna Basford's gorgeous coloring books , but it was thanks to a friend I discovered the National Parks had coloring books , too!
After exploring seven National Parks on our honeymoon , I knew we were just getting started. Now, with more than 60 US National Parks to explore, I have the perfect way to honor our time in each one we visit - with a National Parks coloring book - and a corresponding stamp collector's book , too!
For each park that we visit ( As of this post, 13 total! ), I color the corresponding page with my favorite Prismacolor pencils and add it to a 3-ring binder with sheet protectors. I love this option because it requires less work, but also allows for creativity and remembering places as special as the national parks. I also collect stamps from each of the parks we visit and put into the Stamp Collector Passport Book . Is this really for children? Most likely. Do I care? Not at all.
Coloring books are an excellent option to commemorate your travel memories, especially if you want something less complex than making a scrapbook yourself.
Design a Photo Collage Travel Scrapbook.

From Shutterfly to Snapfish , even your local pharmacy or Walmart - photo books are a great way to recall your vacation memories. You have lots of design and size options and can choose a pre-existing layout, or make your own. A photo book is an excellent option for anyone who feels that making a scrapbook themselves is just too much to do - and that's totally okay!
I've been using Shutterfly since 2012, and continue to use it for photo-related gifts. Every year, I make my parents a calendar with photos from the previous year. Shutterfly always has coupons and discounts plus their site is user-friendly. This is not sponsored, just a heartfelt recommendation. I even used Shutterfly to make our wedding photo album, as seen above!
Photo albums are always a good idea - and can make a great gift or travel memento.
Make a Bullet Journal or Update Your Existing Travel Journal.

Did you keep a travel journal on your last vacation? Use it for scrapbooking!
I bring a travel journal on all of our vacations - and even needed a second one for our 6 month trip around the world last year! Dylan attempted to keep a travel journal too - but that lasted a few days before he opted to take notes on his phone instead. For shorter trips, I bring my bullet journal - my everyday place for keeping lists, notes, thoughts, and ideas. I dedicate certain pages to writing about our travels with fun markers and pens, which can sometimes even include photos, ticket stubs, or funny quotes! If you already have an existing travel journal, go back and add to it ! You can decorate with markers and pens , add photos, ticket stubs, or anything else you want to remember. With the memories already written down, you've done most of the work! All you have to do is go in and have fun making it look as pretty or creative as you like.

Dylan and I haven't hung up any decorative items in our current apartment, but I can't wait until we have a house to hang up all of our maps!
It all started with an actual map Dylan bought in 2012. It was a map of New Hampshire and Vermont, to commemorate our new hiking adventures. We flattened out the map and attached it to a bulletin board, hanging it right in our foyer. For each hike, we placed a pushpin on the map, and watched our adventures grow.
Shortly after our honeymoon adventure , I wanted to add more maps to commemorate our travels and hikes. I bought a National Parks map with a sticker to commemorate visiting each park. Later, I also added a US State High Points map as well. Our front entryway became dedicated to a collection of our hiking adventures and travels. My best friend Kristen bought me a scratch map of the world for my birthday last year, which I can't wait to hang in our home one day soon along with the others.
Maps are a perfect way to keep track of your travels, dream about future vacations, and commemorate your adventures. And they are super easy to do! Check out Mapiful for more inspiration and maps!
Final Thoughts on Scrapbooking Your Travels
After sharing all the ways to scrapbook your travel memories, I'm ready to make another one! I hope these ideas have given you some inspiration to keep the travel spirit alive. Remember, it doesn't have to be complicated. A photo book or a map are some of the easiest ways to travel from home . To quote the movie Up, adventure is OUT THERE!
Well, friends, I'm off to try and find a way to showcase the 10,000+ photos from our six-month trip around the world ! I'm not sure that there's a scrapbook big enough. Happy crafting!
Do you scrapbook?
What is your favorite way to scrapbook your travel memories?
Leave some creative inspiration in the comments below!
More Travel Tips

Reader Interactions
Cherrie Ann Balictar says
May 29, 2020 at 7:30 am
This is super old school and I love it. Usually, we just save our memories on social media or in Dropbox. But scrapbooking really makes it special. Excellent post. 🙂
Jennifer Fitzpatrick says
May 29, 2020 at 8:03 am
Thank you Cherrie! I'm so glad you like it - and yes, scrapbooking truly is a special way to bring our travel memories to life!
Edwardo Raguay says
July 14, 2020 at 4:05 pm
We are very interested in Journaling. I use three journals. How many do you use?
July 14, 2020 at 4:57 pm
Hi there! I use a bullet journal for daily journaling/to dos, plus another separate one for traveling.
Diane Schwarz says
March 05, 2022 at 10:50 am
Thank you getting me motivated to organize my travel memories! Love your post and pictures. and I am intrigued with that Instax Mini camera. Going to check that out next. Thanks so much for your information and inspiration!
March 05, 2022 at 5:15 pm
Thanks Mom! I appreciate you reading! 🙂
Gail Conder says
January 18, 2024 at 4:57 pm
Hey Jennifer,
I am a little behind in scrapbooking our travels/vacations. Do you think it is better to start with the most recent and work my way back? We love visiting the National Parks and have a lot more to visit. We are 70 and 71 so we need to get busy.
Thanks for your inspiration and great ideas.
Gail North Carolina
January 18, 2024 at 5:05 pm
Hi Gail! Love that you are into scrapbooking, how fun! It's completely up to you on how you'd like to go about it. But I've found it can be easier to focus on one thing at a time, and starting with the most recent trip since it's fresh in your mind, and you may also have some mementos/items handy. Hope this helps, enjoy!
Leave a Reply Cancel reply
Your email address will not be published. Required fields are marked *

Ideas, Inspirations & Updates
Travel Scrapbook Ideas: 11 Amazing Layouts & Themes

Scrapbooking is a fun and artistic way to create life-long memories. Not only does it allow you to make use of your time but it helps you spend your time creating something beautiful. It is also a tangible way of storing your beautiful memories in one place where you can easily have access to them anytime you like.
There are lots of awesome travel journal ideas for scrapbooks you can create that would make you excited to share your scrapbook with your friends and family. These fantastic travel scrapbook page ideas will allow you to let your creativity on the loose as you explore the artistic side in you.
5 Ways To Save Travel Memories & 6 Tips and Ideas For a Globetrotter’s Scrapbook
Here are our 5 ways in which you can save your travel memories.
- Follow a pattern that makes sense to you.
- Create travel scrapbook layouts that allow you to add items or maybe give a detailed explanation of that trip.
- Collect different items from all your trips and add them to your scrapbook.
- Have a single theme for the entire scrapbook or have different themes for different adventures.
- You can choose to have a primary colour pattern or play around with different colours.
Here are 6 tips and ideas for your travel scrapbook.
- Use some items which are inspired by a specific culture that you got to experience.
- Use the colours from your photos for your layouts.
- Use a single theme for your entire scrapbook or use different themes for different travel experiences.
- Mix your travel photos with scenic pictures, pictures taken at a distance, pictures of historical places, and more.
- Use detailed embellishments that are inspired by the location.
- Add personal touches to your scrapbook to make it meaningful.
11 Easy & Creative Travel Scrapbook Page Ideas For Travel Lovers
Here are some awesome scrapbook vacation layout ideas that you can give a try and maybe implement into your own travel scrapbook.
Life’s Moments Theme for Cover Page:
The first thing you see when you take out your scrapbook is the cover and it is very important to have travel scrapbook cover ideas for the front of your scrapbook. The best way to make it amazing is to personalize it based on you and the memories you plan on adding to it. Go for something simple or full-blown based on your taste to clearly spread out your fun life moments.
Packing List:
Create a page with a list of all your essentials and leave room for some miscellaneous items that you may curate along your travel. Keep this page detailed, but fun and easy to understand.
Treasure Trove Theme:
Get cutouts of the places you would like to visit, or if you’re feeling up to it, doodle out these locations or write out their names. Also, make a plan by creating a foot track of where you want to visit first to where you want to visit last.
Memories for Life Theme:
Stick to one theme throughout the scrapbook or have different themes for the different places you visit or the different adventures you have in all of those places. Go for this theme to celebrate the things and the people that you create memories with.
Holidays & Seasons Theme:
Have unique scrapbook paper travel themes that celebrate different holidays like Christmas, New Year, Easter, Independence Day, Fourth of July, etc. Also, have different pages that have themes of different seasons like Autumn, Summer, Winter, and Spring.
Culture of Different Places Page:
When you visit new places, you learn of their culture or traditions and how they celebrate them. Join in on this fantastic adventure and create a page dedicated to the different cultures you come across during your globetrotting.
Vacay All Day Theme:
Have a page dedicated to any interesting thing that happens to you aside from being in a new place and meeting new people and experiencing new things. Something that shows the kind of people you met, or something that reminds you of things that made you smile. Be sure to journal a few lines on the event.
World Explorer Theme:
If you’ve travelled far and wide and are a collector of a particular item, then it is something you can add to your scrapbook. Let this be another one of the many travel scrapbook ideas that you can make use of to showcase your experiences. Collect travel tickets, tag albums, envelopes, and more, and add them to your scrapbook.
Living Life & Loving It:
Whether you have a solo trip or you travel with some of your friends and/or family, celebrate all your fun adventures together or celebrate it with the people you meet along the way and take pictures and make lifelong memories and friendships.

Photo Album:
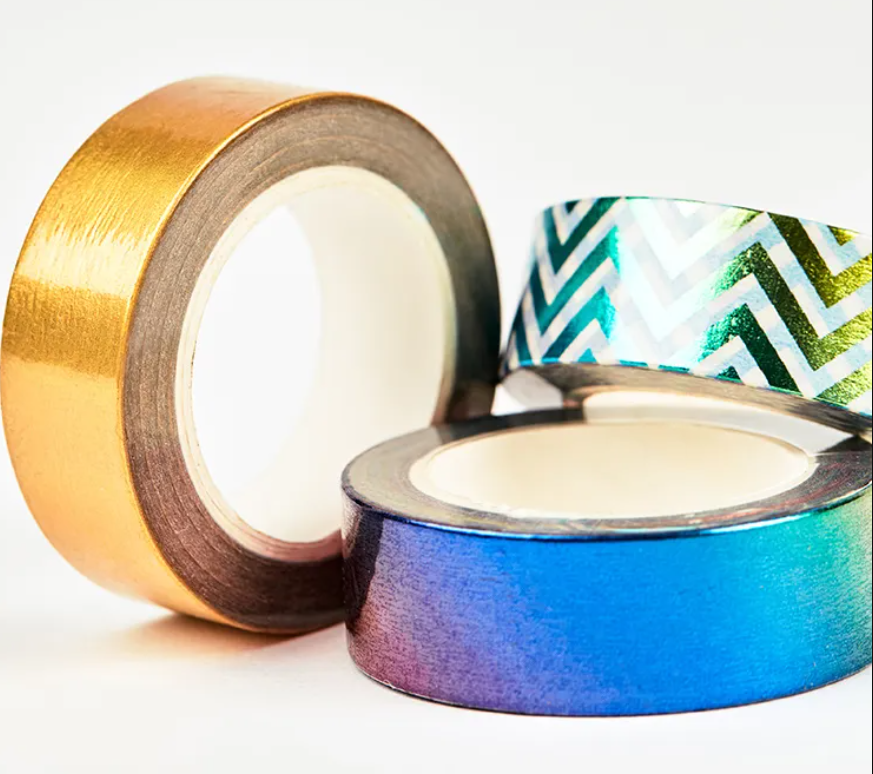
To make your work simple, get a photo album of your best photos and then style it up however you want with doodles, cutouts, markers, highlighters, kit papers, decorative tapes , and lots more. You can get your photo album with as many photos as you like and fun patterns at Zoomin. These photo albums are available in different styles and prints.
Make It A Binder:
If you’re not certain how many pages your scrapbook would need, then turn it into a binder scrapbook where you can remove and add more pages as you wish. Simply get binder rings and turn your photo album into a binder scrapbook.
We hope these travel scrapbook cover ideas have given you lots of inspiration to go out there and live your best life and then create lasting memories in your scrapbook. Celebrate every moment and keep being awesome. Check out Zoomin for different designs to create your personalized photo albums & scrapbook. There are different beautiful layouts & design options to choose from. Go out there and come up with the best and most unique travel journal ideas for your scrapbook.
Q. How do you keep your travel memories?
A: There are lots of unique scrapbooking ideas for travel pictures that would help you create fun and tangible memories of all your travel experiences in one place which you can go back and look at as often as you like.
Q. Why is a travel scrapbook important for memories?
A: A travel scrapbook is one place where you can put all your awesome memories of all your travels. This allows you to have easy access to any memory of your travel experiences right there with you.
Q. What should be included in a travel scrapbook?
A: You can include so many things like photos, souvenirs, artwork, stamps, memorabilia, receipts, tickets, and any other personal touch that would make the scrapbook personal to you.
Q. How do you make a good travel scrapbook?
A: There are different ways to make a scrapbook good and it all depends on what you like and how personal you make the scrapbook. There are lots of beautiful travel scrapbook layouts which you can use to make a scrapbook good.
Q. How to decorate a travel scrapbook?
A: Decorating your scrapbook is completely up to you because this is something you get to flip through with your friends and family over the years. So, use some of the travel scrapbook ideas we’ve put together for you and decorate it with items that put a smile on your face.
Q. What material is used to make a scrapbook?
A: Choosing the right paper, pens, patterns, binders, markers, and highlighters for your scrapbook is important.
Go on and share with us some of your favourite travel or vacation scrapbook ideas that you think we would love. Also, drop your questions down in the comment section below and we’ll be sure to get back to you.
Recommended Articles
5 trending corporate new year gift ideas.

Glam up your homes!
New launch: designer themes for photo cushions (+ special code inside).

Daily Downloads : Free Printables
Fun Travel Scrapbook Tips and Ideas
To snag your Free Coloring Pages, Printables, and other delightful Freebies , Clickety-Click on those enchanting Download Buttons or charming Images scattered across this post (mostly at the end of the posts). 🌈🎨✨ Please be patient while the pages load as a lot of these files are pretty big due to the nature of their Awesomeness and Fun ! If you don't see the Freebie you want to download, please refresh the page and that will usually work! Just a little sprinkle of magic to note: these treasures are exclusively for your personal enjoyment—no commercial wizardry allowed! 🚫💼 And if these whimsies light up your day like a cosmic disco ball, why not share the joy with your buddies and kin ? 🌟💃 Thanks a gazillion!
Note: As an Amazon Associate I earn from qualifying purchases. This means that I get commissions for purchases made through links in this post.
As someone who loves to travel, I am always looking for ways to preserve my memories and experiences. One of my favorite ways to do this is through creating a travel scrapbook. A travel scrapbook is a creative and personalized way to document your adventures, and it allows you to relive your favorite moments for years to come.
Table of Contents

Understanding Travel Scrapbooks
A travel scrapbook is a collection of photos, mementos, and other memorabilia that you have gathered during your travels. These items are then arranged and decorated in a scrapbook, along with captions, journal entries, and other personal touches. The end result is a unique and meaningful keepsake that captures the essence of your trip.
Essential Supplies for a Travel Scrapbook
To create a travel scrapbook, you will need some basic supplies, such as a scrapbook album, adhesive, and scissors. You may also want to invest in some travel-themed stickers, washi tape , and other embellishments to add some personality to your pages. Additionally, it’s a good idea to bring along a small bag or envelope to collect mementos during your trip, such as ticket stubs, postcards, and brochures.
Key Takeaways
- A travel scrapbook is a personalized way to document your travels and preserve your memories.
- To create a travel scrapbook, you will need basic supplies such as an album, adhesive, and scissors, as well as travel-themed stickers and embellishments.
- Collecting mementos and organizing your scrapbook are important steps in creating a meaningful and unique travel scrapbook.
MCS Expandable Scrapbook Album with 12 x 12 Inch Pages

Giiffu Travel Scrapbook Album

Nook Theory Travel Journal

DUNCAN & STONE PAPER CO. Travel Journal

JUNEBRUSHS Vintage Scrapbook Sticker Paper Supplies

BBwill Travel Scrapbook

ZEEYUAN Leather Scrapbook Album

ZEEYUAN Travel Scrapbook Album

Colemoly Adventure Scrapbook

Vintage Junk Journal Notebook

As someone who loves to travel, I find that creating a travel scrapbook is a unique and creative way to preserve my memories. A travel scrapbook is a personalized collection of photos, tickets, brochures, and other memorabilia from your trips. It’s a way to showcase your adventures and share them with others.
When it comes to creating a travel scrapbook, there are no hard and fast rules. Your scrapbook should be as unique as your travels. You can create a traditional scrapbook using paper, glue, and other craft supplies , or you can opt for a digital scrapbook using online software. The choice is yours.
One of the benefits of creating a travel scrapbook is that it allows you to relive your travels and share them with others. You can showcase your photos and memorabilia in a way that tells a story and captures the essence of your trip. It’s a great way to document your adventures and remember the details that might otherwise be forgotten.
As a pro tip, I recommend organizing your scrapbook by destination or theme. This will make it easier to find specific memories and create a cohesive narrative. You can also include journal entries or captions to provide context for your photos and memorabilia.
In conclusion, creating a travel scrapbook is a fun and creative way to preserve your travel memories. Whether you opt for a traditional or digital scrapbook, the end result will be a unique and personalized collection of your adventures.
As a travel enthusiast, I have found that scrapbooking is an excellent way to preserve memories and relive the experiences I have had on my trips. While there are many ways to approach a travel scrapbook, having the right supplies is essential to creating a beautiful and meaningful keepsake. In this section, I will discuss the two main categories of essential supplies for a travel scrapbook: choosing your scrapbook and scrapbook supplies.
Choosing Your Scrapbook
The first step in creating a travel scrapbook is choosing the right scrapbook. There are many options available, from traditional bound books to ring-bound albums to digital scrapbooks. When selecting a scrapbook, consider the following factors:
- Size: Choose a size that is appropriate for the amount of content you plan to include. A smaller book may be suitable for a weekend trip, while a larger book may be necessary for a longer trip or multiple destinations.
- Style: Consider the style of the scrapbook and choose one that reflects your personal taste and the theme of your trip.
- Durability: Look for a scrapbook that is sturdy and well-made to ensure that it will hold up over time.
- Pages: Choose a scrapbook with enough pages to accommodate your content. Some scrapbooks have refillable pages, which can be a useful feature.
Scrapbook Supplies
Once you have chosen your scrapbook, it is time to gather your supplies. Here are some essential scrapbook supplies that you will need for your travel scrapbook:
- Scrapbook paper: Scrapbook paper is the foundation of your pages and is available in a variety of colors, patterns, and textures. Choose paper that complements your photos and the theme of your trip.
- Adhesive: You will need adhesive to attach your photos, paper, and other elements to your pages. Options include glue sticks, double-sided tape, and photo corners.
- Scissors: A good pair of scissors is essential for cutting paper, trimming photos, and creating custom shapes and designs.
- Stickers: Stickers are a fun way to add embellishments to your pages. Look for stickers that reflect the theme of your trip, such as travel icons or destination names.
- Embellishments: Embellishments such as ribbons, buttons, and brads can add texture and interest to your pages.
- Canva: Canva is a great tool for designing custom elements for your pages, such as titles, captions, and borders. You can use Canva to create unique designs that reflect your personal style and the theme of your trip.
In conclusion, creating a travel scrapbook is a fun and rewarding way to preserve your travel memories. By choosing the right scrapbook and gathering the essential supplies, you can create a beautiful and meaningful keepsake that you will treasure for years to come.
Elmer’s Craft Bond Scrapbook Glue Set

GNILLKO Vintage Scrapbook Paper Journaling Scrapbooking Supplies Kit

Vintage Scrapbook Supplies Pack

Vintage Scrapbooking Supplies Pack – Lace 1

Vintage Botanical Scrapbook Kit

Draupnir Aesthetic Scrapbook Kit

Firbon A4 Paper Cutter

Just My Style 1500+ Stickers

Mr. Pen Craft Scissors Decorative Edge, 6 Pack

PuTwo Set of 10 Metallic Marker Pens

Collecting Mementos
As a travel enthusiast, I always find myself collecting mementos from my trips. They are a great way to remember the places I have visited and the experiences I have had. In this section, I will share some tips on how to collect and store mementos for your travel scrapbook.
Types of Mementos
There are many types of mementos that you can collect during your travels. Here are some of the most popular ones:
- Postcards: Postcards are a classic souvenir that you can find almost anywhere. They are affordable, lightweight, and usually have a picture of the destination on the front.
- Ticket stubs: Whether it’s a plane ticket, train ticket, or museum ticket, keeping your ticket stubs is a great way to remember the places you have been.
- Maps: Maps are not only useful for navigating a new city, but they also make great mementos. You can mark the places you have visited or even use them to create a collage.
- Brochures and pamphlets: Many tourist attractions have brochures and pamphlets that provide information about the destination. Keeping them can be a great way to remember the details of your trip.
- Business cards: If you visit a restaurant or shop that you really enjoyed, ask for a business card. You can add it to your scrapbook as a reminder to visit again in the future.

Storing Your Mementos
Once you have collected your mementos, it’s important to store them properly so that they don’t get damaged. Here are some tips:
- Use acid-free paper: When adding mementos to your scrapbook, make sure to use acid-free paper to prevent them from deteriorating over time.
- Protect fragile items: If you have any fragile items, such as a seashell or a small statue, wrap them in tissue paper before adding them to your scrapbook.
- Use clear plastic sleeves: You can use clear plastic sleeves to protect your mementos from dust and other debris. They also make it easy to see your items without having to handle them.
- Label your items: Don’t forget to label your mementos with the date and location so that you can remember where they came from.
Overall, collecting mementos is a fun and easy way to remember your travels. With a little bit of planning and care, you can create a beautiful travel scrapbook that will be a cherished keepsake for years to come.
Organizing Your Travel Scrapbook
As someone who loves to travel and scrapbook, I know how important it is to organize your travel scrapbook in a way that makes sense and allows you to easily revisit your memories. Here are a few tips on how to organize your travel scrapbook:
Arranging by Destinations
One way to organize your travel scrapbook is by arranging it by destination. This means that you would create a section for each place you visited and include all the photos, tickets, and other memorabilia from that location in that section. This is a great way to keep everything organized and to make it easy to find a specific memory when you want to revisit it.
To make this even easier, you can create a table of contents at the beginning of your scrapbook that lists all the destinations you visited and the page numbers where you can find them. This will save you time flipping through pages trying to find a specific memory.

Creating a Timeline
Another way to organize your travel scrapbook is by creating a timeline. This means that you would arrange your memories in chronological order, starting with the first place you visited and ending with the last. This is a great way to see how your trip unfolded and to relive each moment in the order that it happened.
To make this even more interesting, you can include a map of your route and mark each destination as you go along. You can also include photos of the different modes of transportation you took, such as planes, trains, and automobiles.
Regardless of how you choose to organize your travel scrapbook, the most important thing is to make sure that it reflects your unique experiences and memories. Don’t be afraid to get creative and try new things, such as including sketches or handwritten notes. The more personal and unique your scrapbook is, the more meaningful it will be to you in the years to come.
Incorporating Media and Technology
As a travel scrapbooker, I love to incorporate media and technology into my scrapbooking process. Here are a few ways I use them to enhance my travel scrapbooks.
Using Social Media
Social media is a great way to gather inspiration and ideas for your travel scrapbook. I love to follow travel bloggers and photographers on Instagram to see their stunning travel photos and get ideas for how to document my own travels.

Another way to use social media is to create a hashtag for your trip and encourage your travel companions to use it when posting photos. This way, you can easily find all of the photos from your trip in one place and use them to create a collaborative scrapbook.
Scrapbooking Apps
There are many scrapbooking apps available that can make the process of creating a travel scrapbook easier and more efficient. Some of my favorite free apps include:
- Canva: This app has a variety of templates and design tools that make it easy to create beautiful pages for your scrapbook.
- PicCollage: This app allows you to create collages of your photos and add stickers and text to them.
- Google Photos: This app automatically backs up your photos and allows you to create albums and collages from them.
Using these apps can save you time and make it easier to create a cohesive and visually appealing travel scrapbook.
Overall, incorporating media and technology into your travel scrapbook can enhance the creative process and make it easier to document your travels.
Creative Ideas for Your Travel Scrapbook
As a travel enthusiast, I know how important it is to preserve memories from your trips. A travel scrapbook is a perfect way to keep those memories alive and relive those moments whenever you want. Here are a few creative ideas to make your travel scrapbook unique and memorable.
Creating a Collage
Collages are a great way to showcase multiple photos in one place. You can create a collage of photos from a particular location or event. You can use different shapes and sizes of photos to make them more interesting. You can also add stickers, washi tape, or other embellishments to make it more colorful.

Using a Map Background
Using a map background is a great way to add a unique touch to your travel scrapbook. You can use a map of the place you visited or a world map to mark the locations you have been to. You can also use a vintage map to give it a classic look. You can add photos, stickers, or other embellishments on top of the map to make it more personalized.
Overall, there are many creative ideas you can use to make your travel scrapbook unique and memorable. You can use a globe, vintage elements, or other unique touches to make it stand out. The most important thing is to have fun and let your creativity flow.
Preserving Memories and Experiences
As a traveler, one of the most important things for me is to preserve the memories and experiences of my trips. A great way to do this is by creating a travel scrapbook. It’s more than just a photo album; it’s a collection of stories, sights, and sounds that capture the essence of the journey.
When I’m creating a travel scrapbook, I like to start by gathering all the materials I need. This includes photos, postcards, ticket stubs, maps, and any other ephemera I’ve collected along the way. I also like to include journal entries or notes that I’ve written during the trip to add a personal touch to the scrapbook.
One of the benefits of creating a travel scrapbook is that it allows me to relive the memories and experiences of the trip. Each page tells a story, and flipping through the pages takes me back to that moment in time. It’s a great way to preserve memories and share them with others.
When it comes to organizing the scrapbook, I like to use a mix of layouts and designs. Some pages might be simple with just a photo and a caption, while others might be more elaborate with multiple photos and decorative elements. I also like to include quotes or lyrics that capture the mood or feeling of the trip.
Overall, creating a travel scrapbook is a fun and creative way to preserve the memories and experiences of a trip. It’s a great way to relive the sights, sounds, and emotions of the journey and share them with others.

Frequently Asked Questions
What are some creative cover ideas for a travel scrapbook.
When it comes to designing a cover for your travel scrapbook, the possibilities are endless. You can use maps, postcards, ticket stubs, or even create a collage of your favorite travel photos. Another option is to use a plain cover and decorate it with stickers, washi tape, or other embellishments that reflect your travel theme.
How can I make my travel scrapbook more personalized?
One of the best ways to personalize your travel scrapbook is to include items that are unique to your trip. This can be anything from a menu from a restaurant you visited to a seashell you found on the beach. You can also add personal touches like handwritten notes or drawings, or use a specific color scheme that reflects the mood of your trip.
What are some unique layouts for a travel scrapbook?
There are many different layout options for a travel scrapbook, but some unique ideas include using a timeline layout to document your trip day-by-day, using a map as a background for your pages, or creating a scrapbook that focuses on a specific theme, like food or architecture.
What are some essential items to include in a travel scrapbook?
Some essential items to include in your travel scrapbook are photos, ticket stubs, postcards, and maps. You can also add in journal entries, sketches, and other memorabilia that help tell the story of your trip. It’s important to choose items that are meaningful to you and reflect the highlights of your journey.
Are there any good travel scrapbook apps available?
Yes, there are several travel scrapbook apps available that make it easy to create digital scrapbooks on your phone or tablet. Some popular options include Project Life, PicCollage, and Canva.
Is scrapbooking still a popular hobby?
Yes, scrapbooking is still a popular hobby, especially among those who enjoy documenting their travels and creating personalized keepsakes. While digital options have become more popular in recent years, many people still prefer the hands-on experience of creating a physical scrapbook.
Similar Posts

Overcome Negative Thoughts With Cognitive Journaling

Free Printable Square Mazes 1

I Am Motivating Myself to Exercise

Homeschool Year Round Schedule Cheat Sheet

Free Cute Frog Coloring Pages for Kids

Free Cute Horse Coloring Pages for Kids
Leave a reply cancel reply.
Your email address will not be published. Required fields are marked *
This site uses Akismet to reduce spam. Learn how your comment data is processed .
Mosaic Moments Page Layout System

- Our Love Story
- Sign Up & Get Your Weekly SnapFix!
- What Do You Need to Get Started with Mosaic Moments®?
- How Do You Create Mosaic Moments Layouts?
- Tour the Pattern Gallery
- Cutting & Cropping
- Designing Pages
- Color & Composition
- Where Can I Shop for Mosaic Moments® Products?
- How to Videos
- Buy Supplies
12 Tips & Ideas for Travel Scrapbook Pages
If you're like us, travel pages are some of your favorite scrapbooking pages to create.
We tend to take a ton of photos during our trips and we want to display as much as we can! That's why we've put together 12 pages that you'll want to scraplift for your summer travels!
Keep scrolling to get new ideas and inspiration for your next travel pages:
1. Use Items Inspired by a Specific Culture

"Castlewood Canyon" by Jodi Benson - Pattern #544
Everything about Jodi's page makes you believe it's about a trip to an ancient Irish Castle ruin -- the green paper, the Celtic Knot, the green hills, and patterned paper.
She chose these things because that's how she felt when she was among the ruins in Colorado -- transported across the ocean into another time.
This Layout Features: Spring Green 12x12 grid paper and Celtic Knot Die Set .
2. Use a Pinwheel Pattern to Display Vertical & Horizontal pics!
The great thing about this pinwheel pattern is that you can show off both vertical and horizontal photos of the red canyons.
Jodi made sure to get lots of shots of the amazing hike -- up close shots of the hikers, distance shots with her hikers, an unusual shot looking down the canyon, and the epic large distance landscape of the Glen Canyon.
This Layout Features: Mulch 12x12 Grid Paper from In the Garden Collection and 2x2 No. 2 Numbers.

"Glen Canyon" by Jodi Benson - Pattern #356
3. make a panorama of historic buildings.

"Mt. Vernon" by Paije Potter - Pattern #403
Paije made a panorama with two 3x3s and a 3x4 design spots at the top of her page.
She took a long distance shot of the main Mt. Vernon house and two shots of the other buildings from two opposite angles. When she cropped her 4x6 photos to place on her page she made sure her driveways lined up so it looks like a big panorama.
This Layout Features: Fields 12x12 Grid Paper from the Lazy Days Collection and Numbers 2 Die Set .
4. Show Historic Details
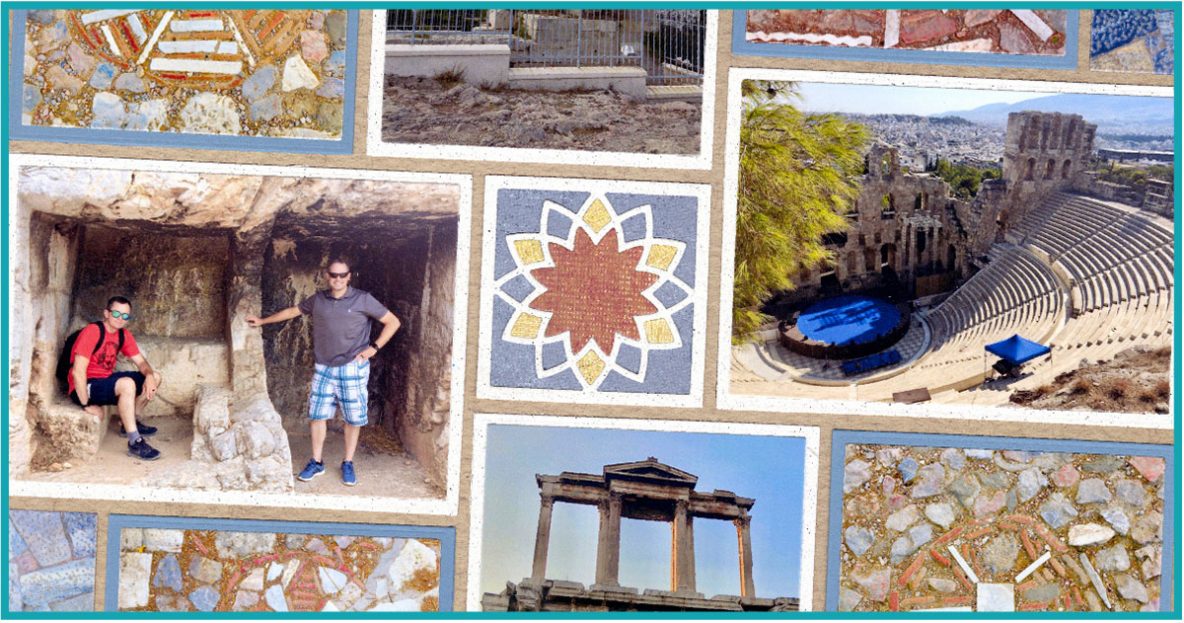
Jodi took pictures of the ancient mosaics she saw in Greece and added 1x4 close ups of the ancient mosaic pavers all around her page.
Many of these type of photos usually get left in a box, but there is plenty of room to show them on a Mosaic Moments layout. If fact, these type of photos are what make our pages magical!
Jodi was so clever to use the original historic art of mosaics for the Mosaic Moments system of scrapbooking.
This Layout Features: Mulch 12x12 Grid Paper from In the Garden Collection and Celestial Die Set .

"Greece" by Jodi Benson - Pattern #327
5. use that spectacular shot as your focal point.

"Day in Yellowstone" by Paije Potter - Pattern #267
Paije made sure she got that epic shot of the enormous waterfall in Yellowstone so it could be the focal point of her layout.
Having an epic photo like this waterfall, will make your eyes go to this photo first and "make" this page.
This Layout Features: Cabin Wood 12x12 Grid Paper from Lazy Days Collection , Fir Tree Die , and Numbers 3 Die Set .
6. Use Colors from the Photos to Inspire Your Layout
Jodi took great shots of the city's street art - the blue, pink, and white wings are so cute!
The Angel Wings graffiti inspired Jodi's chosen colors on her layout. This ties the whole layout together and creates harmony. If you are stuck on color, use an object in one of your photos as inspiration.
Bonus: Don't forget to take photos of the signs - this makes great journaling!
This Layout Features: Tulips 12x12 Grid Paper from theIn the Garden Collection and Wind Spinner Die Set .

"New Bern" by Jodi Benson - Pattern #248
7. use embellishments inspired by the location.

"Evening at Grand Canyon" by Paije Potter - Pattern #474
Paije created her own Southwest blanket pattern on the top of her layout - isn't it cool!
For her Grand Canyon layout, Paije used the southwest dies. This was a perfect fit for her Arizona photos. Plus she added some blue on her page, which was inspired by turquoise jewelry often found in the southwest.
While these embellishments are amazing, don't miss how her photos are balanced -- the canyon's ridge lines up, and the darker photos are above the lighter photos.
This Layout Features: Bright Fire 12x12 Grid Paper from the Renaissance Revival Collection and Southwest Border Die Set .
8. Highlight Photos Taken at a Distance
Having lots of small photographs from your travels can look more interesting than one large photo.
Paije was able to fit 13 photos on her page and 7 are 2x2s of interesting buildings. She even highlighted three by centering them inside the center of the Encircle Die .
Objects, such as architecture, taken at a distance are tiny on a 4x6 photograph, but placing them in a 2x2 frame die helps highlight the main subjects!
This Layout Features: Gratitude 12x12 Grid Paper from the Happiness Collection and Encircle Die .

"World Showcase" by Paije Potter - Pattern # ___
9. journal your travels in the sand.

"Sites in Acadia" by Paije Potter - Pattern #590
Have your beautiful beach photos do double duty and write the name and date of your visit.
Tami wrote Acadia 2019 on the beach and snapped a great shot of her companion and the shoreline. She'll always remember this trip.
When you make your layout at home, the journaling is already done!
This Layout Features: Weathered Pink 12x12 Grid Paper from the Dockside Collection and Film Strip Die .
10. Mix Up Your Shots
Each photograph is so different on this page.
Jodi's casual off-center selfie, the Eiffel Tower with the sun behind it taken from below, a close up of the statue, the classic building shot, the brickwork texture photo, and a long distance shot of a tall monument all go with the overall theme of her asymmetrical page.
What makes Mosaic Moments pages stand out is the variety of photos you can fit on a single page.
This Layout Features: Cocoa 12x12 Grid Paper and French Quarter Die .

"Europe" by Jodi Benson - Pattern #190
11. double your pictures.

"Greece 2020" by Jodi Benson - Pattern #554
Fit in double the photos with dies on your summer travel layouts.
Jodi fit 13 photos on this layout. She used the Hole in One Die to add an additional small photo inside each circle. Notice how she balanced her page with two monumental scenery shots on either side of her focal photo.
If you are like us you take a lot of photos during your travels, and you can fit them in with the right dies!
This Layout Features: Fishermans Wharf 12x12 Grid Paper from the Dockside Collection and Hole in One Die .
12. Use the Detail Shots!
Next time you travel, be sure to take photos of a variety of items such as flowers, brick, stone, sand, clouds, etc.
We call these detail shots and they take a layout from bland to amazing! On this page, Jodi created mosaic details with photos of these beautiful purple flowers. Not only do they make a lovely detail, but they help tell more of the story.
Take more details shots and your pages will be enriched with beautiful memories from your trips.
This Layout Features: Right as Rain 12x12 Grid Paper from the In the Garden Grid Collection , Tropical Leaf Die , and Tropical Leaf Border Die Set .

"Carmel, CA" by Jodi Benson - Pattern #496

Stay Connected!
Winter is here! Check out the winter wonderlands at these 5 amazing winter destinations in Montana
- Travel Tips
How To Make A Travel Scrapbook
Published: September 9, 2023
Modified: December 27, 2023
by Janene Schindler
- Plan Your Trip
- Travel Essentials & Accessories
Introduction
Traveling is an incredible experience that leaves us with memories we want to cherish forever. One way to savor those memories is by creating a travel scrapbook. It’s a perfect blend of creativity and nostalgia, allowing you to preserve your favorite moments in a tangible and personalized way.
A travel scrapbook is like a visual diary of your adventures. It captures the sights, sounds, and emotions of your journey, offering a unique reflection of your travel experiences. Whether you’re a seasoned scrapbooker or a beginner, creating a travel scrapbook is a rewarding and enjoyable process that allows you to relive your adventures again and again.
In this article, we will guide you through the steps to make your own travel scrapbook. From gathering materials to designing and decorating the pages, we’ll provide tips and techniques to help you create a beautiful and meaningful keepsake of your travels.
So grab your favorite photos, souvenirs, and creativity, and let’s embark on a journey to create a travel scrapbook that you’ll treasure for years to come!
Materials Needed
Before you start creating your travel scrapbook, it’s essential to gather all the necessary materials. Here’s a list of items you’ll need:
- A Scrapbook: Choose a scrapbook that suits your style and preferences. It can be a traditional paper album, a photo book, or even a digital scrapbook if you prefer creating it online.
- Photos: Collect all the memorable photographs from your travels. You can print them out or use digital copies if you’re creating a digital scrapbook.
- Mementos and Keepsakes: Gather small items and souvenirs from your trip, such as tickets, postcards, brochures, receipts, maps, and any other items that hold sentimental value.
- Adhesive: You’ll need a good adhesive to secure your photos and mementos to the scrapbook pages. Choose acid-free adhesive to protect your cherished memories from deteriorating over time.
- Scissors and Paper Trimmer: These tools will come in handy for cutting out photos and trimming paper and decorative elements.
- Decorative Papers: Select patterned or colored papers to add visual interest and variety to your scrapbook pages. You can also use scrapbook kits that come with coordinating papers and embellishments.
- Embellishments: Enhance your scrapbook pages with embellishments like stickers, die-cuts, ribbons, washi tape, and other decorative elements that complement your travel theme.
- Pens and Markers: Use acid-free pens and markers to write captions, journaling, and add details to your scrapbook. Consider using different colors and styles to make your pages more visually appealing.
- Protective Sleeves: If you’re using a traditional scrapbook, consider using protective sleeves to keep your pages safe from dust, dirt, and wear.
- Optional Tools: Additional tools like punches, stencils, and stamps can add extra flair and creativity to your scrapbook, but they are not necessary for beginners.
Having these materials ready before you start creating your travel scrapbook will make the process smoother and more enjoyable. Now that you have everything you need, let’s move on to the next step: choosing the right scrapbook.
Choosing the Right Scrapbook
When it comes to selecting the perfect scrapbook for your travel memories, there are a few factors to consider. Here are some tips to help you choose the right one:
- Size: Determine how many photos and mementos you want to include in your travel scrapbook. This will help you decide on the appropriate size. If you have a lot of items, opt for a larger scrapbook with more pages.
- Binding Style: Consider the binding style that suits your preferences. Traditional scrapbooks usually have a ring or post-bound system that allows you to add or rearrange pages easily. If you prefer a streamlined look, choose a book-bound or spiral-bound scrapbook.
- Page Type: Decide if you prefer blank pages where you can design and arrange everything, or if you would like pre-designed pages or pocket pages for effortless photo placement.
- Theme and Design: Look for a scrapbook that complements the theme of your travels. Consider the cover design, color scheme, and overall aesthetic appeal. You can find travel-themed scrapbooks with patterns, motifs, or quotes that resonate with your adventures.
- Quality: Opt for a high-quality scrapbook that will withstand the test of time. Choose acid-free and archival-safe materials to ensure that your photos and mementos will be preserved for years without damage or fading.
- Accessibility: If you’re planning to show your scrapbook to friends and family or display it on a bookshelf, choose a scrapbook that is easy to handle and browse through. Consider the weight and size when making your selection.
Remember, the most important aspect of choosing a scrapbook is finding one that resonates with you and your travel memories. Take your time to explore different options, browse online, and visit craft stores to compare styles and designs.
Once you’ve found the perfect scrapbook, you’re ready to move on to the next step: selecting and printing photos.
Selecting and Printing Photos
Choosing the right photos for your travel scrapbook is a crucial step in capturing the essence of your journey. Here are some tips to help you select and print your photos:
- Sort and Organize: Start by sorting through your collection of travel photos. Separate them by location, theme, or chronological order to make it easier to select the ones you want to include in your scrapbook.
- Consider the Story: Think about the story you want to tell with your scrapbook. Select photos that capture the highlights, emotions, and meaningful moments of your travels. Remember, it’s better to choose a few impactful photos rather than overwhelming your scrapbook with too many.
- Quality Matters: When printing your photos, ensure that you choose a reputable printing service or use high-quality photo paper and a good printer at home. The quality of the photos can greatly enhance the overall aesthetic of your scrapbook.
- Variety and Balance: Aim for a good mix of close-ups, wide shots, scenery, and candid moments to create visual interest in your scrapbook. Varying photo sizes can also add depth and dimension to your pages.
- Edit and Enhance: Before printing, consider editing your photos to enhance their colors and clarity. Basic editing tools on your computer or smartphone can help you crop, adjust exposure, and make minor corrections if needed.
- Printing Options: If you prefer to print your photos at home, ensure you have the right supplies like high-quality photo paper and ink cartridges. Alternatively, you can use online printing services that offer various sizes and finishes.
- Test Prints: Before printing a large batch of photos, do a test print to check the colors, clarity, and resolution. This way, you can make any necessary adjustments before finalizing your scrapbook pages.
- Captions and Dates: Consider adding captions or dates to your photos. This will provide context and help you remember the details of each moment when you look back at your scrapbook in the future.
Remember, the goal is to curate a selection of photos that truly represent your travel experience. Take your time to choose the ones that speak to you and bring back vivid memories. Once you have your photos printed, you can move on to the next step: gathering mementos and keepsakes.
Gathering Mementos and Keepsakes
In addition to photos, including mementos and keepsakes in your travel scrapbook adds an extra layer of nostalgia and personalization. Here’s how you can gather and incorporate these meaningful items:
- Tickets and Passes: Save tickets from attractions, museums, shows, and transportation. These small items will remind you of the places you visited and the experiences you had.
- Postcards and Brochures: Collect postcards and brochures from the destinations you explored. These can be used as decorative elements or as inserts in your scrapbook pages.
- Maps and Itineraries: Preserve maps and itineraries that you used during your trip. They can serve as visual references and help you relive the route and places you visited.
- Postage Stamps: If you sent postcards or letters during your travels, consider including the postage stamps as a unique addition to your scrapbook.
- Natural Elements: Gather small natural elements like pressed flowers, leaves, or shells from beaches. These organic keepsakes add a touch of the environment you experienced during your journey.
- Local Currency: If you still have some coins or banknotes from the countries you visited, incorporate them into your scrapbook. It’s a tangible reminder of where you’ve been.
- Restaurant Menus: If you dined at memorable restaurants, ask for a menu to include in your scrapbook. It will bring back the flavors and culinary experiences from your travels.
- Personal Notes: Write down personal reflections, thoughts, or anecdotes about your travel experiences. These handwritten notes can be included as journaling in your scrapbook.
- Small Souvenirs: Bring back small souvenirs that hold sentimental value, such as keychains, magnets, patches, or trinkets. These can be attached to the pages or displayed in pockets.
- Photographs of Objects: If you couldn’t bring back a physical memento, take a photo of it instead. For example, snap a picture of the local coffee shop where you enjoyed your morning cup or the street art that caught your eye.
Gathering these mementos and keepsakes helps you incorporate different textures, colors, and memories into your scrapbook. As you collect them during your travels, keep them organized in a small bag or envelope so they don’t get lost or damaged.
Now that you have your mementos and photos ready, it’s time to move on to the exciting part: organizing the layout of your travel scrapbook!
Organizing the Layout
The layout of your travel scrapbook is where you bring together all the elements to create visually pleasing and cohesive pages. Consider these tips for organizing your layout:
- Plan Ahead: Before starting, have a rough idea of how you want your pages to look. Consider the number of photos and mementos you have and how you want to arrange them.
- Storytelling Flow: Arrange your photos and mementos in a way that tells a story. You can group them chronologically, by location, or create themed pages that highlight specific experiences or highlights of your travels.
- Grid or Collage: Choose between a grid-style layout with neatly aligned photos or a collage-style layout with overlapping and varying sizes. Both approaches can create visually striking pages.
- Balancing Design Elements: Ensure a proper balance of colors, patterns, and textures on each page. Avoid overcrowding or leaving empty spaces by distributing elements evenly.
- Page Dividers: Consider using decorative papers or dividers to separate different sections of your scrapbook, especially if you’re exploring multiple destinations.
- Eye-catching Focal Points: Choose a focal point for each page, such as a larger photo, a decorative element, or a captivating title. This will draw attention and create visual interest.
- White Space: Embrace white space to provide breathing room and highlight important elements on the page. It allows the eye to focus and brings a clean and modern look to your scrapbook.
- Consistency: Establish a consistent style throughout your scrapbook to give it a cohesive look. Use the same fonts, colors, and design elements to create a unified visual experience.
- Test Layouts: Before adhering everything permanently, arrange your photos and mementos on the pages without adhesive. This allows you to experiment with different placements and make changes until you’re satisfied with the layout.
- Flexibility: Remember that scrapbooking is a creative process, and rules can be broken. Feel free to go with your instincts and try new layouts or unconventional approaches if they suit your travel theme.
By organizing your layout thoughtfully, you’ll create visually appealing pages that highlight your travel experiences in a cohesive and engaging way. Once you’ve finalized your layout, it’s time to move on to the design and decoration phase of your travel scrapbook.
Designing and Decorating Pages
Designing and decorating the pages of your travel scrapbook is where you can let your creativity soar. Here are some ideas and tips to help you make your pages visually appealing:
- Backgrounds: Start by selecting background papers that complement your photos and mementos. Choose colors and patterns that evoke the mood and theme of your travel experiences.
- Layering: Create dimension by layering papers, photos, and mementos. Use adhesive foam dots or strips to raise elements off the page and add depth to your layouts.
- Frames and Borders: Add frames or borders around your photos to make them stand out. You can use patterned paper, decorative tapes, or even draw your own designs.
- Embellishments: Enhance your pages with embellishments like stickers, die-cuts, ribbons, washi tape, and other decorative elements. Use them sparingly to avoid overwhelming the layout.
- Title and Headings: Create bold and eye-catching titles and headings that capture the essence of your travel experiences. Use alphabet stickers, stamps, or even your own handwriting.
- Journaling Blocks: Allocate space for journaling on your pages. Write down your thoughts, memories, or interesting anecdotes related to the photos. Consider using different fonts or colors to make it visually appealing.
- Handwritten Touch: Incorporate your own handwriting in the scrapbook to add a personal touch. It adds authenticity and makes the pages feel more unique and intimate.
- Theme-based Elements: Use themed embellishments and decorations that reflect the places you visited or activities you did during your travels. For example, beach-themed elements for a coastal vacation or travel-related icons for a city trip.
- Photo Arrangement: Experiment with different photo arrangements, such as grids, collages, diagonals, or asymmetrical compositions. Play with sizes and angles for visual interest.
- Color Themes: Choose a color palette for each page or spread. Use colors that complement your photos and evoke the atmosphere of the places you visited.
Remember, the goal is to create visually captivating and cohesive pages that highlight your travel memories. Don’t be afraid to try out different techniques and mix different design elements to make your scrapbook truly unique and representative of your journey.
Once you’re satisfied with the design of your pages, it’s time to add captions and journaling to provide context and tell the stories behind your travel moments.
Adding Captions and Journaling
Captions and journaling are essential components of a travel scrapbook. They provide context and personal insights that bring your memories to life. Here are some tips for adding captions and journaling to your pages:
- Captions: Write short captions directly beneath or beside your photos. Captions can include the location, date, or a brief description of what’s happening in the photo. Keep them concise but meaningful to enhance the storytelling.
- Journaling: Set aside space on your pages for longer journaling entries. Reflect on your experiences, recount memorable moments, and share your thoughts and emotions. Write in a conversational tone as if you’re telling a story to a friend.
- Prompts: If you’re unsure where to start, use prompts to guide your journaling. Some prompts could be: “What was your favorite moment of the trip?”, “What surprised you the most?”, or “Describe a special encounter you had during your travels.”
- Handwritten or Typed: You can choose to handwrite your captions and journaling for a personal touch, or you can type them and print them out if you prefer a neater look. Experiment with different fonts and sizes to add visual interest.
- Decorative Elements: Incorporate decorative elements like banners, speech bubbles, or journaling cards to make your captions and journaling visually appealing. You can also add doodles or hand-drawn illustrations to make them more artistic.
- Quotes and Lyrics: Consider including meaningful quotes or song lyrics that resonate with your travel experiences. They can add depth and evoke emotions connected to your adventures.
- Transcribe Conversations: If you had interesting conversations with locals or fellow travelers, transcribe snippets of those conversations to capture the authenticity and atmosphere of your travels.
- Shared Stories: If you traveled with family or friends, invite them to contribute their own journaling or captions. Their perspectives and memories will add a unique dimension to your scrapbook.
- Location Significance: Share information about the significance of the location or landmarks in your photos. Research interesting facts or historical information to add depth to your storytelling.
- Emotional Reflections: Don’t shy away from expressing your emotions and reflections in your journaling. Describe how the places you visited made you feel or the impact they had on you.
Captions and journaling bring a personal touch to your travel scrapbook, allowing you to relive the moments and emotions you experienced. Take the time to reflect on your travels and add your unique voice to the pages.
Once your captions and journaling are complete, you can move on to the fun part of incorporating maps and itineraries into your scrapbook.
Including Maps and Itineraries
Maps and itineraries are valuable additions to your travel scrapbook as they provide a visual representation of your journey and help tell the story of your adventures. Here’s how you can incorporate maps and itineraries into your scrapbook:
- Maps: Include maps of the regions, cities, or countries you visited. You can use maps from travel guides, brochures, or even printed maps from online sources. Cut them to fit the page and adhere them as a background or as a decorative element.
- Highlight Routes: If you explored different routes or road trips during your travels, use markers or pens to highlight the routes on the maps. This adds visual interest and allows you to remember the paths you took.
- Itineraries: Incorporate your travel itineraries into your scrapbook. Print or write down your planned activities and schedules for each day. This not only adds a chronological structure to your memories but also serves as a reference for the places you visited.
- Decorative Touch: Add decorative elements such as stickers or embellishments around the maps and itineraries to enhance the visual appeal. Consider using icons or symbols to represent the activities or attractions you experienced.
- Handwritten Notes: Write notes directly on the maps or itineraries, marking places you particularly enjoyed or jotting down memories and reflections from specific locations.
- Collage Approach: Create a collage by layering or overlapping maps, itineraries, photos, and other embellishments. This helps to create visually interesting and dynamic pages that showcase your travel route.
- Exploring Different Perspectives: If you traveled with others, encourage them to add their own markings, highlights, or notes to the maps and itineraries. This allows you to see different perspectives and memories from your travel companions.
- City Guides or Brochures: Include snippets from city guides or brochures that you collected during your trip. Cut out interesting facts, recommendations, or descriptions of attractions and paste them next to relevant photos or on the corresponding pages.
- Transcribing Experiences: Use the maps and itineraries as prompts to transcribe specific experiences or memories related to the places you visited. This helps to bring your adventures to life and adds more depth to your scrapbook.
- Creative Interpretation: Don’t be limited by the traditional use of maps and itineraries. Feel free to use them as creative elements, cutting them into unique shapes, or incorporating them into collages or pop-up elements.
Including maps and itineraries in your travel scrapbook adds a visual and chronological aspect to your memories. Whether you use them as decorative elements or as a way to document your journey, they are sure to enhance the overall storytelling of your scrapbook.
Now that you have incorporated maps and itineraries, it’s time to explore adding artistic elements to make your travel scrapbook even more visually captivating.
Incorporating Artistic Elements
Incorporating artistic elements into your travel scrapbook adds a touch of creativity and personal expression. Here are some ideas on how to infuse artistic elements into your pages:
- Hand-drawn Illustrations: If you have a talent for drawing, consider adding hand-drawn illustrations of landmarks, scenery, or memorable moments from your travels. This adds a unique and personalized touch to your scrapbook.
- Watercolor or Acrylic Paints: Experiment with watercolor or acrylic paints to create colorful backgrounds or accent pieces on your pages. You can paint landscapes, abstract shapes, or even use a splatter technique to add texture and visual interest.
- Collage: Collect and include clippings from magazines, brochures, or travel guides to create collages that represent the places you visited. Combine different images and texts to form unique compositions on your pages.
- Calligraphy and Hand lettering: Use calligraphy or hand lettering techniques to write titles, quotes, or captions on your pages. This adds an elegant and artistic touch to your scrapbook.
- Stamped Images: Use rubber stamps with travel-themed images, such as airplanes, suitcases, or landmarks, to create decorative elements on your pages. Choose ink colors that complement your overall color scheme.
- Embossing: Embossing adds texture and dimension to your scrapbook pages. Heat embossing powders and a heat gun, or embossing folders with an embossing machine, can create raised patterns or text on your papers.
- Stitching and Sewing: Add a unique twist by incorporating stitching or sewing into your pages. Use a sewing machine or handheld needle and thread to create borders, details, or textures on your layouts.
- Pressed Flowers or Leaves: Preserve natural elements, like pressed flowers or leaves, by carefully attaching them to your pages. This adds a delicate and organic touch to your scrapbook.
- Mixed Media: Experiment with mixed media techniques by combining different artistic elements. Use elements like washi tape, fabric, textured papers, or ephemera to create collage-like effects and add depth to your pages.
- Photographic Effects: Get creative with your photos by adding filters, overlays, or digital effects. Play around with brightness, contrast, and hue to give your photos a unique look that matches the tone of your scrapbook.
Remember, incorporating artistic elements allows you to express your individual style and adds a personal touch to your travel scrapbook. Don’t be afraid to explore different techniques and experiment with different mediums to create visually captivating and artistic pages.
Now that you’ve added artistic elements to your scrapbook, it’s important to protect and preserve it for years to come. Let’s explore some tips for ensuring the longevity of your treasured travel memories.
Protecting and Preserving the Scrapbook
After putting so much time and effort into creating your travel scrapbook, it’s important to take steps to protect and preserve it for years to come. Here are some tips to ensure its longevity:
- Use Acid-Free and Archival-Safe Materials: When selecting papers, adhesives, pens, and other supplies, choose acid-free and archival-safe options. These materials are designed to prevent deterioration and discoloration over time.
- Handle with Clean Hands: Avoid touching the pages of your scrapbook with dirty or oily hands. Clean your hands before handling the scrapbook to prevent transferring dirt or oils onto the pages.
- Protective Sleeves: Consider using protective plastic sleeves to cover your pages. This shields them from dust, moisture, and accidental spills, keeping your scrapbook in pristine condition.
- Store in a Cool and Dry Place: Choose a location away from direct sunlight, high humidity, or extreme temperature fluctuations to store your scrapbook. Exposure to these elements can accelerate the deterioration of your pages and photos.
- Avoid Overstuffing: Be mindful of the thickness and weight of your scrapbook. Overstuffing can strain the binding and cause pages to tear or fall out. If needed, consider creating multiple volumes to preserve the integrity of your scrapbook.
- Handle with Care: Treat your scrapbook gently when flipping through the pages. Use clean hands and avoid applying unnecessary pressure to prevent tearing or creasing.
- Regular Maintenance: Take the time to inspect your scrapbook periodically. Check for loose pages, torn elements, or signs of deterioration. Make necessary repairs promptly to prevent further damage.
- Digital Backups: Consider making digital backups of your scrapbook pages. Take high-quality photos or scan the pages and save them digitally as a precaution in case of physical damage or loss.
- Share Digitally: Create a digital version of your scrapbook that you can easily share with friends and family. This allows you to preserve the memories while also protecting the physical copy.
- Display with Care: If you choose to display your scrapbook, use acid-free frames or shadow boxes designed for preserving artwork. Ensure the display area is not exposed to direct sunlight or harmful environmental conditions.
By taking these protective measures, you can ensure that your travel scrapbook remains in excellent condition for future generations to enjoy. Remember to continue cherishing and sharing the memories you’ve captured through your creative masterpiece!
Congratulations on completing your travel scrapbook! It’s a precious keepsake that will always remind you of your adventures and the wonderful moments you experienced. Happy travels and happy scrapbooking!
Congratulations on completing your travel scrapbook! By following the steps outlined in this article, you’ve created a beautiful and personalized keepsake that captures the essence of your travel adventures. Your scrapbook is now a treasure trove of memories, allowing you to relive those special moments whenever you flip through its pages.
From selecting and printing photos to incorporating maps, mementos, and artistic elements, you’ve transformed your scrapbook into a visual narrative of your journeys. The captions and journaling have added depth and context, while the design and decoration have made your scrapbook visually captivating.
Remember to protect and preserve your scrapbook by using acid-free materials, handling it with care, and storing it in a cool, dry place. Regular maintenance and backups will ensure that your memories remain intact for years to come.
Whether you created your scrapbook for yourself, to share with loved ones, or to inspire others, your efforts have resulted in a priceless keepsake that holds the power to transport you back to those cherished moments in an instant.
As you embark on new adventures, don’t forget to continue documenting and preserving your travel memories. Your scrapbook can serve as a reminder of the incredible places you’ve visited, the people you’ve met, and the personal growth you’ve experienced along the way.
So, dive into your next travel adventure with enthusiasm, knowing that you have the perfect way to capture and relive those memories in your travel scrapbook. Happy travels and happy scrapbooking!
- Privacy Overview
- Strictly Necessary Cookies
This website uses cookies so that we can provide you with the best user experience possible. Cookie information is stored in your browser and performs functions such as recognising you when you return to our website and helping our team to understand which sections of the website you find most interesting and useful.
Strictly Necessary Cookie should be enabled at all times so that we can save your preferences for cookie settings.
If you disable this cookie, we will not be able to save your preferences. This means that every time you visit this website you will need to enable or disable cookies again.
You must have JavaScript enabled in your browser to utilize the functionality of this website.
Select your country
New selection may affect price, shipping options and product availability
Suggested Countries
All Countries
Recent Searches
Be inspired by these 15 travel scrapbook ideas.

If you’re looking for fun scrapbooking ideas , why not create a travel scrapbook! Remember all your best adventures and treasure your favorite memories with travel scrapbooking for years to come. Gather your holiday photos, ephemera and scrapbooking supplies and check out these travel scrapbook ideas for some serious inspiration!
1. Try a nautical theme
Nothing says holiday quite like red, white and blue! Get a dose of vitamin sea with this fun travel scrapbook layout by Echo Park Paper . Layer up nautical papers, letters and embellishments with photos from your trip.
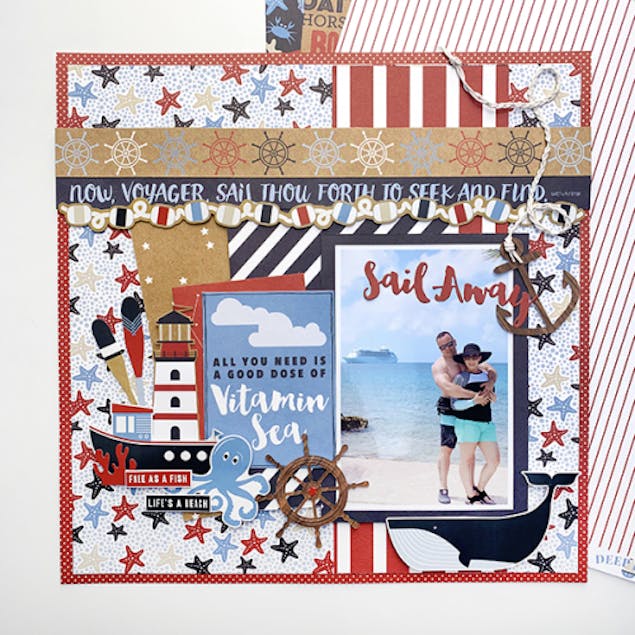
2. A leafy travel layout
This tropical leaf inspired layout by Sizzix is the perfect option for displaying exotic holiday photos! Frame your pictures with a thin border for a Polaroid effect, and finish with cute die-cut leaves.
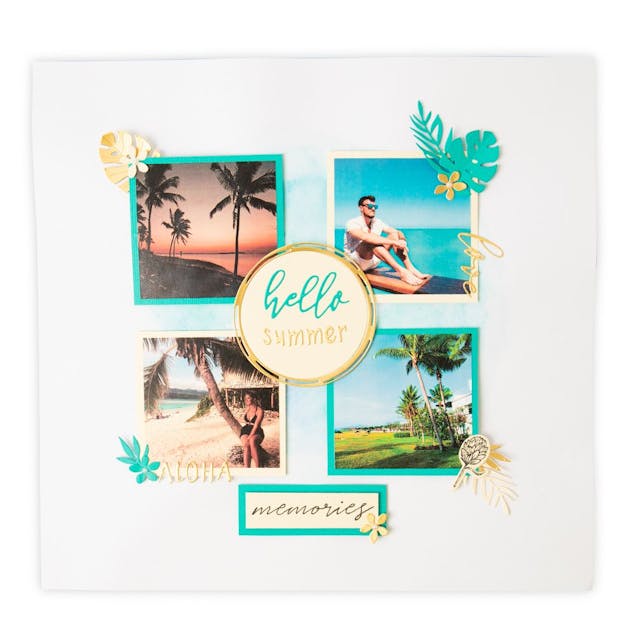
3. Follow your footsteps
One layout we can’t get enough of is Geneva Vanderzeil’s embroidered trip map! This scrapbook layout is a fun, crafty way of tracking your flights and footsteps whilst on your adventures. All you need is an embroidery needle and thread !
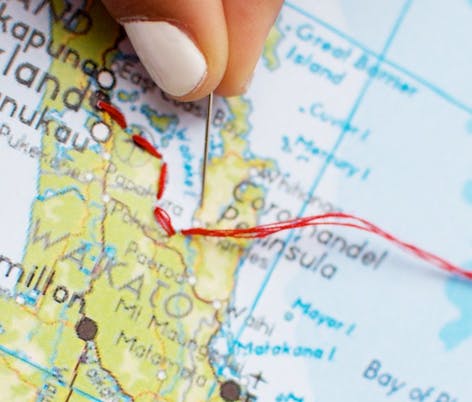
4. Mini scrapbooks with a big impact
Daunted by the idea of a chunky travel scrapbook packed with every memento from your trip? You’re in luck! This mini scrapbook from Volume Twenty Five is a great way to create a travel scrapbook that can fit in your bag. Fill it with pictures and short journal entries; this is travel scrapbooking made easy.
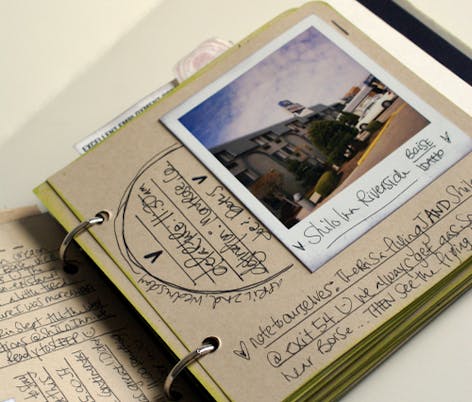
5. Super simple scrapbooking
Don’t complicate things! Grab yourself a ring binder with plastic pockets and make like World of Wanderlust and create your scrapbook layouts on separate pieces of card or paper and slide into the protective pockets. Keep all your ticket stubs, photographs and postcards safe with this scrapbook design.
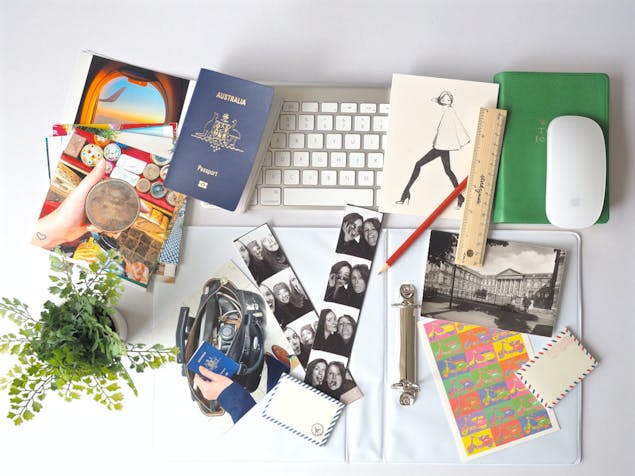
6. Map it out
Martha Stewart’s marvellous map travel scrapbook idea uses old maps as a backdrop for the cute envelopes to stash ticket stubs and other goodies hidden inside. While most of us don’t use physical maps anymore, they do make for great scrapbook design!
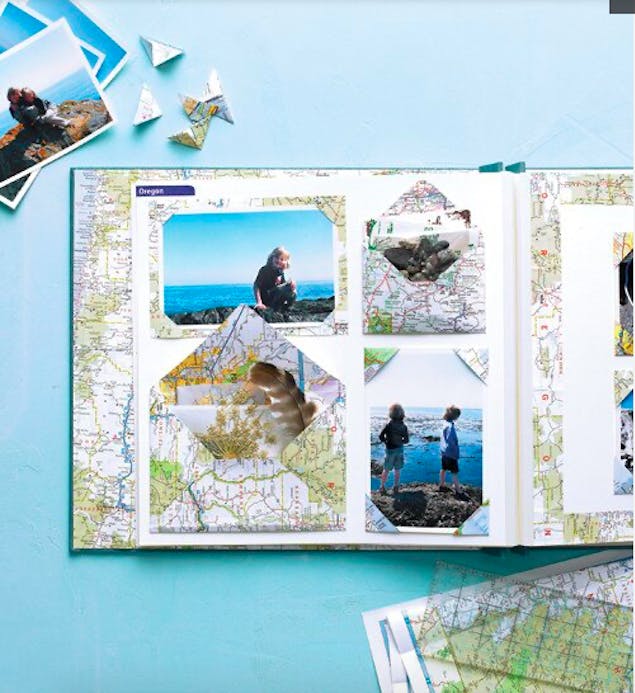
7. Sketchy scrapbooks
To create a simple travel scrapbook, use a small sketchbook like Seaweed Kisses has here. Stick in your favorite photographs and ephemera from your trip. Doodle the food you ate or the sites you’ve seen, and write short journal entries to capture your adventure all in one pocket-sized scrapbook.

8. Scrapbook stylin’
Creating super fun double page scrapbook layouts like this one from misfit.plans is a fabulous way to design your travel scrapbook. Keep it concise with a list of trip highlights and fill the spaces with an assortment of stickers, washi tapes and embellishments !
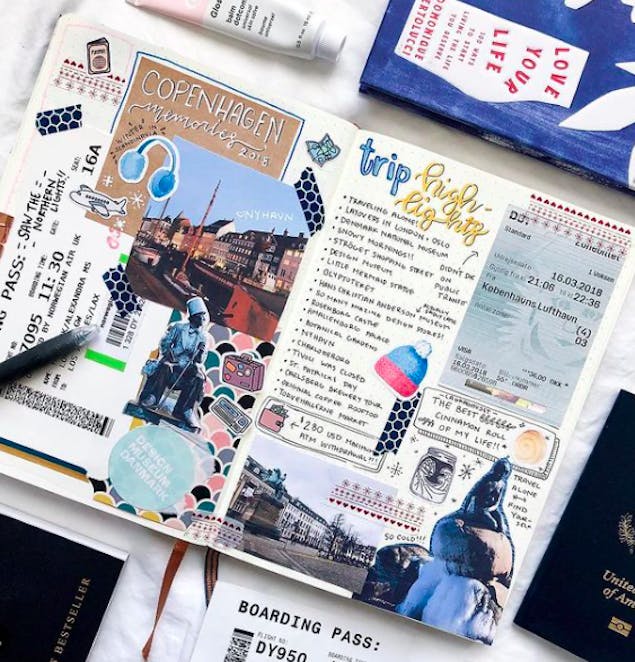
9. A picture says a thousand words
Not one for writing long journal entries? This travel scrapbook design by catvloguje is fuelling our wanderlust! The perfect layout to spark some serious inspiration, capturing all their highlights in one gorgeous aesthetic double page spread.
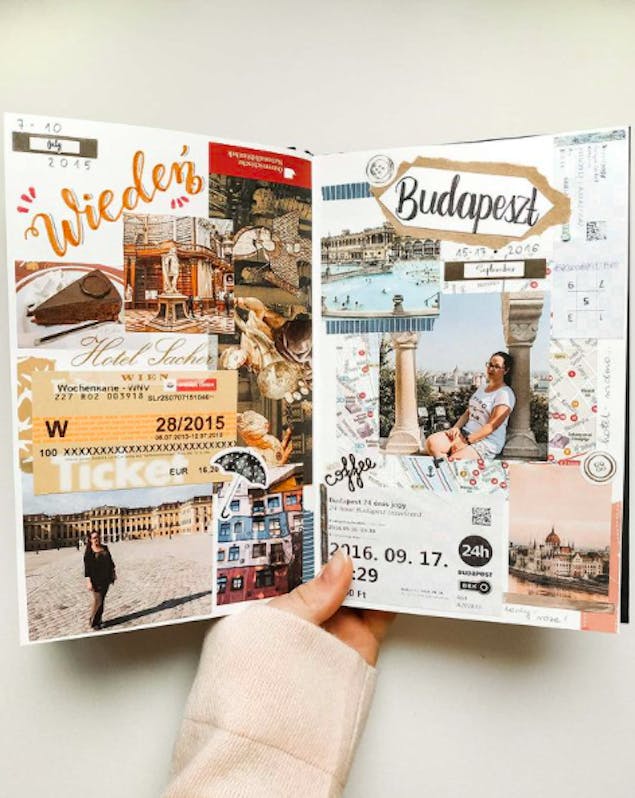
10. Doodle your trip
Take your travel scrapbook on the road with you and sketch the sights and scenery as you see them! This layout maps all the major landmarks this adventurer saw along the Thames and their highlights from a trip to Australia.
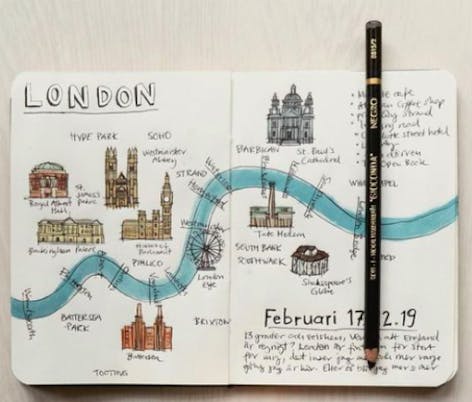
11. Collect all your ticket stubs
During your travels you’re bound to pick up a few ticket stubs to different places you go to along the way. A great travel scrapbook page idea is to stick your ticket stubs to label tags and tie them into your travel scrapbook like Kathleen has done here!
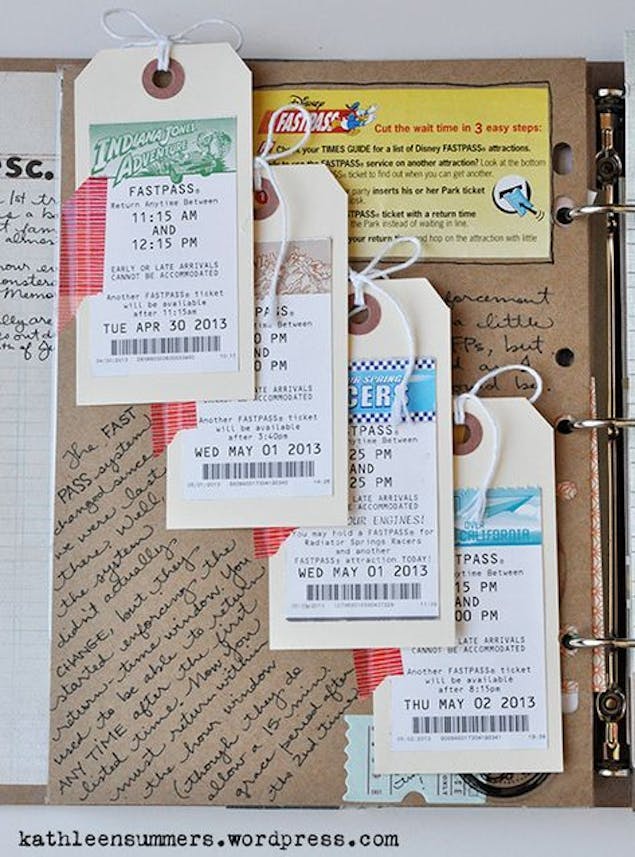
12. Country cut-outs
We love this creative design Stacia uses to capture the countries she’s visited! For something different, cut out the silhouette of the country you visited and piece together mementos from your trip to fit into the cut-out! These little Sizzix Thinlits travel die-cuts would be great to create a similar look.
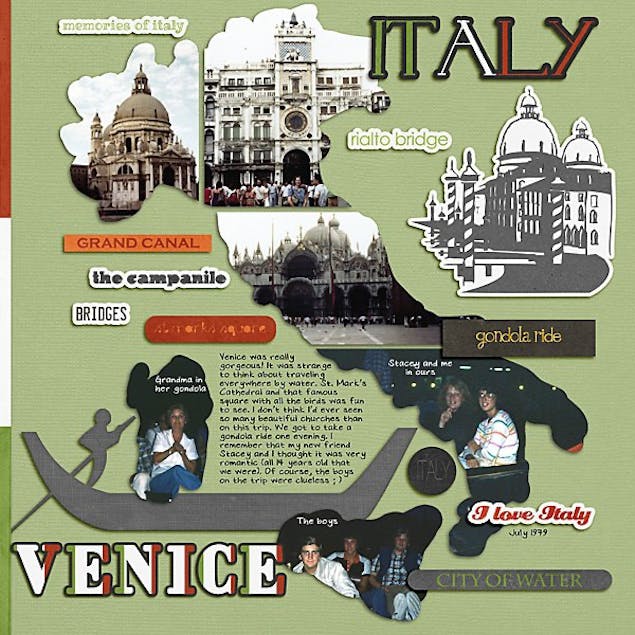
13. Pack your bags!
For the fans of bullet journaling, this lovely travel bullet journal scrapbook page idea from Simple Life of a Lady is just too cute! Plan your packing list in these hand-drawn little suitcases and you won’t forget a thing. Check out our beginners guide to bullet journaling to get started.
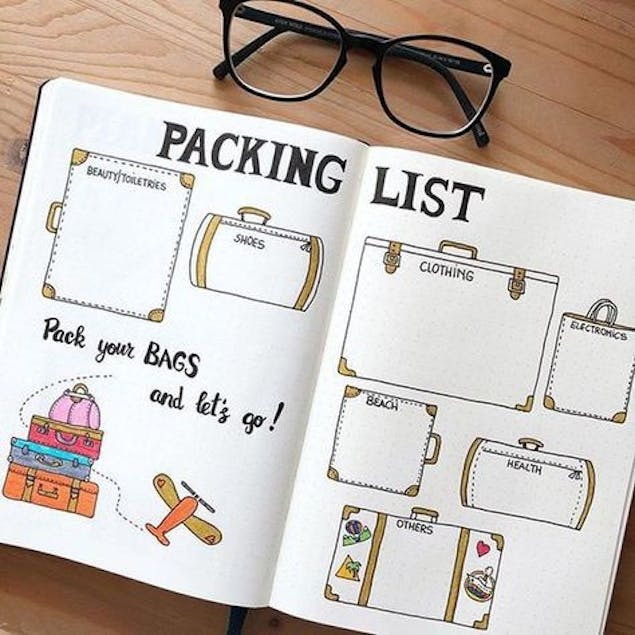
14. Plan your globetrotting adventures!
Planning to visit lots of destinations? Draw out a world or country map like Hannah and Thom and fill in the countries you’ve visited and label the cities you’ve explored!
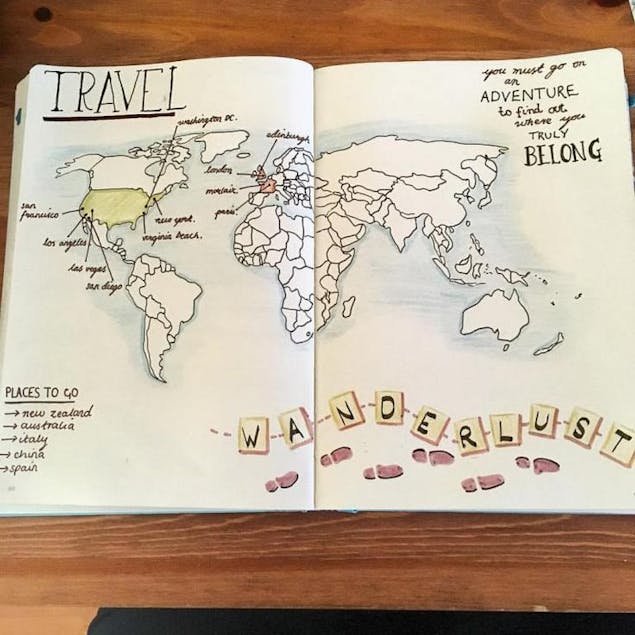
15. Scrapbook bucket list
This cute bullet journal layout from Claudia is fab for writing down your ultimate travel destination bucket list!
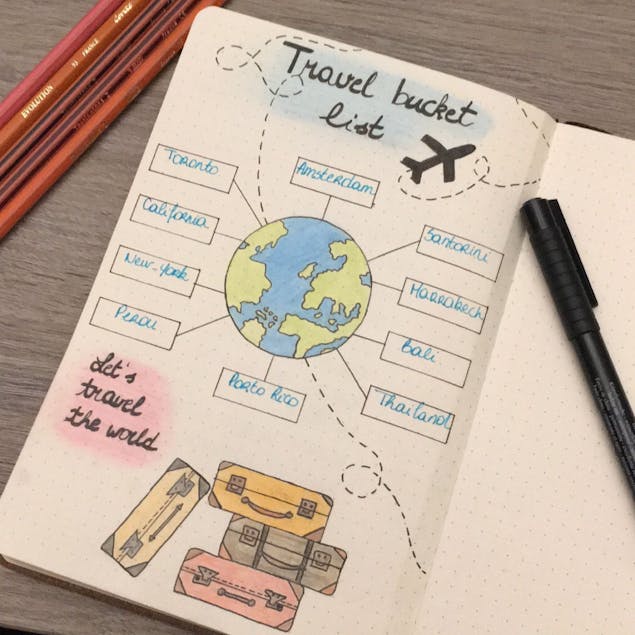
There are loads of fantastic travel scrapbook ideas out there, with unique layouts and designs to help you create a travel scrapbook to be proud of! Want some more inspiration for scrapbooking in general?
You might also like

Discover all things NEW at LoveCrafts!

The ultimate beginners guide to découpage

Homemade Valentine’s Day cards to make for someone special

7 scrapbooking ideas for couples you’re going to love!

Your ultimate guide to scrapbooking

Introducing the Paintbox Tiles collection

Ephemera: what it is and where to find it

34 Gift ideas to make for the activists in your life

Top 10 wedding cross stitch designs

Summer CAL: Welcome!

Crochet designers of the month: September
Visit our international sites: Worldwide Germany Australia France
Knitting, Crochet and Crafts
Find fun, easy craft ideas and instructions, travel scrapbooking ideas: how to make a travel journal with pictures.

Travel Photos for Travel Journal by Joanna Kosinska
When you travel, always grab your camera as you head out the door of your hotel, RV, boat or tent. Take bunches of pictures. Cull through them and include the best ones in your travel scrapbook.

Maps: You Can Include Maps in Your Travel Journal. Photo Courtesy of Andrew Neel.
City Maps, Trail Maps, Destination Maps, ETC — Sometimes the visitor’s center at your travel destination will have maps available. Sometimes if you hike, bike or horseback ride on a particular trail, your guide will have trail maps available. When all else fails, you can print out a Google map of a destination you’ve visited.
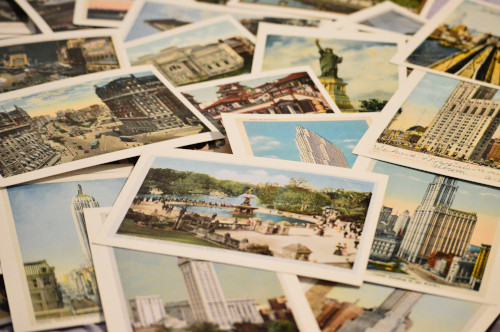
Postcards: Consider Adding Postcards to Your Travel Scrapbook. Photo courtesy of Becky Phan.

Artwork for Travel Journal — Photo Courtesy of Angélica Echeverry

You might want to write journaling or short notes in your travel journal. Make sure to include dates, times, street names, and any other details you’ll want to look back on and remember later. Photo courtesy of Oxana V .

You Can Use Travel Quotes in Your Travel Journal. Photo courtesy of Priscilla Du Preez.

Concert Tickets: You can include these in your travel journal when it’s appropriate to do so. Photo courtesy of Bob Coyne.
How Do You Decorate a Travel Scrapbook?
You can decorate a travel scrapbook however you like. There aren’t any rules dictating what you put in it. If you’re in need of ideas, consider the following suggestions: Travel-Themed Stickers Stickers are popular embellishments for travel journals and travel scrapbooks because they are appealing to look at, broadly available, super easy to use and interesting to use. If you aren’t the most talented artist, stickers give you an easy way to add suitable artwork to your travel journal pages. Bunches of scrapbooking supply companies make destination-specific sticker sheets available.
Stamp Imagery Using Travel-Themed Rubber Stamps or Clear Stamps If there’s an image that you want to repeat on various pages of your travel scrapbook or journal, you might want to use rubber stamps or clear stamps to stamp that image in as many spots as you want it to appear. For example, you could use a compass rose stamp as an embellishment to fill any bare spots on your travel journal pages.
Travel Scrapbook Ideas and FREE Step-By-Step Tutorials

Road Trip to Colonial Beach — A Travel-Themed 6×8 Scrapbooking Album Featuring Nautical and Road Trip Themed Layouts
6×8 Tropical Hawaii Vacation Scrapbooking Album

This Is Paradise Scrapbooking Layout: Snorkeliing in Hawaii
Santa Barbara Scrapbook Mini Album Idea

Tiny Mini Scrapbook Album With Pictures From Santa Barbara, California: Here you can see that this little scrapbook mini album fits in the palm of your hand.
Here’s an idea for a tiny mini scrapbook album with a travel theme. Skiing Vacation Scrapbook

Snowflake Shaped Ski Vacation Scrapbook Album
Seattle Vacation Album

Seattle Cityscapes Scrapbook Mini Album Documenting a Trip to Seattle, Washington
Travel Scrapbooking Layouts
Nautical themed 6×8 pocket page scrapbooking layout featuring sailboat photo.

Enjoy the Journey Sailing Themed Scrapbooking Layout by Amy Solovay
Travel Scrapbooking Ideas: Farmer’s Market Visit in Ashkelon, Israel

6×8 Scrapbooking Album Featuring Havivian Farmer’s Market in Ashkelon, Israel

6×8 Scrapbooking Layout Featuring Havivian Farmer’s Market in Ashkelon, Israel

6″x8″ Travel-Themed Scrapbooking Layout: Santa Maria Island

Scrapbooking Layout Featuring Photos of My Husband Mike Refueling Our Sailboat, Viva, Docked at the Marina in Santa Maria Island in the Azores, Portugal
Take the Scenic Route: 12″x12″ Travel Scrapbooking Layout

Take the Scenic Route 12″x12″ Scrapbooking Layout
More Travel Scrapbook Ideas
This travel scrapbook basically just includes photos and a few embellishments presented in a small album; I didn’t do much of anything special to make this, so I didn’t see any point in making a step-by-step tutorial to document the process. However, I did take pictures of every page in the album so you can see how it turned out. If you aren’t into doing lots of embellishing and journaling on your travel journal pages, perhaps you might find this album inspiring:
Hawaii Vacation Scrapbook Album

Mini Hawaii Scrapbook Album: You could create a mini scrapbook album like this one for displaying your Hawaii vacation photos.
This page was last updated on 4-28-2023.
Karyn Crops
Scrapbooking products & inspiration / scrapbooking retreats & workshops.

Category Archives: Travel Scrapbook Layouts
A folded scrapbook border done twice.
I love to share scrapbooking techniques that may look complicated but are actually easy to do! And the border idea that I’m sharing today is one of those techniques. At first glance, it may look like a lot of small pieces to cut, adhere and keep straight. But it’s really larger pieces that are folded to reveal the backside of the paper.

I also love to share different ways to use Creative Memories punches and border maker cartridges! For these borders, I used small, punched pieces to peek through the openings of my borders. You can use three pieces from one punch or cartridge or mix and match using two or three as I did.

To create my borders, I started with 2″ x 2″ squares and made small cuts and folds. I included punched pieces from cardstock and small strips cut with the 12-Inch Trimmer and Wave Blade . For step-by-step instructions, please view my YouTube video .

For the layout above, I used paper and a few stickers from the Leave Nothing Behind Collection , Hot Fudge Cardstock and Brown Serif ABC/123 Letter Stickers . I also used the NEW White Memories Tabs as spaces to journal. My border includes pieces punched with the Polar Bear , Friendly Fish and Cardinals Border Punches and strips cut with the 12-Inch Trimmer with Wave Blade . These are all current items that are available through my Creative Memories website link .

For my second layout, I used paper, stickers and letter stickers from the current Tropic Time Collection with White Cardstock . I also used pieces punched with the retired Palm Tree Border Punch and the Original Border Maker System with the NEW Dolphin Border Maker Cartridge . You can use this technique with many other border punches and border maker cartridges. Below are just a few additional ideas for you.

Thanks so much for visiting with me! Happy Scrapping! Karyn
Share this:

Double Punched Borders with the Creative Memories Border Maker System

As we roll into summer, I’ve been playing with some of the Creative Memories collections that are great for scrapbooking vacation memories. We have a general travel collection ( Wanderlust ) but also many specific collections that cover so many different destinations. Water: Serene Waters Tropical: Tropic Time National Parks: Leave Nothing Behind Amusement Parks: Sparks of Magic Camping: Set Up Camp Zoos: What a Zoo Too! U.S. Regions and Cities: Wide Open Spaces, Florida, New York, Washington DC, and New Orleans International: United Kingdom, Italy, Mexico and Canada
We even have a collection if you’ll be staying home this summer ( Staycation )!

For my first layout, I used the Tropic Time Collection to preserve memories from a Florida vacation. I also used the Monstera Leaves Border Punch and the Original Border Maker System with the Ancient Key Border Maker Cartridge .
I used the 12″ Trimmer with the Perforating Blade to score my paper at 3″. I turned the paper on it’s side and scored it again at 3″. I then folded the paper on the perforation marks and used the Original Border Maker System with the Ancient Key Border Maker Cartridge to punch borders on both folded sides. For full instructions and to see a step-by-step demonstration, please view my video on my YouTube channel .

I used the same technique to create a second layout with some photos of hiking in the Great Smoky Mountains National Park. I used the Set Up Camp Collection and the Chevron Arrows Border Maker Cartridge for this page. This technique will work with any knock-out style border maker cartridge. Please see my video for instructions . I would also appreciate your subscription to my YouTube channel! If you click on the bell icon, you will receive a notification whenever I add a new video. You may purchase all of the tools and materials that I used for these layouts through my Creative Memories website link . I appreciate your purchases and offer a generous Customer Rewards Program!
Happy Scrapping! Karyn
Punched Swirl Circles with Creative Memories Border Maker System
Yay, it’s May – one of my favorite months of the year! I love the beautiful weather and the early summer blooms in my garden! For my monthly Technique Layout and Challenge, I’m featuring an adaptation of a layout that I created for the Creative Memories Blog in 2016! For that layout, I used punched pieces to decorate circles to create a swirling pattern across a double-page layout. For my new layouts, I punched circles with the Original Border Maker System with knock-out style cartridges to create a swirling pattern.

Did you know that Creative Memories offers three kinds of border maker cartridges?
Chain Style: Punches out a chain pattern that falls off of your paper when punched. Edge Style: Punches the edge of your paper. You can use your punched paper or cut off the decorative edge to create a border. Knock-Out Style: Punches a design from the paper that doesn’t extend to the edge.
To create my layout, I used the Custom Cutting System to cut three different sizes of circles, and then I cut those circles in half. I used the Original Border Maker System with the Zebra Stripe Border Maker Cartridge to punch around the edges of the smallest semi-circles. For this layout, I used the super cute What a Zoo Too! Collection . The What a Zoo Too! Stickers are especially adorable, and I also love the coordinating What a Zoo Too! ABC Letter Stickers !

For my second layout, I used the lovely Painted Garden Collection with the retired Butterflies Border Maker Cartridge and the exclusive Ladybugs Punch that was part of a recent promotion by Creative Memories . I added a journaling box to this layout and also a border punched with the Original Border Maker System with exclusive Woven Scallop Border Maker Cartridge . (Please contact me if you would like to purchase the Woven Scallop BMC .)
To see a step-by-step demonstration of how to create this layout, please see my YouTube video . If you subscribe to my YouTube Channel, you’ll receive a notification when I post a new video.
You may purchase most of the tools and materials that I used through my Creative Memories website link . I so appreciate your purchases and offer a generous Customer Rewards Program.

For an entry into my Monthly Door Prize Drawing , please use this technique to create a layout and share a photo of your layout in my private Facebook group, Karyn’s Croppers . Please ADD your photo to the #TechniqueTue 47 Album where you’ll be able to see versions shared by other croppers. While you’re in the ALBUM section of Karyn’s Croppers, take a peek at the 46 other technique albums!
Wanderlust Travel Scrapbook Layouts

As I’m cleaning my scrapping space and getting ready to create fall and Croptoberfest layouts, I came across these travel layouts that I created earlier in the year. They would be great for photos of your summer travels! But before we look at the layouts, I wanted to remind you about the FREE SHIPPING promotion that Creative Memories is offering now through noon CT on September 9th. With orders of $80+US, you’ll receive FREE SHIPPING. You may wish to order our new Golden Harvest fall collection and Croptoberfest materials that were introduced on Monday along with some new tools.
You might also be interested in joining me for my Virtual Croptoberfest Workshop on Saturday, October 15th. I’ll be using the Essential Customer Croptoberfest Bundle and the new Autumn Leaves Border Punch to create some of my exclusive layouts. These layouts are for personal use, and I’ll only share them with the workshop participants. If you can’t crop along on October 15th, you can still join the event to have access to my instructional videos and printable handouts. Click here for more information and to register.

I used the Wanderlust Collection and the Original Border Maker System with the Chevron Arrows Border Maker Cartridge and the Custom Cutting System with the Jumbo Circle Pattern to create the layout above. There are some great sheets of paper in the Wanderlust collection , and I absolutely adore the stickers and embellishments! To create my layout: 1. Cut a 1″ hollow frame from a sheet of White Cardstock . Cut a sheet of designer paper to 11-1/2″ x 11- 1/2″ and adhere to the hollow frame. 2. Use the Original Border Maker System with the Chevron Arrows Border Maker Cartridge to punch a border from White Cardstock . Cut off of the cardstock at 1-1/8″. Adhere the border as shown and adhere two 1/4″ x 12″ strips of Crimson Cardstock to each edge. ( Please note that CM will be retiring this color along with a few others as it introduces new shades to our cardstock line. See below for more information .) 3. Cut photo mats from White Cardstock that measure: 5-3/4″ x 4-1/4″ and 4-3/4″ x 4-1/4″. Crop photos to fit. Use the Custom Cutting System with the smallest Circle Pattern and Green Blade on the outside edge to cut a mat from White Cardstock . Use the Red Blade on the outside edge to cut a photo. 4. Cut a 5″ x 12″ piece from the word print paper. Arrange the paper piece on the bottom right of the Cutting Mat . Position the Jumbo Circle Pattern so that the inside edge is at the 9″ mark on the right of the mat and at the 5-1/2″ line on the left of the mat. See photo. Use the Red Blade on the inside edge to cut a curve. 5. Keeping the piece on the bottom right corner of the mat, position the Jumbo Circle Pattern so the outside edge is 8-1/8″ on the right and 4″ on the left. See photo. Use the Red Blade on the outside edge to cut a curve. 6. Adhere the curved “road” piece to the bottom right of the designer paper. Adhere photos as shown. 7. Use the Jumbo Circle Pattern and the Blue and Red Blades on the inside edge to cut a curved piece. Cut with the Blue Blade first and without moving the pattern, cut again with the Red Blade . Cut the piece apart into three segments and adhere as shown.

8. Add stickers and embellishments.
I created the layout and the border below for Creative Memories . The layout on the left was published in the 2022 Exclusive NSD Sketch Booklet . The booklet featured a photo of the completed layout along with a sketch of the layout. My border was on the right page was published on the CM Blog on February 8, 2022. Please see the CM Blog post for instructions to create the border.

Below are step-by-step instructions for the layout on the left side. 1. Cut White Cardstock to 10-1/2″ x 10-1/2″ and adhere to the camera designer paper. 2. Use the 12-Inch Decorative Trimmer on the wavy side to cut What a View Paper to 2-3/4″. Trim the strip to 10-1/4″ taking off equal amounts from both sides of the strip. 3. Use the 1 2-Inch Decorative Trimmer on the wavy side to cut What a View Pape r into a 1″ strip. Trim the strip to 10-1/4″ taking off equal amounts from both sides of the strip. 4. Use the Original Border Maker System with the Chevron Arrow Border Maker Cartridge to punch the reverse side of the What a View Paper . Use the 12-Inch Decorative Trimmer to cut off of the paper at 1- 1/2″. 5. Repeat Step 4. but cut the second border off at 1-3/8″. 6. Trim the two border strips to 10-1/4″ taking off equal amounts from both sides of the strips. Make sure that the wavy edges match with the wavy edges of the strips from Steps 2 and 3. 7. Crop photos to 6″ x 3-1/2″ and 4″ x 3-1/2″. 8. Position and adhere all of the strips and the photos onto the White Cardstock square leaving about a ¼” in-between the designer paper strips. 9. Add embellishments and stickers with Foam Squares . 10. Add journaling to the wavy spaces.

I created my last layout for #BorderMakerMonday with Creative Life Scrapbooking . When I first saw the new Sunshine Arches BMC , I saw WHEELS – bicycle wheels, tractor wheels, monster truck wheels, ATV wheels, etc. It inspired me to create another travel layout also using the Wanderlust Collection .
For instructions, please see Creative Life Scrapbooking on Facebook .

I’ll be creating and sharing more layouts with our newest collections soon. I hope that you can join me for my Virtual Croptoberfest Workshop . For information and to register, please click here . Don’t forget that FREE SHIPPING ends on noon CT on September 9th. I appreciate your orders and offer a generous Customer Rewards Program . You can purchase all of the materials and tools that I used through my CM website link .
Creative Memories is adding new colors to our Cardstock line and also retiring a few colors. It is also moving to a uniform cardstock weight of 60lb. Please see below for a chart of colors and dates.

Scrapbooking Technique with Treeline & Dollop Arch Border Maker Punches

Each month I share a scrapbooking technique on my YouTube channel and challenge all of my Facebook followers to use the technique to create and share a layout. When they add a photo of their layout to the appropriate album in Karyn’s Croppers , they are entered into my monthly Door Prize Drawing ! These layouts feature the technique that I’m sharing for August.
I’m calling this a Puzzle Piece Technique as we put the punched pieces back together again to create a striking visual effect. Leaving a gap between the punched pieces creates a new secondary pattern and also creates depth on the layout.

I used the Treeline Border Punch and materials from the Leave Nothing Behind Collection for my first layout. This is a retired punch that Creative Memories brought back for its Tool Time Buffet that is happening August 1-9. When you purchase 3 of 9 designated tools, you will receive a free pack of exclusive embellishments. For this promo, CM brought back two additional retired border punches and also introduced two new border punches and a new border maker cartridge. These items are only available until noon CT on August 9th or while supplies last. They will not be available for purchase otherwise.

For more info about the Tool Time Buffet and to purchase, please visit my Creative Memories website. I appreciate your orders and offer a generous Customer Rewards Program .

For my second layout, I used the Dollop Arch Border Punch which is a current tool in our product line. I also used the super cute What a Zoo Too! collection. I love this collection and highly recommend all of the pieces!
For step-by-step instructions on creating these layouts, please visit my YouTube channel . I would also appreciate your subscription to my channel.
For an entry into my August Door Prize Drawing , please use this technique and share a photo of your layout into the #TechniqueTue 38 Album in Karyn’s Croppers. Happy Scrapping! Karyn
Summertime Scrapbook Layouts
Summer is in full force, and I hope that you’re enjoying it! Creative Memories Summertime Collection is colorful and fun – just like summer should be!

I used the Custom Cutting System with the Rectangle Cutting Patterns to create a colorful row of popsicles from a selection of the Summertime Variety Mats for my first layout. When my granddaughter visits later this month, we have plans to make some icy treats in a variety of flavors, and the layout will be perfect for our photos.
To Create My Layout: 1. Use the Custom Cutting System and the smallest rectangle from the Rectangle Cutting Patterns and the Red Blade on the inside edge to cut shapes from six different Summertime Variety Mats . Position your cutting pattern to conserve the mats, so they can still be used to mat photos. From one of the rectangle pieces use a flower-type of punch to punch out the right upper corner, so it looks like bite marks. I used the old Dewdrop Flower Punch .

2. From Light Gray Cardstock cut six pieces to 1/2″ x 1-1/2″, and adhere to the bottoms of the rectangle pieces leaving a 1″ section protruding from the bottom of the rectangles. Adhere the popsicle pieces to the bottom of a sheet of Black Cardstock . 3. Cut a piece of Summertime Designer Paper to 11-1/2″ x 6-1/2″, adhere at the top of the page. 4. Use the Original Border Maker System with the Lamplight Border Maker Cartridge to punch a border from Summertime Designer Pape r. Trim to 11-1/2″, and cut the border in half length-wise, and adhere to the bottom of the designer paper. Cut a 11-1/2″ x 1/4″ strip of Black Cardstock , and adhere at the seam of the designer paper and the border piece. 5. Crop three of the leftover mat pieces to 3-5/8″ x 3-5/8″. Crop two of the leftover mat pieces to 3-5/8″ x 3/4″. Cut three pieces of Black Cardstock to 3-3/4″ x 3-3/4″ and two pieces to 3-3/4″ x 7/8″. Adhere the mat pieces to the black pieces to create double photo mats and journaling boxes. Adhere to the layout as shown. I used Foam Squares to adhere my middle mat. 6. Add a title with Black Script and Black Serif ABC/123 Letter Stickers .

For my second layout, I used the Sunny Days Journal Template to trace and cut a sheet of Summertime Designer Paper in a sunburst pattern to use as the background of my layout. The Sunny Days Journal Template is great for tracing journaling lines onto a layout, but it’s also can be used for tracing and cutting designs. Please see my post from July 2nd for another example of how this template can be used.

T o Create My Layout: 1. Use the Sunny Days Journal Template to trace a sunburst pattern onto the backside of a sheet of designer paper. Use Micro-Tip Scissors to cut around your trace marks.

2. Adhere the cut-out piece to a sheet of White Cardstock . 3. Cut a 1″ hollow frame from a sheet of Summertime Designer Paper , and adhere to the outside of the layout. 4. From the same sheet of designer paper, use the Custom Cutting System with the medium circle from the Circle Cutting Patterns and Blue Blade on the outside edge to cut a circle. Adhere the circle to the center of the layout. 5. Cut two 4-1/4″ x 4-1/4″ photo mats from Summertime Designer Paper . Crop photos to 4″ x 4″, and adhere to mats. Adhere matted photos to the right side of the layout. 6. Cut a small segment from a wave Summertime Laser Cut Border , and adhere the two pieces to each side of the bottom photo. Adhere a second wave Summertime Laser Cut Border above the first one as shown. 7. Add a Summertime Laser Cut Border as the title. Adhere with Foam Squares . 8. Add Summertime Stickers with Foam Squares as shown.

I hope that my layouts have inspired you to scrapbook some of your summer photos! You can purchase the Summertime Collection and all of the tools that I used through my Creative Memories website link . If you’re looking for a fun virtual scrapbooking event, you might enjoy the PJ Party Virtual Crop that my friends and I at Creative Life Scrapbooking are hosting on Friday, July 30th. For information and to register, click here . If you can’t crop along on the 30th, you can still register and have access to our printable handouts and recorded instructional videos.

Happy Summer! Karyn
Creative Life Scrapbooking 2020 Spring Blog Hop – Planes and Automobiles Layouts
Hello and thanks so much for joining the Creative Life Scrapbooking team for our 2020 Spring Blog Hop ! There are lots of ideas being shared today, and everyone is using different collections from Creative Memories . Just follow the links at the bottom of my post to find more scrapbooking inspiration from my scrapping buddies.
I made two layouts and a border using the Planes and Automobiles collections and the two newest border maker cartridges from Creative Memories . CM’s new travel ensemble also includes the Trains collection. All three collections ( Planes , Trains and Automobiles ) coordinate with each other so you can easily mix and match. I love the color palette, and the backsides of most of the sheets of paper have neutral prints that can be used for not only travel photos but also masculine and out door layouts. The Laser Cut Embellishments are absolutely fabulous with multi colors, textures and dimension, and the stickers are super cute but not too cutesy!

I used the Planes Paper, Stickers and Laser Cut Embellishment Accents to create a fun layout for some hot air balloon photos. I also used the Limited Edition Orange Shimmer Cardstock and Shell Shimmer Cardstock from CM’s recent cardstock buffet. This shimmer cardstock is much lighter than our normal cardstock weight, so it was easy to use with our Original Border Maker System and punches. But I found that the sheets liked to stick together, so beware when using.

1. Cut two 12″ x 3″ strips from the Shell Shimmer Cardstock and punch the four long ends using the Original Border Maker System with the new Clouds Border Maker Cartridge . 2. Use the Original Border Maker System with the new Clouds Border Maker Cartridge to punch 4 strips of Orange Shimmer Cardstock and Gray Carstock. Cut off of your cardstock at about 3/4″. Layer and adhere these pieces to the tops and bottoms of the shell shimmer borders. 3. Cut one 12″ x 3″ strip from each of the Shell Shimmer, Orange Shimmer and Gray Cardstock . Cut these strips in half on the diagonal.

4. Punch the long slanted edge of the strips from Step 3 using the Original Border Maker System with the new Clouds Border Maker Cartridge . Layer and adhere as shown.
")
I used the Automobiles Paper, Laser Cut Embellishment Accents and Sticker s and also CM’s new On the Road and Cloud Border Maker Cartridges to create a layout for a road trip that my husband and took last fall. I also used the Majestic Mountains Border Punch which recently sold out. I love how we can combine our tools to create multi-layered borders!

To create my layout:
1. Cut hollow frames from two sheets of Crimson Cardstock . Trim two sheets of the road sign paper to 11-1/2″ x 11-1/2″, and adhere to the hollow frames. 2. Cut two pieces of Beige Cardstock to 11-1/2″ x 3″ and punch one long end of each piece using the Original Border Maker System with the Cloud Border Maker Cartridge . Use the round edge of the Dual-Tip Brown Pen to chalk the edges of the clouds. 3. From Brown Cardstock , use the Majestic Mountains Border Punch to punch two borders. Cut off of your cardstock at 2″, trim to 11-1/2″ and adhere to the cloud borders. 4. Use the Original Border Maker System with the On the Road Border Maker Cartridge to punch borders from Crimson, Dark Green, and Blue Cardstock . Using All-Purpose Scissors , cut the vehicles off of the cardstock and adhere to the mountains as shown. 5. Use the Original Border Maker System with the On the Road Border Maker Cartridge to punch two borders from Beige Cardstock . Cut off of the cardsdtock at 1″ and trim to 11-1/2″. Use All-Purpose Scissors to cut off some of the vehicles as shown. Adhere these pieces to your borders with Foam Squares . 6. Use the Original Border Maker System with the Cloud Border Maker Cartridge to punch four sides of a 3″ x 2-1/2″ piece of Beige Cardstock . Use the round edge of the Dual-Tip Brown Pen to chalk the edges of the clouds. Layer this piece behind stickers as shown on the second page.

You may have already seen my last border on our Creative Life Scrapbooking Facebook page last week for our Border Maker Monday feature. I was inspired by a title sticker in the Automobiles Designer Stickers to create my border above. I combined two border punches with a border maker cartridge to create a border that depicts leaving town and hitting the open road to explore parts unknown. I love how the combination of punches tells a simple story!

Thanks so much for visiting with us during our Creative Life Scrapbooking 2020 Spring Blog Hop ! I’m the last stop on the blog hop today, but you can use any of the links below to revisit the others.
Please use my Creative Memories website link to purchase the materials and tools that I used for my layouts.
Creative Life Scrapbooking Spring 2020 Blog Hop: Stop 1: Diana from D. Brinsley’s Memory Keeping Blog Stop 2: Noreen from Organized and Creative Mom Stop 3: Krista from Scrappin with Krista Stop 4: Meggan from The Printed Project Stop 5: Tammy from Photos2Albums Stop 6: Karyn from Karyn Crops ( You are here. )
Sun-Kissed Scrapbook Layouts

Aloha! Today I’m sharing two layouts that I created using the Sun-Kissed Collection from Creative Memories. This collection is full of cool blues and greens and warm coral tones, and it has some cute tropical themed stickers and embellishments. Although I currently don’t have any beach or tropical photos to scrapbook, I still found a way to use the collection.

The Sun-Kissed Collection is perfect for some of my lake and boating photos! I created this double-page layout by using the Original Border Maker System with the new Rolling Waves Border Maker Cartridge to punch all of the way around both sheets of the water print paper. The corners came out wonky as they were double punched, but I simply used my scissors to trim them. I adhered both sheets to 12″ x 12″ sheets of White Cardstock.

I created my border by using the Original Border Maker System with Rolling Waves Border Maker Cartridge to punch both sides of 12″ x 2″ strips of the lime patterned paper. Start by punching the border along one side of your paper. Cut the border off of your paper at 2″. Since the strips were too narrow to fit in the Border Maker Guide, I used Post-It Notes to hold the strips in place while punching the other side. I adhered my borders to 12″ x 2″ strips of White Cardstock.

For my title piece and some extra decoration, I cut apart the “Away We Go” Variety Mat and matted the pieces with the dark coral print paper. The cut-apart Variety Mat pieces are: 5-3/4″ x 1-7/8″; 5-3/4″ x 1″; and 5-3/4″ x 1-1/4″. I also matted all of my photos with the dark coral print paper.

I journaled on a second Variety Mat and adorned the pages with Sun-Kissed Embellishments and Stickers. I also included a few leaves punched from Evergreen Cardstock using the new Tropical Leaf Punch . I adhered some of the pieces with Foam Squares. To finish the layout, I added pen dots around all of my waves. This really didn’t take too long to do, and it added some great detail.

My second layout features my grand-daughter dressed for “Tacky Tourist Day” at pre-school! It was the perfect photo-op for the Sun-Kissed Collection!

For my layout, I punched two sides of a 12″ x 12″ sheet our new Aqua Cardstock using the Original Border Maker System with Rolling Waves Cartridge and cut it off of the cardstock to make a 1-1/2 inch “L” shape. The corner of the “L” was wonky after being punched twice, so I shaped it using my scissors. I also cut a 1-1/2 inch “L” shape from the lime patterned paper and adhered both to a sheet of the flamingo patterned paper.

My photo is 5″ x 7″, so I cut a 6″ x 8″ photo mat from Evergreen Cardstock and used my scissors to cut fringe all the way around to mimic the grass skirt. I journaled on a Sun-Kissed Variety Mat and adorned the layout with Sun-Kissed Embellishments and Stickers. I also included a few leaves and flowers punched from the Tropical Leaf Punch and the Embossed Flower Trio Punch . I used Foam Squares on the title sticker, hula girl embellishment, and some of the flowers to give the page some extra pop.

All of the materials and tools can be purchased on my Creative Memories website .

July Crop Club
Our new Cool Serenity Collection is perfect for beach, lake and river photos. The shades of blue and green are beautiful, and the embellishments are some of my favorites. I used this collection and the page sketch below from Noreen Smith for my July Crop Club.

The border on this layout was made with our Original Border Maker System with our new Grass and Ocean Waves Cartridges.

I used Foam Squares to create the layered Ocean Waves border at the bottoms of these pages.

The grass border at the bottom was punched from the green cardstock in the Travel Solid 12×12 Cardstock Paper Pack. This pack of cardstock coordinates perfectly with the Cool Serenity Collection.
To purchase any of these items, please visit my CM website . Through July 29th, receive $10 off of your online purchase by entering HEART10 in the Discount Codes box on the View Cart page. To attend my next Crop Club workshop, please contact me.
Have Travel Photos?
We have TWO great new travel collections for you – Cool Serenity and Uncharted! They are totally different, but both are beautiful! I love the paper prints in both of these collections, but I really LOVE the die cut embellishments! And to top if off, we have an item that has been on the top of my personal wish list – a new Grass Border Maker Cartridge! Yay! Here are some pages that I made with each of the new collections.

I’m quite fond of this page that I made with our Uncharted Paper Pack, Embellishments, Stickers and Slide-In Pack! Although it may look complicated, it was a snap to make. The building tops are just small pieces of paper that I trimmed to points. The green border on the bottom was punched with our Original Border Maker with Crown Cartridge.

For this page, I started with an Uncharted Predesigned Page and added a Crown Border to look like a railroad trestle. For instructions on how to make both of these pages, please see my post on the CM Blog from June 14th .

This is a Cool Serenity Predesigned page that I dressed up with some added embellishment. The grass border and the sun were made with our Border Maker with new Grass Cartridge. The banner consists of 2″ circles that were cut in half.

This layout is made with Cool Serenity Paper, Stickers and Embellishments. The border at the bottom was punched with our Border Maker with Grass Cartridge. The cute clouds were punched with our Word Bubble Punch – which is now only available while supplies last. For instructions on how to make both of the Cool Serenity pages, please see my post on the CM Blog from June 20th .

Travel Itinerary For One Week in Moscow: The Best of Moscow!
I just got back from one week in Moscow. And, as you might have already guessed, it was a mind-boggling experience. It was not my first trip to the Russian capital. But I hardly ever got enough time to explore this sprawling city. Visiting places for business rarely leaves enough time for sightseeing. I think that if you’ve got one week in Russia, you can also consider splitting your time between its largest cities (i.e. Saint Petersburg ) to get the most out of your trip. Seven days will let you see the majority of the main sights and go beyond just scratching the surface. In this post, I’m going to share with you my idea of the perfect travel itinerary for one week in Moscow.
Moscow is perhaps both the business and cultural hub of Russia. There is a lot more to see here than just the Kremlin and Saint Basil’s Cathedral. Centuries-old churches with onion-shaped domes dotted around the city are in stark contrast with newly completed impressive skyscrapers of Moscow City dominating the skyline. I spent a lot of time thinking about my Moscow itinerary before I left. And this city lived up to all of my expectations.

Travel Itinerary For One Week in Moscow
Day 1 – red square and the kremlin.
Metro Station: Okhotny Ryad on Red Line.
No trip to Moscow would be complete without seeing its main attraction. The Red Square is just a stone’s throw away from several metro stations. It is home to some of the most impressive architectural masterpieces in the city. The first thing you’ll probably notice after entering it and passing vendors selling weird fur hats is the fairytale-like looking Saint Basil’s Cathedral. It was built to commemorate one of the major victories of Ivan the Terrible. I once spent 20 minutes gazing at it, trying to find the perfect angle to snap it. It was easier said than done because of the hordes of locals and tourists.
As you continue strolling around Red Square, there’s no way you can miss Gum. It was widely known as the main department store during the Soviet Era. Now this large (yet historic) shopping mall is filled with expensive boutiques, pricey eateries, etc. During my trip to Moscow, I was on a tight budget. So I only took a retro-style stroll in Gum to get a rare glimpse of a place where Soviet leaders used to grocery shop and buy their stuff. In case you want some modern shopping experience, head to the Okhotny Ryad Shopping Center with stores like New Yorker, Zara, and Adidas.

Read Next: Things To Do on Socotra
To continue this Moscow itinerary, next you may want to go inside the Kremlin walls. This is the center of Russian political power and the president’s official residence. If you’re planning to pay Kremlin a visit do your best to visit Ivan the Great Bell Tower as well. Go there as early as possible to avoid crowds and get an incredible bird’s-eye view. There are a couple of museums that are available during designated visiting hours. Make sure to book your ticket online and avoid lines.
Day 2 – Cathedral of Christ the Saviour, the Tretyakov Gallery, and the Arbat Street
Metro Station: Kropotkinskaya on Red Line
As soon as you start creating a Moscow itinerary for your second day, you’ll discover that there are plenty of metro stations that are much closer to certain sites. Depending on your route, take a closer look at the metro map to pick the closest.
The white marble walls of Christ the Saviour Cathedral are awe-inspiring. As you approach this tallest Orthodox Christian church, you may notice the bronze sculptures, magnificent arches, and cupolas that were created to commemorate Russia’s victory against Napoleon.

How to Get a Decent Haircut in a Foreign Country
Unfortunately, the current Cathedral is a replica, since original was blown to bits in 1931 by the Soviet government. The new cathedral basically follows the original design, but they have added some new elements such as marble high reliefs.
Home to some precious collection of artworks, in Tretyakov Gallery you can find more than 150,000 of works spanning centuries of artistic endeavor. Originally a privately owned gallery, it now has become one of the largest museums in Russia. The Gallery is often considered essential to visit. But I have encountered a lot of locals who have never been there.
Famous for its souvenirs, musicians, and theaters, Arbat street is among the few in Moscow that were turned into pedestrian zones. Arbat street is usually very busy with tourists and locals alike. My local friend once called it the oldest street in Moscow dating back to 1493. It is a kilometer long walking street filled with fancy gift shops, small cozy restaurants, lots of cute cafes, and street artists. It is closed to any vehicular traffic, so you can easily stroll it with kids.
Day 3 – Moscow River Boat Ride, Poklonnaya Hill Victory Park, the Moscow City
Metro Station: Kievskaya and Park Pobedy on Dark Blue Line / Vystavochnaya on Light Blue Line
Voyaging along the Moscow River is definitely one of the best ways to catch a glimpse of the city and see the attractions from a bit different perspective. Depending on your Moscow itinerary, travel budget and the time of the year, there are various types of boats available. In the summer there is no shortage of boats, and you’ll be spoiled for choice.

Travel Itinerary for One Week in Beijing
If you find yourself in Moscow during the winter months, I’d recommend going with Radisson boat cruise. These are often more expensive (yet comfy). They offer refreshments like tea, coffee, hot chocolate, and, of course, alcoholic drinks. Prices may vary but mostly depend on your food and drink selection. Find their main pier near the opulent Ukraine hotel . The hotel is one of the “Seven Sisters”, so if you’re into the charm of Stalinist architecture don’t miss a chance to stay there.
The area near Poklonnaya Hill has the closest relation to the country’s recent past. The memorial complex was completed in the mid-1990s to commemorate the Victory and WW2 casualties. Also known as the Great Patriotic War Museum, activities here include indoor attractions while the grounds around host an open-air museum with old tanks and other vehicles used on the battlefield.
How I Planned My Trip to Vietnam
The hallmark of the memorial complex and the first thing you see as you exit metro is the statue of Nike mounted to its column. This is a very impressive Obelisk with a statue of Saint George slaying the dragon at its base.
Maybe not as impressive as Shanghai’s Oriental Pearl Tower , the skyscrapers of the Moscow City (otherwise known as Moscow International Business Center) are so drastically different from dull Soviet architecture. With 239 meters and 60 floors, the Empire Tower is the seventh highest building in the business district.
The observation deck occupies 56 floor from where you have some panoramic views of the city. I loved the view in the direction of Moscow State University and Luzhniki stadium as well to the other side with residential quarters. The entrance fee is pricey, but if you’re want to get a bird’s eye view, the skyscraper is one of the best places for doing just that.
Day 4 – VDNKh, Worker and Collective Farm Woman Monument, The Ostankino TV Tower
Metro Station: VDNKh on Orange Line
VDNKh is one of my favorite attractions in Moscow. The weird abbreviation actually stands for Russian vystavka dostizheniy narodnogo khozyaystva (Exhibition of Achievements of the National Economy). With more than 200 buildings and 30 pavilions on the grounds, VDNKh serves as an open-air museum. You can easily spend a full day here since the park occupies a very large area.

Places to Visit in Barcelona That Aren’t Beaches
First, there are pavilions that used to showcase different cultures the USSR was made of. Additionally, there is a number of shopping pavilions, as well as Moskvarium (an Oceanarium) that features a variety of marine species. VDNKh is a popular venue for events and fairs. There is always something going on, so I’d recommend checking their website if you want to see some particular exhibition.
A stone’s throw away from VDNKh there is a very distinctive 25-meters high monument. Originally built in 1937 for the world fair in Paris, the hulking figures of men and women holding a hammer and a sickle represent the Soviet idea of united workers and farmers. It doesn’t take much time to see the monument, but visiting it gives some idea of the Soviet Union’s grandiose aspirations.
I have a thing for tall buildings. So to continue my travel itinerary for one week in Moscow I decided to climb the fourth highest TV tower in the world. This iconic 540m tower is a fixture of the skyline. You can see it virtually from everywhere in Moscow, and this is where you can get the best panoramic views (yep, even better than Empire skyscraper).

Parts of the floor are made of tempered glass, so it can be quite scary to exit the elevator. But trust me, as you start observing buildings and cars below, you won’t want to leave. There is only a limited number of tickets per day, so you may want to book online. Insider tip: the first tour is cheaper, you can save up to $10 if go there early.
Day 5 – A Tour To Moscow Manor Houses
Metro Station: Kolomenskoye, Tsaritsyno on Dark Green Line / Kuskovo on Purple Line
I love visiting the manor houses and palaces in Moscow. These opulent buildings were generally built to house Russian aristocratic families and monarchs. Houses tend to be rather grand affairs with impressive architecture. And, depending on the whims of the owners, some form of a landscaped garden.
During the early part of the 20th century though, many of Russia’s aristocratic families (including the family of the last emperor) ended up being killed or moving abroad . Their manor houses were nationalized. Some time later (after the fall of the USSR) these were open to the public. It means that today a great many of Moscow’s finest manor houses and palaces are open for touring.

20 Travel Tips I’ve Learned From Travelling The World
There are 20 manor houses scattered throughout the city and more than 25 in the area around. But not all of them easily accessible and exploring them often takes a lot of time. I’d recommend focusing on three most popular estates in Moscow that are some 30-minute metro ride away from Kremlin.
Sandwiched between the Moscow River and the Andropov Avenue, Kolomenskoye is a UNESCO site that became a public park in the 1920’s. Once a former royal estate, now it is one of the most tranquil parks in the city with gorgeous views. The Ascension Church, The White Column, and the grounds are a truly grand place to visit.
You could easily spend a full day here, exploring a traditional Russian village (that is, in fact, a market), picnicking by the river, enjoying the Eastern Orthodox church architecture, hiking the grounds as well as and wandering the park and gardens with wildflower meadows, apple orchards, and birch and maple groves. The estate museum showcases Russian nature at its finest year-round.
12 Stunning National Parks and Regional Parks In France
If my travel itinerary for one week in Moscow was a family tree, Tsaritsyno Park would probably be the crazy uncle that no-one talks about. It’s a large park in the south of the city of mind-boggling proportions, unbelievable in so many ways, and yet most travelers have never heard of it.
The palace was supposed to be a summer home for Empress Catherine the Great. But since the construction didn’t meet with her approval the palace was abandoned. Since the early 1990’s the palace, the pond, and the grounds have been undergoing renovations. The entire complex is now looking brighter and more elaborately decorated than at possibly any other time during its history. Like most parks in Moscow, you can visit Tsaritsyno free of charge, but there is a small fee if you want to visit the palace.

How To Stop Procrastinating When Trip Planning
Last, but by no means least on my Moscow itinerary is Kuskovo Park . This is definitely an off-the-beaten-path place. While it is not easily accessible, you will be rewarded with a lack of crowds. This 18th-century summer country house of the Sheremetev family was one of the first summer country estates of the Russian nobility. And when you visit you’ll quickly realize why locals love this park.
Like many other estates, Kuskovo has just been renovated. So there are lovely French formal garden, a grotto, and the Dutch house to explore. Make sure to plan your itinerary well because the estate is some way from a metro station.
Day 6 – Explore the Golden Ring
Creating the Moscow itinerary may keep you busy for days with the seemingly endless amount of things to do. Visiting the so-called Golden Ring is like stepping back in time. Golden Ring is a “theme route” devised by promotion-minded journalist and writer Yuri Bychkov.
Having started in Moscow the route will take you through a number of historical cities. It now includes Suzdal, Vladimir, Kostroma, Yaroslavl and Sergiev Posad. All these awe-inspiring towns have their own smaller kremlins and feature dramatic churches with onion-shaped domes, tranquil residential areas, and other architectural landmarks.
Two Weeks In Thailand: The Perfect 14-Day Itinerary
I only visited two out of eight cities included on the route. It is a no-brainer that Sergiev Posad is the nearest and the easiest city to see on a day trip from Moscow. That being said, you can explore its main attractions in just one day. Located some 70 km north-east of the Russian capital, this tiny and overlooked town is home to Trinity Lavra of St. Sergius, UNESCO Site.

You Will Also Like: 3-Day London Itinerary
Sergiev Posad is often described as being at the heart of Russian spiritual life. So it is uncommon to see the crowds of Russian pilgrims showing a deep reverence for their religion. If you’re traveling independently and using public transport, you can reach Sergiev Posad by bus (departs from VDNKh) or by suburban commuter train from Yaroslavskaya Railway Station (Bahnhof). It takes about one and a half hours to reach the town.
Trinity Lavra of St. Sergius is a great place to get a glimpse of filling and warming Russian lunch, specifically at the “ Gostevaya Izba ” restaurant. Try the duck breast, hearty potato and vegetables, and the awesome Napoleon cake.
Day 7 – Gorky Park, Izmailovo Kremlin, Patriarch’s Ponds
Metro Station: Park Kultury or Oktyabrskaya on Circle Line / Partizanskaya on Dark Blue Line / Pushkinskaya on Dark Green Line
Gorky Park is in the heart of Moscow. It offers many different types of outdoor activities, such as dancing, cycling, skateboarding, walking, jogging, and anything else you can do in a park. Named after Maxim Gorky, this sprawling and lovely park is where locals go on a picnic, relax and enjoy free yoga classes. It’s a popular place to bike around, and there is a Muzeon Art Park not far from here. A dynamic location with a younger vibe. There is also a pier, so you can take a cruise along the river too.

How to Save Money While Traveling in Europe
The Kremlin in Izmailovo is by no means like the one you can find near the Red Square. Originally built for decorative purposes, it now features the Vernissage flea market and a number of frequent fairs, exhibitions, and conferences. Every weekend, there’s a giant flea market in Izmailovo, where dozens of stalls sell Soviet propaganda crap, Russian nesting dolls, vinyl records, jewelry and just about any object you can imagine. Go early in the morning if you want to beat the crowds.
All the Bulgakov’s fans should pay a visit to Patriarch’s Ponds (yup, that is plural). With a lovely small city park and the only one (!) pond in the middle, the location is where the opening scene of Bulgakov’s novel Master and Margarita was set. The novel is centered around a visit by Devil to the atheistic Soviet Union is considered by many critics to be one of the best novels of the 20th century. I spent great two hours strolling the nearby streets and having lunch in the hipster cafe.
Conclusion and Recommendations
To conclude, Moscow is a safe city to visit. I have never had a problem with getting around and most locals are really friendly once they know you’re a foreigner. Moscow has undergone some serious reconstruction over the last few years. So you can expect some places to be completely different. I hope my one week Moscow itinerary was helpful! If you have less time, say 4 days or 5 days, I would cut out day 6 and day 7. You could save the Golden Ring for a separate trip entirely as there’s lots to see!
What are your thoughts on this one week Moscow itinerary? Are you excited about your first time in the city? Let me know in the comments below!
JOIN MY FREE WEEKLY NEWSLETTER!
Email Address *
YOU WILL ALSO LIKE

10 Dishes You Must Try When Going To Moscow

15 Fantastic and Easy Day Trips Close to Moscow

When Is the Best Time To Visit Russia
24 comments.

Ann Snook-Moreau
Moscow looks so beautiful and historic! Thanks for including public transit information for those of us who don’t like to rent cars.

MindTheTravel
Yup, that is me 🙂 Rarely rent + stick to the metro = Full wallet!

Mariella Blago
Looks like you had loads of fun! Well done. Also great value post for travel lovers.
Thanks, Mariella!

I have always wanted to go to Russia, especially Moscow. These sights look absolutely beautiful to see and there is so much history there!
Agree! Moscow is a thousand-year-old city and there is definitely something for everyone.

Tara Pittman
Those are amazing buildings. Looks like a place that would be amazing to visit.

Adriana Lopez
Never been to Moscow or Russia but my family has. Many great spots and a lot of culture. Your itinerary sounds fantastic and covers a lot despite it is only a short period of time.
What was their favourite thing about Russia?

Gladys Parker
I know very little about Moscow or Russia for the\at matter. I do know I would have to see the Red Square and all of its exquisite architectural masterpieces. Also the CATHEDRAL OF CHRIST THE SAVIOUR. Thanks for shedding some light on visiting Moscow.
Thanks for swinging by! The Red Square is a great starting point, but there way too many places and things to discover aside from it!

Ruthy @ Percolate Kitchen
You are making me so jealous!! I’ve always wanted to see Russia.

Moscow is in my bucket list, I don’t know when I can visit there, your post is really useful. As a culture rich place we need to spend at least week.

DANA GUTKOWSKI
Looks like you had a great trip! Thanks for all the great info! I’ve never been in to Russia, but this post makes me wanna go now!

Wow this is amazing! Moscow is on my bucket list – such an amazing place to visit I can imagine! I can’t wait to go there one day!

The building on the second picture looks familiar. I keep seeing that on TV.

Reesa Lewandowski
What beautiful moments! I always wish I had the personality to travel more like this!

Perfect itinerary for spending a week in Moscow! So many places to visit and it looks like you had a wonderful time. I would love to climb that tower. The views I am sure must have been amazing!
I was lucky enough to see the skyline of Moscow from this TV Tower and it is definitely mind-blowing.

Chelsea Pearl
Moscow is definitely up there on my travel bucket list. So much history and iconic architecture!
Thumbs up! 🙂

Blair Villanueva
OMG I dream to visit Moscow someday! Hope the visa processing would be okay (and become more affordable) so I could pursue my dream trip!
Yup, visa processing is the major downside! Agree! Time and the money consuming process…
Save my name, email, and website in this browser for the next time I comment.
- Privacy Overview
- Strictly Necessary Cookies
My website uses cookies so that I can provide you with the best user experience possible. Cookie information is stored in your browser and performs functions such as recognising you when you return to my website and helping me to understand which sections of Mind The Travel you find most interesting and useful.
You can adjust all of your cookie settings by navigating the tabs on the left hand side.
Strictly Necessary Cookie should be enabled at all times so that I can save your preferences for cookie settings.
If you disable this cookie, I will not be able to save your preferences. This means that every time you visit my website you will need to enable or disable cookies again.

Creative Memories Blog
We Make Scrapbooking Fun!
Now Boarding: A First-Class Travel Scrapbook Layout

Today’s creative captain, blog contributor Krislyn Mattei , has come up with a first-class travel scrapbook layout idea that’ll have your creativity soaring to new heights! Be prepared to be the pilot of your own page and grab your Custom Cutting System supplies with the Jumbo Circle Pattern, 12-inch Trimmer and Tape Chips to try out the paper airplane technique featured on this gorgeous globetrotting layout!

To create this layout you will need:
- Passport to Adventure Paper Pack or ( Shop Canada | Shop Australia )
- Passport to Adventure Embellishments or ( Shop Canada | Shop Australia )
- Passport to Adventure Stickers or ( Shop Canada | Shop Australia )
- White Solid Cardstock or ( Shop Canada | Shop Australia )
- Custom Cutting System with Jumbo Circle Pattern or ( Shop Canada | Shop Australia )
- 12-inch Trimmer or ( Shop Canada | Shop Australia )
- Micro-Tip Scissors ( Shop Canada | Shop Australia )
- Tape Runner or ( Shop Canada | Shop Australia )
- Repositionable Tape Runner or ( Shop Canada | Shop Australia )
- Tape Chips or ( Shop Canada | Shop Australia )
- Foam Squares Variety Pack or ( Shop Canada | Shop Australia )
- Black Dual-Tip Pen or ( Shop Canada | Shop Australia )
- CM Zero-Centering Ruler or ( Shop Canada | Shop Australia )

Step 1: Use a sheet of travel stripes paper as the base for this layout.
Step 2: Using the outside of the Jumbo Circle Custom Cutting System Pattern and the Red Blade, cut a circle with gold compass paper. Adhere on the base as shown. Cut off the excess.

Step 3: Cut a 1-3/16″ strip with gray geo paper. Fold in half lengthwise. Using a ruler and pencil, mark on the left side of the folded piece at 1-1/4″. Mark the right side at the next 1-1/4″ and so on, alternating marks on each side (see image above with red markings for visual reference). Using the 12-inch Trimmer or scissors, cut from mark to mark to create diamond shapes (when unfolded). Cut the diamond shapes in half at the fold line. Arrange two triangles in an arrow shape and secure them together with a Tape Chip on the back. Repeat with dark sea green waves, green arrows and navy map papers. You’ll need 10 complete arrows total. Arrange and adhere the arrows around the circle shape as shown, alternating papers.
Step 4: Crop a photo to 5″ x 3-1/2″ and mount on a 5-1/4″ x 3-3/4″ piece of White Solid Cardstock. Mount again on a 5-3/4″ x 4-1/4″ piece of navy maps paper and adhere on the layout. Crop two photos to 3-1/2″ x 3-1/2″ and mount on the layout as shown.
Step 5: Adhere border stickers across the bottom of the layout. Add a journaling embellishment and stickers, popping some up with Foam Squares for dimension.
Step 6: Journal as desired.
What adventures will you be using this travel scrapbook layout to capture? Are you loving the technique Krislyn used to create the paper airplanes? If so, let us know which papers you’ll be using!
P.S. Are YOU a member of the Virtual Crop Facebook Group ? It’s your go-to place for MONTHLY Virtual Crops , MONTHLY Completed Album Challenges , WEEKLY LIVE STREAMING of Fast & Fun Projects with Noreen , LIVE QUARTERLY Secret Box Openings with project tutorials and so much more! We hope you’ll join our community of more than 38,000 fellow memory-keeping enthusiasts — you’ll feel right at home!

Love this post? Share it!
One thought on “ now boarding: a first-class travel scrapbook layout ”.
I found it helpful to better understand the directions by practicing creating the arrow – diamond shapes by sketching out a 1 3/16″ x ~8.5″ shape on paper. Then I marked it every 1.25″, folded it, and drew angled lines. Then cut with pair scissors. Some of my cuts were simple ~triangles because of how the cuts went. The diamonds I cut in half. So now having a visualization of what I’m supposed to do and what my results should look like, I’m more comfortable to cut up my scrapbook paper. Love when folks find innovative ways to create layouts! Thanks Krislyn!
Leave a Reply Cancel reply
Discover more from creative memories blog.
Subscribe now to keep reading and get access to the full archive.
Type your email…
Continue reading
2018 Primetime Emmy & James Beard Award Winner
In Transit: Notes from the Underground
Jun 06 2018.
Spend some time in one of Moscow’s finest museums.
Subterranean commuting might not be anyone’s idea of a good time, but even in a city packing the war-games treasures and priceless bejeweled eggs of the Kremlin Armoury and the colossal Soviet pavilions of the VDNKh , the Metro holds up as one of Moscow’s finest museums. Just avoid rush hour.
The Metro is stunning and provides an unrivaled insight into the city’s psyche, past and present, but it also happens to be the best way to get around. Moscow has Uber, and the Russian version called Yandex Taxi , but also some nasty traffic. Metro trains come around every 90 seconds or so, at a more than 99 percent on-time rate. It’s also reasonably priced, with a single ride at 55 cents (and cheaper in bulk). From history to tickets to rules — official and not — here’s what you need to know to get started.
A Brief Introduction Buying Tickets Know Before You Go (Down) Rules An Easy Tour
A Brief Introduction
Moscow’s Metro was a long time coming. Plans for rapid transit to relieve the city’s beleaguered tram system date back to the Imperial era, but a couple of wars and a revolution held up its development. Stalin revived it as part of his grand plan to modernize the Soviet Union in the 1920s and 30s. The first lines and tunnels were constructed with help from engineers from the London Underground, although Stalin’s secret police decided that they had learned too much about Moscow’s layout and had them arrested on espionage charges and deported.
The beauty of its stations (if not its trains) is well-documented, and certainly no accident. In its illustrious first phases and particularly after the Second World War, the greatest architects of Soviet era were recruited to create gleaming temples celebrating the Revolution, the USSR, and the war triumph. No two stations are exactly alike, and each of the classic showpieces has a theme. There are world-famous shrines to Futurist architecture, a celebration of electricity, tributes to individuals and regions of the former Soviet Union. Each marble slab, mosaic tile, or light fixture was placed with intent, all in service to a station’s aesthetic; each element, f rom the smallest brass ear of corn to a large blood-spattered sword on a World War II mural, is an essential part of the whole.
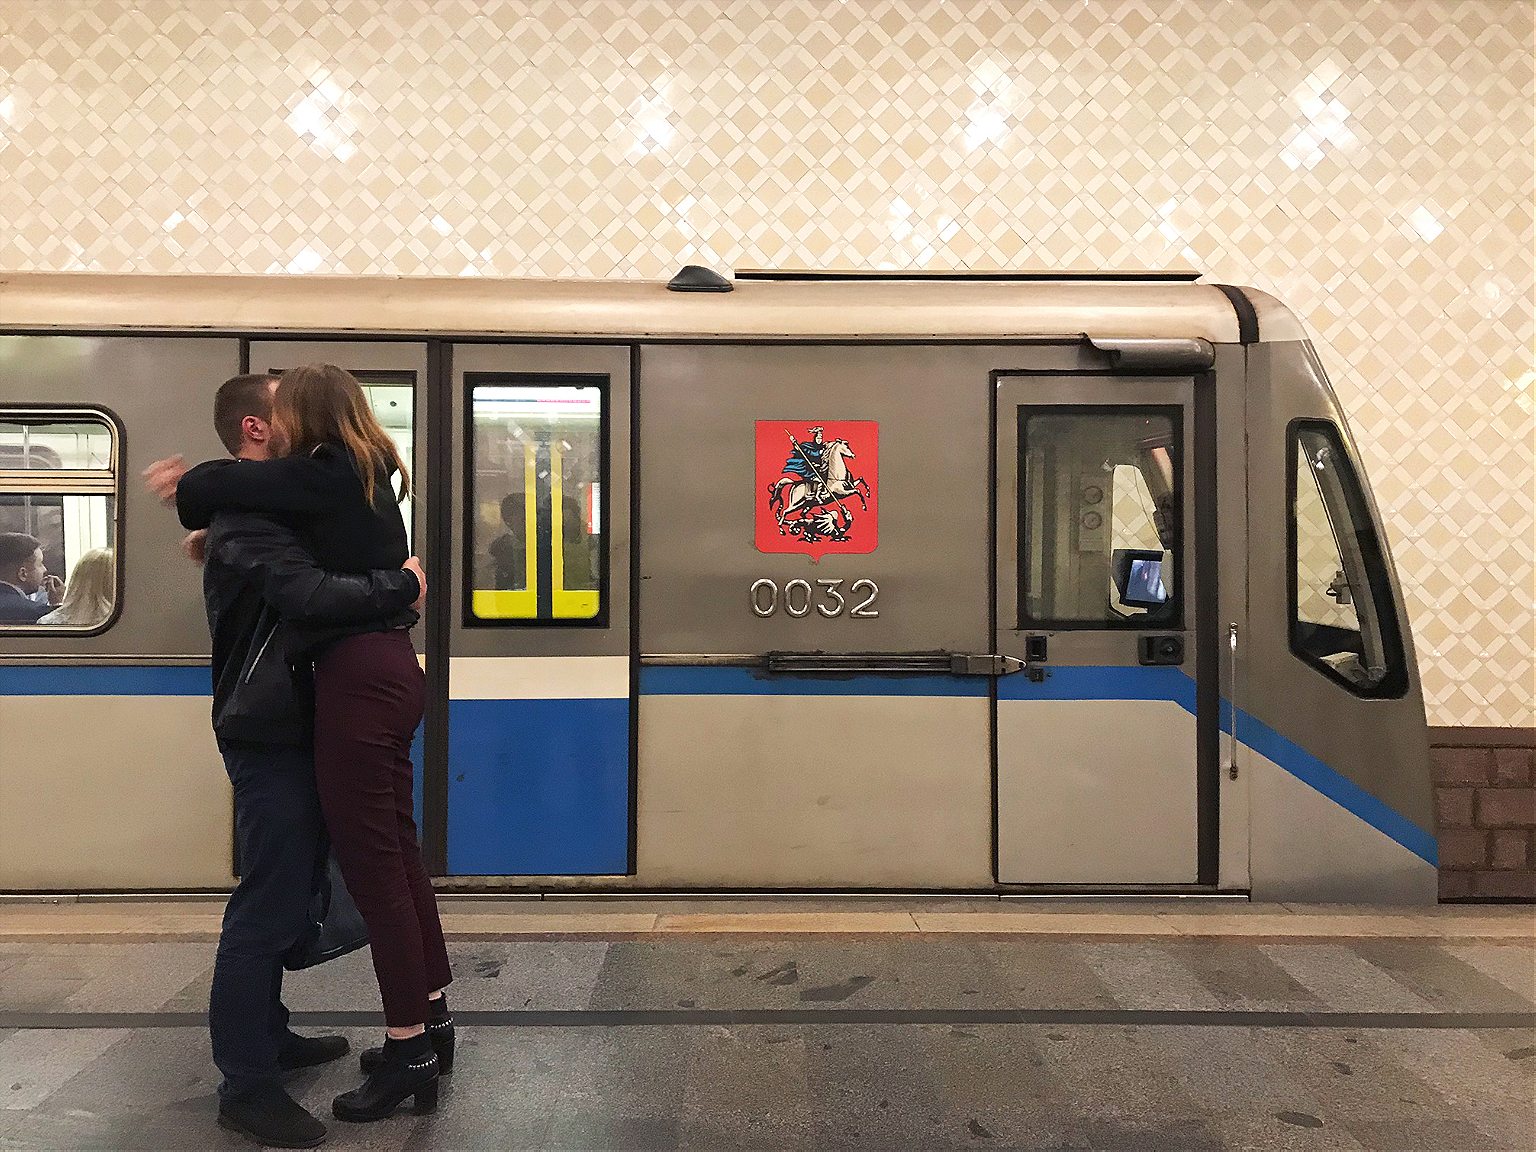
The Metro is a monument to the Soviet propaganda project it was intended to be when it opened in 1935 with the slogan “Building a Palace for the People”. It brought the grand interiors of Imperial Russia to ordinary Muscovites, celebrated the Soviet Union’s past achievements while promising its citizens a bright Soviet future, and of course, it was a show-piece for the world to witness the might and sophistication of life in the Soviet Union.
It may be a museum, but it’s no relic. U p to nine million people use it daily, more than the London Underground and New York Subway combined. (Along with, at one time, about 20 stray dogs that learned to commute on the Metro.)
In its 80+ year history, the Metro has expanded in phases and fits and starts, in step with the fortunes of Moscow and Russia. Now, partly in preparation for the World Cup 2018, it’s also modernizing. New trains allow passengers to walk the entire length of the train without having to change carriages. The system is becoming more visitor-friendly. (There are helpful stickers on the floor marking out the best selfie spots .) But there’s a price to modernity: it’s phasing out one of its beloved institutions, the escalator attendants. Often they are middle-aged or elderly women—“ escalator grandmas ” in news accounts—who have held the post for decades, sitting in their tiny kiosks, scolding commuters for bad escalator etiquette or even bad posture, or telling jokes . They are slated to be replaced, when at all, by members of the escalator maintenance staff.
For all its achievements, the Metro lags behind Moscow’s above-ground growth, as Russia’s capital sprawls ever outwards, generating some of the world’s worst traffic jams . But since 2011, the Metro has been in the middle of an ambitious and long-overdue enlargement; 60 new stations are opening by 2020. If all goes to plan, the 2011-2020 period will have brought 125 miles of new tracks and over 100 new stations — a 40 percent increase — the fastest and largest expansion phase in any period in the Metro’s history.
Facts: 14 lines Opening hours: 5 a.m-1 a.m. Rush hour(s): 8-10 a.m, 4-8 p.m. Single ride: 55₽ (about 85 cents) Wi-Fi network-wide
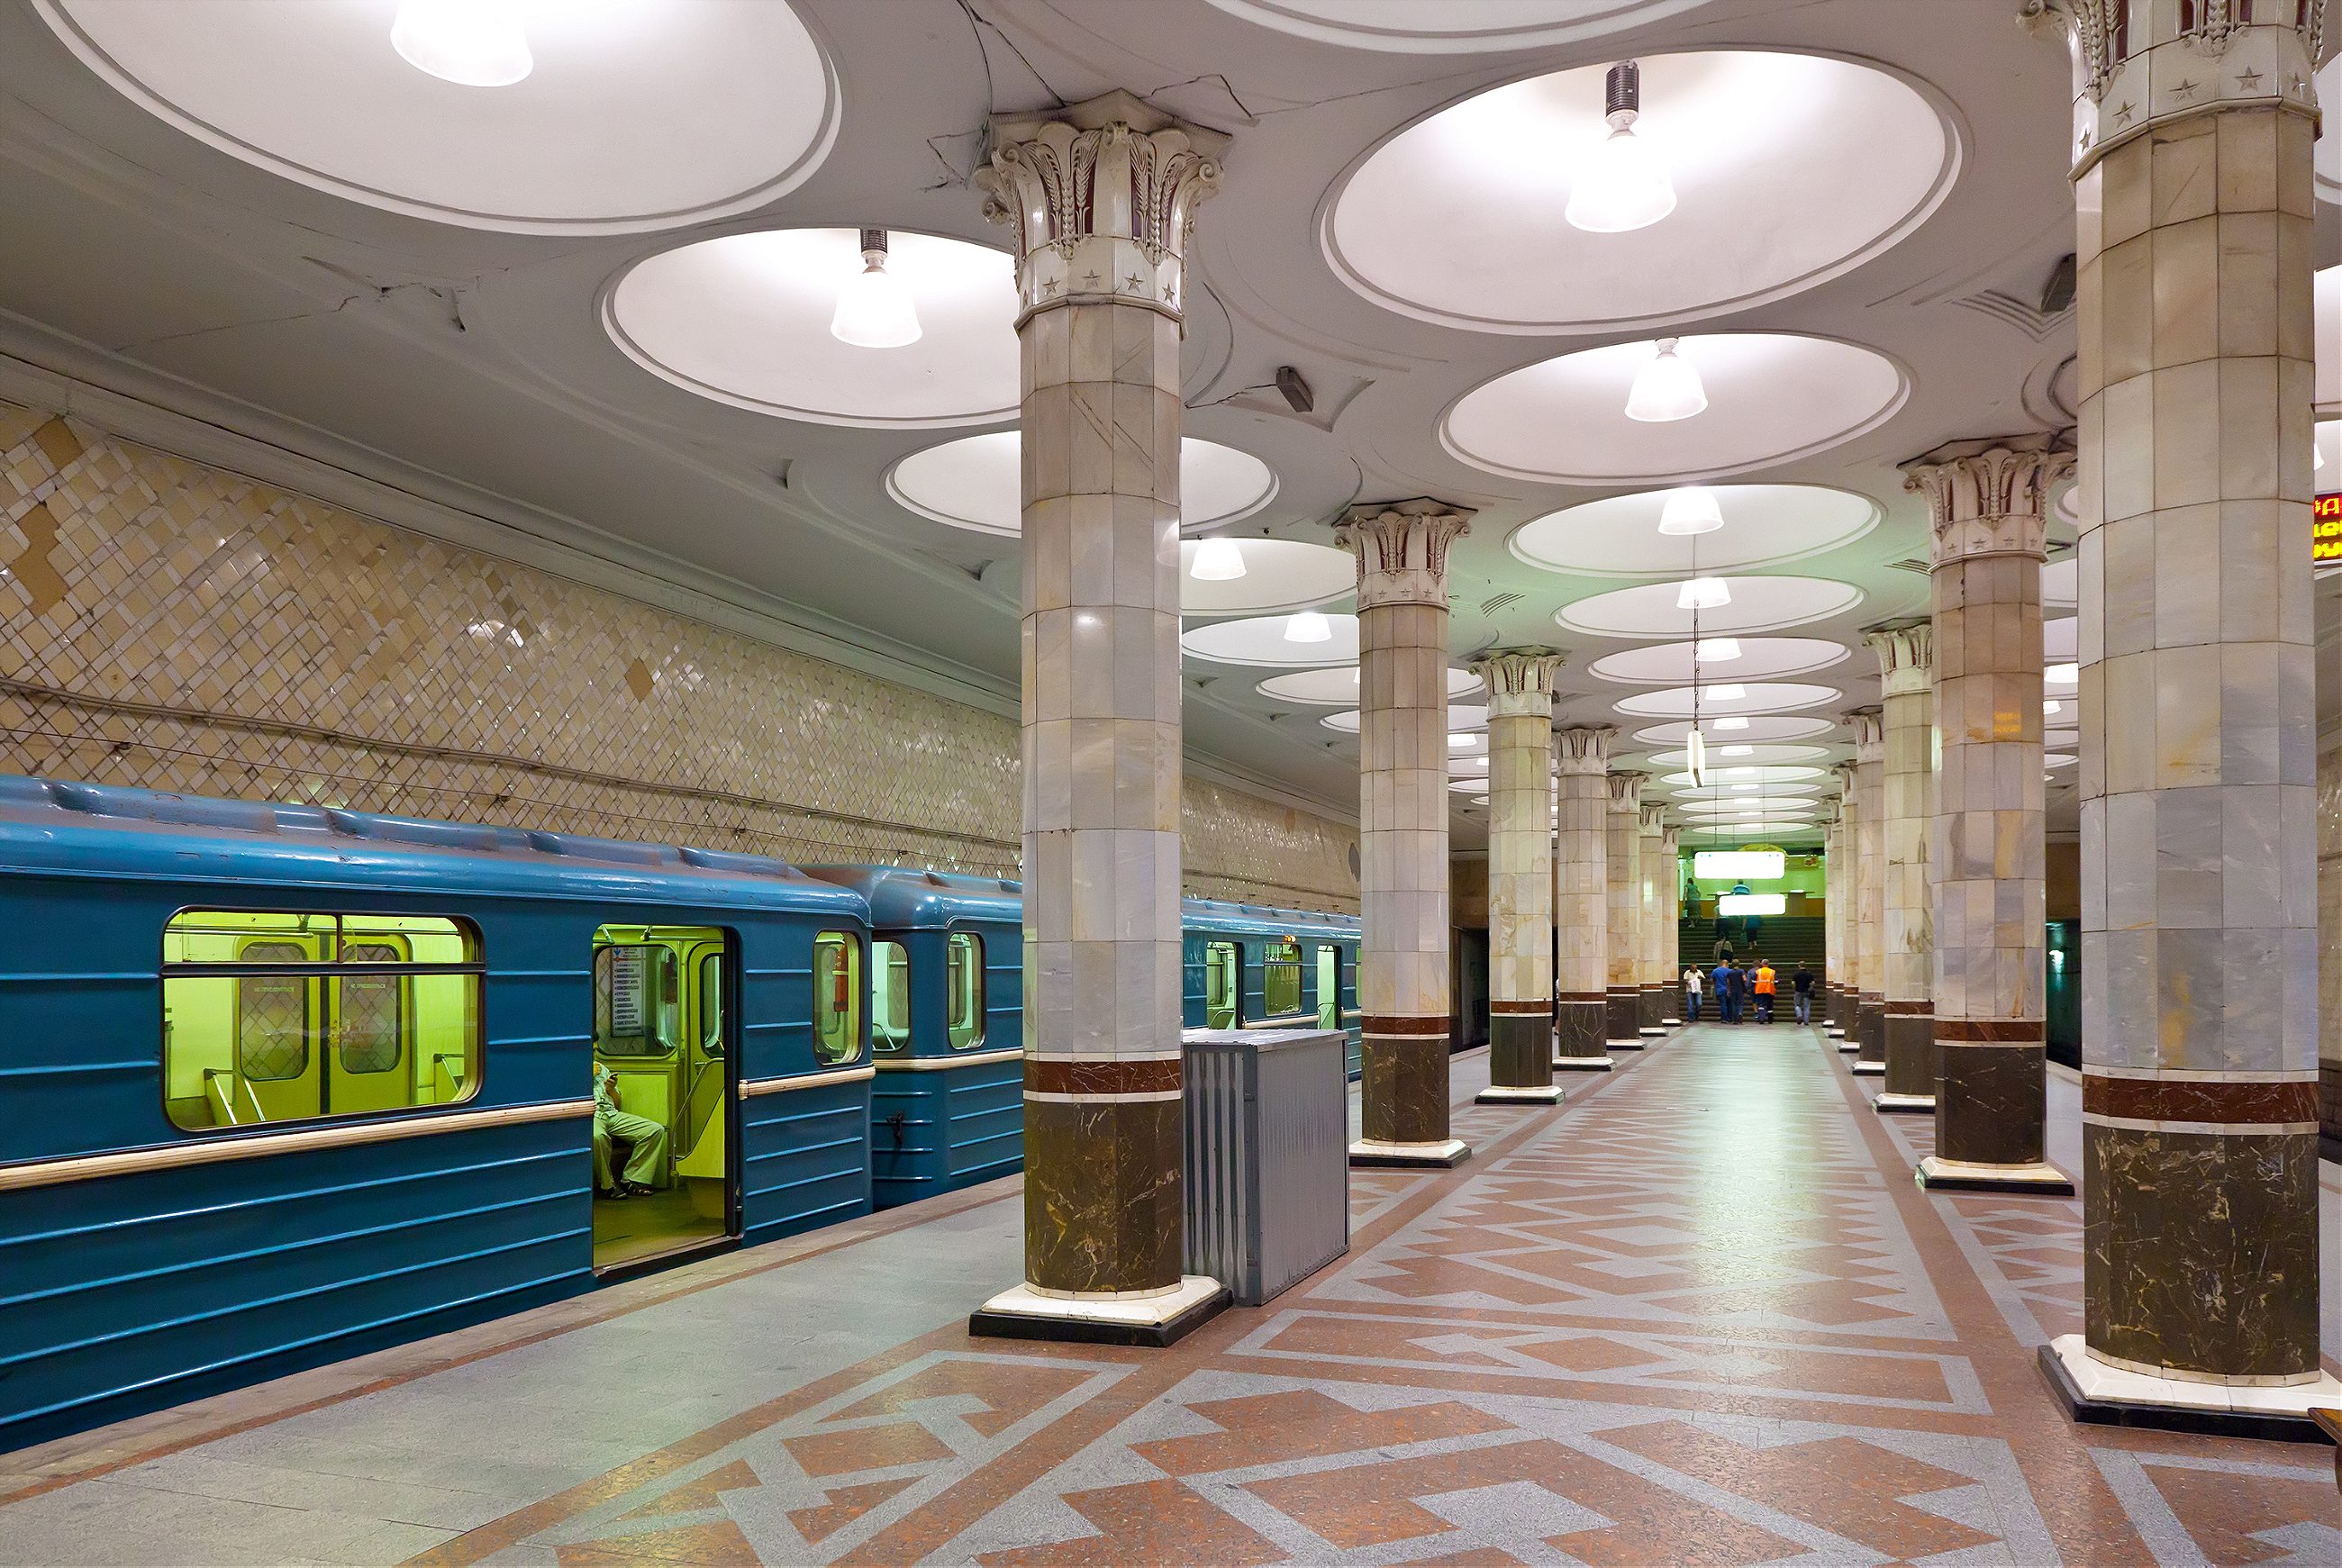
Buying Tickets
- Ticket machines have a button to switch to English.
- You can buy specific numbers of rides: 1, 2, 5, 11, 20, or 60. Hold up fingers to show how many rides you want to buy.
- There is also a 90-minute ticket , which gets you 1 trip on the metro plus an unlimited number of transfers on other transport (bus, tram, etc) within 90 minutes.
- Or, you can buy day tickets with unlimited rides: one day (218₽/ US$4), three days (415₽/US$7) or seven days (830₽/US$15). Check the rates here to stay up-to-date.
- If you’re going to be using the Metro regularly over a few days, it’s worth getting a Troika card , a contactless, refillable card you can use on all public transport. Using the Metro is cheaper with one of these: a single ride is 36₽, not 55₽. Buy them and refill them in the Metro stations, and they’re valid for 5 years, so you can keep it for next time. Or, if you have a lot of cash left on it when you leave, you can get it refunded at the Metro Service Centers at Ulitsa 1905 Goda, 25 or at Staraya Basmannaya 20, Building 1.
- You can also buy silicone bracelets and keychains with built-in transport chips that you can use as a Troika card. (A Moscow Metro Fitbit!) So far, you can only get these at the Pushkinskaya metro station Live Helpdesk and souvenir shops in the Mayakovskaya and Trubnaya metro stations. The fare is the same as for the Troika card.
- You can also use Apple Pay and Samsung Pay.
Rules, spoken and unspoken
No smoking, no drinking, no filming, no littering. Photography is allowed, although it used to be banned.
Stand to the right on the escalator. Break this rule and you risk the wrath of the legendary escalator attendants. (No shenanigans on the escalators in general.)
Get out of the way. Find an empty corner to hide in when you get off a train and need to stare at your phone. Watch out getting out of the train in general; when your train doors open, people tend to appear from nowhere or from behind ornate marble columns, walking full-speed.
Always offer your seat to elderly ladies (what are you, a monster?).
An Easy Tour
This is no Metro Marathon ( 199 stations in 20 hours ). It’s an easy tour, taking in most—though not all—of the notable stations, the bulk of it going clockwise along the Circle line, with a couple of short detours. These stations are within minutes of one another, and the whole tour should take about 1-2 hours.
Start at Mayakovskaya Metro station , at the corner of Tverskaya and Garden Ring, Triumfalnaya Square, Moskva, Russia, 125047.
1. Mayakovskaya. Named for Russian Futurist Movement poet Vladimir Mayakovsky and an attempt to bring to life the future he imagined in his poems. (The Futurist Movement, natch, was all about a rejecting the past and celebrating all things speed, industry, modern machines, youth, modernity.) The result: an Art Deco masterpiece that won the National Grand Prix for architecture at the New York World’s Fair in 1939. It’s all smooth, rounded shine and light, and gentle arches supported by columns of dark pink marble and stainless aircraft steel. Each of its 34 ceiling niches has a mosaic. During World War II, the station was used as an air-raid shelter and, at one point, a bunker for Stalin. He gave a subdued but rousing speech here in Nov. 6, 1941 as the Nazis bombed the city above.
Take the 3/Green line one station to:
2. Belorusskaya. Opened in 1952, named after the connected Belarussky Rail Terminal, which runs trains between Moscow and Belarus. This is a light marble affair with a white, cake-like ceiling, lined with Belorussian patterns and 12 Florentine ceiling mosaics depicting life in Belarussia when it was built.
Transfer onto the 1/Brown line. Then, one stop (clockwise) t o:
3. Novoslobodskaya. This station was designed around the stained-glass panels, which were made in Latvia, because Alexey Dushkin, the Soviet starchitect who dreamed it up (and also designed Mayakovskaya station) couldn’t find the glass and craft locally. The stained glass is the same used for Riga’s Cathedral, and the panels feature plants, flowers, members of the Soviet intelligentsia (musician, artist, architect) and geometric shapes.
Go two stops east on the 1/Circle line to:
4. Komsomolskaya. Named after the Komsomol, or the Young Communist League, this might just be peak Stalin Metro style. Underneath the hub for three regional railways, it was intended to be a grand gateway to Moscow and is today its busiest station. It has chandeliers; a yellow ceiling with Baroque embellishments; and in the main hall, a colossal red star overlaid on golden, shimmering tiles. Designer Alexey Shchusev designed it as an homage to the speech Stalin gave at Red Square on Nov. 7, 1941, in which he invoked Russia’s illustrious military leaders as a pep talk to Soviet soldiers through the first catastrophic year of the war. The station’s eight large mosaics are of the leaders referenced in the speech, such as Alexander Nevsky, a 13th-century prince and military commander who bested German and Swedish invading armies.
One more stop clockwise to Kurskaya station, and change onto the 3/Blue line, and go one stop to:
5. Baumanskaya. Opened in 1944. Named for the Bolshevik Revolutionary Nikolai Bauman , whose monument and namesake district are aboveground here. Though he seemed like a nasty piece of work (he apparently once publicly mocked a woman he had impregnated, who later hung herself), he became a Revolutionary martyr when he was killed in 1905 in a skirmish with a monarchist, who hit him on the head with part of a steel pipe. The station is in Art Deco style with atmospherically dim lighting, and a series of bronze sculptures of soldiers and homefront heroes during the War. At one end, there is a large mosaic portrait of Lenin.
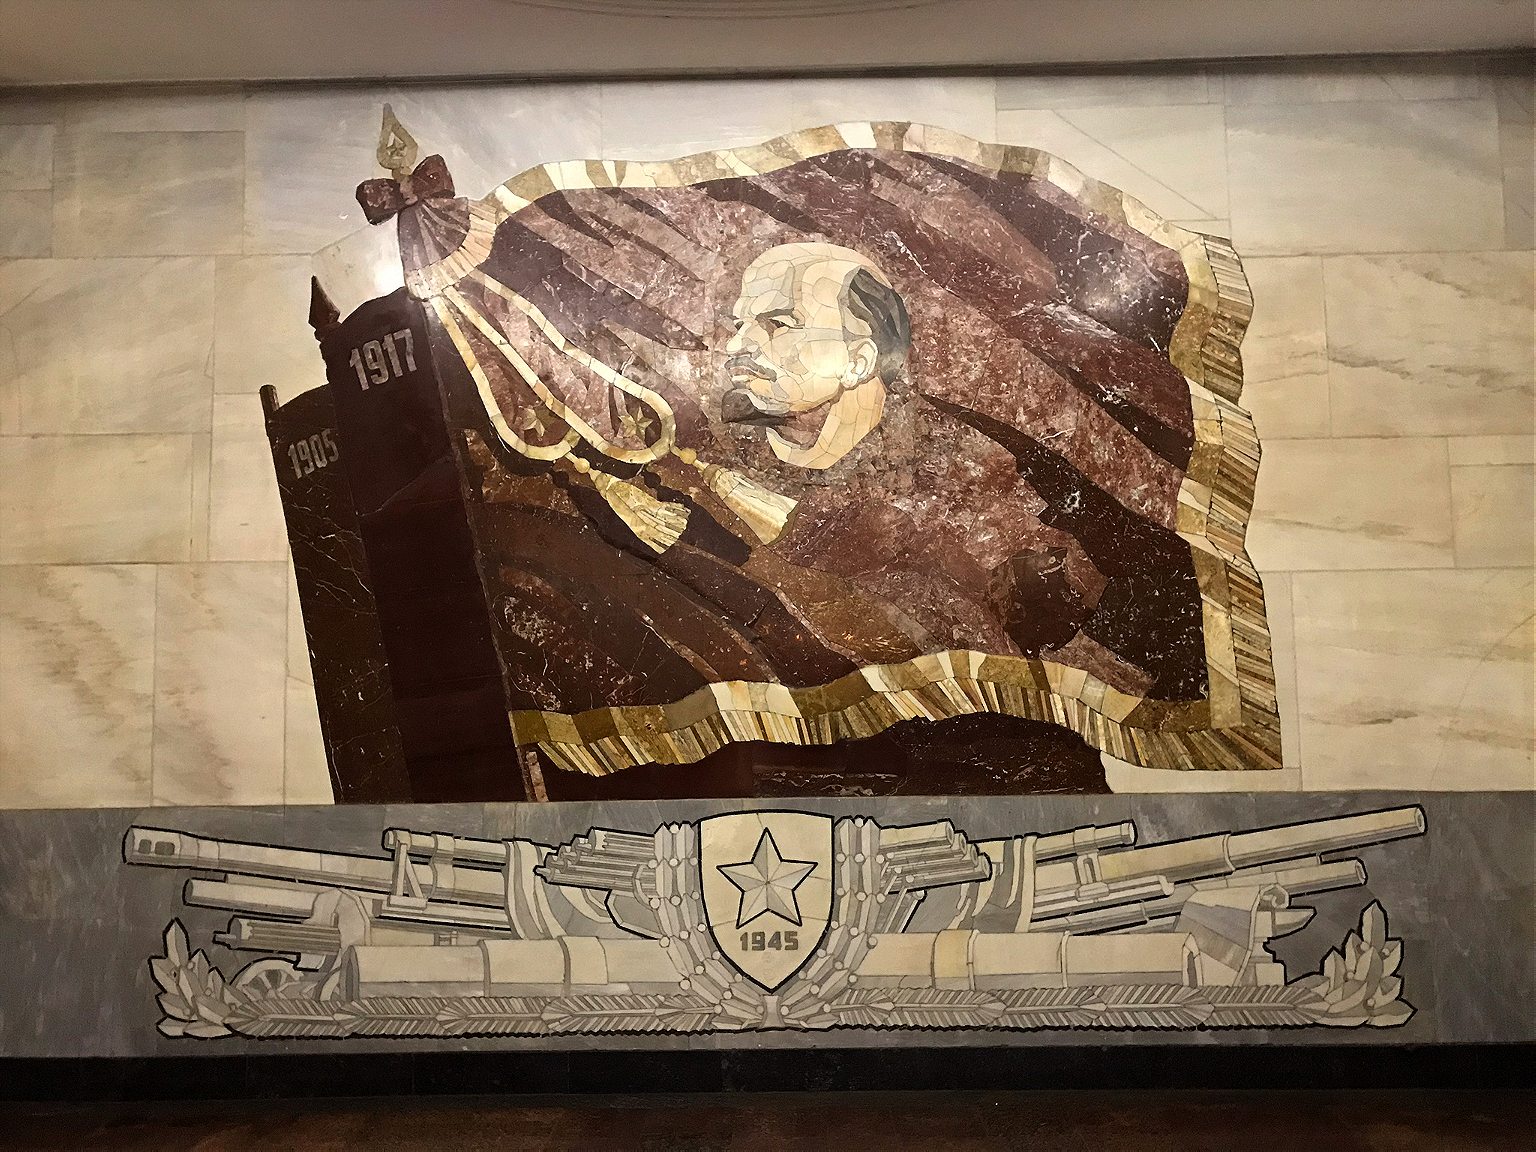
Stay on that train direction one more east to:
6. Elektrozavodskaya. As you may have guessed from the name, this station is the Metro’s tribute to all thing electrical, built in 1944 and named after a nearby lightbulb factory. It has marble bas-relief sculptures of important figures in electrical engineering, and others illustrating the Soviet Union’s war-time struggles at home. The ceiling’s recurring rows of circular lamps give the station’s main tunnel a comforting glow, and a pleasing visual effect.
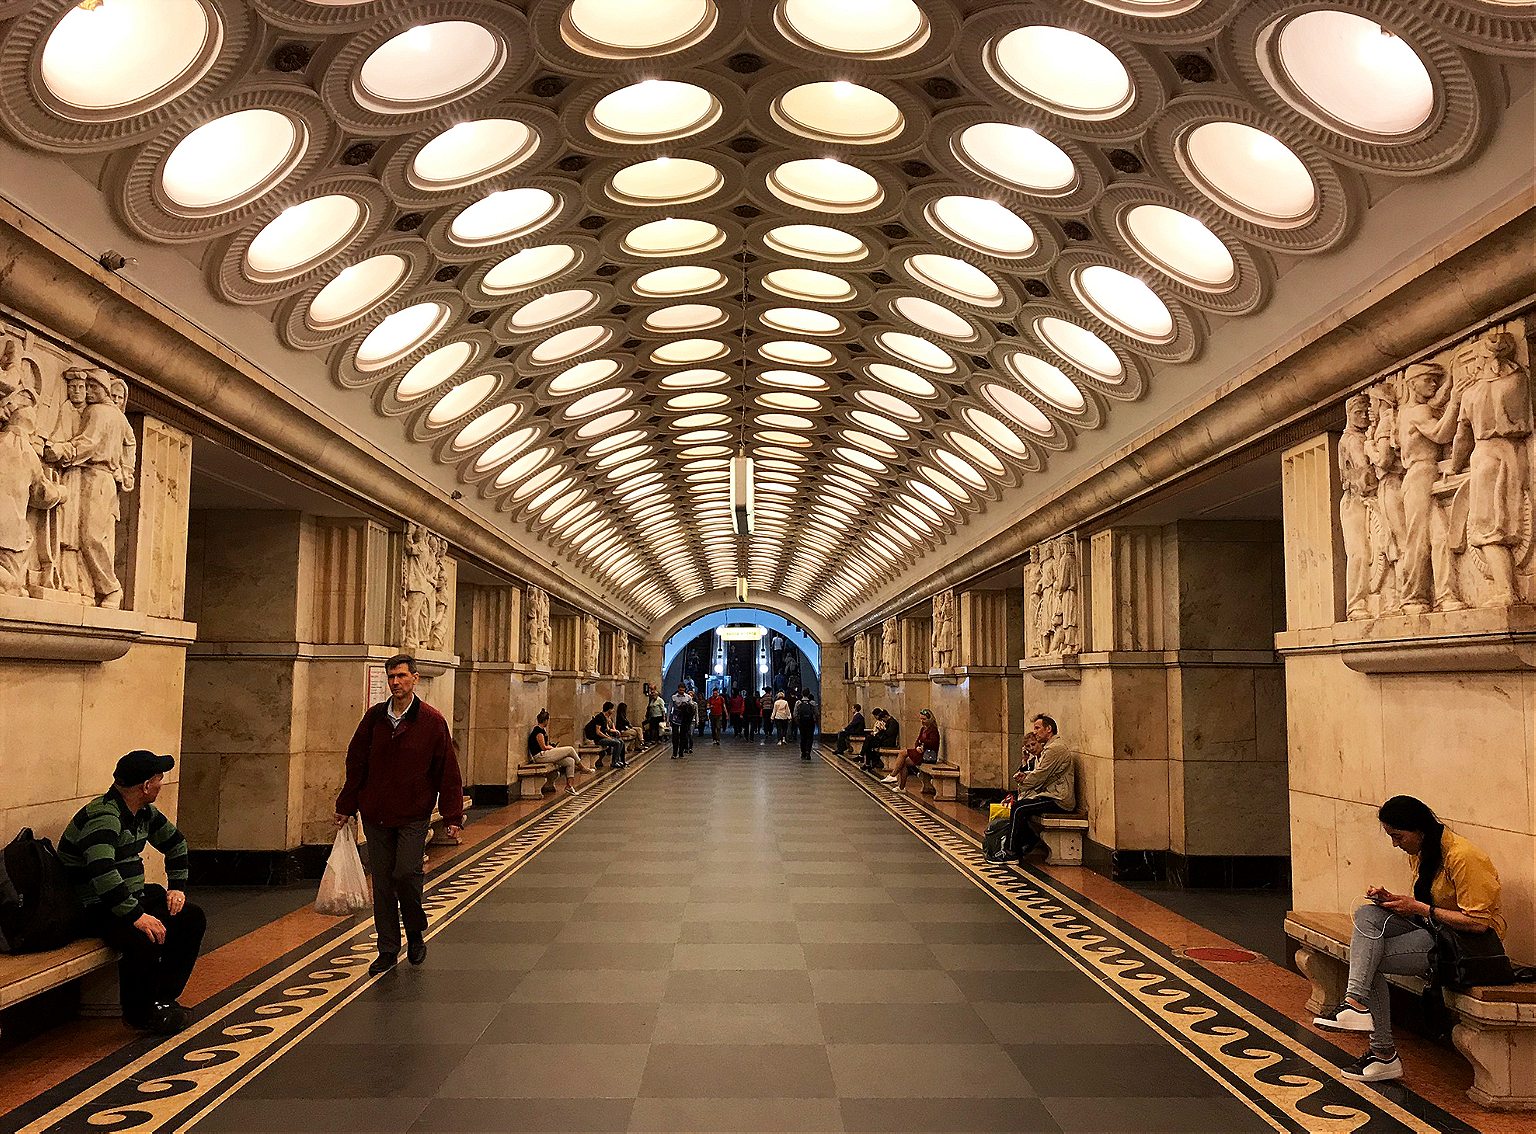
Double back two stops to Kurskaya station , and change back to the 1/Circle line. Sit tight for six stations to:
7. Kiyevskaya. This was the last station on the Circle line to be built, in 1954, completed under Nikita Khrushchev’ s guidance, as a tribute to his homeland, Ukraine. Its three large station halls feature images celebrating Ukraine’s contributions to the Soviet Union and Russo-Ukrainian unity, depicting musicians, textile-working, soldiers, farmers. (One hall has frescoes, one mosaics, and the third murals.) Shortly after it was completed, Khrushchev condemned the architectural excesses and unnecessary luxury of the Stalin era, which ushered in an epoch of more austere Metro stations. According to the legend at least, he timed the policy in part to ensure no Metro station built after could outshine Kiyevskaya.
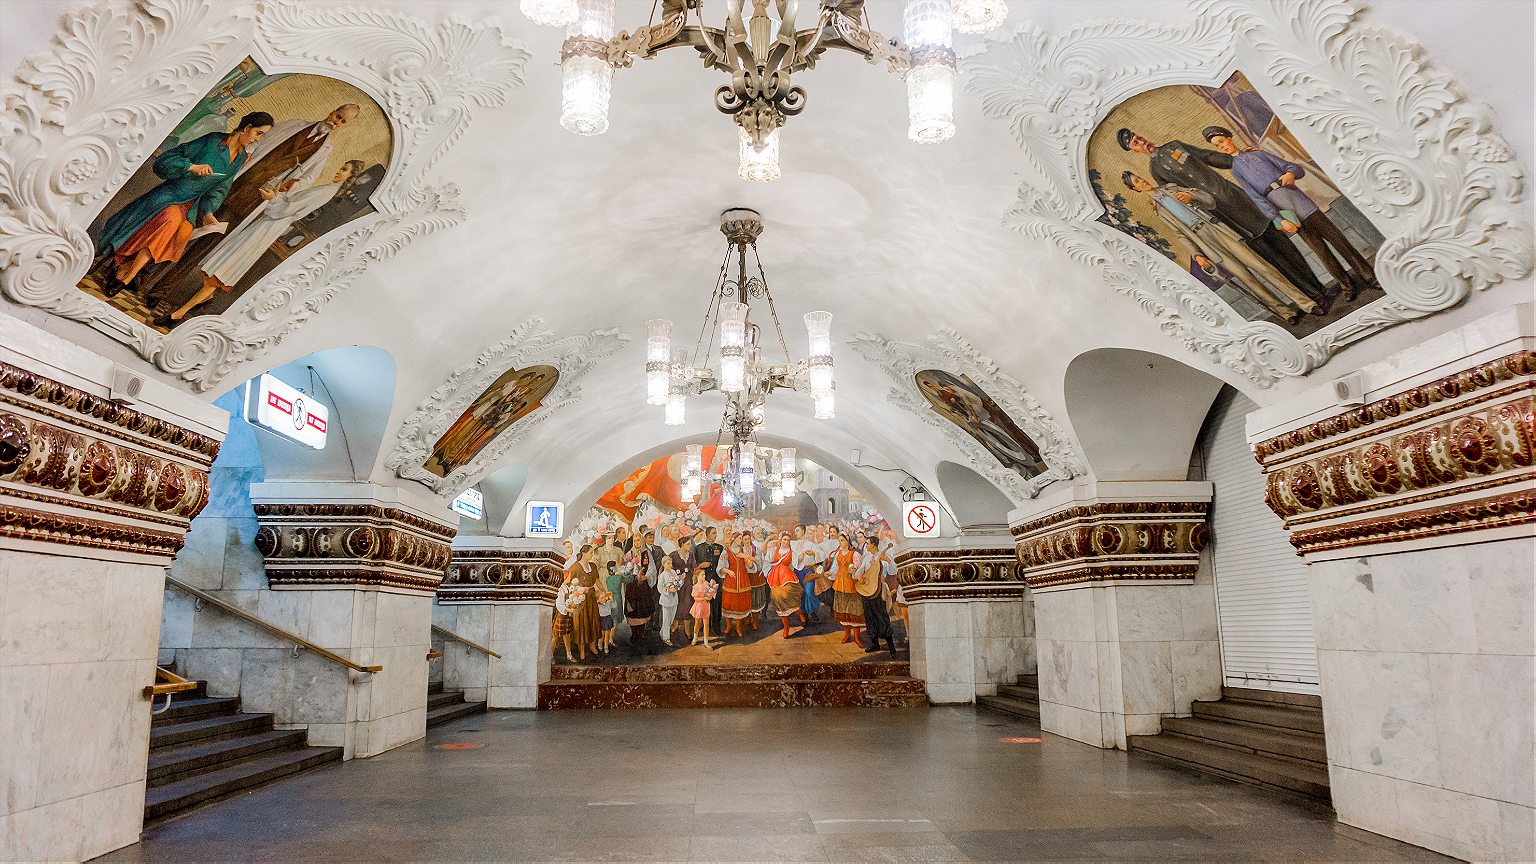
Change to the 3/Blue line and go one stop west.
8. Park Pobedy. This is the deepest station on the Metro, with one of the world’s longest escalators, at 413 feet. If you stand still, the escalator ride to the surface takes about three minutes .) Opened in 2003 at Victory Park, the station celebrates two of Russia’s great military victories. Each end has a mural by Georgian artist Zurab Tsereteli, who also designed the “ Good Defeats Evil ” statue at the UN headquarters in New York. One mural depicts the Russian generals’ victory over the French in 1812 and the other, the German surrender of 1945. The latter is particularly striking; equal parts dramatic, triumphant, and gruesome. To the side, Red Army soldiers trample Nazi flags, and if you look closely there’s some blood spatter among the detail. Still, the biggest impressions here are the marble shine of the chessboard floor pattern and the pleasingly geometric effect if you view from one end to the other.
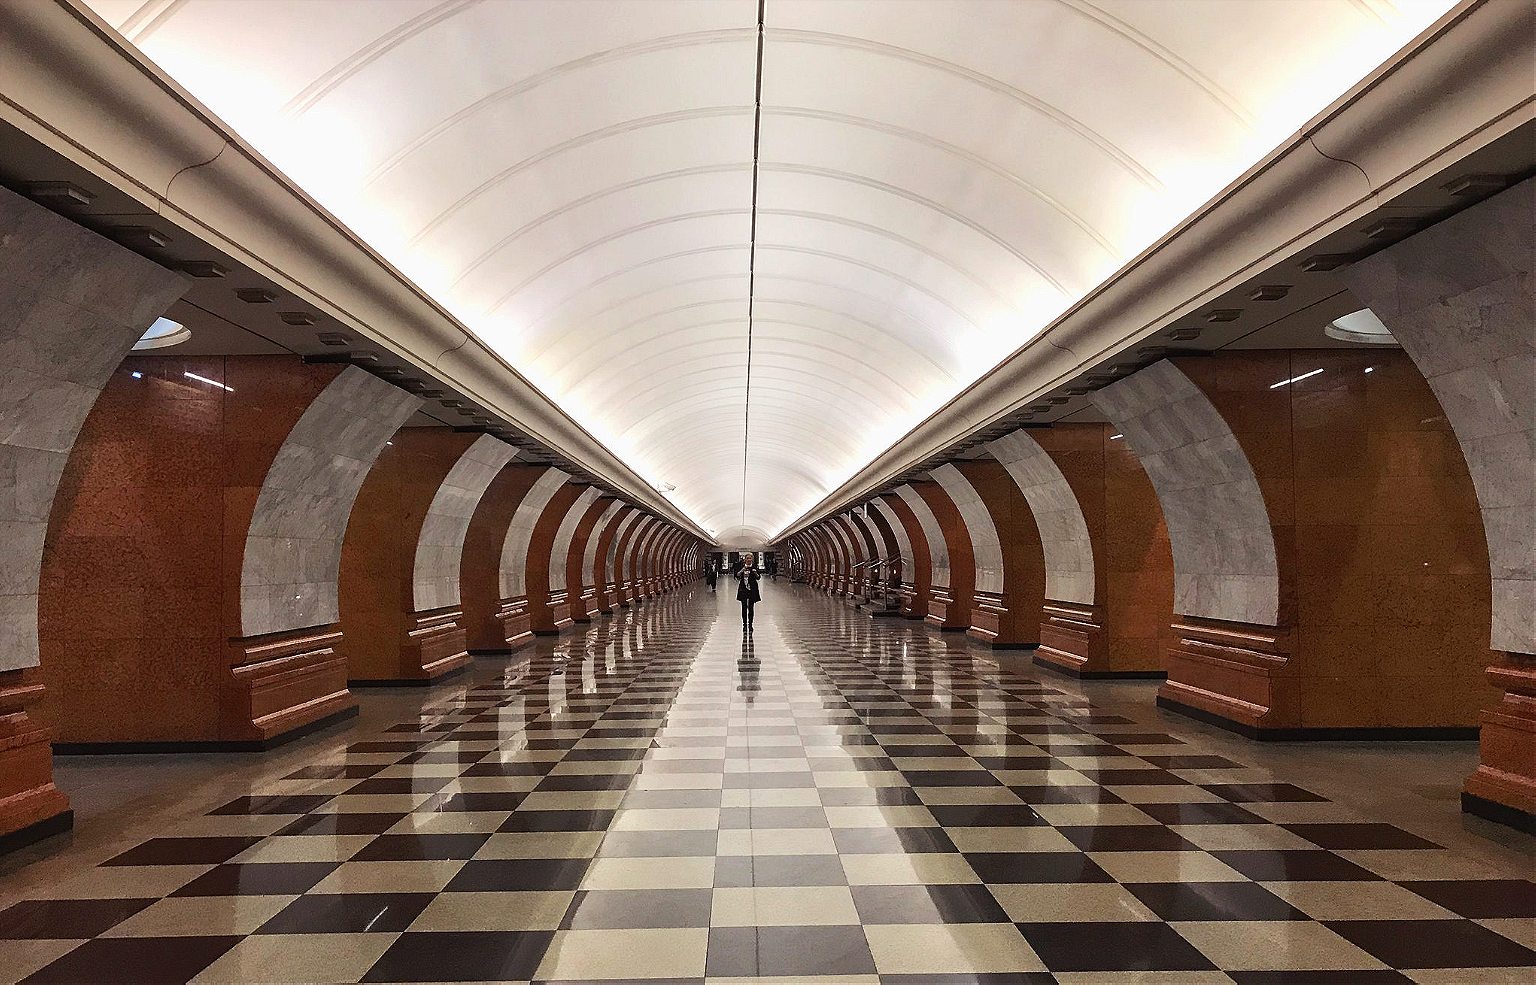
Keep going one more stop west to:
9. Slavyansky Bulvar. One of the Metro’s youngest stations, it opened in 2008. With far higher ceilings than many other stations—which tend to have covered central tunnels on the platforms—it has an “open-air” feel (or as close to it as you can get, one hundred feet under). It’s an homage to French architect Hector Guimard, he of the Art Nouveau entrances for the Paris M é tro, and that’s precisely what this looks like: A Moscow homage to the Paris M é tro, with an additional forest theme. A Cyrillic twist on Guimard’s Metro-style lettering over the benches, furnished with t rees and branch motifs, including creeping vines as towering lamp-posts.
Stay on the 3/Blue line and double back four stations to:
10. Arbatskaya. Its first iteration, Arbatskaya-Smolenskaya station, was damaged by German bombs in 1941. It was rebuilt in 1953, and designed to double as a bomb shelter in the event of nuclear war, although unusually for stations built in the post-war phase, this one doesn’t have a war theme. It may also be one of the system’s most elegant: Baroque, but toned down a little, with red marble floors and white ceilings with gilded bronze c handeliers.
Jump back on the 3/Blue line in the same direction and take it one more stop:
11. Ploshchad Revolyutsii (Revolution Square). Opened in 1938, and serving Red Square and the Kremlin . Its renowned central hall has marble columns flanked by 76 bronze statues of Soviet heroes: soldiers, students, farmers, athletes, writers, parents. Some of these statues’ appendages have a yellow sheen from decades of Moscow’s commuters rubbing them for good luck. Among the most popular for a superstitious walk-by rub: the snout of a frontier guard’s dog, a soldier’s gun (where the touch of millions of human hands have tapered the gun barrel into a fine, pointy blade), a baby’s foot, and a woman’s knee. (A brass rooster also sports the telltale gold sheen, though I am told that rubbing the rooster is thought to bring bad luck. )
Now take the escalator up, and get some fresh air.
R&K Insider
Join our newsletter to get exclusives on where our correspondents travel, what they eat, where they stay. Free to sign up.
21 Things to Know Before You Go to Moscow
Featured city guides.
Moscow - Interactive map
Information about the map.
Check out the main monuments, museums, squares, churches and attractions in our map of Moscow. Click on each icon to see what it is.
To help you find your way once you get to your destination, the map you print out will have numbers on the various icons that correspond to a list with the most interesting tourist attractions. This way, you’ll be able to see where each attraction is.
Icons on the Moscow interactive map
The map is very easy to use:
- Check out information about the destination: click on the color indicators.
- Move across the map: shift your mouse across the map.
- Zoom in: double click on the left-hand side of the mouse on the map or move the scroll wheel upwards.
- Zoom out: double click on the right-hand side of the mouse on the map or move the scroll wheel downwards.
You may also be interested in

Where to eat
Vodka, caviar, borscht... the list of Russian delicacies goes on! Discover where, when and what to eat during your trip to Moscow.
General Information
Learn everything you need to know for your trip to Moscow, from visa requirements and currency to language tips and which plugs to bring! We'll try and answer all of your most frequently asked questions.
IMAGES
VIDEO
COMMENTS
1. On A Plane - Travel Memories Scrapbook. Supplies: Pink plane pattern paper. Round trip ephemera pack. Between planes, trains, and cars there are so many ways to get around the world. And sometimes, the journey is just as fun as the destination. While visiting other parts of the world I am always in awe at the scenery.
We gathered 12 layout ideas and shared our tips for getting the best travel scrapbook pages. Scroll down to see all of these incredible examples. 1. Photograph the Journey. "Fight to Orlando" by Paije Potter - Pattern #438. Take pictures of how you got to your destination.
Our Honeymoon Scrapbook. The first and most common way to scrapbook your travel memories is to create a proper scrapbook in binder form. I typically use a 12x12 binder like this one with plastic page inserts where you can add pages that you design, giving you more creativity and freedom than a notebook.. The first thing to decide is organization and layout.
Here are 6 tips and ideas for your travel scrapbook. Use some items which are inspired by a specific culture that you got to experience. Use the colours from your photos for your layouts. Use a single theme for your entire scrapbook or use different themes for different travel experiences. Mix your travel photos with scenic pictures, pictures ...
What are some unique layouts for a travel scrapbook? There are many different layout options for a travel scrapbook, but some unique ideas include using a timeline layout to document your trip day-by-day, using a map as a background for your pages, or creating a scrapbook that focuses on a specific theme, like food or architecture.
That's why we've put together 12 pages that you'll want to scraplift for your summer travels! Keep scrolling to get new ideas and inspiration for your next travel pages: 1. Use Items Inspired by a Specific Culture. "Castlewood Canyon" by Jodi Benson - Pattern #544. Everything about Jodi's page makes you believe it's about a trip to an ancient ...
Organizing the Layout. The layout of your travel scrapbook is where you bring together all the elements to create visually pleasing and cohesive pages. Consider these tips for organizing your layout: Plan Ahead: Before starting, have a rough idea of how you want your pages to look. Consider the number of photos and mementos you have and how you ...
Gather your holiday photos, ephemera and scrapbooking supplies and check out these travel scrapbook ideas for some serious inspiration! 1. Try a nautical theme. Nothing says holiday quite like red, white and blue! Get a dose of vitamin sea with this fun travel scrapbook layout by Echo Park Paper.
Step 1: Use the ornate red circles tonal paper for your base. Step 2: Using the 12-inch Trimmer, trim one piece of the beige road map designer paper into an 11″ x 11″ square. Align and adhere to base page with a Tape Runner. Step 3: Using the 12-inch Trimmer, cut the large circular sun laser-cut mat in half.
Embark on a creative adventure with our latest video featuring travel scrapbook layout ideas that will transport you to your favorite destinations! Whether y...
To create this layout you will need: Step 1: Use the beige road map designer paper as your base. Step 2: Cut along an edge of mint hexagons designer paper with the gentle waves blade of the 12-inch Decorative Trimmer (the blade has three waves on it). Trim the strip down to 1-1/2″ x 12″.
Feb 24, 2022 - Explore Janine's board "Scrapbooking-Travel Layouts", followed by 21,666 people on Pinterest. See more ideas about travel scrapbook, scrapbooking layouts travel, scrapbook.
Scrapbook by Canva Creative Studio. Beige Brown Polaroid Travel Journal Scrapbook. Scrapbook by Geelator. Red and Pink Floral Scrap Paper Travel Scrapbook. Scrapbook by Move Studios. Blue and White Modern Vintage Travel Memories Scrapbook. Scrapbook by Vani Jain's Team.
Check out this travel scrapbook layout idea and imagine what trip (future or past) would go well with it! To create this layout, you will need: Step 1: Use a piece of Crimson Cardstock as the base of this layout. Step 2: Cut a piece from the road patterned paper to measure 12″ x 8″ and adhere to the cardstock. Step 3: Adhere the trees ...
6×8 Tropical Hawaii Vacation Scrapbooking Album. This Is Paradise Scrapbooking Layout: Snorkeliing in Hawaii. Santa Barbara Scrapbook Mini Album Idea. Tiny Mini Scrapbook Album With Pictures From Santa Barbara, California: Here you can see that this little scrapbook mini album fits in the palm of your hand.
5. Repeat Step 4. but cut the second border off at 1-3/8″. 6. Trim the two border strips to 10-1/4″ taking off equal amounts from both sides of the strips. Make sure. that the wavy edges match with the wavy edges of the strips from Steps 2 and 3. 7. Crop photos to 6″ x 3-1/2″ and 4″ x 3-1/2″. 8.
Day 6 - Explore the Golden Ring. Creating the Moscow itinerary may keep you busy for days with the seemingly endless amount of things to do. Visiting the so-called Golden Ring is like stepping back in time. Golden Ring is a "theme route" devised by promotion-minded journalist and writer Yuri Bychkov.
Step 1: Use a sheet of travel stripes paper as the base for this layout. Step 2: Using the outside of the Jumbo Circle Custom Cutting System Pattern and the Red Blade, cut a circle with gold compass paper. Adhere on the base as shown. Cut off the excess. Step 3: Cut a 1-3/16″ strip with gray geo paper. Fold in half lengthwise.
There are lots to see in the city centre of Moscow, so we decided to start our series of Russia travel videos by showing you around the most historical part ...
Just avoid rush hour. The Metro is stunning andprovides an unrivaled insight into the city's psyche, past and present, but it also happens to be the best way to get around. Moscow has Uber, and the Russian version called Yandex Taxi,butalso some nasty traffic. Metro trains come around every 90 seconds or so, at a more than 99 percent on-time ...
Icons on the Moscow interactive map. The map is very easy to use: Check out information about the destination: click on the color indicators. Move across the map: shift your mouse across the map. Zoom in: double click on the left-hand side of the mouse on the map or move the scroll wheel upwards. Zoom out: double click on the right-hand side of ...