

The Best 3D Printing Speed Settings For Every Filament

Written by: Tom Bardwell
October 26, 2023
Key Takeaways
- Print speed basics : Print speed affects print time and quality, and depends on filament, printer, and model.
- Slicer settings : Adjust print speed and other settings like outer wall speed, infill speed, and retraction speed for optimal results.
- Filament-specific speeds : PLA, ABS, PETG, TPU, and Nylon have different recommended print speeds based on their properties.
- Test prints : Use test prints to find the best balance between speed and quality for your printer and filament.
Print speed is one of the most important settings when 3D printing. It affects both print speeds and the quality of printed parts, and therefore the likelihood of errors and failures. The best speed settings requires striking a balance between speed and quality.
As with most aspects of 3D printing, print speed differs depending on the material. PLA and, say TPU, require a very different approach, so unfortunately there’s no universal ‘best’ print speed for all filament types.
Here is a table of the optimal print speeds for the most popular FDM filaments:
To further complicate matters, different 3D printers have their own hardware and quirks, and this even extends to different brands of the same type of filament, given that formulations and additives can drastically alter the speed requirements.

The type and size of parts also affect print times and the ideal print speed, as do slicer settings such as:
- Infill density
- Layer height
- Support structures
A lot of factors play into finding the best print speed settings. In this guide, we’ll explain what we consider to be the best settings for the most popular filament types, including PLA, ABS, PETG, TPU, and more.
The idea is to give you a solid starting point, and from there, you can tweak and experiment to zero in on the optimum speed for your printer, filament, and specific project.
What Is Speed in 3D Printing, and Why Is It Important?
Your 3D print speed determines how fast the printhead assembly motors on a 3D printer move as the extruder deposits material to create a 3D print . This should NOT be confused with travel time, which is the rate at which the printhead moves when it isn’t depositing filament. Print speed is measured in mm/s.
More specifically, the speed affects how fast the printhead travels along the X and Y axes of the print bed, and how fast the extruder motor feeds filament into the printhead.
Print speed is not to be confused with printing time , which is how long the 3D part or model takes overall. The distinction is important because a fast print speed can still lead to a long print time, especially for larger and more complex prints.
Print speed is important because it not only affects print times – faster speeds can reduce print times by hours in some cases – but also impacts the overall quality of a print (details, features, surface finish) and, therefore, the success of the print. Too fast or too slow, and print errors and failures can arise.
Benefits of Correct 3D Print Speed
- Reduce instances of ringing, ghosting , and stringing
- Improves first and subsequent layer adhesion
- Reduces under-extrusion and clogging
- Better overall print quality
- Fewer errors and print failures
How Fast Is Too Fast in 3D Printing?
To determine what speed is too fast, you’ll need to identify the speed where issues like under-extrusion, ringing, ghosting, and insufficient inter-layer adhesion start to occur.
Quality is subjective, so what may be acceptable to someone may not be to someone else. So, using test prints is a great way to find your personal balance on quality and print time for your projects and filament.
Best 3D Printing Speed Settings
To hone in on the best print settings, we have to look at individual slicer settings , specifically those that relate to speed.
There’s no universal best print speed, so we recommend taking the following as guidance rather than gospel. Experiment and test print to find settings that work for your printer and filament.
Print Speed Settings
To begin, check your filament spool to see the manufacturer’s recommendations. These offer a solid starting point to work forward from. Otherwise, check out our table above for what is considered the typical best speeds for each filament.
From here, make small adjustments to print speed, either up or down in small increments, until you find a happy medium between print quality and print time that you’re satisfied with.
As with so many aspects of 3D printing, experimentation and fine-tuning is the key to finding the optimal print speed. Don’t hesitate to dedicate a few hours to print test and calibration models to zero in on the ideal print speed for your filament and project.
You can further fine-tune the overall print speed setting by adjusting the following settings:
- Outer Wall Speed – the speed the printer prints outer walls (sometimes called the outer shell). Ideally, you’ll want a slower speed for these as they form the finish of a model, and therefore benefit from extra print times to improve the print’s surface finish.
- Inner Wall Speed – sets how fast the inner walls of the model are deposited (sometimes called inner shell). These are not usually visible, so there’s no need to worry too much about the quality of the finish for inner walls.
- Infill Speed – determines how fast infills are printed. Infills are the inner parts of a model, between the inner and outer walls. Here, it’s all about balance, aesthetics aren’t important, but print too fast and you’ll reduce the print’s structural integrity.
- Top and Bottom Layer Speed – sets out how fast the top and bottom layers of the model are printed, which can help with first-layer adhesion and the overall surface quality of the final layer. Here, slower speeds are recommended to ensure that first layer adheres properly, setting you up for the rest of the print, and you always want the top layer to have a good surface finish.
- Skirt, Support, Brim, Raft speed – determines how fast supports and adhesion aids like skirts and rafts print. These tie into first-layer adhesion, so taking a bit more time to deposit a solid initial set of layers helps with the rest of the print.
Travel Speed Settings
Travel speed determines how fast the printhead moves across the build surface when it isn’t depositing filament.
A faster travel speed tends to shorten print time, but runs the risk of introducing print errors such as ringing, layer shifting (where layers don’t line up properly, creating a stair-like effect), and ghosting that can affect the overall quality of a print.
Use test prints and make small adjustments until you find the sweet spot between print time and quality. Start somewhere between 80 and 100 mm/s and work your way up/down progressively.
Retraction Speed Settings
Retraction speed sets how fast the printer retracts filament back into the hot end as it moves or travels across the build surface. The aim is to avoid stray filament landing on the print when it isn’t required, causing stringing and reducing finish quality.
Again, balance is key. If retraction is too slow or two shallow, unsightly blobs and wisps of filament can appear, while upping speeds too far can cause similar effects.
Turn to a test print , and make small adjustments as you go until you eliminate all instances of stringing and blobbing. The perfect starting point really depends on the characteristics of your printer and the filament, but starting around 30 mm/s should set you on the right path.
Factors that Affect 3D Printing Speed
- First-layer adhesion – Printing too fast can cause issues for the printer when laying down the first layer. It can also affect bonds between layers, leading to issues like ghosting, shifting, and ringing. This is often caused by insufficient cooling – the material doesn’t have time to cool properly before the next layer is deposited.
- Nozzle size – Larger nozzle sizes can deposit more material faster. We explain more in our nozzle size 3D printing guide .
- Hot End Temperature – Faster printing requires the hot end to work harder to keep up with the temperature requirements of melting more filament faster. High temperatures can, however, lead to blockages and clogging if too much melted filament is fed through the nozzle at once, forcing it back up into the print head mechanism. It then solidifies, blocking the filament pathway.
- Your printer’s hardware – if your printer is not designed to work at high speeds, it will struggle to keep up, whether that’s the motors, the belt, or the frame simply not being designed to handle the vibrations caused by such rapid movement.
- Type of model – The more detail, the more a model or part benefits from slower speeds, and more pronounced retraction settings. Essentially, your expectations for the overall quality of the print have a big say in the right print speed.
- Material types – less demanding filaments like PLA can handle higher speeds with a small impact on overall quality, while more challenging materials like TPU and PETG only thrive at slower speeds.
Best 3D Printing Speeds For Every Filament
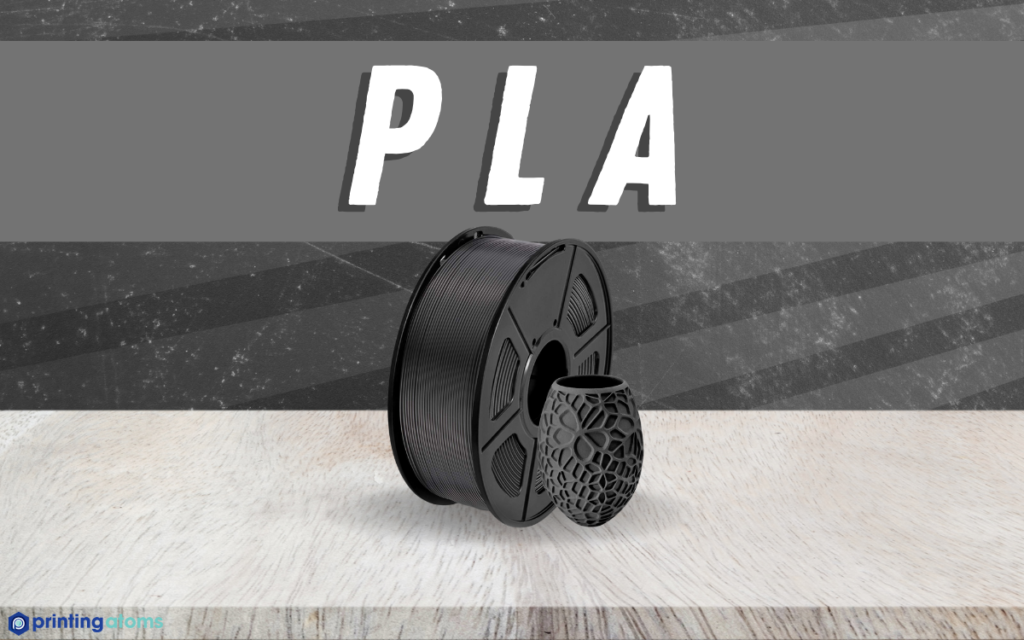
- Best PLA Print Speed : 50 – 80 mm/s
- Retraction Speed – 6 mm at 25 mm/s. Watch out for stringing and adjust downward to avoid it.

For a good balance between speed and print quality, we recommend 50-80 mm/s for most printers for PLA.
For parts where finish and detail aren’t all that important, feel free to crank up the speed to reduce print times. Or, if your printer handles high print speeds, adjust it accordingly.
For detailed prints, stick to the lower end of the recommended print speeds.
For larger prints where aesthetics aren’t all that important, don’t hesitate to push speeds at around 80 mm/s. A good quality FDM printer should be able to handle these speeds and produce a decent-quality model without too many blemishes and errors.
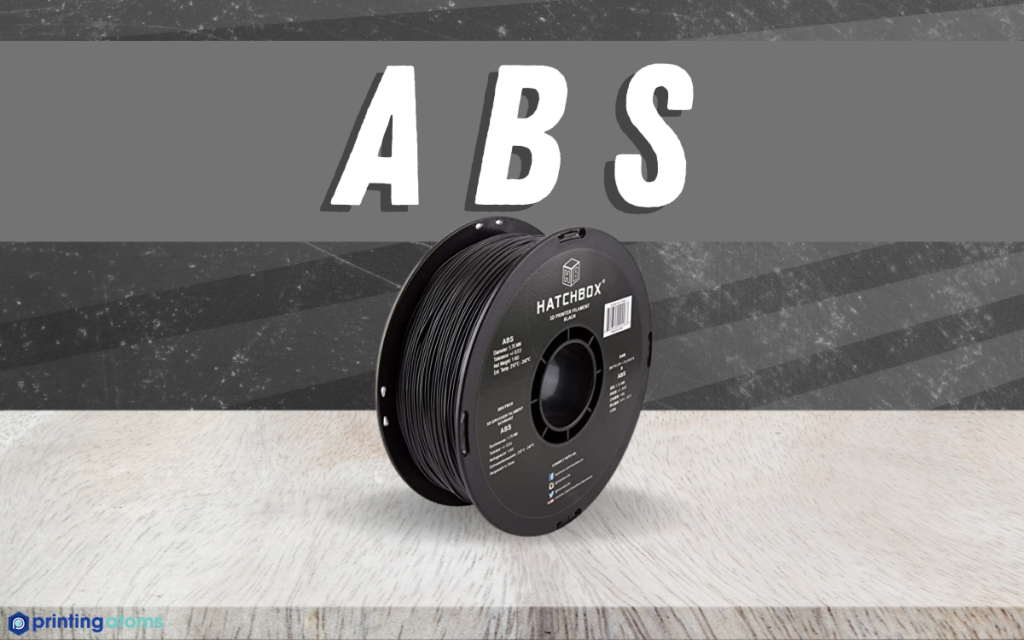
- Best ABS Print Speed: 40 – 60 mm/s
- Retraction Speed – 6 mm at 40 mm/s. Adjust lower to reduce stringing if needed.

Typically, a good print speed for ABS is around 40-60 mm/s, though you can reduce the speed if the print quality isn’t good enough.
For the best results, print ABS inside an enclosure. Without one, ABS is extremely susceptible to warping – the filament needs a controlled thermal environment to truly thrive.
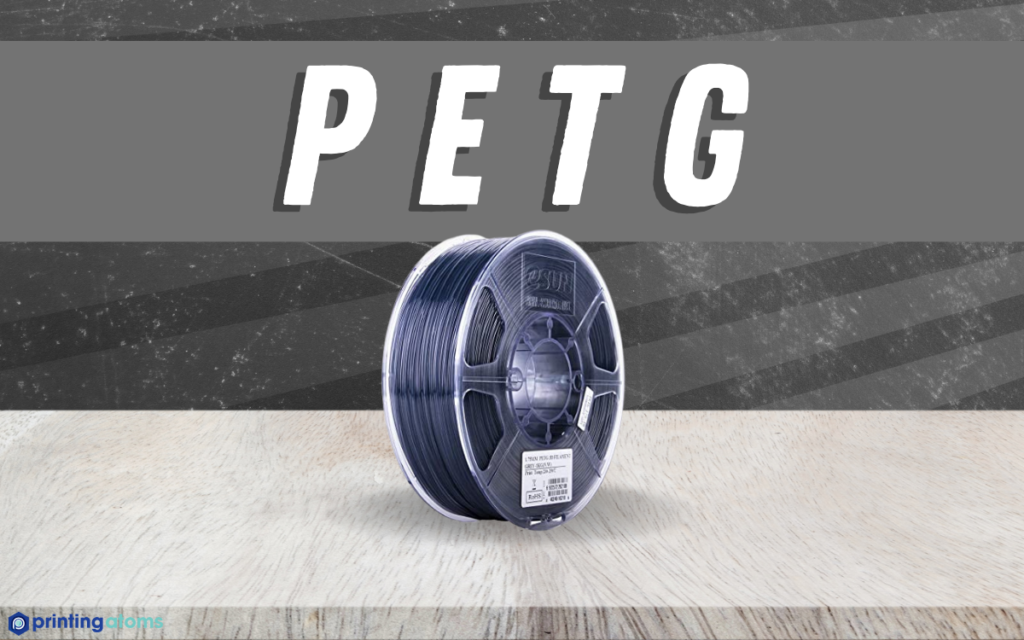
- Best PETG Print Speed : 20 – 40 mm/s
- Retraction Speed – We recommend 4 mm at 25 mm/s. Stringing is generally an issue with PETG, so adjust as needed – shorter retraction distance and higher retraction speed tends to work well for most printers.

We recommend starting at around 40 mm/s, then reducing print speed in small increments until you find a balance between quality and print times.
Note that overall, PETG tends to shine at slower print speeds, so dropping as low as 20 mm/s is recommended for the best results.
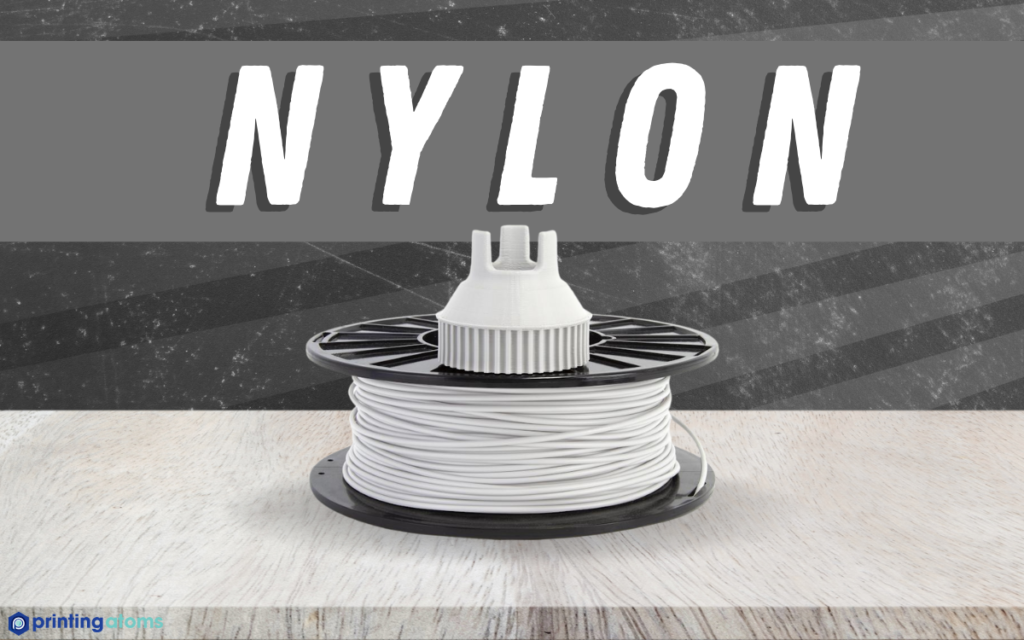
- Best Nylon Print Speed : 25-50 mm/s
- Bed Temperature : 55-65°C

For printing Nylon on an FDM printer, aim for somewhere between 25 and 50 mm/s. Any faster and it’s likely the print will struggle to keep up with the high extrusion temperatures required to print Nylon.
As with ABS, Nylon is highly prone to warping, so ensure you are printing in an enclosed chamber and using a heated bed for the best results.
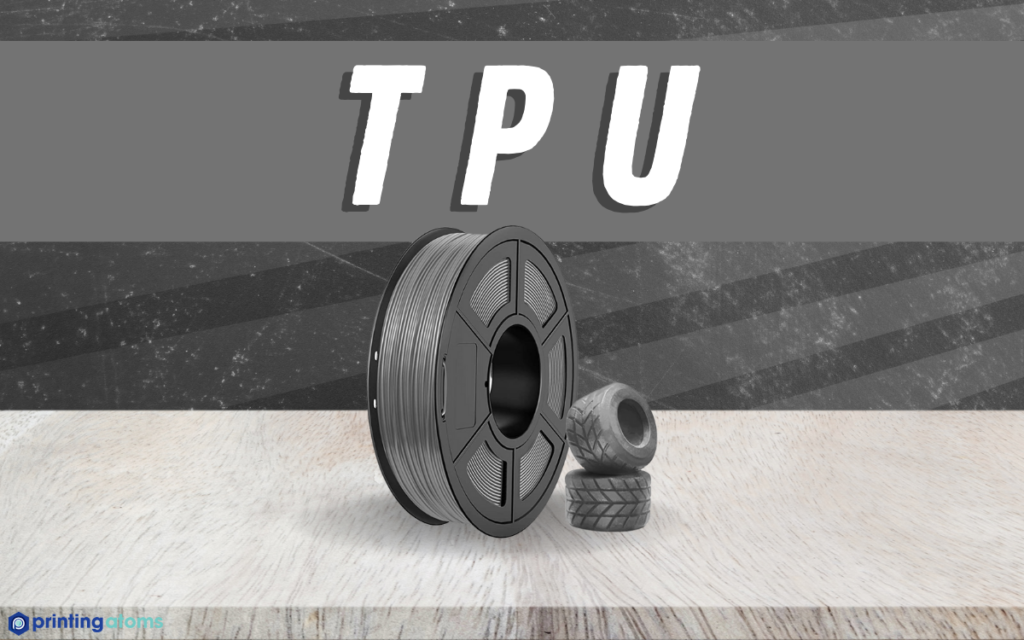
- Best TPU Print Speed : 25-30 mm/s
- Retraction Speed – 3 mm at 20 mm/s. TPU fares best with a shorter retraction distance to avoid introducing too much movement into the filament path potentially causing bending and clogging.

TPU is a fairly tricky filament to print, especially compared to PLA.
It much slower print settings, around 25 to 30 mm/s, though dropping down as low as 10 mm/s for the first layer to promote solid first-layer adhesion is a common step to ensure TPU prints don’t fail.
What Is a Good 3D Printing Speed?
There is no universal good 3D printing speed as it depends on the model, filament, and the printer itself. The key is finding the right speed for all these factors. As a general rule though, most standard FDM filaments (PLA, ABS, PETG, etc) tend to perform well at speeds between 20 mm/s and 60 mm/s, though this is a generalization.
For this reason, we recommend tests to figure out the best print speed for your combo of printer and filament, especially those geared towards calibrating print speeds. They include multiple instances of the same model printed at progressively faster speeds, allowing you to visually inspect the results and select the optimal speed based on the quality produced.
However, if you want a 3D printer capable of printing at higher speeds without losing quality, then some printers are better suited for this than others. The best delta 3D printers print faster than standard Cartesian printers due to their build and bowden extruders – they can often print more than twice as fast. For more information, we have also written an article on the fastest 3D printers .
If you’re one of the 1000s worldwide with an Ender 3, you can read out guide to the best speed settings for Ender 3 here.
Was this content helpful? Give us your feedback here.

Tom Bardwell
Learn More About 3D Sourced

6 Best Large 3D Printers in 2024 (All Budgets)

5 Best 3D Printers for Miniatures & Terrain in 2024

4 Fastest 3D Printers in 2024 (All Budgets)
The 56+ Coolest Things To 3D Print in 2023

44 Common 3D Print Problems – Troubleshooting Issues 2023

13 Best Free 3D Modeling Software (For Beginners) 2024

11 Best 3D Printers in 2024 (All Budgets)

5 Best 3D Printers For Beginners in 2024
Exceptional value with anycubic’s latest 3d printer deals.

40+ 3D Printing Industry Statistics (2024 Update)

22+ Coolest 3D Printed Robotics Projects (2024 Update)

8 Best DIY 3D Printer Kits in 2024 (From $150!)

3D Printing In Space – Top Projects in 2023

Best 3D Printed Shoes in 2023 (Sneakers, Heels & More)

The Best 3D Printer Buyer's Guide Resource & 3D Printer Reviews
[email protected]
3D Printers 3D Scanners 3D Software Guides Rankings Interviews News
Most Popular
Best 3D Printers Best 3D Scanners Best 3D Modeling Software Best 3D Slicers Best Resin 3D Printers Fastest 3D Printers Best Large 3D Printers
Useful Links
About us About the team How we do our reviews Careers Contact Us
Sign up to our newsletter
Privacy policy
Affiliate disclaimer
Editorial policy
- Best 3D Pens
- Top 5 Large 3D Printer – Best Machines To Build Large-Scale Objects
- Top 10 Cheap 3D Printers for Budget Under $500/$1000
- Best 5 Cheap Small 3D Printers – Price Comparison 2017
- 15 Best 3D Printer Reviews – Beginners, Hobbyist, Professionals | Buyers Guide
- PETG Filament Complete Guide | Durability, Flexibility and Reliability
- Wood Filament Review – Easy 3D Printing with Wood Filament
- ABS Filament – 1.75, 3mm Transparent Fiber For Your 3D Printer
- HIPS Filament – An Excellent Support Plastic Material for 3D Printing
- PETT Filament – Strength, Properties, and Tips for Better 3D Printing
- Glow in the Dark Filaments – Producing Perfect 3D Prints with GITD Materials
- TPU Filament 3D Printing Material – The Complete Guide
- Nylon Filament – Features, Properties, and Techniques on Printing Nylon
- TPE Filament – Durable, Elastic, and Versatile 3D Printing Filament
- PVA Filament Review – Best Soluble, Dissolvable Strand For 3D Printing
- 10 Insane Benefits of 3D Printing
- 10 Weird 3D Printed Objects You Do Not Know About
- 13 Mind-Blowing 3D Printed Things You Will Find At The Rio Olympics 2016
- 55 Useful, Cool Things To 3D Print: Best 3D Printing Ideas & Projects
- How to 3D Print with 3D Printing Pen?
- 3D Print – How To Price Your 3D Printing Project
- The History of 3D Printing
- What are 3D Pens or 3D Printing Pens?
- 10 Best 3D Printing Services Online – Cheap and Fast 3D Printing Services US
Creality Ender 3 Pro Review

3D Printing In Constructions: How It Works
3d printing for car parts: a complete guide.

3D Printed Gun: Legality, Models, & STL File Kits

3D Printing Food: 7 Best Food 3D Printers For Customization &…

3D Printing Speeds: 10 Speed Settings Tips To Print Faster

Beginners usually find themselves experimenting with printing speed because they aren’t sure how to choose the correct setting for their project.
However, aside from delaying production, poor printing speeds could also lead to imperfections and flawed outputs.
Thus, it’s something you should be sure of whenever you do your 3D object, especially if it’s for rapid prototyping .
If you need to learn more about setting your printing speeds, you are just on the right page. By the end of this article, you will know how to determine the perfect speed to produce a quality 3D printed object. Also, I will give you several tips if you want to print faster.
So, let’s get started!
What Is 3D Printing Speed?

3D printing speed is the main speed setting when you are 3D printing.
It refers to how fast your 3D printer’s motor moves, including the X- and Y-axis control and the extruder motor. It is usually measured in seconds (unit of time) and kg, mm or cm3 (unit of manufactured material).
You can download a print speed test model to test your printer’s speed. The test model comes with instructions on adjusting the correct settings because the model linked will essentially print the same shape at gradually increasing speeds, allowing you to see for yourself the optimal setting to achieve a flawless output.
There are many factors when we talk about printing speeds like retraction speed, travel speed and more.
Retraction speed is the speed at which the extruder motor drives back the filament. A good retraction speed is between 1200-6000 mm/min (20-100 mm/s) where retraction performs best. When the retraction speed is too fast, the drive gear may grind away pieces of the filament.
Travel speed is the moving speed of the print head during non-printing status. It refers to the movement of the print head without squeezing the printing material out from the nozzle.
When travel speed is too slow, it could lead to stringing issues on the 3D printed object. A good travel speed for a 3D printer is 100 millimeters per second. But the optimum travel speed might differ for each 3D printer.
Here’s why you should aim for the accurate speed:
When the print speed is too slow, it could cause deformation due to the nozzle sitting on the plastic for too long. And when the speed is too fast, it results in ringing, which is caused by overly excessive vibrations.
Also, when you go too fast, the extruder might not be able to keep up and end extruding less filament than it should.
Hitting the sweet spot will enable the 3D printer to work fast, accurately, and flawlessly without sacrificing the quality of the output.
Print speeds and quality go hand-in-hand; that’s why it’s very important to use the right speed to achieve the desired results.
Overall, you will get a better quality output if you use a lower speed than a higher speed. However, that is only true when your 3D printer is not operating at its optimal conditions.
Also, some would argue that printing speed doesn’t impact print quality. That’s because other factors directly impact the print quality, which is as follows:
Type of 3D printer
The type of 3D printer will also affect the quality of the 3D prints without being influenced by the print speed.
A high-quality 3D printer can be set in a high-speed setting and achieve first-class quality 3D prints.
However, if you use a 3D printer of lower quality with the same speed, you won’t get the same high-quality results.
Type Of 3D Printing Material
The speed will be faster when using a high-quality support material because you do not need to keep unclogging the nozzle.
Also, you do not need to deal with support material getting stuck.
When you are done printing, you will remove the material without reducing the print quality.
How Fast Is A 3D Printer?

Regardless of whether you are using a slow 3D printer or the fastest 3D printers , several factors directly affect how fast your printer could finish a certain project.
Let’s get into more details below.
Resolution of the 3D printed part
Part of the process before 3D printing is slicing the model into layers on a 3D slicer such as Cura or Repetier-Host.
The more layers, the thinner each layer and the longer it will take to print. For instance, a part printed with 50-micron layers will have twice as many layers as the same part printed with 100-micron layers and take twice as long at the same speed.
Quality of print
Theoretically, you could run a budget 3D printer at its maximum speed — make it work at extremely high speed.
However, do not expect it to yield a result the same as on your slicer. Instead, it will probably result in a mess because the speed was too fast.
Some 3D printers, especially fast 3D printers, can handle high-speed 3D printing, but others don’t, especially budget 3D printers with limited capacity.
3D printing technology
The technology used is another factor that affects the speed. Resin 3D printers are faster than FDM 3D printers.
Yes, that’s true; even expensive FDM printers are slower than low-cost LCD 3D printers.
Aside from resin technologies used in SLA, DLP and LCD 3D printers, the fastest 3D printing technologies include Multi Jet Fusion.
Here’s an overview of the different printing speeds of the different 3D printing technology.
Materials or type of filaments use

However, the filaments mentioned above have different complexity.
Some are easier to print than others because they put less demand on the printer and make it print faster.
Model’s complexity
The 3D object you are about to print could also affect the speed of your machine. Printing a simple box will be easier for a 3D printer to finish than an intricate 3D printed jewelry piece.
Printing a larger object that’s not complex could make the printer work at a faster print speed without significant loss of quality because there are no intricate details needed.
However, the more complex or intricate the model, the more slow the speed is to ensure that it could follow the design as it is.
Infill settings
This factor affects the amount of materials extruded — depending on the level of the infill percentage; it could be between 10% to 100%. Infill settings affect the 3D printing space depending on the complexity.
The more complex the pattern, the longer it will take to finish printing. The effect of infills on printing speeds is through density.
A heavy density infill could promote the strength of the model. However, it also means that 3D printing will take more time or the printing speed is slower.
Size of print
Obviously, the larger the object to 3D print, the longer it will take for the 3D printer to finish. A full-size vase printed using an FDM printer could take 12 hours or more. But a small statue could only take under an hour.
It is true, provided that the two models are not very complex and have a significant difference in their sizes.
Nozzle size
For FDM 3D printers, the nozzle size matters in speed and performance. Smaller nozzles are great for working on models with intricate details.
Larger nozzles are not the best when printing objects with intricate details, but they can print faster.
How Fast Can The Fastest 3D Printer Print
There are a lot of fast 3D printers on the market today and the fastest FDM 3D printer — WASP 2040 PRO Turbo — could work as fast as 500mm/s.
Some said it could even print faster than that. Another great thing about it is that it is extremely accurate. However, DLP/SLA printers will always work faster than the fastest FDM 3D printer.
What Is A Good 3D Printing Speed

Here’s the recommended setting:
For slow 3D printers, it’s best to use 40 mm per second to 80mm per second. Mid-speed printers work best with 100mm per second. If you want to print faster, you can go 150mm per second. Fast-speed 3D printers can work beyond 150mm per second.
But you should note that there is no general print speed that works for all. There are many things that you need to consider to get the best print speed for your 3D desktop printer.
Here are some factors to consider:
Model’s outer wall. You should ask yourself, “how fast do you want the exterior of your model to be printed?” If your priority is surface quality, you better reduce the speed or opt for lower print speed settings.
Interior walls. For the interior, it is recommended that you use the same print speed in printing the overall model. The 3D printer speed needs to reduce the print time without lowering the 3D print strength.
Infill printing speed. For this, you also need to reduce printing time without compromising stability.
Bottom and top layers. For the last speed setting, you have to consider the top and bottom layers, and the best option is to go for a slightly lower print speed for better surface quality.
Print Speed Settings for PLA, ABS & More

But after a bit of trial and error, you will surely be able to find what works best for your 3D printer’s software and hardware.
The different 3D printing materials have different recommended print settings.
Here’s the good print speed for PLA, ABS, and more, so you will know how to get started when using them. You can refer to the following section for that.
What is a good 3D printing speed for PLA? When using PLA, you can start in the 40-60 mm/s range. It will give a good balance of print quality and speed.
However, depending on your 3D printer type, stability and set-up, you can increase the speed up to 100 mm/s. Some achieved great results at a higher speed, but the quality of your printer matters too.
A good print speed for ABS is typically similar to PLA between 40-60 mm/s. However, you can increase if you have an enclosure around your printer.
You can print ABS filament at a speed of 60 mm/s and keep the first layer speed to 70% of that and see if it will work for you. It works well for adhesion in some cases, ensuring that enough plastic is extruded out of the nozzle for proper and safe adhesion.
For PETG filament , a good print speed starts in the range of 50-6- mm/s. The filament could rise to string issues, so some will usually opt for 40 mm/s, and according to them, they find good results. PETG is a blend of ABS and PLA; that’s why the recommended print speed is not too far from the two’s recommended settings.
If you are using TPU, you can start with a speed between 15 mm/s to 30 mm/s. The filament is soft and should be printed much slower than the average filament. But if you are using a Direct Drive extrusion system, you can increase the speed to about 40 mm/s.
You can go a bit higher from the recommended speed of 15 – 30 mm/s and experiment. But then again, always remember that this is best printed at a low speed.
A good 3D print speed for nylon is between 30 mm/s to 60 mm/s, but most print with 40 mm/s for great quality and great details. You can also go higher, like 70 mm/s, because it is still sustainable if you increase the nozzle temperature side by side.
10 Tips to Get the Best Print Speed Calculation

In addition, it reduces problems such as warping or curling.
Yes, speed is very important because it has to do with your 3D printed model’s quality, accuracy and strength. With the right print setting, you can strike a perfect balance to achieve the three.
Here are some tips to increase print speed from 3D printerly. However, you should note that some of them might affect the quality of your print.
1. Increase print speed in slicer settings
Find the balance of your print speed in the slicer settings. It will be very helpful, especially if you depend on how big the print is because the size of the object is relatively related to printing time. Again, experiment to find the perfect balance of speed and quality, and in time, you will find it.
2. Adjust acceleration and jerk settings
Jerk settings refer to how fast the print head moves from a still position. When setting this, you want its movement to be smooth and fast at the same time.
You can test jerk settings by printing the vibration test cube and seeing whether the vibrations are visible on each axis by inspecting the corners, edges and letters on the cube.
Acceleration settings are how the print head gets to its top speed. A low acceleration means that the printer won’t get its top speed with smaller prints. Acceleration depends on several factors and is not the same in all of your 3D printing projects.
According to AK Eric, who did the test, comparing low jerk values (10) to high ones (40) on a 60 mm/sec speed made no difference in print speed. However, the lower value had better quality.
Increasing the speed at 120 mm/sec decreased printing time by 25% but at the expense of the quality. So, you can use the print speed settings to get what you want, but you might have to choose between speed and quality.
3. Infill pattern
For this, you can choose an infill pattern that prints faster than the others to save much time on increasing the print speed. The best has to be the “lines” pattern due to its simplicity and lower number of movements compared to other patterns. Depending on your model, the infill pattern can save you up to 25% of printing time.
The infill pattern is the strength of your model. It’s the honeycomb pattern. The more detailed it is, the more time it will take, because it will include more turns and movements to follow the pattern. If you want to print fast, you can adjust the infill pattern not to be that high.
4. Infill density
Density is what’s inside your print. An infill density of 0% means that the inside of the model is hallow. On the other hand, a 100% density infill means the inside will be solid. The density could depend on the purpose of the model.
For example, if you want a functional print, you should not sacrifice infill density to achieve the strength of the model. However, if it’s for aesthetics, it’s up to you to go all out for the density or skip it and focus on speed to reduce the print time.
5. Wall Thickness/shells
There is a relationship between the wall thickness or shells and density, so you should consider the other when adjusting either one. The good thing is getting a good ratio will help you achieve a great structure.
The thicker the wall, the longer the print till will be. To speed up the printing time, you can decrease the number of shells or perimeters of your prints in the settings.
You can play around with the print speed settings to find the perfect number, so you can maintain the strength while keeping it low to speed up the printing time.
6. Dynamic layer height/adaptive layer settings

It can improve the print speed and save you a decent amount of time compared to using the traditional layer method.
For example, 3D printing a chess piece without the adaptive layers setting takes 2 hours and 13 minutes.
However, using this featured in the speed settings could reduce the printing time by up to 30% down to 1 hour and 33 minutes.
7. Print multiple objects
To speed up the process, you can utilize all the space in the printer bed rather than doing one print at a time. To make it possible, use the center and arrange function in the slicer.
It will make a significant difference in the printing speed. However, this method might not apply to big prints.
Printing small objects will allow you to copy and paste the design multiple times on the print bed and print them all together simultaneously to speed up the entire process. Those who have tried this approach agreed that printing multiple objects could increase the speed.
8. Remove support
If your 3D object doesn’t need support, the printing time will be shorter. You can eliminate the need for support in many cases when you split the model in the right place and orient them properly.
So use the best orientation for your model, and you’ll definitely reduce the printing time. It is perfect if you want to increase printing speed.
9. Use a large nozzle when practical
Another great way to speed up the printing time is to use a large nozzle. However, doing so might not apply to all models and could reduce your print quality.
Using a large nozzle might not work when you are printing intricate models. But if your 3D objects are not as complex or intricate, go for a large nozzle to increase the printing speed.
There are many sizes of nozzles to choose from. Choose one that is most appropriate for your model.
• 4x 0.2mm nozzles • 4x 0.3mm nozzles • 36x 0.4mm nozzles • 4x 0.5mm nozzles • 4x 0.6mm nozzles • 4x 0.8mm nozzles • 4x 1mm nozzles • 10 cleaning needles
10. Increase layer height
The lower the layer height, the better the quality of your prints, but the longer the 3D printing time takes. If quality is not the top priority, you can increase the layer height and improve the printing speed.
You have to familiarize your printer and explore its print speed settings to get the optimal speed and enjoy quality outputs without the unnecessary long wait.
There are many ways to increase print speeds like using a large nozzle and reducing layer thickness, but always consider the results because when the printer works too fast, it might not achieve the quality you desire.
Also, always remember that the different 3D printing technologies offer different 3D printing speeds. SLA printers will always work faster, even when compared to the fastest FDM 3D printer.
The printing speed will affect the quality of your 3D printed object, so always make sure to strike the right balance, so you will achieve the strength, quality, and look you desire for your 3D project.
If you wish to learn more about 3D printing, better check our 3d printing home page .
- 3dprinterly.com/best-print-speed-settings-for-3d-printing/
- 3dprinterly.com/8-ways-how-to-speed-up-your-3d-printer-without-losing-quality/
- 3dsourced.com/3d-printers/fastest-3d-printer/
- rigid.ink/blogs/news/3d-printing-basics-how-to-get-the-best-results-with-pla-filament
- the3dprinterbee.com/3d-printer-speed/
- 3dsolved.com/3d-printing-speed-vs-quality/
- m3dzone.com/3d-printing-speed/
- all3dp.com/2/3d-printing-speed-optimal-settings/
- all3dp.com/3d-printing-speed/
- dyzedesign.com/2018/07/3d-print-speed-calculation-find-optimal-speed/
- thingiverse.com/thing:277394
RELATED ARTICLES MORE FROM AUTHOR

A Complete Selective Laser Sintering 3D Printing Guide

Advantages & Disadvantages Of 3D Printing Technology

10 Best Site To Find Anime 3D Print STL Files
How to Use a 3D Printer Step by Step (10 Tips...

7 Best Dual Extruder 3D Printers in 2024
Popular category.
- 3D Printing 56
- 3D Print 36
- 3D Printer 24
- 3D Printing Filaments 15
- 3D Printer Kit 9
- 3D Printing Service 8
- 3D Scanner 2
- Amazon Affiliate Disclosure
Best 3D Printing Speed Settings for PLA, PETG, ABS & More: What Is The Fastest Print Speed?
If you’ve ever opened a 3D slicer before, then you’ve probably realized there are tons of different settings you can change. And while they all matter, few settings are as important as those related to print speed.
Settings in this category, including the main “Print Speed” setting, control how fast your model is printed, which affects the print time and print quality.
The best 3D printing speed for PLA and ABS is in the 45-70 mm/s range. And, if you’re printing PETG, 40-50 mm/s should work well, yielding high-quality prints with minimal stringing.
But that’s not all! You can also change the other print speed settings, like wall speed and top layer speed, to further control the print time and quality.
Want to learn more about print speed and the best settings? Just keep reading!
Table of Contents
What is Print Speed?
Why is print speed important, what is the fastest print speed, what happens if you print slow, print quality, print speed, infill speed, top/bottom speed, first layer speed, travel speed, retraction speed.

Print speed is a category of settings found in 3D slicers (e.g. Cura) that controls how fast your 3D printer prints your desired model. The higher the 3D printing speed, the faster the printhead moves, the faster filament is pushed out, and the less time prints take.
In most slicers, there is a single setting called “Print Speed” which controls a handful of other types of speed settings, such as infill speed and wall speed. Changing the “Print Speed” value will automatically change the other speed settings accordingly (usually based on a fraction).
So you’re not confused throughout the rest of the article, when we say “Print Speed”, we are referring to the specific “Print Speed” setting and not the other print speed settings.

Print speed is important because it is one of the main groups of settings that contributes to how long a print job takes. Moreover, if you change the print speed, the print time will also change.
But that’s not all. As we’ll go over later, 3D printing speed also has an effect on the quality of prints . That’s because higher print speeds typically lead to a higher chance of printing issues and defects that hurt the quality of the model.
Because print speed has very significant effects on the outcome of your 3D print, it’s vital that you use the right speed settings in your 3D slicer!
What is the Best 3D Printing Speed?
The best 3D printing speed for your printer depends on a handful of different factors, like the type of extruder and nozzle diameter on your printer. But the most important factor for determining the best 3D printing speed is the filament material.
Different filament materials, like PLA and TPU, can’t always be printed at the same speed. This is due to differences in the chemical and physical properties of each material. And, even with filaments of the same material, there’s no one-size-fits-all print speed value.
However, we can estimate the best print speed for a certain filament material within a range. In the sections below, I’ve provided a range of possible print speed values for some of the most popular filament materials. I suggest trying a 3D printing speed in the range of the filament material you’re using and starting the tuning process from there.
PLA is easily the most popular 3D printing filament material, and it’s also the material you can print the fastest. I suggest using a 3D printing speed value between 45-70 mm/s , as many users have found success in this range.
I suggest starting with 60 mm/s and adjusting in increments of 5 mm/s. Doing so will ensure that you never over-adjust the print speed and accidentally cause other printing issues.
While ABS is significantly more difficult to print than PLA because it requires an enclosure, you can actually use pretty much the same 3D printing speed. Moreover, I also recommend using a 3D printing speed in the 45-70 mm/s range and adjusting in 5 mm/s increments.
PETG is another very popular filament material, but if you want to achieve high-quality prints, you’ll need to use a print speed value a bit lower than you would with PLA or ABS. A print speed of about 40-50 mm/s should work pretty well.
But, if you notice stringing on your prints, consider lowering the print speed by 5 mm/s. Or you can try to preserve the 3D printing speed and fix the problem by lowering the nozzle temperature or increasing the retraction distance.
TPU is a flexible filament, and, as such, it requires a very low print speed. 25 mm/s should work fine, and you might be able to increase it to around 35 or 40 mm/s. However, don’t try to go above 40 mm/s, as TPU filament might start to cause problems in your extruder or hot end at this speed.
Nylon isn’t as flexible as TPU, but it’s still more flexible than PLA or ABS. A 3D printing speed between 30 and 55 mm/s should work perfectly for printing this type of filament. However, feel free to change it in increments of 5 mm/s based on your print results.
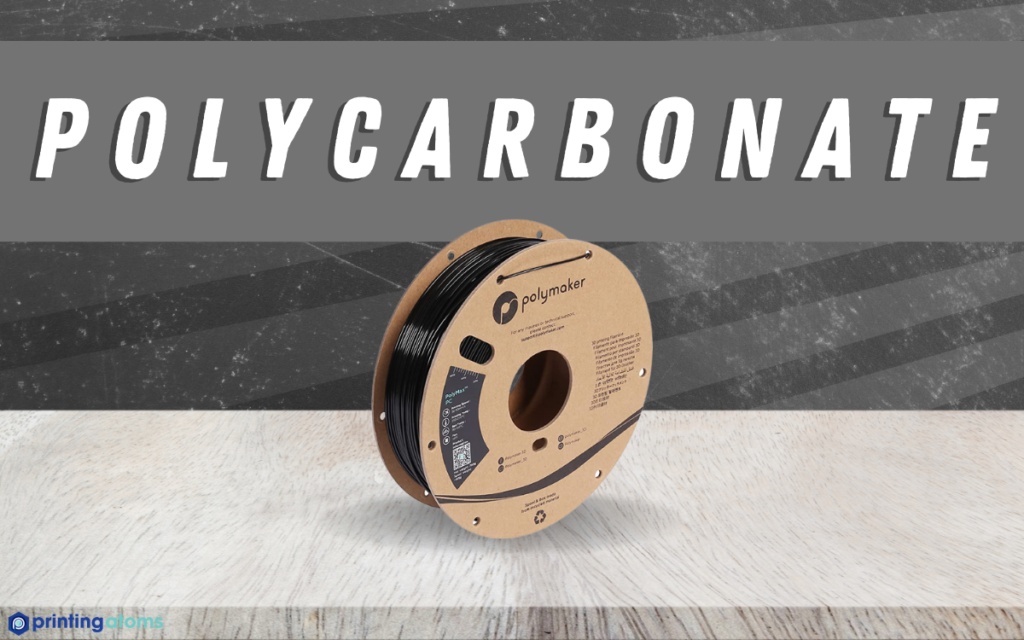
Lastly, polycarbonate , or PC for short, needs to be printed much slower than some of these other rigid materials due to the material’s inherent properties. A value in the 25-45 mm/s should work just fine, as long as you take some time to properly tune the setting. Furthermore, I suggest trying out 35 mm/s and then adjusting the value in increments of 5 mm/s based on how your prints come out.
The fastest print speed you can use is probably around 100 mm/s if you’re printing PLA and using a very high nozzle temperature.
Of course, not just any stock 3D printer can handle printing PLA (or any other material) at this high of a speed. But, if you fine-tune your slicer profile and are using a hot end and extruder that is capable of high-flow printing, then you might be able to print successfully with 100 mm/s.
But, if you’re just printing normally and are wondering how fast you can go without any significant changes or a lot of tuning, then 70-80 mm/s is your answer. At this speed, your prints might be a little bit lower quality, but your printer probably won’t break or completely fail.
Check out our related article on the fastest 3D printers here .

Printing slowly is one way you can try to achieve higher-quality prints. That’s because when the printhead has more time to lay down each layer, the layers have more time to solidify and cure, leading to prints that look better.
However, printing too slowly can also cause issues . If not enough filament is being pushed through the nozzle, then heat will creep up the hot end assembly and cause a clog. This phenomenon is known as “heat creep” and can be prevented by increasing your 3D printing speed.
Check out our article on how to speed up 3D printing here to avoid this issue.
What Does Print Speed Affect?
Print speed can have a very big effect on your 3D prints. I’ve gone over the two main areas of impact of the print speed setting below:

The first and most obvious effect of changing the print speed setting is the print time. As you probably figured out, the faster the printhead lays down filament, the faster your 3D model is completed.
However, you might be a bit surprised at the small effect changing the print speed has on the estimated print time. Moreover, a more effective way to cut down the print time is by increasing the layer height or shrinking your 3D model.

PRINT QUALITY
Changing the print speed can also affect the quality of prints. Moreover, the correlation between print speed and print quality is direct, so increasing the 3D printing speed is likely to lead to a drop in print quality.
However, you can manage the effect that print speed has on print quality through other slicer settings. For example, increasing the nozzle temperature with an increase in the 3D printing speed will help prevent under-extrusion and other printing issues to help increase the print quality.
The moral of the story: when you change the print speed, try to optimize the other slicer settings to ensure that you don’t experience a big drop in print quality.
Types of Print Speed

In any 3D slicer, there are a handful of different print speed settings. Each covers a different type of print speed based on what section of the print is being printed. I’ve gone over the main types of print speed in the sections below.
First, we have the print speed, which is the main setting for controlling the speed of the printing process. Moreover, the print speed value determines how fast the printhead moves across the X and Y axes of the print area. The higher the speed, the faster the printhead moves and the less time your print job takes to complete.
The print speed acts as the parent setting for most of the other speed settings, like infill speed and wall speed. This means that the values of these other types of print speed are derived from the value of the print speed setting. So change this setting, and all of the other ones will change accordingly.
Because it’s the parent setting, this is the most important speed setting to get right.

Infill speed controls how fast the printhead moves (the print speed) during the infill section of a print. For reference, infill is the internal filling inside a 3D model, so this speed value is referenced (used) by your printer every time it’s printing an infill structure, which is a large portion of a 3D print job.
In most 3D slicers, the infill speed is automatically set equal to the value of the main print speed setting.
Wall speed is the print speed when the printer is making the walls of a 3D printed model. The walls are what contain the infill structures of a print, so it’s very important that the wall speed is set correctly. Otherwise, the outer sides of your model might look bad.
The wall speed is usually split into two settings: inner wall speed and outer wall speed. Splitting the settings this way allows you to use a faster speed on the inner wall because you won’t see it once the print is done and then use a slower speed for the outer wall.
Most slicers automatically set both wall speed settings to one-half of the main print speed setting. However, personally, I like to drop the outer wall speed so that it’s 5 mm/s less than one-half of the main print speed. I also increase the inner wall speed by 5-10 mm/s from one-half of the main print speed setting, as this helps speed up my prints.
Just like walls contain the infill of a model from the sides, the top and bottom layers of a model cover a model’s infill from above and below. And, as you probably guessed, the top/bottom speed is the speed for the top and bottom layers of a 3D print.
I like to keep the top and bottom speed settings at a little over one-half of the main print speed setting. This is a little higher than Cura’s default value of exactly one-half of the main print speed setting. But, adding 5-15 mm/s to this default value isn’t likely to cause any issues with your print and will speed up the printing process.
Next, the first layer speed, sometimes called the initial layer speed, is another speed setting, and it controls how fast the printhead is moving during the first layer of a print. If you’ve ever worked with a 3D printer before, then you probably know how important getting the first layer of a print right is. Because of this, it’s equally as important to use a good first-layer speed setting.
The first layer speed should always be slower than every other speed setting. I like to use the Cura default value of 20 mm/s, no matter what filament material I’m using.
While you might be thinking, “20 mm/s is super slow”, well, you’re right. However, it’s only for one layer, so it won’t significantly increase your print time.
But, if you rush the first layer, your print will likely fail. Because of this, I suggest staying on the slow side of things to be safe and never going above 20 mm/s.
Next, the travel speed dictates how fast the printhead moves during travel or non-extrusion moves. For example, if you were printing two models at once, when the printhead is moving between the two items (and not extruding filament), that is a travel move.
Believe it or not, travel moves make up a lot of the movement of your machine’s printhead. As such, travel speed is very relevant when it comes to print time.
Cura’s default value of 150 mm/s for the travel speed works pretty well, but you can definitely go higher. If your printer is a Bowden extruder printer, then feel free to go as high as 200 or even 220 mm/s. But, if you’ve got a direct drive 3D printer , like the Ender 3 S1 , due to the heavier printhead, you should try to stay closer to 180 mm/s.
Retractions are when your 3D printer pulls back filament from the hot end to relieve the nozzle of built-up pressure from the constant extrusions. Retractions happen basically every time the printhead makes a travel move, and the retraction speed controls how fast they happen.
While retractions don’t make up a significant amount of the print time, increasing the retraction speed can still help reduce the time prints take. Also, a higher retraction speed can help reduce stringing in prints. I recommend going with a retraction speed of around 40-45 mm/s , as this is pretty fast and also helps with stringing.
Overall, print speed is one of the most important and impactful categories of print settings. The main reason you should change the setting is to cut down the print time of a model, but you can also change the print speed to solve issues with print quality.
While there’s no single best print speed because many factors play into what value works best, there are ranges based on the filament material you’re using.
If you’re printing with PLA, then a print speed of 45-70 mm/s should work pretty well. The same goes for ABS, as the material is very similar. But, if you’re printing PETG, 40 to 50 mm/s should work better and reduce stringing in your prints.
You also should consider changing the other print speed settings besides just the main “Print Speed” setting. Furthermore, increasing the inner wall speed by 5-10 mm/s and the top/bottom speed by 5-15 mm/s from their default values will help speed up prints a bit. And lowering the outer wall speed by 5 mm/s from the default value will make your prints look a bit better.
About The Author

Jackson O'Connell
FacFox Docs
Knowledgebase of manufacturing
- The Best 3D Print Speed Settings for PLA & More
Tuning 3D print speed can be tricky. Learn how to find the perfect print speed settings for PLA and more materials!
One of the ways that 3D printing is often used is for “rapid prototyping”. The slight irony here is that individual prints can take hours or even days to complete! Fortunately, printing speed can be adjusted to reduce production time, but poor adjustment may also lead to print imperfections and failures.
Here, we’ll run you through the common 3D printer speed settings. By the end of this guide, you’ll know how to strike the perfect balance between printing speed and quality. Keep in mind that different printers, slicing software, and filament may behave differently, so repeated testing may be necessary.
Fire up your slicing software and let’s get started!
Print Speed
Print speed is the main speed setting that will influence your 3D prints. As the name suggests, print speed determines how fast the motors of your printer move. This includes the motors controlling the X- and Y-axes, as well as the extruder motor.
To test for print speed, download a print speed test model . These models generally come with instructions on how to set the correct settings. The model linked here will essentially print the same shape at gradually increasing speeds, allowing you to visually identify the optimal setting.
Too slow of a print speed may cause print deformation due to the nozzle sitting on the plastic for too long. Too fast and there may be other overheating artifacts caused by insufficient cooling, as well as ringing , under extrusion , and weak layer adhesion . The sweet spot should be as fast as your printer can get without sacrificing too much print quality (and some use cases might demand a higher level of quality than others).
To better refine print speed, this setting is commonly split into many more secondary settings :
- Outer wall/shell speed: This setting adjusts how fast the outermost perimeter of the model is printed. It’s typically decreased slightly to improve surface quality.
- Inner wall/shell speed: This setting adjusts how fast the inner perimeter(s) of the model is/are printed. It’s typically the same as the overall print speed to decrease print times while maintaining print strength.
- Infill speed: This setting adjusts how fast the infill of the model is printed. It’s typically the same as the overall print speed, to decrease print times while maintaining print strength.
- Top/bottom speed: This setting adjusts how fast the top and bottom surfaces of the model are printed. It’s typically decreased slightly to improve surface quality.
Travel Speed
Travel speed adjusts how fast the printer’s printhead moves when it’s not extruding filament. Increasing travel speed can save significant amounts of print time, but increasing it too much may lead to ringing or ghosting artifacts or even layer shifting (and thus print failure).
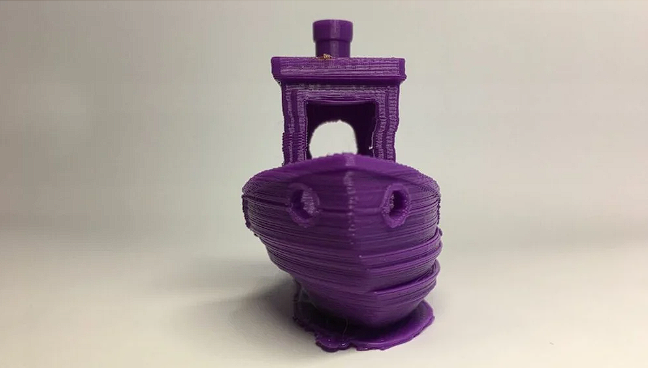
To determine the optimal travel speed for your printer, print out a test print at various travel speeds, starting at 100 mm/s and adjusting by 5-mm/s increments. Keep bumping up the speed if the surface quality is acceptable, and decrease if print quality suffers. Look out for defects like misaligned layers, as pictured above.
Retraction Speed
Retraction speed adjusts how fast the printer pulls filament back before travel moves. This setting is critical for reducing stringing and improving print quality. Too slow, and you may be left with unsightly strings and blobs on your prints. Too fast, and you may experience the symptoms of filament grinding , which also include stringing and blobbing.
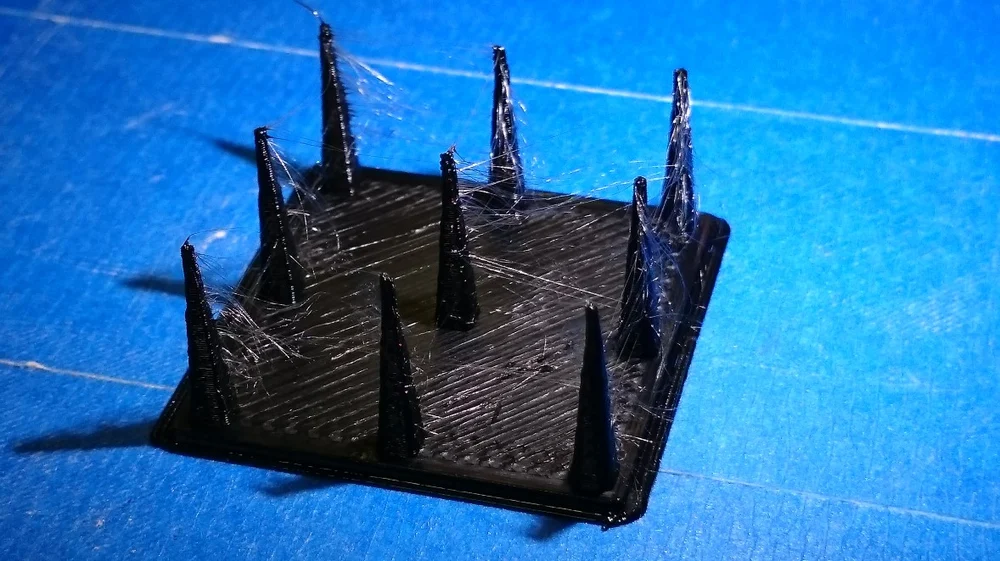
To determine the optimal retraction speed for your printer, print out retraction speed test at various retraction speeds, starting at 25 mm/s and adjusting by 5-mm/s increments. Look out for web or tree-like strings stretching between the spikes on the model. The perfect retraction speed should be the highest value that minimizes these artifacts without jeopardizing filament flow.
To better refine retraction speed, this setting is commonly split into two more secondary settings :
- Retract speed: This setting adjusts how fast the retract (the actual pulling back of the filament) occurs. This is usually the same as your overall retraction speed, and tuning it follows the same process.
- Prime speed: This setting adjusts how fast the filament is reinserted after the initial retract, in preparation for further printing. Increasing this speed will result in reduced print times and less blobbing due to extended exposure of the plastic to heat. Increasing it too much, however, may also result in insufficient heating of the freshly-reinserted filament before printing resumes. For most users, keeping this the same as the general retraction speed setting should work well.
Shells, Infill, & Layer Height
Your 3D printer’s speed isn’t determined only by “speed” specifically. It’s also significantly affected by how much plastic, and in what thickness, each layer of the 3D print is extruded. These settings are incredibly detailed, so we’ll only go through general information about how each affects print speed. For more, we have specific guides to 3D printing shells , infill , and layer height .
- Shells: The shells setting indicates how many perimeters of plastic are extruded to form the outline of your part. Increasing the shell count increases part strength, but also print times.
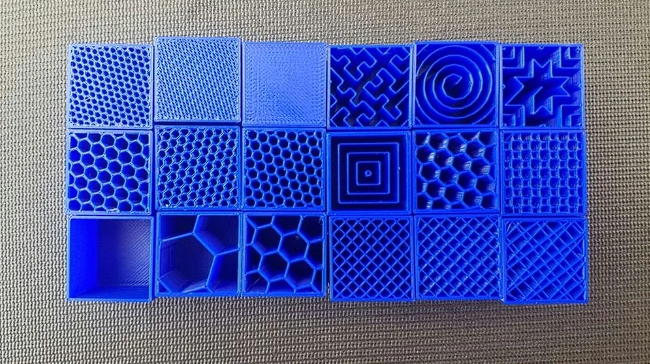
- Infill: Infill is the internal structure generated to save material when printing the interior of 3D prints. The infill pattern will marginally affect print speeds, while infill density will alter print times drastically. A higher infill density will increase part strength but also print time.
- Layer height : Layer height has a significant impact on how fast your prints come out. The greater your layer height, the thicker each layer of your 3D print is, and thus the quicker your print is completed. Adjust this based on how much fine detail your print requires.
Continue reading
- 3D Designs For 3D Printer
- 3D Printing Design Service
3D Printing Guides
- FDM 3D Printer
- 3D Printing Technology
- PLA Filament
- All Popular Filament Types
- PLA+ Filament
- ABS Filament
- PETG Filament
- ASA Filament
- Nylon Filament
- Carbon Fiber Filament
- Resin 3D Printer
- Resin Liquid
- Infill – Complete Guide
- All Infill Pattern Types
- Strongest Infill Pattern
- Fastest Infill Pattern
- Gyroid Infill
- Rectilinear Infill
- Honeycomb Infill
- 100 Infill In 3d Printing – Solid And Robust 3D Print
- 0 Infill In 3D Printing – Hollow 3D Print | Without Infill
- Bed Leveling
- Auto Bed Leveling
- All Build Plate Adhesion Types
- Brim vs Skirt vs Raft
- G-Code File
- How to Open STL File in Blender – Explained Step by Step
- How To Export STL File From Blender For 3D Printing
- Travel Speed
Travel Speed For Print Head in 3D Printing
In 3D printing technology, managing travel speed for print head is crucial for achieving high-quality prints. When the print head travels, it can sometimes leave behind strings of filament , a phenomenon known as stringing. This can affect the overall quality and look of the 3D-printed object.

So here in this article, we will cover everything about Travel Speed and its recommended settings.
Now, let’s talk about travel speed first.
Table Of Contents
What is Travel Speed in 3D Printing?
What is retraction in 3d printing, travel speed setting in cura 3d slicer:, recommended travel speed in cura:, travel speed faq (frequently asked questions):.
The travel speed in 3D printing is a crucial aspect that often goes unnoticed. It refers to the speed at which the print head moves when not extruding any material. This is a non-print move, meaning the printer is transitioning from one area of the design to another without laying down any filament .

The travel speed can significantly impact the quality of your 3D print. If set too high, it can lead to stringing or oozing, as the filament may not have enough time to cool and solidify before the print head moves. On the other hand, if the travel speed is too low, it can result in a longer print time and potential defects in the print due to prolonged heat exposure.

Let’s have a look at what’s retraction. Another very important term to understand.
Retraction is a feature that pulls the filament back from the nozzle and moves it to a new location. This process helps to prevent oozing or stringing, which are common issues in 3D printing where excess filament leaks out of the nozzle and creates unwanted lines or blobs on the print. By using retraction, you can ensure a cleaner and more precise print.

Travel settings in Cura refer to the configuration options that control the movement of the print head during non-printing phases, such as moving between print layers or during retraction. These settings can significantly impact the quality of your 3D prints and help prevent issues like stringing and layer separation.

In Cura, there are several settings related to travel speed that you can adjust to optimize your 3D prints. Let’s understand each travel settings one by one.
1. Combing Mode:
Let’s talk about “Combing Mode.” This setting is like your GPS, guiding the print head’s movement within the parts. It has three options: Off, All, and Not in Skin. When it’s off, the print head moves in straight lines, regardless of the model’s boundaries. The ‘All’ option ensures the print head stays within the model’s boundaries, reducing the risk of stringing. ‘Not in Skin’ is a balance between the two, avoiding visible parts of the print (the skin) but moving freely within infill areas.

2. Max Comb Distance with No Retract:
Max Comb Distance with No Retract is a feature in Cura that sets the maximum distance the print head can travel without retraction. It’s a balancing act between print quality and speed, optimising your 3D printing process.

3. Retract Before Outer Wall:
Retract Before Outer Wall setting pulls back the filament before the printer starts working on the outer wall. This helps to reduce any potential oozing and results in a cleaner, more precise print.

4. Avoid Printed Part When Travelling:
Avoid Printed Parts When Travelling ensure the print head maneuvers around already printed sections, minimizing the risk of damage or displacement.

5. Retraction Setting:
It pulls the filament back when the print head moves between parts, reducing stringing. You can adjust the retraction distance (how far the filament is pulled back) and retraction speed (how fast it’s pulled back).

6. Retraction Minimum Travel:
Retraction Minimum Travel setting determines the minimum distance the print head should travel before a retraction is triggered. This helps to reduce stringing and improve print quality.

7. Maximum Retraction Count:
This setting limits the number of times the filament can retract within a specified distance, helping to prevent filament grinding and other issues.

8. Retraction Prime Speed:
Retraction Prime Speed controls the speed at which the filament is pushed back after a retraction, ensuring smooth and precise printing.

9. Z Hop Setting:
When enabled, the print head lifts slightly when it travels, reducing the chance of it knocking into and damaging the print.

10. Z Hop When Retracted:
Z Hop When Retracted is a 3D printing setting that slightly lifts the print head during retraction, reducing the risk of scraping or damaging the print.
11. Z Hop Only Over Printed Part:
Z Hop Only Over Printed Parts ensures the print head only lifts (or ‘hops’) when moving over already printed areas.

12. Z Hop Height:
Z Hop Height dictates the vertical distance the print head lifts during a Z hop, optimising print quality.

Now, onto the recommended settings. Generally, a good starting point for your travel speed in Cura is around 100 mm/s. This moderate speed allows for efficient printing without compromising on quality.
However, this isn’t a one-size-fits-all solution. Depending on your printer’s capabilities and the complexity of the model you’re printing, you might need to adjust this speed.

If you’re noticing stringing or oozing in your prints, it could be a sign that your travel speed is too slow. In this case, try gradually increasing the speed. On the other hand, if your printer is struggling to keep up or the movements seem jerky, you might need to reduce the travel speed.

- Was this post helpful?
- Next →
Recommended Posts For You
How to update bambu studio to new version, how to update your prusaslicer software to latest version, how to update your cura 3d slicing software in 6 simple steps, leave a reply cancel reply.
Your email address will not be published. Required fields are marked *
Save my name, email, and website in this browser for the next time I comment.
3D Designs For 3D Printing

© Abhi 3D | Terms | Privacy Policy | Cancellation
Sharing is Awesome, Gratitude!
- ReshareOnInstagram

Let’s Design Your

How It Works?
- Kindly email [email protected] with your requirement.
- If what you require, is not in the list above, just tell me what you’d like me to make instead. I take custom orders of any kind.
- I will reply within 48 business hours about the details of the project and the cost.
- If you stay outside India, I will send you a PayPal Invoice. Upon clearing the invoice, you will be asked to send 2-3 photos of the person/pet to my email [email protected] (For people residing within India, other modes of payment can be arranged) The project will be completed within 15-20 business days depending on the nature of the project. All my work is sent across digitally. If you have any other questions, please feel free to ask in the form on the right. I’m more than happy to answer them.
- Kindly email [email protected] with your requirement. If what you require, is not in the list above, just tell me what you’d like me to make instead. I take custom orders of any kind.
- If you stay outside India, I will send you a PayPal Invoice. Upon clearing the invoice, you will be asked to send 2-3 photos of the person/pet to my email [email protected] (For people residing within India, other modes of payment can be arranged)
- The project will be completed within 15-20 business days depending on the nature of the project. All my work is sent across digitally.
- If you have any other questions, please feel free to ask in the form on the right. I’m more than happy to answer them.
Fill Below Form
You are currently not a premium member, upon cancelling you will lose below premium member benefits:.
Book you 3D design service now
- Convert Plus is all-in-one software to generate more leads & drive more sales with onsite targeting
- Unlimited free downloads
How to Speed Up 3D Printing for Faster Prints: 9 Easy Tips

Mario De Lio
Last Updated:
March 11, 2024
Disclosure: This post may contain affiliate links. We may receive compensation when you purchase via my links at no cost to you. See our disclosure for more information.

One of the most common challenges faced by 3D printing enthusiasts is the time it takes to complete a print. With some projects taking hours or even days to finish, everyone is looking for ways to increase the speed of 3D printing without compromising on quality.
There are several ways to speed up 3D printing without reducing print quality. Let’s look at some easy tips to 3D print faster, such as adjusting slicer settings, modifying infill patterns, and experimenting with nozzle sizes to help you create a 3D image more quickly.
Table of Contents
How to Speed Up 3D Printing
1. increase print speed in your slicer.
Increasing the print speed is one of the easiest ways to get faster print times. Print speed, typically measured in millimeters per second, dictates how fast the print head moves during extrusion.
It’s best to increase this speed gradually and run a test print to evaluate the impact on print quality. Faster print speeds often reduce the quality of your 3D model as faster speeds create more vibrations and don’t provide as much time for the filament to bond.
Remember that every printer has its limits. You can’t increase print speed indefinitely.
Different filaments also react differently to speed changes, so consider the material you use. For instance, increasing speed can sometimes lead to poor layer adhesion, reduced surface quality, and less accuracy in the print. To strike the right balance, you might want to experiment with varying speeds for different parts of your print, like opting for slower speeds for the outer walls and faster for the infill.
You can also adjust the acceleration and jerk settings, which control the speed at which the print head changes directions.
Tip: Raise the print temperature when you increase print speed to prevent under-extrusion issues. Higher print temperatures allow the filament to melt and extrude faster. I recommended a 5-15 °C temperature increase for every 5-10mm/s increase in print speed.
2. Increase Travel Speed
An often overlooked speed setting is the travel speed. The travel speed is how fast the print head moves when not extruding material. Think about gaps in your print or when you’re printing multiple items.
Increasing the travel speed reduces overall print times.
You’ll notice the most significant time savings when printing objects where the print head spends much time over open spaces. If you’re printing a solid object, such as a vase, this setting won’t impact print times.
The default setting in Cura is 150mm/s, but you can increase it with a 3D printer capable of faster speeds.
Faster travel speeds also reduce stringing in your 3D prints, as there’s less time for the filament to ooze out of the nozzle during movements.
The biggest drawback is that faster travel speeds increase the chance of the hot end crashing into parts of your print.
Enable Z hop, which raises the nozzle during travel, preventing collisions with printed objects. You can also enable Combing, which adjusts the travel path to avoid collisions. We prefer Z hop over combing as the modified path is longer, increasing print times. In comparison, Z hop does not affect the print speed.
3. Increase Layer Height

Increasing the layer height is the best way to reduce print times. However, increasing the layer height reduces the print quality of your 3D model.
Layer height is often referred to as the print resolution .
Increasing layer height is particularly effective for larger, less detailed objects. However, it’s essential to be aware of the trade-off involved: a thicker layer height can reduce the level of detail and smoothness of the print’s surface, making layer lines more visible.
You can increase the layer height to 80% of the nozzle diameter.
You can print with a standard 0.4mm nozzle with a maximum 0.32mm layer height . With a wider nozzle diameter of 0.6mm, you can print at a much larger layer height of 0.48 mm.
4. Use a Wider Nozzle

Using a wider nozzle diameter is an effective way to increase the speed of 3D printing. Wider nozzles allow for a higher filament extrusion rate and larger layer heights.
Most 3D printers have a 0.4 mm nozzle. However, you can upgrade to a larger 0.6mm or 0.8mm nozzle diameter to increase 3D printing speeds.
However, larger nozzle diameters reduce the level of detail in prints, making them less suitable for high-precision or intricately detailed objects.
When switching to a wider nozzle, adjustments in the slicing software, such as recalibrating the extrusion rate, layer height, and printing temperature, are necessary.
Wider nozzles are especially beneficial for larger prints where fine detail is not a priority. I often use a wide nozzle diameter when printing large cosplay props because I know they will be sanded and painted, so layer resolution isn’t necessary.
5. Decrease Infill Density

Decreasing the infill density of a 3D print is a strategic approach to significantly reducing print times. Infill density refers to the amount of material used to fill the inside of a print. Lowering the infill density reduces the amount of filament required .
You can choose an infill density between 0% and 100%. An 0% infill produces a hollow object that is quickest to 3D print, while an infill density of 100% creates a solid object.
When you decrease the infill density, less material is used to fill the interior of your print. This reduction means the printer has less material to extrude inside the object, directly decreasing the print time.
However, it’s essential to balance the infill density with the structural requirements of the print. Lower infill densities make the 3D printed object lighter and use less material, which is cost-effective but also makes the final object less sturdy and more prone to damage or breaking, especially under stress.
Here’s a general guideline for selecting the best infill density for your 3D print :
- Decorative prints (0-15%) : Ideal for lightweight miniatures, display models, and objects that don’t need much structural integrity.
- Standard prints (15-30%) : A good choice for objects requiring more strength but not needing to be solid or too heavy.
- Durable prints (30-50%) : Suitable for functional parts that undergo moderate repeated stress, where tensile strength and durability are important factors.
- Functional prints (50-100%) : Best for solid functional items and components that must withstand significant forces. Remember that a 100% infill might reduce flexibility in certain models.
Decreasing infill densities is best suited for objects where internal strength is not a primary concern, such as decorative items or parts that don’t bear a load.
6. Choose a Faster Infill Pattern

Changing the infill pattern is another technique to optimize print times in 3D printing. The infill pattern is the shape of the internal structure of a print.
Infill patterns vary in complexity and design. Different patterns impact the finished product’s printing speed and structural integrity.
Lines and zig-zag patterns are among the simplest and fastest to print . These patterns involve straightforward, continuous movements of the print head, allowing for a more efficient printing process with fewer stops and starts. These infill patterns can be printed quickly due to their simplicity and the reduced need for complex movements or retractions of the print head.
However, the simplicity of lines and zig-zags comes with a trade-off regarding structural support. These patterns are not as strong as more complex infill designs like grid, honeycomb, or triangular patterns. The straight-line nature of these infills can lead to weaknesses, especially under torsional or bending forces. Faster printing infill patterns are best for decorative items that don’t require structural strength.
A more intricate infill pattern might be necessary for objects that require more strength, albeit at the expense of longer print times.
7. Lower Wall Thickness
Decreasing the wall thickness in 3D printing, or shell thickness, is the number of solid layers forming the sides of a print, is a straightforward way to improve 3D printing speed.
When you reduce the wall thickness, there are fewer perimeter layers to lay down. The reduction in filament translates to faster 3d printing.
However, lower wall thickness reduces a print’s strength and quality. Thinner walls are less robust, making the print more susceptible to damage under physical stress.
Additionally, with thinner walls, the infill pattern might be more visible, potentially affecting the print’s aesthetic appeal.
8. Remove or Reduce Supports

Adjusting the support settings is a strategic way to reduce the time required to complete a 3D print. Supports are essential for printing overhangs and bridging gaps, but they can also add significantly to print time and material usage.
By optimizing your support material settings in the slicer program, you can minimize the amount of support used, thereby speeding up the printing process.
- Selective Support Placement: Instead of using the default setting, which often adds supports everywhere, opt for selective placement. You can selectively place supports where they are absolutely necessary, such as under extreme overhangs or large bridges. This method does take some skill, as you need to understand which parts of your print require support.
- Reducing Support Density: Decreasing the density of the support structures reduces print time as less filament is required. Higher-density supports are stronger but take longer to print and use more material.
- Using Support Patterns Efficiently: Choose support patterns that are quick to print and easy to remove. For instance, a zig-zag or line pattern can print faster and be less dense than a grid pattern, which helps reduce overall printing time.
- Adjusting Support Overhang Angle: Increase the overhang angle for support generation. By default, many slicers generate supports for overhangs greater than 45 degrees. If your material and printer settings allow, increasing this angle means less support material, speeding up the print. You can often get away with 60 degrees or more if your 3D printer is calibrated correctly.
Optimizing support settings involves ensuring adequate support for overhangs and minimizing unnecessary support structures. This balance is critical to reducing both print time and material usage.
By selectively placing supports, adjusting their density and pattern, and fine-tuning overhang angles and distances, you can significantly speed up your 3D printing process while maintaining the integrity and appearance of your prints.
As a bonus, with less material, supports are easier to remove and have less of an impact on the surface of your print.
You can also use Cura’s tree supports or Prusa Slicer’s organic supports, which use less filament than traditional support structures.
9. Print Multiple Objects at Once
Printing multiple objects at once in 3D printing can lead to significant time savings, often reducing the total print time by up to 50%. This efficiency gain is achieved because the printer works on several prints simultaneously rather than completing them individually.
And that doesn’t include the time it takes to remove the previous print, preheat the hot end, and level the print bed between prints.
When you print multiple items together, the printer’s head moves from one object to the next in a single layer before advancing to the next layer. This process continues layer by layer until all objects are completed.
I’ve found the most significant time savings when printing on multi-color printers. For example, when I print on my Bambu Lab P1P , there’s a significant time delay between color changes. But when I print multiple objects at once, the printer prints one color before moving to the next, reducing the amount of color changes.
However, there are some considerations to keep in mind. Printing multiple objects simultaneously can increase the risk of print failures affecting all objects on the build plate. Additionally, if one object fails, it can potentially interfere with or damage the other models being printed.
Therefore, it’s essential to ensure the bed is properly leveled and the objects adequately spaced to allow smooth movement between the print head.
When printing multiple items, ensure no overlap between support structures or bed adhesion layers, like rafts, brims, and skirts.

Ready to Improve Your Results?
Dive deep into the world of 3D printing with our exclusive newsletter. Get insider tips, hands-on reviews, and the latest news to improve your 3D printing.
Trending now

Your cart is empty
Estimated total.
Rp 0,00 IDR
Selamat Datang di Situs Toto Resmi > BENTO4D

Situs Toto Resmi
BENTO4D Situs Toto Resmi dan Daftar Togel 4d Terpercaya
Couldn't load pickup availability
Bento4d adalah situs toto dan situs togel resmi yang telah berdiri sejak tahun 2016 yang server togel berbasis di Asia, termasuk Thailand dan Indonesia. Di sini Anda akan menemukan permainan judi online terbaik, hadiah jackpot terbesar, deposit withdraw yang amanah dan aplikasi togel yang canggih. Beberapa lisensi yang dimiliki situs togel luar negeri kami termasuk IDN, PAGCOR, WLA dan Garuda. Selain bermain togel online di situs kami, Anda juga bisa mendapat result togel tercepat, data HK, SDY, SGP, prediksi togel jitu dan bergabung dalam komunitas group togel paling aktif. Daftar di situs togel terkenal hari ini dan mulai bermain dengan akun demo atau akun asli. Bento4d adalah pilihan situs togel terbaik yang menguntungkan buat Anda.
Fitur Situs Toto Togel Resmi dan Terpercaya
Memilih situs togel online yang resmi dan terpercaya adalah langkah penting bagi pemain untuk menghindari penipuan dan memastikan pengalaman bermain yang aman. Artikel ini akan menjelaskan kenapa Bento4d adalah situs bandar togel nomor satu di bangsa Indonesia dan kami akan membagi tips untuk mendaftar dan pasang togel online.
Legalitas dan Lisensi Bento4d
Bento4d diatur dan diawasi oleh badan pengawas perjudian seperti IDN, HKB, WLA dan PAGCOR. Lembaga togel ini bertanggung jawab untuk memastikan bahwa situs togel 4D mematuhi semua aturan dan regulasi yang telah ditetapkan. Selain itu, Bento4d juga diawasi oleh lembaga pengawas independen yang bertugas untuk memastikan bahwa permainan yang disediakan oleh Bento4d fair, amanah dan tidak ada kecurangan. Dengan memiliki regulasi dan pengawasan yang ketat, Bento4d dapat menjamin keamanan dan kepercayaan para pelanggan dalam bermain togel dan slot. Dengan bermain di situs togel ternama , pelanggan tidak perlu khawatir tentang kecurangan atau penipuan yang mungkin terjadi. Bento4d siap memberikan pelayanan terbaik dan memastikan keamanan dan kepercayaan para pelanggan.
Pasaran Togel Bervariasi
Sebagai salah satu situs togel terbesar di dunia judi 4d, Bento4d menawarkan permainan togel online yang terlengkap. Dengan ratusan jenis permainan togel yang dapat dipilih, seperti Togel Singapore (SGP), Togel Hongkong (HK), Togel Sydney (SDY), Togel Cambodia, Togel Taiwan, dan Togel China, para pemain dapat memilih permainan yang sesuai dengan keinginan mereka. Kami juga menjadi sala satuh situs togel yang ada pasaran Jakarta buat member yang pengen coba togel Indonesia ini.
Metode Deposit Dan Withdrawal Terlengkap
Bento4d menyediakan berbagai macam metode pembayaran dan kami adalah situs togel yang bisa deposit pakai pulsa. Kami menerima pembayaran melalui bank lokal seperti BCA, BNI, Mandiri, dan BRI, serta melalui e-wallet seperti OVO, Qris, Linkaja, Shopeepay, Dana, dan Gopay. Layanan deposit dan withdraw Rupiah 24 jam non-stop, sehingga para pemain dapat melakukan transaksi kapan saja dan di mana saja.
Salah Satu Situs Togel Yang Gacor
Anda mungkin uda tidak asing lagi dengan kata kata gacor. Untuk membuktikan bento4d adalah situs togel yang gacor, kami memberikan jaminan kepada member dalam bentuk garansi kekalahan sampai sebesar 50%. Minimal deposit disini juga sangat kecil, marilah coba keberuntungan Anda hari ini di situs togel deposit 5000.
Bonus Toto Togel Menarik Buat Member
Salah satu poin utama yang buat member memilih Bento4d sebagai situs togel terpercaya mereka adalah bonus dan promosi yang diberikan. Tentu saja, kami sangat yakin bonus yang di Bento4d adalah terbesar di dunia agen togel sebagai apresiasi buat member setia kami. Anda dapat lihat lebih detail tipe bonus kami di table bawah:
Layanan Customer Service Yang Terbaik
Layanan customer service memegang peranan penting dalam operasional situs toto online . Sebuah layanan customer service yang bagus harus dapat memberikan solusi cepat, tepat, dan ramah kepada member situs. Sifat responsif ini penting untuk membina kepercayaan dan hubungan jangka panjang dengan pemain togel online. Dukungan teknis, kemudahan akses, keluaran tercepat hasil togel serta ketersediaan layanan terbaik adalah jaminan yang Bento4d memberikan kepada member kami. Anda dapat kontak admin kami melalui Whatsapp, Livechat atau Telegram 24 jam setiap hari. Selain itu kami juga sediakan jalur pengaduan customer untuk memberikan masukan Anda.
Hadiah Togel Terbesar Di Dunia Togel
Selain menawarkan keseruan dan tantangan, togel juga memberikan kesempatan untuk memenangkan hadiah besar. Bento4d sanggat bangga menjadi situs togel hadiah tertinggi di dunia toto togel.
Tabel di bawah ini menunjukkan semua jenis taruhan yang tersedia dan hadiah menang jackpot nya :
Illustrasi : Bet 1000 di 2D dapat 100.000 Bet 1000 di 4D akan dapat 3.000.000
Illustrasi : Bet 1000 di colok bebas togel akan menang 1500 Bet 1000 di colok jitu akan menang 8000
Cara Mendaftar Akun Dan Pasang Togel
Cara membuat akun togel lewat hp android dan iphone.

- Kunjungi halaman daftar mobile togel
- Buat akun Anda dengan mengisi data di halaman daftar
- Deposit dana ke akun Anda dan tunggu saldo akun diisi
- Pilih pasaran togel yang Anda ingin pasang dan pilih tipe betting
- Pilih angka Anda dan isi nilai taruhan. Pencet konfirmasi setelah uda di pastikan semua benar
- Tunggu result togel diumumkan dan cocokan dengan nomor Anda. Kemenangan togel Anda akan otomatis diupdate dan diisi ke saldo akun Anda.
Cara membuat akun togel lewat Pc

- Kunjungi halaman daftar desktop
Tips Untuk Menang Togel
Bermain togel online telah menjadi salah satu hiburan yang populer di Indonesia dan mendatangkan peluang untuk menang jackpot besar. Banyak pecinta togel yang tertarik untuk mencoba keberuntungan mereka di situs togel hadiah besar dengan harapan menang jackpot togel. Namun, untuk memenangkan permainan toto togel bukan hanya tentang keberuntungan semata, melainkan juga mengandalkan strategi yang tepat.
Menggunakan Sistem Martingale dalam Togel Online
Sistem Martingale adalah metode yang bisa digunakan dalam judi togel dimana pemain menggandakan taruhan setelah mengalami kekalahan, dengan asumsi bahwa eventual menang akan memulihkan kerugian sebelumnya.
Strategi Memilih Nomor Togel Yang Tepat
Menentukan nomor togel Anda dengan analisa dan strategi khusus. Sebelum pilih nomor Anda, Anda wajib analisis data seperti frekuensi kemunculan nomor, nomor angka yang keluar di result sebelumnya dan pengamatan pola. Anda juga bisa racik nomor menggunakan rumus sendiri atau melihat ahli prediksi togel. Salah satu strategi paling popular adalah menggunakan Angka Mistik atau Angka Index dalam prediksi nomor angka jitu.
Memanfaatkan Bonus Dan Promosi Situs Toto Resmi
Player yang sering menang adalah player yang sering menggunakan bonus dan promosi yang ditawarkan oleh situs toto resmi. Promosi dan bonus selalu sangat dermawan dan Anda tidak mempunyai resiko dengan cara menambah saldo akun Anda dengan cara ini.
Main Togel Dengan Cara Invest
Arti invest dalam dunia toto togel adalah menaruhkan jumlah banyak pilihan nomor sehingga kemungkinan menang sangat besar. Biasa pemain yang cerdas menggunakan strategi ini kombinasi dengan bonus dan promosi situs togel. Karena ada penambahan saldo buat member maka kesempatan profit pemain sangat tinggi.
Selalu ingat untuk bermain secara bertanggung jawab dan jika berhasil menang, segera tarik keuntungan tersebut dan alokasikan untuk keperluan yang lebih pasti, seperti investasi atau tabungan. Bagi Anda yang mengalami kerugian, penting untuk tidak mengejar kerugian tersebut dengan berharap akan memenangkan kembali uang dengan taruhan berikutnya. Langkah selanjutnya untuk pemain adalah terus belajar dan memperbarui pengetahuan tentang permainan togel resmi, mengikuti perkembangan strategi serta memperhatikan regulasi terkait perjudian online di wilayah masing-masing. Bersikaplah rasional dan selalu prioritaskan kebijakan finansial yang sehat.
Pertanyaan yang Sering Diajukan Oleh Pemain Toto Togel Online
- Gunakan VPN (Virtual Private Network): VPN mengenkripsi koneksi internet Anda dan memungkinkan Anda mengakses internet melalui server yang berlokasi di negara-negara berbeda, melewati pemblokiran situs web.
- Server Proxy: Server proxy bertindak sebagai perantara antara perangkat Anda dan internet. Mereka dapat membantu Anda mengakses situs web yang diblokir dengan menyembunyikan alamat IP Anda.
- Browser TOR: Browser TOR (The Onion Router) adalah browser web yang berfokus pada privasi yang mengarahkan lalu lintas internet Anda melalui jaringan server yang dioperasikan oleh sukarelawan, memungkinkan Anda mengakses situs web yang diblokir.
- Mengubah DNS: Anda dapat mengubah pengaturan DNS (Domain Name System) untuk menggunakan server DNS yang tidak tunduk pada pembatasan pemblokiran yang sama dengan server DNS default Anda.
- Akses melalui Alamat IP: Kadang-kadang, Anda dapat mengakses situs web yang diblokir dengan memasukkan alamat IP-nya langsung ke bilah alamat browser Anda daripada menggunakan nama domain.
- Data Seluler: Jika sebuah situs web diblokir di jaringan Wi-Fi Anda, Anda dapat mencoba mengaksesnya menggunakan koneksi data seluler Anda.
- Google Terjemahan atau Halaman Cache: Google Terjemahan atau halaman cache di mesin pencari seperti Google kadang-kadang dapat memberikan akses ke situs web yang diblokir.
- SSH Tunneling: Tunneling Secure Shell (SSH) dapat digunakan untuk melewati pemblokiran situs web dengan mengenkripsi lalu lintas internet Anda dan mengarahkannya melalui server remote.
- Aplikasi Mobile Proxy: Beberapa aplikasi mobile menyediakan layanan proxy yang dapat membantu Anda mengakses situs web yang diblokir pada perangkat mobile Anda.
- Link Alternatif : Minta link alternatif dari situs togel yang Anda mau akses. Link ini akan memungkinkan Anda mengakses situs yang di blokir.

Daftar Situs Toto Togel Bento4d
- Choosing a selection results in a full page refresh.
- Opens in a new window.
The 3D Printing Search Engine!
3D Print Speed vs Quality; Best Settings!
We all want to get the best out of our 3D printed models, both in terms of quality and speed. The problem is most of the time quality and speed don’t go hand in hand and finding the sweet spot between quality and speed will take some trial and error for every printer and filament type.
In this article, I will talk about how much impact print speed has on print quality, the most common problems, and how to find the best settings.
Does Printing Speed affect the Print’s Quality?
Why does it affect printing quality, printing speed, retraction speed, travel speed, print speed and print duration, weak layer adhesion, layer shifting, weak infill, under-extrusion, use a larger nozzle, print with a thicker layer height, lower the infill percentage and the number of shells, does filament type affect the print speed, how fast can a 3d printer print, ender 3 (pro and v2) speed settings, check out our recommended products section.

More often than not the print speed has a significant impact on print quality. As a rule of thumb, slow print speeds produce better quality prints. Achieving fast printing times without losing printing quality is possible, but that will depend on your 3D printer’s type and the quality of the materials used.
The degree to which printing speed affects your print’s quality will be tied to the machine’s ability to handle that given speed. Most consumer-grade 3D printers are not made with fast printing times in mind. These machines are usually made with cheap materials to make them affordable to everyone. As you increase printing speed these design and material deficiencies are more noticeable.
Fast movements from the extruder generate a significant amount of vibrations and the results are poor quality prints. Bowden setups have less weight on the extruder thus are more stable and mitigate this issue. A good quality 3D printer with a Bowden setup can achieve fast printing speeds without losing quality.
Besides the 3D printer’s quality, we need to consider the filaments used to print. Even if the 3D printer can handle a given printing speed, the filament can only melt so fast thus limiting the extrusion flow rates. Different types of filament printed at the same speed yield disparate results as they possess different physical and chemical properties.
Best Speed Settings for 3D Printing
In 3D printing, the best settings vary for every maker as optimal settings depend on many factors such as the 3D printer model, filament, and environmental conditions.
Printing speed controls how fast the nozzle moves across the build plate while printing. Usually, slow printing speeds produce better quality results as high speeds can lead to ringing and under-extrusion issues. To find out the best print speed settings for your machine download this Speed Test Tower .
In the link, you will find all the instructions on how to set up the Speed Test Tower print. Basically, this test increases print speed as the tower moves up so you can see the difference in print quality at a certain speed and figure out the best setting for your 3D printer.
Retraction speed determines how fast the printer retracts the filament through the nozzle while changing the printing position. This is done to avoid filament leaks. If the retraction speed is set too low, you will see stringing and blobs on your models. On the other hand, if the retraction speed is set too high the drive gears that feed the filament might damage the filament and mess with the feed flow.
To find out the proper retraction speed settings for your printer download this Retraction Test . Print a few tests, starting with a retraction speed of 25mm/s, and increase it by 5mm/s as long as you see good results. The speed that yields the cleanest result should be your optimal retraction speed.
Travel speed is the speed at which the nozzle moves while it is not extruding the filament. If the travel speed is set too high the printhead movements can generate some serious vibrations which lead to ringing or even layer shifting issues.
To get the optimal travel speed settings for your printer download this Test (the same model used to test retraction speed). For the first print, use 100mm/s travel speed and if the surface looks good you can repeat the print increasing travel speed by 5mm/s. You can repeat the process until you see defects on the surface.
High printing speeds can drastically decrease the print duration. Using Cura’s Draft profile, I sliced a Benchy using different printing speeds to see how much the printing duration decreases. These are the results:
As you can see, the first speed increments are the ones that have a higher impact on reducing print duration. This happens because depending on the overall shape and size of the printed object the extruder might not be able to reach these higher speeds.
Problems that arise when printing too fast
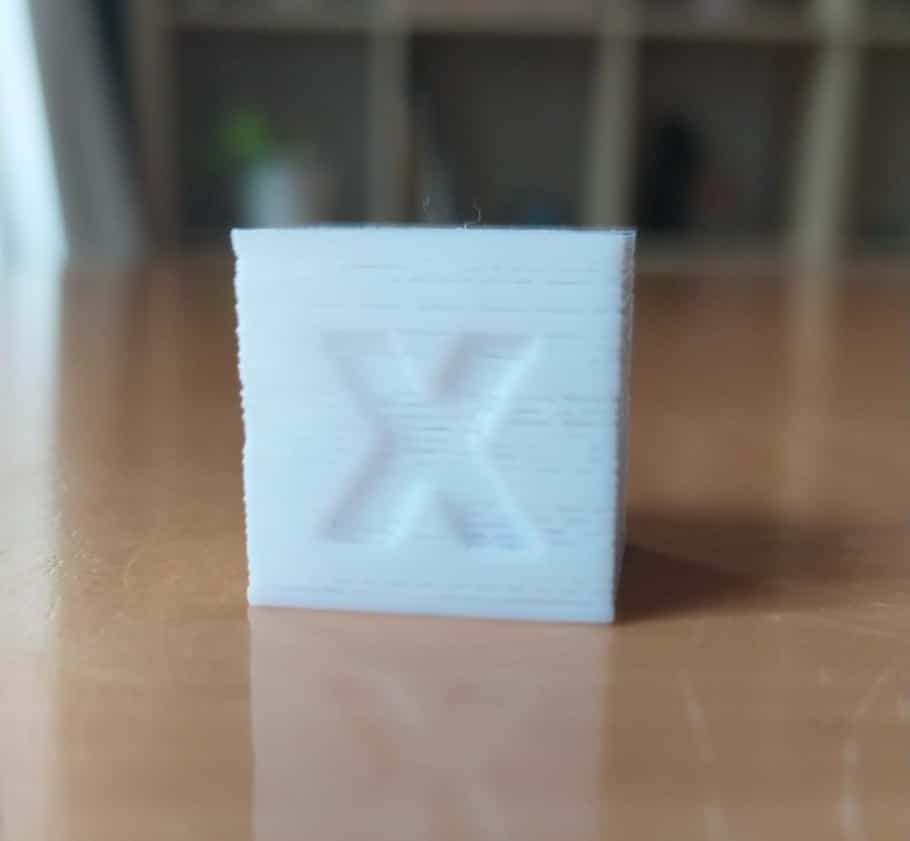
Even if the 3D printer can handle a high print speed the filament still needs time to properly bond. As the filament is laid down, it needs to stick to the print bed and fuse with the other layers to maintain the desired shape. If the printer is going too fast, the filament does not have the time to create a strong bond resulting in weak layer adhesion.
When printing at a high speed there is a chance the X, Y, Z axis motors fail due to the excess stress and misplace a layer. This happens because the motors are being forced to move at a higher speed than they can handle. Layer shifting can happen gradually or as one big displacement.
If we are printing too fast the extruder might not be able to keep up and end up extruding less filament than the software thinks it is extruding. This under-extrusion usually produces a weak infill and thus weakens the overall 3D-printed object structure as it can easily break. We can identify this issue if we see the layers are too thin and the infill is stringy.
When the printer is moving too fast and needs to make a sudden change in direction, like in a sharp corner, the inertia of the extruder can cause a considerable amount of vibrations which cause the ringing. Ringing is a visible defect of an unwanted pattern of lines on the surface of the 3D-printed object.
High printing speed can decrease bridging quality. Whenever a print needs to connect two columns with a suspended filament extrusion (bridging), the filament needs time to stick to the previous layer. If the extruder is moving too fast the filament will not be able to adhere in time to bridge a gap.
Other ways of achieving faster Print Times
With a large diameter nozzle, you sacrifice detail quality in exchange for decreasing print duration as a larger nozzle allows more filament to be extruded at once.
The thicker the layer height of your 3D printed object is the fewer layers need to be printed to finish your print. The downside to thicker layer heights is the loss of resolution in your model.
Lowering infill percentage and the number of shells reduces the overall strength of a 3D printed object. As we decrease these settings the amount of extruded material is reduced thus we get faster print times.
The type of filament used for printing plays an important role in print speed. The physical and chemical properties vary for every kind of filament and thus the recommended print speeds for each one of them.
These are good printing speeds for some of the most commonly used filaments:
Keep in mind that you should always check your filament spool for the best speed settings as these settings may change depending on the manufacturer.
As I said previously, the maximum speed that a 3D printer can achieve depends on the quality of its components. For most common consumer-grade FDM printers the average print speed is around 40mm/s to 80mm/s while some better ones are able to achieve 100mm/s to 150mm/s.
I would like to make a special mention of the VORON project. This is a non-commercial project which handles users the opportunity to build their own printer. The plans are free open-source and these wonderfully engineered machines can achieve impressive print speeds. The build documentation is great and you can download the assembly manual from their website .
Since the Ender 3 is such a popular printer I decided to run a couple speed tests as well as some benchys and calibration cubes at different speeds on it to find out how fast I could print reliably without compromising on quality too much.
Here’s how to the prints turned out (my phone’s camera isn’t the best at detecting ringing and ghosting, so you may have to take my word as far as which one turned out better):
Speed test:
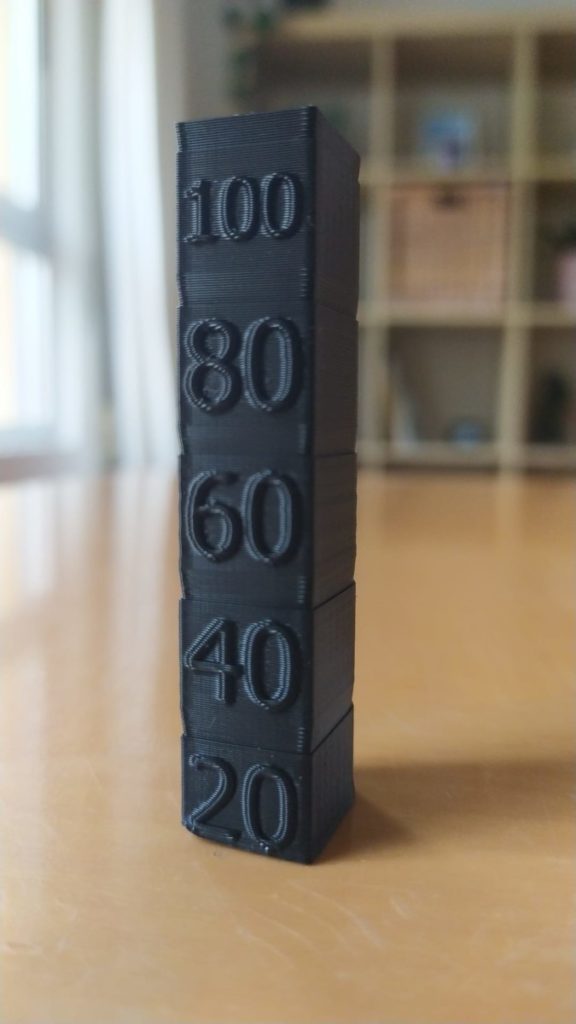
While it may not be as obvious in the image, at 200mm/s there was absolutely no ghosting going on and 40mm/s was very similar. However, from 60mm/s onwards you can clearly see more ghosting.
When looking at the same print from the sides, the height where it was printed at 20mm/s and 40mm/s is a bit smoother than all the other parts as well.
Benchy test:
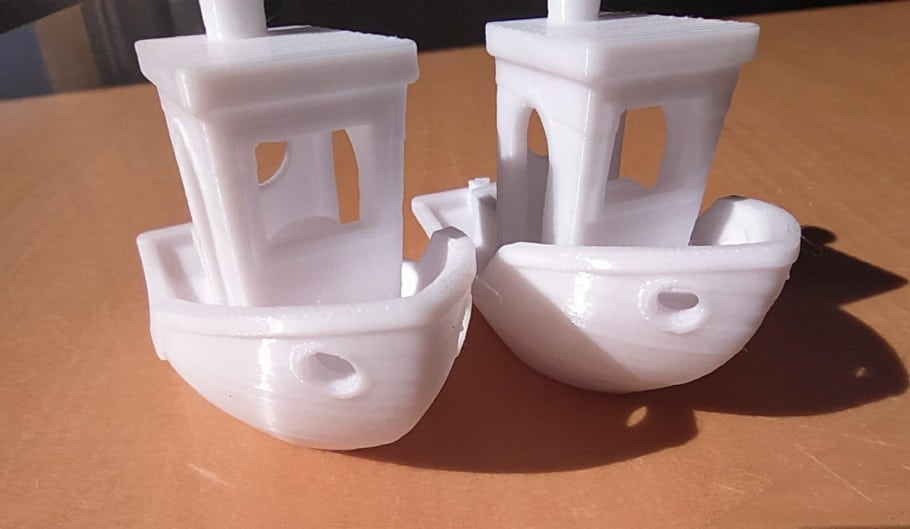
While it may not be very apparent on this image, the Benchy printed at 90mm/s had a bit more ghosting present and some small bulging layer lines, but the difference wasn’t as noticeable as I expected.

We created a recommended products section that will allow you to remove the guesswork and reduce the time spent researching what printer, filament, or upgrades to get, since we know that this can be a very daunting task and which generally leads to a lot of confusion.
We have selected just a handful of 3D printers that we consider to be good for beginners as well as intermediates, and even experts, making the decision easier, and the filaments, as well as the upgrades listed, were all tested by us and carefully selected, so you know that whichever one you choose will work as intended.
About The Author

Facundo Arceo
Leave a comment cancel reply.
Your email address will not be published. Required fields are marked *
Save my name, email, and website in this browser for the next time I comment.

CNC Machining

Sheet Metal Fabrication

3D Printing

Vacuum Casting
Sub-Processes
- CNC Milling
- CNC Turning
Post Processing
Plastic materials.
- Carbon Fiber
Metal Materials
- Laser Cutting
- Metal Bending
- Threading & Chamfering
Processes Available
- Hand Polishing
- Vapor Polishing
3D Printing Materials
- Acrylic-Like
- Rubber-Like

- Rapid Prototyping
Fastest lead time of high-quality prototypes at minimal cost.

- Low Volume Production
From one-off prototyping to low-volume production.

- Mechanical Assembly
Custom assembly for project-specific needs.

- Custom Package
Ready to help you prompt your brand.

Select from 100 more types of metals and plastics.

Select from 20 more types of surface fishes.

Providing precision machining and manufacturing solutions.

How we assist our clients in bringing their projects to fruition.

Produce better parts with these comprehensive guides.

Tips to accelerate production time and reduce production costs.

Resources for learning skills and knowledge in the industry.

Learn answers to common frequently asked questions.

- Quality Assurance
Consistent quality, every time.

Your go-to manufacturer for custom parts.

Learn updated news about ECOREPRAP.

3D Printing Speed: How to Get the Best Setting for PLA?
3d printing speed: how to get the best setting for pla.
If you are new to 3d printing, maybe you note that it is hard to balance the printing speed and quality.
When you use a faster printing speed, the quality of 3d print will not so good. Either, slow speed means that you need to spend much more time. In this post, we will explain the details of 3d printing speed and how to get the best setting for PLA .
Contents(show)
What is Speed Setting in 3d printer?
When we talk about the 3d printing speed, most of us think that it is the moving speed of the extruder. They move around from one layer to another. The faster or slower decide the printing time for the part. Actually, it’s not.
To get good quality print, we need to set the best setting for speed. The speed contains so many parts; extruder speed is just one of the most speed types.
Print Speed
3D print speed is the primary speed setting that will take effects on 3d prints. As the name “print speed” implies, it determines the speed at which your printer motors move. And these motors comprise the extruder motors and the X and Y axis motors. Note that the outcome of your printing mainly depends on the selected print speed.
Now let’s break down the complexity of the print speed. The setting of the print speed has four sub-settings, which are;
- Infill speed : The print speed reduces the printing duration with quality printing strength.
- Outer wall shell speed : It reduces slightly to boost the quality of the surface of the print.
- Inner wall shell speed : It works to reduce the time spent on printing while sustaining the strength of the print.
- Top/Bottom speed : Generally, it is slightly reduced to boost the prints’ surface quality.
Travel Speed
Travel speed is the speed rate of the 3D printer’s print head when it is not extruding plastic. Increasing the travel speed can drastically reduce the duration used in printing. But too much increase of the travel speed can result in a misaligned layer of the model or print failure.
Retraction speed
Shell, infill, and layer height.
3d printer speed not only decides by “speed” alone and is also affected by the extruding thickness and plastic of each layer. So, let me briefly tell you some general information about how each of these concerns the speed rate of your print.
1. Shell thickness: In this setting, the extruded plastic use to forming the outlines of the 3D model. An increase in the shell thickness will not only result in increased consistency and strength. But also cause a notable increase in the print duration.
2. Infill: This describes the inner structure of the 3d model. The density of this internal structure has a remarkable effect on the print speed. Higher infill density will lead to higher strength and longer print time.
3. Layer Height: This influences how quickly your print will finish. The higher your layer height, the thicker each layer of your 3D prints and the shorter the print duration. Adjust your layer based on the required print resolution.
How Do I Get the Perfect Print Speed Settings?
The best way to get the perfect print speed of your 3D printer is by starting it at the default speed setting. That’s 60 mm/s and then increasing it by five mm/s. These are settings that you arrived at after consistent trial and error on the test prints. The perfect print speed setting entirely depends on the type of print you are settling to go for.
If your print speed is set to a very high speed, it may result in overheating due to insufficient cooling. If your print speed is set at a low rate, it may result in the deformation of the prints. This deformation is a result of the extended setting of the nozzle on the plastics. Hence, always consider the print’s temperature and the thickness of your filament.
The materials also play a critical role in the perfection of your print speed. Some materials enable you to in an instant and get incredible quality.
What is a Good Print Speed for PLA?
A good print speed for PLA is a spot that gives it a good balance of print quality and speed. And this falls between 40-60 mm/s range. Based on your 3D printer setup, type, and stability. Your PLA speed rate can reach 100 mm/s and above easily. When compared to Cartesian, Delta 3D printers are going to permit higher speeds.
I’d recommend sticking to this range. But there are instances where using higher print speed and the results were fantastic. The low maintenance nature of PLA allows increased speed without risking the quality as well. But don’t over increase the speed.
Does print speed reduce print quality?
There have been several numbers of controversies on the effects of speed on the quality of a print. Generally, when you are yet to optimize your printer, lower rates make 3d printers better quality. But a high speed has a more negligible effect when you have fully optimized your 3D printer. This optimization is a result of knowing how to set the printer’s settings. That will directly affect 3D printing speed without compromising the print’s quality.
If you use lower infill settings, will your print strength be reduced? The less infill you use, the less strength of your prints. Like I have said earlier in this post. When the print speed is too high, it will result in print failure and most likely render the print useless.
When you have, using the recommended 5mm/s increment for adjusting it. It will be much easier for you to detect the best speed rate for your printer with excellent quality.
Printing Speed Calculator
The printing speed calculator is a digital calculator available on the Internet. It is designed to solve 3D printing speed settings and related challenges, which are printer configuration or finding the best parameters for their desired speed.
This calculator helps you find the maximum printing speed that you can reach with the current structure of your 3d printer. Enter your layer height, nozzle size, line width, and choose the material you will be printing.
How Fast Does a 3D Printer Print?
It depends on the material you are printing. Like how large the part is, what orientation it is in, the alignment of your print object, and the internal support style. Materials-wise, the weaker and cheaper materials you use, the faster it will get the print done. PLA is usually quicker to print but is not as heat resistant or tough as ABS.
Although some things are so small that the printer can get it done in a couple of minutes, some other prints can take a couple of days to print. So one of the most significant factors is time. More material = more time.
Orientation can also have a significant effect on it. The more vertical layers you have, the longer the print will take. How fast your printers print also depends on the internal support. What you are making matters, but for you to decide. It highly depends on what you need or wants in terms of speed versus strength.
And if it sometimes has to go fast, the quality can easily compromise. You can get better results in 3D printing at lower speeds. But you will get the best result when it is optimized.
Suppose you use the correct printing speed and suitable materials. 3D print can be efficient and effective. There are no specific settings to get the best result. It differs from different types of material and printers.
You should print test prints inconsistently. It is the only method to get the best setting.
Shenzhen ECO Industrial Co., Ltd
- [email protected]
- +00 86 13620229297
- Room 421, Xinghe Building, Zhongxin Road, Xinqiao, Baoan, Shenzhen, China

Capabilities
- CNC Machining Services
- Sheet Metal Services
- Metal Laser Cutting
- 3D Printing Services
- Vacuum Casting Services
- Surface Finishes
- Case Studies
- Design Tips
Fastest 3D printers benchmarked: Top printers ranked by output time
Some 3D printers can complete a complex piece in under 15 minutes.

Why use a Speed Benchy?
Creality k1c, creality k1 max, creality k1, bambu lab x1-carbon, elegoo neptune 4 plus, two trees sk1, bambu lab p1p, bambu lab p1s, bambu lab a1 mini, creality ender 3 v3 ke, elegoo neptune 4, ankermake m5c, elegoo neptune 4 pro, ankermake m5, biqu hurakan, prusa mini+ (with alpha input shaping update), anycubic kobra 2, creality ender 3 v3 se, the basics of motion, hotend flow, cooling and firmware.
There’s no doubt about it. 3D printers have been getting a lot faster and that’s a good thing. Models that used to take hours to complete can now be done in minutes. And the technical improvements are not limited to expensive printers either. Even basic machines can be found with stock installations of speedy Klipper firmware, Volcano nozzles and samples of high-flow PLA filament.
To find out which FDM-style (filament) 3D printer offers the best combination of quickness and quality output, we performed a timed print test using standard settings, max acceleration and no restrictions on flow. We used the standard nozzle with no hardware modifications as we tested more than a dozen models from leading manufacturers such as Creality, Bambu Lab and Prusa.
All of these are among the best 3D printers for speed and ease of use and surprisingly, even a handful of best budget 3D printers also made this speedster list, but they’re not all created equal. We saw print times ranging from 13 minutes to 41 minutes and huge quality differences in the output of our test model.
Below is a table summarizing our findings. Note that the Sovol SV06 is included to show how slow an old-school, unaccelerated printer performs.
The fastest printer in our fleet is the K1 Max, which beat other brands by nearly 5 minutes with a 13 minute and 50 second Speed Benchy. The K1 Max has a top speed of 600 mm/s and max acceleration of 20000 mm/s.
Test prints were performed with the same standard filament: Inland’s gray PLA . We choose this filament because it is widely available, affordable and brutally honest in photographs. It actually exaggerates layer lines and other imperfections rather than hide them.
Why you can trust Tom's Hardware Our expert reviewers spend hours testing and comparing products and services so you can choose the best for you. Find out more about how we test .

There are many variables that go into fast 3D printing besides acceleration and flow rates. The type of filament, choice of slicer, size of the model and how well tuned your printer is can all affect speed. We had a difficult time finding one testing model that would work with every slicer and every printer, so in the end we turned to the humble 3D Benchy .
3D Benchy was created to test and tune the quality settings of all types of 3D printers, even the Best Budget 3D Printers . It has difficult overhangs, precise curves and doesn’t waste a lot of filament. A “Speed” Benchy also uses the same quality setting to keep the playing field fair.
Every printer on this list can create a beautiful Benchy given about 45 minutes and sensible settings. However, none of our high-speed 3D printers could pull off a Benchy when all settings were 500mm/s, the top speed listed for several of these machines. Yes, we tried.

Parameters Used for Tom’s Hardware Speed Benchy
None of the printers were able to produce a perfect specimen at full speed, which was expected. But the photos show how close each was able to get.

Beating other brands by nearly 5 minutes (and the K1Max by 11 seconds), the K1C produced a boat that was a bit stringy and rough on the hull line, but exceptionally good by speed boat standards. There is no evidence of ringing and the top of the smokestack and overhangs are well-defined.

Our former champ, the K1 Max bested other brands by nearly 5 minutes with a boat that was a bit stringy and rough on the lower layers, but very solid by speed boat standards. Some edges are a bit rounded off due to excessive input shaping, but there is no ringing and the top of the smokestack and overhangs are well-defined.

Only 4 seconds slower than its larger sibling, the K1 prints a Benchy that is well-defined for Speed Boat rules despite being a bit stringy and rough on the lower layers. Like the K1 Max, which uses the same slicer and firmware, the edges are a bit rounded off from excessive input shaping. All in all, it’s a great printer for fast prototyping.

The fastest of the Bambu Lab printers, the X1-Carbon shines with a 15 minute and 29 second boat, only 2 minutes and 10 seconds slower than our current champion. The boat is remarkably clean, with just a hint of under extrusion in the layers.

Completing the Speed Benchy test in a blistering 16 minutes and 25 seconds, the Elegoo Neptune 4 Plus is an impressively fast machine for a large volume bed slinger. The 12000mm/s² acceleration of the Neptune 4 Plus results in a print with some minor banding and artifacts related to fast travel moves. Overall, the detail in the model is impressive considering the sub-17 minute speed.

The SK1 is a Voron inspired printer that should fare well in speed boat tests, but missed a spot in the Top 5. This boat had some odd bumps, but the hull was beautifully sharp with no cooling issues, no ringing and nice overhangs.

The P1P produced a beautiful speed Benchy with a tiny smudge from cooling issues on the bow, a little stringing but absolutely no ringing.

The fastest bed slinger by a few seconds, the A1 Mini produced a Benchy that was not only amazingly fast but super clean. There’s no ringing, the edges are well-defined and the layers are very smooth.

A very nice – for speed – print with a few rough spots on the corners. The Sovol SV97’s ridiculously large auxiliary curtain fan earns its keep with very decent overhangs.

The Ender 3 V3 KE is one of our favorite budget speedsters. It’s a mash-up of the old school Ender 3 and the K1 line, with a high flow K1 hotend, Klipper firmware and a budget Ender 3 body. The printer is Open Source, which allows for tinkering and updating Klipper however you please. It gave us a respectable speed boat at 19 minutes and 48 seconds that showed off good cooling and no ringing. The layers were a tad bit rough but the overhangs were quite good.

This is a very good print by the Neptune 4. It has some rough layers and gaps in the cabin’s corners, but is incredibly good considering the speed.

The AnkerMake M5c struggled with the columns that form the Benchy’s cabin, but otherwise this print is remarkably good without stringing or ringing about the porthole. Layers on the hull of the boat are very nice.
Elegoo Neptune 4 Pro

The Neptune 4 Pro produced a Benchy with only minor defects in an impressive 18 minutes. The hull has some minor banding, but the high flow part cooling fan on the Neptune 4 Pro prevented any curling even at high print speeds. The smokestack is impressively sharp, and the even layers show the Neptune 4 Pro is precise even at high speeds.

The AnkerMake M5 wasn’t originally built for this level of speed – it originally had a ceiling of 250 mm/s before a firmware update gave it this fast mode. It’s good enough for drafts, but little else.

The Hurakan was the first bed slinger we received with Klipper preinstalled, but now its speed is less remarkable. Lack of cooling holds it back, but on the bright side, there’s no ringing to be found.

Josef Prusa insists his machines are about precision and not speed, which shows with the Prusa XL tool changer. Sure, it’s twice as fast as the old Prusa MK3S, but its nowhere near the speed of a Bambu Lab. Its lack of acceleration could only hustle up a 25 minute and 14 second speed boat, and the results were acceptable, with soft lines, poor cooling on the bow and a weird gap in the lower third where the filament couldn’t keep up.

The MK4 recently received new firmware that released its inner speed demon. The walls are nice and neat, overhangs are pretty good and there’s no ringing. The Input Shaping firmware allows the MK4 to cut its run time in half.

The Prusa Mini+ is getting Input Shaping stuffed into its tiny board, and the Alpha version of this incredible update is out for the adventurous to sample. The results are still a bit shaky – the corners are pretty messy – but this really breathes new life into a fan favorite.

The Kobra 2 gets all its speed upgrades from a sturdy frame and new metal parts. It’s not as fast as a Klipper printer, but that keeps it well within the cooling power of its new fan for well formed overhangs.
Creality Ender 3 V3 SE

The Ender 3 V3 SE claims to be faster than previous Enders, but that’s not saying a lot. This print is very clean and looks fantastic in person.
3D printers create three-dimensional objects using layers of melted plastic extruded by a hot nozzle. The three dimensions are plotted with X, Y and Z coordinates, with X and Y covering lateral movements and Z taking the vertical.
There are three main types of motion systems for 3D printers: Cartesian, Core XY and Delta.
Cartesian: Named after the mathematical coordinate system, this style uses three linear axes – X, Y, and Z – to move the print head. Each axis has its own motor and works independently. The system can be quite heavy, especially when the Y axis is used to move the build plate. Cartesian printers have been popularized by Joseph Prusa’s i3 style machines – like the MK4 – and its many clones. Our favorite budget printers are usually Cartesian, such as the Neptune 3 Pro .
CoreXY: This style of printer uses two motor-driven belts that work together to control the way the print head moves in both the X and Y directions. The system is complex, but more efficient and lighter weight, which allows for fast, precise movement. The Bambu Lab P1S is a good example of a Core XY printer.
Delta: Tall and slender, deltas have three spindly arms connected to the tool head which work together in a complex dance. The nozzle moves by changing the height of these arms, allowing it to reach different points on the circular build area. Delta printers are faster due to their light weight and comparatively fewer moving parts – the build plate is stationary and there’s no heavy gantry to move up and down.
Hotend Flow
All 3D printers need to melt filament before squeezing it out of the nozzle in a desired shape. High speed printers need to melt more filament faster in order to avoid disastrous gaps – called under extrusion – in the layers.
Higher flow rates can be achieved by increasing the melt zone in the hotend. Printers like the Creality K1 use a longer Volcano style nozzle to maximize flow.

In order to print fast, a 3D printer needs adequate cooling systems to make sure each layer of plastic is solid before adding more on top of it. Poor cooling can result in saggy overhangs, sloppy bridging, blurred details and poor layer adhesion.
Cooling is provided by fans attached to the printer and pointed at the fresh layer of plastic as it's laid down. A few years ago, a printer might have one cooling fan on the tool head and call it a day. As we’ve strived for faster speeds, we’ve moved to bigger, more efficient fans. Additional fans have also been added to the sides or back of printers, like the large gantry mounted fan of the Elegoo Neptune 4 .
Your printer’s firmware is a big player in print speed. Traditional Marlin has been slow to add speed improvements, which has led to more manufacturers embracing Klipper. Klipper uses more advanced motion algorithms – and requires a bit more processing power – to make your printer faster. Before the introduction of the FLSun V400 , the only way to get Klipper was to install it yourself. Now many manufacturers are using Klipper as a stock firmware.
MORE: Best 3D Printers
MORE: Best Budget 3D Printers
MORE: Best Resin 3D Printers
Stay On the Cutting Edge: Get the Tom's Hardware Newsletter
Get Tom's Hardware's best news and in-depth reviews, straight to your inbox.

Denise Bertacchi is a Contributing Writer for Tom’s Hardware US, covering 3D printing. Denise has been crafting with PCs since she discovered Print Shop had clip art on her Apple IIe. She’s been a freelance newspaper reporter, online columnist and craft blogger with an eye for kid’s STEM activities. She got hooked on 3D printing after her son made a tiny Tinkercad Jeep for a school science project. Excited to learn more, she got a Creality CR10s and hasn’t looked back. She loves reviewing 3D printers because she can mix all her passions: printing, photography and writing. When she’s not modding her Ender 3 Pro or stirring glitter into a batch of resin, you’ll find her at the latest superhero movie with her husband and two sons.
Actress Felicia Day joins Thangs 3D Printing community, shares her own downloadable models
How to Prevent 3D Printer Filament From Tangling
OpenAI's new assistant makes Apple's Siri look primitive, also announces GPT-4o and new desktop PC client (Updated)
- Jimbosmith What about the Qidi x max 3? Why was that not in the list? Reply
- George³ Hmm, only for Sovol SV06 quality was written as "perfect" in table, but has no image and description in article? Reply
- peachpuff Bambu Lab A1 Mini labelled as P1S? Great article (y) Reply
- Conor Stewart There are a lot of factors here that could be influencing the results, like how the file is sliced and the settings used. Essentially this article isn't great for any kind of comparison, it is good for very rough comparisons but a lot of the times could be due to user skill. For your 500 mm/s benchys did you increase temperature? Also the judging of the quality isn't that consistent, a lot of the fastest printers produce much better results than the slower ones. Reply
- pmbroth Therre are several QIDi printers that should have been on the list, as there specs are similar, and they have addional key features such as heated chambers. Reply
- ThatsCold Only got my bambulab printer to print in 500 mm/s with a filament form https://dwdev.se/What differences does a filament do with the print speed? Reply
- View All 6 Comments
Most Popular
PLA Print Speed: Best Print Speed Settings and More

Last updated on 13 May, 2024

3D print speed refers to the speed of printhead movement
PLA is one of the fastest filaments out there, your PLA print speed is also determined by print settings, hardware, and other factors.
PLA is far from a perfect 3D printing material — it is very brittle and can deform if left out in the sun — but its excellent melt flow characteristics make it a fast and user-friendly filament.
Beginner and expert 3D printer users alike often want to improve their PLA print speed. While this low-cost filament is one of the fastest-printing materials out there, its speed can be further increased with print setting adjustments and improved hardware.
This article goes over the basics of PLA printing speed. It looks at the typical printing speeds of FDM printers, the ways you can adjust print speed settings (and how this affects the PLA print), and PLA print speed compared to other 3D printing filaments.
What is Print Speed?

When talking about 3D printing speeds, it’s easy to get vague with the language we use. For example, when we say that a small, simple part can be printed “quickly,” what we mean is that the part can be printed in a short amount of time (because it is small and requires fewer movements of the printhead than a larger part). Make no mistake, this is a helpful way to think about printing, but it doesn’t tell us much about actual print speed .
Lots of factors can affect the time it takes to finish a print. Using a wide-diameter nozzle, for example, allows you to extrude a greater volume of material at once. And adjusting settings like infill and layer height can also shave minutes or hours off total print time: setting a greater layer height reduces the total number of layers, while minimizing infill density means the printhead is laying down less material per layer. Furthermore, adding extra material via supports, skirts, and rafts, will increase the overall printing time.
However, printing time is not the same as 3D print speed . If it takes you a day to build a LEGO house and it takes a building contractor a week to build a real, bricks-and-mortar house, this doesn’t mean that you have demonstrated a faster building speed than the professionals. On the contrary, the builders will probably have laid down each brick far more speedily than you. And this speed of action is what we need to focus on when it comes to printing speed.
3D print speed is simply the rate at which the printhead moves along the X and Y axes as it puts down a layer of material. A fast 3D print speed will reduce overall print time, but prints printed “fast” can still take a long time — when the part has large dimensions, for instance, or if using a very low layer height. Usually defined in millimeters per second (mm/s), 3D print speed can also vary across the build: sometimes a slower speed is used for the first layer (to ensure good adhesion to the build surface) and a faster speed used for infill (where accuracy matters less).
What is the Normal Printing Speed of a 3D Printer?
In the world of FDM printing, which we will focus on here, printing speed refers to how quickly the printhead moves along the X and Y axes while it is depositing material.[1] It has a big impact on overall printing time, but it is not the only factor.
The printing speed of an FDM printer can be adjusted using printer firmware or slicing software. In general, slower printing speeds produce better results, so very high speeds are typically reserved for rapid prototyping. Printing too fast can lead to defects, lower dimensional accuracy, and weaker parts.[2]
The best print speed for everyday prints (medium quality) is about 50–60 mm/s. However, users should note that some materials can be printed very quickly (e.g. PLA) while some require a slower rate to prevent warping or print failure (e.g. TPU).
Different pieces of hardware offer different print speed capabilities, though this is not usually a key metric to look out for when selecting a printer. Most common entry-level printers (such as the Creality Ender 3 and Prusa Mini) offer a maximum print speed of around 200 mm/s. In reality, however, users will not actually be able to print at that speed. This is partly because filament can’t be melted and extruded that quickly. Furthermore, because the printhead typically makes quite short movements while it prints, it rarely has enough time to accelerate to its maximum speed.
Other additive manufacturing technologies define print speed in different ways. With vat photopolymerization technologies like SLA and DLP, there is no printhead movement, so print speed is often defined by how many millimeters can be printed along the Z-axis per hour. Such a measurement is more useful with SLA and SLP (as well as SLS) than it is with FDM, because there are fewer factors that can influence it (such as nozzle size).
PLA Print Speed Considerations
Polylactic acid (PLA) is a popular material for 3D printing due to its favorable characteristics, including its biodegradability, low toxicity, and ease of use. Users can also achieve very high PLA print speed thanks to the relatively low melting point of PLA compared to other thermoplastics commonly used in 3D printing, such as ABS or PETG. PLA typically melts at around 180 to 220 degrees Celsius, depending on the specific formulation and brand.
This lower melting point means that PLA can be heated up quickly in the printer's hotend, reducing the time required for the printing process to reach optimal temperature.
Additionally, PLA has excellent flow properties when melted, allowing it to be extruded smoothly and with precision. This enables faster printing speeds without sacrificing print quality. Furthermore, PLA has minimal warping and shrinkage during cooling, reducing the likelihood of print failures and allowing for faster print speeds and increased layer adhesion.
Overall, the combination of PLA's low melting point, good flow properties, and minimal warping make it an ideal material for rapid 3D printing, enabling users to produce high-quality prints efficiently.
Print Speed Settings for Your 3D Printer

3D print slicing software applications like Cura and Simplify3D offer a range of print speed settings beyond the default print speed, which is usually set in mm/s. These settings allow the user to fine-tune the rate at which the printhead moves in different situations: during the first layer, when printing infill, when printing outer walls, and also when moving without printing.
Although different slicers sometimes use their own terminology, below are the most common print speed settings available for FDM printing.
Print speed
Otherwise known as default printing speed or overall printing speed, this is the most important setting for determining your 3D printer speed and achieving faster prints. Usually defined in mm/s, the print speed setting tells the printhead how quickly it should move along the X and Y axes while it is depositing material. Most slicers will automatically calculate how much filament will need to be extruded in order to keep up with the selected print speed.
We can call this value the “default” print speed because other settings will at times override the value. In fact, some of the following settings can — depending on the specific slicer used — be defined relative to the default print speed (i.e. as a percentage of it).
Infill speed
Most 3D prints are not printed fully solid, as this uses up a lot of material, requires lots of time, and provides few physical benefits. Instead, the interior structure of a print consists of a pattern known as infill, which can vary in terms of shape and density.
Because the infill pattern cannot be seen once the print is complete, it can be beneficial to print the infill faster than the exterior. Although this may result in some imperfections, these imperfections will be less of a problem than they would be on the outside of the print.
Travel speed
Travel is when the printhead has to jump from one part of the build to another without depositing any material. Increasing the travel speed can help reduce oozing and stringing (when unwanted material drips from the nozzle) but can also lead to other imperfections.
In Simplify3D, travel speed is referred to as “X-Y Axis Movement Speed.” The value is usually defined in mm/s and can sometimes be found under “retraction” settings if not in speed settings.
Initial layer speed
The first layers of a print are critical. If the first layer does not adhere well to the build surface, the entire part can dislodge during printing, causing print failure. It can therefore be beneficial to print the first layer(s) at a reduced speed, to give the printed object the best chance of success. This value may be set in mm/s (Cura) or as a percentage of the default print speed.
Number of slower layers
As explained above, most FDM users configure their print settings to have a slower initial layer. But rather than immediately going full speed on the second layer, it can be beneficial to gradually increase the print speed over a few layers until the normal speed is reached.
The number of slower layers setting determines how many layers it should take to go from the initial layer speed to the normal print speed. For example, if the value is set to 5, the printer will increase the speed in small increments over the first five layers before reaching the normal print speed on the sixth layer.
Support structure speed
Printer users often favor a higher speed for support structures, since these disposable sections of material do not need to be particularly accurate or visually pleasing. On Cura, there is a distinction between the “support infill” (the bulk of the support structure) and the “support interface” (where the support meets the actual part). The support interface speed should be slower, as good adhesion between the support and printed model is important.
Other section-specific speed settings
Some slicers allow for adjustment of print speed for the following parts of the print. Most are set in mm/s or as a percentage of the default print speed.
Outer/inner wall speed (may also be called “outline” or “perimeter” speed)
Top and bottom layers speed
Top surface skin speed
Skirt and brim speed
How Does Print Speed Affect Your Print?
When running a print for the first, it can be tempting to crank up the print speed in order to reduce the overall printing time. However, print speed affects the print in many ways: FDM users must consider how print speed will affect bed adhesion, print quality, and the potential for errors.
Risks of printing too fast
Perhaps unsurprisingly, printing too fast is more likely to lead to issues than printing too slowly, with negative effects including lower dimensional accuracy and part strength.
The most common defects from printing too fast include:
Ringing or ghosting
The phenomenon of ringing (sometimes called ghosting or rippling) is a 3D printing defect characterized by a rippled or wavy appearance to the exterior surfaces of parts. It occurs when layers are not properly aligned, which is itself caused by excessive vibration or out-of-control printhead movements.
Reducing print speed is one of the most effective ways to prevent ringing. This is because faster speeds cause greater vibrations and lead to greater speed variations when the printhead changes direction.
Poor layer adhesion
As mentioned in our discussion of print speed settings, it is vital to print slowly on the first layer in order to guarantee good bed adhesion. But inter-layer adhesion is also important, and too-fast speeds can reduce the ability of each layer to bond with the next.
Reducing print speed on the first layer can help ensure good adhesion to the build plate, and reducing overall print speed can help prevent delamination.
Under-extrusion
If not enough filament is fed to the hotend, printing can suffer from under-extrusion. The result is gaps, holes, missing layers, and other deformities.
Under-extrusion can occur when the print speed exceeds the flow rate, i.e. when the printhead is trying to lay down more material than is being supplied to it. Generally, however, this should not be an issue, as your slicer should automatically calculate a flow rate suitable for the print speed.
Clogging with flexible filament

When printing flexible materials like TPU and TPE, excessive print speeds can cause the soft and pliant material to bend the wrong way and get stuck during extrusion. Using a slow and consistent print speed (i.e. not deviating from the default speed for first layer, infill, support structures, etc.) can help prevent this issue.
Recommended reading: What are flexible filaments and which one should you choose?
Risks of printing too slow
In general, a slower 3D printer print speed results in higher quality. Nonetheless, printing too slowly can cause issues of its own. These issues generally relate to overheating: if the filament stays in the nozzle chamber too long, it can get too hot and cause deformations on the part.
Finding the Best Print Speed by Testing
A good way to find the best print speed for your chosen combination of hardware and material is to download a print speed test model (or print speed tower).
These printable 3D models work in a similar way to temperature towers. They consist of several identical sections designed to be printed at different speeds (by inputting specific instructions to your slicer). Each section is labeled with the relevant value in mm/s. When the tower is printed, a visual inspection can determine to what extent print quality suffers at higher speeds.
STL files for print speed towers (like this one ) can be found on Thingiverse and other 3D model sharing platforms.
Recommended reading: How to find free STL files
Print Speeds for PLA and Other Filaments
Some 3D printing materials are more suited to high-speed printing than others. For instance, those that can be melted quickly are suited to faster flow rates, which in turn allows for fast printing of the material.
High-Speed PLA? Choosing a Fast PLA Material
High-speed PLA formulations refer to specially engineered blends of polylactic acid (PLA) filament designed for rapid 3D printing. These formulations are supposedly optimized to enhance the printing speed while maintaining the desirable properties of PLA, such as biodegradability, low toxicity, and ease of use.
Several factors could contribute to an increased speed. Firstly, these formulations often contain additives or modifiers that improve the material's melt flow characteristics , allowing it to extrude more smoothly and consistently at higher speeds. Additionally, high-speed PLA blends may incorporate additives to enhance heat conductivity or reduce viscosity, enabling faster heating and melting within the 3D printer's hotend.
That being said, these materials offer marginal gains at best, and a high-quality "regular" PLA will often print far more successfully than a supposedly high-speed PLA.
Some popular "high-speed" PLA filaments include:
- eSun ePLA-HS High Speed Printing PLA 3D Printer Filament
- MatterHackers MH Build Series High Speed PLA-HS Filament
- SUNLU HS_PLA (High Speed PLA) 3D Printer Filament
Better Ways to Increase PLA Print Speed
Buying a high-speed PLA filament won't let you print at 100 mm/s if using low-cost 3D printer. Those looking to achieve the highest possible PLA print speeds will need to invest in high-performance hardware capable of pushing PLA to its full potential.
One way to print quickly is to use a CoreXY printer. CoreXY 3D printers work differently to ordinary Cartesian printers, where the X and Y axes are controlled by separate motor movements. With a CoreXY printer, the X and Y motors work together, enabling smoother hotend movement. This in turn enables faster printing speeds without print defects.
Firmware adjustments can also have a big impact on print speed. For example, many users of the popular Creality Ender 3 have achieved faster printing speeds by replacing the printer’s default Marlin firmware with Klipper firmware, which provides advanced motion kinematics. These motion kinematics result in faster speeds and improved control over acceleration.
3D print speed is one of the most important 3D printer settings. While we all want to print our PLA parts as quickly as possible, it is important to recognise the limitations of print speed and the negative effects of printing too fast, such as ghosting, poor adhesion, and jams. Beginners should start by printing at the recommended speed of around 50–60 mm/s then experimenting with different settings when they have more experience and confidence.
Frequently Asked Questions (FAQ)
Can you print more quickly with PLA than other materials?
The low melting point of PLA allows it to be extruded quickly. The material also solidifies quickly, allowing for fast printing speeds without risking part failure.
Are some PLA filaments faster than others?
While all PLA filaments can be printed at fairly fast rates, some manufacturers offer "high-speed" versions of PLA filament that promise faster extrusion and the ability to print at even faster rates. While these materials are excellent for rapid prototyping, the presence of additives may compromise the quality of the material in other areas.
Can I modify my 3D printer to print PLA faster?
Some hardware upgrades can help improve your PLA print speed. These include installing a high-flow hotend to increase material flow rate, upgrading to a direct drive extruder for better filament control and faster retraction, or using a larger nozzle diameter (0.6 mm or 0.8 mm) to allow for thicker layers and faster extrusion.
[1] Agarwal KM, Shubham P, Bhatia D, Sharma P, Vaid H, Vajpeyi R. Analyzing the impact of print parameters on dimensional variation of ABS specimens printed using fused deposition modelling (FDM). Sensors International. 2022 Jan 1;3:100149.
[2] Miazio Ł. Impact of print speed on strength of samples printed in FDM technology . Agricultural Engineering. 2019;23.
Search for articles and topics on Wevolver
What Is a Good 3D Printing Speed?

What 3D printing speed settings will you use to print a 3D model that stands out? What if you mess up your project by using faster or slower speed settings?
These are some of the questions people have when deciding on a printing speed. 3D printing technology uses additive manufacturing processes, making it essential to mind the amount of material you deposit on the printer bed.

3D printing speeds determine how much filament your printer’s extruder will deposit on the 3D printer bed . To achieve an exquisite 3D model, you must set the printing speed according to the category of 3D printers you use.
For slow 3D printers, use 40mm per second to 80mm per second 3D printing speeds. Mid-speed printers work best with 100 mm per second printing speeds, while those who want to print faster use 150mm per second and above in fast-speed 3D printers.
Quick Navigation
How Fast Can 3D Printers Print?
3d printer settings, how to set the printing speed, the type of 3d printing material, 3d printer type, what’s our take.
Since printing speeds control the flow rate, let us understand these 3D printing speeds better with this article.
What Is the Best Print Speed for 3D Desktop Printers?
Before we dive into the best print speed to use in desktop printers, it would help you first understand that print speed is a part of speed settings. For this reason, you have to consider how you set the speed of the 3D printer.
Your printer’s print speed regulates how fast your extruder motors move to extrude either more or less material. If you want to reduce your printing time, adjusting the printing speed will help you. As much as faster printing speeds minimize print time, they affect the quality of your 3D prints .
To avoid damaging extra-ordinary models in the making, 3D printer manufacturers have developed speed regulations. These regulations are not limited to desktop printers; even large 3D printers follow speed settings regulations.
Both fast and slow print speed settings have pros and cons. For instance, if you are creating a 3D-printed object at a slow print speed, you risk deforming it. This is because the nozzle and plastic are too close to each other for prolonged durations.
High 3D printing speed settings, on the other hand, expose your 3D printers to overheating problems. The cooling system will not cool the extruder fast enough; under extrusion will occur, creating weaker layer adhesion.
The bottom line in achieving desirable 3D printed object quality is mastering print speed settings. Here is how you go about deciding the best 3D printer settings for your printing process.
- First, consider the model’s outer wall. How fast do you want the exterior of your model to be printed? If your priority is on surface quality, it will help if you reduce the print speed. In simple terms, use lower print speed settings for more satisfactory surface quality.
- The second factor to consider is the interior walls’ printing speed. Here, make sure you use the same print speed as the one you use in making the overall model. The 3D printer speed here needs to reduce your printing time without lowering the 3D print strength.
- Next, consider the infill printing speed. It needs to also reduce printing time without compromising your model’s stability.
- The last speed setting to consider is how fast you want your 3D printed objects’ bottom and top layers to be printed. If you want a better surface quality, use a slightly lower 3D print speed.
Be sure to also work on achieving optimal retraction settings if you want high-quality 3D prints. Retraction speed settings are responsible for determining the travel speed at which your 3D printer will pull the filament back before any travel moves.
When you set retraction speed too low, your 3D print will have blobs that are not appealing to the eye. Using too high refraction speeds, on the other hand, results in grinding filaments and eventually unpleasant lumps on the 3D model.
What is a Good Print Speed For PLA?
Whenever you make 3D prints using plastic filaments like PLA or PLA+ , it is best to use print speeds of between 30mm and 90mm per second. Manufacturers who want better results use printing speeds that are on the lower end.

It is important to note that there are factors that influence the print speed you use. The amount of plastic you extrude also has a notable impact on the print speed. Similarly, 3D printing layer thickness also affects printing speed.
How much plastic filament you will extrude to make a part’s outline is shown through shell settings .
Increasing shell settings in additive manufacturing means more filament will be extruded. As a result, the line width of your 3D print will increase. The printing process will end up consuming more printing time.
If you have a more significant infill percentage to print, your printing speed will be affected. This is because the infill has a predetermined pattern. Printing that shape is what affects the printing speed.
Other than the pattern, infill density also comes to play, affecting your printing time. If the object you are printing has a higher infill density, be ready to spend more time printing. The part or parts you create will be stronger than those created using other manufacturing processes on the upside.
Layer height is another crucial determinant of printing speed. When you are printing an object with a more significant layer height, you will extrude more filament at a time. The result will be increased layer thickness and faster printing speeds.
If the nozzle size is large, more filament will be extruded when printing each layer. You will therefore need to have a high printing speed setting to avoid over extruding.
If you want to set the printing speed, you will need to launch the slicer software on your PC ( for example Cura ). Locate the basic tab on your slicer software and click on print speed.
For people using older versions, locating the print speed settings demand that you switch to advanced mode. You will then open your slicer software’s speed tab, where you will access print speed settings.
When you alter any setting on the slicing software, including the 3D printing speed setting, the software will recalculate the time required to complete the printing process.
You don’t have to be worried about waiting longer than estimated since the software calculates a print duration that is identical to real-world time.
Does Print Speed Affect Quality?
Without beating around the bush, yes. Print speed affects the quality of your 3D prints. If you use a lower speed to create a 3D model, you will achieve better quality than when you use a higher speed. This, however, occurs when your printer is not operating in optimal conditions.
Nonetheless, there is an argument that printing speed does not necessarily have to impact the print’s quality. This is because there are a few other factors that directly impact 3D printing speed without compromising the print’s quality.
If you are using high-quality support material, you will print faster since you don’t have to keep unclogging the nozzle when the support material gets stuck. Once you are done printing the model, you will remove the material without reducing the print quality.
Printing polymer also comes in different types. When used at the same speed, each of these polymer types will give 3D models of other qualities. Print speed settings do not create the difference; the difference in filament texture creates it.
You might like: Types of 3D Printers
Your 3D printer types affect the quality of the 3D prints you will get without necessarily being influenced by speed. Look at this case from this perspective; you have a high-quality 3D printer. You set it to a high-speed setting and get first-class quality 3D prints.
When you use a 3D printer of lower quality at the same print speed, the quality of the model you get will be lower. Consequently, the price of one of the first-class models will be more than the second model’s price.
Layer heights and line width affect the speed you print 3D objects at, increasing the quality and time consumed to manufacture any 3D parts.
When deciding the best 3D printing speed to use , it will help if you account for all aspects, including printer type, 3D printer’s nozzle size, line width, and other factors discussed in this article.

Recommended Reading
Top 8 best 3d printer software for mac users (free included).
You like 3D printing and have a Mac. What 3D printer software for Mac do you use? Let us guide you and show our top 8 picks. Some are free some not.
Essential 3D Printing Skills You Need Right Now!
There is still a lot more to learn and discover in 3D printing. Thats why you need some essential 3D printing skills to gain before you thrive. Lets see!
Raft 3D Printing vs. Brim vs. Skirt [Little-known Facts]
Raft 3D printing: the main difference between a raft, brim, and 3D skirting is in how they work. A raft forms the first layer of a horizontal mesh...

The 3D Printer Bee
3D Printer Speed | Typical Values & Optimization
- Recent Posts

- Printing BIG with the JUPITER SE – A Review - May 13, 2024
- Is a Wash & Cure Station Worth It? Creality UW-03 Review - April 29, 2024
- Z Seam | How to Hide & Avoid | Cura & PrusaSlicer - April 20, 2024
Disclosure: Links marked with * are Affiliate Links. I earn from qualifying purchases if you decide to make a purchase through these links – at no additional cost for you!
The printing speed of 3D printers is an important criterion when buying a 3D printer. But also when optimizing and improving an existing 3D printer, the printing speed has a great influence on the quality and the printing time of an object.
The print speed of a 3D printer is the speed at which the material is applied to the print bed. The printing time of the object depends on the printing speed. It also has a great influence on the quality of the object.
The goal in 3D printing is therefore always to achieve the highest possible printing speed without sacrificing quality.
In this article, you’ll learn everything you need to know about the printing speed when buying a 3D printer and how to optimize and improve the printing speed of an existing 3D printer.
If you are looking for test objects for the print speed, you can find the best ones in this article .
Table of Contents:
- 1.1 How is the Speed of 3D Printers Specified?
- 1.2 What are Typical 3D Printer Speeds?
- 1.3 What Factors Influence the Printing Speed of a 3D Printer?
- 1.4 What are the Advantages and Disadvantages of Fast Printing Speeds?
- 2.1 Calibrating the Print Speed
- 2.2 Improving the Mechanics of the 3D Printer
- 2.3 Using Klipper as Firmware
- 2.4 Use of other 3D Printing Materials
- 3.1 Increase the Travel Speed
- 3.2 Increasing the Layer Height
- 3.3 Increasing the Line Width
- 3.4 Increasing the Infill Printing Speed
- 3.5 Using the Combing Mode in Cura
- 4 Conclusion
3D Printer Speed as a Purchase Criterion
In addition to other properties of a 3D printer such as the print volume or the material of the print bed, the print speed is an important purchase criterion. It differs greatly between the various 3D printer models and depends on the design of the 3D printer.
You can already read the print speed in the technical specifications before buying. However, it is not always specified uniformly.
How is the Speed of 3D Printers Specified?

For FMD 3D printers, the print speed is specified in mm/s and describes the speed of the print head during the extrusion of filament. For resin 3D printers, it is specified in s/layer or mm/h and describes the speed at which the object is printed in the z-direction.
Here are a few examples of print speed specifications for different 3D printers:
- FDM 3D printer: “50 mm/s” means that the print head moves at 50 millimeters per second during printing.
- FDM 3D printer: “max. 180 mm/s (normal 50 mm/s)” means that the 3D printer can get to a maximum of 180 mm/s without regard to quality, and normal to good quality can be expected at 50 mm/s.
- Resin 3D printer: “2 s/layer” means that the 3D printer takes 2 seconds per layer.
- Resin 3D printer: “30 mm/h” means that the 3D printer can print 30 millimeters per hour in the z-direction.
The specifications are therefore sometimes very inconsistent. They can falsely promise you a faster printing speed. The correct interpretation of these specifications is therefore important to make the right purchase decision.
What are Typical 3D Printer Speeds?
Typical speeds of FDM 3D printers are between 40 and 60 mm/s for Cartesian 3D printers and over 100 mm/s for Delta 3D printers. Modern resin 3D printers achieve a print speed of about 2-3 seconds/layer, which corresponds to about 30-50 mm/h.
To illustrate these print speeds, I’ve created a few sample objects to give you an idea of how fast different objects can be printed.
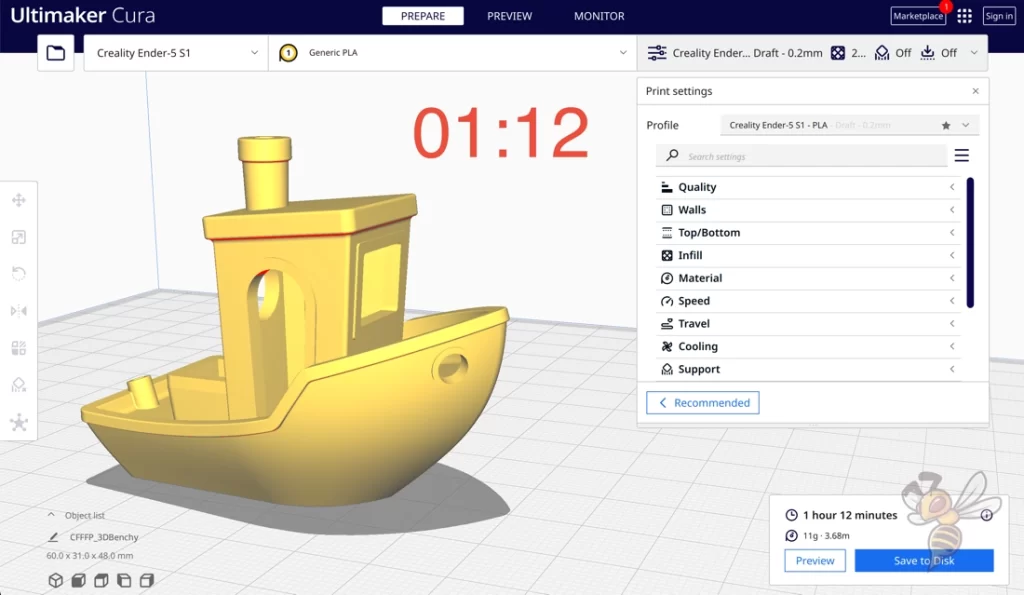
- Technology: FDM Cartesian
- Printing speed: 50 mm/s
- Material: about 11 g filament
- Printing time: 1 hour and 12 minutes
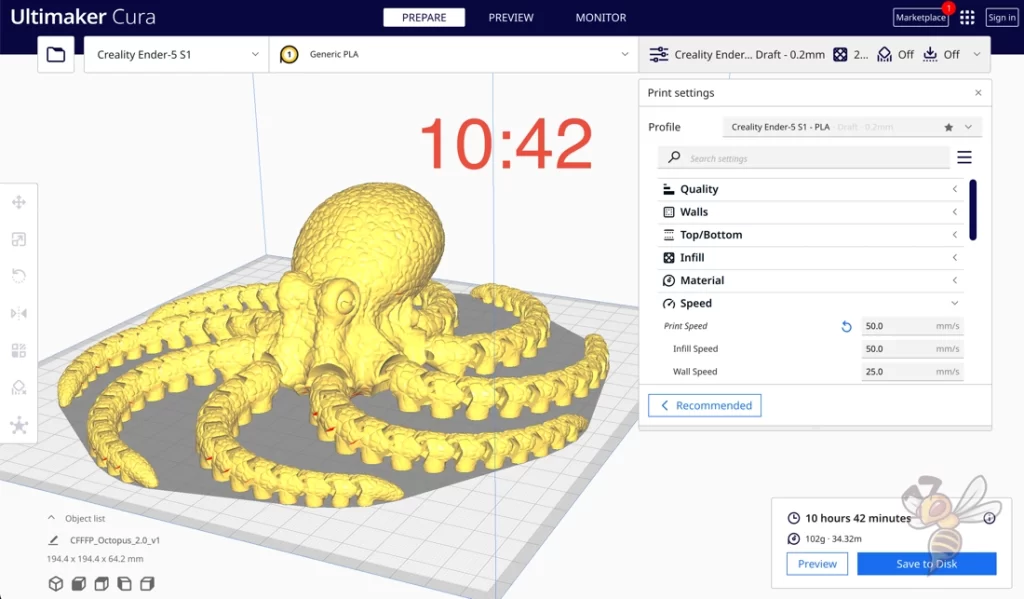
- Material: about 102 g filament
- Printing time: 10 hours and 42 minutes
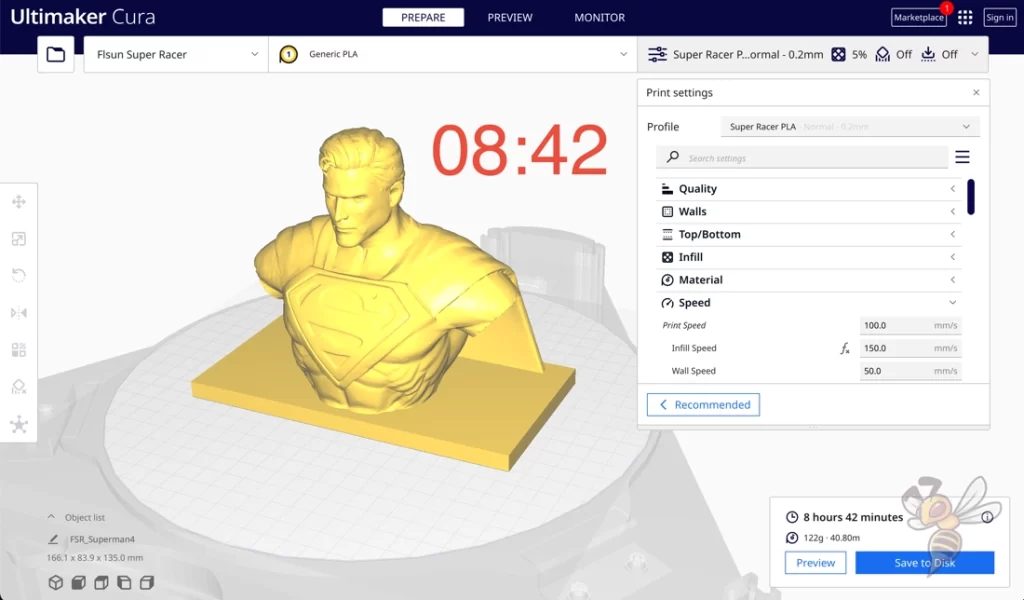
- Technology: FDM Delta
- Printing speed: 100 mm/s
- Material: about 122 g filament
- Printing time: 8 hours and 42 minutes
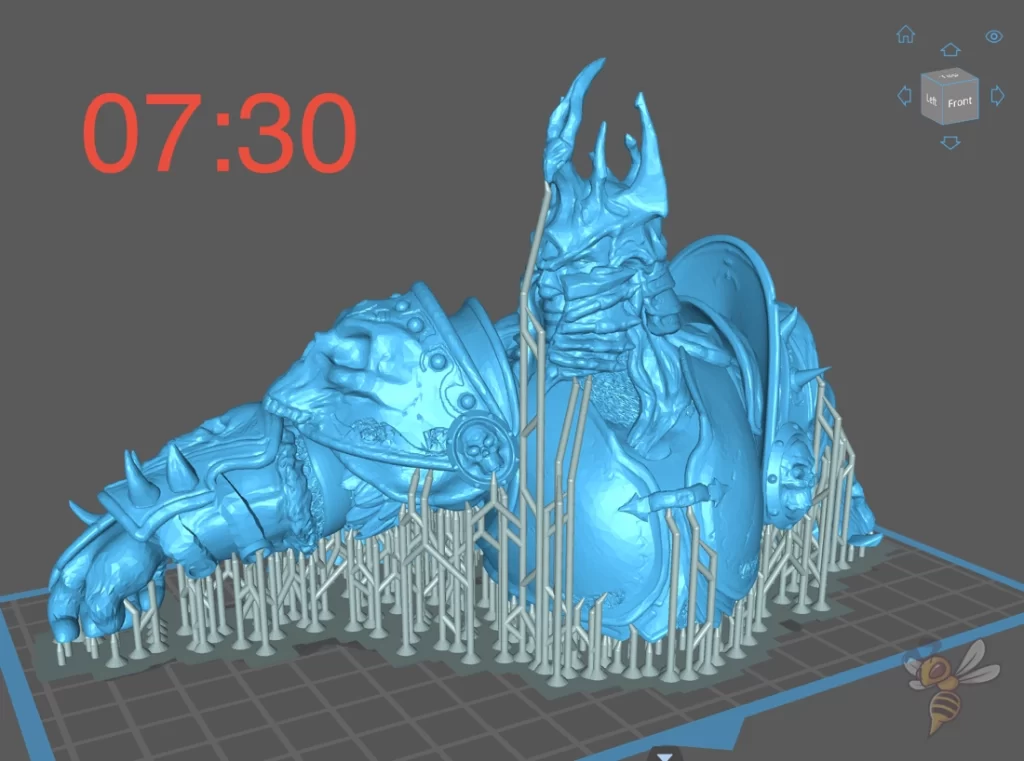
- Technology: Resin
- Print speed: 3 s/layer
- Material: about 70 ml resin (about 77 g)
- Printing time: 7 hours and 30 minutes
What Factors Influence the Printing Speed of a 3D Printer?
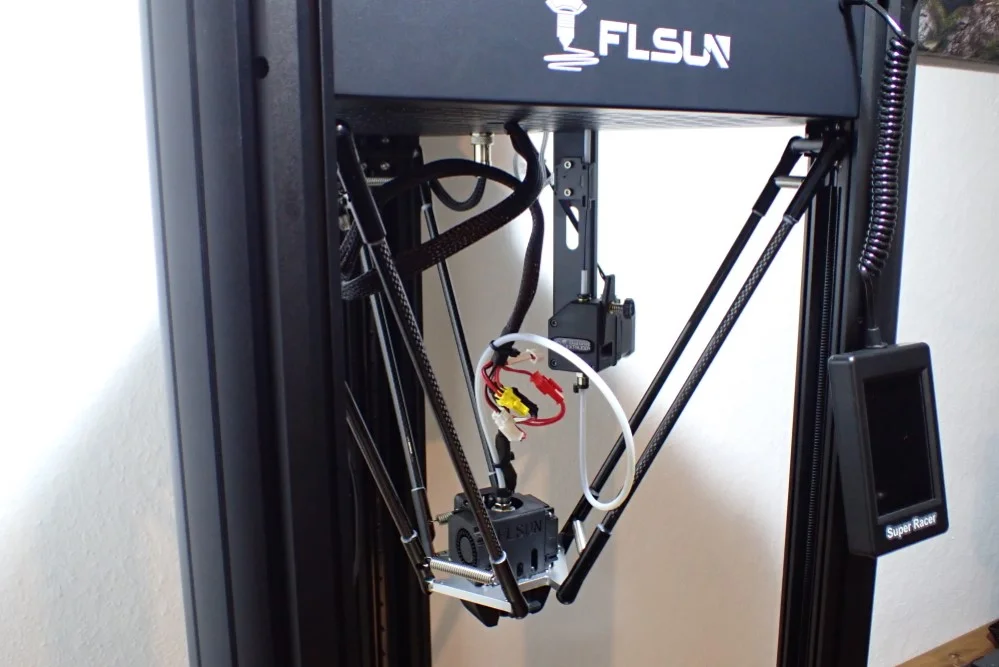
Operating principle of the 3D printer: Delta vs. Cartesian for FDM 3D printers, for example. In Delta 3D printers (such as the FLSUN Super Racer ), the print head is lightweight and moved via three arms rather than rigid rails with heavy weight.
This allows a much higher printing speed to be achieved before vibrations occur that negatively affect the quality of the printed object.
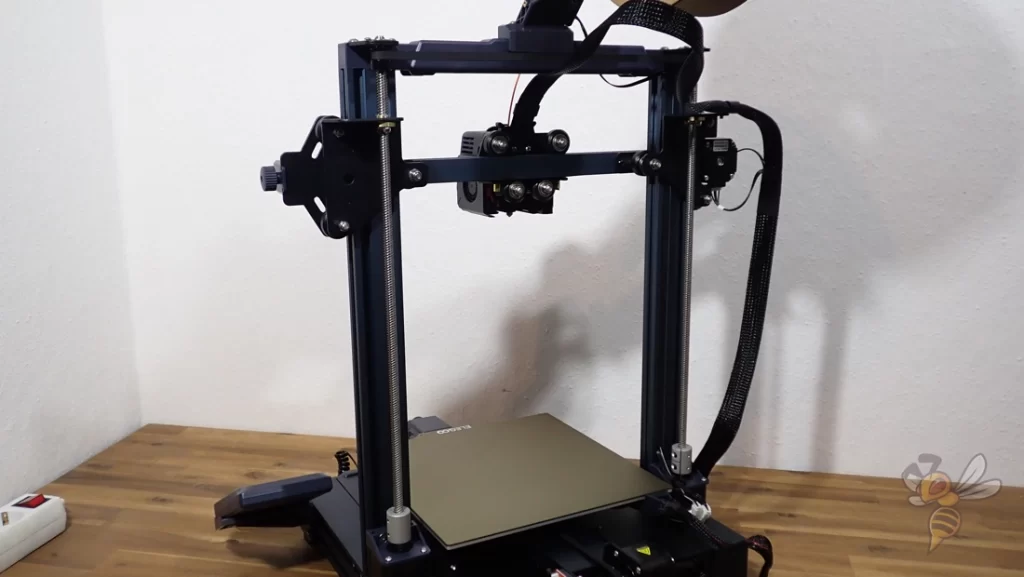
Stability of the 3D printer: At high speeds, vibrations can occur when the 3D printer moves. The better the stability of the 3D printer, the higher the printing speeds can be set before disruptive vibrations occur.
For example, in very large or accurate Cartesian 3D printers, a stepper motor is installed on both sides of the z-axis. This improves positional accuracy and reduces susceptibility to vibration. This is also called “double z-axis”.

Material used: Different filaments may have different print speed requirements. For example, flexible filaments such as TPU may print better at lower print speeds.
For resin 3D printers, the type of resin is critical to how long it needs to cure .
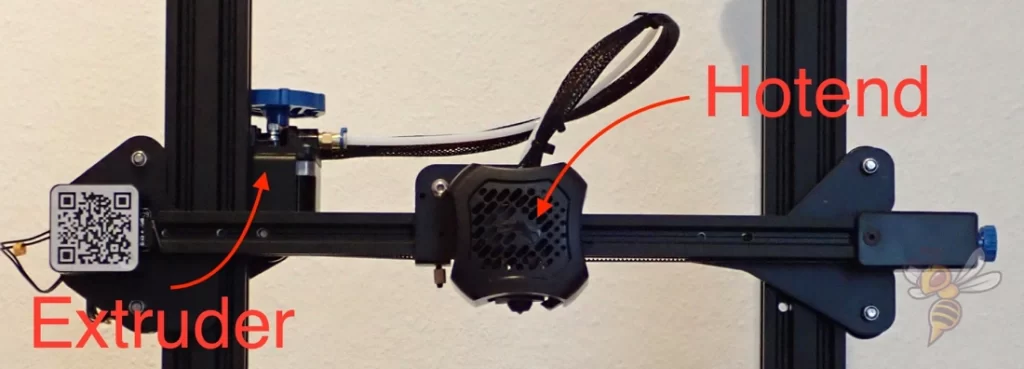
Print head design of FDM 3D printers: There are two different print head designs for FDM 3D printers.
With a Bowden extruder , the extruder sits far away from the nozzle on the frame of the 3D printer and pushes the filament through a PTFE tube to the print head. This makes the print head very light and higher print speeds can be achieved.
With a direct drive extruder, the extruder sits in the print head, increasing its weight. The increased weight causes disturbing vibrations at lower speeds than with lighter print heads.
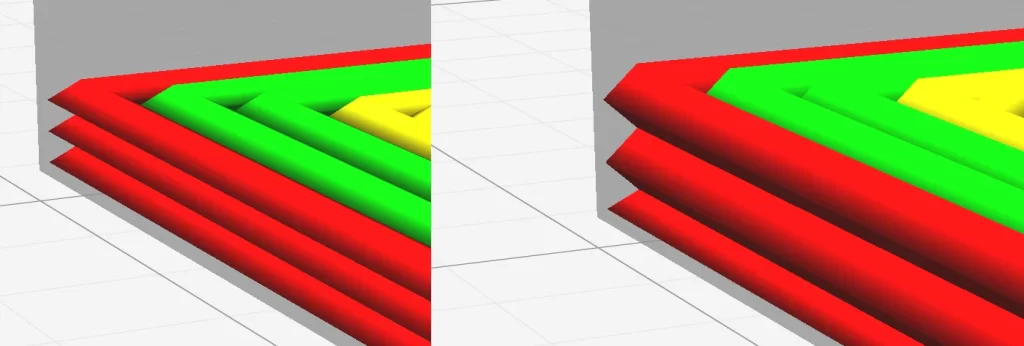
Layer height: When considering the print speed, it is important to note the influence of the layer height. For FDM 3D printers, the print speed specification is not coupled with the layer height.
The layer height only influences the print duration . The individual layers are nevertheless printed at the same printing speed.
However, for resin 3D printers, the print speed is often coupled with the layer height. With specifications such as “30 mm/h”, the print speed per layer is multiplied by the layer height, which is not specified.
The information about how long a layer has to be exposed or how strong the illumination is therefore helps you much more to compare different resin 3D printers. Whether you set the layer height to 0.01 mm or 0.1 mm has (almost) no influence on the printing speed, only on the printing duration.
What are the Advantages and Disadvantages of Fast Printing Speeds?
The print speed influences the print duration and the print quality in 3D printing. A low speed increases the print duration and improves the print quality. A high speed reduces the print duration and deteriorates the quality.
So, the advantage of a fast print speed is that it reduces the print duration. To show how much the print speed affects the print duration for FDM 3D printers, I sliced the same object at different print speeds.

So, as you can see from the data, a higher print speed definitely pays off up to a point. However, there is a point beyond which a higher print speed improves the print duration only slightly.
Increasing the printing speed from 50 to 100 mm/s almost halves the printing time. An increase from 100 to 200 mm/s only brings an improvement of about 20%.

Considering the ever-increasing likelihood of print errors and ever-decreasing surface quality, it is often not practical to increase the print speed above a certain value. In general, the higher the print speed is set, the worse the print quality becomes.
There is therefore a sweet spot for each (FDM) 3D printer where good print quality can be achieved at the highest possible print speed .
Tip: Even if you want to set the print speed as high as possible without producing print errors, you should greatly reduce the print speed for the first layer. Especially if you have problems with print bed adhesion , values between 5 and 10 mm/s will help to create a good print bed adhesion.
Improving the Speed of 3D Printers
With resin in 3D printers, the printing speed is coupled to the light exposure system. Improving the print speed is therefore usually not possible. With FDM 3D printers, however, there are many ways to improve the speed.
Calibrating the Print Speed
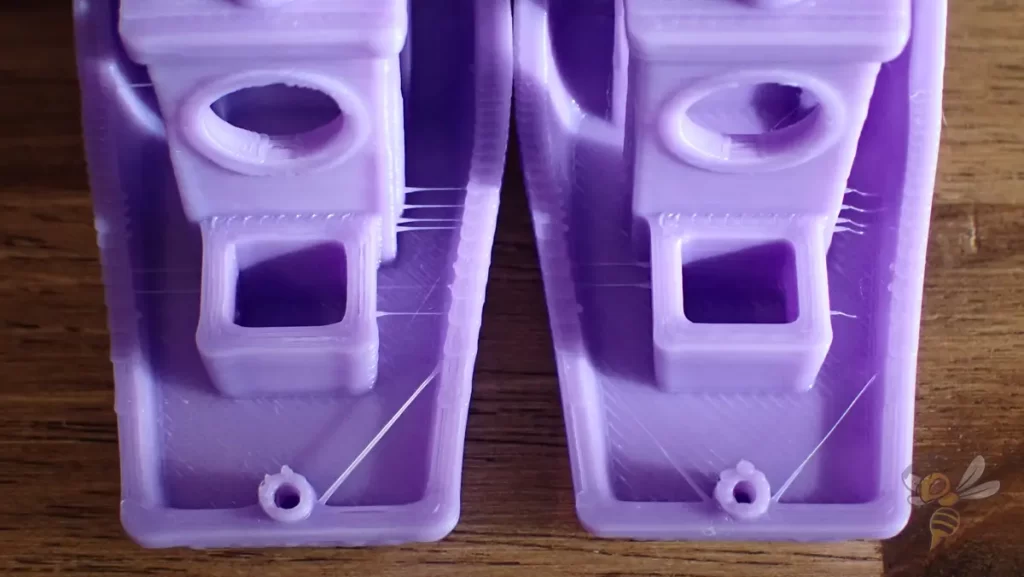
To determine the highest possible print speed while still maintaining good print quality of a 3D printer, calibration is necessary. Calibration objects for the print speed provoke print errors that can occur at high speeds ( ringing/ghosting ).
If the print head of the 3D printer moves too fast, vibrations occur that affect the object. In addition, the general positioning accuracy is lower, especially when changing the direction of movement.
The vibrations distort details on the surface and copy them horizontally in a kind of oscillation. In addition, corners are inaccurately executed and typically widened due to the high speed of the print head.
I like to use a cube with letters or holes on the sides for this type of calibration. The 3DBenchy is also great for this.
When calibrating the print speed with such objects, the goal is to generate as few of these print errors as possible. However, there is no hard limit from which the print errors appear and before which they do not. Threshold is very vague and you have to decide for yourself when these print errors are okay for you.
In the end, the application of the object is decisive. If the object has a decorative use, the quality should be as good as possible and the speed thus relatively slow. But with a doorstop for example, these printing errors are irrelevant and you can set the printing speed very high.
Improving the Mechanics of the 3D Printer
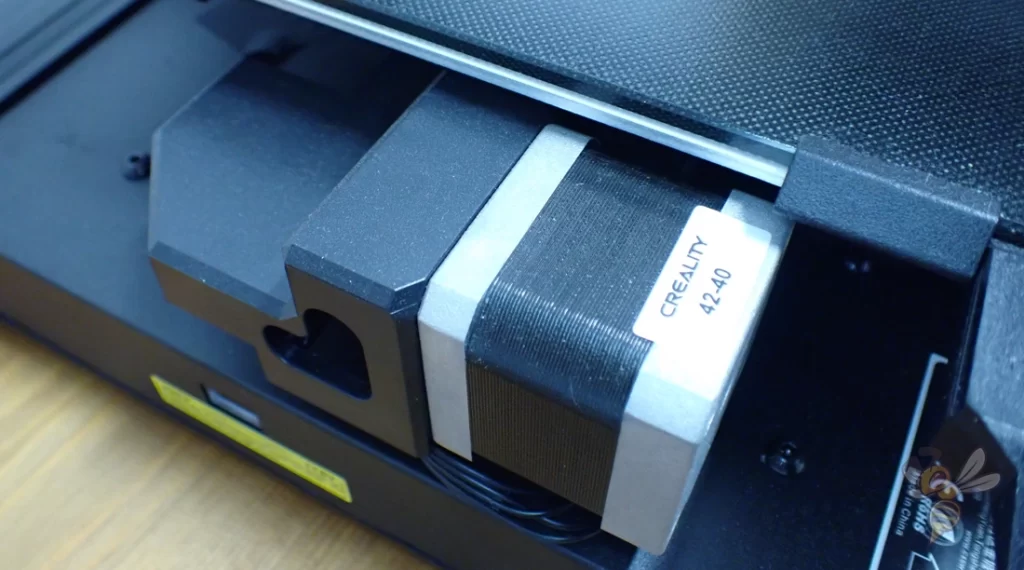
To increase the printing speed of an FDM 3D printer, components of the mechanics can be improved. These include, in particular, higher-quality linear guides* or rods* .
Such upgrades can improve the mobility of the print head. This improves positioning accuracy, resulting in better production of corners and small details at higher print speeds.
However, faster stepper motors* can also be installed. Occasionally, the speed of a 3D printer is limited by the speed of these motors. If the rest of the design is strong enough to support higher print speeds, this is a useful upgrade to improve the printing speed.
Using Klipper as Firmware
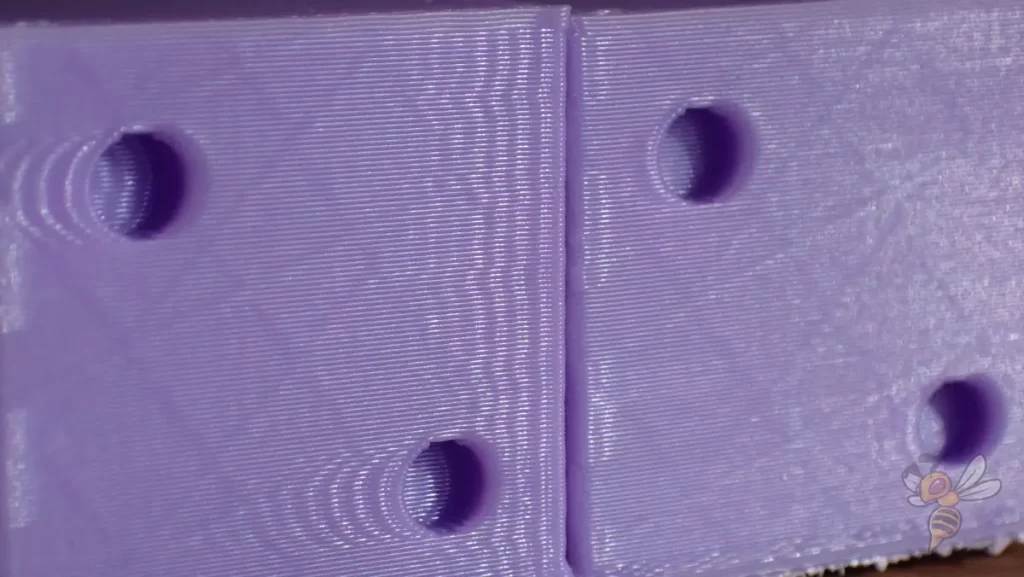
To improve the print speed of an FDM 3D printer, Klipper can be used as firmware. With this firmware, data from an accelerometer on the print head can be used to significantly increase the print speed without producing print errors.
The main factor limiting the printing speed is the vibrations that occur in the print head. The faster the print head changes its direction of movement, the stronger these vibrations become. Print errors caused by such vibrations therefore become more severe the higher the print speed.
The acceleration sensor is used to measure the vibrations in the print head. From the data obtained, Klipper can control the movements of the printer so that they generate as little vibration as possible.
I have often worked with Klipper, but one of the most impressive examples was when I used the Creality Sonic Pad on the Ender 3 V2 . The print quality I achieved at 50 mm/s without Klipper, I could still achieve at 250 mm/s with Klipper!
So, it’s not always just hardware improvements that can improve print speed, firmware has a big impact on that too.
Use of other 3D Printing Materials
For FDM 3D printers, selecting high-quality filaments can increase print speed. Print errors occur less frequently with such filaments. With resin 3D printers, the various resins sometimes differ greatly in their curing time .
In addition, the transparency of the resin used has a major influence on the curing time. Transparent resins take much longer to cure than a matte and black resin. The ability to absorb the light and thus the energy for curing is much better with dark resins, which means that they cure faster.
Improving the Printing Time of a 3D Printer
The printing time of an FDM 3D print is not only influenced by the pure printing speed. Several other factors also play a role in how long an object takes to print.
Increase the Travel Speed
The travel speed of an FDM 3D printer determines the speed of extrusionless movements. Increasing the travel speed reduces the printing time. In this case, the travel speed is often more than twice the printing speed.
However, the travel speed must also not be set too high, otherwise typical printing errors such as ringing or ghosting can occur.
In extreme cases, a layer shift can also occur. Then the speed is so high that the toothed belts slip or the object slips.
Increasing the Layer Height
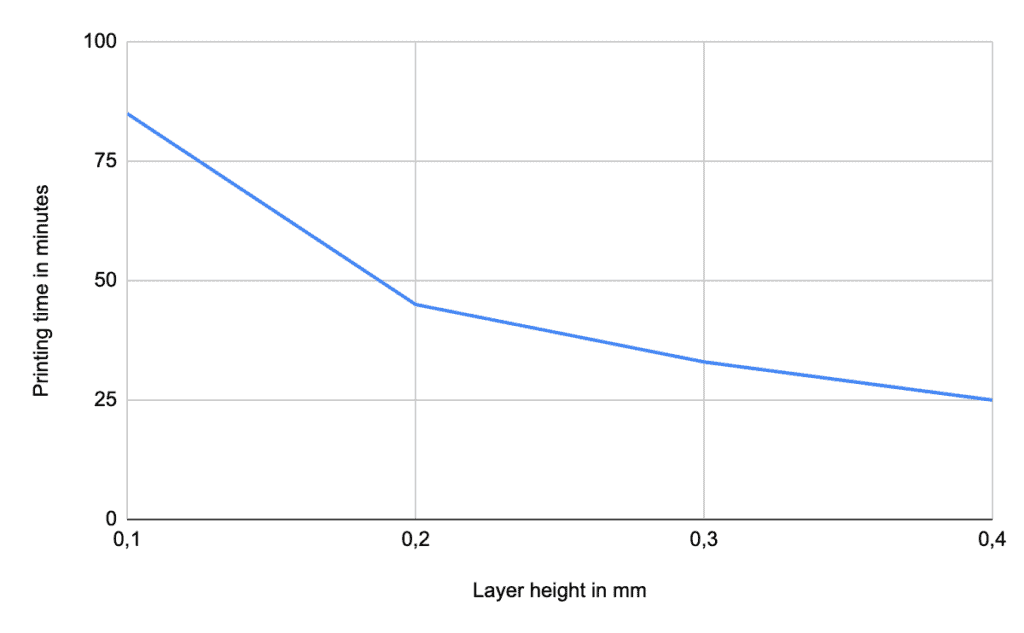
If the surface finish is secondary for an FDM print, thicker layers massively reduce the print duration.
To demonstrate the influence of layer height, I sliced the same object with different layer heights in Cura. The print time decreases rapidly as the layers get higher. Therefore, particularly fine 3D prints take an extremely long time to print.
In this article you will learn which layer heights you can implement with your nozzle.
Increasing the Line Width
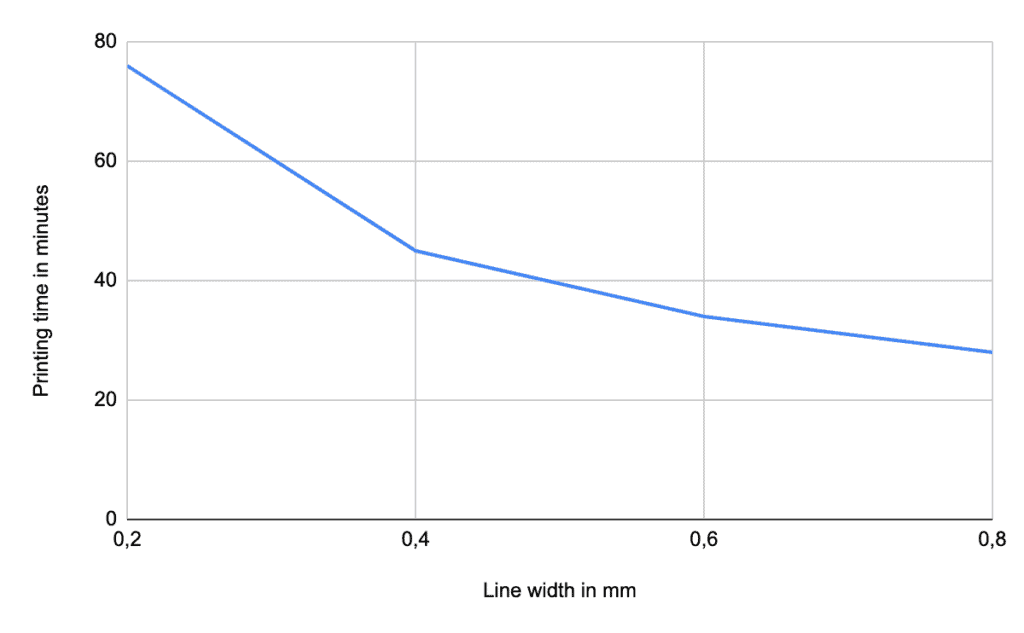
If the line width of a 3D print is increased, the printing time is reduced. The same amount of material is then printed in less time.
The line width behaves similarly to the layer height in reducing the print duration. The more filament is extruded at once, the faster the print is finished.
How wide the lines can be is determined by the diameter of the nozzle. In this article you will learn about the dependency between the diameter of the nozzle and the line width.
Increasing the Infill Printing Speed
Increasing the printing speed inside the object reduces the printing time. The infill, i.e. the material inside, is hidden, making the print quality there irrelevant.
In many standard profiles of 3D printers, the print speed of the infill is set as high as the normal print speed. Here you have great potential to save time when printing.
Since the print quality inside the object is irrelevant, you can start here with 150% of the normal print speed and observe the effects.
Using the Combing Mode in Cura
The Combing mode in Cura determines the paths of the print head during extrusionless travel movements. Depending on the geometry of the object, up to 25% of the printing time can be saved by optimizing these movements.
If you can’t find the Combing mode in Cura, the first thing you need to do is make the setting visible. You can activate or deactivate the visibility of the individual settings via the menu.
I always activate all settings, even if this can be a bit confusing at the beginning. However, you can then also quickly find certain settings via the search bar.
You can adjust the settings so that the print head either travels only over infill areas of the object, over no surfaces already printed, or avoids only the outer skin.
If you would like to learn more about this mode in Cura, you should check out this article .
The speed of a 3D printer has a great influence on the final result. In order for the result to be of high quality, the speed must not be too high so that no printing errors appear.
To delay the threshold at which such printing errors can occur, there are various improvements you can make to the printer itself and its firmware.
Disclosure: This website is the property of Martin Lütkemeyer and is operated by Martin Lütkemeyer. Martin Lütkemeyer is a member of the Amazon Services LLC and other Affiliate Programs. These are affiliate advertising programs designed to enable websites to earn advertising revenue through advertising and linking to Amazon.com and others. Links marked with * are affiliate links.

COMMENTS
The Best 3D Print Speed Settings for PLA & More. by Hironori Kondo, Mônica Laiolti dos Santos. Updated Mar 2, 2024. Tuning your PLA print speed can be tricky. Learn how to find the perfect print speed settings for PLA and more materials! Advertisement. Tuning your PLA print speed can be tricky. Learn how to find the perfect print speed ...
20-40 mm/s. Nylon. 25-50 mm/s. FDM filaments and their best print speeds. To further complicate matters, different 3D printers have their own hardware and quirks, and this even extends to different brands of the same type of filament, given that formulations and additives can drastically alter the speed requirements.
A good print speed for 3D printing ranges from 40mm/s to 100mm/s, with 60 mm/s being the recommended. The best printing speed for quality tends to be in the lower ranges, but at the cost of time. You can test print speed by printing a speed tower to see the effect of different speeds on quality.
For your Jerk setting you should try 7mm/s and see how it goes. Jerk X & Y should be at 7. Acceleration for X, Y, Z should be set to 700. You can go directly into your menu on your printer, select the control setting, then 'motion' you should see your acceleration and jerk settings. Vx - 7.
3D print speed is one of the most critical factors as it directly influences your print quality and print time. 3D print speed refers to the rate at which a 3D printer deposits material to create a three-dimensional object. It's the speed at which the print head moves along the x and y-axis. Print speed is measured in millimeters per second ...
When travel speed is too slow, it could lead to stringing issues on the 3D printed object. A good travel speed for a 3D printer is 100 millimeters per second. But the optimum travel speed might differ for each 3D printer. Here's why you should aim for the accurate speed:
Taking this into account, it's very important to choose the right speed and flow to get the same output. For example, doubling the flow from 5 mm 3 /s to 10mm 3 /s can reduce flow by around 3%. Same case with a 0.60mm nozzle will reduce flow by 2%, and less than 1% with a 1.20mm nozzle.
Learn how to utilize Cura's travel speed settings, and what they entail and contain.
Travel Speed. The travel speed defines how fast the print head of the 3D printer moves when no plastic is extruded. By increasing the travel speed, considerable time savings can be achieved during printing. However, too much increase can result in warped 3D printing or even completely misaligned planes of the model.
Settings in this category, including the main "Print Speed" setting, control how fast your model is printed, which affects the print time and print quality. The best 3D printing speed for PLA and ABS is in the 45-70 mm/s range. And, if you're printing PETG, 40-50 mm/s should work well, yielding high-quality prints with minimal stringing.
To determine the optimal travel speed for your printer, print out a test print at various travel speeds, starting at 100 mm/s and adjusting by 5-mm/s increments. Keep bumping up the speed if the surface quality is acceptable, and decrease if print quality suffers. Look out for defects like misaligned layers, as pictured above.
The travel speed in 3D printing is a crucial aspect that often goes unnoticed. It refers to the speed at which the print head moves when not extruding any material. This is a non-print move, meaning the printer is transitioning from one area of the design to another without laying down any filament. The travel speed can significantly impact the ...
How to Speed Up 3D Printing. 1. Increase Print Speed in Your Slicer. Increasing the print speed is one of the easiest ways to get faster print times. Print speed, typically measured in millimeters per second, dictates how fast the print head moves during extrusion. It's best to increase this speed gradually and run a test print to evaluate ...
This is the main speed setting that will influence your PLA 3D prints. As the name hints, print speed determines how fast the motors of your printer move, which includes the motors controlling not only the X and Y axis but also the extruder motor. ... For determining the optimal travel speed for your printer, you need to print out the test ...
For the first print, use 100mm/s travel speed and if the surface looks good you can repeat the print increasing travel speed by 5mm/s. You can repeat the process until you see defects on the surface. ... As I said previously, the maximum speed that a 3D printer can achieve depends on the quality of its components. For most common consumer-grade ...
Infill Speed - stays the same as the Print Speed. Wall Speed, Top/Bottom Speed, Support Speed - half of your Print Speed; Travel Speed - defaults at 150mm/s until you go past a Print Speed of 60mm/s. Then goes up by 2.5mm/s for every increase of 1mm/s in Print Speed until it caps out at 250mm/s.
Travel speed is the speed rate of the 3D printer's print head when it is not extruding plastic. Increasing the travel speed can drastically reduce the duration used in printing. But too much increase of the travel speed can result in a misaligned layer of the model or print failure.
The fastest printer in our fleet is the K1 Max, which beat other brands by nearly 5 minutes with a 13 minute and 50 second Speed Benchy. The K1 Max has a top speed of 600 mm/s and max acceleration ...
3D printing material. Typical print speed. Upper limit. Explanation. PLA. 60 mm/s. 150 mm/s. When print quality is important, most users will print PLA at a maximum of 60 mm/s. However, the low extrusion temperature of PLA makes it easy to rapidly print the material without the risk of it warping as it cools.
For slow 3D printers, use 40mm per second to 80mm per second 3D printing speeds. Mid-speed printers work best with 100 mm per second printing speeds, while those who want to print faster use 150mm per second and above in fast-speed 3D printers. Since printing speeds control the flow rate, let us understand these 3D printing speeds better with ...
The travel speed of an FDM 3D printer determines the speed of extrusionless movements. Increasing the travel speed reduces the printing time. In this case, the travel speed is often more than twice the printing speed. However, the travel speed must also not be set too high, otherwise typical printing errors such as ringing or ghosting can occur.
This (BB-8's Radar Eye) is a highly detailed object I have to print for my project.. In order to get a high quality print, I'm setting up Cura 15.04.5 with the settings provided in a Word Document (" [DOC] 3D Printing in the NIMBUS Lab") published by NIMBUS Lab.. I'm almost done, but there is a small thing I'm not sure I got right when it comes to the Travel Speed.