RV Air Conditioner Repair and Troubleshooting Guide
Read this page without ads! Go Ad-Free
One of the best aspects of RVing is the ability to bring the comforts of home on the road with you – with one of the main comforts being air conditioning !
Unfortunately, there will come a time when that comfort breaks down. And let me tell you, your AC never breaks down at a convenient time.
Our RV air conditioner repair and troubleshooting guide below covers some of the most common AC issues and tips to repair them. This will help you save time and money you can spend on the road!

RV Air Conditioner Repair & Troubleshooting Guide
Even the best RV air conditioner will eventually run into problems. And when it does, there are five main issues you will run into:
- The air conditioner has no power and won’t turn on
- It will turn on but won’t run
- It runs but isn’t blowing cold air
- The air conditioner cycles on and off
- It’s noisy (or making an odd noise)
If you’re experiencing one of these five issues, jump down to the appropriate section below for tips to repair it.
Important : Before performing any repairs on your AC unit, be sure to turn the unit off and disconnect it from the power source to avoid electrical shock.
RV Air Conditioner Won’t Turn On
If your RV air conditioner is not receiving power and won’t turn on, it’s typically an issue with the power supply or the breakers.
Troubleshooting Tips
- Test the RVs power supply : Plug an appliance into a 110v outlet in the RV to see if it works. If it works, then the power coming into your vehicle is fine.
- Check the breakers : If your RV is receiving power, next, we need to check the breakers. It’s not uncommon for a breaker to trip in the RV and cause the AC to stop working.
- Check the transfer switch : If your unit powers on with shore power but not while using a generator, it could be a bad transfer switch.
If everything checks out, it’s time to call a qualified professional to service your air conditioner.
Tip : Find a mobile RV repair service near you to get your AC running again!
My RV Air Conditioner Won’t Run
If your RV air conditioner powers on but will not run, it’s typically an issue within the unit itself.
- Check the fault codes (if applicable) . Many RV air conditioner models, for example, the Dometic Brisk 2, will display a fault code on the unit when there is an issue. Check your owner’s manual for the meaning of the code.
- Check the high-pressure switch circuit . If your AC model has a high-pressure switch safety circuit, it could have been tripped due to abnormal conditions (dirty filters, etc.). Refer to your owner’s manual for steps to reset the circuit. In some models, it’s as easy as turning the RV’s power supply off and back on.
- Check the capacitors . Your RV air conditioner unit typically has two capacitors – a run capacitor and a start capacitor. Often when you hear a humming sound but your fan won’t kick on, it’s due to a bad capacitor. You can test your capacitors using a standard multimeter. If you find a bad one, you will need to contact the manufacturer for a new one or find a suitable replacement.
- Check the thermostat. This may seem like a no-brainer, but make sure the temperature on the thermostat is low enough for the unit to kick on.
If all the above checks out, you will need to contact a qualified service technician to service the unit.
My RV AC is Not Blowing Cold Air
If your RV air conditioner turns on but isn’t blowing cold air, it typically needs proper maintenance performed on it, or it simply can’t keep up.
- Check the Thermostat: The first thing to do is to ensure that your thermostat is set to the right temperature and is in the ‘cool’ mode.
- Check the outside temperature : On extremely hot days, it can be difficult for your RV AC to keep up, especially if your RV has a high heat gain. If your vehicle is poorly insulated, has a lot of windows, is located directly in the sun, and so on, it can be difficult for even the best air conditioner to keep the vehicle cool. Try parking your RV in the shade, keep doors and windows shut, and don’t use heat-producing indoor appliances like your stove to help keep your RV cool.
- Check the air conditioner filters : A dirty air filter can restrict airflow and cause the air conditioner to not cool properly. Checking and cleaning the filters every two weeks will help keep your AC blowing cold air.
- Inspect the condenser and evaporator coils : Dirty condenser and evaporator coils are another common culprit of air conditioners not blowing cold air as they should. They can also lead to your high-pressure switch circuit tripping. Check out this video on how to clean your RV air conditioner coils.

- Check the refrigerant levels: Low refrigerant levels in the compressor are another common cause for your AC not blowing cold air, though, in our experience, it’s rarely the culprit. How you check the refrigerant level will depend on the model you have (if you are even able to). And while you might be able to check the levels and even recharge the air conditioner yourself, I recommend you leave this to a qualified technician. They will be able to identify why your refrigerant levels are low and will be sure to discard the old freon responsibly (hopefully).
- Examine the Air Ducts: If the air ducts are blocked or leaking, they can cause the air conditioner to not cool properly. If your RV has a ducted system, inspect them for any blockages or leaks.
- Is your AC unit old? Let’s face it, nothing lasts forever. The older your AC gets, the more of a chance it won’t be able to keep up with the high demand of keeping your RV cool. So, it may be time to invest in a new unit for your RV.
RV Air Conditioner Cycles on and Off
If your RV air conditioner is cycling on and off frequently, this is a common issue known as short cycling. It can lead to inefficiency, increased wear on the air conditioner components, and inadequate cooling.
Here are some troubleshooting steps to help you address this issue.
- Check the Thermostat Settings : The first step in troubleshooting this issue is to check your thermostat settings. Ensure that the thermostat is set to the correct temperature and mode. If the settings are too close to the current room temperature, it may cause the unit to cycle on and off frequently.
- Check for Frozen Evaporator Coils : Frozen evaporator coils can cause your air conditioner to cycle on and off frequently. When the coils freeze, the air conditioner may become inefficient and start to short cycle. This is often due to insufficient airflow from issues like a dirty air filter or blocked vents. If you see ice buildup on the coils, turn off the air conditioner to allow the ice to melt.
- Check for Refrigerant Leaks : Low refrigerant levels can cause the air conditioner to cycle on and off frequently. If you suspect a refrigerant leak, you’ll need to have a professional inspect the system and refill the refrigerant if necessary.
- Evaluate the Size of Your Air Conditioner : If your air conditioner is too large for your RV, it may cool the space quickly and then shut off, only to turn back on when the temperature rises again. This is a more complex issue that may require professional evaluation and potentially replacing the unit with one that is appropriately sized.
If you’ve gone through these steps and the problem persists, it’s time to seek professional help. An HVAC professional can diagnose and fix more complex issues that may be causing your air conditioner to cycle on and off.
RV Air Conditioner is Noisy
A noisy RV air conditioner can be a nuisance, especially when you’re trying to enjoy a peaceful trip. The noise can be a sign of various issues, from minor to more serious ones.
Here are some steps to troubleshoot and potentially quiet down your noisy RV air conditioner.
Step 1: Identify the Type of Noise
The first step in troubleshooting a noisy air conditioner is to identify the type of noise. Is it a rattling, buzzing, humming, or whistling noise? The type of noise can give you clues about the potential issue.
Step 2: Check for Loose Parts
A common cause of noise in an air conditioner is loose parts. This could be anything from the screws that hold the unit together to internal components. Tighten any loose screws and check the fan blades for any signs of looseness or damage.
Step 3: Inspect the Fan
A noisy fan can cause your air conditioner to make a lot of noise. Check the fan for any signs of damage, such as bent blades. If the fan is damaged, it may need to be replaced.
Step 4: Check the Compressor
The compressor is another component that can cause noise when it’s not working properly. If the noise is a buzzing or humming sound, it could be a sign of a compressor issue. A professional may need to inspect the compressor to determine if it’s the source of the noise.
Tip : If you’ve gone through these steps and the noise persists, it’s time to seek professional help. An HVAC professional can diagnose and fix more complex issues that may be causing the noise.
Remember, regular maintenance of your RV air conditioner can prevent many common issues, including noise. Regular cleaning of the filters and coils, checking for loose parts, and ensuring the unit is working properly can all contribute to a quieter and more efficient air conditioner.
Regular RV AC Maintenance Tips
Maintaining your RV air conditioner is crucial for its longevity and efficient operation. Regular maintenance can prevent common issues, enhance performance, and extend the unit’s lifespan.
Here are some expert tips on how to maintain your RV air conditioner:
Important : Before performing any maintenance on your AC unit, turn the unit off and disconnect it from the power source to avoid electrical shock.
Clean the Air Filters
Be sure to clean the air filter(s) in your RV AC after every two weeks of operation. Check out our guide on how to clean an RV air conditioner filter for the exact step-by-step process.
Important : Do NOT run your AC without the filter in place! This can cause the evaporator to become clogged with dust and reduce performance.
Clean AC Box Housing
Clean the air distribution box housing and the control panel regularly with mild soap and a soft cloth.
Important : Do NOT use an abrasive scouring pad or furniture polish to clean the housing or control panel.
Inspect for Leaks
Leaks can lead to various problems, from reduced efficiency to potential water damage in your RV. Regularly inspect your air conditioner for signs of leaks, paying particular attention to the condenser coils and the gasket that seals the unit to your RV’s roof.
Keep Your RV AC Covered When Not in Use
There are days, even months, when the RV air conditioner isn’t running. During this time, it’s easy to accumulate soot and dirt in the air conditioner, which can cause a host of issues. By investing in a good A/C cover, you can keep a lot of that debris out, thus keeping the unit clean.
Tip : While on your roof, check any seals and tighten any screws or bolts as needed. This will help ensure a tight seal to prevent leaks and help keep your RV AC quiet when operating.
Inspect the Condenser & Evaporator Coils
At least once a year, inspect the air conditioner condenser and evaporator coils. Look for coils that have been blocked by dirt or leaves. This is especially important if you start to notice your AC not blowing as cold of air as it used to. Check out our video above on how to properly clean these coils.
Lubricate the Fan Motor
Some units may require you to lubricate the blower motor periodically. Check the owner’s manual to see if this is necessary and for the type of oil needed. SAE 20 non-detergent type oil is most commonly used and can be found at a heating and cooling parts supplier.
Regular Professional Service
While many maintenance tasks can be performed on your own, it’s a good idea to have your air conditioner professionally serviced at least once a year. A professional can perform a thorough inspection and address any potential issues before they become significant problems.
How Much Does It Cost to Replace an RV Air Conditioner?
It can cost between $500 to $1100 on average for a new RV air conditioner, plus an additional $400 to $700 (or more) to install it. Keep in mind running costs will change, as well, depending on the size of the new air conditioner. Luckily, newer models tend to be a little more energy-efficient.
Can RV Air Conditioners Be Recharged?
While you can recharge some RV air conditioners, most models do not allow you to without some customization by a qualified service technician.
Why Does My RV Air Conditioner Leak When It Rains?
If your RV air conditioner only leaks when it rains, it’s likely due to a bad seal or rubber gasket where the unit meets the roof of the RV. Read RV Air Conditioner Leaks When it Rains? Do This! for more information on how to identify the cause and fix it.
What Is the Lifespan of an RV AC?
The lifespan of an RV air conditioner can vary depending on several factors, including the brand and model of the unit, how often it’s used, and how well it’s maintained. On average, an RV air conditioner can last between 10 to 15 years with proper care and regular maintenance. However, this can be shorter or longer depending on the factors mentioned above. Regular cleaning, timely repairs, and proper winter storage can all contribute to extending the lifespan of an RV air conditioner.
4 thoughts on “RV Air Conditioner Repair and Troubleshooting Guide”
WHAT TYPE OF FREON DO RV A/C’S CONTAIN & WHAT IS THE NORMAL SUCTION LINE SIZE? THANKS.
Without knowing the year, make, and model of the unit I can’t accurately answer these questions. Your best bet is to reach out to the manufacturer.
My roof top A/C travel trailer is making a clicking sound. Only way to rid of it was to disconnect battery cable. Would a bad start or run capacitor cause the clicking?
Does it only click and not turn on? It could be a number of things, including a capacitor like you mentioned, the control board, a relay, etc.
Leave a Comment Cancel reply
We highly encourage discussion on our posts and in our RV Community Forums . The most helpful comments are those that you can learn from or that help others out. Please refrain from insults, complaints, or promotional material. See our community guidelines for more information.
Save my name and email for the next time I comment.
Notify me of follow-up comments via e-mail.

- Where to Buy

Replacing an RV Air Conditioner - Everything You Need to Know
Since most RVs come with an air conditioner installed from the factory, there are only a few reasons that you might need to buy a new AC unit. First, if the factory installed unit stops working and needs to be replaced. Second, you may want to upgrade your existing AC unit if it underperforms or wasn’t really designed for your specific RV lifestyle. Since replacing an RV air conditioner is not a commonly reoccurring need in an RVer’s life, if you find yourself in the position that you’re replacing your AC unit it very well could be the first time you’re doing it. So, we asked the AC experts at Coleman-Mach to answer common questions about replacing an RV air conditioner and give their tips to be sure the unit you select is the right one to keep you cool on your unique RV adventure.
What are the signs that my AC unit will need to be replaced soon?
There are lots of signs that your current AC may be on the way out. If you notice any of the following symptoms address them immediately with an RV service tech to see if it’s a fixable problem or if you need to start looking into replacing your RV air conditioner.
- Your AC is extremely slow to start
- There is a lack of air flow coming from the unit
- The AC only works in low-stress settings
- The AC is blowing warm air
- The unit is unusually noisy when starting up, running, or powering down
- The unit seems to be drawing more energy than normal
What if I like my AC and want to replace it with the same model?
There are two steps to replace a factory installed air conditioner for aftermarket customers. First, you want to find the model number on your existing unit. Coleman-Mach provides an easy-to-follow video on Finding Essential Parts Number s on YouTube. Then, once you have the model number you can order a replacement unit. If, however, the model number for your factory unit doesn’t translate into an available aftermarket unit, you can use a tool like the Model Number Replacement Tool from Coleman-Mach to find up-to-date product information for corresponding AC replacement units that are available for RV owners to purchase.
How many BTUs do I need?
When it comes to BTUs, the higher the rating the more cooling power the AC unit has. The most common sizes for RV air conditioners are 13,500 BTUs and 15,000 BTUs but there are smaller units for more compact vehicles. Choosing the right size of AC for your RV and working out how many BTUs your rig will need depends on several key factors starting with but not limited to coach size.
The first thing to consider of course is the size of your RV with bigger coaches needing more powerful units to cool their more spacious interiors. Second, take into account the number of AC units in your RV model as well as other environmentally stabilizing factors that may help to keep rigs organically cooler like reflective roofing. Third, you need to be cognizant of the power system on-board your rig whether that be solar, shore power, or generators because different systems have technical limitations to what they can support. Fourth, does your vehicle or your plans on where you’re traveling in that vehicle have rooftop restrictions, like height restrictions for example, that would help define the different options for the best rooftop RV air conditioner? Lastly, take into consideration your destination preferences as frequent travel to hot and humid climates necessitates a stronger air conditioner to account for the larger gap between exterior temperatures and your interior comfort level.
Can I install my new air conditioner myself?
Coleman-Mach recommends a licensed, trained technician completes the installation of any RV air conditioner. Find the closest service location or retail outlet through the Airxcel Dealer & Service Locator .
What’s the difference between ducted and non-ducted AC models?
Just like you may see different types of air conditioner units for brick-and-mortar homes, there are multiple designs for RVs as well. Ducted RV air conditioners have a rooftop unit that distributes cool air to multiple points in the coach through a series of ceiling ducts. Ducted units are controlled through a remote or wall thermostat. Non-ducted units, on the other hand, are like the smaller residential AC units that sit in a window in that they pull hot air in and blow cold air out directly into the interior space; there is no built-in duct work to distribute the cooled air to other parts of the home or RV.
Why is there the option for heat in an air conditioner?
In many RVs the primary source of heat comes from a propane furnace. However, there are other warming options that can be utilized including a heat pump in an air conditioner. Think of a heat pump as an AC operating in reverse. Instead of pulling unwanted heat from inside the RV then expelling it outside like an AC does in the summer, a heat pump pulls ambient heat from outside the RV and routes it into the coach’s interior essentially warming through heat transfer. While a heat pump is not as powerful as a furnace, and likely not a viable choice for freezing weather, it’s a great option during chillier parts of spring and fall travel.
There is also the option of retrofitting existing ACs with an electric heat element. Though not ideal for extreme cold, this heating element can be used to chase the chill away for more comfortable interiors that don’t drain your propane. You can buy an Electric Heating Kit where Coleman-Mach products are sold; find your nearest location on the Dealer & Service Center Locator .
What new technology or upgrades are most worthwhile for RV air conditioners?
The answer to this question heavily depends on your RV lifestyle and what you prioritize on the road. And while there are many options, two that improve both performance and experience are an air purifier and a soft start.
- Air Purifier – Air purifiers can play a number of roles in vehicles and thus be useful to a range of RVers. First and foremost, an air purifier cleans the air; Coleman-Mach’s iWave-M Air Purifier removes bacteria, virus spores, airborne mold, and other pathogens. Air purifiers also remove odors from RV interiors so those that love to cook, those travelling with pets, or those that smoke in their RV can keep their home on wheels smelling fresh.
- Soft Start – A soft start protects your AC by reducing inrush amperage up to 75% and lowering the overall power consumption without sacrificing the unit’s cooling ability. This upgrade is useful for not only extending the life of your AC, but also for vehicles with multiple units. You will see soft starts built into new units now and also soft start kits that can be retrofitted into existing units.
Besides getting a bigger AC, what else can I do to help keep my coach cool?
The effectiveness of any RV air conditioner to cool a space is affected by the overall energy efficiency of the coach. Therefore, looking for ways to elevate your RV’s overall efficiency can go a long way towards creating a comfortable interior environment and easing the strain on AC units so they do not become overused.
Starting at the top and working down, reflective roofing like Tufflex™ from Dicor deflects solar heat keeping interior temperatures cooler. Likewise, exterior awnings, fan/vent shades , and interior window shades that block or absorb sunlight preventing it from entering the RV in its full, temperature raising force are another way to keep interior temperatures naturally cooler.
Another key way that your air conditioner affects the energy efficiency of your RV is through aerodynamics. Low-profile rooftop units are more streamlined which creates less drag for better fuel efficiency. And currently, the Coleman-Mach Mach 8 Plus has the lowest profile on the market.
What are the different kinds of thermostats for RV air conditioners?
We can put thermostats into three general groups: Bluetooth thermostats, digital thermostats, and analog thermostats. Starting with the most cost-friendly are the analog single stage thermostats offering environmental control through manual operation. Next are digital thermostats advancing precise temperature control through a digital display with single stage thermostats. And finally, Bluetooth thermostats that allow for control of the AC wirelessly through the use of Bluetooth and a digital app.
There are also ways that RVers can use the same smart residential thermostats in their RV as they do in their brick-and-mortar home. The Smart Control Center from Colman-Mach has bridging technology that allows residential smart thermostats to work in RVs including their compatible devices like Google Assistant or Alexa.
Where is the best place to buy an RV air conditioner?
Airxcel provides a free Dealer & Service Center Locator for its family of brands including Coleman-Mach with hundreds of dealers and service centers coast to coast in both the U.S. and Canada. Easily find the nearest dealer to your location simply by inputting your zip code.
Have additional questions about buying a new AC or your existing Coleman-Mach unit? Our experts are here for you! Join our private Adventure Club for ongoing access to Airxcel product experts and industry insights to elevate your RV experience. Or submit your question below for a chance to have it answered by our professionals in our next how-to blog on RV air conditioners.
Topics: How-To , Product
Subscribe to our Blog
Recent articles, never summer destinations to escape the summer heat.
Dreaming of cooler temperatures as summer approaches? Make plans to escape the heat with these never summer travel...
Say Goodbye to RV Mold with These Preventive Tips!
Welcome, fellow travelers and adventure seekers! Today, we're diving into the world of RV living and addressing a...
The Key to Better Ventilation in Your RV
Have you ever noticed how stuffy it can get inside your RV, especially during those scorching summer days or when rainy...
2024 Travel Destinations
For the ultimate rv road trip.
As we bid adieu to 2023 and embrace the dawn of a new year, it's time to start planning...
- Privacy Policy
- Cookie Policy
- Terms and Conditions
- Accessibility
- Conflict Minerals Policy
When you buy through our links, we may earn a commission. Learn more .
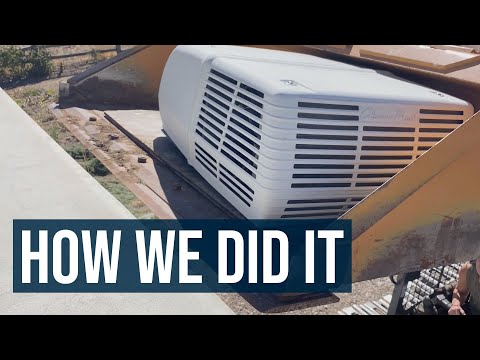
How To Easily Replace An RV AC With A Fan, Vent, or Skylight

This post is for entertainment purposes only. We are not electricians and you should get professional help if you don’t know what you’re doing. We are not responsible for any damage.
Why Should I Remove My RV AC?
If you’re a boondocker like we are you may have noticed that you don’t use your RV AC very often, if at all.
After a year of full-timing, we ran the RV AC maybe one time and only when we happened to be staying in an RV park for a night when passing through a city on our way to a boondocking campsite.
RV AC units can be nice if you are hooked up to 30 or 50 amp power or have a large generator but if you are just a regular dry camper chances are you won’t ever use it.
Related Product: We level our RV with the innovative Andersen RV Leveling System (click to view on Amazon)
Removing your RV AC means there will be less wind resistance on the top of your RV or trailer. An RV AC unit weighs more than you think and getting that extra weight off can be nice as well.
If you have an RV that’s a few years old like ours you probably don’t have a vent or skylight in the main room.
This is the case with our 2013 Heartland Prowler. There are lots of windows and a skylight in the bedroom but there was no way for good natural light to get into the main living/working area.
The windows are all tinted which means they don’t let in a lot of light. We really noticed how dark it was in our travel trailer when we spent our first winter down south.
We realized that if we added a skylight, vent, or fan a lot of natural light would be let into the trailer.
See Also: How To Install Solar Panel On RV Roof & Connect To Battery
Now that we’ve replaced our RV AC with a 12V fan with a white vent lid ( click to view on Amazon ) I can tell you for sure that it really does help bring in some good light.
In this article, I’m going to go through how we removed our RV AC and added a 12V fan step by step.
You can take this information and add a skylight (click to view on Amazon) or even a Maxxair Fan (click to view on Amazon) .
Keep in mind that we are not professionals and any work you do on your RV is at your own risk.
Table of Contents show Why Should I Remove My RV AC? How To Remove An RV Air Conditioner Unit How To Measure For An RV Vent, 12V Fan, Or Skylight How To Install An RV Vent, 12V Fan, Or Skylight Other Products You Will Need
How To Remove An RV Air Conditioner Unit
Removing an RV AC unit is fairly simple and requires very few tools. The most difficult part is going to be finding a safe way to get the RV AC from the roof to the ground.
They can weigh around 100 lbs. If you’re saving your AC for later or going to sell it, you want to be careful when transporting it.
I’ll talk about ways to get your RV AC off the roof later in this section.
1. Disconnect All Electrical
An RV AC is connected to both 120V and 12V power. Disconnect your RV from any outside power source and the RV batteries.
It might sound like overkill but you will be working with bare electrical wires and you can never be too careful.
2. Remove Inside Cover
The first thing you are going to take off is the plastic cover on the inside of your RV.
It doesn’t matter if you have a ducted or non-ducted RV AC unit. The inside cover will be removed by undoing the 4 screws on the corner.

There may also be another couple of screws on the inside of the cover. You can normally access these by removing the small plastic door on the cover.
Inside you will see a few screws that are holding the cover on from the inside. Once removed the entire cover should come off.
See Also: How To Replace A Non-Powered RV Roof Vent With A Powered Fan
3. Take Care Of Electrical Wiring
The RV AC unit is connected to the RV electrical system through an electrical box.
If you’re lucky you will be able to unbolt the entire box so you can bring the entire thing outside of the RV AC without having to remove the main AC cover on the outside.

There are a few things you want to be careful of here.
The RV AC might be connected to your RV thermostat which is also connected to the furnace.
We learned the hard way that if you undo certain wires it will stop the furnace from working. The wiring of your camper might be different though.
See Also: Best RV Roof Coatings That Seal & Protect (All Camper Roofs)
If you look at the picture above you will see the large yellow cable going into the black box on the very left.
Disconnect them from the black box and cover the bare wires with electrical nuts and electrical tape.

You can remove the large white plug and all of the small wires shown in the picture above. Remember to label where wires go in case you want to reinstall your RV AC unit later.
If you are installing a regular vent or a skylight you can simply cover these wires in electrical tape and tuck them to the side.
If you are installing a 12V fan like a Maxxair you are going to need to mess with these wires a little bit more later on. For now, you can just leave them tucked to the side.
4. Remove The Mounting Bolts
Once the electrical from the AC unit is unhooked you are ready to remove the last 4 bolts that are securing the entire AC unit to the RV.
They are the black bolts on the corners of the metal frame. You will unscrew them from the inside.

These bolts are really long and once they are removed the metal frame will fall down and the RV AC unit is ready to be removed.
5. Take Of RV AC
To remove the RV AC unit, push on it from the inside or lift it from the roof. It should come right off.
There is no caulk or sealant you have to worry about and if you got all the wiring disconnected correctly it will lift right off.

The center thing you see in the picture is just a foam piece that you can pull out.
6. Get The RV AC From Roof To Ground
As I said before the tricky part of RV AC removal is getting the unit safely to the ground.
I’ve seen people do this several ways. We were able to use a skid-steer loader to get ours down.
I put the bucket next to the trailer roof and we carefully slid the RV AC unit onto the bucket. I then lowered it carefully to the ground.
See Also: RV Rubber Roof Repair: When to Repair, Reseal or Replace

Not everyone has a skid-steer around and you may have to get creative.
If you can park your RV under a roof with open beams you can use a rope pulley system to get it down. I’ve also seen people use 2×4’s to make a ramp to slide the AC unit down to the ground.
Whichever way you do it make sure you are careful and don’t ever stand directly under the RV AC.
How To Measure For An RV Vent, 12V Fan, Or Skylight
It came as a surprise to me to find that the hole in the roof for the RV AC unit was actually the standard 14×14 inch hole that almost all RVs have for vents and fans.
That means most standard vents, skylights, and fans are going to be an easy fit with no cutting required.
You should still measure the opening to make sure but so long as the hole measures around 14×14 inches most RV roof products should fit.
See Also: How To Replace The Leaf Springs On A Dual Axle Trailer
The only thing you may have trouble finding is a proper “garnish ring” that is the correct length to fit the thickness of your RV, travel trailer, 5th-wheel, or van roof.
The garnish ring is the plastic ring that fits around the vent, fan, or skylight from the inside.
It covers the open wood from the roof and makes the inside look finished and nice.

Since the RV AC unit in our travel trailer was located in the center of the roof the distance between the top of the roof and the ceiling of our RV from the inside was thicker than normal.

Most standard RV vents, fans, or skylights come with a 2 1/2 inch garnish ring, but our roof thickness required a 6 inch garnish ring.
When measuring the roof thickness it’s easiest to do it from the inside.
When you remove the inside cover from your RV AC you will be able to see the entire roof thickness and measure it so you can get the correct parts before taking everything apart.
When ordering a part with a garnish ring it’s ok to get a garnish ring that is longer but not shorter.
In fact, the Maxxair fan actually comes with an extra long garnish ring you are supposed to cut into the correct roof shape.
See Also: 4 Easy Ways To Add Stabilization To An RV, Trailer, Or Van
We were on a budget and weren’t able to get a Maxxair fan.
Instead, we got an affordable 12V fan/RV vent (click to view on Amazon) and a 6 inch garnish ring (click to view on Amazon) .
It fit perfectly and has been working great these past few months we’ve been using it.
To install a skylight (click to view on Amazon) , you’ll need to get a garnish ring (click to view on Amazon) as well.
If you replace your RV AC with a Fan-Tastic fan (click to view on Amazon) it comes with a thick garnish ring. Which means you won’t need to buy one separate unless you have an unusually thick roof.
How To Install An RV Vent, 12V Fan, Or Skylight
Now that you know what RV vent, 12V fan, or skylight you are going to need to cover the hole left from the RV AC you are almost ready to install it.
Other Products You Will Need
Besides the RV vent, 12V fan, or skylight and the correct size of garnish ring, you will need a few more things for a proper install. These things include:
- Self Leveling Lap Sealant (click to view on Amazon)
- Butyl Putty Tape (click to view on Amazon)
1. Put Vent, 12V, Or Skylight Over The Hole
Clean off any dirt or putty around the hole on the outside. There shouldn’t be any putty, but if there is, remove it so you have a clean flat surface to work with.
There was just a bunch of dirt around the RV AC hole on our travel trailer. I just used a rag and soapy water to clean it.
See Also: Best Portable Power Station/Solar Generator For Camping
You can now place whatever you are going to use to cover the RV AC hole on the roof.
At this point, I put the putty tape (click to view on Amazon) around the 12V fans inside edges so I wouldn’t have to do it later.

When putting on putty tape you want to make sure all the screw holes are covered and the edges of the putty tape overlap in the corners so there will be no gaps.
The putty tape is one of the best ways to waterproof your RV roof and you don’t want spaces for water to seep in.
You will also put lap sealant around the outside edges but that comes later.
2. Take Care Of The Wires
If you are installing an RV vent (click to view on Amazon) or a skylight (click to view on Amazon) , you won’t need to worry about any of the electrical parts.
Simply take the electrical wires sticking out of the roof from the RV AC unit and cover them with and electrical tape.
Make sure no bare wires are showing, and push them to the side.
If you are installing a Fan-Tastic fan (click to view on Amazon) or a regular 12V RV Vent Fan (click to view on Amazon) , things are going to be a little more tricky.
You don’t need to worry about the 120V power because you want the fan to be connected to the 12V so you can run it without having to be plugged into shore power.
Again, we are not electricians and you should get professional help if you don’t know how this works.

We wired it by connected the positive fan wire to the circuit that was the blue and white wire.
These wires were originally connected to the black box with a female blade connector . We had to cut off the female connector to wire the positive fan wire to it.
The negative fan wire will be connected to the orange and red wires.
These were not connected to the main black electrical box and it was easy to remove the electrical nut and add the negative fan wire to it.
See Also: Is Your RV Fridge Not Cooling? Try This One Simple Trick
After you connect everything hook your batteries back up to your RV and try to turn on the fan.
It should come on without having to mess with anything on the thermostat. Also, make sure your furnace still works by flipping it on via the thermostat.
If it doesn’t come on then you have misswired something. Make sure you unhook any power before messing with the wires again.

You can use tape to secure all the leftover wires to the sides of the roof hole.
Our RV AC was ducted, so we were able to hide most of the wires inside the duct holes.
The garnish ring should give you about an inch on each side which should be enough space to fit the leftover wires from the AC.
3. Secure The Vent To The Roof
Now that the wires are either connected or placed to the side you can start screwing the vent, fan, or skylight to the roof of your RV.
If you are installing a vent you want the hinges to go towards the front of the RV or trailer.
Think of it this way, if the vent were open and you were driving you want the wind to blow the vent shut.
You also want to make sure it’s centered so the garnish ring will fit.
To do this have someone on the roof holding the vent in place and have someone inside the RV push the garnish ring into position.
On a vent or fan, the garnish ring will fit in the groove between the bug net and the outside of the vent.
If you are installing a skylight the garnish ring will just go to the edge of the roof.
See Also: Best Portable Foldable Solar Panel Chargers For Camping
Once you know the garnish ring will fit and the vent is centered you can start screwing on the vent from the roof. Start with the corners, then the center holes, and work your way out from there.
The grey putty tape may start bulging out once you have installed all of the screws.
This is a good sign that the putty tape is sealing the vent to the roof.
Some people like to cut off the extra putty tape that’s bulging out before putting on the self leveling lap sealant but it’s not going to be a big deal if you leave it.
4. Secure The Garnish Ring
Once the vent, fan, or skylight is secured to the roof you can now install the garnish ring from the inside.
If you are installing a Fan-Tastic fan follow the garnish ring instructions.
If you are installing a 12V fan, vent, or skylight, you should be able to put the garnish ring in place right away.
If it’s too long you can also cut the ring so it fits perfectly.
You secure the garnish ring with 4 screws around the lip. You can reuse the painted screws from the RV AC inside cover if you want.
5. Cover Outside With Lap Sealant
Now for the most important part of any RV roof installation, the sealant.
The number one mistake people make when installing things on the roof of their RV is they don’t use putty tape and they don’t use enough self leveling lap sealant (click to view on Amazon) .

In the picture above you can see that I’ve laid about 2 inches of lap sealant so it covers all of the screws, most of the metal vent edge, and about a 1/2 inch of the roof.
This picture was taken right after I got done laying the lap sealant and after about 15 minutes it had spread out even more.
I used 2 tubes of lap sealant to cover the vent exactly how I wanted. In my opinion, you can never use enough of this stuff.
It’s rained a couple of times since we installed our 12V fan vent and we haven’t had any leaks so far.
6. Enjoy Your New Vent, Fan, Or Skylight
The install is now complete at this point and you should notice a huge difference in the amount of natural light coming into your RV.
We have really enjoyed having a small 12V fan/vent instead of an AC on our travel trailer.
Even though it’s small the fan moves a good amount of air inside the RV without using a ton of electricity.
See Also: Best 12 Volt RV Lithium Battery Reviews + How To Charge
We put our RV AC onto storage so we can reinstall it later if we want to but I don’t think we will any time soon.
Have any questions about replacing an RV AC with a vent, fan, or skylight? Leave a comment below.

2 thoughts on “How To Easily Replace An RV AC With A Fan, Vent, or Skylight”
Thanks for this post. Should save a lot of money by diy.
Thanks, you covered everything I wanted to know.
Leave a Comment Cancel reply

7 Most common RV Air conditioner problems and how to fix them

- BEGINNERS GUIDE
G. Yoganand
Air Conditioning units (AC) on RV’s can be a great asset for those that spend a lot of time in them. But, on some occasions, some sort of deterioration or leakage can occur.
However, these may not be a very difficult situations to fix and it is possible for one to do it at home, provided that the right tools are used.
Troubleshooting a not working AC may not be difficult if you have basic knowledge about AC’s. Most RV’s are equipped with AC’s from atwood, coleman, dometic or advent. We recently replaced our old ac with a Dometic Brisk II Rooftop Air Conditioner (check current price and reviews on amazon). Its an awesome product, easy to install and replace.
In this article, lets explore common issues that we face with RV air conditioners and how to troublshoot them.
Assessing the problem
When you detect that something is wrong with the Air Conditioning unit of your RV, the first thing to do is to see exactly what the problem is, in order to properly fix it. Now, it is important for you to keep in mind how old and how often your AC is used, as that can also influence the problem.
One can face varying issues with camper AC’s like “the RV ac shuts off on its own”, or the AC turns ON and OFF repeatedly or sometimes the AC wont blow cold air at all. There can be issues with the thermostat, or the capacitor in the air conditioner. So, how do you identify and repair these issues?
Read : How to install a portable Air Conditioner in a camper
AC units are complex enough and may not always be fixed by RV owners. RV AC professional becomes a must then. But, sometimes its better to understand the problem and see if you can get it fixed yourslef.
Fixing the problem
Different problems ask for different solutions. Once you have determined what is wrong with your Air Conditioner, then you can move on to fixing it. Lets check out different problems that rooftop AC on RV or travel trailer can face and how we can fix those problems.
1. The AC Does Not Turn “O N”
When you have an Air Conditioner in your RV, usually you want it to work, and so, it can be quite frustrating when it doesn’t. The first step towards fixing it is to check for battery in the remote. Although AA and AAA batteries are known to last for a very long period of time, cheaper brands can wear out sooner than expected.
Generally, changing batteries should be sufficient, but if it is not, then the next step is to check whether there is anything broken in the remote. If your remote seems to be in good condition, then a simple, yet overlooked step is to check whether the electricity in the RV or motorhome is on.
2. The Air Conditioner Blows Out Hot Air
If your AC is blowing out hot air, then the first step is to check the thermostat. If however, you set the temperature right and the AC keeps blowing out hot air, then it is possible that the problem itself is in the thermostat.
To fix this, you will need to disconnect the wires leading to the thermostat and then attach them together, bypassing the thermostat entirely. If the AC starts working properly, then it is definitely a broken thermostat, to which you will need to buy a new one.
3. The Air Conditioning Unit Motor is Unusually Loud
AC units are usually very smooth and silent and so, it is easy to notice when it starts acting up and making a lot of noise. This noise is very likely caused by the fact that the rubber shock absorbers are not in their rightful place.
To fix this issue, you will need to remove your AC unit shroud, find the rubber shock absorber and make sure that they don’t brush up against the fan or compressor coils. Here is a detailed guide on how to quiet your rv ac .
4. There is Ice on Your Air Conditioner
Although it is not a very common issue, ice can appear on the outer part of your AC unit. The problem itself is related to the Freon levels in your AC unit, but it is a rather easy problem to fix. The first thing you need to do is check if there are any leaks.
If you can’t seem to find a leak, then all you need to do is to top off your AC’s Freon. Afterwards it should work well again, not producing that unwanted ice.
5. The Air Conditioner Has a Foul Smell
Air Conditioners don’t usually leave smells, but on rare occasions, an uncomfortable smell can appear. This can happen when the filters aren’t regularly cleaned or replaced. If you do clean the filters and the smell remains, then the problem comes from the radiator. To fix this, you will need to clean all the dirt. Doing that should fix the problem.
6. The AC doesn’t stop running
If you notice that you try to turn off your AC unit, but it keeps running, then you will have to fix it right away to prevent damaging of the machine or decrease in longevity. There are a few reasons as to why your AC unit won’t turn off. First, it could be a busted thermostat, in which case you will have to replace it with a new one. If that does not appear to be the issue, then the circuit board could be affected, and so you will have to hire a professional.
7. The Air Conditioner is Leaking
Leaking is a common problem when it comes to Air Conditioners in Recreational Vehicles. Checkout my previous post on how to fix leaking RV air conditioner . Here, it is important for you to check whether it leaks when the AC is on or when it rains, and maybe even if it leaks in both situations.
Now, Air Conditioners are sealed to the rooftop of the RV with a rubber gasket. This gasket is usually very low-maintenance and so will require little attention. Nevertheless, if you start noticing that there is a leak, then you definitely should try to fix it as soon as possible, before it becomes a long term problem.
That being said, the first step towards fixing it would be to verify if the rubber gasket is intact. To do this, you will need to check whether there is at least) half an inch of height in the gasket between the Air Conditioner and the RV itself. If the rubber gasket really is the problem, then you will need to replace it with a new one.
Here, you can either hire a qualified RV air conditioning specialist or do it yourself. If you wish to do it yourself, then you will need a few tools:

- Screwdriver
- Wire cutter
- Rubbing alcohol
Once you’ve gathered all the necessary tools, then you can move on to fixing it. We carry this Black and Decker RV toolkit (amazon link) in our rig, it has most basic tools. That’s very helpful in fixing and installing appliances on RV.
First of all, you will need to remove the outer part of your AC, also known as shroud, in order to reveal its inner parts. After this is done, you will have to locate the bolts and remove them, placing them in a bag, so that you’ll find them easily when needed. Then you should carefully remove the shroud and set it aside, where you can easily reach it later.
The next step is to remove the Air Conditioning unit from the roof, as it will be much easier to work with. Remove the screws that hold the AC unit to the rooftop of your RV and set them aside. Then, you will need to observe whether there is an electrical connector and, if there is, what sort of connection there is.
Before cutting the three wires attached, you will need to make sure that the power is disconnected. Once it is disconnected, then you can proceed to cutting the three wires with a pair of cutters. After that, removing the Air Conditioner should be pretty easy, but be careful not to scratch the paint of your RV. Also, be vary of the fact that rv roofs support weight upto certain limit and therefore be careful when climbing up there.
Once the Air Conditioning unit has been removed from the rooftop, you can pull out the old rubber gasket and throw it away. If the rubber gasket is either stuck or hard to remove, use a knife to remove it.
Make sure that you remove all of the remaining residues and clean the entire rooftop with rubbing alcohol.
Moving on to the next step: Placing the new rubber gasket. On this step, you will need to return the AC unit to its rightful place, over the new gasket and reattach it, using the right tools. You will need to reconnect the wiring harness and then reattach the shroud.
Once your work is done, you will need to verify if everything is working properly. To do this, you should use a water hose to lightly spray the AC unit while it is running, and then check if there are any leaks.
Related Reading : Consider this before buying a RV Air Conditioner
Tips For The Future
Air Conditioners are practical and useful devices, but they do need some sort of regular maintenance, in order to function properly. Whether you own a class A motorhome or a fifth wheel or a small pop up camper, air conditioner are very important while camping.
That means that if you don’t wish to buy a brand-new AC unit every few years and don’t want to spend unnecessary money on air conditioning repair specialists, that you will have to dedicate some time to make basic maintenance a part of your routine.
Maintaining your Air Conditioner can be done in four easy steps:
1 . Protect from all elements
First of all, you need to protect your AC unit from all the elements. That means you should cover it when you are not using it. There are many covers out there for the buying and they are very easy to apply to your AC unit. This might seem like an expendable step, but it will protect your AC from dust and dirt.
2. Maintain and service the fan

The second step is to oil your Air Conditioner’s fan. It will run much more smoother if it is properly oiled. Note that every AC is different, and so, you should reach for your manufacturer’s instructions, to ensure that you do it properly.
You should buy a high quality oil that is detergent-free, such as automotive motor oil, as cheap oils might wear out faster and could leave residues that could later on become a problem.
3. Inspect the AC Condenser
Step number three involves inspecting the condenser of your AC unit. This step is important, as its coils will provide you with the cooling you seek in the hot summer days.
It is important to occasionally check the condenser as it can accumulate dirt, dust and other debris (as it is exposed to the elements).
4. Air Out roof vents
This last step is a considerably important one, if you wish to keep excessive moisture away from your RV’s Air Conditioning Unit.
In order to do this, you will have to air out the roof vent. It is quite an easy step and it will help you avoid a lot of unwanted and unnecessary issues.
Related Read : How to keep your RV or travel cool without Air conditioner
Your RV Air Conditioner is an important component, but you can’t expect it to last for a lifetime, especially when left uncared for. Many of the issues that can occur in your AC unit can easily be fixed without the aid of professionals, so long as you get informed on how to fix it.
You should establish a schedule to help you know when to do a little cleaning and maintenance. The only thing you should always keep in mind is that all sorts of maintenance should be done while your AC unit is not running.

You Might Also Like

How To Waterproof My Pop Up Camper

Travel trailer or fifth wheel – 25 factors to decide

How much water does a rv shower use (And tips to save rv water)

Why do rvs have ladders ? (And should you get one installed ?)
Best RV Air Conditioners: Efficient And Affordable Cooling Solutions For Your Camper
Cool your RV and make camping a comfortable adventure with these top RV air conditioners.

We may earn revenue from the products available on this page and participate in affiliate programs. Learn more ›
If you love spending time in your RV, whether it’s parked at your favorite national park, or driving all over the country exploring, one thing is certain: hot, humid nights create unhappy campers. Investing in a quality RV air conditioner can be a game-changer when it comes to creating a comfortable, climate-controlled environment that’s perfect for sleeping. Today’s RV air conditioners are efficient and powerful units that will cool your space quickly and help cut down on mold-causing humidity, keeping your RV cleaner and healthier. They come in a variety of sizes, installation configurations, and vary greatly in price. To help aid you in the decision-making process, we’ve come up with a list of some of the best RV air conditioners on the market.

ASA Electronics ACM135 Advent Air RV Air Conditioner
This 13,500 BTU AC unit is manufactured to be extra durable and effectively withstand harsh weather and temperatures while still running reliably.
- Compatible with most RV makes and models
- Reasonably priced
- Features an optional plug-in heat strip
- Concern over long-term reliability
- Control knobs tend to come off easily

Dometic Brisk II Rooftop Air Conditioner
This RV AC unit is our best value pick because of its great performance and affordable price point. It features a 15 percent increase in air flow over its predecessor, cooling your space quickly.
- Tough design withstands shocks and vibrations
- Compact structure works in any RV
- Limited power consumption
- Noisier operation than some other options
- Base pan is less durable than rest of AC unit

RecPro RV Air Conditioner 15K
This 15,000 BTU RV air conditioner functions as a heater in addition to an air conditioner, allowing you to kill two birds with one stone and save valuable RV space in the process.
- Rugged, streamlined design
- Compact height works well with almost any RV model
- Improved efficiency over previous models
- Installation manual can be confusing
- Heavier than some other units on the market
Summary List
- Best Overall: ASA Electronics ACM135 Advent Air RV Air Conditioner
- Best Value: Dometic Brisk II Rooftop Air Conditioner
- Best Premium: RecPro RV Air Conditioner 15K
- Best Dual-Motor: Furrion Chill 15,500 BTU RV Rooftop AC
- Most Versatile: Coleman 48204C866 Mach 15+ A/C Unit
Our Methodology
Our product selections, rankings, and awards for this story are based on research. While we haven’t conducted real-world testing yet on all of these products yet, we’ve looked at consumer testimonials and data, tutorials, and general discussions on social media and in forums. We also consider price and specification in the context of the segment. And, of course, we rely on our institutional knowledge of the automotive landscape to weed out weak products.
In order to be sure we chose the best available and most reliable RV air conditioners, we weeded through countless dozens of options available. When it comes to RV air conditioners, there is a surprising number of choices, so we narrowed it down by relying on our own personal expertise, as well as the experiences of thousands of satisfied, and unsatisfied, customers.
In the end, we also wanted to provide you with options that were suitable for a wide variety of RV makes and models, and not specialized to one specific RV type, because let’s face it, there are a ton of different RV styles and sizes out there. We further eliminated options that were manufactured by companies that didn’t already have a stellar reputation and a long-standing track record of producing high-performance, durable products. The result is the list you see above.
Best RV Air Conditioners: Reviews and Recommendations
Best Overall
When it comes to our top pick for the best overall RV air conditioner, it’s got to be the ASA Electronics ACM135 Advent Air RV Air Conditioner. It’s a 13,500 BTU unit capable of effectively and quickly cooling even large RVs. Manufactured to be durable, this rooftop air conditioner is designed to withstand some of the harshest elements, from direct sunlight to driving rain and wind. It also features a rigid, all-metal construction base pan.
We also like that this air conditioner comes with everything you need to get up and running quickly — and you can also get an optional plug-in heat strip for added customization. A high-quality, thick, watertight vent opening gasket features six foam pads that ensure no water gets through, even in the most driving rain.
This unit also fits ideally with most standard 14.25 x 14.25-inch vent openings, making it a versatile choice for a wide range of RVs. There have been a few customer complaints about the overall cooling capability, but these issues have been limited to just a selection of units. Our advice would be to try it out immediately upon arrival so you can troubleshoot any issues early on.
- Brand: ASA Electronics
- Model: Advent 13.5
- Weight: 50 pounds
- Relatively affordable
- Fits most RV makes and models
- Can add an optional plug-in heat strip
- Some concern over long-term cooling power
- Doesn’t include inside ceiling kit with purchase
- Control knobs fall off easily
The Dometic Brisk II Rooftop Air Conditioner sets itself apart from the competition with a bunch of features that you’ll normally find on pricier models. This RV air conditioner packs a respectable 13,500 BTUs of power that can cool recreational vehicles of all sizes. You don’t need to worry about the power consumption, as this model offers a 15 percent increase in airflow from its previous version, while still drawing the same amount of power. As a result, the Brisk II is now compatible with standard air vents. You get better cooling capacity since the distribution box uses central air delivery.
Moreover, the unit is made from quality materials for better durability, absorbing shocks and vibrations, as well as all types of weather, with its stable and strong frame. One thing to watch out for with this model is the base pan. It’s less durable than the rest of the unit and customers have reported that it’s also a bit noisier during operation than some other models. The packaging is another issue that needs to be addressed since the box doesn’t protect the unit from major damage during shipping. Finally, the starting electrical load is too high for small generators.
- Brand: Dometic
- Model: B59516.XX1J0
- Weight: 74 pounds
- Base pan is not very durable
- Noisier than some other options
- Control unit is sold separately, adding to the overall cost
Best Premium
The RecPro RV Air Conditioner 15K gets high marks for being one of the only units on our list that’s both an air conditioning and a heating unit, letting you extend your RV season to the max. It’s a non-ducted setup that’s quick and easy to install. Like most other air conditioners on the market, it’s available in black or white and runs off 115 volts of power. This unit features a quiet operating noise level of less than 60 decibels and draws just 12 amps for heating and 14 amps for cooling, which is less than many other models available. That translates into less electricity use for you which can amount to significant savings over time.
This unit also comes with a straightforward and easy-to-read wireless remote control for added convenience. While it is on the high end of the price range, this air conditioner does come with everything you need for installation and since it doubles as a heater, it’s actually a great value for your investment.
- Brand: RecPro
- Model: RP-AC3800
- Weight: 80.3 pounds
- Can be used as an AC unit and also as a heating unit
- Sleek and modern looking
- Comes with everything you need for complete installation
Best Dual-Motor
Furrion Chill 15,500 BTU RV Rooftop AC

The Furrion Chill 15,500 BTU RV Rooftop AC features a sleek and modern design that fits almost any RV. It has a powerful output of 15,500 BTU, which is ideal for cooling medium to large RVs quickly, and it’s equipped with dual-fan technology and features a lightweight insulated heat exchanger housing and an isolated plastic base.
This unit features 50 percent greater cooling capacity and 40 percent better energy efficiency when compared to many other models we looked at, too. We also like that this RV air conditioner is built with the brand’s ClimateSmart and VibrationSmart technologies that help improve its overall durability and longevity.
The Chill also has a UV-resistant cover with thermal insulation to protect components from damage due to heat, rain, sun, and debris. One thing many users note is that installation of this unit can be somewhat difficult compared to other models and that the instruction manual is not as clear or understandable as it should be if you’re doing a self-install.
- Brand: Furrion
- Model: FACR15SA-PS-AM
- Weight: 84 pounds
- Powerful enough to cool larger RVs
- Uses eco-friendly coolant
- Boasts the highest energy efficiency rating on the market
- Instruction manual needs to be easier to understand
- Doesn’t come with everything you need to do a complete installation
Most Versatile
Coleman 48204C866 Mach 15+ A/C Unit

If you want the ultimate in functionality, versatility, and aerodynamic design, check out the Coleman 48204C866 Mach 15+ A/C Unit. This unit is one of the most powerful RV air conditioners you can buy. It features a 1/3 HP fan motor, which is the largest available in an RV air conditioning unit and it can move air at an impressive 320 CFM.
It fits perfectly in most existing 14 x 14-inch rooftop vent openings, making it a great choice for almost any RV make and model. It’s charged with eco-friendly R-410A refrigerant, which is better for the environment than typical freon. And with 15,000 BTUs of power, you can be sure your RV will be cooled to your liking in no time.
It has a streamlined design that helps enhance airflow over the top of the unit and allows for improved cooling efficiency. Gas-flux brazed joints and all-copper tubing are durable construction elements that you won’t find in all RV air conditioner models. This unit is also set up to accept an optional heater assembly that’s capable of pumping out up to 5,600 BTUs of heat. It is, however, one of the pricier units on our list and it doesn’t come with an included thermostat.
- Brand: Coleman
- Model: 08-0080
- Weight: 90 pounds
- Can be modified to be a heater as well as an air conditioner
- Compatible with almost all RV makes and models
- Features the largest and most powerful fan motor on the market
- One of the heaviest units on our list
- Doesn’t come with an included thermostat
Our Verdict on the Best RV Air Conditioners
Now that you know what to look for in a top-quality, high-performance RV air conditioner, it’s probably easy to see why we chose the ASA Electronics ACM135 Advent Air RV Air Conditioner as our top pick. It’s a reasonably priced unit that’s compatible with most RV makes and models. It also comes with an optional plug-in heat strip, making it an even better value.
For a more budget-friendly option, we like the Dometic Brisk II Rooftop Air Conditioner . It’s a well-built RV air conditioner that comes with a lot of features you will only find in pricier models. This newly revamped version also offers a 15 percent increase in airflow from its previous version, giving you a bigger bang for your buck.
What to Look For
When it comes to selecting the ideal RV air conditioner to suit your needs, there are several key factors that, if addressed appropriately, will ensure you get a great product that will last you a long time. After all, RV air conditioners aren’t cheap, so you want to make sure that you’re getting the most out of your investment won’t be left sweating and miserable on those 100-degree days.
Benefits of RV Air Conditioners
- Customizable comfort level. When the temperature outside becomes unbearable, you’ll appreciate the cool air inside your RV. Whether you’re camping or on the road, an efficient RV air conditioner is a necessity. It makes the difference between a comfortable experience and one you’d rather forget.
- Clean indoor air. The air quality inside the RV gets better with an AC unit installed. No more dust or allergies; fresh and moving air is less likely to breed germs or impact the health of those living on board.
Types of RV Air Conditioners
Rooftop .
Rooftop air conditioner units are popular since they save you space inside the RV. Their ideal place on top of the vehicle means the brisk air outside cools the RV AC unit, and low-profile units consume less energy and have a lower risk of damage when passing under bridges. Rooftop AC systems come in two options: ducted and non-ducted. Ducted systems are suited for large RVs, as they push the cool air to all corners of the RV. Non-ducted units are suitable for smaller RVs and cost less.
Under Bench
The under-bench RV air conditioner, as you might expect, is located inside your vehicle. It’s stored under a seating bench or inside a cabinet. So while it does take up valuable storage space inside your RV, it’s a perfect option if you have an RV with a curved or already overcrowded roof. It does allow you to keep your windows free and unaffected by ductwork.
Portable units have a smaller size and a better design, as you can move them around, and they don’t require installation. They take up space inside the RV and need extra care for handling. The units are energy efficient but require a hose to avoid water leakage. Instead of the usual refrigeration process, the unit evaporates the air and releases a cold air stream to cool the area.
A Swedish company opening its doors in 2001, it manufactures a wide range of products, designed for recreational vehicles. With a global distribution network dealing in over 100 countries. Its product line continues to evolve, including everything from camping gear to power systems for RVs and boats. Among its top climate control systems for RVs is the Dometic B59516.XX1J0 Brisk , favored for its powerful cooling effects.
This brand falls under the Dometic manufacturing umbrella, but it’s still worth noting. It was successfully bought out due to its high-grade products spanning from heating systems to windows and doors. Focusing on the recreational vehicle industry, you’re likely to find an Atwood product in just about every modern RV. An Illinois-based company, it dates back to 1909, continuing to innovate tech in the RV industry. One of its helpful products when setting up an RV air conditioner is the Atwood Ducted Ceiling Assembly .
Furrion is a company that’s dedicated to melding modern luxury with sustainability. The founding partners met as engineers on a megayacht crew, so they understand what luxury mobile living means on a personal level.
Founded in Kingfisher, Okla. in 1900 by William Coffin Coleman, this company has been manufacturing and delivering reliable and trusted camping and outdoor equipment for more than 120 years. From tents and sleeping bags, to camp stoves, gas-powered generators, and RV air conditioners like the Coleman 48204C869 RV Air Conditioner , there’s almost nothing you can’t get to make your camping or RV experience as comfortable as possible.
Key Features
BTU stands for British Thermal Unit and it’s a technical specification that can help you decide which AC suits your RV based on its size and average local weather conditions. The average AC unit has 13,500 BTU power. This is enough power to cool down a large RV. Humid weather conditions demand more BTU power in your AC. If you visit areas with high humidity or extreme temperatures, you’ll need to invest in a unit with more BTU power.
Power Consumption
Air conditioning units consume a lot of energy, so choosing a unit that consumes less power saves you money in the long run.
Air Purifier
Air with poor quality is a health hazard, especially for people prone to allergies or respiratory issues. Not all RV air conditioners have built-in air purifying systems. Those that have them, however, do a good job of removing odors. The air purifier improves the quality of the air inside the RV and keeps it fresh and clean, regardless of the conditions outside.
Not all RV air conditioners are manufactured to the same size specifications. Be sure to measure your existing unit or the hole for the AC unit prior to purchasing. This is true for rooftop units, under-bench models, and window units. Most rooftop openings measure 14 x 14 inches, but some can be smaller or larger, depending on the manufacturer.
Q: Can I heat my RV with the air conditioning unit as well?
You cannot use the unit to heat the RV in cold weather unless it comes with a heat pump. If your AC doesn’t have a heat pump, you can buy heat strips or a heater assembly kit.
Q: How often should I maintain my RV air conditioner?
Every two months. Check for cracks in the plastic. Clean the filters and air vents and check for wear and tear marks on the unit.
Q: Can I run my RV air conditioner on battery power?
While you technically can run your RV air conditioner using battery power, it’s not recommended. RV air conditioners are power draws that can quickly drain your batteries down to an unusable state, even with plentiful solar panels to help recharge them. It’s usually best to run your AC only when the engine is running, plugged into pedestal power, or by using an appropriately sized gas-powered generator.
Why Trust Us
Our reviews are driven by a combination of hands-on testing, expert input, “wisdom of the crowd” assessments from actual buyers, and our own expertise. We always aim to offer genuine, accurate guides to help you find the best picks.
Other ‘ RVs ’ Reviews You Might Like:
Dometic A/C Replacement: Tips and Considerations
- Description
In this step-by-step video lesson, our RV maintenance experts walk you through a Dometic A/C replacement on a fifth-wheel trailer. To help you navigate the process easily and safely, Dave Solberg and RVIA Certified Master Technician Steve Albright demonstrate the removal and replacement of a defunct rear Dometic cooling system on a 40-foot fifth-wheel. Luckily, this particular model which was performing weakly happened to be under two-year warranty, so the guys were able to get a replacement component at no cost.
What to consider prior to a Dometic A/C replacement
Before you decide to unscrew the Dometic system that cools your vehicle, there are some things you should remember about A/C cooling capability and general functionality. This is important because your first response shouldn’t necessarily be to fork out for a new system; there might be a quick fix to your poorly operating A/C unit.
Steve and Dave begin by explaining what might cause an A/C unit to cool improperly or not at all. Firstly, you should note the ambient temperature inside and the discharge temperature, and keep in mind that a well-functioning A/C unit can only condition air to 20 degrees cooler. So if it’s 95 degrees outside and you want to bring the inside temperature down to 68, well, that’s just not going to happen.
You should also remember to open all or most of the vents in your vehicle to encourage optimal air flow. If the majority of your vents are closed or cracked, you might not be experiencing maximal flow. And lastly, Steve recommends checking the plenum in your discharge area. If there are cracks around the edges, conditioned air will quickly leak back into the discharged flow, and you’ll lose most of that cooling capability.
What to look for during an A/C replacement
To demonstrate the process, Steve and Dave hop on top of the client’s fifth-wheel and slide the new A/C unit into place. While they work, Steve discusses some of the most important aspects of a safe and properly executed installation. This includes confidently moving around on an RV roof, precisely lining up the new A/C unit , carefully tightening and bolting down the gaskets, and testing the divider plate for leaks.
Watch and learn as Steve gets you from initial placement outside to fully attached control module and hooked wires on the inside. You’ll then learn how to install the ceiling assembly shroud and look for any missed steps, and you should be good to go. Give it a test run, and feel the difference!
Explore videos by Dave Solberg

You may be interested in

Premium Membership
Unlock exclusive member content from our industry experts.
- 24/7 Access to Premium RV Maintenance Videos, Travel Inspiration, and Lifestyle Tips
- Step-by-Step Instructional Demos, Projects, and Guides
- 50% Off Video Downloads Purchased in the RV Lifestyle & Repair Shop
- Access to Ask the Expert Program
- 2 Full-Length Video Downloads to Watch Offline
Gold Membership
Get everything included in Premium plus exclusive Gold Membership benefits.
- 9 Full-Length Video Downloads to Watch Offline
- 2 Full-Length RV Repair Classes to Keep for Life
- Discounts on Purchase-to-Own Content in the RV Lifestyle & Repair Shop
- Exclusive GOLD LIVE Streaming Events
Username or email *
Remember me
Lost your password?
Privacy Policy
IMAGES
VIDEO
COMMENTS
Advent Air Low Profile RV Air Conditioner - 15,000 Btu - Black. This AC unit lets you replace an existing AC or add a new AC to your RV or camper. Low-profile design reduces wind resistance. Condensation dispersion system increases efficiency. Compatible with Advent Air, Dometic, Coleman Mach, or Carrier setups.
Coleman Mach 8 Plus RV Air Conditioner with Heat Pump, Soft Start. $1,699.99. Choose Options. + 2 More Options Available. Dometic Penguin II Rooftop Multi-Zone Air Conditioner with Heat Pump. Starting at. $1,582.24. Save up to $537.17 Up to 24% Off. Choose Options.
HOW WE ARE FREE TO TRAVEL http://www.unschoolunwork.comIn this video Jon Dee shows you how to replace the air conditioner in your RV. The hardest part of RV ...
Troubleshooting Tips. Check the fault codes (if applicable). Many RV air conditioner models, for example, the Dometic Brisk 2, will display a fault code on the unit when there is an issue. Check your owner's manual for the meaning of the code. Check the high-pressure switch circuit.
Clean the Condenser Coils: Find a safe way to climb on the top of your RV's roof. Unscrew the bolts and detach the shroud from your air conditioner unit and set it aside. Vacum out the dust. Spray the coils with a product such as Air Conditioner Coil Cleaner. Follow the instructions and make sure not to damage the coils.
There are two steps to replace a factory installed air conditioner for aftermarket customers. First, you want to find the model number on your existing unit. Coleman-Mach provides an easy-to-follow video on Finding Essential Parts Number s on YouTube. Then, once you have the model number you can order a replacement unit.
2. Take Care Of The Wires. If you are installing an RV vent (click to view on Amazon) or a skylight (click to view on Amazon), you won't need to worry about any of the electrical parts. Simply take the electrical wires sticking out of the roof from the RV AC unit and cover them with and electrical tape.
Pull the filter out and check/clean it. If airflow improves the unit may start working again. If the airflow is adequate inside the RV the problem could still be airflow in the exterior heat exchanger part of the air conditioner. Dust and debris clog up the fins of the unit and make it much less efficient.
RV Air Conditioner Parts. If you plan to dive into any RV AC repair, it's a good idea to know what you're looking at. An RV air conditioner is made up of a few key parts. Knowing what these parts are and what they do will help you repair the unit properly: Compressor - A compressor compresses a vapor refrigerant and heats it. This happens ...
#RVACinstall #quickACinstall #easyRVairconditionerinstall How to install an RV Air Conditioner .Affiliate Amazon link if you would like to purchase the same...
That being said, there are a few common problems that may require RV AC repair that can be tackled by RV owners. Here are some common RV AC repair problems. AC blows warm air. The ceiling mounted AC shroud inside your RV has an intake side with a filter and an exhaust side. These airways are sealed from each other and to the air ducting.
To fix this, you will need to disconnect the wires leading to the thermostat and then attach them together, bypassing the thermostat entirely. If the AC starts working properly, then it is definitely a broken thermostat, to which you will need to buy a new one. 3. The Air Conditioning Unit Motor is Unusually Loud.
This video describes how to replace the capicitors in an RV air conditioner.CAUTION: Make sure to unplug your main power before working on the air conditione...
ASA Electronics ACM135 Advent Air RV Air Conditioner. Check Latest Price. Summary. This 13,500 BTU AC unit is manufactured to be extra durable and effectively withstand harsh weather and ...
In this step-by-step video lesson, our RV maintenance experts walk you through a Dometic A/C replacement on a fifth-wheel trailer. To help you navigate the process easily and safely, Dave Solberg and RVIA Certified Master Technician Steve Albright demonstrate the removal and replacement of a defunct rear Dometic cooling system on a 40-foot fifth-wheel.
🥵 Dave does a DIY to replace the Dometic AC Unit on top of our RV. See how clever Dave is to get the old 100 pound AC down and the new unit up. But then i...
This AC unit lets you replace an existing AC or add a new AC to your RV or camper. It works with your existing Advent Air, Dometic, Coleman Mach, or Carrier air distribution box and thermostat - adapter wiring kit (sold separately) may be required. Great Prices for the best rv air conditioners from Advent Air. Advent Air RV Air Conditioner - 15,000 Btu - White part number ACM150 can be ordered ...
Our RV air conditioners are engineered with advanced technology to provide efficient cooling performance, even in the harshest weather conditions. With features like low power consumption, quiet operation, and precise temperature control, Dometic air conditioners ensure a pleasant indoor climate wherever you roam. Browse by type.
Furrion Chill HE RV Air Conditioner System - Multi Zone - 13,500 Btu - Black. AC system lets you independently adjust the temperature of two zones within your RV or camper. Compatible with ducted and ductless systems. Includes 2 ACs, 2 air distribution boxes, 2 multi zone controllers, and a multi zone wall thermostat.
We woke up in the middle of the night to a horrible, loud noise coming from our RV's A/C Heat Pump. As full-time RVers, it's important for us to be comfortab...