
AKIBA’S TRIP: Hellbound & Debriefed 100% Walkthrough and Tips
For AKIBA’S TRIP: Hellbound & Debriefed players, this is not only a complete walkthrough, but also covering gameplay basics, random tips, unlockables and secrets in this game.
Introduction
Also, this game is a remaster of 1. So if you think the mechanics was dated in Undead and Undressed, you are going to feel that this game is much more sluggish and difficult to control. Also, this is a direct 1:1 remaster, so there is no new content. And all brands that was featured in the original PSP game has had their names changed (possibly due to expiring licenses).
Default PC Menu Controls
- WASD for Up, Left, Down, Right
- . for Confirm (as in full stop)
Difficulty Settings
- Easy – You do more damage and you can deal all low, middle and high damage with any hit. Clothes will take more hits before shredding.
- Casual – You do more damage. But this time, Low hits low, middle hits middle and so on. Clothes will take more hits before shredding.
- Gamer – You do normal damage. NPCs attack more frequently. Drop rates for upgraded weapons are increased
- Otaku – You do less damage and NPCs seems to attack much more frequently. Clothes also shred much faster after the clothes flash red visually (about 2-3 hits). in this mode. Drop rates for upgraded weapons are significantly increased. Unlocks only when you clear Casual or above.
- ??? – Super hard mode. I haven’t played it but I heard it’s difficult. Unlocks only when you clear Otaku.
Battle System
Do take note that the low hits will only deal to their bottoms. Same applies to middle hits and high hits respectively unless you are playing on Easy, which any hit will deal damage to all 3 parts.
Attempting a Strip on low HP clothes, will trigger a button mash.
Attempting a Strip on 0 HP clothes will directly strip them or tear them if you do not have the respective Skill book required to steal their clothes.
Counter-Attacking is possible. But you can only counter-attack if you countered the right stance. For example, if the enemy hits low, you can only counter-hit a low. If the enemy hits middle, you can only counter-hit middle. If the enemy’s clothes HP is low, counter-strip automatically occurs if the counter-attack is successful.
Stripping and Stealing Clothes
I refer stripping as holding the attack button respectively to strip. If you lack the skill book to steal their clothes, this will tear the clothes instead of stealing them. If you constantly hit a clothes with no HP left, it will eventually shred (which is similar to tear).
LAMMTORRA at NE Main Street for example, sells ‘Gotcha! – 24-Hour Cop-‘ Skill for 100,000 Yen which allows you to steal the clothes of officers. The Skill ‘High School Charm’, for example, is learnt through the Master.
There are also a lot of costumes that only appear once in the whole playthrough (such as the Shrine Maiden costume). These characters only appear during Sub Missions. So if you want to collect them all, take care not to shred the costumes by accident or you would have to re-load your save. If you did overwrite your save, you can always get them again in New Game Plus mode.
Movesets/Skills
- Bare-Handed Additional Movesets (Moving and Heavy Attacks): Can be found at LAMMTORRA on SE Main Street
- One-Handed Additional Movesets (Moving and Heavy Attacks): Can be found at Software Shop on NW Main Street
- Two-Handed Additional Movesets (Moving and Heavy Attacks): Can be found at Software Shop on SW Main Street
- Third Hit Combo Moveset (Attack Lvl 3): Can be found at TOWANIMUSEN on Akiba Station Front
- AOE Attack Moveset: All Fist, One-Handed, Two-Handed can be purchased at third-rabbit on Junk Street
Additional Movesets/Skills:
- High-Speed Tackle – Auto learn at Level 12
- Kamehame Ho – Auto learn at Level 14
- My Figure – Auto learn at Level 18
- Close Quarters – Auto learn at Level 23
- Bat – Auto learn at Level 28
- Vampire – Auto learn at Level 35
- Low Angle Camera (While taking pictures with the camera, you are able to crouch) – Learn after clearing Master Angler’s Bait Sub Mission.
- Foreign Language Dictionary (To Understand English) – Purchase from YADAMA DENKI on Akiba Station Front. This will also help you understand Stall Vendors
- Cross Dress Ability – Clear the Sub Mission ‘Another World’ (You will need to clear it again if you choose to use a female protagonist for your second run)
Signature Weapons (Weapons with special animations or abilities):
- Sister’s Fighting Spirit -> Beat your little sister in her room.
- Master’s Fighting Spirit -> Beat the Master in the Sub Mission ‘Cherry Strikes Back’ (appears during the Shadow Soul route only) and remember to pick it up from the ground.
- Mido’s Fighting Spirit -> Beat Mido in Shadow Soul route
- Darkside of a Maiden -> Beat SGV
- DBP Boombox -> Beat Kitada Sena in ‘Stop DBP’s Plans’
- DBP Microphone -> Beat Kitada Mana ‘Stop DBP’s Plans’
- Night Stinger -> Beat Yu Abeno in Coexistence Route and finish him off if prompted. Remember to pick it up before leaving the area.
- Eclipse -> Beat Rei Anekoji in Coexistence Route and remember to pick it up during Sejima’s fight directly after.
- Sejima’s Rod -> Beat Sejima Ryuji in Coexistence or Shadow Soul endings
No special animation but high base damage:
- Forbidden Book of Akiba -> When friendship with NIRO, Shadow Soul, Akiba Citizens is maxed before the mission ‘Mother Soul Arrives’, then collect from Yatabe during the Coexistence Route . If you did most of the Sub Missions, this will not be an issue.
- Excawibur -> Beat the Battle Arena X Rank Fight
Hidden Relationship Status/Palm-reading
You will know it is Positive when: ‘These lines show great affection. The people of Akiba must love you.’, ‘Oh, this is a trust line! Someone named “NIRO” trusts you implicitly’, ‘A friendship line! With… Who are the Shadow Souls?’
If you strip too many innocent bystanders/civilians, you will notice that some civilians run away from you when they see you.
If you strip too many Shadow Souls, some Shadow Souls will instantly aggro when you get close.
People that rubs their hands and come and talk to you
- Palm-readers: Neutral. They will help analyse what your relationship status with the various groups in the game.
- Youngsters: Bad. They appear at Back Street and If they manage to talk to you, you are given 3 options. If you choose to not give them money, you instantly get into a fight. However, if your relationship status with Akihabara Citizens are high, they would still come talk to you but they no longer will attack you.
- Maids: Neutral. They will invite you to the Maid Cafe. That is about it.
- Charity Workers: Neutral. They will ask you to donate money. If you donate 1 million yen to the Charity Workers in a single playthrough, Suzuna will recover and will spawn at the park in that playthrough for you to fight and obtain her clothes.
- Artlien: Please don’t talk to her lol. Unless you want to purposely go into debt, which in this case, is the easiest way. More on debt at a later section.
Shredding clothes will not award any EXP and there is no defeat bonus for defeating civilians.
There is a chance of a Lost Maid/Lost Otaku spawning whenever you load into a map. They will run the moment they see you. They drop incredibly high EXP (similar to how Metal Slimes in Dragon Quest work) when you strip them. The defeat experience bonus (strip all headgear, top and bottom) is even higher and can easily go above thousands.
Upgrading and Items
Temporary buff items exists too, such as Tauramine X or Can of Ramen, but they only last until you leave the area.
Always carry some UV Cut Sunscreen as they provide 30 seconds of ‘immortality’. It will not prevent your clothes from being shredded or stripped but it allows you to survive without clothes for 30 seconds. You must use it before all your clothes is gone. If the opponent attempts to strip your 0 HP clothing, quickly pause the game and use the UV Cut Sunscreen. When you finish the battle, a portion of your clothes will return back to you. If you don’t think you can finish your opponent off, running out of the map is an option.
Fighting Sara
This will get you the license to fight Sara and obtain the ability to steal her clothes.
Defeating her will get you the Nickname ‘Charismatic Maid’. She will only use her signature weapon on Gamer difficulty and onwards.
Fighting Suzuna
The sister’s room dialogue options and what they do.
- Random Questions you can ask her
- (Praise me) You can give her money and she can directly increase your EXP by cheering you up.
- (Shame me) You can give her money and she can improve the durability of the costume that you gave her to wear up to +99
- (Change) You can give her money to wear any costume of your choosing
- (Look something up for me) Give hints to where items in the category of your choosing can be found
I’ll give you an allowance: Increase affection with sister temporarily and possibly give you a discount when changing her clothes
Getting into debt
To go into debt, you must not be able to pay the amount that you are required to pay. This can happen such as during ‘Rui’s Date’ where you cannot afford to pay the crane machines that she spent or when you ‘unwillingly’ spend at an Artlien.
But because ‘Forgive Us Our Debts’ Sub Mission is nearly at the endgame, Artlien no longer spawns at this point and there is no way to spend money that you do not have other than to get arrested and pay the fine. However, getting arrested is permanently recorded in Record. If you want to avoid this, the only way is to get into debt is to do so before ‘Mother Soul Arrives’
(SPOILER ALERT) Determining which Ending you will go for:
Choosing “Stick with me, and I’ll…” will lead you to the Coexistence Route. Choosing “Let’s go to your mom. It’s the only way” will lead you to the Shadow Soul Route. (Below paragraph will determine which of the two within Shadow Soul Route you will go for)
Choosing “NIRO sucks. I wanna be a Shadow Soul” will lead you to the Shadow Soul – DBP Route. Choosing “To find a way to live together” will lead you to the Shadow Soul – Rui Route (This option only appears if you choose to be friendly towards Rui throughout the whole game).
Sister Ending: Give her 1 million yen in a single playthrough. That’s it. However, it should be noted that the Imouto ending will overwrite the other endings (Shadow Soul, Coexistence and NIRO). It is best to do the Imouto route on an ending that you have already seen.
Hidden Endings (within the Coexistence ending):
In the Coexistence route, there are two characters that you can opt to save them without killing them. This will slightly change what the characters say at the Epilogue.
1. Yu Abeno – During the prologue (the part with Sejima and Mido), if you let him go, the game would give you the option to let him go after defeating him during the final battle. Otherwise, this will result in him dying after you defeat him.
2. Mother Soul (Rei Anekoji) – You must complete the Paparazzi Sub Mission DIRECTLY before the final mission. This side quest only has a very short window and is only available during the The Siege of Akihabara and before going to UD+ for the final fights. This side quest will need you to obtain a Photo of Rui. If you do so, an additional dialogue option (“Rui’s father is close by right now”) will appear just as Rei is going to commit suicide. Saying that her father is nearby watching would give her the courage to continue living. Any other option will result in her death. If done successfully, the Nickname ‘Hope Bringer’ can be obtained.
In the Paparazzi Sub Mission, DO NOT answer ‘You’re no father at all’ and DO NOT let Rui know that you are doing for a client or else, the mission will fail instantly and Rei will die after the final battle
What carries over in New Game Plus Mode?
That’s all we are sharing today in AKIBA’S TRIP: Hellbound & Debriefed 100% Walkthrough and Tips, if you have anything to add, please feel free to leave a comment below, you can also read the original article here , all the credits goes to the original author happynaru
MORE GAME GUIDES FOR YOU
Related Posts:
- AKIBA’S TRIP Hellbound & Debriefed: How to Make Money & XP Easily
Leave a Reply Cancel reply
Your email address will not be published. Required fields are marked *
Save my name, email, and website in this browser for the next time I comment.
- Akiba's Trip: Undead & Undressed
Table of Contents
- Walkthrough
- Side Missions
- Achievements & trophies

- Hellbound & Debriefed
- Undead & Undressed
- Akiba's Beat
- PlayStation 3
- PlayStation Vita
- PlayStation 4
- Nintendo Switch
- Guides at completion stage 0
- Akiba's Trip
- XSEED Games
- NIS America
- Beat 'em up
- Single player
Navigation menu


AKIBA'S TRIP: Undead & Undressed


Akiba's Trip: Undead and Undressed Strategy Guide: Side Missions: Chapter 2
- Silent Mode 2
- Mission: Sister's Wish 4
- Such Dengeki Playstation!
- Look But Don't Touch
- Akiba Navigator
- Favor For Pops
- iDOL dIS@STER
- Akiba's Runaway Train
- Strip Wars: Famitsu Cup
- Maid Cafe Help Wanted
- Like the Start of a Hentai Game
- Proxy Gourmet
- Proxy Attractions
- Look But Don't Touch 2
- Tyrannical Gamer
- Akiba In a Good Light
← Back to Table of Contents
Side Mission 24: Silent Mode 2
Information:
- Available until the start of Main Mission 23
- Objective: Defeat three groups of delinquents
- Reward: 7,500 yen
- Combat required
- This quest can be repeated as many times as you want
Instructions:
Travel to Main Street SE and speak with Akiba Crime Prevention Committee Member. He can be found standing next to a street sign near Granvania. He's in the same spot he was for the first Silent Mode side mission.
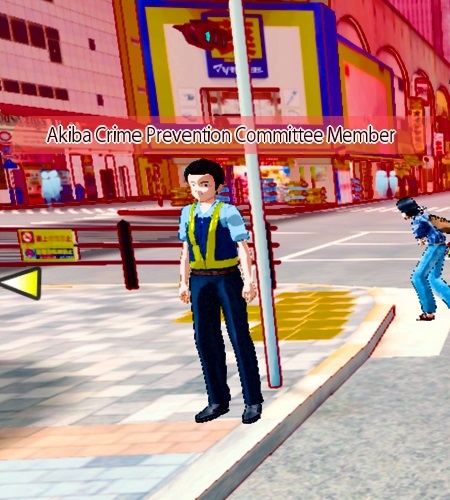
He'll request that you defeat three groups of delinquents. There are three delinquents per group.
These groups can be found in the following areas:
Radio Kaikan Area
Electric Town Plaza
Junk Street
Akihabara Park
Showa Street Exit
These groups appear randomly in these areas. They can be identified by their red name tags. Speak with them and you'll engage in dialogue that leads to combat. Defeat three groups and report back to the Akiba Crime Prevention Committee Member to complete this mission.
You can find the delinquents randomly in the following areas:
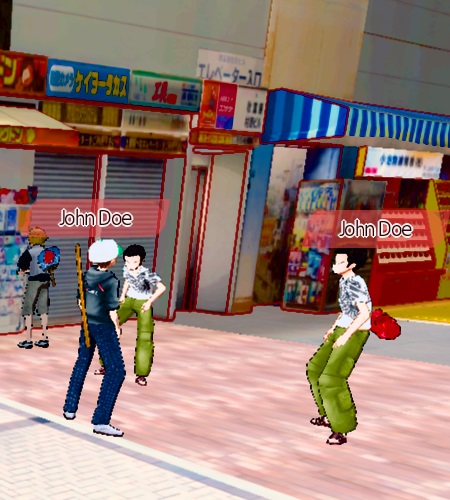
From the fast travel spot, head right. There will be an alley on the right shortly before GAMERS Main Store.
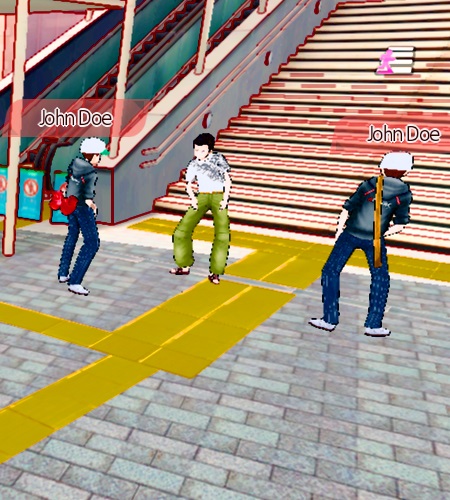
From the fast travel spot, head straight towards the stairs leading to UD+.
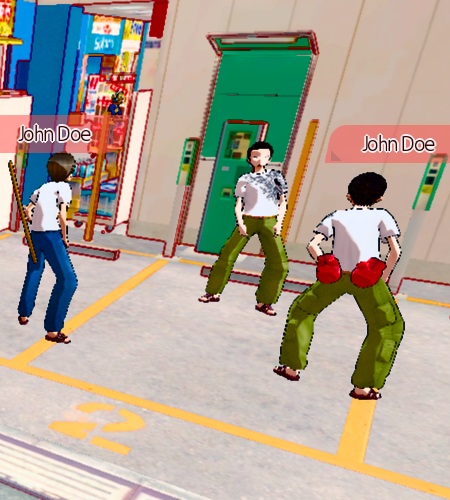
From the fast travel spot, head straight until you reach the parking spaces on your left.
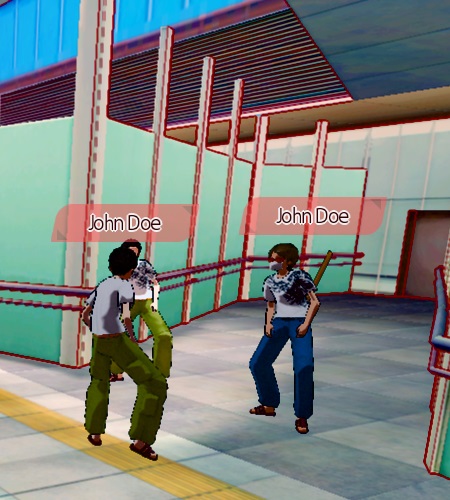
From the fast travel spot, just look behind you towards the left.
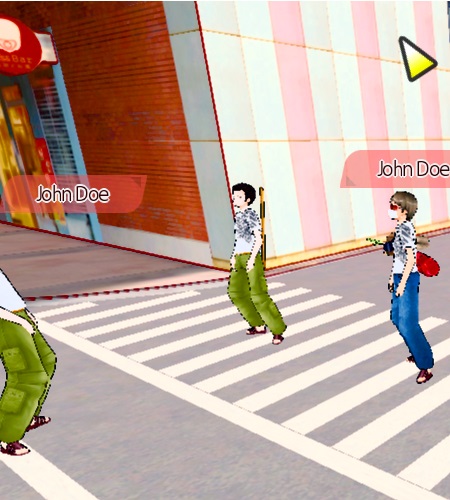
From the fast travel spot, head straight to the crosswalk.
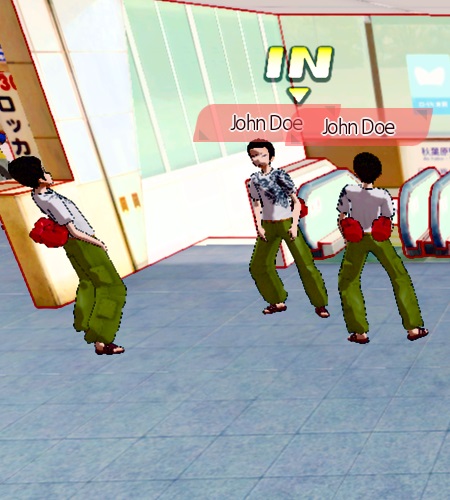
From the fast travel spot, head straight and slightly to the right.
Side Mission 25: Mission: Sister's Wish 4
- This is Sister Mission 4 (completing all Sister Missions is required for Nana's ending)
- This doesn't appear in the Side Missions menu. To trigger this mission, visit Nana. Her name will be red, indicating she has something to say. This mission won't be available unless you completed Sister Mission 3.
- Available until the start of Main Mission 19
- Objective: Speak to Joinus Takabayashi for Nana
- Reward: 10,000 yen
Travel to Main Street NE, head to Toranoana, and speak to Shop Employee outside.
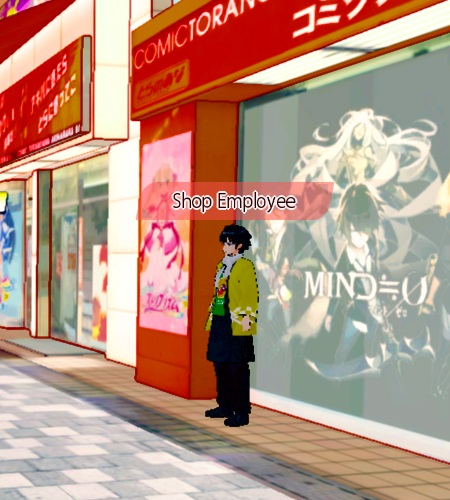
Shop Employee will tell you to check maidreamin at Radio Kaikan Area. Travel there and speak to Maid outside maidreamin.
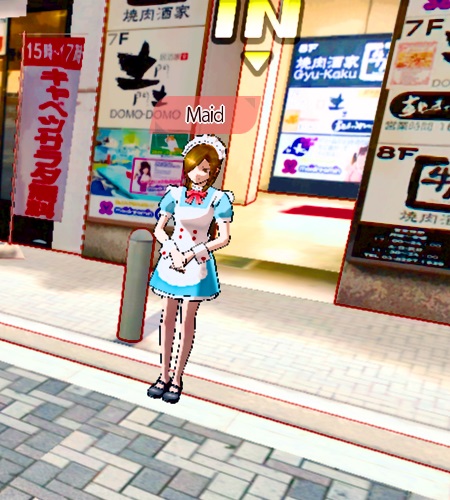
Maid will tell you Joinus Takabayashi is at Akihabara Park. He can be found in the back of the park area.
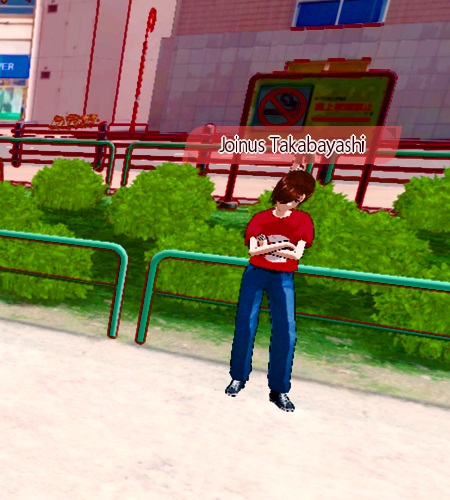
Speaking with him will trigger a fight with a synthister. Defeat the synthister and you'll speak with Joinus Takabayashi again. When you speak with him again, you'll be given several dialogue prompts. You'll succeed no matter which options you chose. After you're done talking with him, return back to Sister's Room and talk to Nana to complete the mission.
Side Mission 26: Such Dengeki Playstation!
- Objective: Fetch "Dengeki Playstation" for Kati
Speak to Kati at MOGRA. She will request you purchase a copy of Dengeki Playstation from YODOBASHI AKIBA at Yodobashi Area.
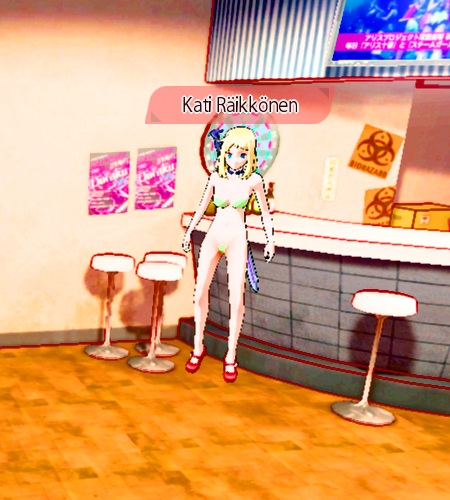
Speak to Shop Employee standing outside YODOBASHI AKIBA.
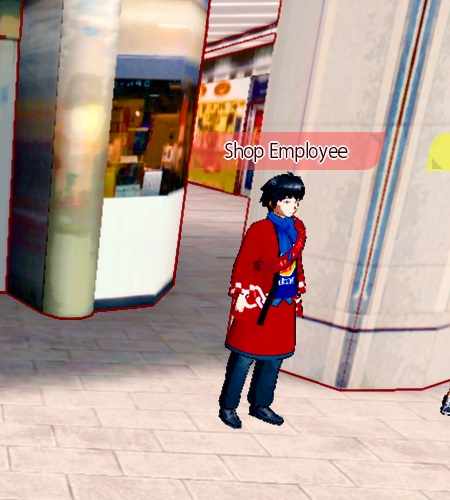
Shop Employee will tell you YODOBASHI AKIBA is sold out. Travel to Radio Kaikan Area and speak to Shop Employee standing outside GAMERS Main Store.
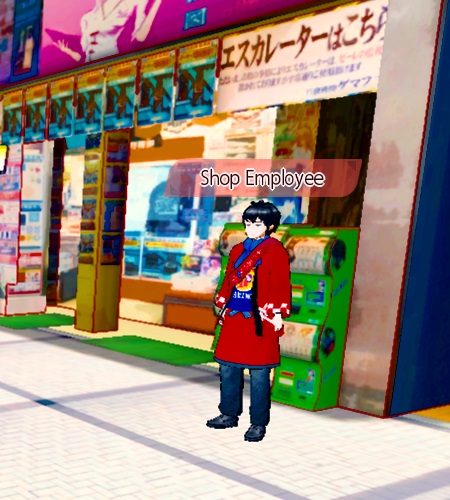
Shop Employee will tell you GAMERS Main Store is sold out. Travel to Main Street NE and speak to Shop Employee standing outside Animate Main Store.
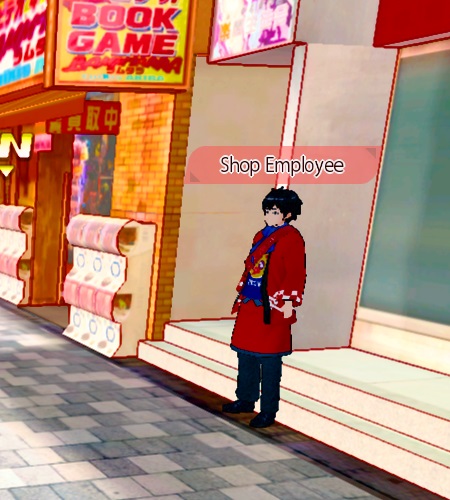
Travel to Side Streets and speak to Striprism Maniac. He can be found outside K-BOOKS, located straight ahead from the fast travel spot.
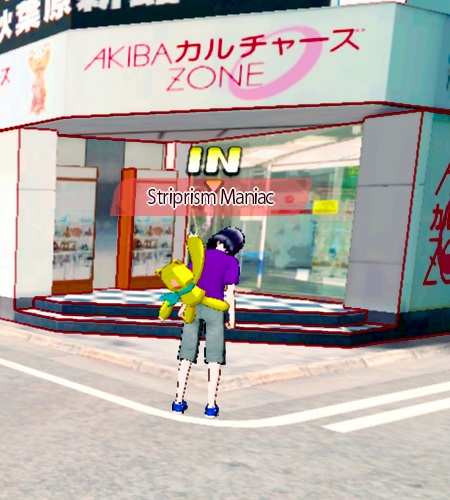
When you speak to Striprism Maniac, no matter what dialogue options you chose, you will fight him for a copy of Dengeki Playstation. Defeat him and report back to Kati at MOGRA to complete the mission.
Side Mission 27: Look But Don't Touch
- Objective: Defeat the three Playboys harassing Schoolgirl
Travel to Radio Kaikan Area and speak to Schoolgirl. She can be found outside the Sega Arcade just to the left of the fast travel spot.
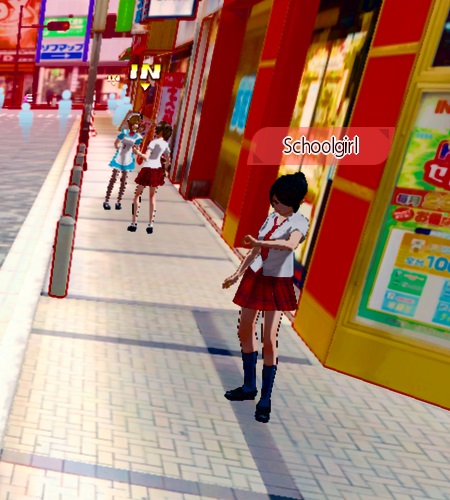
If this is your first playthrough, speaking to Schoolgirl will allow you to dress as a girl now (including in NG+ games). Dress as a girl, then travel to Electric Town Plaza to confront the three Playboys.
They can be found just to the right of the fast travel spot.
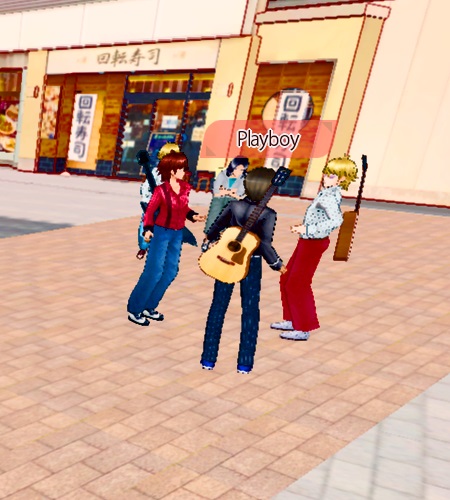
Speak to the three Playboys and you'll engage them in combat. Defeat them, return to Radio Kaikan Area, and speak to Schoolgirl to complete the mission.
Side Mission 28: Akiba Navigator
- Objective: Accompany Wang while he shops
- Reward: 2,500 yen
Travel to Electric Town Plaza and speak to Wang. He can be found directly behind the fast travel spot.
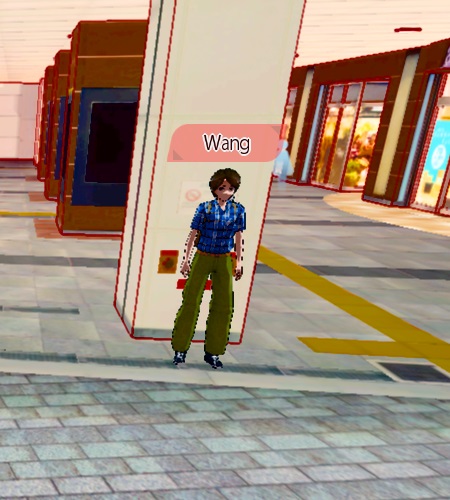
Wang will ask you to accompany him to a few shops. To complete this quest, travel to each shop in the list below. Enter and exit the shop, then wait for Wang to do the same.
The order of shops he'll request you take him to is as follows:
- YODOBASHI AKIBA shop at Yodobashi Area
- TOKIWAMUSEN at Radio Kaikan Area
- LAMMTARA Akihabara at Main Street SE
- sofmap Hon-kan at Main Street NE
After you've taken him to the four shops listed above, he'll request you take him to Anime Center at UD+. This is not an actual shop you can visit, like the others were.
Anime Center can be found in by heading straight back and to the left in UD+. Bring Wang to the door in the picture below and a cut scene will start.
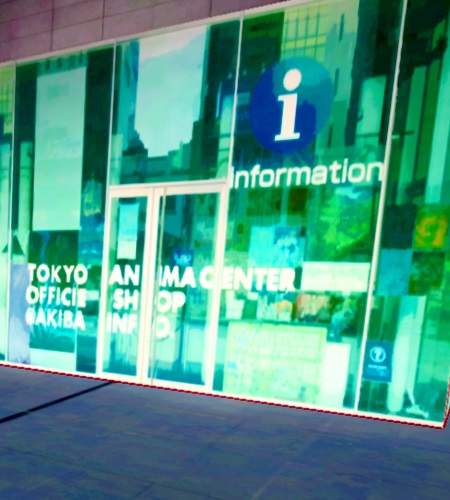
Six delinquents will start a fight with you. Defeat them and speak to Wang outside Anime Center to complete the mission.
Side Mission 29: Favor For Pops
- This is Sister Mission 5 (completing all Sister Missions is required for Nana's ending)
- This doesn't appear in the Side Missions menu. To trigger this mission, stop by Sister's Room and you'll notice Nana is gone. Speak with Pops at MOGRA to get this mission. This mission won't be available unless you completed Sister Mission 4.
- Available until the start of Main Mission 22
- Objective: Fetch "Light Bulb" for Pops
- Reward: 15,000 yen
If you stop by Sister's Room, you'll notice Nana is gone. Speak to Pops at MOGRA to trigger this side mission.
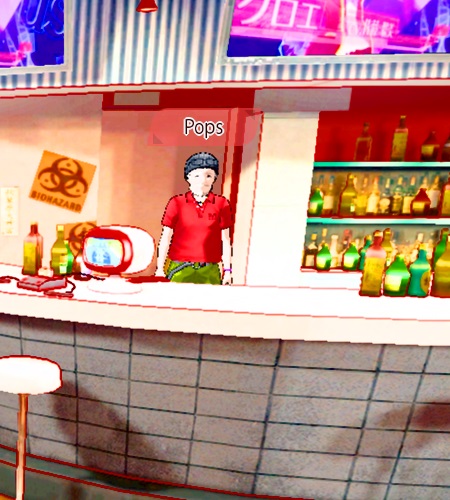
Pops will ask you to pick up a light bulb for him. After the dialogue is over, two girls will enter MOGRA looking for Nana and acting suspicious.
After the cut scene is over, speak to Shop Employee outside sofmap Hon-Kan at Main Street NE. It's directly ahead of the fast travel spot.
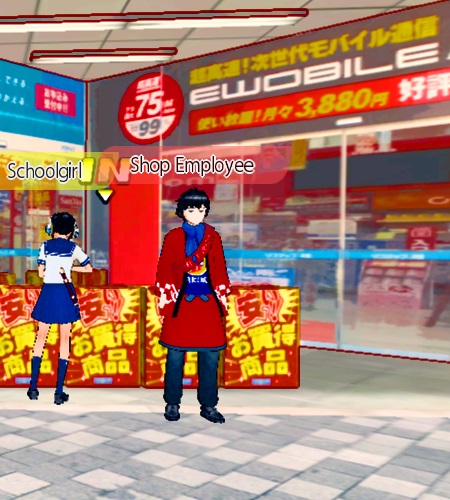
After you speak with Shop Employee, you'll notice Nana and have a quick chat with her. While you're speaking with her, she'll be harassed by three synthisters. When the cut scene is over, you'll fight them. After defeating them, you'll speak with Nana again.
When the cut scene is over, return to MOGRA and speak to Pops to complete the mission.
Side Mission 30: iDOL dIS@STER
- Objective: Defeat all 48 members of AKW48
- Reward: 4,800 yen
Travel to Radio Kaikan Area and speak to Otaku. He can be found standing outside NEWNEYS.
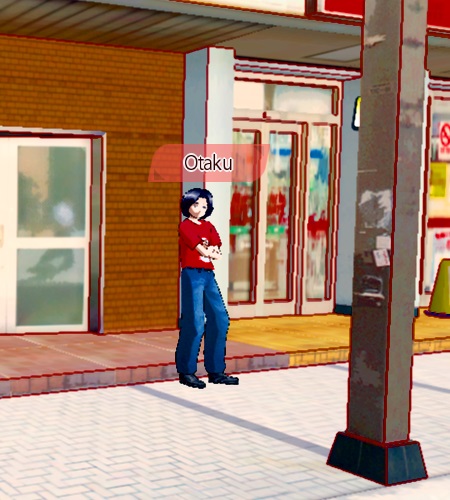
He will request you break up a protest by idol group AKW48. Travel to Electric Town Plaza and you'll find them outside AKW48 Cafe.
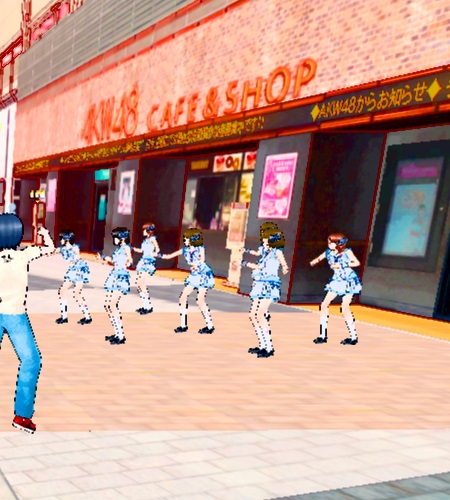
Speak with the idols and they'll engage you in combat. Defeat all 48 members of AKW48 and report back to Otaku at Radio Kaikan Area to complete the mission.
Be cautious with this fight. Don't let the idols surround you, they can do some serious damage if they stun lock you, especially at higher difficulties.
Side Mission 31: Akiba's Runaway Train
- Available until the start of Main Mission 24
- Objective: Defeat Sobu
- Reward: 8,000 yen
Travel to Radio Kaikan Area and just to the right, you'll see Sobu. Speak with him and he'll begin acting strangely.
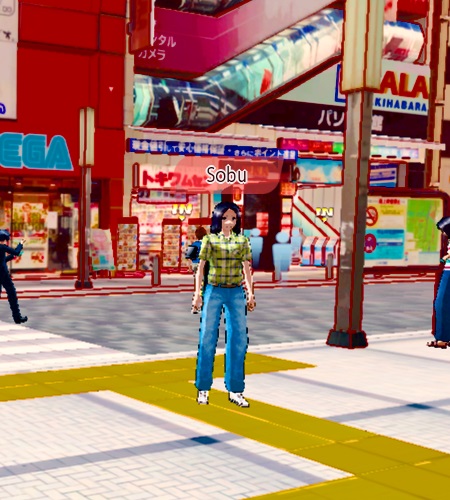
Threaten Sobu and he'll engage you in combat. Defeat him to complete the mission.
Side Mission 32: Strip Wars: Famitsu Cup
- Objective: Help ACQUIRE win the strip battle tournament
- Reward: 10,000 yen & Pantomime Connection (walking animation)
Travel to Radio Kaikan Area and speak with ACQUIRE Staff Member. He can be found straight ahead from the fast travel spot and he'll be on the left, near the end of the area.
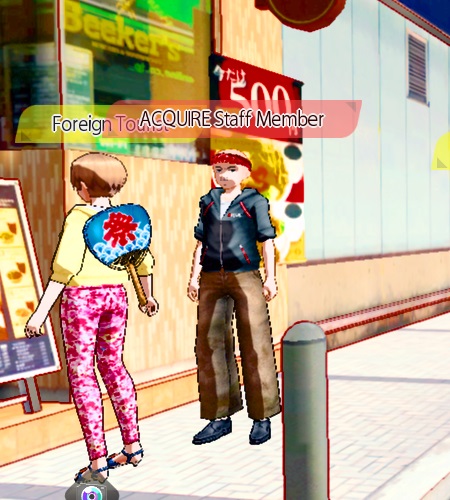
He wants you to compete in the annual strip battle tournament at Battle Arena. Head to Battle Arena and speak to Francois Hayashi to start the fight. For your reward, you'll receive 10,000 yen and Pantomime Connection (a walking animation).
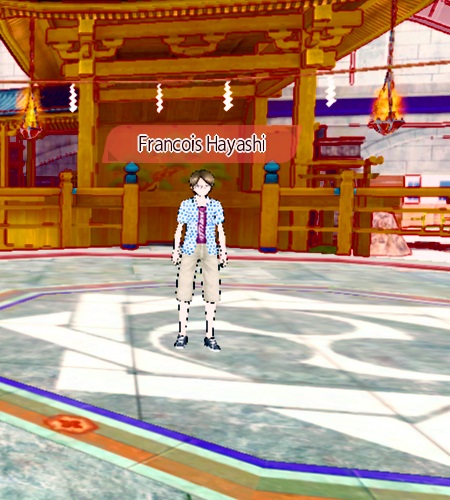
You and three other ACQUIRE Staff Members will face off against two other teams of four and fight until one team wins. This isn't a particularly difficult fight. Defeat the other two teams and return to Radio Kaikan Area and report to ACQUIRE Staff Member to complete the mission.
Side Mission 33: Maid Cafe Help Wanted
- Available until the start of Main Mission 26
- Objective: Help Head Maid recruit women for her new maid cafe
- Reward: 13,000 yen
Travel to Side Streets and speak to Head Maid. She can be found by heading straight from the fast travel spot and taking a right when you reach KOTOBUKIYA.
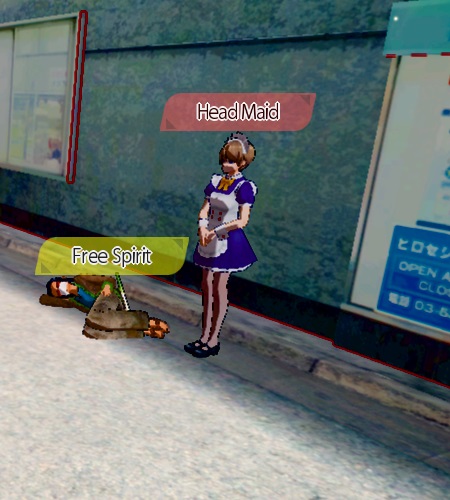
She will request your help recruiting women to work at her new maid cafe. You will be following her to different locations and speaking with women who meet the criteria the Head Maid is looking for.
To complete this quest, follow the Head Maid to the specified area. Look for women with red name tags in that area. Speak with them and pay attention to what they say initially. If they give you the correct introduction (see below), then choose "Explain." and then select "I choose you!" . The Head Maid will tell you if you chose correctly.
The girls are found in random locations, so just keep walking around each area until you find the right ones.
These are the introductions you're looking for from each woman:
- Akiba Girl at Junk Street: "H-Hello. Um... Is there something you need?"
- Schoolgirl at Main Street NW: "Yes? How can I help you? Huh? If I come with you, I'll understand?"
- Office Lady at Yodobashi Area: "Uh...yes? Do you need something?"
- Privileged Skank at Radio Kaikan Area: "Hmmm? What, are you hitting on me?"
WARNING: If you speak to other maids during this quest, both the maid you spoke to and Head Maid may run away, making the quest impossible to complete. The game may freeze as well.
Side Mission 34: Like the Start of a Hentai Game
- Objective: Forgive or fight
- Reward: 10,000 yen
- Combat optional
Head to Side Streets and speak to Yuika. To find her, head straight from the fast travel spot and take the first left. She'll be on the left.
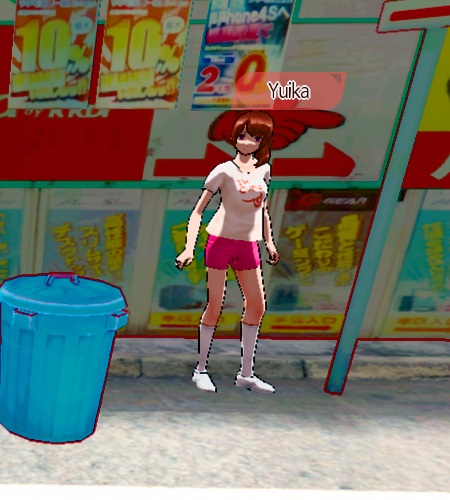
She'll tell you to go to the parking garage at Akihabara Park so she can confess her feelings to you. Travel to Akihabara Park and take a right at the crosswalk. When you walk by the parking garage a scene will play where four girls confess their love for you.
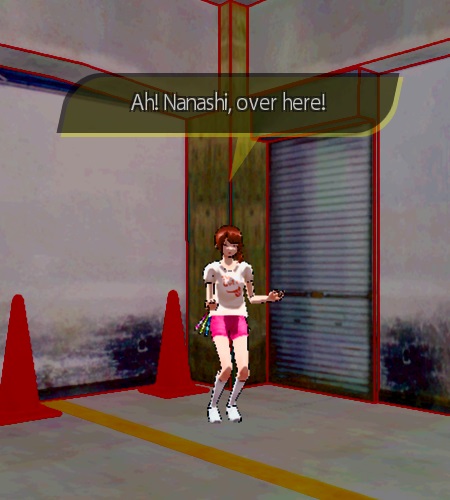
You'll be given a chance to respond to each girl by accepting their love or turning them down. Your decisions here don't matter. Eventually, they'll reveal it was just a prank. You'll be given the option to forgive them. If you do, then you'll receive a new title. If you don't forgive them, a fight will ensue and you must defeat them. The choice is yours. The mission is complete after this.
Side Mission 35: Proxy Gourmet
- Objective: Take four pictures of food ads for Freeman
- Reward: 12,000 yen
Travel to Side Streets and speak to Freeman. He can be found against the wall diagonally across the street from K-BOOKS.
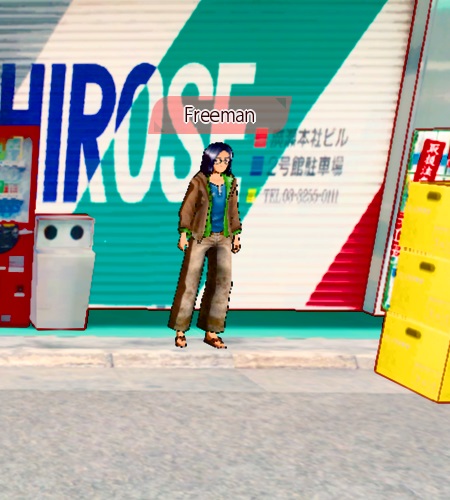
Freeman will request you take pictures of various food ads in Akiba.
The pictures you need are of:
Pasela's Honey Toast at Main Street SE
Hot Dog at Akihabara Park
Dumplings at Battle Arena
GO!GO!CURRY Gorilla at Main Street SW
To complete this mission, travel to the areas listed above and take pictures of the specified food ads and report back to Freeman.
The food ads can be found as follows:
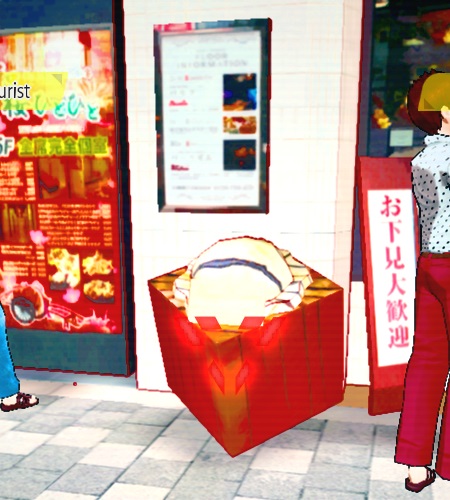
From the fast travel spot, head straight and it will be on the left, just past Suit Store.
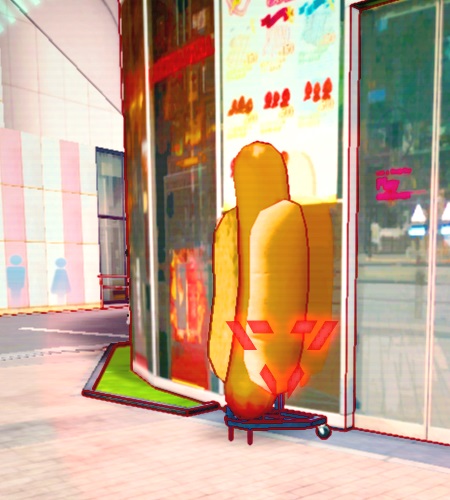
From the fast travel spot, head straight and it will be at the corner by the crosswalk.
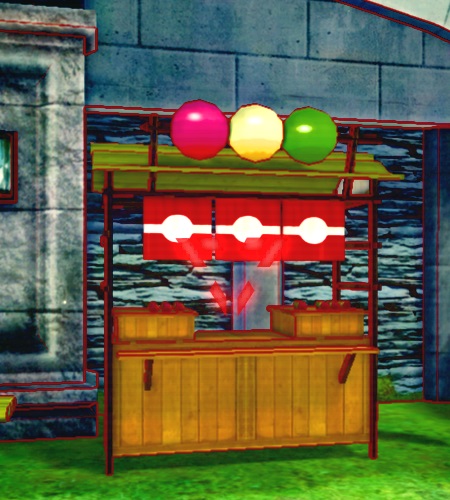
From the fast travel spot, head around to the back of Battle Arena. It will be on the left.
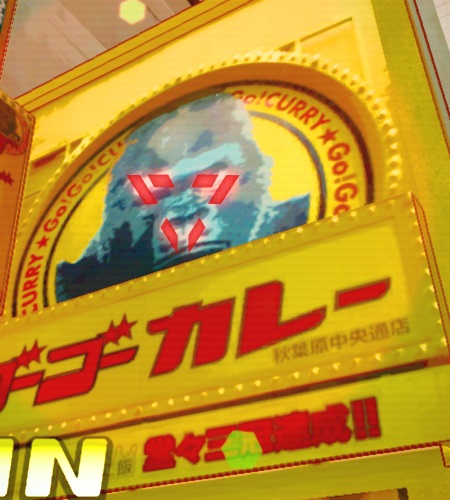
From the fast travel spot, head to GO!GO!CURRY and the gorilla will be right above the doorway.
Side Mission 36: Proxy Attractions
- Available until the start of Main Misison 26
- Objective: Take four pictures of landmarks for Freeman
Travel to Side Streets and speak to Freeman. He can be found against the wall across the street from K-BOOKS.
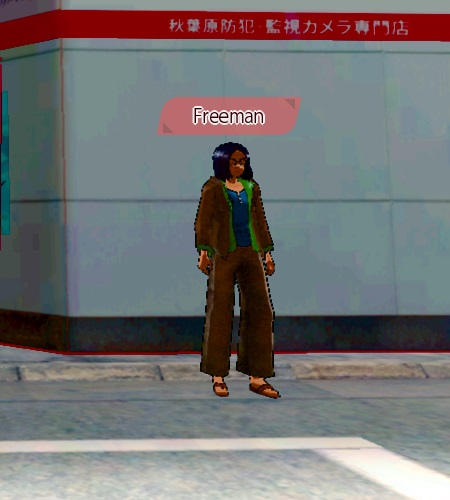
Freeman will request you take pictures of various landmarks in Akiba.
Parking Fare Adjustment Machine at Junk Street
Raffle Stand at Radio Kaikan Area
Mailbox at Akihabara Park
Wall Mural of Pandas at Yodobashi Area
To complete this mission, travel to the areas listed above and take pictures of the specified landmarks and report back to Freeman.
The landmarks can be found as follows:
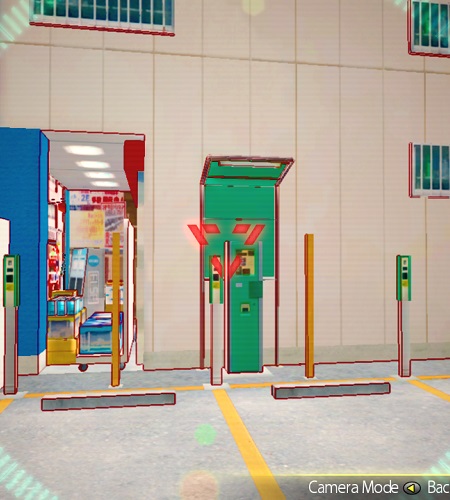
From the fast travel spot, head straight and take the second left to the parking lot area.
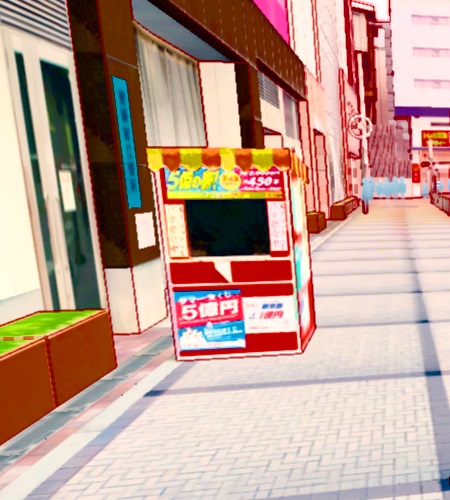
From the fast travel spot, head right. You need to take a picture of this from the front for it to count.
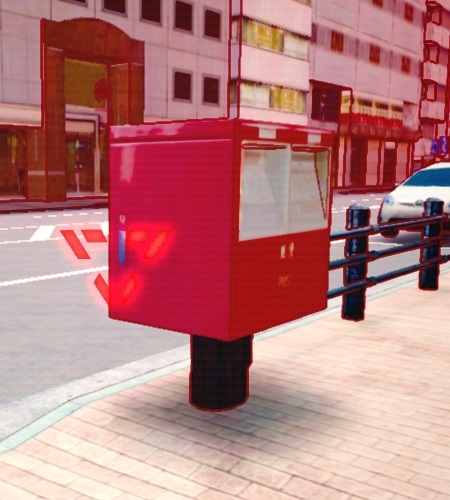
From the fast travel spot, head backwards and around the corner to the left. It will be just outside GO!GO!CURRY.
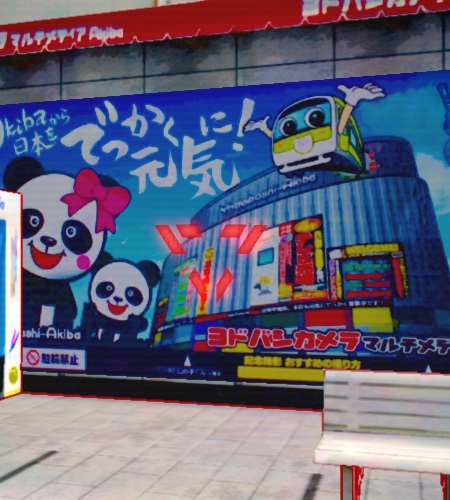
From the fast travel spot, head straight towards YODOBASHI AKIBA. It will be on the right.
Side Mission 37: Look But Don't Touch 2
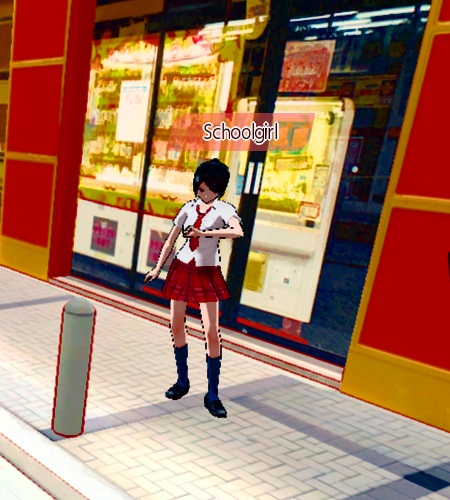
Once again, dress as a girl, then travel to Yodobashi Area to confront the three Playboys.
They can be found right in front of YODOBASHI AKIBA.
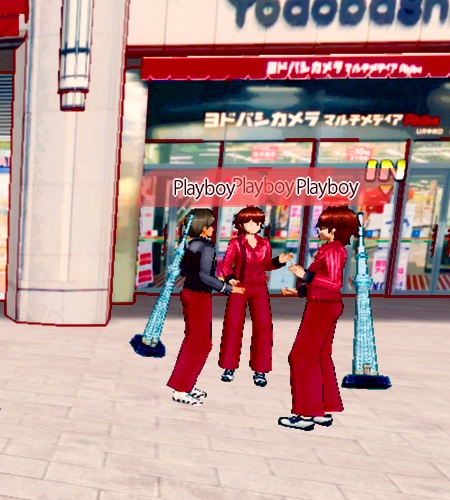
Side Mission 38: Tyrannical Gamer
- Available until the start of Main Mission 28 (Shizuku route)
- Objective: Defeat Arakure
Travel to Yodobashia Area and speak to Arakure. He can be found sitting on a bench outside YODOBASHI AKIBA.
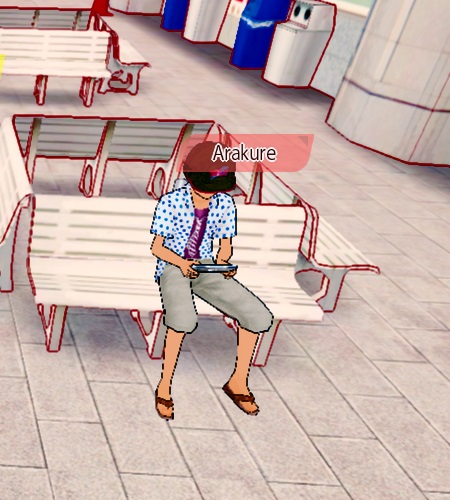
Speaking to him will lead to combat. Defeat Arakure to complete the mission.
Side Mission 39: Akiba In a Good Light
- Objective: Take pictures of six Tourists in Akiba for Chairman of the Tourist Committee
Travel to Radio Kaikan Area and speak to Chairman of the Tourist Committee. From the fast travel spot, head straight and he'll be on the left.
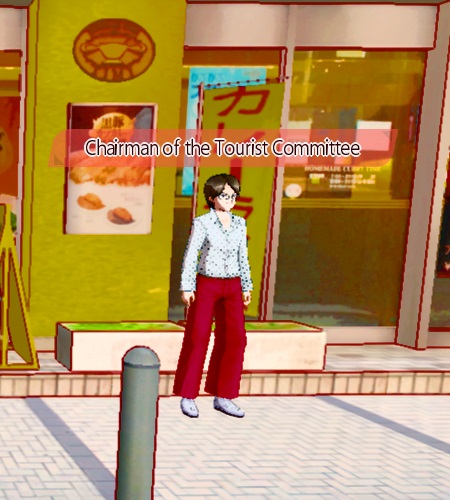
He will request you take pictures with tourists in the following areas:
Side Streets
This quest is pretty straightforward. Visit each area listed above and search for a Tourist walking around with a red name tag. Speak with Tourist and ask to take their picture. Then, simply take their picture and you'll receive an on-screen message indicating it was a great photo. You'll need to take pictures of six Tourists in the five areas (Side Streets will have two Tourists).
Just don't forget to speak to them before taking the picture, otherwise it won't count. Take a picture with a Tourist in each area to complete this mission.
Tourists can be found in the following areas:
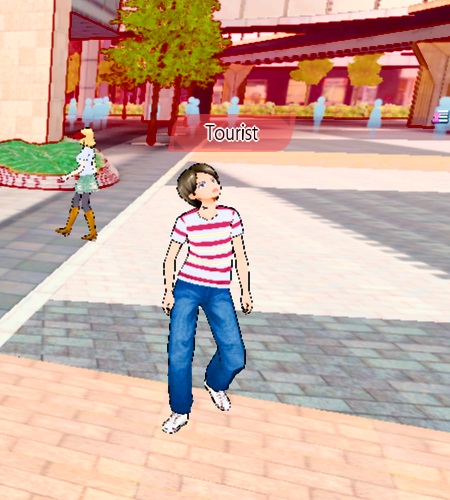
The Tourist in Electric Town Plaza can be found walking around to the left of the stairs leading to UD+.
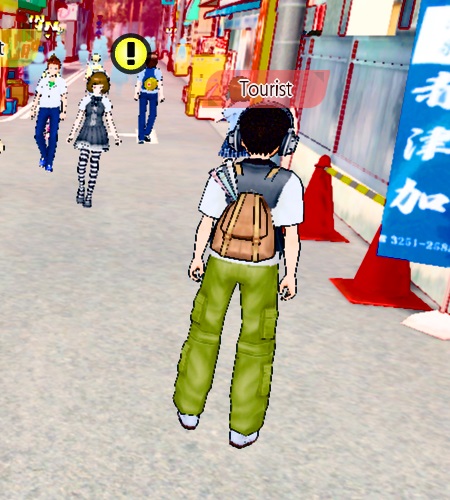
The first Tourist in Side Streets can be found directly ahead of the fast travel spot.
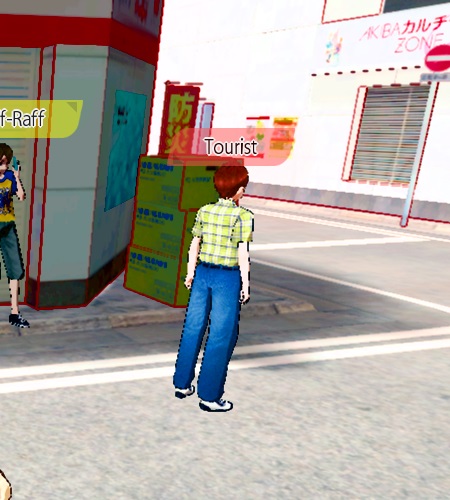
The second Tourist in Side Streets can be found walking around near K-BOOKS.
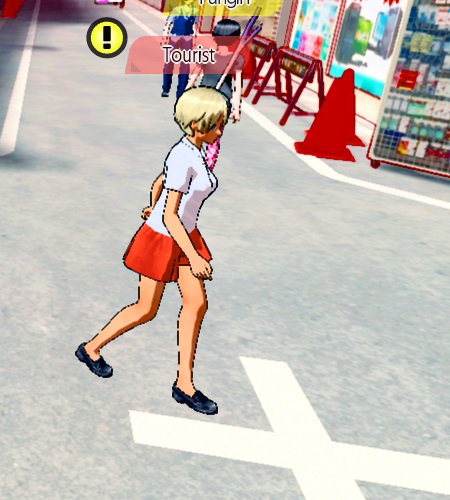
The Tourist at Junk Street can be found walking around the intersection leading to Battle Arena.
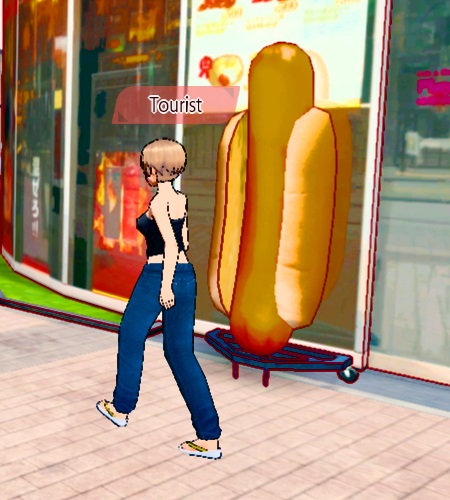
The Tourist at Akihabara Park can be found walking by the crosswalk and sidewalk area directly ahead of the fast travel spot.
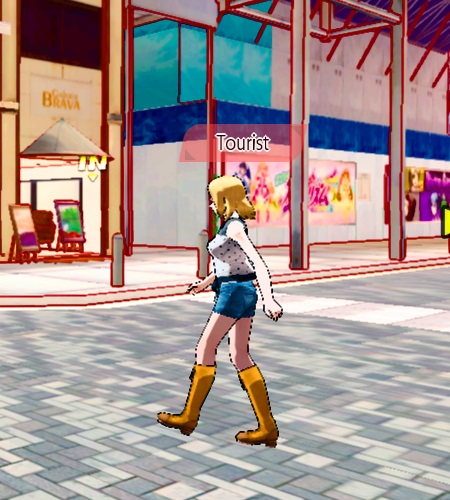
The Tourist at Radio Kaikan Area can be found walking around just to the right of the fast travel spot, before Art Stop.
© 2023-2024 ecchiGamer
- PlayStation 3
- PlayStation 4
- PlayStation 5
- Xbox Series
- More Systems
Akiba's Trip: Hellbound & Debriefed – Guides and FAQs
Nintendo switch pc playstation 4 psp, full game guides.
- Guide and Walkthrough by HyperonicX v.1.01, 35KB, 2021
Want to Write Your Own Guide?
You can write and submit your own guide for this game using either our full-featured online editor or our basic text editor . We also accept maps and charts as well.

IMAGES
COMMENTS
Completion Notes - The Item/Equipment Lists have been filled out. Yay. September 7, 2014 : Walkthrough section is Administratively Complete. Lists will need to be filled in at a later update. March 5, 2014 : Akiba's Trip 2 is being localized as: Akiba's Trip: Undead & Undressed <- This title amuses me greatly. PROFOUND JUBILATION AND LULZ!
Walkthrough. IGN's Akiba's Trip complete strategy guide and walkthrough will lead you through every step of Akiba's Trip from the title screen to the final credits, including every collectible ...
Darkside of a Maiden -> Beat SGV. DBP Boombox -> Beat Kitada Sena in 'Stop DBP's Plans'. DBP Microphone -> Beat Kitada Mana 'Stop DBP's Plans'. Night Stinger -> Beat Yu Abeno in Coexistence Route and finish him off if prompted. Remember to pick it up before leaving the area.
Akiba's Trip: Hellbent & Debriefed Walkthrough Akiba's Trip: Hellbent & Debriefed is a game developed by Acquire and produced by XSEED Games. While it was originally released only in Japan, a remastered version has been recently released worldwide for their 10th anniversary. Table of Contents 1.
Complete Guide to Akiba's Trip. By Fukuyasu. A list of missables , hidden things that is required to complete the in-game Akiba's guide. This includes clothings, weapons, and nicknames mostly. Also general tips on how to fill the Akiba's guide without asking the little sister's help to "google" it. Award.
For Akiba's Trip: Undead & Undressed on the PlayStation 3, GameFAQs has 2 guides and walkthroughs.
Akiba's Trip: Undead and Undressed Strategy Guide. Akiba's Trip: Undead and Undressed. Strategy Guide. Platform: PS3 / PS4 / Vita / Switch / PC. Release Year: 2013. Developer: Acquire. Publisher: Acquire / XSEED / NIS America. Guide Version: 1.1 - Revision History and Credits. Guide includes the Director's Cut DLC.
Akiba's Trip Guide. Akiba's Trip: Undead & Undressed takes players on an eclectic trip through Tokyo's "Electric Town" electronics district in which they will battle vampire-like foes in ...
Akiba's Trip. Japanese title. アキバズトリップ2. Genre (s) Adventure, Beat 'em up. Modes. Single Player. Rating (s) Akiba's Trip: Undead & Undressed Director's Cut.
Akiba's Trip: Undead & Undressed Full Walkthrough Gameplay & Ending on PC in 1080p 60fps. This is my own played and completely edited run that excludes death...
This is the end of Chapter 2. When you return to MOGRA, the dialogue choices available are dependent on which route you're on. If you didn't meet the minimum affection for anyone's route, you'll be put on Tohko's route. From now on, the decisions you make will determine whether you get the normal ending or the true ending for your current route.
A comprehensive walkthrough of Chapter 1 of Akiba's Trip: Undead and Undressed. This includes information about side missions. ... This is a callback to the first Akiba's Trip, where you could also get a game over during the opening dialogue. This is the only time in the game when the wrong dialogue choices can result in a game over.
Support our channel: https://u.muxy.io/tip/bai_gaming https://paypal.me/BAIZEGAMING View ALL our playlists: https://www.youtube.com/channel/UCtISIvF1WYe5Czbi...
After speaking with him, visit Main Street NE. From the fast travel spot, the store is directly ahead of you. Approach the store, a scene will start, and 10 people will begin fighting each other. Defeat them, return to Main Street NW, and speak with Manager again to complete the mission. Back to Chapter 1 Mission 07.
Akiba's Trip Route/Endings Guide. Getting the character routes arnt really that hard, you just need to say certain things like any normal VN to get onto that route. There will be spoilers here so read at your own risk! To use this guide properly, pick one character you like and answer exactly what I have put here in order to get her ending ...
For Akiba's Trip: Undead & Undressed on the PlayStation 4, GameFAQs has 2 guides and walkthroughs.
After this you will get a final quest called "Sister's Bodyguard", while on this quest Nana will talk to some of her friends, you need to pick certain things to say to avoid failing this ending, say the following to achieve it. "I'm Nana's brother.". "Calm down, Nana.". "This sounds like one big misunderstanding.". "Okay ...
For Akiba's Trip: Hellbound & Debriefed on the PlayStation 4, a GameFAQs message board topic titled "Full walkthrough with all endings".
2.0. Got a Akiba's Trip: Undead & Undressed walkthrough, FAQ or Guide? Use the submission form, or email them as attachments to [email protected]. FAQs/Guides are posted in their original ...
If you got Tohko's affection to 100, you'll get her true ending. Tohko and Nanashi agree to partner up to keep helping Akiba and they profess their love for each other. If you did not get Tohko's affection to 100, you'll get her normal ending. Tohko decides to continue making Akiba a better place. A comprehensive walkthrough of Chapter 3 of ...
IGN's Akiba's Trip cheats and secrets guide gives you the inside scoop into every cheat, hidden code, helpful glitch, exploit, and secret in Akiba's Trip. This cheats and secrets page is a stub ...
Anime Center can be found in by heading straight back and to the left in UD+. Bring Wang to the door in the picture below and a cut scene will start. Six delinquents will start a fight with you. Defeat them and speak to Wang outside Anime Center to complete the mission. Back to Chapter 2 Mission 16.
For Akiba's Trip: Hellbound & Debriefed on the Nintendo Switch, GameFAQs has 1 guide/walkthrough.