
7 Creative (& Affordable) Ways To Display Travel Photos
Posted on Published: May 19, 2023 - Last updated: March 25, 2024
Categories Photography , Travel , Travel Tips
I don’t know about you, but when I come back from vacation I have thousands of new pictures. The only question is, what to do with them !
Now that photos live in a digital world, and aren’t automatically printed, they can be easily forgotten which is such a shame.
So, here are 7 creative ways to display travel photos . Whether in a physical travel photo album, a no-frame gallery wall , or a high tech changing photo frame, you can make sure those memories are never lost.
Psst! This blog post contains affiliate links in it which sends me a bit of extra money if you use them… at no extra cost to you!

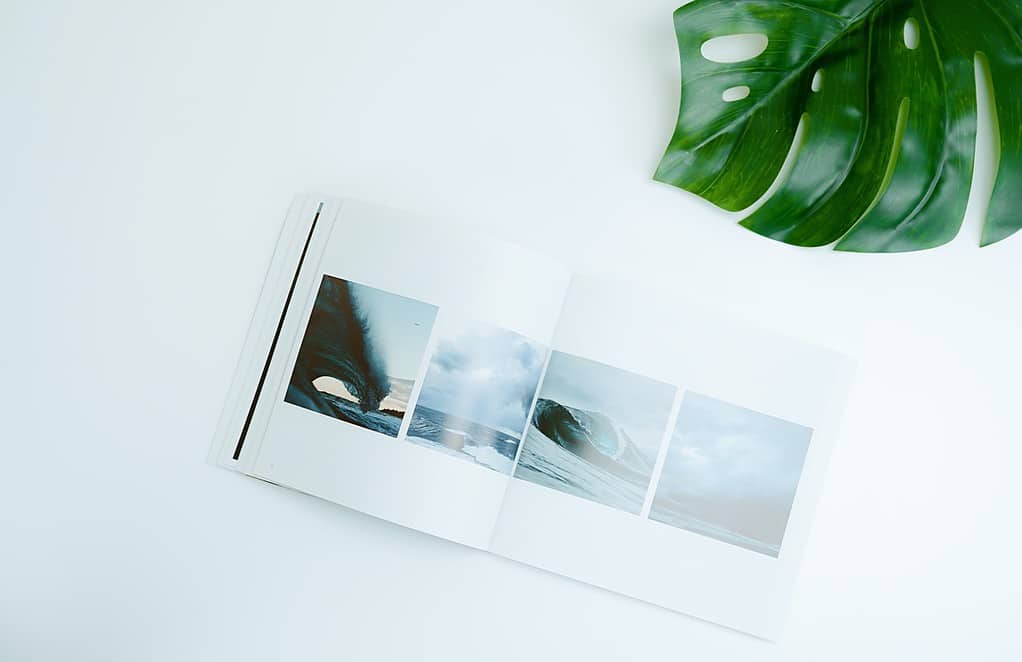
1. Back To The Basics: Make A Travel Photo Album
Making a travel photo album from your digital photos can be done in one of two ways …
The Old School Method: Print & Add Photos Yourself!
Print up all your favourite travel photos the same as when they were taken on physical film. The only difference now is that you can choose to only print the good ones (and eve do some editing before!).
I use Shutterfly to print my photos on standard size prints ( 4×6, 5×7, and 8×10 ), but they also offer square and even large format prints.
You’ll also need to buy a physical photo album to place your photos in once they arrive. And yes, they still sell those!
You can pick up a simple one , like this one on Amazon , to add your photos!
Or, make it more of a scrapbooking project , and buy this album kit to make a truly one of a kind album!

The New School Method: Travel Photo Book
Instead of spending time printing individual photos and adding them to an album, you can do that all digitally. Again, I like to use Shutterfly to make my travel photo books.
It’s more like making a digital scrapbook that you print all at once on one page. You can add different sized images, borders, even stickers, and of course comments!
I make one for every each trip I like making mine 8×8 hardcover books. The lay flat option looks incredible too, but it will add cost of course!
Shutterfly gives you the option for full control over designing your travel photo album. I’ll admit, it’s a big time commitment, but it’s really interesting to see how my editing style has changed over the years!
But if you don’t have time to spend editing, they also give you the option to have them design it for you in 24 hours … free of charge.
Once your travel photo album arrives, leave it on display so you can pick up anytime you want to relive your trip. Or for guests to peruse at their leisure, just like an old school travel photo album!

P.S. Shutterfly often has discounts on their books as well, and now they’ve even partnered with Costco giving members 51%.
2. Display Travel Photos By Printing Them On Something Fun!
On Shutterfly, you can also make your photos into so many other fun creations !
So why not print your photos on a pillow, mug, a calendar for the following year, or even a customized luggage tag for your next trip .
I’ve printed my travel photos on a mousepad and fridge magnets, and it’s such a fun way to subtly display your favourite photos from your latest trip!
Check out all the creative options on Shutterfly !

Ideas To Display Photos On Wall
A very common way to display your favourite travel photos is to print them and hang them somewhere in your home.
But the question is, how do you display them on your wall once they’re printed!? Well there are a few options, with pictures frames and without !
3. Creative Ways To Display Photos Without A Picture Frame
There’s no denying, the most expensive part about hanging your photos on a wall is framing them!
So I came up with a creatives ways to display a lot of photos without the need for any frames at all: a growing travel photo wall!
I chose the biggest emptiest wall in my house and printed as many photos as I wanted in a square template. I simply tape as many photos that could fit on the wall.
Don’t worry, I have a full how to make a growing travel photo wall post here .
It’s an inexpensive way to display A LOT of travel photos all at once for everyone to see. I’m also able to easily add to it after every trip – the only real limit is the size of the wall! Plus, it’s a no brainer to mount the photos and even remove them, it doesn’t damage the wall at all!
I’ve added to, and even moved my photo wall now several times! It’s a real show stopper as well when ever anyone comes over. It’s a fun game to see what locations people can recognize.
Step It Up A Notch
If you aren’t sold on the no-frame idea, you can easily step up your photo wall by buying an extra large frame to add all your photos to.
This way, your photos are protected, and it looks a tad more professional! But, it will definitely cost you!

You might also be interested in reading…
- How To Make A Removable Photo Wall (Perfect For Travel Photos)
4. Make A Gallery Wall Or Photo Grid With Travel Photos
For a more traditional way to display your travel photos on your wall, you can also frame them.
For a fun look, create a travel gallery wall with different sized prints and frames. It’s easy to add new photos, and they don’t have to be measured perfectly, or even match!
For a more uniform look , print the same size photo and place them in the exact same frame. It’s a more serious way to display your photos but I find it works really well for themed photos.
For example I printed up all my lighthouse photos from Prince Edward Island and displayed them in my long – and otherwise empty -hallway.
You can also change the photos in the frames after every trip!

5. Make A Canvas Print (DIY Option)
One of the most creative ways to display photos without frames is to print them on a canvas.
Canvas prints are beautiful and really make a statement on your wall – without the need for any frame at all!
I love the look of photos printed on canvas, but I’ll admit they can definitely add up to a hefty bill (especially for the larger sizes). Several places offer photos prints on canvas, like Shutterfly , or you can attempt to make it yourself…
You can actually transfer a photo print to a canvas yourself. It will cut costs in half, and it makes a really neat rustic look too! Read the full DIY project here.

Non Print Ideas To Display Photos
You might not want to spend time, money, or even paper to print and display travel photos from your latest trip, so here are two no print ideas to display photos !
6. Invest In A Moving Picture Frame
A moving picture frame is a hassle free, no printing, way to display travel photos.
It’s a bit on the pricey side at the start, but you’ll save a lot of time, money, and paper in the long run .
It’s so easy to change the photos it displays, and add more after every trip! You have a constantly changing loop of photos.
I have a Google Nest Hub , and honestly I don’t use it for much else other than displaying my travel photos from my most recent trip.

7. Make A Personal Blog For A Non Print Option!
A blog is your own personal website where you can add your favourite travel photos.
It’s your own online space that’s easily accessible and you can even share the URL with friends and family to see (don’t worry, it doesn’t have to be a public blog).
Sign up for WordPress.com , it’s completely free to start adding your photos! You can even add comments to share your favourite stories from your trip with each photo!

The ultimate digital travel bundle: travel planner & daily travel journal
My digital travel planner template has everything you need to plan your vacation. And keep track of your travels every day with my digital and printable travel journal .
See the bundle on Esty .

P.S. Learn How To Take Better Group Travel Photos
Stop taking selfies or asking someone to take a photo of you while you’re away. I have a few handy travel photo gear I always bring with me to take the best photos of myself and my travel partners – every time!
Although, if you learn how to take better photos, you might just have a harder time deciding which ones to display when you get back…
Anyway, it’s all about a remote shutter, a mini tripod, and a phone adapter… read more about how to take the best travel photos .
Travel Photo Gear

Read More Related Posts
- How To Take Group Travel Photos By Yourself: My Secret Hack
Click Image To Share Or Save This Post

Last update on 2024-04-23 / Affiliate links / Images from Amazon Product Advertising API
Liveshare Moment
Wednesday 30th of August 2023
These 7 tips you mentioned will be very helpful to travelers to create and display their travel albums. Nice information Thanks for sharing...
Friday 22nd of September 2023
Thanks! I hope so :D
Everything You Need to Finally Organize All Your Old Trip Photos
By Alex Erdekian

All products featured on Condé Nast Traveler are independently selected by our editors. However, when you buy something through our retail links, we may earn an affiliate commission.
To me, there's no better souvenir than a photograph . A picture preserves a moment; and since there are many moments I want to remember, I've ended up with lots of shots. But it's tricky to figure out just how to organize photos. Over the years, I’ve found myself with thousands of them, more than I''ll ever need, and that’s a shame. I didn’t spend all that time taking pictures in Florence , Strasbourg, Nantucket , and Naxos to have them waste away in the cloud, collecting digital dust. Compound my photographic habits with other factors—the existence of Instagram, more accessible digital photography, and increased bytes of storage on smartphones—and you'll see my dilemma. And I doubt I'm alone.
Marie Kondo addresses this conundrum in her book, The Life-Changing Magic of Tidying Up . She recommends consolidating pictures by examining them one by one, so that you can process each photo individually while identifying the few keepers. She writes: “With this method, you will keep only about five per day of a special trip, but this will be so representative of that time that they bring back the rest vividly. Really important things are not that great in number.” (For this reason, I'm now shooting fewer, more intentional shots on film and am laying off of digital for a while.)
Right now, many of us remain house-bound, with our formerly busy lives on pause. But the situation also presents an opportunity to reflect on the experiences we’re fresh off of, through the photos we've taken. So what better time to put them in order? Once you've pared down your camera roll, you can showcase your memories in an engraved leather scrapbook, sleek hanging frames, glossy printed photo books, or a digital picture frame. You’ll appreciate them so much more once you’ve swapped your JPGs for keepsakes. Below, an easy guide to how to organize your photos.
All products featured in this story are independently selected by our editors. However, when you buy something through our retail links, we may earn an affiliate commission.

Consider storing your files on an external hard drive
The first rule of photo organization is to back everything up. External hard drives aren't new, but whether you’ve yet to start using one, had one and lost it, or simply don’t maintain yours, now is the time to add one into your digital routine. Storing photos on a hard drive means they're protected if your devices get lost, are stolen, or crash; hard drives also provide maximum storage capacity and free up space on your computer and phone, increasing those devices’ speed and ability to function. The LaCie 2TB Rugged Mini is ideal for travelers due to its shock- and pressure-proof design, rubber sleeve, and portability. Its 2TB storage capacity is plenty for the average user—if you use it only for pictures, it would hold about 500,000. I use my own drive to organize my photos, housing them in folders labeled by trip and date, and then sorting those into two buckets—“all” and “selects”—so that my best shots are readily available.
Buy now: LaCie 2TB Rugged Mini External Hard Drive, $98, bhphotovideo.com

Tame the chaos with a photo organization app
Even with a powerful external hard drive at your disposal, floods of files can become increasingly out of control. For this reason, having an app that reins in the mayhem is essential. Photo Sync is a great one for a few reasons. It addresses the issue of multiple platforms, transferring and syncing photos (automatically, if you like) through Wi-Fi, Bluetooth, or a hotspot between phones, computers, drives, and services like Dropbox, Flickr, and Google Photos. It keeps them tidy with the option to delete photos after transferring (see you never, duplicates). And it even has customizable category, subcategory, and file-naming systems that it maintains for the user automatically. To get the most out of the app, invest in the $1 per month premium version (iOS only).
Download now: iOS , Android

Treasure your trip with a one-of-a-kind scrapbook
Etsy's collection of gorgeous goods is no secret, but some of the craftsmanship you’ll find on the platform is truly stunning—one example of which is this highly customizable photo album. Wooden covers come in a choice of maple, oak, rosewood, walnut, black, or light black; you also have your pick of black or dark brown leather binding, black or dark brown sheets of paper, a choice of dimensions, and number of pages. The most special part of all though, might be the cover engraving, for which customers can select any image or text they like. We love the map carving and beautiful cursive shown in the example above.
Buy now: Travel Photo Album, from $56, etsy.com

Hang prints of your trips around your home
Getting quality prints of your photos produced and framed can be a tedious, multi-step (not to mention, expensive) process. Online photo and design marketplace Minted streamlines it, letting you choose a style, size, and one of 16 frame options in one fell swoop. Two especially nice styles for trip photos are the With a Heart - Landscape print, which adds a small heart to the bottom of the frame and provides an elegant text option beneath your image, and the Love Location print, which collages images into the shape of a map (templates of Mexico, Australia, California, and more are available.).
Buy now: With a Heart - Landscape framed custom photo (20" X 16"), $192, minted.com Buy now: Mexico Love Location framed custom photo art (20" X 16"), $158, minted.com

Bring your camera roll to life with a mini Bluetooth printer
To give your camera roll pictures more value in an instant, consider an iOS- and Android-compatible printer. Polaroid makes one of the best-rated models on the market: It connects to phones via Bluetooth and prints two-by-three-inch prints, which have sticky backs and are smudge-proof, tear-proof, and water-resistant. The special zink (zero ink) paper translates to speedy development, too. This gift set option comes with tons of fun goodies and accessories, including a memory book that holds 64 photos, a set of fine-tip colored markers, sheets of stickers, and photo borders.
Buy now: Polaroid Zip Wireless Mini Printer gift bundle, $183, amazon.com

Digitize your ‘90s snaps with a photo scanner
We’ve covered a lot of ground on how to make hard copies of your digital photos. But what if you need to do the reverse? Whether you're the family’s designated archivist, have a penchant for snapping Polaroids at parties, or are a sucker for throwbacks, a reliable, quality scanner is a necessary tool. This Epson Model is lightning-fast, scanning one photo per second.
Buy now: Wireless High-speed Photo and Document Scanning System, $530, officedepot.com

Keep things compact and modern with a digital picture frame
One of the best ways to display digital photos might just be with a device specifically designed for them. One advantage of digital photos is that they lend themselves so easily to slideshows, which digital picture frames display superbly. This 15.6-inch, 16GB Wi-Fi-connected Feelcare model stands out for its unusually large size, really spotlighting images rather than letting them blend into living room decor. Reviewers rave about the vivid photo quality, amplified by the frame's high-resolution screen.
Buy now: Feelcare Digital Picture Frame, $210, amazon.com

Tell the story of your journey in an elegant, classic photo album
To chronicle a special trip, like a honeymoon , big birthday celebration, or life-changing voyage , a high-quality traditional photo album might be worth the investment. Custom photo gift company Artifact Uprising's Layflat photo album beautifully captures any life milestone, with a linen hardcover that comes in colors like emerald, rose, and oatmeal; a hand-bound spine; and foil title stamp of your choosing.
Buy now: Layflat Photo Album, from $149, artifactuprising.com

Transform your Instagram grid into wall decor
Remember about three years ago when having a color-coordinated Instagram grid was all the rage? We may not miss that high-maintenance approach to social media, but we have nothing but respect for the utter devotion to a look , especially when it can be turned into home decor. Framebridge offers a set of nine square-shaped, golden frames, which add up to a perfectly symmetrical, tic-tac-toe-esque hanging arrangement—use it to bring that satisfyingly neat, white-bordered look from the ‘gram to your walls.
Buy now: The Mini Grid, $349, framebridge.com

Create a no-frills album quickly and inexpensively
From shooting and editing to organizing and printing, maintaining a photo collection is no small amount of work. Chatbooks, a platform that produces photo albums, offers a great way to keep it simple. All you have to do is upload and select your photos, and Chatbooks arranges them chronologically with one per page. The only other steps are adding captions and rearranging photo order as you please, then choosing a cover.
Buy now: Rifle Paper Co. Road Trip cover, from $13, chatbooks.com Buy now: Rifle Paper Co. Wanderlust cover, from $13, chatbooks.com Buy now: Rifle Paper Co. Best Trip Ever cover, from $13, chatbooks.com
Packing List
By signing up you agree to our User Agreement (including the class action waiver and arbitration provisions ), our Privacy Policy & Cookie Statement and to receive marketing and account-related emails from Traveller. You can unsubscribe at any time. This site is protected by reCAPTCHA and the Google Privacy Policy and Terms of Service apply.
Travel Photos: 12 Creative Ways to Actually Share and Display Them
Your plane has landed, you’ve unpacked your bags, and you can finally begin to think past the fog of jet lag. Just because your vacation is over doesn’t mean you forget about the magic of your recent travels.
Whether or not you regularly takes photos of life’s everyday moments, chances are you take travel photos while on vacation .
And what you need are creative ways to share and display your travel photos so you can revisit those special moments… and maybe Instagram captions for travel photos too!
Table of Contents
Discover Creative Ways to Share and Display Your Travel Photos
As an affiliate, I earn from qualifying purchases. This page may contain affiliate links. I would love your support through clicking on the links. Read the full disclosure here.

When you return from a trip, are you the kind who keeps all of your photos on your phone to scroll through as you wait in line at the drive-thru?
Are you a photographer extraordinaire yet still have over 2000 photos from a recent trip on your SD card and your phone? How about a stash of photos from your previous travels?
My favorite photographer, Audrey Ann at LiveSnapLove.com , shares a few tips on how to upload and organize those photos if you are at a loss or new to travel photography.
PS. She offers some FREE cheat sheets and some pretty great courses too!
- Free Manual Mode Cheat Sheet
- Free Lightroom Starter Kit
- Free Aperture Cheat Sheet
- Free 90-Day Starter Kit
- Launch into Lightroom Course
- Auto to Awesome Course
Read on to be inspired with creative ways to share and display your travel photos and keep the memories of your travel experiences alive.
>>Related: 5 Best Travel Photography Courses for Beginners
1. Create a Look Book or Travel Photo Album

Over the past ten years, I have created travel photo albums specifically focused on a travel destination or a “year in review” that featured family vacations and epic destinations. My girls often pull out these books on a rainy afternoon. They make a perfect memento or gift for kids and grandparents at Christmas too.
TIP * Make books for each of your travel destinations as a way to journal your travels. If you have never made one, I think you would be surprised to find just how quick and easy they are to make.
Online Options:
2. Create Wall Art

Are you wondering how to display travel photos?
My husband surprised me with a Christmas gift one year of one of my favorite prints of all time. I captured the photo in Lourmarin , France as he and I explored the South of France together. The metal print now hangs in a niche in my front entry and regularly receives comments such as, “Wow, what an amazing photo?” or “Where did you get that?”
- Metal Prints
- Framed Prints
- Turn Your Photos Into a Painting
>> Related: 5 Spectacular Days in the South of France
3. Create a Travel Photo Gallery Wall

Sometimes our most favorite photos and memories are nicely catalogued and filed on our computers but could be used to decorate a room or a wall.
The cost of printing your photos is relatively inexpensive and you can often have them in less than an hour.
Create memorable travel moments in your home that inspire you to reminisce or to plan your next trip.
Take Photo Tours
4. upload to a photo sharing site.
There are a variety of sites that will allow you to store and share your photos:
- Amazon Photos
- Google Photo Sharing
5. Create and Send Gifts to Family and Friends

Beyond the photo books, many companies feature additional products that allow you to use your own photos to create works of art or mementos that you use daily. You can have your face immortalized on:
- Drink Coasters
- Travel Photo Mug
- Photo Panels
- Luggage Tags
6. Create Postcards to Send
Send an actual postcard by mail. What? That’s so 1990.
But who doesn’t love to receive a personalized note in the mail ? Better yet, who doesn’t love to receive a personalized letter in the mail with a beautiful picture that YOU took?
Astound your friends (and the delivery person) with your talent.
7. Use Your Photos as Screen Savers

- Stream photos as a Digital Screensaver on your TV – Many TVs come with streaming options and instructions on how to access your photos
- Use your travel photos as your Lock Screen and Home Screen on your phone
- Purchase a Digital Photo Frame for your home or to send photos to grandparents
>> Related: 15+ FREE Gorgeous Photos: Wallpaper for Your iPhone to Inspire Travel
8. Create a Personal Blog to Share Your Travel Photos
You can create a personal, diary-style blog to share your travel photos and everyday snapshots with family and friends. WordPress.com or blogger.com make this easy to set up.
I started on Blogger for my personal blog and found it easy as a newbie to use and personalize. Not only do my girls have a written record of their life, but they also have corresponding pictures from the time they were infants.
Tip * My best piece of advice to couples starting a new life together: keep a blog of your life as your family grows. I promise, someday your kids will thank you.
9. Create a Professional Travel Website

If you dream of creating a website dedicated to travel (or parenting or recipes or whatever) these are the steps to begin your journey:
- Step 1: The Best Way to Pick Your Niche and Choose a Domain
- Step 2: The Best Way to Choose a Hosting Plan and a Provider
- Step 3: The Best Way to Create Your Website
A blog is a fantastic medium for journaling travel experiences (or parenting or recipes or whatever), adding your travel photos, and beginning to share itineraries, tips, and practical advice with would-be travelers.
10. Post Your Travel Photos on Social Media
- Upload Photos to YouTube – Upload to your YouTube channel (set to private if you wish), and you have a virtual album of your trip you can watch on the big screen or send to Grandma.
- Create a Travel Instagram Site – Share your pictures with family and friends or work to create a following to grow your brand. Learn some of the Best Selfie Poses for awesome shots.
- Share on Twitter
- Add Photos to your Facebook feed
- Save photos on Pinterest
- Are you TikTok-er?
>> Related: Inspiring Instagram Captions for Travel Photos
Captions for Travel Photos
If you are looking for Instagram captions for travel photos, check out all of the these posts:
- 109 Beach Captions for Instagram
- 101 Best Travel Quotes for Instagram to Inspire Wanderlust
- 103 Romantic Instagram Quotes for Couples Who Love to Travel
- 100 Inspiring Instagram Travel Captions
- 300+ Instagram Content and Travel Caption Ideas for Bloggers
11. Sell Your Travel Photos

I have not had any experience selling my photos to stock photography websites or online marketplaces. You can learn more about that through research or online tutorials.
I do sell my photos on Just Wander More. Contact me if you are interested .
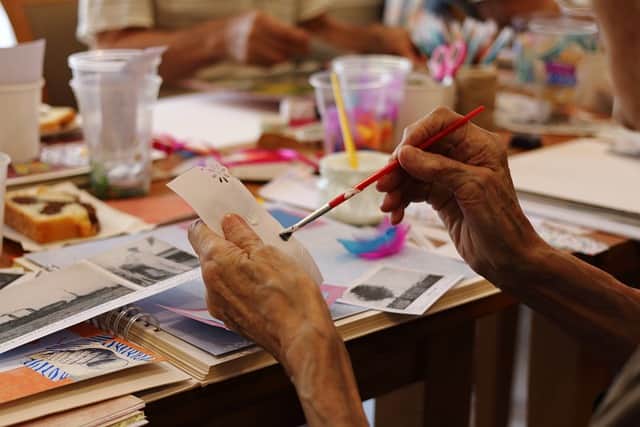
12. Create a Scrapbook Using Your Travel Photos
Are you an avid scrapbooker? I was always too busy blogging to add one more medium to my efforts to journal my travels, but many of my friends love the scrapbooks they have created over the years.
You will want to collect and save memorabilia from your trip such as ticket stubs, vouchers, a napkin, postcards, and receipts. And the hardcopy scrapbooks will give you a great excuse to print your photos and then look back through the pages.
Travel Photography Tips

Whether you are a traveler extraordinaire who hopes to take better travel photos, you want to explore the world of posting on social media, you are a mom who snaps pictures of her family wherever you go , OR you want to UP your photography game, learning a few of the basics will help to improve the quality of your photographs.
- Plan your shots
- Edit photos and be willing to delete (sometimes that’s the hardest thing to do)
- Avoid visiting popular sites at popular times
- Avoid crowds and tour groups if possible
- Have your camera settings dialed in and act fast
- Have your phone ready to go as a back up
- Stand so people in the background are hidden from view
- Take day trips to lesser known destinations
- Simply ask people to move
- Use the crowd in your shot
>> Related: Tips to Take Better Travel Photos
Permission Granted to Delete Some Travel Photos
<GASP>
Did I really just suggest that you should DELETE some of your travel photos? Yes. Yes, I did.
In case YOU need to hear this today, I am giving you permission to delete some of your photos. Yes! You.
Why? You need to get rid of your photo clutter too.
Pictures to Delete:
- So the burst of pictures you took of the Eiffel Tower? You only need one from that angle
- Blurry or badly composed photos
- Unflattering photos of you or your family members (unless you need them for future blackmail opportunities!)
- Screenshots – Are you snapping a quick pic of your train ticket so you won’t forget your seat number? Delete it
- Selfies – Only keep the ones that are really great
- Reminders – I often take pictures of restaurant names, city names, etc. as I travel. These pics are NOT my best work. They are informational. You don’t need to keep them once you have retrieved the information you need
- Super short video clips
- Memes, recipes, kids’ school work that you sent to grandma. Delete it or create a file for them and download it
- Unintentional Photos or Videos – How many videos or photos did you snap that you didn’t even realize you took? You don’t need that shot of your left leg. Delete it .
Composition Tips

- Consider the light and your light sources
- Use the rule of thirds
- Try to not have objects sprouting out of your subject’s head
- Use natural frames
- Find leading lines as you compose your photo
- Shoot from a creative angle
- Try to capture a reflection
- Focus on the eyes
- Make sure your focus is spot on
And don’t forget to STRAIGHTEN YOUR PHOTOS PEOPLE! This happens to be a pet peeve of mine.
I am insanely talented at taking photos that are not straight, ie., the horizon slants horribly to the right.
When I get home and look at the wonkiness of the horizon or the leaning tower of anything in my travel photos, I wonder how I could have taken such a crooked photo!
If this is you as well, not to worry: photo editing programs allow you to crop and straighten the horizon or buildings or whatever on all of your photos.
I go more in depth on Photography Composition Tips, Taking Vacation Photos, How to Improve Your Photography Skills, Camera Equipment, and Tips for Looking Awesome to Take Better Travel Photos of YOU in my post Tips to Take Better Travel Photos . Check it out!
Photography Travel Gear

I take photos everyday and everywhere. Sometimes I quickly grab my phone before the opportunity is gone, and sometimes I use my DSLR for a well-composed quality shot.
And…sometimes when I travel, I have both my phone and my camera ready to go (I look like such a tourist!)
You may encounter people who are passionate about their brand of camera. There has long been a debate about which camera brand is the best—Sony, Canon, Nikon, etc. The answer? Whatever camera you have with you !!!
Here are a few ideas for your photography travel gear options:
- Point and Shoot Camera
- Underwater Camera
- Mid-range DSLR
- Canon EF-S 18-135 mm f/3.5-5.6
- Canon EF 24-105mm f/4 L IS USM Lens
- Nifty Fifty
Just remember, you don’t have to travel with ALL of your photography equipment. Pack lightly. Take only the essentials. That may mean your camera body, one or two versatile lenses, and a few accessories.

Frequently Asked Questions
What are some more creative ways to share and display your photos.
Photo coasters Shadow box Collage and letterboard frames Coffee table books Cork map bulletin board
Are there photo sharing apps?
Yes. You are probably already using some of them: DropBox, Flickr, Amazon Photos, Facebook, Instagram, eFamily, Google Drive, Google Photos…to name a few.
What does it mean to “upload” a photo?
You “upload” a photo to transfer it from your phone to your computer, your phone, another device, or the internet
Love this Post? Pin it!

Final Thoughts on Creative Ways To Actually Share and Display Your Travel Photos
Travel and photography go hand in hand.
If you have been wondering what to do with all of your amazing travel photos, I hope you have some ideas now. You DO NOT have to be a professional photographer!
It is such a convenience to snap digital photos as you travel and to take as many as you wish.
So, after you have spent all that time lining up the perfect shot, taking time to find the right angle, and waiting for the best light, find ways to enjoy your photos and relive your travel memories once you return home.
P.S. They make great Christmas gifts too!
You may also enjoy these posts…
- Tips to Take Better Travel Photos (and Look Good in Them Too!)
- 27 Instagram Worthy Insanely Colorful Destinations Around the World
- Amazing Amazon Deals for Travelers on Prime Day
- 65 Awesome Travel Quotes for Instagram
- 5 Best Travel Photography Courses for Beginners
Share on Social Media

I’m a Colorado-based travel blogger with a passion for exploring the world, enjoying family time, and taking fantastic photographs. I am also a book writing, creative thinking, detail loving, frequent flying, comfort loving mom of three girls and wife to an amazing guy. Discover More .
Similar Posts

Costa Rica Travel Tips: 10 Easy Answers to Your FAQ’s

70 Sensational Cruise Tips and Tricks

10 Stunning Vistas on a Big Sur Road Trip in California

40 Awesome Gifts for Travelers and First Time Travel Enthusiasts

Benefits of Traveling: 21 Essential Skills and Life Lessons

Need Vitamin Sea? 10 Best Reasons for a Couple’s Beachside Getaway
20 comments.
Love all these ideas! Now I just gotta do it!
I love photography. Great tips! And the photos in this post are beautiful.
I love all of these ideas, I love looking at the pictures on the walls they bring back wonderful memories…
Awesome tips! Uploading them to a site like Pinterest is a great tip! I LOVE seeing travel shots on Pinterest and will often re-share.
So many great ways to display travel photos.
Great ideas! It is sooo much better when you actually manage to use your photos! I normally blog and create travel albums… but I love the idea of making postcards! p.s. lol i appreciate the permission to delete some too!
This was so fun! Thank you for these fun ideas, I definitely want to start a trip photo album. Also thank you for the permission to delete some photos! Lord knows I need to do that too!
These are great ideas! I love creating photo albums and photo scrapbooks with my travel photos. I also love sharing them on social media. Thanks for all the additional tips!
You listed some of my favorite camera gear – and the lenses last forever too. Great article!
Your Lourmarin, France is gorgeous! It has never occurred to me to make postcards. That is a fantastic idea. Getting snail mail that isn’t junk mail is a special treat. I share most of my stuff on facebook but I do have special family and friends that aren’t on facebook. SOMEDAY I’ll have time to scrapbook…I hope!
Thank you so much for giving me permission to delete some of my travel photos! ?I so needed to hear that! Great ideas on how to display travel photos…I do all of them.
Fantastic article, I love taking photos all around the world and I am motivated to do better and better! Reading this was inspiring!
I love all these tips. I try to make a photo book each year that has all my pictures so I can look back and easily see the pictures!
Love all these ideas! I always make a scrapbook for each of my big trips, which is fun. I love the postcard idea though too, I’ll need to try that!
This is such a helpful post, I have so many travel photos at this point that I don’t know what to do with them! Deleting them would probably be the best idea for me 😀
These are great tips! I find it difficult to keep up with all the photos and organize them. They get dumped into a folder by location and date. I’m sure there is a lot of wasted space and I should delete before moving them from my camera. Thanks for all the ideas!
Thanks for your great post. Especially I love your permission to delete some of my photos! So far I just add more of hard disc space and delete just really bad unusable photos. I definitely have to use your permission much more often.
Great ideas for share travel photos! I’ve been thinking of printing a few for the walls, but selecting the right ones is difficult.
Great suggestions! I usually scrapbook, but I have been a bit too busy lately!
We have created photo books for gifts and they were always hugely appreciated. But I must admit we don’t have any of our great photos as art on the walls. I always have an online photo gallery when we travel and share it with friends and family to travel with us. And we stream our photos to our Apple TV and enjoy them over and over again. But I sure which my hubby would get better at deleting photos so he can get his to me quicker for the blog so it is not just my photos.
Leave a Reply Cancel reply
Your email address will not be published. Required fields are marked *
Save my name, email, and website in this browser for the next time I comment.
This site uses Akismet to reduce spam. Learn how your comment data is processed .
How to organize your travel photos in four steps

Apr 7, 2020 • 6 min read
Travel photographer Laura Watilo Blake knows a thing or to about good digital hygiene, and keeping track of all the shots she takes on each trip. She shared her top tips for wrangling your own collection of travel photos before your next adventure.
As a professional travel photographer, it’s been a necessity to keep my image archives in order so when a client calls looking for a photo of Argentine grilling or a panoramic shot of Colombia’s famed wax palms in the Cocora Valley, I can quickly and easily access the photos no matter where I am in the world.

There have been a few hiccups over the course of my career, including a few corrupt SD cards and failed hard drives, but over time, I’ve developed strategies for naming my files, adding pertinent information about the destination and backing up the images on multiple hard drives and a cloud-based storage service.
Don’t just take my word for it. I have sought out the helpful advice of Lisa Griffis, a personal photo organizer and certified member of the Association of Personal Photo Organizers . After spending 35 years in photojournalism and design for the newspaper industry, Griffis launched Rescue Your Photos to help people preserve their own visual legacies. She curates and organizes both print and digital photos for clients. These are our tips for wrangling your travel memories.

1. Back up the chaos.
Before tinkering with files on a computer, save everything to an external hard drive “in case anything gets deleted by accident,” Griffis says.
What size hard drive you need depends on how much data you need to back up. Consider the amount of data already on your computer's internal drive, as well as any data backed up to the cloud. If you have photos on your smartphone worth backing up, add that data to your calculations as well.
External hard drives range from $70 for two-terabyte portable hard drive to hundreds of dollars for expandable RAID systems. The acronym “RAID” stands for "redundant array of independent disks," in which a bunch of hard drives act like one big superdrive. Not only can a RAID system expand as your photo collection grows, but it also can be configured for automatic dual back-ups to keep data safer should one drive fail.
If you need suggestions for various types of RAID systems, B&H Photo & Electronics in New York City has a roundup of options here . I have a five-bay Drobo at home with more than 24 terabytes, plus several portable LaCie Rugged drives that go with me on my travels.
Once you’ve decided on the hard drive that fits your needs, you can automate backups using your computer’s operating system, with software that comes with the drive or a third-party app or service.

2. Start sorting and organizing your digital images into folders.
With everything backed up, you can start collecting images from the smartphone and online locations and place them in a “holding tank,” says Griffis. “Your ‘to-be-organized’ folder is the dumping ground for all the images you bring from devices, camera cards, the scanner, etc.”
As you bring each set of digital images into this folder, try to keep events or months together instead of dumping a gazillion images from your camera roll. Use your smartphone’s built-in app to identify groupings like months, events or collections.
Once you have a group of photos in the folder, review the images quickly and get rid of anything that isn’t a keeper. Next, create or rename a folder and give it a name that represents the group of photos that will go into it.
I have my folders organized and named by year, followed by folders listed sequentially by year, month, day and the place, event or theme. For example, inside my 2018 folder, you’ll see “20181012_cinqueterre.” The numeric sequence represents October 12, 2018, while the text after the underscore indicates the photos were taken in Cinque Terre, Italy . Subsequent folders show the raw files straight from the camera and the final images that are ready for archiving, uploading and printing.
“Starting with the date makes sense because the computer does the filing for you,” Griffis says, “but you can sort things in a way that suits them, whether it’s chronological or by name, person or event. I tell them to start by closing their eyes and imagining how they would have files organized in an actual file drawer.”

3. Rename digital photos to add context.
Just as you organize everything into folders, it’s important to add detailed information about the individual photos in the actual file names. After all, the story behind the image is just as important as the picture itself. You’ll want to include who, what and where,” says Griffis.
In the example above, I’ve organized my images starting with the place where it was taken and what’s happening in the photo (ex. ohio-hocking-hills-hike-conkles-hollow-0324.jpg). At the end, I always include the original number assigned to the image straight out of the camera in case I need to go back and find the original raw file for further editing.
If it seems daunting to rename all of your files one by one, then download Adobe Bridge , a free media management program that helps manage and organize images and other files. The batch rename features allows you to quickly rename multiple files in one fell swoop.
The robust program does a lot more as well, including editing, sorting, adding metatags and publishing photos. You can also apply a star rating to the images you love the most, which will help when it comes time to find your favorite images that you want to share and display.
If you’re doing your file naming manually, be sure to save a copy of your best images in a separate folder labeled “Favorites.”

4. Develop a photo archiving strategy using the 3-2-1 backup rule
Now that you have your files in order, it’s important to not only maintain the file-naming practices going forward, but also establish a frequent back-up schedule using the 3-2-1 method.
The “3” stands for three copies of your files saved in three distinct places. The “2” means that two copies of your data should be in two separate places, such as your computer and a hard drive, or on two hard drives if your archive is too large to fit on your computer. The “1” indicates one set of data should exist at a separate location in case of some unforeseen natural disaster, fire, flood or theft.
“Most people don’t have anything backed up,” says Griffis. “But it’s important to get systems in place, especially in uncertain times. I don’t care if it’s in the cloud, on an extra hard drive in a lockbox at the bank, or at your mom’s house 100 miles away.”

Griffis uses a cloud-based back-up service called Backblaze to securely back up the contents on her computer and all attached hard drives once a day. When it comes to archiving photos, Dropbox , Google Photos , Amazon Prime Photos , Apple iCloud and Flickr are the most popular. Each has its advantages and disadvantages, so do your research first.
“If you use the cloud to back up materials,” Griffis says, “make sure that the website doesn't compress images. Many do and it will affect the file size of the image.”
Of the services listed above, Google Photos will back up unlimited photos and videos for free up to 16 megapixels and 1080p video resolution, but it downsizes files that are higher quality. It does have a setting that preserves the original quality of the photos and videos, but there is an additional fee for storing the files.
You may also like: Five creative ways to display your travel photos at home
Explore related stories

Apr 8, 2024 • 13 min read
The five fishing villages of the Cinque Terre are the Italian Riviera's most iconic highlights. Here's our guide to making the most of your trip there.

Mar 26, 2024 • 6 min read

Jan 11, 2024 • 8 min read

Oct 19, 2023 • 8 min read

Jul 27, 2023 • 2 min read

Oct 8, 2022 • 10 min read

Jul 20, 2022 • 5 min read

Sep 24, 2020 • 1 min read

Jul 28, 2020 • 6 min read

Jan 21, 2020 • 2 min read
This post may contain affiliate links, which means I'll receive a commission if you purchase through my link, at no extra cost to you. Please read the full disclosure here.
10 Great Ways To Share and Display Your Travel Photos
Looking for creative ways to display your travel photos?
How many photos have you accumulated from your travels that are just sitting on your computer, hard drives, or even worse, just on your phone?
Who ever sees them?
Do you even ever look at them?
It can be such a shame.
You take all these vivid snapshots of your amazing travels, and then your photos never see the light of day.
It’s a sure way for your trips to soon become a long distant memory.
I’m sure if you had your treasured memories displayed somewhere, they would give you many happy feelings.
So, let’s stop hiding these treasures and display them loud and proud.
You may just want to see them yourself to remind you of your adventures. Or you may want to share them with family, friends and beyond.
These ideas have been compiled to give you some creative ways to display your travel photos in various ways.
Get them off your computer and into your home – and beyond …
Looking to improve your photography? Check out my FREE Photography Resources Bundle to give you a head start.

Pre-Share – Cull and organise
Before we dive into the myriad ways to showcase your travel photos, it’s crucial to get them organised. After all, you can’t display what you can’t find!
Having an efficient photography workflow, as detailed on my blog ( Developing a Photography Workflow ), is key to ensuring your photos are safe, organised, and easily accessible.
It’s a good idea to organise your travel photos as you go. Returning home from a grand adventure only to face the daunting task of sorting through a mountain of photos can be overwhelming. It’s far simpler to do a bit of culling at the end of each day.
After your day’s exploration, settle down with your favourite drink and start uploading your photos. This is the perfect time to sift through them, deleting any duplicates and those not-quite-right shots. We’ve all been there, snapping away at the same scene, hoping one turns out just perfect – it’s okay to let some of those go.
And remember, backing up your photos daily is just as important.
Now that you’re organised, it’s time to bring those amazing travel photos to life in ways you might not have imagined.
Yes, you read that right. I’m actually suggesting you should DELETE some of your travel photos.
And today, I’m giving you the green light to do just that.
Why, you ask?
Well, it’s all about decluttering your digital photo collection. Just like we occasionally need to declutter our homes, the same goes for our photo libraries.
Photos to Consider Deleting:
- The Photo Burst : Remember that series of shots you took of the Sydney Opera House from the same angle? Chances are, one great photo is enough to capture the memory.
- Blurry or Poorly Composed Shots : If it doesn’t add to your story or it’s just not up to par, it’s okay to let it go.
- Unflattering People Photos : We all have those less-than-perfect shots of ourselves or family and friends. Unless they’re earmarked for a bit of light-hearted future blackmail, you might want to consider letting them go.
- Screenshots and Reminders: Snapped a quick photo of your ticket or a restaurant name for reference? Once it’s served its purpose, feel free to delete it.
- Selective Selfies : Keep only the selfies that truly shine. If it doesn’t make you smile, it’s not worth the space.
- Informational Snaps : Photos taken for information rather than aesthetics don’t need a permanent home in your gallery.
- The Oops Moments: We all have them – the accidental photo of your foot or a blurry shot of the ground. These are easy deletions.
Remember, it’s about quality, not quantity. By being selective with your photos, you’re not only freeing up space but also ensuring that your photo collection truly reflects the beauty and joy of your travels.
Wall Prints
Whether it’s a dedicated photography tour or your own adventures, I’m sure you come home with some stunning images. At least a couple of these should end up being displayed – and why not go BIG!
So, have some printed and proudly display them on your walls. This could be at home or your work if allowed.
There are so many options available, whether that’s at a local printer or online.
One thing to consider is if you would like to change them up regularly?
To do this, I recommend buying quality frames and having your photos printed to fit. This way, you can change them without it being super expensive.
Struggling to know which travel photos to choose?
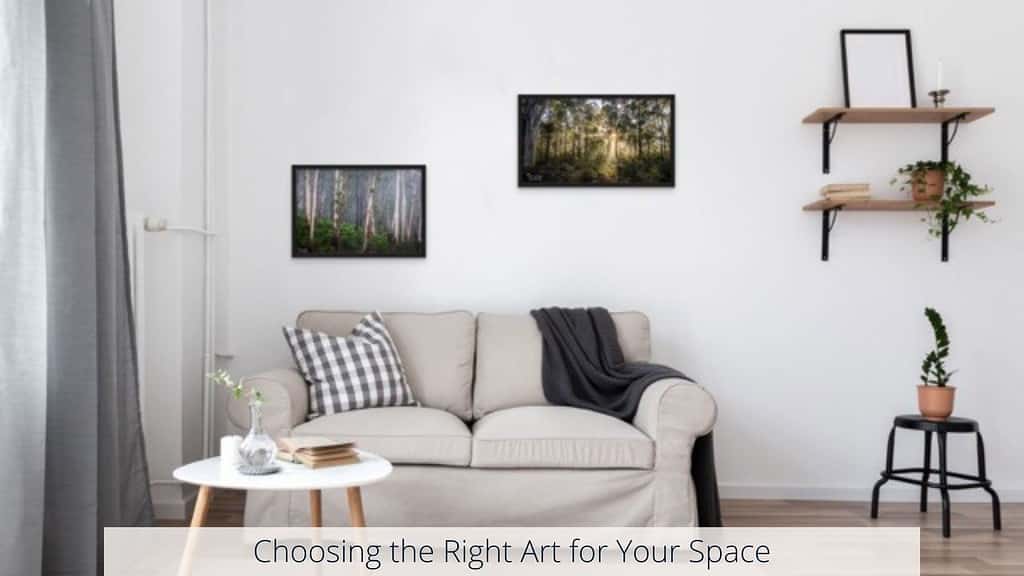
There really isn’t a right or wrong way to choose art for your home. I have a post to help you choose the right photos for your space ( Choosing the Right Art for Your Space ).
It all comes down to style, size, number of prints, type of framing, and above all – you must love what you choose.
It really is lovely to look around your home and see your travel photos displayed. This is definitely my number one recommendation of what to do with your travel photos.

Photo Books: Compact and Creative Displays
While I absolutely recommend printing your travel photos for your walls, you might find yourself limited by space. That’s where photo books or albums come in as a fantastic alternative.
Consider creating an ongoing series of books to chronicle your adventures. These books are not only easy to make but also a cost-effective way to showcase your travel memories.
If you’ve been organising your photos during your travels, compiling a photo book becomes a breeze. For a more traditional approach, simply print your photos, select a charming album, and voilà – you’ll soon have a tangible series of your travel tales.
Why not elevate your photo album experience by creating an online photo book? These are just as easy to craft, won’t break the bank, and offer a delightful way to permanently capture your journeys.
For those in Australia, there are several online companies that print and ship locally. Here are three I recommend:
- Photobookshop
The convenience of these services is remarkable – you can upload photos directly from your phone, Google Photos, Dropbox, and even social media.
Displaying these photo books on your coffee table is not only a stylish choice but also a great conversation starter, allowing you to share your travels in a fun and interactive way.
Photography is the art of making memories tangible ~ Destin Sparks (Australian Landscape Photographer)
Create a Scrapbook
If you’re someone who enjoys getting crafty, creating a scrapbook adventure journal for your travel photos can be a delightful project.
Start with a blank book as your canvas, and let your creativity flow.
This isn’t just about photos; it’s a chance to weave in souvenirs like tickets, stickers, and any little mementos you’ve collected along your journey.
Your imagination is the only limit here.
While I’ve been more focused on blogging, I know many who find joy in scrapbooking their travels.
It’s a wonderful way to physically preserve memories, giving you a tangible connection to your experiences.
In your scrapbook, don’t hesitate to include a variety of memorabilia from your trips – think ticket stubs, postcards, even a charming napkin or receipts. These items add texture and depth to your story.
This adventure scrapbook becomes a unique anthology of your travels, a personal compilation of diverse experiences.
Each page is a blank slate, inviting you to create layouts that reflect the essence of your journeys.
It’s more than a photo album; it’s a narrative of your adventures, with each souvenir adding its own chapter to your travel tales.
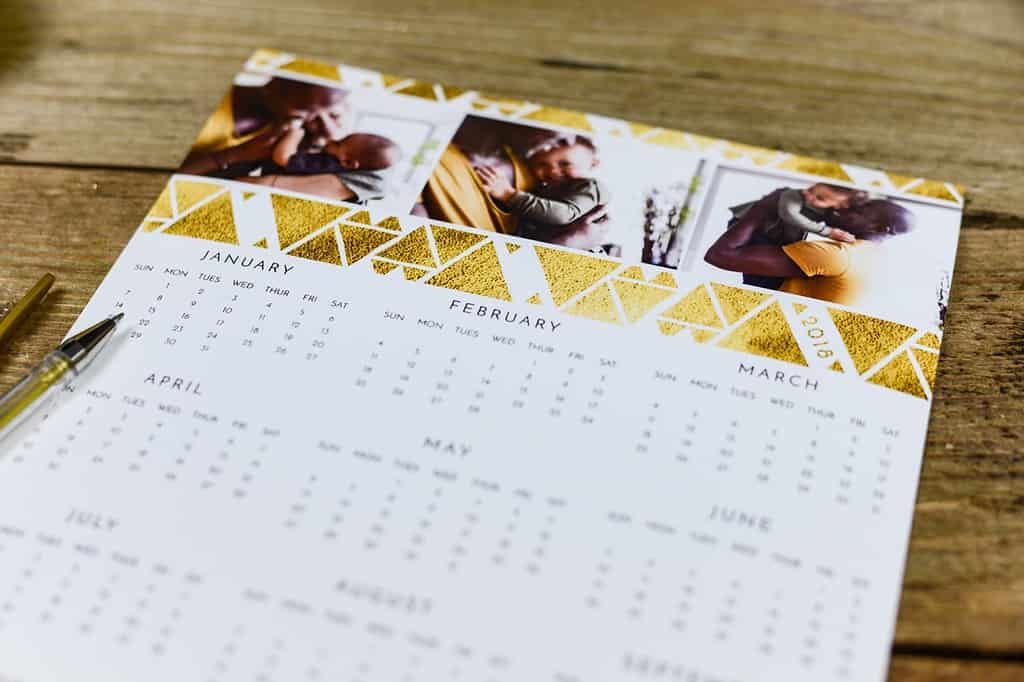
Calendars: A Year-Round Showcase of Your Travels
Creating calendars is a fantastic way to sort through your photos of a particular year or locations, and they make excellent gifts.
There are numerous companies where you can order online at a reasonable price, and calendars are always a hit. I’ve even known people who later cut out their favourite images to frame them, making these calendars a gift that keeps on giving.
These can also be a brilliant fundraising tool if you’re involved in any community groups. Think schools, sports teams, dance groups – the possibilities are endless. What’s more, it’s cost-effective as you can take pre-orders with a deposit, which helps manage and reduce your out-of-pocket expenses.
When it comes to themes, consider showcasing photos of your local area, members of the groups, or the sporting clubs you’re supporting. Themes like flowers, birds, or landscapes offer endless creative possibilities.
Here’s a tip : Start planning a theme early in the year for your calendar. This can also serve as a fantastic photography project, especially if you find yourself in a creative rut.
Creating truly personal calendar gifts is straightforward with the plethora of online options available.
Keep an eye out for sales, choose your size and design, and you’re all set.
Remember, there’s often a discount for bulk purchases, making these calendars a great option for Christmas gifts too!
You can choose from wall calendars, desk calendars, and even diaries – the variety is impressive with so many sites offering these options.
Greeting Cards: Personal Touches from Your Travels
Greeting cards are another fantastic and cost-effective way to share your travel photos.
Much like calendars, purchasing them in bulk means you’ll always have a unique card on hand for any occasion.
This is the perfect opportunity to unleash your creativity with your own unique designs.
Most companies that print calendars also offer greeting cards in a variety of styles, making it easy to find something that suits your taste.
For those running a small business, why not consider using your travel photos on your business cards? It’s a great way to add a personal touch and stand out.
Gifts and Home Decor: Turning Photos into Everyday Treasures
When it comes to photo gifts, the possibilities truly are endless – puzzles, cushions, towels, and so much more.
One creative idea I’ve come across is to create a collage of your travel photos and print it in A3 size. Imagine using this as unique wrapping paper – I’m definitely excited to try this out!
The ease of creating these items is remarkable, thanks to the plethora of online printing companies available.
In addition to the ones I’ve mentioned before, don’t overlook Zazzle, and even Big W and Vistaprint. They offer some great options.
Using your travel photos in this way is not just creative; it’s about bringing a piece of your journey into everyday life.
Here are some more ideas to transform your photos into functional art:
- Drink Bottles
- Coffee Mugs
- Towels and Tea Towels
- Mouse Mats and Laptop Sleeves
- Phone Covers
- T-Shirts or any other clothing item you can imagine.
The list is becoming endless …

Digital Photo Frames: A Dynamic Display of Memories
Embrace the modern approach to photo display with a digital photo frame. These ingenious devices allow you to effortlessly send your photos directly from your phone or digital camera to the frame.
With a digital photo frame, there’s no need to painstakingly select your favourite photos from your last trip – you can showcase them all! The frame will rotate through your collection, displaying each memory for a set amount of time. This way, every photo gets its moment in the spotlight.
It’s a fantastic way to keep your travel memories alive and continuously refreshed, adding a dynamic touch to your home decor.
Screensavers: Your Personal Gallery on Display
Why not turn your favourite vacation photo into your phone’s screensaver or your computer’s desktop background?
There’s something truly uplifting about seeing a stunning photo you’ve taken yourself, rather than the standard screensavers on mobiles and laptops.
Plus, it often becomes a great conversation starter when others notice it.
Consider streaming your travel photos as a digital screensaver on your TV. Many modern TVs come with streaming capabilities, allowing you to bring your travel memories to life on a larger scale.
On Your Phone : Use your travel photos as both the Lock Screen and Home Screen. It’s a small change that brings a personal touch every time you use your phone.
Smart TV Screensavers : Most smart TVs enable you to upload custom images as screensavers. Imagine cycling through your travel photos on your living room TV, creating a dynamic display of your adventures. It’s a wonderful way to relive those memories without being confined to a single image.
This approach is not only free but also incredibly easy to set up. It transforms your everyday screens into a gallery of your personal travel stories, constantly reminding you of the beautiful places you’ve visited.
Want a deep dive into exposure? I wanted to share a special freebie for you if you’re also new to photography. It’s my FREE Exposure Quick Start Guide designed to get you started in your journey by learning the elements of exposure and start taking better photos – Fast! The Exposure Triangle : Understand the foundation of great photography. ISO : Learn how to master light sensitivity to enhance your shots. Aperture : Explore the world of depth and focus. Shutter Speed : Capture life’s moments with precision. On-The-Go Cheatsheet : Your handy companion for quick reference in the field. This FREE instant PDF Download will set you up for great photos, so grab it now.

Social Media: Sharing Your Journeys with the World
It might seem obvious to many, but it’s quite surprising how often people hesitate to share their travel photos.
I understand this sentiment – that was me when I started.
But I’ve learned that if I appreciate a photo, chances are, someone else will too.
If you’re a bit hesitant, start with sharing just a few photos and gradually build up your confidence.
Beyond just sharing with friends, consider joining photography groups. These communities are fantastic for connecting with like-minded individuals, gaining inspiration from others’ work, and receiving constructive feedback.
Another avenue to explore is creating a dedicated Facebook page or Instagram account for your photography. This not only serves as a platform to showcase your work but also chronicles your photographic journey.
Don’t overlook online platforms like Flickr or SmugMug.
These sites offer more than just a space to share; they provide secure storage for your photos. The pro version of Flickr, for instance, is an excellent tool for backing up your best travel shots, offering an additional layer of security for your precious memories.
Plus, these platforms make it easy to share your photos with friends and family.
Start a Blog: Your Personal Travel Chronicle
Starting a blog can be as private or as public as you wish. It’s quite simple to create a blog or website and control who gets access.
Whether it’s just for family and/or selected friends – with a password – or for your eyes only, the choice is entirely up to you.
You can even opt to email it to those who might be interested, or keep it to yourself.
I personally treasure a collection of old school notebooks, handwritten accounts of every overseas trip I took with my late husband.
Each day, I would sit down (with a beer, of course) and write a summary of our day. These notebooks are precious to me, bringing both laughter and tears whenever I revisit them.
There are numerous free blogging platforms to start with, or it can be as straightforward as maintaining a Word document.
I often use Google Docs for drafting my blog posts – it’s what I used for this article too.
Then, I simply copy and paste into my blog. This method also ensures I always have a backup for future reference.

In wrapping up, these ten great ways to display your travel photos offer a world of possibilities to share and relive your cherished memories.
Whether it’s through a beautifully crafted photo book, a personalised calendar, or a digital showcase, each method brings your adventures closer to you and your loved ones.
Remember, every photo tells a story, and it’s these stories that connect us, inspire us, and remind us of the beauty we’ve encountered on our journeys.
So, delve into your collection, choose your favourite way to display, and keep those memories alive and vivid.
That’s it for now – Keep clicking and sipping 📷 ☕ 🍷
Like this post? PIN it so you can save it for later
Other Helpful Articles:
- Developing A Photography Workflow
- Choosing The Right Art For Your Space
- Travel Photography Tips: 40+ Essential Tips For Great Photos
- 80+ Great Travel Photography Quotes To Inspire Your Wanderlust
Don’t miss a post – sign up Here if you haven’t already

Sam is the creator of cameracoffeeandcabernet.net, a website dedicated to photography and solo travel. Based in Australia, Sam combines her passion for photography and travel to bring you tips, insights and experiences to help you plan, pack, and make the most of your photography while on the road.
Similar Posts

Great Ocean Road 5 Day Itinerary: Best Great Ocean Road Photo Spots
Looking for the perfect Great Ocean Road 5 Day Itinerary? Check out this itinerary for an awesome road trip with all the best Great Ocean Road photo spots!
7 Beginner Landscape Photography Mistakes: And How To Overcome Them
Learn how to avoid common mistakes in landscape photography. Our guide offers tips to help beginners improve their skills and produce stunning shots.

NSW South Coast Photo Spots: The Top 10 Locations for Great Photos
Discover the top 10 NSW South Coast photo spots. This stunning coastline is home to Wasp Head, Bingie Bingie, Burrewarra Point, Horse Head Rock and more.

Using Neutral Density Filters To Improve Your Landscape Photos
Learn how to use neutral density filters in your landscape photography and master long exposures. These top tips will help you get better photos today!

Landscape Photography Composition: How to Use the Rule of Thirds
Learn what the rule of thirds is and how to use it to improve your photography composition. Discover how to make images with more aesthetic appeal and impact.
12 Achievable Travel Resolutions You Can Make Today
Would you like to travel more? Plan your best travel year yet with these easy travel resolutions you can start now and actually keep!
Leave a Reply Cancel reply
Your email address will not be published. Required fields are marked *
Save my name, email, and website in this browser for the next time I comment.
9 Creative Ways To Display Your Travel Photos
Searching for unique and creative ideas to display your travel photos? Traveling is an amazing experience that allows you to explore new cultures, meet new people, and create unforgettable memories. So why not relive those moments by displaying your travel photos? These creative travel photo display ideas add a personal touch to your home decor and also serve as a daily reminder of your incredible adventures. Here are the best unique and inspiring ideas for displaying your favorite travel memories.
Creative Ways to Display Holiday Photos
1) make a travel gallery wall .

Create a fun travel gallery wall display highlighting your best travel photos. Mix and match different sizes and mediums to create a unique space with your top travel images. Select a theme like beaches, your favorite dive spots, or scenic sunset views from all around the world. .
2) Design a Calendar

Why buy a generic calendar when you can make a beautiful travel wall calendar with your travel photos? It’s also a good reminder to plan a trip soon!
3) Create a Coffee Table Photo Book
Share your favorite memories in a photo book that will last forever. You can add custom details to make it your own or use a template.
4) Make a Scrapbook

Save your airplane tickets and anything that reminds you of your trip and add it to a fun scrapbook to remember your best holidays. Write down the top things to do and where to eat so you can remember it for next time.
5) Use Reclaimed Materials To Display Photos
Get creative and find unique things to use to hang your photos like mini clothespins . Make a beautiful frame by gluing small pieces of driftwood to a frame you already have. You can also use twine or rustic string to wrap around a rod or piece of driftwood and create a photo display to hang travel photos.
6) Design a Unique Gift
Whether you’re looking for a gift for Mother’s Day , Father’s Day , a birthday or a celebration, give them a unique gift with a travel photo on it. Design a cute tote, mugs, magnets, puzzles, and ornaments for the holidays.
7) Make a Custom Map

Design a custom map with photos of your top adventures. This is a great gift idea and one of our favorite creative travel photo display ideas.
8) Save your Travel Photos in a Journal

Whenever you get the travel bug, reach for your travel journal or keepsake box to remind you of your fondest travel memories. For some extra encouragement, add testimonials and kind words to your journal that you can look at when you need an extra confidence boost.
9) Make Save the Dates or Holiday Cards
Create one-of-a-kind greeting cards, stationery or holiday cards with your travel photos.
Conclusion: How to Display Travel Photos at Home
We hope these travel photo display ideas inspire you to create something beautiful with your vacation photos. Whether you create a wall gallery or use a digital photo frame , there are so many great ways to display your top travel moments.
What are favorite travel photo display ideas?
You may also like:
THE BEST TRAVEL PHOTO APPS TO EDIT ON YOUR PHONE
10 Tips for Displaying Your Travel Photos Back Home
Traveling opens doors to new experiences, cultures, and breathtaking views captured in photos. But what’s next after returning home with bags full of enchanting memories clicked as pictures?
It’s important to display these snapshots of your adventures so they can be remembered and shared with others. Fortunately, there are many creative ways to showcase your photos.
From classic options like photo albums to fridge magnets or artsy alternatives, you have a plethora of methods to make your travel stories come alive in your living space.
10 Options for Displaying Your Travel Photos at Home
Journeying to far-off places creates unforgettable experiences and beautiful photos. Wondering what to do with those precious images? Let’s explore 10 creative ways to display your photos.
1. Make a Custom Painting
An eye-catching way to display your travel photos is by turning them into custom paintings. This approach allows you to depict the story behind the picture, adding an artistic flair that stands out in any room. It’s a timeless piece of decor that will remind you of your travel adventures.
2. Create a Custom Photo Book
One of the best ways to showcase your travel experiences is to create a custom photo book . This option allows you to narrate your experiences through beautiful images and personal notes, providing an intimate journey down memory lane anytime you flip through its pages.
3. Upload to a Photo Sharing Site
Putting your travel photos on a photo-sharing site can be a fantastic option for easy access and virtual display. Sites like Flickr or Instagram let you create galleries where others can appreciate your travel experiences. It’s also a way to keep digital backups of your precious memories.
4. Build a Shadow Box
Shadow boxes are another great way to display your photos. You can add tickets, postcards, or small souvenirs from your trip alongside the photos. It gives each picture context and turns them into three-dimensional stories, capturing the essence of your adventures in one stylish display.
5. Create Postcards to Send
An interesting twist on displaying your travel photos is to turn them into personalized postcards. Send these to family and friends! It’s a different way to share your journey with others while creating special keepsakes. You’ll also be spreading joy through the classic charm of snail mail.
6. Have a Changeable Corkboard
Having a changeable corkboard at home can add dynamism to your travel photo display. Swap them around, pin something new, or put back a favorite old one whenever you like. It will keep your memory wall fresh and exciting while allowing you to relive various travel experiences.
7. Build a Professional Travel Website
Building a professional travel website could be your ultimate canvas for photo display. You have the freedom to design galleries, blogs with attached photos , and much more. In addition to sharing your adventures more broadly, you’ll be inspiring others to embark on their own travels.
8. Use Your Photos as Screen Savers
Utilizing your travel photos as screen savers or wallpapers takes a unique approach. Every time you unlock your device or return to your desktop, you’re greeted with reminders of wonderful times and fabulous places you visited. It’s an effective method to keep those memories alive.
9. Put Them Inside a Scrapbook
One of the most nostalgic ways to display your travel photos is to put them inside a scrapbook. This allows you to pair your images with notes about the trip, mementos, or any other relevant memories. This fun project makes for a highly personal keepsake of your adventures.
10. Hang Photos on a Closeline
For a rustic and homey touch, hang your travel photos on a clothesline. You can use miniature clothespins to hold the pictures on the line. This creates an easily changeable, charming display that adds personality to any room. It’s certainly an appealing way to showcase your travel tales!
In Conclusion…
Displaying your adventurous moments shouldn’t be a struggle. It should be a journey full of delight, just like the travels themselves!
With so many options available, each one telling its own unique story, why not try something new? Whether it’s hanging them on a clothesline or making your own Instagram wall at home, make these memories visible and engaging.

How to Display your Travel Photos

To support this website, at no extra cost to you, we may earn revenue on links within this post. As an Amazon associate, I earn from qualifying purchases.
When we’re not traveling, we’re dreaming of travel. One of the ways we love to dream about travel is to look through our travel pictures. This means, of course, that we have to get our travel pictures off our mobile devices, hard drives, phones, and camera sd cards and on to display them for all to see. What do you do with your travel photos, or how do you display your travel photos?
Have you ever been at a loss as to what to do with travel pictures? I’ve included some DIY and some done-for-you options, so if you don’t feel extra crafty, don’t sweat it! Learn how to display your travel photos with these traditional, fun, or innovative ideas.
Table of Contents
Sources for Printing Your Travel Photos
If we’re going to talk about how to display your travel photos, we need to start with printing. We’ll cover some other ways without printing below, but for now, assume we need to get those digital photos off your phone or your camera.
Printing Services
Traditionally, one of the easier ways to get physical copies of your photos is by using printing services at places such as Walgreens or CVS Photo . I like that for most prints, you have a same-day option. So if we’re feeling super motivated, waiting on delivery won’t stop us!
Snapfish and Shutterfly have also been around for a long time and often have great deals. It’s worth comparing prices for prints across a few of these, and then pick one and stick with it. The last thing you want to do is try to remember who you uploaded your photos with. While these sites are usually popular to create photo books and photo albums, you can opt for full-size photos for displays.
Another good idea, and best if you want to print single photos on a whim, is to invest in a decent photo printer. I like working with Hp Printers because of their HP instant ink program . Enroll for a small monthly charge, based on how many pages you print, and always have ink on hand. It’s cheaper than buying ink. The HP Envy works well with Bluetooth and your phone. Reviews seem pretty great about printing photos as well.
The HP Sprocket Select Photo Printer is possibly the best thing I’ve seen to bring with you on the go. Full-color photos and Bluetooth allow you to print images on the go. It’s only 3.5 by 5 inches long, so it’s perfect to keep in your purse or camera bag. I like the idea of using this printer to use as thank you cards when you’re traveling as well.
Do you have old photos sitting in photo storage boxes? Or what about negatives or slides? An easy way to share those with your family members is to invest in a negative scanner.
The Kodak Slide n Scan is super easy to use and can scan 35mm, 126, 110 film negatives and slides to 22mp resolution digital images. It’s a great option to save old prints and family photos to digital storage, an external hard drive, flash drives, or even Google drive. From there, you can print your favorite family vacation memories.
If your photo collection isn’t in negative form, but you have lots of photos from days gone by, a photo scanner might be the best option. The Plustek Photo scanner scans photos in seconds. I like this over a traditional printer flatbed scanner as you can continue to feed photos into it. That way if you have a large amount of precious memories to save, you’re not constantly stopping to replace what is on the flatbed.
Have you seen Mixtiles yet? These are easy 8×8 “tiles” that you select from their app, and at $13 each, turn into wall art. You can do borderless, black or white frames. I think these will lend well with gallery wall ideas below.
Chatbooks is another one that has easy peel & stick gallery wall tiles. If you want slightly bigger than Mixtiles, Chatbooks wall tiles are 10×10.
Travel Pictures Gallery Wall Ideas
Now that you have your photos printed, how do you display them? Gallery walls are perhaps the most popular of the choices.
Below you can see some of the ideas for collages and gallery walls. Pinterest is a great source for gallery wall ideas if you need further inspiration.
Personally, I like the clean frame look to better show off your travel photos. I would recommend a simple white or black frame with a white mat. You can choose to mix up sizes or keep them all the same size. I do think this is where Mixtiles or Chatbooks appeal to me more. However, I have friends that do amazing gallery walls. in their homes, it’s just not as easy for me.
These are a couple that I love.

Canvas Prints
If you do or don’t do a gallery wall, canvas prints might be the way to do it. Snapfish has a host of canvas wall art options.
Pallet Sign Wood Photo
If you have a rustic look, go for this pallet sign to immortalize your favorite travel photo.

Personalized Photo Mug
You’ve seen those photo mugs where you can put pictures of your kids. They always look a little, well, basic, to me. However I did find this photo mug, that would be great in your kitchen or on the go. I like that it looks a little more artistic.

Personalized Travel Blanket
A photo blanket is another great way to show off your favorite travels. Imagine a cushy plush blanket draped over your sofa or one of your chairs in your living room, filled with stunning photos of your favorite trips. I don’t know about you, but this would definitely get me dreaming of my favorite places as I doze off under the blanket. And if it’s a vacation in Maine , this doubles as a cozy reminder of that trip.

One of the ways I love how to display your travel photos is to incorporate them with a map.
I’ve seen this done in a variety of ways. It can be with postcards or Polaroid-style images glued near a map.
Get a 50 States photo map collage . What I like about this particular one is that it has inner borders that help contain all the state cutouts and make it easier to cut and place your state photos. Plus, it even comes with a map maker tool that you can print the photos just as you need them!

I also like these individual state prints from Minted that include either an outline of the state or your photos within the whole state.

Wall Calendar
Do you have a wall calendar in your home? I know in the age of digital, we may not need a wall calendar, but I always like the at a glance option of looking month to month. Of course, you can fully personalize a calendar to include your travel photos or feature places you’ll travel that month.
See personalized calendars at Shutterfly.
Digital Frame
You could go for a digital frame to display your photos, but I want something as simple as possible. That’s why I would choose a Google Nest Hub or a Google Nest Hub Max . I use Google Photos to back up my photos on my phone (even though it’s an iPhone, more bang for the buck.) So it’s easy to get those photos to display on a Google Nest Hub. Plus you get all the smart home features with a Google Nest hub. Go for the Google Nest Hub Max to use to make video calls. Buy at Staples and get Free Shipping or Free Pick up.
Vision Board
Use your travel pictures for a vision board. If you have a favorite place you’ve traveled, again and again, put these photos in your vision board. Having a vision board inspires the whole family that we will travel again. Set aside some time this weekend to put your travel pictures in your travel vision board .
Paint Your Photos
If you’re feeling extra crafty you can take one of your favorite photos and attempt to recreate it in a watercolor form. Of course, again, someone on Etsy can do it for you .

Ceramic Tiles
Make a big statement with ceramic tiles. This one is 12″ x 12″ but they come in all sizes. Check them out at Image Snap .

Do you have a favorite way to display your travel photos? Let me know in the comments.
Save this for later.

Tonya Denmark of Detail Oriented Traveler's Favorite Resources
✈️ my favorite way to check flights.
Skyscanner is a great way to check all flights and create watch lists for a change in flight prices.
🏩 My choice to check hotel prices
Booking.com has the most extensive list of hotels.
🏠 My go to for the Best Home Rental site
VRBO has better support for home rentals. I recommend using them.
👨👩👧👦 My absolute Best Tour Booking Site
Viator allows you to book now and pay later, plus has free cancellation.
🎠 My Go to for the Best Attractions Pass
Go City all inclusive passes provide extraordinary value
Read my review of Go City Here.
Best Travel Insurance
Travel Insurance Master gives you quotes from a variety of insurance policies so you can pick the best one for you.
Best way to store your luggage
Luggage Hero is the perfect way to find storage options when you are touring a place for the day.
What's the best way to check rental car prices?
Discover Cars is my choice for trusted ratings and no hidden costs.
Best Travel Planning Guide
I have a comprehensive travel planning guide that you can buy here. Use code: WELCOME for 25% off.
About The Author

Tonya Denmark
Comments are closed.

Go Green Travel Green
Travel | Sustainability | Living Responsibly

Creative Ways to Share Travel Photos
Creative ways to share travel photos – I brought my DSLR and point-and-shoot camera on vacation and took lots of great shots. Even after a short trip, I end up with hundreds — sometimes thousands — of photos. I’m always looking for new ways to share them with my friends and family without completely overwhelming and boring them.
- Who wants to look at 300 photos of an elephant?
- Don’t let your travel photos perish in purgatory on your external hard drive.
- Do something practical and fun with them instead.
- Here are 7 creative ways to share travel photos
Best Ways to Share Travel Photos
Make photo books.
There are dozens of companies that offer photo books. These digital scrapbooks are great and affordable ways to share your travel photos. You can customize them as much as you want. Ranging from just dropping your photos into the templates or creating designs in Photoshop and importing them. Companies like Shutterfly have great promotions and coupon codes when you join their mailing list. You can even create the book and wait until you get a coupon code to print. For online coupons, you should visit ChameleonJohn.com. They have coupons and deals for lots of online retailers.
Create a gallery wall
If you’re looking for a way to display travel photos in your home, a gallery wall is a great way to show off some of your favorite photos. Websites like Pinterest and Apartment Therapy offer creative ideas for layout and composition. Whether you use black and white or color photos, this can be a fantastic way to share some of your favorite memories with guests when they come to your home.

Post your travel photos on Instagram
Sometimes the most memorable travel moments happen when you don’t have your camera with you. Instagram is a fun way to share travel photos taken on your smart phone with your online community, and it has a chance to increase Instagram followers. One of the great things about Instagram is that you can instantly share it with Twitter , Facebook , Flickr, and even via email—all at once.

Between Pinterest and all of the DIY blogs, you can find great ideas online for how to show-off your photos around your home or office. Whether it’s using mod podge to put photos on canvas or creating customized coasters, there are endless fun and creative ways to display your travel photos.
Check out Flickr
While there are plenty of photo sharing sites, Flickr is my personal favorite. A free account has limited storage, and a pro account charges an annual fee for unlimited storage. This is a great way to backup photos, but also to share them with your friends and family.

Make personalized gifts
We’ve taken some of our favorite photos and used them for gifts for friends and family. Some we’ve had printed and framed. After traveling through Africa for a few months last year, we made calendars for our parents. Whether it’s a photo on a mug or photo printed and framed, your travel photography can make great gifts.

Create a best-of album
When you start going through your photos after a trip, make sure you put a handful of your favorites in a folder for easy access. Your best-of album makes it easy to find photos when you want to remember your travels. What do you do you with your travel photos? What are some of your creative ways to share them?
Start Your Nature Photography Journey
Are you a green traveler who’s passionate about exploring new cultures, as well as nature and wildlife in exotic locations? Consider preserving memories of your travels through photography. By using a digital camera during your trips, you can discover new features, textures, and colors in the natural environment. However, if you’ve never tried your hand at nature photography (an umbrella term that includes wildlife and landscape photography), you may feel overwhelmed by the different cameras and lenses that are available. You may also be completely clueless when it comes to choosing your subjects and crafting your first photos. Just as importantly, you may worry that your first venture into nature photography might harm the wildlife and natural areas you’ll be exploring. Read on and you’ll soon be armed with the know-how and confidence to tackle nature photography like a boss.
Capturing the Beauty of the Natural World
Nature photography is all about capturing the beauty and grandeur of the natural world—landscapes, wildlife, and plants or close-ups of textures, scenery, and wildlife. Unlike other photography genres (like documentary photography), nature photography places greater emphasis on the aesthetic value of the photographs.

Ethical Nature and Wildlife Photography
Of particular concern to green travelers is the ethical aspect of nature and wildlife photography. While photographers should be free to explore themes and subjects that inspire their creativity, they should also avoid causing any harm to the animals, plants, and natural areas they photograph. As some photographers are prepared to do almost anything to get the shots they want, conservation groups and photography associations have published a number of codes of conduct for wildlife photographers.
Key points to remember when photographing wildlife:
- Always photograph the animals from a safe and respectful distance.
- If the animal shows any signs of stress, move further back or leave the scene altogether.
- Be patient when photographing animals and never force an animal to do something.
- Never encroach on nests or dens during breeding season.
- Always treat the animals and their natural habitat with utmost respect.
- Respect local cultures and customs.
- When baiting wildlife, use only organic food that’s part of the animals’ natural diet, and avoid baiting animals that are potentially dangerous.
As for photographing the natural environment, common sense rules prevail. Nature photographers should avoid polluting and littering the natural environment, and stay on trails that are forged to lessen impact on fragile ecosystems.
Best Entry-Level DSLRs for Amateur Nature Photographers

Canon Rebel T6i

Nikon D3300
The Nikon D3300 is an outstanding budget DSLR that combines a 24-megapixel DX-format (APS) CMOS sensor (measuring 15.4mm x 23.2mm) with a feature set that’s designed to please shutterbugs looking to upgrade from point-and-shoot cameras to entry-level DSLRs. Other key specs include an ISO range of 100-12,800, an 11-point autofocus system, continuous shooting at 5 fps, and shutter speeds of 1/4000-30 sec. Choosing the Nikon D3300 gives users access to Nikon’s more than 70 current-production lenses and teleconverters. Including close-up, fisheye, super-wide, long zoom, and Vibration Reduction lenses. Top lenses Nikon users should consider investing in include the Nikon 10-24mm and the Nikon 18-300mm VR.
DSLR vs Point-and-Shoot Camera: Which Should You Buy?
Last March, I attended a media event with Sony , where I was fortunate enough to spend three full days on location in Park City, Utah learning how to use a variety of their newest cameras, video cameras, and tablets. I now have enough knowledge to make a decision about bringing my DSLR vs Point-and-Shoot Camera wherever I go. I traded in my trusty Nikon point-and-shoot for the duration of the trip, and absorbed the information and in-the-field tutorial of Sony experts. I’ll tell you, I was a bit nervous. I’m not especially tech-savvy, despite using cameras in my line of work as a travel writer for years. I was sure the Sony experts were going to push me out of my comfort zone (the world of point-and-shoots) and make me leave mine behind. While DSLR (which stands for digital single lens reflex) cameras are often the go-to choice for specific functions and results, they don’t have to be complicated. Point-and-shoots still have their place in my day pack or purse.
Best camera for…Taking pictures of kids and action-packed vacations
If you’re trying to capture intense action while on-the-go, it is best to use an action cam. It can be mounted on your helmet, bike handlebar, or even strapped to your chest. Turn it on, record the action, and turn it back off. After being introduced to Sony’s Action Cam, I’ve been able to actually keep up with my skiing kids. Whereas I used to be way behind, trying to film with one hand and hold my poles in the other.
Because action cams (not just the Sony version) have waterproof casing, they can come along for the ride in kayaks, through mud puddles, and in dirt. Even when you’re not traveling, an action cam is the best camera for taking pictures of kids. Sony’s Action Cam features WiFi, which can be used to download videos directly to phones and Facebook as well as for you to see the angle of your shot via your screen as you’re filming. The well-known Go Pro HERO does not feature WiFi, but does enjoy a on-camera screen and more intuitive programming.
Waterproof camera for outdoor travel
If you’re planning to take photos while rafting, swimming, backpacking, or hiking, you need a camera that will fit in a pocket or waist-belt pocket of a day pack, is immune to dust and dirt getting into the lens, and is waterproof. Opt for a waterproof, dust-proof point-and-shoot like the Sony rugged Cyber-Shot with both video and still shoot capability. I’m planning to take mine swimming with whale sharks; horseback riding through the Tetons; and kayaking in Alaska. The Olympus Tough compact digital camera has similar features for a similar price tag, and like the Sony, also claims to be shockproof and freeze-proof.
Best Digital DSLR Cameras for Every Traveler’s Budget
Whether you are going on a staycation or planning a long-term overseas trip, it is definitely easier to capture those legendary travel moments with a great camera. Up until the last few years, it was difficult to get a great camera for a good price. Many professional DSLR cameras seemed off-limits for travelers. But thankfully, there are now cameras that fit with every price range. As the cameras on smart phones continue to improve, we have ditched our point and shoot digital camera. Instead we travel with our DSLRs and our iPhones. We love that this helps us travel light–which is one of the easiest ways we’ve found to travel green. Here are the best digital cameras for every budget.
Entry Level: Rebel T3i
While the price tag may not seem entry-level, the Canon T3i is a great camera for the money. It is an inexpensive DSLR that produces high quality photos. We bought this camera before going on a three month camping trip through Africa and were really happy with our photos and the camera itself. My husband appreciated that it takes video, as well as photos. The flip-out screen allows you to look over crowds and take self-portraits. One of the disadvantages of the entry-level cameras compared to the high-end DSLRs is that they are cropped frame. This camera with a 17-55 mm lens. Nikon equivalent: Nikon D5100.
Mid Range: Canon 60D
The Canon 60D is definitely a step-up from the Canon T3i. The Canon 60D is a more professional camera, but the price is still manageable. Right now, you can purchase a 60D you will also receive a 18-135 mm lens. Like the T3i, one of the biggest disadvantages of this camera is the cropped frame. Canon developed this camera with the photographer in mind. Someone that is looking to upgrade from a camera in the Canon Rebel series. Nikon equivalent: Nikon D7000
High-End: 5D Mark III
The Canon 5D Mark III is definitely on my husband’s wish list. With a price tag this camera is top of the line. With full-frame image quality that gives you wider angle photos, this camera is a big upgrade from both the T3i and the 60D. While the other two cameras come with plastic bodies, the 5D Mark III has a metal body, which makes it a more durable camera. If you are hoping to get into professional photography, this is a good option because it is ideal both the studio and shots in the field. It is also great for still photography. Nikon equivalent: Nikon D800
These three cameras are all Canon because that is what we have always used and what we prefer. Both of cameras are Canon which makes for lighter (and cheaper) traveling because the lenses are interchangeable. We have been extremely happy with both of our DSLRs, but we have friends that swear by Nikon. It is definitely a matter of preference. So, I listed the Nikon equivalent for each camera. What camera do you use for nature travel
Image credits: chris_ford_uk , mklipovsky , theogeo
- Destinations
- Outdoor Adventures
- Travel Photography
- Trip Planning
- Bucket List
- Terms/Privacy
- Travel Resource Library

Best way to organize your travel photos

If you’re anything like me, you’ll be taking thousands of photos on your trips abroad, but what happens when you get home? How do you sort through the mountain of pictures? How do you select the best ones to share with your friends and family? Don’t you worry, by the end of this post, you’ll be an organization master! This guide will help you find the best way to organize your travel photos so that you can easily find them, show off your best snaps and put them together in a memorable way.
Step 1: Create your folder system
Step 2: download them from your camera onto a hard drive., step 3: import them into lightroom, step 4: cull your images/ select for editing, white balance, step 6: share, best way to organize travel photos, backing up your photos while travelling, make a photo book, canvas prints, photo gallery wall, product recommendations.
NOTE: Travel is not recommended at this time. These posts are here to serve as inspiration when we can explore again. Hey there – this post likely contains affiliate links, which means I earn a commission (at no extra cost to you) if you purchase from them. This helps me earn a few dollars to run this website.

What you’ll need:
- Card reader
- All your cameras/ devices
- Editing software, like photoshop or Lightroom, or something free like fotor.
This travel photo organization process can work with either a Mac or a PC, no matter what type of camera you have and can be adapted to suit your needs. If you are looking to share photos on Facebook, or have a slideshow with family or if you want to edit your photos for a gallery, it works for everything that’s why it’s one of the best ways to organize your travel photos

Creating a folder system is probably the most important step and one you’ll want to make sure you get right. For a long time, I just organized my photos by year and dumped Every. Single. Photo. into that folder. (What was I thinking?!) But I smartened up when I got my first DSLR. I started organizing by date, which was great, but not perfect.
Now, after 10 years of photography, I’ve created the perfect system (at least for me.)
I have a specific hard drive for all my raw images. So here’s how I set up that hard drive:
Year> Month > Date + descriptive title.
For example, 2018 > 10 October > 2018-10-12 Italy

(The use of the number in the month folder helps them stay in order by number, rather than alphabetical. And the descriptive title of the date folder is essential for knowing what’s in that folder with just once glance.)
But what happens if your trip goes over multiple days or even multiple months. Well, that’s up to you. You could separate each day inside the month folder, or have a trip folder inside the month folder, then divide it by day like so.
For my Italy trip, which was several days in October, I did the following:
2018> 10 October> 2018-10-12 Italy (the day the trip started)> 2018-10-12 Rome, 2018-10-13 Tivoli and Rome, 2018-10-14 Vatican and Colosseum, 2018-10-15 Venice, 2018-10-16 Tuscany, etc, etc.
You could also separate the inside folders by destination as well. If the trip fell over two months, I would keep the folder in the month that the trip started.
RELATED: How to take better travel photographs

Now, download your raw (original) camera files from your camera and put them in the respective dates. Inside each folder (whether it is each day or each location), make a couple more folders.
To download the photos from your camera to your hard drive, you might need an SD card reader. I prefer this method over transferring photos through software.
First, a “phone” folder. Here’s where I would dump all the photos I took with my phone during that day. I have a Google Pixel 2, and it’s effortless to transfer pictures to my computer using Google Photos. You can also create more folders for each device that you have, like a GoPro or other video device. Phones these days are
Second, an “edits” folder. Here’s where I would keep all the future edits of the photos. Third, a “web edits” folder. Photos pulled from DSLRs (and even phones these days) are MASSIVE files. So you’ll want to edit them into a manageable size to upload into Facebook or Instagram, but keep an originally-sized edit to print them.

Once you have all your photos downloaded into your hard drive, you can start the process of going through them and picking out the best.
I use Lightroom for this, but I didn’t always. Before Lightroom, I would just browse the photos on my computer and write down the ones I liked. Then I would take all of those and open them into a photo editing software, edit and publish. It would take FOREVER. Seriously. I hated editing photos because the process took too freaking long, and I just wanted some instant gratification.
Luckily, I smartened up. Adobe Lightroom is a simple photo browsing and editing system. It’s currently only $9.99USD per month for Lightroom and Photoshop. This is a great deal and one I’m happy to pay. There’s even a seven-day free trial if you wanted to test out the program.
Lightroom gives you the ability to cull your images, edit them, and create presets. You can do this all in bulk and export your photos in bulk. Using this system has shaved down probably 3 or 4 hours of editing for me.

Next, you’ll want to cull your images and select only the best ones for editing.
First thing first, I create an album in Lightroom and upload all photos from the trip into it, even ones from my phone. Then I go through them and cull the ones I don’t like. In Lightroom, hit “x” to flag as rejected. This takes all of 30 minutes, depending on how many photos you have.
Then I use the filter option to take all the images I wanted to keep and drag them into a new album for editing. You could skip this step and keep the filter on, but I just like to have them in a separate folder.
Be ruthless in your culling. No one wants to sit through an hour-long slideshow of your images that are blurry, too dark, not rotated, etc. Select your best and favourite photos.
RELATED: The ultimate guide to improving your travel photography with a smartphone
Step 5: Edit

Editing used to be a pain. I mean, who wants to go in and adjust everything from exposure to white balance to straightening to everything in between?
But sometimes, editing is essential to bring out the colours or to correct a crooked shot. Since I come from a journalism background, my rule with photo editing is that you can change the colour and exposure of a photo, but you can’t change the meaning of the photo. Photojournalism has much more stringent rules than personal photography. But you should keep it in mind if you want to sell your pictures.
So, what should you look for when editing?
There are three things you should keep in mind.
- White Balance
Of course, there are so many other things you can edit (all within Lightroom), such as the correcting optics, correcting distortion, removing chromatic aberration, adding grain, removing noise, adding clarity, dehazing, and SO MUCH MORE. But if you focus on the first three, then you’ll turn out some great images.
If all that sounds like too much work to do on every photo, you’re not alone. There are presets (both free and paid) that you can import to make editing a snap.

Have you ever seen a photo that is a little too pink or too blue? That’s because the white balance is off.
There’s a whole science behind it, but what you need to know is that in the photo, there is a temperature on a sliding blue and yellow scale and a tint, a sliding green magenta scale.
By adjusting those two settings, you’ll be able to get a better check on your white balance, which makes the image look more realistic if your camera didn’t quite get it right.

If your image is too dark or too light, then you’ll need to fix the exposure. In Lightroom, you can adjust the lighting through the exposure tool, contrast, highlights, shadows, whites and blacks. There’s also the tone curve.
It sounds a little complicated, but really, they’re just sliders, so you can fiddle with them until it looks right. Just make sure to have the brightness on your screen all the way up so that you get an accurate image.
Protip: It’s best to shoot your images a little underexposed (not too much), meaning darker and adjust in the editing process. You can pull details in from shadows (the dark parts of the image), whereas highlights (the bright parts) are usually lost as soon as you take the photo.

The next thing to edit is the feeling you want to portray with the image. Personally, I love warm, vibrant shots. But you might respond well to cool, dramatic images or calm, subtle ones.
And if you’re asking Olivia, how do I edit my photo’s feeling? That is where filters and presets come in. And I’m not talking about the ones that come free on Instagram.
Presets are a way of saving the edit adjustments in order to reapply them to other photos. You can make your own or find great and affordable presets on Creative Market.
The key is to be subtle and don’t go overboard.
I like to batch edit by putting the preset I created on my photos, then copy and paste it onto all the other images in the folder. (In Lightroom, it’s as easy as Ctrl+C then select all the other photos and press Ctrl+V.) Then I go in and adjust as needed. It cuts down my editing time!

Yay! You’ve completed the hard part! Now, let’s export and share those suckers!
Lightroom makes it really easy to export images. Just select the ones you want and click File>Export. It will pop open the export tab for the setting that you can change for exporting. You can change the names of the images, the location and more.
First off, I like to do a full-size export. These files will be massive (and will take a long time to export), but these images will be perfect for printing.
I then actually take these images into photoshop to resize, place my watermark and save as a smaller size for my blog or for sharing on the web. But you can also resize the images when you export too! In Lightroom, when you’re in the export option, click the drop-down menu beside “Dimensions.” You can have the option of putting a custom size.
A good size for social media and web use is about 1350px by 1080px (which is the size of a wide Instagram photo), and you can reduce the quality to make the file size smaller. The size limits are totally up to you.
Landscape by Social Sprout is a great tool to resize photos for several uses with a couple clicks of the mouse.
I save all the smaller images in the “web edits” folder on my hard drive. That way, all the photos – original, full-size edit and the web edits – are all together and easily findable.
RELATED: What’s in my camera bag? Camera gear for travel photography

Voila – the perfect way to organize your travel photos. It might seem like a lot of steps, but trust me, I’ve been on the end of poorly organized photos, and it drove me bonkers. And the editing process has helped me so much in the long run.
A couple of years ago, I decided to make photo books of all my trips, but for the size of the book I wanted (LARGE AF), my images needed to be print quality. Well. Guess who didn’t save any of her edited photos in full size before changing them to a shareable web size?
It was me. I did that.
And guess who had to go back and re-edit all her photos from eight previous trips?
Yup. me again.
Let’s just say. I learned my lesson: Keep a well-organized folder system and have a simple editing process. Hopefully, you can learn from my mistakes with this guide on how to organize your travel photos.

If you are a heavy photographer like I cam, shoot raw and fill up SD cards like crazy, then you’ll want to think about bringing along a hard drive for your trip.
A hard drive is also useful since you can back up your photos on the go, meaning you won’t lose them if your camera is stolen or you lose your SD card holders. There’s a lot of good reasons to back up your photos on the go.
Back when I was first thinking about this, I wanted a device that I could just plug my card into and back up my photos without even needing a computer. There weren’t a lot of options – and still aren’t, but there are two solid choices for anyone who wants to back up on the go without a computer.
The first is Gnarbox. Gnarbox is a rugged back up hard drive for those that need a reliable way to do it on the go. With slots for SD, MicroSD and USB, you can easily upload your photos and start sharing them. You can even edit photos wirelessly, without taking up space on your phone. Plus, it’s got a rugged enclosure, keeping the equipment safe.
The downside is that it’s not cheap. The Gnarbox 1.0 starts at $279 USD and the Gnarbox 2.0 SSD starts at $499 USD and climbs to $899 USD.

The other option is the WD My Passport Wireless Pro. Starting at only $149 USD for 1TB, it’s a much better deal. You still have the option of backing up photos directly without the need for a computer. You just need to connect through an app on your phone.
The newer models of this hard drive appear more rugged than my current version, but I don’t think it would stand up to hard climates. Still, it’s an excellent option for backing up your photos on the go.
What do you do with your travel photos?
Now that you’ve done all the work on organizing your travel photos and editing them, what can you do with them to keep the memory alive?
Well here are my three favourite things to do with travel photos:

A photo book is my personal favourite way to display my favourite travel photos. I often can’t narrow down a few of my favourite enough to print for frames, so I include all of my edited images in a book form.
I make the books nice and big, so they become coffee table books for when I want to reminisce about a trip or a conversation starter for when guests come over. I have had incredibly positive feedback about them too.
I plan to print all of my trips that way, which is why I love using Blurb . Not only do the products turn out really well, but the program is straightforward to use.
The program, BookWright , is something you download on your computer and use, rather than through an online version. This is beneficial because it allows me to work on a book for as long as I want, and it never deletes. And if family members (or friends) want copies, it’s effortless to re-order the book.
Blurb has awesome sales, ranging from 25-50% off throughout the year. (I’ve got a couple of books waiting to be printed for their Black Friday sales.) You can even sell your books right through Blurb.

I find that when you take hella awesome photos, there’s no better way to display them than as a big statement. That’s where canvas prints come in. You can get massive prints of your favourite photos, but then you would also need to buy massive frames, which cost quite a bit of money.
With canvas prints, the frame is already built-in, and it’s pretty easy to put together. We have eight in our house. We use BestCanvas.ca . The prints aren’t perfect, but they are great for the price. Some of their enormous frames (60cm wide) are less than $40.

My house is full of gallery walls. I’ve got photo clusters of Greek doors, of Germany, of Quebec City, of Santorini and more. Literally, our walls have filled up with my photos. Having a gallery wall is a great way to display your selected favourites. It’s super easy too.
All you need are some gallery wall frames (or you can create your own), then print out the photos in the correct size, hang them up and voila! Your own gallery
RELATED: Gift guide for travel photographers
Here are the product recommendations for taking, organizing and editing travel photos.
Camera: You’ll want a decent camera to capture all those fabulous places you travel to. I’m a Canon fan and have used them for the last decade. My current camera – the Canon 60D is no longer available – however, you can get the Canon 80D , which comes with an impressive wireless component. If you’re looking for a good mirrorless camera, the Canon RP is on my wishlist, plus you can use your lenses on both (the mirrorless just needs an adapter).
Memory cards: Memory cards are an essential and underrated part of the photography process. You’ll want to get SD cards that have a fast writing speed. I use Class 10, and you want to look for cards that have a higher speed like these. You can even get SD cards that are up to 512 GB
SD card reader: If your laptop doesn’t have an SD card reader like most don’t these days, you’ll want to get a simple one to transfer your files to your computer quickly. If you have a laptop with only one USB port, like mine, then you’ll want a hub, like this , to increase the number of ports you have.
Hard drive: Hard drives are vital for backing up your photos. I have several. One is my working hard drive, and another is a backup hard drive. I really like Seagate’s slim hard drives , since they are easy to transport.
Hard drive for travel: As mentioned above, the Gnarbox and WD My Passport Wireless are the best options for backing up photos on the go without a laptop.
This system of folders is the best way to organize travel photos I have found from my 10 years of photography experience. Learn from my mistakes and organize your travel photos right the first time!

Olivia Rutt
Olivia Rutt is the travel writer and photographer behind My Wandering Voyage, a travel website helping working millennials find time to travel. She shares insight in trip planning, travel inspiration and photography tips. Olivia hails from southern Ontario, Canada where she works in the media industry between travels. Follow Olivia on Instagram where she shares her travel photos, or catch up with her on Facebook or Twitter.
Further Reading...
Against the Grain: A Journey Back to Film Photography

Gift guide for travel photographers

The ultimate guide to improving your travel photography with a smartphone
Mywanderingvoyage.

Privacy Overview
- Destinations
- Photo Books
- How it Works
- Testimonials
- Find a Photographer
- 25,000+ 5 star reviews
Select Page
10 Gorgeous Ways to Display Your Travel Photos
Aug 3, 2017

The plane has landed, your bags are unpacked, and the jet lag is finally starting to wear off. But just because vacation is over doesn’t mean you have to stop living in the magic of travel. After all, that is why you hired a vacation photographer, isn’t it?
Beautiful, high-quality photos of some of the greatest moments of your life need more than just an album on a memory card. Get those photos off of your phone and into your home with 10 gorgeous ways to display your travel photos.
Create a photo wall that will steal your breath every time you walk by
Have your socks knocked off whenever you enter the room. Instead of a single, iconic photo, make a statement with a series of framed prints so every detail of your travel memories has its own real estate in your heart and on your wall.
You can print your favourite Flytographer photos in almost any size straight from your personal shoot gallery. And hey, if you can’t make up your mind, you can always hang them all!

Shop Course Gift Cards
Get out of the (photo) box with a unique album
Maybe you want something that goes beyond a print-and-frame display. Do something a little out of the ordinary with an accordion zine that captures the whimsy of your travel photos. With its fun, accordion folds and sleek, marble print cover, this is an album we could spend hours (gently) playing around with.

Busting Myths About Vacation Photography
August 17, 2018
From mom’s film camera, to elaborate photoshoots in stunning destinations, vacation photos have been taken since the...

The Best Time to Take Vacation Photos
July 17, 2018
Taking great vacation photos isn’t always a walk in the park. You have to navigate hundreds — if not thousands — of...

Top 10 Secret Romantic Spots in Paris
May 30, 2018
Olga in Paris for Flytographer Champagne bar on the roof of the Galleries Lafayette Why wait in line for the Eiffel Tower...
Search the Blog
50+ tips on how to look amazing in photos 📸, travel inspiration, top destinations, recent posts.

Featured On

Pin It on Pinterest
50+ Creative Ideas for Hanging Travel Photos and Making Your Home Feel Like a Work of Art
By: Author Valerie Forgeard
Posted on Published: January 10, 2023 - Last updated: July 1, 2023
Categories Travel
Are you looking for some creative ways to hang your travel photos? Whether you’re an avid traveler or want to add a touch of adventure and wanderlust to your home decor, hanging pictures of your travels can be a great way to do it.
From wall artwork displays featuring multiple images to hanging individual prints in unique ways, plenty of ideas will help you turn those memories into beautiful wall decor.
In this article, we will explore some inspiring ideas for hanging travel photos so that every time you look at them, they remind you of the places you’ve been and the unique experiences.
50 Ideas to Transform Your Travel Photos Into Artwork
- Create a gallery wall with a selection of your favorite travel photos.
- Hang a single large travel photo as an eye-catcher.
- Create a collage of small travel photos.
- Use floating shelves to showcase travel photos.
- Try a series of travel photos in matching frames.
- Create a mosaic of travel photos.
- Use clothespins or clips to hang travel photos from string or wire.
- Hang travel photos on a corkboard or bulletin board.
- Hang travel photos on a world map with push pins.
- Hang travel photos on a pegboard for a modern and functional display.
- Use a hanging photo stand with pockets or sleeves.
- Hang travel photos in a stairwell for a unique presentation.
- Hang travel photos in matching frames in a stairwell.
- Use a hanging rod and clips to showcase travel photos.
- Hang travel photos on a wall in a grid pattern.
- Use a photo ladder to hang travel photos.
- Hang travel photos in a circle or other geometric shape.
- Use a wire system to hang travel photos.
- Hang travel photos on the wall with washi tape or clips.
- Use a hanging photo tree to showcase travel photos.
- Hang travel photos in a group on a wall.
- Use a photo shelf to hang travel photos.
- Hang travel photos on a wall with clipboards.
- Use a hanging photo stand with clips or magnets.
- Hang travel photos on a wall with a hanging display with hooks.
- Use a hanging display with wire or string.
- Hang travel photos in a row on a wall with matching frames.
- Use a hanging display with wooden clips.
- Hang travel photos on the wall with a photo display with rope.
- Use a hanging photo display with clothespins or dowels.
- Hang travel photos on the wall with a photo display with chains.
- Use a photo display to hang with wire loops.
- Hang travel photos on the wall with a photo display with strings.
- Use a hanging photo display with wire baskets.
- Hang travel photos on the wall with a photo display with wooden slats.
- Use a hanging photo display with staples and wire.
- Hang travel photos on the wall in a photo display with clear plastic sleeves.
- Use a hanging photo display with metal staples.
- Hang travel photos on the wall in a photo display with metal rods.
- Use a hanging photo display with wireframes.
- Hang travel photos on the wall in a photo display with metal chains.
- Use a hanging photo display with wooden or metal rods and brackets.
- Hang travel photos on the wall using a photo display with rubber bands.
- Use a hanging photo display with strings or ribbons.
- Hang travel photos on the wall with a photo display with metal rings.
- Use a hanging photo display with wooden dowels and string.
- Hang travel photos on the wall with a photo display with metal hooks.
- Use a hanging photo display with metal clips and wire.
- Hang travel photos on the wall with a photo display with metal baskets.
- Use a hanging photo display with metal rods and clips.
Where to Hang Your Travel Photos
Hanging travel photos in your home is not only a great way to remember your best moments, but they also make a beautiful addition. Travel photos add a touch of wonder and color to gray walls. They are also a great source of inspiration. Looking at them makes you want to go on your next travel adventure!
- Corridor . This is a great way to showcase some of your favorite travel photos and a great way to engage guests in conversation.
- In the kitchen . If you have a large kitchen window with natural light, you can hang some of your favorite travel photos there (as long as they do not block the view). This will create a welcoming atmosphere for your guests and make them feel comfortable when they come over for dinner or other occasions.
- On the mantel or other central point . The mantel is one of the areas that most people look at when they are in your home, so it makes sense to display some of your best travel photos there. You can also try hanging them near the fireplace or another natural focal point in your home, such as an open window or a large plant.
- On a gallery wall in the living or dining room . A gallery wall is an area covered with multiple frames that together act as one cohesive artwork (think Warhol). It’s a great way to display multiple paintings in a room without them having to compete for attention.
- In an office or workspace . If you have an office space where you work on the computer, hang some travel photos there! It will remind you why you went on vacation in the first place – and who knows? Maybe they’ll inspire you for your next vacation, too!
- In the bedroom . Use your favorite travel photos as desktop wallpaper or screensavers on your phone and tablet computer so they are always in view when you need inspiration for planning future adventures.
The Best Way to Hang Your Travel Photos
The best way to hang your travel photos is in a photo frame with an adhesive hook on the back. This is a great way to showcase your photos, as you can move them around and change the position they’re hung.
Here are some things to consider when hanging travel photos:
- Hang them high enough to be seen from anywhere in the room. You want your guests to see the photos from every seat. So hang them high enough so that everyone can see them.
- Make sure you have enough space on either side of your photos so they don’t look crowded together. You want people to see all the details in each photo. So ensure there is enough space around each photo so people don’t miss anything when they look at it up close.
- Don’t put too many picture frames close together because then the wall decor will look messy and chaotic instead of nicely organized as you want. It’s always a good idea to keep some white space between your art pieces and various hanging frames, such as travel photos and family pictures, rather than overloading the entire wall with your decorating ideas.
Inspirations for Creating a Cohesive Theme or Story With Your Travel Photos
When you travel, you’re going to take a lot of photos. And if you’re anything like me, there’s a good chance that many photos aren’t terrific.
By that, I don’t mean that every photo has to be perfect. I think that many of the best travel photos are the ones that don’t look like they were taken by a professional. But when it comes to telling a cohesive story with your travel photos, it can be helpful to have some inspiration to tell your story visually.
Here are a few ideas on how you can do that:
- Use a consistent image detail . This could be as simple as using the same lens or focal length for each shot (if you’re using an interchangeable lens camera). Or it could mean keeping your subject in the center of the frame throughout the images.
- Use the same lighting conditions for each shot . For example, if you take one photo at dusk and another at dawn, try to match both shots to have similar lighting conditions.
- Orient your subject in different ways during the series . If your subject is standing on a beach, try shooting it from above, below, or even behind so that its silhouette stands out against the sunset sky in each photo (make sure it’s not too close to the edge).
What to Do With the Travel Photos That You Can’t Hang Anywhere
You have just returned from a trip and brought back many photos. You start looking through them, going through your favorites, and trying to decide which 2 or 3 dozen photos should be enlarged and hung on your wall. It’s not as easy as you might think. Here are some ideas on what to do with the extra photos in your collection that don’t make it onto your wall display or into your living room.
Digital Archive
If you’re not a professional photographer and don’t need to keep thousands of photos, store them on your computer or an external drive. That way, you’ll always have them on hand when you need them. You can also create a folder for each year and sort your photos by location or theme if you want to create a photo album later.
Photo Prints for Friends and Family
I like to print out smaller versions of my favorite photos so I can hang them as art prints in my home or give them as gifts – especially if they show something special that happened during our travels together (a baby’s first snowfall, etc.). You can even print larger versions for the walls if the quality is good enough!
Create Your Gallery Show Online Using Sites Like PicMonkey or Canva
This is an excellent option if you want to share your travel photos but don’t have the budget or skills to create a proper photo book (see below).
Print Out Your Travel Photos and Stick Them in a Scrapbook or Photo Journal
Scrapbooking is a great way to preserve your travel memories, and it’s fun too! If you don’t like scrapbooking, you can still use your travel photos to make a photo journal. You can even make it interactive by adding stickers, crayons, or paints.
Create a Travel Photo Calendar for the Coming Year
You can easily create your calendar with Vistaprint or Snapfish.
Here are the steps to create a travel photo calendar:
- Select the photos you want to include in your calendar. You can choose photos from a single trip or combine photos from different trips.
- Open a calendar template or software, and choose the layout and design for your calendar. You can usually customize the different sizes, orientations, and number of months in your calendar.
- Add your travel photos to the calendar template by placing one photo each month. You can add text or other design elements, such as patterns or graphics, to the calendar template.
- Preview and proofread your calendar to make sure everything looks correct.
- Print your calendar using a high-quality printer or send it to an online printing service so it can be printed and shipped to you.
- Once you’ve finished your travel photo calendar, you can hang it on the wall or place it on your desk to enjoy throughout the year. You can also give it to friends or family members who love to travel.
Use Your Travel Photos to Create Custom Wallpapers or Screensavers for Your Phone or Computer
Use your photos to create custom wallpapers or screensavers for your phone or computer. You can create a slideshow with your favorite travel family pictures or use a photo as a background for your lock screen or desktop wallpaper.
How to display travel souvenirs – 50+ creative ways
Yes, it’s true guys, there might be affiliate links in this awesome, free post. This means that if you decide to buy something that you find here, and you use one of my links to do so, I will earn a small commission at no extra cost to you. I plan to use this money on ice cream, chocolate, and to travel more so I can write these useful guides for you. As an Amazon Associate, I earn from qualifying purchases.
Traveling is one of the most exciting and enriching experiences we can have. Exploring new places, meeting new people, and trying new foods are just some of the things that make traveling so special. And of course, bringing back souvenirs is a great way to remember those experiences and keep them close to our hearts.
But what do you do with all those souvenirs once you’re back home? It’s easy to let them collect dust on a shelf or get lost in a drawer, but there are so many creative ways to display them and keep those memories alive. From classic options like framing postcards and photos to more unconventional ideas like turning travel maps into wallpaper, there are endless possibilities for showcasing your souvenirs in a way that reflects your personality and style.
In this article, we’ve compiled more than 50 of the most creative ways to display travel souvenirs. Whether you’re a minimalist or a maximalist, a DIY enthusiast, or a fan of store-bought solutions, there’s something here for everyone. So, dust off those souvenirs and get ready to turn them into meaningful works of art that will inspire you every day.
Table of Contents

How to plan a trip for the first time

45+ best free travel apps you want to download for your next trip

How to use Revolut for travel – 15+ ways to save money and time abroad
Shelf displays for travel souvenirs.
Shelves are a great way to display your travel souvenirs, and there are many creative ways to do so. When arranging your souvenirs on shelves, keep in mind the overall aesthetic of the room. Choose a color scheme and style that complements the way you decorate your space with travel souvenirs. Don’t overcrowd the shelves – leave some space to allow the items to breathe. And don’t be afraid to switch things up from time to time to keep your display fresh and interesting. Here are a few tips to make your souvenir display look amazing:
- Use floating shelves to create a minimalist display. Arrange your souvenirs in a way that creates balance and visual interest. Don’t be afraid to experiment with various sizes until you feel the balance looks just how you like.
- Group items by color or theme. For example, if you have a collection of pottery from different countries, group them on a shelf.
- Use a mix of items, such as small figurines, postcards, and photographs, to create a layered display. Vary the heights of the items to add depth.
- Display your souvenirs in shadow boxes or on small easels. This will give them a more formal, museum-like feel.
- If you have a large collection of travel mementos to display, consider creating a gallery wall. Use a mix of shelves, frames, and other display items to create a visually stunning display. Who knows, maybe you’ll open up your house for visitors at one point.
- Hang items from a kitchen utensil holder or a hanging jewelry display, if you need. You have plenty of options online to make them look great and match your desired aesthetic, so check out these options as well.
And here are a few ideas on how and what types of souvenirs you can combine on various shelves. Feel free to mix and match by using shelves, tables, or small parts of your room.
- Make up a corner with your related items per country (an Indian corner, a Chinese corner, a French corner, etc.). Combine things like books, tea sets, and various other items to give the full feeling of the destination.
- Display all of your travel guides (from Lonely Planet or independent travelers, like mine ) on a bookshelf. Who doesn’t want to see a wall full of books, am I right?
- Make decorative arrangements with sand and shells in IKEA glass containers (or their Amazon version ). The same can be done for other types of souvenirs like sand from the desert, rock collections, or other natural items you are allowed to take. That last part is not negotiable: you shouldn’t take anything from the environment if the rules forbid you to.
- Create handpainted Christmas tree decorations with each destination. If you’re more artistic, you can paint each destination on a simple Christmas tree globe, or you can buy some already-made ones from Etsy . In the end, most souvenirs are not sourced locally anyway, so you can choose to be creative with this.
- Create personalized decoration items like pillowcases, embroidered pillows, or throw blankets. These will make your house look warm and cozy and will make you dream of traveling every time you see them. Don’t overdo it though because it stops being funny and starts being in-your-face instead. Check out this example from Etsy.
- Get a travel keepsake box for each destination and add all of your related items to it. Then, display them in a corner of your living room or bedroom after labeling (or use some personalized boxes if you can), so you create a nice overview of your accomplishments. You get bonus points if this memory box is in the shape of a suitcase , and it’s even better if you can find sets of them in assorted colors. This is also a great gift for a traveling couple , for example.
- Create a shadowbox for each destination, including maps, ticket stubs, postcards, etc., or even 3D items like shells, rocks, or small figurines. Arrange them in a grid for a modern and minimalist display, or just put them randomly throughout the house for a more relaxed feeling.
- Make a collage of your boarding passes, luggage tags, entry tickets, public transportation tickets, etc. from a destination and display them on a shelf. You can also hang these on a wall and make a huge piece of wall art with it. It’s a nice way to reuse these items that will otherwise be thrown away.
- Make resin or epoxy art to remember your trips like these amazing rings on Etsy . You can either make nice standing pieces of art to display, or you can even make rings and pendants to wear all the time. I’ve even seen epoxy decorations made out of coins from various countries, so the sky is the limit when it comes to resin art.
- Display all airplane models you have flown on a shelf. This is more for aviation passionate people, but there are more like us than you think. You can either buy the models straight from the airlines so they have the correct logos as well, or you can buy generic ones from Amazon. If you want to be even fancier, you can make 3D puzzles with them and you get to double your fun.
- Make coasters with photocopied versions of your passport stamps. You can either use them as day-to-day coasters, or you can add them as a collection to each destination’s shelf or corner. They’re a conversation starter for sure as any guest will see them for sure.

- Make an embroidery of your travel itinerary , especially for road trips. You can use a map to do so, and old maps look particularly great for this. Then, use embroidery floss and needles to stitch the route you have used, and you can even choose the colors in a way that matches the map’s colors. You can then display these on a special shelf.
- Create a travel binder . You can use a journal bought from each destination to hold the items, making the binder part of the fun, and you can add all sorts of items to it. Include printed photos, postcards, maps, notes from your journaling throughout the trip, entry tickets, transportation tickets, stamps, and everything else you can think of.
- Make origami-specific items and display them on a string, as a mobile for babies, or together on a shelf. You can do virtually anything with origami items, as you can make them of any size and color, and it’s a great way to spend your time as well.
- Have small 3d puzzles with the places you have been to and display them on a shelf. There are great small ones with most of the important buildings in the world, and some can be bought from museum souvenir shops as well. This will recreate a mini-version of the world over time, and it’s cool to see them all.
- Make a tabletop with resin with your coins or keep them in a nice jar. If you’re not the type to collect currency for the sake of it, but always have random coins left over after every trip, this idea is for you. Gather all of them in a huge jar and either use it as a centerpiece or make a tabletop containing all of these coins nicely displayed next to each other. The color palette is nice and warm and the finished item will be unique.
- Add sewing pins to a globe with places you have been to. This is the easiest option you can do if you have very limited space, but still want to show off where you have been. You can buy a big or small globe, depending on your available space, and add pins to it to show the places you have already visited. You can even use tiny flags for this, matching every country, and at one point it will look really cool and colorful like this.

How to keep valuables safe while traveling – 50 tips to keep your stuff safe when abroad

Buy nice or cry twice – 15 travel items to buy nice and 15 to get on a budget

40 + traveling essentials for baby stress-free trips
Wall displays you can create with your souvenirs.
One of the most popular ways to display travel souvenirs is on the wall. There are endless possibilities when it comes to wall displays for travel souvenirs. The key is to choose items that have meaning to you and arrange them in a way that tells a story about your adventures. Here are a few creative ideas to get you started:
- Create a gallery wall with framed photos, postcards, and other mementos from your travels. Mix and match frames for a fun and eclectic look. This option is really nice as you can always add to it, so it will always be growing and changing, keeping your home looking fresh.
- Hang a world map and use push pins or string to mark the places you’ve visited. You can also add photos or small souvenirs from each location, and you can use a painted wall map instead. Maps are great centerpieces anyway and adding your souvenirs will make them personal as well.
- Hang a large tapestry or rug from your travels as a statement piece. You can also use smaller textiles as wall hangings. Especially if you travel often to oriental destinations, you can find amazing pieces of tapestries that you can make some wall displays with.
- Frame free city maps and make a wall art arrangement from them. This way they don’t go to waste and you get a nice piece of wall art. These maps can be used for other ideas as well, so read the whole post before deciding what to do with them.
- Make a piece of wall art with your coins and bills from each country. You can either make a collage with all of them or create separate areas for each destination and keep them more organized.
- Make wall art with your postcards . Better yet, send them to yourself so you also have a stamp and postal stamp on each of them to make them even more special.
- Get these very small frames and put the pages with the stamps from your old passports in them. They look great on long walls like on hallways or staircases or can be combined with different-sized frames for a more vivid look.
- Make an embroidery with flag patches and display it on a wall, or sew all of them on your backpack and see how fast it gets covered. The downside to the last option is that once you change your backpack, it’ll all be out as well, so keep this in mind when deciding.
- Print out your bucket list and check the ones you did already done. You can frame it by continent or area and add pictures to the ones that you already covered. Even better, make the bucket list a central piece on your wall and connect framed pictures with a string from all the places you have been to. It’ll make a nice star-shaped wall art that will evolve over time.
- Add your souvenirs on a corkboard . This way, you can even change them often, once you get bored, or you can use them as well to plan and dream about your next trip.
The form you have selected does not exist.

65+ Pro tips on how to travel on a low budget
Travel collections you can display.
Most souvenirs are already collections in themselves, but I would like to focus more on people that make it a purpose to collect various things from every place they have been to. So, no matter if you collect cups, currency, or teaspoons, here’s your time to shine.
- Organize your wine bottle collection on a display shelf. If you want to drink the wine (which you should, this is what it’s made for), you should keep only the bottles or fill them up with something else. There are special shelves you can use for this or you can just display them on a classic shelf on a wall.
- Organize your spices in spice racks . If you’re a passionate cook, spices are probably the best thing for you to collect. Spice racks are perfect for this purpose, and you can even keep a tiny bit of each condiment in each container and use the rest for your meals.
- Have multiple tea boxes . Collecting tea from all parts of the world can be an amazing way to display your souvenirs. Collect them in specific (or labeled) tea boxes and display the boxes even after the tea in them is long gone, or use the boxes to refill your stash over time.
- Have a shelf for all your mugs . I have recently seen a nice story about a woman that remarried, and the first thing her new husband did was to build her a shelf for her mug collection. I don’t know about you, but this sounds like the perfect love story for me.
- Make a collage with napkins from different airlines/restaurants. This is an interesting collection to have, but also a cheap one. Collect napkins from all the restaurants and airlines you use and make a nice collage out of them. It’s a nice reminder of the places you have been to.
- Have a dedicated shelf with cooking books like this one from around the world . If you’re a passionate cook, or just collect the books in the hope of ever getting to use them, display these cooking books somewhere in your living room or kitchen area, if there’s room. I usually try to get a stamp from the library where I bought it from as well, as a means of authenticity for where the book is coming from.

- Get a specialized album for your coin or currency collection. This goes without saying, but currency should usually be kept in special albums for collectors, as it keeps them safe and nice looking over time. Also, a pro tip: keep two pieces of each item next to each other, to be able to see both sides at the same time. You can leave this as an inheritance to your offspring, as it will be more and more valuable over time.
- Have a special souvenir spoon holder . For those of you collecting teaspoons, there are special holders you can use to display your collection nicely. I had no idea people collected tea spoons as travel souvenirs until I met my mother-in-law, so I’m very happy to be able to share this idea with you as well. I recommend one with a glass door so you don’t have to do the dusting too often.
- Show your toiletries collection . You know the toiletries you get in complimentary baskets at the hotels or the small, special ones you buy in handmade souvenir shops while away? A nice way to display them is by labeling them and putting them in a nice basket in your guest bathroom. It makes the place look cozy and can be used by guests as well.
- Organize your scarves from around the world . If you collect scarves from around the world, try to find a scarf organizer and see if you can display them nicely. I also like to order personalized scarves that are hand-painted like these ones from Etsy ; they look nice and make me feel really good about wearing something unique.
- Show off your rock collection . If geology is your passion, there’s nothing like a shelf full of rocks, geodes, or gems from all around the world. You can even buy a special case to show off your collection and I wouldn’t blame you if you choose one.
- Display rubber ducks from each destination around your bathtub. I know, I know, who collects rubber ducks? Well, some people with children might, and I know a few without children that are doing this. It’s a cool way to display your souvenirs and it’s not so obvious since they’re not taking over the living room, so why not?
Ideas to share your travel knowledge
While most people buy some sort of physical items as souvenirs, some of us decide to go for something less tangible. I’m better with words than I am with anything else (hence you’re reading this post), and some people are better with video, music, or other forms of art. These too can be seen as souvenirs from around the world, so let’s see some ideas on how to display them properly.
- Make a blog and display your stories . This is probably obvious, as this is the path I have chosen. My blog started as a place for me to tell my stories and has evolved into the animal you can see now. You can do the same, it’s easier than it sounds, and it can be a nice hobby if you like writing.
- Create a YouTube video with helpful information . More and more people do this, it seems like everyone with a GoPro has a Youtube channel nowadays. It’s a nice way to share your knowledge and show the good, the bad, and the ugly of traveling, so feel free to do this if you are so inclined.
- Create collections of maps on Google MyMaps . I truly like this as I get to share them after I return. I have done this for so long and shared them with so many people, I started to offer them as products as I see people love them so much! It’s a nice way to feel useful and share information, so check it out if you rely on GoogleMaps. And check out my favorite free travel apps , you’d be surprised how much you can do for free these days!

- Save a playlist with music from each destination (or about each destination). This idea came to mind when, right before taking off to Japan, one of our friends was singing “Big in Japan” to us, on repeat. If I were more musical, I’d totally save a playlist for each destination, containing music from or about the destination where I’m headed, just to get me in the mood. Then, I’d listen to it when back so I can keep on dreaming.
- Learn the language of each destination you have been to. Now, this is for the people inclined to learn languages, I’ve heard there are some in this world. You can use a tool like Babbel for this and learn at least a few phrases in each language you have been exposed to. It’s an awesome way to be reminded of your trips!
- Publish a book with your stories and pictures . I know, I know, who reads books these days? I can assure you that some people still do, including myself. Even people that don’t buy physical books but only read eBooks still can get to read about your trips and adventures. You can write stories, describe your heritage journey with the help of MyHeritage , make a photo album, or write a children’s book. Let your imagination float and see what comes of it!
- Make a book with international food recipes you have collected. This is similar to the idea above, but hear me out. If you collect recipes and cooking classes from all over the world, you can do so much with them. You can create cooking books, you can create subscription boxes where each week you receive a recipe and the ingredients to cook it, or you can create a travel&cooking blog or YouTube channel. Find a way to share this information and you’ll learn so much in the process.
Creative ways to display your travel photos
I know, I know, who prints photos these days anyway? Well, I think pictures make for fabulous souvenirs, and these creative ways to display them have multiple advantages. Using pictures as souvenirs is cost-effective, highly personal, and can look really nice in your home, if displayed properly. Check out some of the options below!
- Make a photo album . There are multiple ways to do this, from buying a cheap photo album from a store or even a few sets from Amazon , and you can have an album for each trip. If you feel fancy, you can even label them accordingly or combine this with some other ideas as well, like including tickets and other keepsakes.
- Make a coffee table book . If you’re more artistic kind, you can print a nice coffee table book with your pictures. If you’re also a bit business-inclined, you can even sell them to your friends or on marketplaces like Etsy. People pay a lot of money for these things and if you love doing them, why not?
- Make a personalized collage of your photos . There are plenty of frames that can keep up to 8-10 pictures, and you can make a nice collage out of your photos like this. You can even buy just a few and change the pictures from time to time, just to make your house look different with very little effort.
- Have a map on the wall and add your pictures there . I have seen this once in a friend’s house and LOVED the idea. You can stick a huge map on your wall like this one , and add pictures of you at the places where you have been. It looks great and makes for a nice road on Memory Avenue.
- Make a giant accent wall with all your photos . This option doesn’t work for everyone but hear me out. By using your personal photos, you can create a one-of-a-kind piece of artwork that showcases your adventures and memories. Not only does it serve as a conversation starter for guests, but it also allows you to relive your favorite travel moments every time you walk by it.
- Make an accent canvas print for your home . Especially if your travel photos are more artistic, you can use them to print a nice canvas print. You need very high-quality pictures though, but if you have them, you can use the horizontal ones for the wall above your bed in your bedroom, for example.
- Use some Christmas lights . Another idea I saw in a friend’s house and I loved it! Get a string of Christmas lights and some rope, spread them alongside a long wall, and use clothespins to display your instant photos. It’s a cool way to decorate an otherwise useless wall like in the hallway or up the stairs, and it doesn’t require too much DIY talent to implement.
- Use your pictures to create everyday use objects . Nowadays, with the solutions you can find online or at every printing shop around, you can make mugs, keychains, T-shirts, Christmas tree decorations, and mouse pads with your pictures, and God knows what else. I’m not saying you should do ALL of them, as that might be a bit overkill, but sprinkling some of these in your daily life might be a nice, creative way to display travel souvenirs
- Make magnets with your travel photos . I know I know, this is a bit tacky, but you can keep them on a board or on the fridge, so it doesn’t have to be so in-your-face. What’s the difference between a $3 magnet made in China and one made by you with pictures you have taken?
- Get an electronic photo frame . These are nice to keep on your desk, either at home or at work, as you can change the pictures often so they’re not boring, and you can add things like calendars and to-do lists to the display rotation as well. There’s nothing like being bored in a meeting that could have been an email and looking at pictures with some palm trees from The Maldives, believe me.
- Make yourself a personalized wall or desk calendar . Especially if you have pictures from all seasons, you can pair them with the corresponding months, and make it look really professional even. Hell, you can even gift them or sell some around, especially at the beginning of the year when everyone can use a calendar.
FAQ – creative ways to display travel souvenirs
How do you organize travel keepsakes.
There are many ways to display your travel keepsakes, but the easiest ones would be to: 1. Use a shadow box to keep them organized by destination 2. Use a box in the shape of a suitcase 3. Get a memory box for your souvenirs 4. Make a DIY album with your keepsakes 5. Build a piece of wall art.
How do you display art from travels?
Collecting pieces of art from your trips is a great souvenir, and you can display them like this: 1. Organize a “destination corner” in your house 2. Build a dedicated shelf for your pieces of art 3. Publish a photo book with your pictures.
How can you organize travel souvenirs?
Keeping your souvenirs in order is a great idea, and you can keep them organized like this: 1. Get an album for your coin or currency collections 2. Have a dedicated box for your rock collections 3. Keep all the related ones in a shadowbox
How can you pack souvenirs?
One way to safely pack souvenirs to be sure they make it home is to wrap them in bubble wrap and pack them between your clothes or in your shoes. Another good way is to wrap them in a piece of clothing and put them in your shoes, so they’ll be safe while flying.

Creative ways to display travel souvenirs – the takeaway
In conclusion, displaying your travel souvenirs in creative ways is a fun and exciting way to add a personal touch to your home decor. From creating a gallery wall with your favorite photos to using unique items as decorative accents, there are endless possibilities for showcasing your adventures.
Not only does this type of decor allow you to relive your favorite travel moments, but it also serves as a reminder of the incredible experiences you’ve had. So, whether you’re a seasoned traveler or just starting out, don’t be afraid to get creative with your souvenirs and turn them into beautiful decor pieces that you can enjoy for years to come. Happy decorating!
3 thoughts on “How to display travel souvenirs – 50+ creative ways”
- Pingback: Romantic travel gifts - The perfect gifts for travel couples in 2023
- Pingback: 5 Ways To Change Up Your Home Interior To Stand Out - chelseamamma.co.uk
- Pingback: Buy nice or cry twice - 15 travel items to buy nice and 15 to get on a budget | Honest Travel Stories
Leave a Comment Cancel reply
Save my name, email, and website in this browser for the next time I comment.

HOW TO DISPLAY TRAVEL SOUVENIRS & WHAT TO COLLECT!
INSIDE: Ultimate Guide to Travel Souvenirs, and how to display them with style.
If you love to travel, perhaps you’ve thought of starting a travel collection of travel souvenirs?
Don’t know where to start, or what to collect?
We can help.
Take a look at our BIG LIST of the BEST SOUVENIRS TO COLLECT FROM TRAVEL!
(Don’t ask what’s your favourite souvenir to buy when you travel? I can’t pick just one.)
Once you’ve chosen your signature travel souvenir, the next problem is how to display travel souvenirs in a way that appeals to your design eye!
Here’s a few ideas to solve that dilemma!
Take a look.
Disclosure: This article contains affiliate links . If you make a purchase after clicking on one of these links, we may receive a small commission at NO extra cost to you.

Image credit: Enrique Hoyo s via Pexels CC0
How to Display Travel Souvenirs
The biggest problem of shopping for souvenirs around the world comes with storing or making the most of them.
People often ask us:
- How to display travel souvenirs?
- How to organize travel souvenirs?
- How to store travel souvenirs after a holiday?
- How to keep travel souvenirs?
- How to decorate with travel souvenirs?
- What should I do with my cruise or trips memorabilia?
- What are some good collections to start, and what do you do with them?
These are our top 14 tips on how to display souvenirs from travel.

Image credit: Mark McCammon via Pexels CC0
No.1: Interior Decorating with Travel Souvenirs
Be inspired by house designers .
Here’s the hot tip on how to decorate with travel souvenirs.
Group travel purchases of the same nature together to make a harmonious vignette.
This is like a “ pocket-size table arrangement that tells a story about you and your home”.
You can do this:
- on a side table
- on an entry table
- on a dresser, or
- on a runner on your dining table.
The trick is to leave space between items , and not have too many items cluttering up the area.
The answer to how to display plants or how to display seashells is much the same.

Image credit: Nasim Keshmiri via Unsplash CC0
Group similar treasures together
You can also display a collection of similar objects together to make a travel souvenir display.
For example:
- all your clocks on one wall
- all your red and white toadstools on a timber shelf by the window
- all your vintage glass bottles in a sunny spot to catch the light
- all the bright embroidered cushions together on one couch
- all the special themed handmade items in one corner of the room

Image credit: Natasha Connell via Unsplash CC0
How to organize travel souvenirs? Group heights and sizes together
Build a DIY cabinet to size to store a complete collection to store all the things you collect, such as:
- all the different sodas and soft drinks in glass bottles
- cereal boxes (be sure to visit the Cereal Killer cafe in London !)
- wine bottles
- sauces & condiments
- beer bottles
This makes a colorful cheery display!
Hot tip: If you’ve drunk the contents before it goes out of date, fill the empty bottle with colored water to maintain the visual effect.

Image credit: Jason Leung on Unsplash CC0
Color Code your travel gifts & souvenir ideas
Display your travel souvenirs by color.
Put all the green souvenirs together in one place.
Or color code them in a rainbow.
There’s no rules!

Image credit: Laura Mitulla via Unsplash CC0
No.2 How to store your travel souvenirs collection
Buy the storage solution particular to your chosen collectible, travel keepsake or best travel souvenirs eg:
- pressed pennies book
- Disney autograph book
- dried herbs in uniform, vacuum sealed glass jars
- souvenir spoon holder
Here’s a modern spoon holder made from clear acrylic to make your display storage for spoons look like an modern art gallery!
Here’s a souvenir spoon holder with a door to keep out the dust.
It’s lockable too.

No.3 Travel Keepsake Box for special travel memorabilia
A travel memory box is a way to store your valuable or nostalgic travel mementoes that don’t need to go on display.
This wooden keepsake box can be used to store:
- special ticket stubs
- boarding passes
- expensive jewelry that you don’t wear every day
- printed photos you never want to lose
- excess currency
- handwritten letters
- postcard collections from your adventures

Image credit: Eric Prouzet via Unsplash CC0
No.4: Travel Display Shelving
Pigeon hole cabinet for a mug collection display.
Purchase a special pigeon hole cabinet with lots of separate shelf areas and store one collectible in each section.
For example, one handcrafted ceramic teacup or mug in each space to form a big visible collection of cups and drinking utensils such as Finnish kuksa cups.

Image credit: Yannes Kiefer via Unsplash CC0
Floating Shelves Souvenir Display Case
Add two or three rows of floating shelves to your wall and line your collectibles, such as your entire nail polish collection from abroad, or shot glasses, along it.
Floating shelves should be placed at a height that is preferably out of reach of kids to keep your travel knick knacks safe.
For fun, you can add a good quality, cinema style lightbox to the shelf, and write an artistic description about the collection.
Can’t think of the perfect narrative?
Try finding a meaningful or relevant line from a poem or reading a favorite book to spark your inspiration.
This would also be one way how to display kids art.

Image credit: Jens Behrmann via Unsplash CC0
Vintage shelves display cabinet
Or, find a fabulous vintage cabinet and do the same.
The best thing about a vintage cabinet is the unusual shelving layout, where not all shelves are the same size, width or height.
This adds visual interest, but also allows to you group your travel souvenirs together, despite them being different heights or widths.
You can also place super tall items on TOP of the cabinet.
This makes them a focus point, as this draws your eye to them in the room.

No.5: Storage Solutions for Travel Knick Knacks
Glass dome displays for your vacation souvenirs.
Buy a few glass domes, or a clear glass cake stand , and store your favourite dolls, toys, and items under the lid.
Place a few domes or cake stands IN A ROW for extra points.
This is the ultimate travel knick knack display.

Image credit: Chris Hertel via Flickr CC BY-2.0
Clear Glass Vase storage
Buy a giant clear glass vase, and place all your small collectibles inside.
This method is particularly good for storing items of the same nature, eg:
- die cast cars
- sewing thimbles
- colored pencils
- lipgloss tubes

Travel Shadow Box displays
Wondering what to put in a shadow box ?
Buy a memento shadow box to store your excess coins, odd currency notes you no longer need, small trinkets, ticket stubs etc
Travel Shadow Box Bank
You can also buy a travel shadow box piggy bank.
Fill the front of the vacation shadow box bank with travel inspiration, travel motivation quotes, or your favorite travel mementos.
Add all your spare coins and notes to this unique money box for your next trip!

Image credit: Cottonbro via Pexels CC0
No.6: How to Display Travel Photos
Order photo books .
Take photos of all your travel souvenirs and make up a photo book online.
Print travel photos for the fridge
Display travel photos of your favorite experiences, days out, and snaps of your beloved purchases on the fridge.
Don’t forget to highlight all your fun food adventures, like hunting for cute snacks at Tokyo Disney Sea!
Instamatic collages look particularly stylish.
Make a travel souvenirs collage
Make a travel display collage of all your:
- paper tickets
- airline tickets
- boarding passes
Make a wire display for your travel mementos
Hang some wire along one wall, a la art gallery style, and peg photos and light souvenirs or trinkets to it.
You can also string ribbon to do the same thing.
And this is another solution to how to display kids art, or how to display Disney photos too.
Set up a slide show on your computer as a screensaver
If there’s no other spare space, a screensaver slide show will save the day!

No.7: How to display travel magnets
Our fridge is filled with most of our travel magnets these days.
The best way to make it look like an art gallery is to position each magnet on it’s own, with space around it.
You can also:
- attach them to a silver baking tray and prop this on a shelf in the lounge
- buy a magnetic office noticeboard and arrange them on this giant art canvas
- arrange the magnets on a souvenir magnet display board by color, by destination, or by size
BUY NOW ON AMAZON: Wall Mounted Framed Magnetic Chalkboard

Image credit: Bogdan Glisik on Unsplash CC0
No.8: How to display ornaments
Wondering how to display Christmas ornaments ?
Look no further than a house shape wooden display case.
Blown glass Christmas ornaments can be hung on a bare tree branch and strung from the ceiling.
Check out these cool Airplane Christmas ornaments!
Everyone who loves airplane travel NEEDS at least one airplane ornament for the tree
- personalized Christmas plane ornament with Flight Captain
- Hallmark Keepsake “Mystery Ship” Christmas ornament
- Commercial airliner resin hanging tree ornament
- three pack of decorative tinplate biplanes for the tree

Image credit: Lina Kivaka via Pexels CC0
No.9: How to display postcards
- Buy a giant white or black frame, sized to fit, and lay them out. Add a matt board to style it up professionally.
- Line them up on a wall, clipped with tiny wooden pegs to a long piece of string.
- Display them lined up along on floating shelves, by destination or color.
- Blu tack them to the back of the bathroom door.

No.10: Cool Keychain Collection Display
Wondering how to display keychains?
These travel knick knacks are one of the most tricky to exhibit , as they are all different shapes, sizes and themes.
Why not try:
- buying a kitchen utensil holder and hanging them on there
- hanging them on a rotating jewelry organizer stand
- pinning them to a hessian pin board or a corkboard
- hang them in a wall mounted keychain display case
Or hang a few favorites on your keys, and rotate out at the beginning of each season!

No.11: Ways to display patches
Take a look at these travel patches ideas to store your cloth patches.
- inside a glass fronted photo frame
- sewn onto a queen size woollen blanket
- sewn onto a cloth tote for shopping excursions
- sewn or ironed onto a cloth apron
- sewn or ironed onto a cotton vest
- sewn onto a zip up jacket or beloved denim jacket
- sewn onto a cotton canvas army style haversack, in khaki or butter color
- sewn onto classic military messenger bag in olive green
- sewn them onto a giant wall hanging quilt of colored squares, one per square

Image credit: Markus Spiske via Pexels CC0
No.12: Travel Sticker Display ideas
One of life’s lovely, if temporary, things!
Display your stickers:
- on your car’s rear window
- on a giant freestanding mirror
- on an old door that no longer serves a purpose. Lean it up against a display wall.
- on your stowed luggage
- create a bullet journal full of stickers
- on your laptop cover
- in a purpose bought sticker collecting album
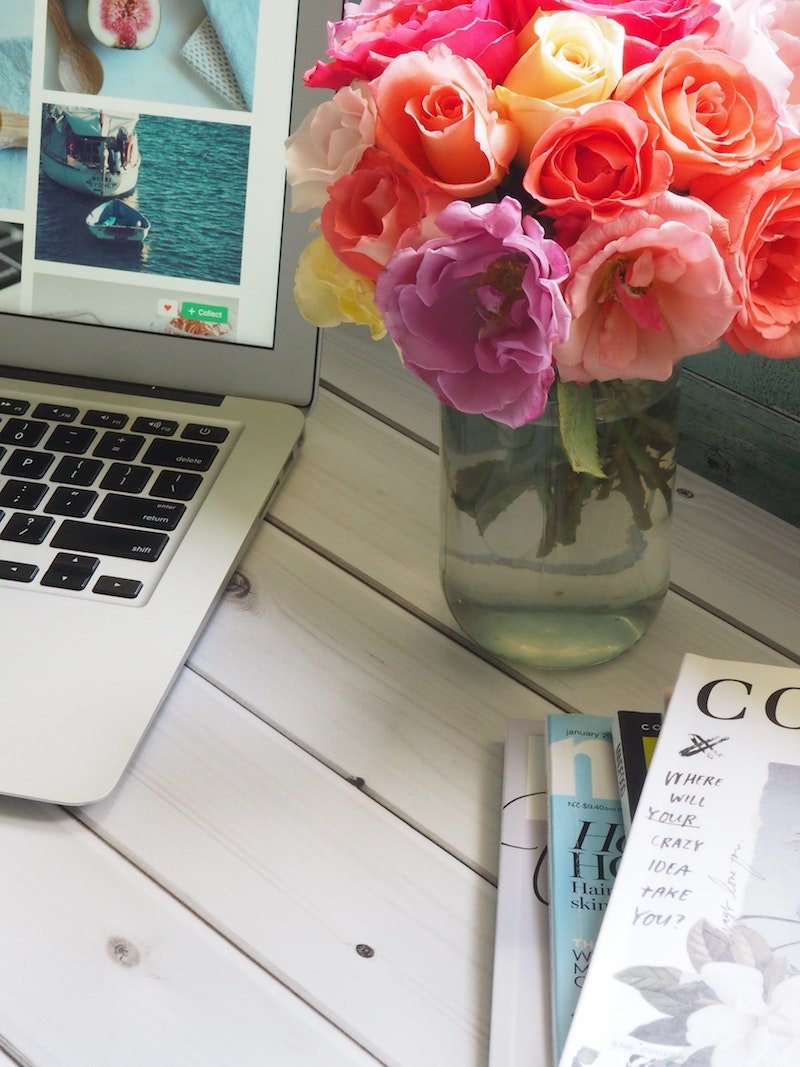
Image credit: Jess Bailey via Pexels CC0
No.13: How to display magazines
Pick a few favorites and pile them up on a side table, next to a fresh vase of flowers.
You can also make a BIG stack of these unique souvenirs in one corner of the room, and use the pile as a shelf for a soft souvenir, like a beloved plush toy.

Image credit: Elly Fairytale via Pexels CC0
No.14: My favorite thing to do with travel mementos!
USE your dish towels (aka, tea towels or dish cloth) when you cook your lunch or dinner, or bake goodies for friends.
Wash your face with your plant-dyed shibori face cloths from Kyoto.
Pop your bottle openers in the dish drawer.
Eat from your ceramic dishes, enjoy your shaving brushes, and drink from your travel coffee mugs so you can feel the joy they bring every single day!
I LOVE drinking from my Snoopy mug from the Charlie Brown cafe in Hong Kong.
It’s the one I carried around the world for 6 weeks in my suitcase.
(Forever grateful it made it home in one piece.)

Image credit: Jen Theodore via Pexels CC0
Make a memento patchwork quilt
Sew up all your favorite dish towels, prayer flags, random fabric pieces from Japan or Morocco, and t-shirts into a big cosy quilt.
If you aren’t crafty, find someone who is.

Image credit: Elijah Macleod via Unsplash CC0
LOOKING FOR SOME MORE TRAVEL TIPS?
Correct at time of publication on Roam the Gnome . Please check with venue for updates. We apologise in advance if there have been any changes we are unaware of. All prices in AUD dollars, unless otherwise stated
Click the blue links below for more travel tips
How to Save Money for DISNEY vacations!
Round up of the most fun hotels for kids around the world, take the kids to see the real elves & santa at joulukka christmas forest in lapland, finland.
Affiliate Disclosure:
This website contains references to products and services from our favourite brands. Some of these are affiliate links . If you make a purchase or booking after clicking on a link on Roam the Gnome™, we may receive a small affiliate commission at NO COST to you. All information on disclosures can be found in our Privacy Policy
Roam the Gnome ™ is a participant in the Amazon Services LLC Associates Program, an affiliate advertising program designed to provide a means for website owners to earn advertising fees by advertising and linking to amazon.com, and any other website that may be affiliated with Amazon Service LLC Associates program. Amazon and the Amazon logo are trademarks of Amazon.com, Inc. or its affiliates. As an Amazon associate , I earn from qualifying purchases.
Click here for a detailed explanation of our Advertising policy.
Thank you for visiting Roam the Gnome Family Travel™ Website Directory. Bookmark this page so you can find us again.

How To Organize and Store Your Travel Photos
S o many of us have photos that we cherish stuck inside our phones for no one to see, so let's talk about How To Organize and Store Your Travel Photos .
The problem of organizing photographs used to be an issue around storage and display. Now it’s an issue of “how far do I scroll before I find it”.
How To Organize & Store Your Photographs
Today, we want to remove both issues once and for all. Get yourself a beautiful leather bound photo album and sit down for an evening of planning and organization.
Gather All Of Your Photos
The first step in this task is to find all of your photos, both physical and digital. Get them all onto one drive, memory stick, or location, while at the same time place all of your physical photos on the table ready to be searched through.
This step should be easy, but here are some reminders about where your photos might be. You could have them stored on a social media platform, they could be locked onto your old phones, and they could be tucked away inside disposable or forgotten digital cameras.
Take your time to find them all!
Separate Them Into Categories
Now that all your photos have been gathered, you need to separate them into categories. First, separate them into digital and physical formats. That step should be easy.
Now consider the elements of your life and how you want to remember them. Do you want to remember them in date order keeping a log of every special event within a year? Do you want to remember every event that's similar to each other in one location - for example, a folder that contains every journey to your family’s holiday destination year after year?
Figure out the theme you want to follow and then start to move your photos into folders (both physical and digital) which represent these times in your life.
This process will take a long time, but have fun looking through the memories.
We suggest taking one concept and then breaking it down into other ideas too. For example, you could have a folder for all of your 2022 photos, and inside that folder could have more folders for every event you had in that year.
Scan Them Into A Digital Format
As you go through your photos you’ll notice that some should fit perfectly in your digital collection and others should be hung up on your walls.
We suggest scanning all of your physical photos into digital form. This will allow you to organize them easily into the categories you have already created and you can reprint them should the originals fade or become damaged.
Create A Reusable Structure
Now that you have your categories created and all of your physical photos have been digitized, you can add the folders to their physical and digital collections.
At this point, you need to ensure the names you have given are understandable without content. This way you can understand them as the years go on.
For example, if you have a folder for all the photos that you take while on your family vacation, first create a folder that separates the years. Then, inside the year category, separate them into events. You could allow them to sit freely inside the folder, but this could lead to confusion when searching later.
Whatever structure you create, it needs to be repeatable so you can do the same thing in the years to come.
As new events pop up, you want to reuse the same categorizing technique so everything is streamlined.
Name And Date Your Photos
Every photo, both physical and digital, needs to be named and dated. This way you can jog your memory when you look at images from the past.
This will also help you find your digital copies faster, as you can type into the search bar “Mom’s Birthday” and find all of the images from that event.
Ideally, you should follow this labeling pattern - 2022.01.30 or Year.Month.Day. Then follow the date with an identifiable label such as “Mom’s Birthday Meal At Zizzi.” Written in this format, your photos will automatically be organized in date order making it easy to navigate.
Create a Photo Book from your Travels
Now let's talk about Mixbook Photo Books . Mixbook photo books are a swoon-worthy keepsake to fill with special memories that will keep everyone smiling all year.
So, why Mixbook over the other companies? Mixbook offers the largest selection of on-trend themes you can make your own, including popular designers like Martha Stewart, Hallmark and Oh Joy! Their photo books are actually fun to create!
Whether you’re looking for a non-cheesy gift for a new love interest, the perfect anniversary gift for your partner of two decades or even a platonic friend who needs a little extra TLC, visit Mixbook.com - there are tons of design templates to get you started, and cue the heart eyes!
A few of our favorite books (softcover books start from $10 up to premium lay flat albums starting at $89.99):
- 10 Reasons Why I Love You
- My Sweet Love
- The Story of Us
- My Valentine
Repeat After Every Event
Now that your photos have been organized you need to keep on top of your system after every event. It will be easier now that the bulk has been added to your system.
How To Organize and Store Your Photographs
Keeping your photos organized will help you find these precious memories when you’re feeling nostalgic. Once you have your system setup, keeping on top of your organization will be easy.
The post How To Organize and Store Your Travel Photos appeared first on The Rebel Chick .

IMAGES
VIDEO
COMMENTS
These notecards are a great way to share your travel photos in place of a postcard. They allow you to personalize your message with a photo of your own. Send a "hello" from the road with a photo of your travels included. You could even use these to display your photos in your home if you like the rustic look. Get It!
The Most Unique Ways to Display Your Travel Photos. 1. Make your own travel mugs. Starbucks collector mugs are a big deal amongst some travelers. They stop by the popular coffee chain and grab a destination mug on all their trips. We guess it makes sense since Starbucks is literally everywhere!
1. Put a frame around it. A digital photo frame is one of the easiest ways to display your travel images. The latest generation of digital photo frames are Wi-Fi enabled and make it easy to link to popular social media and cloud-storage services without a big time commitment. Nixplay, for example, has free-standing and wall-mounted frames that ...
Non Print Ideas To Display Photos. You might not want to spend time, money, or even paper to print and display travel photos from your latest trip, so here are two no print ideas to display photos! 6. Invest In A Moving Picture Frame. A moving picture frame is a hassle free, no printing, way to display travel photos.
Buy now: Travel Photo Album, from $56, etsy.com. ... One of the best ways to display digital photos might just be with a device specifically designed for them. One advantage of digital photos is ...
Step 1: The Best Way to Pick Your Niche and Choose a Domain. Step 2: The Best Way to Choose a Hosting Plan and a Provider. Step 3: The Best Way to Create Your Website. A blog is a fantastic medium for journaling travel experiences (or parenting or recipes or whatever), adding your travel photos, and beginning to share itineraries, tips, and ...
Tile the walls. A wall of photo tiles under a stairwell. Laura Grier. Travel photographer and writer Laura Grier and her boyfriend had a hard time choosing which of the many hundreds of travel ...
3. Rename digital photos to add context. Just as you organize everything into folders, it's important to add detailed information about the individual photos in the actual file names. After all, the story behind the image is just as important as the picture itself.
Consider streaming your travel photos as a digital screensaver on your TV. Many modern TVs come with streaming capabilities, allowing you to bring your travel memories to life on a larger scale. On Your Phone: Use your travel photos as both the Lock Screen and Home Screen. It's a small change that brings a personal touch every time you use ...
1) Make a Travel Gallery Wall. Create a fun travel gallery wall display highlighting your best travel photos. Mix and match different sizes and mediums to create a unique space with your top travel images. Select a theme like beaches, your favorite dive spots, or scenic sunset views from all around the world. . View gallery walls on Amazon.
9. Put Them Inside a Scrapbook. One of the most nostalgic ways to display your travel photos is to put them inside a scrapbook. This allows you to pair your images with notes about the trip, mementos, or any other relevant memories. This fun project makes for a highly personal keepsake of your adventures. 10.
On a Map. One of the ways I love how to display your travel photos is to incorporate them with a map. I've seen this done in a variety of ways. It can be with postcards or Polaroid-style images glued near a map. Get a 50 States photo map collage.
Create a gallery wall. If you're looking for a way to display travel photos in your home, a gallery wall is a great way to show off some of your favorite photos. Websites like Pinterest and Apartment Therapy offer creative ideas for layout and composition. Whether you use black and white or color photos, this can be a fantastic way to share ...
Metal Prints. Metal prints are a really cool way to display travel photos. Metal prints infuse dyes directly into aluminum sheets. It results in shiny, vibrant colors and looks good in both color and black and white. Like Canvas, they pop away from the walls and make an awesome statement. Explore CANVASDISCOUNT wall décor collection, an ...
Make use of a digital frame. Shutterstock. Digital frames are an incredible way to display a lot of your travel photos at once. The frames rotate through whatever photos you have set to them so you can organize a bunch of images together into a slideshow. You can even have multiple digital frames with each one dedicated to a different location ...
Step 4: Cull your images/ Select for editing. Next, you'll want to cull your images and select only the best ones for editing. First thing first, I create an album in Lightroom and upload all photos from the trip into it, even ones from my phone. Then I go through them and cull the ones I don't like.
Get out of the (photo) box with a unique album. Maybe you want something that goes beyond a print-and-frame display. Do something a little out of the ordinary with an accordion zine that captures the whimsy of your travel photos. With its fun, accordion folds and sleek, marble print cover, this is an album we could spend hours (gently) playing ...
Even in the digital era, the best way to do that is through eye-catching physical photo displays. We scoured some DIY sites for ideas and shortlisted a few of our favorite ways to display travel photos: Timeless photo books: This is a classic and foolproof way to showcase your best travel shots.
Hang travel photos on the wall in a photo display with clear plastic sleeves. Use a hanging photo display with metal staples. ... The best way to hang your travel photos is in a photo frame with an adhesive hook on the back. This is a great way to showcase your photos, as you can move them around and change the position they're hung. ...
Upload your favorite photo and, with a few clicks, create a high quality canvas print! This is the best way to showcase the magnificent photos you took on your trip. 5. Design one-of-a-kind postcards. Create a photo postcard of your weekend getaway. 6. Use your travel photos to protect your smartphone. Take the photos from your phone and put ...
Mike_O/Shutterstock. Just like with other seasonal decorations, travel memories can be rotated out of your home decor as well. That's what content creator Giovanna Di Biccari does! Besides saving tickets or other passes to use as bookmarks, she rotates travel photos around throughout the year to remind her family of their global adventures. "Those 4×7, 5×10, and 8x10s are replaced with a ...
Use a mix of items, such as small figurines, postcards, and photographs, to create a layered display. Vary the heights of the items to add depth. Display your souvenirs in shadow boxes or on small easels. This will give them a more formal, museum-like feel.
No.9: How to display postcards. Buy a giant white or black frame, sized to fit, and lay them out. Add a matt board to style it up professionally. Line them up on a wall, clipped with tiny wooden pegs to a long piece of string. Display them lined up along on floating shelves, by destination or color.
The first step in this task is to find all of your photos, both physical and digital. Get them all onto one drive, memory stick, or location, while at the same time place all of your physical ...