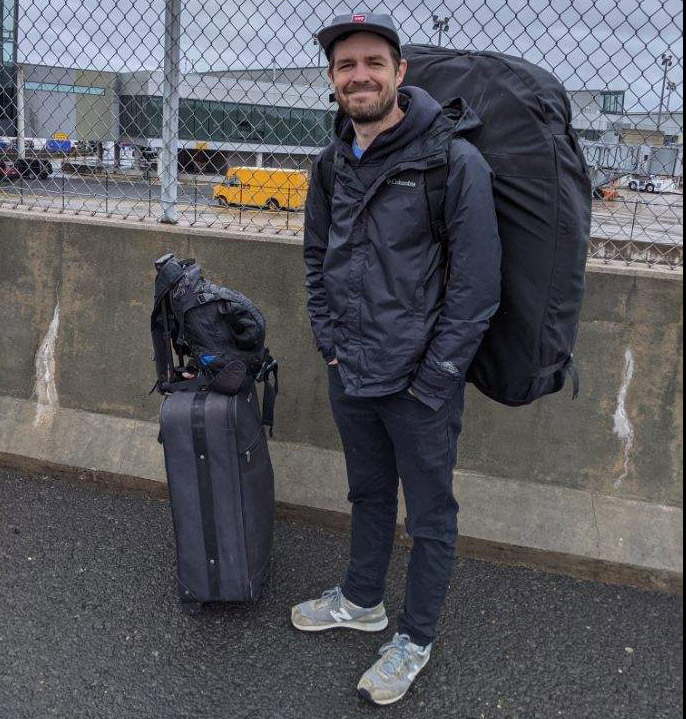
Really Big Bike Ride


Bicycle Touring Tips, Bike Life And Travel Advice From A Decade On The Road
The distilled wisdom of ten years of bike touring life, cycle touring tips and travel advice from hard-earned miles around the globe.
This article documents my bike touring tips from extensive bicycle travels around the world.
Whether you’re a veteran long-distance cyclist or a bicycle touring beginner , this blog post is here to provide you with invaluable bicycle touring tips, bike travel advice, and bicycle touring inspiration from a decade of bicycle trips.
From getting started as a cycle tourer to choosing the right gear. Overcoming fears and avoiding common mistakes, we’ve got you covered.
In particular, the bicycle touring tips we’ll cover include:
- Beginners Guide To Bicycle Touring
- Bike Set Up for Cycle Touring
- Unsolicited Bike Touring Advice
- Reasons To Go On A Bike Tour
- Who Goes Bicycle Touring
- Is Cycle Touring For You?
Bike Trips We’ve Tried and Loved
- Common Mistakes and Bikepacking Fails
What To Pack On A Bike Tour
- How To Travel With A Bicycle
- How To Budget For A Bike Trip
- Overcoming Fears (Just GO!)
- Inspirational Bicycle Touring Tips (Final Checklist)
But first things first – let’s dive into how to get started as a beginner in cycle touring.

Bicycle Touring Tips And Bike Touring Advice
Getting into cycle touring as a beginner.
Getting into cycle touring as a beginner can be both exhilarating and overwhelming. But fear not, because, with the right mindset and a few key tips, you’ll be well on your way to becoming a seasoned cycle tourer in no time!
Start by choosing the right bike for your adventure. Look for a sturdy, reliable bicycle that is comfortable to ride for long distances. Consider factors such as frame material, tire size, and gear options based on the terrain you plan to conquer.
I chose the Dawes Galaxy because we got a great deal from Spa Cycles . I chose steel because it’s tough yet flexible and easy to repair anywhere in the world with a basic fabricator. Also for our charity bike ride around Europe, we knew it would be the best type of touring bike.
Get fit on the bike
Next, it’s important to gradually build up your fitness level before tackling longer tours. Start with shorter rides close to home and gradually increase the distance over time.
This will not only help prepare your body but also allow you to test out different equipment and make any necessary adjustments along the way.
I commuted for years before I got near a heavy touring bike . I tested kit and found stuff I liked and got used to long hours in the saddle.
Remember, cycle touring is all about embracing the journey rather than reaching a specific destination. So take it slow, enjoy the scenery around you, and most importantly – have fun!

Our Bicycle Touring Tips For Bike Set Up
When it comes to bike touring, having the right set-up is essential for a smooth and enjoyable journey. Over our decade on the road, we’ve fine-tuned our bike set-up to meet our specific needs.
Our bikes are equipped with sturdy Tubus racks that allow us to carry all of our gear without compromising stability. We also use Ortlieb pannier bags that attach securely to these racks.
Front and rear panniers provide ample storage space for clothing, camping equipment, and other essentials.
Additionally, we have invested in comfortable bicycle touring saddles and double-wrapped bar tape to ensure long hours on the saddle don’t leave us sore or fatigued.
A well-thought-out bike set-up can make all the difference in your cycling adventure. So take the time to find what works best for you and your needs before hitting the open road!

About Cycle Tourers And Unsolicited Bike Touring Advice
Cycle tourers come in all shapes and sizes, from solo adventurers seeking solitude to couples sharing the journey. Some are experienced riders with years of bicycle touring under their belt. While others are newbies looking for a thrilling escape.
What unites them is their love for the open road and the freedom that comes with pedalling through picturesque landscapes.
You’ll meet bicycle tourists from all over the world. Each one with a unique story and reason for embarking on a two-wheeled adventure.
They share a common passion for exploration and a desire to experience life at a slower pace.
Bicycle Touring Tips From Around The World
Whether you’re cycling across continents or exploring your own backyard, being part of this vibrant community will open your eyes to new cultures, forge lifelong friendships, and create memories that will last a lifetime.
Every bicycle touring tip you get is from a personal experience. In that context, my unsolicited bicycle touring advice is to make up your own mind.
Treat bike travel tips and cycle touring advice as a kind of recipe. Enjoy the useful, disregard the rest.

Reasons To Go On A Bike Tour?
Cycle touring offers a unique and exhilarating way to explore the world. Bicycle travel enables you to immerse yourself in nature, connect with local cultures, and experience a sense of freedom that is hard to find elsewhere.
One of the reasons why people choose to go on bike tours is for the feeling of adventure.
There’s something incredibly thrilling about embarking on a journey across vast landscapes, relying solely on your physical strength and determination. Plus, being able to cover long distances at your own pace allows you to truly appreciate the beauty of your surroundings.
Long-distance Bicycle Touring Is Fun
Another reason why bike touring is so appealing is its simplicity. With just your bicycle and some basic gear, you have everything you need for self-sufficient travel.
The minimalist ideals of bikepacking and bicycle touring make it easy to plan and organize your trip. Enabling you to focus on what really matters – enjoying the ride and connecting with both nature and yourself.
So if you’re looking for an unforgettable adventure then consider going on a bike tour. It’s an experience like no other!

Who Goes Cycle Touring?
Cycle touring is not limited to a specific group of people. It attracts adventurers of all ages and backgrounds, from solo travellers seeking self-discovery to couples looking for a unique bonding experience.
Young backpackers, retirees in search of new horizons, and even families with children are among those who embark on bike tours.
The beauty of cycle touring lies in its versatility. It appeals to both experienced cyclists and beginners who want to try something new.
With the right mindset and preparation, anyone can enjoy the freedom that comes with exploring the world on two wheels.
So whether you’re an adrenaline junkie or simply someone yearning for a slower pace of life, cycle touring welcomes you with open arms.

Is Cycle Touring for You?
Cycle touring is not for everyone, but it can be an incredible adventure for those who are up for the challenge. It requires a certain level of physical fitness and mental resilience. You’ll be spending long hours on the bike, pushing yourself to new limits.
If you enjoy being outdoors, exploring new places at your own pace, and immersing yourself in different cultures, then cycle touring might just be your thing.
Bikepacking and cycle touring offer a unique perspective of the world that you simply can’t get from any other mode of travel.
However, it’s important to consider factors like weather conditions, terrain difficulty, and personal comfort levels before embarking on a bike tour.
So if you’re willing to embrace uncertainty and step out of your comfort zone, then cycle touring could very well be the adventure of a lifetime!

Over the years, we have embarked on countless bike trips that have taken us to breathtaking destinations around the world.
From cycling through the rugged landscapes of the Pamir Mountains to pedalling along picturesque coastal roads in Morocco , each journey has left an indelible mark on our souls.
One particular trip that stands out is our adventure through the stunning countryside of Vietnam . The vibrant colours, bustling markets, and friendly locals made this a truly unforgettable experience.
Another favourite was our tour through Wainwright’s Coast to Coast , where we were captivated by rolling hills, ancient valleys, and mist-covered moors.
Why We Travel By Bike
These bike trips not only enabled us to explore new places but also provided a unique perspective on each destination. They allowed us to immerse ourselves in local culture and interact with people from all walks of life.
There’s nothing quite like feeling the wind against your face as you pedal along remote mountain trails or cycle past iconic landmarks
In short, these bike trips have brought us immense joy and fulfilment. They have taught us valuable lessons about resilience, adaptability, and embracing new experiences. It’s why we travel by bike !
If there’s one thing we can say for certain it’s this: if you’re looking for a thrilling way to discover the world while staying active and connected with nature – bicycle touring is worth considering!

Common Mistakes Bike Travelers Make
One common mistake that many bike travellers make is overpacking. It’s easy to get carried away and want to bring everything you think you might need. A heavy load can quickly become a burden on long rides.
I had to give away a laptop, a heavy-duty bike lock and 15 pairs of socks on my solo Hippe Trail by Bike trip. Instead, focus on packing the essentials and being prepared for different weather conditions.
Another mistake is not doing enough research about the route and terrain ahead of time. It’s important to have an idea of what kind of roads or trails you’ll be riding on.
A general understanding of any political unrest, armed conflicts, or national uprisings can inform your route planning. This will help you plan accordingly and avoid any unnecessary surprises during your journey.
By avoiding these common bikepacking mistakes , bike travellers can ensure a smooth and enjoyable experience on their tours.
So remember to pack light and do your homework before hitting the road!

What to pack on a bike tour can be a daunting task. This cycle touring and bikepacking kit list can ensure that you have everything you need without carrying unnecessary weight.
First and foremost, it’s important to have the essentials: spare inner tubes, a pump or CO2 inflator, tire levers, and basic tools for any potential repairs along the way.
Additionally, packing lightweight camping gear such as the best tent in the world or bivvy bag, a super lightweight sleeping bag , and cooking equipment is crucial for overnight stays.
Don’t forget to bring weather-appropriate clothing including rain gear and layers for varying temperatures.
Remember to prioritize items based on necessity rather than convenience to keep your load light and manageable throughout your journey.

What To Wear On A Bike Tour?
Cycle touring clothing.
When it comes to what to wear on a bike tour, comfort and functionality are key. Opt for moisture-wicking clothing that will keep you dry during long rides. Lightweight and breathable materials like merino wool or synthetic fabrics are ideal for regulating body temperature.
Layering is important, as weather conditions can change throughout the day. Start with a base layer that wicks away sweat, add a mid-layer for insulation, and top it off with a windproof and waterproof outer shell. Don’t forget to protect your extremities – invest in padded cycling shorts, gloves for grip and protection, sunglasses for eye protection from debris or UV rays, and sturdy cycling shoes with cleats for efficient pedalling.
Remember: pack light and practical!

Camping & Cooking Kit List
When embarking on a bike tour, having the right camping and cooking gear is essential. We’ve learned this through years of experience on the road.
Do you really need a stove and cookset?
While for ultra-long bicycle expeditions, a stove and camping cookset make for a useful companion, it may not be essential.
I barely used a stove on my solo multi-month bike trip. In Southeast Asia and India, it’s easy and preferable to eat at the side of the road. Dry foods, salami, nuts, seeds, fruits and jelly sweets are handy to carry as snacks.
However, in Central Asia, I used the stove at least daily to prepare an evening meal. Ingredients were hard to find but given the expansive distances from settlements, it was a bonus to have a hotel meal on the fly.

How To Fly With A Bicycle If You Have To
Ideally, you’ll leave from our front door fully loaded and ready to go. Cycle to a ferry port and you’ll access the next available landmass.
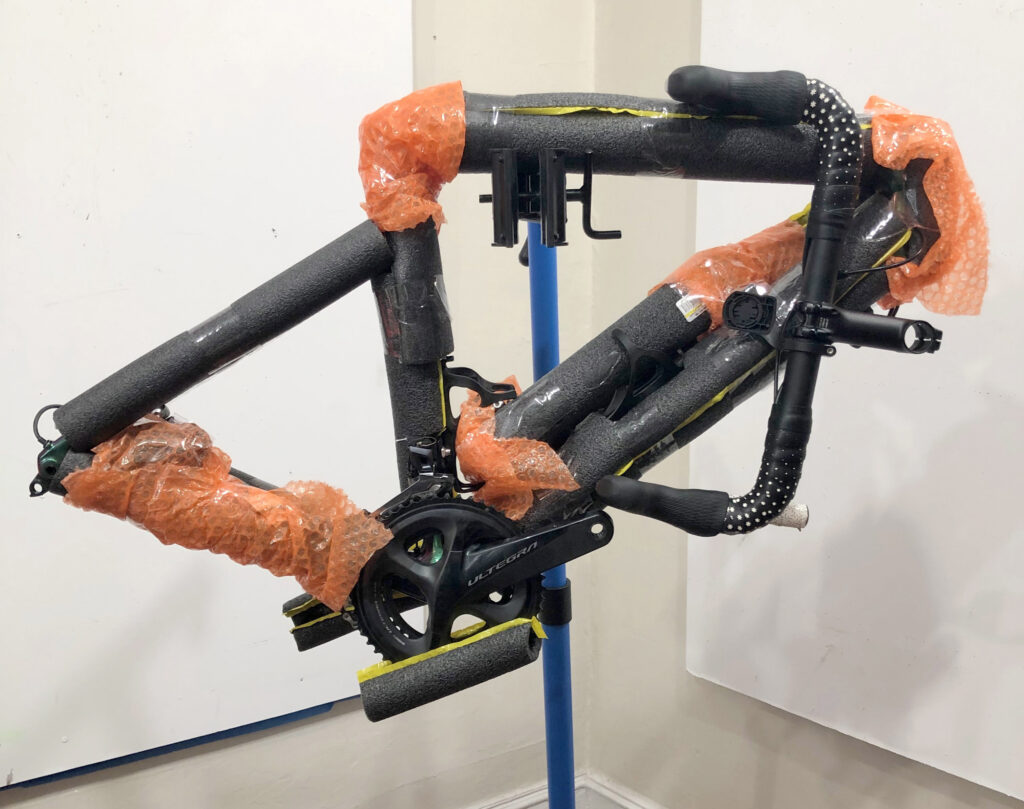
Alternatively, there are various options available. If you have to fly, a bike bag or box for air travel is handy. A cardboard box is best to protect your bike in transit. The see-through bags are liable to damage the bike in my experience. A new box can be found on the return leg.
Make sure all loose parts are removed or tightly secured. Remove the pedals, tuck the drop bars under the frame and remove the front wheel. Store the wheel next to the frame with a cable tie. Leave the bike in the lowest cog on the cassette. This leaves the derailleur compact for travel.
Don’t forget to pack essential tools and spare parts for any potential repairs that may arise during your journey.
Once abroad, it’s possible to put your bike on all kinds of transport. Huge trains in India, speedboats in Europe, and big trucks in Tajikistan.

How To Budget For A Bicycle Tour
When it comes to planning a bicycle tour, budgeting is an essential aspect that can greatly impact your experience. So how do you go about budgeting for a bike tour? Here are a couple of veteran bicycle touring tips to help you get started.
Consider your daily expenses such as accommodation, food, and transportation. Research the average costs in the countries or regions you’ll be visiting and factor them into your budget. Don’t forget to account for any visa fees or travel insurance costs as well.
In Asia, I travelled on $10 a day which at the time was about £6. Most of that was spent on food.
Think about one-time expenses like purchasing or renting gear and equipment. Determine what items are necessary for your trip and research their prices beforehand. It’s also worth considering any potential repairs or maintenance that may come up during the tour.
By carefully planning and estimating your expenses ahead of time, you can ensure that you have enough funds to fully enjoy your bicycle tour without breaking the bank.
Remember, every cyclist has different priorities when it comes to spending money on their journey – so find what works best for you!

Overcoming Fears: The Ultimate Bike Touring Advice
When embarking on a bicycle tour, it’s natural to have fears and doubts. Will I be able to handle the physical demands? What if something goes wrong?
But here’s the thing – fear is just an illusion that can hold you back from incredible experiences. Pushing through those fears is where growth happens.
Fear is just an illusion
One of our last thoughts before setting off on each tour is always gratitude for the opportunity to explore new places by bike.
It’s a reminder to savour every moment, even when faced with challenges or setbacks along the way. Embrace the unknown, push past your comfort zone, and trust in your abilities – you’ll come out stronger on the other side!

Inspirational Bicycle Touring Tips Before You Go
Bicycle touring is not just a hobby or a vacation; for some, it’s a way of life. It opens up new possibilities, pushes boundaries, and connects you with the world in ways that other forms of travel simply cannot match.
As we come to the end of this article, I hope that my experiences and bicycle touring tips have sparked your curiosity and ignited your wanderlust.
Here are some final words of bike travel advice to inspire and guide you on your cycle-touring adventures.
Bicycle Touring Tips Checklist
- Embrace the journey: The true beauty of bicycle touring lies in the unexpected moments, chance encounters, and serendipitous detours along the way. Be open to new experiences and embrace them wholeheartedly.
- Take it slow: Remember that cycle touring is not a race against time. It’s an opportunity to savour each moment at your own pace. Enjoy leisurely rides through picturesque landscapes, stop for coffee breaks in quaint villages, and take time to immerse yourself in local cultures.
- Connect with fellow cyclists: The cycling community is vast and supportive around the world. Whether online through cycle touring resources or on the road, reach out to other cyclists. Bike travel advice, camaraderie, or even potential travel companionship is possible.
- Stay flexible: Inevitably things won’t always go according to plan – weather conditions may change abruptly or unforeseen circumstances may arise – but adaptability is key when bicycle touring. Embrace these challenges as part of the adventure!
- Keep learning: There will always be more skills to acquire and knowledge to gain when it comes to bike travel – from basic maintenance skills like fixing a flat tire to navigating unfamiliar territories using maps or GPS devices .
- Take care of yourself: Remember self-care during long days in the saddle – stay hydrated, eat well-balanced meals, and give your body enough rest to prevent burnout and injury. Listen to your body and know when it’s time to take a break.
- Leave no trace: As responsible travellers, it’s important to leave the places we visit as we find them, if not better. Dispose of waste properly and respect local customs and cultures.

If there’s one thing I’ve learned from our decade on the road, it’s that bicycle touring is as much about mindset as it is about physical stamina.
Cycle with a smile and the world will feed you noodles, get you drunk on xeo and offer you a bed for the night.
Magick happens on the road. Embrace it with an open heart and you’ll be grand.
- MAGAZINE OFFERS
- BIKE INSURANCE
- Best Products
- Maintenance
- Accessories
- Long-Term Reviews
- BikeRadar Podcast
- First Look Friday
- Bike of the Week
- Tech Features
- Routes and Rides
- Bike Galleries
- BikeRadar Bargains
- Buyer's Guides
- Fitness & Training
- Sizing & Fit
- Mountain Biking UK
- Cycling Plus
How to fly with your bike | Packing, weight limits and surcharges explained
Our complete guide to travelling with your bike on a plane
Benedict Pfender
There’s always good riding to be had at home, but sometimes you need to get your bike fix somewhere else.
Often, flying remains the easiest way to get abroad, but figuring out how to transport your bicycle can sometimes feel like a bit of a battle. So we’ve done some research to make it easier for you.
We've also got 15 tips for travelling with your bike from our readers, a separate article with detailed advice on how to pack your bike , our pick of the best bike boxes and bike bags , as well as our guide to bicycle insurance - just in case things do go wrong on your flight.
How to pack your bike for travel

If you’re flying with your bike, you’re going to have to pack it up. The days of chancing it and showing up at the airport with an unpacked bike are over. Instead, we recommend you take a bit of time to prepare.
Whether you’re using a basic bike bag or a more elaborate hardshell case, always ensure your pride and joy is stowed securely and safely.
As a rule, you’ll have to take off your wheels, pedals and bars.
We’ve put together two detailed guides on how to pack your bike for travel, which should provide you with all the information you need to keep your bike safe in transit.
Note too that your airline may have additional restrictions on carriage of the battery if you plan to travel with an electric bike . Some ban batteries altogether, while others stipulate a maximum capacity, usually 160Wh, that's a lot smaller than most electric bike batteries .
Do I need to deflate my tyres and shocks?
Many airlines, but not all, stipulate that tyres and shocks should be deflated or part-deflated for carriage. Aircraft cabin and hold pressures are lower than that at sea level, around that experienced at 2,500m (8,000ft). This might not cause your tyres to explode, but it's probably worth letting some air out.
On the other hand, some air left in your tyres will help to protect your wheel rims, so squidgy, not flat, is probably best.
What to pack it in – a bike bag or box?
We would advocate a dedicated bike bag or box, but recognise that the cost can be off-putting, especially if you don’t plan on travelling with your bike very often. So, there are some cheaper alternatives you could consider.
A cardboard box

You could try to get a cardboard bike box from your local bike shop, though it’s unlikely to be a particularly compact option, so it’s worth checking the baggage size restriction with your airline.
Cardboard is also not the most impact-resistant material (nor durable if it’s sitting outside in the rain), so we’d recommend padding out the box to protect your bike.
It is worth bearing in mind that some airlines don’t accept anything other than a 'recognised bike bag', so you should check beforehand precisely what is meant by this.
While this option is decidedly cheaper than buying a dedicated bike bag or box, if you are travelling regularly then the prospect of investing in a bike bag can seem more reasonable as a purpose-built solution for transporting your bike. It should protect your bike better as well.
A dedicated bike bag or bike box

There are two options here: a hard or a soft case. The former will usually provide a bit more security and protection, while the latter is generally a little cheaper, lighter and easier to store when not in use.
You also get hybrids that are designed to combine the best of both worlds. That usually means a soft shell that has an internal frame to add extra rigidity and protection for your bike.
The main advantage of a dedicated bike bag is it's designed specifically to hold your bike and as such has padding in all the appropriate locations. Being purpose-built means it will also have compartments, straps and all the necessary measures to hold its contents and accessories securely.
We have additional reviews of bike travel cases on site.
As always, the sky's the limit when it comes to protecting your ride – we reported on this decadent $50,000 bike case from Fairwheel bikes a while ago, but there are definitely some more reasonable options available.
We’ve listed some of our favourites for you below:
Evoc bike bags

Evoc bike bags have become a go-to in the cycling world. We gave the Travel bag a 4.5-star review . It’s not the cheapest, but provides very good protection and still comes in cheaper than a hard case.
Scicon Aerocomfort

The Aerocomfort is a soft-sided bag, but includes an internal bike stand and the design provides space to keep the bars and seatpost in place. There are options for MTBs and triathlon bikes, as well as road bikes. Look out for airlines' maximum linear dimension limits though.

Biknd produces soft bags that add additional protection with inflatable side panels. We’ve reviewed the JetPack in the past, and while it's pricey it performed very well.
B&W hard case

If you want the ultimate in protection, a hard case is the way to go.
Something such as the B&W Bike Box is a cheaper option that provides good protection. However, it doesn’t appear to fit mountain bikes.
BikeBox Alan
There are numerous other examples out there. One we have particularly liked in the past is the BikeBox Alan, although it's another box that might fall foul of airlines' maximum linear dimensions regulations.

- Buy the BikeBox Alan
Split your bike in two
In order to pack bikes smaller, frequent travellers might choose to go with travel bikes that have a frame that can be split in two.
These usually enable you to then check your bag as normal, rather than as outsize luggage, saving significant costs.

One of the slickest solutions we’ve seen is the Ritchey Break-Away.
We've reviewed the Break-Away Carbon , and while it's quite an investment, it could easily be used as your only bike. There’s no compromise on ride quality, just a tiny bit of added weight due to the fittings that enable the frame to be disassembled.
S&S couplings

S&S couplings are a precision-fitted, threaded linkage that can be retrofitted to many (round-tubed) frames.
The tubes of your bike can then be split for transport but reassembled without any performance impact. In fact, S&S couplings are said to be stronger than the tubes themselves.
There are a limited number of approved frame builders and you can check out the list here . S&S makes cases specifically to fit the compact, disassembled frames.
Take a folding bike

If you just want a bike to get around a city when you arrive, a folding bike can be a compact solution that will pack into a case that's a lot smaller than a standard bike bag.
Brompton sells a wheeled soft case for its folders, and B&W has a hard-case option with a drag handle. Other folding bike brands also offer soft or hard cases for their bikes, such as Gocycle's travel case for its electric folding bike .
You may be able to avoid airlines' oversized baggage restrictions, but look out for baggage weight limits and, if you're taking an electric folding bike, restrictions on carrying batteries.
What else to pack

Don’t forget, you’ll need to take all your riding accessories with you too. Make sure you have your essential tools, pump, nutrition, bottles, clothes, helmet and anything else you usually take with you when riding.
Bear in mind that bike bags tend to add quite a bit of weight on top of the bike itself (and so will your padding if you’re doing a DIY version). Keep an eye on the maximum weight limit for luggage on your flight and make sure you don't exceed this or pack any restricted items.
Some airlines stipulate that a bike box can't be used to transport anything except your bike.
If your bike goes missing in transit, you can potentially hire a bike while you're at your destination. However, other items such as cycling shoes in the right size and your favourite helmet are going to be trickier, so you might want to take those in carry-on luggage.
There's usually a maximum packed weight for the bag, that's often 32kg but may be lower. Airlines may also stipulate maximum 'linear dimensions', which is the sum of a box's length width height.
Travelling without a bike

So far, the focus here has been on travelling with your bike. However, you may want to consider just leaving your bike behind and hiring one at the other end when you arrive.
There are an increasing number of providers who offer high-quality bike rentals in various destinations, and in some cases this can work out cheaper or easier to organise than transporting bikes yourself, especially when you consider transfers. Often they're dream bikes and stock is updated annually, so you might get to ride an almost-new top-spec bike – and not have to clean it.
Getting your bike on a plane – fees and weight limits explained

The above information is all well and good, but when selecting your flight things start to get complicated. As a rule, we will use a comparison site such as Skyscanner or Tripadvisor to figure out which flights are cheapest, although you might find a better deal on an airline's website and some airlines are not covered by comparison sites.
However, hold fire before booking your tickets – figure out how much transporting your bikes will cost because we’ve found that in some cases choosing an initially more 'premium' flight can work out cheaper overall.
Different airlines will treat bikes differently, with some accepting a bike bag as part of your baggage allowance, even though it's outsized, while others will require you to pay a surcharge on top of your flight cost to be able to carry your bike with you.
Sometimes, we have found it cheaper to upgrade your class of travel rather than adding additional baggage to your booking. You’ll often have a more generous baggage allowance, so it can be worth looking through the fine print to figure out what will work best.
One thing we would add is it’s always worth calling ahead to let airlines know you intend to carry your bike. Find out all the information you need in advance because paying for excess weight allowance or excess baggage at the airport is almost always prohibitively expensive. Keep a note of who you talked to and when.
If you have a transfer flight on a different airline, you should make sure both carriers will accept your bike on board.
It's recommended that you insure your bike because airlines won’t cover any damage to your bike. Make sure to check your bike over once it arrives at the other end too so that you can flag up any issues immediately.
We’ve collated the terms and conditions of the major airlines here, but do please also take the time to double-check them yourself - they do change, usually for the worse.
Flying with a bike from the UK and in Europe – rules, costs and weight limits explained
Most of these airlines fly internationally and long-haul. However, for the purposes of this article we’ve done a rough grouping according to whether the airlines fly predominantly in Europe, the US or Australia.
Details updated 23 March 2023
- Requires approval from customer service department at least 48 hours before flight
- Bikes are not a part of baggage allowance
- 23kg maximum weight
- Bike transport within Europe and to some French DOM-TOMs costs €55
- Price ranges from €40 to 125 depending on five different flight zones
- Max dimensions of 120x90cm
- Max ebike battery 160Wh, must be removed from bike
- Weight limit of 23kg
- For more details visit Air France here
- A bike will cost €50 per flight or €40 if booked online
- Weight allowance up to 23kg
- Part of standard baggage allowance for flights to/from North America
- For flights to/from North America, bikes can be carried as part of your luggage allowance
- Extra luggage is charged at €75 / $100 each way
- Business class passengers carry sports equipment for free
- Electric bikes: contact customer services
- For more details visit Aer Lingus here
British Airways
- Bikes allowed as part of your free checked baggage allowance if packed
- Call 72 hours ahead of time to confirm your bike reservation
- Permissible dimensions of 190x95x65cm
- No clothing or other personal items to be packed with bike
- Above 32kg, you will have to ship anything as freight
- No electric bikes
- For more details visit British Airways here
- A bike is counted as large sports equipment
- One piece per booking, no refunds
- Costs £45 per flight pre-booked / £55 at airport with weight allowance up to 32kg
- Must be packed in a bike box
- No items other than your bike may be transported in the bike box
- 32kg maximum weight
- For more details visit EasyJet here
- Okay, we know this one doesn't leave the ground
- Email [email protected] to book a space
- Drop off at luggage area before departure
- Only available on certain services from London to Paris
- Folding bikes in a protective bag/case up to 85cm long can be taken on board
- For more details visit Eurostar here
- Register in advance to reserve space
- 32kg max weight
- £43/€50 for short haul flight
- For more details visit Eurowings here
- Bike counted as part of luggage allowance for long-haul flights
- A €40 fee applies for short-haul flights if booked in advance, €50 for medium-haul
- Weight allowance up to 32kg
- Permissible dimensions of 131x72x21cm
- Can buy a 131x72x21cm box for €20 at some airports
- No ebikes, no tandems
- For more details visit Iberia here
Ita Airways
- €60 per flight in Europe, €100 per flight intercontinental if booked in advance
- Not larger than 300cm
- For more details visit Ita Airways here
- Must be pre-booked
- Taking a bike starts at £30 / €37
- For more details visit Jet2 here
- Not a part of baggage allowance
- Within Europe €55
- Prices range from €40 to €100 depending on five different flight zones
- Max linear dimensions 300cm, up to 23kg
- Ebike batteries must be removed and be smaller than 160Wh
- For more details visit KLM here
- Register bike at least 24 hours before departure
- Bikes counted as part of your baggage allowance (except in Economy Class Light)
- Weight allowance up to 23kg for economy, 32kg for business
- Sum of linear dimensions of 2.8m maximum
- Additional baggage costs from €70 to €250 / $80 to $287
- For more details visit Luthansa here
Norwegian Air
- Adding a bike will cost £30 online / £50 at airport
- Max size 250x79x112cm
- Print and take travel receipt to airport
- For more details visit Norwegian Air here
- Fixed £60/€60 fee per flight
- Max weight 30kg
- Must be packed in a bike box or bike bag
- For more details visit Ryanair here
- Space must be reserved in advance
- Bikes are part of your baggage allowance
- Must be packed in a box or bag
- Additional fees outside allowance are very expensive
- ebike battery must be removed, max 160Wh capacity
- For more details visit Swiss Air here
- Considered 'Special Luggage' and subject to a minimum €100 fee
- Add to booking online
- Max weight 32kg
- Max linear dimensions 2.7m
- For more details visit Vueling here
- Subject to Sporting Equipment fee of €45 if booked in advance, €65 at airport
- Add to booking online or via call centre
- Can carry an ebike battery up to 160Wh separately in carry-on baggage
- For more details visit Wizz Air here
Flying to, from or in the US with a bike – rules, costs and weight limits explained
- Bikes must be registered at least 24 hours in advance
- Specifically requests bikes are packed in purpose-built bike bag
- Bike can be counted as part of your baggage allowance, except on some flights where there's a $50 (CDN/US) fee
- Weight allowance up to 32kg for bikes, with no overweight charges for bikes below 32kg
- Maximum linear dimensions of 292cm
- No other items in bike box
- For more details visit Air Canada here
Alaska Airlines
- Alaska will waive $100 oversize and overweight baggage fees and charge bikes at standard rate of $30 for first bag, $40 for second bag, $100 for each additional bag
- Weight under 51lb, sum of dimensions less than 115 inches
- No items except bike in box
- For more details visit Alaska Airlines here
American Airlines
- Bike can be taken as part of checked allowance if in bike box/bag
- Must be under 50lbs / 23kg
- Must be under 126 inches / 3.2m in linear dimensions
- Above this will incur a fee of $150, increasing allowance to 70lbs / 32kg and 126 inches / 3.2m
- For more details visit American Airlines here
- Bag can be carried as part of your checked luggage on most flights
- Weight allowance up to 50lb
- Maximum linear dimensions up to 292cm
- Above those limits, bicycle is charged at minimum $150
- Limited release form must be signed unless in a hard case
- For more details visit Delta here
- Carrying bikes between US and Europe costs £66 / $83 within Europe, £92 / $116 to/from US per flight leg
- Pre-book for 20% discount
- Weight allowance up to 70lbs / 32kg
- Maximum dimensions of 87x22x40in / 221x56x102cm
- For more details visit Icelandair here
- Carried as part of checked baggage if under 50lb/62 inches
- $100 / £80 / €90 per leg plus any applicable checked bag fee for larger items
- Must be under 99lbs
- No liability for damage if packed in a soft-sided case
- No other items in bike case
- For more details visit JetBlue here
Southwest Airlines
- Bikes can be carried as part of checked allowance for a $75 fee per flight leg
- Must under 62 inches / 1.57m in linear dimensions
- For more details visit Southwest here
Spirit Airlines
- Bikes are charged at $75 each way
- Counts towards part of your checked allowance
- For more details visit Spirit here
- Bike can be carried as part of your luggage allowance
- Maximum of 292cm linear dimensions
- $150 for travel in North America if limits are exceeded
- $200 for travel everywhere else if limits are exceeded
- For more details visit United here
Virgin Atlantic
- Bikes allowed as part of your free baggage allowance, unless travelling Economy Light
- Pre-booking not required
- Overweight baggage charge from 23kg to 32kg
- Overweight luggage or adding extra bags starts at £65
- For more details visit Virgin here
Flying to, from or in Asia Pacific – rules, costs and weight limits explained
Air new zealand.
- Items can be carried as part of your checked allowance
- Must be in a bike box/bag
- Items may weigh up to 23kg
- May not exceed 2m long
- Can pack accessories in box
- For more details visit Air New Zealand here
Cathay Pacific
- Contact at least 72 hours in advance to book bike
- Bike must be transported in a hard case or "recognised bicycle box"
- Bike counts as part of checked allowance
- For more details visit Cathay Pacific here
- Bikes must be booked at least 24 hours in advance
- Can be carried as part of your checked baggage allowance
- Weight limit of 23kg or 32kg depending on the class you are flying in
- Maximum linear dimensions of 300cm
- Additional charges are rather expensive
- For more details visit Emirates here
- Bikes are exempt from oversize rules
- 300cm linear dimensions
- For more details visit Etihad here
- Bikes can be carried, but must pay oversize fee
- Charged at AU$25 per flight
- Max 32kg weight
- Make sure to purchase enough weight allowance
- For more details visit Jetstar here
Malaysia Airlines
- Bikes will usually be accepted as checked baggage, with different allowances by cabin class
- Maximum 158cm linear dimensions
- Maximum 204cm linear dimensions to carry as oversize baggage
- Fees vary depending on airport
- For more details visit Malaysia Airlines here
- Bike can be carried as part of your baggage allowance
- Maximum weight of 32kg
- Dimensions of 140x30x80cm
- For more details visit Qantas here
- Bike will be carried as part of free baggage allowance
- Minimum $200 to add extra items of luggage to your booking
- For more details visit Qatar Airways here
Singapore Airlines
- Bikes are carried as part of free baggage allowance
- Weight limit of 32kg
- No stated dimension restrictions
- For more details visit Singapore Air here
Virgin Australia
- Bike accepted as part of checked luggage
- Must be packaged in specific bike case (soft or hard)
- Weight limit of 23kg (32kg in business class)
- Size restriction varies by type of aircraft
- Must be checked in at least one hour prior to departure
- ebike batteries maximum 160Wh
- For more details visit Virgin Australia here
At the other end

Once you land at your destination, be sure to consider how you are going to transport your bike. In all likelihood, you’re not going to be riding away from the airport, so check luggage restrictions on any public transport that you might be taking so you don’t run into any trouble.
Make sure you know how to get your bike to where you're wanting to go.
It may also be worth considering whether you need to fly. There are quite a few options that offer to transport you and your bike more conveniently. For example, in the UK, Bike Express offers transport to mainland Europe at relatively reasonable prices.
Always make sure you double-check terms and conditions before making your booking, and if in doubt contact the airline you intend to fly with.
We've flown with our bikes countless times and while it can seem a bit of a logistical headache, with a little bit of effort it's easy enough to get everything sorted out.
Share this article

- Terms & Conditions
- Subscribe to our magazines
- Manage preferences
Item added to your cart
Gear guides.
- Ultralight Backpacking Gear
- Best Ultralight Backpacks
- Best Ultralight Sleeping Bags
- Best Ultralight Tents
- Best Camp Shoes
- Best Down Jackets
- Best Rain Jackets
- Best Minimalist Sandals
Tips and How-To's
- Ultralight Backpacking Tips
- Animal Tracks ID Guide
- Contour Lines and Topo Maps
- How to Read Trail Signs
Food and Water
- Backpacking Food Ideas
- Backpacking Meal Recipes
- Best Meal Replacement Powders
- How Many Calories Do I Burn Backpacking?
- The Triple Crown of Hiking
- Appalachian Trail Map
- Gifts for Hikers
- What is Naked Hiking?
Bicycle Touring 101 | How to Start
A beginner's guide to bicycle touring: what it is and how to get started..

Credit: @heybrotrip
Mention "bike touring" and most people think Easy Rider. We ain't talking about motorcycles here though. We are going to go over an epic mode of travel - manual bicycle touring.
What is Bicycle Touring?
Bicycle touring is a type of adventure travel that combines cycling with backpacking.
Unlike regular cycling, where you pedal for miles and return home later that day, bicycle touring allows you to travel from point to point and set up camp for the night. After some shut-eye, you pack up your tent, hop on your bike and head out for the next leg.
You can plan your own trip or join a guided tour which often offer food and lodging. A bicycle tour can last for as long as you want. Some people like to take off for a weekend cycling, while others enjoy a month-long break from life to cycle across the country. If you really want an adventure, there are year-long tours like the perfect weather tour , a continental US tour that is designed so you are always biking in 70-degree weather.
Your daily mileage depends on your fitness level, your trip goals, and the terrain. As long as there are not too many hills and you are reasonably fit, then 50 miles a day is a good benchmark for most cyclists. Moderate mileage is the beauty of bike touring - it is not as slow as hiking and not as fast as road tripping.
Cycle Touring vs Bikepacking
"Cycle touring" and " bikepacking " are often used interchangeably. Both are long-distance forms of travel on a two-wheeled manually powered bicycle. Note these terms sometimes reference different modes of transportation though. It is the type of bicycle and the type of road the bicycle is travelling that sets them apart. There is obviously a lot of overlap and the differences are negligible. Just want to clarify the terminology nonetheless..
Cycle touring is generally more on-the-road with road bikes that have thinner tires. The emphasis is more on distance as you cycle from one town or landscape to the next, possibly for months at a time.

Bikepacking is generally more off-road on a fatter-tired bike, often a mountain bike with shocks. You'll climb mountains and follow dirt trails deep through the woods, possibly for a few days.

About Kelly Hodgkins
About greenbelly.
After thru-hiking the Appalachian Trail, Chris Cage created Greenbelly to provide fast, filling and balanced meals to backpackers. Chris also wrote How to Hike the Appalachian Trail .

- Choosing a selection results in a full page refresh.
How To Fly With Your Bike: The Ultimate Guide
Exploring new terrain on your bike is one of the true joys of cycling. But if you’re unprepared when flying to your destination, your trip can be ruined by expensive fees, damaged equipment, and logistical challenges. Luckily, flying with a bike can be fairly easy and affordable if you plan ahead. What do you need to know before embarking on your next cycling adventure?
Table of Contents
- Flying With a Bike: An Overview
- Baggage/ Case Options
- Packing Your bike
- Typical Costs/ Airline Policies
Flying With a Mountain Bike
Flying with a bike: an overview .
There are three major variables to consider any time you fly with your bike. First, the safety of your equipment—you want to be confident your bike will arrive intact and undamaged at your destination. The second factor is the cost of getting your bike there, which can vary dramatically depending on the airline and on how you pack it. Finally, the third factor is simplicity— it can be difficult and time-consuming to rebuild a fully-deconstructed bike, especially if you’re in a hotel room or unfamiliar environment with limited tools.
Every method of traveling with a bike balances a mix of these three factors. No option is perfect, but understanding the pros, cons, and logistics of each in advance can help you determine which is best for you and your equipment.
Basic Advice
However you choose to get your bike to your destination, you’ll need some basic technical knowledge and tools to do so. All travel cases and bags require some amount of deconstruction— usually at least the removal of pedals, wheels, and handlebars. It’s notable that for some modern road bikes with fully integrated cockpits, this can be a very laborious and time-consuming job, and these bikes may require special cases that allow handlebars to remain attached.
Many airlines are becoming more bike-friendly, but fees can vary dramatically . In some cases, you may save money overall by choosing a more expensive airline with lower baggage fees. And note that no matter how welcoming an airline is to cyclists, baggage handlers may be very rough with your bike, and airlines are often not responsible for damage that occurs during transit. Consider purchasing luggage insurance for your trip, especially if traveling with an expensive carbon bike. Some homeowners’ and renters’ policies, as well as certain credit cards, may cover your baggage already, so check your specific policies for details.
Don’t save anything for the last minute . Practice packing your bike well in advance, and consider all aspects of your trip’s logistics and how they relate to your bike. Will your box or case fit in your transport upon arrival? Will you be able to comfortably rebuild and later repack your bike in your lodging? How will you get your bike to the airport when it’s time to head home?
Finally, it’s worth considering whether it’s actually necessary to bring your bike on the plane with you in the first place. Bike shipping services can send it in advance, and this option may be economical depending on your destination and itinerary. Alternatively, if having your own bike with you isn’t necessary, consider renting one from a local shop for the duration of your stay.
Note: A few bikes have frames specifically designed to come apart for easy packing. These bikes can be worthy investments for frequent flyers, but this post is primarily intended for athletes traveling with their existing standard bikes.
Flying With a Bike: Packing Options
Three main options exist for packing your bike for flight— cardboard bike boxes, soft-sided bike bags, and hardshell cases. It’s also worth mentioning that a few bikes are made with special frames designed to come apart for easy packing, and these bikes can be excellent options if you are a frequent traveler. But the packing discussion in this post
Cardboard Bike Boxes
A cardboard bike box is the simplest container for your bike during travel. Cardboard boxes do have a few things working in their favor— for one, they’re easy to get (often for free) from almost any bike shop. Most are large enough to fit your bike nearly intact, so they are fairly easy to pack.
But that’s about it when it comes to positives. Cardboard boxes are prone to damage, especially in wet conditions. Cardboard boxes are easily punctured, and their handles often tear out and rip off. Bikes packed in cardboard boxes need significant additional padding and must be very carefully packed to arrive safely. Additionally, cardboard bike boxes are large and ungainly. They might not fit into small vehicles bringing you to and from the airport, and they’ll definitely incur oversize baggage fees. To add insult to injury, most airlines won’t insure or cover any damage to bikes packed in cardboard boxes. Use at your own risk.
Cardboard Box Pros: Cheap, easy to pack. Cons: Large, fragile, difficult to transport, airlines won’t insure, always incur oversize fees.
Bike Bags/ Soft Cases
Soft-sided bike bags vary widely in their design and features. Most have straps and wheels that make them easy to move around, and they’re generally small enough to fit in a rental car without a problem. On the downside, many airlines require a liability release for bikes packed in soft-sided bags. Also, they aren’t cheap— costs typically range from about $400–$600 USD. Some companies allow you to rent one for your trip instead of purchasing the bag outright.
Larger bags allow you to leave your fork on your bike and may include an internal mount for your frame which can make them easy to pack. They usually include some amount of internal padding and protection, but you may want to add additional padding to your frame and components. These bags are usually lighter than hard-sided cases, but they are still quite large, and invariably incur oversize luggage fees.
Smaller bike bags are designed specifically to avoid airline oversize fees and are about the size of a large suitcase. These bags are somewhat challenging to pack and require significant bike deconstruction— fork, handlebars, pedals, both wheels, and rear derailleur usually need to be removed. But if packed with some extra padding on crucial components, they’re quite sturdy and safe, and are by far the easiest option for transport to and from the airport. This blog post’s author has used one of these bags for several years, with no damage or additional fees.
Soft Case Pros: Easy to transport, can avoid airline fees. Cons: Difficult to pack, expensive, often require extra padding.
Hard-Sided Cases
Most protective of your bike but also the most expensive option, hard cases range in size and design. Some are quite compact and challenging to pack. Others are extremely large and heavy, but allow you to travel with your bike almost fully assembled. All offer the promise of robust protection against impact, though some travelers believe baggage handlers are more likely to be rough with hard cases than soft-sided bags. On the plus side, if you use a hard-sided case, airlines are usually willing to insure your bike and compensate you if damage occurs during a flight.
Hard cases are generally less convenient to transport and get around than soft bags, but some have multiple handles and wheels to make things easier. Unfortunately, most hard cases are big enough to incur an oversize luggage fee. It’s also quite obvious what’s in one of these cases, so if your airline charges a bike-specific fee there’s no avoiding it when using one.
Hard Case Pros: Highly protective. Moderate packing difficulty. Cons: Heavy, awkward, expensive, usually incur extra fees.
Packing Your Bike
When it comes time to pack your bike for travel, there are two main tasks— protecting your equipment and preparing it for potential opening and inspection. The more systematic and organized your packing job, the more likely it will be safely repacked after inspection by transportation safety agents.
Packing Your Bike Step-By-Step
- Remove any components needed to fit the bike in your chosen container. This almost always means removing the handlebars, pedals, and front wheel. Depending on your luggage it may also require removing your rear wheel, fork, and seat post. Put shipping spacers or thru axles into your dropouts, and put spacers into your disc brake calipers.
- Wrap your bike and components in padding. Some cases include this, but many riders use bubble wrap, pipe insulation, or pool noodles sliced in half and cut to size. Securely tape or zip-tie the padding in place.
- Attach handlebars/ fork/ seat post to your frame and zip-tie in place. Where you put them depends on your case and your bike, but by attaching everything together it will be easier for TSA agents to put your bike back into your case after inspection, and less likely anything will get lost.
- Remove rear derailleur and any other protruding component (computer mount, derailleur hanger, eTap batteries, etc) that could potentially be impacted if your bag or case is mistreated. Wrap these parts in padding/ attach to your frame. Wrap your chain in padding and attach it to your chainstay. Remove disc rotors from your wheels and wrap in bubble wrap or clothing.
- Photograph your gear before you put it into your bag. It will come in handy if you need to file a claim with the airline, and will help you repack your bag on the way home.
- Write your name and contact information on a sheet of paper and tape it to your bike. Insert the bike into your bag or case. Insert wheels into the case, slightly deflating tires if needed to fit.
- Fill extra space in your bag or case with kit and shoes. Wrap your pump in padding and insert it. Wrap other components you removed in padding (such as pedals, rotors, and saddlebag) and place them together in a small bag, which can also go into the extra space or pockets in your travel bag/ case. Put every tool you used to deconstruct the bike into a small bag, wrap in padding, and place them in the luggage, too.
- Close the bag/case and carefully feel around the outside. If any part of your bike (such as your chainring) can be felt protruding, reopen and reposition/ attach extra padding to this area.
- Verify all old barcodes/ destination stickers are removed from the exterior of your luggage. Mark the exterior prominently with your name and contact information.
Other Important Packing Tips
- Bikes are often damaged by contact with objects inside the case. Add padding anywhere two parts touch each other in the luggage. Wrap every loose component in padding and secure inside.
- Bent disc rotors are the most common damage during travel. Even if your case doesn’t require it, remove your rotors, wrap them in padding, and secure them somewhere safe.
- Zip-tie everything together inside the case, so if a security agent removes your bike during an inspection they won’t lose anything or have trouble putting it back in. Make it foolproof!
- Don’t forget your tools. Many bike tools are prohibited from carry-on luggage, so wrap all the tools you’ll need together and secure them in your case. Don’t forget an air pump, and always bring a torque wrench!
- Your tires won’t explode on an airplane. Some airlines require you to deflate your tires, but always leave enough air in tubeless setups to keep the tires seated.
- Most airlines prohibit CO2 containers in carry-on and checked luggage. Remove them from your flat kit and grab new ones at your destination’s local bike shop.
- Electronic groupsets bring some additional considerations. Remove batteries from SRAM derailleurs, so they don’t get lost if your case is opened. Shift levers can be inadvertently pushed inside of bags and cases, so remove the coin cell battery from SRAM shifters and unplug shifter cables under Shimano hoods.
- If your power meter has a removable battery, remove it during packing to prevent battery drain.
- Remember to bring chargers for any electronic components, including head units, lights, and derailleurs.
The Typical Cost of Flying With Your Bike
So you’ve got your bike packed and ready to fly. How much will it cost?
The answer depends on the airline and your specific equipment. Some airlines charge no special fees, while some charge an all-inclusive fee for bikes, and some layer multiple fees for bike, luggage weight, and luggage size. Check your airline’s policies, but you can usually use this formula to find your expenses:
Cost to Bring Bike = Bike Fee + Standard Checked Bag Fee + Oversize Fee (if Applicable) + Overweight Fee (if applicable)
For most airlines, oversize fees kick in if the combined length, width, and depth measurement of your luggage add up to more than 62”. While many popular bags and cases do exceed this limit, these fees are inconsistently enforced by gate agents. Overweight penalties usually start at 50 lbs, and for even larger and heavier bags most airlines have more severe fees.
All told, costs can vary dramatically. If you have a lightweight road bike in a small, soft bag and you’re flying on an airline with no bike fee, you’ll only be charged for a standard piece of checked luggage. On the other hand, with a large mountain bike, in a hard case, on an airline with a bike fee, you may need to pay $300 or more each direction in bike, weight, and oversize charges. Discount carriers usually charge more in additional fees, so do your homework and research potential costs before you buy your ticket. In the end, it’s often worth paying a little more upfront for a premium carrier without bike penalties.
Best Airlines for Flying With a Bike
Here is a comparison of major airlines’ policies on bikes, to help you find the best option for your next trip. Note: If an airline layers multiple fees, all are listed. Some fees marked N/A may still be incurred if your case is very large/ heavy. Policies are accurate as of 10/5/21. Prices USD unless noted.
Adaptive Training
Get the right workout, every time with training that adapts to you.
In most ways, bringing a mountain bike on an airline is the same as bringing a road or gravel bike. However, mountain bikes are generally bulkier, with thicker tubes and wider axles. This means mountain bikes may not fit in all travel cases, and you may need a case or bag specifically designed for large bikes. Pay close attention to weight, as adding extra kit and equipment to a bag containing a mountain bike may incur an expensive overweight penalty.
When preparing your mountain bike for travel, it’s often easier to remove the handlebars from the stem, than it is to remove the stem from the steerer tube. If possible, flip your fork backward to shorten your wheelbase and make your bike more compact for packing. As with road bikes, always remove your brake rotors, and only deflate your tires enough to fit your luggage. Don’t allow your tires to come off the bead, and bring a small container of sealant in your checked bag just in case you need it upon arrival.
If your bike still won’t fit, let some air out of your suspension to reduce height (but make sure you bring your shock pump with you). Resist the temptation to fly with your dropper post down— a long flight with the cartridge under pressure can stress the hydraulics, so remove the post from your frame instead. And on that note, service any hydraulic components in need of maintenance before you travel. Extended periods in your bag in an unusual position can push worn seals beyond their limits, and you don’t want to arrive at your destination to find a crucial part no longer works.
Finally, bring a large rag or towel along with you for your trip. You might not have the ability to wash your bike at your destination before repacking it for your return, but at least you’ll be prepared to give your equipment a good wipe-down.

Sean Hurley is a bike racer, baker of sourdough bread, and former art professor. He is a connoisseur of cycling socks and a certified USAC level 3 coach. Rumor has it he also runs a famous cycling instagram account, but don't tell anyone about that.
Related Posts

Bike Setup Tips
Cycling Numbness: Dealing with Numb Hands, Feet, & Saddle
Bike Setup Tips Successful Athletes Training
Facing Challenges and Overcoming Limitations With Triathlete Zach Josie

A Conversation About Bike Fit With Dr. Andy Pruitt
How to Prepare for a Bike Trip: Everything to Know Before Your First Adventure

Welcome to the most complete guide on how to plan a bike trip (or a bikepacking trip).
Traveling by bicycle is a synonym of freedom and a dream-come-true for many people. However, setting off from the safety and comfort of your home for the first time can be daunting.
Trust me, I know because I’ve been there myself. So far, I’ve traveled through around 20 countries , covering more than 20,000 miles on two wheels and carrying all of my worldly possessions stuffed in a few bike bags.
As the popular saying goes:
A bicycle ride around the world begins with a single pedal stroke.
In this guide, I’ll help you make that first pedal stroke. I’ll answer all the main questions you might have about planning a bike trip through an actionable step-by-step approach that’s super easy to follow.
See you somewhere on the road once you’ve finished reading!
Step 1: What Kind of a Bike Trip Do You Want to Do?
Step 2: how much does bicycle touring cost, step 3: plan a bike trip based on your free time and fitness level, step 4: research interesting bicycle touring routes, step 5: create a route with one of the popular apps, step 6: choosing the best bicycle for your cycling adventure, step 7: how to carry gear while bicycle touring, step 8: how to cook food on a bike trip, step 9: create a bicycle touring gear checklist, step 10: do you need camping and sleeping gear, step 11: prepare physically if you need to, step 12: learn proper bicycle maintenance, bonus step 1: get travel insurance, bonus step 2: get a bike fit, bonus step 3: learn the language of the country, final words.

Little did I know when I was thinking about doing my first bicycle trip that there was not just one kind. There are actually a large number of different types of bicycle tours.
The first thing that you should think about is whether you want to go alone, with a friend, or with a group of people. Each of these options is fun and fulfilling and comes with advantages and disadvantages.
- Going on a solo bike touring adventure lets you set your own pace and do things the way you like. You can decide where you want to go, how fast or how slow. You decide when you want to stop, take a rest, or even turn around and go back home. However, the disadvantage is that you might feel lonely at times, especially if you are a people person. Also, doing your first cycle tour alone might be intimidating for some people.
- Going on a group bicycle tour or with a friend means that you will have to make more compromises. You’ll need to make all the decisions together regarding the tour plans and the itinerary. However, you’ll have someone to share the good and the bad moments of the trip at all times, which is a big plus.
The Main Types of Bike Tours
While you’re thinking about whether to bicycle tour solo or in a pack, you should also consider all of these different types of bicycle tours:
- Guided Cycle Tours – A bicycle tour in which you pay a company or a guide to take you along a predefined route. Typically, a support van will carry all of your belongings from one checkpoint to another.
- Self-Guided Bicycle Tours – This type differs from the one above in that a company will provide you with a route, lodging, and meals, but you won’t be accompanied by a guide while cycling.
- Self-Supported Bike Tours – This bike touring type requires you to travel alone (without a guide), choose your own route, and carry all of your belongings.
- Supported Bicycle Trips – If you have a friend, family member, or a crew driving along and assisting you on your tour, you would call it supported.
- Overnight/Weekend Tours – Pretty self-explanatory. The idea is that you don’t really need weeks or months to do adventure cycling!
- Credit Card Touring – A tour in which you carry only the barebone essentials and buy everything you need along the way. You would typically pay to sleep in a hotel every night and buy food every day.
- Bikepacking Trips – This is often a mountain bike trip where you’re carrying as little gear as possible. This type of touring is usually done on a mountain bike, with frame bags instead of panniers.
- Expedition Cycle Touring – This type refers to long tours through remote areas, developing countries, and on routes off the beaten path. These are almost exclusively self-supported cycle tours.
Related: Best Self-Guided Bike Tours
As you can see, there are many different ways in which you can travel on a bicycle. It does not need to be extreme or ultra-long unless you want it to be.
The point is, cycle touring is not reserved only for adventurers who are willing to say goodbye to civilization and all of their worldly possessions.
Instead, anyone can do it, including the elderly, and even parents with children.
Related: Long Distance Cycling
Now that you have an idea of what type of bicycle touring you want to do, you can start thinking about your budget.
A lot of people don’t know this, but cycle traveling is actually very cheap. A lot of people do it on a ~$5-$10 daily budget, which is easy to achieve, especially if you travel away from touristy places. However, this is only possible on self-supported tours.
Guided bicycle tours are more expensive. You have to pay the company that will, in turn, hire a guide, a support van, organize the entire trip, book lodgings, and prepare food for you.
If you want to do a self-supported bike trip, it’s possible to travel on $10-$20 a day pretty much anywhere in the world, including bike trips in the US and Europe. If you wild camp and cook your own meals, the majority of your money will be spent on food and drinks.
Gear-Related Expenses
One thing to keep in mind when you plan a bike trip is that you will have to spend some money before setting off on your adventure to purchase all the necessary cycle touring equipment.
…you’re probably looking at spending around $1,500 to $2,000 on a touring bicycle and another $1,000 to $1,500 on additional gear.
It’s hard to say exactly how much money you’ll need because it depends on what kind of gear you plan to purchase. If you want high-end equipment, you’re probably looking at spending around $1,500 to $2,000 on a touring bicycle and another $1,000 to $1,500 on additional gear.
However, if you get budget-friendly gear, you can purchase an entry-level bike and some basic gear for less than $1,000 in total.

Before you can plan a bicycle road trip any further, you should determine how much free time you have at your disposal and what distance you can ride every day.
The worst thing you can do is plan to cover too many miles, finding yourself in a constant rush, unable to enjoy your vacation. Even worse, you could put too much pressure on your body and cause an injury that would force you to quit.
On average, a fit cycle tourist can ride around 60–80 miles a day comfortably on paved roads. Some do more than that, others less.
Personally, I aim to ride anywhere between 50 and 80 miles, depending on the terrain, how I feel, and my sightseeing plans. One piece of advice I can give you is to always plan for less and then do more if conditions allow for it.
Training for cycle touring is a good idea, but it’s not necessary. Before long cycle tours, it’s advisable to try to emulate the effort you will do while traveling to get your legs used to the mileage and your body used to sitting on a bicycle for hours every day.
It’s much better to deal with sore muscles and saddle sores before your trip than having to suffer through it during the first several days/weeks of your trip.

Personally, this is the favorite part of planning a bike trip for me!
If you followed the step above, you now know approximately what distance you can cover on your tour. So let’s research some interesting routes and find the one to follow.
The important thing to keep in mind here is that your home does not need to be the starting point of your cycling adventure.
Related : Best Bike Racks for Cars
Instead of limiting yourself to the area close to where you live, you can hop on a train, bus, or even an airplane and explore another area or another country. Keep in mind that if you plan to transport your bike on an airplane, you will have to pack it properly and make sure not to fit within the bike box dimensions limit.
If you’re planning your first road bike tour, I recommend staying close to home just in case something goes wrong with your bike or gear. The same goes for backroads bike trips.
Follow a Well-Known Cycling Route

There are numerous popular cycling routes around the world ridden by thousands and even tens of thousands of cyclists every year.
The Eurovelo routes in Europe are a good example. This is a system of 19 routes that traverse the entire continent, navigating all European countries, from Scandinavia to Turkey. This makes bike trips in Europe a lot easier.
Related: Cycling Tour Guide: Across Estonia in a Week
These routes will take you through the most scenic roads in a country, showing you the most important places. They’re also usually nicely marked, so they’re pretty easy to follow. There’s also great infrastructure along these routes, including hotels, camping spots, towns and cities, shops, and more.
That makes them a great choice for touring beginners.

The first thing to remember is to stay off of highways and busy roads with lots of traffic. Ideally, you should aim for side roads and gravel roads, which will have a lot less traffic.
In my experience, such roads are also usually a lot more scenic, even though they are often not the fastest way to get from point A to point B.
There are many different apps you can use to create a route to follow while traveling. Some of the most popular ones include:
- RideWithGPS
Related: Best Cycling Apps
However, my favorite one and the one I use the most is Google Maps. It works both online and offline and has extremely detailed information on roads, topography, satellite imaging, and important places along the way.
The way I go about it is to first roughly decide where I want to start and finish my bike trip. After that, I start researching places that I would love to visit along the way. I bookmark them and create a route by adding checkpoints from one place to another.
Exporting Routes from Google Maps
If you intend to use Google Maps as your main app while traveling, you can just save the link to that route in your smartphone and load it whenever you need to.
However, if you plan to use a different app, you can export that route as a GPX file and then import it into the app that you plan to use. The way to do this is as follows:
- Create a route in Google Maps.
- Click on the Menu button (upper left corner).
- Click on “Share or Embed Map” and then on “Copy Link”.
- Go to MapsToGPX and paste the link from Google Maps.
- Now you should have a GPX file that you can import into your preferred app and start riding.
The reason why you have to follow these steps is that Google does not offer the option to save a route as a GPX file in their app or on their website.
Even when you create a detailed map, I’d advise against following it 100% at any cost. Be prepared to improvise and change your plans if need be.
I’ve done numerous rides without any plans set in stone, just with a rough idea of where I want to get. I would then explore as I go along, asking locals to recommend the best (least busy or most scenic) route that I could take. These trips have been some of my most memorable ones!

Now that you know what kind of a route you want to do, you can figure out if the bicycle you have is suitable for such a trip or if you need to get a different type of touring bike.
When looking for a touring or a bikepacking bicycle, the main characteristics you should focus on are stability, durability, and comfort. In most cases, speed is less relevant.
The reason is that you will be spending hours on the saddle every day, so you need a bicycle that puts your body in a relaxed position that you can easily maintain for a long time.
Depending on what type of cycle adventure you intend to do, there are three types of bicycles you can choose from:
Road Touring Bicycles
These look like standard road bikes, but feature a more upright geometry and typically come with front and rear racks , as well as fenders. They usually roll on 700c wheels that are not too wide, so they are efficient on paved roads.
Related: Different Types of Road Bikes
Adventure Touring Bicycles
This type also looks similar to traditional road bikes but comes with burlier 650b wheels that are more suitable for off-road riding. Lately, many travelers have been choosing gravel bicycles for this purpose, as they check all the necessary boxes.
Bikepacking Bicycles
Lastly, if you plan to do a mountain bike trip, on singletracks or dirt roads, you should get a bikepacking bicycle. Basically, these are mountain bicycles (rigid or hardtail) with numerous eyelets to mount panniers and bags, and with a relaxed geometry.
Main Features of Touring Bicycles

Though touring bicycles look very similar to road bicycles and bikepacking to mountain bicycles, they come with some crucial differences.
Some main characteristics that all touring and bikepacking bicycles should include:
- Long wheelbase for more stability.
- Upright geometry for a relaxed riding position.
- Wider and more durable tires.
- Strong wheels with at least 32 spokes.
- A large number and a wide range of gears.
- Numerous eyelets on both the frame and the fork.
- Accessories such as racks, fenders, a kickstand, frame bags, etc.
Related: Best Touring Bikes
To sum, in theory, you can use any type of bicycle to go on an unforgettable adventure. However, if you want to feel comfortable and get the right tool for the job, you should invest in a bike that is made specifically for this purpose.

You have a bicycle, you’ve planned your trip, chosen the route, now you need a way to carry all of your necessities on your bike.
There are two options you can go with when it comes to touring bags. Both options have pros and cons and are better or worse for specific types of cycling adventures.
Bicycle Touring Panniers
Bicycle touring panniers are large, bulky, and heavy, but they allow you to carry a lot more gear than frame bags. You can usually carry a total of four panniers on your bicycle at the same time—two on the front and two on the back. This is a great option for road touring, but not so good for off-road tours.
Bikepacking Frame Bags

Bikepacking trip frame bags, as the name tells you, fit around the frame of your bicycle. Bike travelers usually go for a saddlebag, a handlebar bag, and a frame bag. Sometimes they even combine this setup with a pair of panniers to maximize their carrying capacity. Frame bags are lighter than panniers, but they are also smaller, so you have to travel lightly. They are the go-to choice for light and ultra-light touring adventures.
Related: Best Bikepacking Bags
After your bicycle, your panniers/frame bags will be the most important piece of equipment on your tour. Therefore, they should be well-built and made from durable materials so they don’t fall apart mid-tour (I’ve had that happen to me, and it’s not fun).
Bicycle bags for long-tour bike trips should meet the following criteria if you want to avoid having headaches:
- They should be 100% waterproof, with sealed seams.
- Easy to fit on and remove from the bicycle.
- A stiff, reinforced backside that rests against the rack.
- Made from durable materials.
- Have great reviews online and a proven track record.
- Don’t have too many zippers and compartments that could break or unstitch. The simpler the better.
There are many different manufacturers out there who specialize in making amazing bicycle panniers and frame bags.
However, there are a few names that you will repeatedly hear world bicycle travelers ramble about with excitement anytime you talk to them on this topic. These are:
- Axiom, and a few others.
If you plan to do long-distance touring, you won’t make a mistake if you get a set of panniers or bags from one of these manufacturers. Their products have been tried and tested time and again, in the harshest of conditions.
Personally, I’ve had a phenomenal experience with Ortlieb and Crosso bike touring panniers and Apidura frame bags. But I’ve heard great things about the other brands as well.

To cook or not to cook, that is the question.
Depending on the type of bicycle trip you want to do and the area in which you plan to ride, you might choose to cook your own food or eat at restaurants or convenience stores.
Your decision about whether or not to cook your own food will be influenced by two main factors: budget and weight.
Cooking your own food is the cheapest option, but you will have to carry a stove, fuel, and cooking equipment, which can add up to 10 lbs. of weight to your gear, or even more.
If you do end up making your own food and/or bonfire make sure to put it out before leaving (and picking up your trash).
The hierarchy of food-related costs for bicycle touring and bikepacking trips goes something like this:
- Eating at restaurants: The most convenient but the most expensive option.
- Eating sandwiches and ready-made meals from supermarkets and convenience stores: Less expensive, but still very convenient. Not as healthy nor as tasty as the next option.
- Buying groceries and cooking: The cheapest option by far. Requires more effort and planning, as well as carrying more weight.
So, if you want to prioritize convenience, bring a credit card or a lot of cash and eat at restaurants. If, however, you want to stretch your budget as much as possible, cooking is the way to go.
There are times when you won’t have a choice but to prepare your own food. If you’re bikepacking in remote areas, you won’t have the option of visiting restaurants or well-stocked supermarkets and stores. The same goes for developing countries with poor infrastructure.
As a general rule of thumb, if you’re not passing through a large village or a town at least once a day or once in two days, it’s advisable to carry cooking equipment.
Types of Camp Stoves

When it comes to cooking equipment for bicycle touring and bikepacking trips, we can classify it into three main groups:
- Canister stoves: These are lightweight and easy-to-use stoves that don’t take too much space. They usually screw on top of gas canisters filled with isobutane or propane.
- Liquid fuel stoves: These stoves connect to refillable bottles that can carry different types of liquid fuels, such as white gas, kerosene, unleaded, etc. They are heavier than canister stoves, but more versatile, especially if you’re traveling in remote areas.
- Alternative-fuel stoves: These stoves use fuel pellets, wood, alcohol, and other types of fuel. They’re very lightweight but not as convenient as the two other types.
In addition to carrying a camp stove and a source of fuel, you need to carry other cooking and eating equipment. Some of the things I always carry that might also work for you include:
- A big pot with a lid (up to 2.5L)
- A metal cup
- Some detergent
- A pocket knife
- Windscreen for your camping stove
Bear in mind, these are just the essentials for me. You might make do without some of these things, or your list of essentials may be twice as long.
When you plan a bike trip for the first time, you’re bound to make mistakes. With each subsequent trip, you’ll find it easier to define your priorities and carry only the essentials.

The next step when planning a bike trip is to create a touring gear checklist.
Traveling on a bicycle is a minimalist undertaking. While on the road, you’ll usually have access only to bare necessities. You need to be able to carry your entire home in a pair of panniers and/or frame bags. That means your list of cycle touring equipment will be quite short.
The good news is that the list of bike touring gear does not get longer with the length of your trip. You’ll need to carry the same amount of stuff for a 7-day trip, as well as for a 7-month trip.
Here are some of the things that you can find on and around my bike and in my panniers when I’m bike touring.
On-Bike Clothes

Note: The list can change depending on where I’m riding and the season.
- Two or three pairs of cycling shorts
- A few pairs of wool or synthetic socks
- Two or three pairs of cycling jerseys or dry-fit t-shirts
- Cycling helmet
- Cycling gloves
- Rain jacket and rain pants
- Long-sleeve shirt or a light jacket
- Down jacket
Off-Bike Clothes
- Comfy shorts
- Comfy pants
- Several pairs of underwear
- Sandals or flip-flops
- One or two t-shirts
- A nice shirt for going out
Bike Tools and Spares
Note: Depending on where you ride, you might need to bring more spares.
- Tire patch kit and tire levers
- Spare tube (or two)
Camping Gear
Note: This is just camping gear that works for the majority of my trips. You might use a hammock instead of a tent, or any different type of setup.
- Sleeping bag
- Inflatable sleeping pad
- Ground cloth
- Sleeping bag liner
- Cooking equipment
- Personal eating utensils
Personal Items
- Pocket knife
- Lightweight cable lock (for quick stops)
- First-aid kit
- A pen and a notebook
- Waterproof document sack
This is a list that works for me, that I tailored to fit my needs after years of traveling. When you plan a bike trip for the first time, you’re bound to make mistakes.
Unless you’re perfect, you’ll likely bring too much stuff or forget to bring something that you’ll need frequently. After a few trips, you’ll have a much better idea of what you should pack in your bags and what you should leave at home.

If you plan to camp, you need to get a tent and sleeping gear. Determine what type of camping equipment you need, depending on the season, temperature, rain, duration of the trip, etc. Keep in mind that this is important stuff that you don’t want to skimp on it.
The camping equipment you bring with you will be your home for the remainder of the trip, so you want to feel comfortable and safe.
Camping in a tent is not the only option you have for sleeping outside. There are a few other lighter and just as popular solutions:

A tent is by far the coziest and the most comfortable way to camp. You get excellent protection from the elements, bugs can’t get in, and in most cases, you have a decent amount of livable space. It’s like a pop-up home!
The only trade-off for bringing a tent with you is the weight and the time you need to set it up. If you’re trying to travel as light as possible, you might not like the additional 1–2kg a one-person or two-person tent adds to your setup. In all other cases, this is completely acceptable.
The price is another potential drawback as tents can get quite pricey. Despite that, it’s the most common choice of bicycle tourers and bikepackers around the world, including me.
Unless you’re traveling in extreme weather (snow blizzards and severe storms), you should be looking at getting a three-season tent. These tents strike a balance between weight, protection, and price. They have an inner mesh construction that will protect you from bugs and keep the tent well ventilated and a rainfly that will protect you from the wind, rain, and snow.
If you don’t mind carrying some additional weight and spending a bit of time to set up the tent in the evening, this is the option I recommend and use the most.

A tarp is one of the most versatile types of camping equipment, but it comes with some drawbacks as well.
It gives you complete freedom to set it up however you want. If there’s a lot of wind and rain, you can slant it right down to the ground and get excellent protection. Otherwise, you can raise it up and get tons of livable space. You can also slant the tarp against the wind and move it around if the wind direction changes.
However, a tarp will not protect you against mozzies and other critters. You’ll be completely exposed, which is a plus for some bike tourers, but a deal-breaker for others.
In general, tarps are relatively lightweight and inexpensive, but it takes some time to figure out how to set them up properly and refine your knot-making skills.

A bivy is by far the most lightweight shelter you can find and my least favorite one. Basically, a bivy is a weatherproof sack that you put over your sleeping bag and crawl into to go to sleep.
One of the things I don’t like about them is the perspiration. If your bivy does not have good breathability, your sleeping bag can get damp in the morning from all the perspiration that had nowhere to go.
However, there’s no doubt that bivy sacks save a lot of weight and give you a unique chance to sleep under the stars.

Last but not least, a hammock is a unique type of shelter that can be the perfect solution in certain cases. A hammock is essentially a hanging bivy, which has its upsides and downsides. If you combine it with a tarp and a bug net, you can get pretty good protection from critters and the elements.
Hammocks keep you up and away from the ground which is a plus if you’re traveling during the rainy season or in areas that are especially damp.
Sleeping above the ground will also keep you away from any animals that roam beneath you. I’ve learned this is especially important in areas with a high wild boar population.
Though, keep in mind that getting a good night’s sleep in a hammock takes some getting used to. And there are some dangers that come with sleeping in a hanging sack—such as injured pride, or worse.

If you’re doing a very long trip or you plan to do a lot of miles every day, consider doing a few shorter tours beforehand or training a few weeks or months before.
You don’t have to do this, you will enjoy the first days/weeks of your trip a lot more if you do. Otherwise, you will feel miserable until your muscles and your bum stop being sore.
This is also a good time to see if you’re happy with the setup you have. That is, if your bike feels good, if your saddle is comfortable, if some of your gear is simply dead weight or if you need to include additional gear.
Most of your days on the road will consist of zone 2 (endurance) riding, so this is the type of riding you should focus on in your training. It’s the type of effort that you can comfortably maintain all day long and then repeat it the day after.

This is a very important step when it comes to planning your bike trip. It can make or break your adventure. You need to be ready to do regular maintenance on your bike and do small repairs when necessary without relying on others.
Some of the most important stuff you should learn how to do include:
- Cleaning and lubing the chain
- Replacing the chain
- Repairing and changing a flat tube
- Adjusting the derailleurs and brakes
- Replacing a derailleur hanger
- Replacing spokes and truing the wheels
This might seem like complicated stuff if you’ve never done it before, but it really isn’t. You can do all of it with very basic tools, such as a high-quality multitool, and you can learn how to do all of it by watching YouTube videos.
Related: Bike Repair Kits (Includes a checklist of must-haves)

Any discomfort you feel on your regular rides will become ten times worse when you’re on a bike trip. All you will do every day is sit on the bike and turn the pedals, so you need to make sure that you’re not doing your body any harm.
Read more about the importance and how to fit the saddle, handlebar, and other aspects of your bike.

Learn how to say “Hello,” “Thank you,” “I’m sorry,” as well as how to ask for directions. The locals will appreciate it, they will usually go out of their way to help you, and you’ll have a much better time not feeling like a complete alien in a new country.
Congrats on coming this far and learning how to plan your own bike trips!
As you can see, even though the whole process seemed complex and daunting in the beginning, you don’t really need much to start traveling on two wheels.
Hopefully, this guide has answered any questions you might have had and cleared any remaining doubts. All there is to do now is get a bike, purchase some gear, pack your stuff, and hit the road with a big smile on your face!
Related Topics:

Top Dutch Bikes of 2024: A Comprehensive Buying Guide to Help You Choose

360+ Coolest Bike Names: Creative Ideas for All Bike Types

Understanding Bike Box Dimensions: A Guide to Hassle-Free Bicycle Transport
6 thoughts on “ how to prepare for a bike trip: everything to know before your first adventure ”.
Thanks a million. I’ve only been riding my handtrike for about a month but I am itchin to take my first tour. Do you have any additional advise for a handtrikeer? Larry
You’re welcome, Larry!
I don’t have any specific advice for touring on a handtrike, but what I can say is to just give it a try! Prepare, but don’t overthink. Go on a short overnight trip for starters, see what works for you and what doesn’t, and continue from there. And remember to have fun, don’t take it too seriously! Cheers!
Many, many thanks, Dusan. I learned a lot! Mike.
Hi Mike, Thanks for the feedback! Have a great bike trip!
I appreciate this article about bike trips. I am hoping to go on a trip next year. When I go on a bike tour, I’ll be sure to consider these tips.
It was really helpful when you said guided tours will help you with carrying your stuff. My brother wants to go on a bicycle tour. I’ll make sure to pass this information along to him so that he can know more about bike tours.
Leave a Reply Cancel reply
Your email address will not be published. Required fields are marked *
Bicycle Touring Guide for Beginners: Everything You Need To Know

The idea of planning and preparing for your first-ever bike tour might seem a little intimidating at first. I completely understand — I was very intimidated when I left for my first-ever tour ( from London to Istanbul ), but I quickly discovered that I needn’t have been worried!
In this bicycle touring guide, I’ll cover everything you need to know in order to plan and prepare for your first cycle tour, including how to choose a bike for touring, what gear you’ll need, how to budget, ideas on where to go, tips for life on the road and more.
I’ll also be responding to worries that novice cycle tourists often have, such as whether you need to be really fit and whether you need to know a lot about bikes in order to tour.
Let’s dive in!
What is bicycle touring?
Simply put, bicycle touring is travelling by bicycle.
It’s a type of adventure travel that combines cycling with backpacking. You’ll cycle for days, weeks, months or even years, with your luggage attached to your bike. In doing so, you are self-sufficient and your journey is self-powered.
Cycle touring vs bikepacking
The phrases “cycle touring” and “bikepacking” are often used interchangeably. Both refer to travelling by bike, but it’s the terrain and type of bike used that sets them apart.
Cycle touring is typically done on-road or along bike paths, using a touring, hybrid, or even a road bike.
Bikepacking refers to off-road adventures along dirt roads and/or in the mountains, on a bike with fatter tyres, such as a mountain or fat bike.
For the purpose of this guide, we will focus on cycle touring , but a lot of the information here will also be useful to those who are interested in bikepacking.
Why should you go on a bicycle tour?
There are few better ways to explore the world than by bicycle.
Most tourists will travel from hotspot to hotspot, but on a bike, you’ll get to uncover things that most people miss. You’ll really connect with your surroundings and notice the fine details of the region you’re travelling through.
In a car, you see so much yet experience so little. There’s no real connection to what’s just outside of your window; you’ll see but a timelapse of the world around you. On foot, you soak up each individual step, but with this comes confinement and small distances covered each day.
That’s where bicycle touring, for me, wins every time. On a bicycle, you’ll cover substantial distances, yet you’ll still be slow enough to really see and experience everything around you. If it’s raining, you’re soaked. If it’s hot, you’re sweating. There’s no AC to turn on, no roof over your head. Dirt, dust and insects will stick to your sweat-clad skin. You must grind up the hills, but then you’ll have the joy of coasting down them.
Not only this but bicycle touring is a cheap way and eco-friendly way to travel!
READ MORE: 10 Reasons Why You Should Try Bicycle Touring

How to choose a bike for touring
Touring bikes are specifically designed for long-distance, weight-bearing cycling. They have a longer wheelbase than regular bikes, providing more stability and comfort while carrying a load, and have several attachment points for racks and bags.
When choosing a touring bike , think about the demands of your ride:
Duration : For short tours — perhaps a week or two — just about any bike will do. If you’re planning a longer trip, there’s a stronger case for using a higher quality bike that won’t fail under strain.
Location : If you are touring in a remote location, where access to bike repair is infrequent, it’s a good idea to invest in a quality bike that is unlikely to break down and leave you stranded in the middle of nowhere.
Terrain : If you’ll be sticking mostly to roads, you can really use any bike, although skinnier tyres will enable you to go faster. If you’re planning on going off-road and riding over dirt paths and mountainous terrain, you’ll want a bike with wide tyres and good suspension.
That being said, you don’t need a touring bike. A nice bike is just that: nice but not essential. People have toured great distances on bikes that didn’t look up to the job. I cycled across Europe using a second-hand bike from a charity shop, and Thomas Stevens cycled the world on a penny-farthing in the 1800s!
Your budget needn’t hold you back . You really don’t need to splurge on an expensive new bike, unless you want to. As long as your bike has fitment points so you can attach a rack and panniers, decent gears and tyres and a comfortable saddle, there’s no reason why you can’t tour on it. Just keep in mind that long rides over challenging terrain may be a strain on your cheaper, older bike.
If you’re planning on a long tour over challenging terrain and want to invest in something designed for such an expedition, take a look at the following touring bikes:
- Fuji Touring
- Cube Touring Bike
- Trek 520 Disc
- Kona Sutra Adventure Road Bike
- Ridgeback Panorama

What gear and equipment do you need for a bicycle tour?
At its heart, bike touring is all about minimalism and simplicity. The mantra of “it’s better to have it and not need it” is not the way to go. You need to be selective with what you bring as you’re the one who must grind the weight of your luggage up those hills!
Here is what I recommend you bring with you on your bicycle tour:
- Panniers — I love these ones
- Inner tubes
- Tail lights
- 2 cycling shorts
- Non-cycling pants
- Long sleeve layer
- Jumper/fleece
- Waterproof jacket
- 5 pairs of underwear
- 5 pairs of socks
Camping gear
- Sleeping bag
- Sleeping mat — I love this Forclaz mat
- Travel pillow
- Gas cylinder
- Portable stove
- Plates/cutlery
- Matches/lighter
Miscellaneous
- Wallet and money
- Refillable water bottle
- Soap & shampoo
- Toothbrush & paste
- Hairbrush & hair ties
- Travel towel
- Battery packs
(A side note: you don’t need all of this stuff. You can pick and choose what would provide comfort and value to you during your tour.)
READ MORE: A Complete Bike Touring Gear Guide and Kit List

How do I carry all my gear?
Panniers are a type of bag that sit on your bike and store all your stuff. They’ll mount over your wheels, either at the front, back, or both. You’ll need to fit racks onto your bike, and then clip the panniers onto these racks.
Pannier racks
Choosing a pannier rack for your bicycle is about as exciting as watching paint dry, but strong racks are essential when preparing for a long-distance bicycle tour. You’ll be clipping your panniers and bike bags onto them so they need to be hard-wearing and capable of carrying your luggage.
Every bike is different and there are many variables to consider when choosing your racks:
- Does your bike have disc brakes or rim brakes? Your rack might need extra clearance if you have disc brakes.
- Does your bike have mounts to attach the back rack to, or will you need to use clips?
- Does the rack give you plenty of heel clearance? Essential if you actually want to be able to pedal when the panniers are attached!
You’ll also want to consider the material your racks are made from:
- Aluminium: very lightweight but less durable.
- Chromoly: heavier than aluminium but durable and strong.
- Steel: heavier than chromoly but very durable and can be welded if they break.
- Titanium: lightweight but expensive.
Make sure to check your wheel size and dimensions to get the one best suited to your bike. If you don’t know much about bikes, I’d advise getting racks fitted at your local bicycle shop.
Panniers and bike bags
Panniers/bike bags are where you’re going to store all your gear, and they’ll clip onto your pannier racks.
Ortlieb is one of the most popular panniers and bike bag brands as their bags are known for being waterproof and durable. That being said, Ortlieb isn’t the cheapest at £100+. You certainly don’t need to fork out for Ortliebs, unless you want a really great pair that’ll last you a long time, but it’s worth getting good quality, waterproof panniers that will last.
If you’ll be camping on your tour, you’ll likely need front panniers as well as back panniers, as camping and cooking gear can take up a lot of space. If you’ll be staying in hotels or similar on your tour, you may well be able to get away with back panniers only. It all depends on how much gear you’ll be carrying!
I use these back panniers from BTWIN and they serve me very well. They’re waterproof, durable and have plenty of space.
I had some cheap front panniers which, quite frankly, sucked, and they broke quickly. This is why I advise investing in some good quality panniers.
Some great options for panniers include:
- Ortlieb 20L Back Roller Classic
- Arkel 22.5L Panniers
- Thule Shield 25L Pannier Pair
READ MORE: The 8 Best Panniers For Touring in 2022

How to pick a destination for your first bike trip
It seems that many people think that travelling by bike needs to be adventurous. Sure, there are particularly intrepid individuals out there who are enthused about navigating the steppes of Central Asia or sweating their way across the Sahara desert, but these are far and few between.
Bicycle touring can be thought of as a “cycling holiday” — you’re doing this to enjoy yourself, after all!
When deciding where to go for a bicycle tour, you’ll want to consider the following:
Time: Most of us can only take a short while out of work at a time, or have commitments that can’t be abandoned for too long. If you don’t have much time, why not start local? Just get out of your house and start cycling — a weekend tour can still be a great adventure! If you have two weeks or longer, you have a lot more choice on where to go.
Season: The weather can have a massive impact on how much you enjoy your tour. Choosing to cycle across Asia during the monsoon season or northern Canada during winter could be miserable.
Style: Does your chosen destination fit your cycling and travel style? Think about what you want to get out of your cycle tour, what sights you want to see and how comfortable you are cycling in remote places.
Experience: When planning a bike tour, you should use your previous riding experience to figure out how much distance and how much incline you’re capable of covering. For example, if you’re not in the best shape, touring the steep inclines of the Pyrenees might not be such a fun experience for you.
Ideas on where to go bicycle touring
Here are some great destination ideas for first-time bike tourers:
Western Europe
Many first-time bike tourers select Europe as their first adventure. It’s a great continent to cycle in: bike paths are decent, amenities are great and distances between cities and towns are much smaller than in other parts of the world. Not only this, but Europe is diverse with beautiful scenery and fascinating cultures, and is home to a great community of cycle tourists.
There’s a huge network of dedicated bicycle routes that span across Europe, known as the EuroVelo routes. These are perfect for first-time cycle tourists, as they make planning easy. Just pick a route and follow it!
I would say that Western Europe is more beginner-friendly than Eastern Europe, as (typically) bike paths are better maintained, infrastructure is more set up for cyclists and campsites are everywhere.
I personally cycled EuroVelo 6 one summer and had a fantastic time pedalling along rivers and visiting capital cities. If you’d like to cycle along the Mediterranean coast, taking in Spanish beaches, the canals of Venice, beautiful Croatia and more, have a look into EuroVelo 8.
If you’ve got a week for your cycle tour, Passau to Vienna is a great choice.
If you have 2-3 weeks, I would recommend following the Loire River in France (the Loire a Velo ), or the EuroVelo 15 , which follows the Rhine River through Switzerland, Germany and the Netherlands.

South Korea
The South Korean government has invested massively in cycling, meaning the country now has thousands of kilometres of dedicated bicycle paths. The most famous of their bike routes is the 4 Rivers Path , a 633 km-long path connecting the major Korean cities of Seoul and Busan. It’s an ideal option for a beginner’s bicycle tour.
If you want to see more of the country, you could even make up your own route, as South Korea has an excellent road network with many secondary roads that usually see little traffic.
Camping culture in South Korea is huge and there are lots of free campsites scattered everywhere, usually in scenic areas, such as by the beach or a lake. South Korea is also one of the safest countries in Asia, making it ideal for solo cyclists who might worry about cycling alone.
Japan is a dream destination for many, but many people are put off from visiting due to the high costs. However, there is a budget way to explore Japan, and this is — you guessed it — by bicycle touring.
Wild camping is legal in Japan, meaning you can pitch your tent for free as your travel around the country. Public baths are everywhere and cheap, meaning you can wash easily on the road, too.
Roads in Japan are generally well-maintained, aside from the occasional pothole. Long cycling paths are not as common as in South Korea, but it’s possible to cycle on minor roads, which are usually very beautiful and not too heavily trafficked.
Like South Korea, Japan is also incredibly safe, making it a great option for solo cyclists.
Southeast Asia
Southeast Asia is a very popular destination for cycle tourists; it has a warm climate, there’s so much to see and do, and it’s very budget-friendly . It’s feasible for you to eat out every day and stay in guesthouses, rather than camp and cook your own meals. With this in mind, you could think of Southeast Asia as a luxury destination for touring!
The landscapes are spectacular in this part of the world. You could cycle down the coast of Vietnam, tour through peaceful Laos or pedal along the mighty Mekong River.

How to budget for a bicycle tour
One of the perks of cycle touring is that it’s typically cheaper than your average getaway. Your cooking and camping gear have you covered for food and accommodation, and your bicycle is your transport.
That being said, your daily bicycle touring costs will vary massively depending on your touring style and which part of the world you’re in.
Cycle touring is doable on any budget, but if you’re cycling on a shoestring, it may require a strong sense of adventure and the will to adapt to some discomfort.
If you choose to wild camp, cook your own meals and skip paid attractions, you could potentially tour on a mere $5-10 per day.
On the other hand, you could easily burn through over $100 a day if you choose to eat out and stay in hotels while touring expensive places like West Europe, North America and Australia.
Most tourers’ daily budget falls somewhere in the middle. For example, I prefer to tour by staying at campsites and cooking my own meals. This way, I always have a place to pitch my tent with access to toilet and shower facilities. I also allow myself some luxuries, such as the occasional meal out, fancy coffee from cafes, and some paid attractions. Touring this way, I spent roughly €30 per day while cycling across Europe.
If you’re someone who doesn’t want to camp but is worried about the costs of staying in hotels, consider touring somewhere like Southeast Asia, where accommodation and eating out are super cheap. You could expect to pay roughly $20-30 per day in Southeast Asia by eating delicious street food and staying in budget guesthouses.
As well as your daily touring costs of food, accommodation etc, you’ll want to factor in potential bike repairs and kit replacements. Leave yourself a buffer, in case a hole rips into your tent or your bike needs professional repair.
Finding bike-friendly accommodation
Unless you’re planning a short trip, it’s not practical to plan accommodation in advance. Weather, equipment, your energy levels and other factors can all influence the distance you cover each day. You might also find an unexpectedly nice town and want to spend some time there. With this in mind, it’s best to remain as flexible as possible when it comes to where you lay your head at night.
Campgrounds
Campgrounds offer a safe place to pitch your tent, along with a toilet and shower, and usually WiFi and electrical outlets, too. They’ll even sometimes have laundry facilities, cooking stations and more. Campgrounds can be a great place to stay at a really reasonable price.
In Europe, Australia and New Zealand, you’ll find that campgrounds are everywhere and usually good value for money. In Japan and South Korea, there are many free campgrounds where you can stay.
Watch out for privately-run campsites in the US, as they can charge a lot of money for a small patch of grass. They usually prioritise RVs and may even turn cyclists away!
You won’t really find campgrounds in developing countries, such as in the Middle East or South Asia.

Sometimes you just need a break from camping! Hostels are generally the cheapest way to get a bed for the night, if you don’t mind sharing a room with other people. They’re most commonly found in cities or larger tourist towns — it’s unlikely you’ll find hostels in super rural areas.
In expensive places, such as West Europe or Australia, hostels can be as low as $10, although they’re usually closer to $20. In cheaper places, like Southeast Asia, they can be as low as $4 per night (yes, really)!
If you’re touring in places like Western Europe, the USA or Australia, then nothing will blow your budget faster than staying in hotels. However, if you’re sick or have been riding in bad weather for a few days, a hotel room with an actual bed and a private bathroom can be a real morale booster.
If you do stay in hotels, make sure there is somewhere secure to lock your bike up. Cycle tourists are not usually well catered for at hotels — I had to lock my bike to the fence in a hotel garden in Austria as there was nowhere else to put it.
In continental Europe, you might spot a type of hotel called a pension . Pensions are usually much more budget-friendly than a full-scale hotel and are more like a guesthouse or bed and breakfast. Pensions near bike paths in Germany and Austria often have signs outside to let cyclists know their bikes are welcome: “Radfahrer Wilkommen.”
In less expensive places, such as India or Southeast Asia, it’s affordable to stay in budget hotels every night.
Wild camping
Wild camping is a great way to save money and enjoy nature. It also offers complete flexibility, as you can pitch your tent just about anywhere — a real lifesaver in areas where tourism isn’t common.
You’ll want to find a secluded spot if you choose to wild camp, away from roads and out of sight of people.
Bear in mind that wild camping is prohibited in many countries, although many cyclists do it anyway and don’t get caught. Most people have a relatively relaxed attitude to wild campers, and so may or may not ask you to move on if you’re caught. Just make sure to be discrete: find a secluded spot, wait until dusk to set up camp and be gone by early morning.
If you’re new to wild camping, it’s normal to have some worries at first. I used to be afraid that an unpleasant stranger would come by or the police would show up to ask me to move on. However, as long as you remain hidden and are discrete, it’s unlikely you’ll encounter any problems.
WarmShowers
If you’re not familiar, Warm Showers is a free worldwide hospitality exchange for touring cyclists. It’s a fantastic community — cyclists offer to host other cyclists for a night. You’ll be given a place to sleep and a shower, but it’s likely you’ll also be given food and a beer. Warm Showers states that they have hosts in over 160 countries!
Unconventional options
Churches, police stations, gas stations, farmer’s fields and more are often viable options when looking for somewhere to spend the night. It depends on the country and the laws they have on camping, but in many places, people will be happy to help cyclists and provide somewhere for them to pitch their tent.
People across the world are hospitable and kind — particularly when they see a weary-looking cyclist with lots of gear strapped to their bike!
As an example, myself and two other cyclists pitched our tents next to a gas station in Turkey one night. The security guard gave us coffee and snacks, and a passing farmer even gifted us some watermelon and tomatoes.

Overcoming worries and doubts
If you’ve never been on a cycle tour, you may feel overwhelmed and have doubts about whether you’re capable or not.
Let me tell you: if I can do it, then so can you. With no touring experience, little knowledge of bike mechanics and a not-so-great level of fitness, I cycled from London to Istanbul over the course of 3 months.
I am not particularly brave or strong-willed. I just took it one day at a time.
What if I know NOTHING about bike mechanics?
Don’t worry! I didn’t know much about bike mechanics before committing to my first 3-month cycle tour.
That being said, it would be extremely helpful to know a few basics in case of a breakdown. At a minimum, you should know how to pump your tyres and how to repair a flat tyre.
If you really do know nothing about bike repair, it would be wise to choose a destination where you’re not going to become stuck if your bike breaks down. A popular route like the western part of EuroVelo 6 is dotted with bike repair shops, as well as other bike tourists who would probably be happy to help if you’re in a tough spot.
How do I train for a bicycle tour? Do I need to be really fit?
As the saying goes, “train for the tour or let the tour train you.”
You do not need to be really fit. Training can be done on the road, as long as you’re willing to take things slowly at first. You don’t need to cover massive distances each day if you don’t want to, and no one will judge you if you need to get off your bike and push sometimes.
Ignore the self-important types who think you’re not a proper cyclist just because you only cycled 30km and pushed your bike up that hill.
That being said, having good fitness will make your bike tour much more enjoyable.
Try to cycle 3 or 4 times a week, including one whole day of cycling over varied terrain. This will help to improve your fitness, as well as prepare your body for long days in the saddle.
I’m still not sure if bicycle touring is for me…
If you’re nervous about committing to a big tour, why not have a practice run? You could head out somewhere local one morning, camp that night and then head home the next day. This will give you a feel of what bicycle touring is like.
Alternatively, there are companies such as Spice Roads , Grasshopper Adventures and Bike Adventures that offer fully supported, guided cycle tours. All the logistics will be taken care of for you, so you can enjoy cycling without worrying about getting lost or finding places to stay. This is also a great option if you simply don’t feel comfortable touring on your own due to safety concerns.
What’s the best travel insurance for a bicycle tour?
It’s harder than you would expect to find a decent travel insurance policy that covers bicycle touring. And, unfortunately, most policies that do cover bicycle touring do not cover damage to or theft of your bike.
If you’re a UK resident, Adventures Insurance is probably the best option.
As the name would suggest, they specialise in insurance for more adventurous pursuits — including cycle touring. They cover personal liability and medical expenses while cycle touring, and even allow equipment up to £1,000 to be covered, with a single item limit of £600. However, the maximum duration of your cycle tour must be 3 months.
If you’re not a UK resident or will be touring for longer than 3 months on one continent , I would recommend World Nomads , whom I personally use for most backpacking and general long-term trips.
You can read World Nomads’ policy on cycling-related travel h e re , but here are the basics:
- Cycle touring is covered but the tour must be on one continent only — no cover is available for intercontinental cycle touring.
- You’ll need to tick ‘cycling / biking – independent cycle touring’ when buying your policy. This is an optional extra, so be sure to select it.

READ MORE: 5 Best Cycle Touring Insurance Providers
Tips for life on the road
1) Take every opportunity to refill your water bottles.
2) Drink before you are thirsty and eat before you are hungry.
3) Carrying your own toilet roll is essential. Trust me.
4) Double-check your camping spot before you head off for the day. Cycling back for something you’ve forgotten is the worst!
5) Especially for longer tours, build in a luxury day every so often. A nice hotel room and a warm bath are so welcome after weeks of camping.
6) Be sure to take rest days and make time for sightseeing.
7) Be conservative with the mileage at first; no amount of training can adequately train you for hours in the saddle day after day.
8) Find the little roads. They’re usually much nicer to cycle on than the more direct but busier roads.
9) Stock cubes can add flavour to almost anything and are great to mix into a perhaps otherwise flavourless camp meal.
10) Be prepared to get dirty! Sweat + sunscreen + cycling is an unpleasant combination. Tiny insects and layers of dust/dirt will stick to your skin.
11) Learn the mistakes drivers make, and assume everyone is going to make them every time.
12) Numbness in any part of your body should be treated as a warning sign that something needs to change in your bike fit or cycling posture. Numbness can lead to serious problems and should be treated seriously.
13) It’s not a race. Who cares if you only cycle 10km a day? As long as you’re enjoying yourself, that’s all that matters. As Jimmy Buffett said, “go fast enough to get there but slow enough to see.”
14) A lot of the challenges are mental. The going can get tough at times, but the pros of touring have always outweighed the cons for me.
15) The most important bike touring tip of all: have fun!
READ MORE: 40 Random Yet Helpful Bike Touring Tips

I hope this bicycle touring guide for beginners has been useful and has provided a good foundation of knowledge to help you plan and prepare for your first cycle tour.
Please feel free to post any questions you may have in the comments section below; I’ll be more than happy to answer!
Happy cycling, Lauren

About The Author
Lauren Pears is a freelance travel writer and blogger based in London. She writes about active adventure travel, aiming to encourage and inspire travellers to make the most of the great outdoors.
Thank you for reading! If you found this post useful, I’d be grateful if you would consider using the affiliate links below when planning your travels. I’ll make a small commission at no extra cost to you. This will help me to keep this blog running. Thanks for your support – Lauren. Hotels – Booking.com Hostels – Hostelworld Cheap flights – Skyscanner Travel insurance – World Nomads Outdoor gear – Decathlon / GO Outdoors Cycling gear – Chain Reaction Cycles Alternatively, you could buy me a coffee to say thanks!

Similar Posts

40 Random Yet Helpful Bike Touring Tips

Cycle Touring Insurance: What You Need To Know and the 6 Best Insurance Providers

How to Prevent Numb Hands on Long-Distance Bike Tours

A Complete Bike Touring Gear Guide and Kit List

10 Great Reasons Why You Should Try Bicycle Touring

An Ode to Bicycle Touring
Really great info here, thank you!
You’re welcome!
Leave a Reply Cancel reply
Your email address will not be published. Required fields are marked *
Bike A Ton is reader-supported. When you buy via the links on our site, we may earn an affiliate commission at no cost to you. Feel free to click away.

How to Travel by Bicycle (Bike Touring Guide)
There are so many beautiful reasons to go bicycle touring. It’s simply for everybody- no matter your weight, physical condition, experience or budget, you can travel by bike!
If you’re planning to do your first bike tour but have ZERO experience, stick around cause we’ve listed all the tips you need to get you started with your ride.
Bike Touring vs. Regular Cycling

At its core, bike touring is about embarking on long-distance journeys on a bicycle. It’s not just about the destination, but the journey itself. Unlike regular cycling, where the primary goal might be exercise, commuting, or a short recreational ride, bike touring is about exploration, adventure, and self-sufficiency.
Imagine this: Instead of cycling around your neighborhood or through a local park and returning home, you’re pedaling through scenic countryside, exploring new towns, and at the end of the day, you’re setting up camp under the stars or checking into a cozy inn. That’s bike touring.
- Adventure : Every day brings new scenery, challenges, and experiences.
- Flexibility : You decide the pace, the route, and where to stop.
- Connection : Engage deeply with the environment and the communities you pass through.
- Physical Demand : Requires stamina, especially on multi-day tours.
- Preparation : Planning routes, packing gear, and ensuring safety can be intensive.
- Unpredictability : Weather, road conditions, and other factors can affect your journey.
The Joy of Bike Touring
There’s a unique sense of freedom in bike touring. The open road, the wind in your hair, and the thrill of what lies around the next bend. Every pedal stroke brings a new perspective, every mile a new story. And at the end of the day, there’s the satisfaction of setting up camp, reflecting on the day’s journey, and anticipating the adventures tomorrow will bring.
Planning Your First Bike Tour
Before starting a biking tour, there are things you have to plan. Are you going on-road, off-road, or both? What bike should you use on the tour? What should you bring? How far can you ride? Where do you stay at night? Every ride is different. The more details you put into your plan, the more successful your ride will be.
Bikepacking
Generally, bike-packing is more off-road using wide-tired mountain bikes with shocks. It’s a tour on dirt roads in secluded places. It’s also a great option if you want to go back-country hiking while enjoying the thrills of riding your mountain bike.
Touring in mountainous areas can be demanding so backpackers carry light loads during their rides. Although, carrying less means there is less stuff you need to worry about.

Cycle Touring
If you’re in love with the idea of “living life on the road, then cycle touring is for you. It can range from single to multi-day trips while traveling across towns, cities, or even countries. Cycle tours will require bringing all the gear you would need to travel around sufficiently. Backpacking, on the flip side, demands only the most essential stuff to make cycling less physically demanding.
Getting the Right Bike
On-road ride.
Touring bikes are great for on-road rides. Most touring bikes are pretty heavy because they have steel frames that absorb the cushion of the road.
You can also go on a road bike, although most road bikes aren’t built for long-distance bike touring. A hybrid combo like gravel bikes also does well on the road. These bikes are lightweight and designed to handle a wide range of different terrain and surfaces.
Off-road Ride
Mountain bikes are still best for off-road riding because you’re gonna be able to do hills and trails that you wanna hit without damaging your bike and hurting yourself.
When choosing a bike for off-road tours, you should optimize your bike setup by considering your load’s weight, riding surfaces, and terrain steepness.
The Importance of an Upright Riding Position
An upright riding position is crucial for long hours on the saddle. It reduces strain on the back, neck, and shoulders, allowing for a more comfortable and sustainable ride. This position also offers a better vantage point to enjoy the surroundings.
Expert Tip : Look for handlebars that allow multiple hand positions. This can help reduce fatigue and numbness on longer rides.
Geometry and Stability
The geometry of a touring bike is tailored for stability, especially when loaded with gear. A longer wheelbase, lower bottom bracket, and relaxed head tube angle all contribute to a bike that handles well, even when weighed down with panniers.
Example : Consider two cyclists – one on a nimble road bike and the other on a loaded touring bike. While the road bike might excel in a city sprint, the touring bike will shine on a multi-day journey through varied terrains, providing a stable and comfortable ride.
Features of a Typical Touring Bike
- Durable Frame : Often made of steel, which is resilient and can be repaired in remote areas.
- Wider Tires : Provides better traction and comfort on different surfaces.
- Mounts for Panniers and Racks : Essential for carrying camping gear, food, and other essentials.
- Reliable Braking System : Disc brakes are common for their reliability in varied weather conditions.
- Gearing : A wide range of gears to handle steep climbs and fast descents.
Expert Tip : When choosing a touring bike, consider the type of terrain you’ll be covering. For rougher trails, a touring bike with wider tires and a more robust frame might be ideal. For paved roads, a lighter touring bike with a more streamlined design could be the best choice.
Packing Essentials
Preparing your bike tour list is crucial. What you should pack will depend on the length of your ride and where you’ll be. Below, we discussed how you can efficiently pack when traveling on-road or off-road.
Panniers or Backpacking Bag?
When planning to do a bike tour, you should bring panniers for storing your stuff. These bags are spacious and built to be attached to the sides of your bike’s front and rear sacks. It can also be detached once you reach your destination. We suggest you get a waterproof pannier to protect your stuff from getting wet during rainy trips.
Panniers are best for long cycling tours where you can store all of your food, clothing, gears, and other essentials. When packing for an off-road trip, opt for a bike packing bag (or the best bike messenger bag ) because it would demand lighter load set-ups than a four-pannier cycling tour set-up.
Choosing your Direction
In choosing your destination, consider the weather and the landscape. The weather will also tell you what you need to pack, how far you can ride, and when you should start pedaling.
Are you craving mountainous terrain, city view, or both? When choosing a scenic spot, remember to consider going on lean seasons if you don’t want to get stuck in traffic. Or you can look for routes with a few motorists to avoid undesirable traffic jams.

How Much Will Bike Touring Cost?
If you’re touring America and you already have all the necessary gears you need before you hit the road, you’ll pretty much need $35 to $50 per day to cover your food, camping fees, and repairs and gear replacements. But if you’re planning to tour overseas, here’s a quick breakdown by travellingtwo.com of the possible expenses per day:
- Europe: $39.64
- Morocco: $40.00
- Syria: $23.89
- Iran: $17.16
- Turkey: $53.97
- Turkmenistan: $15.21
- Uzbekistan: $19.09
- Kazakhstan: $18.07
- Kyrgyzstan: $26.58
- Thailand: $32.33
- Cambodia: $34.11
- Laos: $22.00
- Malaysia: $28.59
- Singapore: $20.70
- Australia: $33.01
- New Zealand: $34.67
- Canada: $30.06
Basics of Bicycle Touring
1. Understand the Different Types of Bike Touring :
- Day Touring : Short trips that last a day. Ideal for beginners to get a feel of bike touring.
- Credit Card Touring : Multi-day trips where you stay in hotels or B&Bs and dine in restaurants. Lighter load since you don’t carry camping gear.
- Fully Loaded Touring : Carrying everything you need, including camping gear and food. Offers the most freedom but requires thorough preparation.
2. Physical Preparation : Start with shorter rides and gradually increase your distance. This not only builds stamina but also helps you get accustomed to spending long hours on the saddle.
3. Learn Basic Bike Maintenance : Knowing how to fix a flat tire, adjust brakes, and maintain your chain can save you from potential troubles on the road.
Steps to Become a Pro at Bicycle Touring
1. Plan but Be Flexible : While it’s essential to have a route and itinerary, be prepared for changes. Weather, road conditions, or unexpected discoveries might alter your plans, and that’s okay!
2. Pack Smart :
- Essentials First : Prioritize tools, spare parts, water, and food.
- Balance Your Load : Distribute weight evenly between front and rear panniers.
- Limit Luxuries : Space is limited, so only pack what you’ll truly need.
3. Engage with the Community : Join local cycling groups, participate in forums, and connect with experienced tourers. Their insights and stories can be invaluable.
4. Document Your Journey : Maintain a journal, take photos, or even start a blog. Documenting helps you reflect on your experiences and share them with others.
5. Safety First : Always wear a helmet, use lights and reflective gear, and be aware of traffic rules and road conditions.
6. Embrace Challenges : Flat tires, unexpected rain, or steep terrains are all part of the journey. Embrace these challenges as they come, and remember, they make the best stories!
7. Continuous Learning : The world of bike touring is vast. From new gear innovations to different touring philosophies, there’s always something new to learn.
Expert Tip : Start with a short, local tour to familiarize yourself with the experience. It’s a low-commitment way to understand what bike touring entails and to identify areas you need to work on.
Common Mistakes in Bike Touring
1. Using the Wrong Bike: I t’s possible to use any bike for a bike tour, but using the right bike that’s specific to your needs will make a difference in your overall comfort and success during your trip.
2. Fear of Starting: Start right off! Don’t wait for years of planning before starting to go on a bike tour. Waiting until you’re too old and physically incapable will only bring you lots of regrets.
3. Not Documenting Your Tour : Capture the most scenic view you’ve seen, the best experiences, and the most beautiful people you’ve met during your bike tour. It’s good to look back on the physical and emotional memories during your bike-tour.
4. Not Knowing How to Do Minor Bike Repairs and Adjustments : Learn a few repair and maintenance skills before going on a bike tour. These basic things will save you time and money! Not only that, but a well-maintained bike can also ensure a smooth and safe ride.
About The Author

Antonnette Baker

Hey there! We’re Antonnette and Mario, a sister-and-brother tandem who love bikes and biking.
We and our team use our extensive knowledge about bicycles to help you have a great riding experience.
Read more...
Posts You Might Like
5 top hybrid bike handlebars: choose the right one for your ride, best bikepacking bags of 2024, best co2 inflators in 2024, 8 best mountain bike trainers in 2024, best bike brakes in 2024 (buying guide & reviews), 9 best bmx shoes in 2024 (with buying guide), 7 best bike helmet lights for 2024, best exercise bike for bad knees (our top 7 picks), best women’s cycling shoes (2024 buying guide & reviews), best bike baskets in 2024 (tried and tested), how fast can a mountain bike go speed limits & factors, is a bicycle considered a vehicle , bike vs bicycle: understanding the difference, gear cycle vs normal cycle: which one suits your riding style best, how many miles should you bike a day a comprehensive guide for every rider, when and how to safely enter a bike lane, mountain bike tire width: what every rider needs to know, top 5 bmx tricks for beginners to master, the complete guide to speed and agility training: unlock your athletic potential, how to choose a full suspension mountain bike: a complete guide for beginners.
Advertisement
Related Posts
- Credit cards
- View all credit cards
- Banking guide
- Loans guide
- Insurance guide
- Personal finance
- View all personal finance
- Small business
- Small business guide
- View all taxes
You’re our first priority. Every time.
We believe everyone should be able to make financial decisions with confidence. And while our site doesn’t feature every company or financial product available on the market, we’re proud that the guidance we offer, the information we provide and the tools we create are objective, independent, straightforward — and free.
So how do we make money? Our partners compensate us. This may influence which products we review and write about (and where those products appear on the site), but it in no way affects our recommendations or advice, which are grounded in thousands of hours of research. Our partners cannot pay us to guarantee favorable reviews of their products or services. Here is a list of our partners .
How to Start Traveling by Bike
Many or all of the products featured here are from our partners who compensate us. This influences which products we write about and where and how the product appears on a page. However, this does not influence our evaluations. Our opinions are our own. Here is a list of our partners and here's how we make money .
Traveling by bike not only provides a solid workout and fresh air, but it allows people to get a closer look at their surroundings. Plus, the variability of choosing challenging or easy routes makes the excursion more hands-on.
Whether you’re out for a short leisurely ride or an overnight camping and bike adventure, here are five tips to make sightseeing from behind the handlebars easier.
1. Learn the basics
Getting started is sometimes the hardest part. Harriet and Neil Pike, the writers behind Pikes on Bikes, are here to help. Their guidebooks include everything from choosing the right bike for your budget to the best route for your skill level. They provide practical advice for everyone from the novice to the advanced cyclist.
2. Let an app be your guide
When exploring new areas or paths, let your cellphone guide the way. Whether searching for the smoothest bike trail, most beautiful scenic path or just the most cyclist-friendly route, there’s an app for that. Tom Allen, the blogger behind Tom’s Bike Trip, reviews apps to show you the road less traveled .
3. Make it a family outing
Though the idea might seem difficult, with a bit of planning and organization, a family trip can be one for the memory book. TravelingTwo bloggers Friedel and Andrew Grant take their two kids on short bike rides and discuss what they need along on the route. And Mirjam Wouters of the Cycling Dutch Girl blog writes that overnight bike camping trips with a toddler are doable, and her daughter, Tara, has already camped five times.
» Learn more: 8 pro tips for smart and cheap family travel
4. Start with a weekend trip
Being out on the open road with just a bike and tent can sound a bit scary, but adventure-seeker and blogger, Stephen Fabes, who has camped just about everywhere , shares practical tips, anecdotes and cycling touring advice on his blog, Cycling the 6.
And when you’re ready to take the leap, My Life on Two Wheels blogger Heike Pirngruber lists all of the must-have equipment .
5. Build up to long-distance routes
While of Annika Wachter and Roberto Gallegos of Tasting Travels took a five-year bike journey around the world, you definitely can plan a simpler trip to start. Path Less Pedaled bloggers help you think smaller with overland bike trips that are sure to pack a lot of adventure into a shorter trip.
Planning a trip? Check out these articles for more inspiration and advice: 10 women share tips to save money while traveling solo How to set a trip budget when traveling with friends Pick the best travel credit card for you

on Chase's website
1x-5x 5x on travel purchased through Chase Travel℠, 3x on dining, select streaming services and online groceries, 2x on all other travel purchases, 1x on all other purchases.
60,000 Earn 60,000 bonus points after you spend $4,000 on purchases in the first 3 months from account opening. That's $750 when you redeem through Chase Travel℠.

1.5%-6.5% Enjoy 6.5% cash back on travel purchased through Chase Travel; 4.5% cash back on drugstore purchases and dining at restaurants, including takeout and eligible delivery service, and 3% on all other purchases (on up to $20,000 spent in the first year). After your first year or $20,000 spent, enjoy 5% cash back on travel purchased through Chase Travel, 3% cash back on drugstore purchases and dining at restaurants, including takeout and eligible delivery service, and unlimited 1.5% cash back on all other purchases.
$300 Earn an additional 1.5% cash back on everything you buy (on up to $20,000 spent in the first year) - worth up to $300 cash back!

on Capital One's website
2x-5x Earn unlimited 2X miles on every purchase, every day. Earn 5X miles on hotels and rental cars booked through Capital One Travel, where you'll get Capital One's best prices on thousands of trip options.
75,000 Enjoy a one-time bonus of 75,000 miles once you spend $4,000 on purchases within 3 months from account opening, equal to $750 in travel.

Cycling in the City and Beyond

Complete Guide to Bike Touring
This article will tell you everything you need to know about what bike touring: How to prepare physically and mentally, how to pack, and the best places to tour around.
Introduction
Regular cycling can make for a great day out, but you’re limited to the places you can conceivably travel to within a day, with enough time to return home again.

Bike touring, on the other hand, lets you travel to places further afield. On a bike tour, you travel to a number of checkpoints before you stop and set up camp for the night. This allows you to rest up and refuel for the day of cycling ahead so you can complete the next leg.
This guide will give you a complete overview of bike touring, why it’s become so popular, how you should train for it, what you need to pack to take with you, how to plan your route and tips for touring on a budget. At least you can’t say we haven’t been thorough.
Why Travel by Bike?

Despite it being both physically and mentally challenging, there are a number of reasons why people choose to travel by bike rather than traveling by more traditional means.
Compared to the cost of flights and ferries, traveling by bike is a much cheaper way to get around your chosen touring destination. Aside from the cost of the bike itself, of course.
This is ironically a far cry from the origins of bike touring , once reserved for the rich and aristocratic before they moved on to motor cars. Today, bike touring provides a way for people to travel around beautiful countries while keeping the costs of traveling low.
Bicycles can be a great extension of ourselves. Although they allow you to travel around much faster than you would be able to explore on your own two feet, they’re small enough that you will still be able to access smaller, off-road paths and trails that cars can’t access.
These days, there are also plenty of airlines and travel agencies that will allow you to travel to your intended destination with your bike, which is much cheaper than renting a bike after you have arrived. Plus, people often prefer their own bikes.
Builds Fitness
Traveling by bike requires a lot more physical activity than traveling around by boat or bus, so you’ll be able to build on your fitness levels while enjoying the beautiful local scenery. It’s got to be better than cycling on a treadmill at the gym, right?
There are multiple health benefits of cycling such as improving your mental wellbeing, and a number of fitness-related benefits including building muscle, improving stamina, and aiding weight loss. It’s certainly challenging, but traveling by bike can also be hugely rewarding.
Explore New Cultures and Landscapes
As you travel from place to place you’ll pick up more of the culture around you and you’ll be able to truly appreciate the landscapes you’re exploring.
Traveling by bike allows you to stop and smell the roses – literally – while you’re on the road, as you can stop to meet or chat with the locals. This is harder to do if you’re traveling with a large group and have to adhere to someone else’s travel schedule.
Cycle Touring or Bikepacking?

Cycle touring is when you travel the world with the entirety of your luggage mounted to your bike, either using bicycles specifically designed for this with their own rack and fender mounts, or by converting a regular hybrid bike so you can use it as a touring bike.
This is ideal for when you’re planning a longer trip that requires more luggage, as you can attach more to the front of the bike. There’s room for things like additional cooking equipment, a camera, extra clothes, a laptop or electronic devices, and your tent setup.
Bikepacking, on the other hand, is a more recently adopted version of cycle touring which involves traveling much lighter and traveling much lighter without cumbersome luggage racks, and often venturing off-road for large portions of the journey.
One of the great things about bikepacking is how the “lean setup” allows for either road or gravel bikes provided that they have a 28mm tire clearance as a minimum. They’re also incredibly lightweight and will allow you to fly around the country on your bike in no time.
City Traveling
Some of the best cycling tours to add to your bucket list include the Cultural Trail in the Midwest city of Indianapolis and bike tours in Vietnam and Cambodia where you can enjoy the culture and cuisine of local restaurants along the way.
However, you have to be more careful when touring city areas due to the busier roads and crowds of people. Make sure to store your bike somewhere safe and preferably padlocked indoors when you’re not riding it during the day to avoid anyone stealing it.
Mountain Exploring
Bikepacking offers “the ultimate freedom” according to Lee Craigie , a former Great Britain XC mountain biker and a founding member of the Adventure Syndicate, a group that encourages riders to explore new adventures and push themselves to the absolute limit.
Choose the right mountain bike for bikepacking and all that’s left to do is pack your bags and choose your destination. Mountain exploring is what bikepacking essentially is at its core, so it’s the perfect option for this type of bike touring holiday. Check out the Glacier National Park bike tour and the Carolinas bike tour to climb the Blue Ridge Mountains.
Am I in Good Enough Shape?
One aspect of bike touring that many people find daunting is that it can be physically as well as mentally challenging, so how do you know if you’re in good enough shape?
How Far Can You Ride in a Day?
The distance you’re able to travel by bike in one day is largely determined by your overall fitness level as well as a number of other factors. This includes your personal targets, the type of touring you’re doing, and the terrain you’re cycling on.
You’ll need to train for a bike touring trip in order to ensure your fitness levels are enough to carry you through days of cycling with little rest in between.
As a general rule, adults who have a standard level of fitness can travel at a pace of 65 miles per day on average when traveling over paved roads and carrying less than 20 pounds of gear, and this still leaves time for you to stop and explore or rest your legs for a while!
How Much Gear to Take?
The more weight you’re traveling with, the more physically challenging it will be and the longer it will take you to reach each stop. That’s why it’s always better to try and pack light.
Only take what you need and try to avoid picking up too many souvenirs along the way, or your legs will be the ones paying for it! Later in the article, we’ll go into more details about the essential travel items that you should take with you to help you avoid overpacking.
Based on the example we gave above, if your gear weighed somewhere between 20 and 45 pounds, you should lower your expectations to a pace of around 55 miles per day, although this can increase or decrease depending on the type of terrain you’re traveling on.
Training for a Bike Tour

Bike tours may be an incredible experience, but part of what makes it so rewarding is how challenging it can be at the same time. It does mean, however, that you’ll need to train for it.
Build a Training Plan
Bike touring is enough of a challenge that you can’t go into it with your eyes closed. It’s best to build and follow a training plan in order to make sure you’re physically fit enough to handle the requirements of cycling for miles every day with minimal rest time in between.
Be realistic with your goals and what you hope to achieve on your trip, and gradually work towards this, leaving yourself with enough time to recover before the beginning of your trip.
Base Training Miles
If you’re going to be away for days or even weeks where you’ll be cycling consistently, you’ll want to put in some miles on your bike before you go.
Try to increase the length of time you’re cycling for on every ride in preparation for your tour. You’ll want to have a decent base mileage that you’re able to achieve daily and you can use this to estimate your daily travel distance or a flexible schedule for your trip.
Build Strength
Before you can set off on a bike tour, you’ll need to make sure you’re physically strong enough to carry all your gear while you cycle over long distances for many days.
Building strength before your trip will mean your muscles are more prepared for what’s in store and will be able to repair themselves faster as you push yourself. This means you’ll feel less sore, which will make the journey much more enjoyable for you.
Build Endurance
Although you’re likely to improve your endurance as you go (this is one of the benefits of bike touring!) you’ll enjoy your trip more if you’ve already built some endurance beforehand.
Cycling holidays usually involve successive long days of intense traveling. Although it’s unlikely that you’ll be able to practice such distance before you go, adding some extra miles onto your weekend rides is advisable.
Practice Riding with Weight
Riding a long distance is one thing, but riding that same distance with a full backpack or a bike mount piled high with luggage is something else entirely. Trust us when we say you don’t want to find out what a difference this makes for the first time on day one of your trip.
As such, we’d recommend practicing riding with weight a few times to help build up your strength and endurance so you’ll be ready to take on consecutive days of riding your bike.
Finding a Bike

They say a bad sportsman blames his equipment, but finding the right bike can make or break a bike touring trip. It’s important to choose one that isn’t going to make the aches and pains you’ll probably be feeling after a few days even worse, so comfort is key.
There are bikes specifically designed for bike touring but you can use pretty much any type of bike when you’re first starting out before forking out for a brand new expensive bike. Certain types of bikes can even be customized to suit your individual needs.
The one exception is road racing bikes as they focus on quick handling rather than comfort and durability, which is the second most important factor to consider when choosing a bike.
Look out for low gears on your touring bike as you’ll need these when you’re traveling over trickier terrain or if you reach a point of your journey where you’ll be traveling mostly uphill.
Rack Mounts
The ability to mount racks is another important feature to look out for on a touring bike as this will make it much easier to carry your gear with you while you travel.
There’s some debate over whether you should opt for V-brakes or disc brakes for touring, but ultimately it will depend on your personal preference. We’d recommend choosing disc brakes over V-brakes, as the latter is likely to wear away at your wheel rims over time.
Touring bikes typically have a shorter reach which makes it easier to navigate while you’re riding and helps to keep your body upright in the correct position. This will make your ride easier and help mitigate the aches and pains associated with cycling all day.
Wheels and Tires
You’ll need to factor in the type of road you’ll be traveling on most often. Wider tires are better in most cases where you’ll be riding on uneven terrain, whereas city riders will be better off with a standard 700c size tire .
Planning Your Route

This definitely isn’t the type of holiday that should be left to being organized at the last minute, so learn how to plan your route properly before you go.
Popular Destinations
The Great American Rail-Trail is one of the most popular routes for bike touring and there are some incredible cycle tour vacations suitable for beginner bike tourers.
Planning Ahead
Not only will this save you money, but you’ll have a better idea of how long different routes will take you. You will be able to better plan the next few days so you can make the most of your experience without wasting time getting lost, or money on things you don’t need.
Camping or Hotels?
Bike touring purists would argue that you need to camp each night in order to have a full and true experience, but we don’t see anything wrong with treating yourself to a hotel stay one night after a particularly long day of riding. In fact, this can be a great way to round off a trip!
Planning your route means you can avoid areas known for being unsafe for cyclists and you can keep to quieter roads where there are fewer cars.
Getting to Your Destination

Before you can take off pedaling across the country, you’ll need to make your way to your starting point. If this isn’t local to you, you’ll have to factor in the travel to your destination, which can sometimes be a little complicated when you’re traveling with a bike in tow.
If you’re traveling by car with a bike there are plenty of bike mount racks available that allow you to attach your bike to either the back of the trunk or on top of the vehicle.
You can try to fit the bicycle on the back seats if your chairs go down or if it’s easy to temporarily remove the wheels for traveling. There are also foldable bikes that are highly convenient if you’re going to be transporting them in your car frequently.
Transporting a bike on a plane involves packaging it up in a bike box or bike bag before you travel. It typically costs around $10 to $12 to have your local bike shop package it up safely for you, which is often much easier than trying to do it yourself.
Don’t forget to think about how you’re traveling to the airport as well, as you’ll need to make sure your bike box or bag can fit on the backseat of your car or taxi.
If you’re hoping to hop on a bus or a train with your bike, you may be at the mercy of the driver and whether or not there is any room for your bicycle to comfortably fit. In some cases, you may be required to purchase a second ticket if your bike takes up too much space.
You might also want to research or make inquiries at your local station to check if you can travel with a bike on board, or if they have a separate storage compartment for bikes.
What to Pack?

Ryan Gardill points out that “ If you have a tent and a sleeping bag and a bike, you’re really set ”, but what else do you need to think about when you’re packing for a bike touring trip?
Tools and Parts
To ensure you can take care of any maintenance issues or bike repairs on your journey, you’ll need to make sure you’ve packed a few tools and parts.
- Bike pump: Whatever terrain you’re traveling on, your tires are going to need refilling at some point. Pack a lightweight pump and check your tires before you set off.
- Multi-tools: These can be incredibly useful for a multitude of repairs.
- Adjustable wrench: This is another handy tool to have in the event of a repair job.
- Repair kit: If things go wrong, repair kits usually contain everything you would need to take care of a minor issue with your bike so you can get back on the road.
Choosing the right clothing is extremely important for comfort, so make sure you pack these essentials.
- Cycle touring shoes: Seeing as your feet will be pedaling you across the country, you’ll want to invest in a comfortable pair of cycling shoes . These are designed to provide a good grip on the pedals but are breathable enough to prevent your feet from overheating and uncomfortable blisters from forming.
- Cycling shorts: Aim for a material that is breathable and comfortable and try to pack more pairs than you think you’ll need.
- Sports shorts: Again, it’s advisable to pack a few pairs.
- Cycling socks: Don’t just use any socks as it’s really important to avoid blisters, and it can be a good idea to double up on cycling socks for extra protection.
- Thermal skins: If you’re going to be traveling during the colder months you’ll need something to keep you warm on your journey.
- Cycling jerseys: Cycling can be dangerous if it’s not easy for other people and especially drivers to spot you so choose bright, colorful cycling jerseys.
- Loose base layers: Layers are easy to add or remove based on your body temperature so you can stay comfortable.
- Jacket: Choose one that’s waterproof and well-insulated to protect you from the rain and keep you warm during the colder weather.
- Gloves: Depending on the climate of wherever you’re touring, gloves can help you keep a better grip on the handlebars in the cold and prevent numbness or wind chill.
- Warm hat: Heat escapes from the head, so a warm hat can help combat the cold.
- Underwear: Always pack more than you think you’ll need and try to choose underwear that won’t cause chafing.
- A scarf or neck gaiter: Not only will this help keep your neck warm in cold weather, but it’ll also protect you from sunburn and windburn in warm weather.

It’s important to be clever with your storage options, as every bit of space on your bike counts.
- Pannier racks: Although not the most exciting part of your bike to pick out, you should pay attention to your pannier rack for your bike as this is how you will transport your luggage and other equipment.
- Pannier bags: It’s often a good idea to opt for waterproof pannier bags to prevent your equipment from getting wet if it rains.
- Small frame bag: You can use this to store anything you might need while you’re riding.
- Handlebar bag: This can hold anything you might want to keep close to hand while you’re riding and should be waterproof.
- Frame bottle cages: Hydration is highly important when you’re traveling long distances, so keep one or preferably two to the frame of your bike.
- Bungee cords: It’s better to have too many bungee cords than too few.
- Zip ties: Similarly, zip ties are always handy to have, so remember to pack them.
Accessories
Some accessories that can be useful to bring along for the ride include:
- Sunglasses: You’d be surprised by how many people forget about sunglasses, but it’s important to protect your eyes from the sun’s glare as this can impede your vision which is a safety hazard when you’re riding. They also protect against an even bigger hazard: bugs.
- Phone: As if anyone in the modern world could forget their phone… right? Just don’t forget to also pack your charger and perhaps a portable battery pack.
- Phone mount/holder: Having a phone mount or something to hold it while your hands are busy will make it much easier to snap photos or answer phone calls.
- Water bottles: You’ll need to take care to stay hydrated so make sure you take a good hydration pack or a few spare bottles to keep filled.
- Bike lock: Your bike is the only form of transport you’ll have, so remember to lock it up when not in use to prevent your wheels from being stolen.
- Headlamp: When you’re cycling past nightfall or into the evening a headlamp or head torch can be used with your bike lights to illuminate the road ahead.
- Sound system: Some people enjoy listening to music while they travel, so a sound system will produce better quality sound.
- Laptop: This one is technically optional, but what isn’t optional is the case you’ll need to carry it in for protection.
Camping and Cooking Gear
It’s not just about remembering all your biking gear. Don’t forget that you’ll be camping overnight to break up your days of riding.
- Tent: First and foremost, find a lightweight tent that’s easy to pitch and take down.
- Bedding: Camping mats are comfier than the hard ground beneath them and can be conveniently rolled up and carried while you’re riding.
- Hammock: Another lightweight piece of comfort you can pack is a hammock, either for sleeping in or for relaxing after touring all day.
- Microfiber towel: If you’re drying off sweat or if you’ve been swimming, a microfiber towel is great to use as it dries ultra-quickly and can be repacked.
- String lights: These are a convenient way to illuminate your campsite area.
- Cutlery: You won’t get far with dinner without them! Include a knife, fork, and spoon, as well as any preparation utensils you’ll need, like a chopping board.
- Dishtowel: Unfortunately, the washing up still needs to be done on tour.
- Gas and stove: There are plenty of portable gas stove options available but make sure everything is in working order before you leave.
- Cups, plates, and bowls: Similarly to cutlery, you’ll be in a pickle if you forget these.
- Pots and pans: Aim for ones that are lightweight yet durable enough not to break on the road.
- Tupperware: This is a great way to save leftovers. Why not have last night’s dinner as a snack during tomorrow’s ride?
Medical Supplies
Lastly, it’s important to be prepared for all situations, even the ones you hope won’t happen.
- Hand sanitizer: Because there won’t necessarily always be somewhere to wash your hands.
- Toothbrush and toothpaste: In trying to remember some of the less obvious things to pack, don’t forget about basic hygiene.
- First aid kit: This will typically contain bandages and alcohol wipes for emergencies.
- Sunscreen: You’ll be spending most of your time outdoors exposed to the sun’s UV rays, so aim for sunscreen with an SPF of 50 or above.
- Bug spray: Mosquitos. Need we say more?
Top Tips for Touring on a Budget
Bike touring is already a pretty affordable way to travel, but here are some tips for touring on a budget.
Travel With a Friend
A problem shared is a problem halved, and so are the costs when you travel with a friend. You’ll have someone to contribute to food costs and park fees, as well as widening your pool of potential friends’ houses to crash at along the way.
Use Apps to Find Food and Lodging
There are some apps like Warm Showers that you can use to help you find food and sometimes even accommodation for free along your route, offered by friendly fellow bike enthusiasts who make up a sort of Couchsurfing community.
Avoid Campsites
Campsite fees are one of the biggest costs of touring, so why not skip them and pitch your tent in one of the many free parks that you are legally allowed to stay in. Just make sure to do your research beforehand to check the rules.
Stay Open to Opportunities to Make Friends
Strangers show incredible acts of kindness every day, so keep an open mind when you meet people out on the road as you never know what type of generosity you might inspire. When the people you meet hear of your long journey ahead, they may offer food or advice.
Plan Where to Go and What to See in Advance
Having a plan of action means you’ll be able to budget according to the various locations you’ll be traveling to and the things you’ll want to do along the way, which makes you less likely to accidentally overspend.
Also, don’t forget to check your insurance policy before you go.
Talk to Locals
These are the best people to speak to about local deals and restaurants in the area that offer the best value for money. If you’re lucky enough to strike up a friendship with any of the people you meet, they may even tell you to pass on their name for a special discount.

If you’re thinking about taking a trip somewhere and touring on your bike, this article should have provided you with enough information to start planning to turn this dream into a reality!
We hope you’ve found it helpful, and if there are any questions, concerns, or tips for other riders out there, please feel free to reply in the comments section.
6 thoughts on “Complete Guide to Bike Touring”
Your blog post had me hooked from the first sentence.
Let us know in the comments which of their posts has resonated with you the most.
This blog post is worth the read – trust us!
From start to finish, your content is simply amazing. You have a talent for making complex topics easy to understand and I always come away with valuable insights.
Thank you for the amazing blog post!
Your dedication to quality content is evident in this post.
Comments are closed.

So You Want to Plan a Cycling Vacation?
There are more cyclists on the road than ever before. here’s what you need to know before you roll..
- Copy Link copied

The Biking Boom
As we cycled through a year of pandemic living, one silver lining emerged: the freedom two wheels provided..
Sure, we might’ve been stuck in a world without travel, but a bike could offer fresh air, social distancing, and much-needed endorphins to ward off the pandemic blues (some of them, anyway). Suddenly, it seemed, everyone was buying a bike. Bike sales increased 200 percent in just the first few months of the pandemic, with “anything under $600 . . . just flying out,” Outside reported in January 2021. (Even more than a year after the first shelter-in-place orders were initiated, bikes, and bike parts, are still in short supply.) As we begin to emerge from our collective cocoons, interest in taking those bikes on longer journeys is also spiking—outfitters we interviewed are reporting record increases in cycling trips (and hiking trips, natch), especially U.S.- based routes.
This boom comes on the heels of more than three decades of investment in rails-to-trails throughout the United States, which means there are more possibilities than ever for multiday trips, whether you want to tackle a short overnight or a months-long, cross-country trail. Wondering where to start? You don’t have to be a spandex-clad, Tour de France type to enjoy the freedom of the open road. Here, everything to know about planning a cycling trip, whether you want to plan your own or turn over the reins, whether you’re a first-timer who wants to crash in cushy hotels or an experienced bike-packer looking for a new challenge.
How to Prep

Photo by David Marcu/Unsplash
First step? Just get out there.
It’s easy to fall into a rabbit hole of route planning and gear buying when it comes to bike touring. One thing all the experts agree on? Don’t overthink it.
You want to be adequately prepared—see below—and have a general sense of what you might encounter along the way, but “just taking that first multiday trip or even really long one-day ride will open up so much opportunity,” says Ted King , a retired pro cyclist. “It is a fun adventure just waiting to happen and you’re going to learn so quickly. Just start doing it.”
How do I decide on the trip and route that are right for me?
First, decide if you want to plan your own trip or if you’d like to join a guided trip. (If you’re interested in the latter, check out our guide to the best cycling outfitters .) If you want to go your own way, consider your fitness and experience levels, as well as the season and amount of time you want to devote to the trip.
Never done a multiday ride before? Start super small. Book a hotel or an Airbnb in a destination 10 to 20 miles away, pack a small bag, and cycle to your overnight .
Interested in camping—and therefore carrying the necessary gear (also known also bike-packing)? Or would you prefer to pack a little lighter and stay in hotels, inns, and Airbnbs along the way? If you’re not a camper, or don’t want to deal with carrying so much gear, choose a route that passes through more civilization. The Eastern Seaboard is a great place for this—especially Maine and Vermont—given the density, you can’t throw a bike shoe without hitting a cute little town with all the amenities you need. Socially inclined cyclists can also check out Warmshowers , a community of touring cyclists who act as hosts to other touring cyclists.

Rest days are crucial when bike-touring.
Photo by Sunrise Hunter/Shutterstock
How many miles a day should I ride?
Daily mileage depends on many factors, including your fitness and experience levels, the terrain (are there mad hills, or is it relatively flat?), and how much weight you’re carrying. If you’re new to bike touring, even if you’re a fairly experienced cyclist, consider trips that average no more than 30 to 40 miles per day so as to preserve your most critical resource: your body.
And don’t forget to take rest days! This is vacation, after all. In addition to giving your body—especially your legs—a break, rest days offer time to explore your destination, rather than just pedal past it. Park yourself in a campsite or hotel for a day or two and explore the city or town or take shorter daily rides.
“Distance is not as important as the journey,” says Analise Cleopatra, a filmmaker and relatively new mountain biker who made a documentary of her first bike-packing trip in 2019. “You don’t need to compete—just make sure you’re with people who are on the same wavelength and, you know, explore!”
How do I get my bike there?
Getting wheels where they need to go boils down to three options.
RENTING A BIKE This works well for first-timers, those who aren’t picky about their bikes, and/or those who choose a route in a cycling center such as Colorado or Northern California where there are high-end bike shops with decent rentals. It’s easier, too (no need to break down, ship, and rebuild your bike) though it can be more expensive. Rates vary, but a road bike rental can run you anywhere from $300 to $600 (or more) for a week in popular cycling states like California, Colorado, and Vermont.
SHIPPING YOUR BIKE This is the most popular option, currently, among cyclists we interviewed. BikeFlights has become the go-to company for all bikes, including e-bikes. Rates vary widely based on box size, weight, distance, and shipping speed, but if you shipped your bike from San Francisco to New York City, for example, in one of BikeFlights’ medium boxes, which fit most road and gravel bikes, you’d likely pay $83, excluding protection. (The company recommends buying protection to cover the market value of your bike.) You can also ship through Overnight Bikes , ShipBikes , as well as directly through FedEx and UPS, though you will likely pay more booking directly through the latter two.
The main challenge? You need to plan for this as it can take up to six days to ship a bike cross-country , though BikeFlights recommends building in extra time in the COVID era. Plus, you need to have somewhere to ship it. The pros recommend shipping your wheels to a bike shop in your destination (make sure you call to let them know in advance) and paying them to build your bike for you. Expect to pay at least $50 for this service. You can also take your wheels to a local bike shop and have them disassemble and pack it—BikeFlights can pick up directly from the shop.
FLYING WITH YOUR BIKE Alaska and Delta are among the most bike-friendly airlines. Alaska waives the oversize baggage fee and allows bikes to be checked as standard baggage . Delta also counts bikes as standard baggage . Southwest and United, however, charge higher fees: Southwest charges a bike fee of $75 each way , while JetBlue charges $100 each way, and United charges a flat bike fee of $150 each way for domestic flights. Keep in mind that e-bikes, which are powered by lithium batteries, are prohibited on all airlines.

Photo by Coen van de Broek/Unsplash
How should I train?
It depends on the length and nature of your trip. If you’re doing a short trip (less than three days) through terrain that’s not hugely demanding, there’s no need to map out an arduous training plan, pretrip. In fact, if you’re cycling regularly—at least two or three days a week—and can ride for an hour or more, you’re ready for a low-mileage overnight trip. In addition to building endurance, the most important thing to do is “condition” your butt to prevent saddle sore.
If you’re ramping up for a multiweek or multimonth trip that doesn’t take place on extreme terrain—and have been riding your bike regularly—you can use your trip to train, says Dan Meyer, deputy editor for Adventure Cyclist magazine. For example, ride 10 to 20 miles the first day and see how you feel. Ride 30 miles the next day and 35 to 40 the following day. “That requires some planning ahead of time to make sure that you have facilities and campsites and hotels that are at those distances along the way, ” Meyer says, “but it helps you get in shape more, instead of trying to go 80 miles on the first day and wearing yourself out.” (If you’re tackling an intense trail or just want more structure, Adventure Cycling has put together a 12-week training program .)
The more critical part of preparation is to understand how your bike handles when you’re carrying gear.
“A lot of people get to the start of their big route—this bike trip they’ve been dreaming of doing for years and they start pedaling and they’re like, ‘Holy crap, I’ve never ridden my bike with all this weight on it before,’ ” Meyer says.
He recommends practicing packing your bike , to make sure you’re packing efficiently, that the weight is balanced, and you can get to essential things (maps, food, water, etc.) quickly. Once you’ve done that, “take it out for a quick little 5- to 10-mile ride and just get used to how it handles, because it will handle quite a bit differently,” he says.
Essential Gear

Photo by Skylines/Shutterstock
Bike camping gear
Big Agnes Tiger Wall Bikepacking Tent The Big Agnes Tiger Wall tent is designed for bike-packing. Weighing in at just under three pounds, it’s super lightweight yet still provides protection and warmth when you’re out in the elements. The tent also includes tent poles that are shorter (12 inches) than normal, which makes them easier to attach to your handlebars, frame, or elsewhere on your bike. The stuff sack includes straps that are technically designed to attach to your handlebar bag, though using the recommended setup can be a little cramped on narrower, designed-for-women handlebars—most women should be able to move the poles to their frame.
It also includes loops to hang wet clothes on the outer rainfly, a generous vestibule area, and lots of pockets so you don’t have to sleep on top of your bike bags. Lastly, Big Agnes uses an ecofriendly dye process to reduce the amount of water that goes into making these tents.
>>>Buy now: $450 (two people), backcountry.com ; $499 (three people), backcountry.com
Snow Peak LiteMax Stove You have to pack light while bike-packing, which is why the compact, 1.9 ounce, Snow Peak LiteMax Stove is one of the best options for your bike-camping kitchen kit. It’s tiny but mighty and will last for years. Pair with an MSR Alpine StowAway pot (the stove fits inside even the smallest pot), a good knife, fuel, and a spork to complete your kit.
>>>Buy now: $60, amazon.com

Cotopaxi’s Bataan is an affordable fanny pack option.
Photo courtesy of Cotopaxi
Bags and carrying
Outer Shell bags The bike-obsessed team behind Outer Shell makes a variety of high-quality bike bags—handmade in San Francisco—for all types of cycling adventures, whether you’re roughing it on a backcountry gravel ride or trying to cart a bottle of pinot noir back to your hotel room after a day of riding in Napa. Almost all of its bags are designed to expand for optimal versatility and are either waterproof or water resistant.
For shorter rides, or for those who are embarking on a supported ride and don’t need to carry a lot, the Stem Caddy ($60) is a great choice. It can comfortably fit your phone, wallet, and all your essentials, or an entire bottle of wine. For longer rides or if you just want more space, Outer Shell’s seatpacks ($145–$150) can fit just about everything you’d need for an overnight. They’re also a nice alternative to panniers, since they won’t create an imbalance and can fit on any bike, no bike rack required.
>>>Buy now: Stem caddy, ($60 outershell.com ); Seatpacks ($145-$150, outershell.com )
Fanny/hip bag Skip the backpack (it’ll make you sweat like crazy) and, instead, use a fanny/hip bag while you ride (all the cool kids are doing it). Outer Shell has an excellent waterproof and expandable one, but I also like the compact Axis bag by Mission Workshop ($130, missionworkshop.com ), which was made with cyclists in mind. Cotopaxi’s Bataan ($30, cotopaxi.com ) is another, more affordable option, packed with organizational features and made from fabric remnants.
>>>Buy now: Cotopaxi Battan, ($30 cotopaxi.com ); Axis bag ($130, missionworkshop.com )

Photo courtesy of Velocio
Bike shorts by Velocio Padded bike shorts are essential on any long bike ride, but bike bibs—which are essentially padded, bike short “overalls” that don’t cut into your waist the way regular shorts would—are extra comfortable. There are tons of great brands in the world of cycling clothing, but Velocio is an AFAR favorite. Not only does it excel at making high-quality bike clothes with simple-yet-stylish designs, but its bike bibs also come with one crucial, lady-friendly feature: Its patent- pending FlyFree design means their bike bibs are stretchy enough to pull down for a pee-break, without having to remove your jersey, helmet, glasses . . . basically getting naked.
>>>Buy now: Signature Bike Short, $229, velocio.cc
Other great brands to check out for bike shorts, jerseys, and jackets include Machines for Freedom (ladies only), Castelli , and Rapha .
A bike computer is an essential part of a bike-touring.

A bike computer is an essential part of a bike-touring kit.
Photo by fotoliza/Shutterstock
Tools and other bike essentials
Paceline Products Chamois Butt’r Her’ There’s no way around it: If you’re spending several long days in the saddle, you need to take care of your butt. A good bike seat and shorts are the foundation of butt-on-bike-comfort, but consider packing some chamois cream, which soothes chaffed or irritated skin, as well. We like Butt’r Her’, a non-greasy formula made from natural ingredients like aloe vera and shea butter and designed and pH-balanced with female cyclists in mind.
>>>Buy now: $18, rei.com
Wahoo Elemnt Bolt bike computer One word: reliable. The Wahoo Elemnt Bolt is GPS-powered and can display maps for directions along with helpful data like the gradient of the road and weather and wind conditions. It has all the features to connect to your heart monitor and power meter, and it can sync with tracking apps like Strava so you can monitor your performance as well.
>>>Buy now: $230, backcountry.com
Bike tools (and skills) You’ll want to carry some basic tools and know how to change a tire and how to adjust your brakes. Park Tool makes a great hex wrench set and offers detailed videos on everything from how to change a tire to how to adjust your shifting.
>>>Buy now: Park hex wrench set, $24, backcountry.com
Bike pump When it comes to portable bike pumps, cyclists were once limited to CO2 or hand pumps. A CO2 pump is small, fast, and compact, but single use. (It uses a cartridge attached to the head of a small nozzle to quickly inflate a tire.) Though reliable and reusable, hand pumps can be a 15-minute arm workout as your friends wait impatiently for you, and they’re not as compact. But what about a hand pump that can also use a CO2 cartridge, offering both speed and reliability? Well, it’s 2021 and that now exists with a few brands.
>>>Buy now: Silca Tattico Mini Pump ($65, competitivecyclist.com ); PDW Ninja pump ($35, ridepdw.com )
Bike lights Although you may not be doing much riding after dark, lights can help you see and be seen—whether it’s on a foggy morning or helping drivers spot you as you move in and out of shadows. For lights, you want 500+ lumens for front and 50–100 lumens in the rear. Different blink patterns are a plus as well to help drivers see you.
>>>Buy now: Vis 360 Pro Helmet light by Light & Motion ($130, lightandmotion.com , rei.com ); Vis 1000 Trooper handlebar light by Light & Motion ($90, lightandmotion.com , amazon.com )
Snacks! A lot of new cyclists forget: You have to eat to avoid “bonking,” (the sudden loss of energy that can occur following a long ride). Pack an RX bar or two, or even a plain ol’ banana, to keep your energy up for several hours on the road.
Products we write about are independently vetted and recommended by our editors. AFAR may earn a commission if you buy through our links, which helps support our independent publication.
U.S. Routes

Great Divide photo by Jacinta Creten/Adventure Cycling Association
There are thousands upon thousands of bike trails in the United States with more, it seems, being added each year.
One big route in the works: The Great American Rail-Trail , which when completed, will stretch 3,700 miles from coast to coast. This list is by no means extensive—but it is a place to begin. For a look at more U.S. long-distance routes, check out the interactive map from Adventure Cycling Association, the 45-year-old organization responsible for some of the country’s greatest routes.
The Olympic Discovery Trail , Washington 130 miles
Washington’s Olympic Peninsula is the stuff of legends: Just west of Seattle, the stretch of land (home to Olympic National Park) offers quaint seaside towns, ethereal rain forest, waterfalls, and at the far western edge, the wild Pacific Ocean. On the 130-mile Olympic Discovery Trail—half of which is a dedicated multiuse path—cyclists can see, smell, and hear it all. The route begins in Port Townsend at the northeastern tip of the peninsula and ends at the coastal town of La Push. Camp or stay in lodges and hotels along the way.
Natchez Trace Parkway , Mississippi and Tennessee 444 miles
This National Park Service–designated trail stretches from Nashville, Tennessee, to Natchez, Mississippi, roughly tracing a 10,000-year-old route originally used by Native Americans ( the path once connected the Chickasaw, Choctaw, and Natchez tribes ). Travelers will pass through forests and farmland, witnessing creeks and numerous historical markers along the way. While cyclists do share the road with cars, speeds are low and traffic is relatively light. The route is great for cyclists looking for relatively flat terrain and cozy inns, but there are also more than a dozen campgrounds along the route, for those who prefer the freedom of a tent.
The Underground Railroad , Alabama to Ontario, Canada 1,997 miles
Beginning in Mobile, Alabama, and ending in Owen Sound, Ontario, the Underground Railroad follows the eponymous route used by freedom seekers from the late 18th century until the Civil War. Cyclists can tackle sections of the route or the entire length . The route traces rivers, winds through sleepy towns, and passes by numerous historical markers and sites that honor Black Americans’ struggles for freedom.
The Great Divide , Canada to New Mexico 2,696 miles
Don’t be alarmed by the sheer mileage of this route, which traces the Continental Divide and takes place primarily on dirt or gravel roads and trails—a playground for mountain bikers. Most cyclists tackle sections of the Great Divide, with the 700-mile Montana section among the most popular. Expect solitude, wildlife, and epic runs through pristine forest. Although the trail does pass through small towns, it’s best for those who are interested in camping for at least part of the route.
The East Coast Greenway , Maine to Florida 3,000 miles
Once the entire 3,000-mile route is completed, you’ll be able to hike or bike on protected paths through 15 states and 450 cities and towns, which is the entire point: to connect the nation’s “most populated corridor.” Launched by the nonprofit East Coast Greenway Alliance in 1991, the corridor is 35 percent complete , with 1,000 miles of protected paths between Maine and Florida. The remainder of the trail is on-road (so yes, you could complete the entire route now ). Some campgrounds are available, but the route is best for those who want to crash in hotels, motels, or in homes via Warmshowers.
The Southern Tier , California to Florida 3,022 miles
Tour the entirety of the southern section of the United States—passing through such states as Arizona, Texas, Louisiana, and Florida—or just tackle a section of the fascinating route. The Southern Tier begins in San Diego, winding through desert and the Algodones Dunes Wilderness Area, and ends in the 400-year-old town of St. Augustine, Florida. Ideal for those who prefer motels and hotels to camping.
Guided Trips

Photos courtesy of Backroads and Lamar Sellers/Shutterstock
For those who want the thrill of the open road without the headache of planning their own trip—and hauling their own gear—here are some of AFAR’s favorite cycling outfitters.
Many of these companies now offer e-bikes, making cycling tours more accessible
BACKROADS Berkeley-based Backroads has been leading fantastic small-group hiking, cycling, and other adventure-oriented tours since 1979. Cycling trips take place on custom-built titanium bikes, lodging ranges from small luxury ships (imagine cycling beside and sailing down the Danube ) to five-star hotels, and the food is as finely crafted as the routes. This year, watch for new U.S.-based trips like a five-day cycling tour of the Hudson River Valley, as well as weekend or long weekend getaways in Aspen’s glacial valleys and Texas Hill Country .
ADVENTURE CYCLING ASSOCIATION Long known for its stellar long-distance routes, the nonprofit Adventure Cycling Association , which began in 1976, is responsible for mapping out some of the country’s quintessential bike routes, including the 4,218-mile TransAmerica Trail . During the pandemic, the organization launched its Short Trips Initiative , a series of shorter guided trips in eight metropolitan areas, including Boston, San Francisco, Seattle, and Atlanta. Adventure Cycling expects to release route maps for self-guided versions of the tours in summer 2021.
VBT BICYCLING VACATIONS A two-time AFAR Travelers’ Awards winner , Vermont-based VBT Bicycling Vacations has crafted cycling trips for more than 50 years that include accommodations, luggage transfer, and most meals. It also offers self-guided trips. Pick from one of many New England–based tours or VBT’s national park tours, including a six-day Grand Teton and Yellowstone route .
WOMANTOURS Run by women and geared toward women, WomanTours has been leading cycling trips since 1995. Accommodations focus on smaller inns, bed-and-breakfasts, and in national parks, cabins and lodges. New U.S. routes include an eight-day tour of Alaska’s Inside Passage and a six-day tour of Oregon’s Roses, Rivers, and Rail Trails . Also new for 2021: a 25-day ride along section three (Kansas to Kentucky) of the cross-county TransAmerica route.
DUVINE With its focus on luxury and tapping into the local flavor of a destination, DuVine takes travelers into the heart of a place. The company’s trips range from those geared to avid cyclists looking for a new adventure to family-friendly to rides tailored to all ages. And, like many other outfitters, it offers several new domestic adventures, including a five-day art- and food-focused cycling tour of Santa Fe and Taos .
REI ADVENTURES Another AFAR Travelers’ Awards winner , REI Adventures recently discontinued its international trips to focus on building U.S.-based itineraries. No surprise, then, that the company will offer a bevy of national park trips with varied activities: rafting, kayaking, hiking, and yes, cycling. Cyclists, check out the new Joshua Tree weekend trip or a seven-day tour of Moab, Arches, and Grand Junction .
Notes From the Road
A little inspiration to hit the road, from those who have been there..
We spoke to variety of cyclists—from a relative newbie to people who make their living on two wheels—to share the wonders of exploring the world via your own power.

Photos by Alisa Geiser
Analise Cleopatra on the thrill of her first-ever bike-packing trip
“I’ve never done anything like that—I’d never even camped before that trip [along the Three Sisters, Three Rivers route in Oregon]. Just being out in the woods and open . . . you’re definitely at the mercy of the elements. But being there with Dej’uanae [Toliver], who I had known for a while, and Brooklyn [Bell, a pro mountain biker] who I had just met, definitely made a difference. I was anxious about ‘completing’ the ride, which is not something that I felt like I needed to do, but it felt like to some people the value of the ride was how far you could go. Later, I realized I’m not this person, I just want to bike and see these waterfalls and paint pictures and get to know these girls , you know? There’s so much elitism in the sport, but I think there’s definitely space for people who just want to explore and yes, challenge and push our bodies, but the point is not the pain.
“The terrain was very, very diverse the first couple of days. In the beginning, where we started near Caldera [Springs], it was very redwood-y with mulchy ground, but once we went past Suttle Lodge , it got really arid and there were a lot of dead trees. And then it got really lush around Big Lake. . . . Then it got very, very sandy. Once we got through the desert-like part, once we got to the Mackenzie River Trail it was so beautiful, just riverside the whole time. There were so many waterfalls. We [followed the Mackenzie River Trail] until we got to Oakridge and then there was a lot of climbing. That felt more hardcore: The last couple of days it was very rainy so it was pretty wet and muddy, which was fine—it was just a little cold and a little scary going downhill.
“[I have so much] gratitude for the opportunity to enter this world, because people don’t knowwhat they are missing out on. Hopefully the film inspires people who, like me, never would have gone camping by themselves. Find a buddy to go with and enter this world because it’s incredibly nourishing and healing just to be able to go out in nature to learn what your body is capable of and see the stars in their full capacity.”
Analise Cleopatra is a Florida-based filmmaker who made a documentary, Pedal Through, of her first-ever bike-packing trip in 2019 to inspire other newcomers to pick up a bike. Her next trip? The backroads of Georgia.

Photo by Mike Dicken/Adventure Cycling Association
Adventure Cycling Association’s Dan Meyer on the wildness of the Great Divide
“I’ve been dying to ride the entire Great Divide route for a while now, and I still hope to do it soon. A couple of years ago, I rode a [Montana] section of the Great Divide from Whitefish to Missoula. I did it by myself—it was a quick three-day thing. My now-wife and I had done a weekend loop north of Whitefish, and then she had to get back to work. She left me in Whitefish and I just rode myself back to Missoula. It was everything I was hoping for. It was gorgeous, it was quiet, there was nobody around. It’s just such beautiful terrain up there.
“You ride through a lot of dense forest on these rocky dirt roads—motorized vehicles are allowed but you don’t really see them for the most part. It’s just you spinning along, catching glimpses of wildlife. You get that nice, piney, fresh mountain air, you see a lot of alpine lakes and snow-covered peaks. I was going southbound and I did run into a few people riding northbound, but it was less than a handful. It’s the route for people who want to experience solitude in nature. There are other routes you can do where you’ll get to meet a lot of new people and have a lot of social interaction, but the Great Divide route, for the most part, is not going to be like that. It does pass through small towns and you’ll get to meet people in grocery stores and markets and campgrounds, but when you’re out on the road, it’s probably going to be just you, which I really enjoyed.”
Utah-based Dan Meyer, an avid mountain biker, is deputy editor of Adventure Cyclist magazine , published nine times a year as part of the nonprofit Adventure Cycling Association.

Photos by Rolf_52/Shutterstock and courtesy of Pete Stetina
Pro cyclist Pete Stetina on the beauty of Sonoma County’s endless backroads
“Sonoma County has a pretty storied cycling history. This is a place that a lot of the pro teams would have their early season camps in the earlier days. It’s unique because there are so many little backroads that twist and turn and snake—for every main artery that a lot of people drive to commute, there are four or five alternative options.
“As a pro, when I am here training, preparing for the world’s biggest races, I can pick and choose any direction pretty much and always keep it fresh. There are hundreds of thousands of possibilities. I can hit those rolling pastureland Petaluma hills toward the south and hit the coast. In West County you’re talking Jurassic Park–size redwood trees and ferns and just deep woods, moist redwood forest groves and then [you’ll reach] the coast. Up north, you even start to get into Lake County and that’s more like a dry alpine feeling, almost a Colorado feeling, with a lot more pine trees. Then you have all the vineyards and you have a whole big mountain range called the Mayacamas that borders Sonoma and Napa County [and it has] a bunch of huge climbs.
“If you are an advanced enough rider, one quintessential rugged Sonoma County route is the West County Highlight. It’s a very hard ride that includes some very tough climbs, [but also] some amazing vistas, some rugged backroads. You’re gonna hit every microclimate you can think of in one four- to five-hour ride. I’m talking urban and then redwoods and then riverfront and then coastal and then redwoods again and then oak forest, all of that. If you’re passing through the vineyards, a lot of the time, you’ll smell the fermentation, you’re going to smell the grapes being crushed and a little bit of that alcoholic perfume in the air and then you’re going to get into the redwoods and that deep mossy moist air. The coast is real stinky in a good way. And then there are all these little eclectic artist communities that have bakeries and coffee shops.
“There’s not a lot of fake [in Sonoma County]. Everyone’s kind of content doing them and you’re doing you and we’re a part of this community together, which is really nice. It’s definitely the people and the extracurricular possibilities outside of cycling that have kept me there and kept me happy. It’s one of the easiest places in the world to do my job.”
Pete Stetina is a pro cyclist based in Sonoma County who switched to gravel and adventure racing in 2019. In March 2021, he partnered with the Sonoma-based Piazza Hospitality to offer cycling packages to hotel guests at Hotel Healdsburg , h2hotel , and Harmon Guest House that range from customized routes to the Pro Cycling Experience package , which includes a private, guided ride with Pete. For each package booking, the partnership will provide a bicycle, helmet, lock, and (when they’re happening again) a bike camp adventure to an at-risk kid through the B-Rad Foundation , a Sonoma-based nonprofit.

Photo by Felix Lipov/Shutterstock
Pro cyclist Ted King on Vermont’s picturesque 200-on-100 route
“I’m in Vermont and there’s a cool route called the 200-on-100 and that refers to the 200 miles that spans the length of Vermont, from Canada to Massachusetts, and the route is entirely on Route 100. A lot of people will do it in one day . That said, it would also make for a really nice two-day trip or stretch it out and make it a three-day trip.
“At the beginning, you are literally at the Canadian border and that portion of Vermont is called the Northeast Kingdom. It’s just out there, it is rural, it is rolling pastureland, you can see mountains in the distance. The route is entirely paved and sort of inadvertently becomes a tour of Vermont’s ski towns. You’re going to go through Stowe and you go by Sugarbush and Mad River and you go right by Killington, you go by Mount Snow. It’s a relatively rolling route. There are no real extended climbs, except two, but over the course of a 200-mile ride they are relatively spread out.
“Detour off the route and find an Airbnb or a restaurant or brewery, all the things Vermont is well known for. . . . You’ll go directly by Lassen’s Finest Liquids in the town of Waitsfield, Vermont. Among beer nerds, their stuff is extraordinary. They’re a cycling friendly brewery and brewhouse—they just came out with Single Sip, [which is] absolutely delicious, and their double IPA is called Sip of Sunshine. It’s relatively early in the ride, so you might not want to have too much of that. But as you’re dividing [the route] up into a multiday trip, it might work out perfectly.”
Ted King is a retired pro cyclist who loves Vermont’s ubiquitous gravel roads. So much so that in 2019, he launched Rooted Vermont , a two-course (pick between 45 and 85 miles) ride, which is taking place for the second year from July 30 to August 1, 2021.
Jessie Beck contributed to the reporting of this story.

- Meet the Team
- Work with Us
- Czech Republic
- Netherlands
- Switzerland
- Scandinavia
- Philippines
- South Korea
- New Zealand
- South Africa
- Budget Travel
- Work & Travel
- The Broke Backpacker Manifesto
- Travel Resources
- How to Travel on $10/day
Home » Budget Travel » How To Travel With a Bike – ALL You Need to Know
How To Travel With a Bike – ALL You Need to Know
There is a popular adage amongst bikers (both the motor and pedalling kind) that says that while four wheels move the body, two wheels move the soul. There are few joys like travelling by bike. Travelling by way of pedal power is about the freedom of the open road, the intimacy of exploring new places, and of course the healthy, active lifestyle that comes along with it.
Biking takes travel to a whole new level. You have the option of bikepacking – turning your bike into your primary mode of transportation for your adventure, or you could simply bring your bike along with you on vacation, to use for city exploration or longer rides.
In this post, we will look at the practicalities of travelling with a bicycle.

Now, you could spend a fat chunk of $$$ on the WRONG present for someone. Wrong size hiking boots, wrong fit backpack, wrong shape sleeping bag… As any adventurer will tell you, gear is a personal choice.
So give the adventurer in your life the gift of convenience: buy them an REI Co-op gift card! REI is The Broke Backpacker’s retailer of choice for ALL things outdoors, and an REI gift card is the perfect present you can buy from them. And then you won’t have to keep the receipt. 😉
How To Travel With a Bike
Do i need a licence to travel with a bike, what insurance do i need to travel with a bike, which bikes are best for travelling, bikepacking vs travelling with a bike, final thoughts.

So, you’ve been through all the different options and picked out the best bikepacking bike for your trip …
The first step in planning a trip with your bike is working out exactly how the hell you are going to transport it. Different modes of travel require different preparations, and the rules, costs, and practicality can vary significantly. Let’s take a look.
The good news is that trains are often very bike-friendly. In many cases, you can bring your bike on the train for little or no extra charge. However, this does vary from one train company to another, so it is essential to try and check the specific bike policy in advance.
The safety and practicality of bike travel by train can depend on the facilities available for storing bikes on the train and at stations. Personally, whenever I bring my bike onto a train I try to sit within eyesight of it.
Bus companies also tend to have varying policies on bikes. Some will allow them at no extra charge, while others require a fee and then some outliers do not permit them at all. The safety and practicality of bus travel with a bike can depend on the storage options provided by the bus company.
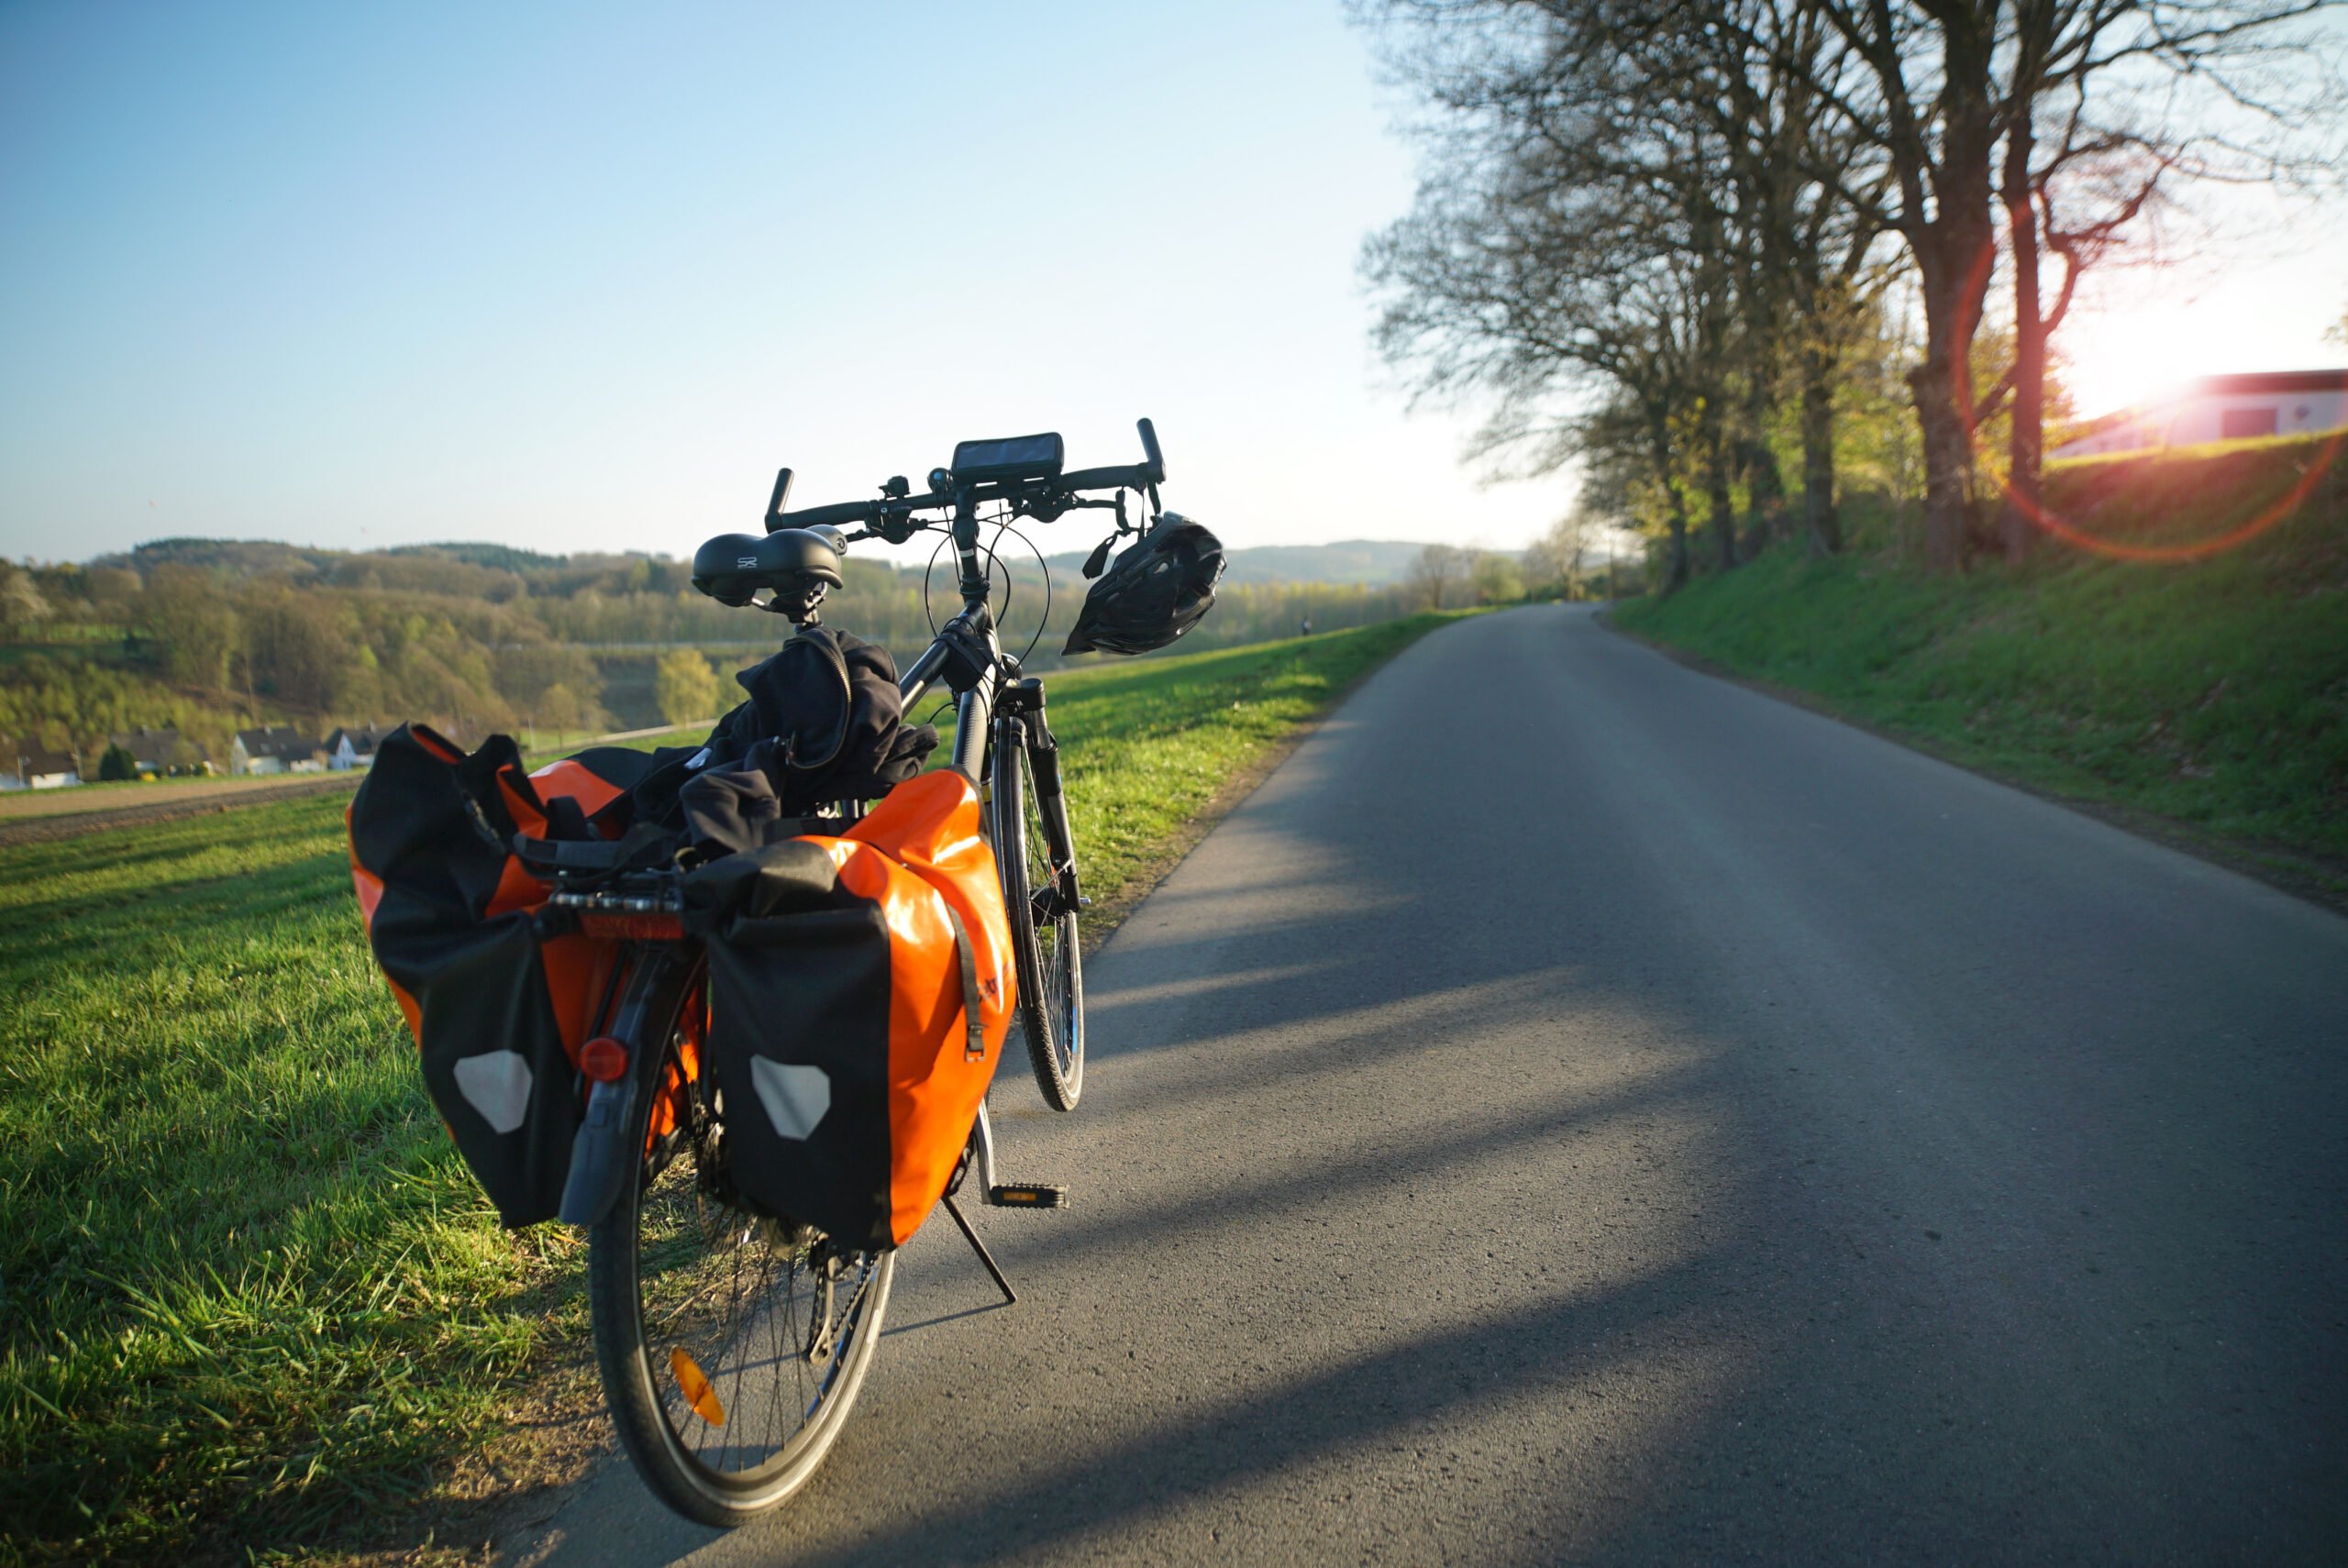
Travelling with a bike by plane can prove to be more challenging and more costly. Bikes are typically (almost always) considered oversized luggage and as such are subject to additional fees. If your bike is worth under $200, then the transport fees may well cost as much as the bike is worth itself!
They also need to be packed properly to prevent damage during transport. Airlines have strict guidelines on this so again, it’s crucial to check these in advance.
When travelling by car, options for transporting your bike include roof racks or stowing it in the boot. It is a lot easier to stow it in the boot if you take the wheels off so maybe look for a bike with clip-off wheels if this is your intention.
Both methods have pros and cons in terms of safety, convenience, and potential impact on fuel efficiency. If you are looking for a roof rack, then check out the selection on offer at REI.
In most cases, you do not need a licence to travel with a bike. In fact, we cannot think of one destination where it is mandatory to have a licence for a cycle ! However, when crossing borders, you by bike you may sometimes need to prove ownership of the bike to avoid complications.
Always have your receipt or another proof of purchase handy when travelling internationally. In some destinations, a well-placed ‘discretionary payment’ may soothe any concerns that zealous border officials might have.
Note that while some travel insurance policies will cover bikes as personal items, many cap their coverage limit, often to around $1,000 and some to $500 per single item.
To ensure your bike is fully insured, you may need to seek additional coverage specifically for your bike. It’s important to read the fine print of any insurance policy and to understand what is covered and what isn’t – for example, some may not cover using your bike in a foreign country which would defeat the whole object!
ALWAYS sort out your backpacker insurance before your trip. There’s plenty to choose from in that department, but a good place to start is Safety Wing .
They offer month-to-month payments, no lock-in contracts, and require absolutely no itineraries: that’s the exact kind of insurance long-term travellers and digital nomads need.

SafetyWing is cheap, easy, and admin-free: just sign up lickety-split so you can get back to it!
Click the button below to learn more about SafetyWing’s setup or read our insider review for the full tasty scoop.
When it comes to choosing a bike for travel , I would advise that you look for a model with a light frame and easily detachable wheels. Some examples of travel-friendly bikes include the following selections.
Co-op Cycles ADV 1.1 Touring Bike

The ADV 1.1 Touring Bike from REI’s Co-op Cycles brand is designed with travel in mind. It boasts a durable steel frame that can handle rough roads and heavy loads, making it ideal for long-distance bikepacking. It also features a variety of mounting points for racks and water bottles. Its disc brakes provide reliable stopping power in all weather conditions.
The downside of this bike for travel is its weight. Being made of steel, it’s heavier than bikes with aluminium or carbon frames, which could make it less convenient for throwing into buses or car roof racks.
Cannondale Quick CX 3 Bike

The Cannondale Quick CX 3 is a versatile hybrid bike that could be a good little option for travelling. Its aluminium frame is notably lighter than steel, making it much easier to transport. It also features front suspension to smooth out rough roads or paths so it could suit those rougher roads and trails.
While this bike does not come with a rack, it does have mounting points so you can add one. This could be a great bike for getting around town on vacation or for shorter bikepacking trips that cover mixed terrain. However, for long-distance touring or for very rough trails, you will probably want a bike that’s more specialized.
Salsa Journeyman Claris 700 Bike

The Salsa Journeyman Claris 700 is a versatile all-road bike with drop bars, providing a balance between speed and comfort. It is built with a lightweight but durable aluminum frame and carbon forks.
The bike includes mounting options for racks and fenders, which makes it a suitable choice for travelers who want to bikepack or tour around. The Journeyman has 700c wheels that are well-suited for pavement and smooth paths but might not be the best choice for those rough trails.
Want a bit of help along the way? We’ve also put together a post on the best electric bikes too.
As mentioned, bikepacking is when the bike IS the mode of transport. You load it up with your gear and set off on your adventure. On the other hand, traveling with a bike means you transport it to your destination and use it there.
Both have their advantages and unique joys. If you are bikepacking then you will need to invest in some specialised gear including bike bags. You can either check the range of bike bags on offer over at REI, or you can check out our guide to the best bikepacking bags .

REI is one of America’s biggest and most-loved outdoor gear retailers.
Now, for just $30, get a lifetime membership that entitles you to 10% OFF on most items, access to their trade-in scheme and discount rentals .
FAQs – Travelling With a Bike
1. What kind of bike case do I need for air travel?
The type of bike case you need will depend on the specifics of your bike and the regulations of the airline. Hard-shell cases offer the most protection but are heavier and can be more expensive. Soft-shell cases or padded bags are lighter and often cheaper but provide less protection. Some airlines will accept a bike in a cardboard box, provided it is well-packed and secured. Always check with your airline for their specific requirements.
2. How do I pack my bike for travel?
The best way to pack your bike will depend on the type of case you’re using. Generally, you’ll need to remove the pedals, deflate the tires slightly, and turn or remove the handlebars. In some cases, you may also need to remove the wheels. Wrap each part of the bike with foam or another type of protection to prevent damage during transport.
3. Are there weight limits for traveling with a bike?
Yes, most airlines have weight limits for checked luggage, including bikes. This limit varies by airline and can range anywhere from 50 to 100 pounds. Exceeding this limit may result in additional fees. Always check the weight limits and fees with your airline before you travel.
4. Can I rent a bike instead of bringing my own?
Yes, renting a bike at your destination is often an option and can be a good alternative to traveling with your own bike. However, it’s important to research bike rental options at your destination beforehand to ensure they have the type of bike you want and to compare costs.

Traveling with a bike can truly unlock a whole new world of experiences. Whether you’re bikepacking across a whole continent, or just taking leisure rides around your vacation destination, a bike makes a perfect travel companion.
Just remember, the key to a successful bike trip is in the planning. By considering how to transport your bike, what documents you’ll need, investing in a good bikepacking tent and how to insure everything properly, you’ll give yourself a break and set yourself up for a smooth and rewarding journey.
Happy biking peeps!

And for transparency’s sake, please know that some of the links in our content are affiliate links . That means that if you book your accommodation, buy your gear, or sort your insurance through our link, we earn a small commission (at no extra cost to you). That said, we only link to the gear we trust and never recommend services we don’t believe are up to scratch. Again, thank you!

Aiden Freeborn

Share or save this post
Leave a Reply Cancel reply
Your email address will not be published. Required fields are marked *
Save my name, email, and website in this browser for the next time I comment.
Notify me of followup comments via e-mail.
Bikepacking
How to Start Bikepacking: Your Complete Guide to Off-Pavement Bike Travel
Bikepacking, for me, conjures up feelings of adventure like nothing else. Strapping some camping gear to an adventure-ready bike, pedaling off toward a distant horizon, and spending a few days (or weeks or months) traveling dirt and gravel and sleeping under the stars… Sign me up!
I love many kinds of outdoor adventure, but nothing gets me excited and uses my full range of skills quite like bikepacking. It’s such a versatile form of exploration. Bikepacking can mean riding rugged singletrack deep in the wilderness, or self-propelled travel through rural villages in a foreign land. It might be an overnighter with friends, a family vacation, or a solo expedition.
I’ve written hundreds of articles about bikepacking on this website: about my many trips, gear recommendations, bikes and parts, problem solving and advice, camping, and much more. It’s truly my passion.
If you’re just getting started bikepacking and need an approachable way into the rabbit hole, this article is it: the ultimate bikepacking guide that ties it all together and gets you out the door on your first bicycle-powered camping trip, while also pointing you toward more detailed resources in case you fall in love with bikepacking (which, fair warning, you probably will).
I’m a firm believer that anyone can enjoy bikepacking, definitely including you. I started out solo and clueless and learned along the way. Now, 15,000+ miles of pedal-powered travel in, I’m on a mission to share the benefits with as many new bikepackers as possible. Join me!

The Bikepacking Vibe
Bikepacking is covering ground, usually gravel or dirt, faster than walking speed ( usually ) but slowly enough to still let every inch of it seep into your skin. It’s self-sufficiency in wild places, campfires, and cozy nights under the stars. It’s sun and rain, dust and grease, and squiggly lines on maps just begging to be explored.
Sometimes bikepacking is solitude and rationing your Cliff bars, other times it’s burgers and beer with friends, old or new. Sometimes it’s not showering for a week and then it’s a refreshing dip in a cool lake on a hot summer day. Sometimes bikepacking is fun, and sometimes it’s the hardest thing you’ve ever done.
Like any outdoor activity, bikepacking comes in many styles. You can spend hours luxuriating in lovely campsites, or you can ride through sunset and stealth nap in a ditch. You can ride with friends, as a couple, with your kids , or solo (yes, even if you’re female, despite what people will tell you). It can be a pleasant vacation or an epic sufferfest. It is what you want it to be, except when it’s not, and then we call it “an adventure.”
At the end of the day, bikepacking is really just a new spin on the old tale of outdoor exploration. But beware, because it’s both contagious and addictive, and it might be your new favorite thing.
Common Questions
In short, bikepacking is multiday cycling where you carry your gear with you on your bike, usually with a focus on unpaved roads and trails and a moderately minimalist packing style. Think backpacking but faster, bicycle touring but more rugged, car camping without the car, or a mountain bike ride or gravel ride that lasts longer than one day.
There’s definitely some grey area, but commonly “bikepacking” refers to mostly off-pavement rides, while “bicycle touring” means riding pavement or light gravel in populated areas. This distinction leads to differences in packing style too. Bikepacking luggage is often more streamlined, minimalist, and rugged, using bikepacking-style bags or smaller panniers. Touring, on the other hand, is traditionally done with racks and larger panniers. Boundaries are blurry though, so don’t get too caught up in the terminology.
Nope, sorry to break it to you, we did not invent bikepacking. People have been strapping camping gear to their bikes for as long as bikes have been around. It is, however, hitting the mainstream outdoor scene like never before.
Short answer: the one you have! Longer and more helpful answer: one that’s best suited to the type of terrain you most want to ride. Scroll down to Bikepacking Bikes for the full answer.
Bikepacking for Beginners: Start Simple
If you’re thinking “Gimme some of that!” but have no idea where to start, never fear. I recommend that beginners keep things simple on your first couple trips. You wouldn’t buy an expensive piano if you’ve never even tried playing music before, right? Try the activity first, find out if you like it, and then invest in the fancy equipment.
Here’s where many of us started:

Unless you happen to have an awesome friend with a well-stocked closet of loaner gear (lucky you!), you’re going to have to try bikepacking the old fashioned way. Here’s what to do:
- Rent, re-purpose, beg, or borrow a bike. It doesn’t have to be a gravel, mountain, or bikepacking-specific bike. It doesn’t have to be lightweight. It just needs to have two wheels that roll and some air in the tires.
- Strap some camping gear to the bike , particularly the handlebars and below your seat.
- Take anything else you need that doesn’t fit on the bike – sleeping bag, warm jacket, chocolate, flask of whiskey, you get the idea – and put it in a backpack and wear it on your back.
- Pack some food and water, ride to someplace you can camp, spend the night there, and then ride back. No campgrounds nearby? Try a friend’s backyard.
- There you go! You just bikepacked.
Now obviously, there are a few safety-related guidelines to consider. They’re far simpler than you think though, and most of the stuff you might be worried about is not actually an issue, as long as you do these three things:
- Start small, not too remote, and have an exit plan. Your exit plan could mean hiking out a short distance to a road or town if something goes wrong, or knowing you have phone service and can call a friend to pick you up.
- Be creative with attaching gear to your bike, but check for loose straps or buckles that could catch in your wheels and cause a crash.
- Choose low-traffic roads if you’ll be riding around motor vehicles.
- Wear a helmet.
Yes, of course, this approach is going to lead to learning some things the hard way. Possibly lots of things. But that’s half the fun, and part of the process. The point is, don’t feel like you need to have it all figured out before you even start.
Read more about simple bikepacking for beginners:
- Bike Camping Overnights: 4 Easy Ideas for Your First Trip
- Budget-Friendly Bikepacking Gear Ideas
Bikepacking Bikes

First of all, if you are just starting out, the best bikepacking bike is… the bike you already have . “Run what you brung,” the saying goes, and it’s how most of us got started.
Adventurous people have been strapping gear to bikes for far longer than the term “bikepacking” has existed. But luckily for us now, there’s been a recent boom in the sport’s popularity, and bike manufacturers are definitely taking notice.
There are a few different categories of bikes commonly used for bikepacking, with the best choice depending on the type of terrain you ride most often, how much gear you like to bring, and how much you do or don’t care about things like speed and comfort.
- Rigid 29er or 27.5″ wheel mountain bikes like the Salsa Fargo or Surly ECR. Often made of steel, but sometimes titanium or even carbon, these bikes rely on good engineering and relatively high-volume tires to deliver a comfy off-road ride. Lack of suspension helps keep weight down and maximize gear-carrying potential. They’re great for gravel and dirt roads and work fine on moderate singletrack. You’ll find a lot of them on less technical routes like the Great Divide .
- Hardtail (front suspension) mountain bikes can expand a bikepacker’s range to bumpy or technical trails in greater comfort. You’ll find these on both the Great Divide route and more technical routes like the Colorado Trail . These are common, available in a wide price range, and very versatile, making them an excellent choice for beginning bikepackers.
- Full-suspension trail bikes: not very common, usually only the bike of choice for experienced mountain bikers riding truly technical trail. You’ll find these on the Colorado Trail alongside hardtails. The rear suspension complicates carrying gear on the bike, adds complexity, and is also expensive.
Tire choice is another huge topic that bikepackers love to geek out about. With so many different options and use cases, I’m going to link to this bikepacking tire overview and leave it at that for now.
Pedal choice is a very individual preference, and you’ll find bikepackers riding both flats and clipless. If riding clipless , you’ll definitely want MTB-style bike shoes with the recessed cleats, essential for things like walking the bike through tricky terrain or walking into a grocery store to resupply food.
Especially on more technical terrain, it’s not unusual to find riders using flat pedals and flat cycling shoes for comfort and convenience. As an in-between choice, toe-straps like Power Grips can help with power transfer while still allowing for all those times when you don’t want to be clipped in (rocky terrain, long hike-a-bikes, mud-clogged cleats…).
Even when using SPD pedals it can be nice to have a single sided model that can function as both platform and clipless, allowing you to pedal while not clipped in when necessary.
Many bikepackers, like traditional bicycle tourists, swear by leather saddles like the Brooks B17 . The Selle Anatomica series is a popular alternative. These saddles aren’t cushy, but they mold to your unique anatomy over time and help reduce chafing, making them a favorite among those who spend long hours in their saddles.
For more information on saddle choice and comfort, see this guide on reducing saddle soreness for women (many of the tips apply to men too).
Choosing A Bikepacking Route
Bikepacking routes can be anything from a quick overnight mini-adventure on a school/work night to a multi-month cross-continent odyssey. No matter how much time you have, there’s a bikepacking route out there for you.
To find a bikepacking route in your area, start by Googling for information about your local trail systems. If bikes are legally allowed on the trails or dirt roads, and there’s a campground somewhere, then you have yourself the makings of a bikepacking route. A few tips:
- In the US, if you happen to live near national forest or BLM land , you likely live near a network of gravel or dirt roads full of legal dispersed camping.
- To learn more about bike-legal trail systems, check out the MTB Project app . Keep in mind that this app is focused on mountain bikers, so unless you are already a reasonably skilled one of those, you’ll want to stick to the green/easy and blue/intermediate trails for your early bikepacking adventures.
- To plan safe road connections where necessary, try the Google Maps app with the “bicycling layer” turned on. Look first for dark green lines (trails), then next for green lines (bike lanes). Use caution on unfamiliar roads that might be busy with vehicle traffic and be prepared to reroute on the fly if a road feels unsafe.
- Bikepacking.com, always a fantastic resource, has more route planning ideas here .
To find more established routes that others have written about, try Googling “bikepacking near ____” or “gravel bike routes near ___.” Often this will turn up a variety of personal blog posts, trip reports, and even elaborate route guides from those who’ve ridden and developed established routes.
Make sure to consider the style of riding you’re looking for. The term “bikepacking” gets used to refer to everything from gravel road touring to technical mountain biking. If you’re looking for one but find the other instead, you’re likely to be a bit disappointed to say the least. When researching routes make sure you understand which side of the spectrum your potential route is on.

If you want to browse and get a sense of what’s out there, here are some excellent resources and guides to bikepacking routes in the US and around the world:
- bikepacking.com
- bikepackingroots.org
- bikeovernights.org (specifically for short rides)
- adventurecycling.org (also includes extensive road cycling route network)
If you prefer the DIY approach or can’t find an established route that works for you, you can always plan your own !
Planning A Bikepacking Trip
Once you have a route in mind, you’ll need to plan out details like daily distances, food and water resupply stops, and potential campsites. It’s definitely possible to wing it if you have a flexible schedule, but this isn’t a good idea unless you already have experience on similar terrain in a similar part of the world.
Estimating Daily Distance
The most basic planning task is to estimate how far you can ride each day. Here’s one handy table , from Salsa via bikepacking.com, with some broad estimates. Here’s my own more detailed overview of estimating mileage. Obviously, once you have a few trips under your belt, it gets easier to look at a route and estimate your daily distances.
The tricky thing about bikepacking, even moreso than backpacking/hiking, is that certain factors can make a HUGE difference in your speed. For example:
- Uphill versus downhill
- Gradient of uphill: steep enough that you’ll be walking, or gradual enough to ride?
- Roughness or smoothness of terrain: cruising on smooth gravel or picking your way over rocks and roots?
- Weather: rain can turn dirt roads into impassible mud, snow can turn a smooth ride into a frustrating hike-a-bike, hail can make you duck for cover, heat can slow you to a crawl on hard climbs.
- Mechanical issues or recurring punctures (for example due to thorns in some areas) can stop progress completely.
Then, there are issues within our control that are important to assess honestly:
- Hours of daylight based on location and time of year, and whether you’re equipped and willing to ride in the dark.
- Your fitness and motivation
- The type of trip you want to have: a leisurely vacation, a limit-pushing endurance project, or somewhere in between?
There’s a bit of an art to putting this all together, and honestly, it’s hard to get right without some experience. For this reason it’s smart to be conservative with your planning, or at least to have some backup plans in place.
Water for Bikepacking
Once you have a rough idea of how far you can and want to ride each day, consider where you’ll be able to find water. You can live for weeks without food, but if you mess up your water supply you can be in real trouble within a day (or even less in hot weather).
In mountain areas this is often easy; you can carry only a couple liters at a time and fill up several times a day as needed. In dry areas though, you may need to plan carefully and carry enough water to get you through a couple days if needed; potentially 6-8 liters or even more in extreme cases. In all cases, you’ll want some kind of water purification system , like those used by wilderness backpackers, so you safely refill from natural sources.

As a worst case scenario, consider what would happen if your bike became unrideable for some reason and you needed to walk out to the nearest town or road in order to find water. Would you have enough water to get you there safely? Keep that in the back of your mind as you’re planning water stops.
Read more about managing water while bikepacking:
- Water Treatment for Bikepacking
- 9 Ways to Carry Water on a Bike
- How Much Water Do You Need for Bikepacking?
Food for Bikepacking
Food takes space and can be heavy, so bikepackers on longer trips will usually resupply every few days at stores along the way. You don’t have to limit yourself to grocery stores though; small towns will often have a general store or gas station convenience store with basics like snacks, energy bars , canned food, sandwiches, and microwave burritos. Bikepacking diets are not always the healthiest, but it’s important to get plenty of calories in, even if that means eating some junk food.
Some bikepackers, like backpackers, use dehydrated or freeze dried meals that are lightweight and require only hot water to cook. Generally speaking though, bikepackers pass through more towns than backpackers (due to the relatively faster speed of biking) and also can manage a little extra weight more easily than those on foot. For this reason, bikepackers are more likely than backpackers to resupply from stores rather than packing dehydrated meals or mailing resupply boxes. It’s also not too painful to go stoveless while bikepacking, especially if you can get hot meals in town every couple of days.
Don’t forget to budget for some meals in town when stopping to resupply. The hearty town meal after a few days in the backcountry is, in my opinion, one of the great joys of bikepacking.
Read more about food for bikepacking:
- Bikepacking Food Guide
- Best Protein Bars for the Trail, Compared
- No-Cook Breakfasts for Bikepacking and Backpacking

Camping and Lodging
There’s nothing wrong with finding campsites as you go along, but a little advance research can make life a lot less stressful when it’s late afternoon and daylight hours are dwindling.
Rules and norms for camping vary a lot between countries. For my fellow US-based bikepackers, common places to spend the night include:
- Established campgrounds
- RV parks or motels that allow tent camping
- Free dispersed camping in national forest and BLM land (check out publiclands.org for helpful online maps)
- Hiker/biker campsites at state parks

In places where these aren’t options, your next best bet (in the US at least) is to camp in public places in small towns. This can include churches, libraries, schools, fire stations, post offices, or stores, ideally with permission from whoever is in charge of the space. Don’t camp at churches on Saturday night, or schools on weeknights, unless you plan to hit the road very early in the morning. 🙂 Generally speaking, this type of camping works best in small communities and is sometimes neither comfortable nor welcome in medium-to-large towns and cities.
If all else fails, there’s always stealth camping. Sometimes this means camping someplace you’re technically not supposed to, such as on private land. I recommend avoiding this, but I also recognize that sometimes it can be the only reasonable option available if you end up in a sticky situation. In this case be sure to choose a spot where vehicle headlights won’t out you, make camp after dark, be gone by sunrise, and leave no trace of your visit.
Finally, you would not be the first bikepacker to enjoy the cozy comforts of a motel room at some point during your journey. Camping, though a key part of most bikepacking journeys, is not required 100% of the time.
Tip: in addition to your route data (more on this below), download offline maps to your smartphone in Google Maps and Maps.me for the locations you’ll be passing through. This will give you access to names and locations of motels, restaurants, gas stations, etc. even without an internet connection.
Navigating a Bikepacking Route
Most bikepackers these days use GPS navigation, which is indeed very convenient. But it’s worth remembering that a) electronics can fail, and b) bike adventurers used to navigate by paper maps, which are still a valid option and a good backup.
There are two ways to navigate by GPS:
- GPS app on a smartphone, like RideWithGPS or Gaia GPS , which lets you cache a route and maps for offline use.
- Dedicated GPS nav unit like a Garmin eTrex or Wahoo ELEMNT
These are tools for creating and following routes based on a series of GPS locations. In both cases, you’ll find or create a GPS track of the route you intend to follow and the device will show you where you are relative to that route. In some cases, if you’re lucky, you may even have a route with cues that tell you where to turn.
A dedicated GPS unit has the advantage of longer battery life and is usually more robust to water and dirt. On the other hand, they can be expensive.
A smartphone app is convenient and cheap if you already have a smartphone, and the familiar interface is easy to use. I use RideWithGPS for all my rides and love it. But, smartphone battery life can be an issue if you’re out for several days, so you’ll want to conserve carefully and carry an extra power bank and/or have a way to generate power on the go (solar panel or dynamo hub).
Tip: if battery life is an issue, keep a quick-charging cable and wall plug handy and use resupply stops to top up. When you first walk into a convenience store or restaurant, ask nicely if you can plug in your phone while you eat or shop. In thousands of miles I’ve only been turned down once, and it was because they didn’t actually have electricity.
If you’re just starting out, I’d recommend starting with RideWithGPS on your smartphone. You definitely don’t need a dedicated GPS unit to try bikepacking. That said, it’s important to remember that phones can and do fail. Your phone can break, get wet, run out of battery, or an app can have a bug. If and when this happens, you need to know how to get yourself safely back to civilization, or ideally just continue on with your route.
Always, always have at least one backup for navigation. You might have a Garmin eTrex as primary device and a smartphone with cached maps that you keep turned off unless you need it. Or maybe you have two smartphones, both with cached maps, plus a printed or paper map.
Before leaving on a more complex trip, I also always save maps offline in both the Google Maps and Maps.me apps. They have slightly different map data than RideWithGPS and sometimes one will show roads or trails that the other doesn’t. It also gives me access to super helpful information about businesses in towns I pass through, like gas stations and motels, all without an internet connection.
Read more about GPS nav devices:
- Garmin eTrex 22x Long Term Review
- GPS Nav Devices for Bikepacking: Side by Side Comparison
Bikepacking Gear
While gear choice is a matter of personal preference, bikepacking tends to lend itself to more minimalist gear than bicycle touring. It’s like lightweight backpacking compared to traditional backpacking.
You’re unlikely to find a bikepacker carrying everything one might find in a long-haul tourer’s four panniers. The typical bikepacking bag setup can’t fit it all, for one thing. Plus, the more technical and demanding the terrain, the more you suffer on a heavily loaded bike. Ever try to pick up and carry a fully loaded touring bike across a rocky stream crossing? Thus bikepackers often focus on a streamlined, lightweight approach to gear.
- Bikepacking bags vs. panniers
- How to pack bikepacking bags
Bikepacking Bags and Cargo Carrying Systems

Part of the fun of bikepacking is the creativity needed to attach your particular set of gear to your particular size and shape of bike. No two setups are exactly alike and there’s no one “right” way to do it. Setups can vary between hundreds of dollars in expensive brand name gear, to cheap budget gear and DIY hacks .
There are, however, some common themes. A traditional bikepacking setup hinges on these three main pieces:
- Frame bag: fills part or all of the triangle in the middle of the frame, often used for water, tools, or other heavier items. Though this is where water bottle cages usually go, you’ll find that by storing water in a hydration bladder in a frame pack instead, you actually have more water capacity PLUS extra room for other things. Frame bags are a very efficient use of space and a great location for carrying heavy things without the weight negatively impacting the handling of your bike.
- Seat bag: attaches to the seat post and rails behind the saddle, and is great for stuffing clothes and other relatively lightweight items. Be sure to put the heaviest items in first to minimize side-to-side sway.
- Handlebar bag or harness: attaches to the front of the handlebars and is often used for bulky things that pack well into cylindrical bags, like a tent or sleeping bag in a stuff sack.
For additional space, people start adding on smaller bags pretty much anywhere they can fit. Examples are:
- Feed bags: small bags that attach to your handlebars and/or stem and hold small items, snacks or water bottles.
- Top tube bag: small bag that goes on top of your top tube, at the front, back, or middle, and holds small items like sunscreen, tools, snacks.
- Fork-mounted cages: these mount to the front fork of the bicycle and can hold water bottles or items in stuff sacks, like a sleeping pad.
When it’s time to get truly creative, bikepackers have some handy go-to accessories. Most revolve around various ways to attach things to your frame even if you don’t have bolts in the right places. Sometimes this means gadgets like these , sometimes straps like these , and sometimes good old-fashioned electrical tape and zip ties.
Sometimes, especially if you need large food or water capacity for remote and/or dry areas, wearing a hydration pack or small backpack is the only way to get the capacity you need. It’s not the most comfortable, but it’s not so bad either.
Can you bikepack with a traditional rack and panniers? Sure, if the terrain isn’t too technical. Sometimes people use small front panniers on a rear rack. Large panniers blur the line between bikepacking and bike touring and are usually only appropriate for relatively smooth gravel and dirt roads.
If using a rack on rough or washboarded terrain, it’s best to use a high-quality steel rack (like this one from Tubus ) so it won’t break, and put threadlocker on your bolts so they don’t vibrate loose.
Popular Bikepacking Gear Brands
Many small new companies are springing up, so this is definitely not a complete list, but here are a few brands that are respected in the bikepacking gear space:
- Revelate Designs
- Oveja Negra
- Porcelain Rocket
- Rogue Panda
- Honorable mention: made-in-China brand RockBros for true budget bikepacking gear. You do get what you pay for (they’re heavier and probably will break sooner), but the prices are around half of the higher end brands and, so far, they are working for me.
Camping and Outdoor Gear
- Shelter, usually a tent, tarp, bivy sack or hammock
- Sleep system, usually a sleeping bag or quilt and sleeping pad
- Water system , usually bottles and/or bladders and a filtration/purification method
- Clothing system, often a mix of cycling clothes (like padded shorts and cycling gloves) and lightweight functional outdoor clothes (like merino wool and down jackets).
- Food and cook system, usually a bowl, utensil, and for many people a stove, pot, and fuel
- Miscellaneous essentials like a first aid kit, pocket knife, headlamp, etc
Popular Lightweight Outdoor Gear Brands
There’s a lot of crossover between bikepacking gear and lightweight backpacking gear. For instance, down quilts from makers like Enlightened Equipment , Katabatic Gear and ZPacks are excellent choices for both activities because they’re light and space-efficient.
Big Agnes makes lightweight tents popular with bikepackers, and I’m personally a big fan of tents from both Tarptent and Big Sky for value and weight.
The ever-popular Thermarest NeoAir Xlite sleeping pad is popular with thru-hikers and bikepackers for the same reasons: it’s light and packs up small. However, if you don’t have the budget quite yet, a classic foldable foam sleeping pad is light, cheap, and can be bungeed to your handlebars or seat bag.
Related : My Favorite Lightweight Backpacking Gear
Bike Gadgets and Repair Gear
- Tire and tube care, such as a pump ( this one works well), spare tubes and patches in case of punctures
- A multitool (my favorite here ) that can adjust most of the various bolts and screws on a bike
- Chain care and repair, including lube, chain breaker tool and master link
- Miscellaneous bike gadgets: handlebar phone mount ( this one lasted me 4500+ rough miles), high-viz tape or flag for road sections, rear view mirror ( this one is the best I’ve found), etc
Electronics
- Phone and/or GPS unit for navigation
- Power bank / cache battery for charging navigation device, lights, etc
- Optional but recommended for remote and/or solo trips: an emergency satellite beacon such as a SPOT or Garmin InReach
- Tail lights and headlights if any chance of riding at night (and there’s always some chance of riding at night)
- Optional but handy: method for generating power on the go, such as a dynamo hub or solar panel
For more details, see this post about charging electronics while bikepacking .
How to Pack for Bikepacking
Talk to any group of bikepackers and each will have their own preferred way of packing. But, they will likely all have a few common suggestions:
Pack heavy things lower to the ground and closer to the center of your bike. This helps prevent the extra weight from interfering with the handling of your bike. Some ways of doing this include:
- Water is heavy! Pack a water bladder in your frame bag or use bottle cages in your frame triangle. If you need extra capacity, use fork-mounted bottle cages.
- Pack heavy things like canned food, electronics, and tools in the inside-most part of your seat bag, closest to your seat, so they don’t cause extra side-to-side sway.
- Pack light bulky things, like clothing or a sleeping bag, at the back of your seat bag or in your handlebar bag.
Pack things you use often so they’re easy to get to.
- Snacks, multi-tool, sunscreen, etc. are convenient in a frame bag, feed bags, or top tube bag.
- Your tent and sleeping bag, on the other hand, can be harder to get to in a handlebar bag.
- It’s nice to have space to bungee extra layers to the outside your seat bag or handlebar bag.
Consider how waterproof your bags are and how much it matters.
- Critical electronics should probably be double-protected with a ziplock bag + dry sack or waterproof bag when riding in the rain.
- Your sleeping bag and warm layers must stay dry for safety in cold, wet weather. Line your bike bags with plastic trash bags, use a waterproof stuff sack, or make absolutely, positively sure your bike bags are 100% waterproof.
- Small items like sunscreen and tools can deal with some water, but watch out for rusty tools if riding in wet conditions for days in a row.
More Info : How to Pack for Bikepacking
Bikepack Racing
As if heading out into the wilderness with all your important possessions strapped to a bicycle isn’t odd enough, there is a sub-niche within the niche of bikepacking that takes the crazy to a whole ‘nother level: ultra-distance bikepack racing.
Before you start picturing the Tour de France with tents and camp stoves… Bikepacking races are usually aggressively low-key and flaunt their lack of entry fee, prize money, and support. Riders simply line up at point A, ride to point B in a self-supported fashion along a prescribed route on the honor system, and the first one to the finish wins. Generally there is a lot of sleep deprivation, boldly minimalist gear selection, and convenience store junk food involved.
These races are usually delightfully inclusive, similar to ultrarunning races in which world-class elites race the same course as amateurs, just faster. The front of the pack is impressed by the back’s grit, and the back is impressed by the front’s speed.
Having brought up the rear now at two different such races, one across the whole US and the other through 400 miles of Idaho backcountry, I can certainly understand what makes them so alluring. If casual bikepacking captures your heart, you may find racing to be a natural next step.
Traditionally, a small but enthusiastic group of spectators, known as “ dot watchers ,” follows racers via satellite tracking beacons on trackleaders.com and sometimes via Facebook groups specifically for each race.
The racing scene is full of astoundingly strong and tough athletes, most of whom fly totally under the radar. However, a few names are starting to break into mainstream news, the most famous of which is probably Lael Wilcox .
The classic documentary Ride the Divide , about the Great Divide Mountain Bike Race, has lured more than a few unsuspecting souls into the bikepack racing scene. The film Inspired to Ride , about the Trans Am Bike Race, holds a similar place in the sub-niche of bikepack racing on pavement. Watch both at your own risk!
Read more about bikepack racing:
- Ultra-Endurance Bikepack Racing for Beginners and Slower Cyclists
- Tour de los Padres 2022: Burly Bikepacking Adventure in Central California
- The Big Lonely 2021: High Desert Bikepacking with a Snowy Twist
- Smoke ‘n Fire 2021: Third Time’s the Charm
- Bike Nonstop US 2019: Lessons Learned From 3500 Miles at the Back of the Pack
Bikepacking Dictionary
Here’s a little dictionary of basic terms you’ll hear a lot when bikepackers get to talking.
- Rig: your bike, often loaded with gear
- Run: used as a verb meaning basically “to use on your bike.” You can run fat tires or skinny tires, you can run a frame bag or panniers, you can run clipless pedals or flats, you can run a particular saddle (seat), etc.
- Singletrack: narrow trail only wide enough for one person to walk or ride at a time. Can range from smooth and easy to highly technical and rough. Speaking of which…
- Technical: terrain that is rough with rocks or roots, or steep, or otherwise requiring some degree of learned riding skill to navigate successfully.
- Doubletrack or two-track: the paths where vehicle wheels would go, usually on a partially overgrown dirt road, which also often make for excellent bike trails.
- Hike-a-bike : dismounting your bike and pushing, dragging, or carrying it through sections that are too rocky, marshy, steep, loose, or otherwise not something you can or want to ride. No shame in this – it’s smart to save your energy and ride safely.
Bikepacking Skills
Part of the allure of bikepacking is the way it combines a variety of skills. While you definitely don’t need all of these skills to get started, here are some of the skills that bikepackers usually end up developing if they don’t have them already:
- Wilderness travel: staying warm, staying safe, finding or making safe drinking water , understanding weather patterns, basic survival skills, personal care and hygiene …
- Backcountry camping: how to choose the right gear for different environments, stay warm and dry with lightweight gear, and set up a comfortable campsite in the backcountry
- Bike handling skills: how to ride efficiently and safely on bumpy, rough, or loose terrain
- Bike maintenance and repair , both at home and on the trail
- Route planning , map reading, and navigation
- Basic wilderness first aid
- Backcountry cooking, meal planning , endurance nutrition: how much food is needed, what types of food work best, how to balance nutrition with weight and space limitations
- Adaptability: how to solve unexpected problems and keep moving forward
- Mental strategies for endurance: how to keep going when you’re tired and frustrated, and how your body is far stronger than you thought
- Travel logistics: getting yourself to and from places, often without precise advance planning: hitchhiking, navigating public transport, talking to locals, etc.
Bikepacking Culture
Obviously it’s hard to entirely describe the culture of any group of people, and bikepacking is also poised for potentially culture-changing growth. But, here are some common elements of bikepacking culture as I have experienced it:
- Love of nature and outdoors
- Embracing adventure, exploration, and some “type 2” fun
- Protection of and advocacy for natural spaces, including Leave No Trace ethics
- Fitness, health, and wellness
- Inclusive welcoming attitude toward all who are interested, regardless of bike, gear, speed, gender, race, etc.
- Creative and practical approach to gear and bike parts
- Bicycle culture and love of bikes in general, often including other styles of riding (commuting, road riding, MTB)
It often feels like bikepacking culture has more in common with other outdoor long-distance sports, like ultrarunning and backpacking, than with pure cycling sports like road biking or even mountain biking. While obviously this is a generalization, you could say bikepacking feels more down to earth, less competitive, and more relaxed.
Bikepacking Resources and Inspiration
As the activity of bikepacking grows in popularity, the number of online resources available is growing rapidly as well. In addition to your local bike shop – often a fantastic resource in areas with a strong bikepacking culture – here’s a list of places to go for bikepacking inspiration, knowledge, and advocacy.
- bikepacking.com : news, routes, gear reviews and more
- bikepackingroots.org : public land advocacy, routes, and more
- bikepacking.net : community resource for gear reviews, trip reports and more
- Bikes or Death Podcast : grassroots podcast featuring deep-dive interviews with bikepackers of all kinds
- Adventure Cycling Association : advocacy, stories, maps and routes for all types of bicycle travel, including off-road and bikepacking
- Trackleaders : hub for “dot watchers” and those interested in ultra-distance bikepacking racers
- Ride Far : racing-focused site with tons of useful info and race lists
Pin For Later

About the Author
Hi there, I’m Alissa, founder of Exploring Wild. I’ve traveled over 19,000 miles by bike and still can’t stop planning my next ride (and helping you plan yours). Pavement and panniers or singletrack and seat bag, I love it all. On my bike I feel free. Learn more about me here .
Shop Bikepacking Resources

Bikepacker’s Companion eBook

Bikepacker’s Fix It Kit

Bikepacking Trip Planner Workbook + Templates
Excited to try bikepacking but need help getting started? The Bikepacking Trip Planner Workbook can help you take the next step.

Bike resources in your inbox?
There’s more where this came from! Sign up here for occasional emails full of inspiration and information about bikepacking and bicycle touring .

Town Day Checklist!
Sign up to receive the free downloadable bikepacking town day checklist to help with your resupply stops:
You’ll also receive occasional emails with other bikepacking and touring resources. I think you’ll like them, but you can unsubscribe at any time.
Share the Adventure
If you found this article helpful, please consider sharing so more people can benefit from it:

- Pinterest 1.2K
9 thoughts on “How to Start Bikepacking: Your Complete Guide to Off-Pavement Bike Travel”
Love these tips! Great resource for breaking into Bike Packing!
Hello Alissa. I need a set of tires for my Fargo. I ride pavement and mostly forest service roads that sometimes have the edgy golf ball size ballast. I’d like to know what you’re riding now and any thoughts about durability, puncture resistance, which is most important for me. Great website. I check it daily for any new articles on backpacking or bikepacking and appreciate the time and information you give. I’ve learned and used many of your tips. Keep it up!
Hi John, right now I’m riding Continental CrossKing Protection tires on the GDMBR and they still have some tread and zero punctures (tubeless) after 2300 miles. They’ve been great for the mix of gravel and occasional rough trails on this route, and they work for pavement, though they’re overkill if you’re going to ride a lot of it. Compared to the WTB Rangers I used previously I’ve been impressed with their durability. Hope this helps!
I’ll check them out. Thanks. I see Maxxis tires dominate a lot of off road bikes. I’ve had great luck with Continental tires for my road bike and appreciate the feed back and confidence on the GravelKing’s.
I think Maxxis are good too. My husband’s Fargo is running Ikons and while they may not be quite as long-lasting as my Continentals, they’ve been trouble-free.
Hi John, I just realized I meant to write Cross King instead of Gravel King! Sorry about that. I’m sure they’re both great tires but I thought Cross King was well suited to the GDMBR. I’m going to edit my first comment to correct it.
I thought there may have been a mistake and unless I’m missing something, the Gravel King sizing only goes to 40mm. For the Cross King I’m looking at the ProTection over the Performance Tire. Though more expensive I assume it’s more durable. A few more questions come to mind. Are you running 29 x 2.2’s and is this tire choice specific to the GDMBR? I know your kind of doing the same thing but for non competitive riding/bikepacking would you use a different tire/size. Thanks…again.
I’ve been very happy with the durability of the ProTection version of the Cross King – 3000+ miles and still going strong!
Mine are 29 x 2.3. I toured the GDMBR over two months, so definitely a non-competitive pace. Durability and comfort were my priorities. I would guess most fast folks go narrower, but I appreciated the extra width on the bumpier sections with my rigid bike.
I also just finished the Smoke ‘n Fire 400 on the same bike and same pair of tires. That event has proportionally more singletrack (some quite rough) than the GDMBR. I thought the tires were a good choice for that route too and had no issues with them.
Wow! Thanks for putting together this great resource.
Leave a Comment Cancel reply
New in bikepacking & touring.

The Arizona Trail Association Turns 30 (Happy Birthday!)

Charging Electronics While Bikepacking: Power Banks, Battery-Saving Tips, Solar and Dynamo

Review: S/F Expandable Hip Pack is A Handy Bikepacking-Friendly Transformer

Pitching a Tent in the Wind: Sanity-Saving Tips for Backpackers and Bikepackers
Bikepacker's Companion eBook
Your experienced riding buddy in digital form: 140 mobile-friendly pages packed with how to's, problem solving tips, and hard-earned wisdom from the trail and road.

Backpacking & Hiking
Adventure Travel
Donate to Tip Jar
Shop Adventure Kits
Adventure in Your Inbox?
Resources and inspiration to support your wildest dreams:
About Exploring Wild
Privacy Policy
Trust & Transparency Policy
This site participates in affiliate programs, including Amazon Associates.
Copyright 2024 Exploring Wild, All Rights Reserved
Privacy Overview

- Travel Tips
Guide: How To Go Bicycle Touring / Bikepacking Japan
Table of Contents
Bicycle touring & bikepacking japan, what bike should you take, hotels, guesthouses, rider houses, trains, buses, ferries, taxis, keeping clean, my recent japan adventure.
Japan is a dream destination for bike travellers. With a unique culture, incredible landscape, an abundance of great food and lots of places to camp – it’s a delight to go both bicycle touring and bikepacking in Japan.
I’ve now cycled around 5000km on the four main islands, and it’s safe to say that Japan is one of my favourite bike touring destinations.
Let me arm you with information so you can get the most out of your time in Japan.

It’s easy to enjoy yourself in Japan but be prepared to work hard for your keep.
Japan is located near multiple fault lines, so it’s littered with mountains, volcanoes and steep winding roads. The backroads are almost always more hilly than the main roads, but this makes them all the more scenic.
You can travel around Japan on any bike.
On my first trip to Japan, I cycled on a tandem touring bike with panniers, and more recently I rode a road bike with racing slicks pulling a trailer. I don’t think there is any perfect bike for everyone, but a bike with a couple of panniers will be comfortable, durable and will take you on mixed terrain.
The most important thing about your bike is that it should have a really small climbing gear ratio. I’m a very strong cyclist and found myself in my smallest gear (34x42t) multiple times per day – yep, it’s that hilly.
Click HERE for my low gear ratio resources; I recommend using as close to 20 gear inches as possible.
There are some excellent bike routes available for Japan. I’ve completed many of the routes listed below and can verify they’re all great.
The big advantage of following these routes is that they’ll shuffle you onto the smaller back roads which you normally wouldn’t find. They also provide the easiest way through the big cities, minimising busy roads and making navigation a pleasant experience.
JapanCycling.org has 4552km (2828mi) of routes from the south (Kyushu Island) to the north (Hokkaido Island). I’d recommend downloading the GPX files to use as a guide as they take in so many of Japan’s highlights.
The Japan Odyssey is a yearly, long-distance cycling event which has riders creating their own route around a series of checkpoints and mandatory roads. The course designers aim to include the best roads in Japan, so I’d suggest seeing if any of the following segments can fit into your tour.
Japan Odyssey segment details: 2017 Odyssey Tour 2016 Odyssey Tour
Rob from HokkaidoWilds.org has been busy establishing some really nice cycling options on Hokkaido. There are 1 through to 10-day cycling routes zig-zagging all over the island. You can easily connect up multiple routes for a month-long tour (or longer).
Given the heavy snowfall in winter, Hokkaido often has road closures. Bookmark this road information website because you may need to plan around them.
If you’d like to go exactly where I went on my 2017 tour: 1. The Tokyo to Hokkaido Commute 2. My Loop Around Hokkaido
You’ll come across multiple tunnels per day in Japan.
Tunnels are extremely noisy to ride in; the smallest cars sound like the biggest trucks. While initially quite scary, you will gain confidence after tackling a few. The Japanese drivers will reduce their speed well below 50kph/30mph in tunnels and only pass you when it’s clear. The longer tunnels have a footpath to the side that you can cycle on. Make sure you turn on your front and rear lights before entering.
Supermarkets are located in most towns. They all have a large range of fresh local produce, tofu, noodles, bread, pasta and sauces. I normally prepare my own breakfast and dinner from supermarket produce because I can piece together large, healthy meals at a really low cost. Shop after 6 pm for 20-50% off the HUGE range of pre-prepared food.
Small restaurants provide affordable meals in most towns. Expect to pay between 500-1500 yen (US $5-15) for a lovely traditional meal which is typically only available in the local area. You’ll notice vast differences in the type of food available, region to region. Everywhere has its own speciality.
I travelled to Japan as a vegan (all of my trips are fuelled by plants). It was really easy to find everything I needed in both convenience stores and supermarkets, but a little more difficult in restaurants. I used the ‘Happy Cow’ app to great effect to find vegetarian and vegan places to eat.
But here’s the good news: you can almost camp anywhere in Japan if you’re happy to wait until sunset and pack up early. I’ve camped in parks, temples and even museums. In towns with a river, there will usually be a grassy park running alongside it. The Japanese people are very accommodating and will almost never ask you to leave.
I regularly used this map of free campsites and onsens . I imported the data as a ‘KML layer’ into my smartphone mapping apps ( Maps.me and MapOut ) so that I could see when I was approaching a potential sleeping or cleaning location.
Note: the paid campsites in Japan very rarely have showers. More on that below.
On the island of Hokkaido, there is an ultra-budget accommodation called a ‘Rider House’ available to motorbike and bicycle travellers only. These bare-bones establishments are typically located away from towns and are only open in the warmer months. THIS is a map of all of the Rider House locations on the island.
You can take your bike on trains provided it’s either in a bike box or packed in a ‘rinko’ bag. The latter involves removing the two wheels from your bike, putting them either side of your frame, and packing it all into a lightweight cloth bag. The bag doesn’t have to be fully closed, but it should be enough to not get grease or dirt on anybody.
You can get Rinko bags from all bike shops for between 3,000-6,000 yen (US $30-60), but some people buy bike covers and a bit of tape from a ‘100 Yen Store’ and make do for a one-way or temporary solution. Buses will require you to pack your bike into a Rinko bag too.
You can roll your bike directly onto most ferries. Every ferry I’ve taken has had a place for bikes, and sometimes they’ll strap your bike down to a railing. Ferries are a great way to connect up the hundreds of small islands off the coast of Japan.
When catching taxis, ferries, trains and buses, you’ll need to make sure you have cash. Most don’t accept credit cards, and if they do, they probably won’t accept international cards.
The onsen (communal bath) is a cultural institution in Japan.
Every town has one, simply ask around for its location. You’ll fold your clothes into a basket, get naked, wash yourself down and then be able to sit in any of the hot pools for as long as you like. Occasionally the natural onsens are free, but cheaper onsens start at about 200 yen (US $2) while expensive hotel onsens are about 800 yen (totally worth it!).
It’s unusual to find campsites that have showers, so if you’d like to have a good wash, make sure to find an onsen in the nearest town first.
Japan is a really long country. This results in vastly different climates between north and south. The island of Kyushu (south) is almost tropical, while the island of Hokkaido (north) is freezing in winter and hot/dry in summer.
Monsoons tend to affect everywhere but Hokkaido, so expect heavy rain between July-September anywhere south of Tokyo.
Cycling in the North: June-August Cycling in the South: March-May and September-December
You can find free internet at convenience stores (7Eleven, Family Mart and more recently Lawson) as well as tourist information centres.
But if you want to be a bit more mobile, you can hire an ‘egg’ from the airport which creates a wifi signal that multiple phones can connect to. These aren’t cheap but can be great for a short trip. SIM cards can be purchased from BIC Camera stores if you feel the need to have the internet everywhere you go.
With the abundance of convenience stores (seriously, it’s every corner) you can probably travel without mobile data.
Have A Question? Drop A Comment Below, Or Try THIS Facebook Group of Local Cyclists.
- travel guides

27 comments
What is your experience riding a tandem bicycle in Japan. Is it still illegal in most of the country?
It is technically illegal – but as far as I know, it isn’t enforced to travellers. I didn’t have any issues for the two months I cycled there.
I can’t wait to read your opinion re trailer vs panniers… I am thinking about getting this one http://www.extrawheel.com
hi, how do you transport your bicycle into Japan? i was thinking of using my bike box, but i can’t seem to find any place to store it for 2 weeks while i’m out cycling.
You throw away the cardboard box and find a new one when you leave. Or you strap it with wrap directly at the airport, as well as strap your panniers together.
Hi Alee, Thanks for this! I just got back from a one-month bicycle tour through Norway – my first big(ish) bicycle tour – and I can’t wait to do it again. Japan is very high on my list, so this is very useful. Do you have any recommendations on books about Japan and it’s culture/ landscape? And what was your experience with communicating with locals (language-wise)? Thanks again.
I just finished my second trailer tour yesterday. Should be some resources coming soon!
You might be able to find a hotel/hostel/host to hold it for you. If not, all bike shops get cardboard boxes when bikes are delivered. Just allocate half a day before you leave to finding one (we found two within 30 mins of searching).
I haven’t done a lot of reading about Japan, most of what I know is anecdotal or from my own experience. Communication with locals isn’t particularly common because the Japanese either don’t get to practice the English learned in school, or are too shy to use it. You can use various online translators to have a conversation if you need. We were lucky enough to stay with a few English-speaking locals via Couch Surfing and Warm Showers.
Hi Alee, great post, thanks. Any hints about stoves and fuel for Japan? What worked best for you? Thanks, Daniel
We used a canister stove. We found one canisters at Snowpeak outdoors shop and another at a tools/car accessories/fishing type general store. Two canisters lasted five weeks!
Thanks Alee, good to know. Which kind of canister stove do you use btw? MSR Whisperlite?
It was a 360 Degrees Furno Stove.
Hi Alee Since Japan is a short flight for me it’s on my list of places to visit. So how common is English there? Are there any Japanese words or phrases you’d recommend learning?
Thanks. Phil North Pole, Alaska.
I go to Japan every few years. Most young people speak broken basic English but they are not going to use it generally, so it is hit and miss. Generally I have found that people who work in stores that sell outdoor supplies for hiking tend to speak more English. Bikes shops are better sometimes too.
Thanks a lot Alee for this great information. I’m currently planning to cross Japan in August 2018 with my road bike. Starting in the far north (near Wakkanai) and finishing near to Kagoshima in the south. Normally I’ve stages of 150-200km a day. Can you recommend such a tour, also the far north and south part? If yes, should I take on the main island the north route along the see or your route from Tokyo to Hokkaido. Would be very thankful for any recommendations!
Hi Kurt. You’ll want to link up as much of the back road stuff as possible. They’re certainly the best roads for cyclists, however they tend to be steep and a little bit indirect. I’d use the JapanCycling.org routes as a general guide and make some modifications to suit how long you have and what you’d like to see. Alee
Thanks a lot Alee for your advice. Will now start the planning and would be happy to come back with some more questions!
Hello Alee, Love the Post! My friend and I will be traveling to Japan for the first time from early April-late May this year (2018)and we would love to do it on bikes (for the adventure and to save train ticket money)! Do you know of any great and reliable places to rent bikes at a good price for those weeks? Do you have any tips for us first time Japan bike travelers? We’re thinking of going to these following places, any help and advice is greatly appreciated!! Thank you! Tokyo, Kanto to Fujiyoshida, Yamanashi Chubu to Kyoto, Kansai to Osaka, Kansai to Nara, Kansai to Hida Takayama, Chubu and back to Tokyo, Kanto.
Between this article and my book “Bicycle Touring In One Hour”, you should have enough information to tour Japan confidently! Check out JapanCycling.org for routes, or if you’re mapping your own, a good way to do that is through Komoot.com to stay off busy roads. Sorry, not too sure where you can rent bikes.
when touring trough japan do you need a new real expensive tour bike, or could you just use your own fixed up bike and if it were to brake down buy a new one there ??
You can use any bike. I’d suggest packing light and avoiding any rough dirt roads to prevent part failures.
Great info – many thanks.
We’re looking to do Seoul -> Tokyo via the Busan – Shimonoseki ferry. Very helpful input. Thanks again.
A question about your gear.
What’s the bag you have on your back?
It’s an old Rapha Bonk Bag (musette). They don’t make them anymore, but you can find similar things if you search ‘cycling musette’ in eBay etc.
should i bring a bike with me or could i find a good deal in kyoto? like $350 with panniers….
Comments are closed.
- PRO Courses Guides New Tech Help Pro Expert Videos About wikiHow Pro Upgrade Sign In
- EDIT Edit this Article
- EXPLORE Tech Help Pro About Us Random Article Quizzes Request a New Article Community Dashboard This Or That Game Popular Categories Arts and Entertainment Artwork Books Movies Computers and Electronics Computers Phone Skills Technology Hacks Health Men's Health Mental Health Women's Health Relationships Dating Love Relationship Issues Hobbies and Crafts Crafts Drawing Games Education & Communication Communication Skills Personal Development Studying Personal Care and Style Fashion Hair Care Personal Hygiene Youth Personal Care School Stuff Dating All Categories Arts and Entertainment Finance and Business Home and Garden Relationship Quizzes Cars & Other Vehicles Food and Entertaining Personal Care and Style Sports and Fitness Computers and Electronics Health Pets and Animals Travel Education & Communication Hobbies and Crafts Philosophy and Religion Work World Family Life Holidays and Traditions Relationships Youth
- Browse Articles
- Learn Something New
- Quizzes Hot
- This Or That Game New
- Train Your Brain
- Explore More
- Support wikiHow
- About wikiHow
- Log in / Sign up
- Cars & Other Vehicles
How to Ride a Bicycle
Last Updated: February 4, 2024 Approved
This article was co-authored by Jonas Jackel . Jonas Jackel is the Owner of Huckleberry Bicycles, a bicycle retail store based in San Francisco, California. Jonas has over 20 years of experience managing bicycle retail stores and has operated Huckleberry Bicycles since 2011. Huckleberry Bicycles specializes in servicing, repairing, and custom building road, cross, gravel, touring, folding, and e-bikes. Jonas was also previously sat on the Board of Directors for Bike East Bay, a bicycle-advocacy non-profit organization based in Oakland, California. There are 14 references cited in this article, which can be found at the bottom of the page. wikiHow marks an article as reader-approved once it receives enough positive feedback. This article has 30 testimonials from our readers, earning it our reader-approved status. This article has been viewed 2,082,033 times.
Do you want to go outside and ride a bike? Are you trying to teach someone else ? Many adults never got the chance to learn how to ride a bike and many kids want to learn. There’s no reason to be embarrassed. Instead, get eager to start one of the healthiest, most environmentally friendly, and most satisfying forms of self-transportation possible. It requires preparation, technique, and a little falling, but anyone can learn how to ride a bicycle.
Things You Should Know
- Safety first! Practice on flat, smooth ground in daylight. Wear a helmet and elbow and knee pads to protect yourself in case you fall.
- Push off of the street with one leg to propel forward. Once you’re gliding, start pedaling with the other foot. Try to pedal straight forward as long as possible.
- Use the hand brakes to stop. Once you’re comfortable with a straight line, it’s time to tackle steering and gentle slopes!
Riding Safely

- Starting off on grass or smooth gravel helps since falls there hurt less. These surfaces make balancing and pedaling harder though.
- If you plan on practicing balance and pedaling on hills, find locations with gentle slopes.
- Check your local laws to see if it is legal to ride on sidewalks or other paths.

- Avoid baggy pants and long skirts. These may get caught in the gears and tires, and may result in you falling down.
- Avoid open-toed shoes. These leave your feet exposed to the bike and ground.
- As an alternative, you can get a bicycle that has a skirt and chain guard that prevents long clothes from getting caught in the gears.

- Helmets are measured to fit the head. A good one fits tightly and comes down to an inch (two and a half centimeters) above your eyebrows. It will also have straps that keep your helmet tight while still letting you move your mouth.
- Commuter helmets are one common type. They are rounded, made of foam and plastic, and can be found online or in retail stores where bikes are available. [2] X Research source
- Road helmets are elongated and often have vents. They’re also made with foam and plastic but are popular on roads or in competitive racing. Seek them online or in retail stores. [3] X Research source
- Youth (age 10-15), child (age 5-10), and toddler (under 5) helmets are all smaller commuter or road helmets. Toddler helmets are the only ones with more foam.
- Mountain bike helmets and professional sports helmets come with visors and neck bracing for tough off-road conditions. [4] X Research source
- Even in areas with safe cycling infrastructure, a helmet may still be a good idea, especially if the bike paths are not well maintained.

- If you have to go out at night, use retroreflective stickers on your bike and use bike headlights, and ride in a well-lit area.
- Certain bikes, such as utility bicycles, make the rider more visible in an upright sitting position and give the rider good visibility, even at night.
Mounting a Bicycle

- Short grass and smooth gravel are also surfaces you can use. Falls will hurt less, but these surfaces force you to pedal harder to move the bike.
- It might not be the best idea to learn to cycle on a commuter trail, especially during rush hour, as there will be dozens of other bikes and scooters as people head to where they are going.

- It is possible to remove the pedals to keep them out of the way, but it isn’t required.

- If your bike has brakes on the handlebars, test each one to see which controls the front and which controls the rear wheel. These can be switched by professionals.
- Notice how squeezing the back brake causes the rear wheel to skid. Squeezing the front brake causes the bike to pitch forward. [7] X Research source
- If your bike doesn’t have brakes on the handles, it should have backpedal (coaster) brakes. To brake, press down on the pedal closest to the back end of the bike as if pedaling backwards. [8] X Research source
- If your bike is a fixed wheel and hasn’t been modified, it has no brakes. Instead of braking, you will need to either slow the pace of your pedaling or skid by leaning forward and holding both pedals horizontally with your feet. [9] X Research source

- Feel the weight of the bike between your legs and try to keep it balanced as you lower yourself. Having feet on the ground prevents the bike from toppling while you acclimate.
- Maintain your weight in the center of the bike, evenly distributed between your left and right sides. Sit up straight instead of leaning.

- Before you have complete control, go where the bike goes. When starting, the bike tends to go to the side or in circles. Instead of stopping, let it go and try to maintain balance while it does. [11] X Research source
- If you are helping a child or friend, you can hold onto their lower back to help them stay steady while they practice.

- Going faster makes balancing easier, but don’t go so fast that you lose control.

- Putting your feet down too early while using the brakes stops the bicycle abruptly. Your momentum won't stop and you'll whack into the handlebars.
Learning to Ride on Slopes

- Keep your weight focused in your feet. Stay pressed against the seat, keep your elbows bent, and your body relaxed. [14] X Research source
- When you are confident you can coast to the bottom, try riding down with your feet on the pedals.

- Once you feel confident, bike halfway up the slope, come to a stop, and start pedaling upwards again.
Safety Information, Rules of the Road, and Things to Remember when Biking

Expert Q&A

- Learning is more fun with other people. For kids or other people who are afraid of falling, seeing other people learning and having fun encourages learning. Thanks Helpful 39 Not Helpful 7
- Bikes with gears are harder for beginners. If you have to use one, increase the gear number as you transition to steeper slopes. Thanks Helpful 33 Not Helpful 6
- Believe that you can do it, and pick yourself up every time you fall. Thanks Helpful 44 Not Helpful 10
Tips from our Readers
- If you think you aren't ready enough to ride a bike with two wheels, don't push yourself! You can't balance on the first try. Feel free to have someone to help you or use some training wheels while you get used to using the bike.
- Make sure you have adult supervision the first time you try to ride on the road. Go riding with friends or siblings if possible, since it's both safer and more fun to ride with a group.
- Don't brake really hard or you could fall off your bike and get hurt. Just ease the brakes on.

- After you've learned how to ride a bike, remember to learn about road safety, such as the dangers of speeding, dealing with cars, and obeying road signs. Thanks Helpful 20 Not Helpful 3
- Biking accidents are common and dangerous, especially in cities lacking safe cycling infrastructure. Wear a helmet to avoid head injuries. Wear padding to avoid scrapes and fractures. Stay off of high speed roads (20 miles per hour (30 km/h) or greater) where possible as those are often the most lacking in terms of safe cycling infrastructure. Thanks Helpful 6 Not Helpful 0
- Be aware of your local laws. Some locations require riders to wear a helmet and others don’t permit riding on sidewalks. Thanks Helpful 19 Not Helpful 6
Things You'll Need
- A bike pump for increasing tire pressure
- A helmet (recommended)
- Knee pads (optional)
- Elbow pads (optional)
- A flat surface
You Might Also Like

- ↑ http://www.bikeradar.com/us/beginners/news/article/how-to-teach-a-child-to-cycle-in-30-minutes-37033/
- ↑ http://www.helmets.org/types.htm
- ↑ http://guides.wiggle.co.uk/helmet-buying-guide
- ↑ http://www.outdoorgearlab.com/Mountain-Bike-Helmet-Reviews/Buying-Advice
- ↑ https://www.cityofmadison.com/BikeMadison/getBiking/10smartRules.cfm
- ↑ http://www.ibike.org/education/teaching-kids.htm
- ↑ http://www.bikexprt.com/streetsmarts/usa/chapter6a.htm
- ↑ https://aseasyasridingabike.wordpress.com/2015/05/12/coasting/
- ↑ https://www.outsideonline.com/1929501/why-i-dont-ride-fixie
- ↑ http://www.bicycling.com/beginners/tips/how-to-learn-to-ride-a-bike-as-an-adult
- ↑ http://www.nytimes.com/2013/06/30/magazine/the-terror-and-humiliation-of-learning-to-ride-a-bike-at-33.html
- ↑ http://www.sheldonbrown.com/starting.html
- ↑ http://marthasbicycles.com/articles/teach-your-kids-to-ride-in-one-easy-lesson-pg86.htm
- ↑ https://www.nytimes.com/2016/08/31/health/how-to-ride-downhill-on-a-bicycle.html?_r=0
About This Article

To learn to ride a bicycle, first find a flat, open area that’s far from traffic. Put on a helmet in case you fall, and consider wearing knee and elbow pads when you’re first learning. Place your bike on a flat surface, and adjust the seat so both of your feet can touch the ground while you’re seated. Before you try riding your bike, walk next to it and practice pressing on the brakes until you get a feel for how they work. Then, sit on your bike, place one foot on one of the pedals, and place your other foot on the ground. When you’re ready, push off with your foot that’s on the ground, and see how long you can glide on your bike without pedaling. Keep your eyes forward and look toward where you want to go, which will help you balance. If you feel yourself starting to tip, place your foot back on the ground to catch yourself. Keep doing this until you’re comfortable balancing on your bike. Then, do the same thing again, but this time start pedaling with your feet. Continue pedaling and steering in the direction you want to go. The faster you pedal, the easier it will be to balance. If you need to come to a stop, stop pedaling and press down on the brakes. Consider asking a friend to spot you as you practice pedaling farther distances! Keep reading to learn how to ride your bike on a slope! Did this summary help you? Yes No
- Send fan mail to authors
Reader Success Stories
Jun 30, 2017
Did this article help you?
Jun 3, 2017
Jul 26, 2021
Aug 8, 2017
Pikachu Riding
Dec 20, 2020

Featured Articles

Trending Articles

Watch Articles

- Terms of Use
- Privacy Policy
- Do Not Sell or Share My Info
- Not Selling Info
wikiHow Tech Help Pro:
Develop the tech skills you need for work and life
NEW! YOUR LOCAL RUNNING DROP
Get after it with nearby recommendations just for you.
BEST WEEK EVER
Try out unlimited access with 7 days of Outside+ for free.
Start Your Free Trial
Powered by Outside
A Pro’s Guide to Packing and Traveling With Your Bike
Looking for a step-by-step guide to packing your bike for a flight we've got just the ticket with this comprehensive guide from a well-traveled pro..
New perk! Get after it with local recommendations just for you. Discover nearby events, routes out your door, and hidden gems when you >","name":"in-content-cta","type":"link"}}'>sign up for the Local Running Drop .
Traveling with your bike can seem overwhelming. It certainly doesn’t fit underneath the seat in front of you or in the overhead bin. But when you compare traveling with your bike to the inconvenience of having to drop it with a shipping service, days or even weeks in advance of your travel, leaving it out of your hands and out of your control for an extended period, packing it up and flying it with you on the plane is a much more attractive option once you know how.
Packing your bike for travel is just like riding a bike: get the hang of it once and it soon becomes second nature. You might even wonder why you were so intimidated by it to begin with!
How to pack a bike box: Starting out
For starters, you’ll want to check with your airline to see what their policies are on bicycles. The good news is that an increasing number of airlines no longer charge a surcharge for a bike; they simply treat it as they would any piece of checked luggage, subject to the same size and weight restrictions. I highly recommend planning ahead and even selecting your carrier based on bicycle surcharges (or lack thereof). Compared to a shipping service, flying with your bike can be cheaper.
RELATED: Which Airline Has the Best Bike Fees?
Next, you’ll need to choose a bike box, bag, or case. There are a lot of options, starting with something as simple as a cardboard box. Beyond that, there are soft bags, hard cases, and hybrid cases. You’ll want to research how your bike will fit into each option. Some key questions to ask are:
- Do you have an integrated front end that is complicated or virtually impossible to dismantle?
- Are you an especially tall rider and will your larger frame meet the box dimensions?
- How many wheels does the case allow you to take and is carrying multiple wheel options important to you?
- Is the bag/box/case easy to store when not in use?
- Does it have wheels so you can roll it rather than carry it?
- Does it have handles making it easy to grab and lift into and out of a vehicle?
- How much does it weigh before you put a bicycle in it?
- What does it cost?
Your answers to some of these questions, coupled with how often you will travel with your bike, will help drive some of your decisions.
Choosing the best bike box for triathletes
Below is a chart with some pros (+) and cons (-) of each type of case and an example of each type:
**Two better known options for carrying multiple wheels are Biknd Helium (which can accommodate two wheelsets) and Bike Box Alan (which can carry three wheels).
I travel with a Bike Box Alan Triathlon Aero Easyfit Bikebox . I chose it for its durability, the protection it gives the bike in transit, and the ease of packing. There is minimal disassembly required. It also allows for a third wheel, which, in certain scenarios is a good option to have.
How to pack a bike box
Step one: travel with a clean bike.
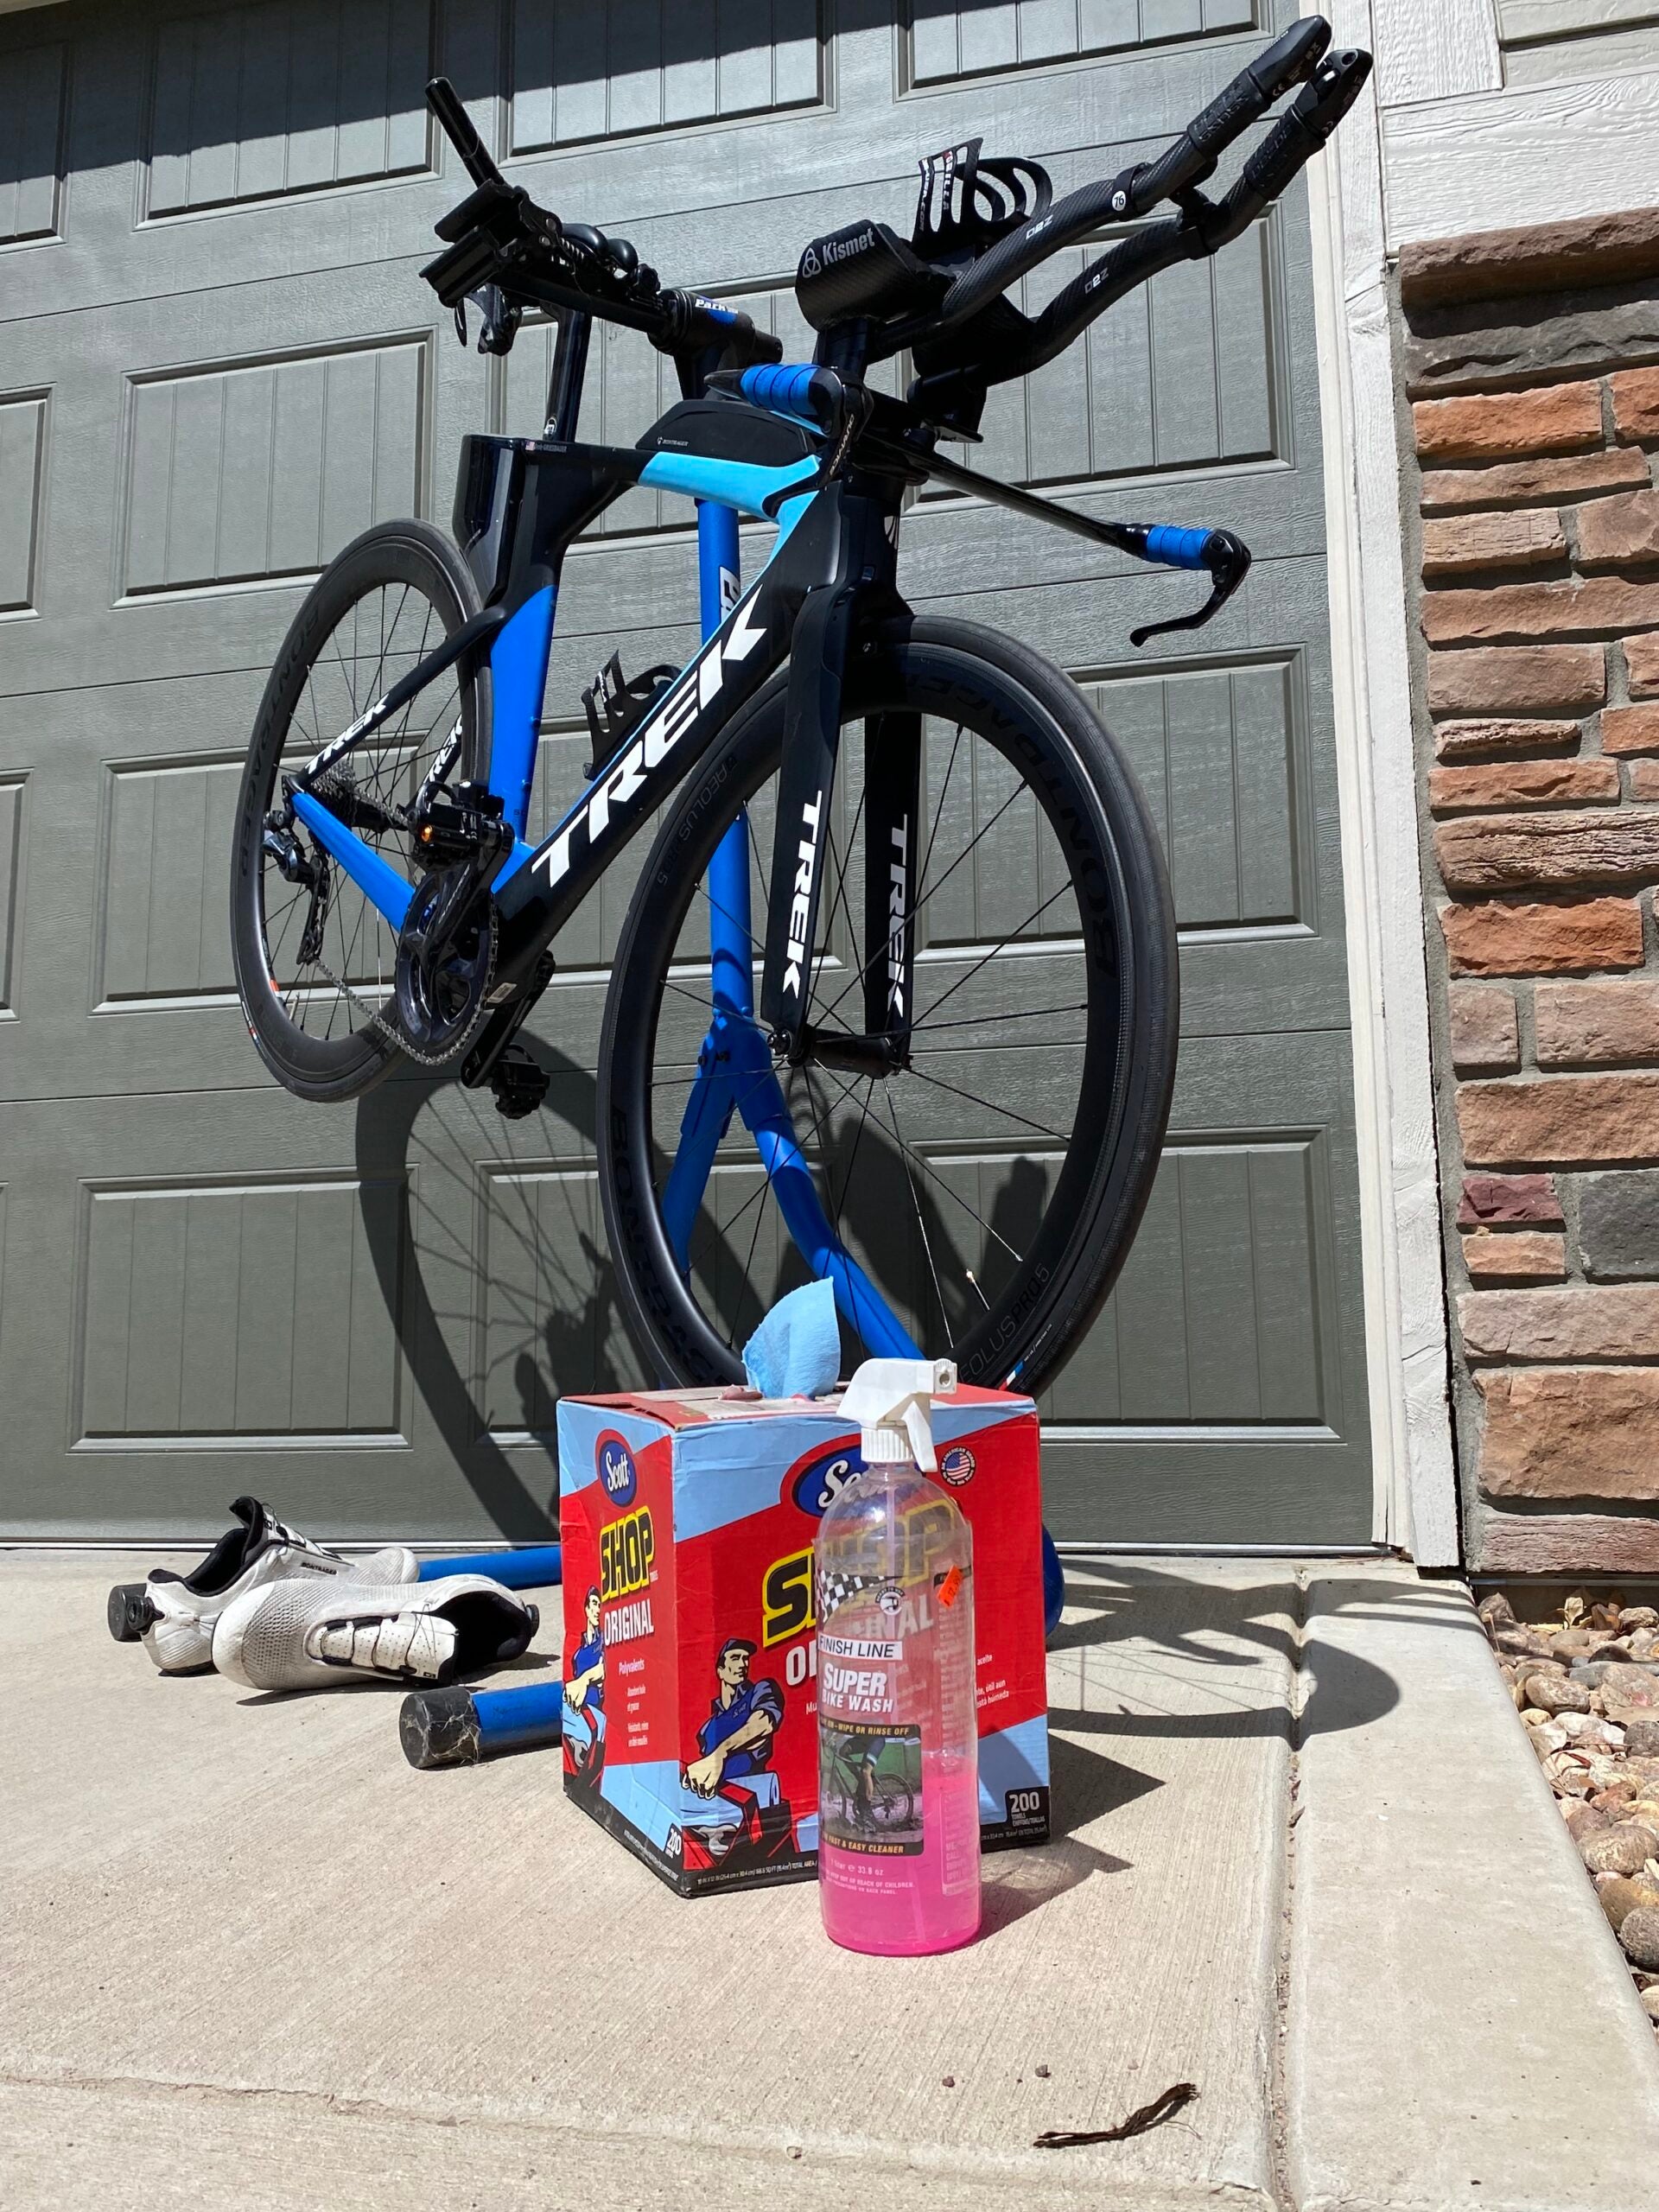
I like to start my process with a clean bike—a clean bike is a fast bike! Pre-race, I’ll often drop my bike off with my local bike mechanic for a tune-up. You’ve invested a lot in your race, so it’s best to make sure your bike is functioning as it should prior to travel. They will often clean the bike at the same time they tune it, so that’s a bonus. If I’m simply traveling with it, say for a training camp, I’ll still give it a good wipe down before I pack it up.
Step two: Mark all measurements
Before you disassemble your bike, make sure your bike is “marked.” Anything you take off the bike for packing (lowering the saddle or removing the seat post, for example), you’ll want to make sure you are able to rebuild the bike to the precise specifications you disassembled it from.
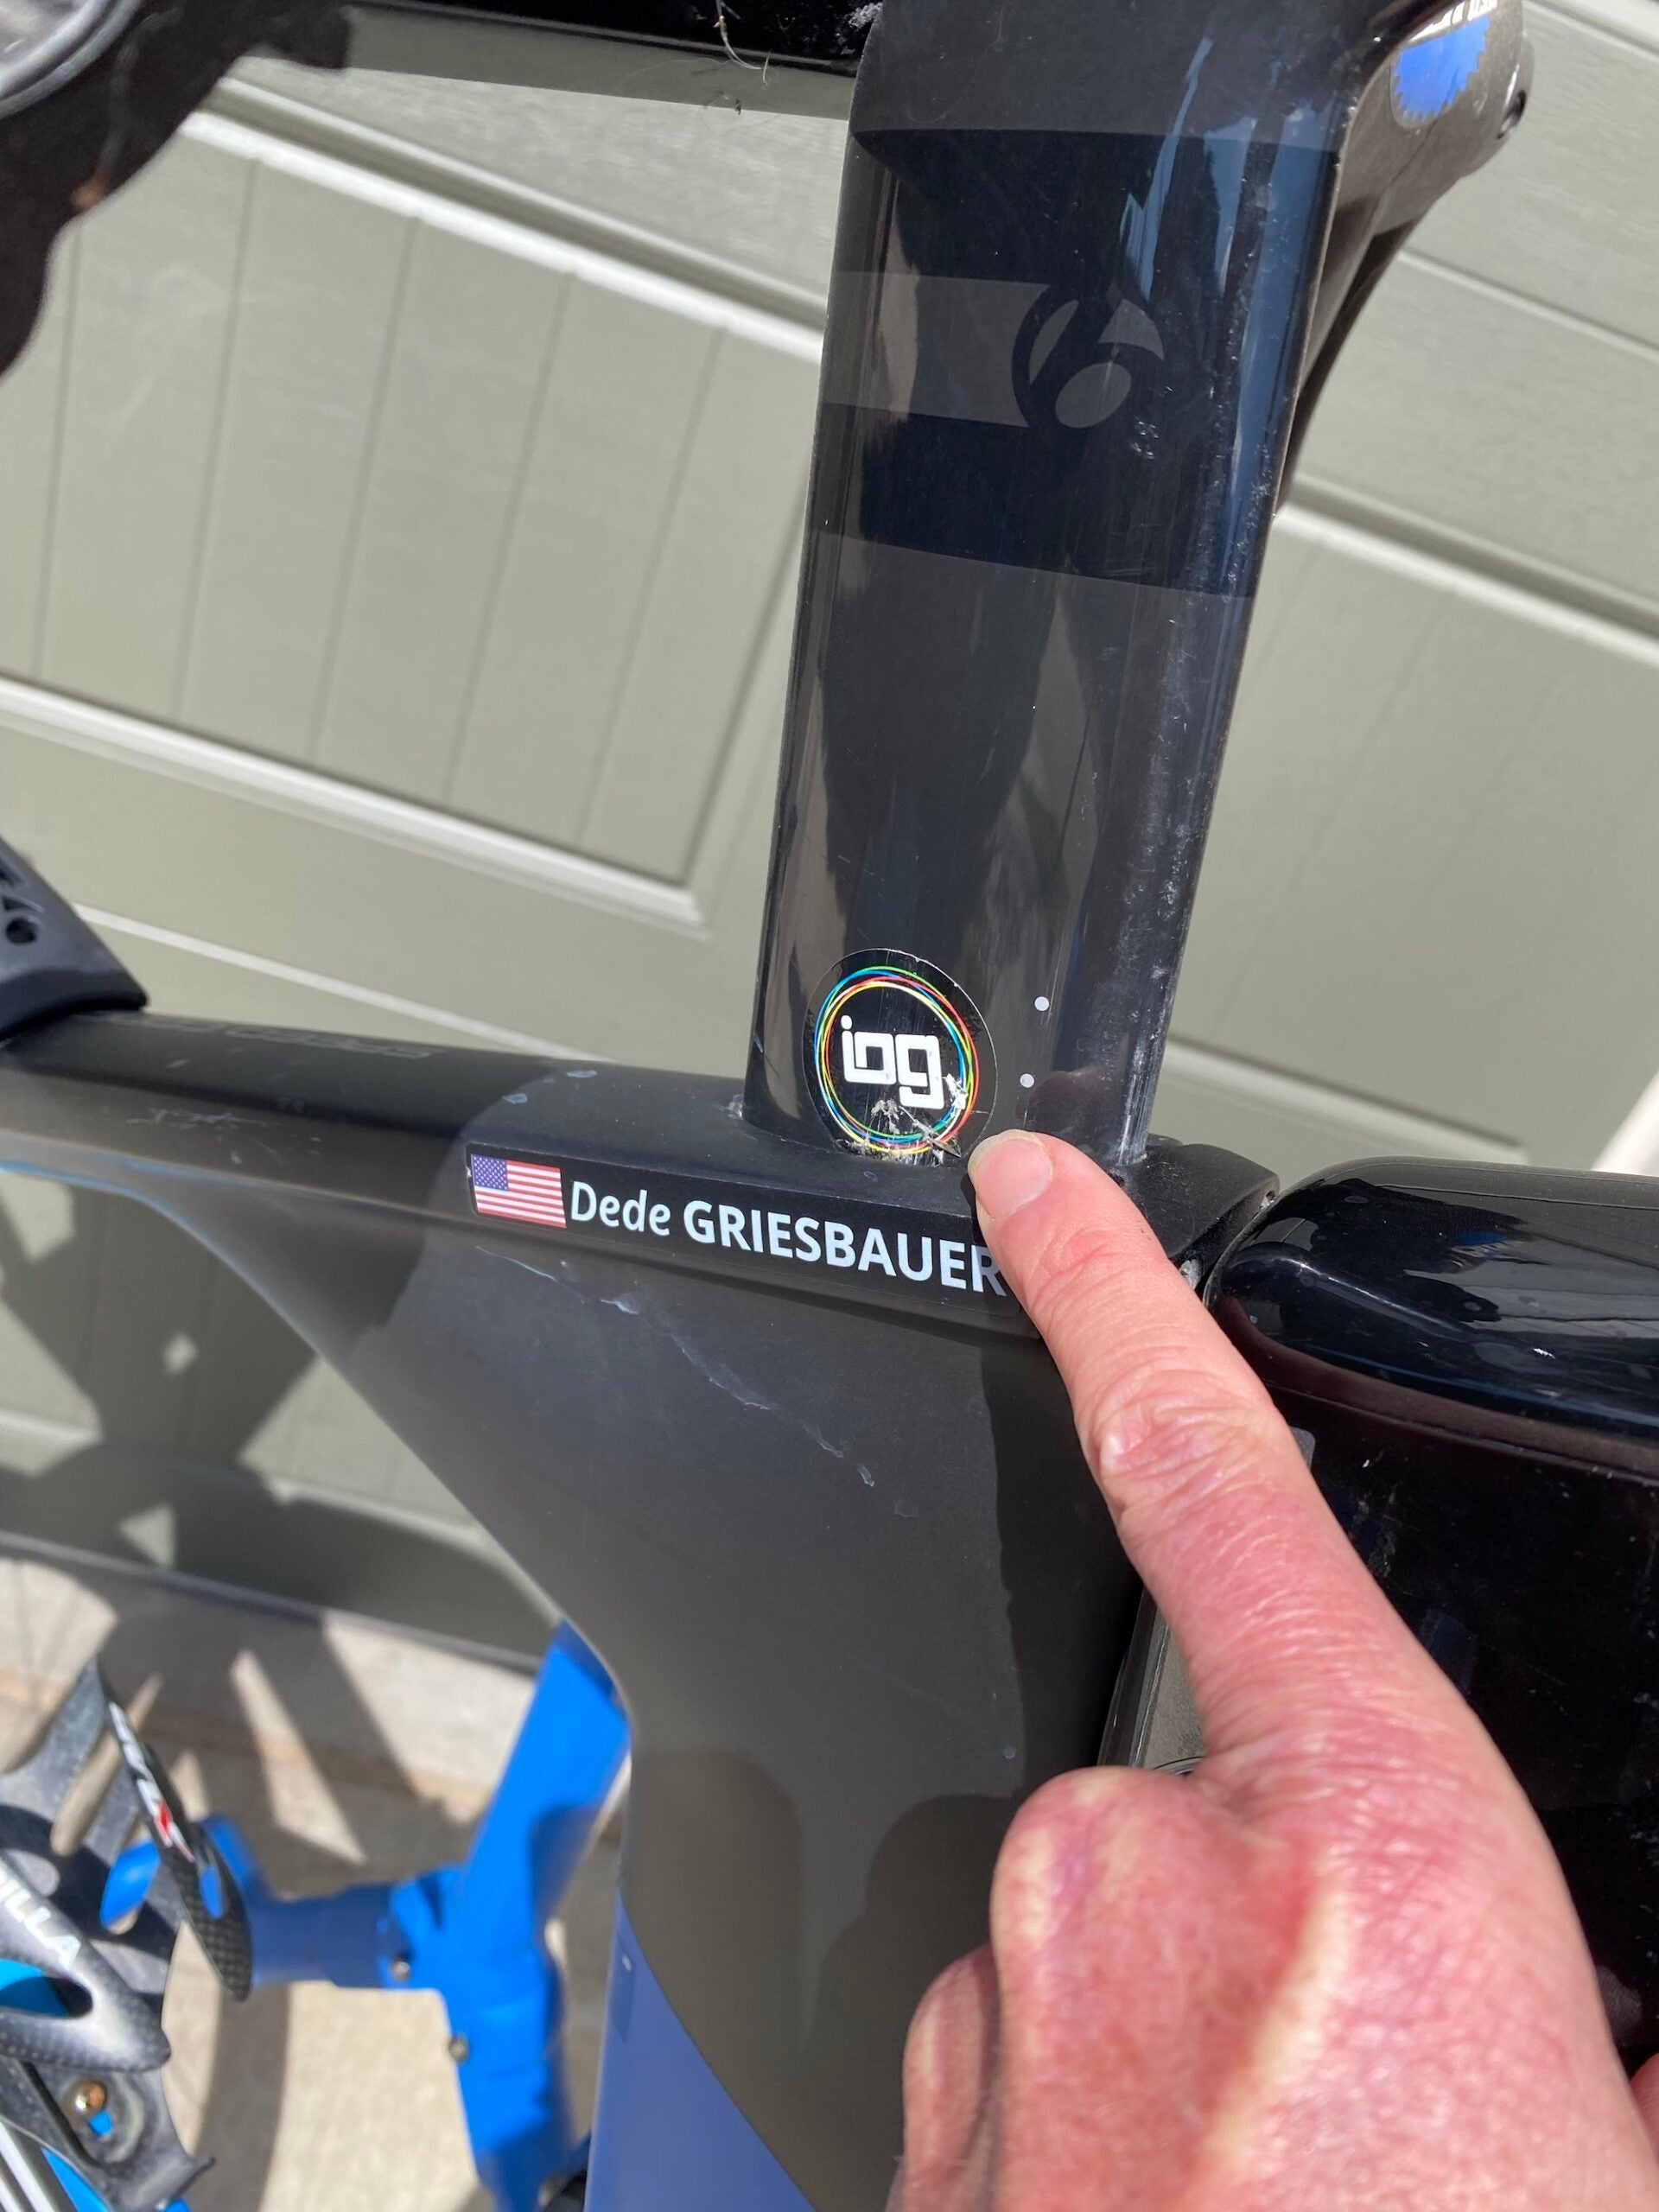
Step three: Remove CO2 cartridges
Also remember to remove all CO2 cartridges from your saddle bag or tool kit. The airlines prohibit CO2 cartridges on planes, and since the bike will be inspected by the TSA, they will remove any CO2 cartridges they find and leave you a nasty-gram, scolding you for it. Leaving them in can cause delays in your bike making it to the plane on time, so plan ahead and remove that CO2! You can purchase a race day CO2 cartridge at a local bike shop or at the race expo at your destination.
Step four: Have the right tools
Another piece of equipment that is good to have as you pack (and then rebuild your bike) is a torque wrench. A torque wrench enables you to tighten bolts to a precise amount. The different bolts on your bike, be it on the stem or seat post, require a specific amount of tension and a torque wrench allows you to dial that in precisely. Most bikes are labeled at each bolt with specific tension instructions, so while standard allen keys will work, a torque wrench will ensure you get the bolts tightened exactly as they were meant to be.
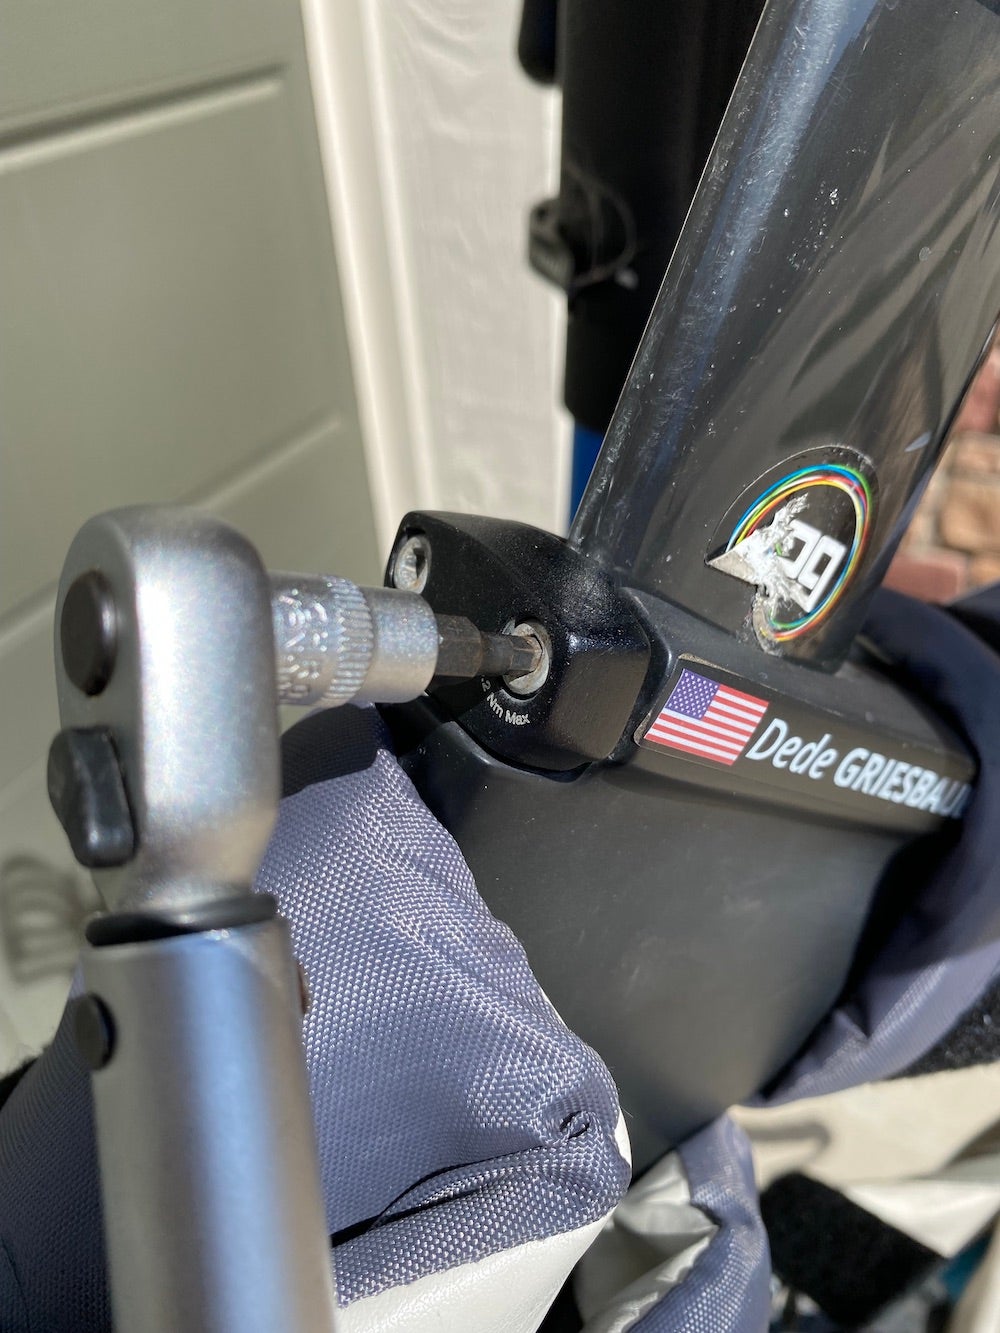
Step five: Pedals off
I start by removing my pedals. It’s always easiest to remove the pedals when the bike is upright and the wheels are on so that you have the leverage you need to loosen them. You need a simple pedal wrench, or an allen key. Pro tip? Always loosen the pedals by twisting the pedal wrench in the direction of the rear stays.
I wrap my pedals in some padding for protection (bubble wrap will do or use an old t-shirt) and then zip them up in my shoe case. If you don’t have a shoe case, a small drawstring bag is a great option. Logically, I like to keep the pedals together with the shoes for travel. This detail is certainly not mission critical, but “a place for everything and everything in its place” is a great approach to take on any bike packing mission.
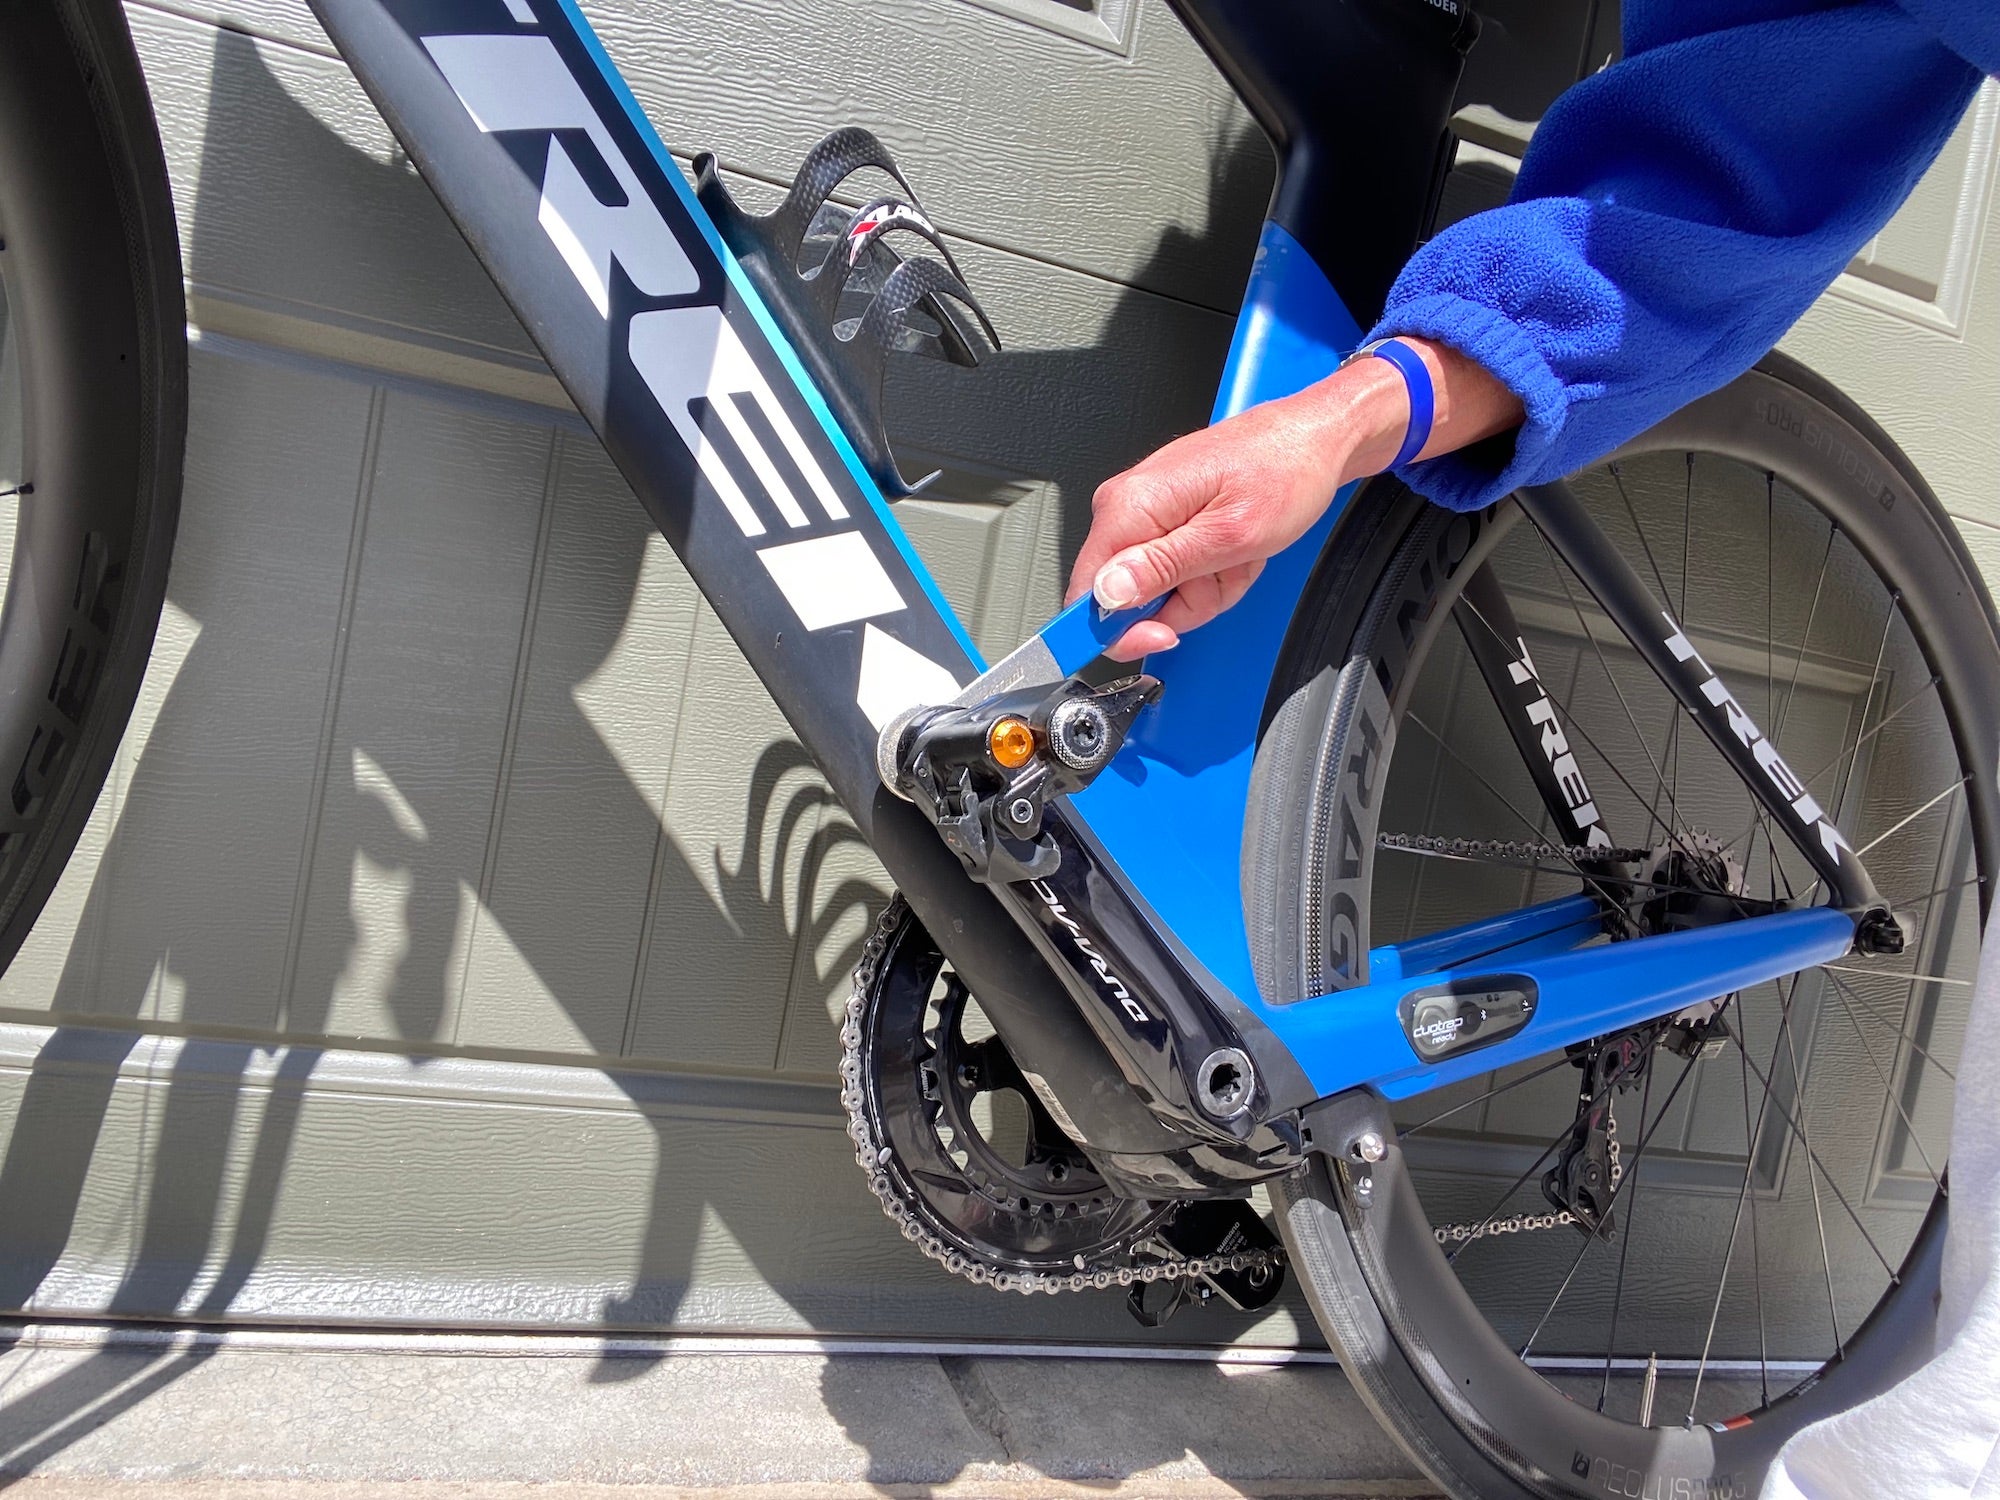
Step six: Wheels off
Next, I remove the wheels. Take the skewers out and place them in a gear bag. If you have disc brakes, put the thru axles into your dropouts and remember to put spacers into your disc brake calipers. Pro tip? If you don’t have a proper spacer, a small wedge of cardboard will do. Be sure to deflate your tires. You don’t need to deflate them fully, but removing pressure from the tires will prevent them from exploding due to pressure changes once you’re airborne.
Before I put my bike in the case, I take the extra step to pad it up. My case is highly durable, so I’m being extra cautious. If you are using a soft case, I highly recommend taking the extra step to pad the bike as some of the soft cases don’t provide the same protection to the frame as a hard case. Years ago, I was given a set of pads for my bike. They come in two sizes; the bigger ones fitting the top tube and down tube and the smaller ones fitting the fork and stays. Unfortunately, they don’t make these anymore, but if you head to your local hardware store or Home Depot, you can grab some pipe insulation foam noodles. They’re great for protecting your frame and they are easy to cut to size. Bubble wrap or pool noodles are other great options.
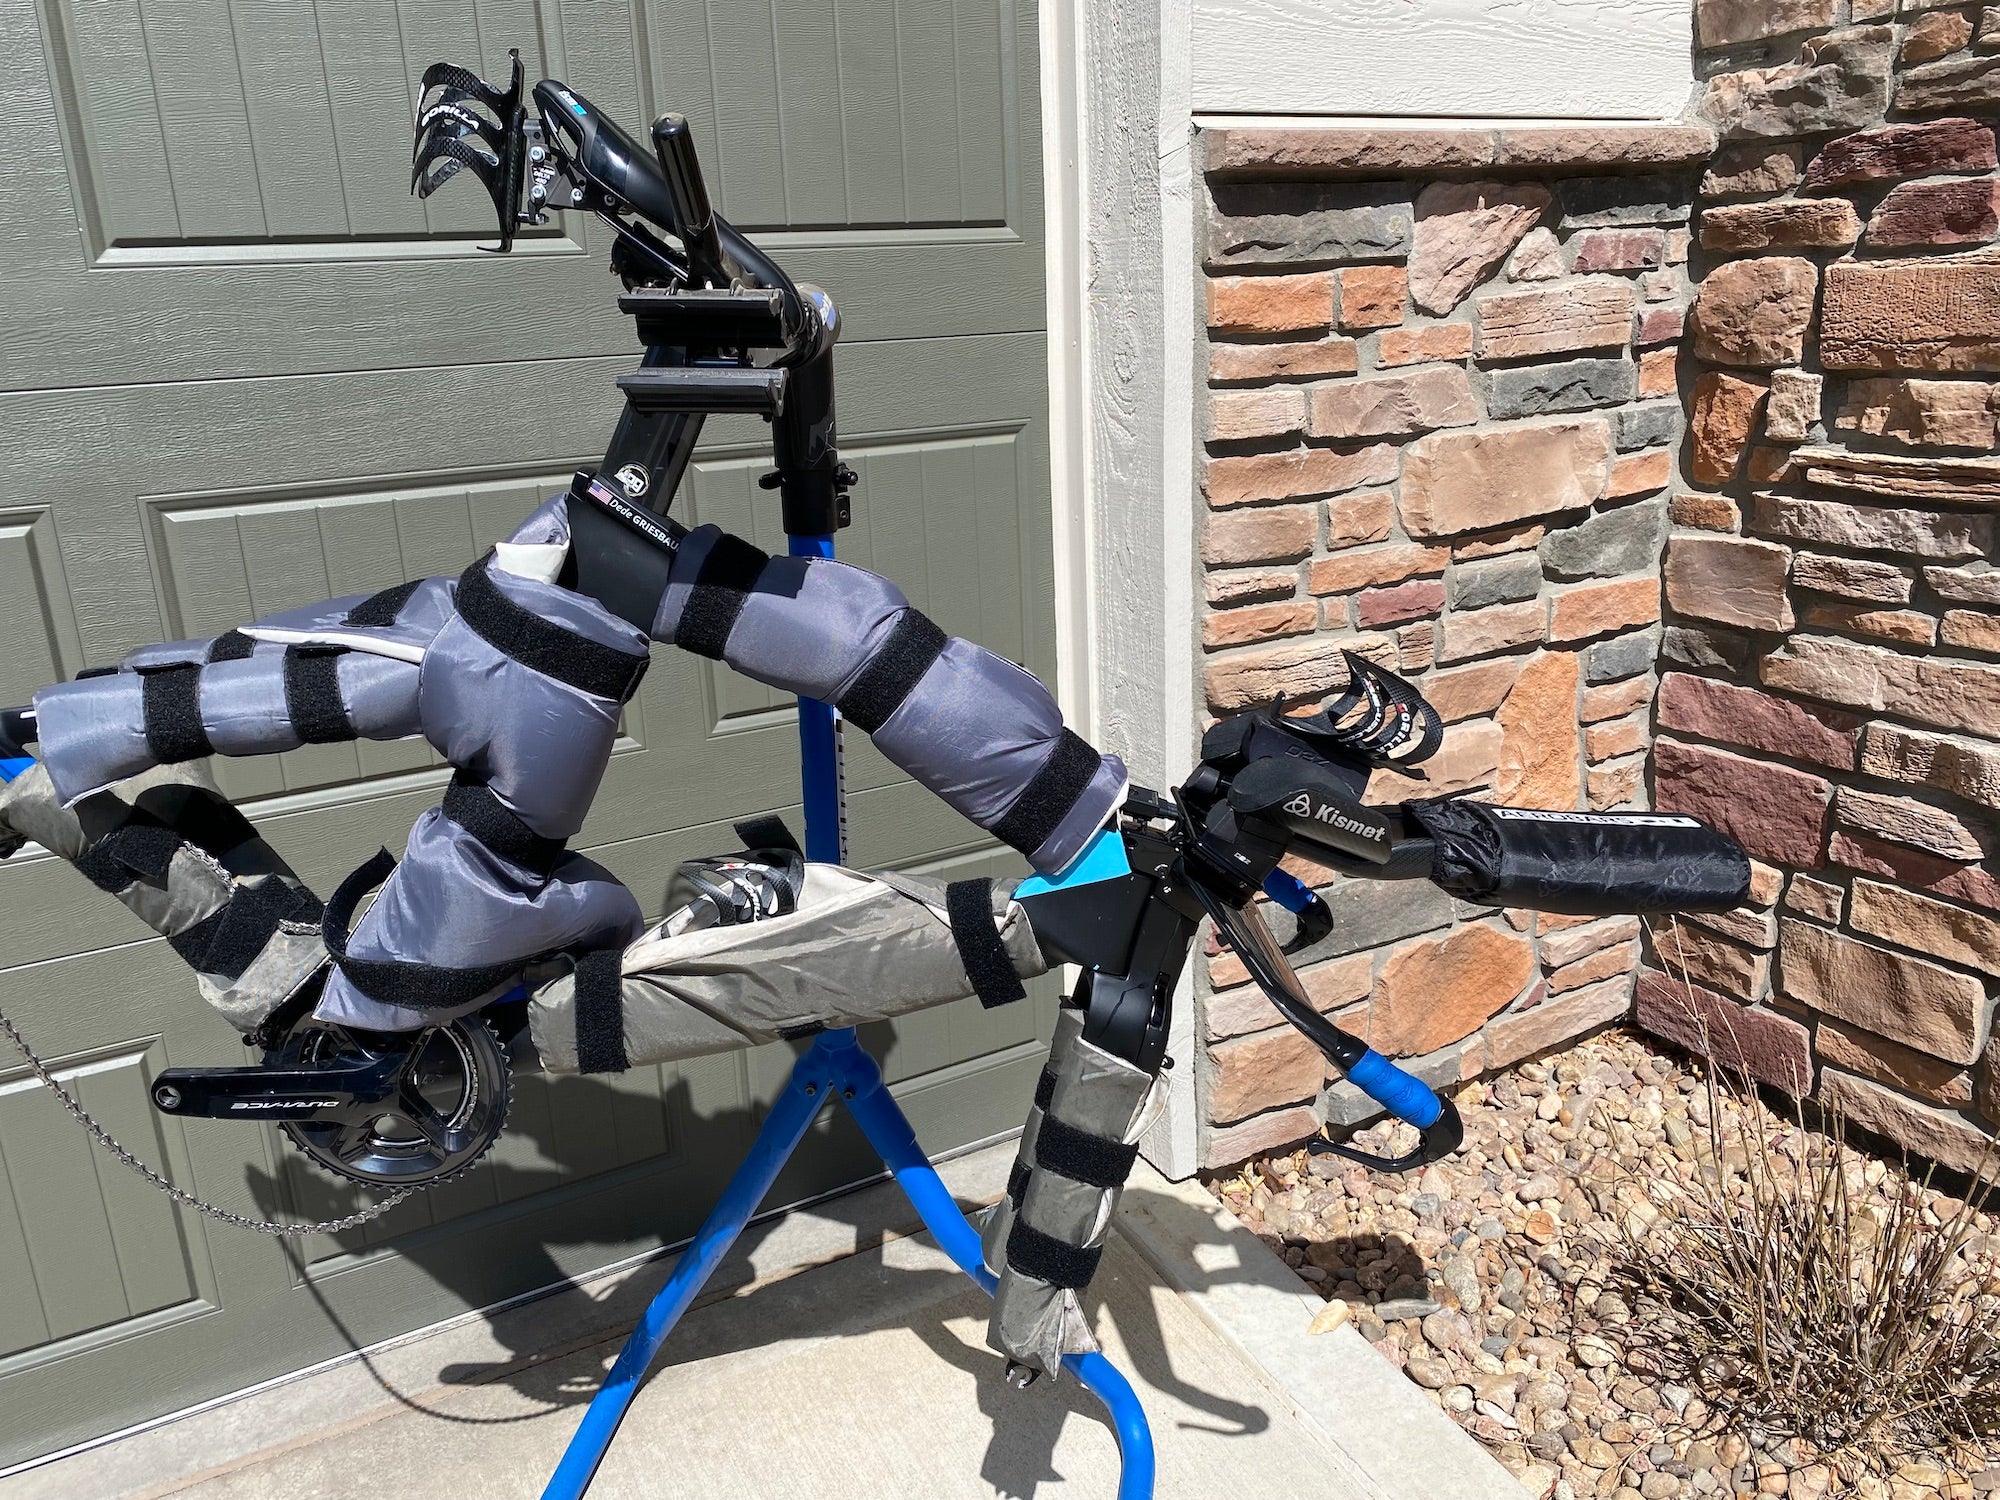
In order to fit my bike into my case, I need to lower my seat post, again, making sure my seat height is properly marked so I can return it to the proper height when I unpack the bike. That is the only adjustment I need to make prior to packing, which is why I chose this particular bike box. Many other bike boxes will likely require you to remove the seat, pull off or rotate the handlebars at the stem, and/or detach the back derailleur.
Removing your rear derailleur is easily done, again, with an allen key. You may also need to adjust your front end, either shortening your extensions, or even removing your aero bars entirely or taking off your handlebars at the stem . Again, make sure all angles and heights are marked and measured so you can build it back to its original fit. Wrap up both your derailleur and handlebars as well, and ensure they’re tightly secured and not loose in the bike box.
Pro tip with the bolts on your bike: righty-tighty, lefty-loosey. Tighten bolts to the right. Loosen them by turning left. If you are using a torque wrench, there will be a switch on it depending if you are tightening or loosening your bolts.
You might also consider unplugging your electronic shifting. If the buttons get depressed during transit, it can drain your battery. Alternatively, or in addition to, I think it’s a great idea to travel with your charger anyway. It’s a small addition to your gear bag that can resolve a lot of headaches on the other end of travel.
Once your bike is prepped for packing, then follow the instructions for your specific box, bag, or case. If you are a first-timer? Ask an experienced friend or your local bike shop to help walk you through it for the first time. Give yourself a test run a few weeks before your event so you can make sure you have all the right tools and steps.
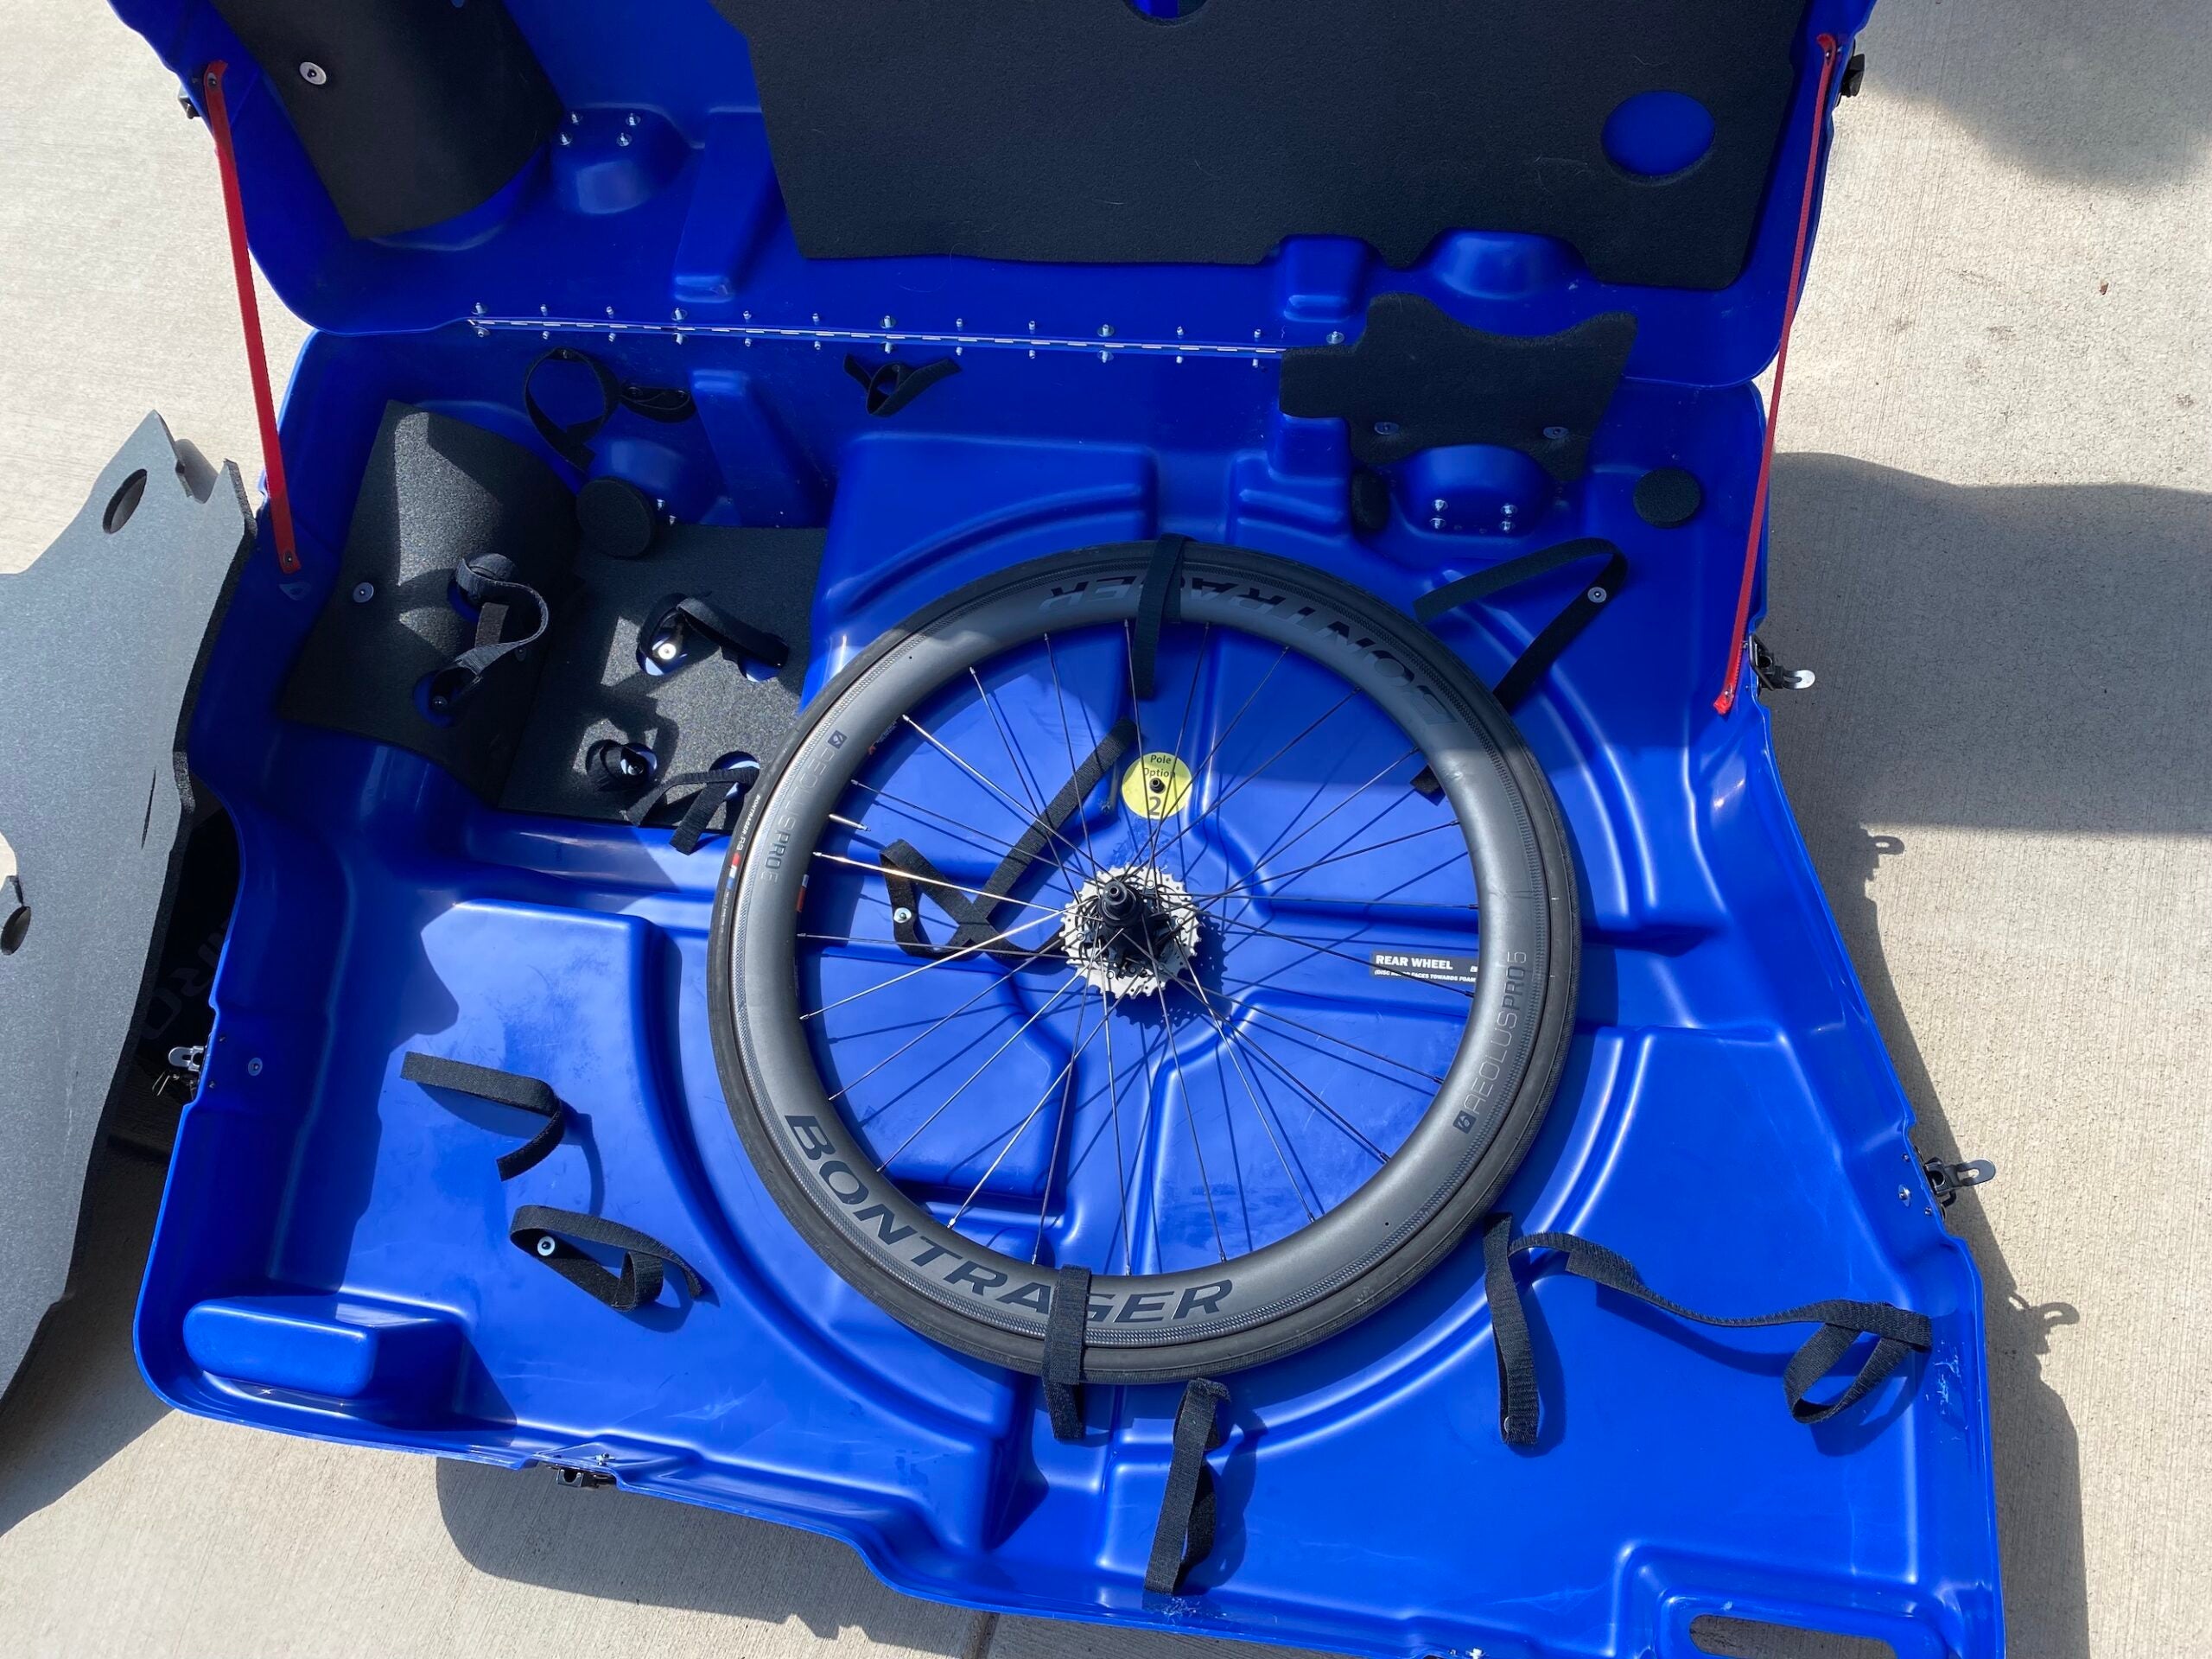
In my case with a Bike Box Alan, I lay a wheel in the bottom of the case (as pictured above), then a layer of protective foam. I place my padded frame on top, securing it to the case with the Velcro straps. I tuck my shoe/pedal bag in under the aero bars.
Pack other gear carefully
Some people will pack a lot in their bike bag or box, e.g., a helmet, wetsuit, clothes, etc. If you do that, just be mindful of the weight it adds. Most airlines will have a 50lb weight limit (70lbs for International travel or for some classes of premium passengers), so if you over-stuff, you may pay the price (quite literally). Also, because TSA individually inspects the bike, the more you put into the box, the more they have to pull out to inspect. It’s a terrible headache when you try to jam 67 items into your bike box and have the TSA only remember to put 66 of them back in!
I put the front wheel into the top of the case, affixing it with the Velcro to hold it in place. I place the second layer of foam protection between the wheel and the frame, and then close the box, making sure that the crush poles line up.
Handle with care
I add a couple of “Fragile” stickers to the exterior of the case. I don’t know that they do any good in encouraging the TSA to be slightly more careful with it, but nevertheless, I find it brings some peace of mind. It’s a good idea to place identification both inside and outside the box. Bag tags easily get knocked off, so it’s always prudent to put your name and contact information on the inside of the case as well. I affix a TSA lock to the case (some cases will include a TSA lock on the case itself)—and off we go to the airport!

More top pro travel tips
When I’m traveling with my bike, I like to allow plenty of time at the airport because the bike gets individual TSA screening. If you want to make sure your bike makes your flight, I suggest doing the same. I don’t use a tracking device like an AirTag in my bike box, though it’s not a bad idea. My preferred airline (United) has a tracker on their app, which I refresh obsessively until I see the luggage has been loaded onto the flight.
Other tips for flying with your bike? Direct flights are better than connections, obviously minimizing the number of times the bike changes hands. And if you are forced to make connections? I pack my patience and choose more liberal connecting times. It’s one thing for me to sprint through an airport to make my connection, but it’s absurd to assume baggage services will do the same! So instead of the 20-minute connecting flight, I’d always opt to wait the extra hour in the airport. It gives you a greater probability that your bike makes the connection and arrives when you do.
If you are hiring a car during your trip, make sure the car you are renting can fit your bike box, bag, or case. Pro tip? In the “large vehicle” category, pickup trucks typically rent for less than SUVs and minivans. You can save a few bucks that way with most rental car companies.
When you arrive at your destination, your bike will arrive, most often, to the oversized luggage area, so if you are waiting forever at the standard carousel and don’t see it, don’t panic. Ask where oversized luggage is delivered, and you will likely find it there. Bikes almost always come off last, so again, be patient.
I always take a moment to open my bike box for a quick inspection before leaving the airport. If there is any damage to the bike or the box/case, it needs to be reported immediately and it’s easier to manage it while you are still at the airport.
In the event something does happen to your bike or your case, again, some advanced planning goes a long way. Consider purchasing luggage insurance or check with your homeowners/renters policy. Certain credit cards, as well, will cover your luggage, so it’s worth checking your specific policies for details.
It might all seem like a lot, but flying with your bike isn’t difficult. Having the right tools, knowing the basics about your bike, knowing airline policies, and booking your travel thoughtfully can make it a breeze and you have the additional peace of mind that your bike is never too far away. Plus, it’s a super fun game at the airport when fellow passengers ask, “What’s in there?” Make them guess. You’ll be highly amused by what they come up with.
RELATED: 5 Steps to Ensuring Your Bike is Race-Ready After Travel

How to plan a bike route for your commute to work: Seven tips and tools you need to know about
A s a driver you're likely to know the fastest commute. However, if you've decided to ditch the car and cycle to work this route may not be so well-suited to two-wheels.
While experience will tell you areas where you can perhaps steal a jump on the stalled traffic, you can almost certainly make your commute easier and less stressful by finding some alternative routes that bypass them altogether. You’ll probably find they're faster, that you can keep riding steadily rather than stopping and starting for lights and junctions and that you’ll not be riding through traffic fumes either.
Here are seven suggestions to plan a commute to work that’s easier, nicer, more comfortable and more enjoyable so that you continue to reap the many benefits of commuting by bike to work . Trying a few different route options will help keep your commute more interesting too.
Our top tips on how to plan a bike route for your commute to work
1. use route planning tools for cyclists.
The best route for a driver is probably not the best for a cyclist. Google Maps has the option to plan a route specific for cycling, so it’s worth seeing the options that it suggests and whether any are faster or quieter than riding the route it suggests for a car.
More and more towns and cities have segregated cycle lanes alongside roads. These often let you get along faster than mixing it with traffic, so it may be worth a slight detour to ride one of these.
You might find a B or C road parallel to an A that is shorter and has less traffic or fewer stops for traffic lights. Once you get into urban areas, there may be a network of quiet residential streets that you can take to bypass busy main roads into town. Since they often have traffic calming measures, you may be able to travel faster than a car can be driven.
Beyond Google Maps, there are other resources for cycling commuters, like Sustrans’s maps of the National Cycle Network . There may be traffic-free bike paths that go where you need to get to. CycleStreets is another option to map out a commuting route. It gives you three options: quietest, fastest and balanced, so you can pick and choose between routes or mix them up on different days.
2. Avoid hills
Cyclists love climbs , but they might not be the best option if you’re commuting wearing a cycling backpack with a load of kit you need for work or if there’s lots of traffic trying to pass you. You may find that a slightly longer route that bypasses a climb is faster and nicer than a more direct route that has you grinding up a steep incline only to have to take it cautiously on the other side to keep with the flow of traffic.
That said, one of reasons an electric bike makes a perfect bike for commuting is that you don't have worry about your route being packed with hills as the motor assistance will make things a little easier.
3. Check cycling heatmaps
Cyclists are adept at finding cunning routes that are quieter and faster than main roads. You can track these down via heatmaps of where cyclists ride most frequently.
Millions of kilometres of riding are logged on Garmin devices , so Garmin Connect has some of the most complete heatmaps available. It’s free to set up an account and you don’t need to own a Garmin device to use its route planner.
Strava has just as much heatmap data . You’ll need to pay for its route planning functionality, although you can get a free trial period. Other cycling computer brands like Hammerhead also have heatmaps available to help you plot a route.
4. Look for cut-throughs
If you study heatmaps you’ll probably see some routes taken by riders that look impossible on a standard map. There are often alleys, paths or just bollarded roads that a car can’t get through but that it’s perfectly possible to ride or walk your bike over and that get you quickly from one area to another, maybe between backroads or across an open area or park.
You may be able to spot options yourself by using Google Street View, checking either end of a potential shortcut. Google’s satellite imagery can help too. Even if you can’t ride a cut-through, it might still save you some time.
5. Go off-road
Taking it further, you may find that a stretch of off-road riding can get you to work faster than a road. You may find that it’s tarmacked or paved with hard, compressed rock and so relatively dry and fast to ride. Even if it isn’t, it may stay relatively dry all winter.
Canal towpaths are another great option to get you where you want to go. They often lead right into the centre of a town and may be metalled and easy to ride. You can pop back onto a street at a bridge that’s nearer to your destination.
A gravel bike with chunky tyres is ideal for this sort of riding, but many hybrid bikes have clearance for wider tyres with plenty of grip. Equally many of today's road bike allow for wider tyres of 30mm or more, which might be sufficient for you to tackle some off-road sections in relative comfort.
6. Switch trains strategically
Thanks to the vagaries of nineteenth century railway construction in the UK, you’ll often find train stations on different lines that are only a few minutes' bicycle ride apart. You may find that by getting off at one station and riding to a different line you can get on a train that goes nearer to your destination than by taking one train and having to ride from a stop that’s further from your destination.
You might also find that a cycle ride from home will take in quieter roads and get you to a line that takes you closer to your workplace, rather than going to the nearest station and having a busier ride in town.
7. Keep it fresh
Cycling offers you lots of options to add variety to your riding. Alongside varying your route, there’s nothing like keeping a record of how far and how fast you’ve ridden to keep you motivated. So a cycling computer or just a cycling app on your smartphone is a great tool and will usually automatically feed your data into an app like Strava so you’ve got a running total of your rides.
Strava also lets you set up segments on your ride, so you can see how fast you’ve ridden parts of your commute and challenge yourself. Ride some segments as fast and slow intervals and you can add some training to your ride.
If you're looking for some easily completable efforts to mix up your commute, try this 'big gear minutes' cycling workout which improves your fitness by specifically working to increase your pedalling force.
Komoot and Strava let you embed photos and other media, to keep a record of your rides. Take a photo every week and you can see how things change through the year.

Home Explore France Official Tourism Board Website
- Explore the map
Discovering France by bike: instructions for use
Inspiration
Cycling Tourism

Reading time: 0 min Published on 25 October 2023, updated on 17 April 2024
With 26,115 kilometres of cycle routes and greenways, France is the world's second most popular destination for cycle tourism. And the champion when it comes to inventing great escapes to discover nature, heritage and local delicacies. Climb the mountains of the Alps or the Pyrenees in the wake of the Tour de France, stroll along the banks of the Loire between châteaux and vineyards, pedal along the coast or explore towns and cities by bike... We explain how to organise your touring trip, cycle in town, and book suitable accommodation and services. Saddle up!
1. plan your cycling itinerary
Unless you want to pedal with your nose to the wind as and when you feel like it, it's best to organise your cycling trip in advance so that you can make the most of it. Whether it's a weekend, a day trip, a mountain bike tour, a route specially adapted for families or a long-distance tour, the France Vélo Tourisme website lists the various cycle routes available in France: Eurovélo routes, national cycle routes, greenways, cycle paths, etc. An interactive map and search engine enable you to find the route you're looking for. An interactive map and search engine allow you to choose your route (a loop or a one-way trip), depending on your technical level (beginner, family or experienced cyclist), duration or theme (châteaux and monuments, in the heart of vineyards, in the mountains or by the sea). The websites of the regional and departmental tourist boards are also full of information to help you plan your cycling trip!

Take your own bike or hire one locally?
Each solution has its advantages. Cycling with your own bike is reassuring for experienced cyclists, but it has to be transported. Hiring a bike is more suitable if you don't want to worry about transport or if this is your first experience of travelling by bike.
Travelling with a bike
By train The train is the most practical mode of transport for cycle tourists. Some TGV lines have spaces reserved for bicycles that have not been dismantled, as do "Ouigo classic trains" (€10 supplement) and Intercités trains (€5 to €10) and Intercités night trains (€10). Booking is compulsory on these lines. Reservations are not compulsory on most TER lines (with some exceptions). It is also possible to travel with a folded or dismantled bicycle on the TGV Inoui and Intercités lines (at no extra charge) and on the Ouigo Grande vitesse and Ouigo train classique lines (booking required, with an extra charge of €5). The bicycle must be placed in a cover measuring no more than 90 x 130 cm. Recumbents, tricycles, tandems and trailers are not permitted. During the summer (from June to September or in July/August), special services are available on trains to increase capacity for transporting bicycles. Travelling by train with a bicycle
By bus Some bus companies accept bicycles, such as Flixbus, on condition that they are packed or placed in covers (extra charge of 9 euros), or BlaBlaCar Bus (in a cover, with a maximum weight of 23 kg). It is generally possible to transport bicycles by air, although each airline has its own rules (weight, size, pricing, etc.). Travelling by Flixbus coach with your bike Travelling by BlaBlaCar bus with your bike
By boat You can also travel by boat, usually on ferries, but also in summer on boats or ferries between the mainland and the islands (check with the shipping companies beforehand). For a nice roaming tour, you can also opt to hire a barge, especially with your family. It's an ideal way of combining a soft mobility trip with cycling!
Hire a bike
You can book a "one way" hire (you hire the bike in one place and return it in another) from a number of hire companies, particularly on certain cycle routes.
- Good to know : whether you choose to travel with your own bike or hire one, you can use luggage transport services (Bicybags, La Malle Postale, BagaFrance, Loire Vélo Nature, Bag Transfert, DeliverBag, etc.).
if the sunny days are making your legs tingle, saddle up! In the land of the Tour de France, there is no shortage of beautiful escapes. With 22,800 km of cycle routes and greenways, 5,500km of regional tourist routes, 3,000 road and mountain bike circuits inviting you to enjoy gentle pedalling as a couple, with your family or with friends. In the countryside, along a canal, by the sea, in the vineyards or in the mountains, from Northern France to the Côte d'Azur and from Brittany to Alsace... here's a small selection of the most beautiful tours and detours and discover France by bike.

Book accommodation, restaurants and other dedicated services
To travel by bike in optimum conditions, cycle tourists can use service providers with the "Accueil Vélo" label, all of which are listed on the France Vélo Tourisme website . More than 7,000 are listed: accommodation, restaurants, cycle hire and repair services, tourist offices and tourist sites. These businesses make a number of commitments: they must be located less than 5 kilometres from a cycle route, have facilities for cyclists (secure bike shelter, repair kit, plug for recharging, etc.), provide dedicated services (luggage transfer, washing and drying of clothes, bike washing, etc.) and offer a personalised welcome to cyclists (advice, weather, itineraries, etc.). The accommodation listed includes campsites, guest houses, hotels, unusual accommodation, self-catering cottages, etc. A community platform offers (with a subscription fee for the first year) home-stay accommodation for cyclists, and the Fédération Française de Cyclotourisme also lists the best places to stay. Find a restaurant close to cycle routes Search for "cycle-friendly" accommodation near cycle routes
2. Cycle routes in France

In France, each region offers an infinite number of routes to explore by bike, mountain bike or electric bike, as well as long-distance routes combining véloroutes and "voies vertes" (greenways) to discover the natural riches and heritage of the region: The Loire à vélo, along the king of rivers and his châteaux, the ViaRhôna, from Lake Geneva to the Mediterranean, the Vélodyssée, from the Basque country to Brittany or the Vélomaritime from Hauts-de-France to Finistère... Depending on your state of fitness and your desires, you can cycle part or all of them, unless you want to emulate the Tour de France riders and embark on a grand loop! Gourmets can also take advantage of the cycling and cheese routes : over 8,000 kilometres of routes and 1,500 cheese-making sites to cycle and enjoy!
Some not-to-be-missed cycle routes : La Loire à Vélo en Val de Loire the ViaRhôna from the Alps to Provence the Vélodyssée from Brittany to the Basque Country the Vélomaritime from Hauts-de-France to Brittany via Normandy
In towns and cities, cycling is a great way to get from one tourist site to another and around the surrounding area. Numerous improvements have been made in recent years to make French towns and cities even more accessible to cycle tourists, and the network of dedicated lanes is constantly expanding. All the major cities and many medium-sized towns have public bicycles available for hire (including long-term hire) at stations, based on the Vélib' model installed in the Paris region (1,443 stations in Paris and the surrounding area) and in 61 communes, with a fleet of almost 20,000 bicycles, 40% of which are electric (€1 for the first 30 minutes, €2 for each additional 30 minutes). Apps such as Weelo or Lime can also be used to hire electrically-assisted bicycles based on location. As well as the themed cycle tours and other bike treasure hunts on offer in Paris and many other major French cities, there are also long-distance routes such as the véloroutes that criss-cross the cities: in Paris, for example, you can cycle the Scandibérique route linking Belgium to Spain!
- Self-service bike hire schemes in France's major cities: Vélib' in Paris Levélo in Marseille Vélo'V in Lyon VélôToulouse Vélobleu in Nice Bicloo in Nantes Vélhop in Strasbourg V3 in Bordeaux V'Lille Star - le vélo à Rennes
4. Learning the rules of road safety
Before taking your first turn on the pedal, it's vital to know the rules of road safety, especially in town where cyclists share space with pedestrians, motorised two-wheelers and cars. On the French road safety website , visitors can consult a few tips for good cycling behaviour and download a full information leaflet.
- Good to know : helmets must be worn by children under the age of 12, whether drivers or passengers, and the use of devices likely to emit sound (earphones, earpieces, headphones) is prohibited on pain of a fine of €135. It is advisable to wear light colours, a hazard marker to prevent motorists from approaching, rear-view mirrors and trouser clips. Outside built-up areas, cyclists and their passengers must wear a certified retro-reflective jacket at night and in poor visibility.
For further information, please contact
France Vélo Tourisme Vélo en France (Fédération française de cyclotourisme) Vélo et Territoires
Also worth reading:
- Getting around France by soft mobility
- Getting around by car: where to recharge your electric vehicle in France
- Our favourite routes for cycling around France
- Cycling and cheese: 7 gourmet cycling itineraries
- Gentle cycling, everything you need to know to make the most of it
By Rédaction France.fr
The magazine of the destination unravels an unexpected France that revisits tradition and cultivates creativity. A France far beyond what you can imagine…
Get in touch with Nouvelle-Aquitaine in South West of France
Biarritz-Basque Country

Join the Accor TRIBE in Paris newest hipster hub
Loire valley, champagne and beyond, the perfect blend.
Alsace and Lorraine
Paris Region is the home of major sporting events!
Tour de france : final stage of glory in paris, 100% nature road trip in auvergne-rhône-alpes with worldelse.
Alps - Mont Blanc

How I never quite made it to Chambord Chateau
Loire Valley

EuroVélo 3 - La Scandibérique dans le Loiret

SORT CONTENT BY LOCATION
CLICK TO DRILL DOWN BY COUNTRY/PROVINCE
Your browser is ancient! Upgrade to a different browser or install Google Chrome Frame to experience this site.
Inspiration
- Bikepacking 101
- Join/Support
- View Latest/All
- Bikepacking Videos
- Your Stories
- Rider's Lens
- Field Trips
Popular Tags
- #bikerafting
- #Tour-Divide
- #family-bikepacking
- #winter-bikepacking
- #1Q5V (1 Question 5 Voices)
Gear/Reviews
- Bikepacking Bags
- Camping Gear
- Accessories
- #Editors-Dozen (Our Favorite Gear)
- #Gear-of-the-Year
- #MYOBG (DIY)
- #Decade-in-Review (Best of All Time)
The Gear Index
Latest indexes.
- Mini Panniers
- Saddlebags & Top Openers
- Cargo Cages & Anything Bags
- Gravel Bars
- Drop Bar 29ers
Bikepacking Bikes
- Rigid & Plus Bikes
- Drop-bar & Gravel
- Full Suspension
Rigs & Roundups
- Rider & Rig
- Race/Event Rig Roundups
- Worthy Builds
- Handbuilt Bikes
- #29+ (29-plus)
- #vintage-mountain-bikes
- #cargo-bikes
- Readers' Rigs (Dispatch)
- New Bikes (Dispatch)
Plan Your Trip
- Bikepacking Guides
- Bikepacking Food
- Gear & Pack Lists
- Bike Photography
Essential Reading
- Leave No Trace (for Bikepackers)
- Guide To Bikepacking Bags
- Bikepacking Gear That Lasts
- #Bikepacking-Awards
- Power Of An Overnighter
- Advice For New Bikepackers
- Our Favorite Bikepacking Routes
-
Where to Begin
We have over 300 original and curated bikepacking routes in our global network spanning nearly 50 countries.

Start at our worldwide routes map to dig into our detailed guides with GPS maps and inspiring photography.
By Location
- The United States
- Latin America
- Middle East
By Length (days)
- Overnighters & S24O
- Weekend Routes (2-4)
- Week-long Routes (5-10)
- Odyssey Routes (11-30)
- "Freakouts" (31+)
Local Overnighters
The Local Overnighters Project is a unified effort to document and map one-night bikepacking routes all over the world—by locals, in their own backyards.
The Bikepacking Journal is our biannual printed publication. Each issue features a collection of inspiring writing and beautiful photography. Find details on the three most recent issues below, join the Bikepacking Collective to get it in the mail (anywhere in the world), or click here to find a collection of selected stories in digital format.

The special edition 10th issue of The Bikepacking Journal is one you won’t want to miss! It features 25% more pages with extra stories, bonus art and maps, and much more...

Issue 09 takes readers on trips through time—one to the early days of bicycles—and offers several reminders to be grateful for supportive friends and family, and strangers we meet along the way...

For Issue 08, we invited several contributors to return and pick up where earlier trips and ideas left off and also feature a handful of first-timers whose perspectives we’ve long been eager to share...
First Look at the Viral Wanderer (Sea Otter 2024)

Reporting from the 2024 Sea Otter Classic, we got a first look at a brand new drop-bar adventure bike from Viral Bikes. Read on to find a photo gallery and learn more about the intriguing Viral Wander, a titanium bikepacking rig designed around the Pinion Smart.Shift system…
Former Niner founder and engineer Steve Domahidy has been designing bikes for a long while. After striking out on his own, he designed and released several small batches of carbon and titanium bikes under Domahidy Designs. Later, Steve launched a new brand with a much more focused vision and compelling name. Viral Bikes officially launched in 2016 with its flagship bike, the Skeptic, a titanium all-mountain hardtail designed around the Pinion Gearbox and a Gates carbon drive. Following that model, Viral later introduced the Dérive ( find our review here ), which was dubbed a bikepacking hardtail and had the same Pinion Gates drivetrain. This year, Steve and co. have been particularly busy. Not only did they move operations from Bend, Oregon, to Bentonville, Arkansas, but they’ve fleshed out their latest model for today’s release. Read on to learn more about the Viral Wanderer.

The Wanderer is the brand’s first drop-bar bike and was specifically made for long off-road endeavors and bikepacking rides. It’s built around a 100mm travel mountain bike suspension fork and Boost spacing and, similar to the other two bikes in their lineup, a Pinion gear box and belt drive. More interesting, the Wanderer is built specifically around Smart.Shift, Pinion’s electronically shifted gearbox. I met up with Steve, who shed some light on this. “As soon as we had the Pinion Smart.Shift in our hands, we knew that this would be the next bike to market.” Following suit, TRP released the Hywire, a drop-bar shifter/lever combo designed around Smart.Shift that Steve claims does this drivetrain justice. “There have been a lot of workarounds to making drop bars compatible with the Pinion gearbox, but they’ve all been pretty major compromises, until now,” Steve added. For those worried about batteries, Steve mentioned that Pinion claims a full 10,000 shifts per charge, which makes it a non-issue most rides.

Similar to the Skeptic and Derive, the Viral Wanderer also pushes the boundaries of gravel/adventure geometry. It was designed with a relatively slack 67.5-degree head tube angle and long front center that extends the wheelbase and reach of the Wanderer for more stability and confidence-inspiring descending, whether loaded or not. In addition, the Viral Wander features size-specific geometry with a twist; the seat tube angle changes for each size instead of the chainstay length. “At the end of the day, we have little control over the final chainstay length of a bike. It is what it is when you tension the belt to a specified amount, and you can change that a bit with belt lengths and gear ratios, but now you’re compromising final drive ratio to accomplish a chainstay length. That’s not how we wanted to go about it,” Domahidy said.
Instead, the new Wanderer puts larger riders and smaller riders more forward on the bike. This is achieved with a steeper seat tube angle, which effectively accomplishes the same result as longer chainstays. “Shorter riders benefit from a steeper seat tube angle as it helps improve the front and center geometry, which helps keep toe overlap in check. Taller riders benefit from the same steepening of the seat tube to keep their center of balance more forward and centered over the bike. As you raise the seatpost for taller riders, this moves their center of gravity further and further back which unbalances the ride characteristics. Because we can’t really effectively control the chainstay length, we decided to control center of gravity through seat tube angle.” As you can see in the geometry chart below, Viral switched from a S-XL sizing model to V2-V5, similar to a few other bikes we’ve talked about recently.

Domahidy spent a lot of time refining the geometry of the Wanderer, and he calls the end result sublime. Part of that may be due to the wild-looking and very unique seat cluster, which decouples the top tube from the seat tube and uses a titanium spring plate welded to the seat stays to support the rider. Steve said this offers between 10-20mm of flex to the seat tube, giving the rider even more comfort on the rough stuff. He and his partner have done a bit of bikepacking with the prototype, and he said the rear end remains laterally stiff with a load. We’re super excited to experience this for ourselves.

There are plenty of touring/bikepacking-ready features on the Viral Wanderer. It has five sets of cage mounts in and outside the triangle, including two three-packs. It also has a couple of stray bosses at the front of the triangle to add the potential for a clean bolt-on frame bag. It also has rear rack mounts on the alloy dropouts and the seat stays and internal dynamo cable routing for a rear tail light.

Viral is also co-launching the Wanderer with Industry 9 using their new SOLiX M wheels and a brand new gravel stem. The SOLiX M Ultralite 300 Carbon wheels weigh just 1,385 grams per pair and feature a rim matched to the Wanderer’s 29 x 2.4” tire clearance. The SOLiX M’s 0.59-degree engagement angle is also a nice companion to the Pinion gearbox, adding very play little to the Pinion’s clutch mechanism.
The Wanderer frame kit comes with a frame, the Pinion C1.12i Smart.Shift gearbox, forged cranks, battery, charger, wiring, and a full TRP Hywire brakeset with 180mm rotors front and rear (either 6-bolt or centerlock). It will also come with a Gates CDX cogs and belt, the Pinion cog lock ring tool, and an oil change kit. Note that Pinion recently updated their requirements for servicing the gearbox. It’s now only necessary to change the oil every 6,000 miles, regardless of how long it takes you to get to that mileage.

Pre-orders are available now from Viral Bikes and require a 50% deposit. Folks who order the frame kit will receive the TRP Hywire brakes and shifters for free in addition to being able to select the color anodization for their frame’s logos and stripes. In addition, Viral is offering complete bike for this pre-order special, with components from Industry 9, Crank Brothers, Fizik, and more, which will also be discounted from the normal sale price of the complete bike. Lastly, in collaboration with Tailfin, Viral customers purchasing a frame or complete bike can add any assortment of Tailfin products they might want to attach to their new bikepacking rig.
The pre-order price for the frame kit is $6,490, and the complete starts at $8,500. Learn more about the Wanderer and how to get in on the pre-order action over at Viral.bike .
Further Reading
Make sure to dig into these related articles for more info...

Viral Derive Review: Built to Wander

Viral Skeptic Review + The Pinion P1.12 Gearbox

Pinion Gearbox Review: A True Bike Transmission!
Filed in (categories & tags), drop-bar & gravel bike reviews.
Please keep the conversation civil, constructive, and inclusive, or your comment will be removed.
Rad Companies that Support Bikepacking
You need to be logged in to use these features. Click here to login , or start an account if you’re not yet a member of the Bikepacking Collective…
- Become An Agent

Respect Senior Care Rider: 9152007550 (Missed call)
Help Control COVID-19 New

Get In Touch
Claim Assistance Numbers
Health toll free Number 1800-103-2529
24x7 Roadside Assistance 1800-103-5858
Global Travel Helpline +91-124-6174720
Extended Warranty 1800-209-1021
Agri Claims 1800-209-5959
Sales : 1800-209-0144
Service : 1800-209-5858
- Motor Insurance
- Health Insurance
- Travel Insurance
- Home Insurance
- Cyber Insurance
- Knowledge Bytes
- Senior Health Care
- Announcements
- Pet Insurance
- All Categories
- Property Insurance
Know When to Change Your Bike Tyres

When Should You Change Your Bike Tyres
Irregular wear (in the tyre’s centre), cupping or scalping of the front tyre, multiple punctures or cuts, ageing of the tyre, damage in the tyre’s sidewalls, exhaustive usage, comprehensive bike insurance - coverage for tyres and more .
- Fire, explosion, or lightning
- Burglary, housebreaking, or theft
- Natural disasters, such as earthquakes, floods, typhoons, storms, cyclones, landslides, etc.
- Accidental external means, and more.
Was this article helpful? Rate it
Average rating 5 / 5. Vote count: 18
No votes so far! Be the first to rate this post.
Like this article? Share it with your friends!
Share Your Thoughts. Leave a Comment Below!
Leave a reply cancel reply.
Your email address will not be published. All fields are required
Request Call Back
Full Name :
Mobile Number :
please select product

Related Articles
Twitter feed.
DOMINATE THE DUNES
2025 KTM 450 RALLY REPLICA
Scroll down

watch the bike in action
- READY THE ROADBOOK
- FULLGAS AHEAD!
- CARVE THE LANDSCAPE
- PRECISION INSTRUMENT
- KEEP ON THE THROTTLE

01. READY THE ROADBOOK

Adjustability
At this level, pin-point accuracy in your setup is essential to gaining an edge on the competition. Good thing then, that the 2025 KTM 450 RALLY REPLICA has that covered, with fully adjustable WP Pro Components suspension which can be fine-tuned to the likes and weights of riders and all kinds of varying terrains, as well as adjustable handlebars.

Digital Roadbook
Already compulsory at many races for the Car, SSV, and Truck categories, the 2025 KTM 450 RALLY REPLICA has provisions to allow for the fitment of a digital roadbook. Not only has this new addition undergone many racing kilometers of hard testing, but it is also more accurate, more user-friendly, and brings more functionality to the racing stage. Prefer the old ways? The conventional paper roadbook system still comes in the buy-pack.

All White Plastics
READY TO RACE bikes need racing stickers. While a simple sticker graphic kit for the all-white bodywork comes in the by-pack of the 2025 KTM 450 RALLY REPLICA, the plastics are left untouched for you to design your kit, with your team, sponsor, and individual needs.

02. FULLGAS AHEAD!

LED Headlight
A new LED headlight system is incorporated into the front mask of the 2025 KTM 450 RALLY REPLICA, with an overall light output increase of 33%. Not only does this light the way to the bivouac on those longer stages, but also plays a vital role in the early morning starts and misty weather conditions.

Engine Management System
The EMS and 44 mm throttle body are supplied by Keihin, and have proven to be the best combination for the KTM 450 RALLY REPLICA and feature rally-specific ECU mappings to the airbox, engine, and exhaust combination.

The powerplant responsible for 10 Dakar victories is based on the hugely successful KTM SOHC 450 cc 4-stroke engine. Engineered with long, hard, and fast rally stages in mind, it features more efficient performance throughout the rev range. For 2025, it is fitted with a newly designed SOHC cylinder head, with a reinforced clutch and gearbox, and the latest electronic fuel injection. The result is unrivaled power, speed, and outstanding reliability.

Cylinder Head
A reworked SOHC cylinder head features newly shaped ports for further improved performance. The single overhead camshaft activates four ultra-lightweight titanium valves via extremely rigid, DLC coasted rocker arms for maximam reliability.

The 2025 KTM 450 RALLY REPLICA debuts a new radiator concept. Featuring two independent radiators instead of one, it dramatically improves cooling efficiency. There is also the added benefit of having a backup radiator should one get damaged.

Akrapovič Exhaust
Fitted with a rally-specific titanium Akrapovič exhaust system as standard, the 2025 KTM 450 RALLY REPLICA is ready to roar - with tuning to match. It has a special hydro-formed section on the bottom for maximum ground clearance and boasts ultra-lightweight construction and unmatched performance.

03. CARVE THE LANDSCAPE

Triple Clamps
An all-new 23 mm offset CNC machined triple clamps with a rally-specific design ensures optimal stiffness and precise handling when charging through the desert. This, together with an in-house developed PHDS system and the proven SCOTT's steering damper, provides the confidence to keep it pinned in the faster, flowing rally stages.

Sharper, sleeker, and ready to take on the roughest rally stages, the 2025 KTM 450 RALLY REPLICA has undergone a complete refresh. Redesigned fairings, a new tank layout, and a rally-specific seat provide improved ergonomics and seat comfort over longer distances. This means enhanced rider ergonomics, allowing for perfect control when standing by providing ample grip surfaces and freedom of movement.
Navigation Tower
An all-new navigation tower made of extra-light carbon fiber is well-protected behind the fairing with a new, narrower dashboard. This brings significantly improved aerodynamics, reduced turbulence, and less stress for the rider when blasting across the landscape at maximum speed. Warning lights are now also fully integrated and illuminate when the front or rear tank reserve is activated.

The 2025 KTM 450 RALLY REPLICA boasts a total fuel volume of 35 liters. It has two separate 9-liter fuel tanks upfront and a self-supporting 16-liter fuel tank at the rear. These are controlled by two separate fuel pumps, which can be independently accessed and activated to supply fuel from either the front or the rear fuel tank. This works as a backup system and an additional means to monitor fuel levels.

04. PRECISION INSTRUMENT

An all-new hydro-formed, laser-cut, and hand-welded frame forms the backbone of the 2025 KTM 450 RALLY REPLICA. Constructed with precisely calculated parameters of longitudinal and torsional flex, the frame provides exceptional rider feedback, energy absorption, and straight-line stability - all of which are crucial for rally racing. To achieve this, the rotating mass, forged steering head connection, and most of the frame tubes have been completely re-positioned., along with the tube wall thickness, for maximum reliability and specific rigidity in high-stress areas. The frame is finished with a long-lasting and eye-catching powder coating, while the rear self-supporting 16-liter fuel tank doubles as the subframe.

A new hollow, die-cast aluminum swingarm is designed for optimal stiffness and reliability at the lowest possible weight. The topology has also been optimized for optimal rigidity. This works together with a proven linkage system and fully adjustable shock absorber, which gives the rider confidence to go flat out. This also means maximum traction when accelerating and bottoming-out resistance for better stability and safety.

The 2025 KTM 450 RALLY REPLICA is fitted with the latest WP PRO COMPONENTS at both ends. In front, a 48 mm WP XACT PRO 7548 closed cartridge fork featuring sophisticated Cone Valve technology shines with outstanding damping performance. A fully adjustable WP XACT PRO 7750 shock takes care of the business in the rear. The suspension components provide full adjustability, improved damping, and higher bottoming reserves for ultimate stability.

05. KEEP ON THE THROTTLE

E-starter and Battery
A reliable electric starter and lightweight Li-Ion 4.5 Ah battery handle start procedures on the 2025 KTM 450 RALLY REPLICA. Weighing substantially less than a conventional lead battery, the Li-Ion battery delivers reliable power to the electronics, as well as enuring the convenience of easy starting particularly at low temperatures.

Tool Kit Space
The 2025 KTM 450 RALLY REPLICA features a fully integrated and well-thought-out tool storage solution, with an engine cover integrated space for essential tools. This means racers can rest assured that they have what they need out in the dunes should the worst-case scenario occur while freeing up space in your bumbag.

Black high-strength alloy rims from EXCEL are coupled to cast aluminum hubs using lightweight spokes and steel nipples for maximum stability and durability. This combination has proven to be the best solution for intense rally racing across all terrain types.

Brembo components guarantee total performance and reliability in braking. 300 mm front and 240 mm rear discs deliver superior stopping power, rider feel, and overall control, instilling maximum confidence in any condition.

Technical Details
- Transmission 6-speed
- Cooling Liquid cooled
- Starter Electric starter
- Stroke 63.4 mm
- Clutch Wet multi-disc clutch, hydraulically actuated
- Compression ratio 12.6
- Displacement 449.3 cm³
- EMS Kokusan
- Design 1-cylinder, 4-stroke engine
- Lubrication Forced oil lubrication with 2 oil pumps
- Tank capacity (approx.) 35 l
- Front brake disc diameter 300 mm
- Rear brake disc diameter 240 mm
- Chain 5/8 x 1/4"
- Rear subframe design Self-supporting plastic tank
- Suspension travel (front) 304 mm
- Suspension travel (rear) 280 mm
- Wheels Spoked wheels with aluminium rims
IMAGES
VIDEO
COMMENTS
By flight. If you're taking your bicycle by plane, you'd need a bike box or a bike bag to pack your bike beforehand. The easiest way to sort this is to take it to the bicycle shop for them to wrap it up for you. It should cost approximately 10-12 USD.
The distilled wisdom of ten years of bike touring life, cycle touring tips and travel advice from hard-earned miles around the globe. This article documents my bike touring tips from extensive bicycle travels around the world. Whether you're a veteran long-distance cyclist or a bicycle touring beginner, this blog post is here to provide you ...
For road tours, a dedicated touring bike is usually the best option. Touring bikes are - unsurprisingly - specifically designed with bike tours in mind. Though it's possible to do a road tour on a road bike, there are a few key differences between the two that make touring bikes better suited to the job. While road bikes prioritize speed ...
How to fly with your bike | Packing, weight limits and surcharges explained | BikeRadar.
Bicycle touring is a type of adventure travel that combines cycling with backpacking. Unlike regular cycling, where you pedal for miles and return home later that day, bicycle touring allows you to travel from point to point and set up camp for the night. After some shut-eye, you pack up your tent, hop on your bike and head out for the next leg.
Write your name and contact information on a sheet of paper and tape it to your bike. Insert the bike into your bag or case. Insert wheels into the case, slightly deflating tires if needed to fit. Fill extra space in your bag or case with kit and shoes. Wrap your pump in padding and insert it.
Step 4: Research Interesting Bicycle Touring Routes. Step 5: Create a Route With One of the Popular Apps. Step 6: Choosing the Best Bicycle for Your Cycling Adventure. Step 7: How to Carry Gear While Bicycle Touring. Step 8: How to Cook Food on a Bike Trip. Step 9: Create a Bicycle Touring Gear Checklist.
The idea of planning and preparing for your first-ever bike tour might seem a little intimidating at first. I completely understand — I was very intimidated when I left for my first-ever tour (from London to Istanbul), but I quickly discovered that I needn't have been worried!In this bicycle touring guide, I'll cover everything you need to know in order to plan and prepare for your first ...
It reduces strain on the back, neck, and shoulders, allowing for a more comfortable and sustainable ride. This position also offers a better vantage point to enjoy the surroundings. Expert Tip: Look for handlebars that allow multiple hand positions. This can help reduce fatigue and numbness on longer rides.
Here's the steps to follow: Pedals: Take them off and put them in a bag or a case. Wheels: Remove both wheels and slot them into their allocated slots. Put a piece of cardboard or brake blocks ...
They provide practical advice for everyone from the novice to the advanced cyclist. 2. Let an app be your guide. When exploring new areas or paths, let your cellphone guide the way. Whether ...
On a bike tour, you travel to a number of checkpoints before you stop and set up camp for the night. This allows you to rest up and refuel for the day of cycling ahead so you can complete the next leg. This guide will give you a complete overview of bike touring, why it's become so popular, how you should train for it, what you need to pack ...
Park yourself in a campsite or hotel for a day or two and explore the city or town or take shorter daily rides. "Distance is not as important as the journey," says Analise Cleopatra, a filmmaker and relatively new mountain biker who made a documentary of her first bike-packing trip in 2019.
Generally, you'll need to remove the pedals, deflate the tires slightly, and turn or remove the handlebars. In some cases, you may also need to remove the wheels. Wrap each part of the bike with foam or another type of protection to prevent damage during transport. 3.
IN this video Taren shows former professional curler Joanne Courtney, who is taking up triathlon, how to pack a bag for travel using the Scicon travel case. ...
So you're going on a riding holiday with your mountain bike, should you choose a cardboard bike box or dedicated bike travel bag to fly with? Here's Neil wit...
I've been traveling by bike for 15 years and it's without a doubt, my favorite way to see the world. This video is aimed at helping you learn a few extra tri...
Here's what to do: Rent, re-purpose, beg, or borrow a bike. It doesn't have to be a gravel, mountain, or bikepacking-specific bike. It doesn't have to be lightweight. It just needs to have two wheels that roll and some air in the tires. Strap some camping gear to the bike, particularly the handlebars and below your seat.
Alee is a bike and travel addict who has cycled through 100+ countries and doesn't really have any plans of stopping. Along the way, he creates technical resources, in-depth reviews, inspirational videos, how-to guides and more. If you've learned something from him, you can support his mission to create the best bike travel content HERE.
A right-handed person, for instance, can stand on the left side of the bike. Lift up your right leg, reach it over the bike, and put it on the ground on the other side of the bike. Hold the bike upwards between your legs. Feel the weight of the bike between your legs and try to keep it balanced as you lower yourself.
I travel with a Bike Box Alan Triathlon Aero Easyfit Bikebox. I chose it for its durability, the protection it gives the bike in transit, and the ease of packing. There is minimal disassembly required. It also allows for a third wheel, which, in certain scenarios is a good option to have. How to pack a bike box Step one: Travel with a clean bike
The number one bike route planning tool on the web. Fast, easy, and powerful. Plan your next bike ride and use voice navigation with offline maps.
2. Avoid hills . Cyclists love climbs, but they might not be the best option if you're commuting wearing a cycling backpack with a load of kit you need for work or if there's lots of traffic ...
To travel by bike in optimum conditions, cycle tourists can use service providers with the "Accueil Vélo" label, all of which are listed on the France Vélo Tourisme website. More than 7,000 are listed: accommodation, restaurants, cycle hire and repair services, tourist offices and tourist sites. These businesses make a number of commitments ...
Buying a used Peloton is a smart way to get what is otherwise a pricey exercise bike. But not all used Bikes are what they seem, and it would be great to be able to check out the Bike's history ...
The Wanderer is the brand's first drop-bar bike and was specifically made for long off-road endeavors and bikepacking rides. It's built around a 100mm travel mountain bike suspension fork and Boost spacing and, similar to the other two bikes in their lineup, a Pinion gear box and belt drive.
If the tyres are in good condition, the bike is more likely to provide better performance and smoother, safer rides. However, like any other vehicle component, the tyre is also subject to wear and tear with constant usage. Hence, one should check their bike's tyres regularly and change them when required. When Should You Change Your Bike Tyres
Adjustability. At this level, pin-point accuracy in your setup is essential to gaining an edge on the competition. Good thing then, that the 2025 KTM 450 RALLY REPLICA has that covered, with fully adjustable WP Pro Components suspension which can be fine-tuned to the likes and weights of riders and all kinds of varying terrains, as well as adjustable handlebars.