The Photographers Ultimate Road Trip Guide

So you want to go on a photography road trip, you pick your favorite spots from Instagram to hit up. You’re all set right? Well, not exactly. There are some major factors you should be considering before planning out the trip.
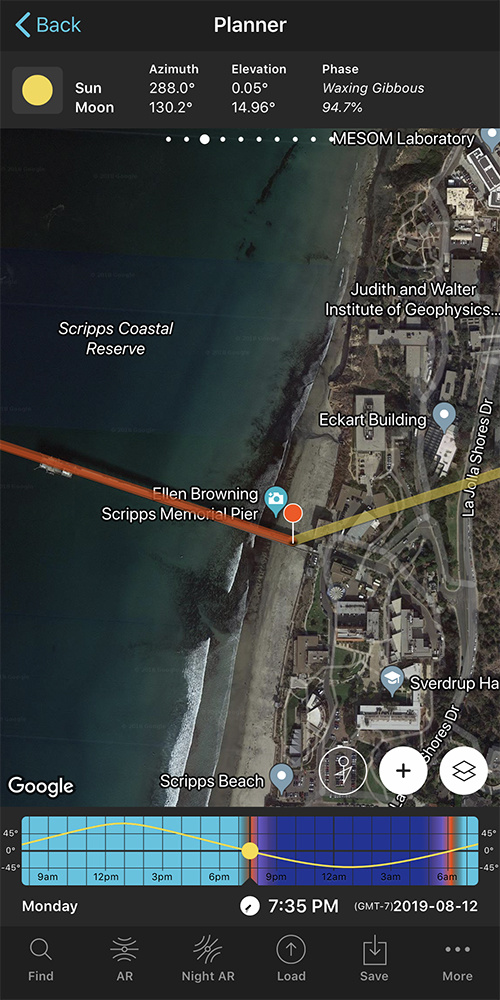
As a landscape photographer I spend a huge portion of my photography traveling and because of that I want to capitalize on every moment possible while on the road. With so many places to go and so little time we want to be mindful and effective in our travels. Like most of you, I see something amazing place online or on social media and think I want to see that in person. That’s how I came across the Scripps Pier sun alignment. I thought that is my next trip, but before I started to book everything I had to know more information, a lot more.
So here is my list of the most important things to consider when planning a photography based road trip.

Research, Research, Research
If you don’t plan, then you plan to fail! A classic quote that holds true even today. When I first found out about the sun alignment at Scripps Pier, I had to do two important things first. Find out where it was and when it happened. When I research a spot, my go to site is Google Maps . You can create your own maps that can be referred to even on you mobile device. You don’t want to find yourself looking for your iconic spot only to learn you are actually miles away. In order to get the most accurate information start with city and government websites.

Now that we know where to go we now need to know when to be there. For example, the sun alignment event only happens two times per year and within those two times of the year the sun only aligns directly down the middle of the pier for only two days. To help determine what time I need to be on location, I use an app called Photos Pills to find out when sunset and sunrise occurs, and where the sun will set in correlation to my composition. This app is crucial for planning out any landscape photography.
Notable mentions for research. Check tide tables if you are going to be shooting along the coast. It is important to know if the beach you want to shoot at will be under high tide or open for low tide. Consistently checking weather apps and websites to get an accurate idea of the weather is also crucial.
Plan Your Trip
The next step is to lay out the drive. Trust me when I say this is important. The worse thing you can do is to not plan out your next stop and miss out on the best light. I’ve been that guy in his car freaking out as I watch the sunset explode and I'm stuck on a highway.

Start with the locations you want to photograph, now that you know when the light is best for each plan your route for the maximum efficiency. Even if you have a day that is completely travel try to find a location near where you are stopping to take in the views at sunset.
When looking for places to spend the night, camp grounds make for great stops. If you are thinking about #vanlife, truck stops are great for overnight stays. Please be sure to check with local laws, signage, and retailers to make sure you are following the rules.
Now that we have our route mapped we need to look at where to stop for food, fuel, traffic and rest. Often overlooked when planning, these factors can add loads of time in your travels. For days that you are not traveling use this time to explore and scout locations.
Before you Embark
Now that you have everything planned out there are still a few things left to do. Some of these could save you heaps of trouble on the road.
- Let friends and family in on your itinerary and route.
- See your Doctor for a quick health check.
- Take you vehicle in for service and mechanical check.
- Make sure all your documents are in order, from passport to insurance.
Have a Back Up Plan
As much as I like to be prepared for everything and make sure I am on schedule, it is important to your experience and your craft to leave room to be creative or inspired. You will find there are times you will get a gut feeling about a location or the weather and it might take you away from photographing your plan A.

Gear will always come down to personal style and your goals, but there will always be the core things to pack with you.
1. Always take a spare body, even if it stays in the car for the entire trip, you will thank me later if something catastrophic happens to your main camera.
2. Take more glass. I almost always shoot very wide with landscapes, but there are those times that the location does not work ultra wide. Taking a long lens can save you from missing the composition you want. I generally have a range from 14mm to 600mm.

3. Get yourself a quality pack. If you plan on hiking this will be the best way to keep your back from getting destroyed and to keep your gear safe. Camera packs come in all shapes and sizes, find the one that fits the gear you want and fits your body well.

4. Three legs are better than two. You can do so much handheld, yes I agree. That being said you can do even more with a sturdy tripod. Even if you only use it a few times, it will be worth it. If you are looking to any astrophotography or long exposure photography you are going to need a tripod.

5. Bring a laptop. But more importantly, bring back up drives. I take a minimum of two external hard drives on any trip. Back up your shots daily!

Some non camera gear choices:
6. Headlamps are a life saver, not just for the hike but while shooting in the dark.
7. Rubber boots or waders come in handy. There is always that one shot that would look better from in the water.
8. Quality hiking shoes are a must. Trust me, your feet will thank you.
9. Get a local SIM card. This may be obvious to some, but you will need it to stay current with weather and if there is an emergency you will want that voice plan as well.

Final Thoughts
Now that you are prepped the only thing left to do is close your eyes and point to a spot on the map. I hope you took some tips away that will land you shooting the best photos on your next adventure! Remember it's not about the destination it's about the journey.
Did I miss anything? Comment below with what you think should be added to the list!

I am an all around creative, I focus primarily on Landscape photography, but there isn't a genre I haven't tried. I balance my time between teaching photography and fine art print sales. I travel the world in search of beautiful scenes and epic adventures! I want to connect people and our planet through emotion to create change.

https://fstoppers.com/originals/one-best-tools-use-when-planning-your-ne...
This might change your life! Well your photography trip life
Gotta love google maps. It’s so helpful!
This is exactly what I do for each trip and it's been so helpful. Especially when you can download those maps and bring them up when you are in an area with limited service!
Thanks for the tips. Now to start planning. :)
Thank you. Get out there!!

"If you don’t plan, then you plan to fail! A classic quote..."
Actually goes a little something like this:
"If you fail to plan, then you plan to fail"
"5. Bring a laptop."
This is the only point I have a slight bit of issue with and it's mostly from the temptation to want to edit photos right away. Most cell phones have the ability to check weather station forecasts, Photopills, PTE and other very useful apps to make your trip run smoother, so unless during your trip it is 100% imperative that you blog everyday from the road, or you need to relay images in a quick turn time to someone else, I just think it's added weight that will slow you down from really enjoying that time on the road.
Sure there is going to be downtime inevitably. I went on a solo 2-week road trip to Oregon last summer and when the weather was awful, my day was shot. I _DID_ bring my laptop, but by the end of the road trip I couldn't wait to be free of it. Bring a book and a portable hard drive to backup your memory cards instead, and enjoy your time on the road free of disctractions. You never know when you will have that chance, in those areas again.
*End useless rant*
Thanks for the article! I usually like to make a Google Map first with all the pins set up on a map I can pull up from my Google Drive.
Fair point. It can be a distraction. That being said so can the camera. I think with anything there is always the need to balance each side of the coin.
I suggest a laptop for two main reasons if you traveling for work, then it will be crucial to get images prepped and secondly to back up. On my last trip to Iceland I took over 1tb of images and footage, I used the back ups to make sure I didn’t loose anything. Another reason I did not mention in the article is the camera lcd can trick you some times, things may look tack sharp on there but because it’s so small it can trick you. I use a laptop to confirm everything looks proper with my shots. That way I don’t leave a location with nothing to use. That has happened to me in the early years.
But like I said you do have a point about keeping a balance.
That definitely makes sense. And recently when there was a sale going on with B&H I picked up a 12 inch iPad Pro to review photos on the road.
I think a good majority of people that do go on these road trips aren't working against deadlines with companies, but more so against their own deadlines to get content up on their social media feeds. I am/was guilty of this too and it ultimately led to my own social media overload that by the time I was done with my road trip I realized the people I met along my journey, the stories I was able to be fully apart of and engaged with, left the most impactful and life changing memories that a computer would have probably distracted me from. But yes, I agree, being able to see my work in the field before I decide to move on to the next place, ensuring that everything is exactly how it should be would have saved a couple of shots for me.
Again, excellent article and one people should definitely take note of. I can''t tell you how many times I have left with a friend of mine that is totally unprepared for life on the road.

I use google earth to help visualise the terrain and what I might be up against. To help with this in the settings change the 'elevation exaggeration' to 1.5 or higher. It literally exaggerates the terrain so you can see hills and valleys etc. Also terrain view in google maps is very useful.
So many tools at our disposal, what a time to be alive :) Thanks for the article :)
Google earth is a fantastic way to find hidden gems. Thank you for the comment!
Be sure to take water and snack food. You won’t take many photos if you have to leave early for McDonalds ..
10 Awesome Tips for Incredible Road Trip Photography
Sometimes the most amazing photo spots lie just off the road, but if you haven’t done your research and don’t have a rough plan, you’ll be missing lots of photography opportunities that often aren’t marked on maps or signs. Before you leave on your road trip, make a list of all the places you want to visit and then try to find interesting destinations nearby. Books like Road Trip USA: Cross-Country Adventures on America’s Two-Lane Highways and websites like Roadtrippers are great resources for planning road trips in the US.
Once you have a basic itinerary, you can use photo sharing sites like 500px and Flickr to search for the locations you’ll be passing, to see what kind of photos others are taking nearby. You might find out about scenic overlooks, secluded waterfalls, and great trails that you would otherwise never know about.
It’s tough to stay organized as a photographer on a road trip, especially a long one. You’ll be juggling memory cards, batteries, lenses, filters, a tripod, and who knows what other odds and ends. It’s really easy to bring too much stuff, so before you head out on your road trip, ask yourself what you really need to bring.
Do you need to bring your Canon 50mm f/1.8 AND your Canon 50mm f/1.4 lens ? Probably not.
Make some tough decisions by making an honest list of the kind of photos you plan on taking. While it might seem like bringing more gear will help you to take more photos, when you’re on the road having too much equipment can actually have the opposite effect. Keeping your kit simple and light makes you more likely to grab your camera and take a photo when you see something interesting! Sometimes the best photos on a road trip end up being of things you almost didn’t take a picture of — having easily accessible gear makes it much easier to quickly grab your camera and take a picture that you might not have bothered with otherwise.
If you’re taking a road trip during a busy travel season, the most photogenic locations like national parks get crowded quickly. Wake up early and you might be able to capture the unspoiled beauty of nature or even a city street without worrying about people walking into your shots! If you’re up early enough, you’ll get a chance to shoot during the morning golden hour, a special time of day shortly after sunrise when the tones of light are very warm, and bathe everything in a beautiful golden light.
It’s easy to start taking pictures on autopilot. Maybe you’ve figured out a setting or method that tends to work really well most of the time, but getting stuck in a routine can be bad for creativity. To keep your shots varied and interesting, pause before you take every photo and make a conscious effort to consider a few things:
How’s the Composition?
Capture more than a snapshot by making sure your composition is strong. Think about your subject placement and your foreground & background elements.
Where's the Light Coming From?
Light is everything in a photo, so be aware of where it’s coming from to avoid underexposing or overexposing your photos.
How Could the Shot be Improved?
Look around you and see if there’s anything you can do to improve your photo. Would walking to a different position give you a better angle? Would your photo benefit from having a person in it to give the scene a sense of scale?
Is your Horizon Straight?
Nothing is more distracting from an otherwise great photo than a crooked horizon. You can fix it later, but you’ll end up cropping out part of your photo to straighten the horizon — it’s much easier and better to get it right when you take the shot.
Nothing captures the magic of the open road better than, well…the open road. Including a stretch of lonely highway in your photo can really convey the essence of the road trip experience. Only pull off the road where it’s safe to do so, and always make sure there’s no traffic anywhere around!
A deep blue sky can really help the colors of the landscape pop in your road trip photos, and one of the most effective ways to get this look is using a circular polarizer filter. Polarizing filters can help increase color saturation and contrast, reduce reflections on glass and water, and block 1 to 2 stops of light, allowing you to use a slightly longer exposure time or a wider aperture on a bright day.
Backing up your photos is one of the most important things you can do to ensure you never lose them, but it’s something that most people don’t bother with while they’re actually traveling. For a comprehensive overview of digital backup options for photographers, be sure to visit this guide .
For road trips of more than just a day or two, you should definitely back up your photos along the way. Memory cards and the cameras they’re usually in get lost, stolen, and broken all the time, but if you’ve got a backup copy of your photos, your memories are much safer. Make backing up your photos a routine you do every evening after you stop driving for the day.
An external hard drive like the shock, rain, and pressure resistant LaCie Rugged Mini 2TB hard drive pictured is a great, compact way to store you photo backups while you’re on a road trip.
Wide open landscapes and snow-capped mountain peaks are great subjects to photograph on your road trip, but some of the best memories are the little moments like setting up camp or pulling into a sleepy country town after a long day on the road. These are often the moments when you feel least like pulling out the camera and shooting, but it’s at these times that you really should!
When it comes to the heavy gear, sometimes it’s better to bring less on your road trip…but for the light weight, small accessories like memory cards and batteries, too much is always enough!
Camera batteries tend to die at the most inopportune times, so having a few spare batteries charged and ready to go makes it easy to keep shooting without having to wait for your one battery to charge for an hour. To charge my spare camera batteries while driving, I use this power inverter that plugs into the car’s cigarette lighter DC outlet. As soon as I get back in the car after taking photos while out on a trail or at an overlook, I pop any dead or low batteries on the charger while I’m driving and it ensures that I’ve never got any dead batteries sitting around
Memory cards are another thing that you can never have too many of. I’ve had good experiences with Lexar , SanDisk , Transcend , and Sony memory cards and usually buy 32GB and 64GB cards, since shooting RAW or HD video consumes memory quickly.
For more tips on what to bring, check out our guide to the best gear and accessories for travel .
It’s really easy to neglect all the great photos you’ve taken on your road trip once you get back to your everyday life. Make your travel photos a priority though, and start going through them as soon as you get home. You spent time carefully composing these photos, so give them the attention the deserve: edit them, share them, print them!
Share some on your Facebook , Twitter , and Instagram so your friends can live vicariously through you. Hang some on your wall to remind you of your adventure. Enter some in a photo contest. Get greeting cards, magnets, and postcards made with your favorite road trip shots. Print some in a photobook to flip through every time you start to get that itch to head out on the road again!
- Student Successes
- My Learning
How to Take Travel Photos: A Complete Guide
You can also select your interests for free access to our premium training:
Travel photography is one of the most exciting types of photography you can pursue. Combining two of life’s great pleasures—exploring new lands and taking photographs—is a thrill any photographer would enjoy.
While travel photography is open to anyone with the drive to get up and hit the road, there are a few things you need to learn. That’s why we’ve compiled this in-depth article containing everything you need to know about travel photography. We cover everything from camera settings to the best travel gear, so keep reading to find out more.

What Is Travel Photography
Travel photography is simply taking pictures of different places around the world. But good travel photos are not mere holiday snaps. Travel images should show a location in a new light so they’re interesting even for people who have already been there.
Travel photography involves many different styles and techniques. You can incorporate landscapes and portraits into your travel photography. You can even use more advanced techniques like time-lapse and long exposures.
A travel photographer needs to show more than the obvious. They need to explore each location at a deeper level and look for elements that make that place unique and interesting. It isn’t enough to take pictures of the famous landmarks. A travel photographer needs to look deeper and go beyond.
Far-flung exotic locations often hold the most romance for travelers, but you don’t have to go far to practice travel photography. Venturing to new locations is always exciting, but you can also photograph places you’re familiar with. Using your familiarity to your advantage, you can give viewers a deeper view of these locations.
Anyone can shoot travel photography. The first thing you need is a desire to explore the world, which is something you probably already have. But continue reading for everything else you need to know about travel photography, from techniques to gear.
Mastering Travel Photography
While travel photography is open to anyone with an adventurous spirit, mastering the art does require practice, knowledge, and skill.
Firstly, you need to understand your camera and its settings. You might be tempted to take the easy road and shoot in Auto mode. But you’ll get far better results and more interesting and unique images when shooting with semi or fully manual settings.
You should also experiment with composition, and you can try both color and black-and-white photography. These are stylistic choices that’ll give your travel photography a personal touch. You also have to consider specific types of travel photography so you’re ready for anything when you’re on the move.
The following sections cover mastering the art of travel photography. Click the links in the text for more information on each topic.
Camera Settings
When it comes to camera settings for travel photography, there are a few key things to keep in mind. First, make sure your camera is set to the right aperture and shutter speed for the type of photo you want to take. You’ll also need to adjust your white balance and ISO as you move through different locations.
To learn more about camera settings for travel photography, check out camera settings for travel photography .

A travel photography shot list helps you plan and capture the best photos on your trip. Research the location thoroughly, including famous sights, experiences, geography, and lighting conditions. Look at existing travel photos for inspiration, but aim to create something unique.
Use a spreadsheet to organize your shots by day and time, considering factors like sunrise, sunset, and harsh midday light. Include a mix of portraits, environmental portraits, cityscapes, daily life moments, religious sites, festivals, food, transportation, landscapes, close-ups, architecture, night scenes, and wildlife.
Remember to be adaptable and respectful of local customs. With careful planning and a detailed shot list, you’ll be well-prepared to capture stunning travel photos that transport viewers to your destination. To learn more about creating a travel photography shot list , check out this in-depth guide.

Composition
Good travel photography composition captures the beauty and essence of a destination. Use the rule of thirds by placing important parts of your photo on the intersecting points of the grid. Or take advantage of symmetry by centering the axis of symmetry in one direction.
Direct attention with leading lines, using elements like paths or fences to guide the viewer’s eye to your subject. Frame spectacular views with windows or arches to provide context. You can also use bold colors to lead the eyes or balance the composition.
Change your perspective by moving around, kneeling, or shooting from a rooftop. Get close to fill the frame with your subject or step back to include surrounding context. Play with scale by including familiar elements like people to convey the impressive size of large spaces.
To learn more about travel photography composition , check out this in-depth guide.

Black & White
Black-and-white travel photography can be a powerful way to capture the essence of a place. By removing color, you can focus on the light, shapes, and textures that make a scene unique.
Pay attention to contrast and tone in your black-and-white photos. Look for strong shadows and highlights that create depth and drama. Texture is also important in black-and-white photography, so seek out interesting surfaces like rough stone or smooth water.
Most importantly, use black-and-white photography to connect with your subject and tell a story. Whether it’s a portrait of a local person or a landscape that captures the mood of a place, aim to convey emotion in your images.
By developing your own style and vision, you can create compelling black-and-white travel photos that stand out. To learn more about black-and-white travel photography , check out this in-depth guide.

Unique Perspectives
Taking unique photos of famous places can be challenging, but with some creativity and planning, you can capture stunning images. Start by researching the location and scouting out potential spots for your shots. Arrive early to avoid crowds and take advantage of the soft, golden light.
Look for elevated views or unusual angles to create a different perspective. Use composition techniques like the rule of thirds to emphasize the landmark in an interesting way. Including people in your shots can add a sense of atmosphere and tell a story.
Don’t be afraid to experiment with different techniques like light trails or time-lapse photography . If you encounter photography restrictions, think outside the box and find creative solutions. To learn more about capturing unique photos of famous places , check out this in-depth guide.

Documentary Photography
Documentary photography captures real-life events as they happen. It’s a form of visual storytelling that depicts the world around us. Documentary photographers often work on long-term projects to tell new stories through their images.
You don’t need to travel far to find good documentary photography ideas. Look for interesting subjects in your family or community. Focus on the people involved to help viewers connect with the story. You can also tackle big topics by photographing small, local stories related to them.
Visit and scout your locations before the shoot. Get comfortable with the basics of photography, like camera settings and composition. Keep your story personal and critique your work as you go.
If you want to learn more about documentary photography ideas , we have a detailed guide to help you get started.

Train Photography
Train photography offers a diverse range of subjects, from historic steam engines to modern bullet trains. To capture excellent locomotive photos, research train routes and schedules to find the best locations and times. Use natural light to your advantage, with side or backlighting to highlight steam and texture.
Longer focal lengths can compress the scene and show the train in its surroundings. At stations, photograph details like wheels and logos to create atmosphere. Adjust shutter speed for sharp images or creative motion blur, and slightly overexpose for more detail.
For more insights on capturing stunning train photography , check out our full-length article.

Backing Up Photos
It is important to back up photos while traveling, and an external hard drive is a great option. They are compact, durable, and have large storage capacities.
Smartphones and tablets can also be used to manage photos on the go. With the right accessories, they can connect to external storage devices. This allows you to back up and edit your photos without a laptop.
For the best results, use multiple backup methods. This could include an external hard drive, a USB thumb drive, and cloud storage. By having multiple copies of your photos, you reduce the risk of losing them. If you want to learn how to back up photos , check out our in-depth article.

Making Money from Travel Photography
Becoming a travel photographer takes hard work and dedication. You need to learn a wide range of photography skills for shooting everything from landscapes to portraits. Building a strong portfolio of your best travel images is key to attracting clients.
To get your name out there, create a travel website or blog to showcase your work. You can also sell your images on digital platforms like stock photography websites. Selling physical prints of your photos is another great option.
As you travel, look for photography work with local businesses, such as hostels or tourism boards. Capture great travel content and consider offering tours or workshops for extra income.
To learn more about how to become a travel photographer , check out this in-depth guide.
Travel Photography Jobs
Travel photography jobs can be an exciting and rewarding career path for those with a passion for photography and adventure. However, it’s important to understand the challenges that come with the job. You’ll need to have exceptional photography skills, business savvy, and the ability to handle tough physical conditions.
To succeed, you’ll need a strong online presence, including a professional website and active social media accounts. You’ll also need reliable gear that can withstand the demands of travel.
There are many ways to make money as a travel photographer, such as selling prints, licensing stock photos, writing for publications, and teaching. The key is diversifying your income streams and constantly looking for new opportunities. With hard work and creativity, finding paid travel photography jobs can be both fulfilling and profitable.

Get Paid to Travel
Getting paid to travel and take photos is a dream for many photographers. There are several ways to make this a reality. Selling prints of your travel photos through print-on-demand websites is one option. You can also upload your best images to stock photography agencies and earn passive income from sales.
Entering travel photography competitions is another way to earn money and gain prestige. Winning contests can help you promote your work and attract potential clients.
Building relationships with travel magazine editors can lead to regular paid assignments. Learn what they want and deliver high-quality photos to make their jobs easier. To further your success, get paid to travel and take photos by marketing your photography services to people who have the budget to hire you.

Sell Travel Photos
Selling your travel photos can be a great way to make money with your photography. To get started, ensure you have high-quality, well-lit, and properly composed images. They should also be free of technical errors like chromatic aberration and noise.
There are many ways to sell your travel photos. You can sell them through stock photography agencies, directly to clients, or as prints. Each option has its own requirements and markets, so consider your goals before deciding which path to take.
Actively promoting your work is key to maximizing sales. Use social media, email lists, and other marketing strategies to reach potential buyers. If you’re working with a stock agency, ask them what types of images are in demand so you can plan your shoots accordingly.
Learning how to sell travel photos takes time and effort, but with persistence and a willingness to adapt, you can turn your passion into a profitable venture.

Gear for Travel Photography
When packing for a travel photography trip, it’s important to bring the right gear. A lightweight and compact camera body is essential, along with one or two versatile lenses like a wide-angle and a medium telephoto lens.
Don’t forget a sturdy tripod that fits in your luggage for sharp shots in low light. Filters like a circular polarizer and strong ND filter are small but open up creative options when traveling.
Cleaning supplies, extra batteries, memory cards, and rain protection round out the must-haves. With the right travel photography gear , you’ll be ready to capture amazing images anywhere your adventures take you.
Traveling with Camera Gear
Traveling with camera gear can be challenging, but there are ways to make it easier and safer. Use padded cases to protect your equipment from bumps and knocks. A shoulder bag is a good option for keeping your camera close and secure while walking through busy areas.
Always carry your gear in your hand luggage when flying. Most airlines understand the importance of this and are lenient about the weight of your carry-on bag. To deter thieves, hide or remove any camera branding using black duct tape.
Insuring your gear is crucial in case of theft or damage. Take down all the serial numbers and make sure your equipment is fully covered. By following these tips for traveling with camera gear , you can have peace of mind and focus on capturing great photos during your travels.

External Hard Drives
An external hard drive is an essential accessory for travel photographers. Memory cards fill up fast when you’re traveling, and you don’t want to carry a bunch of them around with you. It’s best to take an external hard drive to keep all your photo files in one place.
You’ll need something durable yet compact, which is why we recommend the LaCie Rugged Mini for travelers. It’s an easy fit for any travel camera bag. You have storage options up to 5 TB, and it’s the most durable external hard drive on the market.
See more of the best external hard drives in our full-length article.

If you buy a product through one of our referral links we will earn a commission (without costing you anything). Prices last updated on .
As an Amazon Associate, I earn from qualifying purchases. Product prices and availability are accurate as of the date/time indicated and are subject to change. Any price and availability information displayed on Amazon at the time of purchase will apply to the purchase of this product.
Cameras for Travel Photography
The Canon EOS RP is a great mirrorless camera for travel photography. It’s lightweight, easy to handle, and has a 26 MP full-frame sensor that captures high-quality images in any situation.
The camera’s autofocus system is fast and accurate, even in low light. It also offers eye-detection AF for portraits. The EOS RP can shoot 4K video and has convenient Wi-Fi and Bluetooth connectivity.
This camera is ideal for most travel photography needs. If you want to learn more about the best travel cameras , check out our detailed guide.
Mirrorless Cameras
The best mirrorless cameras for travel are compact and lightweight, but still capture stunning photos and videos. Our top pick is the Nikon Z50 . It has a compact body that fits easily in any camera bag. The 20.9 MP sensor produces bright, vibrant images with excellent low-light performance.
The Z50 is also great for travel vlogging. It records 4K video at 30 fps and has an articulating screen for easy self-recording. Built-in Wi-Fi and Bluetooth make it simple to share your adventures with friends and family back home.
If you want to learn more about the best mirrorless cameras for travel , check out our in-depth guide. We cover a range of cameras for every type of traveler, from beginners to professionals.

Compact Cameras
The Sony ZV-1 II is a pocket-sized camera packed with features for modern travelers. It has a high-resolution 20 MP sensor and a versatile 18-50mm zoom lens. The f/1.8-4 aperture provides solid low-light performance.
Vloggers love the ZV-1 II’s 4K video at 30 fps and the special Cinematic Vlog Setting. A built-in mic and wind muffler make capturing audio easy. Real-time AF with face and eye detection keeps subjects sharp.
The Sony ZV-1 II is the ideal compact camera for travel vlogging. It’s a worthwhile investment for creating exciting content abroad. But we have more options in the link above.

Lenses for Travel Photography
The best travel lenses give you a wide focal range in a compact size. Zoom lenses like the Nikon AF-S DX 18-105mm f/3.5-5.6 are very popular. It has vibration reduction to reduce camera shake and improve low-light performance.
Prime lenses are another good option. They are usually smaller and lighter than zooms. The Canon EF-S 24mm f/2.8 STM is a great example. This pancake lens is ultra-compact but still gives you a versatile focal length.
When choosing the best travel lens , think about the size, weight, and focal length. You want a lens that is easy to carry but still gives you plenty of options. The lenses on this list are all fantastic choices for your next adventure.
Canon Lenses
The best Canon lenses for travel photography are lightweight, versatile, and capture stunning images. Our top picks are the Canon RF 50mm f/1.8 STM and Canon EF 50mm f/1.8 STM . These nifty-fifty lenses are compact, affordable, and great in low light.
Other top choices include the Canon RF 24-105mm f/4-7.1 IS STM for its wide zoom range and the Canon RF 16mm f/2.8 STM for landscapes. The Canon EF 24-105mm f/4L IS USM is a popular all-in-one zoom for DSLR users. It has a constant f/4 aperture and weather sealing.
No matter your camera type, there’s a perfect travel lens for you. Look for a lens that’s light, has a useful focal range, and fits your budget. Canon lenses for travel photography help you capture amazing images around the world.

Nikon Lenses
The Nikon Z 50mm f/1.8 S and Nikon AF-S 50mm f/1.8G are the best Nikon lenses for travel photography. The Z 50mm f/1.8 S offers sharp images and a durable build. It’s great for low light with its f/1.8 aperture.
The AF-S 50mm f/1.8G is compact and lightweight. It also performs well in low light. The 50mm focal length is perfect for street scenes and portraits.
Both lenses are very popular with travel photographers. If you want to learn more about Nikon lenses for travel photography , we have a detailed guide that covers the best options for Nikon mirrorless and DSLR cameras.

Sony Lenses
When choosing the best Sony lenses for travel photography, consider weight, versatility, and image quality. Our top pick is the Sony E 18-105mm f/4 G OSS PZ , offering a wide zoom range, constant f/4 aperture, and effective optical stabilization in a compact design.
For APS-C cameras, the Sony E 35mm f/1.8 OSS is a great low-light prime lens. Its wide f/1.8 aperture and built-in stabilization help capture sharp images in dim settings. The Sony FE 50mm f/1.8 is an affordable and versatile prime for full-frame cameras, ideal for portraits and everyday shots.
Other notable lenses include the Sony FE 24-105mm f/4 G OSS for its all-in-one zoom capabilities and the Sigma 18-50mm f/2.8 DC DN | C for its fast aperture and compact size. To learn more about the best Sony lenses for travel photography , check out our in-depth guide.

Travel Tripods
A travel tripod is a must-have for any photographer on the go. The best travel tripods are lightweight, compact, and easy to set up. They also need to be sturdy enough to support your camera gear.
Our top pick is the K&F Concept Lightweight Travel Tripod . It weighs only 2.4 lb but can hold up to 17.6 lb of gear. The aluminum ball head gives you great flexibility for positioning your camera. And the included carry case makes it easy to take with you anywhere.
If you want to learn more about choosing the right travel tripod , check out our detailed guide. It covers everything from key features to look for to our top recommendations in different price ranges.

Travel Camera Backpacks
When choosing a camera backpack for travel, protection and comfort are key. The best bags are well-designed, roomy, and easy to carry.
Our top pick is the Manfrotto PRO Light Multiloader . It’s sturdy, spacious, and versatile. You can use it as a backpack, duffel, or sling. And it has access from the front and both sides.
The Wandrd Duo Daypack is another great option. It’s made from quality materials that protect your gear from the weather. It has ample storage and the main zipper allows quick access to your camera.
If you want to learn more about the best camera backpack for travel , check out our detailed reviews. We’ll help you find the perfect bag for your next adventure.

Manfrotto PRO Light Multiloader
The Manfrotto PRO Light Multiloader Camera Backpack is a top choice for photographers. It has a sturdy design and plenty of space for your gear.
The backpack is comfortable to wear, even when fully loaded. You can easily adjust it to fit your body.
This bag is perfect for any photography adventure. It’s a worthwhile investment for serious photographers looking for a reliable way to carry their equipment. To learn more about the Manfrotto Pro Light Multiloader, check out our full review .

Think Tank Airport Essentials
The Think Tank Airport Essentials is a camera backpack specifically designed for air travel. It has a smart design, useful features, and fits as carry-on luggage.
This backpack offers secure storage with an efficient use of space and a special lock. The lifetime warranty makes it a one-time investment for years of use.
While it lacks some versatility found in other bags, the Airport Essentials excels at storage capacity, protection, and style. Photographers who want a Think Tank Airport Essentials for their travels will find this bag a great choice.

Weatherproof Backpacks
Protecting your camera gear from the elements is essential. Weatherproof camera bags offer peace of mind when shooting in unpredictable conditions. They feature robust materials and coatings that keep water out, even in sudden downpours.
Our top picks, the Wandrd Prvke , Wandrd Duo , and Lowepro Freeline , have impressive exterior materials that don’t need a separate rain cover. The Prvke’s roll-top design is commonly used in waterproof bags, while the Duo and Freeline include waterproof zippers to secure even the weakest points.
When choosing a weatherproof camera bag , consider not only its water-resistant abilities but also its functionality for your photography style. Look for features like easy access points, ample storage, and comfortable carrying options that suit your needs.

A camera hard case is the best way to protect your photography gear while traveling. The Pelican Air 1525 is our top choice, with its tough exterior and foam-padded interior that keeps your equipment safe and secure. It’s spacious enough for your camera and accessories without being too bulky.
The Vanguard Supreme 46F is another excellent option, especially for adventure travel. It’s waterproof down to 16.5 ft (5 m) and can withstand temperatures as low as -40 C. The customizable Pick ‘n’ Pluck foam interior ensures a snug fit for each item.
For convenience, the Nanuk 935 is hard to beat. Its retractable handle and wheels make transportation a breeze, while the padded dividers keep your gear organized and protected. If you’re looking for a camera hard case that combines durability and ease of use, the Nanuk 935 is a great choice.

Travel Apps
Travel apps can make your photography adventures easier and more enjoyable. Snapseed is a powerful photo editor with a wide range of tools, from basic adjustments to creative effects. It’s free and available on both iOS and Android.
VSCO is another popular editing app that offers a simple, streamlined experience. Its presets are based on real film stocks, giving your photos an authentic vintage look. You can also use sliders to fine-tune the exposure and add fade or grain effects.
When you’re ready to share your travel photos, consider using Spot. This app helps you find picturesque locations and share your own discoveries with other photographers. With detailed maps and tips, it’s one of the best apps for travel photography .
Editing Travel Photos
Editing your travel photos can take them to the next level. There are many techniques you can use to improve your images, from simple adjustments to more advanced processes.
Cropping is a quick way to remove unwanted elements or zoom in on important parts of the photo. Sharpening will make details pop, while noise reduction can clean up high ISO shots. Straightening the horizon line is also important for a polished look.
Other useful techniques include adding a vignette to draw the eye, adjusting saturation and contrast, balancing highlights and shadows, and using digital blending for challenging lighting. For an extra level of refinement, you can even remove unwanted objects.
With practice, you’ll learn which editing steps work best for your travel images. Check out our in-depth guide if you’d like to dive deeper into editing travel photos .
Location Guides
Whenever you’re heading off somewhere new, it’s always best to do some research before you go. Your preparations will be more thorough and more specialized when you have a better idea of what to expect. That means you can hit the ground running when you arrive, and you’ll get better results.
We have a collection of location guides for some travel photography hot spots. These posts give you a head start when taking pictures in these locations, helping you get unique shots in popular places.
Let’s drop in on a few of the hottest locations in Europe, Asia, and the US.
European Cities
Europe is a photographer’s dream, with its stunning architecture, charming villages, and beautiful countryside. From the centuries-old buildings to the cobblestone streets, there’s no shortage of photo opportunities.
Some of the best European cities for photography include Amalfi, Italy, with its medieval stories and dainty houses; Venice, Italy, known for its canals and seafood; and Dubrovnik, Croatia, a seaside location with picturesque houses and Game of Thrones filming locations.
Other notable cities include Prague, Czech Republic, with its historic buildings and Gothic churches; Oia, Greece, with its stunning white buildings and sunsets; and Amsterdam, Netherlands, full of incredible art and historical monuments.
Whether you’re interested in architecture, landscapes, or street photography, these European cities offer endless inspiration. To learn more about the European cities for photography , check out this in-depth guide.

Paris is a photographer’s dream, offering countless opportunities to capture stunning images. From the iconic Eiffel Tower to the charming streets of Montmartre, there’s no shortage of beautiful subjects to photograph.
One of the best spots for photography in Paris is the Trocadero, which offers a perfect view of the Eiffel Tower. The Champs Elysee and Arc de Triomphe are also must-see locations, with the latter providing a great vantage point for capturing the city’s skyline.
Other notable photo locations include the Louvre, with its striking glass pyramid, and Notre Dame Cathedral, which offers both interior and exterior photo opportunities. It’s still striking even after the fire damage.
For a taste of modern Paris, head to La Defense, the city’s business district filled with skyscrapers and unique architecture.
To learn more about Paris photography , check out this in-depth guide that covers the best locations, tips, and techniques for capturing the city’s beauty.

London offers plenty of photography opportunities, from cityscapes to street photography and architecture. Some of the best locations include the Palace of Westminster, where you can capture iconic photos from Westminster Bridge or the south bank of the Thames. Tower Bridge is another well-known site, offering great angles for traffic light trails and sunrise photos.
The London Eye is a newer addition to the skyline, perfect for creative shots like zoom bursts or portraits inside the capsules. Don’t miss the photogenic wrought iron roof at Borough Market or the beautiful exterior of St Paul’s Cathedral.
For stunning views, head to The Shard, the highest skyscraper in the European Union. Buckingham Palace is a must-see, especially during the Changing of the Guard ceremony. If you’re interested in photography in London , these locations are sure to inspire you.

Rome is a photographer’s dream, with stunning architecture, rich history, and vibrant culture around every corner. From the iconic Colosseum to the beautiful Trevi Fountain, there are countless opportunities to capture breathtaking images.
Don’t miss the Vatican Museum, where you can photograph the famous spiral staircase. The Pantheon’s exterior and interior are equally impressive, especially during the blue hour. St. Peter’s Basilica offers great views of the city and a chance to capture the Pope if you’re lucky.
The Tiber River provides picturesque views, particularly from Ponte Sant’Angelo towards St. Peter’s Basilica. Piazza Navona and Piazza del Popolo are perfect for street photography and capturing traditional Roman scenes. To learn more about the best spots for Rome photography , check out this in-depth guide.

Venice is a photographer’s dream, offering endless opportunities to capture its unique beauty. The best time to avoid crowds and oppressive heat is during the low season or early morning. Sunrise at Academia Bridge provides a stunning view of the Grand Canal, while Piazza San Marco is best photographed before tourists arrive.
Don’t miss the iconic gondolas along the waterfront near Piazza San Marco, especially during sunset and blue hour. For a different perspective, head to San Giorgio Maggiore island to photograph the church and Venice’s skyline at golden hour.
Explore the backstreets of San Polo and Dorsoduro districts for charming piazzas, decaying architecture, and canal scenes. Murano and Burano islands offer colorful buildings and glassmaking demonstrations perfect for photography. To learn more about Venice photography , check out this in-depth guide.

Budapest is another fantastic city for photographers, offering endless opportunities to capture stunning images. From the grand architecture of the Hungarian Parliament Building to the thermal baths of Széchenyi, there’s no shortage of photogenic spots in this beautiful city.
One of the best places to start is the Fisherman’s Bastion, a neo-Gothic terrace with breathtaking views of the Danube River and the Pest side of the city. Nearby, you’ll find Matthias Church, a stunning example of neo-Gothic architecture that’s perfect for capturing intricate details and beautiful stained glass windows.
For panoramic views of the city, head to Gellért Hill, where you can capture the entire skyline from the Citadella fortress. And don’t miss the iconic Chain Bridge, which looks particularly stunning at night when it’s lit up against the dark sky. To learn more about the best spots for Budapest photography , check out this in-depth guide.

Japan is a brilliant destination for a photography trip. From stunning landscapes to interesting architecture and fascinating culture, there’s no shortage of inspiration for your travel photography.
Capture the vibrant cityscape of Minato, one of Tokyo’s special wards. Improve your food photography skills at Japan’s many cafés and restaurants, where every dish looks like a work of art. Take adorable photos of tame deer in Nara Park or sharpen your landscape photography in Hakone, with its hot springs, views of Mount Fuji, and gorgeous lake.
Don’t miss the breathtaking cherry blossoms in Japan’s parks during the Sakura season, usually from January to April. Visit the magical Blue Pond in Biei, go on an adventure in Kyoto’s Bamboo Grove, or document the commercial side of Japan in Shinjuku. For more inspiration on Japan photography , check out our in-depth guide.

Tokyo is one of the world’s most vibrant locations, offering a diverse range of subjects to capture. From the bustling streets of Shinjuku and Shibuya to the traditional temples of Asakusa, there’s no shortage of incredible hot spots to explore.
For those seeking modern architecture and vibrant city life, the Tokyo Skytree and Roppongi Hills Mori Tower provide stunning views of the skyline. Harajuku, the heart of Tokyo’s youth culture, is perfect for street photography and capturing unique fashion trends.
If you’re interested in learning more about Tokyo photography , check out our in-depth article to help you plan your trip and find the best spots to shoot. With its mix of old and new, Tokyo is a city that will inspire and challenge you as a photographer.

Etiquette in Japan
When taking photos in Japan, it’s important to be respectful and follow proper etiquette. Always ask for permission before taking someone’s photo, especially if you plan to share it publicly. If you can’t get permission, blur the person’s face to protect their privacy.
Be prepared to show your photos to the police if asked, and avoid using selfie sticks in crowded areas to prevent injuries. In cafés and restaurants, ask the staff for permission before taking photos of your meal.
At night, skip the flash and use a higher ISO and tripod to capture vibrant neon lights. Avoid taking photos in no-photo areas, of children without parental consent, geishas, people on public transport, and those in the middle of prayer. For more tips on photography in Japan , check out this in-depth guide.

Los Angeles
Los Angeles is a street photographer’s paradise. From the colorful Venice Beach boardwalk to the iconic Griffith Observatory, there are endless opportunities to capture the city’s unique character.
The Santa Monica Pier is a must-visit spot, especially in the evening when the lights come on. Echo Park offers stunning views of the skyline, particularly at sunrise or sunset.
Downtown LA is full of hidden gems like the Bradbury Building with its intricate architecture and the bustling Grand Central Market. For a taste of old Hollywood glamor, head to Union Station or the Hollywood Bowl Overlook. Places for street photography in Los Angeles are as diverse as the city itself, so grab your camera and start exploring.

New York City remains one of the most popular locations for photographers, with countless iconic locations to capture. Central Park offers a variety of scenes, from the Bethesda Terrace and Fountain to the Alice in Wonderland statue. The Brooklyn Bridge is another must-see, with its stunning suspension cables and brick towers.
Grand Central Station and the Chelsea Market are great for street photography and architectural details. Rockefeller Center provides both street-level interest and panoramic views from its observation deck.
Of course, no trip to New York would be complete without photographing the Empire State Building and the Statue of Liberty. For breathtaking cityscapes, head to Brooklyn Bridge Park or find a unique vantage point to capture the Manhattan skyline. Don’t miss the Flatiron Building and the vibrant energy of Times Square.
To learn more about the best spots for New York photography , check out our in-depth guide.

Photography Road Trip
Planning a road trip for photography involves choosing the right vehicle, deciding on accommodation, and mapping out your route. Your vehicle should be safe, comfortable, and suitable for the terrain you’ll encounter. Living out of your vehicle, like an RV or camper van, allows you to stay closer to photo locations and immerse yourself in nature.
When planning your route, prioritize the locations you want to photograph. Research potential spots using apps and websites like Pinterest, 500px, Flickr, and Google’s My Maps. Plot your route, campgrounds, points of interest, and photo locations to make the most of your trip.
Electricity is essential for photographers on the road. Ensure you have reliable power sources, such as a dual battery system, solar panels, or a 12v inverter. Always carry a power bank as a backup. To stay connected, use local SIM cards with data or take advantage of Wi-Fi at cafes and fast food outlets.
By planning your shots in advance and considering factors like lighting, crowds, and unique perspectives, you can capture stunning images that tell the story of your road trip photography adventure.

Inspiration from the Best Travel Photographers
Travel photography captures the adventures and locations you visit during your journeys. It involves many genres like landscape, architecture, street, and environmental photography. Travel photographers often tell stories through their images, focusing on special moments and atmospheres.
There are many approaches to travel photography. You can focus on people, take self-portraits, emphasize landscapes, or try aerial photography. Mixing these approaches can result in a unique style and help you gain recognition as a travel photographer.
If you’d like to learn more about travel photographers , we have an article that goes into greater depth on the topic.
Travel Blogs
Travel photography blogs are a great source of inspiration for your next adventure. They feature stunning images from around the world and provide useful tips for capturing your own travel photos.
Some of the best travel photography blogs cover a wide range of topics, from destination guides to photography tutorials. They showcase the work of talented photographers who have explored every corner of the globe.
Whether you’re planning your next trip or simply looking for some armchair travel, these blogs are sure to inspire you. To discover some of the best travel photography blogs to follow in 2024, check out this list of top picks.

15 Photography tips on your road trip
by Noel | | Photo Tips , Photo tour , Travel Photography | 13 comments

Capture Memorable Moments: Photography Tips for Your Road Trip Adventure
Everyone loves taking road trips but many travelers spend more time planning the trip experience first and the photography as a secondary function to chronicle the adventure. It’s always disappointing to come back home from the trip and bring back photos that are lackluster and just don’t show the magnificence of a location. This can be very disappointing, but with some pre-planning, you can return home from the trip and bring back some amazing pictures to share about your experience.
It just takes a little more time to plan the photography part, try some basic photography techniques and being at your destination in the right time and place, so you will have better opportunities to photograph your subject. I’ve done a lot of road trips around the world and have learned so much from doing these adventures and how to maximize your timeframe while traveling to showcase your journey from your photography.

We share our favorite ways to capture images along a road trip adventure below. Remember, photography is a creative expression, so don’t be afraid to experiment, try new techniques, and capture the moments that make your road trip memorable. Enjoy the journey and have fun with your photography!
1. Plan your photo trip requirements – just like planning your road trip, it is also crucial to plan your photography approach for this trip. This could be anything you can do in thinking about the destination and checking out websites, blogs and magazines for inspiration of where certain images were taken and how to even get to those locations. Planning the logistics for getting to a certain spot including the important golden hours in the morning and sunset are important considerations to coming up with stunning imagery from your trip
2. Keep flexible with your plans – when it’s a road trip inspiration comes at anytime especially when you are passing through some interesting areas that you may just want to spend more time in to explore and cut things out from your regular agenda. Being flexible in your timeframe, places of interests and what looks attractive that you may want to explore in more detail.
3. Consider your photography equipment – road trips allow you to bring as much or as little equipment with you as you are comfortable with. If you are willing to slepp all your electronic gear with you and keep it handy in your trunk, then go ahead. But for those that are more comfortable traveling light know what you are capable of doing with the equipment you have and how much you are willing to walk to get yourself in a better range to the subject, either in a close up or panorama. Make sure you also bring your handy tripod or monopod for those shots you want to get perfect.
4. Always be ready to shoot – It seems like when you are driving or just happen into something unusual, the moment comes and goes quickly. This is when it makes sense to always have your camera ready to shoot. In fact get those preset camera settings already in place for your shutter speed, priority setting or manual mode so all you have to consider is shooting. Or if you have not time for trying out the perfect setting, just put it on program or automatic and at least you will get the shot that normally you would have missed because the camera setting was not in place.

5. Tell the whole story – Getting a sense of place in a location better known as an environmental shot, really gives a perspective to the place you are visiting. Try to include some of the local scene, graphic elements and signage, architecture, people, food and anything else that gives us a sense of place that is truly unique and tells us a complete story without any words or captures to describe your photograph.
6. Have fun on your trip and show that in your imagery – Be curious and really be in the moment while you travel, this is part of the joy of doing road trips and finding something new to experience. Now the challenging part is to photograph that experience to convey what you are actually doing or seeing at that moment.
7. Golden hour – It’s important to plan and be somewhere specific in order to capture those wonderful sunrise or sunset moments (the golden hour which includes the timeframe before and after sunrise or sunset). These are the best timeframes when you want to be at the site shooting those gorgeous landscapes and landmarks. It does take a little effort to plan on a road trips to be at a location for the golden hour timeframe. But, you will be rewarded for your efforts at the destination when lighting conditions are ideal and you get to photograph your subject at the golden hour.

Senso Ji temple in Tokyo looking to the sky
8. Take those obligatory famous landmark photos, then show us something different about this place . This can be done by infusing some local people or fashion, a different angle to present this landmark or framed in an unusual format. This is a great time to experiment and try something out of the box to see what you can do that’s different now that you have taken the standard tourist shot of that venue.
9. Shoot fast – along with keeping your camera ready, if you are on a drive and doing the drive by shootings, have your camera set on burst mode so at least you can have a variety of shots to choose from instead of the one blurry image you took of that place or an experience that happened only during that moment.

Route 66 at Seligman, Arizona
10. Take the scenic route – get off the main highway and go on those slower but more scenic routes. These roads really do live up to their reputation to show you the more genuine and almost forgotten towns, quirky venues, fun locals and those wonderful landscapes that you will see from taking the time to drive through these scenic routes

Streets around Marrakesh in Morocco
11. Don’t just show us the scenery – road trips are filled with those wonderful small details: the fascinating people and traditions, delicious local foods and roadside stands, architecture and anything else that stands out beyond the traditional photo shots in front of a landmark or beautiful landscape. It’s also great to use people within a landscape to show a sense of scale, doing something active or being place in a strategic spot to create an interesting composition.
12. Balance between taking that photo and savoring the moment – Yes it is amazing to capture that scenery or landmark, but it is also important to be present and admire that visual for just what it is and how special it is. This definitely is a balance of being present and enjoying that immediate scene and taking the time to portray just the way that you are experiencing it for the moment.
13. Using a tripod – Not every situation deserves using a tripod on your road trip especially when you are always on the go. But for those really spectacular scenic shots or even difficult imagery with challenging lighting conditions, using a tripod is mandatory. You can also look for alternatives like some a solid stand/surface or even a makeshift prop you can put your camera or even a monopod if you don’t have space to travel with a tripod.

14. Looking from above – when you are at a vista point or location where you can climb up to get a nice view, make sure you do it! Having a different perspective of a landscape, city or landmark is more interesting when you can see it from above, and you will be able to capture a sense of place looking down from a high vantage point.

15. Time to experiment – Road trips are the perfect excuse to take risks and show us something new or creative. This is really the best time to be curious and explore anything that fascinates or peaks your interest. Try different camera settings, different camera angles, shooting from above or below and using your remote timer to include your subjects or yourself into the scenery.
More inside tips for your road trip and photography focus
Here are some additional inside tips to make your road trip and photography-focused adventure even more rewarding:
- Research Scenic Routes: Plan your road trip along scenic routes known for their natural beauty or cultural landmarks. This will provide abundant photography opportunities along the way.
- Allow for Flexibility: Embrace spontaneity and be open to detours and unexpected discoveries. Some of the best photo opportunities can arise when you least expect them.
- Take Breaks: Schedule regular breaks to stretch your legs, explore new areas, and capture unique shots. Roadside attractions, small towns, and hidden gems can offer interesting subjects for your photographs.
- Capture Local Flavors: Use your camera to document the local cuisine, markets, and regional specialties. Food photography can add a delicious dimension to your road trip memories.
- Scout Locations in Advance: If there are specific landmarks or photography hotspots you want to visit, research them in advance. Look for the best angles, lighting conditions, and times of day to capture them.
- Use Apps for Planning: Utilize navigation and travel apps to find the best photo spots, scout accommodations, and track weather conditions along your route.
- Stay Patient and Observant: Be patient and wait for the perfect moment to capture a shot. Keep an eye out for unique compositions, interesting patterns, and fleeting moments that make your photographs stand out.
- Experiment with Different Genres: Explore various genres of photography during your road trip. Try landscape, portrait, street, and even astrophotography if the conditions are favorable.
- Seek Local Advice: Interact with locals and fellow travelers to get insider tips on lesser-known but picturesque spots. They may suggest hidden gems that are off the beaten path.
- Backup Your Photos: Carry extra memory cards or a portable hard drive to back up your photos during the trip. This ensures that your precious memories are safe, even if something happens to your camera.
- Take Care of Your Gear: Keep your camera and lenses clean and protected during the journey. Carry a cleaning kit and use protective cases or bags to prevent damage.
- Document the Journey: Capture not only the destinations but also the moments in between. Photograph the open road, fellow travelers, and the overall experience of the road trip itself.
If you enjoyed these camera tips, please check out some of my other photo tips below
Black and white photo tips for beginners
Capturing street images – some photo tips and techniques
15 Instagram tips for better photos and compositions
10 Photography tips for grey sky or rainy days
Flower and nature photography – tips on making your images pop
Photographing people – some tips and techniques
Photography tips for travel Photography
Travel photography – what to pack
Photo tip – backlighting your image
Photo tip – fill the frame
Food photography – making your images pop
Try keeping your camera clean and safe on a road trip
Keeping your camera clean and safe during a road trip is essential to ensure optimal performance and protect your valuable equipment. Here are some tips to help you keep your camera clean and secure throughout your journey:
- Use a Camera Bag or Case: Invest in a reliable camera bag or case that provides padding and protection against bumps, shocks, and moisture. Make sure it has compartments to organize your camera body, lenses, and accessories.
- Pack Silica Gel Packs: Include silica gel packs in your camera bag to absorb moisture and prevent condensation buildup, especially in humid environments. This helps protect your gear from potential damage caused by moisture.
- Carry Lens Cleaning Tools: Pack a microfiber cloth, lens cleaning solution, and a lens brush to keep your lenses clean and free from dust, fingerprints, and smudges. Regularly wipe the lens surfaces and use the brush to remove any debris.
- Handle with Care: Be mindful of how you handle your camera and lenses. Avoid touching the glass surfaces and use lens caps or hoods when not in use to provide extra protection.
- Protect from Extreme Temperatures: Avoid exposing your camera gear to extreme temperatures. Keep it shielded from direct sunlight or excessive heat, which can damage the internal components. In cold conditions, allow your camera to gradually adjust to room temperature before use to prevent condensation.
- Secure Your Camera: Use a neck strap or wrist strap to keep your camera secure while shooting. This minimizes the risk of accidental drops and damage.
- Clean Your Camera Body: Regularly wipe down your camera body with a soft, dry cloth to remove dirt, dust, and debris. Pay attention to the buttons, dials, and LCD screen.
- Be Mindful of Changing Lenses: If you need to change lenses during your road trip, do so in a clean and sheltered environment to minimize the risk of dust or debris entering the camera body.
- Backup Your Photos: Create regular backups of your images to prevent losing precious memories. Consider carrying an external hard drive or utilizing cloud storage options to store your photos securely.
- Check for Damage: Routinely inspect your camera and lenses for any signs of damage or wear. If you notice any issues, address them promptly or seek professional assistance if needed.

Crossing the Virgin River at Zion National park
Conclusion on 15 Photography tips on your road trip
Embarking on a road trip with a photography focus opens up a world of possibilities to capture stunning images and create lasting memories. By combining the freedom of the open road with your passion for photography, you have the opportunity to explore new destinations, immerse yourself in diverse landscapes, and document the beauty you encounter along the way.
Through careful planning, flexibility, and an open mind, you can discover hidden gems, unique perspectives, and extraordinary moments that make your road trip truly special. Whether it’s capturing the grandeur of nature, the vibrant energy of city streets, or the intimate details of local cultures, your camera becomes a powerful tool to translate your experiences into visual stories.
Thanks for visiting today, if you enjoyed reading this post on 15 Photography tips on your road trip , please do share it with any of the social media links below, thank you.
If you like what you see, come and check out my other social media channels for more updates, including Instagram , Pinterest and Twitter .
Sharing is caring!
13 Comments

“If you like what you see, come and check out my other social media channels for more updates, including Instagram, Pinterest and Twitter.” None of these links seem to work, Noel.

Great tips. It is always good to have a refresher course in photography. On my recent trip to Trinidad, I rediscovered that golden hour in the morning after sunrise. Got some great shops and have jet lag to thank for it.

Some great tips here. I like the one about pre-planning and researching your photos in the same way you do everything else in your trip.

Great advice, thanks. We try to follow most of this but will keep working on it.

Love road trips and these are great tips! Really need to remember to capture more than just the scenery as it adds so much more to the destination as a whole, as well as the story. 🙂

Thanks for the tips (and more great photos)

Great photo tips Noel. I’ll put them into use right away. I’m off to read your tips on food photography.

This is tremendous advice! I was already thinking I should have a plan for the photos on my next trip. Your tips have clinched it. What a great article, thanks!

Great tips. I have to pay more attention to the Golden Hour. I also like the tip about telling a whole story with the photo. Looking for that perspective should make for some interesting photos.

Talk about timely! Your tips are a great reminder to me as I head off to Bhutan in 2 weeks. I liked #8 and #11 because I tend to do a lot of landscape shots and getting other details and close ups can really help tell a story. So glad you wrote this post….and once again, I LOVE your photos!

thanks so much for the comments, check out some of the other tips that I have also included in the post Janice, they would be perfect for your trip!

Thanks for these wonderful tips that encourage the slower, off-the-highway road trip style we love. Can’t always build our stops around the golden hour, but it’s really nice when we do. When possible, I love to include a person in large landscape shots to give some perspective (pretty tired of the “person jumping in front of the scenery shot” though). Love your Route 66 picture!

Love these tips. The Golden Hour is a great one. I will have to remember that.
Submit a Comment Cancel reply
Your email address will not be published. Required fields are marked *
This site uses Akismet to reduce spam. Learn how your comment data is processed .
Hi, I'm Noel, a writer and photographer based in San Francisco and Hawaii. I write about delicious food and wine indulgences, thoughtful luxury, and adventure travel. I share camera tips and techniques while exploring new and unusual places around the world. My site explores culture and history, art and architecture, world heritage sites, exotic locals, along with nature tours and natural landscapes worldwide. Quite a mixed bag of curiosities and quirky interests, just like myself.
Posts by category
5 Tips to Transform Your Road Trip Photography
A Post By: Simon Ringsmuth

Embarking on a road trip may not initially sound like the most thrilling adventure. Endless stretches of mundane scenery, hours of gazing out the window as the world whizzes by at 70 miles per hour – it’s a recipe for monotony, right?
Well, let me tell you a little secret: Even the dullest car ride can transform into a treasure trove of incredible photo opportunities. With a pinch of planning and a dash of creativity, those seemingly uninspiring countryside views can be the backdrop for photos that’ll make your friends green with envy.
So buckle up, because I’m about to spill the beans on how you can turn those seemingly boring roads into a photographer’s paradise. Get ready to unleash your inner artist and uncover the hidden gems that await along the way. Trust me, your next road trip is going to be one for the photo album!
1. Take the road less traveled
I live about 400 miles away from my parents and siblings, so I find myself hitting the road back to my old stomping grounds a few times a year. The quickest route involves a turnpike and miles of monotonous interstate driving. Sure, it lets me bypass small towns without slowing down every 20 minutes, but it also robs me of some incredible photo opportunities.
You see, interstates and the like may get you to your destination in record time, but when it comes to snapping stunning photos, they fall short. What’s the solution? Instead of taking the quick and easy path, embrace your inner Yoda and seek out alternative routes to your destination. These roads may not be as swift, but trust me, they’re brimming with photographic charm.

Grab your favorite mapping app or dust off a good old-fashioned physical map. Look for quaint, two-lane roads that wind through captivating landscapes. As you traverse these scenic routes, you’ll encounter breathtaking sights that the interstate can never deliver!

Even better, if you take back roads, you have the freedom to pull over at your leisure without causing a traffic nightmare.
So slow down, explore, and let the road less traveled become your gateway to unforgettable photo opportunities.
2. Plan your photos in advance
When you embark on a road trip, it’s essential to have a game plan for capturing amazing photos. Don’t just rely on chance encounters along the way; instead, be proactive and set your sights on specific picture-perfect moments.
Let me introduce you to the Baader-Meinhof phenomenon – a quirky mind trick that works in your favor. Once you’ve got a particular idea in mind, like photographing tractors, your brain starts playing a game. Suddenly, you’ll spot tractors popping up everywhere, as if they’re waiting for you to notice them.
Now, let me share my experience. During a recent road trip, I decided to focus on windmills. I did my homework and chose slower but more intriguing routes on the map. I was determined to capture the beauty of these majestic structures. To be honest, I couldn’t recall ever seeing windmills before, but I had a feeling the Midwestern United States would surprise me. And boy, was I right!

As the hours rolled by on my drive, windmills seemed to appear one after another, like a magical photo opportunity conveyor belt. I couldn’t help but snap some incredible shots that exceeded my expectations.

You can apply this trick to your own road trips. It’s simple, really. Before you hit the road, pick a particular subject or type of photo you want to capture. Then keep an eye out for those hidden gems along the way. Dilapidated barns, weathered billboards, old bridges, towering cacti, breathtaking mountain vistas, or even dusty dirt roads – these are all exciting subjects just waiting for your lens.
So do a bit of planning. Think about what you want to photograph. Plant the ideas in your mind, and you’ll be amazed at how they flourish into fascinating and breathtaking photos!
3. Time of day is paramount
When it comes to capturing amazing road trip photos, the time of day is absolutely crucial. Let’s face it, sunlight can make or break any type of photo, and the same holds true for those epic shots you want to take on your journey.
Picture this: You’re cruising down the open road, and you have some beautiful landscape photos in mind. If you set out in the morning or evening, your results will often be spectacular – but if you set out at high noon, you can kiss those breathtaking sunrise or sunset pictures goodbye! It may sound like common sense, but understanding how sunlight affects your photos will have a massive impact on your departure time and overall planning.

If you’re not quite sure what kind of pictures you want to snap on your road trip, plan to hit the road at least 30 minutes before sunrise. Why? Because magic happens during those early hours, and you might stumble upon something truly captivating.
On the other hand, if you already have a specific photo location in mind along your route, make sure you time your trip accordingly. This way, you’ll increase your chances of capturing that spot in the most awe-inspiring light possible.
Remember, time is of the essence when it comes to photography, and being mindful of the sunlight’s influence will elevate your road trip pictures to a whole new level of brilliance. Don’t overlook the power of timing – embrace it and watch your photos come alive!

4. Allow more time than you need
One of the worst things that can happen to a road-trip photographer is stumbling upon a jaw-dropping sight or a famous landmark, only to realize you’re running out of time and can’t stop to snap a picture. Trust me: It’s a heart-wrenching experience. That’s why you should add an extra hour or two to your drive schedule, just to be safe. Don’t let time limit your creative adventures.
If I take the boring interstate to head back home and plan on stopping only once, I can make the trip in about six and a half hours. But that’s not my style when it comes to driving. I prefer taking those less-traveled roads, making pit stops at least half a dozen times for potential photo opportunities. Sure, it adds an extra hour or two to my journey, but boy, is it worth it!

Having that extra time is not just about capturing amazing shots; it’s also a fantastic excuse to stretch your legs and soak in the breathtaking scenery, even if you’re not sure about the photographic possibilities. On one of my recent drives to visit my folks, I accidentally drove past a massive field filled with gorgeous sunflowers. The lighting wasn’t ideal, but I stopped anyway and took some pictures. I made a mental note to revisit the spot on my way back. With no idea how long it would take, I made sure to allocate plenty of extra time for my drive, and guess what? It paid off! Hours later, I pulled over and captured a cool shot of an oil pump and a majestic wind turbine:

5. Don’t worry about your gear
As you prepare for your next exhilarating road trip, you might find yourself wondering if your current gear is up to the task. But here’s the exciting part: Capturing amazing road trip photos doesn’t require fancy equipment. In fact, you probably already have everything you need right at your fingertips. Even a smartphone camera can transform ordinary moments into breathtaking vistas and picturesque landscapes.
Don’t let the worry of not having the latest gear hold you back from unleashing your creativity on those long hours spent behind the wheel. Whether you wield a DSLR or rely on your trusty smartphone, rest assured that fantastic shots are within your grasp. And if you happen to have a trusty tripod , it’s worth bringing along, as you never know when it might prove useful.

As you hone your skills, you may discover a preference for a specific lens or camera that complements your photographic style. But remember, the true magic lies in mastering lighting techniques, strategic planning, and venturing off the beaten path rather than fixating on acquiring the latest camera gadgetry. So embrace the gear you have, and let your passion for exploration lead to captivating images that will stand the test of time.

Road trip photography: final words
And there you have it, folks! We’ve reached the end of our wild ride through the world of road trip photography. Who knew that those endless stretches of highway could hold so much potential for breathtaking snapshots?
So grab your gear, buckle up, and embark on your own epic photo adventure. Capture those picturesque landscapes and unexpected surprises along the way. Remember that the road is your canvas, and your camera is your brush. Now go out there and create photographic masterpieces that will leave everyone in awe. Happy shooting!
Now over to you:
Do you have any favorite tips or tricks for getting good pictures while out driving? Share your thoughts in the comments below!

Read more from our Tips & Tutorials category

is an educational technology specialist at Oklahoma State University and enjoys sharing his enthusiasm for photography on his website and podcast at Weekly Fifty. He and his brother host a monthly podcast called Camera Dads where they discuss photography and fatherhood, and Simon also posts regularly to Instagram where you can follow him as @sringsmuth.
- Guaranteed for 2 full months
- Pay by PayPal or Credit Card
- Instant Digital Download

- All our best articles for the week
- Fun photographic challenges
- Special offers and discounts
Welcome To The General RV Blog!
Because RVing Is Awesome…
8 Road Trip Photography Tips for Capturing Memories
Last Updated on September 22, 2020 by Christina
Epic adventures deserve epic photos! To help you get ready to capture those memories, we’re sharing road trip photography tips from our professional photographer and videographer, Brandon Bailey.
Brandon has been taking photos since elementary school, when his grandmother gifted him his first camera. Today, his portfolio includes many of General RV’s new videos , in addition to work for musicians, small businesses, and a billboard ad campaign for a hotel in Amsterdam. He has also trekked all over the United States, visiting national parks and taking countless photos documenting his journey along the way. Here are his tips for capturing memories on your next adventure.
Note: The techniques and tips found in this article are for beginner- and amateur-level photographers. If you’re just getting into photography, we recommend checking out these resources and this glossary of photography-related terms .
Road Trip Photography Tip #1: Pack the right gear

In addition to your camera, you’ll likely want a few lenses to switch between for different types of shots. If you can’t bring more than one lens, pick one that’s got enough range to be flexible. Brandon’s go-to is a Canon 24-105mm, f/4 lens. “It’s a perfect walk-around, multi-purpose lens. 24mm is a good wide angle for landscapes, while 105mm provides a comfortable level of zoom.” A sturdy tripod is another must-have. The brand doesn’t matter, so long as it is well-constructed. Remember, you’ve probably invested hundreds or even thousands of dollars into your gear. Would you risk it by buying a cheaper tripod that might tip over if the wind suddenly gusts?
Brandon recommends purchasing a tripod and tripod head with a weight rating that is at least 25% greater than the heaviest combination of camera and lens that you’ll use. Another consideration is a remote shutter release (or intervalometer). This will be a must if you plan on taking long exposure photos or time lapse photography, like of the night sky. Lastly, don’t forget your camera’s battery and charger.
Road Trip Photography Tip #2: Bring extra storage and batteries
When it comes to storage space and battery life, you can never have enough. Be sure to take multiple memory cards on every road trip so you can shoot without fear of running out of space. Trust us. You don’t want to resort to deleting photos on your camera to make room for new shots. An external hard drive can also be handy if your travel plans are longer; just bring a laptop and transfer photos to your hard drive regularly, so you can start with blank memory cards every day.
Likewise, you’ll want to bring enough batteries for your camera to match your shooting plans. Continuous shooting and using the flash often will drain battery life quickly, so think about your needs and plan accordingly. If the RV or vehicle you are traveling in has a power source, make sure to bring any required cables or adapters. If you’re traveling off the grid, consider investing in an external power bank to charge your equipment.
Road Trip Photography Tip #3: Experiment with settings to your advantage

There are three main factors that affect how a picture will be exposed: the aperture controls how much light reaches the camera’s sensor; the shutter speed determines how long the shutter remains open while taking a picture; and ISO defines the sensitivity to light of the sensor. By adjusting these variables, you can control the exposure of your photographs.
Don’t be afraid to experiment with different f/stops and shutter speeds to achieve various depths of field and brightness. Make small adjustments to these settings and take multiple shots of each scene to find the most striking combination. You’ll enhance your photography skills in the process. “For a year straight, I took and edited photos every single day, teaching myself everything I know about the way light reacts to a camera sensor, and how to manipulate the camera settings and the light to create what’s in my mind’s eye,” says Brandon.
Road Trip Photography Tip #4: Pick your location and prepare

Once you’ve picked a location, do some prep work. This is especially helpful for capturing sunrises and sunsets, as you’ll want to know when and where the sun will be beforehand. He also recommends using a tripod to avoid blurriness. “You’ll want your aperture to be at least f/10 or f/22, so your shutter speed has to be a little longer to compensate for the lack of light.”
Unless you have something blocking the sun, you should not shoot directly at the sun. Instead, try shooting wide landscapes to capture all the colors of the sky. “You can add interest by selecting a spot that will have another object in the foreground, like a tree or bridge, but make sure it doesn’t distract from the actual sunset.” For sunrises, start shooting as soon as you see the sun peeking over the horizon. Colors will be most intense at this moment and begin to fade as the sun rises. During sunsets, the colors will be best right after the sun has gone down, and you’ll have a small window before it gets dark.
Road Trip Photography Tip #5: Add interest to landscapes

Landscapes are a classic way to capture memories along your next road trip, and they give context to your journey. You can add interest to your photos by framing landscapes with natural architecture like rock formations or tree branches. Diagnose the scene as a whole and then follow the rule of thirds . “I try to have my main subject on one of those four intersections and interesting things in the other two-thirds to create a photo that will really capture attention and hold it,” says Brandon. Also, consider using different perspectives for a unique take on an often-photographed scene. “If you get higher or lower, the angle might make it that much better. Don’t be afraid, especially in the age of digital, to take one high shot, one low shot, and one standard perspective.” Try (carefully) climbing on the back of your RV or laying down on the ground to capture an alternative perspective.
Road Trip Photography Tip #6: Capture action and emotion

While landscapes can capture the locations that you visit, action photos can convey more emotion to add to your road trip story. For example, Brandon’s adventures often include some type of outdoor recreation, from snowboarding to jet-skiing. To capture action and movement without too much blur, you’ll need a tripod. Then, choose a slower than normal shutter speed (Brandon recommends trying 1/2 or 1/10 of a second). Follow the subject by panning the camera so they stay within your frame while you’re taking the photo. The result is a great shot that captures excitement and energy with the subject still in focus.
Road Trip Photography Tip #7: Remember the small details

Another trick for capturing great road trip memories is to take photos of the small details along the way. A meal prepared over a camp fire , frost on grass, dusty boots outside of an RV – they all help tell a unique story. Use close-up shots, a wide-angle lens, or a soft focus to make something ordinary into a favorite photograph that captures your adventurous side. And be sure to take a portrait of yourself and your travel companions. Traveling brings people closer together; you’ll cherish that photo long after the journey ends.
Road Trip Photography Tip #8: Don’t stress, have fun

Despite all your research and meticulous planning, sometimes things don’t go as expected. When that happens, look at it as an opportunity instead of an obstacle. “I was on a month-long road trip traveling and camping through national parks in the west. I planned to camp at Grand Canyon National Park the next day. But I checked the weather and noticed there was a random cold spell. Temperatures would be dropping to 20 degrees at night,” says Brandon. “That’s how I discovered that, if you book a cruise two days before it sets sail, you can get really cheap deals!”
He had only 48 hours to travel 30 hours across the country and depart from Port Canaveral, Florida. The experience was one Brandon will never forget. “Remember, road trips are adventures. It’s the memories you make along the way that you’ll share for years to come. Have fun on your journey.”
We hope these road trip photography tips have inspired you to hit the road and capture memories. To view Brandon’s work and latest travel adventures, follow @Consciously_Created on Instagram. Looking for places to go on your next adventure? Check out our destination inspiration posts. And, wherever you travel, don’t forget to grab your camera.
roadtripfrom.com

The Best Road Trip Routes for Photography: Capturing Stunning Images on the Highway
There’s something about hitting the open road that ignites a sense of adventure and freedom within us. And for photography enthusiasts, a road trip presents the perfect opportunity to capture stunning images of the world around us. Whether you’re a seasoned photographer or just starting out, there are endless possibilities for capturing breathtaking shots on the highway. In this article, we’ll explore some of the best road trip routes for photography, from coast to coast. We’ll take you on a journey through some of the most picturesque landscapes in the country, and share tips and tricks for capturing the beauty of nature, exploring urban jungles, and making memories that last a lifetime.
For those who love the great outdoors, a road trip through the national parks is a must. From the towering peaks of Yosemite to the rugged coastline of Acadia, there’s no shortage of natural wonders to capture on camera. But it’s not just about pointing and shooting – capturing stunning images of nature requires a keen eye and a few tricks of the trade. We’ll share some of our favorite techniques for capturing the perfect shot, from using the right equipment to mastering composition and lighting. And for those who prefer the hustle and bustle of city life, we’ll explore some of the best road trip routes for capturing captivating street photography. Whether you’re exploring the neon-lit streets of Las Vegas or the colorful neighborhoods of New Orleans, there’s no shortage of inspiration to be found in the urban jungle. So pack your bags, grab your camera, and get ready for an unforgettable photography road trip!
Table of Contents
Discover the Best Road Trip Routes for Photography: From Coast to Coast
Are you a photography enthusiast looking for the perfect road trip routes to capture stunning images? Look no further! We’ve compiled a list of the best road trip routes for photography from coast to coast.
- Starting on the East Coast, the Blue Ridge Parkway is a must-see for any photographer. This scenic drive stretches 469 miles through Virginia and North Carolina, offering breathtaking views of the Appalachian Mountains. Be sure to stop at overlooks like Craggy Gardens and Waterrock Knob for panoramic shots of the mountains.
- Heading west, the Pacific Coast Highway in California is another iconic road trip route for photography. This 655-mile drive offers stunning views of the Pacific Ocean, rugged cliffs, and picturesque beaches. Stop at Bixby Bridge for a classic shot of the coastline or Pfeiffer Beach for a unique shot of the purple sand.
- If you’re looking for a more off-the-beaten-path road trip route, consider the Million Dollar Highway in Colorado. This 25-mile stretch of road winds through the San Juan Mountains, offering stunning views of the rugged terrain. Be sure to stop at Red Mountain Pass for a shot of the vibrant red mountains.
- For a truly unique road trip route, head to Alaska and drive the Dalton Highway. This 414-mile drive takes you through the Arctic Circle and offers stunning views of the Northern Lights. Be sure to bring a tripod and a remote shutter release to capture the aurora borealis.
No matter which road trip route you choose, be sure to plan ahead and bring the right gear. A good camera, tripod, and a variety of lenses will help you capture the perfect shot. And don’t forget to stop often and take in the scenery – sometimes the best shots are the ones you don’t plan for.
So pack your bags, hit the road, and get ready to capture stunning images on these best road trip routes for photography from coast to coast.
Capture the Beauty of Nature: Exploring National Parks on Your Road Trip
One of the best ways to capture stunning images on a road trip is by exploring the national parks along the way. These parks offer some of the most breathtaking landscapes and natural wonders that are perfect for photography.
- Start your journey by visiting Yellowstone National Park, which is known for its geysers, hot springs, and wildlife. The park is home to the famous Old Faithful geyser, which erupts every 90 minutes, and the Grand Prismatic Spring, which is the largest hot spring in the United States. You can also capture images of bison, elk, and grizzly bears in their natural habitat.
- If you’re looking for a desert landscape, then Joshua Tree National Park is the perfect destination. The park is located in Southern California and is known for its unique rock formations and Joshua trees. You can capture images of the sunrise and sunset over the desert landscape, as well as the Milky Way at night.
- Finally, visit Acadia National Park, which is located in Maine and offers stunning views of the Atlantic Ocean. The park is known for its rocky coastline, lighthouses, and fall foliage. You can capture images of the sunrise over Cadillac Mountain, as well as the colorful leaves during the autumn season.
Remember to bring your camera gear, including a tripod, filters, and extra batteries. Also, be sure to check the weather conditions and plan your visit accordingly. With these tips, you can capture stunning images of the national parks on your road trip.
Unleash Your Creativity: Tips and Tricks for Capturing Stunning Images on the Highway
There’s something magical about hitting the open road and exploring new places. And for photography enthusiasts, a road trip is the perfect opportunity to capture stunning images of landscapes, cityscapes, and everything in between. But how do you make the most of your time on the highway and capture images that truly stand out? Here are some tips and tricks to help you unleash your creativity and take your road trip photography to the next level.
- First and foremost, it’s important to plan your route ahead of time. While spontaneity can be fun, having a general idea of where you’re going and what you want to photograph will save you time and ensure that you don’t miss any must-see spots. Research the areas you’ll be driving through and make a list of potential photo locations. This could include scenic overlooks, historic landmarks, or quirky roadside attractions.
- When it comes to gear, less is often more. While it’s tempting to bring along every lens and accessory you own, lugging around a heavy camera bag can quickly become a burden. Instead, focus on bringing a few versatile lenses that will allow you to capture a variety of shots. A wide-angle lens is great for landscapes, while a telephoto lens can help you zoom in on distant subjects. And don’t forget a tripod – it’s essential for capturing sharp, long-exposure shots.
- One of the biggest challenges of road trip photography is dealing with changing lighting conditions. As you drive through different areas and encounter different weather conditions, the light will constantly be changing. To make the most of these changes, be prepared to adjust your camera settings on the fly. This might mean changing your aperture to let in more or less light, adjusting your shutter speed to capture motion, or tweaking your ISO to compensate for low light.
- Finally, don’t be afraid to experiment and try new things. Road trip photography is all about exploring and discovering new places, so don’t be afraid to take risks and try out different techniques. Maybe you’ll discover a new favorite subject or find a unique perspective that you never would have thought of before. The key is to stay curious and keep your eyes open for new opportunities.
With these tips and tricks in mind, you’re ready to hit the highway and capture stunning images that will make your road trip memories last a lifetime. So pack your bags, grab your camera, and get ready to unleash your creativity on the open road!
Explore the Urban Jungle: City Road Trips for Captivating Street Photography
City road trips are a great way to capture stunning images of the urban jungle. The hustle and bustle of the city streets provide a perfect backdrop for street photography. Here are some of the best road trip routes for photography in the city:
- New York City, New York: New York City is a photographer’s paradise. The city is full of iconic landmarks, such as the Empire State Building, the Statue of Liberty, and Times Square. But the real beauty of New York City lies in its people and its streets. Take a walk through Central Park or the streets of SoHo and capture the energy and diversity of the city.
- San Francisco, California: San Francisco is a city of contrasts. From the Golden Gate Bridge to the colorful houses of the Haight-Ashbury neighborhood, there is no shortage of photo opportunities in this city. Take a drive down Lombard Street, the “crookedest street in the world,” or explore the vibrant Mission District for some amazing street art.
- Chicago, Illinois: Chicago is a city of architecture. From the Willis Tower to the John Hancock Center, there are plenty of skyscrapers to capture. But the city also has a rich history and culture that is reflected in its neighborhoods. Take a walk through the colorful houses of Pilsen or the street art of Wicker Park for some unique photo opportunities.
- Miami, Florida: Miami is a city of color and energy. From the pastel-colored buildings of South Beach to the vibrant street art of Wynwood, there is no shortage of photo opportunities in this city. Take a walk through Little Havana or the Art Deco District for some amazing street photography.
City road trips can be a great way to capture stunning images of the urban jungle. Whether you’re exploring the streets of New York City or the colorful houses of San Francisco, there is no shortage of photo opportunities in these cities. So grab your camera and hit the road!
Make Memories That Last a Lifetime: Planning the Perfect Photography Road Trip.
Are you a photography enthusiast looking for the perfect road trip route to capture stunning images? Look no further! A photography road trip is a great way to explore new places, meet new people, and capture memories that will last a lifetime. Here are some tips to help you plan the perfect photography road trip:
- Choose Your Destination: The first step in planning a photography road trip is to choose your destination. Do you want to capture the beauty of the mountains, the serenity of the beach, or the hustle and bustle of the city? Once you have decided on your destination, research the best routes to take and the best time of year to visit. This will help you plan your itinerary and ensure that you capture the best images possible.
- Plan Your Route: Once you have chosen your destination, it’s time to plan your route. Consider the scenic routes and back roads that will offer the best photo opportunities. Don’t be afraid to take detours and explore new areas. Some of the best photo opportunities can be found off the beaten path.
- Pack Your Gear: When packing for your photography road trip, make sure to bring all the gear you will need. This includes your camera, lenses, tripod, filters, and any other accessories you may need. Don’t forget to bring extra batteries and memory cards, as well as a backup camera in case of emergencies.
- Be Prepared for the Weather: Weather can be unpredictable, so make sure to pack for all types of weather conditions. Bring rain gear, warm clothing, and sunscreen. You never know when the perfect photo opportunity will present itself, so it’s important to be prepared for any situation.
- Take Your Time: Finally, remember to take your time and enjoy the journey. A photography road trip is not just about capturing stunning images, it’s also about experiencing new places and meeting new people. Take the time to explore and immerse yourself in the local culture. You never know what kind of inspiration you may find.
With these tips in mind, you are ready to plan the perfect photography road trip. So grab your camera, hit the road, and capture memories that will last a lifetime!
Final Thoughts: Hit the Road and Capture Stunning Images
Embarking on a photography road trip is an excellent way to explore new places, capture stunning images, and make unforgettable memories. From coast to coast, there are countless routes that offer breathtaking scenery and endless opportunities for photography enthusiasts.
If you’re looking to capture the beauty of nature, exploring national parks on your road trip is a must. From the Grand Canyon to Yosemite, these parks offer some of the most awe-inspiring landscapes in the world. With a little planning and research, you can find the best spots to capture stunning images of waterfalls, mountains, and wildlife.
But don’t limit yourself to just nature photography. Urban areas offer a wealth of opportunities for captivating street photography. From the bustling streets of New York City to the colorful neighborhoods of San Francisco, there’s no shortage of interesting subjects to capture.
Of course, capturing stunning images on the highway requires more than just a good eye. You’ll need to be prepared with the right gear and techniques. Whether you’re shooting with a DSLR or a smartphone, there are tips and tricks you can use to take your photography to the next level.
Finally, planning the perfect photography road trip requires a bit of research and preparation. From choosing the right route to finding the best accommodations, there are many factors to consider. But with a little effort, you can create an itinerary that will allow you to capture stunning images and make memories that will last a lifetime.
So, what are you waiting for? Hit the road and start capturing stunning images on your next photography road trip!
Other Road Trips Worth Your Attention
- The Unexpected Joys of Getting Lost on a Road Trip: Embracing the Unknown
- Road Trip Etiquette: Best Practices for Traveling with Others
- Road Trip Mindfulness: Staying Present and Calm on the Road

Hi, I'm Tolga. Your guide for unforgettable road trips across the USA, Europe, and Australia. I offer destination insights, tips, and occasionally use AI for added accuracy. Let's explore the world one road at a time!
Leave a Comment Cancel reply
Save my name, email, and website in this browser for the next time I comment.
- Accessories
- Camera Reviews
- Become a Photographer
- Photo Editing
- Photography 101
- Photography Tips
- Astrophotography
- Travel Photography
- Livestreaming & YouTube
- Video Cameras
- Video Lenses
- Video Monitors
- Video Lighting
- Streaming Accessories
- Videography
- Audio for Video
- Microphones
- Desktop & Laptop
- Console Gaming
- iPads & Tablets
- Televisions
- Camera News
- Adorama Business
- Adorama Rentals
- 800.223.2500
How to Plan a Photography Road Trip
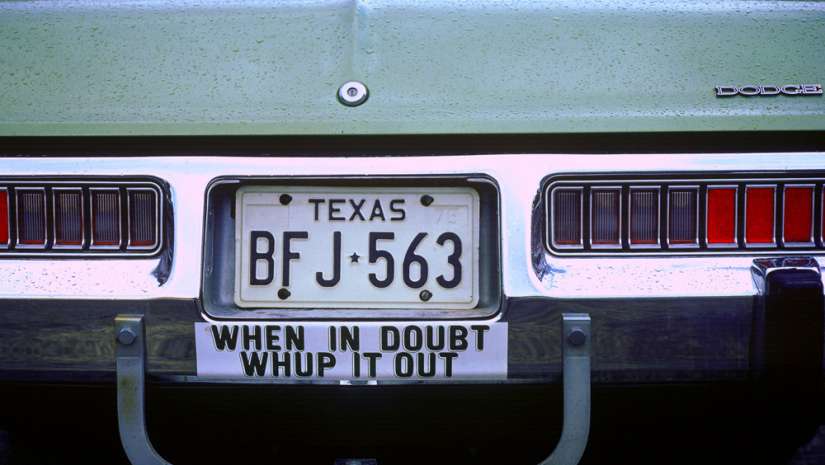
We’ve taken more than our share of road trips, almost always with the idea of gathering images.
Sometimes it’s been for specific projects, like filling photographic gaps in a book, as we did when we were working on Focus on Travel . Other times, we’re on a personal mission, like getting to see all the U. S. national parks. And then there are road trips we take just to explore an area and see what we find.
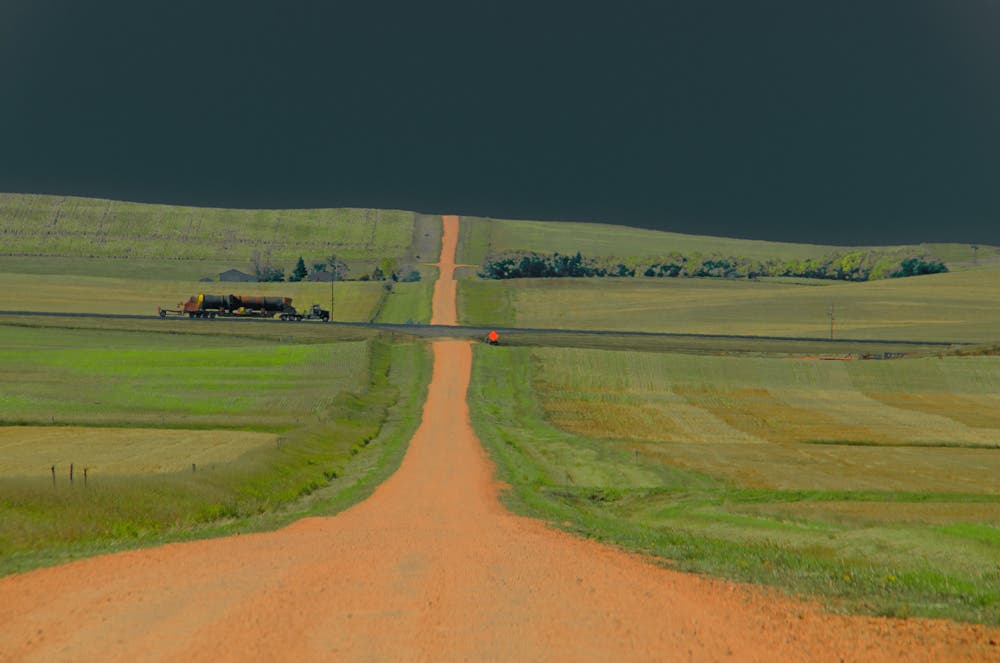
Whatever prompts you to take a road trip, you’ll want to come back with interesting photographs, not just to document what you saw but to capture the spirit of what you experienced.
Here’s some advice to make the most of your upcoming road trip:
Plan time for photography.
Unless you have all the time in the world, you’ll have to plan your trip to fit the time you have. Figure out the places you want to visit, keeping in mind that you may not be going on this trip alone. Leave time for sightseeing but also block out opportunities for picture-taking. Unless you’re just snapping pictures, you’ll need stretches of time to focus on your photography.

Consider your travel partners
If you’re traveling with a friend, a spouse or your family, check if they want to come along or would rather go their own way while you go off on your photographic pursuits. Even if they opt to come along, advise them to bring a book or game if they don’t share your enthusiasm for photography. These kinds of plans make for happier campers all around and prevent your road adventure from turning into a guilt trip.
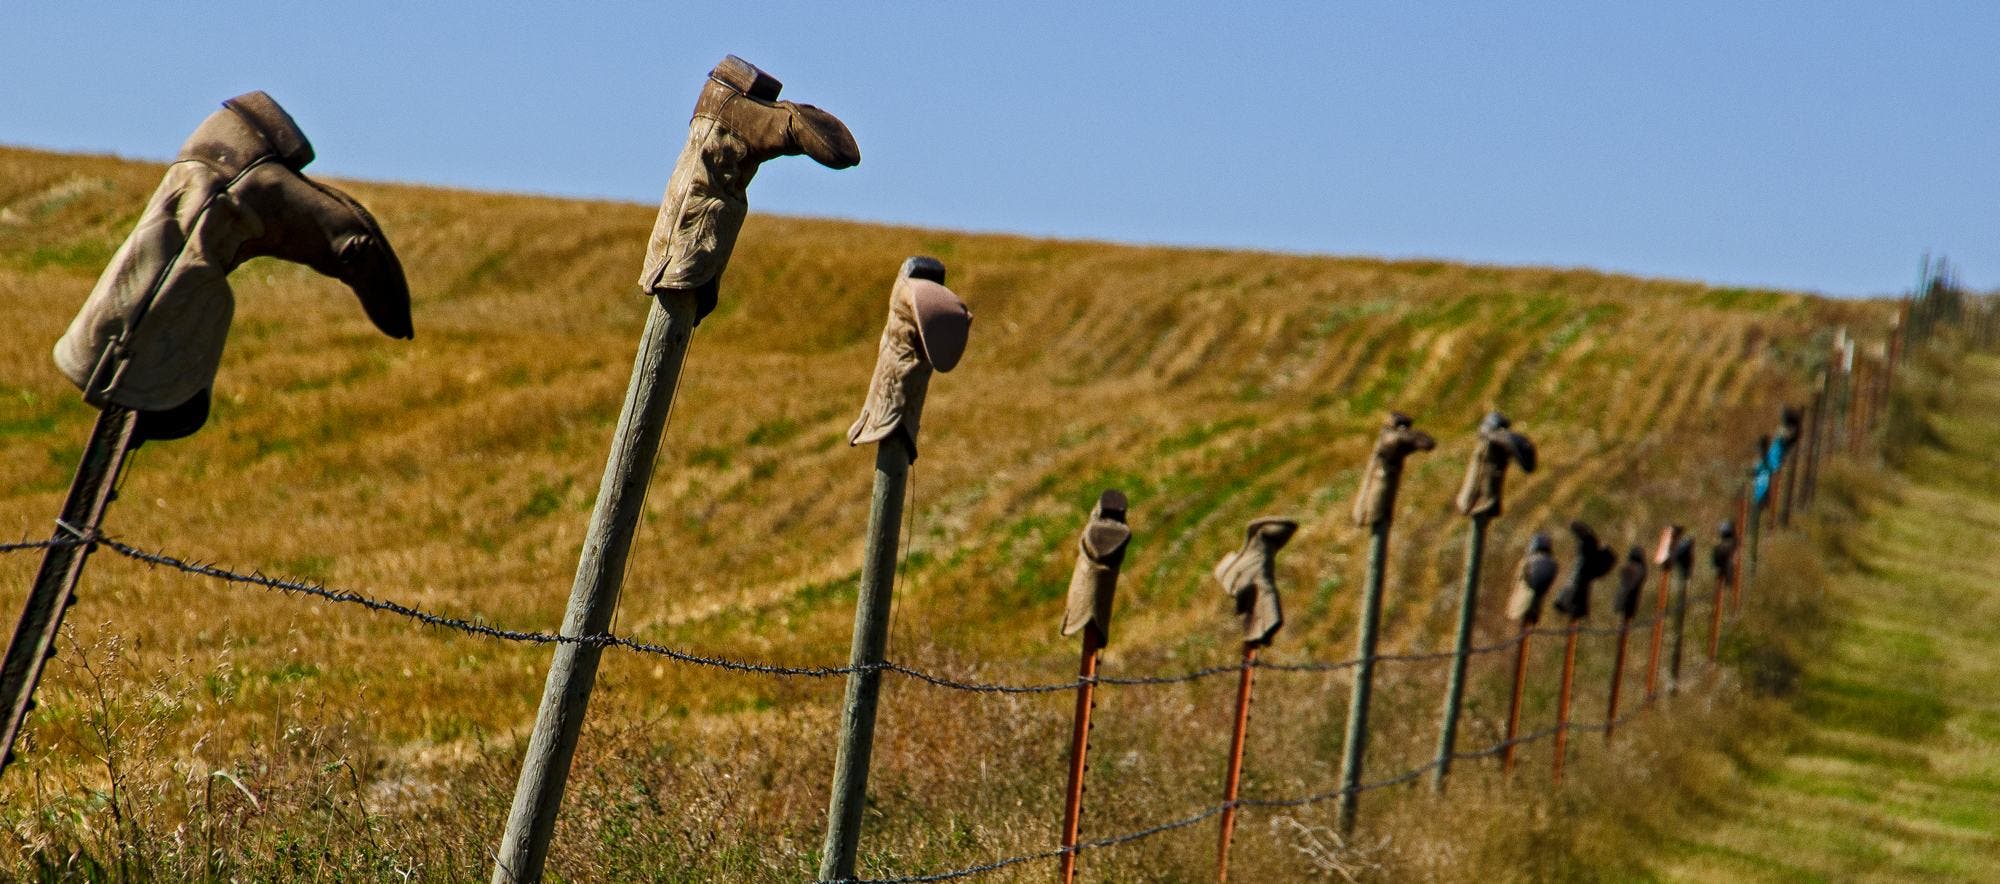
Also, plan to include your companions in some of your photographs so you’ll have nice memories to share together — it’s so easy to forward digital photos either to the folks in your pictures or to family and friends back home. Get your fellow travelers into the act by taking shots of each other and remember to document things that may not automatically seem photogenic, like the great Italian meal you ate or the charming B&B where you stayed. Always take your camera along and make time for photography even during the most ordinary moments and you’ll have a very personal and appreciated collection of images.
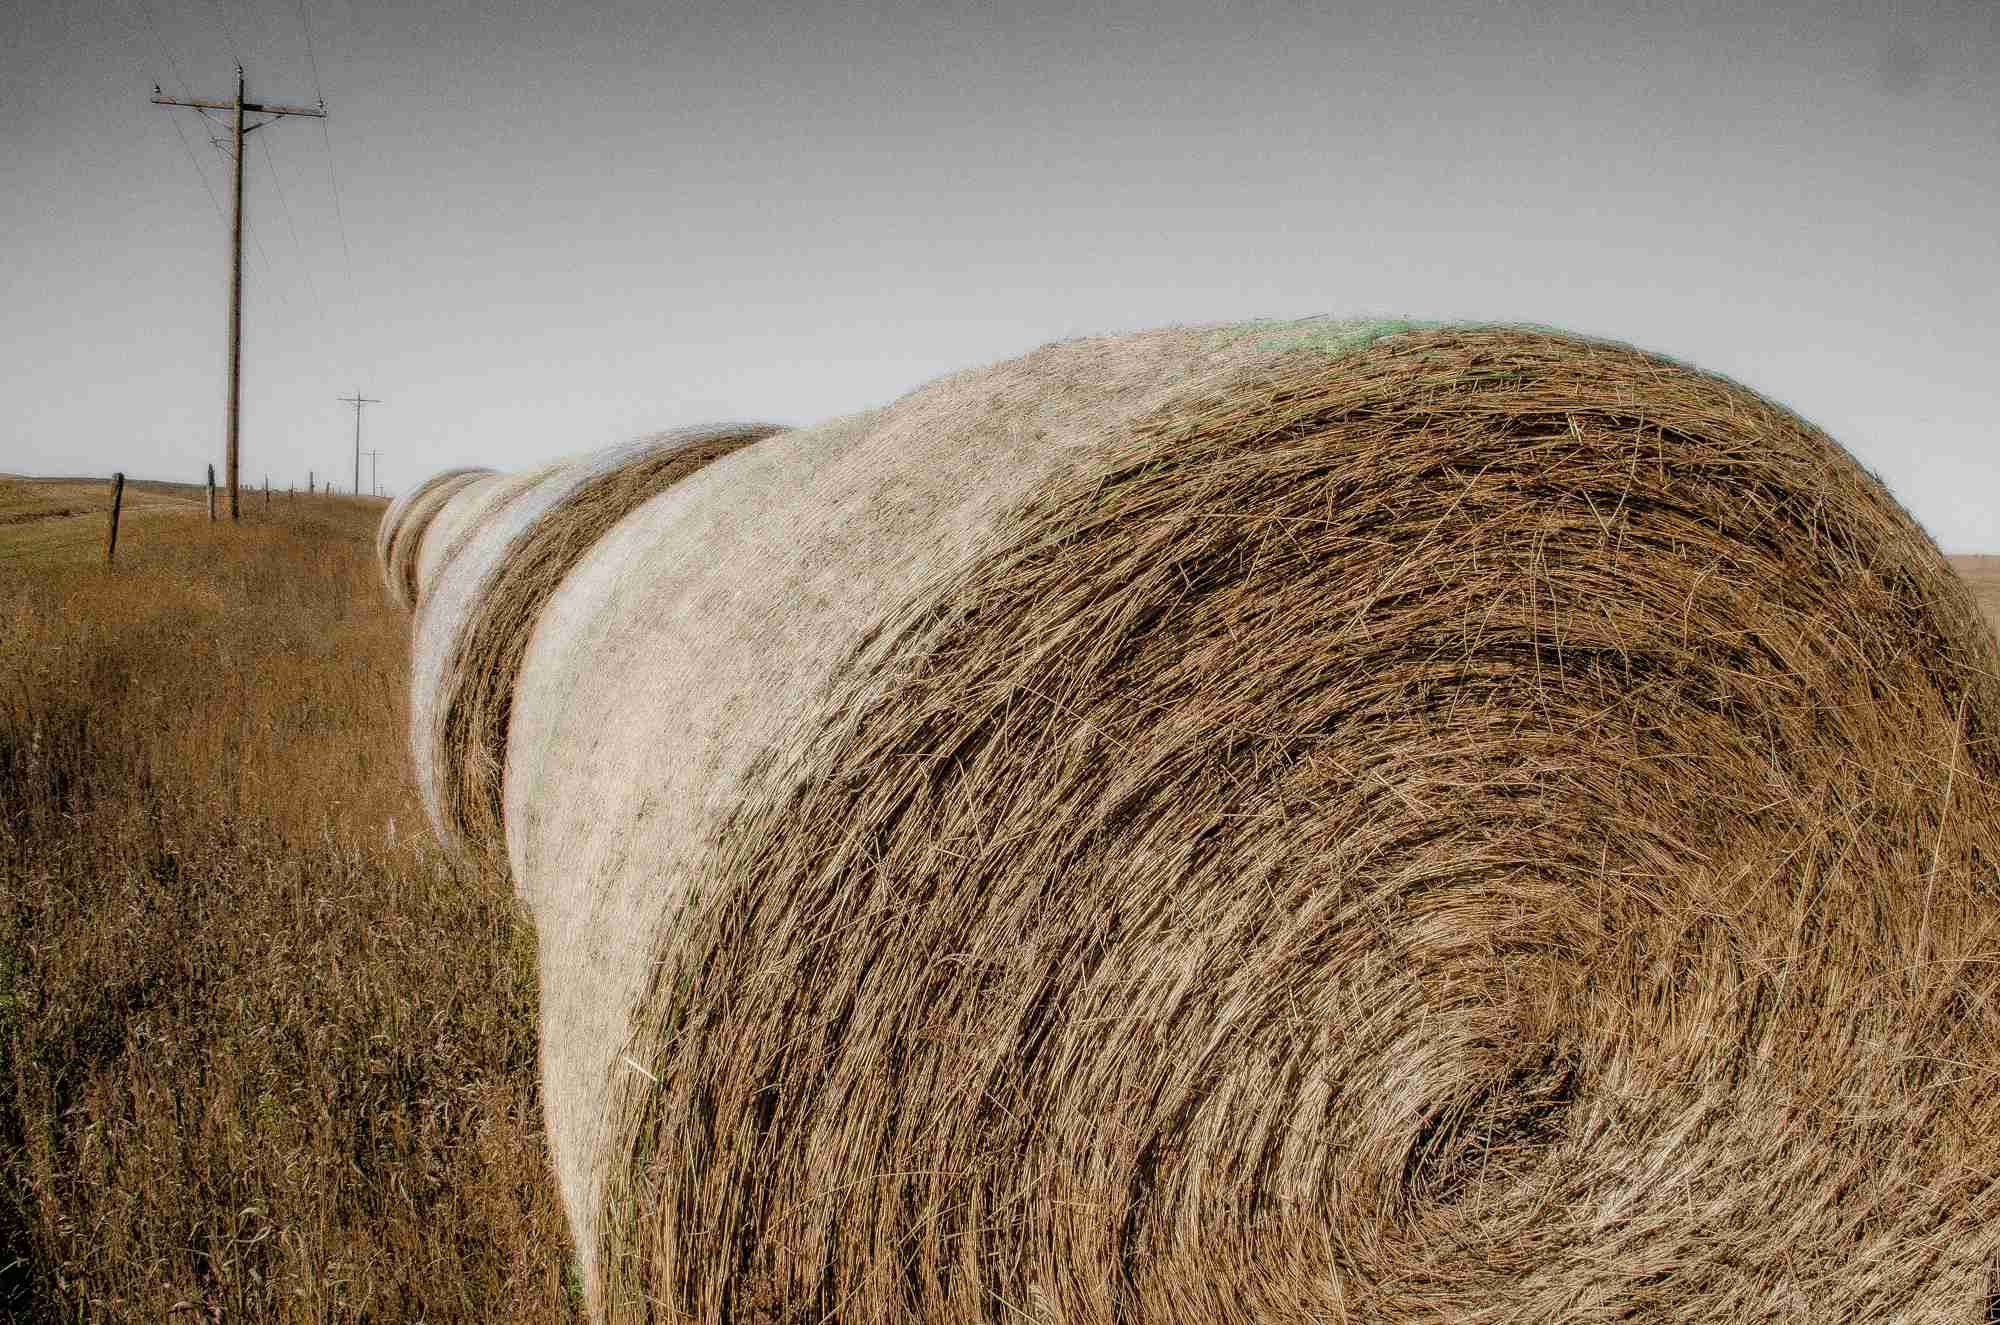
Do your research
Check the route you plan to take to see the points of interest. The best way to do this is with an old-fashioned map. A GPS or the WAZE app is great once you’re on the road, but a map lets you see the big picture so you don’t miss something that’s only a few miles out of the way. For example, when we were at Zion National Park , we planned a day trip to Coral Pink Sand Dunes State Park, which turned out to be a fascinating and beautiful environment, quite different from the major attraction we came to see, and it gave us a chance to try a dune buggy. Also, use the Internet to look up anything you want to research — from places to stay to the times of sunrise and sunset. The better prepared you are in advance, the more relaxing your road trip will be.
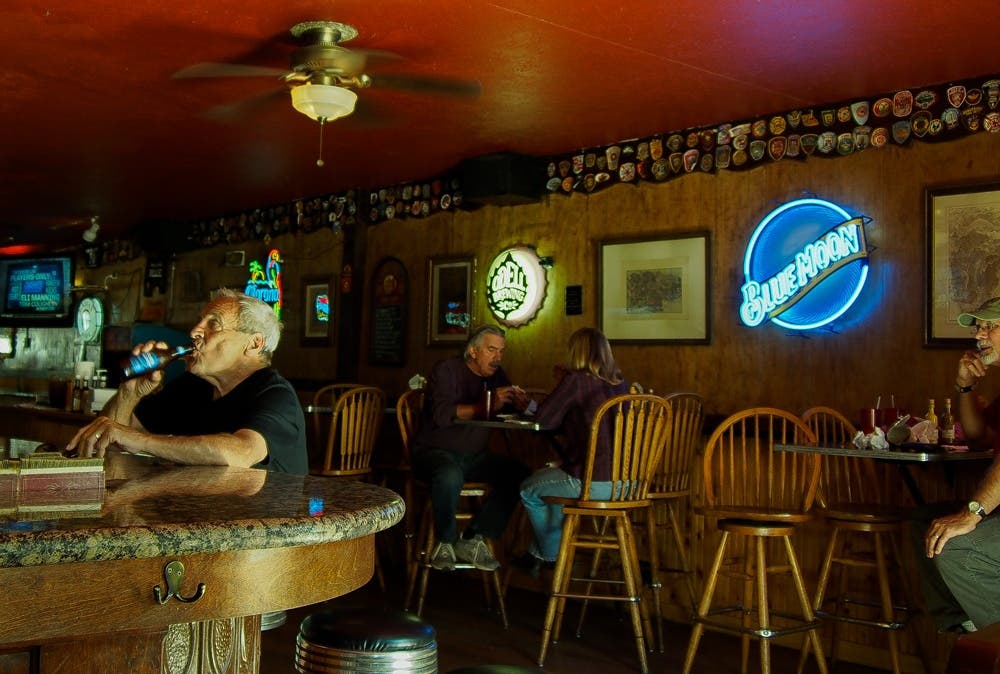
Plan the gear you need to take along
If you’ll be driving from home in your own car, you’ll probably be able to take whatever gear you want, without regard to size or weight. But if you’re flying first, you’ll have to restrain yourself. Think about the type of images you plan to take. If you’re interested in flower photography , be sure to bring a macro lens ; if you expect to see birds or other wildlife, take a long lens; if you’ll mostly be taking landscapes, bring zoom lenses in the 24-200mm range.
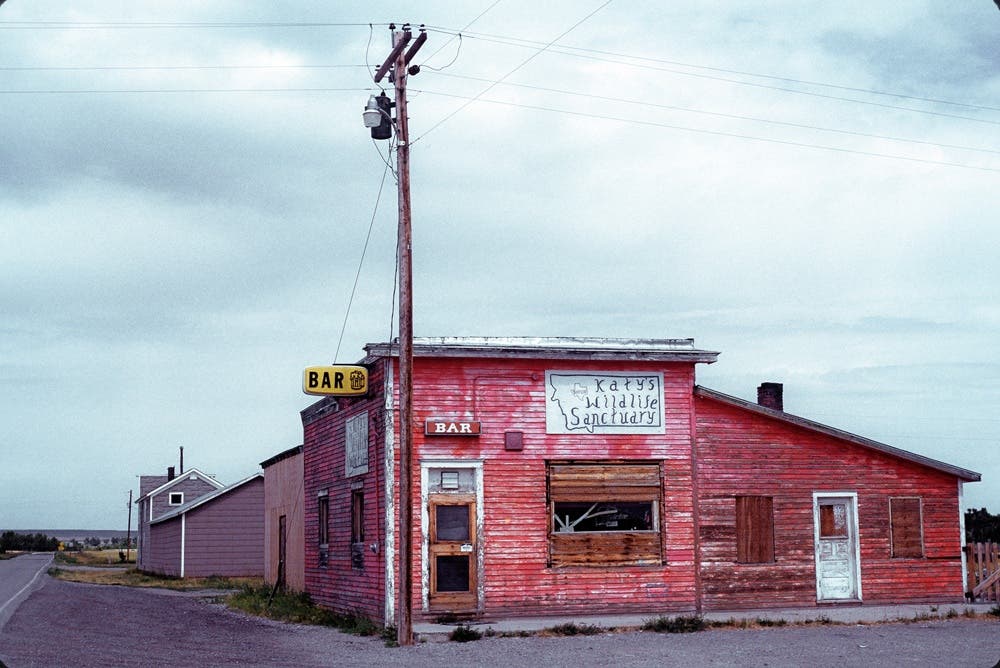
Plan a shot list. If you’re really ambitious, you might put together a shot list. This is a good exercise to help you think about what you expect to see and the gear you’ll need to capture it. It’s also a helpful reminder of what you are looking for so you don’t inadvertently forget about something. Or, in some cases, it can help you prioritize if you don’t have time to go for everything. Another option is to pick one or more themes for your trip. For example, you can collect shots of funny signs, unusual barns or silos, and some of the people who cross your path. Making such a list can also clue you into the equipment you’ll need to bring.

Check your photos every day to make sure your camera and lenses are working properly
If you can, download your images to a laptop so you can see them enlarged and find out if you need to do anything differently or if any adjustments or repairs are needed — a good reason to bring two camera bodies along for the trip. And take a few moments each day to clean you cameras and lenses to protect them and prevent possible breakdowns.
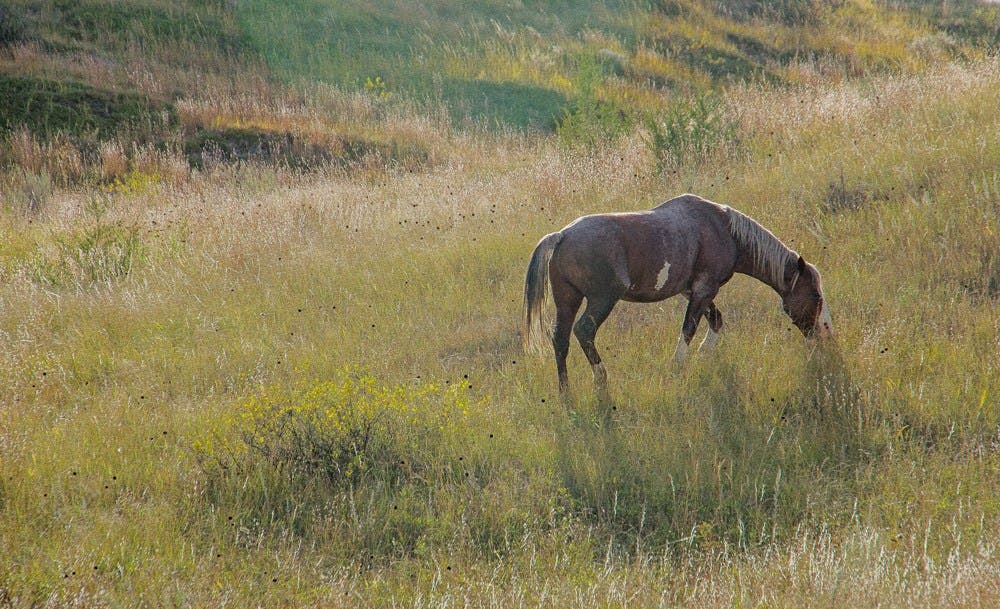
Be prepared to stop the car
Once you’re driving, keep the gear you’ll need inside the car, not in the trunk, so it’s ready to go at a moment’s notice. That’s because the journey itself is a very important part of your road trip and you’d be wise to keep your eyes open to wonderful or surprising sights along the way. There have been countless times when something unexpected popped up while we were on the road — a beautiful rainbow, a field in perfect light, or colorful wildflowers carpeting the area beyond the shoulder .
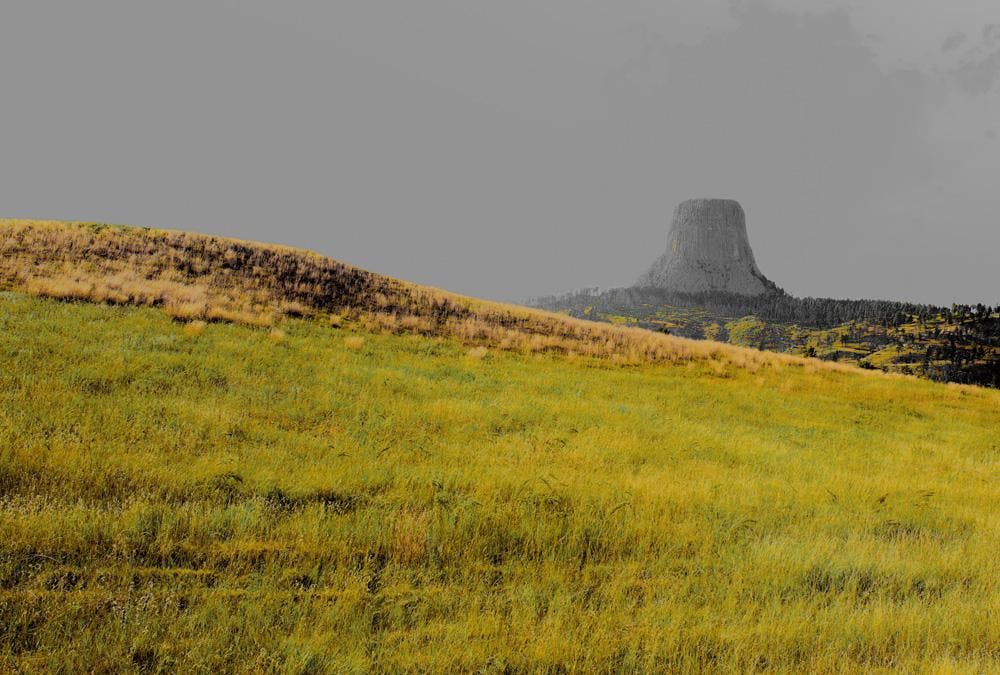
You can’t count on seeing anything comparable later on because these things are a matter of serendipity. Just stop the car in a safe spot and get the shot while you can. It’s a good idea to have someone else do the driving if you plan to do this, but even if you’re alone, it will only take a few moments to pull off the road, turn on your warning lights and grab your gear (it would be great if you had the foresight to put the right lens on your camera) so you can take those now-or-never shots.
And if you like finding the unexpected, plan some drives on the smaller roads — those blue highways — rather than sticking to the interstate. Stop and ask locals about scenic roads or special features to see in the area. Be adventurous and take that unpaved road or just follow your instincts and don’t be afraid to get lost. Exploring is part of the fun and the payoff is to find something worth stopping for.
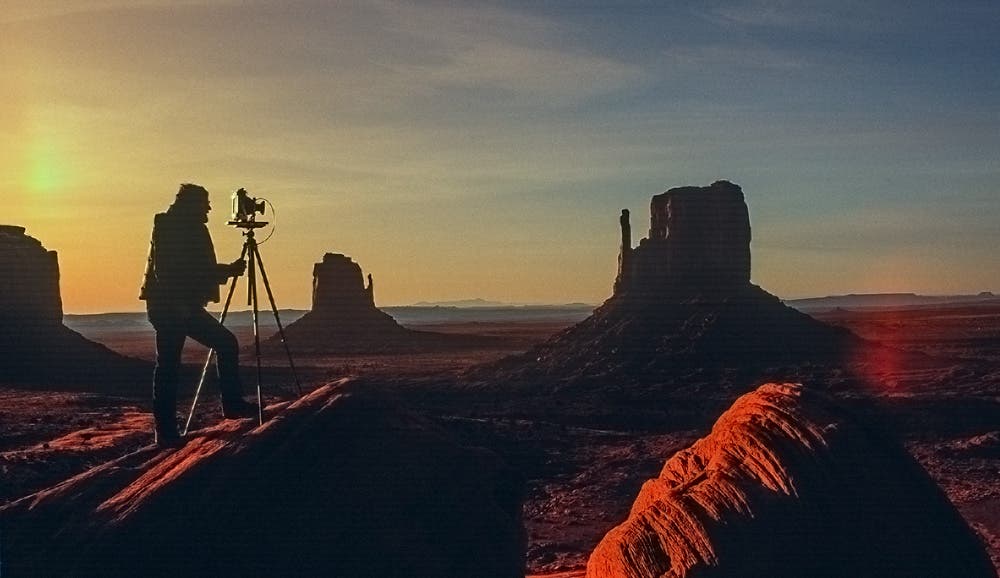
Plan for sunrise and sunset shots
Everyone loves photographing at sunrise and sunset, but you won’t be where you want to be unless you plan ahead. Nowadays, you can use the Internet or various apps to look up the times of sunrise and sunset no matter where you are. You can even search for sunrise and sunset photos taken at your various destinations. Once you know the exact time, plan to get to the location 1/2 hour before sunrise or one hour before sunset (and plan to stay at least 1/2 hour after sunset, especially if there are clouds in the sky).
Decide where you want to be at those critical moments. You can do that with an Internet search or by doing some actual scouting at each destination. If you know how to find east and west, you’ll know where to find the sun in relation to various points that appeal to you. Most national and state parks have a loop road that let’s you preview their landscapes so it’s a good idea to drive that road and get a sense of what you want to capture.
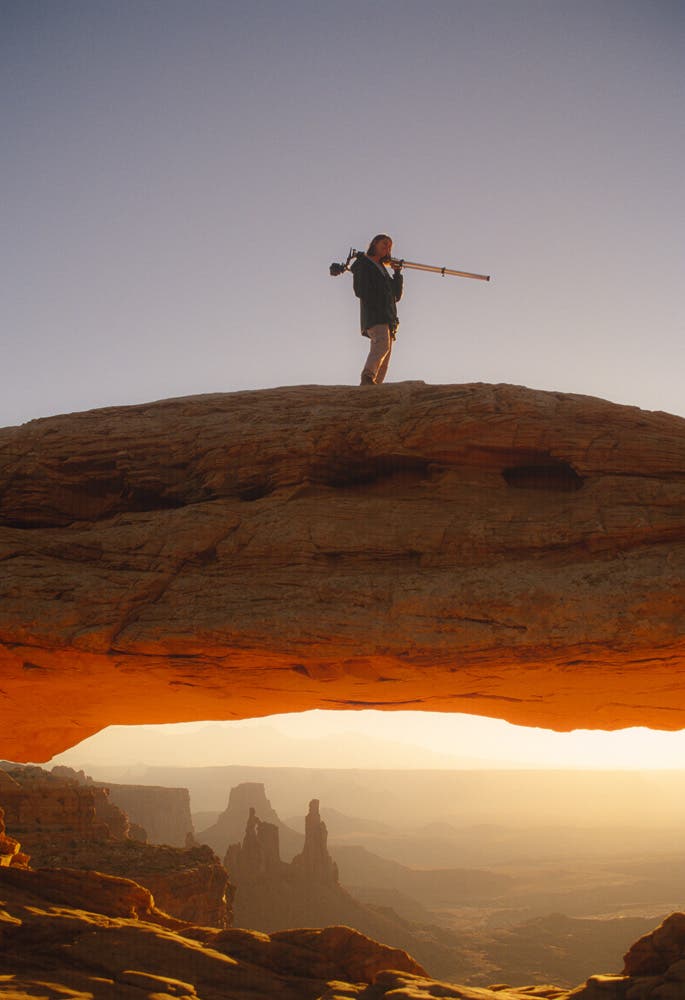
Of course, you may need to hike in to get the shots you really want, so be sure to allow time to walk in if you want to be there before sunset. Also, if sunset conflicts with dinner time, think about eating early or packing along a picnic so hunger pangs don’t force you to quit too soon.
Go beyond cliches
Toward the end of the movie “The Guilt Trip,” Barbra Streisand and Seth Rogen, playing an over-protective mother and her underachiever son, stand at the edge of the Grand Canyon after driving all the way from New Jersey. Neither of them has seen the Grand Canyon before and they stand transfixed for a few minutes when the mother asks, “How long are we supposed to stand here?” They quickly agree that they’ve seen enough and move on.
We’ve known people who do such speed touring, stopping at each location long enough to take a selfie or a shot of the most typical scene before moving on. That’s not our idea of a good road trip.
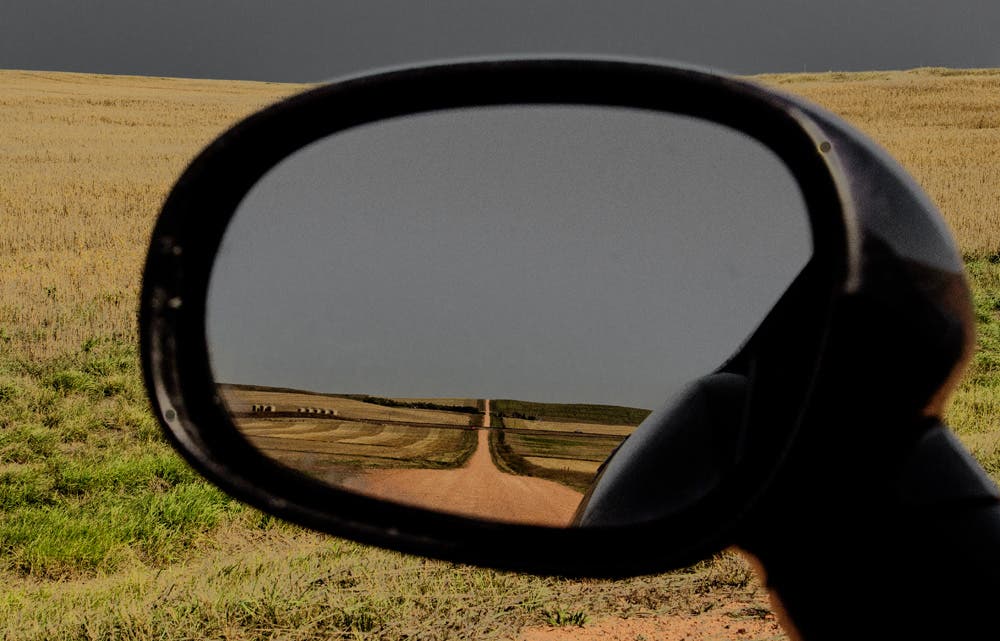
Both your drives and your walks should take you off the beaten path and bring you into places that can’t even be glimpsed from the road. That’s your opportunity to have a very personal connection to the environment you’re in and to create images that are unique to your vision. Another way to come up with singular images is to push yourself to find new perspectives or different ways of portraying the places you’re in. Try putting the road into some of your images for a different twist. It definitely takes imagination but, if you’re planning a photographic road trip, you’ve already got that.
Happy trails to you!

Allen Rokach w/Anne Millman
You might also like.
How to Shoot Black and White Photography

Wedding Photography Pricing: How Not to be a Starving Artist
How To Achieve Sharper Images

Holiday Parties: How To Capture The Good Times
How to Prepare For A Photography Road Trip & Not Miss Any Great Shots
If you have been a reader of Light Stalking for a while, you might remember that way back in 2012, I did a road trip across Europe from London to our home in Odesa, Ukraine.
During that trip I did several photographic stock shoots in some beautiful locations en route, including Budapest and the amazing Transfagarasan Pass in Romania. Despite having been a cruise ship photographer and visiting many places by sea, that road trip remains one of the best photographic journeys I have done.

Now, it’s time for another trip this time for different reasons. As many of you may know, my wife and I have had to leave our home in Odesa. However we had to leave someone behind, now it’s time to get them.
That someone is our beautiful cat Kiki.
So in a couple of weeks, my wife will fly to Moldova, head to Odesa, and collect her. I will drive across Europe doing a photography road trip and meet her at the Ukrainian/Polish border.
But how to plan a photographic road trip? In this article, I will give you some of my ideas and thought processes.
The Romance Of a Photography Road Trip
There is no denying a road trip holds a lot of appeal. After all, Hollywood has spent decades romanticizing them. Add a photographic element to a road trip and to my mind, you have the perfect trip.
Being able to drive opens up so many locations that if not inaccessible, are hard to reach by public transport, especially in the golden and b lue hours . Driving to them allows you to relax in the car until the light is perfect.

When you are driving and see something photogenic, you can pull over and shoot. Try asking a train driver to stop so you can photograph something! Not gonna happen!
But there’s more. A long drive through unfamiliar locations is inspiring. You start to see shots you might not have thought of normally. You will be relaxed, free from the stresses of your normal day, thus increasing your creativity.
Should You Be Fixed Or Flexible for Your Photography Road Trip?
This is an interesting question and one that is down to your personal preference. If you are introverted and dislike being out of your comfort zone then a fixed itinerary may suit you better. However, that inflexibility can put undue time pressure on you when shooting. It’s hard to shoot dawn if you know you need to be 200 miles up the road by lunchtime.
It can also lead to you missing some incredible photographic opportunities. On a fixed schedule you can be susceptible to “get there” syndrome. This is a condition where you are so fixated on getting to your destination, that you ignore the journey and its photographic possibilities.
I consider myself pretty introverted however, I much prefer a flexible approach with some structure. For this photography road trip, I know where I will start from, Dunkirk in France. And I know I need to be in Rzeszow, south-east Poland by the 16th of August to meet my wife. In those two weeks, I want to revisit Frankfurt, a place I struggled to shoot a few years ago, go to Auschwitz, a place I think should be seen, and spend some time in Krakow, a beautiful Polish city.

The timings and route however I have left flexible. This allows me to spend more or less time in a location and to add/subtract locations from the photography trip. A lot of people think that the best deals on hotels are two to three months before the trip. However, the very best deals, if you are flexible and not fixated on a specific hotel can be had in the days before your stay. This is a real bonus to photographers on a road trip as it allows us to maintain that flexibility, but also keep costs down.
“Travel and photography have always been intertwined. I think we have such a brief amount of time in this world that I can’t think of a better use of it than to travel, to photograph the world, to experience life in different places. To me, there’s nothing more important than that.” – Steve McCurry
Planning And Timing Your Road Trip
My photography road trip is pretty much dictated by European animal health rules. We could only collect Kiki 90 days after a negative rabies test. That means an August trip.
This however is quite good.
The weather should be generally in my favor as a photographer and the golden/blue hours are a little more respectable than in June and July. Planning and timing are important. Whilst I talked about flexibility in your itinerary, you should also pre-plan some of the locations that you intend to visit.
These days, photographers have a vast array of tools to help us plan and execute shoots on a road trip. There are both Google Earth and Street View. Earth allows us to look at the wider picture in our scout for locations whilst Streetview will get us down into a 3D view of that location.
Websites like Photo Hound allow us to look for beautiful spots to shoot whilst the Photographer’s Ephemeris allows us to see how and where the light will fall in that location only any day at any time. A lot of these tools allow us to plan on the fly and remain flexible.

What Gear To Take On A Photography Road Trip
The beauty of going by car is that you are not restricted by weight or dimensions. That said, there are some considerations. For example, if you want to take a drone, you need to check each country's regulations to see if you can fly.
I am currently applying for a European drone pilot's permission so that I can take my drone .

It’s much easier to carry bulky items such as tripods and gimbals on a photography road trip however, there are two things to consider.
- The first is to make sure that when you are away from the car shooting, no extra gear is visible in the car. Also, make sure all your gear goes into the hotel room with you at night.
- Secondly , to cover any potential loss, it’s well worth having dedicated photographic insurance coverage. Travel insurance will often only cover consumer cameras up to a limited value.
Road Trip Gear
From one of my older road trips.
A photography road trip can be one of the best ways to reignite your passion for photography and improve your creativity. The freedom to go where you want, when you want is hugely inspiring.
Whilst you should remain flexible, it's also worth having some specific locations in mind. Carry a laptop or tablet to plan en route and be prepared to make diversions to interesting locations on that route. When I return from this next trip, I hope that I can share some of the experiences with you.
About Author

Jason has more than 35 years of experience as a professional photographer, videographer and stock shooter . You can get to know him better here .
I wish you all the best on your travels. Travel photography is certainly a means to broaden ourselves and promote understanding amongst different peoples.
Leave a Reply Cancel
Your email address will not be published. Required fields are marked *
Table of Contents

Latest Posts
Mountain Landscape Photography: 17 Tips for Epic Shots

Here Are Some Inspirational Ideas And Projects For Summer Photography

Adventure Photography Tips
- Skip to main content
- Skip to primary sidebar
- Skip to footer
Photography Concentrate
Learn Photography Faster!
How to Take the Ultimate Photography Road Trip (Even If You Don’t Have Much Time)
Updated on March 17, 2020 by Lauren Lim
Quick, grab your camera. Toss a change of clothes into your backpack. Add some extra batteries. Memory cards. Snacks. A map. Now pile into the car and hit the road. What lies ahead? Adventure. Inspiration. A change of energy. And some totally incredible experiences.
Is there anything more fantastic than a road trip??
Answer: A photography road trip!
Last month we took a little road trip for my birthday. It was a chance to shake up the routine, get a change of scenery, and go out and shoot. We packed up our gear, some toys for our son, and piled into our adventure van. Destination? The Canadian Rockies.
This is our adventure van . It’s from Japan. We like it a lot.
Those few days on the road were jam-packed with adventure, excitement, inspiration and honest-to-goodness joy. There’s a whole lot of photographic value to be had from road-tripping. It can help you to improve your skills, and you’ll come away with both amazing photos, and new insights.
But how to do it? How to make your road trip a great experience from a photographic standpoint? There are some big mistakes to avoid, and some easy ways to ensure success. Here are 12 key tips to planning your ultimate photography road trip.
1. Just Do It
The most important part of going on a road trip? Actually committing to go. Sounds silly, right? Well can I tell you how many trips we’ve intended to go on that never actually happened? Too many.
Work has a sneaky way of filling in all those little gaps that you try to carve out for your adventures. If you’re not careful, you’ll always intend to go, but never actually do it. So here’s what it took for us to actually make the trip happen:
How Long Should You Go? One thing that kept us back was the concern that leaving for a week would be too long, and we’d get behind in our work. So we just went for a few days. A weekend would do. A long weekend even better. But really you don’t need more than a couple days to get the benefits of a road trip.
Where Should You Go? You don’t need to go far. In fact, it’s sometimes better if your destination isn’t too far away. Our driving time was 4 hours, and that was perfect for a short trip. Enough space to feel like we’d really traveled, but not so much that we weren’t spending all our time just getting there.
This isn’t about visiting the most exotic place; it’s just about changing your scenery. That’s all it takes to refresh your eyes.
If you’re having trouble picking your destination, do some research. Head to the library and browse the travel guides for your region. Where do the tourists go? You can road trip to a city, to a particular natural formation (sea, lake, mountains, desert), along an interesting road, or to no place in particular.
Don’t start thinking that there’s nothing interesting around you. That’s simply not true. Open your eyes, try to see things as if you’ve never seen them before, and you’ll realize that everywhere is interesting.
Now Just Book It The best way to make a road trip happen is so simple. Just book the room. Now you’ve really committed, and you’ll find a way to make everything else work.
This was an old trick we learned when we started travelling. Just book the plane ticket, and you’ll figure the details out after. It works the same way for a road trip.
So if you’ve been waffling on a trip, here’s your sign. Go book the room, and then come back and finish reading. I’ll wait :)
2. Pack Light. Pack Smart.
The lighter you pack, the more you enjoy the trip. Less to carry, less to sort through, less work. Sounds good right?
When you set out the clothes you think you’ll need, try to cut it in half. Same goes for accessories. Lenses. Books. Keep trimming until you have just the essentials. Right away you’ll feel a weight lift off your mind, and then when you pick up the bag, the weight is off your shoulders too.
But don’t leave the things you really need. There’s a fine balance between packing light and packing smart. You’ll find your sweet spot with some thinking ahead and some experience.
Make sure you’re bringing extra batteries, memory cards, all necessary chargers and readers. Can you imagine running out of memory in front of the perfect scene? Major bummer.
You’ll also need the RIGHT clothes, and car snacks. Our trip was in the winter, so we had long underwear, fleece layers, mittens, hats, warm jackets, and winter boots. Lots of clothes, certainly. But they were all necessary for us to be comfortable and enjoy the experience of shooting outdoors. Being cold and miserable does not lead to good photos.
Stay warm out there, friends!
And while snacks may seem unnecessary (you could just buy food when you get there) remember that on a road trip you want to be able to go slow, stop, and enjoy the sights. If you are an hour from food, and starving, do you think you’ll be wanting to stop again to take photos? Negative. Pack some good snacks, and you’ll happily munch away as you take another amazing shot.
3. Have Your Camera Ever At The Ready
The most important takeaway: always keep your camera in reach . Always. And by in reach, I don’t mean in the trunk. Or even in your camera bag. Keep it around your neck while you walk. On the seat beside you while you drive. On the table at dinner. On the counter as you hang out in your hotel room. You get the idea.
Great moments happen in an instant, and you don’t want to waste time unpacking the camera. You also don’t want to be thinking about whether that moment is worth the extra work it takes to go get the camera. If you can set things up so that you don’t have to think, you just have to grab, that’s when you start capturing great moments.
4. Shoot More Than You Think You Need To
When you travel you experience things in a new way. By removing yourself from your regular surroundings you see your surroundings as more interesting, unique, novel. And so you shoot more.
But it doesn’t take long before you start to habituate to your new surroundings, and so you don’t think they’re worthy of a photo. Or you think you’ll be able to remember the moment.
And you will, for a short time. But in 10 years? No way. Take the photo. Take more photos than you think you should. Every single trip we’ve ever taken, we thought we took too many photos. Now, years later, I desperately wish I had taken more. But until my Delorean comes back from the shop, I’m out of luck.
So learn from my mistake, and make sure to shoot lots. Your camera has a much better memory than you do.
5. Take Your Time
I’m seriously considering tattooing this on Rob’s forehead so I’ll always see it. Rushing is such a bad habit of mine, and it affects everything I do. On a road trip it can mean the difference between a stressful experience and a peaceful one. So here’s where to take your time:
While Shooting: Don’t rush while you’re taking your shots. Think carefully about your settings and composition while you’re setting up. Are they in line with what you want to capture with this photo? What are some other angles and perspectives you could capture while you’re here?
This is likely your only chance to capture this scene. You’ll be on the road shortly and you’ll never see it again. Keep that in mind while you’re shooting, and take your time to make sure you do your best.
While Planning: Give yourself generous buffers of time when planning what to accomplish each day. If you pack too much in, you’ll be rushing trying to get it all done, and worn out by the end of the day. Great photography requires energy, both mental and physical. Plan less and you’ll get it all done, and enjoy documenting the process.
While Driving: When you’re cruising along, trying to get to your next destination, you’ll see something out the window: an inspiring scene that catches your eye, or even just a small detail that you find interesting. You’ll ask yourself “Is that worth stopping for?”. Here’s your answer: Yes. Always yes.
The result of a “Should I, shouldn’t I?” moment that I said yes to. It ended up being the only sunset we saw during an otherwise cloudy trip.
Remember, a road trip is not about the destination. It’s about the journey. Stopping to take photos is what makes that journey a rich experience. Whenever that little voice says “Should I stop?” listen to it. If you can’t stop because you don’t have enough time, then you’re probably packing too much into your day! Slow down.
6. Just Drive
You don’t always need to plan activities when you’re on a road trip. Sometimes planning to just drive is all you need.
In the Rockies there’s a place called the Columbia Icefield , where you actually go onto glaciers. When I was first looking at things to do on our trip I got excited about the possibility of visiting it. But with a bit of digging I found out that it was closed for the season.
I was bummed out: the Icefield looked amazing, and the drive to it, along a road called the Icefields Parkway, was touted as one of the most beautiful in Canada. “Maybe next time”, I thought to myself, as I started to look for another place to go that day.
But then I stopped and realized that we didn’t need to go to the glacier. We could just drive along the parkway. Sure we weren’t actually driving to anywhere in particular, but the experience of traveling in new territory was a worthy pursuit.
So the only thing we planned for that day was to drive on the Icefields Parkway. We marvelled at the mountains around us, stopped often to take photos, listened to great music, chatted, and enjoyed a quiet, unhurried day. It was wonderful.
7. Make Specific Time for Taking Photos
Traveling as a photographer can be challenging. It’s hard to find the balance between experiencing the trip and shooting it. We’re always trying to discover how to organically blend the two, and I think it’s something that will differ for each photographer, and for each trip.
One technique that has worked for us is really very simple: we set aside a few hours, or a day, depending on the trip, where we are completely focused on shooting. The rest of the time we get shots here and there, but we’re not super concerned about it. This lets us enjoy the trip without always stressing about photos. During shooting time, it’s our priority.
With our son in tow this is a bit trickier than it used to be. Previously we’d shoot together, but now, since we need to watch the kid, we take turns.
For this trip, as we were driving along the Icefields Parkway, we saw a frozen stream with a mountain backdrop, and knew it would make for some great shots.So we parked the van, and took turns marching out into the snow to take some photos. Being out in the mountains, shooting, all by myself, was amazing. I felt alive and free and inspired.
We probably each spent about 15 – 20 minutes shooting. It wasn’t long. But it was all we needed. It wasn’t the length of time that mattered as much as the intentional process of shooting.
This is also a good time to plan to take some family photos or self portraits. Those always take a bit longer, especially if you have to set up a tripod (side note: check out our article on the best tripods you can get for under $100 ). If you try to stuff them into a day filled with activities they can feel rushed and stressful. Or you may even just decide not to take them at all.
But these kinds of shots are important, and well worth the effort. Planning them into photo days makes you all the more likely to take them, and actually enjoy the process.
A family self-portrait, in matching plaid. How very Canadian, eh?
8. Shoot the Details and the People
In the Rockies it’s rather hard to pull your eyes away from the soaring peaks around you. But to only shoot the mountains would be missing out on so much of the rich detail that makes up the experience.
It’s the same no matter where you go. The big sights steal your attention, while the quiet details can go unnoticed. So make the effort to notice. Remind yourself that there is a lot to shoot to recreate a trip. The details, the people, the food, the place you stay, the vehicle you drive – all these things are fantastic photo material, and you’ll be so glad you photographed them.
Pro Travel Tip: Eat dinner at 4:00PM. You get the restaurant all to yourself!
9. Start a Series
When there’s so much around you to shoot, it can sometimes feel overwhelming. Picking a theme, or creating a series, is a really fun way to focus your attention.
For this trip we did a little series of views out the front window. None of the shots are overly fascinating alone, but as a group it’s a really cool record of what the trip looked like from the front seat.
We don’t usually plan a series in advance. They come about more organically as we experience the place, and notice common themes or details. So look around you, and see what you could make a series out of. Then hunt for it! It’s like a photography I-Spy game that will keep you energized and prevent the chaotic feeling of overwhelm that can come when traveling.
10. Don’t Dwell on Missed Shots
There’s simply no way that you’ll be able to capture all the shots you see. It’s the tragedy of being a photographer without Google Glass ;) And it’s easy to dwell on those missed shots, and feel bad about them. Don’t.
Remind yourself that it was fantastic that you even SAW the shot. That’s a sign of a good photographer – noticing great things to shoot everywhere. Appreciate the wonderful thing you got to see, regardless of whether you captured it with your camera or not. Then move on.
There will be more shots to take, so look forward to those. Leave the missed shots in the past.
11. Do a Nightly Review
This was a technique we learned when shooting our big documentary project, Lobster Island . Every night we’d sit down and review our work from that day. By doing it right away, we were still able to remember how we took the shots, giving us more insight into what we were doing well, and what we could improve upon.
We still did a nightly review on this trip, except instead of uploading the shots and formally sitting down to discuss, we’d simply review them on the back of the camera. Sometimes we’d see areas to improve, but more often we would just discuss how much fun we had that day, and get excited about the next day.
The nightly review can serve both functions: to help you improve your photos, and to help you enjoy the process of shooting. It can be on a computer, or on the back of your camera. Either way, it’s a great practice.
12. Do Something With Your Photos. Fast.
When you get back from your trip, what happens? Life. You fall back into old routines of work, school, dinner, sleep, and your road trip gets pushed to the back of your mind. Your photos get pushed to the back of your hard drive, collect digital dust, and soon become forgotten.
Don’t let that happen! Make a point of doing something with them very soon after returning. The sooner the better, before it sinks lower and lower on your to-do list.
The best way to honor the work you put into your photos is to print them. Toss them into a Blurb book, and you’re done. It’s a record you’ll enjoy for the rest of your life. This is easier said than done, as I regrettably have not done my book yet. But don’t make my mistake. Consider your trip unfinished until you print the photos you created.
There’s a lot of lessons here on how to make a road trip more photographically inclined. And just like anything, great road tripping takes practice. You will probably make some mistakes along the way. I know we made tons this time, and we’ve done quite a few road trips now.
But the most important part is that you simply get out there, experiencing the world with your camera, and shooting what you see. The rest will come.
Now pick a destination, book the room, and pack your bags. Adventure is waiting for you.
About Lauren Lim
Hey friend, I’m Lauren! I’m a photography ninja here at Photography Concentrate. I’m downright obsessed with photography, and love sharing it with super cool folks like yourself. When I’m not shooting, or writing, you can find me cooking (and eating!), traveling, and hanging out with wonderful people.
Important Stuff
- Comment Policy
- Material Disclosure
- Privacy Policy
- Terms & Conditions
- Earnings Disclaimer
We are a participant in the Amazon Services LLC Associates Program, an affiliate advertising program designed to provide a means for us to earn fees by linking to Amazon.com and affiliated sites. Additionally, we participate in other affiliate programs and sometimes get a commission through purchases made through our links.
Get FREE photography training today!
Subscribe to our newsletter and learn how to take awesome photos, and get tons of free stuff to make it faster, and easier! Join today and get instant access!
We like to keep it a small group so we can engage together. Our webinars are always filled to the last seat. ONLY reserved seats will gain access to the room!
This post may contain affiliate links, which means I'll receive a commission if you purchase through my link, at no extra cost to you. Please read the full disclosure here.
Photography Road Trip – Ten Essential Tips
Get great photos on your photography road trip.
What’s better than a road trip?
A photography road trip of course!
So you’ve spent hours planning the perfect road trip. But are you sorted to get the best photos of your adventures?
I’ve done this and came home with less than disappointing photos. Surely I took better photos of that!?!
With a little planning and organisation you can make sure you’re at the locations at the right time. Let this next photography road trip be a success so you come home with images you are proud of. And show off all the wonderful places you’ve visited.
“The greatest part of a road trip isn’t arriving at your destination. It’s all the wild stuff that happens along the way.” ~ Emma Chase (American Author)
I’ve now done several photography road trips and learned some simple tips. Maximise the time you have and come home with images to showcase your journey.
First up is, yes you guessed it, planning …

1 – Planning
Just like planning your road trip , you need to start planning your photography before you go.
The best photography really does come from having a plan. That’s especially the case when it comes to landscape photography. You need to be at the right place at the right time to get the right conditions, particularly for golden hour photography.
Yes, sometimes the most amazing photo opportunities do lie just off the road where you’re driving but don’t solely rely on this.
Once you’ve mapped out the route of your photography road trip, it’s time to research the potential photo opportunities. Checking out photo sharing sites like Flickr and Instagram can give you some great ideas you might not have known about otherwise.
There are many other tools and tips to help with this so to plan your next photography shoot . So check them out to make your planning so much easier.
2 – All The Gear
One of the fabulous things about a photography road trip, is that you can take as much gear as you want. No weight or bag restrictions in your own vehicle!
This is a personal choice, but I would rather take something and not use it, than not have it when I want it. Having a packing checklist really helps to not forget anything crucial. Download my free Road Trip Essentials packing list. Print it and use it!
To save unpacking and packing everything I use several smaller bags. Things that I’m not sure I’ll need go in separate bags and stay in the car unless needed. That way I’m not lugging any more than I need but have it if I should need it.
For example, my newly added kitchen kit. This includes a chopping board, cutlery, plate and bowl. I was recently caught out with accommodation that included a microwave and toaster but no crockery or cutlery. This all fits in a small bag that I tuck away and store in the boot. It stays in the car mostly but it is there if needed.
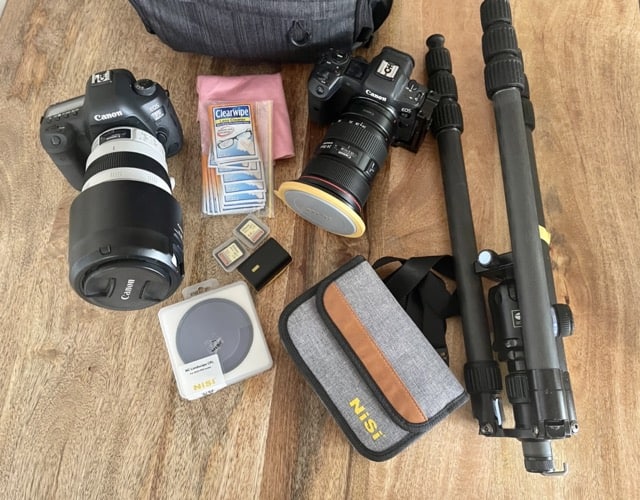
These are the basics that I suggest go on every photo shoot –
- Camera and Lens . I recommend at least two lenses, a wide angle and telephoto. My go to’s are my 24-70 and 100-400. There’s nothing worse than getting to a location and not being able to compose the shot you want because you’ve brought the wrong lens
- Tripod . This is essential for nearly all landscape photography shoots, regardless of the conditions. This will ensure you get nice sharp images every time, particularly when shooting long exposures.
- Filters . These are always worth taking – they take up very little space but can really enhance your long exposure photos.
- Remote . This allows you to take photos without touching the camera, hence removing the chance of camera shake.
- Torch or Headlamp . An essential for both sunrise and sunsets.
- Cleaning Cloths . We’ve all got home and found smudges or water drops on our photos. Don’t do it again!
- Spare Batteries and Memory Cards . Usually two of each mostly in case of failure and they take up hardly any room.
You may have noticed that there are two cameras in the above photo. This is mostly because I can. I leave that camera and lens ready to go so I can zoom in anytime that I spot something interesting.
I kept this camera as a back up and figured that seeing as I have it, I may as well use it when I can.
It’s definitely not essential, but it does come in handy.
- Rock Shoes – these really are essential if you’re shooting seascapes and any kind of rock scrambling is required.
- First Aid Kit . It’s also good to keep a basic one of these in your bag.
- Insect Repellent and Sunscreen . Never leave home without these.
- Spare Clothes and Shoes . For me this also includes an umbrella and towel. At least if you get soaked on the shoot you can get dry feet and a jacket to warm yourself up again quickly.
- Snacks and Water. These are often also in the bag depending on the location.
3 – Stay Organised On The Road
Staying organised really can be a challenge on a photography road trip. But with a simple routine it soon becomes a habit and saves time in the long run. And you don’t want to go to take a photo and your battery is flat!
My routine is to unpack and set up the laptop as soon as I’m back at the accommodation.
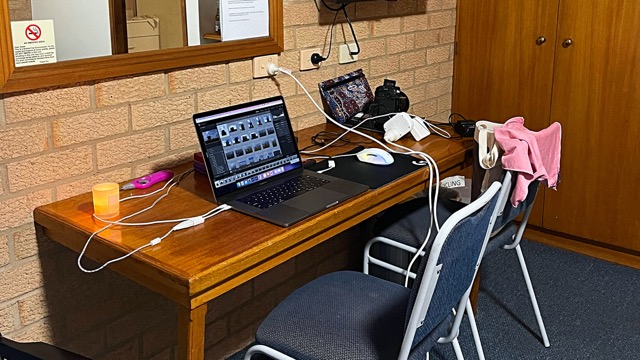
I keep the battery (and phone) charger in the laptop bag so it’s always easy to find. Putting things in the same place consistently means you don’t have to think about it.
Upload your photos to your laptop (or portable hard drive) and charge that battery.
Personally I copy them to both so there are two copies. Alternatively, have several memory cards that can be changed regularly and not deleted until safely backed up once back home. I really can’t stress the importance of having a photography workflow on the road.
Although I’ve not experienced it, I’ve heard stories of photographers who’ve lost all their photos of a trip. Hard drives and memory cards can fail at any time. If you’ve at least saved them in two places, it’s unlikely both will fail at the same time.
While that’s happening I can sit back and enjoy a cabernet (or two) in peace.
Oh, and don’t forget to give your lenses and tripod a quick clean if needed.
While you’re out and about, take snapshots of the signs at all the locations you visit. This will give you an accurate record when you get home. This is particularly important on a long photography road trip.
All those lookouts, or even waterfalls can too easily blend in. Trust me on this one.
I usually just do this with my phone – way more useful than a selfie! Although, don’t forget to have some fun and take selfies if that’s your thing. You do you …
The other thing is keeping a copy of your itinerary, whether it’s on paper or computer. Sometimes it can be months (or longer) before you look at editing your photos . And I’m not sure about you, but I’d rather rely on that than my memory.
4 – Always Have Your Camera Handy And Ready To Shoot
I’ve lost count of the number of times I’ve driven past a lovely scene and not pulled over!
Sometimes just the thought of sorting through the boot to get to the camera bag seems too much effort.
So, having your camera easily accessible removes that barrier.
Next up is to have some basic settings already set before you leave home. A backup to this is just put your camera on auto (shock horror I know) so that at least you get the shot.
Stop and take the photo.
The best piece of advice I can give you on a photography road trip is to stop, turn around, and go back to what you saw originally.
It’s more than likely that you won’t see that same sight again. Dangerous words are ‘we can come back’, yet somehow that very rarely happens.
This is why it’s important to allow plenty of time between destinations. If you are so caught up in where you’re headed, you miss the fact that the journey is the destination.
These special moments are always worth stopping for so you have the images to remember.
5 – Take More Photos Than You Think You Need – Photograph Everything
If you’ve done the planning for your photography road trip you will have your main locations mapped out. But don’t forget to make memories along the way.
Shoot the grand scenes, and then – look for smaller detailed scenes. This is what will make your photos uniquely yours.
The iconic shots are iconic for a reason, so absolutely shoot them and then make the effort to notice the other sights around you. The details, the people (did I just say that?), the food, where you stay. All these are great subjects for photos, and you’ll have the memories for years to come.
Don’t rely on your memory – take the photo. Take more photos than you think you should. Your camera has a much better way of making memories than your mind does.

6 – Take Your Time and Allocate Enough Time for Taking Photos
Always remember that a road trip is not just about your destinations, it’s also about the journey. This starts with the initial planning on what you want to get done each day. If you schedule too much in, you’ll be rushing and end up exhausted.
Try to plan less where possible. This way you’ll get it all done, and enjoy documenting your travels as you go.
Stopping to take photos is what makes your journey unique and an incredibly rich experience.
If you’re asking yourself ‘should I stop?’ – the answer is yes. It should always be yes. If you can’t stop because you don’t have enough time, you are possibly trying to fit too much in. Slow down and capture that scene.
Don’t rush while you’re taking your photos once you do decide to stop. It really doesn’t take a great deal of time to scope your composition. You already saw it. Then grab a few from different angles and perspectives while you’re there. Remember, there is no such thing as too many photos.
You may never have the chance again to capture this exact scene. So keep that in mind and do your best to capture what you see before getting back in the car.
7 – Start a Series
By the sheer nature of a photography road trip, you will spend a lot of time driving. And yes, that can get boring at times.
By pricking a theme or creating a series, you can alleviate a lot of this on your long driving days. Think of it as a photography “I Spy” game to keep things fun and interesting.
I don’t usually plan these in advance. They tend to happen organically along your drive, and once you start noticing common things it tends to snowball. You will notice more of them and you’ll come home with a nice, unique collection of images.
Themes I’ve used in the past include lighthouses, letterboxes, and even the roads themselves. Have fun with it.

Bonus Tip: Include the Road
Well, it is a road trip after all – photos of the actual open road are such fun.
A stretch of lonely roads can really portray the essence of your photography road trip like no other.
Of course, only pull over when it’s safe and make sure there’s no traffic!
8 – Take the scenic route
While it can be tempting to take the efficient freeways, try and take the slower but more scenic routes where possible.
This is not only more interesting and prevents driver fatigue, they give you enormous photo opportunities.
These back roads will take you through the towns that are bypassed by the freeway. You will have the opportunity to see these often forgotten places and local icons that you would otherwise have missed.
You could also just find a cute cafe to stop for a well earned coffee or snack. And don’t forget about the obligatory toilet breaks!
9 – Finding balance between taking that photo and savouring the moment
Yes you are on a photography road trip, but don’t forget to stop and take your surroundings in.
It is just as important to be present and admire where you are as it is to capture that amazing scene or location.
It can be tricky to find the balance of just enjoying the scene with capturing it with the lifetime memory of a photograph.
This is where a well-timed coffee or snack can come in. Sit back, fuel up and soak it all in. It helps to build your memory bank, and you’ll be refreshed to hit the road again.
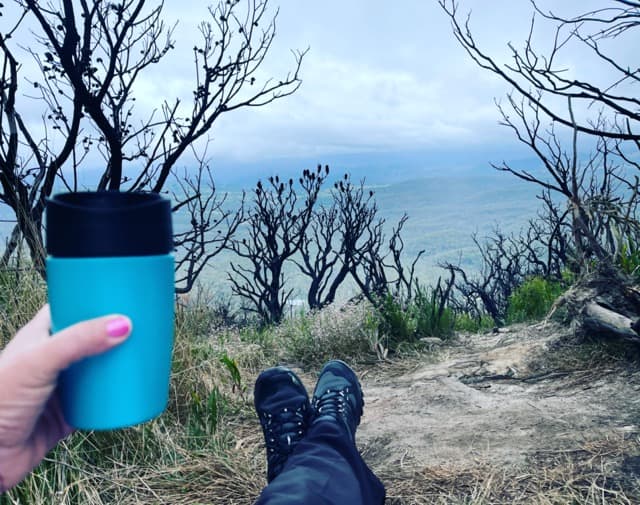
10 – Don’t Forget About Your Photos When You Get Home
To be completely honest, this is something I am still actively working on, and I’m sure I’m not alone.
It’s so easy to neglect all those wonderful memories you’ve created on your photography road trip once you get back home and into your routine.
Make your photos a priority as soon as you can, and start going through them. You spent all this time carefully creating them, so don’t forget to do something with them!
Go through your usual photography workflow like with every other shoot. Save, edit, share and print.
Hang some on your wall as a reminder of your epic trip and consider making a book or gifts for others. Here are some really great ideas to creatively print your photos .
You will definitely make mistakes along the way as I have. The main thing is that you get out there, document your trips with your camera and enjoy the journey.
Now pick a destination, get planning and let me know what adventure you’re heading out to next! Just comment below and add any tips you think I’ve forgotten.
That’s it for now – Keep clicking and stay caffeinated
Like this post? PIN it so you can save it for later
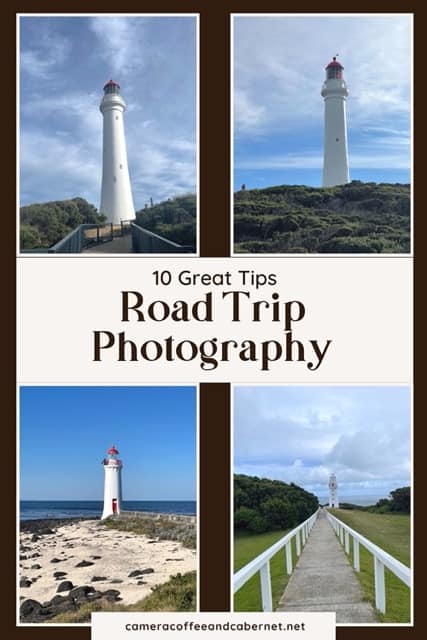
Here’s some more articles and resources I think you’ll like:
- Planning Your Landscape Photography Shoot
- Packing For Your Next Photography Trip: How To Decide What To Take
- Sunrise and Sunset Photography Guide
- Essential Packing For a Photography Road Trip
- Planning a Road Trip
- Create a Travel Photography Shot List
Don’t miss a post – sign up Here if you haven’t already
Note – This post does not contain any sponsored or affiliated links. All suggestions and opinions are mine. Unless otherwise stated, all photos are mine and remain my copyright images – Sam Wilson Photography.

Sam is the creator of cameracoffeeandcabernet.net, a website dedicated to photography and solo travel. Based in Australia, Sam combines her passion for photography and travel to bring you tips, insights and experiences to help you plan, pack, and make the most of your photography while on the road.
Similar Posts

What Makes A Great Photo? Hint, There’s No One Magic Ingredient
What makes a great photo? Take your photos from good to great with these 5 key elements. Learn all about: Light, subject, composition, timing and editing.

Lenses For Landscape Photography: How To Choose What’s Best For You
Lenses for landscape photography. Here is how to choose the right lenses for you, and why a wide-angle, mid-range and telephoto are all recommended.
Overcoming Post Travel Blues
Post Travel Blues are Real! But they can be overcome with some simple tips to help you recover and enjoy your everyday life.

Planning a Road Trip: 10 Steps To A Successful Road Trip
From choosing a destination to budgeting for your trip, this road trip planning guide covers everything you need in 10 simple steps

Making The Most Of Rainy Day Photography
Rainy day photography. If you’re looking for ways to improve your landscape photography in the rain, here is everything you need to know
Solo Road Trip Safety Tips
Don’t let fear stop you from taking that solo road trip. Learn how to stay safe with these helpful safety tips and have a fabulous trip.
Leave a Reply Cancel reply
Your email address will not be published. Required fields are marked *
Save my name, email, and website in this browser for the next time I comment.

No stress. Spend less. Travel success.

Travel Photography Tips for Beginners
How do I make great travel photos? What are the best tips and tricks to capture those unforgettable travel memories? If you ever asked yourself these questions and want to learn more about travel photography then this article is for you. Today I am very happy to present you some really cool travel photography tips for beginners from a professional photographer.
I am so excited that Valeria Kasatkina , a fellow Californian, a travel fan and an experienced photographer agreed to share her knowledge with us. I asked her many questions about travel photography and she provided the answers below. All stunning photographs in this article are made by Valeria herself.
With all the new technology available these days, do you think a cell phone camera is sufficient for taking good travel photos vs. a DSLR camera? Why or why not?
Modern smartphones have great cameras and you can capture a beautiful shot with your cell phone. The main advantage of a smartphone is that it is small, lightweight, and easy to carry. However, I like to use my DSLR to take travel photos. A DSLR camera has a bigger matrix and therefore performs better in low-light conditions. It introduces less noise and as a result, you get sharper images. It also gives more flexibility when it comes to settings and choice of lenses. If I want to capture a quick shot “for fun” I can use my smartphone, but if I want to do some serious and creative photography, I choose a DSLR.
In addition to having a good camera, what other equipment would you recommend for taking great travel photos for beginners?
When you travel you generally don’t want to carry a lot of heavy equipment with you. Choose a lens that fits your needs. For example, Canon 24-105 mm f/4 is my best travel buddy, because it is good for many kinds of photography, including landscapes, cityscapes, and portraits. You may want to bring a tripod with you, especially if you like sunsets and night photography. I also recommend having a spare battery and a memory card.
Landscape is King among travel pictures. What are your landscape photography tips for beginners?
My landscape photography tips for beginners are as follows:
- Try to avoid shooting in the middle of a sunny day. The light at noon creates harsh shadows. The best time for landscape photography (and outdoor portrait photography as well) is around dawn and dusk. This time is known as “golden hour”. During this time the light is very pleasant and soft.
- Including the foreground in the picture gives more depth to it.
- If you are near the water, look for reflections. It may be reflections of trees, mountains, clouds, or even a person or an animal.
- Look for repeating patterns and leading lines, for example, roads, trees, coastline.

If I want to photograph some close up details, like a flower, a butterfly and such – what are your macro photography tips and tricks?
I would be very happy to share my macro photography tips and tricks:
- Open the aperture to create a shallow depth of field or use the Portrait mode on your smartphone: this helps you to separate your subject from the background.
- Try keeping the background not too busy.
- Be careful with focus. I suggest using continuous-servo autofocus – the system that keeps moving objects in focus. It is particularly useful when you want to take a photo of a butterfly or a flower on a windy day.

Everybody loves a great sunset photo – no trip to the beach is complete without one. What is your advice on taking perfect sunset photos?
It is not that difficult to make good sunset photos, just follow these guidelines:
- Expose for the sky, because you don’t want it to be blown out. Adjust your camera settings so that the sky looks accurate.
- Keep in mind that the sky without any clouds looks plain and boring. If you want to capture a stunning sunset, do it when there are some clouds on the sky.
- Try taking a long exposure shot, using a tripod. The longer your shutter speed is, the smoother the water and the sky become on the photo. This effect looks amazing on sunset photos!
- Add a silhouette to the picture, for example, a person or a tree. It makes the photo much more interesting.

What photo editing app would you recommend for a beginner and why?
I use mainly Adobe Lightroom and Photoshop. I’d recommend learning Lightroom because it has everything you need to make your image look stunning. Moreover, Lightroom allows you to organize and label photos in a very convenient way.
Recently I tried another editing app – Luminar. It is a powerful app that uses artificial intelligence to edit images. It works pretty well with both landscapes and portraits. I can recommend it for beginners as well. While Lightroom requires a subscription, you can pay for Luminar once and it will be yours forever.
As a local resident of San Francisco Bay Area, which palces would you recommend for taking great photos of San Francisco?
There are so many beautiful places in San Francisco that will provide you for excellent photo opportunities! Here are some of my favorites:
- Pier 7 – Great view of SF Downtown
- Baker Beach and Marshall beach – the view of the Golden Gate Bridge
- Fort Point National Historic Site – the view of the Golden Gate Bridge
- Twin Peaks – 360-degree view of the city
- Battery Spencer – the view of the Golden Gate Bridge and San Francisco
- The Embarcadero – view of Bay Bridge, downtown SF
- Salesforce Park – a nice rooftop park in the heart of downtown SF
- 16th Avenue Tiled Steps – beautiful tiled stairs
- Mission Dolores Park – a nice park with great view of downtown SF

Tell us about yourself
My name is Valeria Kasatkina. I was born and raised in Russia, and I have moved to California almost 7 years ago. I always loved traveling and photography, and 2.5 years ago I decided that I want to do photography professionally.
You are very welcome to check out my travel/landscape/personal page for photography inspiration: https://www.instagram.com/valevitaly/
My portrait photography page: https://www.instagram.com/valevitaly_photos/
And my Facebook page: https://www.facebook.com/valevitaly
If you found this information about travel photography tips for beginners useful, please, share it with others because there is a high chance it will help them plan their road trip too.
To stay up-dated on all the news and get access to cool videos and photos, please, subscribe to my social media channels.
CHECK OUT MY LATEST POSTS THAT YOU MAY FIND USEFUL:
- Grand Canyon Railway Review
- Things To Do in Williams AZ
- Things to Do in Oatman, Arizona
- Recreating Your Favorite Destinations in Your Backyard
- Christmas in Paso Robles
Share this:

- Share on Tumblr
Leave a Comment Cancel Reply
Your email address will not be published. Required fields are marked *
WC Captcha 54 − = 52
Notify me of follow-up comments by email.
Notify me of new posts by email.
Photography » The Best Camera Settings For Photographing Traffic Trails At Night
The best camera settings for photographing traffic trails at night.
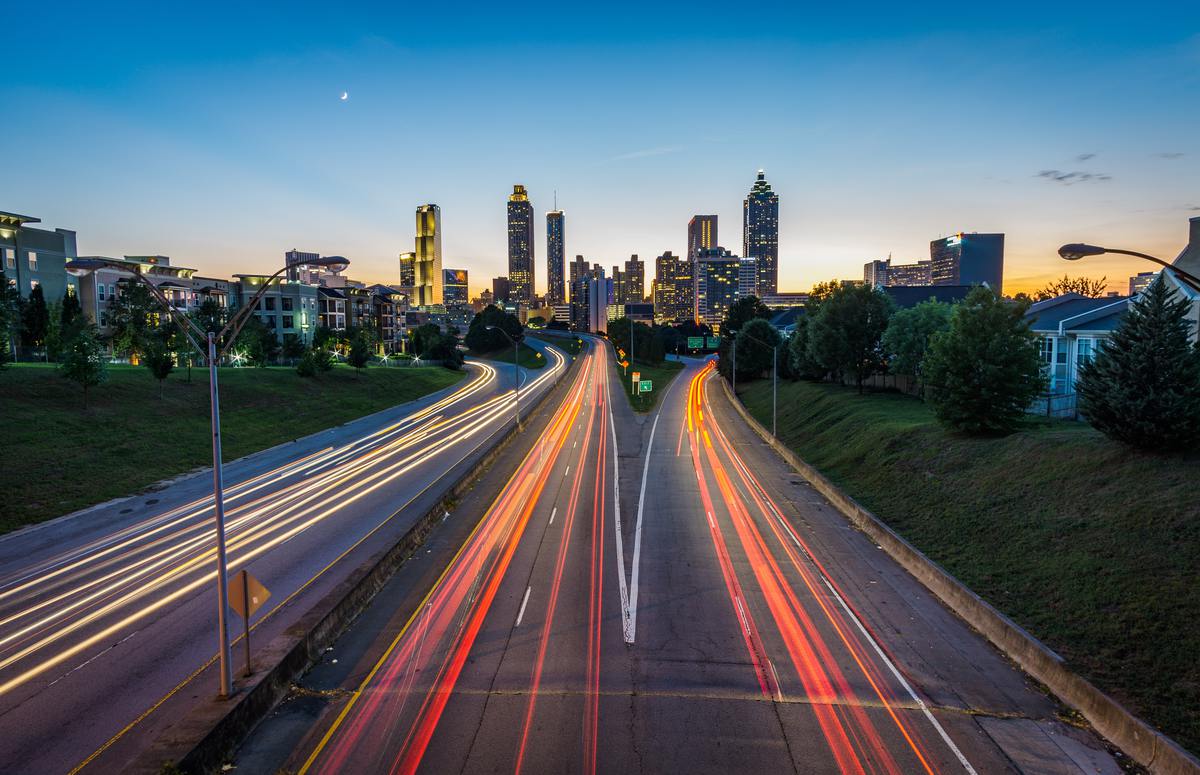
Table of Contents
The Best Camera Settings For Traffic Trail Photography
Choosing the best camera settings for photographing traffic trails is an important part of getting the shot you want. However, there’s a lot more that goes into this fun style of photography than just camera settings. It’s also essential to consider the gear you are using, what location you visit, and the composition of your frame! This article covers the ins and outs of traffic trail photography and teaches you the best camera settings for photographing traffic trails at night. So let’s jump in!
What Is Traffic Trail Photography?

Traffic trails, also known as light trails, are an awesome in-camera effect created with a slow shutter speed. When you are using a slow shutter speed of 30 seconds, for example, anything that moves will become completely blurred in your frame. Mix this with the lights of a moving car, and you create a single light streak across your frame. This is a really easy way to add more dimension to your photos!
Traffic trails only tend to work when it’s night time for a couple of reasons. The first and most important reason is that night time is when cars have their lights turned on! Without the lights, you would completely miss the traffic trail effect you’re going for. The other reason why it’s best to capture these photos at night is because of your shutter speed. To capture a nice long traffic trail, you need to use a very slow shutter speed. After all, the longer the shutter stays open, the more time the lights have to blur through the frame!
The trouble is, a slow shutter speed lets a whole lot more light into your camera, making for a much brighter photo. In the middle of the day, this would cause your image to be completely overexposed. However, under the darkness of night, a slow shutter speed can be accommodated without issues!
Choosing The Best Location To Capture Traffic Trails
Before you can ever consider taking a photo, you need to plan out your location. When it comes to traffic trails, the location can make or break your image. The first thing you want to ask yourself is how many light trails you want in your photo. If you want to keep the trails to a minimum, you’ll want to opt for a more rural area with less traffic. Otherwise, you’ll need to head out at a much later hour of the night when there’s less traffic on the road.
If you want to have a ton of light trails in your frame, heading to the city will always be the best option. Better yet, finding a highway or main road that leads to the city center is an excellent option for traffic trails. Whenever you’re taking photos of traffic trails, walk around and try to find unique compositions. Try to find frames where you can incorporate an extra point of interest in your photo. Things like a city skyline, tunnel, or a bridge work great when photographing traffic trails.
Some of the best places to get unique vantage points are from the top of overpasses. Here you can get right over the traffic and get an expansive view of the surrounding area. Whether it’s the sidewalk on a bridge or a pedestrian walkway, these are great options for better traffic trail photos.
If you aren’t super familiar with the city you’re photographing, be sure to check out google earth to find unique locations. This is an easy (and free) method to plan out your night before you ever get there!
The Essential Gear For Photographing Traffic Trails
While you’re photographing at night, you’ll come across a whole new set of challenges. It’s essential to bring the right gear with you to make your experience as positive as possible! Let’s go over a few must-have gear items for taking on the night.

Most importantly, you need a tripod for photographing traffic trails. Since you are using a slow shutter speed, your camera must stay completely still. No amount of MacGyvering or balancing your camera on a railing will beat out the versatility of a tripod. With a tripod, you can set the exact position you’re looking for, with the assurance of rock steady stability. Besides traffic trails, tripods have a plethora of other uses for photographers. From long exposure photos, enhanced image sharpness, and improved low light capabilities, tripods are a useful all-purpose tool. Learn more about tripods in photography here.
Shop Travel Tripods On Amazon
#2. Wide Angle Lens

The lens choice you choose is a big one when photographing traffic trails at night. Commonly you’ll find yourself shooting close to the traffic like on a sidewalk. To get everything you want in the frame, you need the widest field of view possible. A wide angle lens could be considered as 35mm or wider. However, an optimal range for traffic trail photography is between 10-18mm. With a wider field of view, you have the option to create a more dynamic composition.
Shop Wide Angle Lenses On Amazon
#3. Headlamp

This one tool is something many of us forget about until it’s too late. When you’re out photographing traffic trail at night, it can be pretty frickin dark! A headlamp is an easy way to light up the night and make it easier to find things in your camera bag. If you don’t already have one, I would highly suggest ordering a headlamp for night photography. Rather than a regular torchlight, a headlamp is totally hands-free. This is perfect for making adjustments to your camera while being able to actually see!
Shop Headlamps On Amazon
#4. Layers!

Even in the middle of summer, it can get cold at night! The last thing you want is to have to call it early because you were too cold. Be sure to pack yourself a set of warm layers to take with you when you’re photographing traffic trails. Along with a warm coat, having a set of glove liners can also be useful if you tend to get cold fingers like me!
The Best Camera Settings For Photographing Traffic Trails

Now let’s get into the meat of what you’re here for. There aren’t any specific settings that will work for all traffic trail photos. The perfect settings will depend on the situation and the amount of light around you. With that said, there are a few great rules of thumb to help you choose the best camera settings for photographing traffic trails. In this section, I’ll break down what settings matter most and a good starting ground to work from.
In a nutshell, here are the best camera settings for photographing traffic trails at night:
- Shutter Speed: 15+ seconds (or longer if you wish!)
- Aperture: F/8 – F/11
- ISO: ISO100 (or no higher than ISO400)
- Focus Type: Manual
- White Balance: Tungsten or between 3200K – 4000K
- Camera Mode: Shutter Priority or Manual Mode
- File Format: RAW
To give you a little more reasoning and understanding behind these camera settings for traffic trail photography, let’s break them down individually.
– Shutter Speed
Using a shutter speed of 15 seconds or longer is a must for excellent traffic trail photos. 15 seconds is a good starting ground to create nice long streaks that fill your entire frame. If you are in a darker area with fewer street lights, you could opt for a slower shutter speed like 30 seconds. How slow your shutter actually ends up being will depend on how dark it is around you. Using 15 seconds as a base is a suitable place to aim for when first choosing your camera settings for traffic trail photography.
Learn more about shutter speed and its effects on your images.
– Aperture
It’s uncommon for traffic trail photos to have a shallow depth of field. Since they’re typically showcasing an entire scene, it’s best practice to keep more in focus. A nice mid-range aperture setting such as F/8 is a perfect starting ground for when photographing traffic trails. Since it has a wider depth of field, you can be confident the important aspects of your image remain sharp.
More often than not, an aperture of F/8 will work fine for traffic trails. However, if you find yourself under a streetlight where it’s a bit brighter, you can use a smaller aperture like F/11 to compensate. Stick within the aperture range of F/8 – F/11, and you can’t go wrong!
Learn more about aperture and depth of field in photography.
– ISO
The ISO setting should be used sparingly when photographing traffic trails. This camera setting works by increasing the sensitivity of the sensor to create a brighter image. With a higher ISO, comes more noise that becomes especially noticeable in dark areas of the picture. As it so happens with traffic trail photography, there are a lot of dark areas in your photo! To make sure you have the best image quality possible, make sure to keep your ISO at ISO400 or lower. You could even leave it set to ISO100 and only adjust it if your image is still extremely dark. If that’s that case, you can always open your aperture or slow down your shutter to brighten your exposure.
Learn more about how to use ISO more effectively.
– Focus Type: How To Get Proper Focus At Night
Manual focus is an absolute must for traffic trail photography. When you’re in a low light situation, the automatic focus will have a hard time locking on to a focus point. That’s why manual focus is necessary when taking photos at night. Of course, it can still be equally challenging for you to find focus at night, so what’s the trick?
After you switch into manual focus, use the digital zoom feature in Live View on your cameras LCD screen. The icon is typically noted as a magnifying glass on most cameras. This lets you punch into the photo to see exactly what’s in focus. From here, try to find a light source such as a street light or building to grab focus from. Once you’ve set focus on a light source in your scene, you’re good to go! After you’ve set your manual focus, you won’t need to touch it again until the next setup.
– White Balance
The white balance setting is the way you accurately display the colors in your photo. Without the proper white balance, you can end up with weird hues in your image. A lot of photographers tend to use an auto white balance setting. With night photography, auto white balance tends to look quite yellow and unappealing. Using one of the preset white balances such as tungsten is an easy way to correct things in-camera.
If you feel like having even more customization, try using a custom white balance setting! When using a custom white balance, something between 3200K – 4000K is an optimal setting for traffic trail photography.
Learn more about white balance and its creative uses.

– Camera Modes
The camera mode dictates the way your camera captures an image. When it comes to photographing traffic trails, your shutter speed setting is most important to get the results you need. That’s why camera modes such as automatic won’t work when photographing traffic trails. Since automatic mode doesn’t understand your creative intent, it just tries to create a balanced exposure. To get total control over your shutter, you need to use Shutter Priority or Manual Mode.
Shutter Priority is a semi-automatic camera mode perfect for those not comfortable with full manual. This camera mode gives you total control of the shutter while choosing the other settings for you. If you want to make life easy and just focus on your shutter speed, this is an excellent camera mode to use.
Manual Mode, on the other hand, gives you complete control. With this camera mode, you’re in charge of setting your shutter speed, aperture, ISO, and all other additional settings. This is ideal if you want to make sure your settings match your creative intent. Manual mode is the best way to get the most out of your camera!
You can’t go wrong with either camera mode. Ultimately it comes down to your level of comfort with your camera and related settings.
– File Format
Using the RAW file format is best for traffic trail photography because you can recover the most detail in post. RAW files are uncompressed and can be manipulated heavily without any loss in quality. When you’re taking photos at night, this is a huge advantage! You can easily brighten up the shadows and improve your overall exposure with the click of a slider. If you were to shoot the same image in JPEG, you would be much more limited.
With that said, don’t bother using a RAW file format unless you intend to edit your photos. JPEG files make life easy and are ready to be uploaded and shared once you import. RAW files need to be converted over the JPEG (after the editing process) before you can do anything with them. If you don’t edit your images, you’ll just be creating a lot more work for yourself by shooting in RAW.
Learn the differences between RAW and JPEG files in photography.
What To Set Focus On When Photographing Traffic Trails
The big question remaining when choosing the best settings for traffic trail photography comes down to focus. What the heck are you supposed to focus on? A lot of people will try to set focus on the cars, which can be a challenging process. Trying to check manual focus on a moving subject in the dark does not sound like a good time. Luckily you don’t need to!
When you’re taking traffic trail photos, set focus on the surrounding area. I typically like to set focus on a building in the background or a barrier along the roadway. These are easy (and stationary) objects in your frame to set focus on at night. Just make sure they’re lit up, of course.
If you find yourself in an extremely dark environment, look for a light source such as a street light to set focus on!
How To Check Your Exposure At Night

When there’s a supreme lack of night, it can be challenging to know if you’re actually capturing the right exposure. In low light settings, it’s uncommon that your light meter offers any useful insight. That’s why you need to rely on a different tool called the histogram.
A histogram is a tool that displays your exposure through a graph. With one, it’s easy to see if you’re clipping the exposure in the highlights or shadows. To put it simply, if your histogram is touching either the left or right edge, you have no details in those areas. At night, your histogram will typically favor the darker exposures meaning it bunches up on the left. This is nothing to worry about, as long as the pixels aren’t touching the leftmost edge. If you notice this happening, you need to brighten your exposure to bring back the lost details. You can learn more about how to use and read a histogram here.
The histogram is the best tool to help you check your exposure at night because it shows your whole image. Rather than just sampling the light in the scene, your histogram showcases the individual exposure of all your pixels. This way, even when it’s completely dark, you know exactly what exposure values are present in your image.
Learning how to photograph traffic trails is a fun and creative style perfect for all levels of photographers. If you want to capture the images like what you envision, you must use the right settings. I hope this post helped you to discover all the best camera settings for photographing traffic trails, so you can head out into the night with confidence.
Rather than using the settings in this guide as a be-all-end-all, use them as a base. Different shots and situations may require alternate settings, but the ones shared here are a great starting ground. Now that you know more about what goes into photographing traffic trails, it’s time to put it into practice!
If you know someone who would love traffic trail photography, be sure to share this guide with them and support the blog!
If you want to continue challenging your photography, be sure to download my free 12-Week Photography Blueprint. This Blueprint offers new challenges and photography techniques to help you level up your photography over 90 days! Sign up below to get access:
Disclaimer: Some of the links in this article are affiliate links. By clicking on these links, I may receive a commission at no extra cost to you. This commission helps to support this blog and the creation of more free content! Thank you for your support and understanding.

Continue Reading:

How To Use The Marquee Tool In Photoshop

How To Crop A Layer In Photoshop (3 Simple Methods)

How To Fill A Selection In Photoshop (5 Best Ways)

What Are Embedded Previews In Lightroom + How To Use Them

Adobe Lightroom System Requirements For Mac & PC

How To Add A Watermark In Lightroom Classic & CC

How To Outline An Image In Canva

How To Add A Border In Canva (To Images, Shapes & Text!)

How To Make A Background Transparent In Canva

Products & Courses
Email: [email protected]
As an Amazon Affiliate, I earn from qualifying purchases. Brendan Williams Creative also participates in affiliate programs with Impact, Clickbank, CJ, ShareASale, and other sites. Brendan Williams Creative is compensated for referring traffic and business to these companies . Keep in mind that we may receive commissions when you click our links and make purchases. However, this does not impact our reviews and comparisons. We try our best to keep things fair and balanced, in order to help you make the best choice for you.

What are some things to do in Elektrostal?
This section could be endless, so rather than trying to suggest every local activity or attraction, we'll leave it open-ended.
Of course, Trippy is the perfect place to ask questions because there's an entire community of travelers talking to each other and sharing tips and advice. Trippy is where you can get answers personalized for your tastes, budgets, trip dates & more!
Click the button below to explore more questions and answers related to Elektrostal.
Do I really have to go back home?
Yes, even this step is optional, because if you're on vacation who wants the trip to end? It's okay, you can start planning your next trip!
Want to plan the trip back? Get the reverse directions for a Elektrostal to Moscow drive , or go to the main page to plan a new road trip .
Looking for ideas for more destinations within driving distance of Moscow? Try searching for places within 1 hour of Moscow .
You can also compare the travel time if you're flying or driving by calculating the distance from Moscow to Elektrostal . Or get a full Moscow to Elektrostal flight plan .
Don't forget about exploring your own hometown with a staycation. You can also find some cool day trips or get away for a weekend.
And if you know Moscow well, please help your fellow travelers and answer their questions about Moscow!
More info on this route:
road conditions from Moscow to Elektrostal
places to eat
alternate routes
Google driving directions
IMAGES
VIDEO
COMMENTS
Use your camera to explore many perspectives, like overhead, straight on, close up, and far away. Also, if you're shooting inside, try finding a sun patch, dark corner, or spot by the window, and see what light shows your subject best and creates the feeling you want to convey in your image." For feed-worthy road trip photos you'll want to ...
11 Essential Photography Tips for Any Road Trip. 1. Plan Your Road Trip Photography Route. A photography road trip offers opportunities for taking fantastic photos and making new memories. Choosing the location is all important and will be driven by what you like to photograph.
1. Always take a spare body, even if it stays in the car for the entire trip, you will thank me later if something catastrophic happens to your main camera. 2. Take more glass. I almost always ...
A deep blue sky can really help the colors of the landscape pop in your road trip photos, and one of the most effective ways to get this look is using a circular polarizer filter. Polarizing filters can help increase color saturation and contrast, reduce reflections on glass and water, and block 1 to 2 stops of light, allowing you to use a ...
Road Trip Photography: Capturing the Journey. The first section of the planning is all about the vehicle, accommodation, and route. This involves choosing a vehicle if you don't already have one, deciding on how and where you would like to sleep, and deciding on the road trip route. These things are personal preference and will also depend on ...
When it comes to camera settings for travel photography, there are a few key things to keep in mind. First, make sure your camera is set to the right aperture and shutter speed for the type of photo you want to take. ... Photography Road Trip. Planning a road trip for photography involves choosing the right vehicle, deciding on accommodation ...
6. Have fun on your trip and show that in your imagery - Be curious and really be in the moment while you travel, this is part of the joy of doing road trips and finding something new to experience. Now the challenging part is to photograph that experience to convey what you are actually doing or seeing at that moment. 7.
So slow down, explore, and let the road less traveled become your gateway to unforgettable photo opportunities. 2. Plan your photos in advance. When you embark on a road trip, it's essential to have a game plan for capturing amazing photos. Don't just rely on chance encounters along the way; instead, be proactive and set your sights on ...
Here are five tips for shooting the best road trip photo. Before we start, please remember to be careful when shooting on or near open roads. Never shoot on major highways or interstates, as well as stretches of road with limited visibility of oncoming traffic. Always be looking out for approaching vehicles in front or behind you.
Road Trip Photography Tip #3: Experiment with settings to your advantage There are three main factors that affect how a picture will be exposed: the aperture controls how much light reaches the camera's sensor; the shutter speed determines how long the shutter remains open while taking a picture; and ISO defines the sensitivity to light of ...
An epic road trip through a remote landscape brings you close to a constantly changing panorama ready to be caught by your camera. The tips in this post are designed to keep you shooting: you need to be physically ready to get in the position you need for the shot, but you also need to be mentally ready to make decisions about settings and creative composition.
Heading west, the Pacific Coast Highway in California is another iconic road trip route for photography. This 655-mile drive offers stunning views of the Pacific Ocean, rugged cliffs, and picturesque beaches. Stop at Bixby Bridge for a classic shot of the coastline or Pfeiffer Beach for a unique shot of the purple sand.
If you're interested in flower photography, be sure to bring a macro lens; if you expect to see birds or other wildlife, take a long lens; if you'll mostly be taking landscapes, bring zoom lenses in the 24-200mm range. Plan a shot list. If you're really ambitious, you might put together a shot list. This is a good exercise to help you ...
Planning and timing are important. Whilst I talked about flexibility in your itinerary, you should also pre-plan some of the locations that you intend to visit. These days, photographers have a vast array of tools to help us plan and execute shoots on a road trip. There are both Google Earth and Street View.
Answer: A photography road trip! Last month we took a little road trip for my birthday. It was a chance to shake up the routine, get a change of scenery, and go out and shoot. We packed up our gear, some toys for our son, and piled into our adventure van. ... Think carefully about your settings and composition while you're setting up. Are ...
2 - All The Gear. One of the fabulous things about a photography road trip, is that you can take as much gear as you want. No weight or bag restrictions in your own vehicle! This is a personal choice, but I would rather take something and not use it, than not have it when I want it.
When taking the leap towards road trip adventures, there are a good number of tips that can help you bring the most out of the experience. Stay tuned!
Great travel photography tips for beginners from a professional photographer, whether you like to photograph landscapes, sunsets or do macro photos & much more. ... Adjust your camera settings so that the sky looks accurate. Keep in mind that the sky without any clouds looks plain and boring. If you want to capture a stunning sunset, do it when ...
Using one of the preset white balances such as tungsten is an easy way to correct things in-camera. If you feel like having even more customization, try using a custom white balance setting! When using a custom white balance, something between 3200K - 4000K is an optimal setting for traffic trail photography.
Welcome to the 628DirtRooster website where you can find video links to Randy McCaffrey's (AKA DirtRooster) YouTube videos, community support and other resources for the Hobby Beekeepers and the official 628DirtRooster online store where you can find 628DirtRooster hats and shirts, local Mississippi honey and whole lot more!
Here's a sample itinerary for a drive from Moscow to Kostroma. If you're planning a road trip to Kostroma, you can research locations to stop along the way. Make sure you check road conditions to double check the weather. Find the best hotels, restaurants, and attractions based on the most talked about places recommended by Trippy members.
Here's a sample itinerary for a drive from Moscow to Ryazan. If you're planning a road trip to Ryazan, you can research locations to stop along the way. Make sure you check road conditions to double check the weather. Find the best hotels, restaurants, and attractions based on the most talked about places recommended by Trippy members.
Here's a sample itinerary for a drive from Moscow to Elektrostal. If you're planning a road trip to Elektrostal, you can research locations to stop along the way. Make sure you check road conditions to double check the weather. Find the best hotels, restaurants, and attractions based on the most talked about places recommended by Trippy members.