Looks like no one’s replied in a while. To start the conversation again, simply ask a new question.
I cannot join zoom meetings because safari saks invalid address
Why can’t I join zoom meetings. Safari says address invalid
iPad Mini 5, iPadOS 14
Posted on Nov 22, 2020 11:44 AM

Similar questions
- Why does safari tell me i can't view a simple website like a local restaurant to make a booking? Why does safari tell me i can't view a simple website like a local restaurant to make a booking? 312 5
- Unable to speak in Zoom During a recent attempt to join a Zoom session for our bridge club, I was unable to speak, I believe I need to change to a different search engine possibly Google Chrome, how do I do this, your help would be most appreciated [Re-Titled by Moderator] 132 4
- Google Meetings I'm using Monterey 12.1 and am having issues with Google Meet. While in a meeting Meet will tell me that I've lost connection. I never have this issues with Zoom or Teams. I have restarted my computer, closed the browser (Safari) and even turned off the wifi for all the devices in my house to make sure there's plenty of bandwidth. It doesn't help. Are there compatibility issues with Safari and Meet? Any fixes? Thank! 977 2
Loading page content
Page content loaded
Nov 30, 2020 1:33 PM in response to Newfiemartini
Hi Newfiemartini,
Thanks for coming to Apple Support Communities for help today with Safari on your iPad. It sounds like an address for a Zoom meeting is invalid.
Please see: If Safari displays a blank page or quits on your iPhone, iPad, or iPod touch .
If those tips don't work, you can also try testing with another browser from the App Store. Then the next step would be contacting Zoom support.
Have a fantastic day!
Dec 1, 2020 8:56 AM in response to MichaelB2019
I have succeeded in connecting by deleting the app and re-downloading it thanks for your reply
iPhone User Guide
- iPhone models compatible with iOS 17
- R ' class='toc-item' data-ss-analytics-link-url='https://support.apple.com/guide/iphone/iphone-xr-iph017302841/ios' data-ajax-endpoint='https://support.apple.com/guide/iphone/iphone-xr-iph017302841/ios' data-ss-analytics-event="acs.link_click" href='https://support.apple.com/guide/iphone/iphone-xr-iph017302841/ios' id='toc-item-IPH017302841' data-tocid='IPH017302841' > iPhone X R
- S ' class='toc-item' data-ss-analytics-link-url='https://support.apple.com/guide/iphone/iphone-xs-iphc00446242/ios' data-ajax-endpoint='https://support.apple.com/guide/iphone/iphone-xs-iphc00446242/ios' data-ss-analytics-event="acs.link_click" href='https://support.apple.com/guide/iphone/iphone-xs-iphc00446242/ios' id='toc-item-IPHC00446242' data-tocid='IPHC00446242' > iPhone X S
- S Max' class='toc-item' data-ss-analytics-link-url='https://support.apple.com/guide/iphone/iphone-xs-max-iphcd2066870/ios' data-ajax-endpoint='https://support.apple.com/guide/iphone/iphone-xs-max-iphcd2066870/ios' data-ss-analytics-event="acs.link_click" href='https://support.apple.com/guide/iphone/iphone-xs-max-iphcd2066870/ios' id='toc-item-IPHCD2066870' data-tocid='IPHCD2066870' > iPhone X S Max
- iPhone 11 Pro
- iPhone 11 Pro Max
- iPhone SE (2nd generation)
- iPhone 12 mini
- iPhone 12 Pro
- iPhone 12 Pro Max
- iPhone 13 mini
- iPhone 13 Pro
- iPhone 13 Pro Max
- iPhone SE (3rd generation)
- iPhone 14 Plus
- iPhone 14 Pro
- iPhone 14 Pro Max
- iPhone 15 Plus
- iPhone 15 Pro
- iPhone 15 Pro Max
- Setup basics
- Make your iPhone your own
- Take great photos and videos
- Keep in touch with friends and family
- Share features with your family
- Use iPhone for your daily routines
- Expert advice from Apple Support
- What’s new in iOS 17
- Turn on and set up iPhone
- Wake and unlock
- Set up cellular service
- Use Dual SIM
- Connect to the internet
- Sign in with Apple ID
- Subscribe to iCloud+
- Find settings
- Set up mail, contacts, and calendar accounts
- Learn the meaning of the status icons
- Charge the battery
- Charge with cleaner energy sources
- Show the battery percentage
- Check battery health and usage
- Use Low Power Mode
- Read and bookmark the user guide
- Learn basic gestures
- Learn gestures for iPhone models with Face ID
- Adjust the volume
- Find your apps in App Library
- Switch between open apps
- Quit and reopen an app
- Multitask with Picture in Picture
- Access features from the Lock Screen
- View Live Activities in the Dynamic Island
- Perform quick actions
- Search on iPhone
- Get information about your iPhone
- View or change cellular data settings
- Travel with iPhone
- Change sounds and vibrations
- Use the Action button on iPhone 15 Pro and iPhone 15 Pro Max
- Create a custom Lock Screen
- Change the wallpaper
- Adjust the screen brightness and color balance
- Keep the iPhone display on longer
- Use StandBy
- Customize the text size and zoom setting
- Change the name of your iPhone
- Change the date and time
- Change the language and region
- Organize your apps in folders
- Add, edit, and remove widgets
- Move apps and widgets on the Home Screen
- Remove apps
- Use and customize Control Center
- Change or lock the screen orientation
- View and respond to notifications
- Change notification settings
- Set up a Focus
- Allow or silence notifications for a Focus
- Turn a Focus on or off
- Stay focused while driving
- Customize sharing options
- Type with the onscreen keyboard
- Dictate text
- Select and edit text
- Use predictive text
- Use text replacements
- Add or change keyboards
- Add emoji and stickers
- Take a screenshot
- Take a screen recording
- Draw in documents
- Add text, shapes, signatures, and more
- Fill out forms and sign documents
- Use Live Text to interact with content in a photo or video
- Use Visual Look Up to identify objects in your photos and videos
- Lift a subject from the photo background
- Subscribe to Apple Arcade
- Play with friends in Game Center
- Connect a game controller
- Use App Clips
- Update apps
- View or cancel subscriptions
- Manage purchases, settings, and restrictions
- Install and manage fonts
- Buy books and audiobooks
- Annotate books
- Access books on other Apple devices
- Listen to audiobooks
- Set reading goals
- Organize books
- Create and edit events in Calendar
- Send invitations
- Reply to invitations
- Change how you view events
- Search for events
- Change calendar and event settings
- Schedule or display events in a different time zone
- Keep track of events
- Use multiple calendars
- Use the Holidays calendar
- Share iCloud calendars
- Camera basics
- Set up your shot
- Apply Photographic Styles
- Take Live Photos
- Take Burst mode shots
- Take a selfie
- Take panoramic photos
- Take macro photos and videos
- Take portraits
- Take Night mode photos
- Take Apple ProRAW photos
- Adjust the shutter volume
- Adjust HDR camera settings
- Record videos
- Record spatial videos for Apple Vision Pro
- Record ProRes videos
- Record videos in Cinematic mode
- Change video recording settings
- Save camera settings
- Customize the Main camera lens
- Change advanced camera settings
- View, share, and print photos
- Use Live Text
- Scan a QR code
- See the world clock
- Set an alarm
- Change the next wake up alarm
- Use the stopwatch
- Use multiple timers
- Add and use contact information
- Edit contacts
- Add your contact info
- Use NameDrop on iPhone to share your contact info
- Use other contact accounts
- Use Contacts from the Phone app
- Merge or hide duplicate contacts
- Export contacts
- Get started with FaceTime
- Make FaceTime calls
- Receive FaceTime calls
- Create a FaceTime link
- Take a Live Photo
- Turn on Live Captions in a FaceTime call
- Use other apps during a call
- Make a Group FaceTime call
- View participants in a grid
- Use SharePlay to watch, listen, and play together
- Share your screen in a FaceTime call
- Collaborate on a document in FaceTime
- Use video conferencing features
- Hand off a FaceTime call to another Apple device
- Change the FaceTime video settings
- Change the FaceTime audio settings
- Change your appearance
- Leave a call or switch to Messages
- Block unwanted callers
- Report a call as spam
- Connect external devices or servers
- Modify files, folders, and downloads
- Search for files and folders
- Organize files and folders
- Set up iCloud Drive
- Share files and folders in iCloud Drive
- Share your location
- Meet up with a friend
- Send your location via satellite
- Add or remove a friend
- Locate a friend
- Get notified when friends change their location
- Notify a friend when your location changes
- Add your iPhone
- Add your iPhone Wallet with MagSafe
- Get notified if you leave a device behind
- Locate a device
- Mark a device as lost
- Erase a device
- Remove a device
- Add an AirTag
- Share an AirTag or other item in Find My on iPhone
- Add a third-party item
- Get notified if you leave an item behind
- Locate an item
- Mark an item as lost
- Remove an item
- Adjust map settings
- Get started with Fitness
- Track daily activity and change your move goal
- See your activity summary
- Sync a third-party workout app
- Change fitness notifications
- Share your activity
- Subscribe to Apple Fitness+
- Find Apple Fitness+ workouts and meditations
- Start an Apple Fitness+ workout or meditation
- Create a Custom Plan in Apple Fitness+
- Work out together using SharePlay
- Change what’s on the screen during an Apple Fitness+ workout or meditation
- Download an Apple Fitness+ workout or meditation
- Get started with Freeform
- Create a Freeform board
- Draw or handwrite
- Apply consistent styles
- Position items on a board
- Search Freeform boards
- Share and collaborate
- Delete and recover boards
- Get started with Health
- Fill out your Health Details
- Intro to Health data
- View your health data
- Share your health data
- View health data shared by others
- Download health records
- View health records
- Monitor your walking steadiness
- Log menstrual cycle information
- View menstrual cycle predictions and history
- Track your medications
- Learn more about your medications
- Log your state of mind
- Take a mental health assessment
- Set up a schedule for a Sleep Focus
- Turn off alarms and delete sleep schedules
- Add or change sleep schedules
- Turn Sleep Focus on or off
- Change your wind down period, sleep goal, and more
- View your sleep history
- Check your headphone levels
- Use audiogram data
- Register as an organ donor
- Back up your Health data
- Intro to Home
- Upgrade to the new Home architecture
- Set up accessories
- Control accessories
- Control your home using Siri
- Use Grid Forecast to plan your energy usage
- Set up HomePod
- Control your home remotely
- Create and use scenes
- Use automations
- Set up security cameras
- Use Face Recognition
- Unlock your door with a home key
- Configure a router
- Invite others to control accessories
- Add more homes
- Get music, movies, and TV shows
- Get ringtones
- Manage purchases and settings
- Get started with Journal
- Write in your journal
- Review your past journal entries
- Change Journal settings
- Magnify nearby objects
- Change settings
- Detect people around you
- Detect doors around you
- Receive image descriptions of your surroundings
- Read aloud text and labels around you
- Set up shortcuts for Detection Mode
- Add and remove email accounts
- Set up a custom email domain
- Check your email
- Unsend email with Undo Send
- Reply to and forward emails
- Save an email draft
- Add email attachments
- Download email attachments
- Annotate email attachments
- Set email notifications
- Search for email
- Organize email in mailboxes
- Flag or block emails
- Filter emails
- Use Hide My Email
- Use Mail Privacy Protection
- Change email settings
- Delete and recover emails
- Add a Mail widget to your Home Screen
- Print emails
- Get travel directions
- Select other route options
- Find stops along your route
- View a route overview or a list of turns
- Change settings for spoken directions
- Get driving directions
- Get directions to your parked car
- Set up electric vehicle routing
- Report traffic incidents
- Get cycling directions
- Get walking directions
- Get transit directions
- Delete recent directions
- Get traffic and weather info
- Estimate travel time and ETA
- Download offline maps
- Search for places
- Find nearby attractions, restaurants, and services
- Get information about places
- Mark places
- Share places
- Rate places
- Save favorite places
- Explore new places with Guides
- Organize places in My Guides
- Delete significant locations
- Look around places
- Take Flyover tours
- Find your Maps settings
- Measure dimensions
- View and save measurements
- Measure a person’s height
- Use the level
- Set up Messages
- About iMessage
- Send and reply to messages
- Unsend and edit messages
- Keep track of messages
- Forward and share messages
- Group conversations
- Watch, listen, or play together using SharePlay
- Collaborate on projects
- Use iMessage apps
- Take and edit photos or videos
- Share photos, links, and more
- Send stickers
- Request, send, and receive payments
- Send and receive audio messages
- Animate messages
- Change notifications
- Block, filter, and report messages
- Delete messages and attachments
- Recover deleted messages
- View albums, playlists, and more
- Show song credits and lyrics
- Queue up your music
- Listen to broadcast radio
- Subscribe to Apple Music
- Play music together in the car with iPhone
- Listen to lossless music
- Listen to Dolby Atmos music
- Apple Music Sing
- Find new music
- Add music and listen offline
- Get personalized recommendations
- Listen to radio
- Search for music
- Create playlists
- See what your friends are listening to
- Use Siri to play music
- Change the way music sounds
- Get started with News
- Use News widgets
- See news stories chosen just for you
- Read stories
- Follow your favorite teams with My Sports
- Listen to Apple News Today
- Subscribe to Apple News+
- Browse and read Apple News+ stories and issues
- Download Apple News+ issues
- Listen to audio stories
- Solve crossword puzzles
- Search for news stories
- Save stories in News for later
- Subscribe to individual news channels
- Get started with Notes
- Add or remove accounts
- Create and format notes
- Draw or write
- Add photos, videos, and more
- Scan text and documents
- Work with PDFs
- Create Quick Notes
- Search notes
- Organize in folders
- Organize with tags
- Use Smart Folders
- Export or print notes
- Change Notes settings
- Make a call
- Answer or decline incoming calls
- While on a call
- Set up voicemail
- Check voicemail
- Change voicemail greeting and settings
- Select ringtones and vibrations
- Make calls using Wi-Fi
- Set up call forwarding and call waiting
- Avoid unwanted calls
- View photos and videos
- Play videos and slideshows
- Delete or hide photos and videos
- Edit photos and videos
- Trim video length and adjust slow motion
- Edit Cinematic mode videos
- Edit Live Photos
- Edit portraits
- Use photo albums
- Edit, share, and organize albums
- Filter and sort photos and videos in albums
- Make stickers from your photos
- Duplicate and copy photos and videos
- Merge duplicate photos and videos
- Search for photos
- Identify people and pets
- Browse photos by location
- Share photos and videos
- Share long videos
- View photos and videos shared with you
- Watch memories
- Personalize your memories
- Manage memories and featured photos
- Use iCloud Photos
- Create shared albums
- Add and remove people in a shared album
- Add and delete photos and videos in a shared album
- Set up or join an iCloud Shared Photo Library
- Add content to an iCloud Shared Photo Library
- Use iCloud Shared Photo Library
- Import and export photos and videos
- Print photos
- Find podcasts
- Listen to podcasts
- Follow your favorite podcasts
- Use the Podcasts widget
- Organize your podcast library
- Download, save, or share podcasts
- Subscribe to podcasts
- Listen to subscriber-only content
- Change download settings
- Make a grocery list
- Add items to a list
- Edit and manage a list
- Search and organize lists
- Work with templates
- Use Smart Lists
- Print reminders
- Use the Reminders widget
- Change Reminders settings
- Browse the web
- Search for websites
- Customize your Safari settings
- Change the layout
- Use Safari profiles
- Open and close tabs
- Organize your tabs
- View your Safari tabs from another Apple device
- Share Tab Groups
- Use Siri to listen to a webpage
- Bookmark favorite webpages
- Save pages to a Reading List
- Find links shared with you
- Annotate and save a webpage as a PDF
- Automatically fill in forms
- Get extensions
- Hide ads and distractions
- Clear your cache
- Browse the web privately
- Use passkeys in Safari
- Check stocks
- Manage multiple watchlists
- Read business news
- Add earnings reports to your calendar
- Use a Stocks widget
- Translate text, voice, and conversations
- Translate text in apps
- Translate with the camera view
- Subscribe to Apple TV+, MLS Season Pass, or an Apple TV channel
- Add your TV provider
- Get shows, movies, and more
- Watch sports
- Watch Major League Soccer with MLS Season Pass
- Control playback
- Manage your library
- Change the settings
- Make a recording
- Play it back
- Edit or delete a recording
- Keep recordings up to date
- Organize recordings
- Search for or rename a recording
- Share a recording
- Duplicate a recording
- Keep cards and passes in Wallet
- Set up Apple Pay
- Use Apple Pay for contactless payments
- Use Apple Pay in apps and on the web
- Track your orders
- Use Apple Cash
- Use Apple Card
- Use Savings
- Pay for transit
- Access your home, hotel room, and vehicle
- Add identity cards
- Use COVID-19 vaccination cards
- Check your Apple Account balance
- Use Express Mode
- Organize your Wallet
- Remove cards or passes
- Check the weather
- Check the weather in other locations
- View weather maps
- Manage weather notifications
- Use Weather widgets
- Learn the weather icons
- Find out what Siri can do
- Tell Siri about yourself
- Have Siri announce calls and notifications
- Add Siri Shortcuts
- About Siri Suggestions
- Use Siri in your car
- Change Siri settings
- Contact emergency services
- Use Emergency SOS via satellite
- Request Roadside Assistance via satellite
- Set up and view your Medical ID
- Use Check In
- Manage Crash Detection
- Reset privacy and security settings in an emergency
- Set up Family Sharing
- Add Family Sharing members
- Remove Family Sharing members
- Share subscriptions
- Share purchases
- Share locations with family and locate lost devices
- Set up Apple Cash Family and Apple Card Family
- Set up parental controls
- Set up a child’s device
- Get started with Screen Time
- Protect your vision health with Screen Distance
- Set up Screen Time
- Set communication and safety limits and block inappropriate content
- Charging cable
- Power adapters
- MagSafe chargers and battery packs
- MagSafe cases and sleeves
- Qi-certified wireless chargers
- Use AirPods
- Use EarPods
- Apple Watch
- Wirelessly stream videos and photos to Apple TV or a smart TV
- Connect to a display with a cable
- HomePod and other wireless speakers
- Pair Magic Keyboard
- Enter characters with diacritical marks
- Switch between keyboards
- Use shortcuts
- Choose an alternative keyboard layout
- Change typing assistance options
- External storage devices
- Bluetooth accessories
- Share your internet connection
- Allow phone calls on your iPad and Mac
- Use iPhone as a webcam
- Hand off tasks between devices
- Cut, copy, and paste between iPhone and other devices
- Stream video or mirror the screen of your iPhone
- Start SharePlay instantly
- Use AirDrop to send items
- Connect iPhone and your computer with a cable
- Transfer files between devices
- Transfer files with email, messages, or AirDrop
- Transfer files or sync content with the Finder or iTunes
- Automatically keep files up to date with iCloud
- Use an external storage device, a file server, or a cloud storage service
- Intro to CarPlay
- Connect to CarPlay
- Use your vehicle’s built-in controls
- Get turn-by-turn directions
- Change the map view
- Make phone calls
- View your calendar
- Send and receive text messages
- Announce incoming text messages
- Play podcasts
- Play audiobooks
- Listen to news stories
- Control your home
- Use other apps with CarPlay
- Rearrange icons on CarPlay Home
- Change settings in CarPlay
- Get started with accessibility features
- Turn on accessibility features for setup
- Change Siri accessibility settings
- Open features with Accessibility Shortcut
- Change color and brightness
- Make text easier to read
- Reduce onscreen motion
- Customize per-app visual settings
- Hear what’s on the screen or typed
- Hear audio descriptions
- Turn on and practice VoiceOver
- Change your VoiceOver settings
- Use VoiceOver gestures
- Operate iPhone when VoiceOver is on
- Control VoiceOver using the rotor
- Use the onscreen keyboard
- Write with your finger
- Use VoiceOver with an Apple external keyboard
- Use a braille display
- Type braille on the screen
- Customize gestures and keyboard shortcuts
- Use VoiceOver with a pointer device
- Use VoiceOver for images and videos
- Use VoiceOver in apps
- Use AssistiveTouch
- Adjust how iPhone responds to your touch
- Use Reachability
- Auto-answer calls
- Turn off vibration
- Change Face ID and attention settings
- Use Voice Control
- Adjust the side or Home button
- Use Apple TV Remote buttons
- Adjust pointer settings
- Adjust keyboard settings
- Adjust AirPods settings
- Turn on Apple Watch Mirroring
- Control a nearby Apple device
- Intro to Switch Control
- Set up and turn on Switch Control
- Select items, perform actions, and more
- Control several devices with one switch
- Use hearing devices
- Use Live Listen
- Use sound recognition
- Set up and use RTT and TTY
- Flash the LED for alerts
- Adjust audio settings
- Play background sounds
- Display subtitles and captions
- Show transcriptions for Intercom messages
- Get Live Captions (beta)
- Type to speak
- Record a Personal Voice
- Use Guided Access
- Use built-in privacy and security protections
- Set a passcode
- Set up Face ID
- Set up Touch ID
- Control access to information on the Lock Screen
- Keep your Apple ID secure
- Use passkeys to sign in to apps and websites
- Sign in with Apple
- Share passwords
- Automatically fill in strong passwords
- Change weak or compromised passwords
- View your passwords and related information
- Share passkeys and passwords securely with AirDrop
- Make your passkeys and passwords available on all your devices
- Automatically fill in verification codes
- Automatically fill in SMS passcodes
- Sign in with fewer CAPTCHA challenges
- Use two-factor authentication
- Use security keys
- Manage information sharing with Safety Check
- Control app tracking permissions
- Control the location information you share
- Control access to information in apps
- Control how Apple delivers advertising to you
- Control access to hardware features
- Create and manage Hide My Email addresses
- Protect your web browsing with iCloud Private Relay
- Use a private network address
- Use Advanced Data Protection
- Use Lockdown Mode
- Use Stolen Device Protection
- Receive warnings about sensitive content
- Use Contact Key Verification
- Turn iPhone on or off
- Force restart iPhone
- Back up iPhone
- Return iPhone settings to their defaults
- Restore all content from a backup
- Restore purchased and deleted items
- Sell, give away, or trade in your iPhone
- Erase iPhone
- Install or remove configuration profiles
- Important safety information
- Important handling information
- Find more resources for software and service
- FCC compliance statement
- ISED Canada compliance statement
- Ultra Wideband information
- Class 1 Laser information
- Apple and the environment
- Disposal and recycling information
- Unauthorized modification of iOS
Zoom in on the iPhone screen
In many apps, you can zoom in or out on specific items. For example, you can double-tap or pinch to look closer in Photos or expand webpage columns in Safari. You can also use the Zoom feature to magnify the screen no matter what you’re doing. You can magnify the entire screen (Full Screen Zoom) or magnify only part of the screen with a resizable lens (Window Zoom). And, you can use Zoom together with VoiceOver.

Set up Zoom
Adjust any of the following:
Follow Focus: Track your selections, the text insertion point, and your typing.
Smart Typing: Switch to Window Zoom when a keyboard appears.
Keyboard Shortcuts: Control Zoom using shortcuts on an external keyboard.
Zoom Controller: Turn the controller on, set controller actions, and adjust the color and opacity.
Zoom Region: Choose Full Screen Zoom or Window Zoom.
Zoom Filter: Choose None, Inverted, Grayscale, Grayscale Inverted, or Low Light.
Maximum Zoom Level: Drag the slider to adjust the level.
If you use iPhone with a pointer device, you can also set the following below Pointer Control:
Zoom Pan: Choose Continuous, Centered, or Edges to set how the screen image moves with the pointer.
Adjust Size with Zoom: Allow the pointer to scale with zoom.
To add Zoom to Accessibility Shortcut, go to Settings > Accessibility > Accessibility Shortcut, then tap Zoom.
Double-tap the screen with three fingers or use Accessibility Shortcut to turn on Zoom.
To see more of the screen, do any of the following:
Adjust the magnification: Double-tap the screen with three fingers (without lifting your fingers after the second tap), then drag up or down. Or triple-tap with three fingers, then drag the Zoom Level slider.
Move the Zoom lens: (Window Zoom) Drag the handle at the bottom of the Zoom lens.
Pan to another area: (Full Screen Zoom) Drag the screen with three fingers.
To adjust the settings with the Zoom menu, triple-tap with three fingers, then adjust any of the following:
Choose Region: Choose Full Screen Zoom or Window Zoom.
Resize Lens: (Window Zoom) Tap Resize Lens, then drag any of the round handles that appear.
Choose Filter: Choose Inverted, Grayscale, Grayscale Inverted, or Low Light.
Show Controller: Show the Zoom Controller.
To use the Zoom Controller, do any of the following:
Show the Zoom menu: Tap the controller.
Zoom in or out: Double-tap the controller.
Pan: When zoomed in, drag the controller.
While using Zoom with Magic Keyboard, the Zoom region follows the insertion point, keeping it in the center of the screen. See Pair Magic Keyboard with iPhone .
To turn off Zoom, double-tap the screen with three fingers or use Accessibility Shortcut .
Adjusting your video layout during a virtual meeting
Customize your video layout preferences during your Zoom meetings—see everyone, hide participants, and much more. There are 4 available video layouts when no one in the meeting is screen sharing: Speaker view, Gallery view, Immersive view , and floating thumbnail window. When someone is screen sharing, you can use Side-by-side mode or view the screen share with Speaker view. Any of these layouts can be used in fullscreen or windowed mode, with the exception of the floating thumbnail view.
Other video layout controls include rearranging the gallery view order , pinning or spotlighting up to 9 participants' videos, hiding non-video participants , or stopping all incoming video .
This article covers:
Speaker view
Gallery view, full-screen meeting window, floating thumbnail window.
- Layout when screen sharing
How to hide participants who have their video turned off
How to hide the smart gallery full room view, how to switch views during a meeting, prerequisites for changing meeting view settings.
- Zoom Workplace desktop app for Windows, macOS, or Linux: Global minimum version or higher
- Gallery View (mobile app): 3 or more participants in the meeting (only 2 participants required for iPad)
Zoom Web App
Multi-speaker layout:
- Windows: 6.0.0 or higher
- macOS: 6.0.0 or higher
System requirements for displaying up to 49 thumbnails per page in Gallery view
- The Maximum participants displayed per screen in Gallery View is set to 49 participants in the desktop client video settings Note : If your computer does not meet the CPU requirements, this option is unavailable.
- 4 cores or higher
- 4th generation or higher
- 2 cores or higher
- 6 cores or higher
- 3.0GHz or higher
- AMD Ryzen 5 series
- 6th generation or higher
- 2.0GHz or higher
- 1.6GHz frequency of higher; OR
- 8 cores or higher
- 3.0GHz or higher; OR
- 12 cores or higher
- AMD Ryzen 7/9 series Note : While using dual monitors in the desktop client gallery view will still only be shown on one monitor.
- iPad Pro 12.9" 5th generation
Speaker view will switch the large video window between who is speaking with 3 or more participants in the meeting. If it is just you and one other participant, your video will be smaller at the top and their video will appear below.
Pinning a participant will keep them as the largest video for your view of the meeting, while spotlighting will do the same but for everyone in the meeting.

Gallery view lets you see thumbnail displays of participants, in a grid pattern, which expands and contracts as participants join and leave the meeting. Depending on your CPU, the desktop client can display up to 25 or 49 participants in a single screen of the Gallery view. If more attendees than are allowed to be displayed are in the meeting, additional pages are created with your max number of thumbnails on each page. Cycle through the pages and view up to 1,000 thumbnails by clicking the right or left arrows in gallery view to display the next page of participants.
The order of the videos in Gallery view can also be rearranged to suit your needs , as well as saved for use in later sessions.
When in Gallery view and a participant begins speaking, that active speaker is relocated to the current page you are viewing and highlighted, making it easier to recognize who is speaking. This functionality is not possible when using a custom gallery order, as the order will remain in place.

Multi-speaker view
Multi-speaker view provides meeting participants a more engaging experience, dynamically adapting to current speakers by highlighting and enlarging their video tiles over others, while still providing a view of other participants in a smaller gallery view below. With 4 or fewer participants, gallery view is used instead, but with sufficient participants, up to 4 active speaker(s) will have their video tile enlarged and made the focus of the meeting. Pinning videos is supported with multi-speaker layout, keeping the pinned video in focus, but spotlighting is not supported, as the spotlighted video tile will take control of the video layout for all.
Note : Multi-speaker layout requires desktop app for Windows or macOS, version 6.0.0 or higher.

You can switch any of the layouts (except floating the thumbnail window) to full screen mode by double-clicking your Zoom window.
You can exit full screen by double-clicking again or using the Esc key on your keyboard.
Note : In older versions of macOS, click Meeting and Enter Fullscreen in the Top Menu bar.

The floating thumbnail window allows you to minimize the main Zoom window, but keep the video on top of other applications you have open. You can move the window around your screen as needed, or hide the video entirely.
To switch to floating thumbnail view:
- Click on the minimize icon, located at the top-right corner for Windows, or top-left corner for macOS.
Layout during screen sharing
When viewing shared content, you will have the 3 following view options:
- Standard : Similar to Speaker view, where the shared content is below and other videos tiles are along the top. When in fullscreen, the shared content will fill the screen and video tiles will become smaller, movable thumbnails.
- Side-by-side: Speaker : When in side-by-side mode , the meeting window is split between the shared content and video thumbnails, with the ability to adjust the proportions of the split between the two. Side-by-side: Speaker will only show the active speaker in the portion containing video thumbnails.
- Side-by-side: Gallery : When in side-by-side mode , the meeting window is split between the shared content and video thumbnails, with the ability to adjust the proportions of the split between the two. Side-by-side: Gallery will display a maximum of 6 (when the shared content is given the most space) or 49 video thumbnails (when the shared content is given the least space) in the portion containing video thumbnails.
- Side-by-side: Multi-speaker : When in side-by-side mode , the meeting window is split between the shared content and video thumbnails, with the ability to adjust the proportions of the split between the two. Side-by-side: Multi-speaker will dynamically adapt to current speakers by highlighting and enlarging their video tiles over others below.
Any of these views can be used when the meeting window is maximized as well. Learn more about Side-by-Side mode .
Hiding non-video participants can reduce the number of participants displayed on the screen and draw more attention to those with video on. While this can be controlled through the out-of-meeting client settings , this can also be adjusting during a live session as well.
- Click Hide Non-video Participants to hide all participants without video.
You can also stop all incoming video to preserve bandwidth or avoid mental fatigue.
How to hide your view of your own video
When presenting while on video, seeing your own video can be distracting for some. While this can be controlled through the out-of-meeting client settings , this can also be adjusting during a live session as well.
- Click Hide Self View to hide all participants without video enabled.
If a Zoom Room is participating in your meeting with smart gallery enabled, a camera view of the entire room will accompany the other smart gallery video streams by default. If you want to hide this view and see only the individual video streams, follow these steps:
- Start a meeting and wait for the Zoom Room participant to join and enable smart gallery.
- Click More next to the entry for the Zoom Room participant.
- Click Hide Room View .
- (Optional) If you want to change the setting again, follow steps 2-4 and click Show Room View .
Windows | macOS | Linux
- Start or join a meeting.

These options will change when viewing another participants shared screen or desktop. Learn more about side-by-side mode .
Android | iOS

Note : Gallery View allows you to see up to 16 participants at once, up to 30 participants at once when viewing on 11" and 12.9" iPad Pros (2nd, 3rd, and 4th generations), and up to 49 participants at once when viewing on a 5th generation 12.9" iPad Pro.

How-To Geek
How to zoom in or out on a mac.
Put your reading glasses away and use your Mac’s Zoom feature.
Quick Links
How to zoom in on a mac, how to zoom out on a mac, how to enable accessibility zoom on a mac, how to zoom with hover text, key takeaways.
In many apps, pressing Command and + (plus sign) at the same time will let you zoom in, and Command with - (minus) will let you zoom out on a Mac. You can also zoom system-wide or zoom in on specific text by enabling those features in Accessibility settings.
When you have trouble seeing something on your computer screen, do you lean in closer or put on your reading glasses? You can make it easier to see anything on your Mac screen using the Zoom feature.
We'll show you various ways to zoom in and out on a MacBook or desktop Mac . You can use a keyboard shortcut, gesture, or both. You can even enlarge text when you hover your cursor over it and customize its view.
Related: How to Set a Default Zoom Level in Safari for Mac
To zoom in on a window or specific app such as Safari, hold Command and press the Plus (+) key. Different apps may use other shortcuts, toolbar buttons, or menu actions, so refer to your specific apps' documentation.
Additionally, once you enable zoom options in the Accessibility settings, you can use a shortcut, your trackpad, or a scroll gesture to zoom in on any window or part of the screen:
- Keyboard Shortcut : Press Option+Command+= (equal sign) to zoom in. You can also use Option+Command+8 to switch between no zoom and your last zoom level.
- Trackpad : Double-tap your trackpad with three fingers to zoom in. You can also double-tap and drag on your trackpad to change the zoom level.
- Scroll Gesture : Press the modifier key you chose and then use your mouse or trackpad to scroll up.
To zoom out of a window or a specific app like Safari, you can hold Command and press the Minus (-) key. Again, other apps may use different shortcuts, toolbar buttons, or menu actions to zoom out.
With accessibility zoom option(s) enabled , you have more options for zooming out on your Mac, no matter which app you're using. Depending on which options you've enabled, you can use one or more of the following:
- Keyboard Shortcut : Press Option+Command+- (minus sign).
- Trackpad : Double-tap your trackpad with three fingers to zoom out after you zoom in.
- Scroll Gesture : Press the modifier key you chose and then use your mouse or trackpad to scroll down.
To start zooming anywhere on your Mac, you'll need to enable the Zoom feature in the Accessibility settings . From there, you'll choose the methods you want to use.
Open System Preferences with the Dock icon or from the Apple icon in the menu bar. Then, select "Accessibility" on the left and "Zoom" on the right.
You'll see each of the following options you can use to zoom in on your Mac.
Keyboard Shortcuts and Trackpad Gestures
Enable the toggles for using keyboard shortcuts and/or trackpad gestures to zoom in and out. With these settings, you'll see the shortcuts and gestures to use directly below the settings.
Scroll Gestures
Next, you can turn on the toggle for using a scroll gesture with a modifier key. If you enable this option, choose the modifier key you want to use in the drop-down box. You can pick the Control, Option, or Command key .
Related: How the Command and Option Keys Work on a Mac
Then, pick the zoom style you want to use on your Mac. You can pick from Full Screen, Split Screen, or Picture-in-Picture. Depending on the option you select, you can adjust its options.
- Full Screen : Select "Choose Display" to pick the monitor you want to zoom if you use more than one display .
- Split Screen or Picture-in-Picture : Select "Size and Location" to choose the window placement and size.
Related: How to Use Multiple Monitors on Your Mac
Another zoom option you can enable on your Mac is Hover Text. As you can see from the description, you hold the Command key as you hover your cursor over text to zoom (more detail below ).
Optional: Touch Bar Zoom
If you have a Mac with a Touch Bar , you can enable this option as well. You then touch and hold your Touch Bar to see a larger version of it on your screen.
Related: Five Useful Things You Can Do With The MacBook Pro's Touch Bar
If you enable the Hover Text option in the Zoom settings on your Mac, you can make adjustments to how the zoom looks for complete flexibility.
In System Preferences > Accessibility > Zoom, press the Info icon (small letter "i") to the right of Hover Text.
You can then adjust the text size, style, and entry location along with the activation modifier and an option to triple-press the modifier for activation lock.
Next, you can change the colors for the text, insertion point, background, border, and element-highlight.
Select "Done" when you finish and then check out the Hover Text zoom.
Hold Command, or the modifier key you selected if you changed it, and use your cursor to hover over text. You'll see the text pop making it easy to read. Release the modifier key to remove the zoom.
Using one or more of these zoom methods can help you see just about anything on your Mac screen bigger and better. For more, look at how to magnify your iPhone screen using Display Zoom .
Everything new with the redesigned iOS 16 video player
The default video player gets a big upgrade with iOS 16 and iPadOS 16. The redesign brings a drastically modernized UI, as well as some new features and enhancements.
Apple uses the system video player in all of its apps, of course, but many third-party apps do too so these changes take effect across your entire iPhone and iPad experience. Here’s everything new to try in the iOS 16 video player.
iOS 16 is currently in developer beta and will be available for iPhone and iPad users later this year, probably in September. Adoption of the new system video player is automatic, requiring no code changes by third-party app developers, although apps that use custom video experiences will obviously not benefit from these changes.
After several years of staying the same, the video player is completely rethought in iOS 16. The overall changes are inspired by Apple learned with the overhauled system video player released last year on Apple TV with tvOS 15.
Redesigned controls overlay

Following tvOS’s lead, content titles are more readily visible with bigger font treatments labelling metadata like show and episode names (and a chevron reveals a short description). The player overlay now occludes significantly less of the video content, by removing almost all ancillary chrome. The previous top and bottom blurred-capsule toolbars have been replaced by simple sets of floating white buttons. The volume and time progress sliders have also been simplified, resembling thin bars without a visible nub.
The most common transport controls, like play and pause, have been lifted out of their old bottom toolbar placement and feature prominently in the center of the display, with easy-to-tap big buttons.
Tap to pause

In fact, Apple has further emphasized these transport controls with some interaction shortcuts. Regardless of whether the pause button is visible or not, the tap target is still active. This means you can tap in the dead center of the display to quickly pause the video. Tap again to play.
This saves time as you don’t need to tap twice anymore to pause; in earlier versions of iOS, you would need to tap once to show the controls, and then precisely tap the revealed pause button to actually stop playback.
Pinch to change aspect ratio
Apple has further reduced visible chrome by removing an on-screen button for the ‘fill display action’. This action can now be performed with a two-finger pinch gesture. Pinch in to zoom up content to fill the screen. Pinch out to contain the video inside of the device’s safe areas, avoiding insets like the notch.
The pinch replaces the double-tap gesture found in earlier versions. As double tap now does nothing, the video player doesn’t have to wait to interpret a tap. When you tap to show controls, the controls appear instantly — previously this had to be delayed because the UI was waiting to see if you actually wanted to double tap to zoom. It feels much more responsive overall.
10-second skip and playback speed options as standard
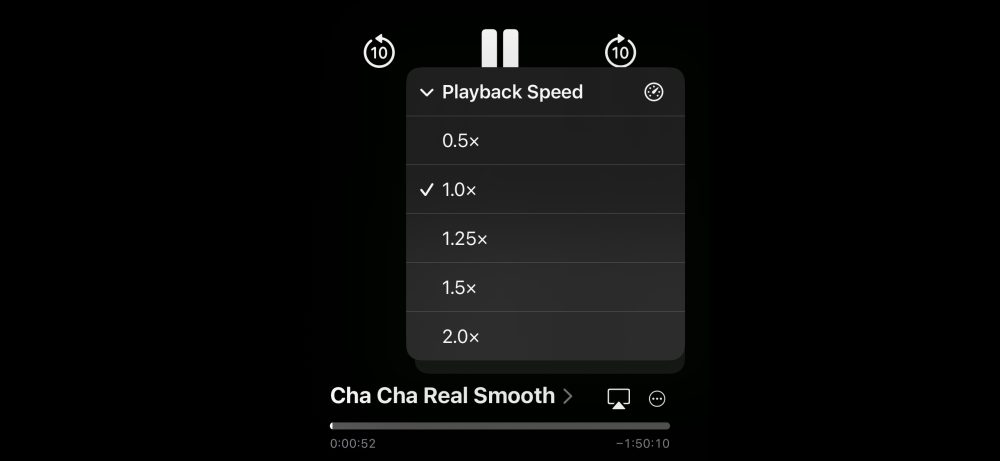
The previous video player offered 15-second skip. In iOS 16, the two skip options allow for ten seconds back or ten seconds forward. Apple says this change allows users to more easily calculate how far through a video they will travel when skipping.
Playback speed controls are now also enabled as standard, available in the ••• menu. By default, the system video player offers 0.5x, 1x, 1.25x, 1.5x, and 2x playback rate options. Third-party apps can customize this menu with different speeds, if they like.
Scrub anywhere

With the removal of the explicit thumb nub on the slider, you can now slide anywhere along the track to move through the video. Whilst interacting with the slider, all other buttons quickly fade out of the way.
Furthermore, you can now scrub from anywhere on the screen. Begin a left or right drag — whether controls are visible or hidden — and the video will fast-forward or rewind in sync with your motion. When you end your swipe, the playback position comes to rest with inertia. With a couple quick swipes, you can skim through minutes at a time.
FTC: We use income earning auto affiliate links. More.
Check out 9to5Mac on YouTube for more Apple news:

Benjamin develops iOS apps professionally and covers Apple news and rumors for 9to5Mac. Listen to Benjamin, every week, on the Happy Hour podcast. Check out his personal blog . Message Benjamin over email or Twitter .
Benjamin Mayo's favorite gear

Philips Hue Lights
The easiest way to get into HomeKit and Apple smart home tech. Great for gifts.

iPhone Wireless Charger
Inexpensive, fast, wireless charger for iPhone.

Manage push notifications
How To Zoom Out In Safari

- How-To Guides
- Software Tutorials

Introduction
Welcome to our guide on how to zoom out in Safari! Safari is a popular web browser with a sleek interface and advanced features. However, sometimes webpages may appear too large, making it difficult to view or navigate through the content. In such cases, zooming out can be a useful solution to adjust the size of the page and improve readability.
In this article, we will explore various methods to zoom out in Safari , catering to different preferences and situations. Whether you prefer using keyboard shortcuts, accessing the zoom option through the view menu, utilizing the pinch-to-zoom gesture on a trackpad or magic mouse, or customizing the zoom settings in the Safari preferences , we’ve got you covered.
By the end of this guide, you’ll have a clear understanding of how to zoom out in Safari and be able to easily adjust the zoom level to suit your needs. So, let’s dive into the methods and start zooming out in Safari !
Method 1: Using Keyboard Shortcuts
One of the quickest and most convenient ways to zoom out in Safari is by using keyboard shortcuts. These shortcuts allow you to adjust the zoom level without having to navigate through menus or settings. Here are the steps to zoom out using keyboard shortcuts:
- To zoom out in Safari, press and hold the “Command” key (⌘) on your keyboard.
- While holding the “Command” key, press the “-” (minus) key.
- Each time you press the “-” key, Safari will zoom out by a preset amount.
- Continue pressing the “-” key until the page is zoomed out to your desired level.
The keyboard shortcut “Command” + “-” is a handy way to quickly decrease the zoom level in Safari. It is especially useful when you want to shrink the page to view more content at once or if the webpage appears too large for your screen.
Keep in mind that using keyboard shortcuts to zoom out in Safari will decrease the overall size of the webpage, including text, images, and other elements. If you find that the page becomes too small to read comfortably, you can use the keyboard shortcut “Command” + “+” (plus) to zoom back in and increase the size.
Now that you know how to use keyboard shortcuts to zoom out in Safari, you can easily adjust the zoom level with a few simple key combinations. Let’s move on to the next method and explore another option for zooming out in Safari.
Method 2: Using the Zoom Option in the View Menu
If you prefer a more visual approach to zooming out in Safari, you can utilize the built-in zoom option available in the view menu. This method provides a user-friendly way to adjust the zoom level and is particularly useful if you’re not familiar with keyboard shortcuts. Here’s how you can zoom out using the view menu:
- Open Safari and navigate to the webpage you want to zoom out.
- Click on the “View” option in the Safari menu bar at the top of the screen.
- In the drop-down menu, hover your cursor over the “Zoom Out” option.
- Click on “Zoom Out” to reduce the zoom level of the webpage.
- You can click on “Zoom Out” multiple times to further decrease the zoom level.
The zoom out option in the view menu allows you to easily adjust the size of the webpage with just a few clicks. By reducing the zoom level, you can fit more content on the screen and improve readability.
In addition to the zoom out option, you’ll also find other useful zoom-related options in the view menu, such as “Zoom In,” “Actual Size,” and “Zoom Text Only.” These options provide additional flexibility to customize your browsing experience according to your preferences and needs.
Using the zoom option in the view menu is a straightforward method to zoom out in Safari. Whether you’re new to Safari or simply prefer a visual approach, this method allows you to easily adjust the zoom level and optimize your browsing experience.
Now that you’ve learned about using the zoom option in the view menu, let’s explore another method that utilizes the pinch-to-zoom gesture on a trackpad or magic mouse.
Method 3: Using the Pinch-to-Zoom Gesture on Trackpad or Magic Mouse
If you’re using a trackpad or a Magic Mouse with your Mac, you can take advantage of the pinch-to-zoom gesture to easily zoom out in Safari. This method provides a seamless and intuitive way to adjust the zoom level with just a simple gesture. Here’s how you can use the pinch-to-zoom gesture:
- Place two fingers on the trackpad or Magic Mouse.
- Pinch your fingers together, moving them closer towards each other.
- As you pinch, Safari will zoom out, reducing the zoom level of the webpage.
- You can continue pinching your fingers together to further decrease the zoom level.
The pinch-to-zoom gesture offers a natural and intuitive way to control the zoom level in Safari. By using your fingers to pinch or expand, you can easily adjust the size of the webpage to your liking. This method is especially convenient for those who prefer tactile interactions and want a more hands-on approach to zooming out.
It’s worth noting that the availability of the pinch-to-zoom gesture depends on your device’s compatibility. Most Mac laptops and trackpads , as well as Magic Mouse, support this gesture. If you’re using a different type of mouse or trackpad, this gesture may not be available. In such cases, you can try using the keyboard shortcuts or other zooming methods mentioned in this guide.
The pinch-to-zoom gesture not only allows you to adjust the zoom level in Safari but also gives you precise control over the size of the webpage. Whether you want to shrink the page to fit more content or make it smaller for comfortable reading, this gesture provides a convenient and efficient solution.
Now that you’ve learned about using the pinch-to-zoom gesture on a trackpad or Magic Mouse, let’s explore another method by customizing the zoom settings in the Safari preferences.
Method 4: Using the Zoom Options in the Safari Preferences
If you prefer a more permanent solution for adjusting the zoom level in Safari, you can customize the zoom options in the Safari preferences. This method allows you to set a default zoom level or enable text-only zoom for a consistent browsing experience. Here’s how you can use the zoom options in the Safari preferences:
- Open Safari and click on “Safari” in the menu bar.
- In the drop-down menu, select “Preferences” to open the Safari preferences.
- Click on the “Advanced” tab in the preferences window.
- Check the box next to “Never use font sizes smaller than” to enable text-only zoom.
- Use the slider or input a specific percentage in the “Page Zoom” section to set the default zoom level.
By customizing the zoom options in the Safari preferences, you can have more control over how webpages are displayed. Enabling text-only zoom ensures that only the text size adjusts when zooming in or out, preserving the layout and preventing images from becoming distorted.
The ability to set a default zoom level allows you to always have your preferred view when loading webpages. Whether you prefer a larger zoom for easier reading or a slightly smaller zoom for a compact layout, you can tailor the default zoom level to your preferences.
Keep in mind that customizing the zoom options in the Safari preferences will apply to all webpages you visit using Safari. This can be particularly useful if you frequently visit websites with similar designs or if you prefer a consistent browsing experience across various sites.
Now that you know how to customize the zoom options in the Safari preferences, you have a more permanent solution for adjusting the zoom level to your liking. Let’s wrap up this guide with a quick summary of what we’ve covered.
Zooming out in Safari is a useful feature that allows you to adjust the size of webpages for improved readability and convenience. In this guide, we explored four different methods to zoom out in Safari:
- Using keyboard shortcuts: By pressing “Command” + “-” (minus), you can quickly decrease the zoom level.
- Using the zoom option in the view menu: Navigating through the “View” menu, you can easily access the zoom options and adjust the zoom level.
- Using the pinch-to-zoom gesture on trackpad or Magic Mouse: By pinching your fingers together on the trackpad or Magic Mouse, you can intuitively decrease the zoom level.
- Customizing the zoom options in the Safari preferences: By adjusting the settings in the Safari preferences, you can set a default zoom level or enable text-only zoom.
Each method offers a unique approach to zooming out in Safari, catering to different preferences and situations. Whether you prefer keyboard shortcuts for quick adjustments, visual options in the view menu, tactile interactions with pinch-to-zoom gestures, or customized settings in the preferences, you can find a method that suits your needs.
Remember that zooming out in Safari can be helpful when webpages appear too large or when you want to fit more content on the screen. It’s important to find a balance between zooming out for better visibility and ensuring that the page remains legible and easy to navigate.
We hope this guide has been informative and helpful in assisting you with zooming out in Safari. Now, you can confidently adjust the zoom level and enhance your browsing experience. Happy zooming!
Leave a Reply Cancel reply
Your email address will not be published. Required fields are marked *
Save my name, email, and website in this browser for the next time I comment.
- Crowdfunding
- Cryptocurrency
- Digital Banking
- Digital Payments
- Investments
- Console Gaming
- Mobile Gaming
- VR/AR Gaming
- Gadget Usage
- Gaming Tips
- Online Safety
- Tech Setup & Troubleshooting
- Buyer’s Guides
- Comparative Analysis
- Gadget Reviews
- Service Reviews
- Software Reviews
- Mobile Devices
- PCs & Laptops
- Smart Home Gadgets
- Content Creation Tools
- Digital Photography
- Video & Music Streaming
- Online Security
- Online Services
- Web Hosting
- WiFi & Ethernet
- Browsers & Extensions
- Communication Platforms
- Operating Systems
- Productivity Tools
- AI & Machine Learning
- Cybersecurity
- Emerging Tech
- IoT & Smart Devices
- Virtual & Augmented Reality
- Latest News
- AI Developments
- Fintech Updates
- Gaming News
- New Product Launches
- Fintechs and Traditional Banks Navigating the Future of Financial Services
- AI Writing How Its Changing the Way We Create Content
Related Post
How to find the best midjourney alternative in 2024: a guide to ai anime generators, unleashing young geniuses: how lingokids makes learning a blast, 10 best ai math solvers for instant homework solutions, 10 best ai homework helper tools to get instant homework help, 10 best ai humanizers to humanize ai text with ease, sla network: benefits, advantages, satisfaction of both parties to the contract, related posts.

How To Go Full Screen On IPhone Safari

Why Is My Safari Zoomed In

Why Is My Safari So Zoomed Out On IPhone

How Do I Zoom Out On Safari

How To Zoom Out Of Safari On IPhone

How To Make Safari Screen Smaller On Mac

How To Zoom Out On Safari Mac

How To Zoom In On Safari On Mac
Recent stories.

Fintechs and Traditional Banks: Navigating the Future of Financial Services

AI Writing: How It’s Changing the Way We Create Content

How to Know When it’s the Right Time to Buy Bitcoin

How to Sell Counter-Strike 2 Skins Instantly? A Comprehensive Guide

10 Proven Ways For Online Gamers To Avoid Cyber Attacks And Scams

- Privacy Overview
- Strictly Necessary Cookies
This website uses cookies so that we can provide you with the best user experience possible. Cookie information is stored in your browser and performs functions such as recognising you when you return to our website and helping our team to understand which sections of the website you find most interesting and useful.
Strictly Necessary Cookie should be enabled at all times so that we can save your preferences for cookie settings.
If you disable this cookie, we will not be able to save your preferences. This means that every time you visit this website you will need to enable or disable cookies again.
Zoom for Safari 4+
Zoom in and out with a slider, stefan van damme.
- 2.6 • 109 Ratings
Screenshots
Description.
It helps you to zoom easily in and out a web page. Thanks to the slider and the zoom buttons. It's the number one and best magnifying browser extension to customize the zoom value of that web page. Zoom is a lightweight and useful add-in designed to get a perfect zoom experience. A few great features in this browser extension: + Zoom with a slider The best way to zoom perfectly in on a web page is to use a slider. You can change the zoom factor from 1 to 400. + Scroll and Zoom When you click on the Z button and scroll up or down with your mouse. Zoom will automatically change LIVE that web page. + Zoom all together In/Out If you enable this option on the Zoom options page, it will zoom in/out on all the open web pages. + Save website Zoom value This saves automatically the current zoom value of this website. So when you come later back to that website, it restores the zoom value since you left the site. As a user, you can always set it back to default zoom, by clicking on the "Reset" button. + Zoom Engine You as a user can choose what zoom engine you want to use. You can use the default browser zoom engine or the CSS website style zoom. That's smoother and enjoyable. Or you even can choose the "font-size" engine, this will increase or decrease only the text on that website. + Manage all the Zoom for each website (domain and web page level) On the options page, you can easily edit or remove the zoom value of that website. + Option to display the Zoom value percent number in the Z button as a badge + Option to display the right-click menu with the necessary zoom percentages + Option to hold your mouse click and scroll to zoom in or out the current page + Set default zoom ratio and zoom step + Video and the web This is one of the important browser extension also to improve your video entertainment. It zooms in the web page but it increases also the size of the video player example on YouTube™ and HTML5 video. And you can use the most popular Turn Off the Lights extension to dims the part around the video player. + An accessibility option to see a larger popup window + Magnify glass in circle and square with adaptable zoom level from 1x to 10x Project Information: https://www.stefanvd.net/project/zoom/browser/ Note: Windows: CTRL and + or CTRL and - Mac: cmd and + or CTRL and - Is doing the same action as in this browser extension. But this extension helps you to increase/decrease the zoom to a custom percentage in a better user experience.
Version 2.7.0
+ Converted to Safari Web Extension technology for Safari 14 + Compatible with macOS Big Sur + Add option for a rectangle or circle magnify glass + Add option to zoom only the font-size + Customization option to choose your context menu style
Ratings and Reviews
109 Ratings
Almost good but many problems
I realy wany to keep using this but i keep having problems. Same on bother my systems Like many times it will not work i try to change the zoom setting and it will not respond right now it is doing this. Then at time i make a zoom change it it will not apply right awat but 5min latter all of a sudden the page jumps to a new zoom. Then i am stuck with it locked into a zoom i do not want. Using it with FB is a problem as when i zoom in some i can then no longer acces my FB side panels. And when making a new post as i start to type the zoom tool jumps the page up so i can no longer see what i am typing as it scrools the page up past the area i am tryping in. I am using Monterey on both my systems a Mac Mini M1 and Macbook Air M1.
Settings do not persist, support is non existent
When you add custom domain zoom levels to the settings, they do not get applied when you close Safari and then re-navigate to that domain. You have to manually re-apply the zoom level. This is the single most basic feature of the extension and it does not work. The developer's support website is broken and does not allow you to email them or send a message. This extension appears to be broken and no longer supported.
functionality
idea seems great but functionality of the user interface makes it counter productive or less efficient. Looking forward to future updates
Developer Response ,
Hi Karlgonzo, You rated 2 star for this? That is sad, I always happy to help my users at https://www.stefanvd.net/support Can you describe a bit more what you mean with less efficient. Do you not liked the zoom popup window? And have you tried the magnify glasses feature? Please if you need any help, do not hesitate to contact me at https://www.stefanvd.net/support I am happy to help you. Thanks,
App Privacy
The developer, Stefan Van Damme , indicated that the app’s privacy practices may include handling of data as described below. For more information, see the developer’s privacy policy .
Data Not Collected
The developer does not collect any data from this app.
Privacy practices may vary, for example, based on the features you use or your age. Learn More
Information
- Developer Website
- App Support
- Privacy Policy
More By This Developer
Turn Off the Lights for Safari
Turn Off the Lights for Mobile
Hard Disk - Monitor Disk Usage
Home Tab for Safari
My Christmas Tree - Countdown
Video Sdk unable to switchCamera WEB (chrome, mozilla, safari)
Hello Im using Vue 2 and having issue on switching the camera i have 2 cameras on my desktop which i need to switch
on my template this is the user can change the camera
and once change this is the code
Hi @enricke , can you share the error message? What’s the problem you’re facing?
I was able to switch the camera easily using this snippet:
Related Topics
IMAGES
VIDEO
COMMENTS
In the Safari app on your Mac, do one of the following:. Make all content larger: Choose Safari > Settings for This Website and choose an option from the Page Zoom pop-up menu, or choose View > Zoom In. You can also pinch open on a trackpad that supports gestures. Safari remembers the zoom level when you return to the website (unless you pinch open to zoom).
Google Meetings I'm using Monterey 12.1 and am having issues with Google Meet. While in a meeting Meet will tell me that I've lost connection. I never have this issues with Zoom or Teams. I have restarted my computer, closed the browser (Safari) and even turned off the wifi for all the devices in my house to make sure there's plenty of bandwidth.
Go to Settings > Accessibility > Zoom, then turn on Zoom.. Adjust any of the following: Follow Focus: Track your selections, the text insertion point, and your typing. Smart Typing: Switch to Window Zoom when a keyboard appears. Keyboard Shortcuts: Control Zoom using shortcuts on an external keyboard. Zoom Controller: Turn the controller on, set controller actions, and adjust the color and ...
Setting the individual page zoom level for specific websites takes just four clicks. In the top menu bar, click Safari > Settings for This Website. Select the current zoom setting next to "Page Zoom" and click your desired setting. To reset the zoom level to 100 percent on any website, press Command + 0. Hold Command and press the Minus (-) or ...
Download Zoom apps, plugins, and add-ons for mobile devices, desktop, web browsers, and operating systems. Available for Mac, PC, Android, Chrome, and Firefox.
Start a meeting and wait for the Zoom Room participant to join and enable smart gallery. Click Participants. Click More next to the entry for the Zoom Room participant. Click Hide Room View. (Optional) If you want to change the setting again, follow steps 2-4 and click Show Room View .
The Zoom Video SDK uses TLS 1.2 and 256-bit AES-GCM Encryption. See the Zoom Encryption whitepaper for details. End-to-end encryption (E2EE) is not supported on any browser. Mobile and tablet browser support. iOS/iPadOS: All browsers on iOS and iPadOS use the same version of WebKit. This includes Chrome as well as Safari.
Keyboard Shortcut: Press Option+Command+= (equal sign) to zoom in. You can also use Option+Command+8 to switch between no zoom and your last zoom level. Trackpad: Double-tap your trackpad with three fingers to zoom in. You can also double-tap and drag on your trackpad to change the zoom level.
Zoom is a modern video conferencing platform that lets you meet face-to-face from any device. You can record meetings, make annotations, engage attendees with polls, and more. Learn how to join a Zoom meeting, or start your own with free video conference calls.
The default video player gets a big upgrade with iOS 16 and iPadOS 16. The redesign brings a drastically modernized UI, as well as some new features and enhancements. Apple uses the system video ...
In Safari, from the menu bar click Develop. Select your device and enable Automatically Show Web Inspector for JSContexts. a. On your iOS test device, launch the Zoom client and open your app. b. On your Mac, launch Safari, click Develop, and select your iOS test device. c. Select your app's home URL.
Web Video SDK v1.5.5. Description. In our Preview / Waiting Room, we give the user the option to turn on their camera, and select to use and preview their different video input devices (webcams). However in Firefox, and Safari, we are not returned the label attribute for these devices using ZoomVideo.getDevices () as explained in the docs ...
All they had to do was add gestures to the old player. Despite nothing being mapped to double tap as a gesture currently we can't do it (nor can we dynamically zoom anymore). Even Apple clearly knows their new player is garbage since the App Store is using the old one for app trailers (in earlier beta it used the new one but was very buggy so ...
Mac equivalent of Ctrl+Mouse Scroll to zoom *in a window like chrome*. On Windows & Linux too, when using chrome or any other browser or often other apps like VSCode, you can Zoom In / Zoom Out with Ctrl + Mouse Scroll. This doesn't work on Mac. The answers Ive found so far suggest ticking the option in System Preferences > Accessibility > Zoom ...
Open Safari and navigate to the webpage you want to zoom out. Click on the "View" option in the Safari menu bar at the top of the screen. In the drop-down menu, hover your cursor over the "Zoom Out" option. Click on "Zoom Out" to reduce the zoom level of the webpage. You can click on "Zoom Out" multiple times to further decrease ...
Safari & fishing videos shot by and/or featuring Professional Safari Guide & Photographer Dominyk Lever (Dom). Dom has travelled extensively to over 75 count...
Zoom video on Safari iOS Hello, before i updated to ios 16 i could zoom a video playing in safari just by two taps or pinched to zoom; now i can zoom just with pinch to zoom, why? What can i do to change like it was before? It's more convenient with a large screen to just tap. Thank you in advance!!
Download Zoom for Safari for macOS 10.14 or later and enjoy it on your Mac. It helps you to zoom easily in and out a web page. Thanks to the slider and the zoom buttons. It's the number one and best magnifying browser extension to customize the zoom value of that web page. ... + Set default zoom ratio and zoom step + Video and the web
(evaluating '"getDisplayMedia"in navigator.mediaDevices') but only on IOS and safari. Zoom Developer Forum Video SDK not working on IOS, Safari, Video SDK. enricke (Enricke) ... Additionally, if you need to use video/audio functionality, the webpage needs to be in a secure context. ...
However, other browsers like Safari or Firefox may handle permissions differently. support.google.com Use your camera & microphone - Computer - Google Chrome Help
26K likes, 831 comments - jennifer.garner on April 23, 2024: "#13GoingOn30. Twenty years. We are three Boomers braving zoom—because we want to thank you. To every ...
Hello Im using Vue 2 and having issue on switching the camera i have 2 cameras on my desktop which i need to switch on my template this is the user can change the camera <v-select @change="changeCam" v-model="cameraSelected" :items="cameraList" item-text="label" item-value="deviceId" return-object label="Camera" solo></v-select> and once change this is the code changeCam(){ console.log('camera ...