10465524 front page hits

The Cave of Dragonflies
Where the smallest bugs live alongside the strongest dragons
R/B/Y Safari Zone Mechanics
A staple of the Pokémon series since the originals is the Safari Zone: a special place with Pokémon that aren't found anywhere else (and some that are) where instead of getting to use your own Pokémon to weaken and capture them, you must employ more old-fashioned methods while the Pokémon may run at any moment. While they haven't been in every game, they shake up the usual routine of catching Pokémon and have had various interesting mechanics through the generations - however, the very most interesting has to be the original.
How It Works
In every Safari Zone, the player is unable to use their own Pokémon at all. Instead, when you encounter a Pokémon you have four options: throwing one of the limited number of Safari Balls you have; an aggressive action used to make the Pokémon easier to catch; an enticing action used to make it less likely to run away; or running away from the battle yourself.
In Red, Blue and Yellow, the aggressive action is called Rock , and the enticing action is called Bait . The basic idea is this: throwing a rock will double your chances of catching the Pokémon, but it will also make the Pokémon angry for 1-5 turns. Conversely, throwing bait will halve your chances of catching the Pokémon, but cause the Pokémon to be eating for 1-5 turns. While angry, a Pokémon is twice as likely to run on any given turn as if it were in its neutral state, while it is four times less likely to run while it is eating than in a neutral state.
However, there are several more interesting details and subtleties to how Safari Zone battles happen.
Throwing a Ball
Capturing in the Safari Zone follows the regular R/B/Y capture algorithm , though since neither the Pokémon's HP nor its status can be affected and the only balls available are Safari Balls (identical to Ultra Balls), a lot of things are abstracted out in the Safari Zone. Unfortunately, thanks to the game's flawed RNG , Safari Balls underperform against full-health Pokémon, making all capture chances in the Safari Zone lower than intended. The capture chance maxes out when the Pokémon has a catch rate of 150 or more, for which the chance will be about 27-30% depending on rounding errors; all other Pokémon are harder than that.
The catch rate C starts out being, as in regular captures, the intrinsic catch rate of the Pokémon species. However, unlike regular captures, your actions in the Safari Zone can directly modify C, as hinted above.
Throwing Rocks/Bait
Rocks and bait have two distinct effects. First, every time a rock is thrown, the catch rate C is doubled (though it is capped at 255, so if doubling would make the catch rate more than that, it is made 255 instead), and every time bait is thrown, C is halved and rounded down. This happens even if the Pokémon is already angry or eating, and it happens completely blindly - if the Pokémon has a catch rate of 235, and you throw a rock to give it a catch rate of 255, then throwing bait will take that catch rate down to 127, rather than "canceling out" to give it the same catch rate as before.
Since the capture chance maxes out when the catch rate is 150 as explained above, there is no point throwing rocks at any Pokémon with an intrinsic catch rate of 150 or more, or more than one rock at a Pokémon with a catch rate of 75 or more, or more than two rocks at one with a catch rate of 38 or more. As it happens that covers all Pokémon that can be found in the Safari Zone except for Chansey (catch rate 30) and Dragonair (catch rate 27 in Yellow), who would need three rocks to go over 150.
Secondly, while a battle in the Safari Zone is going on, the game also keeps track of two counters, the "angry counter" and the "eating counter", which stand for the number of angry or eating turns the Pokémon has left. They both start out at zero; however, when a rock or bait is thrown, a random number between 1 and 5 inclusive will be generated and added to the appropriate counter (i.e. the angry counter if it's a rock, or the eating counter if it's bait), while the other counter will be reset to zero regardless of its previous value. This means only one of the counters can be nonzero at any given time. Since the random number is added to whatever value the counter already has, throwing further rocks at a Pokémon that is already angry will prolong its angry state, and likewise with throwing bait at an eating Pokémon. The eating and angry counters are both capped at 255.
The Pokémon's Turn
You always get the first turn in the Safari Zone, but on the Pokémon's turn, two things happen.
First, the game will check if either of the angry and eating counters is nonzero. If so, then a message saying "Wild [Pokémon] is angry!" or "Wild [Pokémon] is eating!" as appropriate is shown and the counter is decreased by one. If the angry counter is decreased to zero this way, the Pokémon's catch rate will also be reset to its initial catch rate , regardless of how it has been modified in the battle before this point; note that this last bit does not happen when a Pokémon stops eating, nor when the angry counter is reset to zero because you threw a bait.
After this, the game will perform a calculation to determine whether the Pokémon will run away on this turn. The run chance depends only on which state the Pokémon is in - angry, eating or neutral - but not on how many times you've thrown rocks/bait in any way: a Pokémon that you've thrown five rocks at followed by one bait will be exactly as happy to stick around as one that you threw a bait at on the first turn. Note that the Pokémon's actual current state does not necessarily correspond to the state indicated by the message that was just shown, since the message indicates only that the counter in question was nonzero before it was subtracted from. This also means that if you throw a rock or bait and the random number generated is 1, you will see an angry/eating message, but the Pokémon will in fact be back in its neutral state before even the run check is performed.
The run calculation itself goes as follows:
- Make a variable X equal to the low byte (i.e. the remainder if you divide by 256) of the Pokémon's Speed ( not the base Speed of the species, but the individual's actual Speed).
- If the outcome is greater than 255 (i.e. if the Pokémon's Speed was 128 or more), the Pokémon automatically runs. Skip the rest of the procedure.
- If the Pokémon is angry, double X again (if it becomes greater than 255, make it 255 instead).
- If the Pokémon is eating, divide X by four.
- Generate a random number R between 0 and 255 inclusive.
- If R is less than X, the Pokémon runs away.
All in all, this means that so long as (the low byte of) the Pokémon's Speed is less than 128 (which it always will be in the actual game - the highest Speed any Pokémon actually found in the Safari Zone can have is 75), the chance that it will run is 2*Speed/256 if it's in a neutral state, min(255, 4*Speed)/256 if it's angry, or int(Speed/2)/256 if it's eating.
Crucially, since this is the actual individual Speed and not the base Speed of the species, lower-leveled individuals are less likely to run . While Scyther at level 25 or 28 have around or above a 50% chance of running every turn in a neutral state, for instance, Yellow's level 15 Scyther are considerably easier to catch, with only a 32% chance of running in a neutral state at the most. Thus, perhaps the best piece of strategic advice for the Safari Zone is to go for the lowest-leveled possible version of your desired Pokémon, given the lower-leveled version isn't unacceptably rare.
So, well, how should one go about trying to achieve success in the Safari Zone, other than trying to catch lower-leveled Pokémon? Four basic kinds of strategies come to mind:
- Balls only. This is the simplest way to go about the Safari Zone - just madly lob balls at everything you want to catch and pray that they don't run before you catch them.
- Rocks, then balls. Throw some sensible number of rocks, then lob balls and hope you catch it before it either runs or calms down and resets the catch rate. If you see it's not angry anymore, start again from scratch with the rocks.
- Bait, then balls. Throw some bait to put the Pokémon in the eating state and make it stick around, then throw balls and hope the reduced catch rate doesn't come back to bite you. Unlike with rocks, where once the Pokémon stops being angry you're back at square one, it's not quite as obvious here that you should throw more bait once the Pokémon stops eating - each bait you throw lowers the catch rate more, after all.
- Rocks to increase catch rate, then bait to get it to stay, then balls. Throw a rock or two (or three) and then immediately throw bait. Provided your first rock doesn't generate one as the number of angry turns (in which case the Pokémon will calm down immediately and reset the catch rate), you'll manage to increase the Pokémon's catch rate before the bait gets thrown, meaning you end up with a catch rate of the same, double or quadruple the original (depending on the number of rocks), but a 4x reduced chance of running and assurance that the catch rate won't reset when it returns to the neutral state.
There are other possible strategies, but they appear obviously flawed - if you were to throw bait and then a rock, for instance, you'd end up with a normal catch rate but a higher running chance after wasting two turns, which can't possibly be helpful. These are the main ones that at a glance appear to hold some kind of promise.
You may think, as I did when I was initially working this out, that the fourth strategy has the most potential. However, as it turns out, the R/B/Y Safari Zone is broken: the balls-only strategy nearly always wins by a considerable margin, at least in terms of your overall chance of catching the Pokémon per encounter. Wasting your time on bait and rocks is only worth it in a couple of very exceptional cases.
Wait, What?
Good question. If you don't care about getting an intuitive grasp on why this is true, feel free to skip to the Safari Zone calculator.
Here's the thing. The entire Safari Zone experience basically simplifies to a game where you and the Pokémon alternate turns, with each of you having a given chance of "winning" on each of your turns (you win if you catch the Pokémon, while the Pokémon wins if it runs). When you throw bait or a rock, however, you do that instead of throwing a ball on that turn, while the Pokémon will continue to have a chance of running on every single one of its turns; essentially, you are forgoing one of your turns (attempts to "win") in exchange for a later advantage.
What is that later advantage, then, and is it worth losing that turn? Well, in the case of a rock, you double your chances of winning (catching the Pokémon) for up to four subsequent turns - but you also double the Pokémon's chances of winning (running away), and because you used up your turn throwing the rock, it's the Pokémon that has the next move.
You can hopefully see how that's not really a recipe for success. However, it's not quite as bleak as it appears, thanks to the one place where the simplification breaks down: you have a limited number of Safari Balls. A rock, by doubling both yours and the Pokémon's chances of winning each turn, will shorten the average duration of the battle. Thus, if you have sufficiently few balls and the Pokémon has a sufficiently low catch rate and Speed, to the point that in an average battle against it you'd run out of balls before either catching it or it running, throwing a rock and shortening the battle so your balls will last can actually be worth it, even at the aforementioned cost. For instance, if you only have one Safari Ball left, then you can either throw that one ball with a regular catch rate or throw some rocks first, which will make your single ball much more likely to be effective once you do throw it; you'll only get one attempt to catch it either way. The risks will still outweigh the benefits if the Pokémon is pretty speedy, since then it will be likely to run before you can actually throw the ball at all, but for a sufficiently slow target (for a single Safari Ball, the highest Speed where a rock will be worth it is 25 or so), rocks can be a good idea when you don't have a lot of Safari Balls left.
Throwing multiple rocks can also help, at least in theory, since more rocks will continue to double your chances of catching the Pokémon without raising the running chance further. Primarily, in many of those situations where a lack of Safari Balls means one rock is a good idea, two (or possibly three) rocks improve your chances even further, though the range of situations where this works is even narrower than for one rock. Technically multiple rocks can also help in general for Pokémon with very low Speeds and low catch rates - however, that's low Speeds as in single digits, and no Pokémon that fit the bill are actually found in the Safari Zone, making that point kind of moot. Otherwise, if you have plenty of balls to spare, the free angry turns they usually get to run away before you even start trying to catch them just result in a disadvantage you can't make up for.
What about bait? Bait is immediately somewhat more promising than rocks, since it halves your chance of "winning" but quarters the Pokémon's. However, bait also differs from rocks in that the catch rate doesn't go back to normal after the Pokémon stops eating, and just like rocks shorten the duration of the battle, bait prolongs the battle - it makes both parties less likely to win on subsequent turns. And the longer the battle goes on, the more the up-to-four turns (remember, the counter is decreased before the run check) that the Pokémon is actually less likely to run diminish in significance compared to all the turns after the Pokémon stops eating, when it will still have a lowered catch rate but a regular chance of running. That's besides the fact that again you must forgo a turn to throw the bait in the first place. In fact, as it turns out this makes bait wholly useless: there is not even in theory a Speed/catch rate combination for which bait will do you any good.
Where does this leave that especially promising-looking "rocks, then bait" strategy? Ultimately, it's stuck in the same rut rocks are: it's normally only useful for Pokémon with such ludicrously low Speed that they don't actually exist in the Safari Zone, and unfortunately, while rocks at least have a niche when you're running low on balls, you're always going to be better off just throwing however many rocks you're going to throw and then throwing your ball than throwing the rocks and then wasting your time on bait if you only have a couple of balls left. This strategy requires wasting several turns without throwing any balls, during some of which the Pokémon will have an increased chance of running, and to make matters worse, if the number of angry turns generated is one, you're going to lose even the rock's advantage and end up with the bait's lowered catch rate after all that preparation. It just kills it.
So, again, in nearly every case the best strategy is to just throw balls and hope you get lucky. That is, however, assuming that what you want to maximize is your chance of success per encounter: since rocks shorten the battle and make for fewer Safari Balls required, rocks may actually save you time and money.
The Safari Zone calculator below includes a variety of strategies, despite their mostly limited usefulness; play around with it if you think you might go with a different one.
Safari Zone Calculator
Use this tool to calculate your chances of capturing a given Pokémon.
As it is, it only includes Pokémon that are actually found in the Safari Zone in either Red, Blue, Yellow, or the Japanese-exclusive Blue version. If there is demand for adding other Pokémon just for the hell of it, I can do that too, but in the meantime, I feel this makes more sense.
In addition to your chances of capturing the Pokémon with any or all of the provided strategies, the calculator will also provide you with the basic capture rate and run chance per turn. When you select a Pokémon and game, additionally, it will give you the locations, levels and rarities at which the Pokémon is found in the Safari Zone in that game, so that you can perhaps attempt to find your Pokémon at a lower level or in an area where it's more common.
The base percentages the calculator gives may not match exactly up with those given by my R/B/Y catch rate calculator , since this calculator makes the simplifying assumption that the Pokémon's HP and Speed are equal to the average HP/Speed a wild Pokémon of the given species/level would have, while the catch rate calculator does the entire calculation for each possible HP IV and takes the average of the actual outcomes. I chose not to do the more accurate calculation here because this calculation is both already relatively slow and involves two different stats - trying every possibility would mean doing that whole relatively slow calculation up to 256 times, which just seems like way more trouble than it's worth.
Pokémon: Chansey Cubone Doduo Dragonair Dratini Exeggcute Goldeen Kangaskhan Krabby Lickitung Magikarp Marowak Nidoran (f) Nidoran (m) Nidorina Nidorino Paras Parasect Pinsir Poliwag Psyduck Rhyhorn Scyther Slowpoke Tangela Tauros Venomoth Venonat
Game: Red Blue/JP Green JP Blue Yellow
Safari Balls remaining:
Strategy: Show all Balls only One rock Two rocks Three rocks Bait repeatedly One bait Two bait Three bait Rock, then bait Two rocks, then bait Three rocks, then bait
Page last modified August 9 2021 at 02:53 UTC
[Map of Center Area] The item in the middle of the island is a Nugget. Don't bother going into the house (or any other houses for that matter), there are only a few people who will rant about their Safari Zone experiences. Head for A .
[Map of Area 1] There is a Carbos, Max Potion, Full Restore and TM37 - Egg Bomb to grab here. Head for B .
[Map of Area 2] TM40 - Skull Bash and a Protein available here. Don't go into the empty area, it's a waste of time. Head for E .
[Map of Area 3] Make sure you pick up the item immediately to the south! It's the Gold Teeth, a Key Item that you'll need to trade for HM04 - Strength. Head west from the item ball and, if you hopefully haven't run out of time, talk to the man inside the house to claim HM03 - Surf. Examine one of the statues for a Revive as well. There's also TM32 - Double Team on the way. Surf south of the prize house to get a Max Potion, then head east on the ledge and down again to pick up a Max Revive.
At this stage, you'll be running out of time quite soon, so just try to walk around in the grass and see if you can get lucky, or station yourself at a pond edge and fish up some Dratini.
With the Gold Teeth, visit the Safari Warden in the left of the two houses in the south-east corner of Fuchsia City. He'll pop the teeth into his mouth (ugh) and you'll be able to understand him. He'll give you HM04 - Strength, which you can use to move boulders like the one to the right of his house; the item ball there holds a Rare Candy.
Now that you have all five HMs, you have the option of getting a few items and exploring some new places.
Firstly, fly to Celadon City and Surf on the pond there (its by the Rocket Game Corner). Talk to the man and he'll give you TM41 - Softboiled, which only Chansey and Mew can learn - it recovers half their HP.
Get TM16 - Pay Day by Surfing on Route 12 - it's a bit further south of the gatehouse where you got TM39 - Swift.
An optional area can be accessed near the Route 9 entrance to Rock Tunnel. Head for the Route 9 Pokemon Center and head north. You'll reach a strip of water where you can Surf. Follow the canal down and you'll reach the Power Plant. A guide to the Power Plant can be found [here]
Your next destination is Cinnabar Island; you have two methods of getting there. The first is to head south from Fuchsia City and use Sea Routes 19 and 20 to get there, but you'll have to go through Seafoam Islands. The easier way is to fly to Pallet Town and Surf south - not only is the route shorter, there are also less trainers.
These five Route 21 Pokemon are found in the wild grass immediately to the south of Pallet Town.
When you arrive, you'll notice that the Gym is locked - you'll need to find the key in the Cinnabar Mansion. Do some exploring first - head to the Pokemon Lab to the left of the Pokemon Center. In the first room, you can trade a Raichu for your Electrode, or a Tangela for your Venonat. In the second room, the scientist in the corner will give you TM35 - Metronome. Finally, in the third room, there is a scientist who will trade you a Seel for your Ponyta.
You can also ressurect the fossils by talking to the other scientist in the third room - Old Amber becomes Aerodactyl, Helix Fossil becomes Omanyte and Dome Fossil becomes Kabuto. Simply have the Fossil in your bag, talk to the scientist, and walk around for a while.
You'll need to find the Secret Key hidden somewhere in the depths of the abandoned Cinnabar Mansion in order to unlock the gym. First of all, head up and inspect the fifth pillar on the right to get your fifth and last Moon Stone in the game. A bit further north is an Escape Rope. There are several switch doors here, to trigger them, inspect the Pokemon Statues. When you activate the switch, one door will open and another will close. There's a switch in the far left room, but don't activate it. Climb up the stairs when you're ready.
Head up the stairs to the right. There's a Burglar wandering around here, and a diary excerpt of how scientists created Mewtwo from Mew. Here is the complete diary: July 5 - Guyana, Southern America. A new Pokemon was discovered deep in the jungle. July 10 - We christened the newly discovered Pokemon, Mew. February 6 - Mew gave birth. We named the newborn Mewtwo. Sept 1 - Mewtwo is far too powerful. We have failed to curb its vicious tendencies...
South of the table is a Max Potion. Immediately above the itemball, at the end of the narrow passage is a Max Revive. There's nothing else in this room, so return to the floor below. On the second floor, there's a Calcium to the far right, in the top corner room. On the way, you'll see another diary excerpt. You can activate the switch by the stairs if you want (There's no point unless you want to read the diary excerpt to the south), but to continue on, use the stairs in the top left room.
On the third floor, head right for an Iron, then activate the switch to the left. You'll see the doors change, and you'll be able to go in to the balcony room. After beating the scientist, head down the right ledge, and you'll end up on the ground floor, in a section you couldn't access before. There's a Carbos here, pick it up and head down the stairs to the basement.
Get the Full Restore on the far left side of the room, then go inside the lone room in the center. Pick up TM14 - Blizzard, and activate the switch. Head out the other door, and head north from the stairs. Go all the way down the passageway and pick up the Rare Candy first. Backtrack to the adjacent room and flip the switch. Go back down and you'll see the door has opened. Pick up TM22 - Solarbeam on the table, and then pick up the Secret Key directly south of it.
Blaine, the Cinnabar Island Gym Leader, is very fond of quizzes and puzzles. To unlock the doors in his gym, and hence proceed, you can either defeat the trainer guarding it, or you can correctly answer his quiz by examining the machine in the corner. If you get the question wrong, the trainer will automatically battle you. You still have the option of battling the trainer if you get the question right, however. The questions and correct answers are: 1. Caterpie evolves into Butterfree? (Yes) 2. There are 9 certified Pokemon League Badges? (No, there are 8) 3. Poliwag evolves 3 times? (No, only twice) 4. Are thunder moves effective against ground-element type Pokemon? (No, Ground Pokemon are immune to Electric attacks) 5. Pokemon of the same kind and level are not identical? (Yes) 6. TM28 contains Tombstoner? (No, it contains Dig)
You'll receive the Volcano Badge as your reward, which increases the Special of your Pokemon. You'll also receive TM38 - Fire Blast, which contains the most powerful Fire move in the game.
- PRO Courses Guides New Tech Help Pro Expert Videos About wikiHow Pro Upgrade Sign In
- EDIT Edit this Article
- EXPLORE Tech Help Pro About Us Random Article Quizzes Request a New Article Community Dashboard This Or That Game Popular Categories Arts and Entertainment Artwork Books Movies Computers and Electronics Computers Phone Skills Technology Hacks Health Men's Health Mental Health Women's Health Relationships Dating Love Relationship Issues Hobbies and Crafts Crafts Drawing Games Education & Communication Communication Skills Personal Development Studying Personal Care and Style Fashion Hair Care Personal Hygiene Youth Personal Care School Stuff Dating All Categories Arts and Entertainment Finance and Business Home and Garden Relationship Quizzes Cars & Other Vehicles Food and Entertaining Personal Care and Style Sports and Fitness Computers and Electronics Health Pets and Animals Travel Education & Communication Hobbies and Crafts Philosophy and Religion Work World Family Life Holidays and Traditions Relationships Youth
- Browse Articles
- Learn Something New
- Quizzes Hot
- This Or That Game New
- Train Your Brain
- Explore More
- Support wikiHow
- About wikiHow
- Log in / Sign up
- Hobbies and Crafts
- Video Games
- Multi Platform Games
- Pokemon Video Games
How to Catch Pokémon in Safari Zone
Last Updated: May 21, 2023 References
This article was reviewed by Ishrak . Ishrak is a Gaming & Video Expert specializing in sharing Pokémon and Minecraft videos. With over seven years of gaming and streaming experience, Ishrak has a follower base of over 30,000 YouTube subscribers and over 8 million views. He is also a Pokémon ROM-Hacker and some of his most popular videos highlight tips and advice for people learning how to play Pokémon games. This article has been viewed 111,129 times.
In the Pokémon series of games, Safari Zones are special unique areas in each game where rare Pokémon that don't appear anywhere else in the game can be caught. Safari Zones always operate with different rules than the rest of the game world - instead of battling Pokémon in the wild like you normally would, you'll need to carefully use baits and deterrents to get Pokémon to let down their guards so you can catch them. This can be quite challenging, so knowing the ins and outs of Safari Zone mechanics in each game is vital for success.
Navigating the Safari Zone
Fighting and capturing pokémon.

- Note that the "run away" option functions as normal, so we won't be discussing it.

- However, using bait will also make the Pokémon more difficult to catch in a safari ball. Thus, striking a balance here can be difficult — the longer you get the Pokémon to stick around for, the harder it will be to actually capture it.

- However, there's an important downside: using rocks will also make the Pokémon more likely to run away. In fact, after taking more than a few rocks, a Pokémon is virtually guaranteed to run away — some will exit the battle sooner. Thus, once again, using rocks means striking a delicate balance as you try to capture your Pokémon.

- Note that you only have a limited supply of safari balls (depending on the game, usually 30), so save them for Pokémon you want to catch. It's generally the best use of your time to use your safari balls for Pokémon that are only found in the safari zone.

- Note that safari balls are weak compared to the pokéballs you can use in the rest of the game. In addition to this, especially rare Safari Zone Pokémon are extra-difficult to catch. [2] X Research source This can lead to some very frustrating situations — for instance, it can easily take 20 or more tries to catch an exceptionally rare Pokémon like Clefairy.
General Tips

- Bulbapedia, an online user-supported Pokémon encyclopedia, has extensive information about each game's Safari Zone, including maps and guides covering where to look for the Pokémon in each zone. See the Bulbapedia Safari Zone article to get started. [3] X Research source
- Note that there is no step limit in the Safari Zone in Pokémon HeartGold and SoulSilver. [4] X Research source

- Across all of the games in the series, the entrance fee has stayed the same: 500 P . This includes the Great Marsh in Pokémon Diamond/Pearl/Platinum, which is not technically a Safari Zone but behaves very similarly.
- One smart strategy is to save your game before you enter the Safari Zone. This way, if you don't catch any Pokémon you want, you can re-load to avoid paying the entrance fee again.

- As an example of the sort of equation used in the games to determine whether certain Pokémon are captured, consider the equation from the Generation games (Gold and Silver): a = max((3 × HP max - 2 × HP current ) × rate modified / (3 × HP max ), 1) + bonus status where HP max is the Pokémon's maximum HP, HP current is the Pokémon's current HP, rate modified is the catch rate of the Pokémon modified by the ball used (every Pokémon and every ball modifies this in a certain way, and bonus status is the modifier for any status condition (sleep and freeze are 10, all others are 0). [5] X Research source When you throw a ball, a random number between 0 and 255 is generated. If this number is less than or equal to a, the Pokémon is caught.
Catching Pokémon in the Kanto Safari Zone
In the following sections, we'll highlight the rare Pokémon in each Safari zone and give specific advice where applicable. To keep these tables to a reasonable size, we've included only the rarest Pokémon in each area — for exhaustive information, consult the Safari Zone guides at Serebii.net and Bulbapedia.
Catching Pokémon in the Hoenn Safari Zone
Note that the Generation 4 Hoenn Safari Zone (Omega Ruby/Alpha Sapphire) won't be covered here as the player is allowed to engage in ordinary battles in this zone.
Catching Pokémon in the Sinnoh Great Marsh
Though Sinnoh's Pokémon preserve has a different name, it functions virtually identically to Safari Zones in other regions.
Catching Pokémon in the Johto Safari Zone
Note that the Safari Zone is not available in Generation 2 (Gold/Silver) but is available in the Generation IV games that visit Johto (HeartGold/SoulSilver). Note also that in this Safari Zone the player can arrange the six different areas in any arrangement desired. Finally, many of the areas in the Johto Safari Zones have Pokémon appearance rates that are not yet known — only data for the known areas has been included. See Bulbapedia for more information. [6] X Research source
Expert Q&A
- Once again, the data in the tables above only deals with the most noteworthy Pokémon in each area. In fact, many more Pokémon appear in each Safari Zone. Thanks Helpful 3 Not Helpful 2
- Remember — you have a limited number of steps inside the Safari Zone, not a limited amount of time. Thus, you can take as long as you like if you control your movement carefully. Thanks Helpful 1 Not Helpful 3
You Might Also Like

- ↑ http://bulbapedia.bulbagarden.net/wiki/Kanto_Safari_Zone
- ↑ https://strategywiki.org/wiki/Pok%C3%A9mon_Red_and_Blue/Safari_Zone
- ↑ https://bulbapedia.bulbagarden.net/wiki/Safari_Zone
- ↑ https://bulbapedia.bulbagarden.net/wiki/Johto_Safari_Zone#Areas
- ↑ https://bulbapedia.bulbagarden.net/wiki/Catch_rate#Capture_method_.28Generation_II.29
About This Article

- Send fan mail to authors
Reader Success Stories
Jan 16, 2017
Did this article help you?
Apr 1, 2018

Featured Articles

Trending Articles

Watch Articles

- Terms of Use
- Privacy Policy
- Do Not Sell or Share My Info
- Not Selling Info
wikiHow Tech Help Pro:
Level up your tech skills and stay ahead of the curve
Fuchsia City

Now that you have thwarted Team Rocket's clumsy efforts to corrupt Saffron City, it's time to concentrate on your Pokémon training skills once again. This small town outside the famed Safari Zone is home to yet another Pokémon Gym -- but you may want to explore the streets of Fuchsia City first.
Pokémon Mart
Here's a listing of items available for purchase:
Another Rod
If you go to the house in the southeast of town, you'll be able to get yet another fishing rod. Sadly, this so-called "Good Rod" isn't nearly as good as the Super Rod you already own -- so don't pick it up, or simply dump it into your PC as soon as possible. You do, however, may want to do some fishing in the pond behind this guy's house.
The Toothless Warden

The Safari Zone's Warden lives in the house next door. Don't try too much to decipher what he's saying -- you can't. Well, until you fix his speech impediment, which is accomplished by finding his Gold Teeth. So head into the Safari Zone, pay the 500 entrance fee and look for the teeth. Here's how you find them:
From the entrance, head north and east to find the exit to Area 1. Head east until you come to a grassy area, then go up the steps to the north. Go west, then down the steps and continue on north where you will see another short stairway. Go up the stairs, go east, and then down the next stairway you see. The exit to Area 2 is to the west, so go north until you can turn left and continue on west until you find the exit.
Now that you're in Area 2, go west until you're in the tall grass, then continue on north and go up the steps (not the ones by the sign), then take the next flight of stairs down again. Go west until you bump into a pond, then continue on north. Go east until you find yourself in tall grass again, then go north. When you can't go any further, turn to the left and continue on west (pick up the Protein power-up on the way). You'll come to another patch of tall grass. You're almost there. Just go all the way to the south and exit this map to go to Area 3. There, finally -- a few squares to the south -- you will find the Gold Teeth.
Get HM 03 - Surf and TM 32 - Egg Bomb
Since you're already here, why not get the most useful HM at the same time as the teeth? Just go to the west from where you entered into Area 3 and you'll see a small hut (you will also see TM 32 lying outside on the ground, so grab it). Inside the hut, you will receive Surf. Teach this to your Pokémon to get a powerful Water attack that almost always hits its target -- and the ability to cross rivers, ponds, lakes and even oceans. To go for a swim anywhere, just walk up to a shore and select the Pokémon that knows Surf in the Pokémon menu. Select Surf and you're on your way.
Get HM 04 - Strength and Rare Candy
With the Gold Teeth in hand, go back to the Warden's house in Fuchsia City (it's the house in the southeast, below the pond). As a reward for bringing back his teeth, he will give you HM 04 - Strength. This power lets your Pokémon push around large boulders (you have to manually activate the Strength power every time you enter a new area). Use Strength in the Warden's house and push the boulder to the right. You can now grab the Rare Candy.
Fuchsia City Gym

Fuchsia City's gym is led by Koga, a friend of Poison type Pokémon. Bring a team that contains Psychic, Fire, Ground, Water and Bug Pokémon and you will breeze right through this gym. There are a couple of invisible walls in this gym that prevent you from directly walking up to the respective trainers, but it's pretty easy to figure out this maze.
First battle the Juggler on the left side of the room, then walk over to the guy on the right. From there, just continue on up (fight 3 and 4) until you hit the wall. Now go to the left side of the room and head down. You'll bump into another wall. Just go to the right and down and you'll fight trainer #5. Go back to the left side of the room and head down (fight 6 on the way). About four squares below #6, go to the right and face Koga.
- Juggler: Drowzee (34), Kadabra (34)
- Juggler: Hypno (38)
- Juggler: Drowzee (31), Drowzee (31), Drowzee (31), Kadabra (31)
- Tamer: Arbok (33), Arbok (33), Sandslash (33)
- Tamer: Sandslash (34), Arbok (34)
- Juggler: Drowzee (34), Hypno (34)
- Koga (Red and Blue): Koffing (37), Koffing (37), Weezing (43), Muk (39)
- Koga (Yellow): Venonat (44), Venonat (46), Venonat (48), Venomoth (50)
You'll get the Soul Badge as a prize for your victory as well as TM 06 - Toxic, the best Poison attack in the game.
Safari Zone

The Safari Zone is home to some rare Pokémon, as well as a number of interesting items. We've already covered how you can find the Gold Teeth, HM 03 and TM 32 above, but there is certainly some more stuff to be found here:
- Nugget: In the entrance area. You need Surf.
- Carbos: Area 1
- Max Potion: Area 1
- TM 37: Area 1
- Full Restore: Area 1
- TM 40: Area 2
- Protein: Area 2
- Max Revive: Area 3
- Max Potion: Area 3

In case you're confused about how to catch Pokémon in the Safari Zone, here are the basic rules:
- You can take 500 steps before you're automatically recalled to the entrance.
- You can only use the 30 Safari Balls provided by the park.
- You cannot attack or use items or status altering moves.
- You can throw stones to make the Pokémon you are trying to catch angry. This will make it more likely that you will catch the Pokémon, but it will also make the Pokémon more likely to run away. You should throw multiple stones to increase your chances.
- You can toss out bait to make the Pokémon stay around longer. On the downside, this makes them harder to catch.
- Catching some of the rare Pokémon, like Chansey can be tough. It's not unusual to throw all 30 Safari Balls without catching a Pokémon, so don't get discouraged. Just save your game before you enter the Safari Zone. If you don't catch anything good, just restart.
Here are the Pokémon that can be caught in the Safari Zone, by area:
Entrance Area Nidoran Female (Blue only), Nindorina, Nidoran Male (Red only), Nidorino, Exeggcute, Parasect, Venonat, Rhyhorn, Chansey, Scyther (Red only), Pinsir (Blue only). In the water: Krabby, Psyduck, Slowpoke, Dratini, Dragonair.
Area 1 Nidoran Female (Blue only), Nindorina, Nidoran Male (Red only), Nidorino, Exeggcute, Paras, Parasect, Doduo, Kangaskhan, Scyther (Red only), Pinsir (Blue only). In the water: Krabby, Psyduck, Slowpoke, Dratini (Blue only)
Area 2 Nidoran Female (Blue only), Nindorina (Blue only), Nidoran Male (Red only), Nidorino (Red only), Exeggcute, Paras (Red only), Venomoth, Rhyhorn, Chansey, Tauros. In the water: Krabby, Psyduck, Slowpoke, Dratini (Blue only) In the water: Krabby, Psyduck, Slowpoke, Dratini (Blue only)
Area 3 Nidoran Female (Blue only), Nindorina, Nidoran Male (Red only), Nidorino, Exeggcute, Paras (Red only), Venonat (Blue only), Venomoth, Rhyhorn (Red only), Chansey (Red only), Kangaskhan (Blue only), Tauros. In the water: Krabby, Psyduck, Slowpoke, Dratini (Blue only)
When you're done with Fuchsia City and the Safari Zone, exit to the west to get to Route 18 .
Up Next: Route 18
Top guide sections.
- Walkthrough
- Pokemon Listings
Was this guide helpful?
In this guide.

Pokémon Red and Blue/Safari Zone
The Safari Zone is a large area located north of Fuchsia City. It contains many Pokémon that cannot be found anywhere else.
You must pay a fee of •500 every time you enter the Safari Zone. You are given 30 Safari Balls, and are released into the Zone. When you throw your last Safari Ball, you are automatically teleported back to the entrance. Additionally, there is a time limit. Once you enter the Zone, the game will start counting “steps” (movements from one tile to another, triggered by pressing the + Control Pad). When you take your five hundredth step, you are teleported to the entrance.
Catching Pokémon [ edit | edit source ]
You do not (and cannot) use regular Poké Balls to capture Pokémon in the Safari Zone. You use the Safari Balls instead. When you encounter a wild Pokémon, you must start throwing Safari Balls immediately, hoping for a lucky break. You are not permitted to battle the Pokémon in any way before you throw the Safari Balls. Naturally, the more desirable Pokémon are encountered less, and the better a Pokémon is, the more often it will escape from your Poké Balls.
You are also given Pokémon Food and a supply of rocks. When you encounter a wild Pokémon, you have the choice of throwing either. (You never run out of these items.) Throwing food will make the Pokémon more or less likely to stay inside a Safari Ball. Throwing rocks causes most wild Pokémon to flee.
- Book:Pokémon Red and Blue
Navigation menu

- PlayStation 3
- PlayStation 4
- PlayStation 5
- Xbox Series
- More Systems
Walkthrough
Pokemon red version — guide and walkthrough (gb).

Guide and Walkthrough (GB) by zerokid
Version: 2.8 | Updated: 03/21/2023
- Previous: Gameplay hints and tips
Table of Contents
- Next: Pallet Town
- Introduction
- Gameplay hints and tips
- Pallet Town
- Viridian City
- Viridian Forest
- Pewter City
- Cerulean City
- Sea Cottage
- Cerulean Gym
- Underground Path (Routes 5–6)
- Vermilion City
- Diglett's Cave
- Vermilion Gym
- Rock Tunnel
- Lavender Town
- Underground Path (Routes 7–8)
- Celadon City
- Saffron City
- Celadon Game Corner
- Rocket Hideout
- Celadon Gym
- Pokémon Tower
- Fuchsia City
- Fuchsia Gym
- Safari Zone
- Power Plant
- Fighting Dojo
- Saffron Gym
- Sea Route 19
- Sea Route 20
- Seafoam Islands
- Sea Route 21
- Cinnabar Island
- Pokémon Mansion
- Cinnabar Gym
- Viridian Gym
- Victory Road
- Indigo Plateau
- Cerulean Cave
- About the games
- Version differences
- Title screen
- Overworld menu
- Stat modifiers
- Status conditions
- Catching Pokémon
- Pikachu's Beach
- In-game trades
- Connectivity
- Pokémon evaluations
- General items
- TMs and HMs
- Battle items
- Pokémon list
- Pokémon #001–#010
- Pokémon #011–#020
- Pokémon #021–#030
- Pokémon #031–#040
- Pokémon #041–#050
- Pokémon #051–#060
- Pokémon #061–#070
- Pokémon #071–#080
- Pokémon #081–#090
- Pokémon #091–#100
- Pokémon #101–#110
- Pokémon #111–#120
- Pokémon #121–#130
- Pokémon #131–#140
- Pokémon #141–#151
- Stat determination
- Evade and accuracy
- Critical hits
- Damage calculation
- Encounter tables
- Catching mechanics
- Safari Zone mechanics
- Pikachu's friendship
- HP bar colour
- Dual-type effectiveness message
- Obedience mechanics
- Hidden items
- Bugs and glitches
- Cinnabar Island wild Pokémon glitch
- Old Man glitch
- Trainer-Fly glitch
- Experience underflow glitch
- Stat modification glitch
- Stoneless Evolution
- Revisit the S.S. Anne
- Battle Professor Oak
- Version history
This walkthrough aims to be as thorough as possible. It will visit every area, give you details on how to get every item and will encourage you to catch Pokémon liberally. If you're doing a speedrun or are just playing the game casually and don't care about exploring everything it has to offer, this is possibly not the guide for you.
When it comes to battle strategies, this guide assumes that you have no outside help regarding trading with other cartridges. It also assumes that you are playing the game legitimately—that is, not using the help of any glitches or cheating devices. Having said that, useful or easily performed glitches will be pointed out throughout the guide which you can use at your discretion.
The main body of the walkthrough will be written in unformatted text which should succinctly give you directions on where to go and what to do. Any items you can find in an area will have a bold link to make them stand out, which you can click on to find out more information about that item in the item list section. For example:
Head north and pick up the Potion .
Other information that isn't a direct instruction will be written out in italic paragraphs like this. This is worth reading to learn more about the game unless you are already very familiar with it.
Useful information Occasionally, the guide will draw your attention to useful information by putting it in a box like this. Trainer battles will also be presented in this style, as will reminders about any upcoming in-game trades .
Pokémon evaluations Throughout the guide, each Pokémon will be given a rating and a brief overview of its in-game performance. There will also be links to a more in-depth evaluation for each Pokémon in the Pokémon evaluations section of the guide, where you can find a rundown of the Pokémon's strengths and weaknesses plus a recommended moveset for it. Of course, you should use whatever Pokémon and moves you wish on your adventure, but these evaluations should provide a useful baseline of information, particularly for newer players.
This guide makes heavy use of links for areas, items, Pokémon, moves and other terminology. These links will take you to the most relevant section of the guide so that you can find out more information about that topic. After you've clicked one of these links, you can click 'back' in your browser or on your smart device to come straight back to the section you left off from.
If something only applies to a specific version of the game, it will either clearly be spelt out or denoted by the letters R , B and Y , for Red, Blue and Yellow Version respectively.
Area overviews
Each section of the walkthrough is dedicated to an area in the world of Pokémon Red, Blue and Yellow, and will include the following information:
Map : An annotated screenshot of the area, taken from the Yellow Version of the game. The areas from the Red and Blue Versions can have very minor differences in their layouts and design, but not enough that players of those games won't be able to follow along with the Yellow Version maps provided. The one exception to this is Cerulean Cave, which has a completely different layout in Yellow, so for this area maps will be provided for both sets of games. Highlighted on these maps will be anything of interest, including landmarks, scripted events, items, Pokémon Trainers and connections to other areas.
Encounters : Most areas in the game have a handful of different Pokémon that you can encounter or obtain. A lot of the time, they're available to catch in the wild, but you'll also find in-game trades and gift Pokémon presented here. This table will show you what versions of the game the Pokémon appear in, the method of obtaining them, how likely they are to appear in any given random encounter and the possible levels at which they can appear.
Poké Mart : Some built-up areas throughout the world have a Poké Mart. If this is the case, a table will be provided which shows what items you can buy and how much they cost.
Items : At the beginning of each section will be a list of items you can get in that area. Sometimes you'll have to revisit an area at a later time to get all of its items—these items won't be included in the list initially, but the walkthrough will take you back through these areas to pick them up later on when you have the means to do so. Sometimes, different versions of the game will have a different list of items to pick up, so be sure to only follow the list for the version of the game you are playing.
Pokémon : A checklist of the new Pokémon you can obtain in each area, separated by game version. These lists will not include evolved forms of any Pokémon that you might have already obtained. For example, you can catch both Caterpie and Metapod in Viridian Forest, but the list will only include Caterpie since it can evolve into Metapod anyway.
Much like the item list, only the Pokémon that you can obtain on a first trip to the area will be on this list. As you progress through the game, other methods of obtaining Pokémon in previous areas, namely surfing and fishing, will become available to you. At that point, you'll get a friendly reminder that you can go back to these previous areas and pick up any newly obtainable Pokémon.
2018 Primetime Emmy & James Beard Award Winner
In Transit: Notes from the Underground
Jun 06 2018.
Spend some time in one of Moscow’s finest museums.
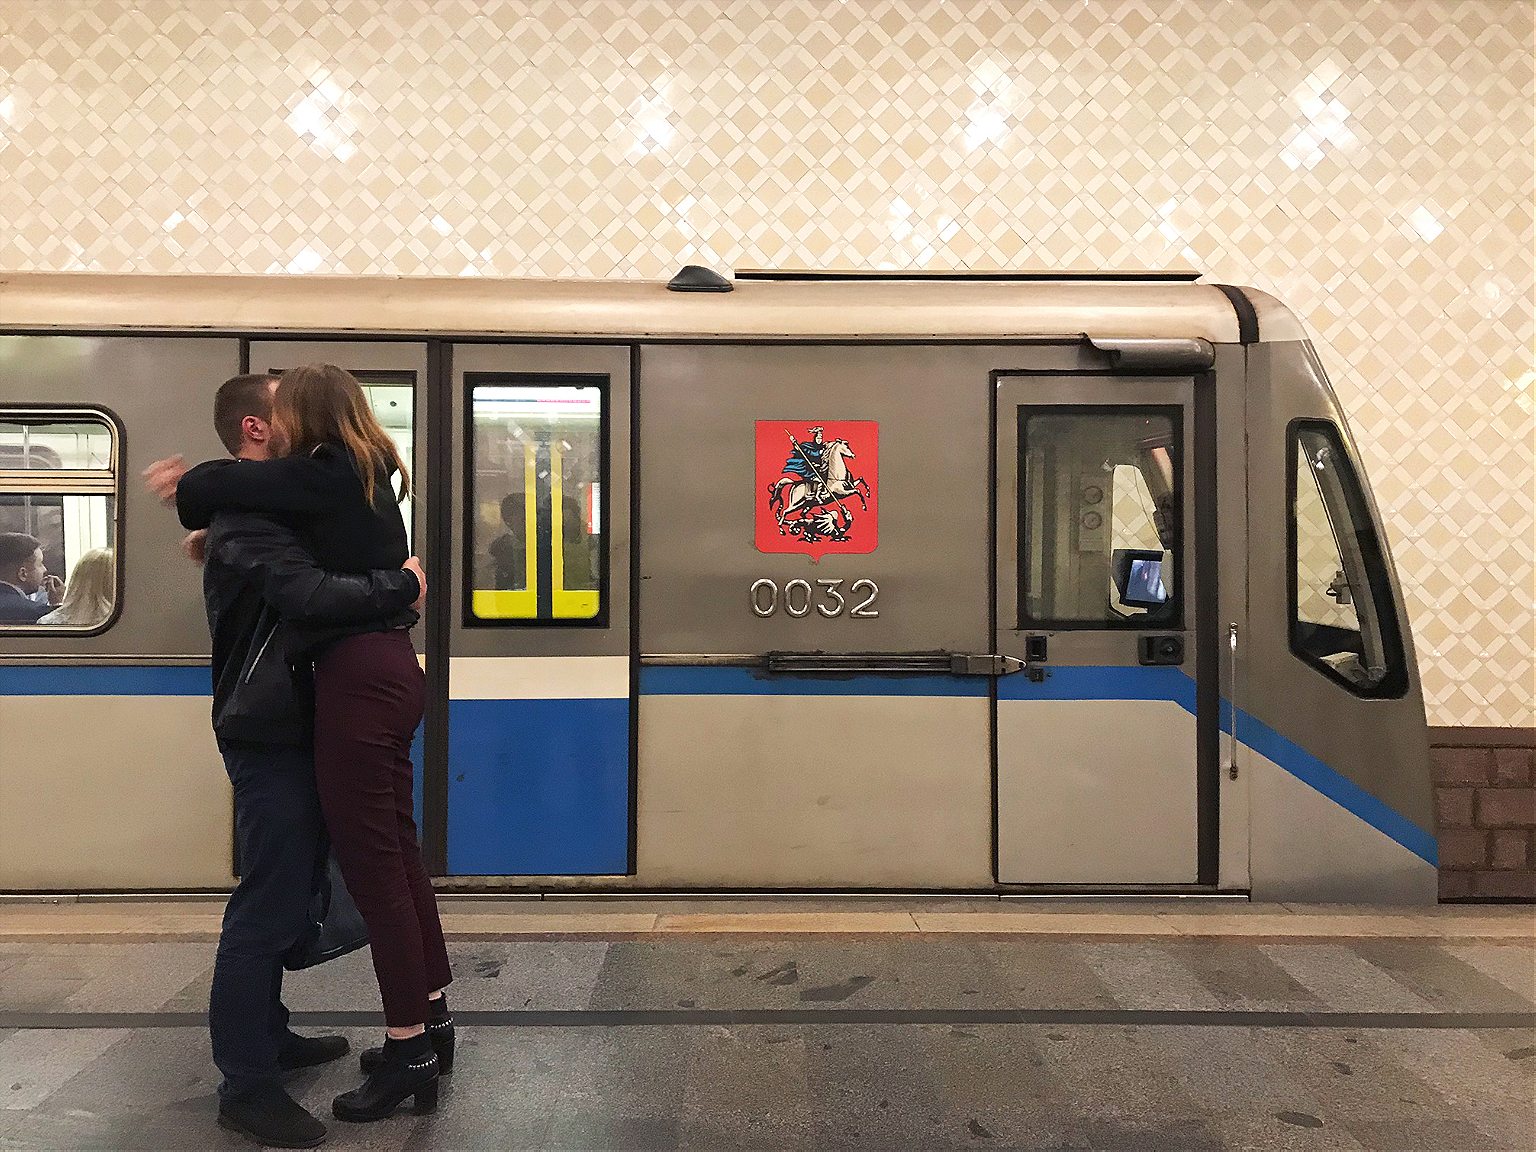
Subterranean commuting might not be anyone’s idea of a good time, but even in a city packing the war-games treasures and priceless bejeweled eggs of the Kremlin Armoury and the colossal Soviet pavilions of the VDNKh , the Metro holds up as one of Moscow’s finest museums. Just avoid rush hour.
The Metro is stunning and provides an unrivaled insight into the city’s psyche, past and present, but it also happens to be the best way to get around. Moscow has Uber, and the Russian version called Yandex Taxi , but also some nasty traffic. Metro trains come around every 90 seconds or so, at a more than 99 percent on-time rate. It’s also reasonably priced, with a single ride at 55 cents (and cheaper in bulk). From history to tickets to rules — official and not — here’s what you need to know to get started.
A Brief Introduction Buying Tickets Know Before You Go (Down) Rules An Easy Tour
A Brief Introduction
Moscow’s Metro was a long time coming. Plans for rapid transit to relieve the city’s beleaguered tram system date back to the Imperial era, but a couple of wars and a revolution held up its development. Stalin revived it as part of his grand plan to modernize the Soviet Union in the 1920s and 30s. The first lines and tunnels were constructed with help from engineers from the London Underground, although Stalin’s secret police decided that they had learned too much about Moscow’s layout and had them arrested on espionage charges and deported.
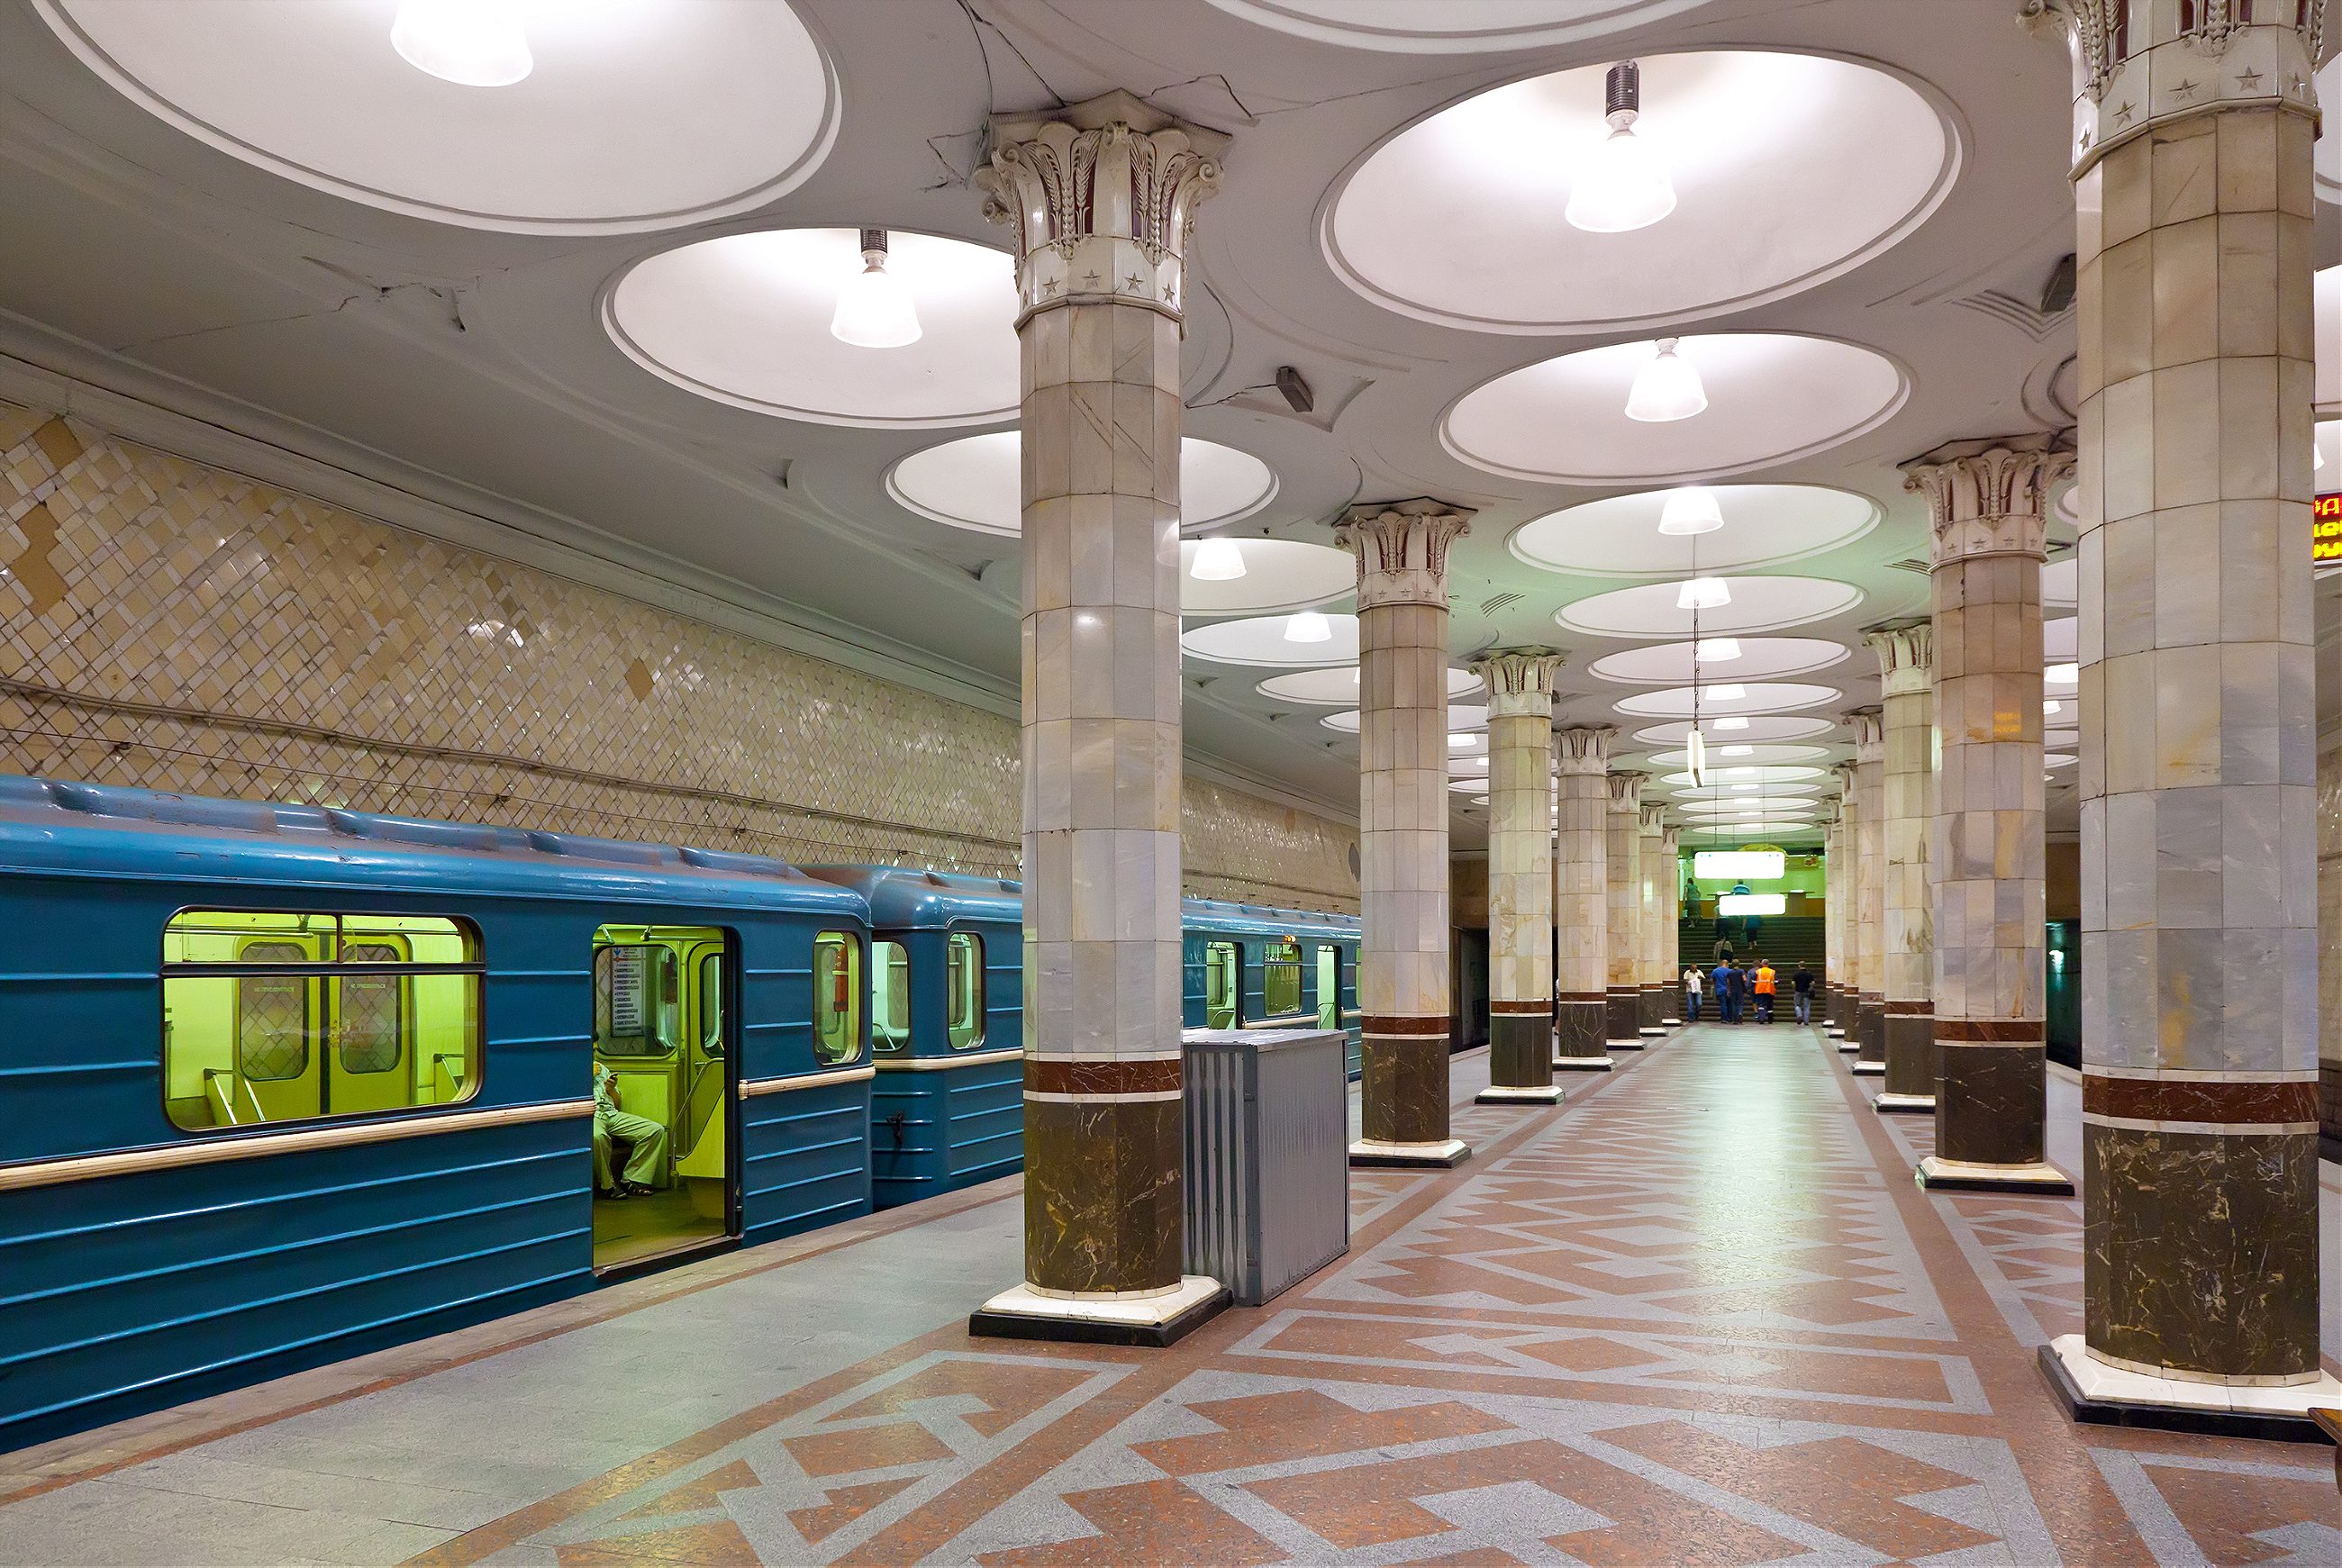
The beauty of its stations (if not its trains) is well-documented, and certainly no accident. In its illustrious first phases and particularly after the Second World War, the greatest architects of Soviet era were recruited to create gleaming temples celebrating the Revolution, the USSR, and the war triumph. No two stations are exactly alike, and each of the classic showpieces has a theme. There are world-famous shrines to Futurist architecture, a celebration of electricity, tributes to individuals and regions of the former Soviet Union. Each marble slab, mosaic tile, or light fixture was placed with intent, all in service to a station’s aesthetic; each element, f rom the smallest brass ear of corn to a large blood-spattered sword on a World War II mural, is an essential part of the whole.
The Metro is a monument to the Soviet propaganda project it was intended to be when it opened in 1935 with the slogan “Building a Palace for the People”. It brought the grand interiors of Imperial Russia to ordinary Muscovites, celebrated the Soviet Union’s past achievements while promising its citizens a bright Soviet future, and of course, it was a show-piece for the world to witness the might and sophistication of life in the Soviet Union.
It may be a museum, but it’s no relic. U p to nine million people use it daily, more than the London Underground and New York Subway combined. (Along with, at one time, about 20 stray dogs that learned to commute on the Metro.)
In its 80+ year history, the Metro has expanded in phases and fits and starts, in step with the fortunes of Moscow and Russia. Now, partly in preparation for the World Cup 2018, it’s also modernizing. New trains allow passengers to walk the entire length of the train without having to change carriages. The system is becoming more visitor-friendly. (There are helpful stickers on the floor marking out the best selfie spots .) But there’s a price to modernity: it’s phasing out one of its beloved institutions, the escalator attendants. Often they are middle-aged or elderly women—“ escalator grandmas ” in news accounts—who have held the post for decades, sitting in their tiny kiosks, scolding commuters for bad escalator etiquette or even bad posture, or telling jokes . They are slated to be replaced, when at all, by members of the escalator maintenance staff.
For all its achievements, the Metro lags behind Moscow’s above-ground growth, as Russia’s capital sprawls ever outwards, generating some of the world’s worst traffic jams . But since 2011, the Metro has been in the middle of an ambitious and long-overdue enlargement; 60 new stations are opening by 2020. If all goes to plan, the 2011-2020 period will have brought 125 miles of new tracks and over 100 new stations — a 40 percent increase — the fastest and largest expansion phase in any period in the Metro’s history.
Facts: 14 lines Opening hours: 5 a.m-1 a.m. Rush hour(s): 8-10 a.m, 4-8 p.m. Single ride: 55₽ (about 85 cents) Wi-Fi network-wide
Buying Tickets
- Ticket machines have a button to switch to English.
- You can buy specific numbers of rides: 1, 2, 5, 11, 20, or 60. Hold up fingers to show how many rides you want to buy.
- There is also a 90-minute ticket , which gets you 1 trip on the metro plus an unlimited number of transfers on other transport (bus, tram, etc) within 90 minutes.
- Or, you can buy day tickets with unlimited rides: one day (218₽/ US$4), three days (415₽/US$7) or seven days (830₽/US$15). Check the rates here to stay up-to-date.
- If you’re going to be using the Metro regularly over a few days, it’s worth getting a Troika card , a contactless, refillable card you can use on all public transport. Using the Metro is cheaper with one of these: a single ride is 36₽, not 55₽. Buy them and refill them in the Metro stations, and they’re valid for 5 years, so you can keep it for next time. Or, if you have a lot of cash left on it when you leave, you can get it refunded at the Metro Service Centers at Ulitsa 1905 Goda, 25 or at Staraya Basmannaya 20, Building 1.
- You can also buy silicone bracelets and keychains with built-in transport chips that you can use as a Troika card. (A Moscow Metro Fitbit!) So far, you can only get these at the Pushkinskaya metro station Live Helpdesk and souvenir shops in the Mayakovskaya and Trubnaya metro stations. The fare is the same as for the Troika card.
- You can also use Apple Pay and Samsung Pay.
Rules, spoken and unspoken
No smoking, no drinking, no filming, no littering. Photography is allowed, although it used to be banned.
Stand to the right on the escalator. Break this rule and you risk the wrath of the legendary escalator attendants. (No shenanigans on the escalators in general.)
Get out of the way. Find an empty corner to hide in when you get off a train and need to stare at your phone. Watch out getting out of the train in general; when your train doors open, people tend to appear from nowhere or from behind ornate marble columns, walking full-speed.
Always offer your seat to elderly ladies (what are you, a monster?).
An Easy Tour
This is no Metro Marathon ( 199 stations in 20 hours ). It’s an easy tour, taking in most—though not all—of the notable stations, the bulk of it going clockwise along the Circle line, with a couple of short detours. These stations are within minutes of one another, and the whole tour should take about 1-2 hours.
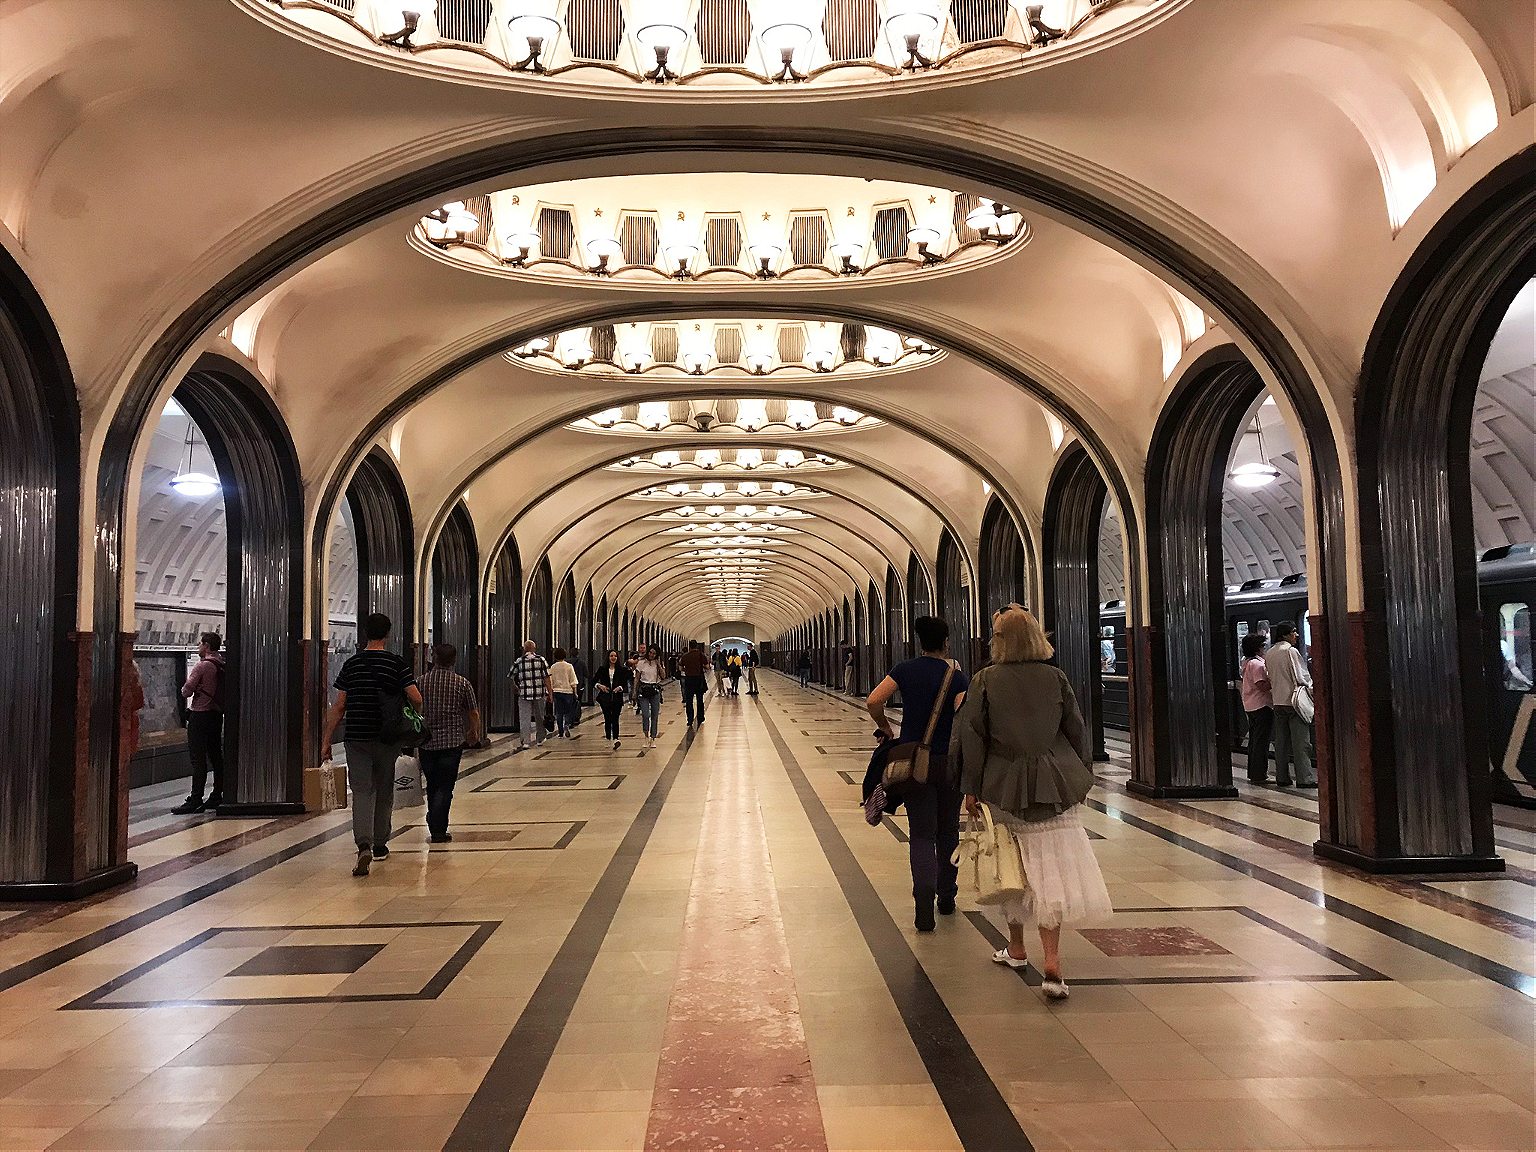
Start at Mayakovskaya Metro station , at the corner of Tverskaya and Garden Ring, Triumfalnaya Square, Moskva, Russia, 125047.
1. Mayakovskaya. Named for Russian Futurist Movement poet Vladimir Mayakovsky and an attempt to bring to life the future he imagined in his poems. (The Futurist Movement, natch, was all about a rejecting the past and celebrating all things speed, industry, modern machines, youth, modernity.) The result: an Art Deco masterpiece that won the National Grand Prix for architecture at the New York World’s Fair in 1939. It’s all smooth, rounded shine and light, and gentle arches supported by columns of dark pink marble and stainless aircraft steel. Each of its 34 ceiling niches has a mosaic. During World War II, the station was used as an air-raid shelter and, at one point, a bunker for Stalin. He gave a subdued but rousing speech here in Nov. 6, 1941 as the Nazis bombed the city above.
Take the 3/Green line one station to:
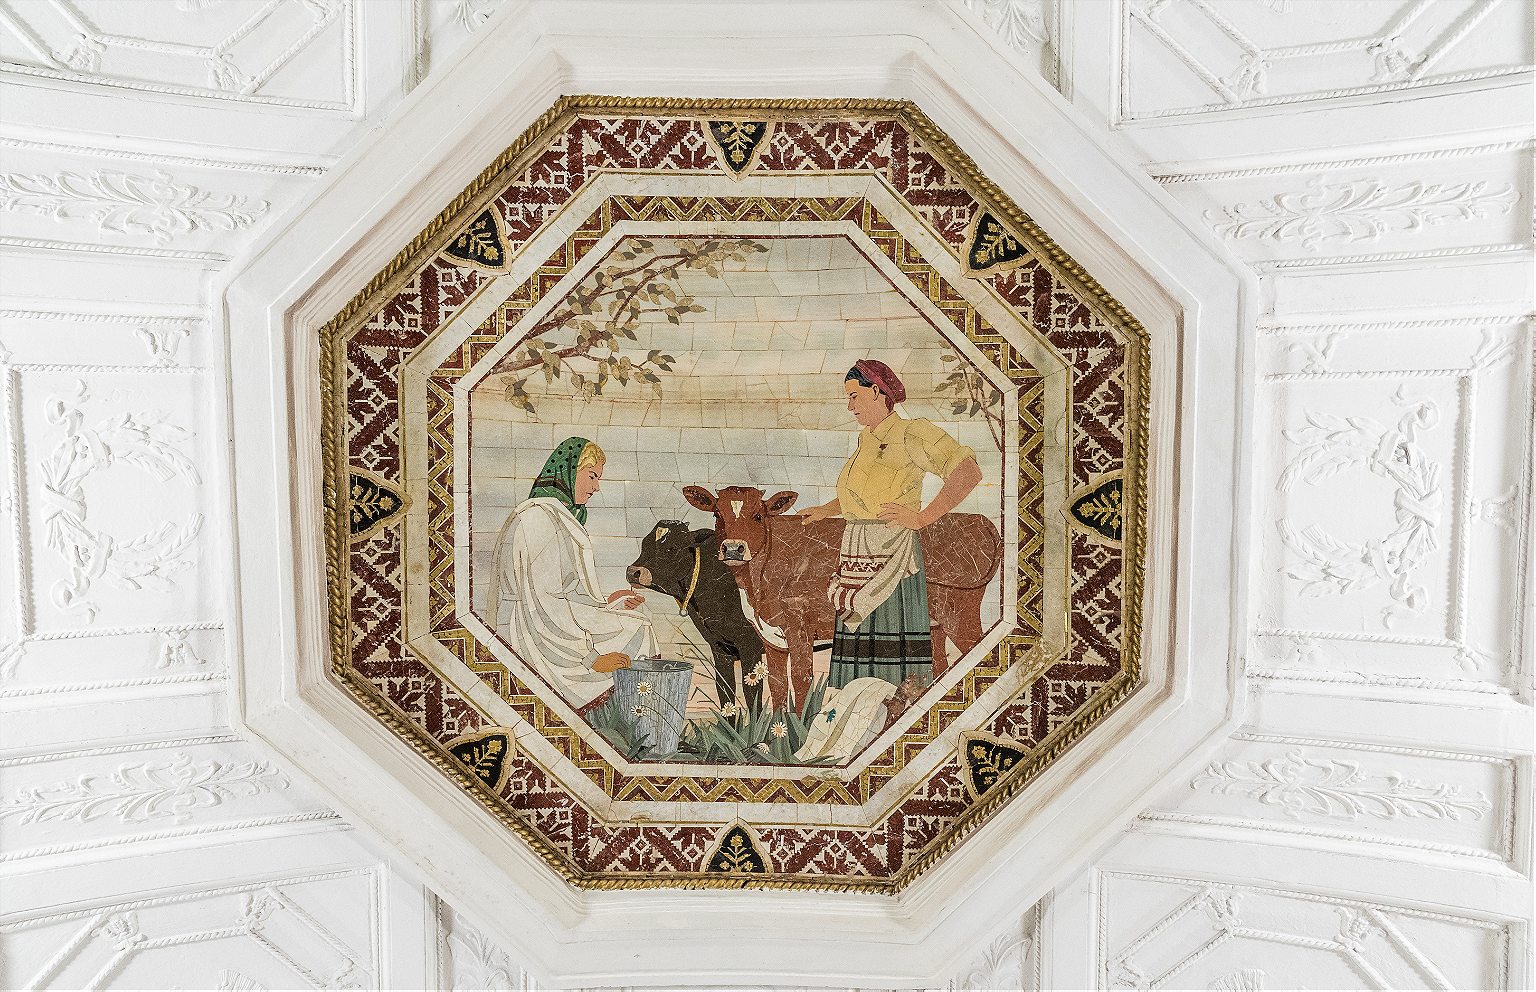
2. Belorusskaya. Opened in 1952, named after the connected Belarussky Rail Terminal, which runs trains between Moscow and Belarus. This is a light marble affair with a white, cake-like ceiling, lined with Belorussian patterns and 12 Florentine ceiling mosaics depicting life in Belarussia when it was built.
Transfer onto the 1/Brown line. Then, one stop (clockwise) t o:
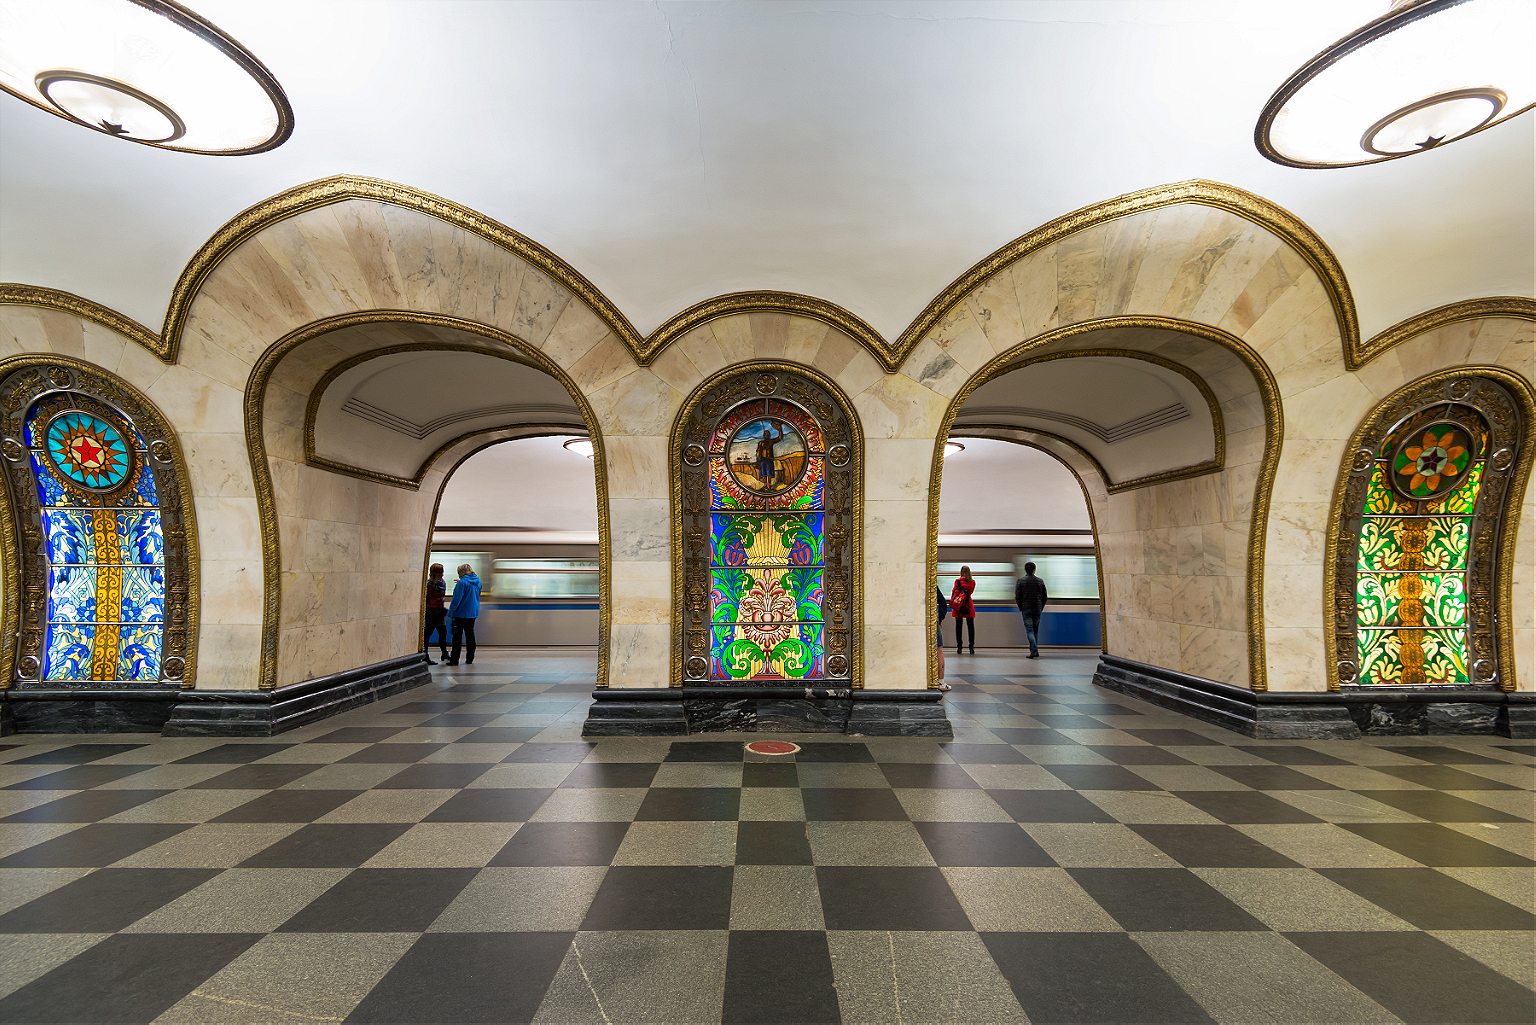
3. Novoslobodskaya. This station was designed around the stained-glass panels, which were made in Latvia, because Alexey Dushkin, the Soviet starchitect who dreamed it up (and also designed Mayakovskaya station) couldn’t find the glass and craft locally. The stained glass is the same used for Riga’s Cathedral, and the panels feature plants, flowers, members of the Soviet intelligentsia (musician, artist, architect) and geometric shapes.
Go two stops east on the 1/Circle line to:
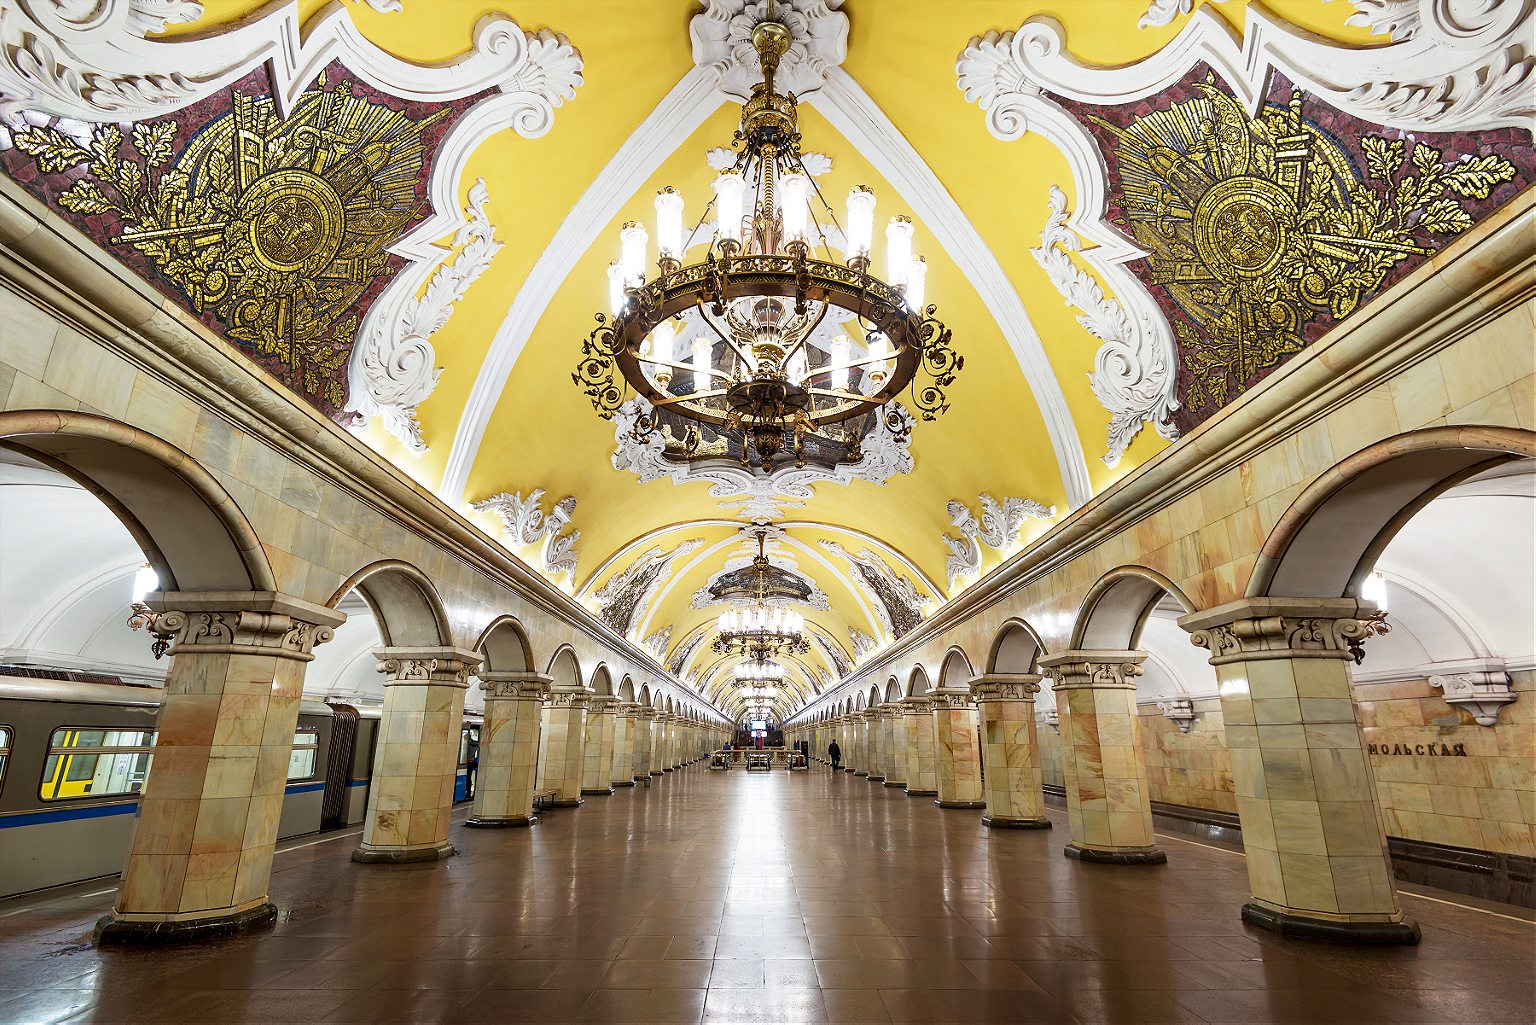
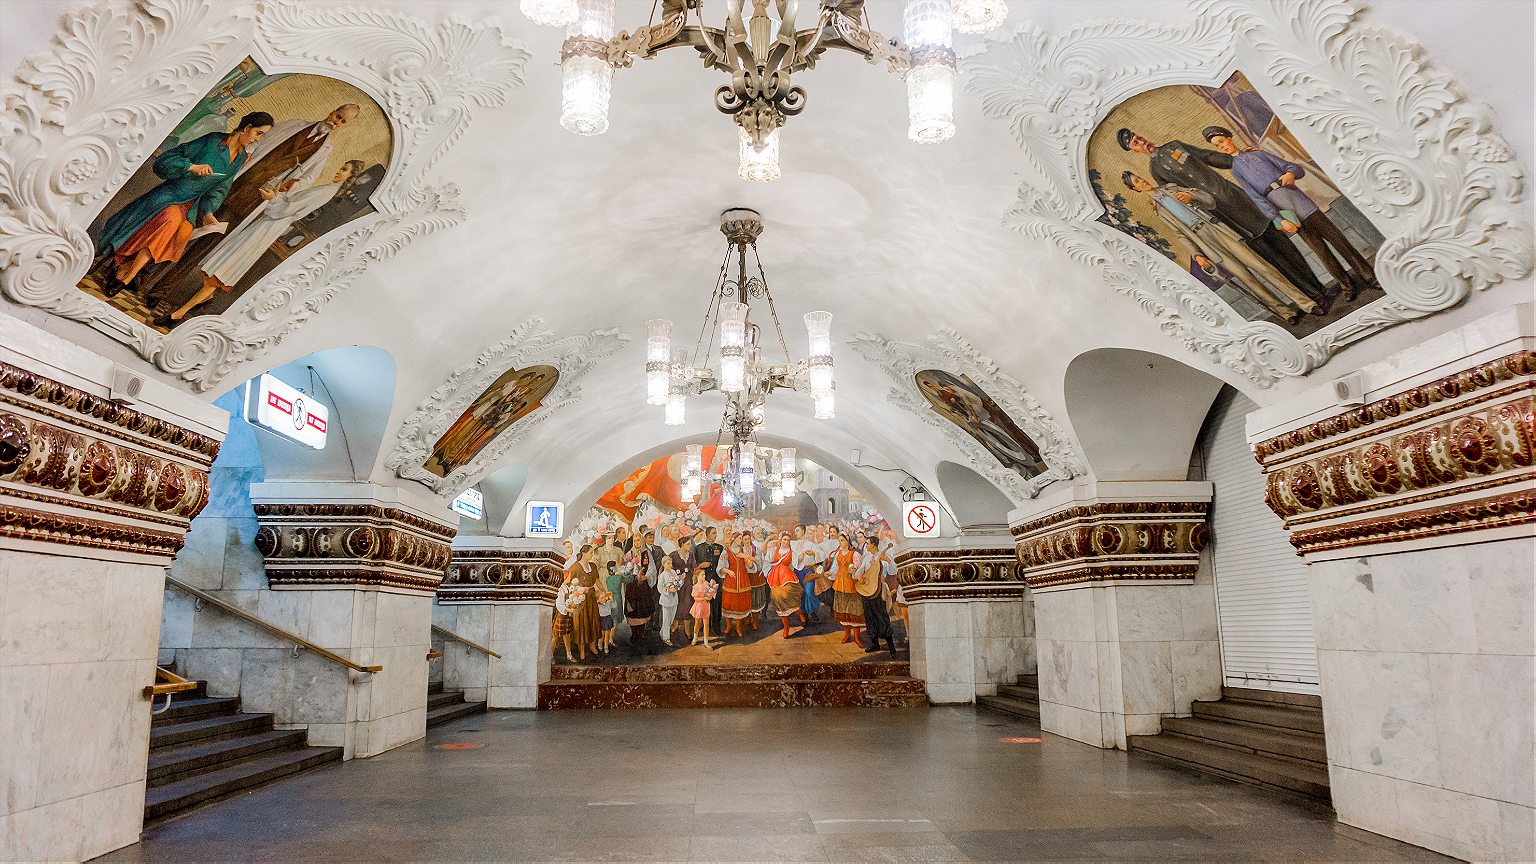
4. Komsomolskaya. Named after the Komsomol, or the Young Communist League, this might just be peak Stalin Metro style. Underneath the hub for three regional railways, it was intended to be a grand gateway to Moscow and is today its busiest station. It has chandeliers; a yellow ceiling with Baroque embellishments; and in the main hall, a colossal red star overlaid on golden, shimmering tiles. Designer Alexey Shchusev designed it as an homage to the speech Stalin gave at Red Square on Nov. 7, 1941, in which he invoked Russia’s illustrious military leaders as a pep talk to Soviet soldiers through the first catastrophic year of the war. The station’s eight large mosaics are of the leaders referenced in the speech, such as Alexander Nevsky, a 13th-century prince and military commander who bested German and Swedish invading armies.
One more stop clockwise to Kurskaya station, and change onto the 3/Blue line, and go one stop to:
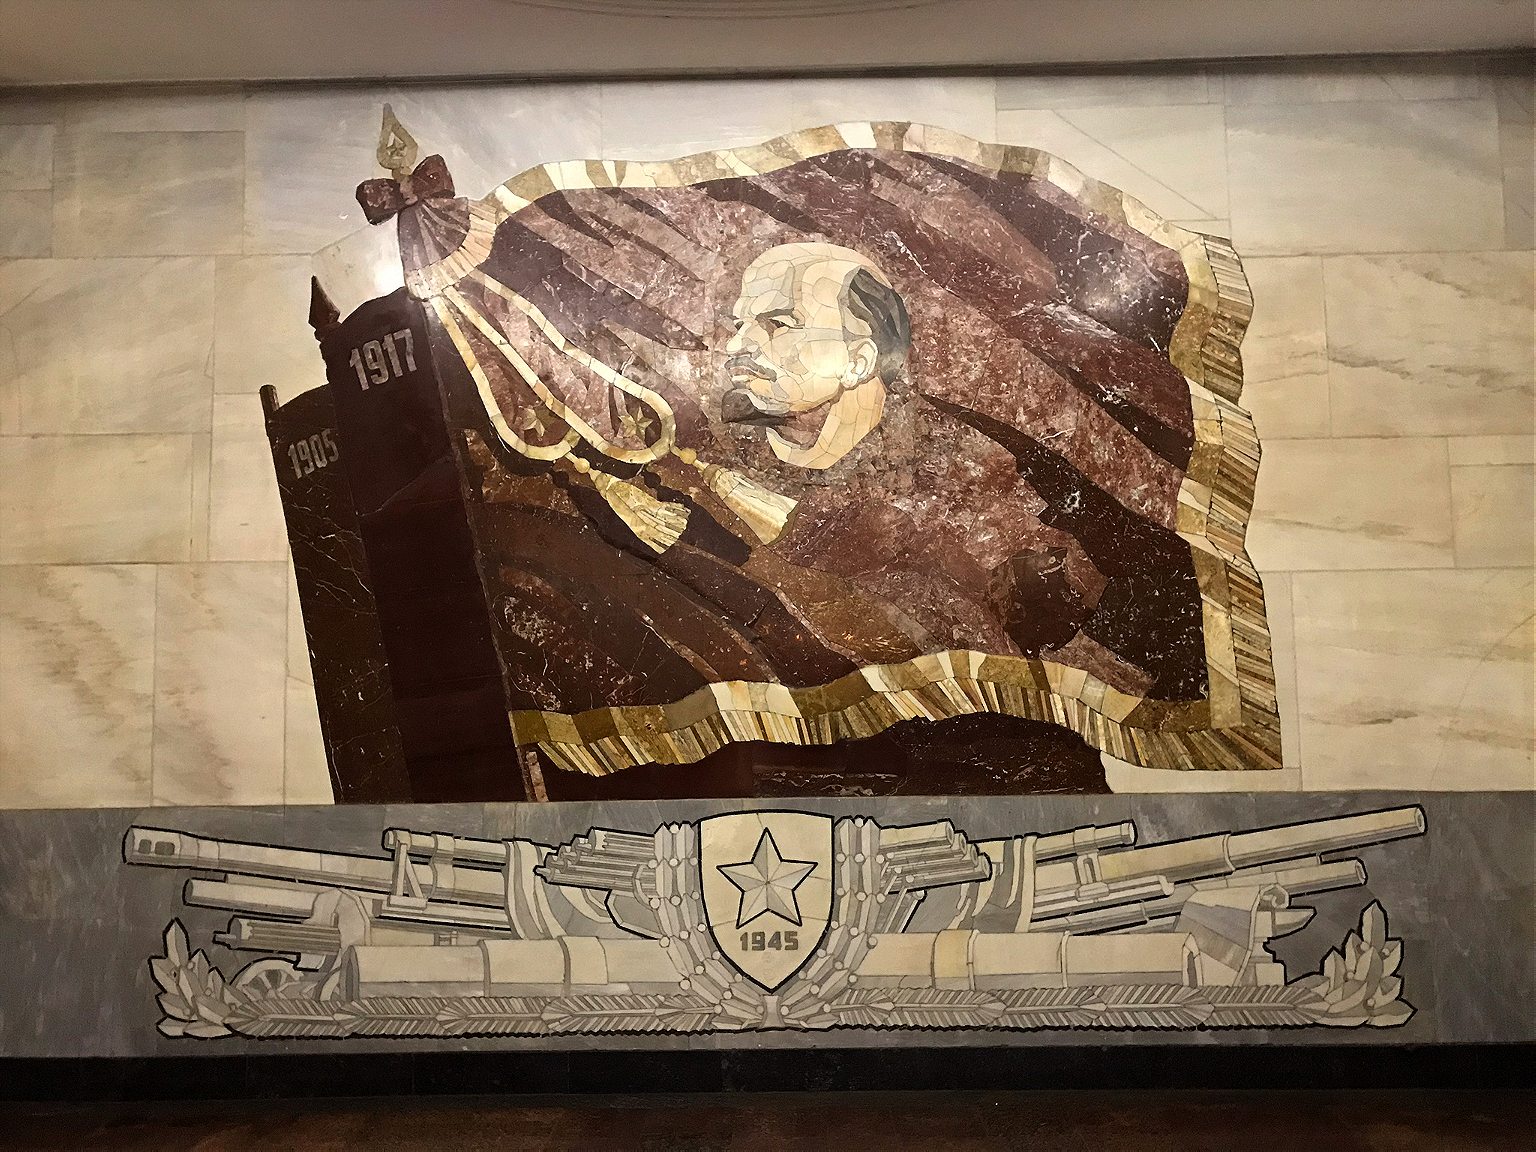
5. Baumanskaya. Opened in 1944. Named for the Bolshevik Revolutionary Nikolai Bauman , whose monument and namesake district are aboveground here. Though he seemed like a nasty piece of work (he apparently once publicly mocked a woman he had impregnated, who later hung herself), he became a Revolutionary martyr when he was killed in 1905 in a skirmish with a monarchist, who hit him on the head with part of a steel pipe. The station is in Art Deco style with atmospherically dim lighting, and a series of bronze sculptures of soldiers and homefront heroes during the War. At one end, there is a large mosaic portrait of Lenin.
Stay on that train direction one more east to:
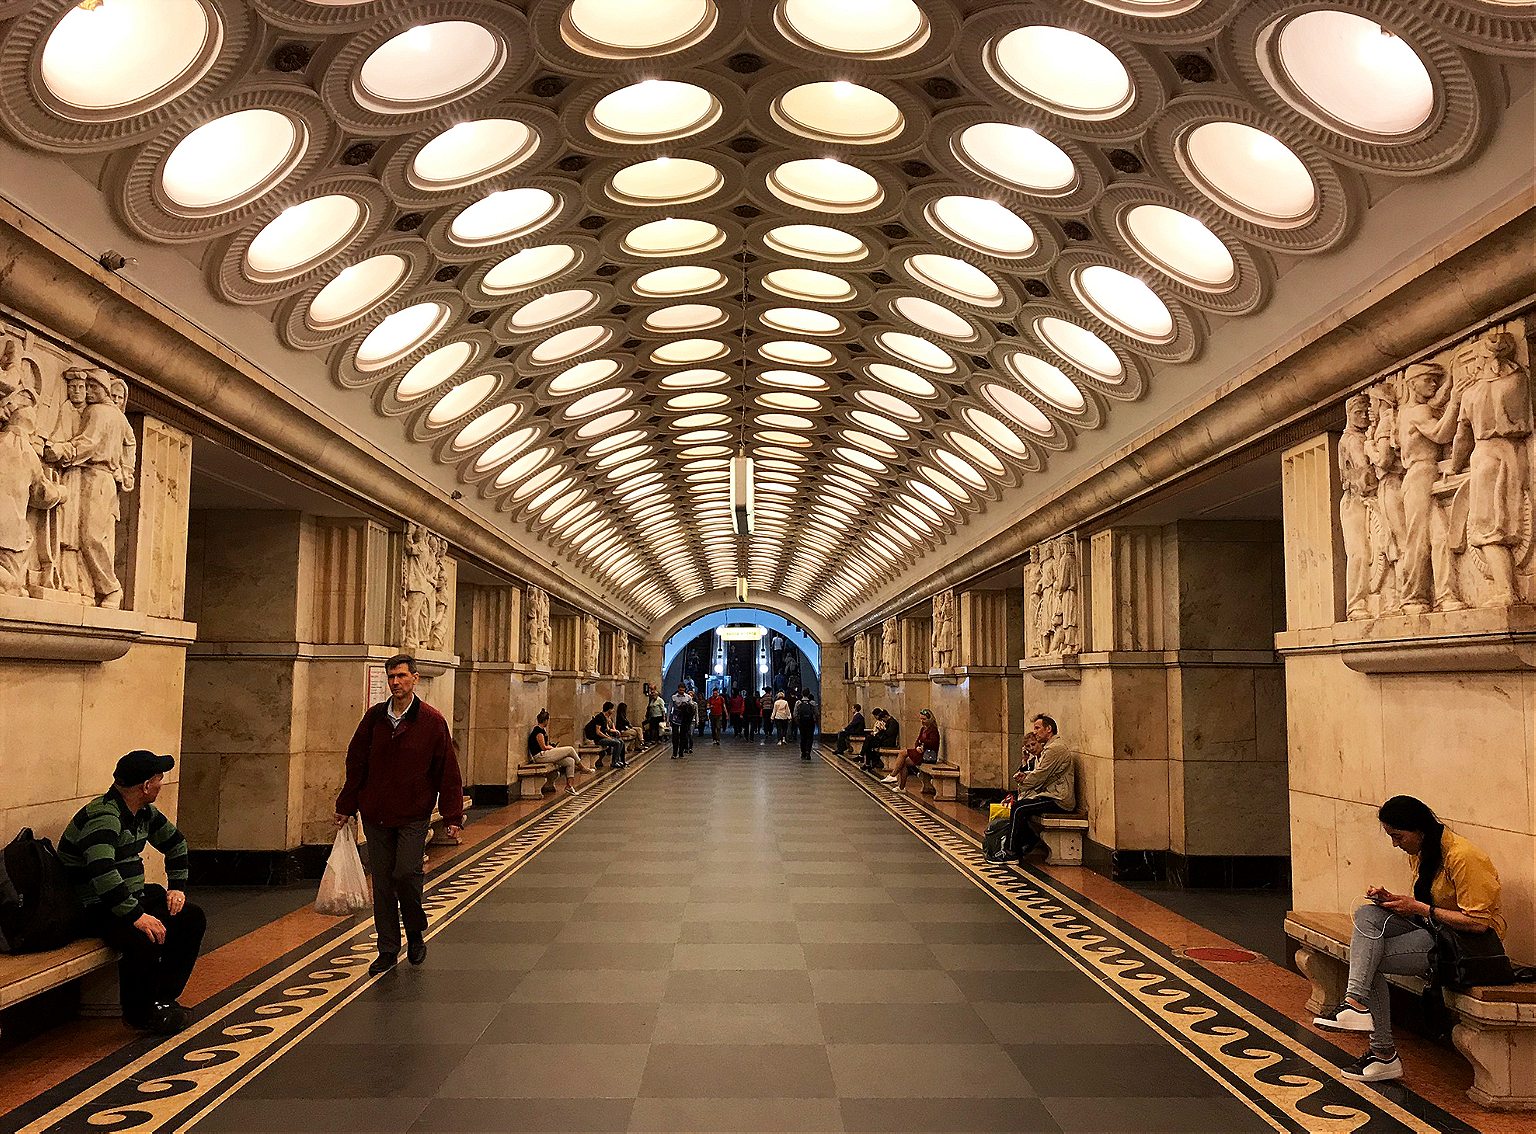
6. Elektrozavodskaya. As you may have guessed from the name, this station is the Metro’s tribute to all thing electrical, built in 1944 and named after a nearby lightbulb factory. It has marble bas-relief sculptures of important figures in electrical engineering, and others illustrating the Soviet Union’s war-time struggles at home. The ceiling’s recurring rows of circular lamps give the station’s main tunnel a comforting glow, and a pleasing visual effect.
Double back two stops to Kurskaya station , and change back to the 1/Circle line. Sit tight for six stations to:
7. Kiyevskaya. This was the last station on the Circle line to be built, in 1954, completed under Nikita Khrushchev’ s guidance, as a tribute to his homeland, Ukraine. Its three large station halls feature images celebrating Ukraine’s contributions to the Soviet Union and Russo-Ukrainian unity, depicting musicians, textile-working, soldiers, farmers. (One hall has frescoes, one mosaics, and the third murals.) Shortly after it was completed, Khrushchev condemned the architectural excesses and unnecessary luxury of the Stalin era, which ushered in an epoch of more austere Metro stations. According to the legend at least, he timed the policy in part to ensure no Metro station built after could outshine Kiyevskaya.
Change to the 3/Blue line and go one stop west.
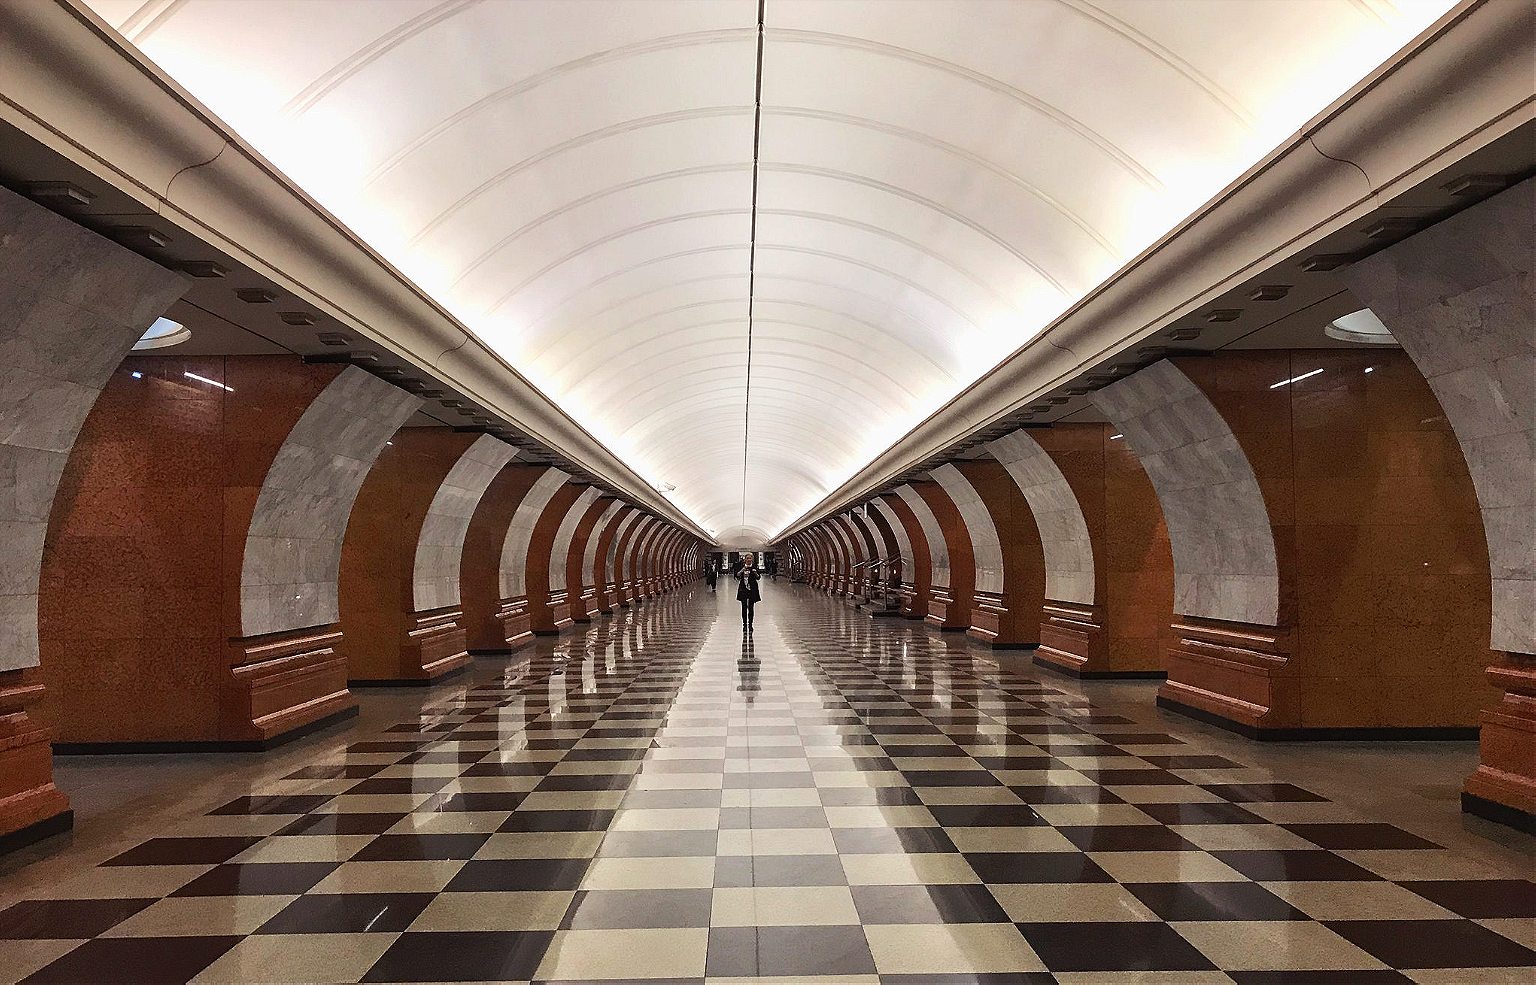
8. Park Pobedy. This is the deepest station on the Metro, with one of the world’s longest escalators, at 413 feet. If you stand still, the escalator ride to the surface takes about three minutes .) Opened in 2003 at Victory Park, the station celebrates two of Russia’s great military victories. Each end has a mural by Georgian artist Zurab Tsereteli, who also designed the “ Good Defeats Evil ” statue at the UN headquarters in New York. One mural depicts the Russian generals’ victory over the French in 1812 and the other, the German surrender of 1945. The latter is particularly striking; equal parts dramatic, triumphant, and gruesome. To the side, Red Army soldiers trample Nazi flags, and if you look closely there’s some blood spatter among the detail. Still, the biggest impressions here are the marble shine of the chessboard floor pattern and the pleasingly geometric effect if you view from one end to the other.
Keep going one more stop west to:
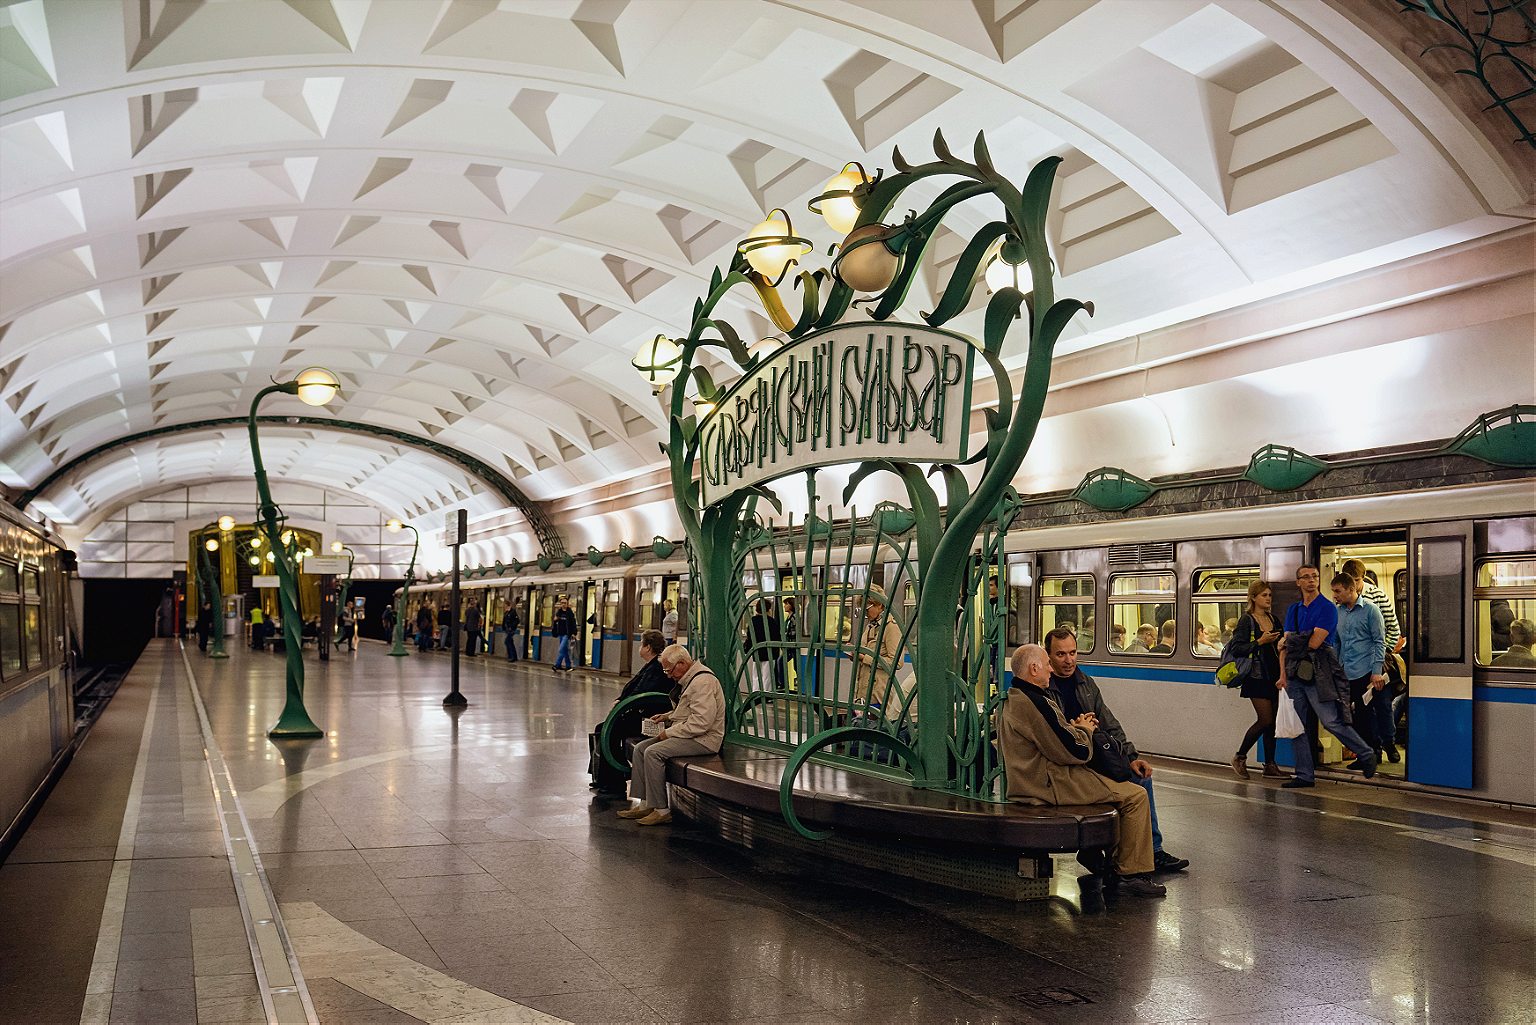
9. Slavyansky Bulvar. One of the Metro’s youngest stations, it opened in 2008. With far higher ceilings than many other stations—which tend to have covered central tunnels on the platforms—it has an “open-air” feel (or as close to it as you can get, one hundred feet under). It’s an homage to French architect Hector Guimard, he of the Art Nouveau entrances for the Paris M é tro, and that’s precisely what this looks like: A Moscow homage to the Paris M é tro, with an additional forest theme. A Cyrillic twist on Guimard’s Metro-style lettering over the benches, furnished with t rees and branch motifs, including creeping vines as towering lamp-posts.
Stay on the 3/Blue line and double back four stations to:
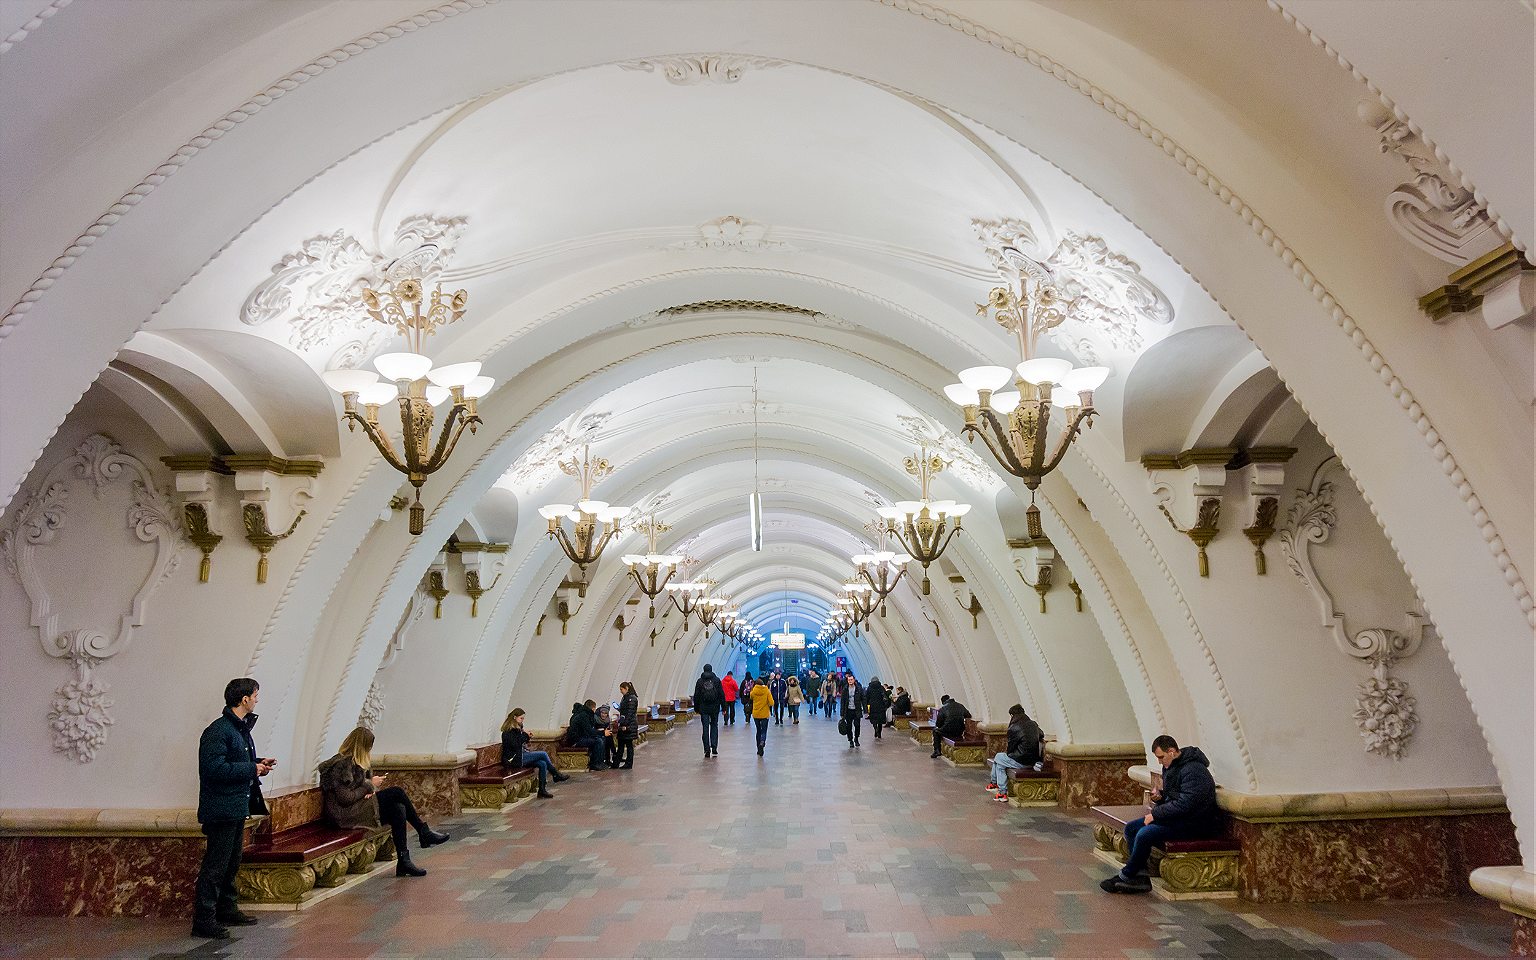
10. Arbatskaya. Its first iteration, Arbatskaya-Smolenskaya station, was damaged by German bombs in 1941. It was rebuilt in 1953, and designed to double as a bomb shelter in the event of nuclear war, although unusually for stations built in the post-war phase, this one doesn’t have a war theme. It may also be one of the system’s most elegant: Baroque, but toned down a little, with red marble floors and white ceilings with gilded bronze c handeliers.
Jump back on the 3/Blue line in the same direction and take it one more stop:
11. Ploshchad Revolyutsii (Revolution Square). Opened in 1938, and serving Red Square and the Kremlin . Its renowned central hall has marble columns flanked by 76 bronze statues of Soviet heroes: soldiers, students, farmers, athletes, writers, parents. Some of these statues’ appendages have a yellow sheen from decades of Moscow’s commuters rubbing them for good luck. Among the most popular for a superstitious walk-by rub: the snout of a frontier guard’s dog, a soldier’s gun (where the touch of millions of human hands have tapered the gun barrel into a fine, pointy blade), a baby’s foot, and a woman’s knee. (A brass rooster also sports the telltale gold sheen, though I am told that rubbing the rooster is thought to bring bad luck. )
Now take the escalator up, and get some fresh air.
R&K Insider
Join our newsletter to get exclusives on where our correspondents travel, what they eat, where they stay. Free to sign up.
21 Things to Know Before You Go to Moscow
Featured city guides.
Safari Zone

A Safari Zone (Japanese: サファリゾーン Safari Zone ) is a special Pokémon preserve where Trainers can enter and participate in the Safari Game (Japanese: サファリゲーム Safari Game ) to catch rare wild Pokémon .
Safari Zones can be found in the following regions :
- The Safari Zone in Kanto , located north of Fuchsia City .
- The Safari Zone in Johto , located north of Route 48 beyond the Safari Zone Gate in Pokémon HeartGold and SoulSilver .
- The Safari Zone in Hoenn , located north of Route 121 .
- The Great Marsh in Sinnoh , located north of Pastoria City .
- 1.1 Differences between games
- 1.2 Similar examples
- 3 In other languages
In the games

The mechanics of the Safari Zones are similar to each other. Most have a $ 500 entry fee, a step limit, a series of distinct areas with different wild Pokémon in each, and 30 Safari Balls , with which players may catch the Pokémon they come upon. The most important of their specific mechanics, however, is that Trainers do not initiate Pokémon battles with the wild Pokémon, but instead must catch them without battling them. The wild Pokémon within Safari Zones are capable of fleeing at any given time.
Differences between games
- The Johto Safari Zone has no step limit.
- In Pokémon Omega Ruby and Alpha Sapphire , the Hoenn Safari Zone does not use typical Safari Zone mechanics, instead functioning like normal routes .
- Pokémon: Let's Go, Pikachu! and Let's Go, Eevee! effectively do not have a Safari Zone; the area that used to be the Safari Zone is replaced with GO Park , while the zoo area in front is referred to as the "Safari Zone" instead.
Similar examples
- Johto 's National Park is somewhat similar to a Safari Zone, being a nature preserve for Pokémon and having a thrice-weekly Bug-Catching Contest which shares several aspects with a Safari Game.
- Kalos 's Friend Safari area, located in Kiloude City , also bears some similarities with Safari Zones, differing in the available wild Pokémon (which are dependent on the Nintendo 3DS Friend Codes of other players) as well as allowing Poké Balls of any variety as opposed to solely Safari Balls.
- The Pal Park in all Generation IV games bears some superficial similarities to a Safari Zone, being a special area where only a specific type of Poké Ball can be used, featuring possible Pokémon species that otherwise cannot be found, and where the player cannot battle the Pokémon found there. Additionally, in Pokémon HeartGold and SoulSilver , the Pal Park is placed in Fuchsia City where it replaces the Safari Zone.
- In Hisui , the Safari Zone was not yet established, but the main gameplay of Pokémon Legends: Arceus is similar to the Safari Zone.
Unova , Alola , Galar , Paldea , and Kitakami have neither a Safari Zone nor anything similar to or resembling a Safari Zone.
- In the Generation II games, there is some data for a beta Safari Zone in Fuchsia City , but it was ultimately unused.
In other languages
- Articles needing more information
- Safari Zones
- Pokémon world
- Locations by type
- Game mechanics
- Methods of obtaining Pokémon
Navigation menu
Page actions.
- View source
Personal tools
- Create account
- Editor's Hub
- Frequently asked questions
- Bulbawiki forum
- Recent changes
- Random page
Bulbagarden
- Bulbagarden home page
- Bulbagarden Archives
- Bulbagarden Forums
- Bulbagarden Discord server
- What links here
- Related changes
- Upload file
- Special pages
- Printable version
- Permanent link
- Page information
- Cite this page
- This page was last edited on 11 December 2023, at 19:29.
- Content is available under Attribution-NonCommercial-ShareAlike 2.5 . (see Copyrights for details)
- Privacy policy
- About Bulbapedia
- Disclaimers
- Mobile view
The Red Square and beyond: a guide to Moscow’s neighbourhoods
Apr 23, 2019 • 6 min read

The Red Square, Kremlin and St Basil's Cathedral in Moscow at night © Mordolff / Getty Images
One of the world’s largest cities, Moscow is a true metropolis whose ancient neighbourhoods are interspersed with newly built high-rises, inhabited by people from all over the former Soviet Union.
It’s also the city of rings: the innermost is the Kremlin itself; further away are the former defensive rings, Boulevard Ring and Garden Ring; still further are the Third Ring Road and the MKAD, which delineates the city’s borders. There’s an ongoing joke that Moscow Mayor is the Lord of the Rings. Most sights are contained within the Garden Ring, although for some more authentic neighbourhoods one has to venture further out. To help you explore Moscow’s diversity, we picked our favourite ’hoods – but this list is by no means exhaustive.

The Red Square and around
It can be argued that Moscow, or even the whole of Russia, starts at the Red Square – it’s an absolute must-see for any visitor. After standing in line to check out Lenin’s granite mausoleum , go to GUM , Moscow's oldest department store. Full of luxury shops, it’s famous for the glass roof designed by one of Russia’s most celebrated architects, Vladimir Shukhov. Apart from architectural wonders, GUM has several places to eat including the Soviet-style cafeteria Stolovaya No 57 where you can sample mysterious-sounding delicacies such as the ‘herring in a fur coat’.
On the opposite side of GUM, Kremlin ’s walls and towers rise above the Red Square. Walk through the Alexander Garden and past the grotto to the Kremlin’s entrance. It’s a treasure trove for any art and history lover: ancient gold-domed churches, icons galore and the resting place of Moscow tsars.
On the other side of the Red Square is Moscow's symbol, St Basil's Cathedral with its multi-colored domes. Right behind it is the newly built Zaryadye Park , which showcases flora from all over Russia; another attraction is the floating bridge jutting out above the embankment and the Moscow river. A glass pavilion nearby hosts Voskhod , a space-themed restaurant with dishes from all 15 former Soviet Union republics. It’s a perfect spot for a classy evening meal and there’s often live music.

Patriarch’s Ponds
The Patriarch’s Ponds (aka Patriki) is a historical neighbourhood, celebrated in Mikhail Bulgakov’s novel Master and Margarita . Located right off Tverskaya street, Moscow’s main thoroughfare, Patriki recently became the city’s most happening quarter. It has some of the most elegant architecture, including several buildings by art-nouveau genius Fyodor Shekhtel. Narrow streets here have a cozy feel, with recently widened sidewalks and bike lanes. In the summer it becomes party central.
Start by checking out free exhibitions or one of the cutting-edge performances at the experimental theatre Praktika . But make no mistake, the neighbourhood’s main attraction are its bars and restaurants. Patriki’s residents are well-off Russians and expats, so it’s no wonder that Moscow’s recent culinary revolution started here. Uilliam’s , one of the pioneers of this foodie movement, still rules over the scene with its floor-to-ceiling windows. Also try AQ Chicken for everything chicken-related, Patara for a taste of Georgian cuisine, and Cutfish for some great sushi. Finish your gastronomic tour with original cocktails at Pinch or the Moscow outpost of NYC restaurant Saxon+Parole .

Around Kursky train station
For a long time, Kursky train station was surrounded by semi-abandoned factories and the area was best avoided. It all changed in the late 2000s, when a dilapidated wine factory was turned into Winzavod , a mecca for fans of contemporary art. Today these red-brick buildings are occupied by some of Moscow’s leading galleries. After taking in all the art, pop in the small wine bar Barrell for a glass from burgeoning wineries of Russia’s south or grab a bite at Khitrye Lyudi cafe.
Right next to Winzavod is Artplay , another refurbished factory full of design and furniture shops and large exhibition spaces. It’s also home to Pluton , one of the latest additions to Moscow’s dance scene. Other Pluton residents are the multimedia art gallery Proun and another lunch option, Shanhaika , with authentic Chinese cuisine.
A short walk away is Arma, where a cluster of circular gas holders has been turned into offices, restaurants and clubs including Gazgolder (it belongs to one of Russia’s most famous rappers, Basta). Apart from hip-hop concerts, Gazgolder organises regular techno parties that sometimes go non-stop from Friday to Monday.

If you’re interested in religious architecture, Taganka is the place to go. First of all, see the old Moscow at Krutitskoye Podvorye – one of those places where nothing seems to have changed in centuries. The monastery was founded in the 13th century, but in the 16th century it became the home of Moscow metropolitans and most of the surviving buildings are from that epoch. Take a tour of the grounds, and don’t miss the interior and icons of the Assumption Cathedral.
Your next stop is the Rogozhskoe settlement of ‘old believers’, a branch that split from Russian Orthodoxy in the 17th century. The settlement is dominated by an 80m-tall bell tower. The yellow-coloured Intercession Church, built in neoclassical style with baroque elements, has an important collection of icons. Next to the church grounds is the popular Trapeznaya cafeteria, with Russian food cooked using traditional recipes – a perfect spot for lunch.
A short ride away is Andronikov Monastery, which today houses the Rublyov Museum in the old monks’ quarters. There’s a great collection of ancient Orthodox icons although none by Andrei Rublyov, who was a monk here in the 15th century. The main attraction at the monastery is the small Saviour’s Cathedral, considered the oldest surviving church in Moscow.
Finish the day at the craft-beer cluster around Taganskaya metro station. Varka offers both Russian and imported labels, with the Burger Heroes stand serving arguably the best burgers in town. Craft & Draft looks more like a respectable old-fashioned pub, with decent food, 20 beers on tap and a hundred types of bottled brews.

Khamovniki is Moscow’s ancient textile district, named after the word kham (a type of cloth). Two main thoroughfares, Ostozhenka and Prechistenka, cut through the neighbourhood parallel to each other. The former turned into the so-called ‘Golden Mile’ of Moscow in the 1990s, with the highest real-estate prices and some of the best examples of new Russian architecture, while the latter is still mostly lined up with impressive 19th-century mansions.
Khamovniki is somewhat of a literary quarter, as several museums devoted to Russia’s best-known writers – among them Leo Tolstoy , Alexander Pushkin and Ivan Turgenev – popped up here during the last century. There’s also plenty to see for an art lover. The Multimedia Art Museum regularly hosts exhibitions by some of the best photographers from all over the world, as well as contemporary art. Several galleries, including RuArts and Kournikova Gallery , have also found home in Khamovniki.
When you’ve had your fill of literature and art, stop by Gorod Sad on Ostozhenka, an outpost of a local health-food chain, and order dishes such as pumpkin soup or grilled vegetables salads. Afterwards, head to Dom 12 , which is located just off Ostozhenka street. This restaurant and wine bar is frequented by the city’s intellectuals and its schedule includes lectures, book presentations and film screenings, while in the summer guests migrate to a lovely courtyard.
https://shop.lonelyplanet.com/products/moscow-city-guide-7
Explore related stories

Mar 31, 2024 • 10 min read
With savvy planning and a bit of local know-how, you'll find a wealth of ways to enjoy Paris without blowing your budget. Here are our top tips.

Feb 15, 2024 • 16 min read

Jan 25, 2024 • 9 min read

Apr 20, 2023 • 8 min read

Apr 15, 2024 • 8 min read

Apr 14, 2024 • 6 min read

Apr 12, 2024 • 12 min read

Apr 15, 2024 • 7 min read

Apr 15, 2024 • 12 min read

- Bahasa Indonesia
- Slovenščina
- Science & Tech
- Russian Kitchen
Your 48-hour tour guide of Moscow this winter!

9 am – Visit the Red Square

Christmas market on Red Square
The first thing that every tourist should do by default is visit the very heart of Moscow – it’s main and most beautiful (which ‘krasnaya’ actually meant in Old Russian) square!
There are several ways to explore it:
- Take a selfie with Spasskaya Tower
- Have a warm drink at the Christmas market (which lasts until mid-January)
- Visit Lenin’s Mausoleum
- Shop in the gorgeous adjacent GUM department store
- Visit St. Basil’s Cathedral (and learn that it’s actually several churches under one roof).
11 am – It’s Kremlin time!

Inside the Moscow Kremlin
Entering the Kremlin is, actually, a bit of a quest, as it’s a presidential facility with no general access. You need to buy a ticket or, better still, book a guided tour. Inside the Kremlin’s walls, you will find ancient cathedrals, in which Russian tsars used to be crowned and buried, as well as explore the magnificent architecture of the Kremlin that reflects the rich history of the country. And, finally, you could also make a quick visit to the Moscow Kremlin Museums and admire artifacts from various Russian tsarist eras: carriages, thrones, crowns and the most incredible armory and jewelry.
For more information, visit the official website of the Kremlin . It’s open from 10 am to 5 pm (and it’s closed on Thursdays) in winter.
2 pm – Watch the changing of the Guard

The honor guard at the Tomb of the Unknown Soldier
A very spectacular (and free) thing to do is watch how the honor guard does their ceremonial change at the Tomb of the Unknown Soldier and the Eternal Flame, situated in Alexander Garden, right next to the Kremlin wall. Every hour, from 8 am to 8 pm, the 1st Company of the Kremlin (Presidential) Regiment performs this rather old and beautiful tradition. But, be warned, it's often overcrowded.
3 pm – Enjoy a green oasis just in the center

Florarium in Zaryadye
Just a few steps from the Red Square, you will find the fabulous Zaryadye park. Opened in 2017, it is designed by renowned American architect bureau ‘Diller Scofidio + Renfro’. You can walk among the very cozy botanical decorations and explore Russia’s climate zones, as each of them is represented in dedicated areas, complete with flora from those zones.

The floating bridge in Zaryadye Park
The park also has an underground museum, an “ice cave” and a 3D cinema, where you can take part in a virtual adventure – a flight over Moscow! However, the piece de resistance is a floating boomerang bridge over the Moskva River, one of the best places to take a selfie.
You can also grab a quick lunch or relax with a cup of coffee or tea in the park.
7 pm – Arrange a ballet night

The Bolshoi Theater
Of course, the most fancy way to finish your day in Moscow would be to go to the ballet at the Bolshoi Theater (in a perfect world, to see ‘The Nutcracker’!). However, getting tickets to the Bolshoi is not an easy task and should be done well in advance of your visit.
But, don’t be upset if you don’t manage to get tickets to the Bolshoi. Moscow has dozens of other options to see a ballet (or opera). No less brilliant performances can be seen in the Stanislavsky and Nemirovich-Danchenko Music Theater or in The State Kremlin Palace (by the way, this is another way to get a quick glimpse inside the Kremlin!).
10:30 pm – Have a late dinner in a fancy restaurant

Dr Zhivago restaurant
There are not so many other cities with such a big choice of restaurants in a range of tastes and styles. In 2021, the authoritative Michelin guide announced their pick of the best of Moscow’s restaurants. And here’s our guide to all the places with Russian cuisine for any budget. But, if you happen to be in the area of the Bolshoi or Nemirovich-Danchenko Theater, then ‘Dr. Zhivago’ would definitely be a nice option (and it’s open around the clock).
DAY 2
9 am – grab a moscow coffee.

Winter festivities mood in Moscow
Moscow is definitely a coffee city! You can find coffee shops on every corner and they all offer a huge range of drinks. Try a ‘raf’ coffee, a sweet, creamy drink that was created in Russia, or dare to pick one of the very unusual offers, like cheese coffee or a Soviet candy style one (check out our coffee guide here ).
10 am – Take a river cruise

Winter boating along the Moskva River
Another exciting way to explore Moscow is to observe it from the water. Boats cruise along the Moskva River all year round. Most begin their route from the Hotel Ukraine, one of Stalin's ‘Seven Sister’ skyscrapers, and will bring you back to the same spot after passing the medieval Novodevichy Convent, Moscow State University and Luzhniki Stadium, the Cathedral of Christ the Saviour and giant monument to Peter the Great and many other sightseeings.
It’s always at optimum temperature inside the boat, which also has huge panoramic windows. Select boats also offer a full dining experience, so it is also a nice place to have breakfast or lunch.
If you are not a water person, then discover other, unusual sides of Moscow – pick one of the activities we’ve prepared for you here !
1 pm – Visit ‘Russia’ Expo and taste a bunch of Russian regional cuisines

Russia Expo at VDNKh
Until April 2024, the Soviet-era VDNKh exhibition park is hosting the huge ‘Russia’ expo, with tons of activities and expositions devoted to Russia, its culture, science and nature. Check out our special guide on what to do there!
An entire ‘House of Russian Cuisine’ has been opened at the expo. You will find 15 food stands with flagship dishes from Kamchatka, Siberia, Karelia and other regions of Russia. Imagine trying a range of cuisines and dishes in one place without even having to travel anywhere, be it Altai pelmeni, Tula kalach or Caucasian pies! A perfect place to grab some lunch.

House of Russian cuisines at VDNKh
The VDNKh exhibition park is a great place to visit, in general! Its pavilions are the perfect example of Stalinit Empire style architecture and you can almost feel as if you’ve traveled back in time! You will also find several interesting museums in the park – devoted to space exploration, Russian history and even a ‘Special Purpose Garage’, which showcases the various vehicles used by the country’s leaders.

'Sun of Moscow' wheel
And, finally, you can ride Europe's tallest panoramic wheel – ‘Sun of Moscow’ – that will give you panoramic views of the city – from a height of 140 meters!
5 pm – Ice skate with view & mulled wine

Ice skating rink on Red Square (GUM department store on the background)
Ice skating is one of the most popular and affordable activities in Moscow. There are several great ice skating rinks in picturesque locations that are open all winter long. One of the biggest rinks in Europe is also at the aforementioned VDNKh or you can visit the one in Gorky Park, another very popular Moscow spot, or the small, but fancy rink – right on Red Square!
All the parks offer ice skate rental, so the only things you need are warm clothes, a charged phone to record your memories and a good mood! Moscow also gets dark at 4:30 pm in winter and hundreds of lights are switched on, turning the city into a giant fairy tale!

A mulled wine with a view
And, if you are not a sports person, we’ve picked several other unusual activities that you could do in Moscow instead. For example, did you know that there is an entire district of dacha (countryside) houses, just 10 minutes from the center, surrounded by giant new highrises? How about taking a stroll there and feeling the early Soviet atmosphere?
8 pm – Warm up & laugh out loud
After all these outdoor activities, what could be better than a warm cozy bar with a hot drink and nice company? Moscow is a city full of entertainment for all tastes. So, if you know the Russian language or want to practice it, go to a theater or catch a stand-up comedy show. Moscow even has comedy shows in English, where you can hear both Russians speaking fluent English or foreigners (including Brits and Americans) who live in Russia speaking in broken or heavily-accented Russian (Check their show dates on the ‘ Moscow English Comedy ’ Telegram channel)!
11 pm – Finish by partying the night away!

Propaganda club in Moscow
Moscow never sleeps, as you might have heard. Which means there are plenty of bars and nightclubs where you can have a drink (or two or three; be sure to check out how Russians make Black Russian and White Russian cocktails) and chat with incredibly different people. Have fun and don’t miss your flight (or miss it and stay longer in the best city in the world!)!

That's it! See you soon in Moscow
Dear readers,
Our website and social media accounts are under threat of being restricted or banned, due to the current circumstances. So, to keep up with our latest content, simply do the following:
- Subscribe to our Telegram channel
- Subscribe to our weekly email newsletter
- Enable push notifications on our website
- Install a VPN service on your computer and/or phone to have access to our website, even if it is blocked in your country
If using any of Russia Beyond's content, partly or in full, always provide an active hyperlink to the original material.
to our newsletter!
Get the week's best stories straight to your inbox
- Tula: The best getaway from Moscow! (PHOTOS)
- 20 most interesting places in Moscow Region (PHOTOS)
- 10 things you should NEVER do in Moscow
This website uses cookies. Click here to find out more.
Shooter Files by f.d. walker
Street Photography Tips, Interaction, Travel, Guides
Apr 24 2017
City Street Guides by f.d. walker: A Street Photography Guide to Moscow, Russia

*A series of guides on shooting Street Photography in cities around the world. Find the best spots to shoot, things to capture, street walks, street tips, safety concerns, and more for cities around the world. I have personally researched, explored and shot Street Photography in every city that I create a guide for. So you can be ready to capture the streets as soon as you step outside with your camera!
At over 12 million people, Moscow is the largest city in Russia and second largest in Europe by population ( Istanbul is #1). An urban, cosmopolitan metropolis with more than enough glitz and glam to cater to the elite, but without losing its fair share of Soviet era roughness around the edges. It can be fast paced, brash, busy, and trendy like other big cities, but it has its blend of West meets Russia atmosphere and beauty that provides plenty of unique interest. The Red Square is as famous as it gets, but there’s so much more to this city, including the most beautiful subway system you’ve ever seen. It would take years to capture all of Moscow, but that means you have an endless amount of areas to discover.

So here’s a Street Photography guide so you can be ready to capture all that Moscow has to offer before you even arrive!
- Patriarch’s Pond
- Old Arbat Street
- Maroseyka Street
- Tverskoy Boulevard
Top 5 Street Spots:
1. red square.
The Red Square is the most famous square in not just Russia, but all of Eastern Europe. The name actually doesn’t come from the color of the bricks or communism, but from the name in Russian, Krásnaya, once meaning “beautiful” before its meaning changed to “red.” This large plaza is what you see on the cover of guide books and magazines for Moscow, with St. Basil’s Cathedral being the center piece next to Lenin’s Mausoleum surrounded by the Kremlin Wall. Of course, the Red Square attracts hordes of tourist due to the main attractions, but all that activity around an interesting atmosphere does provide street photo opportunities. It’s also the central square connecting to the city’s major streets, providing a good starting point to explore outward.

You’ll also find the popular pedestrian only Nikolskaya Street connecting the Red Square to Lubyanka Square. This line of expensive shops includes plenty of activity, while also leading you to another popular square. Filled with history rivaling any city, the Red Square and surrounding areas are the heart and soul of Russia.

2. Patriarch’s Ponds
Patriarch’s Ponds is one of the most exclusive neighborhoods in Moscow. Despite the name being plural, there’s only one large pond, but it’s worth a visit with your camera. It’s a popular spot for locals and expats to come relax or take a stroll around the pond. You get an interesting mix of young and old too, from young love to “babushkas” feeding pigeons. It’s a very peaceful park atmosphere in one of the nicer areas within the city center, while bringing enough activity for street photography.

The pond is shallow and in the winter becomes a popular spot for ice-skating too. The area is also well-known for the location in the famous Russian novel, The Master and Margarita.
3. Old Arbat (Stary Arbat)
Old Arbat is the most famous pedestrian street in Moscow, and dating back to the 15th century, also one of its oldest. Originally, it was an area of trade, but soon became the most prestigious residential area in Moscow. During the 18th century, Arbat started attracting the city’s scholars and artists, including Alexander Pushkin. Cafes lined the streets and impressive homes filled the neighborhood. Since then, New Arbat street was created as a highway in the area, while Old Arbat was paved for a 1km pedestrian only walkway.

Due to the historic buildings, famous artists that lived here, and the bohemian atmosphere, Old Arbat has become a big attraction for tourists today. Now, there’s a mix of cafes, restaurants, souvenir shops, street performers, street merchants and other attractions for visitors, and some locals, to come enjoy. It can get really busy here and there’s usually something interesting going on so it’s a good street to come walk with your camera for guaranteed life.
4. Gorky Park
One of the most famous places in Moscow is Gorky Park. The official name is Maxim Gorky’s Central Park of Culture & Leisure, which gives you an idea of what goes on here. When built, it was the first of its kind in the Soviet Union. Divided into two parts, it stretches along Moscow River. One end contains fair rides, foods stands, tennis courts, a sports club, a lake for boat rides, and more. This end brings more active life due to its number of attractions, while the other end is more relaxed, where you’ll find gardens, trees, older buildings, and an outdoor amphitheater.

Gorky Park attracts mostly locals so it’s a good spot to capture the non-tourist side of Moscow life. Muscovites come here to escape the city and unwind in a picturesque setting. The park remains alive outside of the warmer months too, especially when the lake turns into the city’s largest outdoor skating rink. I’d recommend taking the metro out here to spend at least half a day exploring the massive park’s life with your camera.
5. Maroseyka Street
Maroseyka Street is a popular area not too far from the Red Square. The long, winding street turns into Pokrovka and is lined with restaurants, cafes, bars and places to stay. It’s actually where I like to stay when I’m in Moscow due to its location and solid street photography opportunities itself. You have Kitay-gorod station near and if you keep walking southwest, you’ll get to the Red Square. But if you walk northwest, as it changes to Pokrovka, you can find a long street of activity for photography with its own interesting atmosphere.

6. Tverskoy Boulevard
Tverskoy Boulevard is the oldest and longest boulevard in Moscow, beginning at the end of Nikitsky Boulevard, and finishing at Pushkin Square, a spot to come for activity itself. The boulevard is made up of two avenues, with pedestrian walkways in-between. You’ll find grass, shrubbery, trees, benches and more walking it’s almost kilometer length. Many people come here to enjoy some relaxation, walk their dog, or just to use it to walk wherever they’re going. Its center location also provides a nice place to walk with your camera near plenty of other spots you’ll want to check out anyway.
Sample Street Walk:
For a full day of Street Photography, covering some of the best spots, you can follow this sample street walk for Moscow:
- Start your morning walking around the Red Square (1), while exploring the surrounding area, including Nikolskaya Street
- Then walk northwest to Patriarch’s Ponds (2) and slowly walk the pond and surrounding area with your camera
- Next, walk east to the Pushkin Monument and stroll down Tverskoy Boulevard (6)
- Once Tverskoy Boulevard (6) ends, it will turn into Nikitsky Boulevard. Follow this down until you get to the start of Old Arbat Street (3), across from Arbatskaya station
- After you’re done walking down Old Arbat Street (3) for more street photography, spend some time checking out Moscow’s beautiful metro stations
- To finish off the day with more street photography, get off the metro near Red Square (1) again, Maroseyka Street (5) or wherever you’re staying for the night.

3 Things I’ll Remember about Shooting in Moscow:
1. museum metro.
The Moscow metro system was the first underground railway system in the Soviet Union and today includes 203 stations across 340km of routes. The elaborate system has some of the deepest stations in the world too, with escalators that seem to go on forever. None of this is what makes it so special, though. Many of its stations feel like stepping inside a museum, making it without a doubt the most interesting and beautiful metro system I’ve been in.

When built, Stalin wanted to make the metro stations “palaces for the people” with marble, chandeliers, and grand architecture. The best part is the variety of architecture and styles used, making many of the stations a completely different experience visually. You could easily spend a whole day traveling the stations and there are even tours available for people who wish to do just that. My advice, though, would be just to buy a ticket and hop on and off at different stations, while exploring different lines. The museum-like surrounding mixed with the crowds of characters can make for a great photography experience.

Since there are so many stations, here are some of my favorites to check out:
- Novoslobodskaya
- Mayakovskaya
- Elektrozavodskaya
- Komsomolskaya
- Ploschad Revolyutsii
- Dostoyevskaya
- Prospekt Mira

2. Moscow is Big
It’s no secret that Moscow is a big city, but it can feel even bigger with how spread out much of it is. This is especially true if you compare it to cities outside of Asia. If I compared it to cities in Europe, I’d probably say only Istanbul would warrant more time to really discover the depths of this city. Most only explore around the Red Square and surrounding area, but that is such a small part of the city. Although, that central area does give you plenty to see on its own.

Fortunately, I had a good friend living in the city to show me around, but it opened up my eyes even more to how much there is to discover in Moscow. It’s a big city with a variety of atmosphere that can take you from “east” to “west” and trendy to rugged depending on where you go. I’d imagine you’d have to live here a while to really know the city.
3. Cosmopolitan Mix of East meets West
Modern skyscrapers mixed with amazing architecture, a world-class metro system with museum-like beauty, trendy fashion and chic clubs, Moscow is a rich mix of Russian culture and history in a more western cosmopolitan package. There is a push to keep the Russian culture, while also pushing forward with a modern metropolis the whole world will envy. This comes with an impressive skyline, that continues to grow, and endless modernities, but with soviet nostalgia and atmosphere mixed in for good measure.

Mixed in with this grand western cosmopolitan atmosphere, is a strong national pride in Russia. This includes their famous leader, Vladimir Putin. Maybe no other place will you see a country’s leader more often. All over, from the pricey tourist shops to the underground walkway stalls, you’ll find goods with Putin’s likeness covering them. From t-shirts to magnets to Matryoshka dolls. There’s a strong national pride that can be seen around the city, which also extends to their leader. Moscow is many things. It’s East meets West, modernizations meets Soviet era, and a whole lot more.
What To Do For a Street Photography Break?:
Eat at a stolovaya.
Stolovayas are Russian cafeterias that became popular in the Soviet days. You grab a tray and walk down the line of freshly prepared local dishes, and select whatever you want from the chefs. They’re usually inexpensive and a much better value than restaurants, while giving you the opportunity to try from a wide selection of everyday Russian food. They’re also very tasty. I always include some borsch on my tray and go from there. The places themselves are all over Moscow and usually come with Soviet-era aesthetics to complete the experience.

Street Safety Score: 7
*As always, no place is completely safe! So when I talk about safety, I’m speaking in general comparison to other places. Always take precaution, be smart, observe your surroundings and trust your instincts anywhere you go!
Being the 2nd largest city in Europe with over 12 million people, you’re going to have your dangerous areas, but for the most part, it feels safe walking around. Russia is statistically higher in crime compared to most of Europe, but this generally doesn’t apply to tourists and visitors. Around the Red Square and surrounding city center, you should feel completely safe walking around. Pick pocketing can happen, but no more than other touristic places. I always explore Moscow freely without coming across too much to worry about. It’s a spread out city, though, so of course it matters where you are. Just use basic street smarts, know where you are and Moscow shouldn’t give you a problem.

People’s Reaction Score: 7
Moscow is fast paced, big city life, which usually means people aren’t too concerned with you, or your camera. I don’t find people notice or pay much attention to me when I’m out taking photos in Moscow. For the most part, people just go about their day. You shouldn’t get too many looks or concern. But it can depend on the area you are in. The more you stick out, the more you might get noticed with suspicions. I’ve never had any problems in Moscow, or Russia, but just be careful who you’re taking a photo of if you get out of the city center. Other than that, it’s about average for reactions.

Street Tips:
Learn the alphabet .
Much of Moscow, including the metro system, doesn’t use english. The Russian alphabet uses letters from the Cyrillic script, which if you aren’t familiar with it and don’t know the sounds, can be hard to decipher the words. This is most important for street names and metro stops when trying to get around. It can save confusion and make it easier getting around if you learn the basic alphabet. At the very least then, you can sound out the words to see which are similar in the english conversion, which can help matching them to maps. When out shooting street photography, getting around is as important as anything. So save yourself some time and frustration by learning the Russian Alphabet.

Use the metro
While Saint-Petersburg feels very walkable for a city its size, Moscow can feel very spread out, even for its bigger size. Outside of the Red Square area, you can have plenty of walking before getting anywhere very interesting, so you’ll need to take the metro a lot if you really want to explore the city. Maps are deceiving here too, it will always be further than it looks.

Another reason it’s less walkable than Saint-Petersburg is its completely different set-up. Moscow’s streets are mostly contstructed in rings with narrow, winding streets in-between. This is common with medieval city cities that used to be confined by walls, but you usually don’t have it in a city this massive. Saint-Petersburg has a more grid-like pattern that also uses the canals to help you know your way around. When it comes to navigating on foot in Moscow, it can be more difficult, so bring a map and take the metro when needed. It’s why Moscow’s metro carries more passengers per day than the London and Paris subways combined.
Explore other areas if you have time
Moscow is really big. While most people stay around the Red Square within the Boulevard Ring, there’s so much more to the city. I covered some other spots outside of this circle, but if you really want to see the city, you’ll need time. If you do have time, some other areas I’d check out first are Zamoskvarechye, along some of the south and western Moscow.

Inspiration:
For some more inspiration, you can look through the Street Photography of Moscow photographer Artem Zhitenev and check out 33 of my photos taken in Moscow .
Conclusion:
Moscow’s name brings a certain mystique, but once you’re there it might bring a different atmosphere than you expect. It’s big and sprawling, but beautiful in many ways. It can feel like a European capital on a grand scale, but you can definitely find its Russian side in there.

The urban sprawl of Moscow can be intimidating, but give it enough time and you’ll be rewarded with plenty to discover. All with the world’s best metro system to take you around.
I hope this guide can help you start to experience some of what Moscow contains. So grab your camera and capture all that Moscow has to offer for Street Photography!
If you still have any questions about shooting in Moscow, feel free to comment below or email me!
(I want to make these guides as valuable as possible for all of you so add any ideas on improvements, including addition requests, in the comment section!)
Click Here For More City Street Guides!
(A New Guide Posted Every Other Wednesday)

Comment Here! Cancel reply
For patreon exclusive educational content:.

Limited Edition Postcard Prints!
Street Photography Workshops
Donations Always Appreciated
I'll always keep Shooter Files free for everyone, but any donations would be greatly appreciated and help me keep it going. Many thanks to everyone following along!
Cheers! -f.d. walker
Search the Files

For Exclusive Patron Content:
IMAGES
VIDEO
COMMENTS
Area 1[ edit] Safari Zone - Area 1. In Area 1, the Poké Ball on the ledge contains a Carbos. To the left of the house nearby, you will find a Full Restore. On the patch of ground that extends into the lake, a TM 37 can be found in the grass. And close to the entrance to Area 2 there's a Max Potion on the ground. Red.
Throw Bait. Halve C and round it down. Set R = 0. Increase B by a random number between 1-5, up to a maximum of 255. When you throw a Safari Ball, your catch chance is then: min (C + 1, 152) × 86 ÷ 256 ÷ 151. This is derived from the formula in the catching mechanics section for throwing a Safari Ball at a Pokémon with full HP.
Throwing a Ball. Capturing in the Safari Zone follows the regular R/B/Y capture algorithm, though since neither the Pokémon's HP nor its status can be affected and the only balls available are Safari Balls (identical to Ultra Balls), a lot of things are abstracted out in the Safari Zone. Unfortunately, thanks to the game's flawed RNG, Safari ...
Area 3. In the entrance gatehouse to the Safari Zone, pay the requisite ₽500 to enter and receive 30 Safari Balls before heading inside the Safari Zone proper. In Yellow Version, if you bother the attendant here, he will allow you to enter the Safari Zone even if you don't have ₽500. Instead, he will take all your remaining money and give ...
Head out the other door, and head north from the stairs. Go all the way down the passageway and pick up the Rare Candy first. Backtrack to the adjacent room and flip the switch. Go back down and you'll see the door has opened. Pick up TM22 - Solarbeam on the table, and then pick up the Secret Key directly south of it.
Entrance. Enter the safari and head to the northeast to reach the second area. Area 1. Climb onto the larger rocky ridge to the south and pick up the Carbos.Head west to reach several patches of tall grass, TM37 on the edge of a lake, and a Max Potion to the northwest. Collect the Full Restore near the rest house and take the northeast exit.. Area 2
KODYS KICK ASS WALKTHROUGH- In this video I'll go through the Safari Zone (hence the title) and get the HM Surf.
This is an in-depth walkthrough for Pokémon Red and Blue for the ... not Pokémon FireRed and LeafGreen. The guide for those games can be found here. Contents Main Storyline; Part 1: Introduction, Pallet Town: ... Fuchsia Gym, Safari Zone: Part 12: Route 12, Route 13, Route 14, Route 15, Route 19, Route 20 (East), Seafoam Islands, Route 20 ...
Find The Golden Teeth!Twitter Page: http://twitter.com/GCPM11
Located to the northeast of Area 1. Kangaskhan 4%, Scyther (Red only) 1%, Pinsir (Blue only) 1%, Parasect 5%. Area 3. Located to the northwest of the rest house in Area 2. Tauros 1%, Chansey 4%, Rhyhorn 15%, Dratini 25%. To catch Dratini and the other high-value aquatic Pokémon in this area, use a Super Rod. Area 4.
Explore Fuchsia City, the home of the Safari Zone and the Poison-type Gym, in this classic Pokemon guide. Learn tips and tricks to catch rare Pokemon and defeat Koga.
Pokémon Red and Blue/Safari Zone. The Safari Zone is a large area located north of Fuchsia City. It contains many Pokémon that cannot be found anywhere else. You must pay a fee of •500 every time you enter the Safari Zone. You are given 30 Safari Balls, and are released into the Zone. When you throw your last Safari Ball, you are ...
Here is a quick tutorial on how you can easily catch all of the rare Pokemon from the Safari Zone in Pokemon Red & Blue. And here are some helpful maps of th...
Speak to the gate attendants to receive 30 Safari Balls. To catch any wild Pokémon you find, toss Safari Balls at them. Often you'll have to throw food or rocks...
The Kanto Safari Zone (Japanese: サファリゾーン Safari Zone) is a special Pokémon preserve in Kanto that Trainers can enter to catch wild Pokémon. It is owned by Baoba.. For $ 500, the player can play the Safari Game (Japanese: サファリゲーム Safari Game) and receive 30 Safari Balls.Trainers are limited to 500 R B Y /600 FR LG steps in the Safari Zone before the Game is over.
Pokémon Blue (Intl.) / Pokémon Green: Nidoran♀: Exeggcute: Rhyhorn: Venonat: Nidorina: Nidorino: Parasect: Pinsir: Chansey: 25%: 20%: 15%: 15%: 10%: 5%: 5%: 4%: 1 ...
Description Of Safari Zone: The Safari Zone is a wildlife preserve found in Fuchsia City, and a place to go where players can go to catch many different Pokemon. Some of these Pokemon are found thoughout the game, but a few species can only be found here. Bait can please a Safari Pokemon as a rock will anger it, both, surprisingly, make them ...
Each section of the walkthrough is dedicated to an area in the world of Pokémon Red, Blue and Yellow, and will include the following information: Map: An annotated screenshot of the area, taken from the Yellow Version of the game. The areas from the Red and Blue Versions can have very minor differences in their layouts and design, but not ...
The Metro is very centralized. The brown-colored 1 Koltsevaya ('circular') line forms a ring around the central zone and central stations. (It follows Moscow's above-ground's circular highway, the Garden Ring, which was built over the old city ramparts.) The Metro's radial layout means people coming from outer stations have to travel ...
The mechanics of the Safari Zones are similar to each other. Most have a $ 500 entry fee, a step limit, a series of distinct areas with different wild Pokémon in each, and 30 Safari Balls, with which players may catch the Pokémon they come upon. The most important of their specific mechanics, however, is that Trainers do not initiate Pokémon battles with the wild Pokémon, but instead must ...
The Patriarch's Ponds (aka Patriki) is a historical neighbourhood, celebrated in Mikhail Bulgakov's novel Master and Margarita. Located right off Tverskaya street, Moscow's main thoroughfare, Patriki recently became the city's most happening quarter. It has some of the most elegant architecture, including several buildings by art ...
And, finally, you could also make a quick visit to the Moscow Kremlin Museums and admire artifacts from various Russian tsarist eras: carriages, thrones, crowns and the most incredible armory and ...
This large plaza is what you see on the cover of guide books and magazines for Moscow, with St. Basil's Cathedral being the center piece next to Lenin's Mausoleum surrounded by the Kremlin Wall. Of course, the Red Square attracts hordes of tourist due to the main attractions, but all that activity around an interesting atmosphere does ...