CDL Pre-Trip Inspection Checklist
Studying this Class-A CDL pre-trip inspection checklist is an important part of truck driver training. Before getting your Class-A CDL and finding an entry level truck driving job , most states will require students to pass a DOT (department of transportation) pre-trip inspection test and a general knowledge test .
Each company’s pre-trip inspection varies slightly. Most likely you will have to do the coupling system, light check and in-cab inspections plus one of the remaining three sections.

Pre Trip Inspection Checklist
Download free and print it! Printable Pre Trip Inspection Checklist (PDF)
There are many sections to learn but the test is not as difficult as it may seem. Studying our simplified Class-A pre-trip inspection checklist and taking classes at your local CDL training school will get you prepared.
Engine Compartment
Driver door fuel area, coupling area, light check, in-cab inspection and brake tests, belt driven alternator, belt driven water pump, brake chamber, brake lining, caste nuts and cotter pins, coolant reservoir, gear box and hoses, gear driven air compressor, gear driven power steering pump.
- General Hoses
Leaf Springs
Power steering fluid reservoir, shock absorber, slack adjuster and push rod, spring hanger, steering column, what to check for:.
When checking the engine compartment, you will always want to make sure the following components are properly mounted and secured. You should also make sure they are not cracked, bent or broken. The items you will need to check for include:
- Make sure all of the wires are connected. The belt should not be cracked or frayed and the free play on the belt should be between ½ to ¾ of an inch.
- The free play on the belt should be between ½ to ¾ of an inch. Also check all the hoses running to and from the water pump to make sure nothing is leaking.
- The brake chamber should not be leaking air.
- The brake drum should be properly mounted and secure.
- The brake hose is rubber, so it is important to make sure it is not leaking air.
- Check for oil or debris on the lining. There should be at least ¼ of an inch of friction material.
- Make sure all three caste nuts and cotter pins are present.
- The reservoir should not leaking and must be filled to the manufacturer’s specifications.
- Make sure the drag link is properly mounted and secure, and not cracked, bent or broken.
- The gear box and hoses should have no abrasions, bulges or cuts, and should not be leaking.
- Although the air compressor is hard to see, you must make sure it is properly mounted and does not leak.
- The steering pump is located in the same place as the air compressor and is also gear driven. Ensure the steering pump is not leaking.
General Hoses (Passenger and Driver’s Side)
- The hoses should be secure at both ends. There should be no abrasions, bulges or cuts. Fluids run through these hoses, so it is important to make sure they are not leaking.
- The hub seal (or axle seal) should not be leaking and should be filled to the manufacturer’s specifications.
- Make sure none of the leaf springs have shifted.
- Check for leaks under the truck.
- There should be no lug nuts missing. Look for rust trails, powder residue and cracks around the bolt holes.
- The oil level should be filled to the manufacturer’s specifications.
- Make sure the pitman arm is properly mounted and secure. It should be not cracked, bent or broken.
- Make sure this reservoir is not leaking and filled to the manufacturer’s specifications.
- The rim cannot have any unauthorized welds.
- Make sure the shock absorber is not leaking. If it is leaking, the leak will be at the point where the top and bottom portion of the shock meet.
- With the brakes released and pulled by hand, the push rod should never move more than one inch.
- The spring hanger should be properly mounted and secure.
- Make sure the steering column is properly mounted and secure. It should not be cracked, bent or broken.
- Look for abrasions, bulges or cuts on the tread or sidewalls. Tread depth should have a depth no less than 4/32 of an inch. Tires must be properly filled to the manufacturer’s specifications. This can be checked with an air gauge.
- Make sure the tie rod is properly mounted and secure, not cracked, bent or broken.
- Make sure all are accounted for.
Back to top of Engine Compartment
Catwalk and Steps
Door and hinges, drive shaft, exhaust system, frame and cross members, spring mount.
Again it is important to make sure these items are properly mounted and secure. Look for cracks, bends, and breaks.
- The actual airbag is rubber, so it is important to check for abrasions, bulges, cuts and leaks, in addition to any missing mounting bolts.
- The axle seal should not be leaking and should be filled to the manufacturer’s specifications.
- Make sure to mention the brake chamber is not leaking air.
- Make sure the brake drum is secured properly. Also look for cracks, bends and breaks.
- Check the brake hose at both ends to make sure it is not leaking air.
- There should be no oil or debris on the brake lining. There should be at least ¼ of an inch of friction material.
- The cat walk and steps should be clear of any loose objects.
- Physically demonstrate that the doors open, close and latch properly. Door seals should not be worn, torn or rotten.
- The drive shaft should not be twisted and the u-joints should be free of any debris.
- The tread and sidewalls should have no abrasions, bulges or cuts. The tread depth should be no less than 2/32 of an inch. Tires should be properly filled to the manufacturer’s specifications. This can be checked with an air gauge.
- The exhaust system should show no signs of leaks.
- There should be no unauthorized holes or welds. Bundle up the cross members to ensure none are missing.
- Fuel should not be leaking from the tank and the cap should always be on tight.
- Rust trails could indicate loose bolts, while powder residue and racks around the bolts could mean the bolts have been over-tightened.
- Mirrors should be clean for best visibility.
- Make sure the mud flap is secured properly. Also look for cracks, bends and breaks.
- Make sure to mention there should be never be any unauthorized welds.
- The shock absorber should be secure at both ends and not leaking. If it does leak, it will leak in the middle.
- With the brakes released and pulled by hand, the push rod should not move more than one inch.
- If you are equipped with duals, check to see there is proper spacing between the tires and there is nothing stuck.
- The spring arm should be secure at both ends.
- The spring mount should be secure at both ends.
- Make sure the torque arm is secured properly. Also look for cracks, bends and breaks.
- Make sure to check and mention that no U-bolts are missing.
Back to top of Driver Door Fuel Area
Electric Line
Locking jaws, mounting bolts, release arm, sliding fifth wheel locking pin.
- Air lines should be secure at both ends with no abrasions, bulges or cuts. They should not be leaking, dragging or tangled.
- Make sure the apron is properly mounted and secure. Look for cracks, bends and breaks.
- Make sure there is enough space between the tractor mudflap and the trailer landing gear so that they don’t hit each other when making a turn.
- The electric line should be secure at both ends. There should be no abrasions, bulges, cuts or exposed wires.
- The gap is not an actual item, however there should be no space between the apron and the skid plate.
- The seals should be in good condition with no cracks, signs of rotting, or leaking air.
- Make sure the king pin is properly mounted and secure. Look for cracks, bends and breaks.
- You must physically check that the locking jaws is fully locked around the king pin.
- No mounting bolts should be missing.
- Make sure the platform is properly mounted and secure. Look for cracks, bends and breaks.
- The release arm should be in the fully locked position.
- The skid plate needs to be properly lubed.
- The pin must be in the fully locked position.
Back to top of Coupling Area
Header Board
Landing gear, rear door and hinges.
- Shock Absorbers
Tandem Frame and Release
Trailer tire.
- Again make sure the airbag has no abrasions, bulges, cuts or leakings. The airbag should not be missing any mounting bolts.
- The brake chamber should be properly mounted so that is does not leak air.
- The brake hose should be secure at both ends with no abrasions, bulges, cuts or leaks.
- Check for oil or debris on the brake lining. There should be at least ¼ of an inch of friction material.
- There cannot be any missing cross members.
- The header board cannot have any holes or missing rivets.
- The landing gear must be fully raised and the cradle handle secure.
- Rust trails indicate loose bolts. Powder residue and cracks around the bolt holes could be an indication of over-tightened bolts.
- The rims cannot have any unauthorized welds.
- The rear door should open, close and latch properly. Door seals should not be worn, torn or dry rotten.
- The shock absorber should be checked at both ends for leaks.
- When the brakes are released and pulled by hand, the push rod should not move more than one inch.
- Release handle and locking pins should be in the fully locked position.
There should be no abrasions, bulges or cuts to the tread or sidewalls. Tread depth should be no less than 2/32 of an inch. The tire should be properly filled to manufacturer’s specifications and checked with an air gauge.
- Front of the truck
- Both sides of the truck
- Rear of the truck
- Both sides of the trailer
- Rear of the trailer
Back to top of Trailer
The five functions are:
- Left turn signal
- Right turn signal
- Four way flashers
- High/low beams
- Brake lights
Back to top of Light Check
- Airbrake Test
Air Pressure Gauges
Emergency equipment, heater and defroster, lighting indicators, oil pressure gauge, parking brake, service brake check, water temperature gauge, windshield and mirrors, windshield wipers and washers.
The last section is In-Cab Inspection and Brake Tests. For the In-Cab Inspection you will once again want to make sure all of the following components are properly mounted and secure. As well as the following:
Air Brake Test
There are three stages to an air brake test:
- Applied Pressure Test – When doing the Applied Pressure Test, you will want to build the air pressure to governor cut out. Put the truck in the lowest gear, turn the engine off and immediately turn it back on. Push in the tractor and trailer valves which will then release the parking brakes. Push and hold the brake pedal, allowing the gauges to stabilize. When the gauges have stabilized, announce the Primary and Secondary PSI. Listen for air leaks while doing this.
- Warning Light and Buzzer – Pump down on the brake pedal until the warning light and buzzer comes on. This is typically at or before 60 PSI.
- Tractor/Trailer Protection Valve Pop Out – Pump down on the brake pedal until the tractor and trailer protection valves pop out, this will be between 20 and 40 PSI.
- The air pressure gauges should build to governor cut out.
- Your truck should have a fire extinguisher, three red reflective triangles and spare electrical fuses.
- Demonstrate both the heater and defroster are working properly.
Horns (Air Horn and City Horn)
- Blow both horns to make sure they are working.
- Check the left turn, right turn, four way flashers and high beams; also point these out on the dashboard.
- Make sure transmission is in neutral and then fully depress the clutch. Turn the key on, check the ABS light, announce when it comes on and off, and start the engine.
- The seat belt should not be ripped or frayed and should adjust and latch properly.
- The engine oil pressure gauge should rise to normal operating range.
- Trailer Parking Brakes – Set the trailer brake, release the tractor brake, then tug lightly on the trailer.
- Tractor Parking Brakes – Set the tractor brake, release the trailer brake and tug lightly on the trailer.
- Release both the tractor and trailer brakes. Drive at idle speed. Apply the service brake to make sure you come to a complete stop and that it doesn’t pull to the left or right when applying the brakes.
- The voltmeter should be charging between 13 and 14 volts.
- The water temperature gauge should also rise to normal operating range.
- The windshield and mirrors must be clean, with no obstructions and in proper adjustment.
- Demonstrate the wipers and washers are working properly by spraying the windshield.
Back to top of In-Cab Inspection and Brake Tests
During a CDL pre-trip inspection, truckers inspect many aspects of their commercial vehicle, including the overall safety of the vehicle; major hoses, fluid levels, and vehicle belts; the clutch or gear shift; and emergency equipment. The driver demonstrates their knowledge by walking around the vehicle, checking various safety components and explaining why each part should be checked for safety.
Reference and practice tests:
- Printable Pre Trip Inspection Checklist (PDF)
- CDL General Knowledge Practice Test
- Pre Trip Inspection Practice Test
- CDL HAZMAT Endorsement Practice Test
Edited for 2024 on 12/5/23
Best Free CDL Pre-Trip Inspection Checklist | Trucker Safety & Profit

Brian Smith
October 9, 2023

The indispensable CDL pre trip inspection checklist is one of the most important rituals of a driver's day. Industry veterans know this routine like the back of their hands—it's that vital to the trade— but new drivers struggle with how to remember their CDL pre trip inspections, especially for the exam.
Drivers are required to complete this walkthrough at least every 24 hours, after their mandatory 10-hour break. A detailed inspection can safeguard not only your safety but also that of everyone else on the road.
This article will walk you through an exhaustive checklist to follow before every trip, as well as the potential costs of not doing so. We've designed this list with YOU in mind, so we're throwing in some money-making tips that will help you avoid steep fines and costly repairs.
"Spotting and fixing vehicle defects early on keeps you safe and your truck in good shape."

Why Following the CDL Pre-Inspection Checklist is So Important
The price of a failed DOT inspection makes completing a thorough CDL pre trip inspection checklist even more pressing. Violations can cost carriers thousands each year in both penalties and out-of-service (OOS) trucks. According to the FMCSA, around 20% of vehicles are OOS due to failed inspections at any given time. For an owner-operator, this means you'd be paying thousands in vehicle payments on a truck that's not earning you any money.
The pre trip checklist is designed to avoid any possible accidents due to equipment failure and failed safety inspections. A few minutes of caution pays for itself ten-fold down the line.
DOT & Truck Inspection
- Steer Axle/ Rear Suspension
- Side of Cab
- Rear of Cab
Driver Shaft/Rear Frame
- Trailer Front/Side/Rear- Trailer Suspension
Gauges/Inner Truck
- DVIR form fill out
"Most pre-trip truck inspection lists cover safety. We go beyond that with time and money-saving tips in our pre-trip inspection checklist PDF." - Brian Smith, Director, Global Marketing of Cota Systems
- Get the Google Sheet
- Download the Printable PDF
General Tips Throughout Your Pre-Trip Inspection
Because you don't have access to a pre trip inspection checklist during the CDL exam, drivers have created a few tricks to pass this part of the test. The most common memorization tricks are:
BBC: Is any plastic or metal bent, broken, or cracked?
CDL: No hard materials should be cracked, damaged or loose.
ABC: Are there any abrasions, bulges, or cuts on the rubber?
PFL: Peak for leaks in fluid and air containers.
PMS: Are bolts properly mounted and secure?
ABCDF: Do you see abrasions, bulges, cuts, dry rot, or frays?
A bit of common sense will help you put these acronyms to good use. For example, there's no way BBC would apply to rubber, as rubber wouldn't be bent, cracked, or broken. Most drivers pick one for each material type and stick with it until they get more comfortable with the list.
What are the ABCS in a pre-trip inspection?
As mentioned above, the ABCs refer to Abrasions, Bulges, and Cuts to check for during the Class A CDL pre-trip inspection. This applies to rubber or soft surfaces - things like tires, hoses, and rubber bushings.
How Long Should a Proper CDL Checklist & Inspection Take?
Ideally, it takes 15-30 minutes to run through the CDL pre trip inspection checklist depending on experience level and whether or not any issues are found. If issues are found, they must be fixed right then, before taking any more loads.
The cost of preventative maintenance averages $15,000 per truck per year. This figure is a drop in the bucket compared to the cost of inoperable equipment. Breakdowns and crashes due to mechanical failure cost carriers billions industry-wide. Consider an owner-op paying $3,500 per month on insurance and loan payments. Those payments still have to be made regardless of whether the truck is in the shop or on the road. Adds up quickly right? Spending a bit of extra time and money on prevention keeps trucks on the road and earning money.

Get your Free CDL Pre-Trip Inspection checklist today!
Standard cdl pre trip inspection checklist.
Our pre-trip inspection Class A checklist serves two purposes: helping new drivers pass this portion of the CDL exam, and guiding CDL holders through the process with 100% accuracy every time.
A few exam tips before the pre-trip checklist:
- Point to or physically touch each area being inspected. This will help your memory and prove you know your stuff.
- Start with a big section and break it down into small sections from left to right like reading a book.
- During the test, make at least 2 checks for every item or area.
▢ Hoses: all hoses should be secured on both ends with no splits or cuts
▢ Fluids: engine oil, washer fluid, coolants, and power steering
▢ Belts: no more than 1/2"" to 3/4"" of give, securely mounted with no fraying ends
▢ Alternator: securely mounted, belt in good shape
▢ Water pump: properly mounted with no split or leaking hoses
▢ Air compressor: securely mounted, no visible or audible leaks
If Left Unchecked:
Oil leaks and coolant issues are two of the most common breakdown causes, both of which can be spotted during pre-trip. Scheduling dry maintenance every 10,000-25,000 miles and wet maintenance every 25,000-50,000 miles can prevent most engine issues. These regular services, ranging from $50-$450 , are nothing compared to the price of replacing or rebuilding an engine - $20,000 - $40,000 . Thorough pre-trip inspections are the best way to avoid engine breakdowns and escalated damage.

▢ Brake Pads: ¼ minimum brake pad thickness
▢ Slack Adjuster: 1” of play and at a 90' angle to the brake chamber
▢ Brake Chamber : no audible leaks or visible damage
▢ Brake Hose: securely mounted, no audible leaks, splits, or cuts
▢ Brake Drum: no bluing from excessive heat, securely mounted
Brake problems are the most common cause of semi-truck accidents . While over-breaking is a big player in this, a lack of maintenance and unnoticed airline damage usually play roles, too.
Brake pad replacement costs $150-$300 per axle ($750-$1,500 total) and $80-$160 per hour in labor. The consequences of brake failure are incalculable - body repairs, cargo damage, and strikes to your carrier safety rating will follow you. The last thing you want to deal with is higher insurance premiums or trouble getting placed on loads. Take this part of your pre-trip inspection extra seriously.

- Front: clearance lights, headlights, high beams, turn signals, flashers
- Sides: turn signals, flashers, clearance lights
- Rear: tail lights, brake lights, left turn, right turn, 4-way flashers
- Front: clearance lights
- Rear: clearance lights, tail lights, license plate lights, brake lights, turn signals, flashers
▢ Reflector Tape: clear, free of dirt
If Left Unchecked:
Fines for a headlight out vary from state to state, but the consequences of non-functioning brake lights or turn signals could confuse drivers and create unsafe situations. Both of these can be spotted and fixed during a pre-trip inspection. It's easy to run to the shop and change the light yourself if possible. License plate bulbs are just a few cents, and headlight kits range from $40-$250 . Don't add the price of a ticket on top from getting pulled over!
On the topic of lights, it's important to note that warning lights like the engine light or battery alert light should be addressed immediately to avoid developing into bigger issues down the road.

▢ Wheel inside: not broken, no illegal welds
▢ Wheel outside: no cracks or illegal welds
▢ Tires: no cuts or bulges, air gauge matches manufacturer recommendations, tread depth at least 4/32" and evenly worn
▢ Spacing: duals are properly spaced
▢ Valve Stem: not audibly leaking. metal cap in place and secure
▢ Lug Nuts: present, tight, no cracks
▢ Hub Seal: not cracked or loose
Tire problems cause 8,000 truck accidents per year. While flats are sometimes unpreventable, blowouts can be caused by improper inflation , which can also shorten the lifespan of your tires via irregular wear and tear. Timely alignments and rotations can also keep tires running longer; the price of new big rig tires is from $250 to $600 . A tire blowout mid-load can make you miss your appointment and waste precious driving hours - all the more reason to be thorough in your truck inspection.
Something to keep in mind is the way you conduct your pre-trip checklist is important. For example, there are a lot of videos and content showing truckers how to check their tires by kicking, beating, and even using a hammer. Hitting a tire with force like that, in the right spot (damaged) can lead to a blow-up and severely injure you and your truck. Even lugging around a damaged tire can lead to a blow-up . Stay safe and take all necessary precautions!

Steer Axle/Rear Suspension
▢ Steering Shaft: not BBC, securely mounted
▢ Steering Gear Box: not BBC, securely mounted, no visible leaks
▢ Hose: no visible leaks, properly mounted
▢ Pitman Arm: not BBC, securely mounted, nuts and pins are all hardware is present and secure
▢ Drag Link: rubber is in good shape, bushings are properly greased and not split or cut
▢ Upper/Lower Control Arms and Tie Rod: not BBC, securely mounted
▢ Spring Mounts: not BBC, securely mounted
▢ Leaf Springs: not BBC, securely mounted, not shifted or scissored
▢ U-bolts: not BBC, securely mounted, all accounted for
▢ Shock Absorber: not BBC, securely mounted, no visible leaks, rubber bushings aren't dry rotting
If Left Unchecked:
On their own, each of these parts isn't a huge deal to replace. For example,
- Steering Shafts: $100-$300
- Pitman Arms: $50-$200
- Steering Gear Box: $150-750
- Shock Absorber: $50 - $90
On the other end of the spectrum, neglect can lead to the truck leaning to one side, which can cause further damage. Blown shock absorbers will also make your truck hard to handle, steer, and control. Say it takes a mechanic 3-5 days to diagnose and fix a suspension issue. You could lose out on $1,000 - $3,000 in earnings that week, plus the several hundred it will cost in repairs. Spotting these issues during your 15-minute pre-trip inspection could save you thousands.

▢ Mirrors: mirrors adjusted properly and without cracks, free of dirt
▢ Foot Pedals: unobstructed
▢ Horns: functioning properly
▢ Windshield: no stickers, cracks, or excessive dirt
▢ Heater/defrost: both operate when the fan is set to max
▢ Wipers: arms move properly when turned on, and wiper fluid works
▢ Steps: mounted and secured
▢ DEF cap: secured
▢ Fuel cap: gasket and vent in place, chain secures cap to the tank
▢ Skirting: no damage, panels secure
To be mid-trip and discover your defrost or wipers don't work can be a scary feeling. A suddenly obstructed view with no way to clear it is what the in cab inspection is meant to avoid.
With the average truck eating up $15,000 per year in maintenance and repairs, it's the little things that add up to such a steep number. For example, fixing a windshield can cost anywhere from $500 - $2,000, depending on the truck type and severity of damage. Wiper blades cost $14 - $35 on average, and an AC compressor would cost around $200 to fix/replace . It's easy to see how these numbers add up fast, but waiting until something breaks on the road and taking on the cost of an OOS violation can quickly double and even triple those numbers.

▢ Frame: no illegal welds, not BBC, no rust
▢ Drive Shaft: not BBC, properly mounted, not twisted, and the U-joints are clean
▢ Universal joint: not BBC
▢ Differential: no leaks
Rusting frames and chassis can be prevented and stopped in their tracks with preventative protective sprays . To protect a drive shaft, keep it free of dirt and debris and make sure it's well lubricated. The price of a new driveshaft is around $1,200 . The cost of checking it during pre-trip is free. Remember, the purpose of a pre trip inspection Class A is to not only keep you safe but to spot mechanical issues before they get worse.

▢ Bolts/Bracket: all accounted for and secure, not broken or bent
▢ Locking pins: all accounted for and secure, not broken or bent
▢ Release Handle: releases freely and is in the locked position.
▢ Apron: no cracks, no gap between apron and 5th wheel plate, securely fastened
▢ Skid Plate: no cracks, properly greased, securely mounted
▢ Platform: securely mounted, not cracked or broken, no illegal welds
▢ Kingpin/Locking Jaws: locking jaws are wrapped around kingpin, which is straight with no chips or welds
▢ Air Lines: securely mounted at both ends. Lines are free of cuts, no audible leaks.
▢ Electrical line: secured at both ends. Lines are free of cuts, no audible leaks.
The consequence of worn brackets or pins is accidental uncoupling, otherwise known as dropping a trailer. Not only can this cause accidents, but it can damage the trailer and the cargo inside. In these cases, the carrier is almost always liable for any damages.

▢ Header Board: properly mounted and secured, not BBC, no missing rivets
▢ Clearance lights: not loose, cracked, or dirty
▢ Top rail: No cracks or collision damage.
▢ Rivets, holes: no holes, all rivets in place.
▢ Landing gear: properly mounted and secured, not BBC, shoes are present, handle moves freely
▢ DOT tape: covers at least 50%, not dirty or peeling
▢ Floor: no holes
▢ Cross members: none are damaged, missing, or twisting
▢ Tandem release: properly mounted and secured, not BBC
▢ Slide rail: properly mounted and secured, not BBC
▢ Pins: engaged
▢ Clearance lights: not cracked or dirty
▢ Doors: not broken, no holes, seal intact
▢ Hinges: securely mounted, not BBC
▢ Door handles and rods: securely mounted, functioning properly
▢ Lights: securely mounted, not cracked or dirty
▢ DOT tape: clean, covers 100% of the backside of the trailer
▢ Bumper: properly secured, not BBC
The trailer keeps your precious cargo safe. Issues with the cross members, flooring, or doors leave cargo unsecured and exposed to the elements. Of this list, the most expensive fix is replacing or repairing cross members. Just one broken cross member puts a truck OOS, and repair/replacement costs thousands , mostly in labor. How can they get damaged?
- sloppy hooking/unhooking
- exposure to the elements
- uneven loading
- punctures from inside the trailer
- blown tires
If you notice trailer damage during your Class A pre-trip inspection, you'll have to get it fixed before taking any more loads.

▢ Air pressure: set to proper operating range, no warning lights
▢ Temperature gauge: rising to proper operating range, no warnings
▢ Oil pressure: rising to proper operating range (25-50 PSI), no warnings
▢ Voltmeter: operational, 13 - 14 volts
▢ Dashboard light indicators: check the indicators for the high beams, turn signals, and flashers.
▢ Fuel: gauge matches visual compared to looking in the tank
▢ Tachometer: 1000-1500
▢ Water temperature: 180-205 degrees
▢ Def level: minimum of one light bar
If these gauges don't pass the pre trip inspection Class A checklist, it's likely due to faulty wiring or a fuse issue. You'll have to identify the source or take it to someone who can.
Simple electrical fixes can be done on your own. At a mechanic, a blown fuse costs around $100 to repair, and a full rewiring can cost anywhere from $1,000 - $2,000 .
Preventative maintenance includes replacing old connections with more modern technology and having circuit protectors checked during regular maintenance.

A DVIR, or Driver's Daily Vehicle Inspection Report, is the form that drivers fill out during the Class A pre-trip inspection and at the end of their day. It's designed to keep the company informed of any missing or damaged parts of the truck, keep maintenance costs as low as possible, and keep trucks on the road safely.
Drivers should keep their completed forms accessible and stored for up to 6 months, just in case they're asked to pull them for reference.

Most Common Issues Found During Pre Trip Inspection
Below are the most common issues found while running through a CDL pre trip inspection checklist. If left unchecked, these things can lead to getting pulled over and receiving a violation, or worse, causing a breakdown where you or others are hurt.
Here's a run-through of what to do if you run into these common issues and how to avoid them."
Broken Lights
What to Do:
The first of the three L's (lights, leaks, and leans), broken lights are an easy way to get pulled over and trigger a full-blown roadside inspection. If you notice an issue with one of the many lights during your truck inspection, you're required (and it's in your best interest) to get a replacement immediately.
How to Avoid This:
Obviously, there's no way to avoid lights going out. However, you can avoid faulty reflectors by getting regular washes, especially if you've driven somewhere rural or salted. Shippers appreciate a clean truck, too.
Maintenance as a Money Saver:
Lighting violations are known as ""gateway violations"" because they open the door to law enforcement noticing other things wrong with the truck. This makes staying on top of maintenance even more pressing. For example, most new reflectors cost around $5 each . If you get pulled over for missing or faulty reflectors, it could trigger an inspection that makes you A) sit still and waste hours, B) miss your appointments, C) end up OOS, and D) get in trouble with your company.
Leaning is the second of the three L's. A leaning truck could indicate
- tire problems
- faulty suspension
- worn spring bushings
- airbag issues
The first step is to check out the above mechanisms yourself for any noticeable worn springs or airbag problems. To avoid damaging any equipment even further, go to the shop after your pre-trip inspection and get it checked out.
Uneven loading puts excess strain on the truck and can cause leaning over time. You have every right to ask shippers to fix uneven or shoddy loading.
A new leaf spring is one common solution to fixing a leaning truck. Costing anywhere from $80 - $450 , it's a solid first step compared to full suspension repair which costs $1,000 - $2,000.
The last of the three L's are leaks. When you look on the ground near the engine, do you see any puddles or fluids? There are three common sources:
- power steering
- water leaks
- brake fluid
Identify the source. What type of liquid is it? Does it smell? How big is the puddle? Is the radiator cap secured and not broken? If you can identify the problem and fix it - great. If not, make a call to the nearest shop.
The reason you check every bolt and hose on the pre trip inspection Class A checklist is to avoid these mystery leaks. Preventative maintenance is key.
Maintenance as a Money Saver:
It's a lot cheaper to replace nuts and bolts than it is to replace an entire system that's been damaged due to ongoing leaking. Driving with a leaking radiator can damage engine bay components and require repairs to a chain of other parts. If the problem was the radiator gasket, for example, the cost of a replacement would only be around $40 .
The limit for tread depth is 4/32" on steer tires and 2/32" on others to pass a Class A pre trip inspection. Sometimes tires look good during inspection, but after a long haul, treads have worn down too low.
Tire replacement should be prompt - blowouts happen all the time and can do serious damage to the underside of the trailer. Check if the tire is still under warranty, and have it and any others replaced ASAP.
Make sure tires are always filled to the manufacturer's recommendation and ideally the same PSI in each tire. Note that tread loss accelerates in extreme heat. Tires gain about 1 pound of pressure every 10 degrees as the temperature increases. Asphalt can be 20-50 degrees hotter than the air; keep that in mind before thinking any bulges or worn tread will be fine.
New big rig tires cost $250 - $600 , or $0.04 per mile. Because of the high cost, many large fleets are opting for imported tires to keep costs down. Research reviews on the brand you have in mind first - many have bad reviews from truckers. Here's a video that shows how much time can be lost by blowing a steer tire.
Overheating
Pull over safely and legally. Give the truck some time to cool down in idle. Try turning the heat on to get some of that heat out of the engine - it will feel uncomfortable but protecting the engine is worth it. Check to see if the radiator is jammed with debris or has bent fins. An overheating truck could be difficult to diagnose, and you'll most likely have to have a mobile mechanic come to you. If you were going up a steep grade, it might have just been the way you were driving.
- Keep the radiator clean
- Check the muffler for soot build-up in older trucks
- Don't use cruise control in hilly areas
- Don't overload the trailer
Constant overheating can be hard to diagnose, and it can make you chronically late to appointments. Regular maintenance and a thorough CDL pre trip inspection Class A are where the little details can be spotted and nipped in the bud.

Cota Systems Make More Money Per Mile CDL Pre-Trip Checklist
We know the struggle of hauling empty or partially full trucks and deadheading between every load. Our solution? Seamlessly connecting truckers with available LTL loads that complement their route and trailer capacity. Free and easy to use, Cota Systems™ platform makes it simple to earn more money per mile. We'll send you available LTL truck loads on your preferred routes as soon as they're posted.
Simply sync all of your favorite load boards into Cota Systems™ for easy browsing and instant notifications.
COTA SYSTEMS™ Mobile App
Cota Systems™ mobile app connects drivers with new loads and their dispatchers no matter where they are.
- Extra loads on the road.
- Scan and send documents.
- Keep track of your earnings.
- Seamless dispatch integration.
- Real-time load notifications.
- Stay connected anywhere.
Staying efficient on the road makes the difference between staying profitable and staying afloat.
Our trucking dispatch software is completely free and feature-rich, saving teams time on paperwork and document sharing. The platform integrates seamlessly with the driver app simplifying everything from load finding to billing.
How Cota Systems™ helps drivers 10X their income:
- Eliminates wasted miles with convenient LTL and partial load boards
- Efficient document uploading and one-click billing
- Communicate with shippers in the same app
- Load board syncing cuts down the time it takes to book a load
Bypass Construction
The DOT 511 traffic app provides state-specific traffic and construction updates. Check for delays on your route to get ahead of detours and lane closures. Each state has their own app, so download it ahead of time.
Why does it matter? If you earn $0.60 per mile on a 400-mile trip, that's $240 earned in roughly 8 hours. Now, say traffic adds 1.5 hours to your trip. You still earn the same $240 AND you don't have the opportunity to pick up another load before you reset. Time is money!"
In 2016, truckers were delayed a total of 1.2 billion hours because of congestion on the road - that's in the billions! Truck bottlenecks are mostly common in major cities. Planning your route ahead of time to avoid traffic delays is crucial to your bottom line.

Weather Apps
Winter and summer storms can eat into income and create seriously dangerous roads. Depending on the weather, you might be able to plan a different route to avoid delays or change the time and place you stop to rest. The AccuWeather app is a popular choice among drivers.
The horror stories of drivers getting stuck at a rest stop for days or getting blown over by strong winds paint the ugly picture of the weather as a driver's biggest opponent.
Truck Parking
After finishing your Class A CDL pre trip inspection, take a few minutes to map out overnight parking spots along your route. American Truck Parking does a good job of showing truck stops and rest areas that offer overnight parking, as well as the pricing, pictures, and other amenities. You can filter out for gated parking spots, CAT scales, showers, truck washes, and much more. Compare pricing beforehand and save yourself the cash!
Dock Details
Headed to a new shed? Check them out on Dock 411 to confirm things like pallet restrictions and hours of operation. Not sure if you can fit? Most places have pictures that other drivers took or reviews about slow loading and yard hazards.
The benefit? This helps plan things like getting lunch, calculating hours, and knowing whether or not you even want to take a certain load. If you see reviews that a shed has an average 7-hour loading time (the standard is 2.5 hours ), you can have a conversation with dispatch early on to make a game plan regarding detention and/or layovers.

Gas Buddy helps truckers find the cheapest gas prices along their route. While you're looking, you can see what stops have showers, food, repairmen, and other amenities so you can save time at a 1-stop shop.
For reference, the average owner-operator spends $45,605 on fuel per year ( 2022 ). Company drivers don't usually have this problem since they have discounted fuel cards. (You can get fuel cards with Cota Systems , too).
Legally Bypass Inspection Sites
Did we mention that time is money? Another way to save time is with Drivewyze , an in-cab app for driver devices that provides inspection bypass opportunities at 884 weigh stations across the states. When bypass isn't allowed, they have an e-inspection system that speeds up the process and avoids long lines. It sounds too good to be true, but it's 100% legal and works 89% of the time. Prepass is another company that offers this service.
Weigh station stops can take anywhere from 30 minutes to a few hours if lines are long or they find something wrong with your truck. That 30-minute stop could have earned you $15 (at $0.60/mile for 25 miles). Doing so every day could cost you $300/month, and that's IF the stops only take 30 minutes!
Most drivers use a combination of navigation apps. Hammer and Google Maps are popular choices. Systems made specifically for truckers won't take you down prohibited roads - that's why Google Maps alone might not cut it.
Health Apps
Recent studies found that workers who take care of their mental health average 9.3 fewer sick days per year than workers who don't. The life expectancy of truck drivers is 61 years , partly due to their unhealthy lifestyle and work-related stress. Your health is just as important as any CDL pre-trip list. Obesity is one of the most prevalent health issues in the trucking industry for long-haul drivers. These healthy habits can save you down the line:
- Skip the fast food, sugary snacks, and sodas.
- Find a way to manage your stress. Talking to a friend while you drive or finding a podcast that you enjoy are two common solutions.
- Exercise during home days focusing on your back.
- Switch up your stimulants. Instead of Redbull every day, try green tea, coffee, or Yerba Mate a few days per week.
Try out some apps like MyFitnessPal for weight loss and nutrient tracking or Luminosity for mental health support.

OTR drivers can take advantage of toll services like Prepass (which also serves as a weigh station bypass) and Best Pass , a prepaid transponder system. If a toll company isn't covered, it's best to just use cash and keep your receipt. A few tips:
- Take a second to review toll prices on your trip. Any tolls should be factored in when dispatch discusses rates, especially in cities.
- Find and join any toll discount program you can find (take the New York toll reimbursement program, for example)
- Best Pass offers cash toll discounts, but you should verify that the transponder rate wouldn't have been the same (and much faster).
How to Remember Pre Trip Inspection CDL Checklist
Start with our printable CDL pre trip inspection cheat sheet and repeat, repeat, repeat. Use the same checklist every time so your brain can get into that rhythm. Remember the acronyms:
BBC: Bent, broken, or cracked
ABC: Abrasions, bruises, cuts
PFL: Peak for leaks
3 L's: Lights, leaks, leans
Understanding the mechanics of the truck and how everything works together will help your brain form stronger connections and remember more. Try explaining the process to your wife, kids, or friends (even if they won't remember) so you can spot areas you need to study the CDL pre trip inspection PDF more.
What is the item most commonly overlooked during a pre trip inspection?
A few items on the CDL pre trip inspection checklist trip up new drivers most often:
- Chocks: During your CDL class a pre trip inspection, you'll have the vehicle on and off, and be testing various brake systems. Chocks prevent the truck from moving around while you're underneath and walking around.
- Seatbelts: It's often the last thing on a new driver's mind on the long list of items to inspect. But, your life depends on it.
- Emergency Kit: Especially if you drive a shared truck, you don't know if the previous driver used up anything in the kit. Just because you see the kit doesn't mean everything is present and functional.
- Reflectors: Reflectors help other vehicles see you at night. Because there are so many, drivers rush through this check or give them a quick glance. These are another "gateway violation" that can get you pulled over and given a roadside inspection.
- Wheel Lug Nuts: Loose wheel fasteners could have your tires speeding down the freeway toward other cars and trucks. Double-check that all lug nuts are fastened and free of rust.
- Personal Health: Remember the figures we mentioned about truck driver life expectancy. Put your health first, and don't drive if you feel sick and feverish.
This is all about the safety of you and others. Keep your pre trip inspection Class A cheat sheet with you and go through the same, thorough motions every time.
CDL Class B Pre Trip Inspection
The CDL Class B pre trip inspection follows virtually the same guidelines as Class A, but they differ in terms of vehicle type.
Class B includes buses, straight trucks, and smaller commercial vehicles that are typically not designed to tow additional trailers. Items like the 5th wheel and coupling mechanisms are obviously left off. Drivers have to check passenger doors, wheelchair lifts, handrails, emergency exits, and seating for passenger safety.
New Truck Pre-Inspection Checklist Addition
Non owner-operators who are regularly assigned new trucks can't take for granted that everything was left as you might have left it. Add these to your pre-inspection checklist:
- Cab card & book: permits, registration, IFTA paperwork, and cab cards are present and up-to-date
- IFTA Sticker: current year is displayed on both sides of the truck
- Elog Device: present and functional
- Permits: in the cab card book and up to date
- License Plate: front and back plates match
- Medical Card: med card and CDL are on your person or in the truck
- Paper Logbook: backup if E-log stops working
- Inspection sticker: stuck to the side of the truck and up-to-date
- FMCSA Safety Book: within arms reach of the driver's seat
Additional Supplies: load securing equipment, extra coolant and oil, cable cutters, hammer and wrench, hard hat, and steel-toed boots.
Final Notes on Completing Your CDL Pre-Trip Inspection Checklist
So, you're armed with the ultimate CDL pre trip inspection checklist that will help you pass your exam and save on vehicle maintenance. Your truck is your money maker; our goal for this guide is to give drivers the tools to protect their biggest asset and keep the most money in their pockets as they can.
Learn more about how to earn more money and truck driver pay in our blog . Here's another link to the pre trip inspection Class A PDF . Good luck!
I joined Cota Systems to help U.S. truckers grow their businesses. I proudly served in the U.S. Navy, managed some of the largest brands on earth, and I'm excited to share what I've learned with you. Truckers are the backbone of our great nation and when you and your family are thriving, so is America! 🇺🇸
Cota Systems LinkedIn
Brian's LinkedIn
Best articles
How To Avoid Surprising Double-Brokering Impact | Best Free Hacks
205 Best Truck Driver Quotes for Success in Life and Business
Popular articles
#1 Free Truck Dispatch Software: Boost Your Business
Dispatching for Truckers: The Unsung Heroes of the Road
Different Truck Types in Freight: Every Freight Truck & Goods They Haul
What is LTL Freight Shipping and How LTL Shipping Rates Are Calculated
#1 Ultimate Freight Broker Guide: Results You’ll Love
Join Our Newsletter
Discover new features of Cota systems along with tips, tricks, giveaways, and more to maximize your shipping profits.
You may also like

April 12, 2024
Introduction to Logistics Management: 2024 Guide
March 29, 2024
How to Find Box Truck Loads: The #1 Ultimate Guide
March 22, 2024
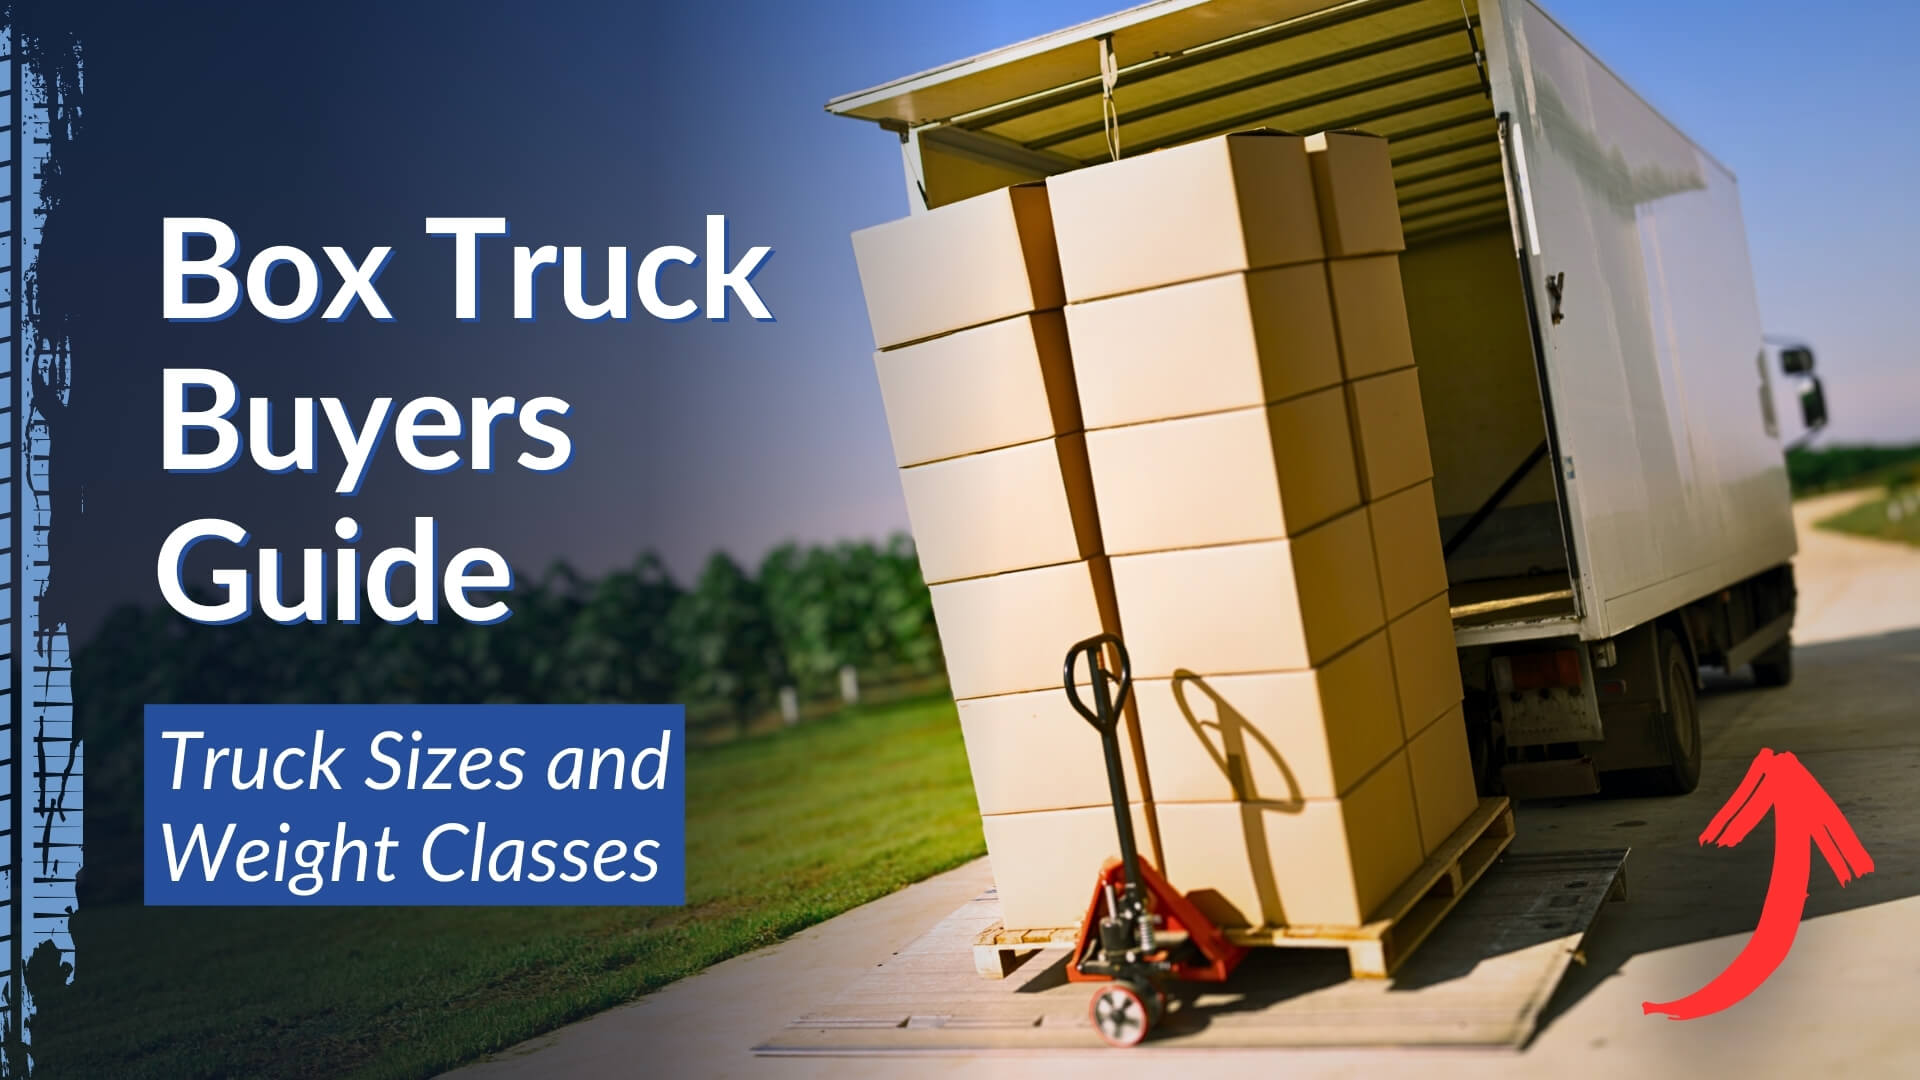
Buyer's Guide to Commercial Box Trucks: Box Truck Sizes and Weight Classes
Back to topics

- Free Practice Tests
Commercial Driving
- Introduction
Getting a CDL
- Fees and costs
CDL Types & Permits
Endorsements & Restrictions
CDL Exam Preparation
Written exams
Practical exams
- Skills test
- Pre-trip inspection
- TSA background check
- Retake policy
CDL Maintenance
ELDT Training & Certification
CDL how-to guides
Pretrip Inspection Test
Cdl pretrip inspection test made easy: video tutorial, mastering the cdl pretrip inspection test: a step-by-step video guide introduction.
Are you preparing for the CDL pretrip inspection test and feeling overwhelmed? Don't worry; we've got you covered! In this comprehensive guide, we will walk you through the essential steps of the pretrip inspection test, focusing on the value of instructional videos for mastering the process.
Importance of CDL Pretrip Inspection
Before we delve into the instructional video, let's understand why the CDL pretrip inspection is crucial. It's a vital part of the CDL test, ensuring that drivers can identify and address any issues with their commercial vehicles before hitting the road.
The Challenge of Pretrip Inspection Test
For many aspiring commercial drivers, the pretrip inspection test can be perplexing. It requires a burst of attention to detail, as missing even a single step can lead to failure. However, breaking down the process into manageable steps can make it less overwhelming.
Navigating the Complexity with Video Instruction
One of the most effective ways to master the pretrip inspection test is by watching instructional videos. These videos provide a visual guide, allowing you to see each step in action and understand the intricacies of the inspection process.
Clear Visual Demonstration
Video instruction offers a clear demonstration of each component of the pretrip inspection. From checking the tires and brakes to examining the lights and indicators, seeing the process in action can significantly enhance your understanding.
Accessible Learning Resources
Instructional videos are readily available online, providing aspiring commercial drivers with easy access to valuable learning resources. With just a few clicks, you can access a wealth of video tutorials that break down the pretrip inspection into digestible segments.
Engaging and Informative Content
By utilizing instructional videos, you can engage with the content in a more interactive manner. The active voice used in the videos prompts you to participate mentally, enhancing your retention of essential information.
The Power of Detailed Guidance
In the context of the CDL pretrip inspection, detailed guidance is paramount to success. An instructional video that offers specific and clear instructions can significantly boost your confidence and competence in performing the inspection.
Step-by-Step Narration
An ideal instructional video provides step-by-step narration, guiding you through each part of the pretrip inspection process. This detailed approach ensures that no aspect is overlooked, building your proficiency in conducting a thorough inspection.
Visual Analogies for Understanding
Incorporating analogies and metaphors in instructional videos can make complex concepts easier to grasp. For instance, comparing the inspection process to a routine health checkup can help drivers relate to the significance of each inspection component.
Emphasizing Safety and Compliance
A well-crafted instructional video will emphasize the importance of safety and regulatory compliance throughout the pretrip inspection. This ensures that drivers understand the underlying purpose of each inspection element, fostering a safety-oriented mindset.
Mastering the CDL pretrip inspection test is achievable with the right guidance and resources. Leveraging instructional videos as a part of your preparation can provide you with a clear advantage in understanding the intricacies of the inspection process. With accessible, engaging, and detailed video guidance, you can approach the pretrip inspection test with confidence and competence.
Join 100,000+ Drivers
- Sponsorship
- Thinking of Becoming a Truck Driver?
- Getting a CDL License
- Trucking Driving Jobs Guide
- Trucking Company Guide
- Trucker Life
- Paid CDL Training
- CDL Schools
- Professional Driving Skills + Knowledge
- Owner Operator
- Latest Articles
- Truck Driver Skills
The Pre-Trip Inspection: A Practical Guide For the Truck Driver
Updated February 24th, 2022

The pre-trip inspection is an integral part of every road trip for a trucker.
It’s probably the most disliked and most often overlooked part of the job of the professional truck driver in the trucking industry.
This inspection is meant to be a thorough check of the truck, trailer and load.
The check is to ensure that everything is in correct working order, prior to the truck and driver, departing on a trip.
Any damage or issues found during the pre-trip inspection which needs attention, must be addressed before departure.
CDL Test Pre-Trip Inspection
If you just came through the process of getting your CDL, you can breathe a sigh of relief.
You don’t have to check all 500 or so items that you had to memorize for the test every single day.
Out on the road, a thorough pre trip shouldn’t take more than 10 to 15 minutes.
DVIRs – Daily Vehicle Inspection Report
According to federal law ( FMCSR Section 396.11 ), every day, a driver must submit a Daily Vehicle Inspection Report (DVIR) for each power unit he operates. Multiple trailers can go in one report.
DVIRs are either paper or electronic.
Not every trucking company (ahem) enforces this policy, so some truck drivers can go months or years without submitting a DVIR.
Minimum DOT Pre-Trip Inspection Requirements
- Service brakes including trailer brake connections
- Parking brake
- Steering mechanism
- Lighting devices and reflectors
- Windshield wipers
- Rear vision mirrors
- Coupling devices
- Wheels and rims
- Emergency equipment
Your trucking company’s DVIR might be more thorough.
This is a thorough Q&A on DVIRs which you can refer to.

Inspecting a New Truck
When you are assigned a new truck (either daily or just once), there are a few additional things you need to check for on the pre-trip inspection.
Truck Compliance
- Cab card and book – This is a book containing the registration, inspection, permits, cab cards, IFTA paperwork, and any other important papers for the truck. Make sure it is in the truck and all the paperwork is up to date.
- Inspection sticker – This is outside the truck. Find it and make sure the truck is not overdue.
- IFTA stickers – These are the fuel tax compliance stickers. They are on both sides of the truck. Make sure the current year is displayed.
- Elog device – Most trucks are required to have a working elog device.
- Required permits – These are in the cab card book. The most common permits are Heavy Motor Vehicle Trip Permit (Oregon) and the Weight Distance Tax Permit (New Mexico).
- New York HUT sticker – This is usually on the front of your truck. It’s a type of permit.
- License plate – Make sure the license plates on the front and back of the truck match.
- FMCSA Safety Regulations and Hazardous Materials book – These will be given to you by your company. They must stay in your truck within arms reach from the driver’s seat.
- Paper logbook – If your e-log stops working, you must log your hours in a paper logbook, which must be kept in your truck.
- Medical card – You must keep your current medical card in your truck. Always have your CDL on you as well.
- Orange triangles – You must have 3 triangles for when you break down.
- Fire extinguisher – Must be charged and secured to the truck. No rolling around on the floor.
- Extra fuses – If your truck doesn’t use circuit breakers, you must have spare fuses.
- Load bars and/or straps
- Extra oil, coolant, and windshield washer fluid
- Line antifreeze and diesel anti-gel
- Chains and bungees
- Gladhand seals
- Hammer, wrench, wire cutters, cable cutters, knife with glass-breaker
The Class A Pre-Trip Inspection Process
Unless I have to bobtail to pick up my trailer, I inspect my truck and trailer together.
The best way to memorize a thorough pre trip is to do it the same way each time.
Your process will look different from mine, but as long as you are consistent, you will be less likely to miss anything.
I do the inspection first thing each morning as well as every time I swap trailers.
Paperwork and Trailer
- Check the paperwork. It should be the first thing checked when you get to your truck.
- Match the trailer number to your paperwork. If your trailer has a seal, make sure it matches too.
- Unsealed trailer. If your trailer does not have a seal, open it and confirm the product matches the bills. If you are picking up an empty trailer, open it and make sure it’s actually empty.
- Confirm your destination. Ensure the destination is the same as on your trip sheet or load assignment. If there is a discrepancy, call your dispatcher.

I personally like to start with checking under the hood of the rig. Not everyone does, but I do.
Under the Hood of the Truck
I walk around the front of the truck, making sure all the lights work. Then I open the hood.

- Fluid levels – Check all fluids: coolant, oil, power steering fluid, and windshield washer fluid. Make sure caps are tight for the rad, oil filler, power steering fluid and the dip-stick is seated properly.
- Alternator, water pump, power steering pump –Make sure these are in good working order, and the belts are not worn or have too much slack.
- Observe at the engine block. Check for leaks, fluid running down the side of the engine. Check for wear, cracking or fraying. Inspect fan belts for proper tension and signs of wear.
- Hoses – Check all hoses for leaks, cracks, and tears.
- Wiring – Check wiring for wear.
- Steering linkage – Check linkage for worn or missing parts.
- Tires – Tires should be properly inflated and have decent tread. If there are flat spots on the tire, it needs to be replaced.
- Hub seal – Make sure it’s not leaking and wiped with oil if transparent.
- Brakes – Brake chambers should not be out of round and should be free of grease. Shoes should not be worn down too much.
- Slack adjusters – Pull slack adjuster. If it travels more than an inch, it needs to be adjusted.
- Suspension – Shocks should be in good condition, and not covered in grease or oil.
Back of the Truck
Next, I check the back of my truck because it’s easier to check this before hooking to a trailer.
- Tires – Tires should be properly inflated and have decent tread. If the tires have flat spots, the tire needs to be replaced.
- Suspension – Shocks and airbags should be in good condition, and not covered in grease or oil.
- Drive shaft – Driveshaft should be undamaged and free of grease. Make sure there is no debris in the u-joints.
- Frame – The frame should not have any welds and not cracked or significantly rusted.
- Fifth wheel – The fifth wheel should be properly greased and not broken.
- Fuel tanks – Fuel tanks should not be leaking.
- Stairs and catwalk – Stairs and catwalk should be free of debris and not broken.

Tires should be checked with a tire gauge.
Tip . This is especially if you are slip seating. Tire thumpers aren’t very accurate. If you use a tire thumper, still check with a tire gauge from time to time.
Drives and tandems should be inflated to 100-110 psi and have a minimum tread or 2/32in. Steer tires should be inflated to 110-120 psi and have a minimum tread of 4/32in.
Tires under 50 psi should be replaced, as they can’t retain enough air pressure.
Flat spots can occur from dragging tandems in the winter or when trying to slide the tandems. Tires with flat spots should be replaced.
Check tires for damage, nails, and punctures.

Next, I jump in my cab and start my truck.
- Gauges – Make sure air, oil, and water temperature gauges rise to normal levels.
- Mirrors – Adjust mirrors before moving your truck.
- Windshield wipers – Make sure they work and sit flat against the windshield.
- Horn – Make sure the city and air horns both work.
- Heat and A/C – Check to see if heat and/or air conditioning is working.
- Seat belt – Seat belt should not be frayed and should move freely.
Coupling and Air Lines
This is what could happen if you don’t do the tug test.
The pre-trip inspection is a pretty important thing to do.
Learn your pre-trip procedure and do it when required.
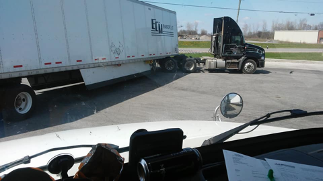
This is why you should always do a tug test when picking up a trailer. The passenger side of the front of the trailer is resting on the frame of the truck and NOT hooked up to the 5th wheel.

The front left corner of the trailer is supported by retracted landing gear only. (Not good!)
The truck driver in this photo (hopefully) learned how critical a pre-trip is. Don’t end up in a pickle like this guy.
Next, I hook up to my trailer.
- Tug test – I back under my trailer until I hear a click, and then immediately do a tug test.
A tug test tests both your coupling and your brakes. If you pull away from your trailer, you aren’t hooked properly.
If you pull your trailer with you, your trailer brakes are out of adjustment. Be absolutely sure to write it up and have it corrected before departure.
- 4 Ways + Headlights. I also turn on my four-way flashers and headlights.
- Airlines and pigtails – Next, hook up airlines and pigtails (electrical connection). Inspect to make sure they aren’t leaking or ripped.
- Visual check of Fifth wheel – Look at the fifth wheel arm under the trailer to make sure it is coupled. The arm should be in.
- Landing gear – Raise the landing gear and check for damage.

Next, I check the bulkhead (front of the trailer).
- Wall – Make sure the wall is not damaged.
- Inspection sticker – Check the DOT inspection sticker to make sure it’s not out of date.
- Registration paperwork – Check the front trailer box to make sure the registration is good.
- Reefer unit – If you are pulling a reefer, select the pre trip function on the unit and run it. It should be completed by the time you are finished your pre trip inspection.
Next step for the pre-trip inspection is to check the side of the trailer and the tandems.
- Lights – Lights should be on and flashing.
- Suspension – springs or airbags should be in good condition, and not covered in oil or grease.
- Tandem pins – Tandem pins should be locked in position, and slider arm should be in its cradle.
- Cables – Make sure the tandem cables aren’t dragging on the ground.
- Underbelly – Make sure there are no damaged beams under the trailer. Check the entire length.
- Mudflaps – Mud flaps should not be torn and hanging.
Back of Trailer
Next, I check the back of the trailer.
- Doors – Doors and hinges should not be damaged.
- Door latches – Doors should be closed and secured.
- Seal – Seal should be intact and match paperwork.
- DOT bumper – DOT bumper should not be damaged
- License plate – Check for the license plate. They tend to wear out and fall off.
Passenger Side
Next, I check the passenger side.
- Brakes – Brake chambers should not be out of round and should be free of grease.
- Suspension – Springs or airbags should be in good condition, and not covered in grease or oil.
- Mudflaps – Mud flaps should not be torn.
Ready to Roll

Finally, I jump in my truck and double check my paperwork and destination.
I release my air brakes, roll forward, and push the service brake.
If everything is good, I’m ready to roll.
Post-Trip Inspection
When I’m done for the day, and every time I swap trailers, I do a post-trip inspection. If I am swapping trailers, I do a pre-trip on the new trailer as well.
A post-trip includes:
- lowering the landing gear
- removing the airlines
- uncoupling, and walking around the trailer checking tires, lights, seal, and mudflaps
Then I finish my paperwork and go home.
Slip Seating
If you slip seat (meaning you are in a different truck each shift), your pre- trip check should be more thorough than if you are permanently assigned a truck.
This also applies to the first inspection after being assigned a truck.
Please be courteous and write up any problems or issues found, so the next driver of the vehicle doesn’t have to deal with it.
Side Note: Clean out your truck and throw away any trash. Common courtesy goes a long way in trucking, between drivers.
Pre-Trip Inspection F.A.Q.
Most breakdowns can be avoided with proper preventative measures, such as daily inspections.
Thorough inspections should be done at the start of each shift. Inspections of trailers should be done every time you swap trailers.
Each driver should do a thorough pre-trip every time they swap drivers.
It should take about 10-15 minutes to perform a pre trip inspection.
The DOT. Make sure you stay in compliance so you don’t end up with hefty fines and an out of service.
The best way to memorize your pre trip inspection routine, is to do it the same way every time. That way you’re less likely to miss something. If you have questions, ask your safety team at your company.
Fluids in the engine, engine hoses and wires, brakes and suspension, mudflaps, trailer registration and inspection paperwork, and license plates.
A Few Trip Planning Tips

- Buy and learn to read a trucker’s atlas. It’s useful to plan routes and avoid restricted roads. I find this road atlas a necessity as a professional truck driver.
- Buy a decent trucking GPS , but don’t rely on it 100%. Use common sense.
- Don’t use the GPS in your elog device. It will put you in a lake.
Please note that minimum requirements for the inspection are established by the FMCSA.
But these may vary by state, trucking company, truck type, and trailer type.
It is your duty as a professional truck driver to perform a thorough pre-trip inspection before each trip and before you drive.
You’ll save yourself from headaches, fines and unnecessary accidents.

More Articles You May Like
- Trucking Terms – A Guide to Our Industry’s Lingo
- The 18 Wheeler – A Comprehensive Guide to Big Rigs
CDL Truck Driver Skills – Tips, Tricks + Knowledge to Kick Your CDL Skills Up a Notch!
- The D.O.T. Physical- A Guide For the Truck Driver

Everything You’ll Want To Know About Paid CDL Training

Custom Big Truck Sleepers Photo Gallery Collection

The Best Trucking Companies to Work For 2024 USA

5 Best GPS For Truckers – A Professional Driver’s Guide
Twice a month we email you the best tips and new articles to help you better navigate the trucking industry..

10 Truck Driving Safety Tips Every Professional Driver Should Follow
A veteran 40+ years truck driver shares 10 of the all time, tried and true truck driving safety tips ALL professional truckers should know AND follow! If every driver of EVERY vehicle on the road followed these safety tips, our roads would be SO much safer.

Trucker Tips Master Guide: Expert Advice From Experienced Truck Drivers
A collection of trucker tips from million milers and experienced drivers. These are gold nuggets for the new truck drivers!

Instruction, clear advice, videos and photos for truck driver skills, maneuvers and information for all professional truck drivers.
A practical guide to paid CDL training programs. Recommended Company Sponsored Schools, Requirements, pros + cons, what to expect from company-sponsored cdl training programs.
Is a Career As a Department of Defense Truck Driver For You?
As a Department of Defense (D.O.D.) truck driver, your role is integral to the logistics and supply chain operations of […]
Navigating Fair Truck Driver Pay: Are You Earning Enough?
Ready to take control of your truck driver pay? Discover key factors impacting your earnings and ensure you’re compensated appropriately […]
The Best Tanker Trucking Companies to Work, U.S., 2024
Top Tanker Trucking Companies in the US To Work For Tanker work typically falls to the ‘better carriers’. Tanker carriers […]
Best Flatbed Trucking Companies, US, 2024: Our Top Picks
There are over 1 million truck drivers working for flatbed trucking companies in the U.S. trucking industry. However, not all […]
Best Trucking Companies For New Drivers in the U.S., 2024
For new drivers entering the trucking industry, diving into the right pool can make all the difference. The foundation of […]
Follow Smart Trucking
How To Study For the CDL Pre-Trip Inspection
As a professional truck driver, there are crucial tasks to complete to be safe and stay compliant. One of the most important tasks is a CDL pre-trip inspection. Not only does this keep you and everyone else on the road safer, but it is required to remain compliant with FMCSA rules and regulations.
The nation has deemed truck drivers essential, and the industry needs new drivers more than ever. Roadmaster can help you start a new high paying career in about a month. And as a professional truck driver, there are crucial tasks to complete to be safe and stay compliant. These are the very things you’ll find when studying and testing.
One of the most important tasks is a CDL pre-trip inspection. Not only does this keep you and everyone else on the road safer, but it is required to remain compliant with FMCSA rules and regulations . It also keeps you in-the-know about how your truck is performing and if there are any issues that need to be addressed.
Here is a guide on how to study for a CDL pre-trip inspection.
What Is a CDL Pre-Trip Inspection?
The definition of a pre-trip inspection is self-explanatory – it is a complete assessment of the trailer, truck, and cargo before each trip. The DOT has a pre-trip inspection list and the guidelines dictate to follow their list. Rules dictate to document everything using a DVIR or driver vehicle inspection report according to federal law FMCSR Section 396.11.
A professional truck driver must have any problems found with the truck and trailer addressed before leaving. This includes things like damage or other issues affecting the trip. The inspection process should be thorough and doesn’t take long – around 15 minutes or so. During this time, the driver must report as on duty, not driving.
This is one important aspect to learn in becoming a driver, so studying it is crucial.
Why Is It Important?
Your safety and the safety of others.
Any kind of issue with your truck can cause safety concerns. From damaged brakes to an unsecured load – these are the very things you are looking for with the inspection. It keeps you on your toes and ensures you know that every trip is the safest possible. This also has the added benefit of keeping you on the road more. You’ll avoid violations that ground you till it’s fixed. And you can better avoid an accident because of a fixable issue.
By learning this information and studying it, you’ll have the knowledge you need to prepare for the exam.
It’s the Law
It is your responsibility as a professional truck driver to ensure your truck is safe and road-ready. This means not only is it safe to operate, but it is free of issues that cause accidents. This has other benefits too. By catching any problems yourself, you are less likely to get a violation.
It Saves Extra Costs
With any situation, catching a problem before it’s a bigger problem is ideal. Instead of finding out you have a major repair, you might be able to find it while it’s still easily fixable. Plus, you have time to take it to a shop rather than a roadside service that costs more and is less convenient. And let’s not forget about how expensive towing is.
Steps in Studying for a CDL Pre-Trip Inspection
Now that you know how important a CDL pre-trip inspection is to your livelihood, here are the steps in conducting one. We showcase these steps to help you study for what the exam requires.
Under the Hood
The engine compartment is the first part of the CDL pre-trip inspection process. This is before you start the truck and the inspections include:
- Make sure kingpins, ball joints, and shocks look good and have lubrication
- Check fluid levels including windshield washer fluid, coolant, and oil
- Look at steering axle tires for uneven wear
- Look for fluid drips or leaks in and around the engine
- Secure the dipstick and tighten any loose caps
- Look for wear or damage to belts and hoses
- Check the blade and fan belt for cracks, nicks, or any other damage
- Check wiring for damage like frays or misplacement
- Air conditioner compressor mounting secure
- Ensure engine air ductwork has secure clamps and no cuts
- No exhaust leaks or oil in the turbocharger
- Check fuel water separator, radiator brace, water pump, pitman arm, oil filler cap
- Inspect engine coolant reservoir, steering shaft, and brake master cylinder
If you find anything wrong, notate it in the DVIR. Notate important information and use photographs. The truck cannot leave until you appropriately fix these issues.
Take a Walk Around
Do an external inspection next. This is where you walk around your truck checking for problems. These include:
- Check all tires for proper pressure, damage, and wear and tear
- Check valve cap, outer oil seal, lug nuts, and hub oil
- Look for proper positioning in brake pads and that they are in good shape
- Inspect brake drum, lining, inner oil seal, slack adjuster, brake line, and chamber
- Inspect airlines and the electrical cord for proper connection
- Inspect the landing gear to ensure the legs are up and secured
- Ensure the 5th wheel is securely coupled to the trailer
- Look for mirror damage such as nicks and cracks
- Ensure doors close properly with secure hinges
Start Your Engine
Before leaving your location, you must ensure the engine is mechanically sound. These key components of the last inspection are:
- With the clutch depressed and the truck in neutral, start the engine
- As you ease off the clutch, idle the truck at 650rpm
- Check your gauges to ensure everything is as it should be
- Turn on your flashers and lights and step out to make sure they are all working
- Look under the hood for leaks and secure belts
- Make sure all lights are working properly
After this inspection, notate any anomalies in the DVIR. This includes things like repairs or part replacements.
The Last Steps
The last step involves moving your truck. Make sure there is nothing in the way or anything that causes a safety hazard.
- Drive forward a few feet and use the trailer brake, making sure the trailer is coupled and the brake works right
- Pull forward a few feet more, using the foot brake to stop
Look for anything not up to par and report it. This is one of the most repetitive tasks you’ll do and the most common. And therefore, it is on the test. You also need to know when to do these steps:
- Each start of the day
- After 10 hour breaks
- Every 24 hours
- When you pick up a new trailer
Ready To Learn More?
These are steps to learn that are on the test. Study these components of the CDL pre-trip inspection so it prepares you to ace the exam.
Once you have your Class A CDL license you are ready to apply for entry-level truck driver jobs. If you attend a truck driving school like Roadmaster, a career services associate will help you apply for your first job. And they’ll assist you in getting your new career started.
During the first few days of school, Placement Associates work with you to choose which company best fits your needs. They will review your job applications and help you submit them to potential employers. The placement staff will follow up with potential employers and notify you of employment offer letters.
Tuition reimbursement could cover up to 100 percent of the cost of school! We offer in-house financing to those who qualify to help cover the cost of tuition. Trucking carriers that recruit from Roadmaster offer up to 100 percent tuition reimbursement .
If you are ready to get your career started as a professional truck driver, contact Roadmaster by filling out the application form or calling us at 1-800-831-1300.

- CDL Training Materials
- High Road Training Program
- Walk-Around Pre-Trip Inspection - Page 11
New! High Road 2.0! We have a new version of this program. You can find it here: High Road 2.0
Step 4: Turn Off Engine and Check Lights
Make sure the parking brake is set, turn off the engine, and take the key with you. Turn on headlights (low beams) and four-way flashers, and get out.
- Go to front of vehicle and check that low beams are on and both of the four-way flashers are working.
- Push dimmer switch and check that high beams work.
- Turn off headlights and four-way hazard warning flashers.
- Turn on parking, clearance, side-marker and identification lights.
- Turn on right turn signal, and start walk-around inspection.
Step 5: Perform Walk-Around Inspection
- Walk around and inspect.
- Clean all lights, reflectors and glass as you go along.
Left Front Side
- Driverʼs door glass should be clean.
- Door latches or locks work properly.
Left front wheel:
- Condition of wheel and rim - none missing or bent, no broken studs, clamps, lugs, or any signs of misalignment.
- Condition of tires - properly inflated, valve stem and cap OK, no serious cuts, bulges, or tread wear.
- Use wrench to test rust-streaked lug nuts, indicating looseness, or check for shiny threads indicating worn holes.
- Hub oil level OK, no leaks.
Left front suspension:
- Condition of spring, spring hangers, shackles, u-bolts.
- Shock absorber condition.
Left front brake:
- Condition of brake drum.
- Condition of hoses.
Front of Vehicle
- Condition of front axle.
- No loose, worn, bent, damaged or missing parts.
- Must grab steering mechanism to test for looseness.
- Check for damage and clean if dirty.
- Check windshield wiper arms for proper spring tension.
- Check wiper blades for damage, “stiff” rubber and securement.
Lights and reflectors:
- Parking, clearance and identification lights are clean, operating and proper color (amber at front).
- Reflectors clean and proper color (amber at front).
- Right front turn signal light clean, operating and proper color (amber or white on signals facing forward).
Commercial Driver's License (CDL)
A CDL is required to drive any of the following vehicles:
- Any combination of vehicles with a gross combined weight rating (GCWR) of 26,001 or more pounds, providing the gross vehicle weight rating (GVWR) of the vehicle being towed is in excess of 10,000 pounds.
- Any single vehicle with a GVWR of 26,001 or more pounds, or any such vehicle towing another not in excess of 10,000 pounds.
- Any vehicle, regardless of size, designed to transport 16 or more persons, including the driver.
- Any vehicle required by federal regulations to be placarded while transporting hazardous materials.
Hours Of Service
When a violation by either a driver or company is confirmed, an out-of-service order removes either the driver or the vehicle from the roadway until the violation is corrected.
Review Questions - Click On The Picture To Begin...

- Check wiper blades for damage
- All of these should be checked
- Check for damage and clean if dirty
Quote From The CDL Manual:
Condition of windshield:
- Check for damage and clean if dirty. - Check windshield wiper arms for proper spring tension. - Check wiper blades for damage, "stiff" rubber and securement.
- Spring hangers
- Condition of spring, spring hangers, shackles, u-bolts. - Shock absorber condition.
- Steering System
Font of Vehicle
- Condition of front axle. - Condition of steering system. - No loose, worn, bent, damaged or missing parts. - Must grab steering mechanism to test for looseness. - Condition of windshield. - Check for damage and clean if dirty. - Check windshield wiper arms for proper spring tension. - Check wiper blades for damage, "stiff" rubber and securement.

Click Anywhere To Close

- The High Road Training Program
- The High Road Article Series
- The Friendliest Trucker's Forum Ever!
- Email Updates When New Articles Are Posted

Apply For Paid CDL Training Through TruckingTruth
Did you know you can fill out one quick form here on TruckingTruth and apply to several companies at once for paid CDL training? Seriously! The application only takes one minute. You will speak with recruiters today. There is no obligation whatsoever. Learn more and apply here:
Apply For Paid CDL Training

TruckingTruth was founded by Brett Aquila (that's me!), a 15 year truck driving veteran, in January 2007. After 15 years on the road I wanted to help people understand the trucking industry and everything that came with the career and lifestyle of an over the road trucker. We'll help you make the right choices and prepare for a great start to your trucking career.
Becoming A Truck Driver

Becoming A Truck Driver is a dream we've all pondered at some point in our lives. We've all wondered if the adventure and challenges of life on the open road would suit us better than the ordinary day to day lives we've always known. At TruckingTruth we'll help you decide if trucking is right for you and help you get your career off to a great start.
- Privacy Policy

Are you a student trying to take a class? Click here...
Email Address Password
Register | Forgot your logon info?
By logging into J. J. Keller Training, you agree to the Terms of Use . For information about how we use any personal information we collect for our own purposes, please review our Notice at Collection .
- Construction
- HR & Legal
- Workplace Safety
- Recordkeeping
Safe and Smart CDL Class A Driver Training: Pre-Trip Vehicle Inspection: Walk Around

Per Seat Cost: 25 Points
Material Code: 62375
Cancel
Deleting this Training Reminder will remove all existing occurrences of this reminder and will stop all scheduled future reminders for this course.
About Us | Terms of Use | Privacy and Security | FAQ's | Contact Us
Copyright 2024 J. J. Keller & Associates, Inc.
Visit www.jjkeller.com for other products and services. (Web-457)
Access to this function has been disabled by your Training Coordinator. If you have questions, please contact:
We’re on the road right now – join in on the fun and follow @thebrokebackpacker on IG!
- Meet the Team
- Work with Us
- Czech Republic
- Netherlands
- Switzerland
- Scandinavia
- Philippines
- South Korea
- New Zealand
- South Africa
- Budget Travel
- Work & Travel
- The Broke Backpacker Manifesto
- Travel Resources
- How to Travel on $10/day
Home » Europe » Moscow
EPIC MOSCOW Itinerary! (2024)
Moscow is the heart of Mother Russia. Just the mention of this city conjures images of colorful bulbous pointed domes, crisp temperatures, and a uniquely original spirit!
Moscow has an incredibly turbulent history, a seemingly resilient culture, and a unique enchantment that pulls countless tourists to the city each year! Although the warmer months make exploring Moscow’s attractions more favorable, there’s just something about a fresh snowfall that only enhances the appearance of the city’s iconic sites!
If you’re a first-time visitor to Moscow, or simply wanting to see as much of the city as possible, this Moscow itinerary will help you do just that!

Unlock Our GREATEST Travel Secrets!
Sign up for our newsletter and get the best travel tips delivered right to your inbox.
Best Time To Visit Moscow
Where to stay in moscow, moscow itinerary, day 1 itinerary in moscow, day 2 itinerary in moscow, day 3 and beyond, staying safe in moscow, day trips from moscow, faq on moscow itinerary.
Here is a quick look at the seasons so you can decide when to visit Moscow!
The summer months (June-August) are a great time to travel to Moscow to take advantage of the enjoyable mild temperatures. This is considered peak travel season. Bear in mind that hotel prices rise along with the temperatures!

If you’re planning a trip to Moscow during fall (September-November) try to plan for early fall. This way the temperatures will still be pleasant and winter won’t be threatening.
Russian winters (December-February) are not for the faint of heart as Napoleon learned to his peril. Some days the sun will be out for less than an hour, and snow is guaranteed. Although winters are exceptionally cold, this is when you’ll get a true glimpse of the Moscow experience!
The best time to visit Moscow is during spring (March-May). The temperatures will begin to creep up and the sun begins to shine for significant portions of the day. Hotel rates will also have yet to skyrocket into peak ranges!
With a Moscow City Pass , you can experience the best of Moscow at the CHEAPEST prices. Discounts, attractions, tickets, and even public transport are all standards in any good city pass – be sure invest now and save them $$$ when you arrive!
Moscow is a large city with many accommodation options to choose from. Staying in a location that fits with your travel plans will only enhance your Moscow itinerary. Here is a brief introduction to a few great areas of the city we recommend checking out!
The best place to stay in Moscow to be close to all the action is Kitay-Gorod. This charming neighborhood will put you within walking distance to Moscow’s famous Red Square, thus cutting down on travel time. This will allow you to see more of the city in a shorter amount of time!

It’s surrounded by restaurants, cafes, bars, and shops. If you’re a first-time visitor to Moscow, or just planning a quick weekend in Moscow, then this area is perfect for you!
Another great area to consider is the Zamoskvorechye district. This area of the city offers a blend of new and old Moscow. It has an artsy vibe and there are plenty of fun sites you can explore outside of the main touristy areas of Moscow.
Of course, as in all areas of Moscow, it’s close to public transportation that will quickly connect you with the rest of the city and make your Moscow itinerary super accessible!
Best Airbnb in Moscow – Exclusive Apartment in Old Moscow

Modern and cozy, this apartment is in the heart of Old Moscow. Bordering the Basmanny and Kitay-Gorod districts, this two-bedroom flat is walking distance to the Kremlin and Red Square. Safe, quiet, and comfortable, this is the best Airbnb in Moscow, no question!
Best Budget Hotel in Moscow – Izmailovo Alfa Hotel

The Izmailovo Alfa Hotel is a very highly rated accommodation that provides all the components necessary for a comfortable trip to Moscow. There is an on-site restaurant, bar, fitness center, and an airport shuttle service. The rooms are modern and spacious and are equipped with a TV, heating/air conditioning, minibar, and more!
Best Luxury Hotel in Moscow – Crowne Plaza Moscow World Trade Centre

If you’re touring Moscow in luxury, the Crowne Plaza Moscow World Trade Centre is the hotel for you! Elegantly furnished rooms are equipped with a minibar, flat-screen TV, in-room safes, as well as tea and coffee making facilities! Bathrooms come with bathrobes, slippers, and free toiletries. There is also an onsite restaurant, bar, and fitness center.
Best Hostel in Moscow – Godzillas Hostel

Godzillas Hostel is located in the center of Moscow, just a short walk from all the major tourist attractions and the metro station. Guests will enjoy all the usual hostel perks such as self-catering facilities, 24-hour reception, Free Wi-Fi, and security lockers. This is one of the best hostels in Moscow and its wonderful social atmosphere and will make your vacation in Moscow extra special!
Godzillas Hostel is one of our favourites in Moscow but they’re not taking guests right now. We’re not sure if they’re closed for good but we hope they’ll come back soon.
An important aspect of planning any trip is figuring out the transportation situation. You’re probably wondering how you’re going to get to all of your Moscow points of interest right? Luckily, this sprawling city has an excellent network of public transportation that will make traveling a breeze!
The underground metro system is the quickest and most efficient way to travel around Moscow. Most visitors rely exclusively on this super-efficient transportation system, which allows you to get to pretty much anywhere in the city! It’s also a great option if you’re planning a Moscow itinerary during the colder months, as you’ll be sheltered from the snow and freezing temperatures!

If you prefer above-ground transportation, buses, trams, and trolleybuses, run throughout the city and provide a rather comfortable alternative to the metro.
Moscow’s metro, buses, trams, and trolleybuses are all accessible with a ‘Troika’ card. This card can be topped up with any sum of money at a metro cash desk. The ticket is simple, convenient, and even refundable upon return to a cashier!
No matter which method you choose, you’ll never find yourself without an easy means of getting from point A to point B!
Red Square | Moscow Kremlin | Lenin’s Mausoleum | St. Basil’s Cathedral | GUM Department Store
Spend the first day of your itinerary taking your own self guided Moscow walking tour around the historic Red Square! This is Moscow’s compact city center and every stop on this list is within easy walking distance to the next! Get ready to see all of the top Moscow landmarks!
Day 1 / Stop 1 – The Red Square
- Why it’s awesome: The Red Square is the most recognizable area in Moscow, it has mesmerizing architecture and centuries worth of history attached to its name.
- Cost: Free to walk around, individual attractions in the square have separate fees.
- Food nearby: Check out Bar BQ Cafe for friendly service and good food in a great location! The atmosphere is upbeat and they’re open 24/7!
The Red Square is Moscow’s historic fortress and the center of the Russian government. The origins of the square date back to the late 15th century, when Ivan the Great decided to expand the Kremlin to reflect Moscow’s growing power and prestige!
During the 20th century, the square became famous as the site for demonstrations designed to showcase Soviet strength. Visiting the Red Square today, you’ll find it teeming with tourists, who come to witness its magical architecture up close!

The square is the picture postcard of Russian tourism, so make sure to bring your camera when you visit! No matter the season, or the time of day, it’s delightfully photogenic!
It’s also home to some of Russia’s most distinguishing and important landmarks, which we’ve made sure to include further down in this itinerary. It’s an important center of Russia’s cultural life and one of the top places to visit in Moscow!
In 1990, UNESCO designated Russia’s Red Square as a World Heritage site. Visiting this historic site is a true bucket-list event and essential addition to your itinerary for Moscow!
Day 1 / Stop 2 – The Moscow Kremlin
- Why it’s awesome: The Moscow Kremlin complex includes several palaces and cathedrals and is surrounded by the Kremlin wall. It also houses the principal museum of Russia (the Kremlin Armory).
- Cost: USD $15.00
- Food nearby: Bosco Cafe is a charming place to grat a casual bite to eat. They have excellent coffee and wonderful views of the Red Square and the Moscow Kremlin!
The iconic Moscow Kremlin , also known as the Kremlin museum complex, sits on Borovitsky Hill, rising above the Moscow River. It is a fortified complex in the center of the city, overlooking several iconic buildings in the Red Square!
It’s the best known of the Russian Kremlins – citadels or fortress’ protecting and dominating a city. During the early decades of the Soviet era, the Kremlin was a private enclave where the state’s governing elite lived and worked.
The Kremlin is outlined by an irregularly shaped triangular wall that encloses an area of 68 acres! The existing walls and towers were built from 1485 to 1495. Inside the Kremlin museum complex, there are five palaces, four cathedrals, and the enclosing Kremlin Wall with Kremlin towers.
The Armoury Chamber is a part of the Grand Kremlin Palace’s complex and is one of the oldest museums of Moscow, established in 1851. It showcases Russian history and displays many cherished relics. Definitely make sure to check out this museum while you’re here!

The churches inside the Moscow Kremlin are the Cathedral of the Dormition, Church of the Archangel, Church of the Annunciation, and the bell tower of Ivan Veliki (a church tower).
The five-domed Cathedral of the Dormition is considered the most famous. It was built from 1475–1479 by an Italian architect and has served as a wedding and coronation place for great princes, tsars, and emperors of Russia. Church services are given in the Kremlin’s numerous cathedrals on a regular basis.
The Grand Kremlin Palace was the former Tsar’s Moscow residence and today it serves as the official workplace of the President of the Russian Federation (Vladimir Putin seems to have bagged that title for life) .
Insider Tip: The Kremlin is closed every Thursday! Make sure to plan this stop on your Moscow itinerary for any other day of the week!
Day 1 / Stop 3 – Lenin’s Mausoleum
- Why it’s awesome: The mausoleum displays the preserved body of Soviet leader Vladimir Lenin .
- Cost: Free!
- Food nearby: Khinkal’naya is a charming Georgian restaurant with vaulted ceilings and exposed brick. It’s a popular place with locals and right next to the Red Square!
Lenin’s Mausoleum, also known as Lenin’s Tomb, is the modernist mausoleum for the revolutionary leader Vladimir Lenin. It’s located within the Red Square and serves as the resting place for the Soviet leader! His preserved body has been on public display since shortly after his death in 1924.
It’s located just a few steps away from the Kremlin Wall and is one of the most controversial yet popular Moscow attractions!
Admission is free for everyone, you’ll only need to pay if you need to check a bag. Before visitors are allowed to enter the mausoleum, they have to go through a metal detector first. No metal objects, liquids, or large bags are allowed in the mausoleum!

Expect a line to enter the building, and while you’re inside the building, you’ll be constantly moving in line with other visitors. This means you won’t be able to spend as long as you’d like viewing the mausoleum, but you’ll still be able to get a good look. Pictures and filming while inside the building are strictly prohibited, and security guards will stop you if they see you breaking this rule.
The mausoleum is only open on Tuesday, Wednesday, Thursday, and Saturday – unless it’s a public holiday or a day scheduled for maintenance. The hours it’s open for each day are limited, make sure to check online before you visit to make sure you can fit this into your Moscow itinerary for that day!
Insider Tip: The Lenin’s Museum is there for people to pay their respect; remember to keep silent and move along quickly, it’s not intended for people to congregate around. Also, men are not allowed to wear hats and everyone must take their hands out of their pockets when inside the building.
Day 1 / Stop 4 – St. Basil’s Cathedral
- Why it’s awesome: A dazzling designed cathedral that showcases Russia’s unique architecture. This cathedral is one of the most recognizable symbols of the country!
- Cost: USD $8.00
- Food nearby: Moskovskiy Chaynyy Klub is a cozy cafe serving food items and pipping hot tea; it’s the perfect place to go if you’re visiting Moscow during the winter months!
Located in the Red Square, the ornate 16th-century St. Basil’s Cathedral is probably the building you picture when you think of Moscow’s unique architecture. Its colorful onion-shaped domes tower over the Moscow skyline!
The cathedral was built from 1555-1561 by order of Tsar Ivan the Terrible. It was designed with an iconic onion dome facade and enchanting colors that captivate all who see it. Fun fact: If you’re wondering why Russian churches have onion domes, they are popularly believed to symbolize burning candles!
This iconic cathedral has become a symbol of Russia due to its distinguishing architecture and prominent position inside the Red Square. It’s one of the most beautiful, wonderful, and mesmerizing historical cathedrals in the world!

The interior of the church surprises most people when they visit. In contrast to the large exterior, the inside is not so much one large area, but rather a collection of smaller areas, with many corridors and small rooms. There are 9 small chapels and one mausoleum grouped around a central tower.
Visiting the inside is like walking through a maze, there are even small signs all around the cathedral tracing where to walk, and pointing you in the right direction! The walls are meticulously decorated and painted with intricate floral designs and religious themes.
The church rarely holds service and is instead a museum open for the public to visit.
Insider Tip: During the summer months the line to go inside the cathedral can get quite long! Make sure to arrive early or reserve your tickets online to guarantee quick access into the cathedral!
Day 1 / Stop 5 – GUM Department Store
- Why it’s awesome: This is Russia’s most famous shopping mall! It’s designed with elegant and opulent architecture and provides a real sense of nostalgia!
- Cost: Free to enter
- Food nearby: Stolovaya 57 is a cafeteria-style restaurant with a variety of inexpensive Russian cuisine menu items including soups, salads, meat dishes, and desserts. It’s also located inside the GUM department store, making it very easily accessible when you’re shopping!
The enormous GUM Department Store is located within the historic Red Square. It has a whimsical enchantment to it that sets it apart from your typical department store.
A massive domed glass ceiling lines the top of the building and fills the interior with natural sunlight. There are live plants and flowers placed throughout the mall that give the shopping complex a lively and cheerful feel! A playful fountain sits in the center, further adding to the malls inviting a sense of wonder and amusement!
The GUM department store opened on December 2, 1893. Today, it includes local and luxury stores, including Fendi, Louis Vuitton, Prada, and many more! There are numerous cafes, restaurants, and even a movie theater inside!

For a special treat, head into Gastronom 1. This 1950s-style shop sells gourmet food items, like wine, freshly-baked pastries, cheese, Russian chocolate, and of course, vodka! Also, be on the lookout for a bicycle pedaling ice cream truck with an employing selling ice cream!
The ambiance is simply amazing, a trip to this idyllic shopping mall is an absolute must on any Moscow itinerary!
Insider Tip: Make sure to carry some small change on you in case you need to use the restroom, you’ll need to pay 50 rubles – or about USD $0.80 to use the bathroom in GUM.

Wanna know how to pack like a pro? Well for a start you need the right gear….
These are packing cubes for the globetrotters and compression sacks for the real adventurers – these babies are a traveller’s best kept secret. They organise yo’ packing and minimise volume too so you can pack MORE.
Or, y’know… you can stick to just chucking it all in your backpack…
Novodevichy Convent | Gorky Park | State Tretyakov Gallery | All-Russian Exhibition Center | Bolshoi Theater
On your 2 day itinerary in Moscow, you’ll have a chance to use the city’s excellent public transportation service! You’ll explore a few more of Moscow’s historic highlight as well as some modern attractions. These sites are a little more spread out, but still very easily accessible thanks to the metro!
Day 2 / Stop 1 – Novodevichy Convent
- Why it’s awesome: The Novodevichy Convent is rich in imperial Russian history and contains some of Russia’s best examples of classical architecture!
- Cost: USD $5.00
- Food nearby: Culinary Shop Karavaevs Brothers is a cozy and simple place to have a quick bite, they also have vegetarian options!
The Novodevichy Convent is the best-known and most popular cloister of Moscow. The convent complex is contained within high walls, and there are many attractions this site is known for!
The six-pillared five-domed Smolensk Cathedral is the main attraction. It was built to resemble the Kremlin’s Assumption Cathedral and its facade boasts beautiful snowy white walls and a pristine golden onion dome as its centerpiece. It’s the oldest structure in the convent, built from 1524 -1525, and is situated in the center of the complex between the two entrance gates.
There are other churches inside the convent as well, all dating back from many centuries past. The convent is filled with an abundance of 16th and 17th-century religious artworks, including numerous large and extravagant frescos!

Just outside the convent’s grounds lies the Novodevichy Cemetery. Here, you can visit the graves of famous Russians, including esteemed authors, composers, and politicians. Probably the most intriguing gravestone belongs to Russian politician Nikita Khruschev!
The Novodevichy Convent is located near the Moscow River and offers a peaceful retreat from the busy city. In 2004, it was proclaimed a UNESCO World Heritage Site. The convent remains remarkably well-preserved and is an outstanding example of Moscow Baroque architecture!
Insider Tip: To enter the cathedrals inside the complex, women are advised to cover their heads and shoulders, while men should wear long pants.
Day 2 / Stop 2 – Gorky Central Park of Culture and Leisure
- Why it’s awesome: A large amusement area in the heart of the city offering many attractions!
- Cost: Free!
- Food nearby: Check out Mepkato, located inside Gorky Central Park for a casual meal in a cozy setting. There are indoor and outdoor seating options and the restaurant is child-friendly!
Gorky Central Park of Culture and Leisure is a large green space in the heart of Moscow. The park opened in 1928, and it stretches along the scenic embankment of the Moskva River. It covers an area of 300-acres and offers a lovely contrast from the compact city center.
You’ll find all sorts of wonderful attractions, from boat rides to bike rentals to tennis courts and ping-pong tables, and much more! there are an open-air cinema and festive events and concerts scheduled in the summer months. A wide selection of free fitness classes is also offered on a regular basis, including jogging, roller skating, and dancing!
Although many of the options you’ll find here are more suited for outdoor leisure during the summer, you’ll also a selection of winter attractions, including one of Europe’s largest ice rinks for ice-skating!

If you’re trying to decide what to do in Moscow with kids, the park also offers several venues designed specifically for kids. Check out the year-round Green School which offers hands-on classes in gardening and art! You can also feed the squirrels and birds at the Golitsinsky Ponds!
The park is very well maintained and kept clean and the entrance is free of charge, although most individual attractions cost money. There is also Wi-Fi available throughout the park.
With so many attractions, you could easily spend all day here! If you’re only planning a 2 day itinerary in Moscow, make sure to plan your time accordingly and map out all the areas you want to see beforehand!
Day 2 / Stop 3 – The State Tretyakov Gallery
- Why it’s awesome: The gallery’s collection consists entirely of Russian art made by Russian artists!
- Food nearby : Brothers Tretyakovs is located right across the street from the gallery. It’s a wonderfully atmospheric restaurant serving top quality food and drinks!
The State Tretyakov Gallery was founded in 1856 by influential merchant and collector Pavel Tretyakov. The gallery is a national treasury of Russian fine art and one of the most important museums in Russia!
It houses the world’s best collection of Russian art and contains more than 130, 000 paintings, sculptures, and graphics! These works have been created throughout the centuries by generations of Russia’s most talented artists!

The exhibits range from mysterious 12th-century images to politically charged canvases. The collection is rich and revealing and offers great insight into the history and attitudes of this long-suffering yet inspired people!
All pictures are also labeled in English. If you plan to take your time and see everything inside the museum it will take a good 3-4 hours, so make sure to plan your Moscow trip itinerary accordingly! This gallery is a must-see stop for art lovers, or anyone wanting to explore the local culture and history of Russia in a creative and insightful manner!
Insider Tip: When planning your 2 days in Moscow itinerary, keep in mind that most museums in Moscow are closed on Mondays, this includes The State Tretyakov Gallery!
Day 2 / Stop 4 – All-Russian Exhibition Center
- Why it’s awesome: This large exhibition center showcases the achievements of the Soviet Union in several different spheres.
- Food nearby: Varenichnaya No. 1 serves authentic and homestyle Russian cuisine in an intimate and casual setting.
The All-Russian Exhibition Center is a massive park that presents the glory of the Soviet era! It pays homage to the achievements of Soviet Russia with its many different sites found on the property.
The center was officially opened in 1939 to exhibit the achievements of the Soviet Union. It’s a huge complex of buildings and the largest exhibition center in Moscow. There are several exhibition halls dedicated to different achievements and every year there are more than one hundred and fifty specialized exhibitions!

The Peoples Friendship Fountain was constructed in 1954 and is a highlight of the park. The stunning gold fountain features 16 gilded statues of girls, each representing the former Soviet Union republics.
The Stone Flower Fountain was also built in 1954 and is worth checking out. The centerpiece of this large fountain is a flower carved from stones from the Ural Mountains! Along the side of the fountain are various bronze sculptures.
You will find many people zipping around on rollerblades and bicycles across the large area that the venue covers. It’s also home to amusement rides and carousels, making it the perfect place to stop with kids on your Moscow itinerary! Make sure to wear comfortable shoes and allow a few hours to explore all the areas that interest you!
Day 2 / Stop 5 – Bolshoi Theater
- Why it’s awesome: The Bolshoi Theater is a historic venue that hosts world-class ballet and opera performances!
- Cost: Prices vary largely between USD $2.00 – USD $228.00 based on seat location.
- Food nearby: Head to the Russian restaurant, Bolshoi for high-quality food and drinks and excellent service!
The Bolshoi Theater is among the oldest and most renowned ballet and opera companies in the world! It also boasts the world’s biggest ballet company, with more than 200 dancers!
The theater has been rebuilt and renovated several times during its long history. In 2011 it finished its most recent renovation after an extensive six-year restoration that started in 2005. The renovation included an improvement in acoustics and the restoration of the original Imperial decor.
The Bolshoi Theater has put on many of the world’s most famous ballet acts! Tchaikovsky’s ballet Swan Lake premiered at the theater in 1877 and other notable performances of the Bolshoi repertoire include Tchaikovsky’s The Sleeping Beauty and The Nutcracker!

Today, when you visit the theater, you can expect a magical performance from skilled singers, dancers, and musicians with the highest level of technique!
If you don’t have time to see a show, the theater also provides guided tours on select days of the week. Tours are given in both Russian and English and will provide visitors with a more intimate look at the different areas of the theater!
The stage of this iconic Russian theater has seen many outstanding performances. If you’re a fan of the performing arts, the Bolshoi Theater is one of the greatest and oldest ballet and opera companies in the world, making it a must-see attraction on your Moscow itinerary!

Godzillas Hostel
Godzillas Hostel is located in the center of Moscow, just a short walk from all the major tourist attractions and the metro station.
- Towels Included
Cosmonautics Museum | Alexander Garden | Ostankino Tower | Izmaylovo District | Soviet Arcade Museum
Now that we’ve covered what to do in Moscow in 2 days, if you’re able to spend more time in the city you’re going to need more attractions to fill your time. Here are a few more really cool things to do in Moscow we recommend!
Memorial Museum of Cosmonautics
- Hear the timeline of the ‘space race’ from the Russian perspective
- This museum is fun for both adults and children!
- Admission is USD $4.00
The Memorial Museum of Cosmonautics is a museum dedicated to space exploration! The museum explores the history of flight, astronomy, space exploration, space technology, and space in the arts. It houses a large assortment of Soviet and Russian space-related exhibits, and the museum’s collection holds approximately 85,000 different items!

The museum does an excellent job of telling the full story of the exciting space race between the USSR and the US! It highlights the brightest moments in Russian history and humanity and is very interesting and fun for all ages!
If you’re a fan of space or just curious about gaining insight into Russia’s fascinating history of space exploration, make sure to add this to your 3 day itinerary in Moscow!
The Alexander Garden
- A tranquil place to relax near the Red Square
- Green lawns dotted with sculptures and lovely water features
- The park is open every day and has no entrance fee
The Alexander Garden was one of the first urban public parks in Moscow! The garden premiered in 1821 and was built to celebrate Russia’s victory over Napoleon’s forces in 1812!
The park is beautiful and well maintained with paths to walk on and benches to rest on. The park contains three separate gardens: the upper garden, middle garden, and lower garden.

Located in the upper garden, towards the main entrance to the park is the Tomb of the Unknown Soldier with its eternal flame. This monument was created in 1967 and contains the body of a soldier who fell during the Great Patriotic War!
The park stretches along all the length of the western Kremlin wall for about half a mile. Due to its central location in the city, it’ll be easily accessible when you’re out exploring The Red Square.
It provides a bit of relief from the city’s high-energy city streets. Bring a picnic lunch, go for a walk, or just sit and people watch, this is one of the best Moscow sites to wind-down and relax!
Ostankino Television Tower
- Television and radio tower in Moscow
- Currently the tallest free-standing structure in Europe
- Make sure you bring your passport when you visit, you can’t go up without it!
For spectacular views of the city, make sure to add the Ostankino Television Tower to your itinerary for Moscow! This impressive free-standing structure provides stunning views of the city in every direction. The glass floor at the top also provides great alternative views of the city!

It takes just 58 seconds for visitors to reach the Tower’s observation deck by super fast elevator. The tower is open every day for long hours and is a great site in Moscow to check out! There is even a restaurant at the top where you can enjoy rotating views of the city while you dine on traditional Russian cuisine or European cuisine!
The tower is somewhat of an architectural surprise in a city that is not known for skyscrapers! To see the city from a new perspective, make sure to add this stop to your Moscow itinerary!
Izmaylovo District
- The most popular attractions in this district are the kremlin and the flea market
- Outside of the city center and easy to reach via metro
- Most popular during the summer and on weekends
Travel outside the city center and discover a unique area of the city! The Izmaylovo District is a popular destination for locals and tourists alike, and one of the coolest places to see in Moscow! The two main attractions we recommend checking out are the Kremlin and the flea market.
The Izmailovo Kremlin was established as a cultural center and molded after traditional Russian architecture. This colorful complex is home to several single-subject museums, including a Russian folk art museum and a vodka museum!

Next to the Kremlin is the Izmailovo open-air market, which dates back to the 17th century! The market is connected to the Izmailovo Kremlin by a wooden bridge. Pick up all your Russian souvenirs here, including traditional handicrafts, paintings, books, retro toys, and Soviet memorabilia!
You will find many hand-made and hand-painted options available at higher prices, as well as mass-produced souvenir options at lower prices!
Museum of Soviet Arcade Games
- Closed on Mondays
- Filled with old arcade games that visitors get to try out!
- The museum also includes a small cafe and burger shop
For something a little different, check out the Museum of Soviet Arcade Games! The museum features roughly 60 machines from the Soviet era, including video games, pinball machines, and collaborative hockey foosball! The machines inside the museum were produced in the USSR in the mid-1970s.

The best part is, most of the games are still playable! Purchase tickets and try the games out for yourself! The museum also has a neat little screening room that plays old Soviet cartoons and an area with Soviet magazines! This unique attraction is a fun addition to a 3 day itinerary in Moscow, and an attraction that all ages will enjoy!
Whether you’re spending one day in Moscow, or more, safety is an important thing to keep in mind when traveling to a big city! Overall, Moscow is a very safe place to visit. However, it is always recommended that tourists take certain precautions when traveling to a new destination!
The police in Moscow is extremely effective at making the city a safe place to visit and do their best to patrol all of the top Moscow, Russia tourist attractions. However, tourists can still be a target for pickpockets and scammers.
Moscow has a huge flow of tourists, therefore there is a risk for pickpocketing. Simple precautions will help eliminate your chances of being robbed. Stay vigilant, keep your items close to you at all times, and don’t flash your valuables!
If you’re planning a solo Moscow itinerary, you should have no need to worry, as the city is also considered safe for solo travelers, even women. Stay in the populated areas, try and not travel alone late at night, and never accept rides from strangers or taxis without a meter and correct signage.
The threat of natural disasters in Moscow is low, with the exception of severe winters when the temperature can dip below freezing! Bring a good, warm jacket if you visit in Winter.
However, please note that Russian views on homsexuality are far less accepting than those in Western Europe. Likewise, Non-Caucasian travellers may sadly encounter racism in Russia .
Don’t Forget Your Travel Insurance for Moscow
ALWAYS sort out your backpacker insurance before your trip. There’s plenty to choose from in that department, but a good place to start is Safety Wing .
They offer month-to-month payments, no lock-in contracts, and require absolutely no itineraries: that’s the exact kind of insurance long-term travellers and digital nomads need.

SafetyWing is cheap, easy, and admin-free: just sign up lickety-split so you can get back to it!
Click the button below to learn more about SafetyWing’s setup or read our insider review for the full tasty scoop.
Now that we’ve covered all the top things to see in Moscow, we thought we’d include some exciting day trips to other areas of the country!
Sergiev Posad (Golden Ring)

On this 7-hour guided tour, you’ll visit several scenic and historic areas of Russia. Start your day with hotel pick-up as you’re transferred by a comfortable car or minivan to Sergiev Posad. Admire the charming Russian countryside on your drive and enjoy a quick stop to visit the Russian village, Rudonezh!
You’ll see the majestic Saint Spring and the Church of Sergiev Radonezh. You’ll also visit the UNESCO World Heritage Site, Trinity Lavra of St. Sergius, one of the most famous Orthodox sites in Russia!
Lastly, you’ll swing by the local Matreshka market and enjoy a break in a nice Russian restaurant before returning to Moscow!
Day Trip to Vladimir and Suzdal

On this 13-hour trip, you’ll discover old Russia, with its picturesque landscapes and white-stoned beautiful churches! You’ll visit the main towns of the famous Golden Ring of Russia – the name for several cities and smaller towns north-east of Moscow.
Your first stop will be in the town of Vladimir, the ancient capital of all Russian principalities. The city dates back to the 11th century and is one of the oldest and the most important towns along the Ring! Next, you’ll visit Suzdal, a calm ancient Russian town north of Vladimir with only 13,000 inhabitants!
The old-style architecture and buildings of Suzdal are kept wonderfully intact. If you’re spending three days in Moscow, or more, this is a great option for exploring the charming areas outside the city!
Zvenigorod Day Trip and Russian Countryside

On this 9-hour private tour, you’ll explore the ancient town of Zvenigorod, one of the oldest towns in the Moscow region! As you leave Moscow you’ll enjoy the stunning scenery along the Moscow River, and make a few stops at old churches along the way to Zvenigorod.
Upon arrival, you’ll explore the medieval center, including the 14th-century Savvino-Storozhevsky Monastery. Next, you’ll take a break for lunch (own expense) where you’ll have the chance to try out the Russian cuisine! Next, you’ll visit the Museum of Russian Dessert and sip on tea at a Russian tea ceremony.
The final stop of the day is at the Ershovo Estate, a gorgeous place to walk around and enjoy nature!
Day Trip to St Petersburg by Train visiting Hermitage & Faberge

On this full-day tour, you’ll enjoy a a full round trip to St Petersburg where you’ll spend an exciting day exploring another popular Russian city! You’ll be picked up from your hotel in Moscow and be transferred to the train station where you’ll ride the high-speed train ‘Sapsan’ to St Petersburg.
Upon arrival, you’ll start the day by touring the Hermitage Museum and the Winter Palace. Next, you’ll visit the Faberge Museum, where you’ll explore the impressive collection of rare Faberge Eggs! In the afternoon, enjoy a sightseeing boat ride and a traditional 3-course Russian lunch.
If you’re spending 3 days in Moscow, or more, this is an excellent trip to take!
Trip to Kolomna – Authentic Cultural Experience from Moscow

On this 10-hour tour, you’ll escape the city and travel to the historic town of Kolomna! First, you’ll visit the 14th-century Kolomna Kremlin, home to the Assumption Cathedral and an abundance of museums!
Next, enjoy lunch at a local cafe (own expense) before embarking on a tour of the Marshmallow Museum – of course, a marshmallow tasting is provided! Your final stop is the Museum of Forging Settlements, where displays include armor and accessories for fishing and hunting.
Discover this beautiful Russian fairytale city on a private trip, where all of the planning is taken care of for you!

Stash your cash safely with this money belt. It will keep your valuables safely concealed, no matter where you go.
It looks exactly like a normal belt except for a SECRET interior pocket perfectly designed to hide a wad of cash, a passport photocopy or anything else you may wish to hide. Never get caught with your pants down again! (Unless you want to…)
Find out what people want to know when planning their Moscow itinerary.
How many days you need in Moscow?
We recommend that you spend at least two or three days in Moscow to take it all in.
What’s the best month to visit Moscow?
The best time to visit Moscow is over the spring, from March to May as temperatures are mild, crowds are thin and prices are reasonable.
What are some unusual things to do in Moscow?
I mean, queuing up to see an almost 100 year old corpse is pretty unsual! Check out Lenin’s Mausoleum if you fancy it!
What are some fun things to do in Moscow?
The Memorial Museum of Cosmonautics is a fun place to explore the famous space race from the perspective of the ‘other side’!
We hope you enjoyed our Moscow itinerary! We’ve made sure to cover all the Moscow must-sees as well as some unique attractions in the city! Our addition of insider tips, favorite food stops, and day trips from Moscow is an added bonus and will guarantee you make the most out of your exciting Russian vacation!
Immerse yourself in the modern and traditional Russian lifestyle! Get lost in museums, witness awe-inspiring architecture, and indulge in Russian cuisine! Spend the day strolling through all of the charming sites of Moscow, admiring the beautiful scenery and discovering the city’s fairytale-like enchantment!

And for transparency’s sake, please know that some of the links in our content are affiliate links . That means that if you book your accommodation, buy your gear, or sort your insurance through our link, we earn a small commission (at no extra cost to you). That said, we only link to the gear we trust and never recommend services we don’t believe are up to scratch. Again, thank you!

Alya and Campbell

Share or save this post
Leave a Reply Cancel reply
Your email address will not be published. Required fields are marked *
Save my name, email, and website in this browser for the next time I comment.
Notify me of followup comments via e-mail.
Serving your CDL Learner Permit requirement needs
- Texas CDL Permit Training Program
- | 2024 TX CDL Skills Tests
- TX CDL Pre-Trip Inspection
Texas CDL Pre-Trip Checklist Vehicle Inspection (Walk-Around) Skills Test
First of three texas cdl skills tests - the texas cdl vehicle checklist inspection skills test must be passed prior to being allowed to continue., there are three parts to the texas cdl skills test.
- First Part: Texas CDL PreTrip Inspection on THIS page . . .
- Second Part: Texas CDL Basic Vehicle Control
- Third Part: Texas CDL Road Test
Texas CDL Pre Trip Inspection Diagram
 Skills Test")
Vehicle Pre-Trip Checklist Inspection - Texas CDL Skills Tests:
Quick study guide to texas cdl pre-trip inspection.
- Engine Compartment
- Cab Check and Engine Start
- Brake Check
- External Cab

1. Texas CDL Engine Compartment Pre-Trip Inspection
- Look for puddles on the ground that would indicate a leak.
- Look for dripping fluids on the underside of the engine and transmission.
- Inspect hoses for "good" condition and leaks.
- Indicate the location of dipstick.
- Make sure the oil level is within safe operating range and above the refill mark.
- a) Checking the reservoir sight glass, or
- b) Removing the radiator cap if the engine is not hot and visually checking the coolant level.
- Indicate the location of the power steering fluid dipstick.
- Confirm that there is an adequate power steering fluid level that is above the refill mark.
- power steering belt
- water pump belt
- alternator belt
- air compressor belt
2. Texas CDL Cab Check and Engine Start - Pre-Trip Inspection
- Manual Transmissions:
- Depress the clutch.
- Place the gearshift lever in neutral.
- Start the engine and then slowly release the clutch.
- Automatic Transmissions:
- Confirm the vehicle is in �park� and start the engine.
- Confirm that the oil pressure gauge is functioning.
- Make sure that the pressure gauge shows increasing or normal oil pressure, otherwise that the warning light goes off.
- If equipped with an oil temperature gauge, it should begin to gradually rise to a normal operating range.
- Confirm that the temperature gauge is working.
- The temperature gauge should begin to climb to the normal operating range.
- The gauges should show the alternator and/or generator charging; otherwise the warning light should be set off.
- Check for proper operation and acceptable readings on the air and vacuum gauges.
- The speedometer should not be obscured or obviously broken.
- Mirrors should be clean and adjusted properly from the inside.
- Windshield should be clean with no illegal stickers, obstructions, or damage to the glass.
- Three red reflective triangles.
- One properly charged and rated fire extinguisher.
- Spare electrical fuses.
- Power steering equipped vehicles: With the engine running, play should not exceed 10 degrees (or about two inches on a 20-inch wheel) before the front left wheel barely moves when you turn the steering wheel back and forth.
- Non-power steering vehicles: Play should not exceed 10 degrees (or about two inches on a 20-inch wheel) when you turn the steering wheel back and forth.
- Check that the wiper arms and blades are not damaged and operate smoothly.
- Windshield washers must operate correctly if the vehicle is equipped.
- Left turn signal
- Right turn signal
- 4-way emergency flashers
- High beam headlight
- Check that air horn and/or electric horn are operational.
- Test that the heater and defroster works.
- Check that the safety belt is securely mounted, adjusts, and latches properly.
- Clearance lights (red on rear, amber elsewhere)
- Headlights (high and low beams)
- Turn signals
- 4-way flashers
- Brake lights
- Red reflectors (on rear) and amber reflectors (elsewhere)
3. Texas CDL Brake Check Pre-Trip Inspection
- Apply parking brake only and shift into a lower gear. Gently pull against the brake by releasing the clutch, and it should hold the vehicle.
- With the engine running, apply the foot brake and hold for five seconds. The pedal should not move (lose pressure) during those five seconds.
- If equipped with a hydraulic brake reserve system, with the key in the off position, depress the brake pedal and listen for the sound of the reserve system electric motor turning on.
- Check that the warning buzzer and light is off.
- Check the proper operation of the foot brake by moving the vehicle forward slowly at about 5 mph and applying the brake firmly.
- With a fully-charged air system, typically at 120 psi, turn the engine off, chock the wheels, release (push in) the parking brake button and trailer air supply button (for combination vehicles) and time the air pressure drop. After the initial drop, the rate of pressure loss should not be more than 2 psi per minute for single vehicles and no more than 3 psi per minute for combination vehicles
- Release (push in) the parking brake and trailer air supply button (for combination vehicles), and apply pressure to the foot brake. After the initial drop in pressure, the rate of pressure loss should be no more than 3 psi per minute for single vehicles and no more than 4 psi per minute for combination vehicles.
- Turn the key to the on position. Rapidly depress and release the foot brake to reduce air tank pressure. The low air pressure warning signal must come on before the pressure drops below 60 psi.
- Continue to rapidly apply and release the service brake pedal further reducing air pressure. The trailer air supply button (for combination vehicles) and parking brake button should pop out when the pressure falls to usually between 20 to 40 psi. This should activate the spring brakes.
- While the engine is operating at 1800 RPM, the pressure should rise from 85 to 100 psi within 45 seconds in dual air systems.
- With normal air pressure, release the parking brake and trailer air supply button (for combination vehicles), move the vehicle forward slowly at about 5 mph and apply the brakes firmly using the brake pedal. Test for any pulling to any one side or delayed stopping action.
4. Texas CDL External Cab | Truck | Bus Pre-Trip Inspection
- Check that the steering box is mounted securely and is not leaking.
- Check for damage to power steering hoses and power steering fluid leaks.
- Check that connecting links, arms, and rods from the steering box to the wheels are not worn and cracked.
- Check that the joints and sockets are not loose or worn and that there are no missing nuts, bolts, or cotter keys.
- Check for shifted, cracked, broken, or even missing leaf springs.
- Check for broken and distorted coil springs.
- If equipped, check the air ride suspension for damage and leaks.
- Look for cracked or broken spring hangers, missing or damaged bushings, and broken, loose, or missing bolts, U-bolts or other axle mounting parts.
- Confirm that the shock absorbers are secure and that there are no leaks.
- Look for missing, loose or broken parts.
- The angle between the adjuster arm and push rod should be not less than 90 degrees when the brakes are applied and when the brakes are released a little over 90 degrees.
- When pulled by hand, the brake rod should not move more than one inch with the brakes released.
- Check that brake chambers are not dented, cracked, or leaking and that they are mounted securely.
- Check for worn, cracked or leaking hoses, lines, and couplings.
- Check for dents, cracks or holes, and loose or missing bolts.
- Brake linings and pads should not be worn thin.
- Where visible, check that a reasonable amount of brake lining is showing.
- Check for damaged or bent rims. Rims cannot have welding repairs.
- Tread depth: need a minimum tread depth of 4/32 on steering axle tires, 2/32 on all other tires.
- Tire condition: Check that tread is evenly worn and without cuts or damage to tread or sidewalls. Valve caps and stems should not be missing, broken, or damaged.
- Tire inflation: Check for proper inflation with a tire gauge or by striking tires with a mallet.
- Check that hub oil/grease seals and axle seals are not leaking.
- Check for any missing lug nuts, cracks, distortions, and for signs of looseness such as rust trails or shiny threads.
- Check for cracked or distorted bolt holes.
- Spacers should not be bent, damaged, or rusted through.
- Spacers should be centered evenly.
- Check doors for any damage and that they open and close properly.
- Hinges should be secure with seals intact.
- Mirrors and mirror brackets should be mounted securely.
- Check for secure tanks, tight caps, and that the tanks or lines don�t leak.
- Check to see that batteries are secure, for tight cable connections, and that cell caps are present.
- Check for signs of excessive corrosion.
- Battery box and cover/door must be secure.
- The drive shaft should not be bent or cracked.
- Couplings should be secure.
- Check system for rust or carbon soot as they are signs of damage or leaks.
- System should be secure and connected tightly.
- Check the longitudinal frame members, cross members, box, and floor for cracks, broken welds, holes or other damage.
- If equipped with mud flaps or splash guards, check that they are mounted securely and not damaged.
- Doors and hinges must open, close, and latch properly from the outside, and should not be damaged.
- Check that any ties, straps, chains, and binders are secure.
- If equipped with a cargo lift, it must be fully retracted and latched securely, and should not be leaking, damaged or missing any parts.
- Check that electrical lines and air hoses are not cut, chafed, spliced, or worn, the steel braid should not show through its outer lining.
- Make sure the lines and hoses are not tangled or dragging against tractor parts.
- Make sure the catwalk is securely bolted to tractor frame.
- Check for loose or missing mounting brackets, clamps, bolts, or nuts. The fifth wheel and the slide mounting must be solidly attached.
- Other types of coupling systems should be inspected for missing or broken components.
- Check that the locking jaws fully close around the kingpin
- On other types of coupling systems the locking mechanism should not have missing or broken parts and should lock securely.
- The platform structure supporting the fifth wheel skid plate should be free of cracks or breaks.
- If equipped with a release arm, check that it engaged and that the safety latch is in place.
- The kingpin should not be bent.
- The visible part of the apron should not be bent, cracked, or broken.
- The trailer should be laying flat on the fifth wheel skid plate without any gap.
- Locking pins should be fully engaged.
- The fifth wheel should be positioned so the tractor frame will not strike the landing gear or the tractor.
5. Texas CDL Trailer Pre-Trip Inspection
- The trailer air connectors should be sealed and in good condition.
- Glad hands should be locked in place and free of damage or air leaks.
- The trailer electrical plug should be firmly seated and locked in place.
- If equipped with a header board, check to see that it is secure, damage-free and strong enough to contain cargo.
- If equipped with a canvas or tarp carrier, it should be mounted and fastened securely.
- Check the front area of enclosed trailers for cracks, bulges or holes.
- The landing gear must be fully raised. Check that it has no missing parts with a non-damaged support frame and that the crank handle is secure.
- Check for air or hydraulic leaks if power operated.
- Check that doors are not damaged and that they open, close, and latch properly from the outside.
- Ties, straps, chains, and binders should be secure.
- Any cargo lifts should be checked for leaking, damaged or missing parts, and should be fully retracted and latched securely.
- The frame, cross members, box, and floor should be checked for holes, cracks, broken welds or other damage.
- If equipped, make sure that the release arm is secured and that the locking pins are locked in place.
- Suspension System
- Doors, Ties and Lift
- Splash Guards
Are YOU ready to get YOUR Texas CDL? Prepare for YOUR Texas CDL Tests NOW . . .
- In separate study modules - you won't need all of them - don't waste time on what you don't require.
- 670 practice Texas CDL test questions with actual answers.
- Access to CDL videos covering written and skills tests.
- CDL study guide in both text and audio - listen as you read along .
- CDL study Quick Reviews.
- Interactive online CDL Quizzes.
- and much more!
- United Arab Emirates
- Switzerland
- The Netherlands
- Puerto Rico
- United States
- New Zealand
- ➨ Choose from World Map
- Budget Travel
- Family Travel
- Getting Around
- Visas & Passports
- Work with Us
Browsing Category
- Czech Republic
- Saint Martin
- Uncategorized
Moscow Travel Guide: Best Things to Do + More [2023]
· everything to know about visiting moscow, including the best things to do and how to get around. ·.

Moscow is Russia’s vibrant capital city, and it also happens to be the largest city in all of Europe. The city’s long and infamous history makes it one of the most unique places we have ever visited.
The architecture ranges from centuries-old palaces to uniform, gray concrete buildings. The people range from cold and private to warm and welcoming. Moscow is a city is strong juxtapositions, and we learned a lot during our time there.
This post will break down all you need to know about visiting Moscow, including the best things to do, how to get there, how to get around, and more.

The Best Things to Do in Moscow
1. explore the red square.
The Red Square is the heart of Moscow. Most of the city’s top attractions can be found here, including just about everything on this list. The Kremlin, St. Basil’s Cathedral, and Lenin’s Mausoleum are all located here, and the State Historical Museum and GUM are not far from here, either.
The Red Square is a common home for parades, protests, and seasonal celebrations. There are massive Christmas celebrations here, with food vendors and carnival rides set up in numbers.

2. Check Out the Ziferblat
The Ziferblat is a café in Moscow that is unlike any café we have ever been to. While most cafes charge you for your drinks and food, the Ziferblat charges you for your time.
Upon arrival, you are given a clock. When you leave, the barista calculates how much time you spent in the café and charges you accordingly. This concept was created to help visitors to be more intentional with their time, and the cafe itself is incredibly charming.
For a detailed look at everything you need to know before you visit, make sure you read my post about visiting the Ziferblat Cafe in Moscow .

3. Marvel at St. Basil’s Cathedral
St. Basil’s Cathedral is one of the most iconic churches in the world, and it was the single thing we were most excited to see while in Moscow. Built almost 500 years ago, St. Basil’s Cathedral is recognized by its colorful domes and whimsical style. The church is of the Russian Orthodox faith, and the inside is just as wondrous as the outside.
St. Basil’s Cathedral is located on the edge of the Red Square, making it incredibly convenient to visit. Entrance for non-worshippers costs 800 rubles, and tickets can be bought at the church

4. Explore the Kremlin
The Kremlin is the largest active fortress in Europe, and it is the site of most of Russia’s government affairs. In addition to government buildings, the Kremlin Complex is filled with courtyards, towers, and museums that are open to the public. If you have the time, you could spend a couple of days fully exploring all that there is to see in the Kremlin.

5. Walk Through Lenin’s Mausoleum
Vladimir Lenin is one of the most important figures in Russian history, and his body is located perfectly embalmed in a mausoleum in the Red Square. The Mausoleum is open to the public to visit, and as long as you are willing to go through a few security checks, it is easily one of the best things to do in Moscow. Its convenient location in the Red Square makes it a can’t miss attraction.
There is absolutely no photography allowed inside the Mausoleum. Do not test this rule.

6. Wander Along Arbat Street
The Arbat is a very popular street in Moscow that is lined with stores, cafes, and other touristy attractions. It is one of the oldest streets in the city, dating back to the 1400s. This street is both quaint and trendy, and there are many walking tours that introduce tourists to the neighborhood’s wonders and highlights.

7. Catch a Show at the Bolshoi Theatre
As a lover of the arts, it is hard to think of Moscow and not think of ballet. Russia has always been a top dog in the world of fine arts, and Bolshoi Theater is one of the best places to catch a performance. We were lucky enough to attend an Opera here, and it is a venue that you don’t want to miss out on if you enjoy opera, ballet, or orchestral performances.
8. Visit the State Historical Museum
The State Historical Museum is one of the most respected museums in Moscow. Despite its name, it is not really focused on the history of Russia as a nation. Rather, it contains a collection of artifacts from all throughout Russia’s history.
The museum’s collection is very broad in nature. It houses some items from indigenous tribes that used to occupy the region, pieces collected by the Romanov family, and more.
9. Wander Around GUM
GUM is an absolutely massive mall within walking distance of the Red Square. It isn’t just the size that draws visitors here; it’s the sense of luxury. The mall is so beautiful inside, much like the metro stations.
While visiting a mall might not sound like it belongs on a bucket list, this mall does. You will not want to miss out on visiting GUM while in Moscow.

10. Admire the Cathedral of Christ the Saviour
While St. Basil’s Cathedral is the most iconic church in Moscow, it isn’t the only one. The Cathedral of Christ the Saviour is absolutely stunning, with massive golden domes. It is the tallest Orthodox church in the world, and it is the seat of the Orthodox Patriarch of Moscow.
It is located just about a mile from the Red Square, just south of the Kremlin Complex. You can walk to it from the Red Square in about 20 minutes.
How to Get to Moscow
Flying to moscow.
Moscow has three major international airports: Sheremetyevo (SVO) , Domodedovo (DMO) , and Vnukovo (VKO) . All three of them are directly connected to downtown Moscow by the Aeroexpress trains, which leave every 30 minutes throughout the day. By Aeroexpress train, you can expect to get to the city center in 25-45 minutes depending on the airport that you fly into.
Sheremetyevo is the biggest and busiest of the three airports, and it is the one you are most likely to fly into – especially if you are coming from outside of Europe or the Caucus region. We flew into Sheremetyevo on a direct flight from New York City.
I usually provide backup airport options, because flying right into the city isn’t always the cheapest way to get where you’re going. Unfortunately, when it comes to Moscow, don’t really have a choice other than to fly right into Moscow. It is a very remote city, and it is usually the cheapest place to fly into in Russia as a whole.
Since Sheremetyevo is so busy, you will probably find a great flight option anyway. I wrote in my post about finding cheap flights that using hub airports will lead to more affordable airfare, and the same logic applies here. Even though Russia’s national airline, Aeroflot, is no longer a member of the SkyTeam Alliance, Moscow is still a major hub connecting passengers from all over the world.

READ OUR CHEAT SHEET
Train or Bus to Moscow
Trains and buses are one of the most popular ways to get around Europe. However, they’re of very little use when you’re trying to get to Moscow.
Moscow is hundreds of miles from the nearest major cities. The only major European city that can even be reached within 8 hours on the ground is St. Petersburg, and even the Baltic capitals of Riga, Vilnius, and Tallinn are over 12 hours away.
If you want to get to Moscow, the best option is almost always to fly. While the train routes to Moscow are scenic, they simply take forever.
How to Get Around Moscow
METRO | TROLLEYS | TRAMS | BUSES
Moscow has one of the most memorable metro systems in the world. Its metro lines are very deep underground, and the stations are absolutely stunning. Each station has its own unique style, but all of them contain escalators that seem to go on forever.

The system was built in an effort to showcase the power of the Soviet Union and its bright future. The plans were a form of propaganda, but they resulted in what is still one of the most visually appealing subway systems on earth.
Moscow’s metro system isn’t just pretty. It is also very useful and accessible. The system has 17 lines that connect the city and its surrounding area.
But wait; there’s more!
The Moscow metro system is also incredibly affordable, with each ride costing less than a dollar. The metro is by far the best way to get around Moscow, as it is almost impossible to beat the connection times and the low cost to ride.
Tickets can be bought at electronic, English-speaking kiosks in stations, or directly from ticket counters at certain larger stations. There are also day passes available, which are a very solid option if you plan on riding the metro several times per day.

The metro is by far the best way to get around Moscow.
In addition to the metro system, Moscow also has a network of buses, trams, and trolleys. This system is nowhere near as convenient or well-connected as the metro, though, and is likely of little use to you during your trip. There is no Uber in Moscow, but a similar app named Yandex is available if you need a ride in a pinch.
How Many Days Do You Need in Moscow?
Moscow is the biggest city in all of Europe, and it is absolutely loaded with things to do. You could spend weeks in Moscow and still find new things to do. Of course, most travelers don’t have that kind of time to spend in one place!
I recommend spending no less than three full days in Moscow, and ideally closer to five or seven.
Moscow is very spread out, and it can take some time to get from one major point to another. There are also so many places that are nice to just sit back and relax, which is hard to do when you’re in a hurry trying to cram activities into just a few days.
If you only have a week to visit Russia, I’d advise spending all of the time in one city. If you decide to split your time between Moscow and St. Petersburg, I recommend not trying to squeeze in any day trips beyond those two cities.

When Is the Best Time of the Year to Visit Moscow?
There are two different ways to approach this question. Personally, I think the best time to visit Moscow is around Christmas and New Year’s Day. While the weather will be absolutely freezing, Moscow is a surreal winter wonderland in December and January.
We were in Moscow right before Christmas. While it was very cold, you can always bundle up. Exploring the Christmas markets and pop-up ice skating rinks throughout Moscow is one of my favorite memories from anywhere I’ve traveled, and I dream of going back to do it again.
If you aren’t fond of the cold, Moscow is beautiful in the summer. It tends to get pretty cold in the shoulder seasons, so if you want warm weather, you should plan to visit in the summer. Moscow actually gets pretty warm in July and August, and there are a bunch of fantastic places to soak up the sun within the city.
The best time to visit Moscow is either around Christmas or from late May to August.

Is Moscow Safe to Visit?
While Moscow is a truly wonderful city, there’s no denying that visiting Russia comes with risks. As the country is run by an infamous communist dictator, concerns about visiting are valid. While we didn’t experience any sort of threat or negative treatment during our time in Moscow, we visited in a peaceful time.
In our experience, Russia doesn’t seem to detain normal Americans or Westerners to use as pawns. As a regular person, as long as you don’t commit any crimes, there is a slim chance you will run into any issues. However, Russia will not hesitate to enforce its laws against foreigners, and illegal behaviors will likely land you in a very compromising position.
Russia will not hesitate to enforce its laws against foreigners, and illegal behaviors will likely land you in a very compromising position.
To make matters worse, Russia has a bad reputation for gang violence. While the Russian mafia has very little interest in normal Western tourists, they won’t hesitate to pick a fight with anyone who ventures into their sphere of influence. If you seek out illegal substances or activities, you could be a target of the mafia.
If you seek out illegal substances or activities, you could be a target of the mafia.
Finally, since Russia’s invasion of Ukraine, things are all very different. Russia is currently at war, and there are battles raging within 8 hours of Moscow. While it is still relatively safe to visit, that could change at any time as the war with Ukraine continues.
Is Moscow Worth Visiting?
Without a doubt, Moscow is worth visiting. It is one of the most unique major cities we have ever visited, and we hope to make it back one day. The Russian Orthodox churches are stunning, the city’s history is unlike any other, and the food is to die for.
While many visitors prefer St. Petersburg to Moscow, I think Moscow deserves a lot of hype of its own. Moscow is the beating heart of Russian culture and history, and it’s a place I highly recommend checking out if you have the chance.

That’s all we have for you about Moscow! I hope this post was helpful as you plan your trip to Russia’s capital.
Have you been to Moscow? Or is this your first time visiting? Comment below if you have anything to add to our travel guide!
Hi, I'm Greg. I'm an avid traveler who has traveled to over 50 countries all around the world with my wife and kids. I've lived in Italy, Mexico, China, and the United States, and I dream of moving abroad again in the future. With this blog, I provide my audience with detailed destination guides to my favorite places and pro-tips to make travel as stress-free as possible.
Leave a comment
Save my name, email, and website in this browser for the next time I comment.
Meet The Author - Greg

Recent Post

How Much Does a Trip to Egypt Cost: Budget Breakdown
March 10, 2024

Best Time to Visit the India Gate in Delhi [2024]
March 1, 2024

Flying with a Sinus Infection: Tips to Avoid Pain
February 20, 2024

11 Best Things to Do in Breckenridge Besides Skiing
February 12, 2024

10 Best Beaches in Mexico for Families (We Lived Here)
February 3, 2024


Come with me on my travels, as you plan yours

A Moscow Free Walking Tour of the Iconic Red Square
Updated March 10th, 2020
This post might contain affiliate links. That means I may earn a small commission at no extra cost to you, if you buy through my site. I appreciate your support of my site.
No visit to Moscow, Russia is complete unless you take a walk around the famous Red Square and see the iconic sights of the city. One of the best ways to see all the famous landmarks in Moscow and learn a little something about them too is on a free Moscow walking tour through the Red Square.
Continue reading for a sneak peek at what you will see on your free tour in Moscow and for tips on both the tour and visiting the sights. Make sure to save some time during your trip to go inside of the magnificent buildings because you will not be going in the buildings during the tour.
The State Historical Museum

The Moscow free walking tour begins at the Marshal Zhukov monument in front of the State Historical Museum . You can’t miss this massive red building. The museum’s interior is almost as spectacular as the artifacts you can see within. Read my post dedicated to the museum here to find out more on what you can see and tips for visiting. Admission is free with the Moscow City Pass .
The Kremlin

Behind the walls of the Kremlin lie the working offices of Russian’s government and president. When visiting the Kremlin you can see the Armory Chamber, Cathedral Square, the Patriach’s Palace and many more cathedrals. You definitely want to buy tickets ahead of time so you avoid the long-lines. You can get free admission with the Moscow City Pass . It’s also worth it to take a guided tour if you don’t speak Russian so you have more of an understanding of what you are seeing.
St. Basil’s Cathedral

If asked to conquer up an image of Moscow, St. Basil’s Cathedral might just be the most likely image you picture. The cathedral has a museum that you can visit at a later time. You can buy tickets at the ticket kiosk outside the cathedral or receive free admission with the Moscow City Pass .
Moskva River

Next up on the tour is the Moskva River which runs through the center of Moscow. A cruise on the Moskva River is a great way to see the city from a different perspective.
GUM Shopping Mall
Who would think a mall would be one of Moscow’s most well-known attractions? GUM shopping mall across from the Kremlin makes up one of the four sides of the Red Square. The stores might be a bit too pricey for shopping, but the gorgeous interior is worth a visit. If that doesn’t convince you, the mall has some of the best ice cream! GUM is the only building you go inside during the free walking tour. There are pay bathrooms you can use while you have a few minutes of free time.
Kazan Cathedral

Located on the northeast corner of the Red Square, the Kazan Cathedral is another impressive dome-shaped building in Moscow that is also an active place of worship. Entering the cathedral is allowed, but remember to be respectful if people are worshipping.
Bolshoi Theater

Contrary to the previous buildings, the Bolshoi Theater isn’t along one of the four sides of the Red Square. Located a few minutes away, the theater is one of the best theaters in the world. Make sure to come back for a guided tour of the inside or make reservations far ahead of time to attend a ballet or opera.
Alexander Gardens

The tour ends near the Alexander Gardens , a free public park located along the western Kremlin walls. The garden’s green lawns, sculptures and water fountains offer a nice place to take a stroll or relax a bit after some busy sightseeing.

You can visit all these sites on your own, but the best part of doing the Moscow free tour is that you learn more information and have the potential to meet new people!
During my tour I started to talk to a woman from Malaysia and she invited me to join her and her friends for a Russian meal afterwards. It’s these little impromptu meetings and opportunities that I love most about traveling and add more to the sightseeing experience. While I was a little hesitant about going to the tour myself I told myself it would be a great opportunity to possibly meet new people. I love when things work out like that!
If you have already seen the iconic sights of the Red Square and are looking for other things to do in Moscow check out my What to Do in Moscow post that gives more off-the beaten track things to do in Moscow!
Moscow Free Walking Tour Visiting Information
Moscow Free Walking Tours
How to Get There
The Moscow Free Walking Tour begins at the Marshal Zhukov monument in front of the State Historical Museum (a large red building). The website shows a map with the exact meeting point.
To get to the red square area you can take the blue 3 metro line to the Ploshchad Revolyutsii stop, or the green 2 line to the Teatralnaya station or the red 1 line to the Okhotny Ryad station. For more on how to use the metro read my Moscow Metro Guide .
Tours every day at 10:30am – 1pm in English
If you need a toilet before the start of the tour the Okhotny Ryad and GUM shopping malls are both close to the start of the tour. You will need to pay to use the toilets. There is a quick break mid-way through the tour at the GUM shopping mall where you can use the toilet if needed.
During the mid-way break in the tour you can buy some ice cream at the GUM shopping mall. There aren’t many other options or time for anything else. After the tour there are a lot of restaurants in the area. There are a couple of Varenichnaya №1 locations nearby if you would like some authentic Russian food. Their speciality is Russian dumplings. Another classic choice nearby is Grand Cafe Dr. Jhivago. While you can try traditional Russian foods like borscht and Olivier Salad, you may need a reservation. GUM has several restaurants, including a couple of buffets upstairs.
Recommendations
While I would start off your visit to Moscow with a tour of the Red Square, make sure to come back to each place to tour the inside. If you are visiting several sights consider buying the Moscow City Pass to save money on admissions.
Other Tour Options
Another company Moscow Free Tour does a similar free walking tour in the Red Square. Check the site for the details on the starting point and times. If you prefer a private paid tour with a hotel pick-up and a visit to St. Basil’s Cathedral included check out this tour . For a private paid tour with a hotel pick-up and a visit to the Kremlin included you may want to take this tour or this one . Even if you don’t typically take tours, I would recommend taking tours as much as possible in Moscow. Many people do not speak English and most information is not in English either.
Where to Stay in Moscow
Find somewhere to stay in Moscow near the Red Square so you are convenient to all the sights!
More About Russia
- Moscow Things to Do: Unique Things to Do , Spartak Stadium
- Moscow Markets: Izmailovsky Market , Danilovsky Market
- Moscow Museums: Moscow City Museum , Victory Museum , Museum of the Patriotic War in 1812 , State Historical Museum ,
- Moscow Life: Malls , Christmas in Moscow , Metro , Learning Spanish , My Russian Apartment , What is Life Really Like in Russia , FiFa World Cup , Russian Winters , and more posts about life abroad in Russia .
- St Petersburg: City Guide , The Hermitage Museum , Kayaking the Rivers & Canals , Peterhof Palace

Share this:
- Click to share on Pinterest (Opens in new window)
- Click to share on Facebook (Opens in new window)
- Click to share on Twitter (Opens in new window)
- Click to share on LinkedIn (Opens in new window)
- Click to share on Reddit (Opens in new window)
- Click to share on Tumblr (Opens in new window)
You May Also Like

A Walk Through My Russian Apartment

Oh So Very Lost, All The Time – 9/27/17
22 comments.

The Kremlin looks rather imposing. It would be great to explore the history in Moscow.

There is a lot of history in Moscow to explore!

What a handy guide to get the most of Moscow’s red square! I’ve always wanted to try a walking tour and this looks like the perfect place to start!
I really enjoy walking tours, I think they are a great way to get to know a new place!

You have highlighted all the main sights around and in the Red Square indeed! I have visited Moscow in winter and the atmosphere was magical…even though it was cold 🙂 I’m looking forward to visiting in summer too!
Yes, there is a magical feel during the winter. I have to say I prefer the warmer, brighter summers though 🙂

Follow My Anchor
I am planning to go to Moscow and St. Petersburg this year so reading this was very helpful. I would love to do the walking tour! What time of year did you do it? I am planning to go in August as I really can’t stand the cold 😀 Do you think August might be a good time to visit Moscow? Thank you so much for your information!
I did the walking tour in September. July and August are the best times to visit Moscow in my opinion, so you are going at a great time! I lived in Moscow for a year so I have a lot of posts about Moscow and a couple for St. Petersburg too. Please check out my other posts as you are planning your trip and feel free to send any questions my way!

I’m a huge fan of taking free walking tours whenever my husband and I travel. We learn more about the history from the local’s perspective. Your walking tour in Moscow looks fun. The St. Basil’s Cathedral is beautiful and would love to see it. Thanks for sharing the must-see places in Moscow!
I’m a big fan of free walking tours too! I completely agree that you get a good perspective and introduction to the history of the city.

I would love to take the walking tour to get a good coverage of the area! The tip about paying for the bathrooms is great. That’s something I didn’t realize when I went to Europe for the first time from the US.
I always find it annoying paying for bathrooms in Europe!

I visited Moscow in June this year for the World Cup and I loved it. St. Basil’s Cathedral was the highlight for me, it’s such an impressive piece of architecture. I would’ve liked to visit more of Russia but maybe next time!
I really enjoyed Moscow during the World Cup too. The city was much livelier than usual!

I have been to St. Petersburg but never to Moscow. I think that these kind of tours are very useful to gather many information but I second your suggestion to visit the palaces inside as they have stunning interior decor and art treasures.
Yes, I think both going on tours and getting an overview and touring the inside of places are good to do.

Shreya Saha
St. Basil’s cathedral is definitely a beautiful place to visit. I would also love to stroll by the Alexander gardens and maybe spend some time in the shopping mall call mom maybe visit the theater, also I would love to visit Kremlin and the State Historical Museum. That’s a great list you have managed to provide here.

Never been to Russia, but the country’s history and culture has always fascinated me. Great list of things to do in Moscow’s Red Square. Kremlin is definitely on top of my list!
Russia does have a fascinating history and culture!

The architecture here always looks so beautiful. I would love to go to Russia. Some helpful tips here that would really help me navigate a future trip. I love the Russian ballet so a trip to the theater would be a must for me.
Leave a Reply Cancel reply
Your email address will not be published. Required fields are marked *
Notify me of follow-up comments by email.
Notify me of new posts by email.

- Bahasa Indonesia
- Slovenščina
- Science & Tech
- Russian Kitchen
Cruising the Moskva River: A short guide to boat trips in Russia’s capital

There’s hardly a better way to absorb Moscow’s atmosphere than on a ship sailing up and down the Moskva River. While complicated ticketing, loud music and chilling winds might dampen the anticipated fun, this checklist will help you to enjoy the scenic views and not fall into common tourist traps.
How to find the right boat?
There are plenty of boats and selecting the right one might be challenging. The size of the boat should be your main criteria.
Plenty of small boats cruise the Moskva River, and the most vivid one is this yellow Lay’s-branded boat. Everyone who has ever visited Moscow probably has seen it.

This option might leave a passenger disembarking partially deaf as the merciless Russian pop music blasts onboard. A free spirit, however, will find partying on such a vessel to be an unforgettable and authentic experience that’s almost a metaphor for life in modern Russia: too loud, and sometimes too welcoming. Tickets start at $13 (800 rubles) per person.
Bigger boats offer smoother sailing and tend to attract foreign visitors because of their distinct Soviet aura. Indeed, many of the older vessels must have seen better days. They are still afloat, however, and getting aboard is a unique ‘cultural’ experience. Sometimes the crew might offer lunch or dinner to passengers, but this option must be purchased with the ticket. Here is one such option offering dinner for $24 (1,490 rubles).

If you want to travel in style, consider Flotilla Radisson. These large, modern vessels are quite posh, with a cozy restaurant and an attentive crew at your service. Even though the selection of wines and food is modest, these vessels are still much better than other boats.

Surprisingly, the luxurious boats are priced rather modestly, and a single ticket goes for $17-$32 (1,100-2,000 rubles); also expect a reasonable restaurant bill on top.
How to buy tickets?
Women holding photos of ships promise huge discounts to “the young and beautiful,” and give personal invitations for river tours. They sound and look nice, but there’s a small catch: their ticket prices are usually more than those purchased online.
“We bought tickets from street hawkers for 900 rubles each, only to later discover that the other passengers bought their tickets twice as cheap!” wrote (in Russian) a disappointed Rostislav on a travel company website.
Nevertheless, buying from street hawkers has one considerable advantage: they personally escort you to the vessel so that you don’t waste time looking for the boat on your own.

Prices start at $13 (800 rubles) for one ride, and for an additional $6.5 (400 rubles) you can purchase an unlimited number of tours on the same boat on any given day.
Flotilla Radisson has official ticket offices at Gorky Park and Hotel Ukraine, but they’re often sold out.
Buying online is an option that might save some cash. Websites such as this offer considerable discounts for tickets sold online. On a busy Friday night an online purchase might be the only chance to get a ticket on a Flotilla Radisson boat.
This website (in Russian) offers multiple options for short river cruises in and around the city center, including offbeat options such as ‘disco cruises’ and ‘children cruises.’ This other website sells tickets online, but doesn’t have an English version. The interface is intuitive, however.
Buying tickets online has its bad points, however. The most common is confusing which pier you should go to and missing your river tour.

“I once bought tickets online to save with the discount that the website offered,” said Igor Shvarkin from Moscow. “The pier was initially marked as ‘Park Kultury,’ but when I arrived it wasn’t easy to find my boat because there were too many there. My guests had to walk a considerable distance before I finally found the vessel that accepted my tickets purchased online,” said the man.
There are two main boarding piers in the city center: Hotel Ukraine and Park Kultury . Always take note of your particular berth when buying tickets online.
Where to sit onboard?
Even on a warm day, the headwind might be chilly for passengers on deck. Make sure you have warm clothes, or that the crew has blankets ready upon request.
The glass-encased hold makes the tour much more comfortable, but not at the expense of having an enjoyable experience.

Getting off the boat requires preparation as well. Ideally, you should be able to disembark on any pier along the way. In reality, passengers never know where the boat’s captain will make the next stop. Street hawkers often tell passengers in advance where they’ll be able to disembark. If you buy tickets online then you’ll have to research it yourself.
There’s a chance that the captain won’t make any stops at all and will take you back to where the tour began, which is the case with Flotilla Radisson. The safest option is to automatically expect that you’ll return to the pier where you started.
If using any of Russia Beyond's content, partly or in full, always provide an active hyperlink to the original material.
to our newsletter!
Get the week's best stories straight to your inbox
- What to do in Moscow City, if you’re not mega-rich
- Moscow after dusk: 10 places to drink, dance, and groove
- 5 things you must do in Moscow in 2018 between football matches (or without them)
- Sandwiched between Moscow and St. Petersburg: How to spend a perfect weekend in Tver
- 24 or 48 hours in Moscow: Where to go and what to do in 2019
This website uses cookies. Click here to find out more.
IMAGES
VIDEO
COMMENTS
Printable Pre Trip Inspection Checklist (PDF) CDL Manual. CDL General Knowledge Practice Test. Pre Trip Inspection Practice Test. CDL HAZMAT Endorsement Practice Test. Edited for 2024 on 12/5/23. Complete CDL pre-trip inspection checklist with online reference and study guide plus a free PDF pre trip inspection checklist to print.
Our Pre-Trip Inspection Study Guide has everything you need to prepare for the Class A CDL Pre-Trip Inspection Exam. Our study guide will cover the pre-trip inspection terminology as well as a thorough list of all of the parts you will be inspecting on the vehicle. For each part you will be inspecting there will also be a list of items you will ...
Jeff from Apex CDL Institute is a licensed 3rd party CDL examiner in the state of Kansas. Here he demonstrates how to perform a proper pre-trip inspection on...
In this in-depth video, we will walk you through every crucial element of the inspection process, ensuring you are prepared and confident for your upcoming C...
Rubber Parts: no abrasions, bulges, or cuts. Parts that hold a Fluid or Air: cannot be leaking. Example: the engine air compressor (a metal part) is securely mounted, not cracked, gear-driven, and has no audible leaks. • The Pre-Trip Inspection is a verbal test. • Say at least 2 things about every item you inspect.
Engine Compartment + 1 Axle. 3 L's. Leaks, Leans, and Lights. Before opening the hood, check for LEAKS on the ground, under the engine. Check that the truck is not LEANING. to one side or the other. Check the LIGHTS on the top and front of the truck. They must be the proper color and not cracked, broken, or dirty.
How to do a class A cdl pre trip walk around inspection. The person that is doing this inspection just passed their CDL test with this same sequence. If you ...
Download our Free CDL Pre-trip Inspection Checklist! Get the ultimate guide to improve your safety each trip and earn more money every mile! ... This article will walk you through an exhaustive checklist to follow before every trip, as well as the potential costs of not doing so. ... At a mechanic, a blown fuse costs around $100 to repair, and ...
Practical exams. Skills test. Pre-trip inspection. TSA background check. Retake policy. CDL Maintenance. ELDT Training & Certification. CDL how-to guides. Learn how to conduct thorough pre-trip inspections with our guide, a critical component for commercial vehicle safety.
Vehicle Pre-Trip Checklist Inspection CDL Skills Tests: The vehicle inspection checklist test (walk around) requires the driver to point out vehicle components and explain what you are checking and why to the examiner. This includes an under the hood engine compartment inspection. A driver is not required to crawl under the vehicle during the test.
In this comprehensive guide, we will walk you through the essential steps of the pretrip inspection test, focusing on the value of instructional videos for mastering the process. Importance of CDL Pretrip Inspection. Before we delve into the instructional video, let's understand why the CDL pretrip inspection is crucial.
CDL Test Pre-Trip Inspection. If you just came through the process of getting your CDL, you can breathe a sigh of relief. ... I walk around the front of the truck, making sure all the lights work. Then I open the hood. Fluid levels - Check all fluids: coolant, oil, power steering fluid, and windshield washer fluid. Make sure caps are tight ...
PRE-TRIP INSPECTION GUIDE TT iv Pre-Trip Inspection Terminology: PMS - Properly Mounted, Secure CBB - Cracked, Bent, Broken ABC - Abrasions, Bulges, Cuts A few general tips: If its rubber - ABC If it has fluid/air going through it or in it - Not leaking. If its mounted (almost everything is)- PMS If its metal or some other hard surface- CBB
Application Form. Call us at 1-800-831-1300 or fill out the brief form to submit your information. First Name. Last Name. Phone Number. E-Mail Address. Zip Code. Do you have a valid drivers license in the state of your residence Yes No. Can you pass a drug screen?
This video will explain the full pre-trip inspection on your Class A truck for the new CDL road test. Watch the whole thing to learn the new pre-trip.Our Web...
Go to front of vehicle and check that low beams are on and both of the four-way flashers are working. Push dimmer switch and check that high beams work. Turn off headlights and four-way hazard warning flashers. Turn on parking, clearance, side-marker and identification lights. Turn on right turn signal, and start walk-around inspection.
Performing a consistent walk-around inspection will help you find mechanical problems before they cause a breakdown or accident. Catching problems early will also help you avoid citations. Safe and Smart CDL Class A Driver Training: Pre-Trip Vehicle Inspections: Walk-Around is designed to help inexperienced CDL drivers understand how to conduct ...
EPIC MOSCOW Itinerary! (2024) Moscow is the heart of Mother Russia. Just the mention of this city conjures images of colorful bulbous pointed domes, crisp temperatures, and a uniquely original spirit! Moscow has an incredibly turbulent history, a seemingly resilient culture, and a unique enchantment that pulls countless tourists to the city ...
3. Texas CDL Brake Check Pre-Trip Inspection. Parking Brake Check. Apply parking brake only and shift into a lower gear. Gently pull against the brake by releasing the clutch, and it should hold the vehicle. Hydraulic Brake Check. With the engine running, apply the foot brake and hold for five seconds.
3. Marvel at St. Basil's Cathedral. St. Basil's Cathedral is one of the most iconic churches in the world, and it was the single thing we were most excited to see while in Moscow. Built almost 500 years ago, St. Basil's Cathedral is recognized by its colorful domes and whimsical style.
No visit to Moscow, Russia is complete unless you take a walk around the famous Red Square and. One of the best ways to see the iconic sights of Moscow, Russia is on a Moscow Free Walking Tour of the Red Square. ... Please check out my other posts as you are planning your trip and feel free to send any questions my way! Jackie S. January 4 ...
Prices start at $13 (800 rubles) for one ride, and for an additional $6.5 (400 rubles) you can purchase an unlimited number of tours on the same boat on any given day.