- Anniversaries
- Baby Showers
- Cards and Stationery
- Father's Day

Photo Books
Wedding invitations, 35 wedding scrapbook ideas to preserve your memories.
Written by Shutterfly Community Last Updated: Sep 3, 2020
The rush of wedding planning and the week of the celebration can fly by in a flash. After the celebration winds down, compiling a wedding scrapbook is one of the best ways to relive all the heartfelt moments and decisions made along the way. This is also an excellent time to reactivate that passion for creative design as you remember how you figured out how to choose your wedding invitations , picked your wedding color combinations and even found your dress.
Shop Trending Categories

Graduation Announcements

Canvas Prints
Did you use a DIY wedding binder to help you plan? Begin by gathering all your printed paper goods , favorite photos and the scrapbook of your choice. Here we’ll explore scrapbook layout ideas, what to include in your wedding scrapbook and fun ways to tell your wedding day story.
1. Add Wedding Quotes

Source: Shutterfly
Though wedding photos speak for themselves, adding a bit of poetry elevates the design to the next level. Include an occasional quote about marriage or weddings or pull a passage from your and your spouse’s favorite book.
2. Timeless Quotes

Source: ShoeBox Scrapbooking
Fill each page layout with quotes about love and marriage. Purchase foam mounting materials in the scrapbook section of your local craft store and add the quotes for a 3D design.
3. Ode To The Centerpiece

The reception centerpieces received some of the most attention and design creativity. Create a scrapbook page layout completely dedicated to the design process of your centerpieces, from pressed flowers and ribbons to your menus and place cards .
4. Vintage Glam

Source: Mutated Musings
Emulate the look of a vintage photo album by printing photos with rounded edges and securing them with paper clips and photo corners inside a classic style photo album.
5. Table Numbers

Did your photographer grab a shot of each table? Pair up your paper table numbers with images of each group of family members and friends or with images of the table decor.
6. Photo Booth Props

Source: Zoom Theory
Be sure to include every silly and sentimental paper prop on a page dedicated to your photo booth images. Did you have engagement photo props as well? Be sure to include these with your engagement shots!
7. Professional Photo Book

Take a whole different approach to your scrapbooking process by designing a professionally printed wedding photo book . Choose from a long list of page layouts, book styles and cover designs to fit your theme and taste.
8. Scrapbook Shadow Box

Either in addition to or in lieu of a traditional scrapbook, display your favorite wedding items and stationery within a shadow box frame and hang in a curated wall collage or display on your coffee table to enjoy every day.
9. Save Room For Your Anniversary

Source: Abigail Jill
The celebration only truly begins on your wedding day. Save pages in the back of your scrapbook for your first anniversary photos and any milestones in the future!
10. Window Into Your World

Source: Your First Wedding
Go beyond traditional 3D scrapbooking elements and include doors, windows, flowers and other creative pieces that frame your photos with the same grace and style as your wedding day.
11. Bouquet Charms

Source: Stevie Jay Photography
Charms that honor the memory of a lost loved one or represent symbols of good luck wrap around a bride’s bouquet in some traditions. Create a special pocket or envelope in your scrapbook to keep these safe.
12. Showcase Your Signs

Source: Wild About You Photography
You created a handful of important signage to guide your guests throughout the evening. Each will bring back memories of the design of your big day. Include them on a page in your scrapbook with corresponding images.
13. Add Your Art

Source: Hill City Bride
Personalize your scrapbook to align with your own unique creativity. Surround photos, wedding quotes and stories with your own paintings, doodles and designs.
14. Repurpose Decor

Source: Fresh Design Pedia
If you DIY’d your wedding with buttons, bows and lace, repurpose these elements for your scrapbook pages. Scrapbooking is a great way to incorporate leftover envelopes, labels and other paper goods as well.
15. Floral Frame

Source: Thinking Closet
If you’d like to focus on one larger photo on a page, surround it in a scrapbook paper frame in the same wedding colors from your theme. For a custom look, use a Cricut machine to make your own.
16. Preserve Your Bouquet

Source: Laura and Rachel
Save your dried flowers the old-fashioned way, deep in the pages of a book. If you want to keep your bouquet intact, save a few blooms from your centerpieces or bridesmaid bouquets for scrapbooking.
17. Bundles Of Ribbons

Source: Rebekah Photography
Was your wedding scattered with flowing ribbons and bows? Borrow these for your wedding scrapbook to line the edges of pages, frame photos and decorate the cover of the book.
18. Photo Decor

Did you work your engagement images into your wedding decor? This is an easy way to display both your wedding paper suite and photos of you and your spouse in one spot.
19. Show Off The Shower

Source: Hanna Walkowaik
The celebration truly began before the wedding weekend kicked off. Save a spot in your wedding scrapbook for photos, invitations and cards from your bridal shower .
20. Snap A Photo

Source: TPoz Photo
Include a camera at your guest book as an informal photo booth and invite guests to glue their image into a scrapbook with a handwritten message. Expand this book into your wedding scrapbook after the event.
21. Wedding Schedule

Source: Nikkis Plate
Collect all those logistical pages that helped your wedding day flow with ease and mount them in your scrapbook just before the ceremony section. This step-by-step style walks you through each event of the day and gives you a timeline to remember the whole process.
22. Play With Layers

Source: Imagine Crafts Blog
That professional scrapbooking look can be created by laying colors and textures before adding a focal point such as a photo or card. Begin with a layer of watercolor and lay scrapbooking paper, faux flowers and additional glitz to make it your own.
23. Destination Decor

Source: The Craft Blog
Did you have a destination wedding by the seashore or in a famous city? Set the scene of your wedding photo book by including images of the beautiful area surrounded by matching scrapbook crafting materials.
24. Honor Your Fonts

Source: Teryn Lee Photography and Olga Siyanko
Calligraphy and printed lettering is a huge part of what made your stationery stunning. Match the printed quotes with your wedding invitation fonts for a uniform design.
25. Escort Cards

Source: April and Joseph Photography
Create a page dedicated to the guest experience with items like escort and seating cards. Pair them up with sketches of your seating chart and photos of guests heading to the reception.

Source: Alice Scraps Wonderland
Head to your local craft store for paper flowers that mirror your bouquets from the big day. Create bunches of flowers, sequins and floral wire to adorn the cover or sit at the corners of each photo.
27. Stationery Suite

Source: 2 Brides
Your stationery choices are always a great place to start when designing a wedding scrapbook. Tie the look of the layout together by matching your wedding invitation font and color scheme.
28. DIY Shaker Card

Source: Pitter and Glink
Pop a mason jar-shaped piece of scrapbooking decor into a plastic paper protector to fit its shape. Fill with glitter and sequins and add to a scrapbook page to reflect your wedding theme.
29. Honeymoon Memories

Source: Smiling Colors
Did you hit the road right after tying the knot? Keep all your maps, photos and postcards in a special area after your wedding pages.
30. Wedding Card Collage

Source: Bugaboo City
The wedding cards are the best way to commemorate each individual guests’ wishes for you and your spouse. Group them by friends and family on several scrapbook pages.
31. Love Letters

Source: Five Grain Events
Did you give bride gifts and groom gifts to each other on the morning of the wedding? Include a special section to display your love notes or tuck them into decorative envelopes on a page to be opened as you flip through the book.
32. Preserve The Program

Source: Rossella Putino
Introduce the ceremony section of your wedding scrapbook by showcasing the rundown of your nuptials. Include photos of you and your wedding party entering the church or ceremony space of guests finding their seats.
33. Notes For Later

Source: The Homesteady
Similar to the folded envelope, glue a small paper gift bag to the page for safely keeping notes and small papers without securing them down. Do you have a photo of a love letter from your spouse-to-be? Include the letter itself next to the precious image.
34. DIY Details

Source: Simple Like Portraits
Be sure to highlight all the time and hard work spent on handmade details like place cards, signs and centerpiece decor. Create an entire page for your personal design elements.
35. Pocket Of Paper

How do you keep all your precious items safe in a scrapbook without tape or glue? Fold up this handmade envelope to mount on a scrapbook page and safely include all your items inside.
Memories of your wedding day make a lifelong impact on your journey as a family. Dive into scrapbook design as soon as the planning is behind you. Once your wedding photos arrive from your photographer, be sure to pair your scrapbook with a printed photo album for both yourself and your family.
Explore Categories

Graduation Invitations

Custom Photo Blankets

Save the Dates

Coffee Table Books

Written by Shutterfly Community | View all posts
★ Lifestyle Expert
Shutterfly Community is here to help capture and share life's most important moments. Discover thoughtful gifts, creative ideas and endless inspiration to create meaningful memories with family and friends.
Visit their Website . You can follow on Instagram and Pinterest .
Mosaic Moments Page Layout System

- Our Love Story
- Sign Up & Get Your Weekly SnapFix!
- What Do You Need to Get Started with Mosaic Moments®?
- How Do You Create Mosaic Moments Layouts?
- Tour the Pattern Gallery
- Cutting & Cropping
- Designing Pages
- Color & Composition
- Where Can I Shop for Mosaic Moments® Products?
- How to Videos
- Buy Supplies
14 Beautiful Wedding Scrapbook Page Ideas You Need to Scraplift!
Updated: October 2022
If you are currently planning a wedding or in the process of scrapbooking one, it may feel overwhelming!
Photographers and guests take a ton of photos at weddings. Hundreds (if not thousands) are taken of the lovely bride & groom, the amazing venue, the beautiful flowers, & more! So of course, you end up with enough photos to fill an entire album. This requires a lot of wedding scrapbook page ideas!
If you're stuck & need some inspiration, check out these Mosaic Moments® pages you will want to scraplift!
#1. Wedding Colors

"Summer Bride" by Paije Potter - Pattern #301
This bride used colors based on the sunset, so there were lots of orange, peach, & cream colors.
Paije found this orange striped paper from Doodlebug Design™ and it surprisingly works so well for this wedding layout. Fresh Cream Grid Paper & Ivory Card stock gave this page an elegant feel and toned down the bright orange.
Tip: When you have one or more bright colors, be sure to tone them down with a neutral such as white, cream, brown, or grey.
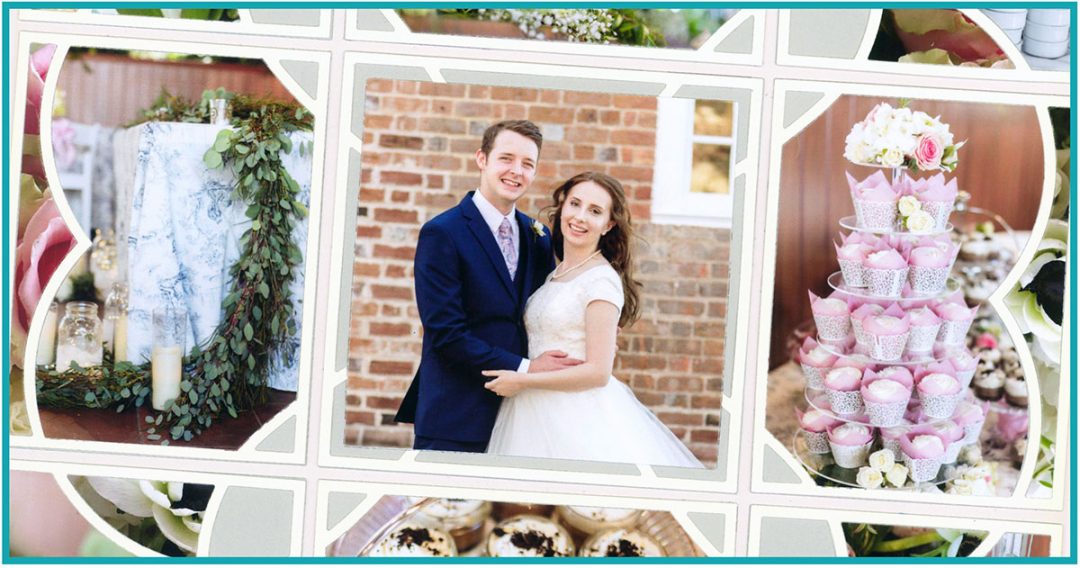
This bride and groom chose Navy, green, and pink for the wedding colors.
On the left side, Paije used the looped 2x2 die set to create an interlocking ring design. The inner circles have an ivory and pink floral paper. The outer parts were embossed and green chalk ink was added on top.
A dash of blue paper was placed on the right of the layout, which matches the groom's suit.

"Alexis & Matt" by Paije Potter - Pattern #416
#2. wedding items.

"Wedding" by Andrea Fisher - Pattern #860
Andrea placed a two-sided invitation on this wedding scrapbook layout.
We love Mosaic Moments pages since you can add so much! Not only did Andrea fit in the invitation, but also nine photos from the ceremony. She filled the rest of the space with beautiful cuts of the Diamond Ring 2x2 die - how perfect!
You can learn more about this page by visiting Andrea's article here .
The heart and flower stickers shown on this layout were used for the guest book at the wedding reception.
So, be sure to have any items from the wedding! You just might need it for your scrapbook album. Adding the lovely stickers was a simple way to decorate the layout and to also remember the little wedding details.

"Bridesmaids" by Paije Potter - Pattern #211
#3. wedding theme.

"Wedding" by Andrea Fisher
When you look at this layout do you automatically think 'rustic wedding'?
Andrea did a great job decorating her layout with burlap and wood grain paper. Her layout also was created with lots of neutral colors, which fits with the wedding's rustic theming.
Learn more about this page and get her tips here .
This wedding's theme was based on a cottage garden.
The sweetheart dies were chosen since they create a flower shape when used together. Not only does this die collection fit with the garden theme, but we love how much character it adds to these reception photos.
Photos like these may seem dull when cut into squares and rectangles, but the Sweetheart dies give them an amazing look!

"Reception Details" by Paije Potter - Pattern #344
#4. keep it simple.

"Bride" by Paije Potter - Pattern #191
On this layout, all of the photos were cropped to squares.
This page pattern (#191) is great if you have a lot of detail shots to show, which it's very likely you do! Paije used a pattern paper from Echo Park™ for the focal point so it would stand out the most. Plus, the paper gives some "breathing room" between the center photo and the 2x2 photos on the outer edges.
Keeping your layout simple allows you to fit in more photos too!
This layout was kept simple since the designer, Paije, wanted to keep the photos close to the full 4x6 size.
She also simplified the page by using one color mat. If you have a lot of pages to create, sticking to one color mat will make the process go quicker! To add some interest, she used a snowflake stamp on the black card-stock.

"Winter Bride" by Paije Potter - Pattern #731
#5. make the details mosaic.

"Spring Wedding" by Tami Potter - Pattern #295
Wow! Isn't this layout just breathe taking!
Tami took photos of a blossoming tree and created it into a mosaic. The trick is to take multiple shots of the tree and then blend the two or more photos together. This is a wonderful detail any bride and groom will love!
While the bride and groom were getting their portraits taken, Tami explored the area to capture the flowers and scenery.
Generally, the professionals are busy getting shots of the couple and don't think to get the surrounding details. So, when you attend a wedding look around and photograph the beautiful venue. Later these photos will make a fabulous mosaic!

"Moon Wedding" by Tami Potter
#6. be inspired by the season.

"Tyler & Mariah" by Jodi Benson - Pattern #343
Here, Jodi found lovely burnt orange and greens for this fall layout of her son's wedding.
The pattern paper is very elegant and the 3x3 scallop frame die was a wonderful choice for a wedding page. Even if the colors don't necessarily say "wedding", placing in elegant dies will fix that!
You don't have to use wedding themed paper for all of your pages.
Here, Lynn used beautiful winter patterned paper. Winter designs are often very elegant and beautiful which is perfect for a wedding!

"Winter Wedding" by Lynn Wardell
#7. change it up with fancy designs.

"Forever Families" by Jodi Benson - Pattern #102
Jodi framed each of these photos with the 4x4 dynamic die.
She also added the 1x4 Dynamic die, so each space creates little diamond designs. This is a great layout if you have four formal photos you would like to feature.
If you really want an adventure, try the bliss dies with your wedding photos!
The best part about the bliss die is the petal designs that rotate around the layout, which is perfect for a wedding.

"Fall Wedding" by Jodi Benson - Pattern #344
Stay connected.
- 14 Stylish Wedding Scrapbook Ideas
Looking for scrapbook inspiration that's super stylish? Zola's here with the perfect list of ideas for your next DIY.
By Emily Forrest

Scrapbooking allows us to create and preserve our memories. Through the magical portal of colored card stock, scissors, binding, and photos, we can turn a special day into a tangible object that can be loved for years to come.
When you’re considering stylish wedding scrapbook ideas to implement into your artistic creation, the world is your oyster. Here, 10 of our team’s favorite ways to tell the story of your wedding day through colors, shapes, words, and textures in one scrapbook album.
1. Use Wedding Colors
Whether you opted for the rose gold color scheme or went with all things sunshine yellow, incorporating your wedding colors adds a personal element to your scrapbook. Depending on what sort of color theme you went with for the big day, you can tie this in with patterns, geometric shapes, or florals from printed paper and card stock. You can also include textured items, like colored stickers or small flowers.
2. Find Seasonal Inspiration
Did you host your wedding on the beach in the summertime or amidst the orange and crimson leaves of the fall? If your wedding was in part an ode to a specific season, think of tying this in as you come up with your wedding scrapbook ideas. Incorporating seasonality into an engagement photobook or wedding album helps ensure that every time you open your scrapbook, you’ll be transported right back to that very day.
3. Incorporate Cards

Many brides and grooms receive an assortment of festive wedding cards from family and friends. One of the most meaningful wedding scrapbook ideas is to use these cards to help tell your story. If you had a big wedding ceremony and each guest or couple brought a card, you most likely ended up with a lot of cards and sweet sentiments. Don’t be afraid to showcase bits and pieces. Maybe one friend found the winner with a glittery cover that accurately depicts your wedding cake; another may have you tearing up with kind words about your love story. Highlight what makes you happy, then save the rest of your cards in a keepsake box to read through on your anniversary.
4. Add Photo Booth Props
Photo booth props not only add excitement to the wedding day, but they can also bring in loads of fun if you add them to your list of wedding scrapbook ideas, too. If you didn’t toss the props once the party was over, you can use them to bring some creative flare to each scrapbook page. From cardboard mustaches to glasses, pick your favorite props and find the perfect page to display them. If you had a photo booth or Polaroid camera at the wedding, this is a good spot to toss in some of your best snapshots.
5. Print Out Your Schedule
Lots of couples opt to create a wedding weekend schedule for their guests, like when and where the welcome party is, directions to the wedding, and information about the day-after brunch. If you did have a schedule, print it out and glue it in your scrapbook alongside some photos or fun mementos and memories.
6. Save Anniversary Pages
Although the majority of your wedding scrapbook will be made up of wedding memories, it’s also a nice time to start a tradition. Save some space for anniversary pages where you can add in some images or jot down memories of what you do to celebrate each year. As the years progress, it’s special to sit down with your wedding album and read about what you’ve done to ring in your anniversary in years past. Save some trinkets to add in, too, like a napkin from your first wedding anniversary dinner or a dried flower from the hike you did to celebrate five years.
7. Seating Cards and Table Settings
So many seating cards and table settings get thrown out after the excitement of the big day. But if you managed to save any, or if your friends and family did, they make for one of the more personalized wedding scrapbook ideas. You can do one page for “the bride side” and one for “the groom side,” or if all the family and friends mold together, group them in whatever way feels meaningful.
8. Intertwine Love Letters
Did you and your spouse write love letters to read to each other on the big day? How about at any point throughout your relationship? A page of love letters is a romantic and poignant way to showcase some of the most special words the two of you share.
Of course, not every bride and groom want to make their love letters public reading material for their family and friends. In that case, peek around in old memory boxes or kitchen drawers to see if you have any cute small scribbled notes lying around. Once they’re put in book-form, they really do make one of the sweetest wedding scrapbook ideas.
9. Take Screenshots of Your Wedding Website
Lots of couples spend weeks crafting the perfect wedding website, and at Zola, we know firsthand how important these websites are for our brides and grooms. But what do you do with the website once the wedding is over? Taking screenshots of your site and crafting a few pages out of it is one of the easiest wedding scrapbook ideas.
These sites tend to showcase your journey as a couple and offer insight into why you chose a particular venue or date. On a detailed level, they help you remember the little things, like which hotels you suggested for your guests or what time your rehearsal dinner was. Remember: With scrapbooking, every small detail works to tell the overall story. These are the things you’ll have fun remembering as the years move onward.
10. Use Printed Vows and Speeches
When it comes to some of our favorite wedding scrapbook ideas, it’s hard to beat the magic of printed vows and speeches. Reach out to the friends or family who shared their words and advice on your wedding day, and see if they have a digital version they can send over. If you and your spouse wrote your own vows, print them out, and create a special page to feature your words. Or, if an officiant helped to craft your vows, see if they’ll send over a copy for you to include when you design the wedding photobook layout .
11. Include Honeymoon Memories
If you went on a honeymoon or mini-moon, save a few pages to share that story, too. Whether you have photos from hiking in Maui or ticket stubs from the train in Paris, this is the prime place to put all those incredible memories. With countless honeymoon photo album ideas to consider, creating a separate album to showcase your adventures will serve as an excellent complement to your wedding photo book. Of course, there’s nothing wrong with creating an entirely separate scrapbook for your honeymoon, but if you aren’t feeling quite that ambitious, leave some space for it in your wedding scrapbook instead.
12. Focus on Your Wedding Theme
Maybe you went with a citrus theme inspired by summer evenings in Tuscany or a nautical theme fit for saying your “I dos” on a boat or cruise ship. Whatever your wedding theme was, you can bring it to the page of a scrapbook in a myriad of ways. Use creative papers, stickers, adhesives, and embellishments that help bring out the feeling of your theme. Whether you’re new to scrapbooking or you’re an old pro, deeply exploring a theme offers the chance to do something creative with your pages. Or, maybe you didn’t have a theme, but wished you did)? Now is the time to flex those imaginative scrapbooking skills.
13. Make Your Own Art
Scrapbook creating is not a time to feel hesitant about your creative abilities. Instead, it’s a time to explore your own artistic side and boost your confidence. Scrapbooking in general is a personalized experience, so feel free to bring your own personality into your pages.
Some of our favorite wedding scrapbook ideas involve doodles and paintings from the bride and groom. Incorporate some hand-drawn geometric shapes or a watercolor painting of your floral bouquet. If you have any artists in the family, you can even ask them to contribute some form of special art to your scrapbook.
14. Create Mosaics
If you’re new to scrapbooking, you might not be too familiar with scrapbook mosaics. Essentially, a mosaic takes a photo (or a series of photos) and cuts it up to create some white space before placing it back together again. Mosaics are one of our favorite wedding scrapbook ideas, because they don’t take too long to create, but they make a big impact once they’re on the page. One idea is to place a regular picture of the bride and groom in the center, then craft a mosaic around it.
The variety of wedding scrapbook ideas that are available are vast and varied. But depending on what sort of scrapbook you’re looking to create, we hope you’ve found some tidbits of inspiration in this crafty guide.
Whether you’re incorporating mosaics, screenshots, or honeymoon memories, we’re certain you’ll find the absolute perfect way to share the story of your most special day.
Up next for you

Engagement Photo Book: Tips + 10 Ideas
Inspiration
An engagement photo book is a beautiful way to put part of your love story on display. Here are the best ways to go about creating it and what you can use it for.

How to Create a Wedding Photo Book
Need to learn how to make your ideal wedding photobook? Look no further than our complete guide.

How to Make a Personalized Wedding Photo Album
Do you want to create a wedding album yourself? We've got you covered! Continue reading to learn how to make your own wedding album online.

12 Unique Wedding Album Ideas
Wanting to show off your wedding photos in cool, not-so-typical ways? Check out our latest list of unique wedding album ideas.
Even more answers
- What Renters Insurance Covers, and What It Doesn’t
- How To Buy Family Life Insurance
- How to Buy Homeowners Insurance
- Post-Wedding Blues Are Real—Here's 5 Ways to Beat Them
- 5 Tips For Newlyweds Buying Their First Car
- Most Popular Wedding Album Sizes
- How to Design the Ultimate Wedding Photo Book
- Are You Ready For A Joint Bank Account?
- How Many Photos Should Be In A Wedding Album?
- What's a Wedding Memory Book?
- Why Married Millennial Couples Are In Debt

Find even more wedding ideas, inspo, tips, and tricks
We’ve got wedding planning advice on everything from save the dates to wedding cakes.
Getting engaged
Wedding planning 101.
- Real weddings
- Creating a budget
- Wedding websites
- Wedding planning tools
- Wedding planning questions
- Wedding decorations
- Wedding day
Wedding trends
- First Look Reports
Venues & vendors
- Wedding venues
- Photos & video
- Food & catering
- Florists & flowers
- Bands, DJs & music
- Cakes & desserts
- Bar & beverages
Invites & paper
- Save the dates
- Invitations
- Day-of paper
Registry & gifts
- Wedding registry basics
- Wedding gifts
Parties & events
- Engagement party
- Wedding shower
- Bachelorette party
- Bachelor party
Fashion & beauty
- Wedding Hair & makeup
- Wedding dresses
- Shoes & accessories
- Wedding attire
- Honeymoon planning
- Honeymoon destinations
Relationship advice
- Newly engaged couples
- Newlywed couples
- Anniversaries
- News & culture
Zola behind the scenes
- Sweepstakes
- Inside Zola
You must have JavaScript enabled in your browser to utilize the functionality of this website.
Select your country
New selection may affect price, shipping options and product availability
Suggested Countries
All Countries
Recent Searches
Say 'i do' to these wedding scrapbook ideas.
After all that’s wed and done, a wedding scrapbook is a wonderful way to treasure your precious memories. Capture the magic of the day by displaying your photos and memorabilia in one place. Or, why not craft as a gift for the happy couple? We’ve rounded up our favorite wedding scrapbooking layout ideas for that unforgettable keepsake that will be treasured for years to come!
1. Beachy ‘My Lobster, My Love’ wedding layout
For seaside celebrations, we love this double page lobster-themed scrapbooking layout from American Crafts . Simple die-cutting in beachy hued cardstock and driftwood design is perfect for framing your fave wedding photos. Elegant and romantic, each page will sweep you back to those special moments.

2. Flower wedding scrapbook layout
For makers with a bit more experience, this delicate, intricate flower die-cutting design will make each page bloom with wedding memories. Great for flower girl pages, or using as a wider theme for your wedding scrapbook. Why not use the color palette of the flower bouquet on the day as your color-theme? American Crafts have lots of fun supplies to get inspired!

3. Minimalist magnolia wedding scrapbook idea
Modern and chic, who can resist this clean minimalist wedding scrapbook idea by Heidi Swapp. Take a beautiful magnolia scrapbook and embellish your photos and keepsakes with Magnolia Jane die-cuts and beautiful bespoke Heidi Swapp Magnolia Washi tape from American Crafts. Sealed with a ribbon, each page frames every moment to perfection!

4. Floral and botanical layout
To remember those summer weddings, this romantic botanical layout is a great base for layering memories, ideal for beginners. Using this bouquet of botanical cardstock from Echo Park and a die-cutting machine , collate handwritten notes, photos and keepsakes from the special day.

5. Wildflower wedding layout
This wildflower wedding scrapbook layout with butterfly embellishments will make your heart flutter! Scattered with unforgettable detail using supplies from We R Memory Keepers , this ethereal wedding scrapbook idea combines gold foil dots, butterflies and typed journaling to create an eye-catching page that is sure to whisk you away to that special day.

6. Shine on! Wedding scrapbook idea
Perfect for beginner scrapbookers, we adore this modern shimmery wedding scrapbook layout design from Amy Tangerine inspired by her friend’s wedding invitation. Light and fresh, using simple scrapbook supplies from American Crafts and Amy Tangerine’s very own Shine On craft collection . You’ll need white cardstock for the background, gold and brown alphabet lettering and puffy blue heart stickers!

Wedding scrapbook craft supplies we love!
More scrapbook layout ideas to try.

Best friend scrapbook ideas!

Be inspired by these 15 travel scrapbook ideas

Baby scrapbook ideas
You might also like

Hip hip hooray! 12 fabulous DIY birthday card ideas

10 happy anniversary card ideas

7 brilliant DIY graduation card ideas

Midsummer: the latest collection from MillaMia has arrived

Amazing animal knitting patterns

Designers of the month - July
Visit our international sites: Worldwide Germany Australia France
- OUR KIT CLUB
- Scrapbook Ideas
- How To Scrapbook
- Scrapbook Layouts
- Scrapbooking Supplies
- Scrapbook Organization
5 Wedding Scrapbook Ideas To Celebrate Your Special Day!
Idea #1. create a beautiful first page for your wedding scrapbook.
Your first page introduces the best moments of your special day. A great first page will open you up to a memorable journey. Make use of a heart scrapbook layout as you begin creating your scrapbook. To design a stunning first layout, start looking for a solid background using a color from your wedding theme. In the center of the layout, carefully cut out a heart so that the opening can be used to frame the photo. (You might want to cut a heart out of stock paper and trace around it.) Want more wedding layout ideas? Click here and check out our Layout Ideas Books for more amazing themed scrapbook!

Stick a 5″ by 7″ wedding photo in the center of the layout. Take a second sheet of scrapbook paper. You can either choose a white or a pale version of your background paper. Design a border around all four sides using a heart-shaped puncher. In the center of the spread, carefully cut out a large heart so that the opening may be used to frame the photo. (You might want to cut a heart out of stock paper and trace around it.)
Glue or tape the heart cutout to the background. Center a tiny bead or sequin in every other heart of the border. Using a thin white ribbon, design a border around the large heart.
At the top of the layout, put "Our Wedding Day". At the bottom of the spread, put the date. If you don't want to do the words free handed, type out the information on clear labels and adhere.
♥How to get your creative juices flowing again so you'll NEVER experience scrappers block again! ♥How to always have the perfect scrapbook layout for every occasion!
Idea #2. Embellish Your Wedding Scrapbook Album With White
Mat each photo with black card stock. Trim each mat with a lacey white ribbon. Also, put black journal boxes and journal with a silver marker. Trim the journal boxes with a wedding ribbon as well. Embellish the scrapbook spread with white buttons, tiny white flowers, and/or white hearts.
Idea #3. Introducing Mr. and Mrs

Idea #4. Make it fun (show your personality!)

For a clever wedding scrapbook layout of your wedding cake, enlarge a photo of your wedding cake and carefully cut around the cake. For a beautiful wedding topper, cut a photo of the bride and groom and place it on top of the cake. In the bottom left and right corner of the spread, adhere two matted photos of the couple cutting the cake and feeding the cake to each other. Use a solid background style that matches one of the colors from the cake or the theme of the wedding and add a scalloped white border. Add your journal writing and you're done.
Idea #5. Accent each of your wedding scrapbook pages (but don't go overboard!)
For a special wedding scrapbook, choose a simple background paper that is white/gray/black. For example, you might choose white paper that has "I love you" written across the page in rows of gray. Use the same background for each spread (the two side by side pages). Most weddings have at least one color for the bride maids' dresses, but quite often two colors are used. Using the colors from your wedding, accent each scrapbook page by including the color(s) in your borders, mats, and embellishments. These accents will make the color from your photos really pop. Scrapbook wedding ideas are endless. For more ideas, go online and do a search. The next time you're at a craft store, you might find a brochure that features wedding albums and stunning relationship scrapbooking themes and templates. You can also check out a craft magazine. The important thing is that you create each page or spread it in a unique way that reflects your personality and style, but also honoring your special day every time you open your scrapbook.
Before you begin adhering items to your scrapbook pages, lay all photos and new embellishments first. Move things around until you're satisfied with how the scrapbook looks. Lastly, remember to keep your wedding scrapbook simple. Unlike a photo album, which is page after page filled with photos, your wedding scrapbook will highlight a handful of photos that you believe captures your special day. Go easy with the embellishments and keep your pages in sequence.
And finally – don't forget to spend some time on your journaling 🙂 There's a helpful article we've written here to help you.
I hope that you find this guide useful and has provided you with great inspiration. Relieve the memories of your special day by creating a page using these wedding scrapbook ideas!

How to Make a Wedding Scrapbook
Make your big day last forever, with a memory scrapbook filled with all the special moments that made your wedding so unique. The design includes plenty of room for personalised captions, quotes and images. This is the perfect gift idea for any newlyweds you know!
Make this scrapbook a memorable keepsake to be cherished with your loved ones for years to come with the help of our simple guide.
Project and instructions by Jackie Jasper
Discover more scrapbook ideas here >
- Share on Pinterest
- Share on Facebook
- Share on Twitter
- Copy this idea
You will need

Tuscan Grey Paper Flowers 20 Pack
Is £3.30

Sentiment Foil Letter Thickers Stickers 167 Pieces
Is £7.80

Gold and Clear Assorted Round Gems 90g
Is £4.00

Jen Hadfield Gold Puffy Leaf Stickers 31 Pieces
Out of stock

Gold and Silver Metallic Card A4 4 Pack
Is £2.00
Gold Metallic Home Craft Acrylic Paint 60ml
You’ve viewed 2 of 6 products
You’ve viewed 4 of 6 products
You will also need
*White gel pen
How to make
Trim a large panel of kraft coloured card to approximately 28.4 x 29.4cm. Mix a small amount of gold acrylic paint with some water, then use a large paint brush to splatter the kraft panel.
Top Tip: Use a cardboard box to splatter the panel as this will help prevent the splatters splashing everywhere!

Use a paper trimmer to cut a handful of squares and a few hexagons measuring approximately 8.5 x 8.5cm or whatever suits your chosen photos, then add these to all but one section.

Arrange the paper flowers into two or three bunches depending on how many you would like there to be on the page. Add a few puffy gold leaves and some gems here and there

Add the photos to the patterned paper squares at a slight angle, creating movement.

Handwrite some journaling panels onto white card, then splatter in the same way as step one. Layer on to a gold card panel the same size, then add them together using 3d foam pads before gluing them to the hexagons.

Add the large gold sentiment across the blank section, then finish off by adding white gel pen around a few of the patterned paper shapes.

Relive your special day with your stunning, wedding memory scrapbook!

Related Products

Related Items
- valentine's day card
- bullet journaling for beginners
- scrapbook layout kids
- wedding scrapbook pages
- recipe scrapbook
- bvseo_sdk, dw_cartridge, 18.2.0, p_sdk_3.2.0
- CLOUD, getReviews, 19ms
- reviews, product
- bvseo-msg: Unsuccessful GET. status = 'ERROR', msg = 'Not Found.'; Unsuccessful GET. status = 'ERROR', msg = 'Not Found.';
Craft with us at our workshops

Online Workshops

Cricut Workshops

Creative Memories Blog
We Make Scrapbooking Fun!
Preserve Your Love Story With This Two-Page Wedding Scrapbook Layout

Walk down the aisle of your heartwarming love story with the Devotion collection! From sweet date nights to the surprise engagement, the intimate wedding ceremony and the anniversaries for years and years to come, these scrapbooking supplies commit as an “I do” for complementing your special relationship and meaningful photos with endearing, ethereal designs. So, happy couples, relish your romance with this two-page wedding scrapbook layout that is sure to ring in beauty!

To create this layout you will need:
- Devotion Paper Pack or ( Shop Canada | Shop Australia )
- Devotion Foiled Accent Paper Pack or ( Shop Canada | Shop Australia )
- Devotion Laser Cut Paper Pack or ( Shop Canada | Shop Australia )
- Devotion Variety Mat Pack or ( Shop Canada | Shop Australia )
- Red Rose Foiled Embellishments or ( Shop Canada | Shop Australia )
- White Rose Foiled Embellishments or ( Shop Canada | Shop Australia )
- Devotion Stickers or ( Shop Canada | Shop Australia )
- Bronze Shimmer Solid Cardstock or ( Shop Canada | Shop Australia )
- 12-inch Trimmer or ( Shop Canada | Shop Australia )
- Tape Runner or ( Shop Canada | Shop Australia )
- Repositionable Tape Runner Refill or ( Shop Canada | Shop Australia )
- Foam Squares or ( Shop Canada | Shop Australia )
- Black Dual-Tip Pen or ( Shop Canada | Shop Australia )
Check out the whole Devotion collection in the video below!

Step 1: Use two pieces of beige mini diamonds designer paper as the base for this two-page layout.
Step 2 : Cut the double-framing roses laser-cut paper apart, leaving you with two curved rose edges and two straight rose-edged photo frames. Adhere the curved rose edges on either side of the layout as shown.
S t ep 3: Cut two 4″ x 12″ pieces of white hearts foiled accent paper. Tear two 2″ x 12″ pieces of gold scallops foiled accent paper. Adhere to the layout as shown.
Step 4: Adhere two 4″ x 6″ photos behind the two straight rose-edged photo frames and mount on the layout.
Step 5: Crop two photos to 5″ x 3-1/2″. Cut a slim mat with Bronze Shimmer Solid Cardstock for each, then cut a 5-1/2″ x 4″ mat with white intricate florals designer paper for each. Adhere to the layout as shown.
Step 6: Crop two photos to 3-1/2″ x 3-1/2″ and one photo to 3-1/2″ x 5″. Cut slim mats with Bronze Shimmer Solid Cardstock for each. Mount on the layout.
Step 7: Cut a variety mat to 3-1/4″ x 4-1/2″ and mount it on the layout. Journal as desired.
Step 8: Add embellishments and stickers, popping some up with Foam Squares for added dimension.
Did you fall in love with this wedding scrapbook layout? What other everlasting moments would you share with the Devotion products? Express your thoughts and ideas in the comments section!

Love this post? Share it!
3 thoughts on “ preserve your love story with this two-page wedding scrapbook layout ”.
I love how you cut the laser paper in order to use it across a 2-page spread.
So pretty! Thanks for sharing.
Absolutely stunning!!
Leave a Reply Cancel reply
Discover more from creative memories blog.
Subscribe now to keep reading and get access to the full archive.
Type your email…
Continue reading
Karyn Crops
Scrapbooking products & inspiration / scrapbooking retreats & workshops.

Category Archives: Wedding Scrapbook Layouts
Unique use for the spring leaves frame punch.
I love to make pretty pages, and today I’m sharing a beauty! I used the new Spring Leaves Frame Punch and the Something Blue Collection from Creative Memories for my monthly technique layout and challenge.

We can use the frame punches to punch square and rectangular frames and borders. But we can also use them to punch inside frames! I started with 6″ x 6″ squares that I cut into hollow frames and then punched with the Spring Leaves Frame Punch . For my third frame, I used White Shimmer Cardstock as a pretty shimmery accent. Please note that this technique will only work with designer papers and thin shimmer cardstocks. Cardstock and heavier papers will likely jam your punch. This technique will also work with border punches in addition to frame punches.

For step-by-step instructions and a demo, please view my YouTube video. While you’re on YouTube, please also subscribe to my channel and click on the bell icon to receive notices when I add new videos. I begin my video with a look at the very lovely Something Blue Collection that is the new wedding collection from Creative Memories. In the video, I show how many of the pieces can also be used for other types of layouts.
Creative Memories is offering FREE SHIPPING until noon CT on Friday, March 8th ! Now is a great time to purchase the Spring Leaves Frame Punch and Something Blue Collection along with our new spring collection, Birds & Blooms !
Don’t forget to add the NSD 2024 Customer Bundle to your cart to make my exclusive National Scrapbook Day layouts.
I also invite you to join me for my Virtual National Scrapbook Day Workshop on Saturday, April 20th. I’ll be sharing recorded video instructions and printable handouts for my own exclusive National Scrapbook Day layouts. We’ll meet on Zoom on April 20th to create the layouts together. If you can’t be on Zoom, you will receive access to the recorded videos. My layouts are beautifully layered and detailed and contain some unique features. I will only share these layouts through my event.
Thanks so much for visiting with me today! Happy Scrapping! Karyn
Share this:

Double-Edge Punched Frame Scrapbook Layout
Hello! Today I used two of my current favorite Creative Memories tools to create a beautiful layout. This layout features a double-edge punched frame. I punched the outside of my frame with the Damask Flourish Frame Punch and punched the inside of my frame with the Original Border Maker System and Flourish Vine Border Maker Cartridge. I LOVE how these two punched patterns look together!

I punched the outside edge of a piece of 12″ x 12″ designer paper with the Damask Flourish Frame Punch . After punching the frame, I cut out the center of the paper leaving a 2-1/2″ hollow frame. I folded the frame on the diagonal and punched the inside edge of the frame with the Original Border Maker System and Flourish Vine Border Cartridge .

I finished the layout with photo mats cut from Black Shimmer Cardstock and Silver and Gold Foiled Layered Embellishments . The paper is from the Shades of Silver and Gold Paper pack. All of these materials and tools are current products and can be purchased through my Creative Memories website link . To see a step-by-step video demonstration of how to create this layout, please visit my YouTube channel . Please also subscribe to my channel after watching. Happy Scrapping! Karyn
Creative Life Scrapbooking Winter Blog Hop – Ever After Scrapbook Layouts
Welcome to our Creative Life Scrapbooking Winter Blog Hop ! We’re sharing ideas using some of our favorite Creative Memories products that were released this winter. Just follow the links at the bottom of my post to continue blog hopping.
I used the new Ever After Collection from Creative Memories for my layouts. Although this collection is marketed as a wedding collection, I found that the colors and patterns worked beautifully for some photos of my new granddaughter. Most of the stickers are wedding themed, so I only used a few stickers and relied on the Ever After Laser Cut Frames and Ever After Variety Mats to adorn my pages. For my titles, I used some older CM products.

For my first layout, I created a shabby chic ruffed border by tearing ~1″ strips from the green designer paper, crumpling it up, unfolding it, and then randomly folding pleats forwards and backwards. Afterwards, I flattened the top edges with my hands and taped the pieces to a strip of cardstock to make it easier to handle. I then adhered the entire piece to my page and covered the top edge with an Ever After sticker strip adhered with Foam Squares. Underneath the top edge, I tucked in a border punched from a variety mat with the Original Border Maker System and new Rose Chain Border Maker Cartridge.

I made a paper bow from the wood print designer paper and also matted my 7″ x 5″ photo with the same paper. I included a frame from the embellishment pack under the top edge of my photo and added some stickers around my bow. The title is from the old Everyday Sentiments Laser Cut Embellishments.

My second layout consists of multi-layers of paper strips and borders. The rose print paper measures 12″ x 3-1/2″, the light green print paper is 12″ x 3-1/4″, and the two dark green print strips are 12″ x 1/4″. I included a border on the top that was punched from the light green print paper with the Original Border Maker System and new Heart Duet Cartridge and a border in the middle punched with the Original Border Maker and new Rose Chain Cartridge.

I matted my 7″ x 5″ photo with the mauve striped paper and slid the entire piece into an oval frame from the embellishment pack. I layered the photo piece over a lovely floral laser cut piece also from the embellishment pack.

I finished the layout with Ever After stickers under the top corner of the photo and title stickers from the Little Lamb Girl Stickers.

I pieced together a few strips of paper to make the background of my third layout. I punched the top edge of a 12″ x 7″ piece of light green print paper with the Original Border Maker and Garland Cartridge and adhered this piece on top of a 12″ x 5-1/4″ piece of wood print paper. I adhered a 12″ x 1-1/2″ strip of wood print paper underneath the top edge of the light green print paper and left a 1/4″ exposed at the top – making sure that my total page measures 12″ x 12″. I matted my photo with a 4-1/4″ x 6-1/4″ piece of wood paper and layered it over a frame from the embellishment pack.

I used an old Natural Elegance Variety Mat as my title and layered it over an Ever After Variety Mat and roses that I fussy cut from the rose print paper. I added a laser cut embellishment from the embellishment pack on top of the title card.

Lastly, I used the Original Border Maker with Rose Chain Cartridge to punch two rose borders from the mauve striped paper and layered these pieces underneath the garland border at the top of the page.

To create my last layout, I fussy cut half of the outside edge of a sheet of the rose print paper and adhered this to a sheet of 12″ x 12″ white cardstock. I then cut a 1/4″ frame from the outside edge of a sheet of the wood print paper and adhered this to my page. My photo is matted with a 4-1/4″ x 6-1/4″ piece of wood paper and layered on top of a green striped variety mat.

To embellish my layout, I fussy cut more roses from the rose print paper and included Bloom & Blend Greenery Embellishments and a title from the Little Lamb Girl Stickers.
I hope that I’ve inspired you with the Ever After Collection. Any of my layouts could be used for other types of photos – including wedding photos – and can also be easily adapted into double-page spreads or adapted to include more photos and journaling.
This slideshow requires JavaScript.
Please leave a comment below and let me know which idea you might try or which layout that you like best. You may purchase the materials and tools that I used on my Creative Memories website. You may also like to follow me on my private Facebook Page, Karyn’s Croppers. You can also find Creative Life Scrapbooking on Facebook.
For more inspiration, please continue with our Creative Life Scrapbooking Winter Blog Hop and visit Julie next.
Lisa’s Workshop Organized & Creative Mom Karyn Crops (You Are Here) Julie’s Creative Memories Blog D. Brinsley’s Memory Keeping Blog Scrappin’ Jpegs Crop With Stef
Forever Yours & Woodland Whimsy Layouts

Several product collections from Creative Memories are now in limited supply and available while supplies last. Before they’re gone, I wanted to share a few layouts with you. My first pages feature the Forever Yours collection. Forever Yours is elegant with shades of pink, rose, gold, navy and silver and perfect for wedding photos. On March 5th, our new Black & White wedding collection will be released. If black and white is not the color palette for your wedding photos, I suggest purchasing the Forever Yours items sooner than later.

My first layout is quick and easy but yet so beautiful. I conserved paper by cutting both the silver and navy paper in half at 6″ and adhering to the 12″ x 12″ paper insert from the paper pack. These inserts serve as a label for the paper packs and show photos of each sheet of paper in the pack. They are also photo-safe and can be used in our albums. With this trick, I saved two 12″ x 6″ pieces of designer paper.
I adhered a border sticker to the paper seam and used the Doily Border Punch to punch two borders from white cardstock. I used the Custom Cutting System with the Circle Cutting Pattern to cut my photo and also to cut a photo mat from the navy paper. I used Foam Squares under the flower and title stickers and added a few grey pearl gemstones.

My second page is also a snap to make! I matted a piece of 6″ x 12″ rose patterned paper with navy cardstock and adhered down the center of a sheet of the multi-print paper. My photos are 4″ x 6″ and also matted with navy cardstock. I used the Original Border Maker with the Heart Chain Cartridge to punch three navy borders and adhered them using our Repositionable Tape. If you don’t yet have CM’s Original Border Maker, the Heart Chain Cartridge is one of three cartridges than come with the border maker when purchased. Lastly I added a paper flower from the Forever Yours Embellishments and leaf and title stickers adhered with Foam Squares.

Although the Forever Yours Paper is perfect for wedding photos, the prints are neutral enough to be used with all sorts of photos. To make the page above, I cut two sheets of pink patterned paper in half on the diagonal and attached to another insert from a paper pack. Since the paper wouldn’t fit in my trimmer when turned on the diagonal, I folded it in half and cut with my scissors. I used my flower embellishments and stickers to cover the uneven cut lines. You will need to cut apart the border sticker to make it fit on the page. I used a Gold Dual-Tip Pen to edge my Forever Yours flower embellishments, added small flowers punched from Gold Shimmer Cardstock to some, and added pearl gemstones to the centers. My photo is 6″ x 4″ and triple matted with two pieces of Gold Shimmer Cardstock and white print paper. The largest gold mat is 7-3/4″ x 6″, and the white piece is 7-1/2″ x 5-3/4″. The smallest gold mat is 6-1/8″ x 4-1/8″. My title piece was cut from a Variety Mat and is matted on a gold shimmer circle and a paper flower embellishment. I hand-cut the ribbon pieces from Gold Shimmer Cardstock.

My last page is a reminder that two of my favorite collections from the last year are also being discontinued and are in limited supply. I’ve made many baby and non-baby pages with both the Woodland Whimsy Baby Girl and Baby Boy Collections. But I love making pretty pages, and I just had to share this final baby page made with the Woodland Whimsy Baby Girl Papers and Embellishments.
I used the Custom Cutting System with the old Jumbo Circle Cutting Pattern to cut a hollow circle from brown cardstock. Using the Original Border Maker System with the Sprout Cartridge, I cut two borders from brown cardstock. Using the Cherry Blossom Punch and other flower punches, I created layered flowers from the pink designer paper. My leaves were punched with the Maple Leaf Punch and old Leaf Trio Punch. I used the Outdoor Adventure Quartet Punch to punch a single bird from black cardstock. My photo is 7″ x 5″ and matted with brown cardstock. To assemble, I recommend laying out all of the pieces first before you start to adhere. You’ll have to cut the sprout borders in order to wind them around the circle. I adhered all of the flowers, the bird and the title embellishments with Foam Squares. You’ll notice that I also edged my flower pieces with a brown pen and used the brown pen to draw veins on the leaves and bark lines on the sprout borders and the large circle piece. I also added a pen detail around the entire edge of the page.

You may purchase the pieces of the Forever Yours and Woodland Whimsy Baby Girl Collections under the Going Gone section of my Creative Memories website .
Happy Scrapping!

Capturing the Journey: How to Create a Timeline or Chronological Scrapbook
- How do I create a timeline or chronological scrapbook?

- What's the process for making a heritage or family history scrapbook?
Frequently asked questions (FAQs) for scrapbooking tutorials
- What supplies do I need to start scrapbooking?
- Where can I buy scrapbooking supplies?
- What are the essential tools for scrapbooking?
- What is the difference between traditional and digital scrapbooking?
- Can I use old photos for scrapbooking?
- How do I organize my photos for scrapbooking?
- What is a scrapbook layout?
- How do I choose a theme for my scrapbook?
- What's the importance of journaling in scrapbooking?
- What adhesive should I use for my scrapbook projects?
- How can I preserve my scrapbook pages over time?
- What size should my scrapbook pages be?
- What are embellishments, and how should I use them?
- How do I create a balanced and visually appealing scrapbook page?
- What are some creative ways to use patterned paper in scrapbooking?
- How can I add texture to my scrapbook pages?
- What is the best way to incorporate memorabilia into my scrapbook?
- How can I create custom backgrounds for my scrapbook pages?
- What is the process for digital scrapbooking?
- Are there any copyright considerations when using images in my scrapbook?
- How do I choose the right colors for my scrapbook projects?
- What is layering in scrapbooking, and how do I do it effectively?
- How can I make my own scrapbook embellishments?
- What's the difference between a single-page layout and a double-page layout?
- How do I create a scrapbook title or heading?
- What are the best photo editing tools for improving my scrapbook pictures?
- How do I make my scrapbook pages pop with dimension?
- What's the process for creating a mini-album?
- How can I create a cohesive look for a themed scrapbook?
- What are some ideas for incorporating quotes and sentiments into my scrapbook?
- How can I store my scrapbook supplies neatly?
- How do I fix mistakes on my scrapbook pages?
- What are some unique scrapbooking techniques?
- How do I choose the right album for my scrapbook?
- What are pocket-style scrapbooking and Project Life?
- How can I use stamps and inks in my scrapbooking projects?
- What are the best practices for working with stickers in scrapbooking?
- How can I incorporate mixed media into my scrapbook pages?
- What are flipbook-style scrapbooks, and how can I make one?
- How do I document special occasions like weddings or vacations in my scrapbook?
- What's the role of page protectors in scrapbooking?
- How can I make my own custom die-cuts for scrapbooking?
- What are some creative ideas for scrapbook covers?
- How can I personalize my scrapbook layouts to reflect my style?
- How do I create interactive elements in my scrapbook?
- Where can I find inspiration for my scrapbook projects?
Scrapbooking Supplies
Which scrapbooking products do you need, featured products, featured scrapbooking products.

CutterBee Retractable Knife Value Pack

Stampendous - Perfectly Clear Stamps - Save The Date Set

ScrapGirl TShirts - Blue Large

Confetti - Parade - Memories Polka Dots/LT Blue 12x12

Go West - Acrylic Carnival Monogram x

Applegate Production - Calling All Spooks
Product Search
Scrapbooking frequently asked questions.
Frequently asked questions (FAQs) about scrapbooking
Are there online resources for free scrapbooking templates?
What's the difference between acid-free and lignin-free paper?
What are some ideas for documenting everyday life in my scrapbook?
How can I make my own DIY scrapbooking embellishments?
What's the difference between scrapbooking and journaling?
Frequently asked questions (FAQs) for scrapbook supplies, scrapbooking ideas, and scrapbook layouts
Frequently asked questions (FAQs) for digital scrapbooking
445 Minnesota St #1500 St Paul, MN 55101
[email protected]
Related Topics: Capturing the Journey: How to Create a Timeline or Chronological Scrapbook - How do I create a timeline or chronological scrapbook?, scrapbook kits, page ideas stores, paper, disney scrapbook, showcase templates
Showing results for All Categories vendors in Moscow (Moscow City) , Russia .

Wedding Planning

Wedding People

Maria German decor
Decoration & lighting.

Marina Fadeeva Photography
Photography.

Aleksandra Sashina

Natalia Donskih

Elena Pavlova
Videography

SundayRussiaDecor

Serenity Wedding
Wedding accessories.

Ksenia Riley

Journey to Moscow
Welcome to Moscow - the capital of Russia, its political, scientific, historical, architectural and business centre, from which power and might of the Russian state developed.
IMAGES
VIDEO
COMMENTS
Check out our wedding journey scrapbook selection for the very best in unique or custom, handmade pieces from our shops.
#3. Capturing the Pre-Wedding Journey. Remember to also include elements from the entire wedding planning period, such as engagement photos, the story of how you met, or the moments that led to your big day. These snapshots of your journey add color to your wedding scrapbook, making it a more comprehensive story of your relationship. #4.
A wedding scrapbook is a handmade album that carefully and creatively displays various elements of a wedding, including photographs, invitations, cards, and other sentimental memorabilia. ... So get started on your wedding scrapbook journey and let your creativity and love shine through every page. References. Insert references here.
3. Ode To The Centerpiece. Source: Shutterfly. The reception centerpieces received some of the most attention and design creativity. Create a scrapbook page layout completely dedicated to the design process of your centerpieces, from pressed flowers and ribbons to your menus and place cards. 4.
Adding the lovely stickers was a simple way to decorate the layout and to also remember the little wedding details. "Bridesmaids" by Paije Potter - Pattern #211. #3. Wedding Theme. Incorporate the theme of the wedding by choosing colors and embellishments that help tell the story. Here are a couple of examples:
By following the tips and guidelines in this article, you can create a stunning wedding scrapbook that becomes a cherished family heirloom for generations to come. So, gather your materials, unleash your creativity, and embark on this exciting journey of creating your perfect wedding scrapbook! Jessica Rankin.
Here, 10 of our team's favorite ways to tell the story of your wedding day through colors, shapes, words, and textures in one scrapbook album. 1. Use Wedding Colors. Whether you opted for the rose gold color scheme or went with all things sunshine yellow, incorporating your wedding colors adds a personal element to your scrapbook. Depending ...
1. Beachy 'My Lobster, My Love' wedding layout. For seaside celebrations, we love this double page lobster-themed scrapbooking layout from American Crafts. Simple die-cutting in beachy hued cardstock and driftwood design is perfect for framing your fave wedding photos. Elegant and romantic, each page will sweep you back to those special ...
A wedding scrapbook is something you'll surely cherish for many years to come. ... Your first page introduces the best moments of your special day. A great first page will open you up to a memorable journey. Make use of a heart scrapbook layout as you begin creating your scrapbook. To design a stunning first layout, start looking for a solid ...
Time. Budget. Make your big day last forever, with a memory scrapbook filled with all the special moments that made your wedding so unique. The design includes plenty of room for personalised captions, quotes and images. This is the perfect gift idea for any newlyweds you know! Make this scrapbook a memorable keepsake to be cherished with your ...
Check out the whole Devotion collection in the video below! Step 1: Use two pieces of beige mini diamonds designer paper as the base for this two-page layout. Step 2: Cut the double-framing roses laser-cut paper apart, leaving you with two curved rose edges and two straight rose-edged photo frames. Adhere the curved rose edges on either side of ...
Junk Journal Kit Wedding Beige White Digital Scrapbook Paper Kit Wedding Ephemera Shabby Chic Wedding Junk Journal Supplies Printable Pages. (447) $2.15. $5.37 (60% off) Digital Download.
The largest gold mat is 7-3/4″ x 6″, and the white piece is 7-1/2″ x 5-3/4″. The smallest gold mat is 6-1/8″ x 4-1/8″. My title piece was cut from a Variety Mat and is matted on a gold shimmer circle and a paper flower embellishment. I hand-cut the ribbon pieces from Gold Shimmer Cardstock.
A timeline or chronological scrapbook is a unique and meaningful way to document the passage of time, whether it's a personal journey, a family history, or a special project. Creating a chronological scrapbook allows you to visually map out and celebrate important milestones, events, and memories.
This scrapbook will be a cherished keepsake of the day you both said "I do." Don't forget to check out these 26 wedding guestbook ideas while you're planning your big day! #9. Pregnancy Scrapbook. A pregnancy scrapbook documents the incredible journey to parenthood. You can add ultrasound photos, monthly belly shots, and notes about your ...
Amazon.com: our journey scrapbook. ... Wedding Scrapbook, Engagement Gift. Rose Gold Foil, Scrapbook For Couples, Marriage Journal, Couples Journal Wedding Keepsake, First Anniversary Paper. 4.4 out of 5 stars. 117. $29.00 $ 29. 00. FREE delivery Tue, Feb 27 on $35 of items shipped by Amazon.
Ksenia Riley. Wedding Planning. Moscow (Moscow City), RU. $$$. Pricelist. Plan your wedding in moscow-moscow-city • Photography, catering, venues • Find reviews & prices for top vendors in Russia • Bridestory.com.
Walking tour around Moscow-City.Thanks for watching!MY GEAR THAT I USEMinimalist Handheld SetupiPhone 11 128GB https://amzn.to/3zfqbboMic for Street https://...
The Evolution Tower (aka City Palace Tower or Wedding Palace) has arguably become Moscow City's new architectural landmark. The inspiration for the tower comes from Rodin's Kiss, St Basil's ...
Moscow hotels and destination guide. Find information on Moscow sights, hotels, museums, and restaurants online.