

Most Common Problems with Jayco Journey & Their Solutions
Every travel trailer has problems, and it’s essential to have a clear idea about the problems and their solutions. When discussing the Jayco Journey, you may also have to deal with some issues. Some problems are minor, whereas others can cost you a lot of money.
But what are the most common Jayco Journey problems? The most frequent problems with the Jayco Journey are water leakage, a cracked or leaky roof, a noisy water pump, stuck windows, rusting gas cover handle, unfinished edges, and more. So doesn’t the Jayco journey seem pretty problematic?
Once you discover issues with your Jayco Journey RV, you must act to resolve them. Fortunately, this blog covers the troubleshooting guide for the most common Jayco Journey problems.

What Are The Common Problems With The Jayco Journey?
It’s natural to face some issues with the Jayco Journey travel trailer. However, after serious discussions with the users, we have sorted out some of the critical Jayco Journey issues.
Moreover, the Jayco Journey is known to have some difficulties within a short time. Let’s see the most irritating problems below.
- Water leakage
- Faulty braking system
- Unfinished edges
- Leaky/cracked roof
- The door comes inside the caravan
- Oil spots beside the kitchen area
- Noisy water pump
- Scrubbed out tires
- Wear and tear on the exterior
How Do You Troubleshoot and Fix Jayco Journey Problems?
You’ve got some ideas about the possible problems with the Jayco Journey caravan.
Now, you will find a lot of ease while troubleshooting the issues. We will also demonstrate the causes and symptoms of the issues below.
Read Also: 4 Common Jayco Eagle Problems & Solutions
Problem 1: Water Leakage
Water leakage is one of the significant problems with any travel trailer. Unfortunately, the issues have become more frequent regarding the Jayco Journey as well.
Extreme water leakage can cause many problems. For example, you may notice flooring damage and corrosion in different parts of the RV.
What Causes Water Leakage On Jayco Journey?
Many possible reasons can cause water leakage problems on the Jayco Journey. However, if the water pump of the Jayco Journey goes bad or is damaged, it will cause the issue of water leakage.
Some of the symptoms of water leakage include:
- Broken water pipe.
- Damaged roof seals and loose sealant.
- Faulty window or door seals.
- Cracks and gaps on the walls.
How To Fix Water Leakage On Jayco Journey?
You should start the water leakage troubleshooting by discovering the source of the leakage. If the water pump or tank goes bad, you should also inspect it.
- Check where the water comes from by checking all the possible leakage sources.
- Next, check the water pump to see any additional damage.
- Repair the roof seams if they go bad or there are significant gaps.
- Replace the door and window sealants if they are leaking.
- If the water pump becomes faulty, replace it with a new one.
- Finally, repair or replace the leaky water pipe.
- Repair the kitchen sink with tape if it becomes damaged.
How Much Does It Cost To Fix Water Leakage On Jayco Journey?
The cost will depend on what causes the water leakage problem on the Jayco Journey. However, you may need to spend around $500-$600 on average. The cost increases because of the faulty water pump or tank.
- Mechanical Cost: $250-300$
- Parts/Replacement Cost: $250-300$
Read Also: Common Jayco Outback Problems & Solutions
Problem 2: Faulty Brake Control System
Unfortunately, you will notice the braking system of the Jayco North Point being faulty on some occasions. Moreover, the majority of the problems are with the electrical braking controller.
One of the most common symptoms of a faulty electrical braking system is that it weakens over time. So, this type of problem needs to be fixed immediately.
What Causes A Faulty Brake Control System On A Jayco Journey?
Before that, let us remind you of an important fact: the Jayco Journey has one brake for its four wheels. However, the electronic braking system Jayco Journey has always been a disturbing fact.
One of the most common reasons for this problem is broken wires. Some of the other causes of the issues are:
- Poor electrical connection
- Broken wires.
- Corroded connection.
- Undersized brake cabling
- Broken brake component.
- Faulty brake controller.
How To Fix A Faulty Brake Control System On A Jayco Journey?
First, you need to check the electrical connection of your Jayco journey brake system. No change in the braking system functions appropriately if there is insufficient connection.
- Cheek the electrical connection of the brake to see whether there is enough voltage.
- If there is voltage loss, you must supply additional voltage to the electrical magnet.
- Check whether there is a corroded connection.
- Clean and repair the corroded connection.
- Check the brake cabling.
- Replace the undersized brake cabling with 100% copper.
- Check all the brake components and parts.
- Check the broken wire.
- Repair or replace it based on the type of damage.
- Replace the brake component if there is severe damage.
- Test the brake controller.
- Replace or repair the controller based on its condition.
How Much Does It Cost To Fix A Faulty Brake Control System On A Jayco Journey?
The repair cost will vary because there are quite a few issues that can cause a faulty brake system on the Jayco Journey. But, on average, fixing the braking system issues can cause you around $300-$600.
- Mechanical Cost: $100-$200
- Parts/Replacement Cost: $200-400
Read Also: Common Jayco North Point Problems & Solutions
Problem 3: Unfinished Edges
The unfinished edges can be another most visible issue regarding the Jayco Journey. Nonetheless, some users find it unexpected to discover a case like this with Jayco. You can notice the unfinished edges around the buck beds.
However, the unfinished edges sometimes decrease the interior beauty of the travel trailer. Besides, if you have children, the unfinished edges can also hurt them.
What Causes Unfinished Edges On The Jayco Journey?
Users find the problem of the unfinished edge in different stages of their user journey. However, if the wood around the bunk bed area is This is more likely to happen due to careless finishing while manufacturing the travel.
But, it can also happen that, as time passes, the finished wood becomes damaged and causes unfinished edges.
How To Fix Unfinished Edges On Jayco Journey?
First, you need to check the condition of the edges. Based on that, you should repair the edges. In most cases, you will find unfinished wood edges around the bunk area of the caravan.
So, in this case, you need to repair the edges and give them perfect shapes. Furthermore, repairing won’t do; it would be better if you made new edges and fitted them around the bunk area.
How Much Does It Cost To Fix Unfinished Edges On Jayco Journey?
Luckily, you don’t need to spend too much money to fix unfinished edges on the Jayco Journey. On average, it costs around $50-$100, depending on the finished problems.
- Mechanical Cost: $20-$30.
- Parts/Replacement Cost: $30-$70.
Read Also: Common Jayco White Hawk Problems & Solutions
Problem 4: Leaky Roof
Roof leakage is another irritating problem, and it becomes more acute when heavy rain or damage occurs. However, we have seen this issue with most Jayco travel trailers.
The most common symptom of a leaky roof is that you will notice water drops from the roof down to the floor when there is rain. You may also see the crack from the inside part of the roof.
What Causes a Leaky Roof On A Jayco Journey?
Among the few important causes, the harsh weather conditions are a culprit behind roof leakage or cracked issues.
You need regular maintenance to keep the roof protected from bad weather. So, lack of care can be another reason for roof leakage. Other possible causes are:
- Unexpected damage.
- Poor roof seals.
- Puncture in the roof membrane.
How To Fix a Leaky Roof On A Jayco Journey?
One thing is clear: you need to be careful about the roof maintenance on Jayco’s journey. Use the travel trailer roof cover when it is extremely hot or rainy.
Furthermore, follow the below steps carefully.
- Clean the roof.
- Check the damage.
- If the damage or crack is extreme, you must apply the proper sealant to the roof.
- Use the rubberized leak stopper if you find tiny holes in the roof. You can also use tape as well.
- Replace the roof seals if they are damaged.
How Much Does It Cost To Fix A Leaky Roof On A Jayco Journey?
It depends on the level of leakage. However, if there are significant issues, fixing a leaky or cracked roof will cost you anywhere from $700-$1500. If you can fix some of the causes on your own, you will save a lot of money.
Always take enough time to fix any of the Jayco Journey Problems . It will be better if you start with the basic causes of any problem. Furthermore, most issues have more than one symptom. So, make sure you are pretty sure about them as well.
Most users often make a mistake waiting for the warranty period to take further steps to fix any problems. But, this is not a good approach. Instead, once you notice the symptoms, you should start troubleshooting the issues.
Besides, never mind calling a professional in this case to fix the Jayco Journey Problems. If you DIY, you’re welcome.
Read Also: Common Jayco Caravan Problems & Solutions

Zayan is an accomplished author and a go-to expert for all things RV and camper-related. With a passion for adventure and a knack for problem-solving, he has spent years exploring the open road and fine-tuning his knowledge of recreational vehicles.
Zayan’s writing is a testament to his expertise, offering readers practical solutions to common RV dilemmas. Whether it’s troubleshooting mechanical issues, optimizing space, or planning the perfect road trip, Zayan’s insightful advice and engaging storytelling make him an invaluable resource for both seasoned travelers and newcomers to the world of RVing.
Similar Posts

What are the Reasons For Jayco Fridge Not Working?
With a Jayco motorhome, you can enjoy your weekend or vacation more comfortably. It might, however, occasionally run into a few refrigerator issues. Some issues are easy to solve, while some require professional help. The…
![4 Common Jayco White Hawk Problems [Solutions Included]](https://campertroop.com/wp-content/uploads/2022/01/Jayco-White-Hawk-Problems-768x509.jpg "jayco journey lights not working")
4 Common Jayco White Hawk Problems [Solutions Included]
Jayco White Hawk is one of the highly efficient travel trailers known for its decent features and performance. However, you may face quite a few problems with this fifth-wheel travel trailer. The most common Jayco…

5 Common Problems with Keystone Bullet and Their Solutions
If you own a Keystone RV but lack fundamental knowledge of RV repair, you will have to spend money on resolving common problems. Recent data indicates that the average hourly rate for a skilled RV…
![4 Common Problems with Jayco Eagle [Solutions Included]](https://campertroop.com/wp-content/uploads/2022/01/Jayco-Eagle-Problems-768x509.jpg "jayco journey lights not working")
4 Common Problems with Jayco Eagle [Solutions Included]
Every RV requires maintenance & care irrespective of its quality. And the Jayco Eagle is no different. However, nobody can guarantee what issues you will encounter. To be on the safe side, you should familiarize…

5 Most Common Problems with Cedar Creek Cottages
Whether you are a frequent visitor to Cedar Creek Cottages or are considering a trip to this beloved vacation spot, it is important to be aware of the potential pitfalls and take steps to ensure…
![6 Common Problems with Jayco Freedom [Solutions Included]](https://campertroop.com/wp-content/uploads/2022/01/Jayco-Freedom-Problems-768x509.jpg "jayco journey lights not working")
6 Common Problems with Jayco Freedom [Solutions Included]
When talking about popular campers, Jayco freedom is a name that will pop up. They are highly rated among users for their style, comfort, and ease of use. However, like other camper caravans, they also…

STARCRAFT POP TOP
Journey pop top, all-terrain pop top, all terrain, basestation, jrv campervan, optimum campervan, all terrain campervan, conquest motorhome, optimum motorhome, a guide to your jayco rv: how to use the 12v system.
The 12 Volt system on an RV allows you to operate many of your appliances and lights without being connected to a power outlet.
Most 12V systems are designed to use deep-cycle house batteries fitted in your RV and take slow, regular current draws until roughly 50% charge remains.
It’s important you know how to operate this before you embark on your journey.
Luckily, this is an easy process.
In this video, Chris will be demonstrating how to use the 12 Volt system fitted in a Journey Pop Top.
This is a standard inclusion in Journey Pop Top , Expanda Pop Top , Starcraft Pop Top , Starcraft Caravan , Basestation , Work’N’Play , CrossTrak , and all Jayco Camper Trailers .
Step-by-step guide to using the 12V system:
Regardless of whether you are plugged into 240V or not, you can power up your van using 12V.
Locate the isolation switch in your van.
Switch it on to operate your entire 12V system.
Below this, you will find the pump switch.
If you are free camping, switch this on.
This will provide you with access to water for your shower, outside tap or kitchen sink, if you have water available in the tank.
Make sure you don’t turn this on if you are in a caravan park. If you are connected to mains, it will burn out the water pump if turned on.
For more information, tips, or guides, please visit https://www.jayco.com.au/community/category/how-to-guides
Jayco E-Newsletter

- Travel Gear and Gadgets
- Jayco Camper Tips & Mods
- Hints & Tips
- Must See Destinations
- The Family Travel Podcast
Select Page
23 Tips For New Jayco Camper Trailer Owners
Aug 17, 2020 | Jayco Camper Tips & Mods | 6

Disclosure: When you click on links to various merchants on this site and make a purchase, this can result in this site earning a commission. Affiliate programs and affiliations include, but are not limited to, the eBay Partner Network
Here’s 23 tips for new Jayco camper trailer owners
(plus some answers to a few of the most frequently asked questions)
These are things that are specific to the operation of a windup camper trailer…
…and are things I wish I knew when we first got our Jayco Swan.
Here we go:
1. Hang the upper part of the door flat against the ceiling
How you hang the top part of the door makes a BIG difference when you wind down the roof of your camper.
This was a mistake we made:
If you leave the door hanging down at the entrance when you attach the little clips…

…then it can get in the way when you lower the roof.
This can make the lid hard to close, or even bend the clips.
But if you push the metal plate up first?
The door folds flat to the roof:

This makes the roof easier to close and gives more space for bedding
(and lets us keep our Ever Rest Memory Foam mattress topper on the bed when we pack down)
2. Check your roof safety switch if your lights aren’t working
A question that pops up nearly every day:
Why aren’t my Jayco camper’s lights working even though I have power everywhere else?
There’s a roof safety kill switch whose job is to cut power to the roof when it’s packed down

(so if the lights are accidentally left on they don’t melt the canvas or cause a fire)
The most common reason the lights aren’t working:
The switch often malfunctions because the metal lever gets caught and doesn’t let the white button drop down
So you might just need to check it here:

(on our Jayco Swan the metal lever has fallen off the switch at some point)
Believe it or not, cutting it out and simply joining the wires is one of the 35 Most Popular Jayco Camper Trailer Modifications
[because if you’ve turned off all the switches and/or disconnected the power before lowering the roof then there’s no power supply anyway]
Also, check that the 12 V plug near the sink is seated correctly too… and not corroded
3. Check the telescopic arms have lifted while you’re winding up the roof of your camper
Sometimes when you’re winding up the roof of your Jayco camper trailer the middle telescopic arm doesn’t slide freely.
This can cause one of the lifting arms to pop out and really ruin your holiday.

So when you’re winding up the roof of your camper it’s wise to stop half to three-quarters of the way and check the lifters
[It’s a step in our Jayco Camper Trailer Set-Up Checklist ]
If the main outer sleeve looks like this:

Gently slide it up with your hand so it looks like this:

But… it’s important you find out WHY this is happening:
Unless the lifter arms are bent it’s usually that the arms need to be sprayed with some silicon spray
(or that the camper isn’t levelled properly)
HINT: The Velcro covers are there to keep your lifter arms clean and dry
[you’ll see what I mean in Number 6]
4. Cool down your 3-way fridge well before you need it
The 3-way fridge in a Jayco camper is pretty much designed to be run on:
- Gas when you’re free camping
- 12V from your car when you’re driving
- 240V when you have access to mains power
It takes about 24 hours for your fridge to cool down…
Should you run the fridge on 240V with the roof of a Jayco camper trailer wound down?
Some people have been doing it for years with no problem and say it depends on the van:
- If it’s an older model that has venting in the top of the bench then ‘no’
- If it’s vented outside then it’s fine
But… even on our 2014 Jayco Swan OB (vented outside) it still has this warning:

This might be some good ol’ fashion butt covering…
…but then there’s this Jayco Penguin that was for sale for parts:

Maybe it would have happened anyway even if the roof was up?
Anyway… to make sure you can keep your camping supplies cool when you reach your destination a couple of options are:
- Put some pre-frozen bottles of water in the fridge to cool it down while you’re travelling (and take things in an esky), or
- Plug your camper into 240V a day or two before you travel
(we don’t have a 15A power point installed so we got one of these Ampfibian 15A to 10A adaptors from eBay)
If I can’t set up our Jayco Swan before travelling, I’ll stick with the first option
Want to learn more about getting the most out of your 3-way fridge?
Read : 3-Way Fridge: Jayco Camper Trailer Hints, Tips and FAQs
5. Always make sure your camper is level before you set up
There was this one time (before I fixed a T-spirit level to our drawbar) that I set up our Jayco Swan and it wasn’t level:
The door wouldn’t shut properly. Water pooled on the sink.
But the big one?
The roof was noticeably leaning to one side
(the whole time I was worrying that it would bend the telescopic lifter arms)
And… not having a 3-way fridge level can stop it from working properly.
Sticking a T-spirit level on the drawbar is the best $5 you’ll ever spend on your camper

(another entry on the list of the 35 Most Popular Jayco Camper Trailer Modifications )
HINT : Don’t stick it straight on there… just because your drawbar is level, doesn’t mean your bench or sink will be too
Check out : How To Fix A T-Spirit Level To Your Caravan or Camper Drawbar [5 Steps]
6. Use roof support poles (but as backups only)
A pair of roof support poles now come as standard when you buy a Jayco camper trailer:
They’re like 1200 mm insurance policies in case your roof collapses.
If your camper didn’t come with (at least) 2 of these then grab a pair for the corners opposite to the door and wardrobe

But remember:
There’s no designated weight-bearing area in the roof for these poles. They’re a fail-safe only. Don’t take tension off the lifting arms and rest the roof on the poles.
Ours came with 4 and take less than a minute to put in
(I do it while I’m checking the sleeves are fully up and when I’m closing the Velcro).
You can get them yourselves with some aluminium poles and rubber stoppers from Bunnings.
But to be honest?
By the time you’ve bought all of that it’d be just as cheap to buy them from your local Jayco store
[they’re about $12.50 each]
I scrounged the Internet and could only find one single example of the roof collapsing once it’s up. Collapses seem to occur during set-up…
7. Double check that the roof clips are undone before you start winding up the roof of your camper
One of the most common causes of cable failure is forgetting to undo one of the catches and starting to wind up the roof.
Even if it doesn’t fail now, it can start to open up the eye bolts that hold the cable

(they’re an engineered weak point)
I’ve given myself this gentle reminder:

8. Keep slack off the cables when the roof is down
When you’re winding down the roof of a Jayco camper it’ll usually stop a couple of centimetres off being completely closed.
Resist the temptation to keep unwinding because the cables will get slack in them
(and may not spool properly when you go to wind it up again)
Use the clips to close the roof… and give the handle a GENTLE turn to take any slack off the cable
9. Do the bed end fly mod (so you’ll use them more often)
I thought the bed and flys would be something I’d only use in bad weather.

But I’ve since come across some reasons to use them (nearly) every time I set up.
There’s probably more, but here’s…
9 reasons to use bed end flys on your Jayco camper trailer:
- They keep your van a bit darker in the mornings (important with small kids!)
- Creates more privacy if your windows are open
- Stops condensation landing directly on your bed ends on cold and damp nights
- Keeps your bedding dry during pack up
- You can stand under them to keep your bed dry while you’re setting up
- Keeps the sun off the bed ends to keep them cooler
- They create an air gap for extra insulation
- Stops rain from landing and pooling on your bed ends
- No folding bird poo into your bedding!
Our Jayco Swan came with these CampSmart ones
(we love them)
Sure, they’re one extra thing to do during set-up and pack-up, but they’re worth it.
Want to make the bed end flys quicker to set-up, with less poles, and less guy ropes to trip over?
Then check out the bed fly conversion kit from SupaPeg via eBay
(about $40 and one kit does both ends)
Read : Bed End Fly Modification For Jayco Swan Camper Trailer (Our Review)
10. Insert the hockey sticks before doing up the Velcro on your bed ends

If you fasten the Velcro on your bed ends before inserting the the hockey sticks, then this:
- Makes it harder than it needs to be, and
- Can snap off the round bit on the Plastic Bed Saddles

(we carry spares a couple of spares, they’re about $7 here on eBay )
Our set-up routine is pull out the beds, go inside to insert the hockey stick, then go back out to do up the Velcro.
11. Create a checklist of things to do before you lower the roof
There’s some things that are a pain in the bum if you forget to do before you lower the roof.
If you forget to switch the fridge over it won’t work while you’re driving.
If you forget to turn off the lights it can cause a fire.

Full credit to the person we bought our Swan from…. they made this handy laminated list for the inside of our door:
- Battery switch
- All power switches

(I was surprised that ‘door’ was on this list… until one day I went to wind down the roof without doing it too!)
For our full list, read: Our Jayco Camper Trailer Set-Up Checklist
12. Lubrication is your friend
Unlike a caravan, a Jayco camper trailer has a lot of moving parts…
…so it’s important you keep things well lubricated to reduce wear, tear, and effort.
A can of this stuff is less than $10 from Bunnings:

The first time I used it I noticed a massive difference in:
- Opening and closing the zips on the bed and flys
- Sliding the beds in and out
- Letting the sleeves on the telescopic lifter arms move more freely
HINT: Hold a piece of cardboard behind the lifter arms when you spray so you don’t stain the canvas
13. Keep your canvas as dry as possible
Anyone who’s owned a camper trailer before knows that you should:
- Try to let your camper dry out as much as possible before packing up
- If you have to pack up when it’s wet, set it up at home and let it dry out
- Open it up regularly to make sure there’s no moisture trapped inside
(it’s easy to kill mould, but removing mould stains is another story)
One of the things about a Jayco camper trailer is that there’s still air circulating even when it is closed down.
Moisture absorbers are only a couple of dollars…

…get them from hardware stores, cheap shops, and most supermarkets
(you’ll be surprised how quick they fill up)
14. Turn the battery switch on when you’re on 240V to charge your battery properly
Your battery will not charge properly if you’re plugged into 240V and the battery switch is off.
Depending on the model of Setec charger that’s in your Jayco camper leaving the switch off will either give:
- Trickle charge at 0.8A, or
- No power at all
If you have access to 240V… both Setec Series II and Series III manuals say the same thing:

Turning it on allows it to use its 4 modes:

This extends the battery life. During store mode, the unit exits to boost mode for 15 minutes every 24hrs to maintain charge in the battery.
And if you can’t (or don’t want to) leave it plugged in?

Leave the power supply on for at least 2 – 5 days with battery connected
NOTE : If you’ve got something different to a Setec charger (like a BMPro) then turning off the switch may have no impact on the charger
15. Fold the canvas flat to make it easier to close your roof
If the canvas is all bunched up on the mattresses then:
- It creates more bulk, and
- Air pockets can get trapped
[this can make the difference between keeping your bed made or leaving a mattress topper in place]
To get things as flat as possible the method that works for us is to:
- Push the rear bed in first
- Go inside to pull the rear canvas flat
- Fold the front canvas using the “envelope” method
How to fold up a Jayco camper trailer bed canvas like an envelope:
- Fold the corners of the canvas into the middle of the bed

- Fold the long edge of the canvas back into the middle

- Push the bed in slowly, neatening it up as you go

I’m not even sure where these pics came from (they’ve been shared by so many people)…
…but whoever took these photos is a legend!
When you’re packing down, don’t forget…
16. Remove rings and use the back of your hands when pushing in the canvas
Anyone who’s wound down the roof of a Jayco camper trailer knows that you need to stop a few times to go around pushing in the canvas.
But something that some people have learned the hard way?
Fingers can poke holes in the fly screens, and diamond rings can get caught
[especially as the fly screens get older]

So a big tip is remove jewellery and use the back of your hand to push in the canvas so that you don’t accidentally stick your fingers through the flyscreens.
17. Don’t worry about the ‘clunk’ noise when you’re about half way through winding up the roof
I was skeptical when I was told this at handover:
“Don’t worry about it, it’s normal, it’s always done it”
I wasn’t convinced because there was no REASON given…
…but it’s a question that gets asked all the time.
It turns out that it is normal for a wind up camper system, which winds a cable around a winch drum:

The cable slips on itself as the first layer is complete and it’s starting a new layer
( TIP : I use it as my cue to go around and check that the telescopic arms have lifted)
18. Adjust your roof clips so that they don’t come loose while you’re driving
You can adjust how loose or tight the roof clips are by twisting them
(they have a nut and bolt built into them)

So any time you go to clip down your roof and it feels a little loose, it’s worth adjusting them so they’re snug.
I’m sure you don’t come loose often, but if they do, once is enough!
19. Don’t plan on your power points working if you’re not connected to mains power (unless you have an inverter or generator)
A simple way of looking at things is that you’ve got 2 separate electrical circuits in your camper:
- Your battery powers a 12V system
- Your power points run off a separate 240V circuit
So if you’re not plugged into mains power, your 240V power points won’t be live

(this includes USB chargers if they’re part of a 240V power point)
Read : Pop Up Power Point for Jayco Swan (Installation and Review)
So if you’re free camping plan on cooking on gas…and buy 12V appliances where you can.
If you insist on using 240V appliances, you could:
- Get an inverter (but you’ll more than likely chew through your battery really quickly), or
- Run a generator (but be prepared to lose a few friends)
20. Make sure you have the right 15A gear to plug your camper into 10A mains power
The electrical system in your Jayco camper trailer is rated to draw up to 15 amps of current at once…
…while your home runs on a 10A power supply.
So to start with, you need a heavy duty extension cord that’s rated to 15 amps
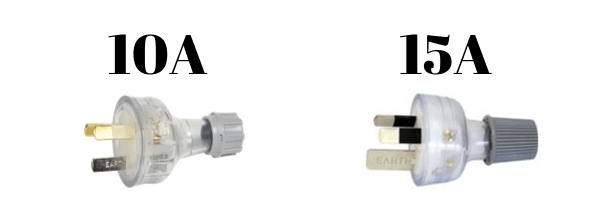
(which won’t fit into a standard power point).
Then you have 2 options:
- Get a qualified electrician to install a 15A power point to plug into, or
- Purchase an approved 15A to 10A adaptor (which is handy for travel anyway)

Changing the head of the power lead to a 10A one or grinding the earth plug down to size are not options.
The most popular and best option is an ampfibian adaptor. You can get them at Bunnings, but we bought ours a bit cheaper here off eBay .
21. If you’re using an awning make sure you have a way to even out the tension on the other side
When you put up an awning (or annex) it can pull the roof sideways.
- Put a bending force on the lifting arms
- Stop the door frame from being in alignment
One option is to replace the lifting arm bolts with eye bolts to create a spot to connect guy ropes…

…but another option is a kitchen awning privacy sunscreen:

[ get them here from eBay … perfect for keeping the sun off the fridge in summer]
22. Protect the 12V plug that’s near the sink from water with some plastic tubing and a chopping board
<insert your favourite joke here about this amazing Jayco camper trailer design feature>
Protecting the 12V socket from water is important for obvious reasons.
A culprit seems to be when you connect to mains and first turn on the tap:
Water can come blasting out!
Some tips that a few people have done to help this include:
- Attaching some 8mm tubing (Bunnings) to increase the length of the tap
- Placing a chopping board behind the tap and in front of the 12V plug
23. Know how water affects your weights
Here’s a couple of important numbers to know:
300 kg is the standard load carrying limit for a Jayco camper trailer
You’re carrying 82 kg of water when you fill the standard 82 L capacity tank
So it’s worth keeping those numbers in mind when you’re wondering whether you should travel with your water tanks full…
…especially when you consider that the 300 kg limit includes your awning, aircon, solar, etc
[there’s no straight answer about how water will affect your tow ball weight because it’ll differ depending on where tanks are relative to your axles]
Summary: Tips for Jayco camper trailer owners
I’m sure this is just scratching the surface of tips for Jayco camper trailer owners
…but these are the ones that jumped out at me as important to know
(and I only learned most of them AFTER we started using our Jayco Swan)
You might also like : 7 Tips to Keep Your Jayco Camper Trailer Warmer in Winter
Otherwise, check out our most popular article:…
Read : 35 Most Popular Jayco Camper Trailer Modifications
Or one of our more recent articles…
Read : 9 Tips To Save Time Setting Up Your Jayco Camper Trailer
Related Posts
![Jayco Swan Diesel Heater Installation [Step-By-Step With Pictures]](https://abigpeacheyadventure.com.au/wp-content/uploads/2020/06/Jayco-Swan-Diesel-Heater-Installation-Step-By-Step-440x264.jpg "jayco journey lights not working")
Jayco Swan Diesel Heater Installation [Step-By-Step With Pictures]
June 2, 2020

What Size Fiamma Awning for My Jayco Camper Trailer?
December 27, 2020

35 Most Popular Jayco Camper Trailer Modifications
April 12, 2020
![Removing The Centre Pillar From Entrance Cupboard [Jayco Swan]](https://abigpeacheyadventure.com.au/wp-content/uploads/2020/07/Removing-Centre-Pillar-From-Entrance-Cupboard-Jayco-Swan-440x264.png "jayco journey lights not working")
Removing The Centre Pillar From Entrance Cupboard [Jayco Swan]
July 29, 2020

Awesome list. Keep them coming!

Thanks Caleb… If you think of anything that’s not on here, please let us know!

What a great list and so many great ideas. My swan is 8yrs old and I noticed the winder has been getting more difficult on a recent trip. Guess what fraying Amin 5mm cable. Your pages, ideas and links will help me fix it myself. Love the diesel heater install as well. And I really like that you have included the links on where to obtain the various bits and pieces. Thanks
Hi Peter, thanks for your kind words! If you have any things you’d like a hand with or need more detail on, more than happy to help

These are all great. Thanks so much! Never thought about the balance of the roof when annex is only out.
We bought our Hawk in July and have already managed 8 different destinations in Vic. We love it!

G’day everyone, I am new to the carvaning scene. I am enjoying reading and getting tips when setting up our van. We have just purchased a 2014 Jayco hawk outback. As a novice to owning a caravan I gradually getting ideas on how to make things a easier, like we have just installed a jackajay lift system and fitted a fiaama s45 awning also a cruisemaster 35 hitch and other handy items like a ampfibian caravan power adaptor. Looking forward to our first adventure soon. Thank you for sharing your tips, advice and comments
Leave a reply Cancel reply
Your email address will not be published. Required fields are marked *
Recent Posts
![Jayco Camper Trailer Bed Weight Limits [And How To Increase Support]](https://abigpeacheyadventure.com.au/wp-content/uploads/2020/04/Jayco-camper-trailer-bed-clothesline-modification-hang-between-the-support-poles-1-150x150.jpg "jayco journey lights not working")

Big Outdoor Adventure

9 Reasons Why Your Caravan Interior Lights Aren’t Working
Some of the links below are affiliate links. As an Amazon Associate, I earn from qualifying purchases. This means that, at zero cost to you, I will earn an affiliate commission if you click through the link and finalize a purchase.
Interior lights are crucial for visibility and aesthetics. If your caravan’s light went out and you’re unsure what happened, you’re in the right place. Fixing damaged light sockets is much easier than you might think; all you need is a multimeter, some pliers, and a few other supplies to get the job done.
Your caravan’s interior lights aren’t working because there might be a blown fuse, old bulb, or disconnected light switch. Faulty wiring, blown circuit breakers, and power overloads also cause interior lights to turn off. Ensure you’re using the correct wattage for your caravan to prevent errors.
Throughout this article, you’ll also learn the following information about why your caravan’s interior lights aren’t working:
- Several tips to replace light bulbs and deal with electrical problems
- All of the tools and supplies you’ll need to fix each issue
- Why your caravan’s interior lights keep going out
The Light Bulbs Might Be Old
Perhaps the most common reason a caravan’s interior lights fail is they’re old and used. We’ve all dealt with expired lightbulbs. However, that doesn’t make it less frustrating to deal with. The good news is you can quickly replace an old light bulb, but you should test it beforehand.
Here’s how you can tell if a light bulb is old and needs a replacement:
- Turn off the light switch and remove the bulb. Never adjust to remove light bulbs when the power is on. You could risk burning or shocking yourself, so turn off the switch and head to the next step.
- Check the filament. A Quora member suggests lightly shaking the bulb and listening for a rattling noise. If the bulb is dark around the base, it’s time to get a new one.
- Replace the bulb if the filament is damaged, the glass is cracked, or if there’s a burnt smell. Also, check for discoloration and similar signs around the area where the light screws into the caravan’s wall or ceiling.
Old light bulbs are often very easy to replace. Twist out the old one and twist in the new one. It’s as easy as that! Always ensure the power is out, then test your work when the bulb is secured.
There Could Be a Blown Fuse
According to Mountain Modern Life , blown fuses are responsible for many light-related problems in motorhomes and caravans. Fuses are cheap and easy to come by, so you should always have a couple of them in your vehicle. The last thing you’d want is to have to leave your campsite to find a place that sells fuses.
So, what will you need to check and replace a blown fuse?
- A multimeter, such as the AstroAI Digital Multimeter is necessary. This tool allows you to assess the damage by checking voltage and other measurements of electricity. It’s essential for all electrical problems in and out of your caravan.
- Pliers are also crucial. Needle-nose pliers help you remove small fuses that get stuck. Make sure you turn off the power before removing wires and fuses.
- (Optional) You might need a screwdriver, depending on your caravan’s setup. Some fuses are accessible by hand, while others are sealed behind a plate.
Test the fuse with the multimeter to see if it’s getting 12 volts. If it’s getting the proper reading, your fuse isn’t the culprit. However, if your fuse shows anything less than 12V, it’s time to get a new one.
Fuses are very easy to replace. Pull out the old one with needle-nose pliers, then push the new fuse into the box until you hear it snap in place. Be careful when dealing with fuses; They’re fragile.
Light Switches Can Go Bad
We often mistake the light bulb as the problem, but it can be the light switch. If you’re driving an old caravan, wires can loosen and prevent power from going through the switch and bulb.
This is a straightforward DIY fix if you’re good at dealing with electrical problems, but you can also hire a professional if you’d like to.
Let’s review the step-by-step process below.
- Turn all of the switches and circuit breakers off in your caravan.
- Test everything with the previously mentioned multimeter until you read 0 volts at each point.
- Remove the light switch’s faceplate with a screwdriver (some require a Phillip’s head, and few require a flathead).
- Pull the light switch out of the socket and check all of the wires. If any of them are loose or disconnected, reconnect them.
- Inspect any splices or wire nuts by lightly tugging them. Again, tighten anything loose or disconnected.
- Close the faceplate and seal it with the screws.
- Test your work by turning on all of the circuit breakers and the light switch. If it turns on, you’re in luck!
Unfortunately, there might be a few other issues. If you succeed when following this method, there’s nothing else you have to do.
In the next section, we’ll troubleshoot a few other common wiring problems that might affect your caravan’s interior lights.
Faulty Wiring Ruins Interior Lighting
Much like light bulbs, old caravan’s experience faulty wiring issues. They’re far from uncommon, especially for caravans that have been used regularly. Make sure you don’t rip plugs out of the outlets or shake them when they’re secured. Sometimes, there’s very little you can do to prevent such long-term issues.
Here’s the step-by-step process to inspect for faulty wiring (and how to replace wires if you need to):
- Turn off the circuit breakers to prevent electrical shocks.
- Check each outlet and light switch throughout the caravan as you did in the previous section, then tighten loose wires.
- Inspect the backside of each circuit breaker, especially the ones wired to the lights you’re fixing. Tighten any wires if necessary.
- Turn on all of the circuit breakers, using a multimeter to test the voltage of each of them.
- If all circuit breakers, outlets, and light switches receive 120V or 220V (depending on your caravan’s electrical setup), it’s either the fuse or light bulb.
It Might Be the Caravan’s Power Source
Whether you use solar power or traditional batteries, they might be the cause of the problem. Make sure your charge controller shows you’re getting the proper amount of power. Everything About RVing states there might be a problem with the convert, even if everything is reading the proper voltage.
Use your multimeter to test the converter. As you can see, this tool becomes useful for almost every part of the troubleshooting process. If the converter isn’t working as it should, you won’t be able to pull enough electricity via shore power (the current coming from external sources, like the hookups you find at campgrounds).
Solar power is becoming much more popular since the panels are efficient and nearly maintenance-free. Loose connections can be caused by rain or wind, so ensure everything is secured. Long-term storage is another problem because it makes the wires brittle under the panels. Inspect the charge controller to see if everything is secure, too.
It should be noted that if any of these problems exist, you’ll likely have more issues outside of interior lights cutting out. The primary power source is responsible for everything in the caravan, so you’ll have plenty of outages on your hand. If you find power everywhere else, inside and outside, it’s likely not the power source or converter.
Overloading the Battery Will Do It
Did you recently add a bunch of new gadgets? Are you running all of your devices and appliances simultaneously? These problems can overload batteries, especially old ones. Make sure you know the maximum load and current of your inverter, converter, and batteries before turning everything on.
Below, you’ll find some common symptoms of an overloaded battery and what you can do about it.
- Burning odors aren’t rare for overloaded batteries. If you smell something’s burning, turn off the power and exit the caravan. Call an expert to assess the situation.
- Sudden power loss throughout the caravan might be a sign you’ve overloaded the batteries. Check the circuit breakers; if they’re halfway down, you’ve tripped them with too much power. Flip them all off, unplug most of the appliances and devices, then flip them back on.
- If the lights are flickering, turn them off and check the damage. Overloaded batteries can surge your lights, especially if you don’t have surge protectors preventing electrical overloads.
Incorrect Light Bulbs Short Out
If you recently bought new bulbs or got the caravan from a private owner, you should check each light socket’s power capacity. Lumens determine the brightness, so don’t fall for the trap that you need more watts and volts to brighten the bulb. Never get a light bulb that’s over the recommended limit.
So, how do you know if a light bulb isn’t right for the socket?
- Remove the old light bulb and read its specifications. Most bulbs have all of the details around the base or top.
- Inspect the specs around the socket. They’re typically found around the outside or the interior.
- If the bulb has too many watts or volts, you’ll need to replace it. The best way to quickly replace bulbs with the correct specs is to keep the stock bulbs for reference.
Note: If your light bulb shorts because it’s much bigger than the requirements, it might flip the circuit breaker. Check the breaker box to see if any of them are halfway, much like the previous section. Turn them off, remove the bulb, replace it with a good bulb, and flip the breaker on.
Blown Circuit Breakers Cause Outages
One of the first things you should do when buying a caravan is locate the circuit breaker box. It houses everything dealing with electricity. If there’s an outage, including a light that won’t turn on, you’ll likely find a breaker that corresponds with the problem.
When the breaker trips (tripping is when it clicks, turns off the power for everything connected to it, and sits halfway switched), there’s no power to the bulb. Each breaker usually holds power for multiple devices in a region of the caravan. You might notice a few other appliances don’t turn on when a circuit breaker trips.
Here’s what you can do about it:
- Turn the breaker off by flipping it down.
- If the breaker is on but won’t supply power, test it with a multimeter.
- If the circuit breaker isn’t reading enough volts (120V to 220V), replace it with a new one.
- Remove the light bulb and inspect the problem.
Water splashes, electrical overloads, loose connections, and sparks can trip a circuit breaker. Speaking of which, let’s discuss the possibility of a leak in the next section.
There Might Be a Leak
Water damage can ruin a caravan. It deteriorates the outside while rotting the wood on the inside. Furthermore, water can leak into the breaker box or drip onto wires throughout the caravan. If your light bulbs get wet, they’ll trip the breaker or fry immediately. Make sure you don’t let water anywhere near anything electrical in the caravan.
Leaks usually leave water stains on the roof. Old caravans are prone to mildew, mold, water damage, and electrical shorts caused by leaks. If the wires in the breaker box, behind a light socket, or in a light switch look blackened and burnt, you might have water damage. Bring it to a local professional to assess and treat the situation. They might need to rewire the caravan.
IMAGES
VIDEO
COMMENTS
We recently bought a 2001 Jayco Qwest 10X. The inside ceiling lights do not work. All other electrical devices DO work. ... Journey with Confidence RV GPS App RV Trip Planner RV LIFE Campground Reviews RV Maintenance Take a Speed Test Free 7 Day Trial ... The inside ceiling lights do not work. All other electrical devices DO work.
2. Check the lever on the roof safety kill switch. Jayco camper trailers have a roof safety kill switch: When the roof is packed down the metal lever is depressed. This pushes in the white button which cuts power to the roof. This is so that if the lights are accidentally left on they don't set the canvas on fire.
Power lift will be directly connected to the battery. Also check the wiring by one of the roof posts to be sure it's not disconnected, that's for the ceiling lights. Check how many wires are connected to the positive terminal of your battery. There may be 2 wires, 1 for the power lift and 1 that goes to your converter.
Problem 2: Faulty Brake Control System. Unfortunately, you will notice the braking system of the Jayco North Point being faulty on some occasions. Moreover, the majority of the problems are with the electrical braking controller. One of the most common symptoms of a faulty electrical braking system is that it weakens over time.
Here I replaced the LED side marker light on my Jayco RV
Hi - I have a 2020 journey 21.6 .The 2 kitchen down lights stopped working after being fine for last couple of days this trip?? When switched on , the light button lights like the others - the 2 Down … read more
JAYCO JOURNEY OB - TOP 10 ISSUES THUS FAR, 6 MONTHS IN.In this video I go through our Top 10 issues that we've encountered whilst owning our 2019 Jayco Journ...
At the heart of every Jayco RV lies a control panel. This is where you can control the lights, charge your batteries or any other 12V appliances, operate you...
The lights on the Jayco will be 12V. You may have a blown fuse in the 12V panel feeding those lights. If water got in, it may have caused some corrosion preventing those lights from working. Whatever it is, it won't be in the 120V system. As mentioned before, grounding could also be a problem, either bad connection or corrosion.
It's where you can control the lights, charge your batteries or any other 12 Volt appliances. The control panel is also used to operate the hot water system and power your Jayco RV. In this video, Chris will demonstrate the features and functions of the control panel on a Jayco Journey Outback 19.61-3 Caravan.
release the programming switch, the corresponding channel is now in learning mode. 2) Press the remote switch button (i.e. the Master OFF switch) that you wish to program to the receiver. 3) When the receiver module receives the wireless switch signal, the LED corresponding to the programmed channel will flash orange once.
Greetings Nomads, our 2005 Jayco outback 52.58.OB model is blowing the 250 volt - 6 amp fuse behind the black cover for all the 12 volt blade fuses when 240 is connected resulting in the lights not working. The power points and all the appliances have power when connected to mains power, the lights all work when switched to 12 volt.
What to do if Some of Your RV 12V Lights Stop WorkingOne of our RV 12v Light Fixtures stopped working the other day, and we were unsure if it was the fixture...
Step-by-step guide to using the 12V system: Step 1. Regardless of whether you are plugged into 240V or not, you can power up your van using 12V. Locate the isolation switch in your van. Step 2. Switch it on to operate your entire 12V system. Step 3. Below this, you will find the pump switch. Step 4.
2014 Jayco Journey. Light switch next to bed appears not to work. Just bought it. Didn't check light switches. Mechanic's Assistant: Just to clarify, what are the exact lights you're talking about? Small light from wall and won't turn off the led light above single beds.
4. Cool down your 3-way fridge well before you need it. The 3-way fridge in a Jayco camper is pretty much designed to be run on: Gas when you're free camping. 12V from your car when you're driving. 240V when you have access to mains power. It takes about 24 hours for your fridge to cool down….
Shot this video last year and just now uploading. The repair worked wonderfully and I'm happy to report that the water intrusion has stopped.
Fixing damaged light sockets is much easier than you might think; all you need is a multimeter, some pliers, and a few other supplies to get the job done. Your caravan's interior lights aren't working because there might be a blown fuse, old bulb, or disconnected light switch. Faulty wiring, blown circuit breakers, and power overloads also ...