Root out friction in every digital experience, super-charge conversion rates, and optimize digital self-service
Uncover insights from any interaction, deliver AI-powered agent coaching, and reduce cost to serve
Increase revenue and loyalty with real-time insights and recommendations delivered to teams on the ground
Know how your people feel and empower managers to improve employee engagement, productivity, and retention
Take action in the moments that matter most along the employee journey and drive bottom line growth
Whatever they’re are saying, wherever they’re saying it, know exactly what’s going on with your people
Get faster, richer insights with qual and quant tools that make powerful market research available to everyone
Run concept tests, pricing studies, prototyping + more with fast, powerful studies designed by UX research experts
Track your brand performance 24/7 and act quickly to respond to opportunities and challenges in your market
Explore the platform powering Experience Management
- Free Account
- For Digital
- For Customer Care
- For Human Resources
- For Researchers
- Financial Services
- All Industries
Popular Use Cases
- Customer Experience
- Employee Experience
- Employee Exit Interviews
- Net Promoter Score
- Voice of Customer
- Customer Success Hub
- Product Documentation
- Training & Certification
- XM Institute
- Popular Resources
- Customer Stories
- Market Research
- Artificial Intelligence
- Partnerships
- Marketplace
The annual gathering of the experience leaders at the world’s iconic brands building breakthrough business results, live in Salt Lake City.
- English/AU & NZ
- Español/Europa
- Español/América Latina
- Português Brasileiro
- REQUEST DEMO
- Experience Management
- Customer Journey Mapping
- Journey Mapping Workshop

See how XM for Customer Frontlines works
How to run a journey mapping workshop.
3 min read If you want to improve your customer experience (CX) and drive loyalty, you have to understand where your customers are coming from. The best place to begin understanding your CX successes and failures is by creating a customer journey map . Here’s how you do it as part of a workshop.
How do I run a customer journey mapping workshop?
Start with documenting the practical nature of customers’ steps and then move on to mapping customer thoughts and emotions, much like the standard interview methodology.
On a practical level, the process involves putting a bunch of post-it notes up on a whiteboard, moving them around, removing some, and adding others. You may want to split everyone into 3 to 5 small groups, each of which can focus on a different persona or journey. Groups with 4 to 6 participants are a perfect size to get multiple perspectives while ensuring that everyone’s voices are heard.
Free Course: Customer Journey Management & Improvement
Who should be involved in customer journey mapping workshops?
Marketing and customer experience teams are the obvious choices for workshop participants, but include behind-the-scenes employees, as well. Think about employees in sales, finance, operations, legal, customer service , e-commerce, or any other part of the organization that has some influence on the particular journey you’re focusing on. You can also include any partners who are key to delivering that journey.
You also need senior leaders in the room as well, as you need their buy-in from the very beginning. Once you have a journey map finished, you’ll need budget and managerial support to implement changes and drive CX improvements.
It’s also a good idea to include your customers in these workshops, as their participation leads to the most significant organizational improvements. That’s because customers give you the most accurate idea of what it’s like interacting with your brand, and what they think and feel at every stage of the journey.
How long is the workshop for an average journey map?
Aim for 1 to 2 days. Any more and you’ll lose people along the way; any less and you won’t fit everything in. There are many ways to design an effective 2-day journey mapping workshop, but here’s a starting point:
- Day 1: Bring together internal stakeholders from across the company and create journey maps based on your assumptions of your customers’ experiences. In an ideal world, you’ve done some ethnographic research prior to the workshop to provide background information for the mapping activity.
- Day 2: Bring customers in to validate (or invalidate) your assumptions. The customers are typically with you for 4 to 5 hours.
LEARN MORE: 10 Must-Haves for Customer Journey Mapping Tools
Free Course: Customer Journey Management & Improvement
Related resources
Customer Journey
B2B Customer Journey 13 min read
Customer interactions 11 min read, consumer decision journey 14 min read, customer journey orchestration 12 min read, customer journey management 14 min read, customer journey stages 12 min read, buyer's journey 16 min read, request demo.
Ready to learn more about Qualtrics?
18 MIN READ
SHARE THIS POST
Product best practices
- Product Management
- UX research
User Journey Map Guide with Examples & FREE Templates
18 April, 2024

Senior UX Researcher
Customer journey mapping is also a popular workshop task to align user understanding within teams. If backed up by user data and research, they can be a high-level inventory that helps discover strategic oversights, knowledge gaps, and future opportunities.
Yet, if you ask two different people, you will likely get at least three different opinions as to what a user journey looks like and whether it is worth the hassle. Read on if you want to understand whether a UX journey map is what you currently need and how to create one.
You can get the templates here:
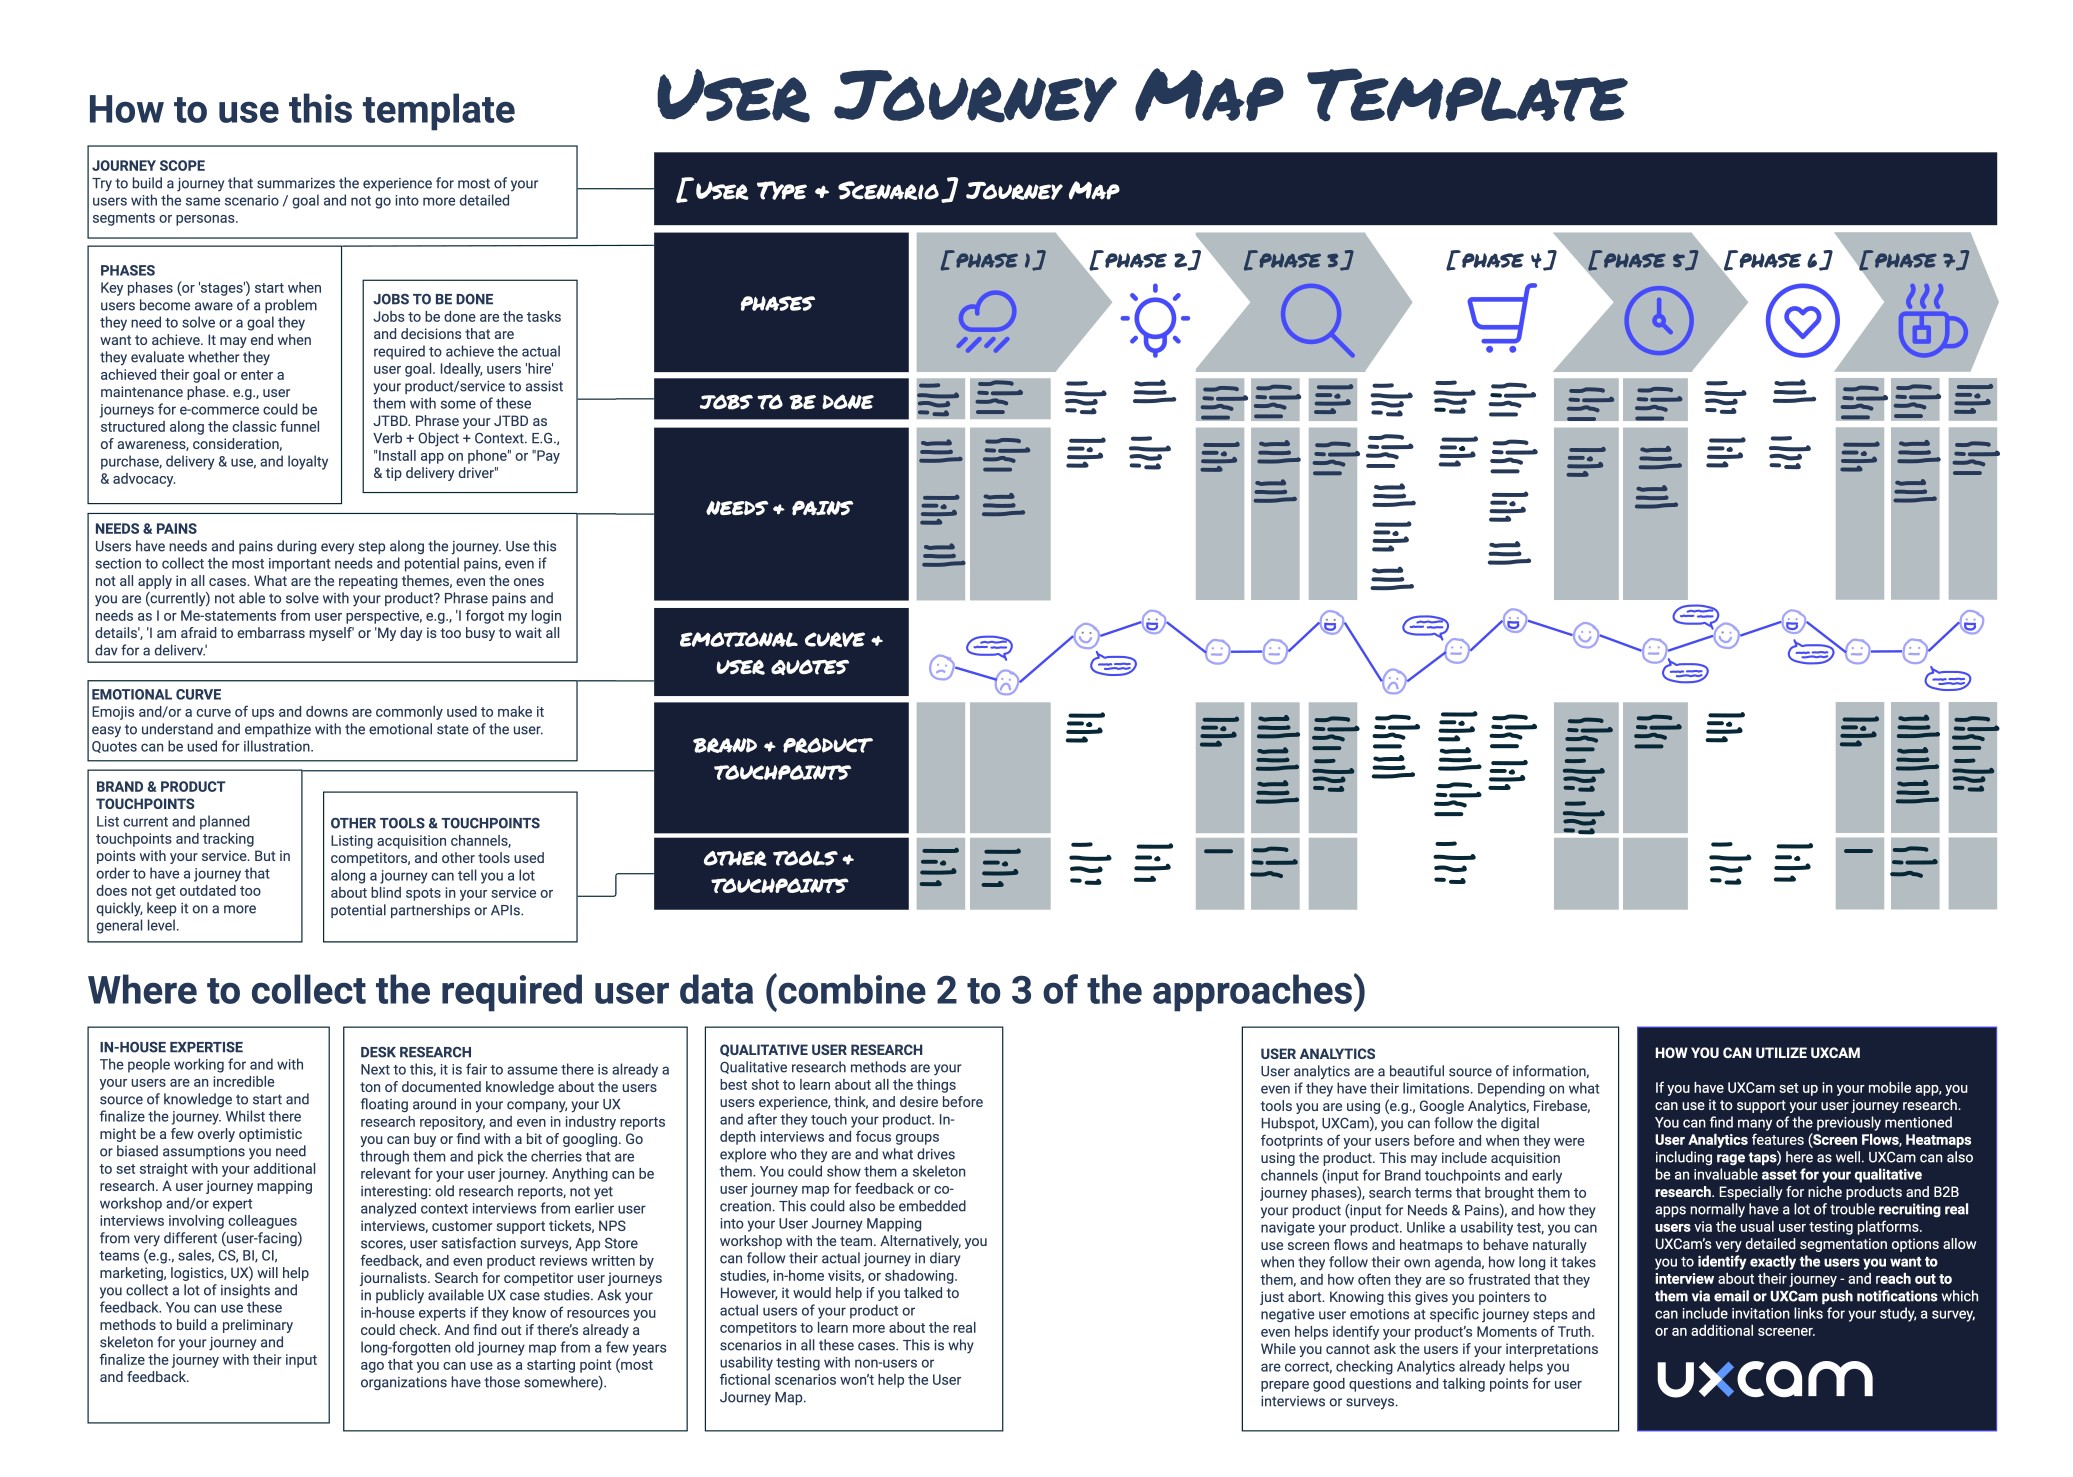
Click here to download a high-resolution PDF of this template.
What is user journey mapping?
Imagine your product is a supermarket and your user is the person wanting to refill their fridge. They need to:
Decide what to buy, and in what supermarket will they be able to find and afford it
Remember to bring their coupons
Park there
Find everything
Save the new coupons for the next shopping trip
Dive Deeper: Mobile Product Management Certification
If you want to learn more about how to optimize your user journeys, we recommend enrolling in our course "Mastering Mobile App Product Management" for free.
Unlock the secrets of user-centric design with our course
Gain practical skills in identifying user needs and crafting engaging, intuitive UX designs
Get 15+ templates and frameworks
Our modules, including "How to Map Out Your Discovery" and "User Research for Mobile Apps," ensure you create visually stunning and highly functional user experiences.
Enroll for free here.
Mobile App Product Management Certification
- Upskill for free
- Career growth
- Expert Instructors
- Practical Insights

3 ways to understand customer journey maps
Now, there are at least three ways to look at the customer journey.
1. Workflow maps for usability optimization
Some imagine a user journey map as a wireframe or detailed analysis of specific flows in their app . This could be, for example, a sign-up flow or the flow for inviting others to a document. In our supermarket example, it’s a closer look at what they do inside your supermarket, maybe even only in the frozen section. Or you could define what you want them to do in the frozen aisle.
.css-61w915{margin-right:8px;margin-top:8px;max-height:30px;}@media screen and (min-width: 768px){.css-61w915{margin-right:38px;max-height:unset;}} The focus here is on getting the details of the execution right, not how it fits into the bigger picture of what the user needs.
It is more or less a wireframe from a user perspective. Such a product-focused understanding is not what we want to discuss in this article, though many examples for the best user journey maps you might come across are exactly this. There are good reasons to do such an analysis as well, since it helps you smooth out usability for the people who have already found their way into your supermarket because of your excellent ice cream selection. Workflow maps won’t help you notice that your lack of parking spots is one of the reasons why you are missing out on potential customers in the first place. By only looking at what they do inside the supermarket, you might also miss out on an opportunity for user retention: You could help them get their ice cream home before it melts.
2. Holistic user journey maps for strategic insights
With a more holistic view of what people experience when trying to achieve a goal, product makers gain strategic insights on how their product fits into the big picture and what could be in the future. Because this journey document covers so much ground, it is usually a linear simplification of what all the steps would look like if they were completed. Going back to our supermarket example, it would start from the moment the person starts planning to fill the fridge and ends when the fridge is full again — even if the supermarket building is only relevant in a few phases of this journey. Creating this version of a user journey map requires quite some time and research effort. But it can be an invaluable tool for product and business strategy. It is an inventory of user needs that can help you discover knowledge gaps and future opportunities. Service blueprints are the most comprehensive version of a user journey map since they also lay out the behind-the-scenes of a service, usually called backstage. In our supermarket example, that could be:
the advertising efforts
logistics required to keep all shelves stocked
protocols the staffers follow when communicating with customers
3. Journey mapping workshops as an alignment method
In a user journey mapping workshop, stakeholders and team members share their knowledge and assumptions about the users. Some of these assumptions might need to be challenged — which is part of the process. The goal is not the perfect output, but rather to get everyone into one room and work out a common understanding of the users they are building products for. It forces everyone to organize their thoughts, spell out what they know and assumed was common knowledge — and ideally meet real users as part of the workshop. If done right, this establishes a more comprehensive understanding of what users go through and helps overcome the very superficial ideas one might have about the lives and needs of people outside their own social bubble.
Hence, such a workshop helps create aha moments and gives the consequences of great and poor product decisions a face. So at the end of the day, it is one of many methods to evangelize user-centricity in an organization.
What are the benefits of user experience (UX) mapping?
We already discussed the benefits and shortcomings of workflow maps, but what are the reasons you should consider a UX journey map and/or a journey mapping workshop ?
1. Switching perspectives
Empathy: Like any other UX method and user research output, user journey maps are supposed to foster empathy and help product makers put themselves into the shoes of a user. Awareness: It creates awareness of why users do all the things they do. And it challenges product makers to resist the temptation of building something because it’s feasible, not because it’s needed that way.
2. Aligned understanding
Given the team is involved in creating the user experience map (either as a workshop, in expert interviews, observing the user research, or at least as a results presentation), it forces a conversation and offers a shared mental model and terminology — the foundation for a shared vision.
3. Seeing the big picture
Imagine the vastly different perceptions Sales reps, Customer Support teams, C-level, and backend engineers might have since they all meet very different segments at very different stages of their journey. Day-to-day, it makes sense to be an expert in the stages of a user journey you are responsible for. A journey map helps to step back from this and see the bigger picture, where your work fits in, and where assumptions about the majority of users were wrong. It might even help define KPIs across teams that don’t cancel each other out.
4. Uncovering blind spots and opportunities
A user journey map gives you a structured and comprehensive overview of which user needs are already tackled by your product and which ones are either underserved or solved with other tools and touchpoints. Which moments of truth do not get enough attention yet? These are the opportunities and blind spots you can work on in the future.
When is customer journey mapping just a waste of time?
In all honesty, there are also moments when creating a user journey map or running a journey mapping workshop is destined to fail and should better be put on hold. It’s a lot of work, so don’t let this energy go to waste. User journey maps only make sense when there is an intention to collaboratively work on and with them. Here are some of the scenarios and indicators that it’s the wrong moment for a journey map:
No buy-in for the workshop: The requirements of a successful journey workshop are not met, e.g., there is not enough time (60 minutes over lunch won’t do the trick), only a few team members are willing to attend, and/or key stakeholders refuse to have their assumptions challenged.
Isolated creation: The whole creation process of the user journey map happens isolated from the team, e.g., it is outsourced to an agency or an intern. Nobody from the team observes or runs the user research, or is consulted for input or feedback on the first drafts. There is no event or presentation planned that walks the team through the output. Finally, a very detailed, 10-foot-long poster appears in a hallway, and none of the team members ever find time to read, process, or discuss it with each other.
UX theater: For one reason or another, there is no time/resources allocated to user research or reviewing existing insights whilst creating the map (usability tests with non-users do not count in this case, though). Such an approach, also known as, can do more harm than good since the resulting user journey may only reinforce wrong assumptions and wishful thinking about your users.
Unclear objectives: The user journey map is only created because it is on your UX design checklist, but the purpose is unclear. If you are unsure what you or your stakeholders want to achieve with this journey map, clarify expectations and desired output before investing more energy into this. E.g., there is a chance you were only meant to do a usability review of a bumpy app workflow.
Lack of follow-through: Creating a user journey map is just the start. Without a plan to implement changes based on insights gathered, the map is merely a paper exercise. This lack of action can result from limited resources, lack of authority, or inertia. It's vital to establish a process for turning insights from the map into design improvements or strategy adjustments. This includes assigning tasks, setting deadlines, and defining success metrics to ensure the map drives real change and doesn't end up forgotten.
Overcomplication: Sometimes, to capture every nuance and detail of the user experience, teams can create an overly complex user journey map. This can make the map difficult to understand and use, particularly for team members who weren't involved in its creation. A good user journey map should balance detail and clarity, providing insightful and actionable information without overwhelming its users.
Failure to update: User expectations, behaviors, and the digital landscape constantly evolve. A user journey map that remains static will quickly become outdated. Regular reviews and updates are necessary to ensure that the map reflects the current state of user experiences. This requires a commitment to ongoing user research and a willingness to adjust your understanding of the user's path as new information becomes available.
The good news is: UX maturity in an organization can change rapidly, so even if you run into one of the obstacles above, it is worth revisiting the idea in the future. Once you’re good to go, you can get started with the user journey map examples and templates below.
User journey mapping: examples, templates & tools
There is more than one way to do it right and design a great user journey map. Every organization and industry has its own templates, tools and approaches to what elements are most important to them. The following examples and template will give you an idea of what a user journey map can look like if you decide to create one yourself. Make it your own, and change up the sections and design so they make sense for your product and use cases.
User journey map template and checklist
To give you a first orientation, you can use this user journey template and check the two fictional examples below to see how you could adapt it for two very different industries: instant meal delivery and healthcare.
Click here to download a high-resolution PDF of the user journey map template.
While there is no official standard, most other user journey maps contain the following elements or variations of them:
Key phases (or ‘stages’) start when users become aware of a problem they need to solve or a goal they want to achieve and may end when they evaluate whether they achieved their goal or enter a maintenance phase. E.g., user journeys for e-commerce could be structured along the classic funnel of:
Consideration
Delivery & use
Loyalty & advocacy
2. Jobs to be done
Whilst some other user journey templates might call this section ‘steps’ or ‘tasks’, it can be very beneficial to structure the stages into ‘jobs to be done’ (JTBD) instead. This framework helps you distinguish better between the actual goal of a user vs. the tasks required to get there . For example, safe online payments are never a goal of a user, this is just one of many jobs on the long way to get new sneakers on their feet. Ideally, users ‘hire’ your product/service to assist them with some of the JTBD on their journey. Phrase your JTBD as verb + object + context . Examples:
Install app on phone
Tip delivery driver
Buy new shoes
Naturally, the stages closest to your current (and future) solution require a more detailed understanding, so you might want to investigate and document deeper what JTBDs happen there.
3. Needs and pains
Users have needs and pains every step along the journey. Use this section to collect the most important needs and potential pains, even if not all apply in all cases. Ask:
What are the repeating themes, even the ones you are (currently) not able to solve with your product?
Phrase pains and needs as I- or me-statements from the user perspective, e.g., ‘I forgot my login details, ‘I am afraid to embarrass myself’ or ‘My day is too busy to wait for a delivery.’
Which are the pains and needs that are so severe that, if not solved, they can become real deal-breakers for your product or service?
On the last point, such deal-breaker and dealmaker situations, or ‘ moments of truth ’, require particular attention in your product decisions and could be visually highlighted in your journey. In a meal delivery, the taste and temperature of the food are such a moment of truth that can spoil the whole experience with your otherwise fantastic service.
4. Emotional curve
An emotional curve visualizes how happy or frustrated users are at certain stages of their journey. Emojis are commonly used to make it easy to understand and empathize with the emotional state of the user across the whole journey. It can be a surprising realization that users are not delighted with your witty microcopy, but you already did a great job by not annoying them. It is also a good reminder that what might personally excite you is perceived as stressful or overwhelming by most other users. Strong user quotes can be used for illustration.
5. Brand and product touchpoints
Here, you can list current and planned touchpoints with your brand and product, as well as. Whilst the touchpoints when using your product might be obvious, others early and late in the journey are probably less obvious to you but critical for the user experience and decision to use or return to your product. This is why it is worthwhile to include them in your map. Make sure your journey does not get outdated too soon, and don’t list one-off marketing campaigns or very detailed aspects of current workflows — just what you got in general so there is no major revision needed for a couple of years.
6. Opportunities for improvement
As you map out your user journey, it is important to not only identify the current touchpoints and experiences but also opportunities for improvement. This could include potential areas where users may become frustrated or confused, as well as areas where they may be delighted or pleasantly surprised.
By identifying these opportunities, you can prioritize making meaningful improvements to the user experience and ultimately creating a more positive, long-lasting relationship with your users.
7. Other tools and touchpoints
This may seem the least interesting aspect of your journey or a user interview, but it can tell you a lot about blind spots in your service or potential partnerships or APIs to extend your service. E.g., Google Maps or WhatsApp are common workaround tools for missing or poor in-app solutions.
User journey map example 1: health industry
The following example is for a fictional platform listing therapists for people in need of mental health support, helping them find, contact, schedule, and pay for therapy sessions. As you can see, the very long journey with recurring steps (repeated therapy sessions) is cut short to avoid repetition.
At the same time, it generalizes very individual mental health experiences into a tangible summary. While it is fair to assume that the key phases happen in this chronological order, JTBD, timing, and the number of sessions are kept open so that it works for different types of patients.
You can also see how the journey covers several phases when the platform is not in active use. Yet, these phases are milestones in the patient’s road to recovery. Looking at a journey like this, you could, for example, realize that a ‘graduation’ feature could be beneficial for your users, even if it means they will stop using your platform because they are feeling better.
This user journey map is fictional but oriented on Johanne Miller’s UX case study Designing a mental healthcare platform .
User journey map example 2: delivery services
What the example above does not cover is the role of the therapist on the platform — most likely they are a second user type that has very different needs for the way they use the platform. This is why the second example shows the two parallel journeys of two different user roles and how they interact with each other.
Nowadays, internal staff such as delivery drivers have dedicated apps and ideally have a designated UX team looking out for their needs, too. Creating a frictionless and respectful user experience for ‘internal users’ is just as critical for the success of a business as it is to please customers.
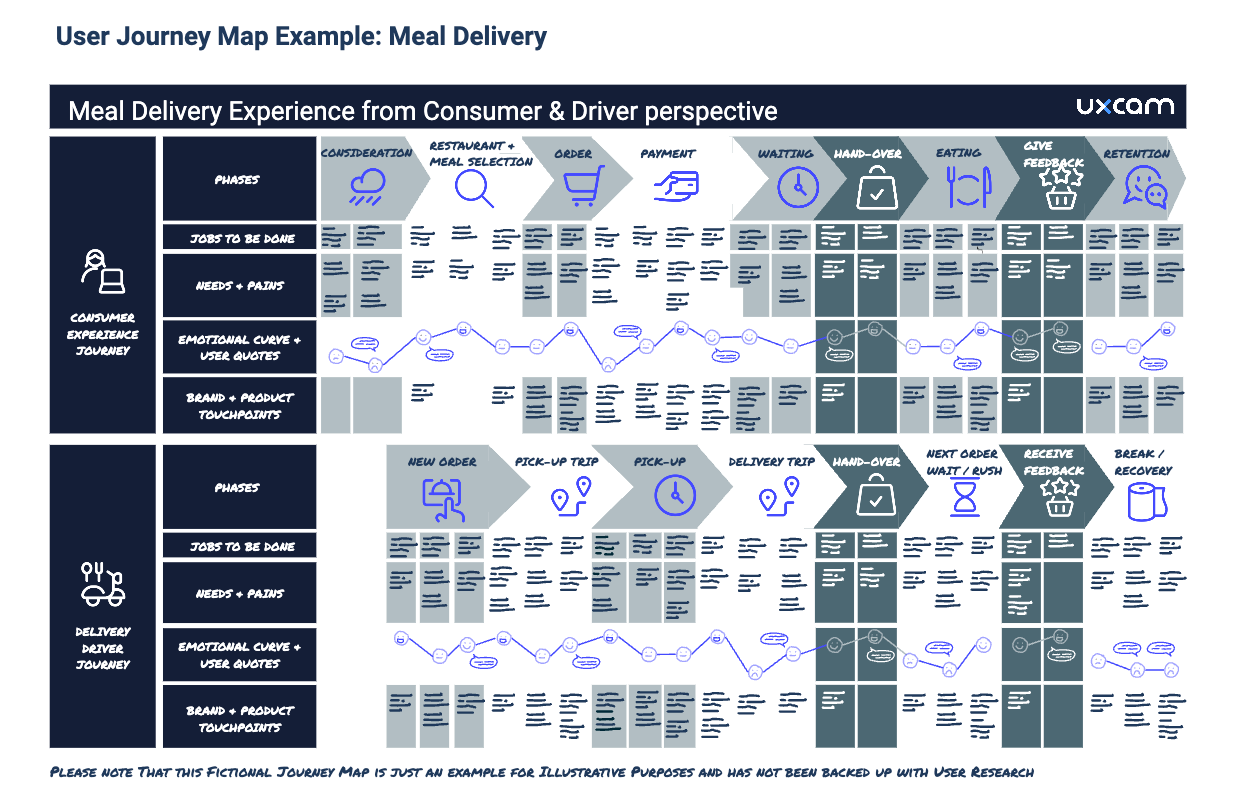
User journey map example: meal delivery. Please note that this fictional journey map is just an example for illustrative purposes and has not been backed up with user research.
For more inspiration, you can find collections with more real-life user journey examples and customer journey maps on UXeria , eleken.co & userinterviews.com , or check out free templates provided by the design tools listed below.
Free UX journey mapping tools with templates
No matter whether you’re a design buff or feel more comfortable in spreadsheets, there are many templates available for free(mium) tools you might be already using.
For example, there are good templates and tutorials available for Canva , Miro and even Google Sheets . If you are more comfortable with regular design software, you can use the templates available for Sketch or one of these two from the Figma (template 1 , template 2 ) community. There are also several dedicated journey map tools with free licenses or free trials, e.g., FlowMapp , Lucidchart and UXPressia , just to name a few.
Be aware that the first draft will require a lot of rearrangement and fiddling until you get to the final version. So it might help to pick where this feels easy for you.
How do I collect data for my app user journey?
User journey maps need to be rooted in reality and based on what users really need and do (not what we wish they did) to add value to the product and business strategy. Hence, user insights are an inevitable step in the creation process.
However, it’s a huge pile of information that needs to be puzzled together and usually, one source of information is not enough to cover the whole experience — every research method has its own blind spots. But if you combine at least two or three of the approaches below, you can create a solid app user journey .
1. In-house expertise
The people working for and with your users are an incredible source of knowledge to start and finalize the journey. Whilst there might be a few overly optimistic or biased assumptions you need to set straight with your additional research, a user journey mapping workshop and/or expert interviews involving colleagues from very different (user-facing) teams such as:
customer service
business intelligence
customer insights
will help you collect a lot of insights and feedback. You can use these methods to build a preliminary skeleton for your journey but also to finalize the journey with their input and feedback.
2. Desk research
Next to this, it is fair to assume there is already a ton of preexisting documented knowledge about the users simply floating around in your company. Your UX research repository and even industry reports you can buy or find with a bit of googling will help. Go through them and pick the cherries that are relevant for your user journey. Almost anything can be interesting:
Old research reports and not-yet-analyzed context interviews from earlier user interviews
NPS scores & user satisfaction surveys
App store feedback
Customer support tickets
Product reviews written by journalists
Competitor user journeys in publicly available UX case studies
Ask your in-house experts if they know of additional resources you could check. And find out if there’s already a long-forgotten old journey map from a few years ago that you can use as a starting point (most organizations have those somewhere).
3. Qualitative user research
Qualitative research methods are your best shot to learn about all the things users experience, think, and desire before and after they touch your product. In-depth interviews and focus groups explore who they are and what drives them. You could show them a skeleton user journey for feedback or co-creation .
This could also be embedded into your user journey mapping workshop with the team. Alternatively, you can follow their actual journey in diary studies , in-home visits or shadowing . However, in all these cases it is important that you talk to real users of your product or competitors to learn more about the real scenarios. This is why usability testing with non-users or fictional scenarios won’t help much for the user journey map.
4. Quantitative research
Once you know the rough cornerstones of your user journey map, surveys could be used to let users rate what needs and pains really matter to them. And what their mood is at certain phases of the journey. You can learn how they became aware of your product and ask them which of the motives you identified are common or exotic edge cases. Implementing micro-surveys such as NPS surveys , CES , and CSAT embedded into your product experience can give additional insights.
5. Customer satisfaction (CSAT) survey
Customer satisfaction surveys (or CSATs for short) are important tools that measure your customers' satisfaction with your product or service. It is usually measured through surveys or feedback forms, asking customers to rate their experience on a scale from 1 to 5. This metric can give valuable insights into the overall satisfaction of your customers and can help identify areas of improvement for your product.
CSAT surveys can be conducted at different customer journey stages, such as after purchase or using a specific feature. This allows you to gather feedback on different aspects of your product and make necessary changes to improve overall satisfaction.
The benefit of CSAT lies in understanding how satisfied customers are with your product and why. By including open-ended questions in the surveys, you can gather qualitative insights into what aspects of your product work well and what needs improvement.
5. User analytics
User analytics is a beautiful source of information, even if it has its limits. Depending on what tools you are using (e.g., Google Analytics, Firebase, Hubspot, UXCam), you can follow the digital footprints of your users before and when they were using the product. This may include acquisition channels (input for brand touchpoints and early journey phases), search terms that brought them to your product (input for needs and pains), and how they navigate your product.
Unlike a usability test, you can use screen flows and heatmaps to understand how your users behave naturally when they follow their own agenda at their own pace — and how often they are so frustrated that they just quit. Knowing this gives you pointers to negative user emotions at certain journey steps and even helps identify your product’s moments of truth. Whilst you cannot ask the users if your interpretations are correct, checking analytics already helps you prepare good questions and talking points for user interviews or surveys.
Curious to know how heatmaps will look in your app? Try UXCam for free — with 100,000 monthly sessions and unlimited features.
How can I utilize UXCam to collect App User Journey data?
If you have UXCam set up in your mobile app, you can use it to support your user journey research. You can find many of the previously mentioned user analytics features ( screen flows and heatmaps , including rage taps ) here as well.
UXCam can also be an invaluable asset for your qualitative research . Especially for niche products and B2B apps that normally have a lot of trouble recruiting real users via the usual user testing platforms.
UXCam’s detailed segmentation options allow you to identify exactly the users you want to interview about their journey — and reach out to them via either email or UXCam push notifications , which can include invitation links for your study, a survey or an additional screener.
Additionally, UXCam's session replay feature allows you to watch recordings of user sessions, providing valuable insights into how users interact with your app and where they may face challenges.
Where can I learn more?
Don’t feel ready to get started? Here are a few additional resources that can help you dive deeper into user journey mapping and create the version that is best for your project.
Creating user journey maps & service blueprints:
Mapping Experiences by Jim Kalbach
Journey Mapping 101
How to create customer journey maps
Customer Journey Stages for Product Managers
The Perfect Customer Journey Map
Planning and running user journey mapping workshops:
Journey mapping workshop
Jobs to be done:
The Theory of Jobs To Be Done
Moments of truth in customer journeys:
Journey mapping MoTs
What is a user journey map?
A user journey map is a visual representation of the process that a user goes through to accomplish a goal with your product, service, or app.
What is a user journey?
A user journey refers to the series of steps a user takes to accomplish a specific goal within a product, service, or website. It represents the user's experience from their point of view as they interact with the product or service, starting from the initial contact or discovery, moving through various touchpoints, and leading to a final outcome or goal.
How do I use a user journey map in UX?
User journey maps are an essential tool in the UX design process, used to understand and address the user's needs and pain points.
Related Articles
Best behavioral analytics tools to optimize mobile app UX
20+ powerful UX statistics to impress stakeholders
Mobile UX design: The complete expert guide
5 Best User Journey Mapping Tools
App user journey: Mapping from download to daily use
Your guide to the mobile app customer journey
Customer journey optimization: 6 Practical steps
Alice Ruddigkeit
Get the latest from uxcam.
Stay up-to-date with UXCam's latest features, insights, and industry news for an exceptional user experience.
Related articles
User journey map guide with examples & free templates.
Learn experience mapping basics and benefits using templates and examples with mixed-methods UX researcher Alice...

45 Mobile App Best Practices: The Ultimate List 2024
Proven best practices to improve user experience and performance of your mobile...

Jonas Kurzweg
Growth Lead
North Star Metric Examples from Tech Giants
Discover 9 North Star Metric examples to guide your business growth strategy, from user engagement to revenue, and align your team's...

Growth Manager
- Case studies
- Expert advice
How to run a customer journey mapping workshop
The #1 reason why customer journey maps end up collecting dust on a shelf is that they are created by lone rangers and in complete isolation. Sometimes running a customer journey mapping workshop involving stakeholders seems like an overkill and a waste of time. It doesn't have to be like that. At UXPressia , we prepared a comprehensive how-to guide along with awesome freebies for you and your team.
Step 1: Set a goal for your customer journey mapping workshop

First, you should clearly define the goal of your workshop. The goal must be specific and achievable. It cannot be trying the CJM framework because you heard you should do it. Nor can it be creating a ton of detailed customer journey maps that cover all aspects of user interactions. This is just not feasible, won't fit into a single workshop, and will probably take a year to complete.
I'd say it's been a productive customer journey mapping workshop if you came up with the map structure and went over the as-is processes. This alone might take a good couple of hours, so don't think you'll nail an entire journey map in a day. 😉
Here is a list of sound goals you can set for your kick-off customer journey mapping workshop:
- Sharing knowledge across the team;
- Discovering pain points and problems;
- Ideating solutions for the pain points you discovered either before or during the workshop.
It could be educational too. However,teaching the team to use a new framework would require a slightly different approach and timing than condensed ideas brainstorming.
The important thing is for you to have a goal.
During your first workshop, you will want to get your first customer journey map off the ground. But don't think you can make an entire journey map in one sitting.
But even if you can't make it past the skeleton phase (where you just come up with the structure) it is Okay. What's most important is that you start communicating. Even if the only takeout is that the team grasps what the framework is all about—you are off to a great start. That will make the team prepared for further work.
If you want to run the workshop to educate the team though (and given that the team doesn’t have any experience with journey mapping), then prepare to explain the concepts and the context of the CJM technique, what you're introducing it for, and how frequently the workshops will happen, etc. So you will want to set expectations and give projected outcomes.
Step 2: Who you gonna call? Stakeholders!

When it comes to inviting teammates to your customer journey workshop, there are a few rules to follow.
Invite those who can share knowledge about actual customer journeys. These can be:
- Customer service and sales reps. They are the ones who talk with your customers face-to-face. There are lots of ideas and insights they can share, so they are your VIP guests.
- Marketing folks, customer experience specialists, and researchers (including the ones who do usability tests, web analytics reviews, etc.). Even if they don't talk to the customers, they know a lot about how things are with your customer journey now.
- Product owners if they communicate with customers and have a more or less clear idea of what the customer journey looks like at the moment.
These people might not take part in the transformation process and implement the changes by themselves, but you need their presence to fill in the gaps and share the knowledge they have.
Invite those who will bring the CJM to life and implement the changes . They may have little to no knowledge about the as-is customer journey, but it’s them whose work will be directly affected by whatever you find during the workshop. In this case, their roles can be pretty much the same as above. Plus, consider inviting the IT folks, office managers and any other internal roles who will participate in the implementation process.
Invite the influencers and decision makers . You need them aboard as long as you want to get time and resources for further service improvement.
Besides, they do not often communicate with the customers directly. They might have a very vague vision of what their customers are going through and what pain point they face. Showing them the areas of opportunity will be an eye-opener and the first step toward a better design process within the organization.
You’ll then need to break workshop participants into teams. The teams should have evenly distributed roles, with at least one person per team knowing what to do. You will also need at least one facilitator, i.e., the person guiding and expediting the process.
Step 3: Prep-work for the customer journey mapping workshop
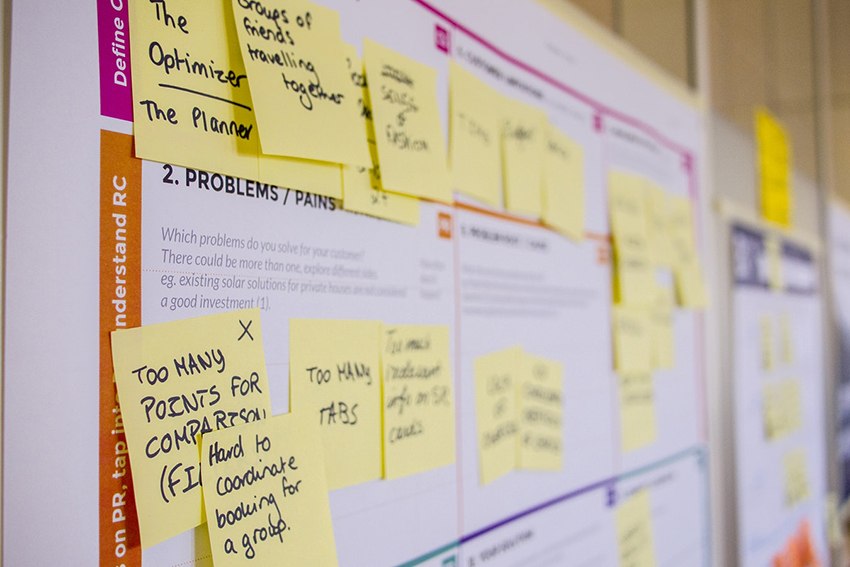
To run a kick-ass customer journey mapping workshop, you will need to do some homework before. Things you want to have ready for the workshop are:
Place and time
The first one is obvious and probably the hardest. You need to invite all the people you plan to involve and decide on the time/place that works for everyone. Good luck with that one! 😀
The duration is up to you, but 4 hours seems to be the golden middle for one session . Go shorter, and you won't have time to do anything. The session will end all of a sudden when the participants are full of inspiration and ideas. Longer sessions are exhausting, and the last thing you want to achieve is having the whole team daydreaming.
Who's your customer persona?
Decide on the persona that will be your primary focus at the workshop and prepare a short intro for all the participants. You need a specific customer segment to map for. You won't have time to cover all possible touchpoints for all the personas within a workshop. Read more on how to create a persona in nine steps .
Make sure you print out your persona (or empathy map or any customer info you might have) to hand out to the participants. Also, prepare a brief speech to get everyone on the same page.
Define the scope
Define the journey scope that you will focus on at the workshop. This might be the most problematic service area that needs to be improved in the first place. It can also be the part you know the most about. You can start with onboarding or the purchase process, for instance. It really depends on the complexity of your service. Surely, you can take the whole journey if it's short and fairly simple. But for longer B2B cycles it definitely makes more sense to pick just a part.
No matter what scope you pick for mapping, gather as much information as possible upfront. If any research data that exists for this journey, get a hold of it and take it to the workshop. This might also give you a clue into who needs to be invited - different influencers might be in charge of different journeys.
Get a room!
Book a room of the right size for your workshop. It should be big enough to accommodate all the participants but not too roomy. You don't want to run marathons from one table to another.
Speaking of tables, you will need enough tables for the participants. It's best to place tables closer to the walls. Ideally, you should be able to cover the walls with paper rolls. You’ll need as much surface as possible.
A projector or a screen is nice to have - they might come in handy when you need to show some research data, for instance.
Grab supplies
You will need to be armed up to the teeth with everything that might come in handy during the journey mapping workshop. And this is your lucky day as we've prepared some free downloadable goodies to save you hours of time. 😉
- Print out a customer journey template. Here's one for ya . Don’t print it too small - if the room allows, cover all the walls, you need as much surface as possible.
- Print out these instructions for participants and the facilitator cheat sheet .
- Grab some transparent tape to hang the templates around the walls.
- Sticky notes. Many, many, many sticky notes. All the sticky notes you can get. We recommend having at least three colors: one for the facts, the other one for the problems, and the last one for improvement ideas.
- Black markers for writing/sketching
- Last but not least: prepare tea/coffee breaks and snacks. Hungry and decaffeinated people are bad allies. 🙂
DOWNLOAD ZIP ARCHIVE WITH ALL ASSETS
On the journey mapping workshop day, block some time to set up the room. Arrange the tables, place printed reference materials on each table. Make sure sticky notes and sharpies all are placed within reach as well. Prepare journey mapping surfaces (e.g., the walls). You might need an assistant or two to do that.
Step 4: Run the customer journey mapping workshop
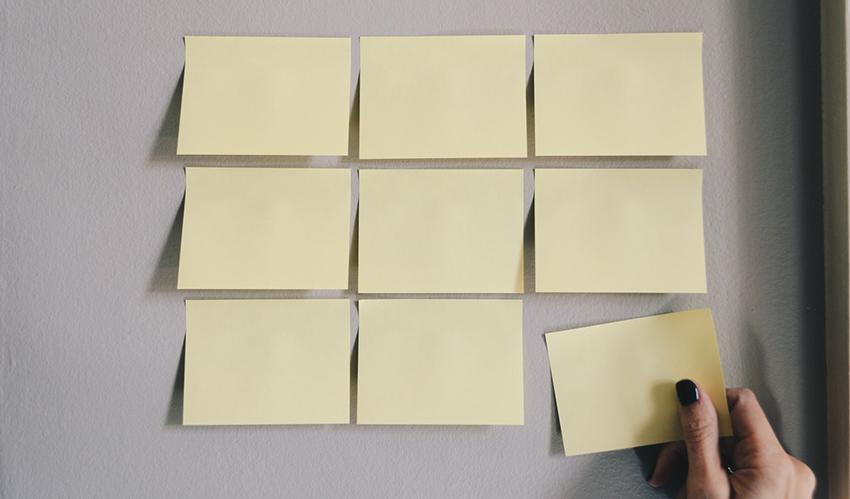
When the workshop starts, the first thing to do is set up some ground rules, give people context, and explain what you will do. Give them the agenda, an overview of the personas, and the scope of your today's journey mapping. It might be a good idea to ask people to put their phones or laptops aside.
Once everyone is on the same page, you can start mapping. Come up with the skeleton of your customer journey map first - these are the steps in the journey (or part of the journey).
Then complete the first step together to make sure everyone understands what the process looks like. Next, start writing information section by section on sticky notes and stick them onto the customer journey map.
By the time you finish the first step, everyone will have an idea of how to move forward. If you have a complex journey, make sure to split it between the participants (for instance, Team A maps the product research journey stage, Team B maps the onboarding, etc.) — this will speed up the journey mapping process and make it more manageable. Remember to have at least one knowledgeable person in each team to help others.
When the participants are done, make sure to get everyone back together and discuss the results. Encourage people to contribute to the journey stages they didn’t map initially.
Finally, when the workshop is over, take photos of the resulting map before you leave, you’ll need it later.
Step 5: Digitize & distribute
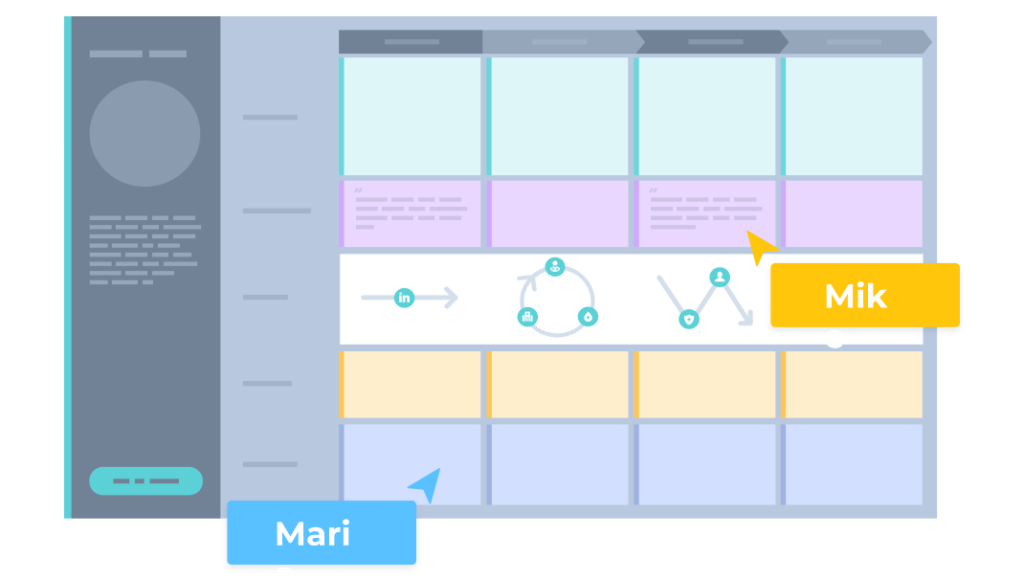
Sticky notes are fun, they give enough flexibility when you need to arrange things fast and collaborate during a workshop. But you will now want to keep the journey map you created, share it with the team, update and present it. And that's where UXPressia comes up on the stage. 🙂
Make sure to keep your map easy to present and read. Check out our tips for making your customer journey maps more visual and digestible.
Of course, there is more than one way to conduct a customer journey mapping workshop. We shared the approach we use in the UXPressia team, but feel free to add your own stories and share your know-how in the comments section.
Meanwhile, I welcome you to try our persona and CJM tool to digitize the paper map you end up with after your customer journey mapping workshop. More than that, you can even use it for digital workshops with your distributed (or local for that matter) as we support real-time online collaboration.
DIGITIZE YOUR JOURNEY MAP FOR FREE
This article was updated in 2022. Original publishing date: October 11, 2018
Related posts
Rate this post
Nice tips, downloaded the bundle archive as well, very helpful. I’m all for the old-school offline workshops, but sometimes, you just can’t physically get everyone in the same room. Do you have any tips for running a customer journey workshop online?
Hi Tony, we do indeed! Here’s a post you can check out: https://uxpressia.com/blog/online-journey-mapping-workshop
It’s a complete guide for running a customer journey mapping workshop online, with step-by-step instructions on what to do before, during, and after the meeting to make the most of the session. Hope this helps 🙂
Wow, this is an excellent resource for anyone who wants to elevate their customer experience strategy. My team has been struggling with organizing a customer journey mapping workshop, but I believe that the free resources you provide can make a significant difference. Thank you for this fantastic article, and I’ll certainly recommend it to my colleagues.

Skip navigation

World Leaders in Research-Based User Experience
Getting started with journey mapping: 27 tips from practitioners.

March 7, 2021 2021-03-07
- Email article
- Share on LinkedIn
- Share on Twitter
Journey maps visualize the process that a user goes through to accomplish a goal. They provide a holistic view of the customer experience , highlighting both positive and negative moments from the user’s point-of-view.
Leading a journey-mapping initiative is no small challenge. It takes product knowledge and research savvy, along with project- and stakeholder-management skills. To learn about journey mapping in practice, we surveyed more than 300 UX professionals on their journey-mapping experiences. Within that group, 206 respondents shared advice for people creating a journey map for the first time. In this article, we’ve consolidated the advice into 27 tips relevant not only to those getting started with journey mapping, but to all practitioners who want to learn from their peers’ knowledge. We grouped these into 6 categories: learning about journey mapping, defining goals, gathering and conducting research, collaborating on the map, visualizing and communicating the journey, and bonus words of encouragement.
In This Article:
getting started with journey mapping, defining goals, team, and scope, gathering and conducting research, collaborating on the map, visualizing and communicating the journey, final thoughts and words of encouragement.
- Educate yourself on journey-mapping fundamentals . Learning the basics can save you time in the long run because you’ll learn about common faults and pain points to avoid. One participant advises, “Educate yourself on various approaches, methods, and templates in order to make the right choices for your project.” If you’re looking to get started, we’ve published extensive content on customer journeys and even facilitate a course on creating and using customer-journey maps .
- Practice in a low-stakes environment . Once you understand the fundamentals, find ways to practice your approach and learn from your experience. One respondent recommended creating a journey map for something personally familiar, such as a recent, memorable experience. They wrote, “try it out on yourself and something you do and are familiar with.” For example, you might create a journey map documenting your journey to set up a new smart-home device.
- Research existing industry journey maps for inspiration . Search for case studies and artifacts relevant to your context. A quick search can return valuable examples that may inform project planning, communication, and scope or help you learn about communication formats that will work for your context.
- Set expectations for how the map will be used before starting. As you create a team and build buy-in, set clear expectations for the outcome. Journey maps are not created solely for visualizing the experience; they’re intended to help evaluate and improve it. One respondent commented, “Don’t expect it to solve everything. It’s one tool in a sea of many […] It’s up to you to use it to inform decision making.” As you sell journey mapping to your stakeholders, highlight the evaluative benefits, not just the visualization benefits.
- Spend time defining the objectives . Why are you creating a journey map and what do you hope to get out of it? Your goals should be clear and well documented. Share these goals with your stakeholders so you’re all on the same page. A participant notes, “make sure to outline the purpose of the journey map” while another respondent wrote, “define what is the question you need to answer.”
- Start with a small, focused scope . We recommend starting with a focused journey with known pain points and feasible quick wins that the team has authority to change. One participant commented, “Pick a very small project with easy to achieve, low-hanging–fruit outcomes.” With a small, focused scope, it’s likely that pain points uncovered during the initiative will be addressed.
- Accept that you can’t (and shouldn’t) map everything . Journey mapping is a great tool, but you can’t map everything at once. It wouldn’t be a good use of your time. You’d end up spending more time visualizing the pain points than solving them. Relatedly, one participant advises “Start small and scale. Accept that you don't map or `save’ everything.” Prioritize journeys with a significant impact on your experience so you can work on improving high-impact pain points.
- Involve a crossfunctional team . When deciding whom to involve in the initiative, consider the stakeholders or departments that play a role in the experience of the journey to be mapped. Crossfunctional journey-mapping teams often include people from engineering, marketing, sales, and customer support. As one respondent put it, “Do not make it alone. Speak to people who make the journey. Involve people who have to do something with the results.”
- Build a team of influencers and knowledge holders . One respondent said, “Figure out who has sway and influence and include them at early stages of this process!” Your core team should include well-respected influencers who can increase the visibility and positive perception of the initiative and knowledge holders with direct knowledge of the experience being mapped.
- Keep your stakeholders engaged. As one participant recommends, “share progress early and often.” Stay connected with stakeholders by involving them in relevant conversations and activities like research studies and workshops.
- Iterate and don't let perfectionism drag you down . This is an iterative process, so adapt and iterate your map as needed. One survey respondent said, “start small and understand you will make many revisions. Don't try to get it perfect the first time.”
- Focus on action and outcomes . As one participant said, “Have a plan for what you are going to do with the information to make it actionable. It doesn’t do any good to hang the map above the copy machine and expect everyone to know how that impacts their job/function.” In other words, the goal isn’t just creating the artifact, but acting on findings to improve the experience.
- Document assumptions and use them to argue for new research . Don’t let lack of buy-in for initial research derail your mapping goals. One respondent recommended, “start[ing] with assumptions if you can't get user interviews so that you can communicate the need for research.” Starting your mapping process by asking stakeholders to share already known insights or hypotheses can reveal gaps that require additional research. Another participant recommended that practitioners “start by mapping quickly the existing experience based on internal team feedback” before following up with additional user research.
- Know your users and your product. Journey maps require real user data to be effective. As one participant wrote, “Understand the user as well as the problem before you start solutioning.” A basic map with the right insights is better than an extensive map based on assumptions.
- Use mixed methods to understand the full picture. The best research methods for journey mapping are qualitative methods. Even small-sample qualitative studies can give profound insights into what users do, think, and feel throughout a journey. Quantitative methods (e.g., analytics ) can be used as a second step to show the scale of key insights or add additional evidence for your recommendations. On this subject, a respondent commented, “start rough and use qualitative methods to go deeper. Put steps into perspective by adding quantitative metrics.”
- Make the process collaborative . There are immense benefits to creating journey maps collaboratively in a workshop environment. This approach takes considerable coordination and planning, so communicate expectations to management early on and explain why you need help. One participant recommends, “start with a simple 1-hour workshop with the most important internal resources and keep the map low fidelity on paper or a whiteboard.” Workshops involve everyone in the process and create buy-in.
- Asynchronous collaboration is better than no collaboration . This type of collaboration allows people to contribute to your map when it’s convenient for them to do so. For one method of doing this, a participant recommends, “Start a spreadsheet and find an ally who can help fill it in.” If getting everyone together for a workshop isn’t possible, this option might work for you: consider using the template we published for remote journey mapping .
- Involve end users in the process . Creating a journey map with an end user saves time without sacrificing insights. For example, you could have participants document their experience using sticky notes (or a digital equivalent) to create a quick, low-fidelity journey map. After the session, these artifacts can be refined and added to data from other sources. Such participatory-design sessions are especially useful for complex domain-specific workflows .
- Start low fidelity. Journey mapping is an iterative process, so don’t expect to create a high-fidelity map early on in the process. One respondent suggested: “Lay it out on a wall or huge piece of paper using sticky notes. That makes it easy to re-think, re-do, and move things around.” Whether you’re working in person or remote ly, use materials and tools that support iterating and moving things around.
- Use a template . Multiple participants recommended using a template to save time when creating the artifact, saying things like “use a baseline template to get started.” Journey maps don’t have to be works of art; often a simple spreadsheet template can be incredibly useful for tight timelines or iterative work. When selecting a template, be mindful of format and the potential bias certain tools may introduce — people unfamiliar with a tool will be unlikely to contribute.
- Keep it simple . The idea of focusing the artifact was mentioned by several respondents. Aim to provide a clear overview of key moments within the journey, rather than documenting every discrete interaction. As one participant put it, “It’s really easy to go down a rabbit hole and get stuck in the weeds.” Instead of attempting to record all the potential interactions and overlapping journeys, try to focus on one path at a time. Keep the conversation — and your recommendations — focused on the main journey being evaluated.
- Prioritize content over graphics . Polished graphic design is not the main focus of your journey map. One participant wrote, “ignore the fancy versions you see online, the content is core, not the graphics.” Yes, good visual design is important in that it assists the reader in consuming the content, but the content in the map should be the priority. Before jumping to complex visual tools, get your content ready and validated in an easy-to-edit, accessible format.
- Provide recommendations . Don’t just point out what’s wrong with the experience; provide some insight! As one participant put it, “Find the pain and the gain.” Another described: “[The map] is a communication tool…for you to create and finetune your experience,” not just an exhaustive log of problems to be addressed.
- Pilot your journey map . Before presenting your map, ask a colleague or team member to view and explain key takeaways from the artifact. One participant wrote, “Ask a colleague or team member to have a pre-client/stakeholder demo so you can work out as many kinks as possible.” This type of exercise will help reveal points of confusion ahead of time. For example, if there are certain terms or icons used that people don’t understand, you have an opportunity to change them or remove them before sharing the artifact widely.
- Optimize your presentation for the audience . One participant recommends, “make two versions —[a] detailed one for [the] design team and [a] simple one for management.” Don’t be afraid to create custom versions for specific audiences, to highlight insights that are relevant for that group. This approach will result in a compelling presentation tailored for your audience.
- Be patient and persistent. Initiatives like this require a team effort. Be patient with competing motives and persistent about evaluating and improving the experience. Journey mapping requires substantial effort, but as one participant said, “[It’s] worth the effort, and you'll get better with each one you do.” Stay motivated and home in on the outcomes.
- “Do the best you can with the tools and buy-in you have,” a great closing thought from one respondent. Your first-time journey mapping might not be perfect, but it will be a valuable learning experience. Apply your learnings over subsequent mapping initiatives to improve and perfect your craft.
Journey mapping is not new, and many teams have struggled, stumbled, succeeded, and sometimes even failed at it. No single case study can tell you what to do in your specific situation, which is why we research best practices across hundreds of UX projects. This distillation of lessons learned by many teams will position your mapping initiative for success.
Learn more in our full day course, Journey Mapping to Understand Customer Needs .
Related Courses
Discovery: building the right thing.
Conduct successful discovery phases to ensure you build the best solution
Effective Ideation Techniques for UX Design
Systematic methods for creative solutions to any UX design or redesign challenge
Interaction
Personas: Turn User Data Into User-Centered Design
Successfully turn user data into user interfaces. Learn how to create, maintain and utilize personas throughout the UX design process.
Related Topics
- Customer Journeys Customer Journeys
- Design Process
Learn More:

The 3 Competencies of Journey Management
Kim Salazar · 5 min

Journey Management vs. Service Design
Kim Salazar · 4 min

Types of User Pain Points
Sarah Gibbons · 4 min
Related Articles:
A Guide to Service-Blueprinting Workshops
Alita Joyce · 8 min
Journey-Mapping Approaches: 2 Critical Decisions To Make Before You Begin
Kate Kaplan · 8 min
Journey Mapping: 9 Frequently Asked Questions
Alita Joyce and Kate Kaplan · 7 min
How to Run a Journey-Mapping Workshop: A Step-by-Step Case Study
Kate Kaplan · 10 min
7 Ways to Analyze a Customer-Journey Map
Kim Salazar · 7 min
Refine, Remodel, Rebuild: 3 Strategies for Experience Improvement
About 5 mins
Learning Objectives
Welcome your cocreators and get down to business, think about your customers together, synthesize your research and insights, take a step back, find the opportunities.
- Challenge +100 points
Run a Journey Mapping Workshop
After completing this unit, you’ll be able to:
- Run a journey mapping workshop.
- Synthesize insights and ideas.
- Identify opportunities to deliver a better experience.
At the beginning of the workshop, it’s critical you set an inviting and collaborative tone. Reserve the first portion of the workshop to do the following.
- Extend a warm welcome and start group introductions
- Go over the agenda and set expectations for the day
- Distribute and review materials
As a first activity, have your participants review your work thus far, and confirm that you've gotten each of the phases and actions right.
- Do the phases and actions in the journey resonate as true to life?
- Did we miss anything?
- Did we include anything unnecessary?
It’s key to get these elements right before you move on. Once you’ve confirmed that they're the right ones, move on to the next stage.
Have participants review the research materials for relevant customer quotes, feedback, and other insights. Make sure to prompt them to look beyond a business or product.
Customers are driven by relationship-based factors, like social dynamics, their values, their level of trust, emotional readiness to deepen engagement or move to the next phase, and potential community impact. Make these factors an intentional part of your insight collection process. Write each insight or quote on a single sticky note.
What happens when you don’t know what’s going on with your customer or user at a specific phase or activity? When you’re not sure, it’s okay to form a hypothesis and make a note to do some follow-up research. Another option is to restructure the phases and activities if they start to feel out of proportion with the rest.
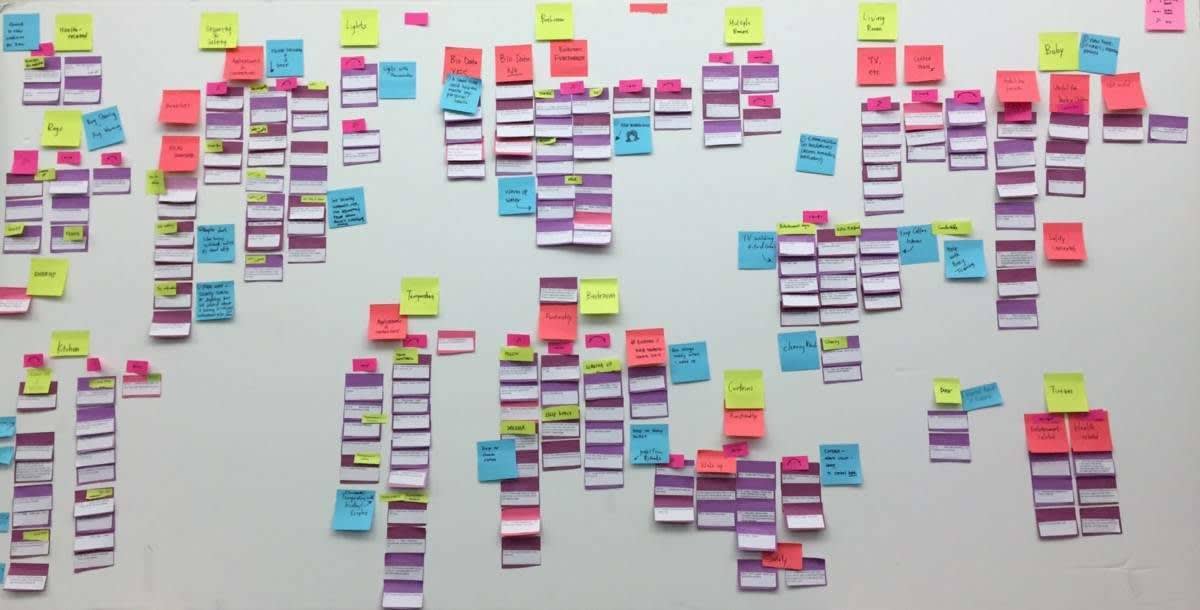
Once participants go through the research materials for important insights, begin to synthesize. Synthesis is how we arrive at the key insights that form our customer journey. It’s our process for making sense, and it’s more of an art than science. Depending on the size of your workshop, you may want to break out into smaller groups to focus on each phase.
Step 1: Cluster
Begin by clustering insights based on similar or related themes and ideas. Empathy is particularly important during this step, as you have to determine what's most important to your customers at each phase of their journey.
This is where sticky notes, or their virtual counterpart, are useful, because you can easily cluster and recluster ideas until the themes feel clear and resolved.
Step 2: Express
Craft phrases to express each important cluster around thoughts and feelings , touchpoints , and contexts . Aim to come up with the top three to four points for each square of your journey map grid, and add them to the grid when you feel they are complete.
As you move through this process, participants will undoubtedly come up with ideas and solutions for the opportunities section. When those ideas pop up, ask participants to note them in a “parking lot” (typically a blank board or a wall in the corner of the room) to go back to later, and resume your task.
Once you’ve synthesized the emotions, touchpoints, and contexts for each phase, come together to review the complete story your insights are revealing.
Ask yourselves a few questions.
- Does it read as a coherent story?
- Can you picture a real person having this experience? Or does it combine several different people’s journeys?
- Which parts are most important to the customer?
- Do any feel extraneous or misplaced?
- Can you try reading it through with emphasis on emotions? How about social dynamics or values?
Edit the details after the workshop, but while you have everyone together you want to make sure there’s consensus on the big picture story you’re telling, and the key points around what’s working and what’s not.
This is a great time to think about whether the traditional timeline format is best for your journey map. Sometimes you’re describing an iterative process (like a tool to help customers pick paint colors) or a repeated behavioral loop (like for a digital grocery shopping experience).
You may want to reformat your map to reflect this, and in doing so, you may discover that the shape changes the way you look at the whole experience.
Once you’ve got your coherent story, walk through it again, asking participants to extract opportunities based on whatever they’ve noticed is lacking, inefficient, or could be improved. These opportunities serve as recommendations for the organization.
Opportunities can be vastly different. For example: “Engage in social media with strategic purpose” (a somewhat vague goal) can exist on the same journey map as “Visualize the shipping route and package tracking” (a clear and specific idea). The point is to have the group call out ways the experience can improve. You’ll go from phase to phase, collecting your participants’ input.
End your workshop by asking people to vote for their favorite opportunities in each phase. Ask participants to consider:
- Moments that matter most to the customer.
- Metrics you might improve.
- Places where your organization can contribute to the community or the world in some way.
- How well they satisfy business objectives using current capabilities.
Each participant can use sticky dots to vote on their top two ideas in each phase, and discuss why people voted for the most popular ideas, if time allows. Eliminate opportunities that represent short-term gains at the expense of longer-term relationships; they’re ultimately bad for your business.
Now that the workshop is over, it’s time to craft the final artifact, your journey map.
- Get personalized recommendations for your career goals
- Practice your skills with hands-on challenges and quizzes
- Track and share your progress with employers
- Connect to mentorship and career opportunities
User Journey Mapping Workshop
The User Journey Mapping workshop offers a 90 minute + workshop template that helps your team collaborate virtually and create comprehensive user journey maps.
When to use User Journey Mapping Workshop? When building or designing a product for users, user journey maps are incredibly helpful as they allow you to empathize with and better understand your users. Building out user journey maps can also be a great way get stakeholders involved and aligned. Use this template to synthesize everyone's knowledge of your users to create a well rounded journey map.
The user journey maps you create in this workshop can be used to:
clarify where in the user experience there are pain points
unify your organization's understanding of your users
inform the designs and decisions for a specific project
inspire new features or initiatives
How does the User Journey Mapping workshop work?
Your team will be guided through these eight steps:
Intro: Welcome and general overview of how the workshop will go. What is the purpose of this workshop? What are our goals and desired outcomes? What personas are we addressing? 5 mins
Persona work: Participants review their persona's information and fill in their empathy map. Who is the persona? What do they think, hear, feel, see? 5 mins
Brainstorm: Think about the persona's experience. What are their goals? What steps do they take to fulfill those goals? 10 mins
Create a user journey map: Participants work in groups to build out a linear user journey map. What goals and tasks do we agree on? What pain points exist? What is the user's mental state? 25 min
Break: Take a breather, get a snack! 5 min
Present and discuss: Each group presents and discusses their user journey map with everyone. Where do we agree or disagree? Was anything surprising? 30 min
Opportunities: Review the finalized maps together to highlight the key moments in the journey with the biggest opportunities for improvement. What changes would benefit the most personas and solve the largest existing difficulties? What goals are most important for our users to achieve? 15 mins
Wrap up: Thank participants for their help and inform them of next steps. What's next? How will the journey maps be used?"
- Diagramming
- Meetings & Workshops
- Facilitator

Submit your template →
Do you have a great board to share with the world? We' ll help you turn it into a template to share with the community.
Similar templates

Customer Journey Map


User Journey

Current Experience Canvas

- Reviews / Why join our community?
- For companies
- Frequently asked questions
Journey Mapping
How this course will help your career, what you will learn.
How and why journey mapping is used by top design teams around the world
How to choose the best journey mapping process to fit your team’s goals
How to gather data as part of your journey mapping process
How to analyze data using a perspective grid
How to create the three most common types of journey map : experience maps, customer journey maps, service blueprints
How to run a journey mapping workshop and turn your insights into viable product initiatives
This course will show you how to use journey mapping to turn your own complex design challenges into simple, delightful user experiences . If you want to design a great shopping experience, an efficient signup flow or an app that brings users delight over time, journey mapping is a critical addition to your toolbox.
We will begin with a short introduction to mapping — why it is so powerful, and why it is so useful in UX. Then we will get familiar with the three most common types of journey map — experience maps, customer journey maps and service blueprints — and how to recognize, read and use each one. Then you will learn how to collect and analyze data as a part of a journey mapping process. Next you will learn how to create each type of journey map , and in the final lesson you will learn how to run a journey mapping workshop that will help to turn your journey mapping insights into actual products and services.
This course will provide you with practical methods that you can start using immediately in your own design projects, as well as downloadable templates that can give you a head start in your own journey mapping projects.
The “Build Your Portfolio: Journey Mapping Project” includes three practical exercises where you can practice the methods you learn, solidify your knowledge and if you choose, create a journey mapping case study that you can add to your portfolio to demonstrate your journey mapping skills to future employers, freelance customers and your peers.
Throughout the course you will learn from four industry experts.
Indi Young will provide wisdom on how to gather the right data as part of your journey mapping process. She has written two books, Practical Empathy and Mental Models . Currently she conducts live online advanced courses about the importance of pushing the boundaries of your perspective. She was a founder of Adaptive Path, the pioneering UX agency that was an early innovator in journey mapping.
Kai Wang will walk us through his very practical process for creating a service blueprint, and share how he makes journey mapping a critical part of an organization’s success. Kai is a talented UX pro who has designed complex experiences for companies such as CarMax and CapitalOne.
Matt Snyder will help us think about journey mapping as a powerful and cost-effective tool for building successful products. He will also teach you how to use a tool called a perspective grid that can help a data-rich journey mapping process go more smoothly. In 2020 Matt left his role as the Sr. Director of Product Design at Lucid Software to become Head of Product & Design at Hivewire.
Christian Briggs will be your tour guide for this course. He is a Senior Product Designer and Design Educator at the Interaction Design Foundation. He has been designing digital products for many years, and has been using methods like journey mapping for most of those years.
Gain an Industry-Recognized UX Course Certificate
Use your industry-recognized Course Certificate on your resume , CV , LinkedIn profile or your website.
Our courses and Course Certificates are trusted by these industry leaders:
Is This Course Right for You?
This is a beginner to intermediate course suitable for anyone who wants to better design complex user experiences. If you are an aspiring designer , this course will provide you with the essential skills to do this and to work more confidently in teams who are designing complex experiences.
If you are a junior or mid-level designer , journey mapping will allow you to take on ever more complex design challenges, move into more senior design roles and help you work more strategically with your team. This course is particularly valuable for:
Aspiring UX and UI designers who are building essential design skills.
Junior and mid-level UX and UI designers who would like to improve and expand their capabilities.
Product managers who create complex experiences with their teams.
Anyone who wants to create better, more efficient and profitable complex user experiences.
Learn and Work with a Global Community of Designers
When you take part in this course, you’ll join a global community and work together to improve your skills and career opportunities. Connect with helpful peers and make friends with like-minded individuals as you push deeper into the exciting and booming industry of design. You will have the opportunity to share ideas, learn from your fellow course participants and enjoy the social aspects afforded by our open and friendly forum.
Lessons in This Course
- Each week, one lesson becomes available.
- There’s no time limit to finish a course. Lessons have no deadlines .
- Estimated learning time: 9 hours 54 mins spread over 7 weeks .
Lesson 0: Welcome and Introduction
- 0.1: Welcome and Introduction (4 mins) Start course now
- 0.2: Build Your Portfolio: Ideation Project (5 mins) Start course now
- 0.3: Let our community help you (1 min) Start course now
- 0.4: How to Earn Your Course Certificate (16 mins) Start course now
- 0.5: Expand your network and grow your skills in our online forums (5 mins) Start course now
- 0.6: Meet and learn from design professionals in your area (1 min) Start course now
- 0.7: Gain Timeless Skills Through Courses From the Interaction Design Foundation (21 mins) Start course now
- 0.8: Mandatory vs. Optional Lesson Items (7 mins) Start course now
- 0.9: A Mix Between Video-Based and Text-Based Lesson Content (6 mins) Start course now
- See all lesson items See less lesson items
Lesson 1: What is Journey Mapping?
- 1.1: Welcome and Introduction (14 mins) Start course now
- 1.2: The Power of Mapping (27 mins) Preview Preview Start course now
- 1.3: Journey Mapping in UX (29 mins) Preview Preview Start course now
- 1.4: Congratulations and Recap (2 mins) Start course now
Lesson 2: Journey Mapping Variations
- 2.1: Welcome and Introduction (13 mins) Start course now
- 2.2: Experience Maps (18 mins) Start course now
- 2.3: Customer Journey Maps (13 mins) Start course now
- 2.4: Service Blueprints (14 mins) Start course now
- 2.5: Journey Mapping Process Variations (49 mins) Start course now
- 2.6: Congratulations and Recap (2 mins) Start course now
Lesson 3: How Do I Gather Data for a Journey Map?
- 3.1: Welcome and Introduction (15 mins) Preview Preview Start course now
- 3.2: How to Conduct Problem and Solution Space Research (1 hour 9 mins) Start course now
- 3.3: How to Create a Perspective Grid (28 mins) Start course now
- 3.4: Build your Portfolio Project: Perspective Grid (8 mins) Start course now
- 3.5: Congratulations and Recap (1 min) Start course now
Lesson 4: How to Create a Journey Map
- 4.1: Welcome and Introduction (10 mins) Start course now
- 4.2: How to Create an Experience Map (18 mins) Start course now
- 4.3: How to Create a Customer Journey Map (17 mins) Start course now
- 4.4: How to Create a Service Design Blueprint (1 hour 19 mins) Start course now
- 4.5: Build Your Portfolio Project: Journey Map (5 mins) Start course now
- 4.6: Congratulations and Recap (1 min) Start course now
Lesson 5: How to Run a Journey Mapping Workshop
- 5.1: Welcome and Introduction (3 mins) Start course now
- 5.2: How to Set Up a Workshop (25 mins) Start course now
- 5.3: How to Increase Understanding (31 mins) Start course now
- 5.4: How to Create Vision (11 mins) Start course now
- 5.5: How to Guide Evaluation (19 mins) Start course now
- 5.6: How to Plan Experiments (14 mins) Start course now
- 5.7: Build your Portfolio Project: Workshop Plan (4 mins) Start course now
- 5.8: Discussion Forum (6 mins) Start course now
- 5.9: Congratulations and Recap (1 min) Start course now
Lesson 6: Course Certificate, Final Networking, and Course Wrap-up
- 6.1: Get Your Course Certificate (1 min) Start course now
- 6.2: Course Evaluation (1 min) Start course now
- 6.3: Continue Your Professional Growth (1 min) Start course now
Learning Paths
This course is part of 4 learning paths:
How Others Have Benefited

Carolina Cajazeira, Brazil
“Even with it being a course for beginners, it brings a lot of valuable content, even for people with greater seniority. Classes are dynamic, and the organization of the content makes it easy to understand and assimilate all the lessons learned.”

Olha Abazalii, Denmark
“A lot of interesting and necessary information, good explanation skills, very insightful examples, and enjoyable tasks.”

Björn Rohles, Luxembourg
“This course was really cool. It was engaging and had a good mix of content. I particularly enjoyed the good use of a realistic example (Rhythm Road) throughout the course. That made it really engaging to learn.”
How It Works
Lessons are self-paced so you’ll never be late for class or miss a deadline. Learning and life, hand in hand.
Your answers are graded by experts, not machines. Get an industry-recognized Course Certificate to show you’ve put in the work.
Grow your professional knowledge by watching Master Classes, networking within our UX community, and more.
Start Advancing Your Career Now
Join us to take “Journey Mapping”. Take other courses at no additional cost. Make a concrete step forward in your career path today.
- Frequently Asked Questions
Don't worry if you missed the course . We will re-run it shortly. One of the reasons we continually open and close courses is in order to control the classroom size.
Networking is a large part of our value proposition, so we want just the right number of people inside the courses. That is also why we display the "XX % percent booked" on our course icons.
No . You can set your own study schedule. There are no "live sessions" since we have members from all timezones around the world. We are a truly global community.
Thus, once you are enrolled, you can take all the time to complete a given course. Every "classroom" in each course will never close , so you’ll have permanent access to your classmates and your course material (as well as your own answers).
Yes. You will get a digital industry-recognized course certificate every time you complete a course. Certificates never expire and can be saved as a .jpg file, so it's easy to be shared. Also, there is no limit to how many certificates you can earn during your membership.
You can see an example of a Course Certificate at the bottom of the Course Catalogue .
Don't worry; once you change your name, your certificate will be updated automatically in the next 48 hours.
Sure! We will be marking all your answers for as long as you are an active member.
You will have access to the course materials for the entire duration of your membership . So, if you pay for a one-year membership, you will have access for one year. Renewing your membership for a second year means you will have access to one more year, and so on.
No, you will not be locked out of any lesson or course. You will have access to all course materials throughout your membership, so there is no pressure to keep at the same pace as the specified lesson release dates.
All we recommend is that you try to stick to the same schedule as other participants. The reason is they may have moved on to other lessons, thereby meaning you could miss out on the social aspects of the course(s).
No, you can generate your certificate as soon as you score at least 70% of the total course points.
Course certificates will be given to participants when they have scored more than 70% or more of the total course points. For example, if a course contains ten lessons each with ten questions, you will receive a course certificate when the instructor has awarded you at least 70 points (70% of the total course points).
There is no specified time that certificates will be awarded — instead, they are given to participants as and when they have answered all questions, even if this is long after the official end date.
Below is a step-by-step guide on how to add your Interaction Design Foundation course(s) to your LinkedIn profile:
Log in to your LinkedIn account, then go to your profile.
Below your profile description, click on the button Add profile section , choose Recommended and then select Add license or certification .
3. In the following fields add:
Name – Course name
Issuing organization – The Interaction Design Foundation
Check the field “This credential does not expire”
Issue date - Input the date written on your certificate (e.g., May 2021)
Credential ID – Your membership ID number – it's written on your certificate. (For non-members, you can leave this field blank or, if you prefer, insert the certificate ID, which can be extracted from the certificate link. This ID will begin with "mcc_" and be followed by a string of numbers and letters.")
Credential URL: Input the certificate URL provided on your course page
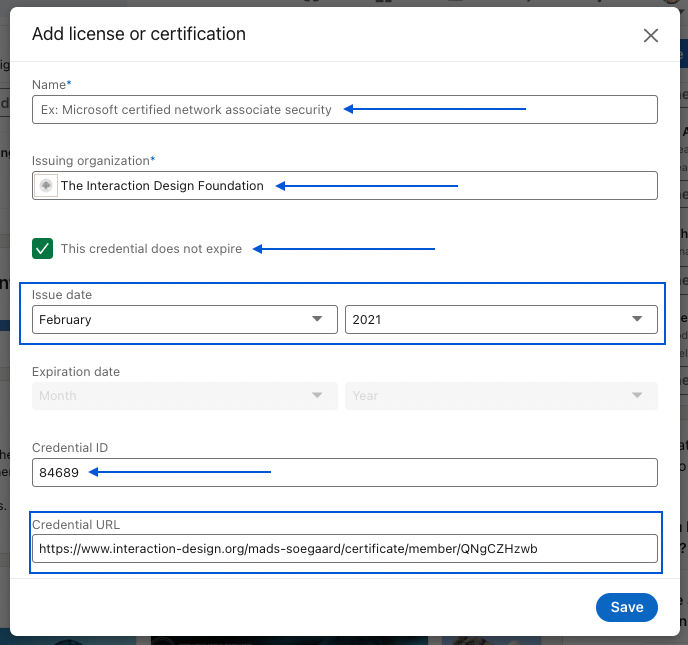
Congratulate yourself! Earning the certificate is a great accomplishment and now you can share it with the world!
Name – Membership Certificate
Issue date - Input the date when you joined our community (e.g., May 2019)
Credential ID – Your membership ID number (it's written on your certificate)
Credential URL: Input the certificate URL provided on your profile page

It is as simple as that. Now, anyone who visits your profile can see your certificate!
After you pay for your membership, you can take as many courses as you want with no additional costs . There are no further charges on top of the membership fee.
You will need approximately 5-8 hours to complete one lesson. Each course has between 3 and 16 lessons.
Once enrolled in a course, you will gain access to a new lesson each week, which you are free to complete without any deadlines and no end date, either.
Yes! Everyone's learning journey looks different, and we'd never stop our members from trying again. To retake a course, just follow these steps:
1. Go to your profile and click on the relevant course you'd like to retake.
2. Underneath your progress bar, you'll see a phrase "UX Courses" with an arrow (>) pointing to a clickable landing page of that course. Click on that link.
3. Once on the landing page, scroll all the way down to the bottom of the page. You'll see a red button, which you can simply click to drop the course.
4. Head back to our main list of UX Courses, and re-enroll yourself in the course. You'll all set to try again!
Please note that when you drop a course, you will lose any answers and progress you submitted. We advise that you screenshot or save any answers you'd like to reuse.
In some cases, we can open up lessons for members who are retaking a course, so that they don't have to wait for familiar lessons to unlock each week. If you'd like us to do this for you, please get in touch with our support team at [email protected] , and we can help you out.
To drop a course, the following should be done:
1. Visit your profile page and click the 'continue lesson...' button for the course you want to drop.
2. Click the course name link breadcrumb near the top of the page that opens (this only appears in unlocked lessons, not upcoming lessons)
3. Click the red 'drop my course now' button at the bottom of the page that opens
Privacy Settings
Our digital services use necessary tracking technologies, including third-party cookies, for security, functionality, and to uphold user rights. Optional cookies offer enhanced features, and analytics.
Experience the full potential of our site that remembers your preferences and supports secure sign-in.
Governs the storage of data necessary for maintaining website security, user authentication, and fraud prevention mechanisms.
Enhanced Functionality
Saves your settings and preferences, like your location, for a more personalized experience.
Referral Program
We use cookies to enable our referral program, giving you and your friends discounts.
Error Reporting
We share user ID with Bugsnag and NewRelic to help us track errors and fix issues.
Optimize your experience by allowing us to monitor site usage. You’ll enjoy a smoother, more personalized journey without compromising your privacy.
Analytics Storage
Collects anonymous data on how you navigate and interact, helping us make informed improvements.
Differentiates real visitors from automated bots, ensuring accurate usage data and improving your website experience.
Lets us tailor your digital ads to match your interests, making them more relevant and useful to you.
Advertising Storage
Stores information for better-targeted advertising, enhancing your online ad experience.
Personalization Storage
Permits storing data to personalize content and ads across Google services based on user behavior, enhancing overall user experience.
Advertising Personalization
Allows for content and ad personalization across Google services based on user behavior. This consent enhances user experiences.
Enables personalizing ads based on user data and interactions, allowing for more relevant advertising experiences across Google services.
Receive more relevant advertisements by sharing your interests and behavior with our trusted advertising partners.
Enables better ad targeting and measurement on Meta platforms, making ads you see more relevant.
Allows for improved ad effectiveness and measurement through Meta’s Conversions API, ensuring privacy-compliant data sharing.
LinkedIn Insights
Tracks conversions, retargeting, and web analytics for LinkedIn ad campaigns, enhancing ad relevance and performance.
LinkedIn CAPI
Enhances LinkedIn advertising through server-side event tracking, offering more accurate measurement and personalization.
Google Ads Tag
Tracks ad performance and user engagement, helping deliver ads that are most useful to you.
1.2 - The Power of Mapping
- Transcript loading…
1.3 - Journey Mapping in UX
3.1 - Welcome and Introduction
New to UX Design? We’re Giving You a Free ebook!
Download our free ebook The Basics of User Experience Design to learn about core concepts of UX design.
In 9 chapters, we’ll cover: conducting user interviews, design thinking, interaction design, mobile UX design, usability, UX research, and many more!
Customer Journey Mapping
Journey mapping helps you visualize how customers experience your product or service, and how they feel along the way. Scroll to step 6 for a real-life example from one of our product teams!
USE THIS PLAY TO...
Understand the customer journey from a specific persona's perspective so that you can design a better experience.

Running the play
Depending on how many touchpoints along the customer journey you're mapping, you might break the journey into stages and tackle each stage in pairs.
Sticky notes
Whiteboards.io Template
Define the map's scope (15 min)
Ideally, customer journey mapping focuses on the experience of a single persona in a single scenario with a single goal. Else, the journey map will be too generic, and you'll miss out on opportunities for new insights and questions. You may need to pause creating a customer journey map until you have defined your customer personas . Your personas should be informed by customer interviews , as well as data wherever possible.
Saying that, don't let perfect be the enemy of good! Sometimes a team just needs to get started, and you can agree to revisit with more rigor in a few months' time. Once scope is agreed on, check your invite list to make sure you've got people who know the details of what customers experience when using your product or service.
Set the stage (5 min)
It's really important that your group understands the user persona and the goal driving their journey. Decide on or recap with your group the target persona and the scope of the journey being explored in your session. Make sure to pre-share required reading with the team at least a week ahead of your session to make sure everyone understands the persona, scope of the journey, and has a chance to delve deeper into research and data where needed. Even better- invite the team to run or attend the customer interviews to hear from customers first hand!
E.g. "We're going to focus on the Alana persona. Alana's role is project manager, and her goal is to find a scalable way for her team to share their knowledge so they spend less time explaining things over email. We're going to map out what it's like for Alana to evaluate Confluence for this purpose, from the point where she clicks that TRY button, to the point where she decides to buy it – or not."
Build a customer back-story (10 min)
Have the group use sticky notes to post up reasons why your target persona would be on this journey in the first place. Odds are, you'll get a range of responses: everything from high-level goals, to pain points, to requested features or services. Group similar ideas and groom the stickies so you can design a story from them.
These narratives should be inspired by actual customer interviews. But each team member will also bring a different perspective to the table that helps to broaden the lens.
Take a look at the example provided in the call out of this section. This back story starts with the pain points – the reasons why Alana would be wanting something like Confluence in the first place.
- E.g., "Her team's knowledge is in silos"
Then it basically has a list of requirements – what Alana is looking for in a product to solve the bottom pain points. This is essentially a mental shopping list for the group to refer to when mapping out the customer journey.
- E.g., "Provide structure"
Then it has the outcomes – goals that Alana wants to achieve by using the product
- E.g., "To keep my team focused on their work instead of distracted by unnecessary emails and shoulder-taps"
And finally the highest-level goal for her and her team.
- E.g., "Improve team efficiency"
Round off the back story by getting someone to say out loud what they think the overall story so far is, highlighting the main goals the customer has. This ensures a shared understanding that will inform the journey mapping, and improve the chances that your team will map it from the persona's point of view (not their own).
- E.g., "Alana and her team are frustrated by having to spend so much time explaining their work to each other, and to stakeholders. They want a way to share their knowledge, and organize it so it's easy for people outside their team to find, so they can focus more energy on the tasks at hand."

For example...
Here's a backstory the Confluence team created.
Map what the customer thinks and feels (30-60 min)
With the target persona, back story, and destination in place, it's time to walk a mile in their shoes. Show participants how to get going by writing the first thing that the persona does on a sticky note. The whole group can then grab stickies and markers and continue plotting the journey one action at a time.
This can also include questions and decisions! If the journey branches based on the answers or choices, have one participant map out each path. Keep in mind that the purpose of this Play is to build empathy for, and a shared understanding of the customer for the team. In order to do this, we focus on mapping the current state of one discrete end to end journey, and looking for opportunities for improvement.
To do a more comprehensive discovery and inform strategy, you will need to go deeper on researching and designing these journey maps, which will need to split up over multiple sessions. Take a look at the variation below for tipes on how to design a completely new customer journey.
Use different color sticky notes for actions, questions, decisions, etc. so it's easier to see each element when you look at the whole map.
For each action on the customer journey, capture which channels are used for the interactions. Depending on your context, channels might include a website, phone, email, postal mail, face-to-face, and/or social media.
It might also help to visually split the mapping area in zones, such as "frontstage" (what the customer experiences) versus "backstage" (what systems and processes are active in the background).
Journey mapping can open up rich discussion, but try to avoid delving into the wrong sort of detail. The idea is to explore the journey and mine it for opportunities to improve the experience instead of coming up with solutions on the spot. It's important not only to keep the conversation on track, but also to create an artefact that can be easily referenced in the future. Use expands or footnotes in the Confluence template to capture any additional context while keeping the overview stable.
Try to be the commentator, not the critic. And remember: you're there to call out what’s going on for the persona, not explain what’s going on with internal systems and processes.
To get more granular on the 'backstage' processes required to provide the 'frontstage' customer value, consider using Confluence Whiteboard's Service Blueprint template as a next step to follow up on this Play.

ANTI-PATTERN
Your map has heaps of branches and loops.
Your scope is probably too high-level. Map a specific journey that focuses on a specific task, rather than mapping how a customer might explore for the first time.
Map the pain points (10-30 min)
"Ok, show me where it hurts." Go back over the map and jot down pain points on sticky notes. Place them underneath the corresponding touchpoints on the journey. Where is there frustration? Errors? Bottlenecks? Things not working as expected?
For added value, talk about the impact of each pain point. Is it trivial, or is it likely to necessitate some kind of hack or work-around. Even worse: does it cause the persona to abandon their journey entirely?
Chart a sentiment line (15 min)
(Optional, but totally worth it.) Plot the persona's sentiment in an area under your journey map, so that you can see how their emotional experience changes with each touchpoint. Look for things like:
- Areas of sawtooth sentiment – going up and down a lot is pretty common, but that doesn't mean it's not exhausting for the persona.
- Rapid drops – this indicates large gaps in expectations, and frustration.
- Troughs – these indicate opportunities for lifting overall sentiments.
- Positive peaks – can you design an experience that lifts them even higher? Can you delight the persona and inspire them to recommend you?
Remember that pain points don't always cause immediate drops in customer sentiment. Sometimes some friction may even buold trust (consider requiring verification for example). A pain point early in the journey might also result in negative feelings later on, as experiences accumulate.
Having customers in the session to help validate and challenge the journey map means you'll be more confident what comes out of this session.
Analyse the big picture (15 min)
As a group, stand back from the journey map and discuss trends and patterns in the experience.
- Where are the areas of greatest confusion/frustration?
- Where is the journey falling short of expectations?
- Are there any new un-met needs that have come up for the user type?
- Are there areas in the process being needlessly complicated or duplicated? Are there lots of emails being sent that aren’t actually useful?
Then, discuss areas of opportunity to improve the experience. E.g., are there areas in the process where seven steps could be reduced to three? Is that verification email actually needed?
You can use quantitative data to validate the impact of the various opportunity areas identified. A particular step may well be a customer experience that falls short, but how many of your customers are actually effected by that step? Might you be better off as a team focused on another higher impact opportunity?
Here's a user onboarding jouney map our Engaging First Impressions team created.
Be sure to run a full Health Monitor session or checkpoint with your team to see if you're improving.
MAP A FUTURE STATE
Instead of mapping the current experience, map out an experience you haven't delivered yet. You can map one that simply improves on existing pain points, or design an absolutely visionary amazeballs awesome experience!
Just make sure to always base your ideas on real customer interviews and data. When designing a totally new customer journey, it can also be interesting to map competitor or peer customer journeys to find inspiration. Working on a personalised service? How do they do it in grocery? What about fashion? Finance?
After the mapping session, create a stakeholder summary. What pain points have the highest impact to customers' evaluation, adoption and usage of our products? What opportunities are there, and which teams should know about them? What is your action plan to resolve these pain points? Keep it at a summary level for a fast share out of key takeaways.
For a broader audience, or to allow stakeholders to go deeper, you could also create a write-up of your analysis and recommendations you came up with, notes captured, photos of the group and the artefacts created on a Confluence page. A great way of sharing this information is in a video walk through of the journey map. Loom is a great tool for this as viewers can comment on specific stages of the journey. This can be a great way to inspire change in your organization and provide a model for customer-centric design practices.
KEEP IT REAL
Now that you have interviewed your customers and created your customer journey map, circle back to your customers and validate! And yes: you might learn that your entire map is invalid and have to start again from scratch. (Better to find that out now, versus after you've delivered the journey!) Major initiatives typically make multiple journey maps to capture the needs of multiple personas, and often iterate on each map. Remember not to set and forget. Journeys are rapidly disrupted, and keeping your finger on the pulse of your customer's reality will enable your team to pivot (and get results!) faster when needed.
Related Plays
Customer Interview
Project Poster
Want even more Playbook?
Drop your email below to be notified when we add new Health Monitors and plays.
Thanks! Now get back to work.
Got feedback?
Drop a question or comment on the Atlassian Community site.
Shared understanding
Different types of teams need to share an understanding of different things.
LEADERSHIP TEAMS
The team has a shared vision and collective purpose which they support, and confidence they have made the right strategic bets to achieve success.
Proof of concept
Project teams.
Some sort of demonstration has been created and tested, that demonstrates why this problem needs to be solved, and demonstrates its value.
Customer centricity
Service teams.
Team members are skilled at understanding , empathizing and resolving requests with an effective customer feedback loop in place that drives improvements and builds trust to improve service offerings.
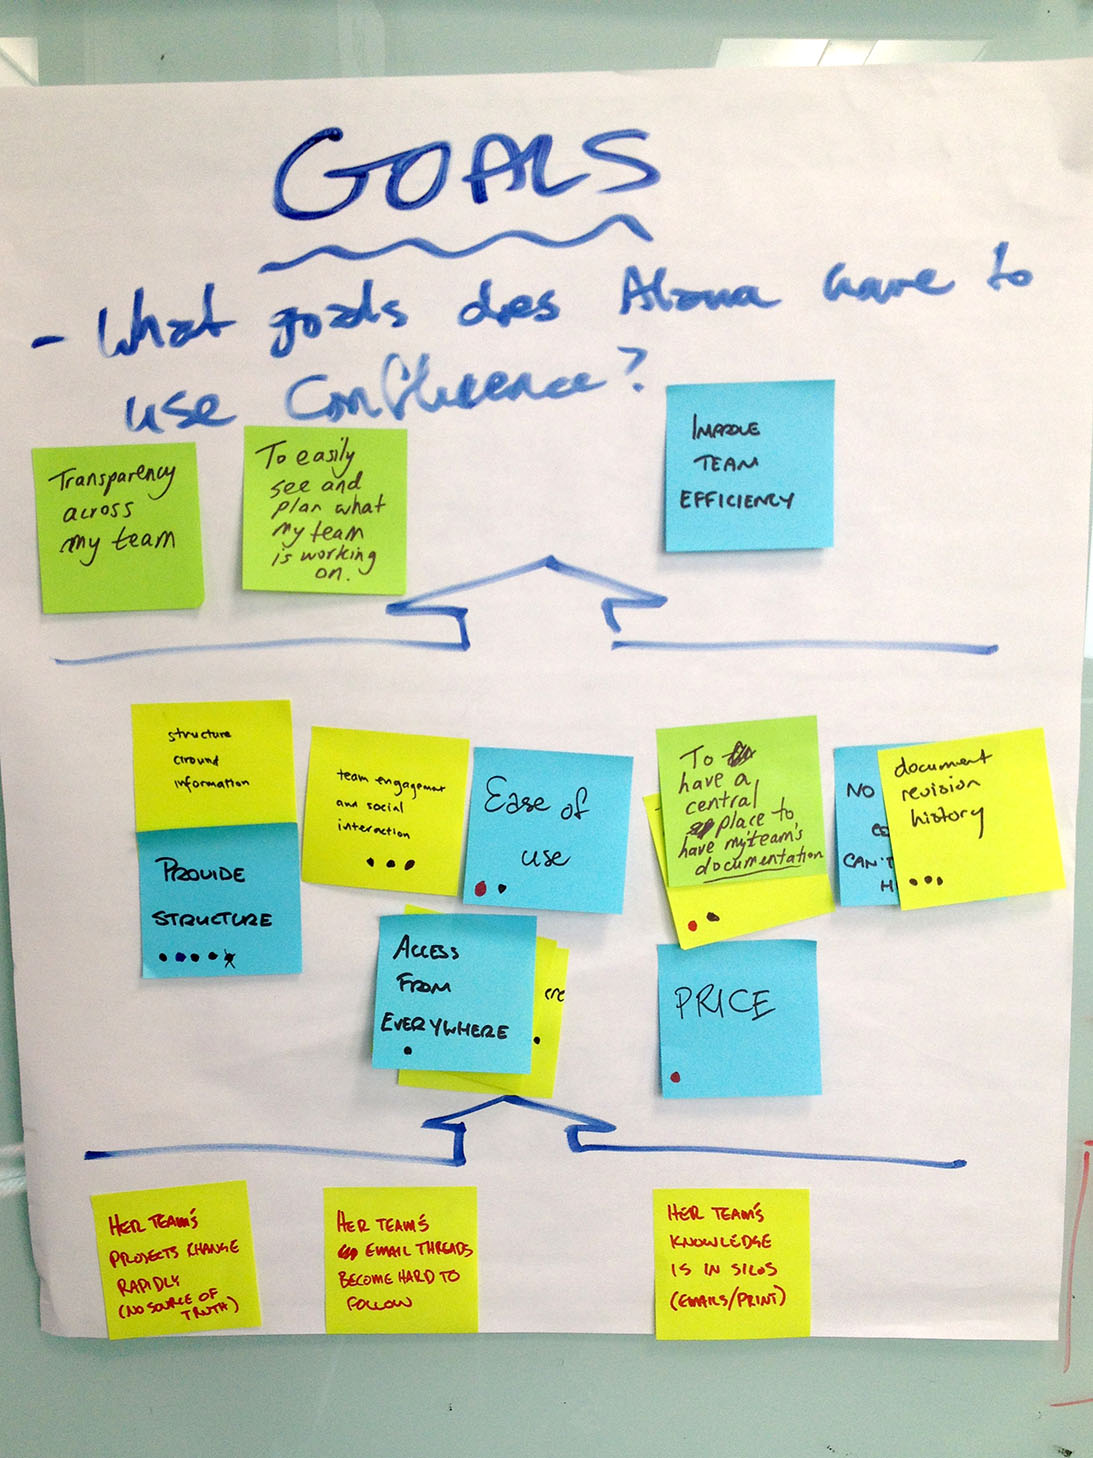
- Get started Get started for free
Figma design
Design and prototype in one place
Collaborate with a digital whiteboard
Translate designs into code
Get the desktop, mobile, and font installer apps
See the latest features and releases
- Prototyping
- Design systems
- Wireframing
- Online whiteboard
- Team meetings
- Strategic planning
- Brainstorming
- Diagramming
- Product development
- Web development
- Design handoff
- Product managers
Organizations
Config 2024
Register to attend in person or online — June 26–27

Creator fund
Build and sell what you love
User groups
Join a local Friends of Figma group
Learn best practices at virtual events
Customer stories
Read about leading product teams
Stories about bringing new ideas to life
Get started
- Developer docs
- Best practices
- Reports & insights
- Resource library
- Help center
How to create an effective user journey map
No matter what you’re working on, the key to customer satisfaction and business growth is understanding your users. A user journey map helps you uncover pain points, explore the touchpoints from their perspective, and learn how to improve your product.
Imagine you just launched a new ecommerce platform. Shoppers fill their carts with products, but they abandon their carts before checkout. With a user journey map, you can pinpoint where the customer experience is going wrong, and how to enable more successful checkouts.
Read on to find out:
- What is a user journey map, and how it captures user flows and customer touchpoints
- Benefits of user journey mapping to refine UX design and reach business goals
- How to make user journey maps in five steps, using FigJam’s user journey map template
What is a user journey map?
Think about the path a user takes to explore your product or website. How would you design the best way to get there? User journey maps (or user experience maps) help team members and stakeholders align on user needs throughout the design process, starting with user research. As you trace users' steps through your user flows, notice: Where do users get lost, backtrack, or drop off?
User journey maps help you flag pain points and churn, so your team can see where the user experience may be confusing or frustrating for your audience. Then you can use your map to identify key customer touchpoints and find opportunities for optimization.
How to read a user journey map
Most user journey maps are flowcharts or grids showing the user experience from end to end. Consider this real-life journey map example of a freelancing app from Figma's design community. The journey starts with a buyer persona needing freelance services, and a freelancer looking for a gig. Ideally, the journey ends with service delivery and payment—but customer pain points could interrupt the flow.
Start your user journey map with FigJam
5 key user journey map phases.
Take a look at another Figma community user journey template , which uses a simple grid. Columns capture the five key stages of the user journey: awareness, consideration, decision, purchase, and retention (see below). Rows show customer experiences across these stages—their thoughts, feelings, and pain points. These experiences are rated as good, neutral, and bad.
To see how this works, consider a practical example. Suppose a new pet parent wants to learn how to train their puppy and discovers your dog-training app. Here's how you might map out the five key user journey stages:
- Awareness. The user sees a puppy-training video on social media with a link to your product website. They're intrigued—a positive experience.
- Consideration. The user visits your product website to preview your app. If they can't find a video preview easily, this could be a neutral or negative experience.
- Decision. The user clicks on a link to the app store and reads reviews of your app and compares it to others. They might think your app reviews are good, but your price is high—a negative or neutral experience.
- Purchase. The user buys your app and completes the onboarding process. If this process is smooth, it's a positive experience. If not, the customer experience could turn negative at this point.
- Retention. The user receives follow-up emails featuring premium puppy-training services or special offers. Depending on their perception of these emails, the experience can range from good (helpful support) to bad (too much spam).
2 types of user journey maps—and when to use them
User journey maps are helpful across the product design and development process, especially at two crucial moments: during product development and for UX troubleshooting. These scenarios call for different user journey maps: current-state and future-state.
Current-state user journey maps
A current-state user journey map shows existing customer interactions with your product. It gives you a snapshot of what's happening, and pinpoints how to enhance the user experience.
Take the puppy training app, for example. A current-state customer journey map might reveal that users are abandoning their shopping carts before making in-app purchases. Look at it from your customers' point of view: Maybe they aren't convinced their credit cards will be secure or the shipping address workflow takes too long. These pain points show where you might tweak functionality to boost user experience and build customer loyalty.
Future-state user journey maps
A future-state user journey map is like a vision board : it shows the ideal customer journey, supported by exceptional customer experiences. Sketch out your best guesses about user behavior on an ideal journey, then put them to the test with usability testing. Once you've identified your north star, you can explore new product or site features that will optimize user experience.
How to make a user journey map in 5 steps
To start user journey mapping, follow this step-by-step guide.
Step 1: Define user personas and goals.
Gather user research and data like demographics, psychographics, and shopping behavior to create detailed customer personas representing your target audience. In your dog-training app example, one key demographic may be parents. What’s their goal? It isn't necessarily "hire a puppy trainer"—it could be "teach kids how to interact with a puppy."
Step 2: Identify customer touch points.
Locate the points along the user journey where the user encounters or interacts with your product. In the dog training app example, touchpoints might include social media videos, app website, app store category search (e.g., pets), app reviews, app store checkout, in-app onboarding, and app customer support.
Step 3: Visualize journey phases.
Create a visual representation of user journey phases across key touchpoints with user flow diagrams , flowcharts , or storyboards .
Step 4: Capture user actions and responses.
For each journey stage, capture the user story: at this juncture, what are they doing, thinking, and feeling ? This could be simple, such as: "Potential customer feels frustrated when the product image takes too long to load."
Step 5: Validate and iterate.
Finally, show your map to real users. Get honest feedback about what works and what doesn’t with user testing , website metrics , or surveys . To use the dog-training app example, you might ask users: Are they interested in subscribing to premium how-to video content by a professional dog trainer? Apply user feedback to refine your map and ensure it reflects customer needs.
Jumpstart your user journey map with FigJam
Lead your team's user journey mapping effort with FigJam, the online collaborative whiteboard for brainstorming, designing, and idea-sharing. Choose a user journey map template from Figma's design community as your guide. With Figma's drag-and-drop design features, you can quickly produce your own professional, presentation-ready user journey map.
Pro tip: Use a service blueprint template to capture behind-the-scenes processes that support the user journey, bridging the gap between user experience and service delivery.
Ready to improve UX with user journey mapping?
D. Nalbandian's Museum Workshop

- Okhotny Ryad • 4 min walk
- Teatralnaya • 4 min walk

Most Recent: Reviews ordered by most recent publish date in descending order.
Detailed Reviews: Reviews ordered by recency and descriptiveness of user-identified themes such as wait time, length of visit, general tips, and location information.
Also popular with travelers

D. Nalbandian's Museum Workshop - All You Need to Know BEFORE You Go (2024)
- Wed - Sun 2:00 PM - 9:00 PM
- (0.00 mi) Hostel Cucumber
- (0.00 mi) Elis
- (0.00 mi) Minsk Hotel
- (0.00 mi) Inga Hotels Moscow
- (0.00 mi) Hermes
- (0.00 mi) Porkys
- (0.00 mi) Moskovsky
- (0.01 mi) D'Tekina
- (0.01 mi) Coffee House
- (0.02 mi) Skazka

Download the free Kindle app and start reading Kindle books instantly on your smartphone, tablet, or computer - no Kindle device required .
Read instantly on your browser with Kindle for Web.
Using your mobile phone camera - scan the code below and download the Kindle app.

Image Unavailable

- To view this video download Flash Player
Follow the author

Journey from Moscow to Constantinople in the years 1817, 1818 (The Eastern Europe collection) Unknown Binding – January 1, 1971
- Print length 272 pages
- Language English
- Publisher Arno Press
- Publication date January 1, 1971
- ISBN-10 0405027591
- ISBN-13 978-0405027598
- See all details

Product details
- Publisher : Arno Press (January 1, 1971)
- Language : English
- Unknown Binding : 272 pages
- ISBN-10 : 0405027591
- ISBN-13 : 978-0405027598
About the author
William macmichael.
Discover more of the author’s books, see similar authors, read author blogs and more
Customer reviews
Customer Reviews, including Product Star Ratings help customers to learn more about the product and decide whether it is the right product for them.
To calculate the overall star rating and percentage breakdown by star, we don’t use a simple average. Instead, our system considers things like how recent a review is and if the reviewer bought the item on Amazon. It also analyzed reviews to verify trustworthiness.
No customer reviews
- Amazon Newsletter
- About Amazon
- Accessibility
- Sustainability
- Press Center
- Investor Relations
- Amazon Devices
- Amazon Science
- Sell on Amazon
- Sell apps on Amazon
- Supply to Amazon
- Protect & Build Your Brand
- Become an Affiliate
- Become a Delivery Driver
- Start a Package Delivery Business
- Advertise Your Products
- Self-Publish with Us
- Become an Amazon Hub Partner
- › See More Ways to Make Money
- Amazon Visa
- Amazon Store Card
- Amazon Secured Card
- Amazon Business Card
- Shop with Points
- Credit Card Marketplace
- Reload Your Balance
- Amazon Currency Converter
- Your Account
- Your Orders
- Shipping Rates & Policies
- Amazon Prime
- Returns & Replacements
- Manage Your Content and Devices
- Recalls and Product Safety Alerts
- Conditions of Use
- Privacy Notice
- Consumer Health Data Privacy Disclosure
- Your Ads Privacy Choices

IMAGES
VIDEO
COMMENTS
Journey-mapping workshop participants talk with customers who have joined their small groups. Their current-state assumption maps hang around the room. Step 3. Evolve the map: Once customers have shared experiences without seeing their team's assumptions, the discussion moves to the wall. Teams walk customers through their assumption maps ...
Day 1: Bring together internal stakeholders from across the company and create journey maps based on your assumptions of your customers' experiences. In an ideal world, you've done some ethnographic research prior to the workshop to provide background information for the mapping activity. Day 2: Bring customers in to validate (or invalidate ...
Here are the steps to organize a virtual user journey mapping workshop: 1. Identify the scope of the workshop. You first need to identify which persona's user journey you want to tackle. Keeping the workshop focused on a specific user journey allows you to dive deeper into the user's experience and emerge with a more fleshed-out journey map. 2.
The user journey map , also known as customer journey map or user experience journey map is a way to visually structure your knowledge of potential users and how they experience a service. Customer journey mapping is also a popular workshop task to align user understanding within teams. If backed up by user data and research, they can be a high ...
On the journey mapping workshop day, block some time to set up the room. Arrange the tables, place printed reference materials on each table. Make sure sticky notes and sharpies all are placed within reach as well. Prepare journey mapping surfaces (e.g., the walls). You might need an assistant or two to do that.
Step 2. Give the context. Yes, you told everyone all the details in advance, but it's time to do it again. Briefly explain key things about the journey mapping methodology. There may be people that have never mapped customer journeys and even seen them. Tip #1: Don't go into the details of each workshop's part.
There are immense benefits to creating journey maps collaboratively in a workshop environment. This approach takes considerable coordination and planning, so communicate expectations to management early on and explain why you need help. One participant recommends, "start with a simple 1-hour workshop with the most important internal resources ...
Depending on the size of your workshop, you may want to break out into smaller groups to focus on each phase. Step 1: Cluster. Begin by clustering insights based on similar or related themes and ideas. Empathy is particularly important during this step, as you have to determine what's most important to your customers at each phase of their journey.
The end goal of the journey should be defined before the workshop begins. Be realistic with timings. Decide whether it is an assumption or research-based journey map. Digital journey maps are important. 1. Have a manageable group size. We had around 30 people in our session, which was a challenge logistically.
Tip #2: For an online workshop, digitize the persona (s) and map (if you have one). For this purpose, you can use either a specialized customer journey mapping tool or any other online software that fits the purpose. Also, compress all heavy images and documents, as their loading can slow down the teamwork at the session.
Preliminary Customer Journey Mapping Work. Before you host a customer journey mapping workshop, it's important to understand who needs to be involved, what tools you'll be using to make your map, and what technology you'll need to host your workshop. Here are a few important steps to take before making your customer journey map.
Join UX expert Sarah Weise for a hands-on workshop in how to plot a journey from research insights to actually getting it down on paper. Sarah explains the benefits and building blocks of journey ...
The User Journey Mapping workshop offers a 90 minute + workshop template that helps your team collaborate virtually and create comprehensive user journey maps. When to use User Journey Mapping Workshop? When building or designing a product for users, user journey maps are incredibly helpful as they allow you to empathize with and better ...
Lesson 5: How to Run a Journey Mapping Workshop. Available anytime after Jun 09, 2024. Estimated time to complete: 1 hour 50 mins. 5.1: Welcome and Introduction (3 mins) Start course now. 5.2: How to Set Up a Workshop (25 mins) Start course now. 5.3: How to Increase Understanding (31 mins) Start course now.
Define the map's scope (15 min) Ideally, customer journey mapping focuses on the experience of a single persona in a single scenario with a single goal. Else, the journey map will be too generic, and you'll miss out on opportunities for new insights and questions. You may need to pause creating a customer journey map until you have defined your ...
Columns capture the five key stages of the user journey: awareness, consideration, decision, purchase, and retention (see below). Rows show customer experiences across these stages—their thoughts, feelings, and pain points. These experiences are rated as good, neutral, and bad. To see how this works, consider a practical example.
It is common that the initial workshop includes many stakeholders, and then the workshop output is taken to different teams, departments and experts to refine and build the maps, with a final workshop to present the final map. Some customer journey mapping projects are simple enough to complete with one or two rounds of stakeholder and expert ...
Introduction. This article will teach you two popular design workshop techniques: empathy mapping and user journey mapping. Empathy mapping is a way to characterise your target users in order to make effective design decisions.User journey mapping is a way to deconstruct a user's experience with a product or service as a series of steps and themes. . Put simply, these methods encourage your ...
A customer journey map is an indispensable design thinking process that will help you do just that! The workshop is divided into 4 parts. In the first part, I spend a little time discussing why businesses who wish to succeed must focus on delivering an ever-improving customer experience. This is particularly relevant in a "post-Covid" world!
MoSCoW Prioritisation 1 Introduction In an Atern project where time has been fixed, understanding the relative importance of things is vital to making progress and keeping to deadlines.
Skip to main content. Discover. Trips
Journey from Moscow to Constantinople in the years 1817, 1818 (The Eastern Europe collection) [Macmichael, William] on Amazon.com. *FREE* shipping on qualifying offers. Journey from Moscow to Constantinople in the years 1817, 1818 (The Eastern Europe collection)
The journey into Russia has been described as the crossing of the boundary from one economic system, Capitalism, into another, Communism. But this description is too simple, for each country has a different type of Capitalism. German Capitalism, which is almost a State Socialism or, as a German banker described it to me, "a Socialist State ...