- Student Successes
- My Learning

How to Take Travel Photos: A Complete Guide
You can also select your interests for free access to our premium training:
Travel photography is one of the most exciting types of photography you can pursue. Combining two of life’s great pleasures—exploring new lands and taking photographs—is a thrill any photographer would enjoy.
While travel photography is open to anyone with the drive to get up and hit the road, there are a few things you need to learn. That’s why we’ve compiled this in-depth article containing everything you need to know about travel photography. We cover everything from camera settings to the best travel gear, so keep reading to find out more.

What Is Travel Photography
Travel photography is simply taking pictures of different places around the world. But good travel photos are not mere holiday snaps. Travel images should show a location in a new light so they’re interesting even for people who have already been there.
Travel photography involves many different styles and techniques. You can incorporate landscapes and portraits into your travel photography. You can even use more advanced techniques like time-lapse and long exposures.
A travel photographer needs to show more than the obvious. They need to explore each location at a deeper level and look for elements that make that place unique and interesting. It isn’t enough to take pictures of the famous landmarks. A travel photographer needs to look deeper and go beyond.
Far-flung exotic locations often hold the most romance for travelers, but you don’t have to go far to practice travel photography. Venturing to new locations is always exciting, but you can also photograph places you’re familiar with. Using your familiarity to your advantage, you can give viewers a deeper view of these locations.
Anyone can shoot travel photography. The first thing you need is a desire to explore the world, which is something you probably already have. But continue reading for everything else you need to know about travel photography, from techniques to gear.
Mastering Travel Photography
While travel photography is open to anyone with an adventurous spirit, mastering the art does require practice, knowledge, and skill.
Firstly, you need to understand your camera and its settings. You might be tempted to take the easy road and shoot in Auto mode. But you’ll get far better results and more interesting and unique images when shooting with semi or fully manual settings.
You should also experiment with composition, and you can try both color and black-and-white photography. These are stylistic choices that’ll give your travel photography a personal touch. You also have to consider specific types of travel photography so you’re ready for anything when you’re on the move.
The following sections cover mastering the art of travel photography. Click the links in the text for more information on each topic.
Camera Settings
When it comes to camera settings for travel photography, there are a few key things to keep in mind. First, make sure your camera is set to the right aperture and shutter speed for the type of photo you want to take. You’ll also need to adjust your white balance and ISO as you move through different locations.
To learn more about camera settings for travel photography, check out camera settings for travel photography .

A travel photography shot list helps you plan and capture the best photos on your trip. Research the location thoroughly, including famous sights, experiences, geography, and lighting conditions. Look at existing travel photos for inspiration, but aim to create something unique.
Use a spreadsheet to organize your shots by day and time, considering factors like sunrise, sunset, and harsh midday light. Include a mix of portraits, environmental portraits, cityscapes, daily life moments, religious sites, festivals, food, transportation, landscapes, close-ups, architecture, night scenes, and wildlife.
Remember to be adaptable and respectful of local customs. With careful planning and a detailed shot list, you’ll be well-prepared to capture stunning travel photos that transport viewers to your destination. To learn more about creating a travel photography shot list , check out this in-depth guide.

Composition
Good travel photography composition captures the beauty and essence of a destination. Use the rule of thirds by placing important parts of your photo on the intersecting points of the grid. Or take advantage of symmetry by centering the axis of symmetry in one direction.
Direct attention with leading lines, using elements like paths or fences to guide the viewer’s eye to your subject. Frame spectacular views with windows or arches to provide context. You can also use bold colors to lead the eyes or balance the composition.
Change your perspective by moving around, kneeling, or shooting from a rooftop. Get close to fill the frame with your subject or step back to include surrounding context. Play with scale by including familiar elements like people to convey the impressive size of large spaces.
To learn more about travel photography composition , check out this in-depth guide.

Black & White
Black-and-white travel photography can be a powerful way to capture the essence of a place. By removing color, you can focus on the light, shapes, and textures that make a scene unique.
Pay attention to contrast and tone in your black-and-white photos. Look for strong shadows and highlights that create depth and drama. Texture is also important in black-and-white photography, so seek out interesting surfaces like rough stone or smooth water.
Most importantly, use black-and-white photography to connect with your subject and tell a story. Whether it’s a portrait of a local person or a landscape that captures the mood of a place, aim to convey emotion in your images.
By developing your own style and vision, you can create compelling black-and-white travel photos that stand out. To learn more about black-and-white travel photography , check out this in-depth guide.

Unique Perspectives
Taking unique photos of famous places can be challenging, but with some creativity and planning, you can capture stunning images. Start by researching the location and scouting out potential spots for your shots. Arrive early to avoid crowds and take advantage of the soft, golden light.
Look for elevated views or unusual angles to create a different perspective. Use composition techniques like the rule of thirds to emphasize the landmark in an interesting way. Including people in your shots can add a sense of atmosphere and tell a story.
Don’t be afraid to experiment with different techniques like light trails or time-lapse photography . If you encounter photography restrictions, think outside the box and find creative solutions. To learn more about capturing unique photos of famous places , check out this in-depth guide.

Documentary Photography
Documentary photography captures real-life events as they happen. It’s a form of visual storytelling that depicts the world around us. Documentary photographers often work on long-term projects to tell new stories through their images.
You don’t need to travel far to find good documentary photography ideas. Look for interesting subjects in your family or community. Focus on the people involved to help viewers connect with the story. You can also tackle big topics by photographing small, local stories related to them.
Visit and scout your locations before the shoot. Get comfortable with the basics of photography, like camera settings and composition. Keep your story personal and critique your work as you go.
If you want to learn more about documentary photography ideas , we have a detailed guide to help you get started.

Train Photography
Train photography offers a diverse range of subjects, from historic steam engines to modern bullet trains. To capture excellent locomotive photos, research train routes and schedules to find the best locations and times. Use natural light to your advantage, with side or backlighting to highlight steam and texture.
Longer focal lengths can compress the scene and show the train in its surroundings. At stations, photograph details like wheels and logos to create atmosphere. Adjust shutter speed for sharp images or creative motion blur, and slightly overexpose for more detail.
For more insights on capturing stunning train photography , check out our full-length article.

Backing Up Photos
It is important to back up photos while traveling, and an external hard drive is a great option. They are compact, durable, and have large storage capacities.
Smartphones and tablets can also be used to manage photos on the go. With the right accessories, they can connect to external storage devices. This allows you to back up and edit your photos without a laptop.
For the best results, use multiple backup methods. This could include an external hard drive, a USB thumb drive, and cloud storage. By having multiple copies of your photos, you reduce the risk of losing them. If you want to learn how to back up photos , check out our in-depth article.

Making Money from Travel Photography
Becoming a travel photographer takes hard work and dedication. You need to learn a wide range of photography skills for shooting everything from landscapes to portraits. Building a strong portfolio of your best travel images is key to attracting clients.
To get your name out there, create a travel website or blog to showcase your work. You can also sell your images on digital platforms like stock photography websites. Selling physical prints of your photos is another great option.
As you travel, look for photography work with local businesses, such as hostels or tourism boards. Capture great travel content and consider offering tours or workshops for extra income.
To learn more about how to become a travel photographer , check out this in-depth guide.
Travel Photography Jobs
Travel photography jobs can be an exciting and rewarding career path for those with a passion for photography and adventure. However, it’s important to understand the challenges that come with the job. You’ll need to have exceptional photography skills, business savvy, and the ability to handle tough physical conditions.
To succeed, you’ll need a strong online presence, including a professional website and active social media accounts. You’ll also need reliable gear that can withstand the demands of travel.
There are many ways to make money as a travel photographer, such as selling prints, licensing stock photos, writing for publications, and teaching. The key is diversifying your income streams and constantly looking for new opportunities. With hard work and creativity, finding paid travel photography jobs can be both fulfilling and profitable.

Get Paid to Travel
Getting paid to travel and take photos is a dream for many photographers. There are several ways to make this a reality. Selling prints of your travel photos through print-on-demand websites is one option. You can also upload your best images to stock photography agencies and earn passive income from sales.
Entering travel photography competitions is another way to earn money and gain prestige. Winning contests can help you promote your work and attract potential clients.
Building relationships with travel magazine editors can lead to regular paid assignments. Learn what they want and deliver high-quality photos to make their jobs easier. To further your success, get paid to travel and take photos by marketing your photography services to people who have the budget to hire you.

Sell Travel Photos
Selling your travel photos can be a great way to make money with your photography. To get started, ensure you have high-quality, well-lit, and properly composed images. They should also be free of technical errors like chromatic aberration and noise.
There are many ways to sell your travel photos. You can sell them through stock photography agencies, directly to clients, or as prints. Each option has its own requirements and markets, so consider your goals before deciding which path to take.
Actively promoting your work is key to maximizing sales. Use social media, email lists, and other marketing strategies to reach potential buyers. If you’re working with a stock agency, ask them what types of images are in demand so you can plan your shoots accordingly.
Learning how to sell travel photos takes time and effort, but with persistence and a willingness to adapt, you can turn your passion into a profitable venture.

Gear for Travel Photography
When packing for a travel photography trip, it’s important to bring the right gear. A lightweight and compact camera body is essential, along with one or two versatile lenses like a wide-angle and a medium telephoto lens.
Don’t forget a sturdy tripod that fits in your luggage for sharp shots in low light. Filters like a circular polarizer and strong ND filter are small but open up creative options when traveling.
Cleaning supplies, extra batteries, memory cards, and rain protection round out the must-haves. With the right travel photography gear , you’ll be ready to capture amazing images anywhere your adventures take you.
Traveling with Camera Gear
Traveling with camera gear can be challenging, but there are ways to make it easier and safer. Use padded cases to protect your equipment from bumps and knocks. A shoulder bag is a good option for keeping your camera close and secure while walking through busy areas.
Always carry your gear in your hand luggage when flying. Most airlines understand the importance of this and are lenient about the weight of your carry-on bag. To deter thieves, hide or remove any camera branding using black duct tape.
Insuring your gear is crucial in case of theft or damage. Take down all the serial numbers and make sure your equipment is fully covered. By following these tips for traveling with camera gear , you can have peace of mind and focus on capturing great photos during your travels.

External Hard Drives
An external hard drive is an essential accessory for travel photographers. Memory cards fill up fast when you’re traveling, and you don’t want to carry a bunch of them around with you. It’s best to take an external hard drive to keep all your photo files in one place.
You’ll need something durable yet compact, which is why we recommend the LaCie Rugged Mini for travelers. It’s an easy fit for any travel camera bag. You have storage options up to 5 TB, and it’s the most durable external hard drive on the market.
See more of the best external hard drives in our full-length article.

If you buy a product through one of our referral links we will earn a commission (without costing you anything). Prices last updated on .
As an Amazon Associate, I earn from qualifying purchases. Product prices and availability are accurate as of the date/time indicated and are subject to change. Any price and availability information displayed on Amazon at the time of purchase will apply to the purchase of this product.
Cameras for Travel Photography
The Canon EOS RP is a great mirrorless camera for travel photography. It’s lightweight, easy to handle, and has a 26 MP full-frame sensor that captures high-quality images in any situation.
The camera’s autofocus system is fast and accurate, even in low light. It also offers eye-detection AF for portraits. The EOS RP can shoot 4K video and has convenient Wi-Fi and Bluetooth connectivity.
This camera is ideal for most travel photography needs. If you want to learn more about the best travel cameras , check out our detailed guide.
Mirrorless Cameras
The best mirrorless cameras for travel are compact and lightweight, but still capture stunning photos and videos. Our top pick is the Nikon Z50 . It has a compact body that fits easily in any camera bag. The 20.9 MP sensor produces bright, vibrant images with excellent low-light performance.
The Z50 is also great for travel vlogging. It records 4K video at 30 fps and has an articulating screen for easy self-recording. Built-in Wi-Fi and Bluetooth make it simple to share your adventures with friends and family back home.
If you want to learn more about the best mirrorless cameras for travel , check out our in-depth guide. We cover a range of cameras for every type of traveler, from beginners to professionals.

Compact Cameras
The Sony ZV-1 II is a pocket-sized camera packed with features for modern travelers. It has a high-resolution 20 MP sensor and a versatile 18-50mm zoom lens. The f/1.8-4 aperture provides solid low-light performance.
Vloggers love the ZV-1 II’s 4K video at 30 fps and the special Cinematic Vlog Setting. A built-in mic and wind muffler make capturing audio easy. Real-time AF with face and eye detection keeps subjects sharp.
The Sony ZV-1 II is the ideal compact camera for travel vlogging. It’s a worthwhile investment for creating exciting content abroad. But we have more options in the link above.

Lenses for Travel Photography
The best travel lenses give you a wide focal range in a compact size. Zoom lenses like the Nikon AF-S DX 18-105mm f/3.5-5.6 are very popular. It has vibration reduction to reduce camera shake and improve low-light performance.
Prime lenses are another good option. They are usually smaller and lighter than zooms. The Canon EF-S 24mm f/2.8 STM is a great example. This pancake lens is ultra-compact but still gives you a versatile focal length.
When choosing the best travel lens , think about the size, weight, and focal length. You want a lens that is easy to carry but still gives you plenty of options. The lenses on this list are all fantastic choices for your next adventure.
Canon Lenses
The best Canon lenses for travel photography are lightweight, versatile, and capture stunning images. Our top picks are the Canon RF 50mm f/1.8 STM and Canon EF 50mm f/1.8 STM . These nifty-fifty lenses are compact, affordable, and great in low light.
Other top choices include the Canon RF 24-105mm f/4-7.1 IS STM for its wide zoom range and the Canon RF 16mm f/2.8 STM for landscapes. The Canon EF 24-105mm f/4L IS USM is a popular all-in-one zoom for DSLR users. It has a constant f/4 aperture and weather sealing.
No matter your camera type, there’s a perfect travel lens for you. Look for a lens that’s light, has a useful focal range, and fits your budget. Canon lenses for travel photography help you capture amazing images around the world.

Nikon Lenses
The Nikon Z 50mm f/1.8 S and Nikon AF-S 50mm f/1.8G are the best Nikon lenses for travel photography. The Z 50mm f/1.8 S offers sharp images and a durable build. It’s great for low light with its f/1.8 aperture.
The AF-S 50mm f/1.8G is compact and lightweight. It also performs well in low light. The 50mm focal length is perfect for street scenes and portraits.
Both lenses are very popular with travel photographers. If you want to learn more about Nikon lenses for travel photography , we have a detailed guide that covers the best options for Nikon mirrorless and DSLR cameras.

Sony Lenses
When choosing the best Sony lenses for travel photography, consider weight, versatility, and image quality. Our top pick is the Sony E 18-105mm f/4 G OSS PZ , offering a wide zoom range, constant f/4 aperture, and effective optical stabilization in a compact design.
For APS-C cameras, the Sony E 35mm f/1.8 OSS is a great low-light prime lens. Its wide f/1.8 aperture and built-in stabilization help capture sharp images in dim settings. The Sony FE 50mm f/1.8 is an affordable and versatile prime for full-frame cameras, ideal for portraits and everyday shots.
Other notable lenses include the Sony FE 24-105mm f/4 G OSS for its all-in-one zoom capabilities and the Sigma 18-50mm f/2.8 DC DN | C for its fast aperture and compact size. To learn more about the best Sony lenses for travel photography , check out our in-depth guide.

Travel Tripods
A travel tripod is a must-have for any photographer on the go. The best travel tripods are lightweight, compact, and easy to set up. They also need to be sturdy enough to support your camera gear.
Our top pick is the K&F Concept Lightweight Travel Tripod . It weighs only 2.4 lb but can hold up to 17.6 lb of gear. The aluminum ball head gives you great flexibility for positioning your camera. And the included carry case makes it easy to take with you anywhere.
If you want to learn more about choosing the right travel tripod , check out our detailed guide. It covers everything from key features to look for to our top recommendations in different price ranges.

Travel Camera Backpacks
When choosing a camera backpack for travel, protection and comfort are key. The best bags are well-designed, roomy, and easy to carry.
Our top pick is the Manfrotto PRO Light Multiloader . It’s sturdy, spacious, and versatile. You can use it as a backpack, duffel, or sling. And it has access from the front and both sides.
The Wandrd Duo Daypack is another great option. It’s made from quality materials that protect your gear from the weather. It has ample storage and the main zipper allows quick access to your camera.
If you want to learn more about the best camera backpack for travel , check out our detailed reviews. We’ll help you find the perfect bag for your next adventure.

Manfrotto PRO Light Multiloader
The Manfrotto PRO Light Multiloader Camera Backpack is a top choice for photographers. It has a sturdy design and plenty of space for your gear.
The backpack is comfortable to wear, even when fully loaded. You can easily adjust it to fit your body.
This bag is perfect for any photography adventure. It’s a worthwhile investment for serious photographers looking for a reliable way to carry their equipment. To learn more about the Manfrotto Pro Light Multiloader, check out our full review .

Think Tank Airport Essentials
The Think Tank Airport Essentials is a camera backpack specifically designed for air travel. It has a smart design, useful features, and fits as carry-on luggage.
This backpack offers secure storage with an efficient use of space and a special lock. The lifetime warranty makes it a one-time investment for years of use.
While it lacks some versatility found in other bags, the Airport Essentials excels at storage capacity, protection, and style. Photographers who want a Think Tank Airport Essentials for their travels will find this bag a great choice.

Weatherproof Backpacks
Protecting your camera gear from the elements is essential. Weatherproof camera bags offer peace of mind when shooting in unpredictable conditions. They feature robust materials and coatings that keep water out, even in sudden downpours.
Our top picks, the Wandrd Prvke , Wandrd Duo , and Lowepro Freeline , have impressive exterior materials that don’t need a separate rain cover. The Prvke’s roll-top design is commonly used in waterproof bags, while the Duo and Freeline include waterproof zippers to secure even the weakest points.
When choosing a weatherproof camera bag , consider not only its water-resistant abilities but also its functionality for your photography style. Look for features like easy access points, ample storage, and comfortable carrying options that suit your needs.

A camera hard case is the best way to protect your photography gear while traveling. The Pelican Air 1525 is our top choice, with its tough exterior and foam-padded interior that keeps your equipment safe and secure. It’s spacious enough for your camera and accessories without being too bulky.
The Vanguard Supreme 46F is another excellent option, especially for adventure travel. It’s waterproof down to 16.5 ft (5 m) and can withstand temperatures as low as -40 C. The customizable Pick ‘n’ Pluck foam interior ensures a snug fit for each item.
For convenience, the Nanuk 935 is hard to beat. Its retractable handle and wheels make transportation a breeze, while the padded dividers keep your gear organized and protected. If you’re looking for a camera hard case that combines durability and ease of use, the Nanuk 935 is a great choice.

Travel Apps
Travel apps can make your photography adventures easier and more enjoyable. Snapseed is a powerful photo editor with a wide range of tools, from basic adjustments to creative effects. It’s free and available on both iOS and Android.
VSCO is another popular editing app that offers a simple, streamlined experience. Its presets are based on real film stocks, giving your photos an authentic vintage look. You can also use sliders to fine-tune the exposure and add fade or grain effects.
When you’re ready to share your travel photos, consider using Spot. This app helps you find picturesque locations and share your own discoveries with other photographers. With detailed maps and tips, it’s one of the best apps for travel photography .
Editing Travel Photos
Editing your travel photos can take them to the next level. There are many techniques you can use to improve your images, from simple adjustments to more advanced processes.
Cropping is a quick way to remove unwanted elements or zoom in on important parts of the photo. Sharpening will make details pop, while noise reduction can clean up high ISO shots. Straightening the horizon line is also important for a polished look.
Other useful techniques include adding a vignette to draw the eye, adjusting saturation and contrast, balancing highlights and shadows, and using digital blending for challenging lighting. For an extra level of refinement, you can even remove unwanted objects.
With practice, you’ll learn which editing steps work best for your travel images. Check out our in-depth guide if you’d like to dive deeper into editing travel photos .
Location Guides
Whenever you’re heading off somewhere new, it’s always best to do some research before you go. Your preparations will be more thorough and more specialized when you have a better idea of what to expect. That means you can hit the ground running when you arrive, and you’ll get better results.
We have a collection of location guides for some travel photography hot spots. These posts give you a head start when taking pictures in these locations, helping you get unique shots in popular places.
Let’s drop in on a few of the hottest locations in Europe, Asia, and the US.
European Cities
Europe is a photographer’s dream, with its stunning architecture, charming villages, and beautiful countryside. From the centuries-old buildings to the cobblestone streets, there’s no shortage of photo opportunities.
Some of the best European cities for photography include Amalfi, Italy, with its medieval stories and dainty houses; Venice, Italy, known for its canals and seafood; and Dubrovnik, Croatia, a seaside location with picturesque houses and Game of Thrones filming locations.
Other notable cities include Prague, Czech Republic, with its historic buildings and Gothic churches; Oia, Greece, with its stunning white buildings and sunsets; and Amsterdam, Netherlands, full of incredible art and historical monuments.
Whether you’re interested in architecture, landscapes, or street photography, these European cities offer endless inspiration. To learn more about the European cities for photography , check out this in-depth guide.

Paris is a photographer’s dream, offering countless opportunities to capture stunning images. From the iconic Eiffel Tower to the charming streets of Montmartre, there’s no shortage of beautiful subjects to photograph.
One of the best spots for photography in Paris is the Trocadero, which offers a perfect view of the Eiffel Tower. The Champs Elysee and Arc de Triomphe are also must-see locations, with the latter providing a great vantage point for capturing the city’s skyline.
Other notable photo locations include the Louvre, with its striking glass pyramid, and Notre Dame Cathedral, which offers both interior and exterior photo opportunities. It’s still striking even after the fire damage.
For a taste of modern Paris, head to La Defense, the city’s business district filled with skyscrapers and unique architecture.
To learn more about Paris photography , check out this in-depth guide that covers the best locations, tips, and techniques for capturing the city’s beauty.

London offers plenty of photography opportunities, from cityscapes to street photography and architecture. Some of the best locations include the Palace of Westminster, where you can capture iconic photos from Westminster Bridge or the south bank of the Thames. Tower Bridge is another well-known site, offering great angles for traffic light trails and sunrise photos.
The London Eye is a newer addition to the skyline, perfect for creative shots like zoom bursts or portraits inside the capsules. Don’t miss the photogenic wrought iron roof at Borough Market or the beautiful exterior of St Paul’s Cathedral.
For stunning views, head to The Shard, the highest skyscraper in the European Union. Buckingham Palace is a must-see, especially during the Changing of the Guard ceremony. If you’re interested in photography in London , these locations are sure to inspire you.

Rome is a photographer’s dream, with stunning architecture, rich history, and vibrant culture around every corner. From the iconic Colosseum to the beautiful Trevi Fountain, there are countless opportunities to capture breathtaking images.
Don’t miss the Vatican Museum, where you can photograph the famous spiral staircase. The Pantheon’s exterior and interior are equally impressive, especially during the blue hour. St. Peter’s Basilica offers great views of the city and a chance to capture the Pope if you’re lucky.
The Tiber River provides picturesque views, particularly from Ponte Sant’Angelo towards St. Peter’s Basilica. Piazza Navona and Piazza del Popolo are perfect for street photography and capturing traditional Roman scenes. To learn more about the best spots for Rome photography , check out this in-depth guide.

Venice is a photographer’s dream, offering endless opportunities to capture its unique beauty. The best time to avoid crowds and oppressive heat is during the low season or early morning. Sunrise at Academia Bridge provides a stunning view of the Grand Canal, while Piazza San Marco is best photographed before tourists arrive.
Don’t miss the iconic gondolas along the waterfront near Piazza San Marco, especially during sunset and blue hour. For a different perspective, head to San Giorgio Maggiore island to photograph the church and Venice’s skyline at golden hour.
Explore the backstreets of San Polo and Dorsoduro districts for charming piazzas, decaying architecture, and canal scenes. Murano and Burano islands offer colorful buildings and glassmaking demonstrations perfect for photography. To learn more about Venice photography , check out this in-depth guide.

Budapest is another fantastic city for photographers, offering endless opportunities to capture stunning images. From the grand architecture of the Hungarian Parliament Building to the thermal baths of Széchenyi, there’s no shortage of photogenic spots in this beautiful city.
One of the best places to start is the Fisherman’s Bastion, a neo-Gothic terrace with breathtaking views of the Danube River and the Pest side of the city. Nearby, you’ll find Matthias Church, a stunning example of neo-Gothic architecture that’s perfect for capturing intricate details and beautiful stained glass windows.
For panoramic views of the city, head to Gellért Hill, where you can capture the entire skyline from the Citadella fortress. And don’t miss the iconic Chain Bridge, which looks particularly stunning at night when it’s lit up against the dark sky. To learn more about the best spots for Budapest photography , check out this in-depth guide.

Japan is a brilliant destination for a photography trip. From stunning landscapes to interesting architecture and fascinating culture, there’s no shortage of inspiration for your travel photography.
Capture the vibrant cityscape of Minato, one of Tokyo’s special wards. Improve your food photography skills at Japan’s many cafés and restaurants, where every dish looks like a work of art. Take adorable photos of tame deer in Nara Park or sharpen your landscape photography in Hakone, with its hot springs, views of Mount Fuji, and gorgeous lake.
Don’t miss the breathtaking cherry blossoms in Japan’s parks during the Sakura season, usually from January to April. Visit the magical Blue Pond in Biei, go on an adventure in Kyoto’s Bamboo Grove, or document the commercial side of Japan in Shinjuku. For more inspiration on Japan photography , check out our in-depth guide.

Tokyo is one of the world’s most vibrant locations, offering a diverse range of subjects to capture. From the bustling streets of Shinjuku and Shibuya to the traditional temples of Asakusa, there’s no shortage of incredible hot spots to explore.
For those seeking modern architecture and vibrant city life, the Tokyo Skytree and Roppongi Hills Mori Tower provide stunning views of the skyline. Harajuku, the heart of Tokyo’s youth culture, is perfect for street photography and capturing unique fashion trends.
If you’re interested in learning more about Tokyo photography , check out our in-depth article to help you plan your trip and find the best spots to shoot. With its mix of old and new, Tokyo is a city that will inspire and challenge you as a photographer.

Etiquette in Japan
When taking photos in Japan, it’s important to be respectful and follow proper etiquette. Always ask for permission before taking someone’s photo, especially if you plan to share it publicly. If you can’t get permission, blur the person’s face to protect their privacy.
Be prepared to show your photos to the police if asked, and avoid using selfie sticks in crowded areas to prevent injuries. In cafés and restaurants, ask the staff for permission before taking photos of your meal.
At night, skip the flash and use a higher ISO and tripod to capture vibrant neon lights. Avoid taking photos in no-photo areas, of children without parental consent, geishas, people on public transport, and those in the middle of prayer. For more tips on photography in Japan , check out this in-depth guide.

Los Angeles
Los Angeles is a street photographer’s paradise. From the colorful Venice Beach boardwalk to the iconic Griffith Observatory, there are endless opportunities to capture the city’s unique character.
The Santa Monica Pier is a must-visit spot, especially in the evening when the lights come on. Echo Park offers stunning views of the skyline, particularly at sunrise or sunset.
Downtown LA is full of hidden gems like the Bradbury Building with its intricate architecture and the bustling Grand Central Market. For a taste of old Hollywood glamor, head to Union Station or the Hollywood Bowl Overlook. Places for street photography in Los Angeles are as diverse as the city itself, so grab your camera and start exploring.

New York City remains one of the most popular locations for photographers, with countless iconic locations to capture. Central Park offers a variety of scenes, from the Bethesda Terrace and Fountain to the Alice in Wonderland statue. The Brooklyn Bridge is another must-see, with its stunning suspension cables and brick towers.
Grand Central Station and the Chelsea Market are great for street photography and architectural details. Rockefeller Center provides both street-level interest and panoramic views from its observation deck.
Of course, no trip to New York would be complete without photographing the Empire State Building and the Statue of Liberty. For breathtaking cityscapes, head to Brooklyn Bridge Park or find a unique vantage point to capture the Manhattan skyline. Don’t miss the Flatiron Building and the vibrant energy of Times Square.
To learn more about the best spots for New York photography , check out our in-depth guide.

Photography Road Trip
Planning a road trip for photography involves choosing the right vehicle, deciding on accommodation, and mapping out your route. Your vehicle should be safe, comfortable, and suitable for the terrain you’ll encounter. Living out of your vehicle, like an RV or camper van, allows you to stay closer to photo locations and immerse yourself in nature.
When planning your route, prioritize the locations you want to photograph. Research potential spots using apps and websites like Pinterest, 500px, Flickr, and Google’s My Maps. Plot your route, campgrounds, points of interest, and photo locations to make the most of your trip.
Electricity is essential for photographers on the road. Ensure you have reliable power sources, such as a dual battery system, solar panels, or a 12v inverter. Always carry a power bank as a backup. To stay connected, use local SIM cards with data or take advantage of Wi-Fi at cafes and fast food outlets.
By planning your shots in advance and considering factors like lighting, crowds, and unique perspectives, you can capture stunning images that tell the story of your road trip photography adventure.

Inspiration from the Best Travel Photographers
Travel photography captures the adventures and locations you visit during your journeys. It involves many genres like landscape, architecture, street, and environmental photography. Travel photographers often tell stories through their images, focusing on special moments and atmospheres.
There are many approaches to travel photography. You can focus on people, take self-portraits, emphasize landscapes, or try aerial photography. Mixing these approaches can result in a unique style and help you gain recognition as a travel photographer.
If you’d like to learn more about travel photographers , we have an article that goes into greater depth on the topic.
Travel Blogs
Travel photography blogs are a great source of inspiration for your next adventure. They feature stunning images from around the world and provide useful tips for capturing your own travel photos.
Some of the best travel photography blogs cover a wide range of topics, from destination guides to photography tutorials. They showcase the work of talented photographers who have explored every corner of the globe.
Whether you’re planning your next trip or simply looking for some armchair travel, these blogs are sure to inspire you. To discover some of the best travel photography blogs to follow in 2024, check out this list of top picks.

The leading authority in photography and camera gear.
Become a better photographer.
12.9 Million
Annual Readers
Newsletter Subscribers
Featured Photographers
Photography Guides & Gear Reviews

Travel Photography Tips, Ideas, Examples & Jobs
Have a passion for travel photography but not sure how to take it further? This post covers careers, what gear is best, and tips for improving!
Learn | Photography Guides | By Ashley Darrow
Travel photography is one of the most exciting styles of photography, but it can also be one of the most intimidating to get started with.
I’m at my most inspired as a photographer when I’m on the road.
Even when I’m not headed to an exciting new location, I’ve started to think about all of my photography from the standpoint of travel.
This guide is going to give you everything you need to know to get started with travel photography.
I’ll be covering everything from the basics, to the equipment you need, to 20 travel photography tips that will improve how you approach taking photos.
When you’re ready to hit the road, we’ll start our adventure with some travel photography 101.
Table of Contents
What Is Travel Photography?
Defining travel photography can be a little bit challenging as this is one of the most open and free categories of photography.
In general, travel photography involves documenting people, landscapes, and cultures anywhere in the world.
Your travel photography counts whether you have to hike for thousands of miles or you took a 10-minute bus ride from your home.
Travel photography can be done by career professionals working for major magazines like National Geographic or it can be done as part-time freelance work.
Many travel photographers make their money by taking contract work from tourism departments or brands looking for product photography shot on location.
Travel photographers often find themselves working in challenging conditions. There’s a good chance that you’re going to be snapping pics in low light conditions , rough weather, or even half a world away from the comfort of your own bed.
- Related: 77 useful travel tips for photographers
What Does Travel Photography Include?

Image Credit: Sam Forson
Travel photography incorporates countless different styles.
Travel photographers often take landscape photographs, architectural photographs , as well as street photography. It’s also common to see food photography and documentary work being done by travel photographers.
As a travel photographer, your goal is to capture and express the story of a particular time and place. You’ll be giving people a taste of what’s happening in the moment while you’re in a particular location.
How Much Do Travel Photographers Make?
Travel photography is made up of a wide range of styles, but it’s also made up of a wide range of pay rates.
If you’re lucky enough to land a staff photography job with a major magazine, you could wind up with a six-figure salary. However, freelance travel photographers can make as little as around $18,000 a year.
Beginner travel photographers often make even less than that as they start to piece together their career.
Part of your pay as a travel photographer will come in the form of comped travel expenses. It’s pretty common for travel photographers to take a job with a tourism department that includes free transportation and lodging as part of their payment.
Is travel photography in demand?
Travel photography is in high demand.
How Much Do You REALLY Know About Photography?! 🤔
Test your photography knowledge with this quick quiz!
See how much you really know about photography...

Your answer:
Correct answer:
SHARE YOUR RESULTS
Your Answers
This demand is being driven by tourism departments, brands looking for more engaged lifestyle photography , and the rise of social media making travel photography a viable path for a content creator.
There are more people taking travel photos than ever before which means that you’re also going to have a lot more competition despite there being more job openings.
How Do I Become a Travel Photographer?

Image Credit: Kamaji Ogino
Becoming a travel photographer is pretty similar to how you would start up almost any photography career.
If you’re a total beginner, you want to start by mastering the craft of working behind the camera. This means learning how to stay in control of your exposure, frame captivating shots, and just get comfortable taking pictures wherever you go.
Here’s a basic outline of the steps you’ll take to start your travel photography career.
- Learn your photography basics
- Identify your travel photography niches
- Build your portfolio
- Grow a social media presence
- Begin reaching out to clients
- Publish your photography
- Grow your business by reaching out to bigger clients
- Continue to promote your work
- Have fun traveling!
I should note that plenty of travel photographers also crowdfund parts of their career.
Building a presence on social media sites like YouTube and connecting that to your crowdfunding platform of choice is a great way to bring in some additional money.
What Equipment is Needed for Travel Photography?

Image Credit: Hiren Lad
In all my years of photography, the one thing I’ve learned is that if there’s anything photographers love nearly as much as taking pictures, it’s talking about their gear.
Whether you see this equipment as the tools of your trade or the raw materials of your art, you’re going to need some equipment to get started with travel photography.
I’m going to cover the standard gear that most travel photographers will gravitate towards, but I’ll also be talking about different setups for film photographers and mobile photography.
I’m going to kick things off with the absolute must: a camera.
You’re not going to get very far in your career as a Travel Photographer without a camera. I’m being a little silly here, but it’s not just as simple as picking up any random mirrorless camera for travel blogging .
So, what camera is best for travel photography?
The absolute best cameras for travel photography are going to be, no surprises here, the latest mirrorless releases from the big-name brands like Sony, Camera, and Nikon.
Those cameras are packed full of the latest features and offer some of the best image quality.
You can also get amazing results, and save money, by picking up older cameras. My Sony a7s II is still my main camera body and my Canon 5D Classic, which was released way back in 2005, still takes pictures that get people asking me “How did you do that?”
You don’t need to spend a lot of money on your travel photography camera. A skilled photographer will be able to take amazing pictures using a point and shoot digital camera from the 90s. It’s craft that makes the photographer, not gear.
Travel photography can also be done with your smartphone. There are plenty of professional photographers out there primarily shooting on smartphones.
I also want to highlight film cameras. Film is the historic origin of our art form. Any film camera from a toy lomography camera to a professional large format camera can help us see our travels in a new way.
With all of that said, there are a few important features that you should look for in a travel photography camera.
- Weather sealed designs are much more important when you’re trekking through unknown territory than when you’re at home in the studio
- Your camera should also be ready for the road. Just like your car, you should take your camera in for a tune-up before a long trip
- Double-check for the specs that matter most to you. For me, that’s low-light performance and color science
Your camera is only half the equation which means we need to take a look at the lenses that will be going on this journey with you.
- Related: How to choose a camera and what is the best camera for travel photography?
I bet you’re wondering which lens is best for travel photography? You don’t need to worry, I’ll walk you through my top pics for a travel lens whether you’re shooting on a brand-new Sony mirrorless camera or you plan on taking a Canon 5D Classic on the road.
The first place you need to start is by asking yourself the most essential question in photography: What types of pictures do I plan on taking?
Here’s a quick breakdown of my recommendations for travel photography lenses based on my experience for a variety of photographic styles and budgets.
- Standard Zoom Lens —A standard zoom lens like the classic 24 to 70mm is the go-to travel lens for so many photographers I know. This lens easily handles street photographs, landscapes, and portraits. Pick this to make a flexible one-lens kit
- Wide Angle Zoom Lens —Wide angle zooms are better suited for photographers who know they’ll be shooting landscapes and architecture. If your wide angle zoom goes up to 35mm, then you can even get away with using that as your every-day lens
- Wide to Telephoto —These lenses have focal length ranges like 24 to 105mm. They are usually affordable alternatives to pro-level lenses that can still capture stunning images. You’ll want this lens if your main concerns are budget and stylistic flexibility
- Telephoto Zoom Lenses —These massive lenses typically top out at 200mm or 400mm focal lengths and are ideal for wildlife, bird, and sports photography. Their size, weight, and cost make them less flexible than other options, but these lenses are a must-have for photographers interested in the styles I just mentioned
- Pancakes and Nifty Fifties —Pancakes lenses have such a small profile they double as a body cap while the iconic Nifty Fifty is a budget 50mm with a huge fanbase. These lenses are perfect for photogs who want to stay ultralight or for anyone who wants an emergency backup lens.
- THAT lens —We all have a lens that, despite never getting much use, we just can’t seem to leave at home. Mine is the Helios 44-2. I take that lens on pretty much every trip even if it doesn’t get much use. Allow yourself a little room for that “fun” lens and you might be surprised by how much use it gets over time
I always have at least two lenses on me when I’m traveling—just in case.
I once dropped an expensive prime lens and watched it roll off the edge of a mountain in the desert. Luckily, I had a pancake lens in my bag so the photography trip wasn’t a total loss.
Ever since then, not only do I treat each of my lenses with the utmost care, but I also make sure but I’ve got backup options on hand.
- Related: How to choose a camera lens and best lenses for travel photography .
Travel Photography Bag
Just like with lenses and camera bodies, you have a few options to consider when it comes to picking the right travel bag for your next adventure.
Before I get too far into talking about camera bags, here’s the five things I always consider when I’m packing a bag for my next trip.
- Camera Bag Size —Size is one of the most important things to look at when shopping for a new travel photography bag. You want to find a bag that’s going to comfortably fit all of your equipment without causing too much strain on your back. Sling bags are great for days out in the city with light gear, but you should look for a comfortable backpack if you plan on covering some serious distance with your gear
- Pack Weight —Here’s a quick piece of advice I picked up from hiking. Your maximum pack weight should only ever be 20% of your total body weight. This means that if you weigh 200 lb, the heaviest your camera bag should ever be is 40 lb. The lighter, the better
- Features —There are some features that I consider an absolute must have in any of my travel camera bags including rugged build quality, plenty of padding and protection for my gear, and easy access to at least my main camera body and lens so I can shoot on the fly
- Style —You could buy the most technically perfect travel camera bag, but if you don’t actually like the way it looks you’re never going to take it on a trip. I definitely believe that form should be second to function when it comes to camera bags, but I’d also be lying if I said it wasn’t a huge factor in my camera bag purchasing decisions
- Your Gear —Your gear is actually going to dictate the type of bag that you’ll be looking for. A travel photographer shooting on a Leica Q2 can get away with a much smaller bag than a photographer shooting with a Canon 1DX
I also typically bring a packable backpack with me as part of my kit. This could be a really lightweight sling bag or something like the Lowepro Runabout.
This lets me leave the bulk of my gear at my hotel when I just want to have a quick trip around a new city taking pictures.
- Related: How to choose a camera bag
Tripods for Travel Photography
Tripods are an interesting—and somewhat contested—piece of the travel photography puzzle. I never used to take a tripod with me while traveling and that’s because most of my photography was shot street style which means lightweight and handheld.
However, the more I get into film photography and more interesting exposures, the more I find myself relying on my travel tripod.
My absolute number one pick for an adventure tripod would have to be the Peak Design Travel Tripod . It’s fairly lightweight, intelligently designed, and packs down small enough to fit in most of my bags.
Depending on the type of photography you’re looking to capture, you can also use tripods like a gorilla pod or even just take the tripod you have—even though it might be a little larger and heavier than would be ideal for travel.
This roundup of the 7 best travel tripods is a great place to get started if you’re shopping for something designed for the road.
Do I Need a Tripod for Travel Photography?
I’m going to dig into this mild controversy for just a moment. The question of whether or not you need a travel tripod to begin with is the source of some debate for photographers.
Honestly, the answer is maybe. It really depends on the type of pictures that you’re hoping to capture and your personal style as a photographer.
If you like to run and gun while capturing slices of life on busy city streets, you probably don’t need to bring a tripod with you.
Styles of photography that are highly mobile and rely on fast composition changes typically ditch the added stabilization that a tripod brings because it just slows them down too much.
Tripods might also not work for certain events and organizations. Trying to set up a tripod during a rock concert is a recipe for disaster and some museums won’t even let you bring in a tripod unless you pay their professional photography fees.
Then again, there are a few types of photography that absolutely need a tripod in order to work. Long exposures, shooting in dimly lit situations, and using some telephoto zoom lenses pretty much mandate shooting on a tripod.
The long and short of this is that owning a tripod and learning how to use it will make you a better photographer, but it’s not quite a mandatory piece of your travel photography kit.
The Camera Accessories I Always Forget for Travel Photography!
There are so many small accessories that are vital for digital photography that I find myself constantly forgetting. Far from being little odds and ends, these are essential parts of my kit that I’ve started to just leave in my travel bag so I never have to worry about packing them.
I’m talking about SD cards , microfiber cloths, sensor cleaning kits, and all those other little things that you might not miss until you’re in the field and you’ve got a speck of sand on your sensor ruining your shots.
I’ve started making a checklist that contains all these little items before I pack out. There’s nothing more defeating than being in some beautiful destination and realizing you only have enough space on your memory card for a few dozen more shots.
This is the checklist that I use for your average trip. Feel free to adjust things based on the gear that you use.
- Sensor cleaning swab x 2
- Lens cleaning Spray
- Microfiber cloth
- Spare camera batteries for each camera
- Memory cards—one in each camera, extra in the bag
- External SSD if I’ll need to backup files while traveling
- iPad for editing, emailing, and posting pics on socials
- Camera strap
- Camera body cap and rear lens cap
- Remote shutter release
- Chargers and cables
Lighting for Travel Photography
Lighting is a bit of an interesting topic when it comes to travel photography. We don’t often associate this incredibly mobile genre of photography with the piece of equipment that defines studio work, but there’s some great reasons to take some lights with you on your next trip.
Photographers like Briscoe Park are doing incredible work mixing bold, almost giallo, lighting styles with travel photography. There’s also a wealth of photographers using the dark nights of remote locations as canvases for their light paintings.
I started taking a few small lights with me when I hit the road and it’s definitely pushing my abilities behind the camera.
Lights like the Aputure MC and MC Pro are great for adding lights to portraits, throwing splashes of color into images, or creating other-worldly scenes. The Infinibar or MT Pro, also from Aputure, are solid choices for light painting .
Even something small like the Lume Cube can help gain control over lighting while away from the studio. Just don’t try to haul around your old tungsten lights on your next trip!
Mobile Travel Photography Gear
Before you start thinking travel photography requires a mountain of expensive equipment, you might be reading this article on the only device you need to get started with travel photography.
That’s right, smartphone cameras have come a long way and they are perfectly capable of being your main camera body for traveling adventure photography .
Even though your smartphone is essentially a pocket camera that can surf the internet and make phone calls, you still might want to add some extra gear to make the most out of being a mobile travel photographer.
My biggest recommendation would be to pick up a Moment smartphone case and a few Moment lenses.
These lenses will dramatically change your composition and help make your images look a bit more professional and a bit less like a quick shot on a smartphone.
A lightweight Gorillapod, a photo editing app like Lightroom mobile, and a power bank to keep you charged are a few must-haves.
This might sound a little unconventional, but my smartphone is one of the cameras I use the most. It’s lightweight, can take high quality pictures, and it can be a great budget alternative to expensive cameras because you probably already own one.
I almost never leave the house without throwing one or two Moment lenses in my bag. This is true whether I’m going on a 10-minute walk to the store or I’m about to hop on a 10-hour flight.
Travel Film Photography Gear
Is there any sound more relaxing than the shutter of a film camera when you’re deep in the woods or on top of a mountain ridgeline?
I don’t think so and that’s one of the reasons why I tend to travel with film photography equipment.
Film photography is almost a completely different animal than digital photography. You have to be much more engaged with your subject, composition, and exposure since you only have a few frames before your roll is spent.
Here’s a quick list of the film photography gear that I travel with. Just as a quick note, I’m leaving out things like tripods and camera bags that overlap with digital photography.
- Gallon zip-top bag to store film
- Permanent marker to jot notes on the side of a film canister
- Light meter
- Film (I always try to bring one more roll than I think I’ll need—just in case)
Read our guide to film photography for more tips.
20 Tips to Help You Improve Your Travel Photography
Want to improve your travel photography? I’ve put together 20 travel photography tips to help you up your game the next time you take your camera on vacation.
These tips are going to cover everything from advice for total beginners to some really interesting things that caught me by surprise while I’ve been on tour with my camera.
Tip 1—Get Comfortable With Your Gear Before You Travel

Image Credit: Amar Preciado
This is my number one tip for travel photography because it applies to experienced photographers as well as beginners. Before you head out on your big trip, take some time to get comfortable with your equipment.
This means packing your camera bag just like you’re going to for your travel photography trip and wearing it around your home city or just walking around your neighborhood.
There’s nothing worse than being hundreds, or thousands, of miles from home only to find out that you actually don’t like that brand new camera bag you bought.
Giving all of your gear a comfortable trial run ahead of time ensures that you don’t run into any sudden surprises while you’re traveling.
I’ve started doing this with all of my travel photography gear and it’s hard to express just how much it’s helped me. Most of the time I’m just adjusting my backpack to make sure it’s got a comfortable fit for a long day of hiking, but there have also been times where I realized that piece of my equipment just wasn’t right for me.
This will also help make things easier when you’re out there taking pictures.
It can be a little stressful to try and line up the right composition in a busy downtown neighborhood of a foreign city. Knowing your gear inside and out will give you a huge confidence boost when you need it the most.
Tip 2—Set Your Travel Photography Intentions
This might seem like a silly question to ask, but why do you want to do travel photography?
Setting some intentions and being aware of your goals ahead of time is going to help improve your career as a photographer.
If you need some inspiration for your goals, here’s a few that I’ve used in the past.
- Have at least 5 new pictures that I can turn into prints once I’m home
- Spend two days on location, day one focuses on lifestyle photography while day two is all about landscapes
- Get out of my comfort zone and network with other travel photographers shooting the same location
Remember that goals are a lot like onions. They have layers.
Your ultimate goal might be to become a world famous travel photographer with National Geographic calling you every day, but you’ve got to start somewhere.
Let’s say that your goal is to start getting freelance travel photography contracts with tourism departments. You can start from scratch by pretending that you’re on contract to take photos of a particular location.
This will help you with your future goals as well as allow you to build your portfolio in the now.
Tip 3—Always Bring (Your) Camera

Image Credit: Ketut Subiyanto
Everything starts with the ABCs and for travel photographers this means to Always Bring (your) Camera and always be taking pictures.
You really never know when the right moment is going to strike for your photography. There have been countless moments where I wish I would have had a camera on me to capture a moment that was either beautiful or could have even been historic.
Whether you’re carrying your main camera body, a pocket camera, or even your smartphone, you should always have a camera on you when you’re traveling. Be ready to start snapping pics at a moment’s notice if you spot something that catches your eye.
Worst case scenario, you’ve got another few hundred pictures to sort through when you get home. Best case scenario, you’ve caught the once-in-a-lifetime shot that you might have otherwise missed.
Tip 4—Be Patient with Your Shots
Here’s something that’s happened to me nearly every single time I’ve gone on a travel photography trip.
I’ll be at a historic ruin or in a national park with the perfect shot framed only for there to be dozens of other tourists cluttering up my shot.
When I first started with photography, I didn’t have enough patience just to wait it out. I thought that I would have to spend hours standing at a particular spot waiting for people to disperse.
As it turns out, the longest I’ve really ever had to wait for a shot to clear up has been about a half hour. If you’ve got someone to talk to or a book to read, that’s no time at all.
Don’t pass up on the shots that you want to capture just because there’s something cluttering your frame. Patients will reward photographers every single time.
Pro travel photography tip: Using an ND filter on your camera can let you lower your shutter speed which will cause fast-moving cars and people to “vanish” from your shots!
Tip 5—Learn How to Photograph People
This travel photography tip can be one of the most challenging to incorporate. Getting comfortable cold approaching strangers takes a lot of social energy.
I know extroverted photographers that have a dozen model release forms printed and ready to go in their backpack. They have no problem chatting up strangers, but it took me some time to build up that confidence.
Here’s a quick template that you can use for approaching strangers for portraits.
Be cheerful and open about being a photographer. You can say something like “I’m a photographer taking portraits today in [Location] and I’d love to take your picture.”
If you’re on a freelance contract or working for a client, feel free to name drop them to give yourself some added credibility.
After snapping their pic, I like to give people my business card, email, or Instagram handle so they can contact me later if they’d like a copy of their photo.
If they say no photos, that’s just business.
It also really helps if you can speak just a little bit of the local language. You’ll be shocked how much more accommodating people can be if you can handle a few lines of the local tongue.
Tip 6—Study Local Laws and Customs
Photography laws and customs are different the world over. As a travel photographer, you’re going to need to familiarize yourself with local laws and customs—especially when you’re traveling abroad.
Remember that the letter of the law and the local customs might not necessarily be a one-to-one match.
I’m based in the United States and here it’s perfectly legal to take pictures of strangers as long as you’re in a public location. However, social customs dictate that it’s considered rude to take someone’s picture without asking their permission first.
When in doubt, always default to asking permission first. This means asking someone’s permission before taking their portrait or asking permission before taking pictures at a historic site or museum.
Tip 7—Get in Frame

Image Credit: Dominika Roseclay
This is something I’m still working on becoming more comfortable with.
When I’m in the studio, I’ve got no problem hopping in front of the lens and doing some self-portraiture. However, once I’m out in the field I’m a little bit reluctant to stand in as my own model.
Travel photography is about telling your story. This means that you’re going to need to get in frame for some of your photographs.
Even if it’s just a few shots of you setting up, traveling to your destination, or getting dinner after a long day of shooting, people want to see the photographer behind the camera.
If you’re traveling with other photographers, why not consider making this a game? Challenge each other to see who can take the most interesting photos of your fellow photographers.
You can even take some quick selfies on location to contrast your professional photography. This will make your self-portraiture a little more intimate and warm while your travel photos show off your full talent.
Tip 8—Scout Travel Photography Locations with Your Smartphone
A great way to dramatically improve your travel photography is to scout your locations ahead of time. Before you haul all of your gear on a quest for the perfect photo, go out there with just a day pack and walk around soaking up the scenery.
Location scouting gives you a strong understanding of what speaks to you as a photographer about this location before you even start pressing the shutter button.
I recommend carrying your smartphone or a point-and-shoot camera when you’re out scouting locations.
This lets you take some test shots of a travel location before bringing all your gear out.
Tip 9—How to Always Pack the Right Lenses
I used to be so worried about not bringing the right lenses on a trip, but it’s been years since I’ve felt like I picked the wrong lens for the job.
Part of this is knowing your lenses inside and out. You should learn the basics of your lenses like aperture, how their focal length compresses an image, and which focal lengths are ideal for different styles of photography.
Lenses like the Sony FE 24-70mm f/2.8 make a great choice for travel. The focal length options on that lens easily handle majestic landscape panoramas and street photography portraiture.
I also recommend taking at least two lenses with you for most travel photography trips. I’ll take one primary lens with me that I plan on doing most of my shooting with and a secondary lens for those “just in case” moments.
Tip 10—Staying Safe While Traveling with Camera Gear
Being a tourist always carries some risk when it comes to crime. Being a tourist that happens to be carrying $3,000 in photography equipment carries a little bit more risk.
Here’s a few tips that I stick with when it comes to staying safe while shooting with expensive camera equipment.
If you can, try to do your travel photography with a group. Even if you have one other person traveling with you, that company is usually more than enough to deter most would-be thieves.
This might seem a little obvious, but you always want to keep your gear in sight. Unless I know I’m alone in the wilderness, my camera bag is never further than an arm’s reach away.
I’ve got a tip for you that I don’t see a lot of people talking about when it comes to traveling safely with your camera equipment. I like to stay discreet when I’m traveling with my camera gear.
This means I leave the branded Sony strap at home and opt for a much more neutral Peak Design strap . I also throw a velcro patch over things like the LowePro logo on my backpack that might otherwise announce that there’s some expensive camera equipment in there.
If you stay smart and aware of your surroundings, your odds of having an unfortunate encounter while carrying camera equipment will be greatly reduced.
Tip 11—Shoot Some Short Format Video
We’re all photographers here. This means I can be a little honest with you about shooting short form video.
It might not be your main stay, but social media platforms are putting a lot of emphasis on TikTok style videos. If you can incorporate a little short form videography into your travel photography routine, you’ll have that much better performance online.
There are countless ways that you can build short form video production into your photography routine. You could record a 60 second video demonstrating your setup for the shot or even just an interesting voice over on top of a still image.
Shooting short videos can also be fun. Building this into your photography routine is a great way to improve your skill set while you’re also increasing your social media following.
Tip 12—Find Your Voice by Getting Lost
Some of the best travel photography stories happen because you get lost. Getting turned around is a great way to change your perspective on things and improve you or travel photography.
This is easily one of the most underrated travel photography tips. Best of all, you can do this from the comfort of your hometown.
Try getting lost on purpose by walking through a neighborhood you don’t usually go to or checking out a city that you might have otherwise overlooked.
While all the other travel photographers are gathered at the tourist traps we’ve all seen a thousand times on Instagram, you’ll be exploring something new while catching refreshing pictures of your travels.
Tip 13—How to Fly With Film
If you plan on doing some film photography while you’re traveling, you’re going to need to know how to transport your film while traversing through airports safely.
The x-rays used in airport security scanners can damage undeveloped photographic film. The more x-rays undeveloped film is exposed to, the more haze and distortion starts to pop up on the final image.
Film with an ISO 800 and above can be damaged by any airport X-ray machine. Expired and experimental films can also be damaged by x-ray equipment.
Some airports now use more powerful CT scanners. These are often used for checked baggage, but they can also be used for carry-on as well.
CT scanners put out enough x-ray radiation to damage film of any ISO. You should always bring your film with your carry-on luggage in its own zip-top bag.
When you’re traveling through security at an airport, you can ask the security personnel for a hand examination of your photographic film. In my experience, they almost always say yes no matter how busy the airport is.
However, it is at the discretion of airport security and I have had them turn down a hand examination of my film. One trip through an X-ray scanner won’t damage your film, but multiple trips will.
This is why I recommend buying film on location if possible. You can also have film mailed to your hotel or to a friend’s address who lives near where you’re traveling.
Tip 14—Become a Traveler at Home
Traveling is expensive and it’s not always available for us. However, this doesn’t mean that you have to stop your travel photography plans.
If you’re looking for the true zero-budget way of starting a travel photography career, you have to start in your home city.
While this might not seem exciting at first, keep in mind that the city that you live in is an exotic travel destination for someone else.
Try using all of the travel photography tips and tricks I’ve talked about in this article while taking pictures of your home city. Even if you live in a sleepy little town, there are compelling stories that you can tell by documenting the life and history of the place you live.
Tip 15—How to Find Travel Photography Inspiration
No matter what style of photography you’re in, it’s easy to get stuck in a rut. What should you do if you’re running out of inspiration before your next big travel photography trip?
Here are five quick ways I stay inspired and motivated as a photographer.
- Start following more photographers on social media to see what other people are doing
- Research historic photographers and get inspired by how they were shooting when our medium was still new
- Check out international photographers to see how people are shooting across the world
- Get experimental by looking into the weirder side of photography with things like film soup or databending
- When I’m heading to a new location, I like to look at the history, upcoming events, and what photographers are shooting for that local
Tip 16—Turn Regular Trips into Travel Photography Trips
If you’ve always got your camera with you, and you’re always shooting, every trip you go on is a travel photography trip.
A great way to stay active as a travel photographer who has yet to break into the full-time business is to transform every trip you go on into an opportunity for travel photography.
Whether you’re heading across town for a family dinner or going on a work trip, you’ve got an opportunity to do some trouble photography.
Not everything has to be a grand adventure. You could use that trip across town as an excuse to work on catching shots of yourself in transit, for example.
Tip 17—Becoming a Better Photographer
Every photographer has an area that they can improve on. Whether you’ve always wanted to be one of those photographers who only ever shoots on full manual mode or you’ve been hoping to add sports photography to your travel routine, now’s the time to start working on those skills.
Skills building exercises can be a great activity during your travel photography downtime. You’re not always going to be on the road to an exotic destination and that time in between trips is vital to your success.
Even if you’ve been a professional photographer for decades, there’s still countless things about this art form that you can learn.
Tip 18—Get Your Photos Seen
Now that you’ve got a portfolio of travel photography images, how do you get people to see them?
As with most freelancing gigs, the name of the game is networking. Here’s a few tips for getting your pics in front of more eyes.
- Be more consistent with social media by posting regularly and using hashtags strategically
- Enter into photography competitions
- Ask local shops if you can display your work
- Get your photos published
- Reach out to travel agencies, tourism boards, and parks departments for freelance work or partnerships
- Network with other photographers
As the old saying goes: It’s not what you know, it’s who you know.
Tip 19— Travel Photographer Tips for The Business Side of Things
Making it as a working travel photographer has gotten harder in recent years, but it’s not out of reach. Here’s a few business tips to help you stay on top of your budding photography career.
Always try reaching out to new clients. Keep in mind that bigger clients are harder to land, but there are plenty of smaller travel destinations that are ideal for a beginner photographer.
You should create a budget for your travel photography work. If you’re just starting out, you don’t need a fancy app. A simple spreadsheet is more than enough for you to stay on top of your money.
You can also try becoming a content creator while you’re working on landing clients. Building up a social media following and generating some income through a site like Patreon can help you stay on the road longer.
Tip 20—How to Tell Your Travel Photography Story

Image Credit: Ena Marinkovic
You’ve reached the end of my travel photography tips. The last tip, and the most important one, that I’m going to give you is some advice on how you can tell your story.
Travel photography is all about storytelling. This means documenting your journey, engaging your audience, and finding your voice.
Taking captivating pictures without context isn’t enough. Your travel photography needs to speak to people on a deeper level and communicate something yet untold about the experiences behind your journeys.
It’s going to take time to figure out how you want to represent your adventures. The best thing you can do is get started today.
Even if you’re just taking travel photos a few blocks from your home, you’ll be breaking the ice and taking those important steps in finding your voice as a storyteller.
What is the purpose of travel photography?
The purpose of travel photography is to share your journey with the world. Travel photographers help to tell the story of not only their adventures, but also the people and places they encounter whether they are traveling around the world or within a few miles of where they grew up.
Is travel photography a good career?
Travel photography can be an amazing career that is rewarding and potentially very lucrative. It can be challenging to get started, but there are countless photographers who do travel photography as both their main job as well as a side gig.
What is the single best lens for travel photography?
The single best lens for travel photography is the wide angle to telephoto zoom like the Sony FE 24-105mm f/4 G OSS Lens. This lens allows you to capture everything from sweeping landscape panoramas to sports and wildlife photography .
Is travel photography a job?
Travel photography can absolutely be a job. You can make money as a travel photographer by freelancing for clients, photographing destination weddings , or working as a photojournalist.
Is GoPro good for travel photography?
A GoPro can be great for travel photography especially if you’re interested in capturing video and using stills from that footage for your photography.
Even though a GoPro is a good choice for travel photography, you’re probably going to be better served by a dedicated camera if your main goal is photo rather than video.
Final Words
I hope this guide gives you everything you need to hit the ground running with travel photography. If you’re an experienced travel photographer, I hope you’ve picked up a few new tricks that can help improve your next adventure.
I’ve tried to cover travel photography from nose to tail in this blog, but I’m sure I left a few things out.
I want to hear your travel photography tips, tricks, and experiences in the comments. If you like this article, make sure to check out my other photography blogs .

Check out these 8 essential tools to help you succeed as a professional photographer.
Includes limited-time discounts.
You'll Also Like These:

Ashley is a photographer, writer, and film critic. When Ashley’s not writing essays on photography, cinema, and theory, he’s out taking pictures with retro film cameras.
Keep Sharing more impressive blogs.
Leave a Comment Cancel Reply
👋 WELCOME TO SHOTKIT!

🔥 Popular NOW:

Unlock the EXACT blueprint to capture breathtaking iPhone photos!
Shotkit may earn a commission on affiliate links. Learn more.
21 TRAVEL PHOTOGRAPHY TIPS (Easy Ways to Improve Today)

- Last Updated: February 8, 2024
Here are our best travel photography tips for beginners and intermediates, based on our experience of going from complete beginners to professional travel photographers, and now working in the industry for 8 years.
Picture this.
You finally book a trip to your ultimate bucket list destination.
Antarctica, Iceland, Namibia, Bali, seeing the Aurora Borealis – wherever it is, you’ve waited your whole life to finally visit.
Naturally you are going to want to capture the best travel photos possible of this once-in-a-lifetime adventure to share with your portrfriends and family members, on social media, and maybe even print on the wall at home.
Moments in time or a travel experience that you always want to cherish.
So you’ve splashed out on a new camera based on expert recommendations , and you’re keen to hit the road.
But here’s the problem – you don’t have the faintest idea how to get the same kinds of images you see in postcards or on the internet.
The kinds of travel photos that just pop, stand out from the rest, inspire you to book a flight immediately.
Luckily that’s where we come in.
We’ve been fortunate enough to work as professional travel photographers for almost a decade now, being paid to fly around the world, running photography workshops, take pictures for the tourism industry and tell stories.
And now we want to share our knowledge, secrets and insights from our travel photography journey with you so you can take better travel photos.
In this post you’ll find many of our favourite travel photography tips you need to know to come home with shots you will be proud to show off.
Today is the time to learn. Let’s begin.

Table of Contents
1) Know Your Camera
2) focus on the golden and blue hours, 3) plan your shots, 4) learn about composition, 5) framing, framing and more framing, 6) move your feet, make them feel comfortable, 8) use a tripod, 9) find the right travel photography gear, 10) be unique, 11) find your voice as a photographer, 13) aperture, 15) shutter speed, 17) bonus – general ideas for camera equipment settings, 18) use manual mode, 19) shoot in raw (if available), 20) learn about post processing, save this pin for later, general travel photography tips for beginners.
To start with let me talk about the general travel photography tips that I feel are not only the most important, but also the most difficult to master.
Developing an eye for photography takes time. Years in fact. It’s a never-ending learning process, but I promise you with practice you will get much better.
And once you start to get the skills for framing and composing a shot, the rest is easy.
Whether you shoot on a dSLR, mirrorless, smartphone or an old film unit, the first travel photography tip is to get to know your camera equipment.
Whatever you have in your camera bag , take the time to read the instructions, play around with all the buttons and camera settings, and spend hours with it in your hand so that it becomes a part of you.
Study the menu so that if you need to change camera settings in the field you’re not spending minutes scrolling through it when timing is critical.
Also don’t forget to learn your camera’s limitations.
Does it perform well in low-light or does the image fall apart? Is it sharp wide open, or do you need to stop down to get the best clarity? Does it have inbuilt image stabilisation?
Ultimately when you pick up your camera you want to feel comfortable and know exactly how it works. Then getting better pictures will come faster and easier.

Light is everything when it comes to travel photography images, and there’s a good chance you’ve already heard about the golden and blue hours.
The Golden Hour is that time when the sun is low in the sky and it throws a magical, warm glow across the scene.
Think the first hour after the sun peaks in the morning, and the last hour or two before the sun drops over the horizon in the afternoon.
The Blue Hour is when the sun is below the horizon and the sky gives off a beautiful blue hue.
If you really want better travel photos, one of the best travel photography tips we can give is to get used to waking up early and stay out late to make the most of these two times of day.
If you’re not a morning person, get used to setting an alarm. Many of the great travel photos of the Taj Mahal and other tourist sites with no one in them for example were taken by people who got there early.
Taking photos in the middle of the day can still result in great shots, but in general you’ll find the blue sky too blown out unless there are some interesting clouds, and on a sunny day you’ll find the lighting conditions can be a bit harsh.
Instead use the middle of the day to get street photography, or scout out photo locations and a vantage point for your sunrise and sunset photos to come back later.
Bonus Tip – Even if it looks like the sunrise or sunset might not be so beautiful, wait around. You never know when the clouds might break or the sky randomly lights up in brilliant colours.

Before you arrive in your tourist destinations, spend a few hours planning out your shot list of images you want to photograph.
You can get inspiration from Instagram, Google Maps, travel guides, magazines and more.
Make a note of these pictures, and then plan your day around the optimum time to shoot (sunrise or sunset for example).
Doing this will help you nail the shots you want to go, and give you more purpose and direction.
You need to know that all of the best photographers use tools like Google Maps or social media to form a shot list, and you should get used to it too.

You’ve probably heard about how important it is to compose a shot properly, and I bet if you’ve ever read a photography manual you would have come across the ‘ rule of thirds ‘.
Good composition can be the difference between an average shot and award-winning travel photos.
There’s all kinds of ‘rules’ that theoretically make a photo look nicer, such as not putting your subject in the middle of the shot, don’t cut elements out of the frame, etc.
But right now let’s go a bit into the Rule of Thirds.
This concept is where you divide your image into 9 even squares (many cameras actually have this grid line feature built into their display options).
Then what you do is you place the subjects and points of interest such as a human element along those lines and squares.
Here’s an example of how this looks:

The idea of the rule of thirds is that this is a mathematical idea of what our eyes naturally find pleasing. So it’s good practice to incorporate this method into your shots.
Another thing to look for is leading lines that naturally draw your eye around the photo, as well as different angles and shapes.
Have a river flowing from the side of the shot up to a waterfall on the top left for example, or the foreground bending around, leading the eye towards a church at the top of the photo.
This is a skill that you’ll learn with more practice.
An important thing to remember is that rules are meant to be broken .
Get used to analysing your shots with the rule of thirds, but please don’t use it as gospel if you think a different composition would work.
Adding a human element also brings a lot of interest to a good shot, so place people in your frame.

When you look through the viewfinder or LCD screen, don’t just focus on the subject.
Make sure you run your eyes around the entire frame to make sure you’re not accidentally cutting off something important.
Double-check that the top of a mountain is fully inside the frame, or that your friend’s whole body is in the shot as an example.
This isn’t gospel, because sometimes having something cut off from the frame can be good for composition, but you’ll have to be the judge of that.
Also check to see if you can use something natural in the scene to create a frame inside your picture.
Think of looking out a window at a building, or a bent-over tree surrounding a pretty lake.
These can all help make better travel photos.

This is one of the most important travel photography tips I can give – Move your feet.
Don’t just arrive to a scene and take a shot from the place you’re standing.
Instead take a few minutes to walk around and see if there is a better frame or composition.
Go closer, move back, step to the side, consider your lens’ focal length, etc.
Imagine trying to take that iconic Taj Mahal photo, only to find out later that you were 2m to the left of centre, throwing off that perfect symmetry.
Or maybe if you walk to the river’s edge you’ll be able to incorporate some interesting rocks into the scene instead of just water.
Better yet, take multiple travel photos and fill up those memory cards from the same photo locations so you have lots of options when you get home to see which is your favourite.

7) Ask People for Permission
Travel photography isn’t all about capturing the most beautiful sunsets and gorgeous architecture around the world.
Travel photography is also about the people you meet. But if you’re a bit shy like me, how do you get those amazing portrait photos without feeling rude?
Simple – just ask for permission.
Asking someone for permission to take their photo is polite and respectful.
If you have had a great encounter with someone, or you just see a great opportunity and want to capture a wonderful portrait, give them a big smile and ask if it’s ok to take their photo.
You’ll find many people are more than happy to pose for a photo if you just ask (just make sure you respect them if they say no).

But what if you want to get a candid shot, with the subject looking natural?
There’s always another way to get these without annoying the person.
Don’t make it obvious that you are taking their photo. Act natural and take lots of photos of the environment around them.
You can also keep your camera down by your side and point the lens in their direction.
If you have a zoom lens, use it. This was you can be on the other side of the street or market and still photograph the person.
Interested in learning more? Join one of our exclusive photography workshops in Antarctica, Kyrgyzstan, Tajikistan or Mongolia !
Another one of my favourite travel photography tips for portraits is to bring in another element to the shot.
Some people will feel uncomfortable posing for a stranger, but if you can make it about something else they will feel much more at ease.
As an example, maybe ask if they can pose with something in their store like a rug, or ask them to show you their wedding ring.
This way they’ll realise there is more to your photo than just them. This will also add a lot more interesting elements to the shot!

A tripod is one of the best camera accessories you can have in your camera bag, and really essential for travel photography.
This will allow you to get excellent shots in low light, as well as get creative with your images (like taking long exposures).
These days you don’t always need a massive tripod to travel around with, especially if you want to travel light and are a hobbyist photographer. Look at some of the Joby Gorillapods .
Another good thing about using a tripod is that it will force you to slow down with your photography and put more thought into each shot.
Rather than just pointing and shooting, you will think carefully about where you want to set up your tripod and how you want to compose your shot.
Honestly if you want to become a better travel photographer, you’ll need to invest in at least a small tripod.

You don’t need to go out and spend tens of thousands of dollars on new travel photography gear to get the best shots.
In fact chances are you already have a perfectly adequate camera right next to you (your phone).
Instead just get what you an afford, and as you grow with your photography style, post production, etc, you’ll learn what camera gear you need as well.
Things like filters, tripods, flashes, prime lenses, zoom lenses, etc will come in time.
For now, all you really need is a camera, memory card and enthusiasm!
Check out our recommendations for the best travel tripods .
There’s nothing wrong with getting those iconic shots of the Eiffel Tower or Machu Picchu to share on social media.
They’re beautiful and are often amazing camera angles of famous places that everyone wants to visit.
But don’t forget to be unique as well! Find a different perspective that hasn’t been photographed a million times.
In fact make it your goal to get a few unique shots that you can be proud of.
Over-expose, under-expose, incorporate motion blue – the only limitation is your imagination!

Just like a writer or musician finds a particular style they like, as a photographer you need to discover your ‘voice’.
Travel photography is such a broad term that can cover just about anything.
Really just taking any travel photos will fit the description, whether it is landscape photography, wildlife photography, architecture, portraits, food or whatever.
Just find a style you love most, and focus on getting better at it.
If you really like black and white photography, then start shooting in black and white! Love taking images of crazy street markets? Then get out there and find them!
Experiment, learn, discover and nurture!

Technical Travel Photography Tips
While the technical side of using a camera is usually the most overwhelming thing for a new photographer to think about, it’s actually one of the easiest things to master. All it takes is a bit of study and practice.
If you’ve never looked into getting out of ‘Auto mode’ on your camera, then terms like ISO, aperture, white balance and shutter speed will seem completely foreign.
READ MORE: Check out our great article and blog posts featuring our best landscape photography tips !
12) Exposure Triangle of Photography
The Exposure Triangle is a metaphor to explain the 3 elements that allow light onto a sensor.
A camera captures light, and the right amount is needed so that your image isn’t too bright or too dark.
The 3 parts of the Exposure Triangle are aperture, ISO and shutter.
Each one affects how light reaches the sensor in different ways, and getting this combination right is essential to capturing a beautiful image.

If you want more information, I’ve put together this comprehensive guide to understanding the exposure triangle which you should really check out.
For now though I’ll explain these three things briefly, and how they relate to taking better travel photographs.
Aperture is how wide, or small, the blades in your lens are and how much light goes through the lens.
The aperture size is measured in ‘F Stops’, and displayed as numbers. f5.6, f8, f11, f16, etc
A wide aperture (small number – f1.8) lets in more light than a low aperture (big number – f22).
A wide aperture also has a shallowed depth of field than a low aperture. I know it can be a little confusing, but you’ll pick it up the more you play around with it.
If you want the background blurry in your photo, you’ll want a wide aperture. If you want everything in focus, you’ll want a low aperture.

ISO is how sensitive your camera sensor is to light. A small number, such as 100, means it’s not very sensitive and therefore needs more light to leave an impression.
A high number, like 6400, means it’s very sensitive and needs only a little bit of light to show up on the sensor.
The higher the ISO, the more noise shows up in a photo. Noise lowers the quality of your image, so in a perfect world you’ll want to keep this as low as possible (unless you’re going to stay out late doing astro and night photography ).
It’s also necessary to raise your ISO if you’re shooting moving subjects (or handheld) indoors.

Shutter speed is pretty straight forward – how long it takes for your shutter to open and close. This allows you to freeze a frame, or introduce motion blur.
Want to capture a bird in flight? You’ll want to have a fast shutter (1/4000th of a second for example).
Want to make a waterfall look silky smooth, like you see in so much Iceland photography? Go for slow shutter speeds (3 seconds for example), and check out our guide to waterfall photography tips while you’re at it!
Keep in mind that if you are holding your camera equipment rather than using a tripod, you’ll need to have a fast enough shutter to eliminate your own hand movement.
As a general rule 1/60 of a second is the slowest you should go so your picture doesn’t pick up hand movement. Any slower than that and you’ll probably need a tripod.

16) Combining All Three for Perfect Exposure
There is no ‘perfect setting’ for aperture, ISO and shutter. It all depends on what you are trying to photograph and the style you’re going for.
Luckily most decent digital cameras have two little tools that will let you play around figure out how all three work together – manual mode and histograms.
Manual gives you complete control over your camera’s ISO, aperture and shutter.
If you change one, nothing else will change, unlike in ‘aperture priority’ mode or ‘shutter priority’ mode.
The histogram is a visual display of light. When the bars are all the way to the left, the image is darker. When they are all the way to the right, the image is lighter.
When most of the bars are in the centre, this is perfectly exposed.

The best way to figure out what combinations work best when you’re a complete amateur is to put your camera on “manual” mode, activate the histogram, and play around with the settings.
Pick an aperture (f/8 for example) and point it at the scene. Now look at the histogram.
If the image is too dark, then you’ll need to let more light in. Let’s make the speed slower. See a change?
Now put the shutter back to where it was and instead change the ISO. Make the ISO higher. Is the image getting lighter?
Spend an hour or two playing around with different apertures, ISO and shutter so you get an idea of how each one affects the light hitting the display.
Take note at how drastically things can change if a cloud goes in front of the sun, or you take the camera inside.
This just comes with practice of course, and knowing what settings you want for a particular scene will become second nature
Keep in mind that not all travel photos needs to be perfectly exposed. Sometimes having a darker image looks much better than having one that is nice and bright. You can use your judgement for this.

This is very, very basic and by no means should be read as gospel. There are a million different things that can affect why you would want a faster shutter, or wider aperture. But if you are confused about what to pick for what here’s a quick idea.
- Landscapes – You’ll want your aperture around f8-f11. You’ll also want your ISO as low as possible. Slow down the shutter accordingly.
- Portraits – You’ll probably want to photograph your subject to be sharp, but the background blurry to bring focus on the person. Have a wider aperture (say f2.8 for example), and a faster shutter (around 1/160 at the absolute slowest) to freeze the subject. Adjust ISO accordingly.
- Indoors – Because it is darker inside than outside, you’ll need to let a lot more light into the sensor. Unless you’re using a tripod, keep the speed at around 1/60 as the slowest, and the aperture around f5.6 to start with. Adjust ISO and aperture accordingly.
Of course there’s a bunch of other styles of travel photography that would use different settings, such as astrophotography, architecture, street scenes photography, wildlife photography, etc.
In time you’ll learn what settings work best for each scene.
The best way to get to know your camera and how light works is to have complete control over what settings you choose.
The only way to do this is to shoot in manual mode (shown by the letter M on most cameras).
It will take months of practice, but I promise you that in time you’ll be able to look at a scene and instantly know what aperture, ISO and shutter to use to get the exact style of image you’re looking for.
You can also use aperture priority mode (the letter A on your camera) if you don’t want to make the big leap to manual just yet.
This way you can lock in the aperture you want (f8 for landscape photography, f2.8 for portraits, etc) and the camera will automatically adjust the ISO (although you can control this part too) and shutter to get perfect exposure.
I highly recommend focusing on learning manual settings though until you have it perfected.

When you take a photo on your digital camera, the computer chip inside it takes what you captured on the sensor and converts it into a format that can be easily read. For most cameras, these two formats are RAW and JPEG.
JPEG is a compressed format that the camera creates to save on space. In doing so it ‘locks in’ all the data that it picked up such as the colour and white balance.
RAW files actually saves all the data of what you took and doesn’t compress it.
Most decent digital cameras will give you the menu option of shooting in RAW, and I recommend you use it if you ever plan on editing your photos.
Keep in mind that the file sizes will be a lot bigger (for example on one of our cameras a RAW is 42, while a JPEG is just 20), so you’ll need to have extra memory cards and external hard drive storage.
If you have no plans on editing your photos then shoot in JPEG.

Some people think that editing your photo is ‘cheating’. But the truth is photographers have been editing their photos ever since photography was invented.
Yes, even your favourite photos in National Geographic have been manipulated in some way.
99% of photos you see in your favourite travel magazines have been edited. Every professional photographer edits their photos to some degree.
The reason is that not all cameras are great at capturing exactly what the eye saw in terms of colour and light.
If you really want to get the most out of your professional travel photography business, you should start playing around with post processing.
Many people have heard of Adobe Photoshop , but it’s a pretty advanced tool that most people wouldn’t ever need to use (until you get more experience).
To start with look at the free apps that you can get on your phone, such as Snapseed, or free editing programs on your computer, like iPhoto or GIMP.
Once you get serious about travel photography and you want to start editing all of your photos that are filling up your memory cards and external hard drive, we recommend purchasing Adobe Lightroom.
If you’re ready to make the jump to using Lightroom and Photoshop, Adobe have a great ‘Creative Cloud’ package, which is what we use for only $10 a month. You can buy it here with a 7-day free trial

21) Practice, Practice, Practice
Just like anything, becoming a great travel photographer takes time, and a lot of practice. The only way you can get better is by getting out there taking travel photos!
You don’t even have to travel the world to tourist destinations or have the most travel camera available to be a great photographer.
Borrow some family members to take their portraits, get a friend who is also interested in photography and push each other, or grab your smartphone and go shoot sunset.
Buy whatever you can afford, go for a walk around your city and snap away.
We hope that this general guide on travel photography tips for beginners has been helpful.
Please feel free to reach out to us if you have any other questions. We have a lot of experience working with tourism boards, and would be happy to help you too.
Good luck on your photographic journey, and maybe we’ll see you in National Geographic one day!
DISCLAIMER: Some of the links in this article are affiliate links, which means if you book accommodation, tours or buy a product, we will receive a small commission at no extra cost to you. These commissions help us keep creating more free travel content to help people plan their holidays and adventures. We only recommend the best accommodations, tours and products that ourselves or our fantastic editorial team have personally experienced, and regularly review these. Thanks for your support, kind friend!

Alesha and Jarryd
Hi, We’re Alesha and Jarryd!

We’ve been traveling the world together since 2008, searching for the planet’s best destinations and adventures.
Love Travel?
Sign up for our free weekly newsletter for the best travel tips, ideas and deals!
We respect your privacy. Unsubscribe at any time.
READ MORE...
GoPro HERO 12 Review – Is it Worth Buying in 2024?
Peak Design Everyday Messenger Review – My Honest Experience
GoPro HERO 11 Review – Is it Worth Upgrading in 2024?
Related Posts
A photo journey along the silk road, your guide to the top vivid sydney photography tips and locations, our honest manfrotto d1 aviator drone backpack review, 31 photos that will put kyrgyzstan on your bucket list, 73 thoughts on “21 travel photography tips (easy ways to improve today)”.
I indeed agree in Know your camera and Plan your shots. These tips would make a good start in achieving your socmed worthy travel shots. And ofcourse, the other tips will surely be useful too. Great post!
Good article but I need to say something about using Manual – it’s not that great. Manual is just a different mode of settings for exposure, little different from either shutter or aperture priority, except these two give you a leg up, to where you’re going anyway. At the end of the day whatever exposure setting you choose will be just a combination of the 3 on the ‘exposure triangle’. Instead of using manual try these other two in conjunction with exposure compensation, which overrides the exposure meter reading. You still need the meter for any exposure anyway, just not necessarily using the value it recommends. It amounts to the same thing, only easier, quicker, and still constraining one of the triangle sides that you want. I use manual for specific unusual objects, such as sun, moon, stars, but during general daytime subjects it’ll be very unusual to hamper yourself by not using the aid provided when there is no advantage.
Your blog has become my go-to source for insightful content.
Thank you so much. So glad to hear. 🙂
Before you go, research your destination and its culture. This will help you better understand the people, customs, and landscapes you’ll be photographing.
I benefited a lot from your post. Thank you
So glad you did. Thank you for stopping by. 🙂
Thanks for sharing all this amazing tips & information. Fabulous post !
You are welcome. We are happy to help. Happy photographing
nice summary of basic photo tips that will improve my shots, thanx!
You are rocking..keep it up your work
Thank you so much. We really appreciate it.
Great article with great tips and i also like the pictures
Thank you so much Alesha and Jarryd for these amazing photography tips! I look forward to putting into practice some of your wonderful ideas and tips! I do so appreciate any tips that I can get to improve my photography. :)) Cheers, Marilyn
I absolutely loved this article! Like you I received my first ‘proper’ camera at 14 and since then have been hooked. I recently purchased a Nikon D750 and am absolutely loving it. Although at the moment I only have two lenses for it I am hoping to be able to afford more soon. What are your favourite lenses?
In my photography I love capturing candid portraits of people I encounter during my travels. I always struggle with the dilemma of getting the perfect candid shot and feeling compelled to ask permission before taking the shot. As a very shy person directing people in images is daunting, but it is something I am striving to work on. It’s nice to read that you are also shy yet manage to capture such incredible images of people.
As I am mostly self-taught, I always love to read technical tips to improve my images. I found the technical side of your post incredibly helpful and wanted to say thank you for taking the time to write such a detailed post. I believe it really helps and inspires amateur photographers like myself.
Glad you liked the article. Thank you for your comment. Keep photographying Caitlyn 🙂
Great tips and awesome photos! I always tell people if they aren’t comfortable with their settings, the #1 way to make sure their images aren’t blurry is to shoot in TV/S (shutter) priority. That way you can prioritize having no hand shake.
Thank you so much. Great advice. Thanks for your comment. 🙂
Awesome tips for everyone and specially to me who loves capturing photos everytime i travel.This one also help me and give me more knowledge on how to make awesome photos and its good because you don’t need to buy expensive camera to have a good quality photos, just your iPhone or smartphone you can make a great photos.
Hi, you are so right. You can take great photos with your phone. Glad the article could help you.
Great article! Do you even bother carrying your camera with you during the day in broad sunlight? I find it’s not worth the hassle for such poor shooting conditions.
Hi Scott, It all depends what we are doing. If we are on a job, we always carry our cameras with us. The midday sun is harsh but you get used to working with it. Especially indoors with the sun coming through the cracks, it can work out really lovely sometimes. When we are travelling on our own time, we don’t usually carry the camera. Happy travels
I really enjoyed reading this post, as I am a beginner in photography as well and it’s always interesting to see what gear other people are using!
I have the Canon Rebel as well, and also love the 50mm lens. It’s just great and is so versatile!
Thanks for sharing.
Glad we could help. Thank you for your comment. Happy photographing,
Great tips guys! Photography is an art so it must be learned properly. A good guide can teach art in a great way. This article is similar to a guide because it is an eye-opener for blooming photographers and travel lovers.
Thank you so much!
Thank you for your comment Glorias. Glad the article could help.
Hello Alesha and Jarryd, not sure to whom I adresse the message to, but I’m guessing Jarryd took the pictures and Alesha wrote about it :p
Anyway, do you guys use any customized Firmware on your DSLR? like the CHDK or Magic Lantern. That’s one question, the other one will be: can’t find any Mobile Phone photography on your blog? can you please refer me to any article that provide valuable info around Mobile phone photography?
Hi Ayoub, The photos and words in the article are a combination of both of us. Usually Alesha is the photographer and Jarryd is the writer.
We use use no customise firmware at all. We haven’t ventured this way as it voids our warranty.
As for phone photography, maybe this is an article we should write. With our phone photos, we do use Snapseed to edit them. But do not take any photos through any apps. All the best
Thank you for the tip regarding phone photography, I mostly use the customized firmware to do timelaps and edit directly on the camera, keep me posted after publishing the new article. (Already subscribed to the weekly newsletter)
Definitely will do. Thank you so much. Happy photographing. 🙂
you are doing a great job
Thank you so much. 🙂
This was really an amazing list of tips, I am a hobbyist photographer and this would really helps me a lot
Glad we could help. Keep up the photographing. 🙂
Great tips Alesha and Jarred. I really liked your golden and blue hours tip. Will try it soon and hope get amazing pics 🙂
Glad we could help. Practise will get you on the right track and before you know it you will be taking amazing shots. We are still learning about photography everyday. We love that you can never stop learning. Thanks Linda.
Some of the best tips I have read so far. Amazing post and captures so much detail. Worth the read for every travel photographer. 🙂 Keep it up.
Thank you so much,. We really appreciate it. 🙂
Priceless tips for amateurs like me. Thanks for sharing. For a long while, I’ve tried to follow the rule of thirds, but the best shots came out when I finally dared to break it. You’re absolutely right about the rules are meant to be broken. Regarding the camera, I agree it doesn’t have to be the most expensive. But sometimes I have a feeling my shots would have been better had I owned a proper camera. What device is the best balance between price and quality?
HI Robin, you’re welcome. We are so happy we could help. Sometimes breaking the rules works out to be better. 🙂 We definitely know what you mean. You do not need to buy the most experience camera. A camera that you can use manual settings, is great as you can start using and playing with aperture, shutter speed and ISO. We started off with a Sony RX100ii and it was great. Compact and a great camera to learn. Here is some articles that may help. https://www.nomadasaurus.com/best-camera-for-travel-ultimate-photography-series/ https://www.nomadasaurus.com/best-camera-accessories-ultimate-photography-series/
Thanks a lot for the great advise! I especially like your explanations about the exposure triangle. I was a bit aware of it before, but never played around with it unless I wanted to change the depth of field (and even then, I did this very rarely). But thanks to focusing more on it, I am starting to get the hang of it. I have taken some very good hummingbird pictures, for example, which never would have been possible if I hadn’t raised the ISO so I can keep the shutter speed fast. Those birds zip around like crazy!
Also, I think one of the most important pieces of advise, and the one I’m struggling with most, is to always look at the whole frame. I am guilty of looking at the main subject and later finding out that I cut off important things on the side or that something weird is in the photo that shouldn’t have been there.
Hi Ilona, so happy the article could help you. That’s amazing you experiment with your hummingbird shots. They are fast birds. By practising photography, you will get better and better. No matter how experienced you are, there are always things to learn. When you come to a scene you want to photograph, stop for a minute look around, walk around and think about what shots you want to take. Obviously this is hard when the subject is moving but great for landscape and street photography. All the best and keep up the awesome work. 🙂
Hi, I took around 500 shots on a trip to Kyrgyzstan recently, some I think are pretty good, but now after reading your tips, I think I will make another trip to that part of the world again soon!
what a great tips especially the lighting part – i also agree that getting up earlier and shooting in the natural sunlight is so great for your photos. talking to the locals and knowing your camera, You guys covered it all
Thank you so much for reading Shama. Glad you liked our article. Natural lighting is the best. Even though sometimes that early morning is hard it is worth it. 🙂
u are absolutely right u don’t need an expensive camera or go to Bali ( although it’s a good idea) to get great photos. it’s just simple common sense and a good eye and you can master photography
Well said. Thank you for your comment and reading Shama. Have a great week.
Thanks a lot for the helpful tips on holiday photos. My partner and I are in Easter Island, irresistible place for photo opportunity. My Nikon D7000 will keep on taking photos on auto mode for the time being until I have had enough practice following your guidelines and the who knows what photos I might produce! Thanks.
Glad we could help Balu. Definitely when you have time, go out and take some photos on manual. Play with the different settings. Before you know it, you’ll only be on manual. At the beginning when I was still learning, I would take a shot on the manual settings I thought and then a shot of the same view on auto in case I messed up. Better safe than sorry. Have a great time in Easter Island. There is so much to do there and learning about the history is amazing. Take care. Alesha
Guys your advice are completely helped me. I was stressed before, i want to travelling at the moment but i hope i can take a good picture cause you know how annoying it will be when we take a picture and then when we are home they are completely bad. So then you have to comeback at the same place again just to take a picture. But this one is helpfull
Hi Fabio, Don’t stress. You are going to bring back amazing photos from your travels. It is all overwhelming at the beginning but it gets easy. When you are shooting, put some time aside and concentrate on what you have learned. It doesn’t matter if it takes you 20 minutes to an hour to get your shot. If their are other photographers around, most of the time that are happy to give you some advice. Let them know you are new. Maybe they will let you know their settings for ISO, aperture and shutter. When it comes to editing, take your time as well. There are many You Tube videos that can help you for free. Have a great time on your trip. Happy travels
Hey Guys, very useful tips especially the Bonus tips.
Keep Sharing!!!
Glad we could help. Thanks for reading.
P(Program) you set either the aperture or shutter and the camera adjusts the other one accordingly to maintain the right exposure. Thanks
Thanks Rezan
I love traveling around the world. I wish to capture some of the beautiful places that I enjoyed. The above tips helped me to improve my travel photography skills. It also helped me to click some of the memorable moments of my travel with my friends and relatives.
Hi Vivek, Glad we could help. It is all about practise. We love having a day to ourselves and just getting out and shooting anything – landscape, cityscape, people or animals. We try to give ourselves a challenge sometimes. It makes it interesting and we are enjoying ourselves. 🙂
Great tips to help out beginners like me. I need to work on to ask people for permission as I get shy sometimes. I love the quote “rules are meant to be broken”!
Thank you Mao. Don’t worry, “asking” will come. Alesha was so shy and I used to take all the people shots. Now she is more confident and really enjoys shooting people. All the best.
THANK YOU . Your very easy to read starter guide to photography was AMAZEBALLS I learnt so much .cheers LIZY
Thank you. Glad we could help. Happy shooting and get creative. 🙂
Hey guys, this is an amazing guide, thanks for writing this up in such detail. As an amateur, I always look for good travel photography tips from other travellers. I left my tripod behind in Thailand and I think this was a huge mistake, I need to get a new one, urgently 🙂
By the way, really enjoy your photos on your blog and Instagram, they are amazing! 🙂
Glad we could help guys. We never used to use a tripod in our early years until we discovered how amazing the shots can be with one in low light and now we have 3. You can rest your camera on something to get a shot but you are limited to positions. Thanks for reading guys. 🙂
thanks for the tips. i’d make one edit: instead of ‘move your feet’ i’d say “don’t be lazy”…move left or right. move forward or back. climb up on something or get down on your knees.
Love it Aaron. You are so right. A little to the left might be the perfect shot or a little to the right and crouching might be the perfect shot. thanks for the input. Have a good one.
I love this post. It is incredibly helpful to all beginner travel photographers like myself! I have only been shooting in manual mode for the past 5 months and have already seen a huge increase in the quality of my photos! But I am always looking to improve. Will definitely be sharing your post
It is crazy how you improve when you start shooting manual. I know Alesha did also. You learn so much about the camera and what it can do, it is incredible. Thank you for reading and all the best with your photography Hayley. 🙂
this guide is amazing, thank you so much for explaining everything in a way an amateur can understand 🙂
Bookmarking the post for future reference!
Cheers, Naddya
Thank you guys. We are glad it is useful for you. 🙂
Wow! Amazing Tips. These tips will help a lot to click great pictures with your camera. Love the point of Shutter Speed. and about RAW.
Thanks for Sharing Helpful Post.
Thank you so much Nitin. Glad we can help. Thank you for reading.
Yeah I agree with you buddy.
Thank you 🙂
Leave a comment Cancel reply
Save my name, email, and website in this browser for the next time I comment.
The Complete Guide to Travel Photography
By Megan Spurrell

As travelers, our cameras can feel like a fifth limb—an essential tool with which to move through the world and absorb new experiences. They make it possible to document the people we meet. They provide tangible memories of the remarkable beauty we travel so far to see. Ultimately, they help us communicate what words cannot.
In the digital era, the tie between travel and photography feels more innate than ever. Photography has become more accessible and affordable to dabble in (who even needs a real camera with phones these days? ). On the flip side, it can feel as if documenting and sharing our travel experiences has become half of the seeing itself. In her essay on pushing herself to take a photo-free trip , Allie Jones asks a question we can all relate to: “If you visit a trendy upstate New York museum and don’t take any photos, were you ever really there?”
As the routine of snapping and sharing becomes as habitual as rinse and repeat, others urge us to become more thoughtful with our travel photography. Just because we can photograph and share everything, in a matter of seconds, doesn’t mean we need to. In his feature, Tyler Moss explores the #nogeotag movement , and looks at just how our photo sharing can drastically alter a destination—and decide who gets to experience it. For professional photographers Gray Malin and Alex Strohl , the “how” of nailing their iconic travel photographs has relied more on patience, and analog techniques like driving massive props cross-country, or waiting for the perfect shot in sub-zero temps, than on any new developments.
And, just in case you were starting to let your Instagram feed convince you that you’ve seen it all, we’ve pulled in photo studies from photographers whose work we can’t help but ogle. Jessica Sarkodie shares a refreshing look at the unspoiled beaches of her native Ghana. Cedric Angeles flew to Mongolia for a peek inside the lives of the country’s famous eagle hunters (and yes, there are photos of the eagles in their hunting caps ahead). For Sandy Noto , photographing harvest season in the Dolomites while off-duty yielded gorgeous slices of life.
Of course, if you’re ready to step up your own game, we’ve also got the gear you need—from underwater cameras to camera bags that don’t look like camera bags. And, we’ve rounded up our favorite photographers to follow right now, because as much as we want to cut the social media umbilical cord, there is so much to admire there. You just need to know where to look.
Through the lens
Think before you shoot
Behind the scenes
The gear you need
Everything else you need to know
By signing up you agree to our User Agreement (including the class action waiver and arbitration provisions ), our Privacy Policy & Cookie Statement and to receive marketing and account-related emails from Traveller. You can unsubscribe at any time. This site is protected by reCAPTCHA and the Google Privacy Policy and Terms of Service apply.

Photography
Travel photography tips for near or far.
Get travel photography tips from professional photographers so you can capture new landscapes, cityscapes, and portraits of people you meet on your journeys.
Not sure which apps are best for you?
Take a minute. We'll help you figure it out.
JUMP TO SECTION
Types of travel photography
Top tips for travel photography
Turn travel photography into a career
A 10,000-foot view of travel photography
- Travel photography can be pictures of landscapes, cities, architecture, or people on the street.
- You don’t have to go far to start practicing — photograph interesting places close to where you live.
- To make a career of it, build an online portfolio of your best work.
Types of travel photography.
Travel photography can stretch across genres because you can take any type of photo when you travel. Depending on where you go and what you do, you can touch on everything from astrophotography to wildlife photography . As you travel, consider which aspects of your journey you want to focus on.
Landscape photography.
The world is dotted with picturesque, compelling, and breathtaking sights. When you’re on a walk and you want to capture the feeling of the scenery you find, you can focus on landscape photography. Make sure to do your research before you go, be intentional about the time of day you want to shoot, and be sure to bring gear to protect yourself from the elements.

City photography.
Capture the cityscape . From vast skylines to everyday life on the street, cities present wonderful subjects for experiments with perspective, texture, light, and color. Play with framing and vantage points, from the tops of buildings down to street level and below.
Architecture photography.
With architecture photography , you can explore the universal features and specific quirks of human-made structures wherever you go. Study a still subject like a building or a bridge to highlight the effects of weather or time of day, or to play with different vantage points.

Street photography.
Once you’re on the street, you can focus less on the architecture and more on the people moving through the city. Capturing life on the ground is the goal of street photography — a style of visual storytelling that shows off and communicates the experience of everyday life. It’s vibrant and spontaneous, and you have to work with whatever light is available. Catch people as they move about their day to immerse yourself in the experience of a new city.
Top tips for travel photography.
Finding your way in the world of travel photography doesn’t have to be overwhelming or onerous. Discover how you can get started with these tips.

1. Follow your wanderlust.
No matter where your interest lies, if you travel for the shoot, it counts as travel photography. Like documentary photography , travel photography expresses some truth about the particular scene it captures. “For me, it’s just one way to share my perspective on the world,” says professional travel photographer Tiffany Nguyen. “I travel to different places, see the world through my lens, and tell stories through photography.”
2. Start where you are.
You don’t need to quit your day job and sell all your possessions to make travel photography. “I would just start in your own backyard,” Nguyen says. “I started small, doing short, weekend trips, and then when I got more comfortable traveling and better at photography, I wanted to take it to the next level and do more international locations.” Begin with a list of places nearby that might be interesting to shoot. Find locations you can get to in an afternoon.
3. Research the location.
You can save yourself time and effort, and get better pictures, if you plan ahead. “Having the right inspiration before you get there is really key,” says travel photographer Forrest Smith. “Before I go, I like to build a moodboard to try to find the exact shot that I want.”
Nguyen does a lot of internet research, looking at blogs, Google Earth, and Google images. She scouts Instagram for different angles and perspectives. “I also find that social media is a huge resource, especially using hashtags on Instagram,” she says. “They’re really helpful for finding live conditions at a certain location. For example, if I go to a waterfall, I don’t really want to waste my time trying to get water photos if the waterfall is dry. So I’ll search the hashtag of the waterfall name to get an idea of the water level.”
In addition to weather conditions, your internet research can tell you how popular the location is, how to get there, and what times might be the least crowded. “I’m looking for the length of the hike, the elevation gain, any obstacles or challenges that are going to come my way,” says Nguyen.

4. Bring the right equipment.
Make a checklist so you don’t forget anything as you pack your camera bag. Include things like extra batteries, an extra memory card, a headlamp, emergency snacks, rain gear, protective cover for your photographic equipment, and extra lenses . (If you know you’ll do a lot of walking, make sure you really want that telephoto lens before you bring it.)
“For me it’s important to have compact, lightweight equipment,” says Nguyen, who uses a mirrorless Sony camera. Unlike DSLR cameras , mirrorless cameras have no mirror to reflect the image to the optical viewfinder. “Their bodies and lenses are much smaller than the DSLR cameras, but they’re still super-high quality, super-high resolution,” Nguyen says. She uses several lenses, including a 24–70mm f/2.8 lens and a 16–35mm f/2.8 lens for wide-angle shots. She’ll bring a prime lens (a lens of fixed focal length ) for astrophotography or low-light photography, and a lightweight carbon-fiber tripod. If she’s going to be close to her car, she’ll bring a 70–200mm f/2.8 telephoto lens.
Both Nguyen and Smith will bring drones for aerial shots if they know they’re going somewhere drones are allowed to fly. (Drones are not allowed in US national parks.) The best camera for his work, Smith says, is a Canon 5D Mark IV DSLR. Like Nguyen, he uses a 24–70mm f/2.8 lens. “If I’m going out for the day, I like to have something wide and something more cropped, so I’ll bring my 24mm prime or my 100mm prime,” Smith says. He’ll also bring neutral density filters . “They’re really great to have if you’re photographing water.”

5. Get the timing right.
Part of your research should include finding the best times of day to shoot and factoring in travel time. “I like to take advantage of the light, so I like to shoot at golden hour or sunset,” Nguyen says. “I try to avoid shooting at midday because the harsh lighting doesn’t look good for photos and there are more people out.” If you want to shoot an empty landscape in a typically busy place like a national park, you may want to get to the location before sunrise.
Always be on the lookout for great shots that you haven’t planned. “You have to be in the right place at the right time with the right attitude,” says Smith. “Keep an eye out because there are always stories to be told. Whether you’re in the heart of New York City or the middle of nowhere in Utah, there are always things happening that, if you’re attentive to them, you can use to tell an incredible story.”
Smith recommends keeping a camera with you at all times, even if it’s just a Polaroid or the camera on your smartphone, and using it to develop your creative eye. “Whether you’re at an iconic location or you’re just walking around your neighborhood, look for compositions and good lighting. Those off-the-hip, spur-of-the-moment photographs often tell a more incredible narrative than the super-planned shots do,” he says.
6. Accept uncertainty.
Travel is all about unpredictability. You might stumble upon a once-in-a-lifetime shot, or you might get fogged in and rained on. Try to roll with the punches when you encounter frustrating weather, find a road closed, or miss a train.
It helps to have backup plans and even backup plans for your backup plans. That way, you’re never at a complete loss for what to do if things go wrong. “Be realistic with your expectations and with things that you can’t control; it’s just a lot easier to be flexible and try to find a different plan,” Nguyen says.

7. Focus on telling stories.
Every travel photograph has a story to tell about a time and place. “Being able to bring people along for your journey through your images is the most important part of travel photography for me,” says Smith. “You want to be able to not just show the location but breathe life into it and find those authentic moments.”
Don’t be afraid to tread the beaten path. Even if you travel to places that have been photographed by hundreds or thousands of people, your photos and your stories will be unique. “You can have ten different photographers go to the same location, but you’ll come back with ten completely different images, ten different edits, and ten different stories, because everyone sees the locations differently,” says Nguyen.

8. International travel photography tips.
International travel involves a lot of planning because you want to make the most of your time. But it’s also important to accept that you can’t plan every moment. “Part of the experience that’s so fun and rewarding is how spontaneous it can be,” says Nguyen. “You never know where you’ll run into things you just can’t plan out or predict, so you just have to just go with the flow and work with what you find around you.”
Approach local people and their customs with an open mind and heart, and try to participate in their culture instead of just observing it from outside. “The people make the big difference. They have their own stories to tell, and you can learn a lot from them,” says Nguyen.
Remember to always be respectful. If you want to take a photo of someone, talk to them. Get to know them a bit, and then ask for permission. “A majority of the time, they’re more than happy for you to take their photo and maybe talk, too,” Nguyen says. “People think it’s fun because it’s not something that happens every day.”
Edit, organize, store, and share photos from anywhere.
Adobe Photoshop Lightroom
View product details
9. Family travel photography tips.
You can apply all the tips above to the family photos you take on your travels. Just remember to be patient, do your best to cultivate patience in your family members, and be sure to pack a tripod and remote so you can capture the whole group at once.
If you have specific staged shots in mind, communicate your ideas ahead of time. It might help to share some inspirational photos from Pinterest or Instagram to get buy-in from every member of the family. If you have young children (or teenagers) be prepared to bribe them to cooperate.
Otherwise, focus on taking candid shots of your family members. Like people, candid photography can be unpredictable. You have to read the room, adapt, and give up control, but you might perfectly capture the experience of family travel with a mix of shots that cover everything from excitement to exhaustion, unfettered joy to unequivocal irritation.
10. Practice.
The best way to get better at travel photography is to keep going places and taking photos. “Put in the time and effort, show up and shoot as much as you can,” Nguyen says. Keep building your portfolio, and when you’re ready to look for work in the photography business, be selective about the photos you share. Be sure that you know why you’re including each photo and what skills you want to showcase with it.

11. Make the right moves in post-processing.
With Adobe Photoshop Lightroom photo editing software, you can take your photos from good to great. If a photo just needs a nudge toward the rule of thirds , or your horizon needs leveling, you can easily make those changes in Lightroom. You can also apply presets for fast fixes to urban photos and nature photos or follow step-by-step tutorials to learn how to do everything from image sharpening to removing unwanted objects.
Wherever you go with your camera, remember to embrace the adventure and the uncertainty that goes along with it. Be patient with yourself and your surroundings. With every photo you take, you’re practicing your photography skills and adding to your story.
Turn travel photography into a career.
To turn your passion for travel photos into a career, start by taking a lot of photos and collecting your best work. If you’re committed and willing to think outside the box, you can start your own photography business .
- Pay attention to costs. You may already have camera gear and a computer, but you’ll also have to spend money on photo editing software and travel.
- Create a portfolio. Clients have to see your work before booking, so create a portfolio specific to your audience and your niche.
- Market yourself. One key part of turning your photography into a business is paying attention to marketing and branding . Establish an aesthetic and a point of view, so potential clients can have a sense of what they’re getting when they work with you.
- Think unconventionally. Many tropical paradises are oversaturated with people who want to travel and take photos of picturesque landscapes. A great place to start is by contacting bed and breakfasts, smaller hotels, and other businesses trying to attract visitors. Link them to your portfolio and see if they’re interested in providing lodging or a small per diem to photograph their resort.
- Treat every trip as an opportunity. If you’re interested in travel photography, you've likely already been bitten by the travel bug. Whenever you take a trip, take some time to build your portfolio. Professional photography can be a nomadic lifestyle with inconsistent income, so embrace a mindset of working wherever you are and being open to new opportunities.
Finally, remember that careers are not made overnight, and every small step you take as a travel photographer is moving you closer to the goal of adopting it as your career. Good luck, and happy trails.
Contributors
Tiffany Nguyen , Forrest Smith
Share this article
Do more with Adobe Photoshop Lightroom.
You may also like
Language Navigation
30 Travel Photography Tips: Take Better Travel Photos (and Look Good in Them Too!)
Whether you are a traveler extraordinaire who hopes to take better travel photos , you want to explore the world of posting on social media, you are a mom who snaps pictures of her family wherever you go , OR you want to UP your adventure photography game, learning a few of basic tips will help to improve your photography skills AND the quality of your photographs.
Let’s get started.
Table of Contents
30 Simple Tips to Take Better Travel Photos
As an affiliate, I earn from qualifying purchases. This page may contain affiliate links. I would love your support through clicking on the links. Read the full disclosure here.

Here are a few simple tips to follow as you are traveling and learning how to take aesthetic photos —especially when you visit sites that are popular and everyone else wants to visit at the same time as you!
Aesthetic definition : (adj) concerned with beauty or the appreciation of beauty. Examples of beautiful objects are: landscapes, sunsets, humans and works of art .
1. Avoid Visiting Popular Sites at Popular Times
Maybe this isn’t the “popular” answer, but it is the obvious one.
To avoid visiting popular attractions at the busiest times, this tip might mean waking up early in the morning before crowds gather or visiting a popular site in the early evening when crowds begin to thin.
Not a morning person? Sometimes sacrifices have to be made to capture the best pic and take better travel photos!
Other busy times you may wish to avoid visiting popular sites:
- During holidays
- In the high season
- On a local holiday
- Around noon
- On the weekend
That being said, sometimes you just have to go with the flow and recognize that your shots might be full of 500 of your “new” best friends!
2. Avoid Crowds and Tour Groups if Possible
One of my golden rules for dining while traveling is to wander about five blocks away from the main tourist area and crowded dining options to find out-of-the-way restaurants where the locals might pop in for lunch or dinner.
The same can be said for learning how to take aesthetic photos. If you find that the main tourist areas are completely overrun with tourists AND with tour groups following a guide holding a brightly colored selfie stick, wander away from the crowds and discover the photos that show local life, Friday morning markets, and beautiful architecture.
You will be amazed at your ability to take better travel photos when you can slow down and enjoy the scene in front of you.
3. Be Patient
Have you ever looked at a photo on Instagram and wondered, “ How did they manage to take a picture without any tourists in it ? When I was there it was so crowded I could hardly keep track of my family!”
Patience, my friend. Patience.
…And having your camera ready to go the moment the last tourist walks out of your frame. That’s another idea for learning to take better travel photos.
Again, patience may not reward you with a tourist-free shot. Sometimes you just have to be okay with that.
>> Related : Romantic Instagram Quotes for Couples Who Love to Travel
4. Have Your Camera Settings Dialed In and Act Fast
Having patience leads to this tip: As you are waiting for a photo opportunity, make sure that you have ALL of your camera settings ready to go. Take a few test pictures while the crowds are milling if needed so you know that your shot will be perfect. Adjust for light, change angles, or zoom in.
Act fast once your frame clears.
This spot in front of of the General Sherman tree in the Sequoia National Park in California is often besieged with tourists wanting a memento in front of the giant sequoia tree and the sign.

To capture a “tourist-free” photo of the tree, be ready for the break in the crowd and then snap away. You may only have 2 seconds. Again, have your settings ready to go so that you know the shot will turn out the way you want.
>> Related: 20 Epic Outdoor Adventures in Yosemite National Park
5. Have Your Smartphone Ready as a Backup
This may take a little fancy handwork, but have your camera open on your phone and easy to reach if you are switching between a DSLR. If you find you just can’t get the lighting right or need to shoot from a higher angle to take better travel photos, use your phone’s camera.
Don’t be afraid to use your phone for pictures.
Cameras on newer phones offer sophisticated and advanced technology for all of your travel and adventure photography.
6. Edit Your Photos Later
Edit, edit, edit.
There are free apps for your phone or even desktop options such as Adobe Photoshop or Lightroom where you can crop and remove people from your photo. A little bit of magic to help you take better travel photos.
If you have never used the Adobe products, there is a learning curve associated with those programs.
My tip : Straighten your photos. This is especially apparent if you are taking photos of the ocean. Be sure to straighten the horizon before posting online.
7. Stand So People in the Background are Hidden from View
Sometimes it will be simply impossible to wait for all of the people to clear from your shot to take an amazing travel photo .
If you can, place your subject (you, a family member, friend, or travel partner ) strategically in front of people in the distance.
Voila! It looks as though the street is empty AND that you have mad photography skills!
8. Take Day Trips to Less Popular Destinations to Take Better Travel Photos
The touristy experiences in the bigger cities, such as Rome and Venice and Paris, are great so you can say, “I’ve been there!”, but sometimes getting outside of the city and away from the crowds is awesome.
Day trips to smaller, out-of-the-way towns and villages, such as Orvieto in Italy or Riquewihr in France, can be just as magical and picturesque.
>> Related: 7 Instagram Worthy Villages in the Cotswolds
9. Simply Ask People to Move
You will find that most people will move when they see you waiting with a camera in hand to take a picture.
Sometimes you’ll just have to ask people to move and they are happy to do it. Other times, there’s no rushing some people and they are going to stand in that spot for as long as they want. Dang it! (If this is the case, you can go back to the “ be patient ” point, you can change your angle, you can try again later, or you can just move along.)
10. Use the Crowd in Your Shot to Take Better Travel Photos

Recognize that sometimes you just aren’t going to get the “tourist-free” shot of your dreams when you are planning how to take aesthetic photos of a destination.
For example, the Piazzale degli Uffizi in Florence outside of the Uffizi Museum is often overcrowded with tourists. You may wish to have all of the tourists move out of the way for you to capture the amazing architecture in the foreground and the buildings in the background, but sometimes wishes don’t come true.
Take the picture anyway.
>> Related: Best Things To Do In Florence, Italy
Tips for Looking Awesome and Taking Pictures of YOU!
11. wear colors that pop.

Do you know what colors look best on you?
Choose bright colors that enhance your skin AND make your photos POP with color when you travel.
It may be as simple as wearing a brightly colored scarf.
Consider your destination and make color choices based on it. For example, if you’re at the beach, wear something besides blue so that you stand out from the color of the ocean.
>> Related: 27 Instagram Worthy, Insanely Colorful Destinations Around the World
12. Learn How to Pose to Show Your Best Side
- Move to good lighting
- Slightly push your butt out behind you to show a slimmer torso
- Bend your arm to create space between your arm and your body
- Turn your body 45 degrees toward the camera
- Turn your face so one ear is closer to the camera and slightly tilt your chin down
- Lean forward from the waist just a touch
- Stand tall, don’t slouch. Watch your posture. Sit up to elongate and slim your waist
- Put one foot forward—put most of your weight on the foot in the back
- Show movement—walk, twirl, look away from camera, grab your sunglasses, tuck your hair behind your ear
- Be confident
- Take candid shots
- Use props and have some fun

13. Use a Tripod
While not one of your essential photography gadgets, you may find that a tripod for your camera or your iPhone comes in handy for family photos, still shots, selfies and travel and adventure photography.

The GorillaPod might be a great inbetween tripod if your camera and lens fit the 6.6 pound weight specification.

14. Use a Selfie Stick to Take Better Travel Photos of You!
In a world with camera phones, it is a simple task to ask your travel partners or even a stranger to take your picture.
If you go on vacation and return home without a single photo of you, hand over your camera next time or consider investing in a selfie stick.
How to Take Aesthetic Photos: Follow the Rules of Composition
If you are a new photographer and are feeling a little overwhelmed as you learn to master your camera and take better travel photos, take heart. It takes a lot of practice. The amazing thing about digital cameras is that you can take as many photos as you like , delete as many photos as you don’t like, and continue learning each time you venture out with your camera to take better travel photos.
Following a few rules of composition will enhance your photos.
15. Consider the Light
Use natural light as much as possible in your photographs. Natural light generally refers to any light created by the sun (or the moon).
While it would be nice to say, “Avoid the sun at midday,” sometimes you just can’t as you are traveling. What can you do in such a situation?
- Use a lens hood
- Try to find shade
- Make a point to come back to the spot in early morning or early evening
- Have your subject turn their back to the camera
- Take advantage of the shadows cast by your subject and be creative
- Shoot from a different angle
Good lighting is essential to your photographs when you are trying to take better travel photos.
Quick Tip * Do you ever wonder where the ideal position is to have your subject stand in relation to the sun? Have them stand so that when you as the photographer are facing them, you see their shadow between you and them.
16. Use the Rule of Thirds To Take Better Travel Photos
Imagine that your screen (view finder) is divided into a grid of 9 equal sections when you frame your shot. For the most dynamic and natural photos, move your subject away from the center of the photo and place them along one of those vertical lines or where the points intersect.

You can turn ON the “GRID” option in your camera app or camera settings to visually see the grid as you take pictures. After practice, you will naturally begin to use the Rule of Thirds in your photos and take better travel photos.

Now, this is not to say NEVER CENTER YOUR PHOTOS! There is a time for centering your subject when you wish to create symmetry. But to generally achieve a more natural-looking photo, learn to use the Rule of Thirds.
17. Try Not to Have Objects Sprouting Out Of Your Subject’s Head

Photography skills 101: If you look at the composition of your photo and notice that there is a flagpole or a sign or an architectural feature that extends smack above your subject’s head, have them move a little to the left or the right.
18. Use Natural Frames

Framing is a compositional technique in photography that draws the viewer’s eye to the most important feature in your photo and creates a frame around the subject. Using frames adds more dimension to your photo.
You can achieve this framing technique using windows and doors, an arched entryway, trees and bushes, a tunnel…even an umbrella.
Once you start finding objects that can create a framing effect, you’ll begin to see them everywhere.
19. Find Leading Lines as You Compose Your Photo

Using leading lines to take better travel photos is where you basically use lines from a feature in your photo to direct the viewer’s eye toward the main story, subject, or intent within the photo. Leading lines moves the attention from one element to another.
Examples of leading lines:
- Railroad tracks
- An aisle in a church
- Architectural feature
>> Related: 15 Breathtaking Hikes in Colorado
20. Shoot from a Creative Angle

The effort to take better travel photos may simply mean taking a picture from a different perspective. This may involve shooting up from a lower angle or looking down from a higher vantage point.
Move away from always trying to see your subject eye to eye. Crouch down to a child’s level, stand on your tiptoes, or hold your phone above the crowd to capture a new perspective.
If your children are playing at a play park, try standing under them as they climb the structure or above them as they as play below.
21. Try to Capture a Reflection
Some of the coolest photos come from capturing a reflection of your desired subject.
Did you know that some photographers travel with a water bottle for this very purpose? They create a puddle on the ground in front of an architectural tourist site and take a shot of the reflection in the water.
You can also look for reflections after a rain shower, in a river or body of water, or even in a pair of reflective sunglasses.

22. Focus on the Eyes
Think back to the Rule of Thirds compositional tip. An important point when photographing people is to make sure that the subject’s eye that is closest to you is on one of those points. That is where you camera focus should be as well.
Focusing on the eyes ensures that the viewer engages with the eyes, after all “the eyes are the window to the soul.”
23. Make Sure Your Focus is Spot On
How many times have you taken a picture only to find later that it is out of focus or focusing on the wrong thing? Practice. Practice. Practice.

24. Look for Contrasting Colors

If you are visiting the beach, wear a color that pops against the color of the ocean. If you are in the mountains, zoom back a little to capture some of the bright blue sky to add extra dimensions. Even fall color pops more with the contrast of a little blue in the sky.
Adventure Photography Skills to Take Better Travel Photos
25. learn the basics of your camera.
If your goal is to improve your adventure photography skills AND take better travel photos, find a course that teaches the basic principles of photography. Find someone that teaches in a style that resonates with you.
Understanding ISO, Aperture, and Shutter Speed and how they all work together sometimes takes effort to wrap your head around.
Many professional photographers encourage you to get away from shooting in Auto Mode and “focus” on shooting in Manual Mode. That’s where understanding ISO, Aperture, and Shutter Speed is essential.
If you are traveling and moving from one scene to another, one tip is to shoot in Aperture Mode and let your camera figure out the Shutter Speed. This helps when you are on the go and want to be able to compose a shot quickly.
You can still achieve some nicely composed and focused shots.
Beginner’s Bootcamp Photography Course
26. Practice
There’s nothing like good old fashioned practice to improve your skills over time. Practice on your family. Practice on your friends. Practice on inanimate objects in your garden. Practice with each trip you go on to take better travel photos and improve your photography skills.
Study photos that professionals have taken to discover the angles they shoot from, where they focus and how they use light to their advantage.
27. Take a Course to Learn the Features of Your Camera

If you are looking for a comprehensive course that starts at the beginning, Audrey Ann from Live Snap Love has some amazing photography courses to take.
PS. She offers some FREE cheat sheets too!
- Free Manual Mode Cheat Sheet
- Free Lightroom Starter Kit
- Free Aperture Cheat Sheet
- Free 90-Day Starter Kit
- Launch into Lightroom Course
- Auto to Awesome Course
Want to learn more about these courses? Discover the 5 Best Travel Photography Courses for Beginners .
28. Study Other Photographers

One of the best ways to improve your photography skills is to study other photographers.
Follow some of your favorite photographers on Instagram and discover the Instagrammable places they shoot around the world. If you know you will be traveling to the dreamy villages outside of Florence , see what others take pictures of.
- What time of day did they take the picture?
- Did they stand from above or below?
- Did they include people in their photograph?
- What creative angle did they use?
29. Research Instagrammable Places in Advance

If you spend time on social media or Pinterest, begin to take note of particular destinations and the Instagrammable places where people take pictures. Search for “ Instagrammable places of… ”
Captions for Travel Photos
Once you have captured the best travel photos, you may wish to post them on Instagram. Here are a variety of posts showcasing the best captions for travel photos:
- 75 Romantic Instagram Quotes for Couples Who Love to Travel
- 70 Inspiring Instagram Captions for Travel
- 65 Awesome Travel Quotes for Instagram
- 300+ Instagram Content and Travel Caption Ideas for Bloggers
10 Captions for Travel Photos that Combine Photography and Travel:
- “You can always take a great photo—no matter what the conditions.” – Steve Davey
- “The whole point of taking pictures is so you don’t have to explain things in words.” – Elliott Erwitt
- “Travel photography is really a way of life: a way of traveling.” – Steve Davey
- “Having a camera around your neck gives you a good excuse to be nosy.” – Martin Parr
- “The most valuable things in life are a man’s memories. And they are priceless.” – Andre Kertesz
- “Take only pictures, leave only footprints.”
- “I think of myself as an explorer who has spent his life on a long voyage of discovery.” – Paul Strand
- “Never stop looking, no matter where you are, everywhere there are good photographs.” – Art Wolf
- “If you want to be a better photographer, stand in front of more interesting stuff.” – Jim Richardson
- “The real voyage of discovery consists not in seeking new landscapes, but in having new eyes.” – Marcel Proust
30. Book a Photography Tour
There are plenty of walking tours around the world, and many have options for photography tours as well.
My Favorite Camera Equipment
If you spend any time on social media, you may encounter people who are passionate about their brand of camera. There has long been a debate about which camera brand is the best—Sony, Canon, Nikon, etc.
The answer? Whatever camera you have with you !!!
Point and Shoot Camera

Underwater Camera

Mid-range DSLR

Just remember, you don’t have to travel with ALL of your photography equipment. Pack lightly. Take only the essentials. That may mean your camera body and one possibly two versatile lenses and a few accessories. Here are a few ideas for you to consider.
A go-to lens for the Canon T8i is the Canon EF-S 18-135 mm f/3.5-5.6 with image stabilization. It is perfect for all of your domestic AND international adventures. The Canon T8i (in the Canon Rebel Line) is a perfect beginner’s camera.

If your skills have improved and you are looking to upgrade from a T-series camera to a Canon 6D Mark II or similar DSLR, note that you will also need to upgrade your lenses from the EF-S line to the EF lenses such as this lens: Canon EF 24-105mm f/4 L IS USM Lens

Upgrading is an important consideration, as the photography hobby comes with some expensive photography gadgets and equipment!
The good news, the relatively inexpensive Canon “ nifty fifty ” lens—an EF lens—works with both camera bodies. (Be sure to pick the nifty fifty lens suited to your brand of camera).

Nowadays, with the advances in smartphone camera technology, the best camera might just be in your back pocket!

There are tripods that are small and flexible for travel, but if you are traveling solo (or even with a group), you may wish to have the added benefit of the Fugetek selfie stick in your travel gear .
The selfie stick a handy gadget complete with an iPhone and Android compatible camera stand. The stick can extend in height with an easy click-in lock and comes with a removable remote for easy one-step operation. The tripod features non-skid feet for your selfie stick to become a stand alone device.
The Canon Wireless Remote Control is a handy photography gadget that is lightweight and small. It allows you to take “selfies” with your DSLR!

Or, if your hands are full holding reflectors or if you are using a tripod, you can easily set up your camera on the remote setting and enable the remote control.
There is a specific camera setting !
Don’t forget to change the setting on your camera!
There is a debate in the photography community as to the need or value of Lens Filters. For certain types of photography, filters are essential in achieving a specific look and feel to your photos.

A UV Protected Lens Filter can be a protection to your more expensive lenses.
Be sure to purchase the correct size of filter for your lens.
While you often hear about the “golden hours” in photography, it isn’t always practical to only shoot at the first light of the morning or in the waning hours of the evening for the best light.

As you travel, you are shooting and sightseeing all day long and need to account for the sun as best you can. A Lens Hood can help you to take better travel photos during the daytime hours.
The lens hood blocks the direct sunlight from hitting the lens and allows you to take better travel photos in the bright light of the day.
Again, be sure to purchase the correct size for your lens.
Extra Memory Card
Be sure to have sufficient memory in your SD Cards . If your travel extends for an extended length of time, invest in a card with enough space for all of your vacation photos.

Having a backup card isn’t a bad idea either.
Camera Battery & Charger

Not only should you have a back up SD card as part of your photography gadgets, but having a back up Camera Battery along with your Battery Charger is a good idea.

An improvised backpack rain cover fashioned from plastic bags may work to cover your backpack and keep your camera and photography gadgets dry in a pinch. Invest in a Waterproof Backpack Covers for future rainy days.

Frequently Asked Questions
What makes a great travel photo.
Anyone can take a nice picture of the Eiffel tower. To elevate your photography skills and take great travel photos, you will need great light and excellent composition. Learn those skills to give your photography skills an edge.
What is a good quote of traveling and photography?
“Sometimes I arrive just when God’s ready to have someone click the shutter. ” ~ Ansel Adams
Is a smartphone good for travel and adventure photography?
Yes. Your iPhone may just be your best travel camera. “While the image resolution and quality might be higher on a DSLR or other high-end camera, the iPhone wins hands-down on portability and convenience.” iPhonephotographyschool.com
Love this Post? Pin it!

Final Thoughts on 30 Travel Photography Tips to Take Better Travel Photos and Look Good in Them Too!
This is a brief overview of how to take better travel photos. The key, really, is to practice, practice, practice .
There is so much more to learn if you wish to master the features of your camera, and especially to move away from shooting in Auto .
All in the hopes that you will be able to take better travel photos.
And when you arrive home from your excursions, find creative ways to display the amazing photos you took on vacation.
Related Articles
- Travel Photos: 12 Creative Ways to Share and Display Them
- 15 Popular Photography Gadgets
- 11 Instagram Worthy Beautiful Lakes Around the World
- How to Best Journal Your Travels and Your Life
- 10 Great Reasons to Visit Paris
Share on Social Media

I’m a Colorado-based travel blogger with a passion for exploring the world, enjoying family time, and taking fantastic photographs. I am also a book writing, creative thinking, detail loving, frequent flying, comfort loving mom of three girls and wife to an amazing guy.
Similar Posts

25 Awesome Beachside Getaways Around the World

100 Inspiring Instagram Travel Captions

7 Best Things To Do in Cinque Terre on a Romantic Couples Getaway

25 Seriously Cool Things to Do In Boston in The Fall

25 Great Gift Ideas for Adventure Seeking Women

39 Cool Gift Ideas for Travelers (That They Actually Want!)
48 comments.
Thanks for sharing, I really needed this article. These are some great tips. I already know about using the grid but for some reason, I still end up having photos in the center! It’s such a hard habit to break.
Great tips! I definitely try to avoid popular spots at popular times, because I am definitely not an expert at editing people out of my photos. I also really would like to start taking photos with a camera and not just a smart phone, I think that’s a great way to step up my photography game!
This is a super helpful guide! I try to use a lot of these techniques when I take photos too, but you also taught me something new with the use of the grid on your phone camera – great idea! I also swear by my selfie stick/tripod; it really comes in handy for those couple shots. Xx Sara
This is such a useful guide! I definitely need to work on my patience more as I’m not an expert at removing people from shots with software. Even using a grid, I always end up with focal points in the centre, but I guess that takes practice to break that habit. Also, love the tip on the lighting shadow direction!
Great tips Jolayne! I agree with all of these – and above all, be patient haha! Avoiding group tours is another big one for me, where possible! I’m a huge fan of Adobe Lightroom for editing. Thanks for sharing!
Patience is a virtue, especially when traveling.
Interesting idea to use the grid to take photos! Patience is definitely key when you’re trying to get photos in busy spots. We always get at least one person walking into the photo who doesn’t seem to notice we’re taking photos.
This is a fantastic post! I think so many of us are looking to up our photography game and guides like this definitely help 🙂
Thanks so much. I know I can always use helpful tips.
These are some great tips! I’m always looking to take better travel photos so I’ll be sure to test out your suggestions! And it is a good reminder that I need to spend some time getting to know my new camera too! So far it is stuck on manual mode! Thanks for the great guide!
Love all these tips! I use the Grid on iPhone camera all the time – it really helps!
It is pretty handy even if it is just a reminder.
I wished I could just ask people to move aside sometimes, but I’m so socially awkward I almost always NEVER say anything hahahah.. I like the tip about just working them into your composition though! Definitely a creative alternative way to just make the situation work for you and I’m gonna keep that positive attitude with me the next time I’m out there!
These are some great tips! I always try to get to touristy spots during off-times exactly for this purpose. I’m not a professional photographer but I can at least try to not have a bunch of people in my pictures haha
So many great photo travel tips! I especially like the ones for take better photos of yourself!
So sorry for your loss. Keep practicing on the photography and editing and you will find improvement.
A really comprehensive post, very useful. I’ve definitely suffered from photo frustration, where my mind- and even my eye- can see the capture I want but I can’t master my camera/ timing/ settings to quite get it. Practice for progress, I suppose!
On a different note, I’m glad to see the humble selfie stick getting a mention. I think they got a bad reputation at one point but used with consideration- a great tool.
WOW! This is a very comprehensive list with tons of great advice. Would be useful for everyone regardless of their skill level.
These are some great tips! I especially like the ideas for posing and wearing colors that pop.
We all want to look fantastic in our pics right?
Great tips! I am a big fan of avoiding crowds and shooting early in the morning when possible. I also love the idea of wearing items that pop – it’s great to think about contrast when shooting.
Haha i love the bit about be patient, but also simply ask people to move. So true!
Patience is a virtue as a photographer.
This guide was SO helpful! Thank you! I really appreciated the tip about shadows.
Thanks. I always love to learn more about photography.
Wait, you mean people DON’T like to see things coming out of their heads in photos?! Just kidding, but truly, that was a tip that I used to never think about, LOL! Great ideas, and beautiful photos.
Wow! Some great tips here. Thank you for sharing.
Great tips – I omitted a lot of these on my own photography tips blog so really appreciated the depth of information you put together 🙂
Thanks so much.
I love your photos! I have to start using my selfie stick!
Thanks. I am photography junkie. Just can’t help myself.
Love this post! I love taking photos and slowly but surely getting better at doing so over the years has been so rewarding. Great read <3
I like the rule of thirds– I have started using this recently and the composition is so much better!
It is where you eye tends to focus
Thanks for these helpful tips, Jolayne! Will have to try putting some of them into practice ?
Lots of great advice. I love taking photos when I’m traveling, I just need to practice with not making them on auto. We had the general Sherman tree without others since we visited at the end of April. There was another couple and we took pictures of them and they of us.
Very useful guide as I have a trip coming up! I was especially interested in the lens you recommended. Thanks!
Very helpful tips. Thanks for sharing your favorite camera equipment. That’s very helpful!
You certainly demonstrate a deep understanding and expertise. The images are mesmerizing and simply awe-inspiring. The autumn shades of the trees, in particular, capture my heart. It’s as if the leaves are giving a standing ovation to the changing seasons!
Great tips. We are constantly taking blurry pictures while running. Advice for being patient is definitely key.
Great Post! I bought myself a camera as a Christmas present a few years ago and I’m scared to death of it. So many settings to navigate through. I definitely need to take a class to get some of the basics down. Lots of great information here. Thank you!
Really some great and some easy-to-implement tips in this post! Thank you for putting this together.
Great post. Mastering photography is on my to-do list.
So many great tips here! And I definitely need to start practicing how to take better photos of myself, LOL!
Great and detailed post. This will definitely help our followers!
Great post! Definitely will give this a closer read later. I consider myself a decent amateur photographer, so really appreciate all the info and great tips!
You have some lovely photos on this post. I find these tips very useful and will try to remember them the next I am out and about. Thanks for sharing!
Awesome post!! Needed this reminder as a content creator
Leave a Reply Cancel reply
Your email address will not be published. Required fields are marked *
Save my name, email, and website in this browser for the next time I comment.
This site uses Akismet to reduce spam. Learn how your comment data is processed .
- Skip to primary navigation
- Skip to main content
- Skip to primary sidebar
- Skip to footer
DIGITAL PHOTO MENTOR
Photography tips, tutorials and guides for Beginner and Intermediate Photographers.
Travel Photography Tutorials
Are you looking to go beyond being a tourist and improve your travel photography?
Whether you are a complete beginner or an experienced photographer, here you will find plenty to fuel your photography wanderlust.

- 6 Tips for Taking More Interesting Photos of Iconic Landmarks
- Tips for improving your travel photography
- Tips for making your travel photography bucket list
- Examples, tips, and practice to improve your travel pictures
- What camera gear to take on vacation
- Photoshop Tutorial: How to remove tourists from your shots
In this section, you will find everything you need to take your travel photography beyond cliche holiday photos. I'm going to share with you an abundance of tips and tricks to help you improve your travel photographs, and avoid those travel photo fails!
Why not join me on a photo tour? Are you looking to take your travel photography to the next level? The best way to learn travel photography is to learn while traveling.
I offer group photo tours to inspirational destinations around the world . Be sure to book early as my photo tours sell out fast!
Crafting Your Travel Photography Style: Essential Tips
by Jon Enoch | Last Updated: December 18, 2023

In the article, you will learn the thought processes and planning aspects of the pros to ensure your travel photography is striking and individual.
Planning Tips for Better Photos of People in Your Travel Photography
by Darlene Hildebrandt | Last Updated: October 17, 2022

In this article, you’ll get tips on how to prepare for taking better photos of people you meet on your travels.
Fireside Chat – Virtual Travel Photography
by Darlene Hildebrandt | Last Updated: April 15, 2020

This is the first of hopefully many videos to come on virtual travel. In this episode, I talk with three of my fellow photographers about travel photography. Come along with us!
Venice Carnival – a Photography and Adventure of Canals, Masks and Architecture
by Darlene Hildebrandt | Last Updated: September 6, 2022

Take an in-depth look at what it’s like to photograph the legendary and iconic Venice Carnival. Come along, be prepared to be inspired, and get ready to survive the coronavirus.
How to Decide What to Pack for Your Next Photography Trip
by Darlene Hildebrandt | Last Updated: November 18, 2023

Knowing what camera gear to pack for a trip is hard. The tendency is to bring everything to you don’t miss a shot. But that often leads to overpacking. Here are some tips to help you decide what you need to bring and what can stay at home.
- Go to page 1
- Go to page 2
- Go to page 3
- Interim pages omitted …
- Go to page 7
- Go to Next Page »
Learn Photography Basics
Yes, you can learn to take better photos! It’s my passion to help you learn the photography basics and take better pictures. It’s also the same reason I teach workshops, do photo travel tours, and have online photography courses available.
Enroll in our free photography basics for beginners course, or 12-part portrait photography course , also free.
Recent Photography Articles
- Step-by-Step Guide to Making Stunning Portraits With One Light
- How To Discover and Develop Your Unique Photography Style
- Luminar Neo GenExpand: Game-Changer or Just Hype?
- PRO Tips – How To Create Great Looking Professional Headshots
- How To Find the Best Camera Bag for Your Needs
Useful Links
- Beginner Photography
- Intermediate Photography
- Photography Challenges
- Photography Tips
- Photo Editing
- Recommended Amazon Products
- Course Login
- Write for Us

- PHOTOGRAPHY
Travel Photography Tips
Each place we visit has its own particular look, character, and ambiance. If we want photographs of our travels to be good and lasting, they should capture all of these qualities, and say as much about a place as give the literal look of it.
We are unlikely to long remember the smell and buzz of a flower garden in spring, the awe of gazing for the first time at the mountain we intend to climb, the caress of a tropical breeze, the thrill of a huge roller coaster, the wonder of our first wild bear, or the adrenaline of rafting white water. Our photographs need to bring these and other sensations back, to trigger our memories, and to communicate how we felt to others. To do this, we need to think and feel as much as look when setting out to make photographs.
First and foremost, think about what made you decide, out of all the places in the world, to choose this particular destination. Whatever it is—the beach, the rides, the mountain, the galleries, the food—obviously appeals to you. If it didn't, you wouldn't be going there. That site or activity (or inactivity) is one of the things you want to photograph. But there are probably many other interesting aspects of the place you may not be aware of. That's where research comes in.
Photographers for National Geographic spend a lot of time doing research. This helps us figure out what's there—what the place is about and what subjects we need to cover. Read brochures and travel books. Go to libraries, bookstores, or onto the Web. Talk to friends who have been there. Pick up travel information at the country's embassy. Find whatever you can that is relevant, and devour it.
Understanding the customs and traditions of a place is vital. For one thing, you want to be sure you act in a way that is not rude or offensive while you are there, and it's hard to know what's acceptable and what isn't with some knowledge. It can also help you understand things people do that at first encounter you might consider incomprehensible or even horrifying.
When you arrive at your destination, be open and try to take note of the first impressions—write them down if you have to. (A notebook is an essential accessory for a travel photographer.) When you see a place for the first time from the plane window, or when you drive around a bend and there it is, or as the ship nears some distant island—how do you feel? Where do your eyes go first? What do you notice about the place right away? A smell? The heat or cold? Blistering sunlight? Mysterious fog? A particular building or vista? The way people move? Their dress? Whatever it is, remember it. First impressions are invaluable sparks to creative interpretation, and by definition are not repeatable. You've seen the place in pictures, you've read about it. Now you're there, and all your senses can partake.
FREE BONUS ISSUE
Get out there. The only way to discover the rhythm of life in a place, and so figure out what to shoot, is to experience it. Many places, particularly hot ones, are active very early in the morning and late in the afternoon but rather in a lull around midday. Get up early, stay out late. If you are on a tour that is scheduled to leave the hotel or ship at 9:00, get up well before dawn. Wander around before meeting up with your companions. If the tour goes back to the hotel or ship for lunch, don't go with them. Rather than take the bus back at the end of an afternoon tour, hang around until after sunset and then take a taxi. Use any spare time to get out and look for photographs. Besides availing yourself of more opportunities, time spent discovering the place will enrich your experience.
Get lost. Wander down alleys. Sit in cafés and watch life pass by. Don't eat where the tourists do, but where you see locals. Just set off down a street and see where it leads. Look around the bends, over the rises. Get away from the crowd. I find that if I meander away from the tourists and tourist sites, away from what is too familiar and comfortable, it's much easier to adapt to the rhythm of a place, and to be more observant.
Always have your camera with you and always keep your eyes open. Serendipity plays an enormously important role in travel photography. You never know what you are going to run into, and you have to be ready. Many times you will see what could be a good photograph but decide that the light is not right, or there are no people around, or too many—something that means you will have to come back later. But sometimes you get lucky. You happen to stumble upon a scene at just the right moment. If you forgot your camera, are out of film, or your digital card is full, if you have to fumble around getting the right lens on, the moment may be gone before you can recover. This is true whether you are doing street photography or visiting a natural or man-made site. Mountains, trees, monuments, and other static subjects are, of course, not going to go anywhere, but the ray of sunshine, the soaring eagle, or the embracing couple that add the needed element to your photograph are unlikely to hang around. Think of it as hunting—whenever you leave the confines of your camp, you should be ready and able to capture whatever pops up.
Make time for photography. Like doing anything well, making good photographs requires a commitment of time and energy. One problem with much of modern travel is that the days are chockablock full of scheduled tours, events, and meals. Our trips are usually of limited time, and we naturally want to see as many sites as possible. The itineraries rarely leave room for serious photography. You have to make time. It may help to make photography a scheduled part of every day, so you know you have the time and won't be tempted to get lazy and say, "I'll do it tomorrow." It might rain tomorrow. Don't procrastinate.
When traveling, you're likely to encounter all sorts of situations and subjects. This requires being a bit of a jack-of-all-trades—you need to be able to photograph portraits, landscapes, and everything in between.
Above all, work the situations over. Never be satisfied with your first view of a place or the first frame you snap. It's always possible—and usually likely—that you can come up with something better. Why else would painters make sketches? Get closer, then get closer still. Try different angles, different lenses. Wait for the light, wait for the crowd, wait for a bird to land on the tree branch. Never be in a hurry to get somewhere else. Tell yourself that nothing is more important than getting the best you can get out of the situation you are in. Once you've exhausted every possibility you can think of, you can start working on the next one.
You May Also Like

These photographs reveal invisible wonders of our world

How to photograph fireworks

How to take perfect portrait photos
Landscapes come in all forms—mountains, forests, plains, deserts, swamps, lakes, rivers, seacoasts. Each has its own characteristics, and individual sites within each category have their own too. The Grand Tetons do not look like the Andes—the Nile River is different from the Mississippi.
Whatever kind of landscape you are shooting, think about what the essential qualities are—and not just the visual ones; think about how the place makes you feel, what kind of emotions it stirs in you. Then look for ways to get those qualities and feelings onto film. Is it a rocky, violently wave-washed coast or a bright and sandy one? If it's the former, you want to show waves crashing against the shore, probably in stormy weather. Blue sky and sunlight are more appropriate for the latter unless you want to show the desolation of a resort beach in winter.
Cities and Towns
Like landscapes, each city and town has its own look and feel—a distinctive setting, architecture, or skyline; a famous local site; a particular kind of food or dress. There's always at least one thing that is unique. When covering a town or city, even a small village, you need to do three basic things at a minimum: capture a sense of place, which is usually a wide shot that shows the setting, skyline, or other view that gives a feeling for the whole; landmarks that the place is famous for; the life of its inhabitants. For the cityscapes and wide shots, as well as for the landmarks, it's a good idea to check out the postcard racks in your hotel lobby or at kiosks. They will quickly give you an idea of where the best views are and what is considered well-known enough to warrant a postcard.
Monuments and Other Buildings
When you are photographing buildings, statues, or other monuments, think about what they represent before you shoot. For example: There's a large statue of Vulcan outside Birmingham, Alabama. You could make a perfectly nice image of him standing on his hill on a sunny day, but such a picture would not say a lot about who Vulcan is. A photograph on a stormy evening, with perhaps lightning in the background, would. Cannons on a historic battlefield might look better in fog than in bright sunlight. Get the idea of the subject, then think of the weather, light, angle, etc. that best communicates it.
Photographing Family Members and Friends
We often travel with people we know—taking a family vacation, for example, or bicycling around Tuscany with a group of friends. We quite naturally want to come home with pictures of them as souvenirs of the trip. Be sure to get these, but don't forget that you can also use members of your family and your friends to make your other photographs more effective.
When you are making pictures of your friends, try to strike a balance between a picture of them and a picture of the place. A friend of mine once made a close-up portrait of me in China. It wasn't a great portrait, but more important, it could have been made in my backyard—there was nothing of the place in the frame. Of course, you may want to shoot portraits, or to capture someone's expression at a particular moment, but often you are making the picture as a way of documenting your shared experience. You want to show enough of your friend to be able to recognize him—that vertical speck in the distance could be anybody. But you don't want to be so close that there's no context. If your friend is the primary subject, he has to be strong enough to draw attention and be recognizable but still keep some sense of where he is.
Photographing Strangers
It's best to ask permission if you want to photograph someone, especially if you are working in close. Engage them before you pull out your camera. Learn at least how to say "hello" and "May I make a photograph" in the local language—just showing that you've made a little effort helps. Explain to them what you want to do and what it is about them that made you want to make a picture. If approached in an open and friendly manner, most people will be agreeable—many are flattered that someone has shown an interest in them and what they do. In places where there's a lot of tourism, you may run into people who are tired of being photographed—many tourists are not courteous enough to ask permission, and local people can come to feel abused and exploited. The only way to overcome this is to spend time with the people or to go to parts of the place less frequented by tourists.
In many tourist destinations, people may ask for money if you want to photograph them. Many of these places are desperately poor, and people have few ways of getting hold of cash. The money they ask for is usually not very much to us, but may represent quite a lot to them. How you deal with these situations is up to you, but remember that every time you buy a postcard, you are happy to spend the money for a picture somebody else took. Why not spend a little on your own?
You cannot always ask permission, of course. If you are shooting a street scene or a wide shot of a market, you can't run up to everyone and ask if it's OK. In general, people do not mind this sort of photography—it's only when they're singled out that they get uncomfortable. But not always. Be sensitive to the scene in your viewfinder. If people are getting nervous, ask permission or move on.
Make use of people to give your images life and scale. If the facade of a particular building appeals to you, the picture may be that much better if you show people walking in front of it. They will give it scale and also let viewers know what sorts of people live there, how they dress, and the like. An outdoor café may be more interesting crowded with people than empty.
Related Topics
- TRAVEL PHOTOGRAPHY
- PHOTOGRAPHY TIPS

How can you tell if a photo is AI generated? Here are some tips.

These breathtaking natural wonders no longer exist

The Cool List 2024: the 30 most exciting destinations to visit in 2024

This artist’s animal paintings bridge a gap between photography and reality

Grief drove a photographer to India. That’s where she found joy.
- Perpetual Planet
- Environment
- History & Culture
- Paid Content
History & Culture
- Photography
- Terms of Use
- Privacy Policy
- Your US State Privacy Rights
- Children's Online Privacy Policy
- Interest-Based Ads
- About Nielsen Measurement
- Do Not Sell or Share My Personal Information
- Nat Geo Home
- Attend a Live Event
- Book a Trip
- Inspire Your Kids
- Shop Nat Geo
- Visit the D.C. Museum
- Learn About Our Impact
- Support Our Mission
- Advertise With Us
- Customer Service
- Renew Subscription
- Manage Your Subscription
- Work at Nat Geo
- Sign Up for Our Newsletters
- Contribute to Protect the Planet
Copyright © 1996-2015 National Geographic Society Copyright © 2015-2024 National Geographic Partners, LLC. All rights reserved
What Skills do You Need to be a Travel Photographer?
A Post By: Kav Dadfar
Most prospective travel photographers find out very early on in their careers that travel photography is very different to taking photographs when you travel. As a travel photographer, your absolute focus has to be on taking photos, and nothing else comes above that. Tiredness, hunger, boredom, and time with loved ones are sacrificed while you are on the road, so that you can maximize your time, and achieve the best possible photographs.

Here are some of the skills needed to be a professional travel photographer.
- Perfect Planning
The reality is that the majority of the time when you are on the road, you will be pushed for time, and even more so if there are unforeseen circumstances like delays or poor weather. To ensure that you can maximize your time in each location, you have to plan as much as possible for every trip. Start off by creating a detailed shot list, then break down your trip day by day, and even hour by hour. Work out the direction of light at different times of the day, and think about the best time to photograph. If you are photographing somewhere or something that has been photographed a lot, browse through stock image libraries at what already exists, and think how you can make your shot unique. Remember to always have a back-up plan in case you have a poor weather day.
Every little detail that you can pre-plan will enable your time to be used more efficiently while you are away.
- Settle in Quickly
As a travel photographer, you have to be able to hit the ground running as soon as you reach your destination, so the ability to settle in quickly to a new place is a must. There’s no time for culture shock or jet lag, even though that is not always easy if you are in a new place, and travelling alone. The only way to combat this is to practice, and the more places that you experience, the greater confidence you will acquire in new environments.
- Master of all Trades

You’ll need to be confident photographing a wide variety of subjects.
Landscapes , cityscapes , portraits , sport, food, close-ups… the list goes on. As a travel photographer, you have to have a basic knowledge of how to photograph everything, and be confident in doing so. That doesn’t mean you have to be an expert (very few photographers are) but you need to have these skills so that you have variety, and capture a set of images that portray a destination at its best.
- Quick Reflexes
A travel photographer has to be patient when it’s needed, but you will also need lightning quick reflexes, and you need to know your camera inside out. Sometimes, you only get one chance to capture a fleeting moment that presents itself, so you have to be able to take it. You need a good understanding of the technical elements of photography such as lighting, shutter speed , and depth of field , alongside creative skills such as composition. On top of all of that you will need to put it all together in a split second. The only way to achieve this is to practice, so that it eventually becomes second nature to you.
- Strong Visual Analysis
A majority of time, the difference between a good photo and a great photo, is simply the composition. Add a person walking into a scene, and it suddenly comes alive, where before it looked ordinary. You have to be able to look at a scene, critique it in your mind, and ask yourself how you can make it look better. A technique that I like to use is to imagine where that photo might be used. Is it going to be in a double page spread in a magazine? If so, do I place my point of interest on the left or right? Try to get into the habit of making every shot you take your best.

The first photo has no point of interest and doesn’t engage the viewer. But the cable car suddenly makes the image tell a story and adds a point of interest, and a sense of scale.
- Strong Social Skills
Travel photography is about capturing different cultures, and big part of that are the people. You need to be able to move beyond any shyness, and build connections with people quickly, even if you don’t speak their language. It is incredible how receptive and friendly people are when you make the effort to talk to them – especially when they find out you are from a different country.
- Be Comfortable in Your Own Company
Unfortunately, travel photography is a lonely and solitary occupation, and the only way to ensure you can maximize your time and creative output, is to travel alone. That’s because your only priority on any trip should be to ensure you are at the right place, at the right time, all the time, to capture the best photo possible. Anything else will compromise your ability to be totally focused on the task at hand.
- Be Committed
As a travel photographer, you have to be willing to search for hours for your next photo opportunity, while at the same time, having the patience to wait, once you have found what you’ve been looking for. It’s very rare to turn up to a scene and have everything in place for the perfect photo, so the majority of time you have to be willing to wait. That could be minutes, or hours, and sometimes days, which means having to come back again and again until you capture the perfect photo.

First attempt at this view after a five hour hike.

This was was tough five hour round trip hike that I had to make two days in a row as the first attempt was spoilt by poor weather.
You’ve just spent three hours hiking up a hill and waited for sunset, only to find a thick blanket of white cloud has made the scene completely dull and now you have a three hour hike back down in the dark to look forward to. There’s no doubt that sometimes travel photography can be incredibly frustrating, which in turn can leave you feeling down and disappointed, but unfortunately there is no time to dwell on it. You just have to pick yourself up and go again, even if that means hiking back up the hill for a second time. You need to train yourself to always be optimistic about tomorrow; after all, you never know what photo opportunities will present themselves.
- A Love of Travel
It probably goes without saying, that to be a travel photographer you need to love to travel. While most people love going on vacation, not everyone enjoys travelling. There is no time for sunbathing by the pool, or spending an afternoon sitting in a bar. It’s all about experiencing things, and finding those unique moments that capture the story.
Travel photography is a very lonely, tiring and high-pressure profession. But it is also an incredibly exciting, and rewarding branch of photography, which can really make you see and experience a destination more than the average tourist. To succeed you’ll need all the skills above, and more!
What skills do you think you need to be a travel photographer? Share your tips, experiences, ideas and travel iamges below.
Table of contents
Travel photography.
- 8 Ideas of What To Do With Your Vacation Photos
- How to Capture the Essence of a Place – Travel Photography Tips
- 7 Tips to Make Travel Photography Interesting Again
- Avoid These 5 Major Mistakes Made By Travel Photographers
- Travel Photography – Do You Ask Permission Before, After Or Not At All?
- Travel Photographers Workflow – At Home and on the Road
- The Photo Critique: Travel Photo Edition
- 6 Reasons Why Your Travel Photos Don’t Look Like the Ones in Magazines
- The Fine Line Between Travel Photography and Having a family Vacation
- 10 Ways to Improve your Vacation Photos
- What is Your Biggest Travel Photography Challenge?
- 7 Travel Photography Hacks to Get You Going Places
- How to Use a Travel Photography Shot List to Come Home with Better Photos
- Why You Need To Be A Guerrilla Travel Photographer – And How To Become One
- How to Get the Most Out of a Travel Photography Location
- Travel Photography, Backpacking and Packing Light
- 6 of the Best Smartphone Apps for Travel and Landscape Photography
- How To Keep Camera Gear Safe While Traveling
- 5 Ways to Find Great Locations for Travel Photography
- 15 Tips for Protecting Your Images While Traveling
- Safety Tips for Travel Photographers (Particularly Women)
- Off Camera Flash for Your Travel Photography
- How to Use Natural Light in Travel Photography
- Photo Composition Tips from Bob Holmes – Composition in Travel Photos
- The Importance of People in your Travel Photos
- Create More Unique Travel Photos by Adding a Model
- 5 Lessons Learned Switching from DSLR to Mirrorless for Travel Photography
- How To Keep Your Batteries Charged While Traveling – Remote Location Edition
- 5 Tips For Travel With Only One Lens
- 5 Lessons Learned While Using a Kit Lens for Travel Photography
- 7 Tips for Using a Tripod in Landscape and Travel Photography
- The Best Fujifilm X-Series Kits for Travel Photography
- The First 10 Things You Need to Buy After Your Camera for Travel Photography
- Tiniest Interchangable Lens Micro Four Thirds Cameras for Travel with Amazing Quality
- The Only Three Lenses You Need for Travel Photography
- Must Have Gear for Travel Photography Newbies
- Why Olympus Mirrorless Cameras are Top Notch for Travel Photography
- The Best Travel Photography Lenses: Our Top 12 Picks
- 5 Camera Bags That Every Travel Photographer Needs At Some Point
- A Travel Tripod that can Also Act as a Light Stand
- The iPad as a Photographer’s Travel Helper [a Review]
- 7 Non-Photography Items Which No Travel Photographer Should Leave Home Without
- 7 Reasons Why a Tripod is a Travel Photographer’s Best Friend
- Travel Photography Equipment – What To Pack?
- 10 Ways to Improve Your Travel Photography Portraits
- How to Plan and Take Killer Sunset Photos on Your Next Vacation
- Tips for Photographing Local Parks
- How to Find the Best Kinds of People to Photograph While Traveling
- 4 Ways To Make Better Street Portraits While Traveling
- How to Photograph People When Traveling
- How To Take More Creative Environmental Travel Portraits
- Photographing Signs – Travel Photography Tip
- Tips for Creating Better Documentary Travel Photos
- 6 Tips for How to be a Culturally Sensitive Travel Photographer
- Travel Photography Subjects: Old People
- How to Put the Fine Art into Travel Photography
- Travel Photography without the Travel – Going Local
- How to Tell Better Visual Stories with Travel Photography
- Create a Theme to Step Up Your Travel Photography
- Travel Photography ~ Think Outside The Postcard When Photographing Famous Landmarks
- Photographing Festivals and Events – Tips for Travel Photographers
- Video: Travel Photography Tips – Shoot with a Purpose
- 7 Reasons Why You Should Art Direct Your Travel Photography
- Buy Less Gear: Travel and Experience More
- Editorial Travel Photography – Telling the Story of a Location
- Travel Photography Subjects: Religion
- Travel Photography Subjects: Views
- Travel Photography Tips – Photographing the Coast
- Taking Photos in Busy Tourist Destinations with no People in the Shot
- How to Backup and Manage Your Photos When Traveling Without a Computer
- Tips for Creating a Killer Vacation Photo Book
- Photo Editing Workflow for Travel Photography
- How to Build a Travel Photography Portfolio
- How to Become a Professional Travel Photographer – Two Paths
- 11 Tips for Shooting Travel Stock Photography to Make Money
- How to Sell a Travel Story to a Magazine and Help Fund Your Travels
- 7 Realities That Hit Once You Become a Professional Travel Photographer
- Is a Career in Travel Photography Right for You?
- Travel Inspiration: Bali
- Canadian Travelogue – Introduction
- Travel Photography Inspiration Project: South Africa
- Travel Photography Inspiration Project: Thailand
- Canadian Travelogue – Newfoundland – Gros Morne National Park
- Travel Photography Inspiration Project: India
- Travel Photography Inspiration Project: Japan
- Travel Photography Inspiration Project: Kenya
- Travel Photography Inspiration Project: Morocco
- Travel Photography Inspiration Project: Vietnam
- An Interview With World Traveler Gary Arndt
- Interview: Oded Wagenstein – Author of Snapn Travel Guide and dPS Writer

Read more from our Tips & Tutorials category

is a professional travel photographer, writer and photo tour leader based in the UK. His images are represented by stock agencies such as 4Corners Images and Robert Harding World Imagery and they have been used by clients such as Condé Nast, National Geographic, Lonely Planet, and many others. Kav is also the co-founder of That Wild Idea, a company specializing in photography workshops and tours both in the UK and around the world. Find out more at That Wild Idea .
- Guaranteed for 2 full months
- Pay by PayPal or Credit Card
- Instant Digital Download

- All our best articles for the week
- Fun photographic challenges
- Special offers and discounts

- 7 Travel Photography Jobs to take you around the World
- Career Tips
- By Lisa Michele Burns
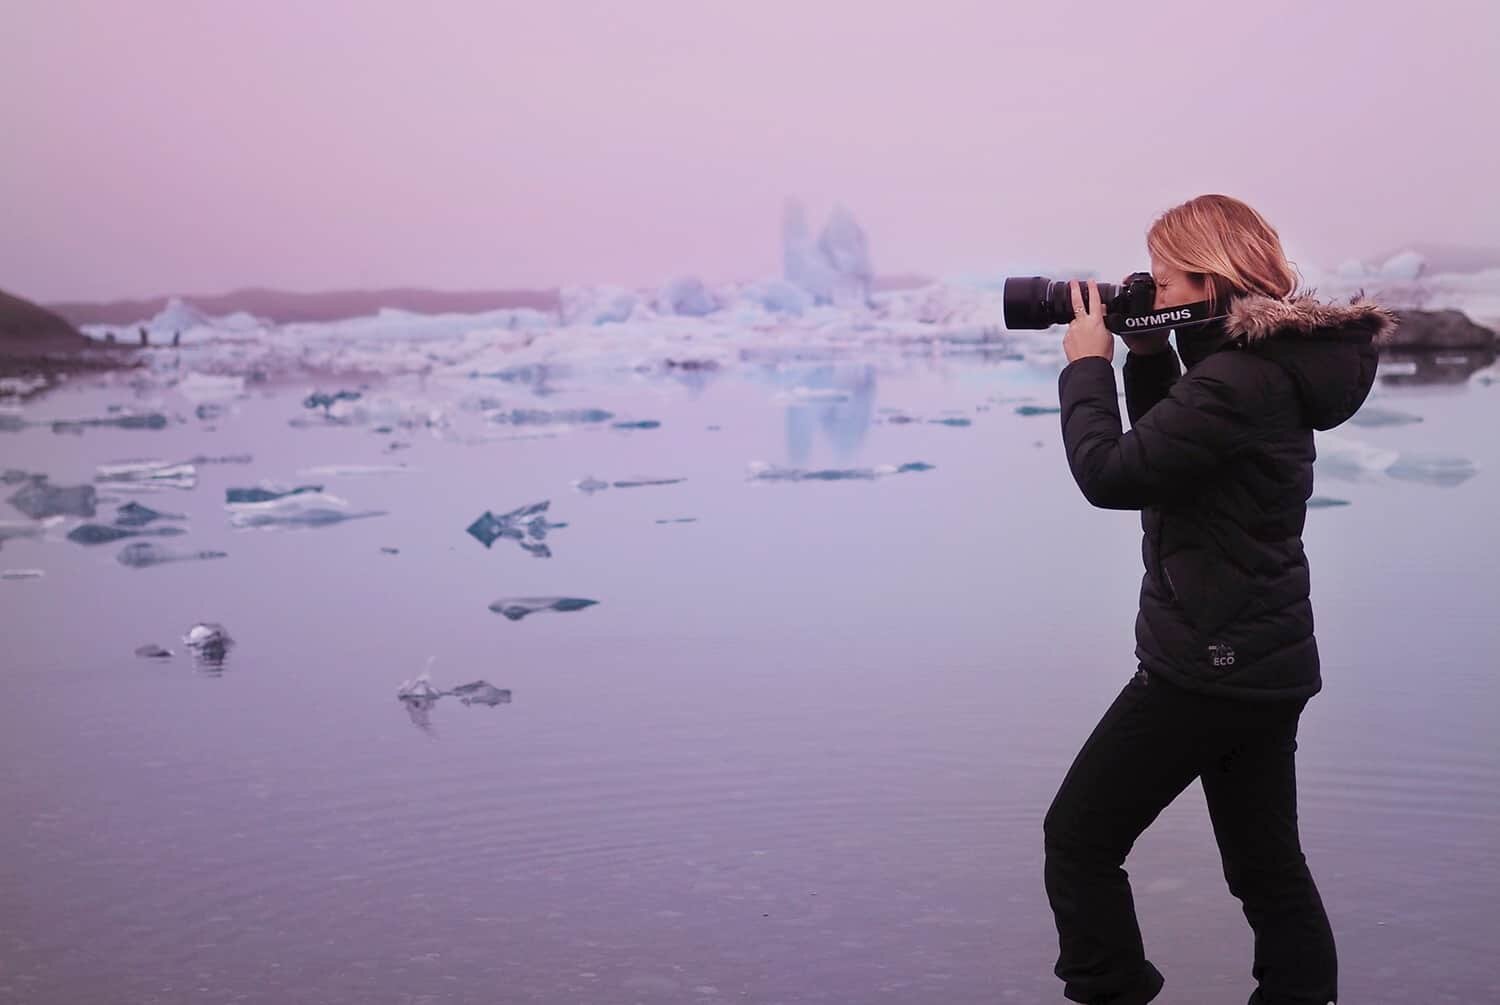
Travel Photography Jobs + Tips for Becoming a Travel Photographer
Travel photography offers a broad range of potential career paths that can see you and your camera heading off for endless adventures around the world. From working as a photojournalist to capturing photos at a resort, there are plenty of ways to combine your love of travelling with photography if you’ve got both determination and talent.
I’ve been utterly obsessed with travelling since I was in school and first attempted to become a pilot so I can fly myself (and a plane load of passengers) to exotic destinations. That plan fell through when I got violently air sick during every flying lesson so my back-up was to become a travel journalist. You can read about that journey here , but long story short, that path led to discovering the art of photography and over the past 15 years I’ve worked a number of jobs under the ‘travel photography’ umbrella and it’s been one crazy, incredible adventure.
For those with a creative mind and the motivation to turn their dream into a reality and working business, it may sound cliché but the sky really is the limit. Sure it takes a tonne of begging, pitching, rejections, both time and money, BUT, now more than ever there’s such a need for photographic content that there are plenty of positions and career paths available!
But let’s take a peek at the available jobs!
Firstly, a few tips for getting a travel photography job –
- Create an online portfolio/website of your work
- Learn photography and develop a style that’s uniquely yours ( read more here on how to stand out as a photographer )
- Don’t undersell yourself or your photography and be confident in your ability
- Find a niche or specialty
- Learn to market your work and have a pitch ready for interviews/phone calls
- Invest in quality camera equipment ( see what Olympus gear I use here )
- Be flexible, travel photography requires a commitment to time away from home and long days working, unfortunately it’s only about 15% glamourous.

Now let’s take a peek at six travel photography jobs that may just be suited for you…
Travel Photography Jobs
#1 freelance travel photographer.
Working as a freelance photographer sounds quite carefree and adventurous but it does require a lot of organisation, patience and determination. As a freelance travel photographer you’re essentially running your own business so are responsible for not only finding work and clients, but marketing, managing, researching, producing the content to a high standard and then keeping a track of your invoicing and payments.
Freelance photography is a maze of opportunities when it comes to how you can make it work as so many brands, businesses and publications need content. As a freelancer you can potentially work for multiple clients at any one time or if you’re lucky, you may score a regular gig that will ensure a stable monthly income…a big plus when working solo!
While there are endless areas within freelancing that you can find work in, if you’re looking to focus on travel photography then you’ll want to have a good portfolio of work from your previous travels to use as you pitch for work. And of course, a passion for travelling and talent that helps you stand out when approaching clients and editors!
Learn more: Enrol in a self-study program called ‘ The Freelance Travel Photographer Course ‘ with The Wandering Lens, aimed at developing your photography portfolio, industry knowledge + starting a freelance career.
Read more: ‘ How to Become a Professional Travel Photographer ‘
Having an online portfolio is essential when working as a freelance photographer, I used to actually carry around a printed album of my work and introduce myself in person (yikes, scary!) but thank goodness a well-written email introduction with a link to your work does the trick now.

Travel photography is quite a competitive market to work in however there is a constant need for content with social media, magazines, online travel guides, blogs, marketing materials, newspapers and so on all requiring regular updates and a fresh take on destinations.
If you’re looking to approach magazines to have your work published, it can be worthwhile to read the publication for a few months to get a feel for their style, what they publish and what regions they focus on throughout the year…more often than not they’ll be quite seasonal so you’ll need to time your pitch. You probably won’t find a photo or article about skiing on the shelves just before summer as an example.
A few tips for working as a freelance photographer:
- Build a portfolio of both published + personal work (I recommend the Premium plan on Wix.com , loved using it for my site!)
- Learn the art of pitching
- Ensure you have enough funds to support yourself if it’s a little slow getting clients
- Don’t take rejection as failure, you will get a lot of no’s whether you’re just starting out or established so get used to negative responses and learn to shine once you get a yes!
- Streamline your finances so you have a steady system in place for expenses/income
Exciting news – The Freelance Travel Photographer Course is a brand new online offering by The Wandering Lens.

#2 Destination Wedding Photographer
It may come as a surprise to some readers, but I actually owned a wedding photography (and landscape) business for six years on a tropical island in Australia. After the first two years on one very small (but beautiful!) island, I branched out and took enquiries for destination weddings, combining wedding photography with my addiction to travelling.
As a destination wedding photographer you’re typically booked by a couple to photograph their wedding day somewhere away from home. It could mean they’re travelling from their home to somewhere close to your base, or they may ask you to travel with them abroad to photograph their nuptials, aka the dream job.
I’ve photographed over 450 weddings and of those, many were destination weddings in places like Italy, France, New Zealand, the Cook Islands and on numerous islands of the Great Barrier Reef. The best part about working as a destination wedding photographer is that if you’re equally as passionate about travel and landscape photography as you are about weddings and portraits, then you get to combine the two and create magic for your clients!
I had a motto with my business that it was ‘blending love and landscapes’, a concept that attracted clients because my work wasn’t traditional and posed, it was relaxed and romantic mainly featuring the couple amongst a scene, enjoying their wedding day and exploring the destination. You can have a peek at my wedding portfolio here .

As a business, working as a wedding photographer abroad you need to ensure you have insurance, a good contract, price your packages to cover travel costs and just like working as a freelancer, you need to have the skills to market and manage plus a portfolio that allows couples to trust that you’ll cover their perfect day professionally.
I can’t stress enough how important it is to be professional when photographing a wedding. It may look pretty and calm on the outside but there’s a lot of pressure involved because the moments don’t happen twice so you’ll want to ensure you’re completely comfortable using your camera in any environment, are a pro at posing or relaxing your clients so they’re appearing natural and their most beautiful in front of the camera and that you’ve got all the equipment to photograph not just on the day, but to save back up and edit the images.
Tips for becoming a destination wedding photographer:
- Build a career as a wedding photographer in your local area
- Create an online portfolio of your wedding and travel images (I used Wix.com to create my portfolio site in a few hours)
- Network at wedding industry events with potential clients
- Approach destination wedding specialists (they may need to add to their list of recommended photographers)
- Be confident in your abilities as a photographer and ensure you know how to capture a wedding day from start to finish in all conditions!
- Advertise in bridal magazines, social media and ask your friends and family to spread the word if they know anyone heading abroad to get married.

#3 Resort Photographer
Many resorts whether they’re located on an island, a ski resort or are attached to a theme park will have resort photographer positions available. Typically they’ll be seasonal and are a great way to work your way around the world with the safety net of a fixed income and usually some discounted staff accommodation where most people holiday!
More often than not the positions will be quite casual, requiring a few hours work per day photographing people doing activities or you may be booked for family portraits, events or work in the photography store. This job probably won’t get you rich quick but it’s a fantastic way to improve your photography skills while working in a beautiful destination.
One of the first resort photography jobs I did was at Tangalooma Island Resort and every day was a mix between photographing people at the sand dunes, on quad bike tours (yes I got to ride one!) and then in the evening I’d shoot sunset portraits and photos in the water with wild dolphins. It’s a job that inspired a lot of what I do today and I’ll be forever grateful for the skills and people I met during the year I worked there.

Settings: ISO 200 (this was taken from a moving ski lift), f/3.5, 1/1600sec.
To find a resort photography job take a peek at online employment sites for the area you’re hoping to work. You may need to also look into working visas if you’re looking to work abroad but a number of countries have working holiday arrangements if you’re under 32 and casual work like a resort photographer is an ideal position for this type of visa!
The skill level required for a resort photography job is usually not too high as more often than not you’ll be working in a set environment so the camera settings and position won’t change too much. It’s a great job if you’re just starting out and will help build a lot of confidence as a photographer which you can then take on to bigger and more professional opportunities.
Tips for getting work as a resort photographer:
- Be flexible with starting dates, working hours and living conditions
- Show you’re a people person and can think on your feet
- Demonstrate an interest or skill in photography
- Research the resort/area you’re applying for
- Learn the basics of capturing action shots and portrait images
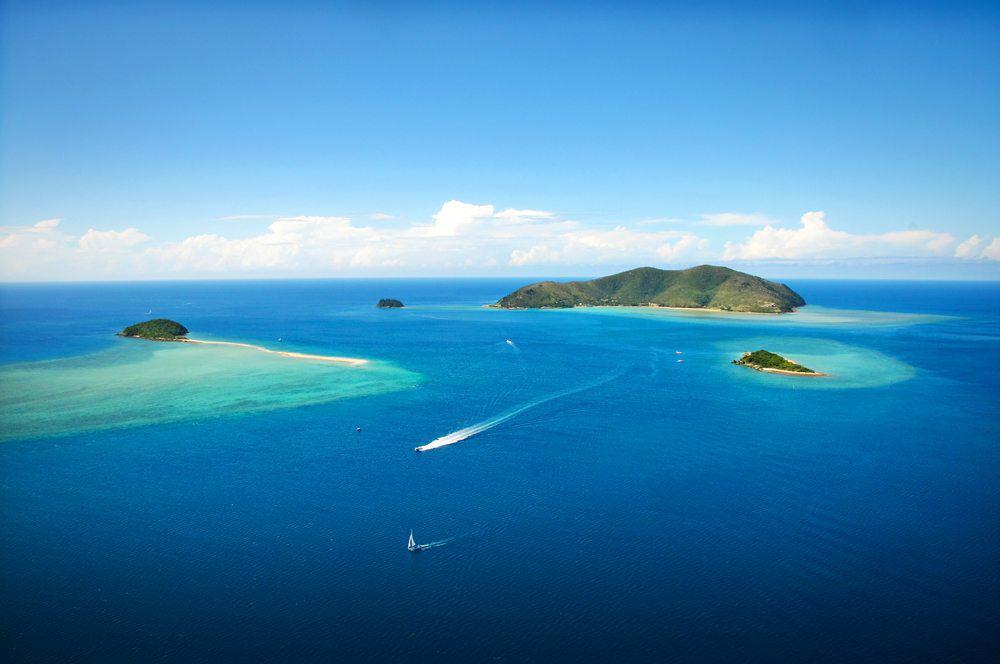
#4 Photojournalist
Possibly the most respected job in the travel photography realm, a photojournalist is quite similar to working as a freelance photographer however is associated more with commissioned work from publications or clients.
Photojournalism is traditionally relating to the coverage of an event, issue, subject or location that helps to shed light and tell a story for a newspaper, magazine, NGO or online publication. More often than not, people working as photojournalists are also journalists who can write a supporting story or provide in depth captions for their images. To work as a photojournalist who specializes in travel photography, you’ll want to have gained a lot of experience before applying for jobs or approaching editors as these are sought after gigs!
Work experience, internships or publishing your own photo features and stories on a website/blog can be a great way to get a foot in the door as a photojournalist. These steps will also help you to develop your style and skills as a photographer because you’ll be booked for your ability and proven results.

It can be helpful to have studied or have a background in journalism and then check with your local newspaper for openings within the journalism or photography departments. Online publications can also be a great place to build a portfolio of published work so once you feel you’ve got a solid skillset and have a story to tell, pitch it, there’s nothing to lose!
Also don’t forget to enter photography competitions as some include a commission and chance to have your work published! National Geographic runs a monthly ‘Your Sho t’ competition, and a number of other publications such as Wanderlust and Lonely Planet also regularly run talent based contests which can help get your work seen by editors. World Nomads offers regular travel photography scholarships that offer talented photographers a chance to learn from industry experts and have their work published! *Always check entry terms when submitting your images as some contests are run purely to grab content and don’t have the photographer’s rights in mind.
Tips for finding work as a photojournalist:
- Research the work of other photojournalists, see where they’re getting published.
- Find a niche or issue you’re passionate about
- Develop a consistent style that editors can come to rely on
- Network with writers, photographers and editors at social travel and/or publishing events
Read more: The Art of Telling Stories with your Photos

#5 Cruise Ship Photographer
Now this is a travel photography job for the more patient and seaworthy photographer…for obvious reasons. While you’ll be visiting a number of exotic ports, there’s a lot of time spent on board the cruise ship so before you follow this path, be sure you’re ready for time at sea, cramped staff cabins and repetitive working conditions.
Typical tasks as a cruise ship photographer include capturing portraits of guests on board, at dinners, doing activities and if you’re lucky, some adventures off the boat but more often than not, it’s focused around what happens on the ship itself. The size of ship can differ, there’s luxury yachts right through to the mega cruise liners and you’ll find it much easier to secure a job on board one of the big boys.

There are some very cool opportunities that exist on board expedition vessels, not just your typical cruise ship. It’s worth researching available opportunities with Arctic or Antarctic expedition cruises as they’ll have on board photographers to and these positions will be more focused on not only photographing guests but teaching them how to capture the stunning scenery you’ll pass.
It can be a great job to build your confidence and skills as a photographer and you’ll get very comfortable using flash as a lot of the time it’s a staged setting (on a traditional ship). Because you’re working with guests, there’s a lot of interaction with people so you’ll want to be comfortable socializing or looking to use this experience to bring you out of your shell a little. Take a peek at MSC’s career site to see job outlines relating to photography on a cruise ship.
A few things to check when applying for a cruise ship photography position:
- What are the hours you’ll work?
- What country is the cruise ship company based in, for visa/work permit purposes?
- What are the living arrangements like? Is it a shared cabin?
- Do you get sea sick? If so, visit your doctor to be prescribed some medication!
- Do you get to actually visit the locations the ship docks in? In my opinion there’s no point being a cruise ship photographer if all you get to see is the ship! Unless you like ships…

#6 Travel Blogger
Ever wanted to take full control of your career and release your creative projects into the world without having to wait for someone to approve them? Travel blogging may be just the thing for you!
Now firstly, take away all those ideas that a travel blogger only writes about ‘what I did on my holiday in Paris’, more often than not, bloggers are savvy and business-minded people and the blog is not only a creative outlet, but a full-time job. Travel blogging is a career path open to anyone from any background with one common interest, a love of travel and thanks to the good old internet, is a job that can be done absolutely anywhere…with a WIFI connection!
Technically you can turn your own travel blog into anything you want! You can publish hard hitting political pieces about destinations effected by war, environmental articles and images that highlight issues relating to climate change, or you can of course, focus on the travel experience, cultures and destinations both popular and more off the beaten path.
Now having a travel blog doesn’t mean you need to be an accomplished journalist or writer, you can be a photographer keen to have somewhere to publish your images. I started The Wandering Lens to write destination guides for photographers and while I have a background in journalism, I wanted the site to be very image heavy so people would be attracted to the visuals, not the words. I actually don’t love the word ‘blog’ and prefer to call it a guide or website because essentially, it’s a little library of content that sits online waiting for someone to type some golden search words into Google and discover my Destination Guides or Photo Tip archives.
Learn more – chat with me (Lisa) about your goals and I’ll personally suggest a path forward to learn faster and get started as a travel blogger and photographer! Email [email protected] and let’s chat about your career!

A blog can be a fantastic way to share some behind the scenes of your photography missions whether they’re personal or professional to document the destination or project. At first it may feel like you’re pressing publish and only your mum is taking a peek (Hi Mum!) but building an audience to follow your work is one of the essential elements of having a blog and does take time and patience.
Since The Wandering Lens started back in 2015 I’ve grown from just 100 visitors per month to over 125,000 and it’s incredible to finally see years of work paying off. There were definitely times when it just didn’t feel worth it and it takes a lot of work and a tonne of motivation to stick with it. You’ll also need to dedicate quite a bit of time to creating content, to actually do the travel part of having a travel blog! This sounds like the fun part but because you’re working for yourself, need to ensure that you’re sticking to a budget and not going bananas on the credit card to become a famous blogger…that’s never going to end well. Once you’re more established you can approach partners, tourism boards, tour operators and accommodation outlets to work in supporting your ventures to reduce costs but to do this you need to be able to prove there’s a benefit to them, eg. your blog needs a lot of visitors or you can provide them with high quality imagery.
You may hear a lot of people say that you can start a blog in just a matter of minutes, which is very true. However, to create a successful travel blog you need to continuously work on it and treat it as a business. There’s always new technical updates to install, HTML code, plugins, SEO, checking your domain name and server subscriptions are up to date not to mention writing, photographing, editing, creating a layout then working to make sure your posts are seen across social media or visible on Google.
If you love sharing stories, telling people where to find amazing places or simply just want an outlet to publish your images then building a travel blog is such a rewarding career path. Eventually you can aim to monetize your website via display advertising or affiliate income but when starting out, it’s important to lay a foundation of solid and informative content or inspiring imagery that make people want to visit your site again and again.

#7 An Influencer
Since the rise of social media, a career path has evolved that relates to creating content with the aim of ‘influencing’ others. I’m sure if you’ve got an Instagram account you’re well aware of who the influencers are, personally I still find it a little bizarre that people are out there pretending (in some cases, definitely not all), to live a certain way or use certain brands because they’re being paid to do so. I know that probably 70% (random figure) are genuine but that other chunk can make this career appear a tad questionable and from a business point of view, very risky, especially if it’s your only source of income.
Influencing is essentially marketing with a fancy new name and the game of promoting and selling things to people has been around for centuries, it’s now just a bit more obvious. Combining travel photography with being an influencer is a no brainer because visual aids are essential when selling a product or experience and the need for fresh content is never ending. Working as an influencer can mean collaborating with clients to showcase their product, creating content for them to use in their own marketing requirements or using your influence to support something meaningful or a creative project.
Read more: ‘ The Power of Instagram and how its Changing the Way we Travel ‘

There’s a lot of factors that come into working as an influencer and while it may look glamourous on the outside, there’s countless pitches, emails, negotiations, planning, research and creating that goes into taking that perfect photo. More often than not people will judge an influencer solely on their images but forget about how much time and effort went into the set up and production, something you’ll need to perfect in order to become a professional influencer.
Read more: ‘ The Best Apps for Travel Photographers ‘
I’m a little old school but of course have social media and due to my following on Instagram @the_wanderinglens , I’m often considered an influencer despite the fact I have no fashion sense or rarely show myself on camera. Starting to consider yourself an influencer usually comes down to numbers, the amount of likes and engagement you receive and also, your message…which is the part I’m much more comfortable with. Being an influencer has many, many positives because once you’ve built a large following (or small and super engaged) and audience, you can use it for good. A lot of what I share relates to revealing beautiful places to photograph, creative photo tips for people to use on their travels and very soon I’ll be sharing content from a project I’m photographing that highlights destinations impact by climatic conditions and environmental issues. There’s a number of influencers currently involved in sustainable tourism projects, clean ups, wildlife conservation and charitable initiatives which is something that’s on the increase and a wonderful outcome from the world of social media.
One thing I do want to mention about becoming an influencer is that due to the ever changing algorithms and lack of control you actually have over how your content is delivered, it can be quite a risky career move. Instead, combine social media with another element of your business such as travel blogging, travel writing and travel photography to give yourself a better chance of a stable income and more opportunities.
There are a lot of courses available online that promise to ‘help you become an influencer’ but really, you need to follow these few steps:
- Create beautiful and original content
- Engage with other users on social media
- Have a message and/or tell a story within your posts
- Curate and publish a consistent body of work ( read more about this here )
- Lastly, get lucky. Sure it requires a lot of work but sometimes it’s all about luck too!
- Be responsible, being an influencer means you’re influencing trends and behaviour so take that fact seriously
Do you have any questions about working as a travel photographer?
Leave comment below and I’ll do my best to answer!
Keen to learn more with The Wandering Lens?
If you’re eager to improve your photography, explore your creative talents and even perhaps work in the industry, you’ll find self-study courses and a library of eBooks and Workbooks via The Wandering Lens store. I’ve developed online resources for photographers, creatives, dreamers, adventurers, travellers and freelancers. If that sounds like you, maybe we should connect and chat about your photography goals! These creative courses and resources bring together my 17+years of experience and lessons from working in the industry. I want to see others share their talents and get published, sell prints, find clients – to have the confidence to achieve whatever it is you want to within the field of photography. Get in touch via [email protected] if you’d like to chat about your photography!
SELF-STUDY COURSES – ONLINE LEARNING, WORK AT YOUR OWN PACE
You’ll find The Freelance Travel Photographer Course guides you through the process of getting ready to work in the industry, teaches you about pricing, professionalism and how to get published and find clients! If you’re keen to start a little slower, The 3-Week Composition Reset program is a great way to refresh your approach to photography, learn new composition skills and find your style as a photographer.
Want to work as a travel photographer yourself?
To learn more about becoming a travel photographer, join me for an 8-week online course called The Freelance Travel Photographer Course , where I share anything and everything you need to know to succeed in the industry, based on my 17+yrs as a professional travel photographer. Alternatively, you can register to receive my free email series focused on travel photography as a career. Register for the free travel photography email series here.
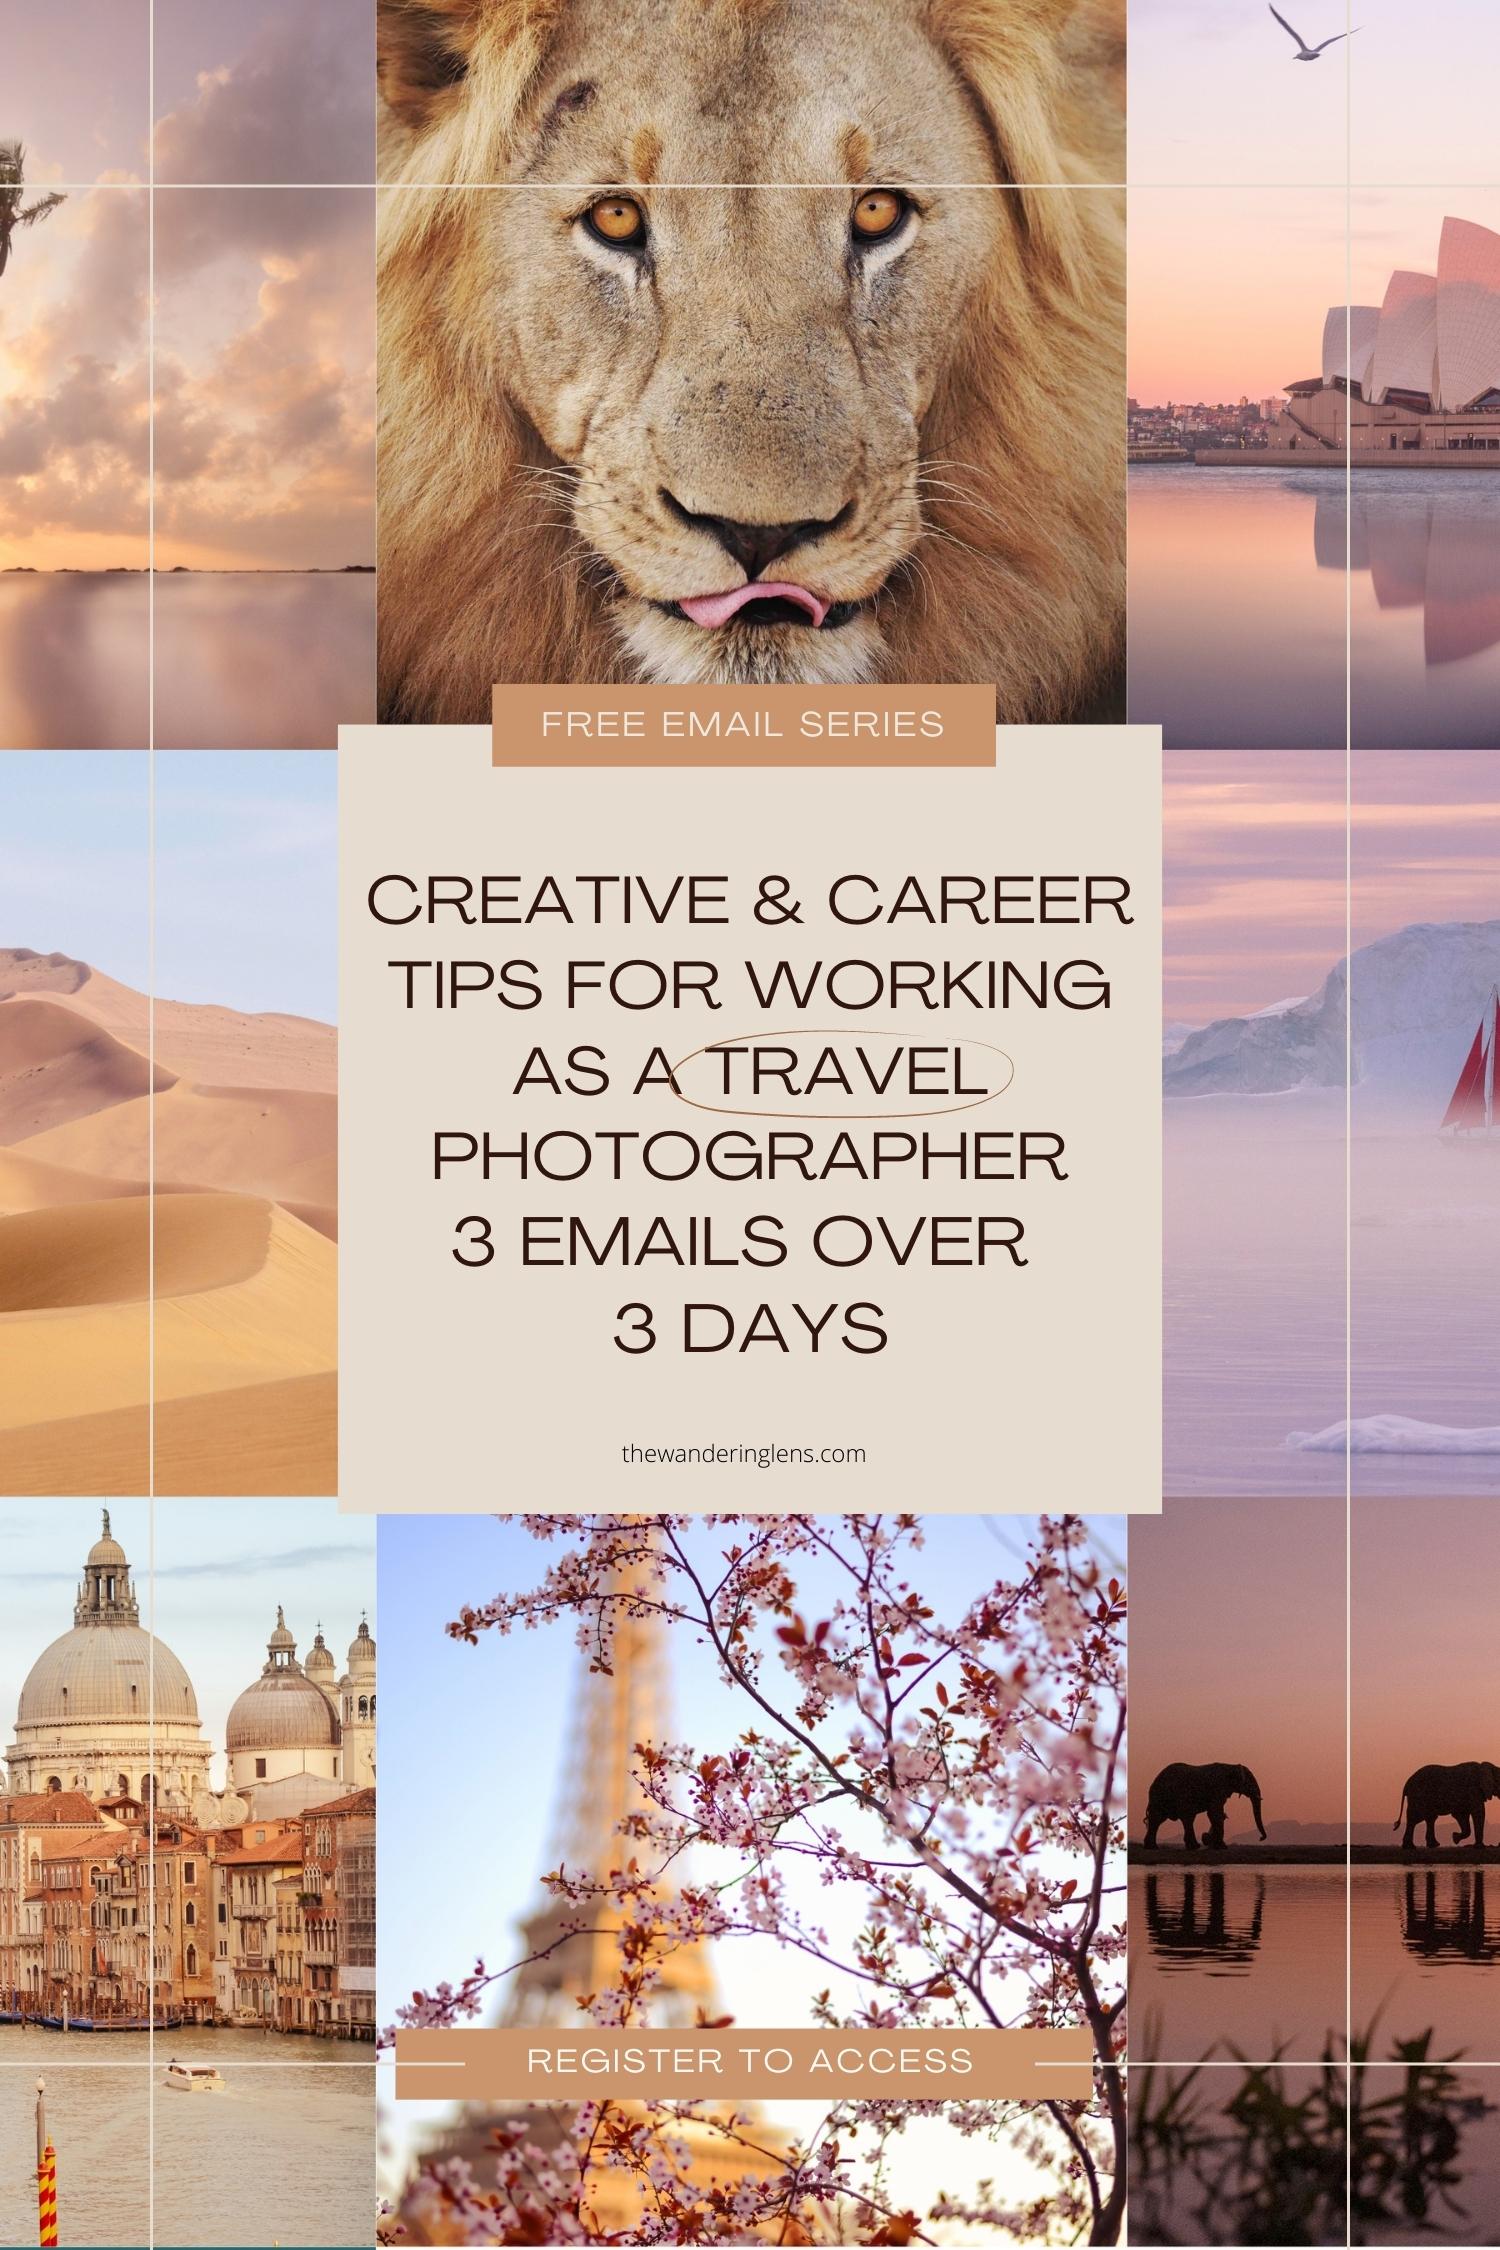
*This article contains relevant affiliate links to sites I recommend and from which I would make a small commission if you opt to use their products.

Hello! I’m the founder and photographer behind The Wandering Lens. With 17+yrs experience as a professional travel and landscape photographer, all advice found on this site is from my personal experience on the road. I hope it’s useful for your own travels and would love to hear in the comments about your trips and experiences around the world.
Enjoyed reading? Share the article!
- 15 Comments
Keep Reading...
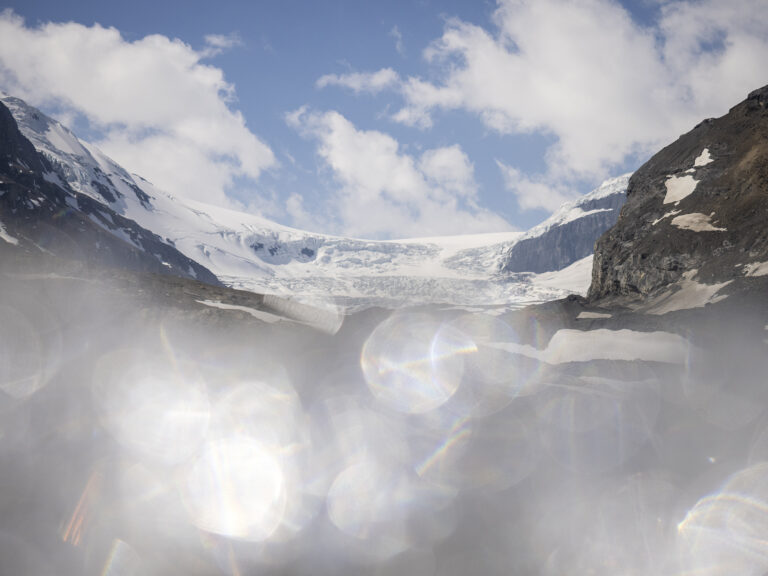
Columbia Icefields – Hiking on the Athabasca Glacier with IceWalks
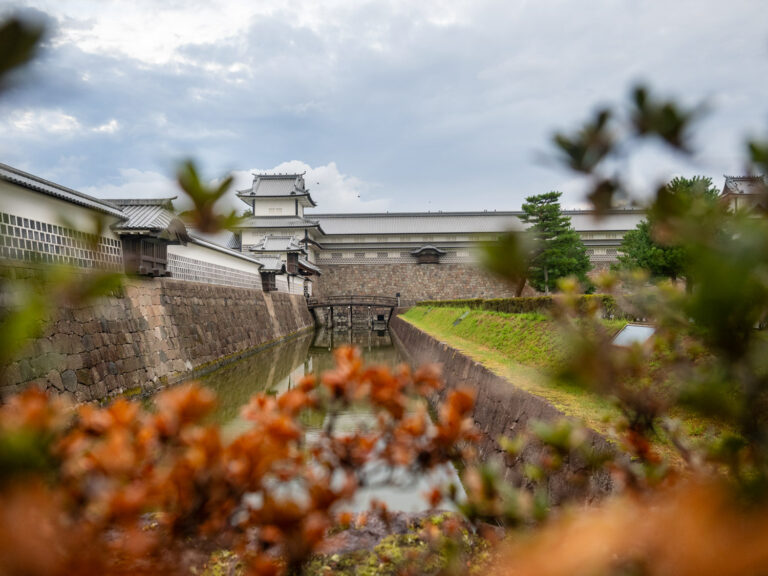
A Photographer’s Guide to Kanazawa, Japan
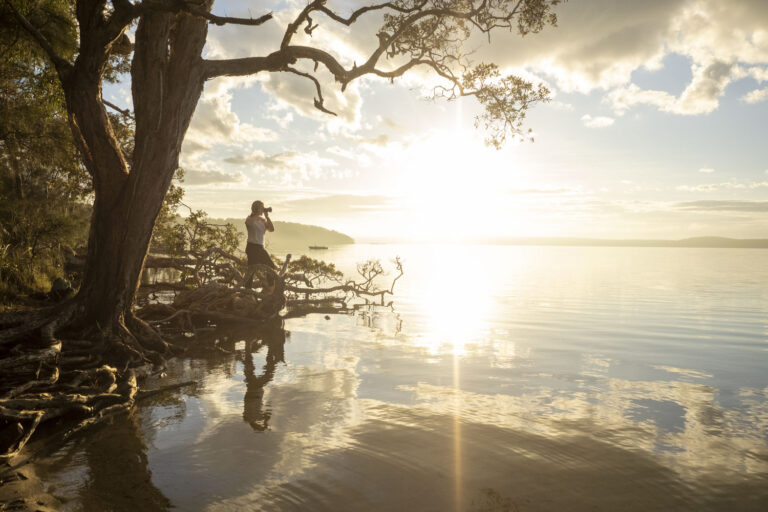
Mastering Light: A Quick Guide to Golden Hour Photography
Blog comments.
Brennen Tope
May 11, 2019 at 3:32 am
Thanks for the post! I’ve been interested in traveling more with my camera and this will give me ideas for how to support that.
airlie beach accommodation
February 27, 2020 at 8:58 pm
really cool website
April 13, 2020 at 7:18 pm
I have finished my +1,+2, in India. Now I wish to take degree in IITTM (INDIAN INSTITUTE OF TOURISM AND MANAGEMENT) in Nellore. Iam very much instrested on wild life photography and travelling photography. Do we have any chances in this. I request to kindly look into my matter.
Trisha pragassa
April 19, 2020 at 7:50 pm
Hello Lisa. My name is Trisha and I am currently in high school but preparing to go to university. I wish to undertake a course that will in turn let me pursue a career concerning travel, photography or/and geography. I was hoping you could give me some advice because I am running out of options on what I can do. If possible please help me out with my predicament. Thank you.
Lisa Michele Burns
May 7, 2020 at 3:41 pm
Hi Trisha, great to hear you’re keen to get involved within the photography and travel industries. There are so many career paths you can take that it really depends on what you want to focus on. One tip I would give, is to include some element of business and/or marketing studies in there because if you’re running your own business whether it’s focused on travel or photography, having these skills will give you a head start! Best of luck 🙂
July 8, 2020 at 7:25 pm
Thank you for great article. There are also lot of people on worldee who takes professional photos and travel.
Zach McConnell
December 14, 2020 at 10:12 pm
Awsome – this gave me so much clarity
Ivvor Rocha
January 25, 2021 at 3:09 pm
thanks for sharing
Jacqueline L. Pollock
May 31, 2021 at 8:45 pm
I remember how excited I was when I first started posting on instagram. I finally had a platform to get my work seen, tell my stories, share my life and get inspired by those of others. It was all about creativity and art and The Work, it was fair and ethical and just awesome! Things have changed a lot since, and now I often find myself feeling sick to my stomach when I have to post a new picture!
June 11, 2021 at 3:49 am
Thanks for sharing such an informative website. your all article really greats.
July 6, 2021 at 1:44 am
Thank you for the information. It is very informative. I am just beginning my journey as a travel blogger/photographer and am so excited and a little overwhelmed at everything there is to learn. I have a long way to go but believe anything good in life comes with a price. Good luck to your future endeavors. Who knows, maybe one day we must get the opportunity to meet in person.
LA Photo Party
July 12, 2021 at 4:54 pm
Great Blog. Thanks for Sharing.
Lisa Hughes
October 18, 2021 at 3:33 am
Hi Lisa, I enjoyed reading your blog. I am just getting started as a travel agent and wondered if you know of some study programs with travel photography and writing combined. Or can you suggest some other route to learn more about photojournalism. Lisa
July 2, 2022 at 7:07 pm
Hi Lisa, apologies for the delay in replying to your comment! Combining work as a travel agent with photography/travel writing is so ideal. I actually came from a similar career path and studied tourism operations and management before moving into journalism. I’ve got a self-study program available online that works through the steps of improving your photography, creating a portfolio and exploring ways in which to freelance, start a blog or sell prints via your blog/website. You’re welcome to reach out via email ([email protected]) and chat further if you like!
Vivian Kent
August 17, 2023 at 5:43 pm
Thank you so much for sharing these invaluable insights on travel photography jobs! Your article has not only inspired me but also provided practical advice that I can apply to my own journey in the world of photography. Your tips are a treasure trove for aspiring photographers like me who dream of combining their passion for travel with their love for capturing stunning moments. Your generosity in sharing your experiences is truly appreciated. Looking forward to more of your incredible content!
Leave a Comment Cancel Comment
Looking for something….

Three Pro Photographers Share Gear Tips for Shooting on the Go
O n a flight to Denver last week, I did the unexpected: I actually talked with the person next to me. Sitting on the tarmac with an unknown delay, we riffed back and forth on bad reasons why the plane wasn’t taking off. The conversation segued to work and eventually life more broadly, even though I knew I would never see the guy again. One part of our chat still stands out.
After learning that I was a professional adventure photographer, he began peppering me with questions about what was in my travel bag. It quickly became clear that he knew his stuff, so I shared some of the most important lessons I’ve learned over the years, like how to not ruin expensive gear while shooting in the elements.
All of a sudden, the stranger across the aisle chimed in, asking a question about international travel with cameras — and just like that we opened Pandora’s box. Through many conversations similar to this one, I’ve come to realize there is a growing cohort of people interested in travel photography outside of iPhones. Amateurs looking for tips to travel light, shoot on the go and keep their photo gear safe. Hopefully this story can be a resource for anyone looking to level up their game.
About The Panel
Instead of sharing just my personal (and biased) perspective, I figured it would be more useful to collect advice from some of the best and most experienced photographers I know. So, I reached out to three of my mentors, Johnie Gall, Adam Wells and Taylor Burk, who brought me into the photo world, helped me get my first jobs, grow my skills and hone my craft.
Adam Wells is a commercial lifestyle photographer and filmmaker based in San Francisco, California. He has shot projects around the world, from remote jungles in Japan to the open ocean of Alaska’s Bering Sea. He focuses on travel, outdoors, food & drink and sustainability stories, and has worked for brands big and small, including HBO, Rivian, Starbucks and National Geographic.
Taylor Burk is an adventure and travel photographer based in Vancouver, British Columbia. He also has worked all over the world, from the Gear Bear Rainforest to the deserts of Jordan to the mountains in Patagonia. He focuses on landscapes, sports and lifestyle imagery, including work with Red Bull, Chevrolet, The North Face and National Geographic, among others.
Johnie Gall is a commercial and editorial photographer based in Ojai, California. Like the two others, she has tackled assignments in far off places around the globe, but recently has focused closer to home, around the western U.S. Her biggest curiosities center on science, adventure and climate change, including projects with Patagonia, Backcountry and the Rodale Institute.
Picking the Right Bag
It may sound simple and trite, but the first piece of advice I usually give is about finding the right camera bag. Something that fits your needs, the requirements of the job, and ideally, the standards of a modern day carry-on. There is nothing worse than checking your camera gear to a dream destination, only to find a shattered lens inside (yes, it’s happened) — or even worse, a bag lost entirely.
Wells’ go-to is the 45L Travel Backpack by Peak Design , which he says maxes out the carry-on size limit while handling intense travel with versatility and comfort. Burk agrees, saying he almost exclusively uses the same backpack, with his only exception on longer backpacking trips. “If I’m going far into the backcountry, I use a bigger pack and wrap my camera gear with spare clothes or in a padded dry bag.”
Gall’s favorite is the smaller version of the same Peak Design pack , which she says is easier for her to carry and fits under airplane seats. “If I’m not traveling and just on a single day shoot, I use a leather ONA camera bag — it’s classic, rugged, lasts forever and heirloom quality.” With any bag, Burk’s biggest piece of advice is to always insure your gear, because you never know what will happen.
Peak Design 45L Travel Backpack
Peak design 30l travel backpack, ona bowery camera bag, the light-and-fast kit.
The most frequent question I get from amateur shooters, especially those who speak the love language of ISO and aperture, is about the camera and lens combination I trust the most. If I’m traveling light on a one-man show, what do I bring? Does it change for locations, jobs or types of jobs?
Gall’s advice is to not overthink the brand and instead focus on the quality of the lens. “I’ve shot with all the major camera brands and what I’ve learned is that you’ll most likely end up with a great picture if you have decent glass.” On run-and-gun jobs her go-to is a Fujifilm XT5 with a 18-55mm f/2.8 lens because it is small, light and the color is incredible. Sometimes she’ll add a Yashica t4 35mm film camera for behind the scenes shots and a DJI Mini 3 Pro to complete the story from the air. “In the water, I sometimes just use a GoPro 11 . GoPro has come a long way and is sharp right out of the camera.”
Fujifilm XT5
Dji mini 3 pro.
Wells recommends what many of us insiders call the workhorse — a Canon R5 mirrorless camera with an RF 24-70mm f2.8 lens . This pair will get you the majority of the shots that clients are looking for, and is reliable day in and day out. “In an ideal world I mix in other lenses for unique perspectives, but nothing beats the versatility and simplicity of this combo for me.”
Canon R5 Mirrorless Camera
Rf 24-70mm f2.8 lens.
Burk isn’t as much of a minimalist, saying “When it comes to gear, I try to bring as much as possible, within reason. I try to use every lens with me to capture the same subject, creating unique perspectives.” He often carries the holy trinity — 16-35mm, 24-70mm and 70-200mm — a 2x extender, and a 50mm prime, for compression and sharpness. He suggests the Packup App when organizing all your gear before a trip, to make sure you have everything. “It almost always catches something I’ve missed — redundancy is key.”
International Travel & Protecting Camera Gear
Shooting for commercial clients gets harder the farther you get from home. The always present balance of weight versus flexibility is magnified with complex travel, going further off the beaten path, charging batteries, weather and other elements and border crossings with different regulations. These factors play into the decisions of what gear to bring — and are often learned the hard way.
As a hard and fast rule, Wells will bring a 1510 Pelican Case when flying internationally. “It’s bomb proof, fits in overhead bins, and to be honest, I use it a lot as a stool when I’m tired. It goes everywhere with me and because of it I’ve never had an issue with keeping gear safe.” The case allows him to shoot a mixture of digital and analog cameras, as well as other tools like fill flashes and drones. “The case keeps all the gear organized, protected, and dry. I keep a silica gel pack in there too, to help with moisture.”
1510 Pelican Case
Silica gel pack.
The little things often make a big difference sometimes. Burk suggests colored tape to hide name brands, making them look cheaper and not as eye-catching, reducing the chances your camera gear gets stolen. “For film, I always hand check at airport security. I place everything in a mesh bag and sometimes even leave a little candy as a thank you for not ruining my photos.” However, Gall says not all airports will allow you to hand check your film. As a backup for moments like this, she brings a Domke filmguard bag .
Domke Film Guard Bag
The further you go into the backcountry, the more likely you are to deal with adverse weather conditions. Gall suggests bringing just the necessities when shooting in the elements, to reduce the risk of damaging extra gear. “Salt water will destroy a camera quickly, so I keep a microfiber towel with me to immediately wipe my gear down. Anything waterproof gets a fresh water dunk as quickly as possible.”
Creative Tips For Travel Photos
No matter what gear you have, the most important thing is the story you’re telling, says Burk. “I don’t think the camera brand matters as much as most amateurs think. It’s how you’re conveying what’s in front of you. Try focusing on something unique, honing in on it, and capturing it in a way that makes the viewer feel like they are right there next to you.”
To do that, Wells says, look for symmetry, movement and small gestures. “Try dragging the shutter on a passing motorcycle or wait until a bird flies into the corner of the frame. It’s those details that push beyond good composition and bring an image to life. Once you master manual control, it’s just a matter of how playful you can be.”
Even for professional photographers, it’s important to stay humble. Gall says that there are so many incredible photographers out there, it’s nearly impossible to get a “better” shot than what’s already been created. “However, no one will see something quite the same way you do, so take a moment to really look around and notice what someone else might not. Think like a writer or filmmaker and notice characters, settings, moments of humor or emotion. If all else fails, create layers in a photo by shooting through flowers or tall grasses, or shooting through windows or door frames to create some mystery.”
More Like This
This article was featured in the InsideHook newsletter. Sign up now .
The post Three Pro Photographers Share Gear Tips for Shooting on the Go appeared first on InsideHook .

- TripAdvisor
- Testimonials
- Travel Tips
Moscow Metro

About Me in Short

My name's Arthur Lookyanov, I'm a private tour guide, personal driver and photographer in Moscow, Russia. I work in my business and run my website Moscow-Driver.com from 2002. Read more about me and my services , check out testimonials of my former business and travel clients from all over the World, hit me up on Twitter or other social websites. I hope that you will like my photos as well.
See you in Moscow!
- View full size
- Owner: Moscow Guide & Driver
- Date: June 3, 2012 06:12:00 am EDT
- File name: ALP-2012-0603-146-Entering-Moscow-Metro-Station-Komsomolskaya.jpg
- Tags: Russia , Moscow Metro , Komsomolskaya , Moscow Highlights , escalators , Moscow Famous Landmarks , underground palace , Moscow
GPS Location of the Photo
Google maps.
- GPS Map of this album
- GPS Map of Moscow Guide & Driver's pictures
Random image

The Night View of the Red square from the Guest Rostrums
Overview of the Red Square at night, just a few days before the New Year of 2014, taken from the side of the visitor rostrum at the necropolis area, on northern side of the Lenin's Tomb. The guest rostrums were built along both sides of the Mausoleum in 1930 according to the project of an architect I.
Featured Tags
- 273 photos are tagged with architecture
- 199 photos are tagged with cathedrals
- 305 photos are tagged with churches
- 294 photos are tagged with Dear Clients
- 260 photos are tagged with lights
- 1875 photos are tagged with Moscow
- 306 photos are tagged with Moscow by Night
- 194 photos are tagged with Moscow cityscapes
- 264 photos are tagged with Moscow Kremlin
- 326 photos are tagged with night moscow
- 426 photos are tagged with Orthodox Churches
- 226 photos are tagged with Red Square
- 2538 photos are tagged with Russia
- 209 photos are tagged with twilights
- 350 photos are tagged with Winter
Take one of these exciting tours:
- Moscow Highlights
- Discovering the Golden Ring of Russia
- Arts & Culture Tours
- Moscow by Night tour
- Photographers

Going Deeper Underground: Photographer Alexey Fokin on the Moscow Metro
Moscow’s metro system is mainly known as being one of the most beautiful in the world, but photographer and actor-in-training Alexey Fokin (1995) is more interested in the gritty, human side of it. Born and raised in Russia’s hectic capital, he knows the city inside-out, and loves to go underground to capture the diverse faces of this metropolis.
Whereas most sane people would try to avoid the chaotic rush hour in the subway, Alexey enjoys getting up early, taking his camera, and capturing Muscovites making their way to work. “People are rude, everybody wants to sit down, and you’ll see faces looking like they want to kill somebody. And themselves,” he laughs, “but then suddenly, there’s a smile.” Preferring the busy stations in the city centre which connect two or more of the 14 lines, he walks through the tunnels, rides the escalators, and boards the trains – looking for scenes worth shooting.
It is hard to imagine that Alexey only took up photography two years ago. But his shots effortlessly show what life inside one of the world’s busiest metro systems is like. They display everything you expect, and more. The lovers, the cleaner, the babushka, the businessman, the tourist, the youngster, the beggar, the child. They tell you their stories with their eyes, their newspapers, their pets, their musical instruments, their flowers, their groceries, their phones, their clothes. Some with the stunning architectural backdrop of the famous stations, others in sober and at first sight unnoteworthy settings.
He likes to think of the Moscow subway as an underground metropolis in itself, as “another city with other rules”. Even though he considers it to be different from its actual streets, this subsurface universe reflects the many different faces of the capital: “Maybe poor, maybe homeless, maybe with money: all of them in one place, where they are just looking for each other, sometimes confused. So many lines of love you can find there.”
With over 200 stations and countless kilometres of underground streets, Alexey notices that people behave in ways they wouldn’t above ground. You can find people – and animals – who actually live in Moscow’s parallel world. They are smoking on the trains, drinking, getting very intimate, feeling like ‘normal’ behavioural codes do not apply to life underneath the surface.
As he is currently in his last year of acting school, Alexey is busy every day from early in the morning until late at night. But his free time is inseparable from his camera, and his intention is to make a collected photo essay about life in different metros worldwide.
Until then, he continues to show how the metro is quintessentially part of Moscow culture. He believes that everyone in Moscow has a metro story, and he does a damn good job in telling several of them through his captivating work.

©AlexeyFokin @fokinman
- Search Please fill out this field.
- Manage Your Subscription
- Give a Gift Subscription
- Sweepstakes
- Travel Tips
How to Write for 'Travel + Leisure'
Since 1971, Travel + Leisure editors have followed one mission: to inform, inspire, and guide travelers to have deeper, more meaningful experiences. T+L's editors have traveled to countries all over the world, having flown, sailed, road tripped, and taken the train countless miles. They've visited small towns and big cities, hidden gems and popular destinations, beaches and mountains, and everything in between. With a breadth of knowledge about destinations around the globe, air travel, cruises, hotels, food and drinks, outdoor adventure, and more, they are able to take their real-world experience and provide readers with tried-and-tested trip ideas, in-depth intel, and inspiration at every point of a journey.
We tell stories from around the world: stories that are big or small, visually driven or essayistic, first-person or as-told-to or service-oriented.
Our audience is made up of active and passionate travelers — travelers who book an average of seven trips per year, big and small. They're up for anything: adventure, active travel, history, solo trips, luxury, the arts, spa vacations, multi-generational travel, food, wine, RVs, private jets. (Well, some of them take private jets.) Our readers want to learn about people and places around the world, even if they'll never visit those places themselves — to gain a deeper understanding of what's relevant there, and to challenge their own assumptions.
If you want to pitch a story to us, make sure your idea adds something to the conversation. We don't want to have seen that story elsewhere. We love stories about a place that is misunderstood or changing, stories about seeing the world in a new way, and especially stories by writers or photographers who bring a new voice to the conversation about a place or topic.
What We Want From a Pitch
A paragraph encompassing:
- The topic and angle
- The scope of the story
- Why we should cover it
- Why you are the writer for the job
- Whether you've traveled yet
- If not, what kind of editorial support you'd need for travel expenses
If we've never worked with you before, a pitch is your shot at giving us a sense of what your (unedited) writing is like — feel free to show us your voice.
For stories about a particular destination: maybe you have never been to the place before; maybe you went there all the time when you were growing up; maybe you live there now. That part doesn't matter so much as why you are the right person to tell this story, and what particular angle you will bring to the table. For longer, first-person stories, we prefer to have the writer travel on assignment, or write based on a recent trip. If your story will require additional travel, let us know. If you just got back from a trip, or are already planning your own trip, let us know.
If you have never worked with us before, please also include some relevant clips and/or a link to your portfolio. Clips for digital publications are perfectly fine, but if you're pitching print it's also helpful to see what work you've done that's similar in length, style, and scope to what Travel + Leisure does in print.
What We Don't Want From a Pitch
- A list of places you're going.
- A forwarded press release, or a copy-and-pasted press release.
- A couple sentences with no real angle.
- A pitch that will justify you going on a press trip (even if you don't tell us about the trip, we can usually tell).
- A story you've already written for someone else.
- A story that's already appeared recently in Travel + Leisure or on our website , or a competing magazine/website, or even a not-really-competing magazine/website.
Please do not send a pitch to everyone on the team; instead, use the guidelines below to decide who might be the best target for your idea. If an editor says no, it is best practice to not send the same idea to another editor. And if an editor says yes, it's often advisable to try to keep working with them in the future; if they're not the right person for a particular story, they can point you to a colleague. These types of writer-editor relationships are essential and help streamline the pitching process for everyone.
Another thing: we often get asked "what we're looking for" or "what we're currently working on." We totally get it, but we will almost never be able to give you a clear response. The answers to these questions change by the minute, and it's rare that we have a "hole" that we need to fill or a story idea that needs a writer. The best way to start working with us is showing you have unique story ideas that we wouldn't find anywhere else.
What to Expect When You Pitch
Many of us have been on the other side of this conversation (i.e. we've freelanced ourselves, and pitched many other faceless editors) and we know it's often frustrating. Feel free to follow up. If you don't hear back, follow up again! We will never be offended by "if I don't hear back by X date, I'll assume you're not interested and pitch this elsewhere."
Press/FAM Trips and Conflicts of Interest
We are aware that press trips are often a necessity for writers to familiarize themselves with new places, make industry connections, and develop their voice in the travel space. We won't fault anyone for taking press trips, and we don't mind if you pitch something to us based on independent reporting from a past press trip. What's important to us is editorial integrity and fresh storytelling. If you went on the trip for another publication, or have written about it elsewhere, your pitch should be distinctly different from your previous work on the topic. If it was a group trip, your pitch should hinge on your own fresh reporting and angle, not the same itinerary attended by a dozen other writers.
Writers must disclose any and all affiliations with travel companies, tourism boards, or government entities that could present a conflict of interest in their reporting. This includes previously contracted work such as copywriting, social strategy, consulting, or acting as a brand ambassador. If in doubt, point it out! Those who fail to do so will not be considered for future assignments.
It is very, very rare that we actively send writers on press trips for print stories. If your pitch is tied to your attendance on an upcoming press trip — and we can usually tell — we will most likely say no, though we always welcome you to report back afterwards if you find anything interesting.
How to Pitch Us: Digital
Travel never sleeps and neither do we (well, we do sometimes). At travelandleisure.com we write inspirational and instructional stories for passionate travelers. Digital editorial is a mix of short-lead and long-lead story creation. We are looking for all types of travel stories: From practical travel tips and expert advice to inspirational first-person stories and features about a destination or experience. We cover small towns and big cities, beaches, lakes, and rivers (basically if it's a body of water, you'll find us there), mountains and valleys, outdoor adventures and exploring hidden gems, fine dining and speakeasies, and everything in between all over the world.
The Writing and Editing Process: Digital
We commission short-lead and long-lead stories daily. We generally work with regular contributors on our daily stories. Word count varies…a lot. We aren't constrained by page count or, quite, frankly, pages at all — our pages can scroll forever. That said, our news stories are generally 300-500 words. Our general travel stories, first-person storytelling, or listicles can be anywhere from 500 - 2,000+ words.
As you can imagine, we are pitched a lot and don't always have time to respond to every single email (please don't be offended!), so in order to make yours stand out, here's what we suggest:
- We are looking for unique stories we don't already have on our site. Please do your research first and make sure the story you're pitching wasn't recently published on travelandleisure.com.
- Your story can be a listicle or an in-depth look at a particular activity in a destination so long as there is an inspiration and service element. For example, if you're pitching a story on bird watching in Colombia, please be sure to include in your story the binoculars you used, places that offer the best watching opportunities, and any hotels that may offer this as an experience.
- Please don't send a pre-written story — we don't generally accept them. We do however want to read a short blurb about your idea (4-5 sentences) along with a grabby headline. If we are interested, we will reach back out to get more details. But, don't leave out the important bits of your story in the pitch! Remember: How you write your pitch gives us insight into the quality and style of your writing.
We do not pay by word count. We have a flat rate that we pay by type of story. Your editor will share our rate sheet with you. That said, we pay upon receipt of the story and your story must be filed with an invoice. Along with your story, you must also provide press contacts and press releases.
Our daily news writers have a minimum number of stories they write for us each day. If you're interested in becoming a daily news writer, please email [email protected] along with recent news clips, why you're interested in becoming a daily news writer, and your expertise in the travel news space.
For everything else, here's who you'll want to pitch:
- Nina Ruggiero , editorial director, overseeing site, sold campaign content, and social. [email protected]
- Alisha Prakash , associate editorial director, personal essays and first-person narratives, reported features, profiles, evergreen and seasonal SEO stories and roundups, travel tips and trends, and under-the-radar destination spotlights that offer a fresh perspective on a place. [email protected]
- Christine Burroni , senior news editor, travel news, explainers and first-person experiences that expand upon how timely news is affecting travelers, service pieces, wellness trends and tips for travelers, and celebrity interviews with a travel angle. [email protected]
- Maya Kachroo-Levine , digital senior editor; reported features on hotels, destinations, cruising, aviation, food-and-beverage experiences, art, and architecture, ideally pitched with a timely hook; longer-form profiles and articles on often overlooked communities within the travel realm. [email protected]
- Sam Lauriello , social editor, all social requests and platforms. [email protected]
- Elizabeth Rhodes , special projects editor, all-things Disney, cruising, trip ideas, and over-the-top suites. [email protected]
While we're at it, meet the rest of the Travel + Leisure digital team:
Annie Archer, assistant social editor
Mariah Tyler, visuals editor
Alessandra Amodio, photo editor
Courtney Dennis, producer
Madeline Diamond, ecommerce editor
How to Pitch Us: Print
Travel + Leisure is the only monthly print travel publication in the United States, with a circulation of nearly one million.
Print editors are usually thinking at least three months ahead, and sometimes up to a year or more. Breaking, same-day, or otherwise time-sensitive pitches will not be considered; the T+L digital team is the best point of contact for pitching travel news stories, and social takeovers.
We are also constrained in our assigning by the simple fact of page counts. Pitching for print, by nature, involves a lot of rejections. Maybe we've done a similar story recently, maybe we have something similar in the works, maybe that particular editor just doesn't love the pitch as much as others they've gotten, maybe it's just not right for our audience at the moment but two years from now it would be. It happens all the time, even for those of us on staff, and it's not a referendum on you as a person or the quality of your ideas and reporting.
Another thing: If you are used to digital timelines, please manage your expectations for print. Our internal pitching process is rigorous. If the editor you pitched likes your idea, it still has to get past a number of other people. Sometimes those people will say no. You may be grumpy about this, and understandably so! Your editor is probably grumpy, too.
Most positive responses look like: "This is such a cool idea! I'd love to run it past our executive editor to see what she thinks." or "Hey, I love this idea and I think it could be a good fit for our Discoveries section. I'll bring it up with the section editor, and if she likes it too, she will propose it to our editor-in-chief at their next meeting." At that point, we hope that you won't pitch the story around while you're waiting for next steps. Sometimes we'll be able to get an answer for you after a few days; sometimes, depending on the story, it could be a month or longer. Feel free to follow up if you're curious about where we're at, and if you're getting antsy and considering pulling the piece, let your editor know!
The Writing and Editing Process: Print
Travel + Leisure is the only monthly print travel publication in the United States, with a circulation of nearly one million. We tell stories from around the world: stories that are big or small, visually driven or essayistic, first-person or as-told-to or service-oriented.
Our audience is made up of active and passionate travelers—travelers who book an average of seven trips per year, big and small. They're up for anything: adventure, active travel, history, solo trips, luxury, the arts, spa vacations, multi-generational travel, food, wine, RVs, private jets. (Well, some of them take private jets.) Our readers want to learn about people and places around the world, even if they'll never visit those places themselves—to gain a deeper understanding of what's relevant there, and to challenge their own assumptions.
Print editors are usually thinking at least three months ahead, and sometimes up to a year or more. Breaking, same-day, or otherwise time-sensitive pitches will not be considered; the T+L digital team is the best point of contact for pitching travel news stories and social takeovers.
The Sections of the Magazine
While you don't need to have a section in mind when pitching a print story, we encourage you to familiarize yourself with them. It's a cliche for a reason: The best way to have success with a pitch is to get to know the magazine well. If you can't see a story idea fitting into any of these, it's probably not right for us. All editors on our team can slot their stories into any of these sections, but each has one or more dedicated editors who oversee the general mix of stories.
Discoveries
A globetrotter's guide to the latest in travel.
Our front-of-book opener section, made up of stories that are often bitsy and news-driven. A great place to break into the magazine.
Story Formats: Short news-driven write-throughs, roundups, Q&As, step-by-step itineraries, neighborhood guide maps, short blurbs with a collection of beautiful pictures, etc.
Story Length: 100-500 words, though the shortest pieces are usually staff written.
Experiences
Travelers' tales, from near and far.
First-person travel narratives, often with a literary bent, as well as the occasional photo essay. Where appropriate, we try to incorporate relevant travel news (e.g. new hotels, restaurants, shops, galleries, etc.) or a "why now" element.
Story Formats: Essays and written-through travelogues, occasionally broken out into itinerary form, almost always first-person.
Story Lengths: ~700-1,500 words
Intelligent Traveler
Tips and tricks to help you travel smarter.
Travel hacks and insider info on the logistics and process of travel: innovations in the industry, trends in how we're traveling, tips to help you plan ahead and save money while doing it, cool gear you should have on your radar, and news about planes, trains, and automobiles.
Story Formats: A mix of written-through pieces and broken out roundups; they are generally not first-person or based deeply in a personal experience, but rather synthesize trends or give directions. (It's okay to use a first-person experience as a jumping-off point to discuss something larger in the industry.)
Story Lengths: Under 600 words.
The longest stories in the magazine, which live in the "well"—no ads, just beautiful images and thoughtful writing. Most of these are place-based stories—usually a city or a route around a particular state, island, or country—with a literary approach and with plenty of historical and social context. These types of features always include a fairly comprehensive "how to do it" sidebar for readers who want to replicate the journey. Sometimes, we will run travel essays or commentary that aren't about a particular trip, or we'll want to showcase an outstanding photo portfolio and will commission an essay to accompany it.
Story Lengths: typically 2,500–4,000 words
A Note About Feature Assignments: It's tricky to break into T+L with a feature—they're costly to produce, we run fewer of them each year than other kinds of stories, and rarely assign them to new-to-us writers unless there's significant evidence (generally in the form of multiple feature-length bylines and/or a book) that said writer can tackle something of that scope. That's not to say it never happens, just that you may get more traction with your T+L pitches in another section of the magazine, at least until we get to know you and your work.
"Your Best Shot." On this page, we spotlight an outstanding photo from one of our readers, accompanied by a short interview about their experience getting the shot. This is not a paid opportunity, but rather a prize for our Photo of the Day contest. If you're interested, you can submit your best shots HERE for the chance to be featured on this page in a future issue.
Who to Pitch on Print
Every print editor works on all sorts of things and can direct you to the right person if it's not them. But we each focus on certain sections, themes, and geographical areas, and for new writers, those will help you decide to whom to direct your ideas.
Here's the breakdown:
- Paul Brady, news director, edits the Intelligent Traveler section and is our point person for trend pieces about the travel industry. He leads our cruise coverage and often handles stories about aviation, loyalty programs, ski/winter sports, and the polar regions. He also follows Central America, Southeast Asia. [email protected]
- Liz Cantrell, senior editor, edits the Discoveries section and commissions other stories with a focus on outdoor and adventure travel, as well as Canada, Northern Europe, and the Southern U.S., including Texas. [email protected]
- Samantha Falewée , senior editor, works on many sections with a focus on South America; Fiji and French Polynesia; Arizona and New Mexico; and the Midwestern U.S. She is also interested in cultural and Indigenous travel. [email protected]
- Denny Lee , articles editor, focuses on Mediterranean Europe (France, Italy, Greece, Portugal & Spain); East Asia (China, Japan & Korea); Eastern Europe; Western U.S. (Colorado, Montana, Utah, Nevada, Idaho, Wyoming),. He also handles our ski and winter sports coverage, and food coverage. [email protected]
- Danielle Pointdujour , senior editor, leads our hotel coverage and the brand's annual It List. She also covers destinations including the Caribbean, Central America, the Middle East, Turkey, North Africa, Florida, and Texas. [email protected]
- Flora Stubbs, executive editor, has a hand in everything, but focuses mainly on South Asia and East, West, and Southern Africa. [email protected]
- Peter Terzian, features editor, oversees our features well and curates our coverage of East Asia; the U.K. & Ireland; Scandinavia; and the Northeastern U.S. [email protected]
- Jessica Vadillo, editorial assistant, often works on packages and front-of-book items. [email protected]
- Scott Hall, photo director, and Skye Senterfeit, deputy photo editor, are the best points of contact for photographers interested in contributing or those pitching photo essays. [email protected] ; [email protected]
- Fryda Lidor, creative director, is the best point of contact for illustrators and artists interested in contributing. [email protected]
Meet the rest of the Travel + Leisure print team :
Jacqueline Gifford, editor in chief
Erin Agostinelli, managing editor
Ray Isle, wine and spirits editor
Griffin Plonchak, production manager
Kathy Roberson, copy and research chief
Lisa Greissinger, research editor
How to Pitch Us: Social
Travel + Leisure has over 15M followers across its social channels. On Instagram, we share awe-inspiring destination images, first-person travel experiences, and educational articles. On TikTok, we post travel vlogs, hotel suite tours, destination roundups, and more. Overall, we use compelling photos and videos to inspire our audience to explore the world.
We want pitches for:
- Instagram takeovers highlighting a recent travel experience
- Personality-driven TikTok vlogs recapping a trip
- TikTok series that aim to either educate or entertain (bonus points if you can do both)
What pitches should include:
- For TikToks, why it has viral potential
- Whether you've traveled yet (or whether the trip is already booked)
- A timeframe for when you could have the assets ready to go live
- 1-2 examples of your past social media work (takeovers, TikToks, photography, videography, etc.)
Please send social pitches to [email protected] .
- Northern Ireland
- Couchsurfing
- Miscellaneous
- Bucket List
- Who is Penelope?
The Most Beautiful Stations on the Moscow Metro
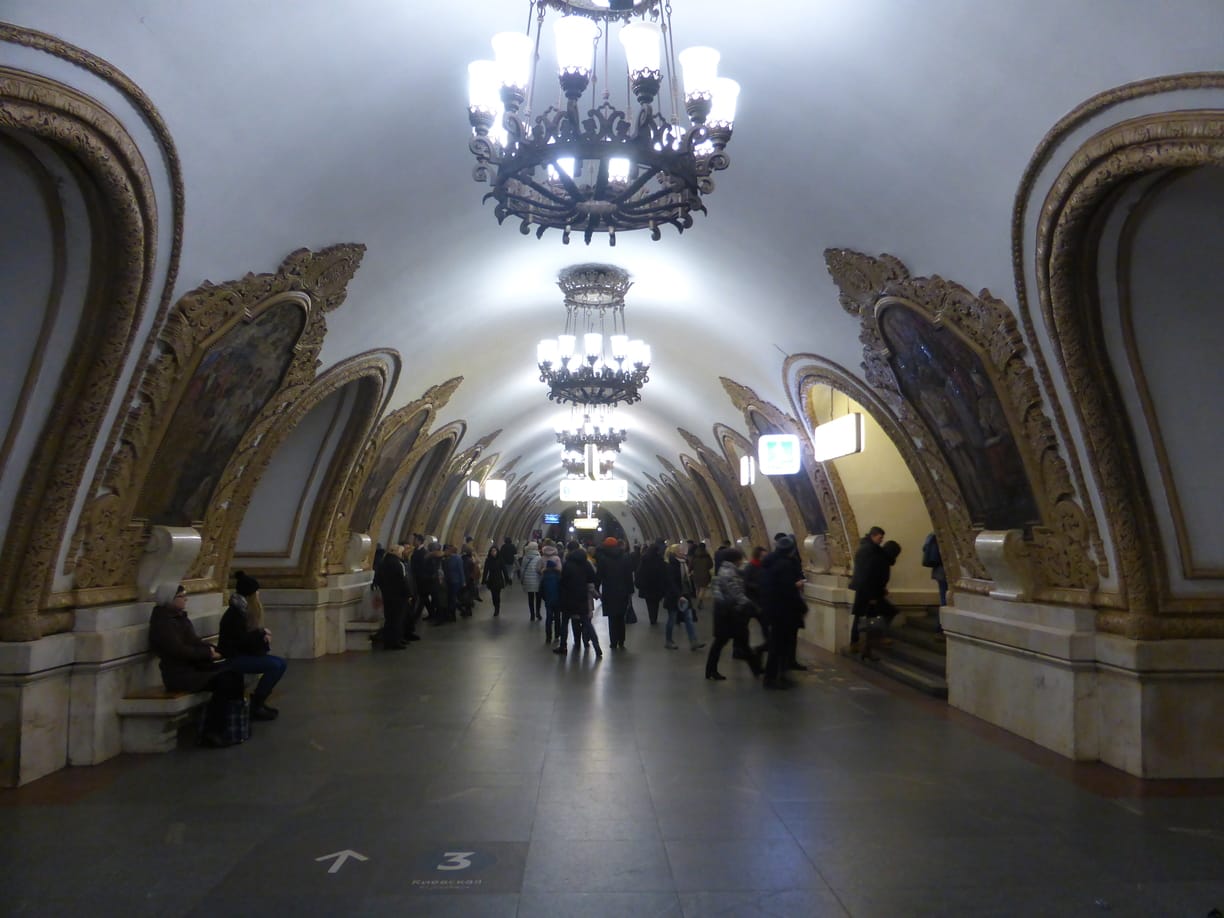
You might have heard that there are some beautiful metro stations in Moscow. Soviet decorations, chandeliers, mosaic painting and statues are common in many of the stations. The good news is that the Moscow Metro does not cost a lot of money and many of the most beautiful stations on the Moscow metro are on the same line, so you can almost get on and off at each station to visit these. Over the New Year holidays, I had a free afternoon and decided to visit some of these stations. Check out what I found below…..
The main stations that you will want to visit are on the Number 5 line, also known as the Circle Line. An advantage of this line is that you can get to it very easily and quickly no matter where you are in Moscow. The announcements on the metro are in Russian as well as English so you don’t need to worry if your Russian language skills are not good.
If, like me, you arrive in Moscow via train from Kyiv , then you will arrive at a metro station which many Muscovites believe to be the most beautiful of them all…..
Kievskaya metro station was opened in 1954 and features white marble walls which curve upwards and have with large mosaics surrounded by a gold trim in a very classical style. The mosaics depict life in Ukraine and was designed by a Ukrainian who wanted to display Ukraine’s influence and contribution to Soviet Russia.

Kievskaya, one of the most beautiful stations on the Moscow metro

Soviet era artwork between the arches

Mosaic with golden trim

People carrying flags is a common theme

Going into battle
Belorusskaya
If you look at a map of the metro , you will want to go in a clockwise direction on the circle line. So you will want to get on the train going in the Barrikadnaya direction and not Park Kultury. Stay on this line until you reach the 2nd station, Belorusskaya. This station was built in 1952 and like Kievskaya also features white marble pylons and a plaster ceiling.
The ceiling features 12 mosaics in an octagonal shape depicting Belarusian life, while the tiling on the floor is said to resemble a Belarusian quilt. One of the passageway exits of the station has a statue called ‘Belarusian Partisans’ of three men wearing long coats, holding guns and carrying a flag.”

Belorusskaya metro platform

Soviet artwork on the roof

The hammer and sickle features prominently in the metro artwork

Three men carrying guns, holding the flag…
Mayakovskaya
To get to the next station, we need to change onto the green line (line 2) and go just one stop to the station of Mayakovskaya. This station has an art deco theme and, for some, resembles an elaborate ballroom. The columns are faced with stainless steel and pink rhodonite while the marble walls and ceiling have 34 mosaics with the theme “24-hour Soviet Sky. Apparently, Stalin resided here during the 2nd World War as the station was used as a command post for Moscow’s anti-aircraft regiment.

Mayakovskaya metro

24-Hour Soviet Sky mosaic

Bomber planes

It looks like planes flying over Red Square

Novoslobodskaya
It’s time to get back on the metro and return to Belorusskaya. At Belorusskaya, change to the circle line again and continue clockwise to the next station, Novoslobodskaya. With its 32 stained glass panels, this station reminds me of a church. The panels were designed by Latvian artists and are surrounded by a brass border.

Novoslobodskaya metro

The platform of Novoslobodskaya metro

Stained glass artwork

The golden trim around artwork is also very common

Prospekt Mira
Back on the metro and again just one stop until our next station, Prospekt Mira. This station was originally called Botanichesky Sad after the nearby Botanical Gardens of the Moscow State University. The pylons are covered in white marble and decorated with floral bas-relief friezes. The ceiling is decorated with casts and several cylindrical chandeliers.

Prospekt Mira metro station

Notice the floral decoration
Komsomolskaya
On the metro once more and once more we are going just one stop to the next station – Komsomolskaya. This station is famous for its its yellow ceiling. The chandeliers in this station are huge. The photos below do not do this station justice. For me, this station resembles a presidential palace. You hace to see it for yourself to truly appreciate it.
Because of it’s location, this is one of the busiest stations in the Moscow metro as it serves three of the main train stations in the city – Leningradsky, Yaroslavsky, and Kazansky so be prepared for a lot of people.

Komsomolskaya metro

The yellow ceiling seems to go on forever

Yellow ceiling and artwork

One of the ceiling mosaics
Elektrozavodskaya
When you are ready to leave Komsomolskaya metro station behind, then get back on the circle line and go one stop to Kurskaya and change to the blue line (line 3) and go to two stops to the Elektrozavodskaya station. This station gets it’s name from a nearby electric light bulb factory and has a somewhat industrial but also futuristic style, with 6 rows of circular lamps (there are 318 lamps in total). I think this is one of the most beautiful stations on the Moscow metro for how unique it is. The station was opened in 1944 after a delay because of the 2nd World War and features 12 marble bas-reliefs of the struggle on the home front during the war.

The Komsomolskaya metro station

The struggles of war at home

Fixing machinery

Hard at work

Making weapons

Building a tank

Even the station sign is elaborate
Ploschad Revolyutsii
Back on the metro line 3 (but in the other direction), getting off at the 3rd stop – Ploschad Revolyutsii (Revolution Square). This is located underneath the square in Moscow of the same name and is a short walk from Red Square in the city centre. It is the perfect place to end a visit around Moscow’s metro. The station features red and yellow marble arches with a total of 76 sculptures in between each arch. The sculptures are supposed to represent the people of the Soviet Union and include soldiers, farmers, industrial workers, children etc… I noticed a lot of people touching the golden chicken in the photo below as well as the show of the woman. I am assuming that this is for good luck.

Industrial worker

Touch the chicken for good luck

Sculpture of the people of the Soviet Union

Woman reading a book – touch the shoe for good luck

In education

Parent and child
These are some of what I think are the most beautiful stations on the Moscow metro. Which ones are your favourite? Would you add any to this list?
You Might Also Like

The Oldest Whiskey Distillery in the World

Kjeragbolten: Scary, Exhausting and Exciting!
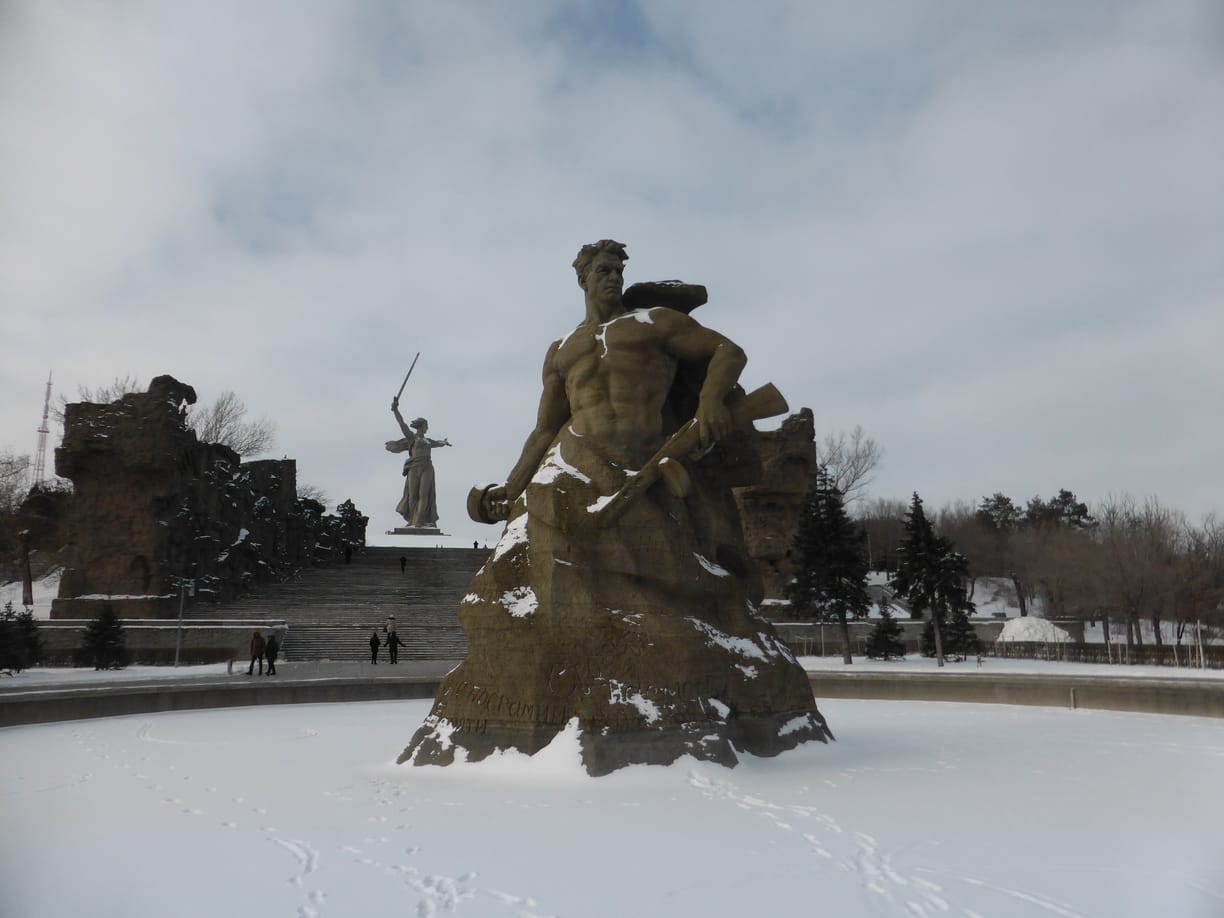
Mamayev Kurgan Memorial in Volgograd
19 comments.

Kievskaya definitely caught me off guard. Didn’t know Moscow metro stations were THIS extravagant! Mayakovskaya is gorgeous too with the marble walls and mosaics. I might just need to book a flight over to admire all of these!

Do it! Kievskaya was my first introduction to the Moscow metro as I got an overnight train from Kyiv.

You know, in the States, all we ever hear is bad stuff about Russia. It’s nice to see other (and lovely!) dimensions of such a controversial place.
It’s the same in the UK which is why I prefer going to see somewhere and making up my own mind. It’s all ‘politics and bullshit’ as I say

I went to Moscow about 13years for Christmas and went to train stations, so I can see these amazing mosaics and chandeliers. I agree with you that are beautiful Stations for sure and I could of wandered around for days. I think Kievskaya is definitely my favourite out of them all and I even have some similar pictures as you.
I imagine Moscow would have been a little different 13 years ago but these stations have probably always looked beautiful

Food and Footprints
You chose some great stations for this write up! Beautiful details in these stations and would love to visit them sometime. Particularly like the Komsomolskaya station with that yellow ceiling!
Thank you very much. Komsomolskaya seems to be a lot of peoples favourite stations too

Sumit Surai
Wow! Without the text I would have thought them to be some museum or gallery.
I know exactly what you mean!

Rosie Fluskey
Wow, it is just stunning! How does anyone get to work with so much to look at. I’m surprised at the very bourgeois-looking Komsomolskaya station. I would have thought it was all too Tzarist looking, but then I haven’t been to Russia yet lol. This has just made me want to go more!

Wow, that’s a lot of artwork. I wonder how old some of these pieces are?
Generally most of the stations are from 1940-1960 approximately. The later stations are more functional than style.

My mother-in-law was in Moscow fifty years ago and still raves about the metro stations. So far, I could not imagine much. But now! The pictures are great and I think it’s almost a pity that this splendor is underground. But for every user of the Metro can enjoy a free trip to the world of art. Susanne
True. It is like having a free trip to an art museum/gallery. I hope that you can one day visit Moscow and see for yourself.

Oh wow, I would never have known that these were metro stations. The ceilings remind me of how you need to look up sometimes, even in the commuter rush!
It is true about life in general, we just go from A to B looking directly in front of us instead of around us

Wow, I would have never guessed that these were stations. The decor is so pretty and not one I’m used to seeing at metro stations. Love the ceiling at The Komsomolskaya metro station.
They certainly don’t look like metro stations. The ceiling there is one of my favourites too!
Leave a Reply Cancel Reply
Save my name, email, and website in this browser for the next time I comment.
Notify me via e-mail if anyone answers my comment.

Turn Your Curiosity Into Discovery
Latest facts.
12 Facts About German Beer Day April 23rd
14 Facts About Sherlock Holmes Day May 22nd
40 facts about elektrostal.
Written by Lanette Mayes
Modified & Updated: 02 Mar 2024
Reviewed by Jessica Corbett

Elektrostal is a vibrant city located in the Moscow Oblast region of Russia. With a rich history, stunning architecture, and a thriving community, Elektrostal is a city that has much to offer. Whether you are a history buff, nature enthusiast, or simply curious about different cultures, Elektrostal is sure to captivate you.
This article will provide you with 40 fascinating facts about Elektrostal, giving you a better understanding of why this city is worth exploring. From its origins as an industrial hub to its modern-day charm, we will delve into the various aspects that make Elektrostal a unique and must-visit destination.
So, join us as we uncover the hidden treasures of Elektrostal and discover what makes this city a true gem in the heart of Russia.
Key Takeaways:
- Elektrostal, known as the “Motor City of Russia,” is a vibrant and growing city with a rich industrial history, offering diverse cultural experiences and a strong commitment to environmental sustainability.
- With its convenient location near Moscow, Elektrostal provides a picturesque landscape, vibrant nightlife, and a range of recreational activities, making it an ideal destination for residents and visitors alike.
Known as the “Motor City of Russia.”
Elektrostal, a city located in the Moscow Oblast region of Russia, earned the nickname “Motor City” due to its significant involvement in the automotive industry.
Home to the Elektrostal Metallurgical Plant.
Elektrostal is renowned for its metallurgical plant, which has been producing high-quality steel and alloys since its establishment in 1916.
Boasts a rich industrial heritage.
Elektrostal has a long history of industrial development, contributing to the growth and progress of the region.
Founded in 1916.
The city of Elektrostal was founded in 1916 as a result of the construction of the Elektrostal Metallurgical Plant.
Located approximately 50 kilometers east of Moscow.
Elektrostal is situated in close proximity to the Russian capital, making it easily accessible for both residents and visitors.
Known for its vibrant cultural scene.
Elektrostal is home to several cultural institutions, including museums, theaters, and art galleries that showcase the city’s rich artistic heritage.
A popular destination for nature lovers.
Surrounded by picturesque landscapes and forests, Elektrostal offers ample opportunities for outdoor activities such as hiking, camping, and birdwatching.
Hosts the annual Elektrostal City Day celebrations.
Every year, Elektrostal organizes festive events and activities to celebrate its founding, bringing together residents and visitors in a spirit of unity and joy.
Has a population of approximately 160,000 people.
Elektrostal is home to a diverse and vibrant community of around 160,000 residents, contributing to its dynamic atmosphere.
Boasts excellent education facilities.
The city is known for its well-established educational institutions, providing quality education to students of all ages.
A center for scientific research and innovation.
Elektrostal serves as an important hub for scientific research, particularly in the fields of metallurgy, materials science, and engineering.
Surrounded by picturesque lakes.
The city is blessed with numerous beautiful lakes, offering scenic views and recreational opportunities for locals and visitors alike.
Well-connected transportation system.
Elektrostal benefits from an efficient transportation network, including highways, railways, and public transportation options, ensuring convenient travel within and beyond the city.
Famous for its traditional Russian cuisine.
Food enthusiasts can indulge in authentic Russian dishes at numerous restaurants and cafes scattered throughout Elektrostal.
Home to notable architectural landmarks.
Elektrostal boasts impressive architecture, including the Church of the Transfiguration of the Lord and the Elektrostal Palace of Culture.
Offers a wide range of recreational facilities.
Residents and visitors can enjoy various recreational activities, such as sports complexes, swimming pools, and fitness centers, enhancing the overall quality of life.
Provides a high standard of healthcare.
Elektrostal is equipped with modern medical facilities, ensuring residents have access to quality healthcare services.
Home to the Elektrostal History Museum.
The Elektrostal History Museum showcases the city’s fascinating past through exhibitions and displays.
A hub for sports enthusiasts.
Elektrostal is passionate about sports, with numerous stadiums, arenas, and sports clubs offering opportunities for athletes and spectators.
Celebrates diverse cultural festivals.
Throughout the year, Elektrostal hosts a variety of cultural festivals, celebrating different ethnicities, traditions, and art forms.
Electric power played a significant role in its early development.
Elektrostal owes its name and initial growth to the establishment of electric power stations and the utilization of electricity in the industrial sector.
Boasts a thriving economy.
The city’s strong industrial base, coupled with its strategic location near Moscow, has contributed to Elektrostal’s prosperous economic status.
Houses the Elektrostal Drama Theater.
The Elektrostal Drama Theater is a cultural centerpiece, attracting theater enthusiasts from far and wide.
Popular destination for winter sports.
Elektrostal’s proximity to ski resorts and winter sport facilities makes it a favorite destination for skiing, snowboarding, and other winter activities.
Promotes environmental sustainability.
Elektrostal prioritizes environmental protection and sustainability, implementing initiatives to reduce pollution and preserve natural resources.
Home to renowned educational institutions.
Elektrostal is known for its prestigious schools and universities, offering a wide range of academic programs to students.
Committed to cultural preservation.
The city values its cultural heritage and takes active steps to preserve and promote traditional customs, crafts, and arts.
Hosts an annual International Film Festival.
The Elektrostal International Film Festival attracts filmmakers and cinema enthusiasts from around the world, showcasing a diverse range of films.
Encourages entrepreneurship and innovation.
Elektrostal supports aspiring entrepreneurs and fosters a culture of innovation, providing opportunities for startups and business development.
Offers a range of housing options.
Elektrostal provides diverse housing options, including apartments, houses, and residential complexes, catering to different lifestyles and budgets.
Home to notable sports teams.
Elektrostal is proud of its sports legacy, with several successful sports teams competing at regional and national levels.
Boasts a vibrant nightlife scene.
Residents and visitors can enjoy a lively nightlife in Elektrostal, with numerous bars, clubs, and entertainment venues.
Promotes cultural exchange and international relations.
Elektrostal actively engages in international partnerships, cultural exchanges, and diplomatic collaborations to foster global connections.
Surrounded by beautiful nature reserves.
Nearby nature reserves, such as the Barybino Forest and Luchinskoye Lake, offer opportunities for nature enthusiasts to explore and appreciate the region’s biodiversity.
Commemorates historical events.
The city pays tribute to significant historical events through memorials, monuments, and exhibitions, ensuring the preservation of collective memory.
Promotes sports and youth development.
Elektrostal invests in sports infrastructure and programs to encourage youth participation, health, and physical fitness.
Hosts annual cultural and artistic festivals.
Throughout the year, Elektrostal celebrates its cultural diversity through festivals dedicated to music, dance, art, and theater.
Provides a picturesque landscape for photography enthusiasts.
The city’s scenic beauty, architectural landmarks, and natural surroundings make it a paradise for photographers.
Connects to Moscow via a direct train line.
The convenient train connection between Elektrostal and Moscow makes commuting between the two cities effortless.
A city with a bright future.
Elektrostal continues to grow and develop, aiming to become a model city in terms of infrastructure, sustainability, and quality of life for its residents.
In conclusion, Elektrostal is a fascinating city with a rich history and a vibrant present. From its origins as a center of steel production to its modern-day status as a hub for education and industry, Elektrostal has plenty to offer both residents and visitors. With its beautiful parks, cultural attractions, and proximity to Moscow, there is no shortage of things to see and do in this dynamic city. Whether you’re interested in exploring its historical landmarks, enjoying outdoor activities, or immersing yourself in the local culture, Elektrostal has something for everyone. So, next time you find yourself in the Moscow region, don’t miss the opportunity to discover the hidden gems of Elektrostal.
Q: What is the population of Elektrostal?
A: As of the latest data, the population of Elektrostal is approximately XXXX.
Q: How far is Elektrostal from Moscow?
A: Elektrostal is located approximately XX kilometers away from Moscow.
Q: Are there any famous landmarks in Elektrostal?
A: Yes, Elektrostal is home to several notable landmarks, including XXXX and XXXX.
Q: What industries are prominent in Elektrostal?
A: Elektrostal is known for its steel production industry and is also a center for engineering and manufacturing.
Q: Are there any universities or educational institutions in Elektrostal?
A: Yes, Elektrostal is home to XXXX University and several other educational institutions.
Q: What are some popular outdoor activities in Elektrostal?
A: Elektrostal offers several outdoor activities, such as hiking, cycling, and picnicking in its beautiful parks.
Q: Is Elektrostal well-connected in terms of transportation?
A: Yes, Elektrostal has good transportation links, including trains and buses, making it easily accessible from nearby cities.
Q: Are there any annual events or festivals in Elektrostal?
A: Yes, Elektrostal hosts various events and festivals throughout the year, including XXXX and XXXX.
Was this page helpful?
Our commitment to delivering trustworthy and engaging content is at the heart of what we do. Each fact on our site is contributed by real users like you, bringing a wealth of diverse insights and information. To ensure the highest standards of accuracy and reliability, our dedicated editors meticulously review each submission. This process guarantees that the facts we share are not only fascinating but also credible. Trust in our commitment to quality and authenticity as you explore and learn with us.
Share this Fact:
IMAGES
VIDEO
COMMENTS
But for tack sharp landscapes, low-light photography, self-portraits, flowing water shots, and sunsets/sunrises, a travel tripod makes a huge difference. 7. Experiment With Composition. Get Low for a Different Perspective. You can almost always come up with a better photo composition after some experimentation.
Research the location thoroughly, including famous sights, experiences, geography, and lighting conditions. Look at existing travel photos for inspiration, but aim to create something unique. Use a spreadsheet to organize your shots by day and time, considering factors like sunrise, sunset, and harsh midday light.
Tip 8—Scout Travel Photography Locations with Your Smartphone. A great way to dramatically improve your travel photography is to scout your locations ahead of time. Before you haul all of your gear on a quest for the perfect photo, go out there with just a day pack and walk around soaking up the scenery.
Table of Contents. General Travel Photography Tips for Beginners. 1) Know Your Camera. 2) Focus on the Golden and Blue Hours. 3) Plan Your Shots. 4) Learn About Composition. 5) Framing, Framing and More Framing. 6) Move Your Feet. 7) Ask People for Permission.
Jessica Sarkodie shares a refreshing look at the unspoiled beaches of her native Ghana. Cedric Angeles flew to Mongolia for a peek inside the lives of the country's famous eagle hunters (and yes ...
Discover how you can get started with these tips. 1. Follow your wanderlust. No matter where your interest lies, if you travel for the shoot, it counts as travel photography. Like documentary photography, travel photography expresses some truth about the particular scene it captures.
16 Travel Photography Tips. Now we'll dive into our comprehensive list of tips and tricks to help you become the best travel photographer you can. 1. Time of day matters. One of the best tips for taking stunning travel photos is to plan around lighting and time of day.
Practice on your friends. Practice on inanimate objects in your garden. Practice with each trip you go on to take better travel photos and improve your photography skills. Study photos that professionals have taken to discover the angles they shoot from, where they focus and how they use light to their advantage. 27.
20 Best Travel Photography Tips. 1. Know Your Camera. Knowing the in's and out's of your camera and how to properly use it is incredibly important in taking great travel photos. If you have a new camera, I recommend watching some online videos about it, understanding the settings, and doing some low-stakes photoshoots at home before taking ...
Get Inspired by our travel photography tutorials and guides Including: In this section, you will find everything you need to take your travel photography beyond cliche holiday photos. I'm going to share with you an abundance of tips and tricks to help you improve your travel photographs, and avoid those travel photo fails!
Travel and adventure photographer James Popsys has travelled to more than 40 countries. He shares the secrets behind a successful photography business and his tips for getting started in the industry.
Here are several tips to help you take stunning travel photography with every camera click. 1. Find the right light. Finding the right light is essential for taking amazing photos for a few reasons. It's simply the best travel photography tip that anyone will tell you. Lighting is everything to capture the perfect shot.
Travel photography is becoming a popular niche, and you're in the right place if you're thinking of giving it a try (or looking to take your current technique to the next level). Anyone can become a travel photographer in 2023, but creating award-winning, stunning images takes time and practice.
A few tips on creating a great portfolio: - Keep a folder of your best shots and curate regularly. - Be your own worst critic. - Sort images based on destination, colour or style. Having a folder of your best shots for each destination will allow you to quickly access them when you need to grab them for a client.
You have to make time. It may help to make photography a scheduled part of every day, so you know you have the time and won't be tempted to get lazy and say, "I'll do it tomorrow." It might rain ...
Here are some of the skills needed to be a professional travel photographer. Perfect Planning. The reality is that the majority of the time when you are on the road, you will be pushed for time, and even more so if there are unforeseen circumstances like delays or poor weather.
Firstly, a few tips for getting a travel photography job -. Create an online portfolio/website of your work. Learn photography and develop a style that's uniquely yours ( read more here on how to stand out as a photographer) Don't undersell yourself or your photography and be confident in your ability. Find a niche or specialty.
Whether you're an aspiring travel photographer or simply someone who loves to document their journey, these tips are bound to elevate your photography game. ...
Here are seven steps you can follow to help you become a travel photographer: 1. Establish goals. A helpful first step toward becoming a travel photographer is to set goals that help you create a business model you can sustain. Try asking yourself questions about why you've chosen this career and what steps you plan to take to achieve your ...
Gall's advice is to not overthink the brand and instead focus on the quality of the lens. "I've shot with all the major camera brands and what I've learned is that you'll most likely end ...
In fact, Komsomolskaya-Ring marks the height of the Stalinist Empire style in the Moscow Metro. The station design was awarded a grand prix at the International Exhibition in Brussels in 1958. Photo #146 taken on June 03, 2012 during Moscow Metro tour with my Dear client from USA, Brandon Pelsmaeker.
Moscow's metro system is mainly known as being one of the most beautiful in the world, but photographer and actor-in-training Alexey Fokin (1995) is more interested in the gritty, human side of it. Born and raised in Russia's hectic capital, he knows the city inside-out, and loves to go underground to capture the diverse faces of this metropolis.
First-person travel narratives, often with a literary bent, as well as the occasional photo essay. Where appropriate, we try to incorporate relevant travel news (e.g. new hotels, restaurants ...
Ploschad Revolyutsii. Back on the metro line 3 (but in the other direction), getting off at the 3rd stop - Ploschad Revolyutsii (Revolution Square). This is located underneath the square in Moscow of the same name and is a short walk from Red Square in the city centre. It is the perfect place to end a visit around Moscow's metro.
40 Facts About Elektrostal. Elektrostal is a vibrant city located in the Moscow Oblast region of Russia. With a rich history, stunning architecture, and a thriving community, Elektrostal is a city that has much to offer. Whether you are a history buff, nature enthusiast, or simply curious about different cultures, Elektrostal is sure to ...