
How to Adjust Trailer Brakes in 10 Easy Steps
What’s more important than hauling your RV or trailer to your destination? Being able to arrive safely and, of course, stop when you need to. Keeping your trailer brakes adjusted is crucial. And learning how to do this yourself will definitely come in handy.
How do you adjust trailer brakes? Here are 10 ways to adjust electric trailer brakes. Later, air brakes and surge brakes will be addressed.
- Gather the right tools
- Jack up wheel
- Free the wheel
- Remove adjusting hole cover
- Insert a flat-head screwdriver or brake adjusting tool
- Locate star wheel
- Click star wheel
- Free the wheel tire
- Clean out rust
- Replace cap
This is a simple process, but it does take some time. If your trailer brakes aren’t properly adjusted, it will put a strain on your vehicle’s brakes because the vehicle will be doing all the work. This can be a safety hazard. Whatever type of brakes you have, with a few tools and these steps, you’ll be back on the road in a jiffy.
10 Easy Steps to Adjusting Trailer Brakes
1. gather the right tools.
There are only a few tools needed to perform a proper trailer brake adjustment. They include:
- A rollaway jack or a bottle jack
- Flathead screwdriver or brake adjusting tool
- Safety goggles
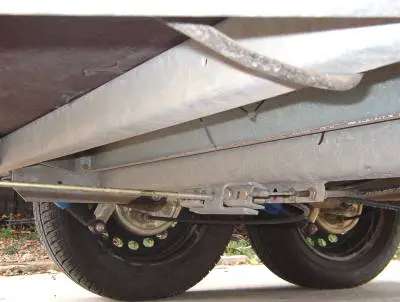
2. Jack up the wheel
When raising a trailer’s wheel, always lift by the frame. Never lift with the axel. Do not go under the trailer unless the trailer is supported by jack stands. Lift a wheel off the ground one at a time. Your automobile jack may not be strong enough to lift your trailer. A trailer can be heavier than an automobile.
3. Free the wheel
Make sure the wheel is jacked up high enough so that if freely rotates.
4. Remove the adjusting hole cover
Remove the rubber adjusting cap. It’s located underneath the brake drum. This is below the brake backing plate in the back of the wheel. If it’s an older trailer, don’t be alarmed if the adjusting cap is missing. It’s still workable. Beneath the adjusting cap, you will find a slot.
5. Insert a screwdriver or brake-adjusting tool
Insert your screwdriver or adjusting tool into the slot.
6. Locate the star wheel
A specialized gear called a star wheel is in the slot. The star wheel’s teeth are uncovered on the edges. It’s called a star wheel because the teeth or ridges stick out in a star shape. With the inserted tool, feel around for the teeth in the star wheel. When you have a grip on one, you’ll find your tool won’t slip.
7. Click the star wheel
Push your end of the tool down, allowing the inserted end of the tool to go up. It’s a similar motion as a teeter-totter…up and down. You’ll hear a clicking noise. You’ll want to give it at least five clicks.
8. Freewheel the tire.
Freewheel the tire and see how it feels. You want to feel a little drag, so you know it’s barely touching the brake drum. But the wheel should still freely rotate. If you feel it needs more adjustment, insert the tool and listen for another click or two.
9. Clean out any rust
There might be some rust or scaling on the cast iron of the brake plate. This can happen if:
- You store your trailer outside
- Live in the Northeast
- Live in a damp or rainy area
As you adjust the brake, you’re going to have some of that scale knock off. Rotate the wheel a few times to clean some of it out.
10. Replace the cap
Replace the rubber cap. And you are finished.
What is an Electric Trailer Brake Controller?
Electric brakes use a brake controller in the towing vehicle’s cabin. Because electric brakes use electromagnets to initiate the drum brakes, you use the brake controller and the brake light circuit to control the electricity to the brakes.
The brake controller can also be used manually with your hand to apply a small amount of braking. This is usually done when a trailer begins swaying. This can happen:
- Descending a hill
- In high winds
- Being passed by large semi-trucks
How to Adjust an Electric Brake Controller
The brake controller is located in the cab of your vehicle. When engaged, it sends a signal from your vehicle’s brakes to your trailer’s brakes. This reduces the wear and tear on your rig’s brakes. It also stops the vehicle more safely. The following are the steps to adjusting your brake controller. We’ll go into each step in more detail below.
- Hook up the trailer to the vehicle
- Warm the trailer brakes
- Power control knob
- Release the accelerator while driving
- Braking action
- Driving test
- Fine-tune adjustments
1. Hook up the trailer to the vehicle
Connect the vehicle and the trailer. The electrical plug will be near the trailer hitch.
2. Warm the trailer brakes
Drive the vehicle at forty-five MPH. Apply the manual lever on the controller for around one-quarter of a mile. Make sure you have towed the trailer to a flat, dry area such as:
- Parking lot
- Deserted road
3. Power control knob
Do not turn off the engine. Set the power control knob on its mid-point setting.
4. Release accelerator while driving
Begin moving. Accelerate to twenty-five MPH and then release the gas pedal.
5. Maximum limit
Move the control lever to its maximum limit.
6. Braking action
Begin to brake. If you notice the wheels locking or skidding, turn the power level down. Continue brake and note how the brakes react. If the trailer doesn’t brake properly, turn up the power. If the wheels skid or lock, turn it down. Maneuver it until you have the braking action you desire.
7. Driving Test
Continue going back and forth with the power level. Test the breaks for several minutes. Remember, stay on a flat surface.
8. Fine-tune adjustments
Continue testing. Use the brake pedal to slow down or stop your vehicle. You want to be sure the trailer brakes are doing their share of the braking work. But you don’t want them skidding or grabbing.
How Often Should You Adjust Electric Trailer Brakes and the controller?
As the lining wears and drums wear through, more clearance between the lining and the drums occurs. At this point, the brakes will need to be adjusted.
Your trailer brakes should be adjusted about every three thousand miles or every three months . If you don’t keep your trailer brakes adjusted, you could have uneven braking. When that happens, your vehicle will start pulling to one side or the other. When you adjust your brakes, make it a point to adjust your controller as well. Other instances to adjust the brake controller one way or the other include:
- If the weight of the load you are towing changes: for heavier loads, increase the power.
- Weather can also affect the brake controller: when the roads are wet or otherwise slippery, you will want to decrease the power.
Adjusting Self-adjusting Air Brakes
Air brakes use compressed air to transmit pressure from the driver’s control to the brake. Air brakes are used in:
- Semi-trailers
Even though they are self-adjusting, they will reach their tolerance at some point. When this happens, it’s time to adjust them. The following are the steps to adjusting self-adjusting air brakes.
- Gather the tools needed
- Jack up vehicle
- Find brake chamber
- Find adjustment nut
- Distance push arm travels
- When to call a mechanic
1. Gather the tools needed
There are only a few basic tools needed to complete the job. They include:
- Open-ended wrench set
- Jack stand or chocks
2. Jack up vehicle
Jack up the vehicle and place it on jack stands. Once more, lift by the frame, never by the axel. Choose a jack that can handle the weight of your trailer.
Most trailers weigh more than cars so your car jack may not work. A larger trailer may not need to be jacked up, but you will need to chock the tires. Chocking is when you use wedges of strong material and closely place them against the wheels. This will keep the trailer from moving.
3. Find brake chamber
You will find the brake chamber near the rear wheel. You will want to also find the pushrod. It comes out of the back of the chamber.
When the brake is pressed, the brake chamber goes back in. You might need someone to help you with this part. Have your helper push down on the brakes. You will be able to see the pushrod going in and out of the chamber when the brake is applied and released.
4. Find adjustment nut
In the back of the pushrod, you will find the adjustment nut. The nut will only turn freely in one direction. If you turn it the wrong way, it will ratchet. Turn it where it moves freely until the brake shoes are against the drum. At this point, the nut won’t turn anymore.
5. Turn nut
Once the nut doesn’t turn anymore, turn it in the other direction. You will hear the ratcheting. You will want to turn it one and a half turns.
6. Distance pushrod travels
The pushrod should travel between 1.25 and 1.5 inches into the chamber. Measure the distance. Your helper should press the brakes while you measure. The pushrod shouldn’t travel more than two inches.
7. When to call a mechanic
The pushrod shouldn’t travel more than two inches. If it does, it’s time to call a mechanic.
When to Manually Adjust Self-Adjusting Air Brakes
As self-adjusting air brakes acquire wear and tear, they will need adjusting. They will only self-adjust to a certain point. When they go beyond that point, they need manually adjusted.
When an air brake ages, the rubber in the brake chamber will stretch. It will become brittle. When this happens, it forces the brake arm to travel further to initiate the braking. The longer it takes the brake arm to engage the brakes the longer it will take to stop.
Surge Trailer Brakes
Surge brakes are also known as hydraulic surge brakes. They are generally used in:
- Leisure trailers
With Surge trailer brakes, the driver doesn’t have to control them. They automatically activate when needed. The benefits of surge brakes include:
- No need to have knowledge of braking system
- Can be submerged in water
- Requires no electric controller
- Requires no special wiring
How to Adjust Surge Trailer Brakes
Brakes must be adjusted periodically in order to function properly. The steps include:
- Jack the trailer
- Locate the cover
- Insert flathead screwdriver
- Rotate tire
- Adjust star wheel
- Replace cover
You will need a few tools to start. They include:
- Two wheel chocks
- Jack stands
- Flathead screwdriver
2. Jack the trailer
Chock tires on the opposite side of the trailer you will be working on. Jack the side you will be working on until the tires rotate freely. Place jack stands.
3. Locate covers
Locate the cover that is over the adjustment hole. You will find it on the rearmost wheel. It will be on the backside of the brake backing plate. Take the cover off using your flat blade screwdriver. Save it.
4. Insert flat blade screwdriver
Insert the screwdriver in the exposed hole. You will come in contact with the star wheel. It will be used to adjust the brakes.
5. Rotate tire
Rotate the tire forward. While rotating the tire, use the screwdriver to turn the star wheel. It should turn in a clockwise direction. Do this until braking pressure or friction is felt on the wheel.
6. Adjust star wheel
Click star wheel five notches. Rotate the tire freely in a forward direction. Make sure it’s turning easily. Then you can remove the screwdriver.
7. Replace cover
Push the cover back in place and lower trailer
8. Repeat
Do the same procedure on the other side of the trailer.
Do You Need Trailer Brakes?
The majority of states require trailer brakes based on the trailer’s weight. A trailer with a gross weight of three thousand pounds or more is usually required to have brakes. But some experts recommend brakes for a trailer weighing fifteen hundred gross pounds or more.
Greasing Your Wheel Bearings
While you have your trailer jacked up, you should consider greasing those wheel bearings. A wheel bearing properly packed with fresh grease will rotate freely. And it will diminish overheating.
Wheel bearings secure the wheel and the tire to the trailer. It’s an easy process to repack your bearings. However, it is messy, so wear old clothes and wear latex gloves. Here are the steps.
- Jack up trailer
- Remove metal hub dust cover
- Remove dust jacket
- Start pumping grease
- Scrape edges
- Put grease in a jar
- Avoid trailer brakes
- Insert Dust jacket
- Metal hub dust cover
There are several tools needed to grease the wheel bearings. Most of them for clean-up. They include:
- Latex gloves
- Rags/paper towels
- Flat painter’s stick or tongue depressors
- Safety glasses
- 1 tube grease per wheel
- Sealable jar (like a peanut butter jar)
2. Jack up trailer
You probably already have your trailer jacked up. But you do want to make sure the wheel you’re working on can spin freely.
3. Remove metal hub dust cover
There’s usually a little notch on the cover. Place your screwdriver in the notch and pry the cover off.
4. Remove dust jacket
There’s a little rubber dust jacket in the center. That covers the grease zerk. Put your screwdriver underneath it and pry it loose. If it’s dried and cracked, you’ll need to replace it.
5. Grease gun
Put on your latex gloves and safety glasses. Hook up your grease gun.
6. Spin wheel
Spin the wheel that you are working on and attach the grease gun.
7. Start pumping grease
New grease will go in and push the old grease out. You only want fresh grease. You don’t want a mixture of the old and new. That’s why you will use one tube of grease per wheel. The pressure of the gun will push the old grease out.
8. Scrape edges
Take the flat painter’s sticks or tongue depressors and scrape the old grease that is coming out. It will be oozing out of the zerk.
9. Put grease in a jar
Take the excess grease from the zerk and place it in your glass jar. The grease can be recycled.
10. Avoid trailer brakes
You don’t want to have any grease on your trailer brakes. Make sure you are careful. Take the towels or paper towels and constantly wipe them.
11. Insert dust jacket
Return the rubber dust jacket to its original position. Place the jacket in the hole by pushing in the center.
Once, more and this can’t be stressed enough; you must wipe all the grease off. You don’t want to have grease on your brakes. Take the time to clean everything up.
13. Metal hub dust cover
Replace the metal hub dust cover, and you’re finished with the first one.
Check Your Trailer’s Tire Pressure
Finally, check to make sure all the tires have an ample amount of air. Now you’re ready to go.
I'm Arwood, but the grandkids call me Big Papa. After retiring from teaching automotive classes for 30+ years I decided to create a blog about all the questions I used to get about brakes and anything automotive.
Recent Posts
Does it matter which brake pad goes where
Does it Matter Which Brake Pad Goes Where? A Deep Dive Into Brake Pad Installation When it comes to the safety and performance of your vehicle, the brake system is paramount. Among the components of...
can you drive with one brake pad missing
Can You Drive With One Brake Pad Missing? When it involves vehicle safety, brakes are arguably one of the most critical systems in your car. They are your first line of defense when it comes to...
- PRO Courses Guides New Tech Help Pro Expert Videos About wikiHow Pro Upgrade Sign In
- EDIT Edit this Article
- EXPLORE Tech Help Pro About Us Random Article Quizzes Request a New Article Community Dashboard This Or That Game Popular Categories Arts and Entertainment Artwork Books Movies Computers and Electronics Computers Phone Skills Technology Hacks Health Men's Health Mental Health Women's Health Relationships Dating Love Relationship Issues Hobbies and Crafts Crafts Drawing Games Education & Communication Communication Skills Personal Development Studying Personal Care and Style Fashion Hair Care Personal Hygiene Youth Personal Care School Stuff Dating All Categories Arts and Entertainment Finance and Business Home and Garden Relationship Quizzes Cars & Other Vehicles Food and Entertaining Personal Care and Style Sports and Fitness Computers and Electronics Health Pets and Animals Travel Education & Communication Hobbies and Crafts Philosophy and Religion Work World Family Life Holidays and Traditions Relationships Youth
- Browse Articles
- Learn Something New
- Quizzes Hot
- This Or That Game New
- Train Your Brain
- Explore More
- Support wikiHow
- About wikiHow
- Log in / Sign up
- Cars & Other Vehicles
- Car Maintenance and Repair
The Best & Easiest Way to Adjust Electric Trailer Brakes
Last Updated: January 16, 2024 Fact Checked
This article was co-authored by Hovig Manouchekian and by wikiHow staff writer, Aly Rusciano . Hovig Manouchekian is an Auto Repair and Design Specialist and the Manager of Funk Brothers Auto, a family-owned business operated since 1925. With over 30 years of experience in the automotive industry, Hovig specializes in the process of auto repair and maintenance. He is also very knowledgeable in common automotive issues and needs including engine repair, battery replacement, and windshield accessory and maintenance. Hovig's knowledge and hard work have contributed to Funk Brothers Auto winning Angie's List Super Service Award for five consecutive years. This article has been fact-checked, ensuring the accuracy of any cited facts and confirming the authority of its sources. This article has been viewed 6,933 times.
Gearing up to hit the open road? Whether you’re towing a simple trailer or RV, checking and adjusting your brakes every 3,000 miles ensures that your trailer will stop smoothly. Electric trailer brakes use a combination of electrical signals, electromagnets, and brake pads to function. Although they have a brake control panel, you still need to manually adjust them like a regular trailer. In this quick guide, we’ll teach you how to adjust electric or self-adjusting trailer brakes yourself in just a few minutes.
Things You Should Know
- Adjust your trailer brakes by prying up the star wheel adjuster with a brake spoon or flathead screwdriver.
- Push up on the star wheel adjuster to tighten the brake pads, or press it down to loosen the pads.
- Rotate the tire slowly until it drags, as this signifies a tight, well-adjusted brake.
- Make sure to adjust each tire on your trailer evenly so the brakes work and stop cohesively.
Jack up your trailer.

- Stabilize the tires by placing chock blocks under them.
- Keep in mind that an automobile jack may not be strong enough to lift a trailer.
Take off the brake access cover.

- If you’re unsure where your trailer or RV’s brake access covers are, check the user manual.
- The access cover or protection cap is usually the same width as your thumb.
- Every wheel has at least 1 brake access cover.
Pry up the star wheel adjuster.

- Don’t be alarmed if you hear a clicking noise—this is completely normal and means you’re doing it right.
- Prying up the wheel’s adjuster and pressing down on the brake spoon tightens the brake pads or shoes, while pressing up on the spoon and down on the adjuster loosens the pads.
Turn the wheel until the tire drags.

- Depending on your trailer’s manufacturer, it may take around 10 notches to back the tire off; however, it’s best to go by feel rather than an exact number as each trailer is different.
- If the wheel gets too tight, simply back it off by rotating the tire the other way.
Recover the brakes and repeat on the opposite tire.

- Make sure you adjust all of your tires the same way; otherwise, your trailer won’t stop evenly. [6] X Research source
- In other words, ensure that each tire has the same amount of drag by feel or by counting the number of notches.
- If your trailer has more than 2 tires, adjust all of them while the trailer is jacked up.
Expert Q&A

- With an RV trailer, you may need to remove the dust cover from the axle entirely to access the star wheel adjuster, depending on your trailer’s make and model. [7] X Research source Thanks Helpful 0 Not Helpful 0
- Adjust and break in new brakes in a large location (like an empty parking lot) so you can drive around freely. This way, you can test your brakes in a controlled environment before hitting the road. [8] X Research source Thanks Helpful 0 Not Helpful 0
- If you have an electric trailer, it’s usually time to adjust the brakes when they have a 7.5 or higher gain on the trailer’s brake controller. Thanks Helpful 0 Not Helpful 0

- Never go under a trailer without stabilizing and jacking it first. [9] X Research source Thanks Helpful 0 Not Helpful 0
You Might Also Like

Expert Interview

Thanks for reading our article! If you’d like to learn more about car maintenance and repair, check out our in-depth interview with Hovig Manouchekian .
- ↑ https://brakeexperts.com/how-to-adjust-trailer-brakes-in-10-easy-steps/
- ↑ https://youtu.be/ClNp8T9cGo4?t=172
- ↑ https://youtu.be/ClNp8T9cGo4?t=244
- ↑ https://youtu.be/ClNp8T9cGo4?t=292
- ↑ https://www.rv.com/archive/install-lipperts-forward-self-adjusting-rv-brakes/
- ↑ https://youtu.be/TzFtSEiRZPE?t=172
About This Article

- Send fan mail to authors
Did this article help you?

Featured Articles

Trending Articles

Watch Articles

- Terms of Use
- Privacy Policy
- Do Not Sell or Share My Info
- Not Selling Info
Don’t miss out! Sign up for
wikiHow’s newsletter
JavaScript seems to be disabled in your browser. For the best experience on our site, be sure to turn on Javascript in your browser.
- My Purchase Orders
- Compare Products
- Understanding Towing
- How to Use a Trailer Brake Controller - Chapter 8
How to Use a Trailer Brake Controller

Brake Controller Users Guide
and How to Make Adjustments
Using a brake controller while towing a trailer involves setting up the controller, adjusting trailer brake gain, adjusting braking sensitivity, manually activating the trailer brakes and possibly choosing a few personal settings.
In this guide we will walk through how a trailer brake controller works and the steps involved in how to use a brake controller while towing with trailer brakes.
If you need to adjust your trailer brakes , check out our guide!
How to Use Trailer Brake Controller Video
What Is a Brake Controller?
A brake controller is an electronic device that regulates the electric trailer brakes. It allows the driver to activate and monitor trailer brake activity from the cab of the vehicle.
A brake controller mounts in the cab of the vehicle and generally has a few different controls, such as an interface to view braking information and buttons to control the output and manual activation. Trailer brake controllers come in many different styles and capacities.
Need help installing your brake controller?

How Does a Brake Controller Work?
Time Delay vs Proportional
There are two basic types of brake controllers: time-delay and proportional or inertia-based. Each type is classified by the method of activation the brake controller uses.

Time-Delay Operation
A time-delay brake controller operates on very simple electrical principles. As soon as the driver presses the brake pedal, the time-based brake controller activates the trailer brakes, applying an increasing amount of power, fixed over time. This is called gain.
The gain setting of a time-delay brake controller can be adjusted by the driver to accommodate each specific trailer. However, the time-delay approach is not as precise as the proportional method.

Proportional Operation
A proportional or inertia-based brake controller uses an electrical circuit called an accelerometer to sense changes in momentum. When the driver presses the brake pedal, the brake controller applies power to the trailer brakes in proportion to the vehicle's momentum.
Proportional brake controllers provide smooth stops and efficient braking. This is especially apparent when braking on a hill. If traveling up a hill, the controller applies less power, and if traveling down, it applies more power.
Proportional Brake Controller Automatic Adjustment

How to Adjust Trailer Brake Controller: 6 Steps
Step 1: plug in the trailer wiring harness.
With your trailer coupled to your vehicle, the first step when towing with a brake controller is to make sure the trailer wiring harness is plugged into your vehicle. A brake controller requires power from the vehicle and a connection to the trailer brakes for proper towing.
During setup, make sure your vehicle and trailer are parked on a level surface. Also, make sure you are in a safe, open area with plenty of stopping distance and no other traffic around.

Step 2: Allow the Brake Controller to Calibrate
With the trailer plugged in, the brake controller may need to be calibrated. Most brake controllers are self-calibrating. Others do not require calibration at all.
Typically, self-calibrating brake controllers will flash a light or signal to indicate when the unit is calibrating and when calibration is complete.

Step 3: Select Personal Settings
Some brake controllers come with personal settings that can be adjusted to your preference, such as the angle of the interface, the brightness of the screen and even the location of the brake controller itself.
Be sure to adjust all of these settings before driving.

Step 4: Set the Maximum Output
Maximum output is the maximum amount of power the brake controller will apply to the trailer brakes. You will need to set this level and adjust it depending on the load size.
To adjust your brake controller output, press and hold the vehicle brake pedal. Set the output to the starting value specified in the instructions.
Then, in an open area, test the trailer brakes by driving forward at about 25 mph and applying the brakes. If the vehicle stops too slowly, increase the maximum output. If it stops too abruptly or locks up, reduce the output.

Step 5: Adjust the Sensitivity Level
Sensitivity is how aggressively your brake controller will apply the brakes. You can set sensitivity by testing the trailer brakes again.
Drive forward at about 25 mph and press the brake pedal. If the vehicle stops too slowly, increase the sensitivity setting. If it stops too abruptly, lower the sensitivity.
As operation becomes more comfortable, you can test braking at various speeds to ensure smooth stops in any conditions.

Step 6: Manually Activate Brakes as Needed
Most trailer brake controllers come with a manual activation button. This allows you to activate the trailer brakes whenever desired, without applying the vehicle brakes.
Manual trailer brake activation can be useful for correcting minor trailer sway and gradually slowing down on a steep hill or before stops.
Want to use your smartphone as a brake controller? Check out Echo®

How to Use a Proportional Brake Controller Video
Do I Need a Trailer Brake Controller?
If you're asking yourself: Do electric trailer brakes work without a controller? The answer is, no. Electric trailer brakes do not work without a brake controller. If your trailer is equipped with electric brakes, you will need a brake controller to tow.
However, some trailers are equipped with surge brakes. These are a hydraulic braking system that uses the trailer's own weight and momentum to actuate the brakes. Unlike electric trailer brakes, they do not require a brake controller or even an electrical connection to the vehicle.
Need help adjusting your trailer brakes?

Towing Tip!
If you have a trailer shop adjust your brakes, have them lubricate your wheel bearings, check your wheel nuts and inspect your tires and valve stems at the same time.
How does a trailer brake controller work?
A trailer brake controller uses electricity from the tow vehicle to apply a specific amount of power to the trailer brakes. It uses electrical circuits and trailer gain settings to regulate the amount of braking power. Some brake controllers have circuits that respond to the vehicle's momentum while towing. Others apply power on a fixed increasing scale and level off at a maximum output, based on parameters set by the driver.
How to Adjust Trailer Brake Controller
With your trailer coupled to your vehicle, the first step when towing with a brake controller is to make sure the trailer wiring harness is plugged into your vehicle.
Note: During setup, make sure your vehicle and trailer are parked on a level surface. Also, make sure you are in a safe, open area with plenty of stopping distance and no other traffic around.
The next step is allowing the brake controller to calibrate. With the trailer plugged in, the brake controller may need to be calibrated. Most brake controllers are self-calibrating. Others do not require calibration at all. Next, you should select and adjust personal settings, such as angle of the interface, brightness of the screen, etc. before driving. The next thing you should do is set the maximum output. To do so, press and hold the vehicle brake pedal. Set the output to the starting value specified in the instructions. Then, in an open area, test the trailer brakes by driving forward at about 25 mph and applying the brakes. If the vehicle stops too slowly, increase the maximum output. If it stops too abruptly or locks up, reduce the output.
The following step is to adjust the sensitivity level. You can do so by driving forward at about 25 mph and pressing the brake pedal. If the vehicle stops too slowly, increase the sensitivity setting. If it stops too abruptly, lower the sensitivity. The final step for adjusting the brake controller is to manually activate the brakes as needed. Most trailer brake controllers come with a manual activation button. This allows you to activate the trailer brakes whenever desired, without applying the vehicle brakes.
How do you calibrate a trailer brake controller?
To calibrate a brake controller, make sure the vehicle is parked on a level surface. Then, plug your trailer into your tow vehicle. The brake controller will then calibrate. Most brake controllers are self-calibrating. After calibration, some adjustment may be required to best fit the vehicle, trailer and load size.
What is the best setting for trailer brake controller?
The best setting for a brake controller is one that will match the trailer and load size. Begin by selecting the gain level and sensitivity recommended by the manufacturer. Then, test the brake controller and brakes. If more gain or sensitivity is needed, adjust accordingly.
What is trailer gain?
Trailer gain is the amount of power a brake controller applies to the trailer brakes. It is equal to the maximum amount of stopping force for the trailer. As the vehicle brake pedal is applied, the gain tells the brake controller how much electrical power to apply to the trailer brake electromagnets.
What should my trailer gain be set at?
Trailer gain should be set based on the trailer and load size. For larger trailers, use a higher gain setting. For smaller trailers, a lower gain setting should be used to avoid brake lockup.
How to set trailer brake gain
To set trailer brake gain, start with the values specified by the manufacturer. Test your trailer brakes at 25mph. If the vehicle stops slowly, increase the trailer brake gain. If the brakes lock up, decrease the gain.
Towing 101 Table of Contents
Looking for more.
Discover more great tips and how-tos on the Lippert blog -- your destination for all things RVing, towing, boating and beyond!

How To Adjust Trailer Brakes For Optimal Performance
If you’re like most people, you probably don’t think about your trailer brakes all that often. If you want to ensure safe and smooth towing, it’s important to know how to adjust trailer brakes for optimal performance.
Today we will explain the process of adjusting trailer brakes so that you can do it yourself quickly and easily.
Why Do Trailer Brakes Need Adjustment?

Over time and use, the linings and drums of your trailer breaks wear down, providing more clearance between the brake lining and drum surface.
As this clearance grows, you’ll notice reduced performance from your trailer brakes.
Some people combat this by increasing the gain on their electric brake controller, but that isn’t the safest choice.
How To Adjust Trailer Brakes
How To Adjust Trailer Brakes: Step-By-Step Guide
Gather your supplies.

You’ll need the following items to adjust your trailer brakes:
- Rollaway jack or bottle jack
- Jack stands
- Wheel chocks
- Flathead screwdriver or brake spoon
- Safety Goggles
Chock The Wheels

When working underneath a trailer, you’ll want to chock all wheels to ensure there is absolutely no movement.
Do not skip this step!
Jack Up The Trailer

Lift one end of the trailer axle off the ground at a time using a rollaway jack or bottle jack.
This allows the other wheels to carry the load.
Jack your trailer up high enough where you can spin the tire freely without it touching the ground.
Always be sure to lift the unit by the frame, and never by the axle or suspension.
Never go under your trailer unless it’s supported by jack stands, as unsupported trailers can fall causing injury or death.
Remove The Brake Adjustment Hole Cover

On the back side of the wheel, you’ll see one or two rubber or plastic plugs that are usually oval-shaped.
Remove those with a flathead screwdriver and set them aside in a safe place.
Tighten The Brake Adjustment Wheel
Inside the brake adjustment hole you will see the brake adjustment mechanism, which is usually located below the brake drum.
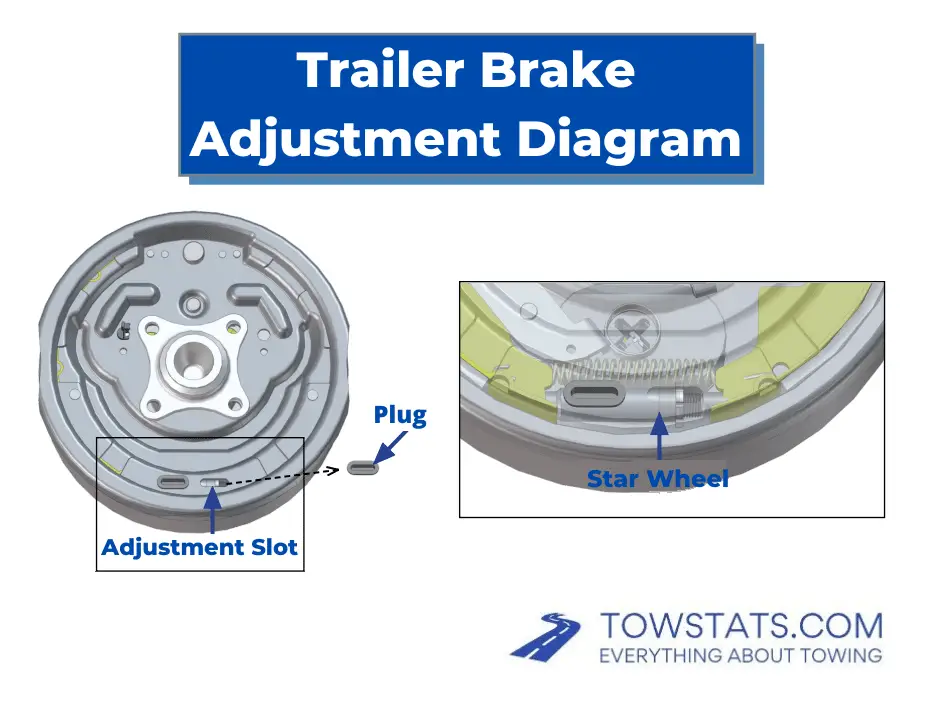
It’s a star wheel or splined nut that you can adjust with a screwdriver or brake spoon.
Adjust the nut up by inserting the screwdriver or brake spoon horizontally into the hole and pry downward.
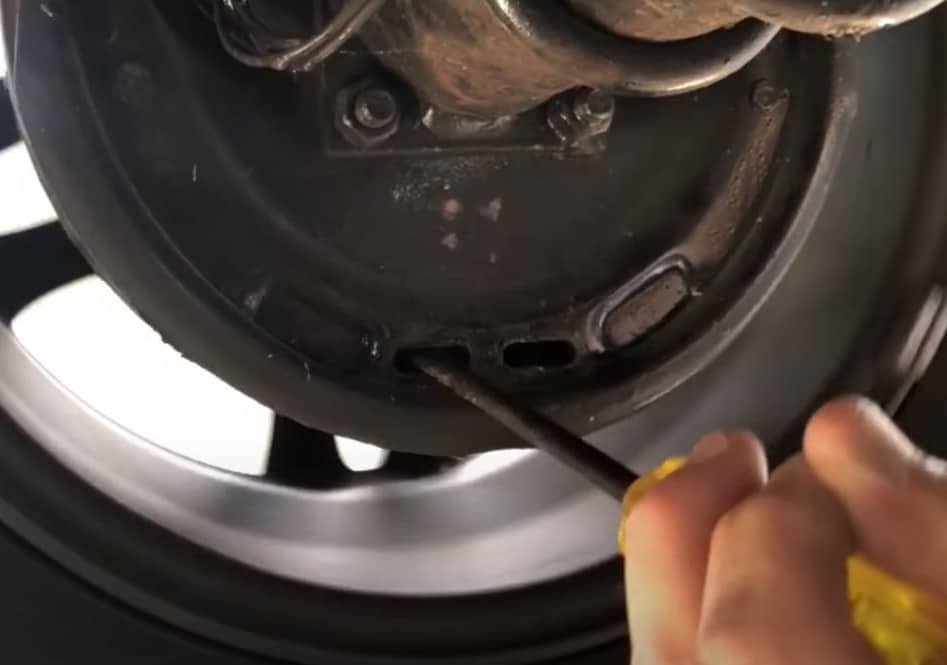
This movement turns the nut in the upward direction.
To loosen the brake adjustment, insert the screwdriver or brake spoon horizontally into the hole and pry upwards.
Pay attention to how many clicks of the nut it takes to get your tire to a point where the tire spins freely with minimal drag.
You can use that same number of clicks as a reference point when adjusting the other trailer brakes on your trailer.
Test The Tire
You’ll want to adjust the trailer brakes until you hear a light drag but the tire rolls freely.
That ensures you’ve got your brakes adjusted properly.
Replace The Brake Hole Covers
Push the rubber or plastic plugs back in to the adjustment holes to keep debris out.
Torque Your Tires

Refer to your trailer brake manual or a sticker on the unit that has the torque value.
Torque your tires to this setting using a socket and extension bar in a star pattern on the lug nuts.
Hit The Road
Now that you’re finished adjusting your trailer brakes, it’s time to get back out on the open road.
Now is a good time to make sure you have your trailer tires set to the right tire pressure for towing .
When you’re on the road, always obey the proper speed limit when towing and general towing safety .
Frequently Asked Questions
It’s recommended that your trailer brakes be checked and adjusted every 3 months or 3,000 miles, whichever comes first.
The good news is that trailer disc brakes are self-adjusting and don’t need manual adjustment.
To tighten trailer brakes, pry the star wheel or splined nut upward using a downward motion on your screwdriver or brake spoon. To loosen trailer brakes, pry the star wheel or splined nut downward using an upward motion on your screwdriver or brake spoon.
You only need to break in trailer brakes if you’ve installed new brakes on your trailer. This applies to both self-adjusting and manual adjusting electric trailer brakes. If you’re manually adjusting a set of existing trailer brakes, there is no need to “break them in”.
Leave a Comment Cancel reply
Save my name, email, and website in this browser for the next time I comment.
Terms and Conditions - Privacy Policy
- WordPress.org
- Documentation
- Learn WordPress
- Advertise with The Teckyenergy: Powering the Future Together
Energy & Technology
Mastering the Art of Adjusting Electric Trailer Brakes: A Comprehensive Guide

Safe towing is a skill that every trailer owner must master. Among the crucial components ensuring a smooth and secure towing experience are electric trailer brakes. These brakes play a pivotal role in maintaining control and stability while on the road, especially when navigating steep slopes or sudden stops. Just like any mechanical system, electric trailer brakes require regular attention and adjustments to perform optimally.
In this comprehensive guide, we will delve into the art of adjusting electric trailer brakes, equipping you with the knowledge and step-by-step instructions needed to ensure your trailer’s braking system is finely tuned for every journey. Whether you’re a seasoned tower or a novice explorer, mastering this skill will contribute to safer travels and a more confident towing experience. So, let’s dive in and unravel the secrets of achieving perfectly adjusted electric trailer brakes.
Understanding Electric Trailer Brakes
Electric trailer brakes are the unsung heroes of towing safety. To embark on a journey of adjusting them, it’s crucial to first comprehend their inner workings. These braking systems differ from traditional hydraulic brakes, relying on an electrical current to activate their braking force.
At the heart of electric trailer brakes are components like brake shoes, magnets, and adjusters. Brake shoes are the workhorses, pressing against the brake drum to create friction and slow down the trailer. Magnets play a pivotal role by producing the necessary force when energized. The adjuster, as the name implies, allows for fine-tuning the brake’s engagement.
Understanding this setup provides the foundation for appreciating the significance of proper adjustment. Balanced braking ensures even wear and tear on the components and prevents overloading one side, ultimately leading to a smoother and safer towing experience. As we delve deeper into the art of adjustment, remember that a grasp of the basics is essential before we roll up our sleeves and get hands-on.
Tools and Materials You’ll Need
Before delving into the adjustment process, it’s essential to gather the right tools and materials to ensure a smooth and efficient experience. Here’s a rundown of what you’ll need:
- Adjusting Wrench: A specialized wrench designed for adjusting the brake shoes. It allows you to fine-tune the position of the brake shoes against the brake drum.
- Jack and Jack Stands: A reliable jack to safely elevate the trailer, along with sturdy jack stands to support it securely. Safety should always be a top priority when working underneath the trailer.
- Wheel Chocks: These prevent the trailer from rolling while it’s raised on the jack stands. Place them on both sides of the wheels that remain on the ground.
- Safety Gear: Safety glasses, gloves, and protective clothing are crucial to shield yourself from any potential hazards during the adjustment process.
- Owner’s Manual: Your trailer’s owner’s manual is an invaluable resource. It provides specific instructions and guidelines for adjusting the electric trailer brakes based on the manufacturer’s recommendations.
- Cleaning Supplies: Brake cleaner or a suitable cleaning solution to remove dust, dirt, and debris from the brake components.
- Penetrating Oil: This helps loosen any rusted or stuck components, making it easier to adjust and maintain the brakes.
- Measuring Tape or Calipers: These tools will come in handy for measuring and ensuring consistent adjustments.
Having these tools and materials at the ready sets the stage for a successful adjustment process. Safety and preparation go hand in hand, so make sure to equip yourself with everything necessary before you begin fine-tuning your electric trailer brakes for optimal performance.
READ ALSO: Does Plastic Conduct Electricity? Exploring the Insulating Wonders
Preparing for Adjustment
Before you dive into adjusting your electric trailer brakes, taking the time to properly prepare the trailer and the surrounding area is essential. This stage ensures not only your safety but also the effectiveness of the adjustment process.
- Choose a Level Surface: Park your trailer on a level and stable surface to prevent any unintended movement during the adjustment. This provides a secure foundation for the entire procedure.
- Chock the Wheels: Place wheel chocks on both sides of the wheels that will remain on the ground. This prevents the trailer from rolling while it’s raised on the jack stands.
- Disconnect from the Towing Vehicle: Safely disconnect your trailer from the towing vehicle. This eliminates any external forces that could affect the adjustment process and ensures your safety while working.
- Elevate the Trailer: Use a suitable jack to carefully lift the trailer off the ground. Position the jack at the designated points indicated in your owner’s manual to avoid damaging the trailer frame.
- Secure with Jack Stands: Once the trailer is lifted to the desired height, place sturdy jack stands under the frame. Double-check their stability and ensure they’re properly aligned to support the trailer’s weight.
- Safety First: Wear appropriate safety gear, including safety glasses and gloves, to protect yourself from potential hazards while working under the trailer.
By meticulously following these preparation steps, you set the stage for a safe and effective adjustment process. The groundwork you lay here contributes to the overall success of fine-tuning your electric trailer brakes for optimal performance and a safer towing experience.

Before you delve into the intricacies of adjusting your electric trailer brakes, it’s crucial to establish a solid foundation through careful preparation. Taking the time to get things in order ensures both your safety and the effectiveness of the adjustment process.
- Secure Your Workspace: Park your trailer on a flat and stable surface, free from any incline or decline. This minimizes the risk of accidents and ensures a safe environment for working.
- Wheel Chocks: Prioritize safety by placing wheel chocks on the opposite side of the trailer’s wheels that you’ll be working on. This prevents any unintended movement during the adjustment process.
- Disconnect from the Towing Vehicle: Separate the trailer from the towing vehicle to eliminate any external forces and allow for independent adjustment of the brakes.
- Jack It Up: Using a reliable jack, raise the trailer’s wheels off the ground. Refer to your owner’s manual for the appropriate jacking points to avoid damaging the trailer frame.
- Steady Support: Position sturdy jack stands beneath the trailer’s frame to provide stable and secure support. Make sure they’re correctly aligned and capable of holding the trailer’s weight.
- Safety Gear: Equip yourself with appropriate safety gear, including gloves and protective eyewear, to safeguard against potential hazards while working underneath the trailer.
By meticulously adhering to these preparation steps, you’re not only prioritizing your safety but also laying the groundwork for a successful brake adjustment. A well-prepared workspace sets the stage for a smooth and efficient process, ultimately contributing to improved trailer performance and a safer towing experience ahead.
Adjusting Electric Trailer Brakes – The Process
With your workspace secured and your trailer prepped, it’s time to dive into the heart of the matter – adjusting your electric trailer brakes. This step-by-step process will empower you to fine-tune the braking system for optimal performance.
- Access the Brake Assemblies: Begin by removing the wheels to gain access to the brake assemblies. This might involve removing the wheel’s lug nuts and carefully sliding the wheel off the hub.
- Inspect Brake Components: Before making any adjustments, take a moment to inspect the brake components for signs of wear, damage, or debris buildup. Clear away any dirt or debris that could affect performance.
- Adjust the Brake Shoes: Using your adjusting wrench, make precise adjustments to the brake shoes. The goal is to achieve a balanced level of brake shoe-to-drum contact. Gradually tighten or loosen the adjuster as needed.
- Testing and Fine-Tuning: After adjusting the brake shoes, manually rotate the trailer’s wheels. You should feel a slight drag caused by the brake shoes touching the brake drum. Fine-tune the adjustment if necessary, ensuring an even and consistent drag on both sides.
- Reassemble and Test: Once you’re satisfied with the adjustment, reassemble the wheels, and secure them with the lug nuts. Lower the trailer off the jack stands and remove the wheel chocks. Take your trailer for a slow test drive to evaluate the braking performance. Pay attention to how the trailer responds when you apply the brakes.
Remember, patience is key during this process. Small adjustments can have a significant impact on braking performance. Regular checks and adjustments ensure that your electric trailer brakes are functioning optimally, contributing to a safer and more confident towing experience.
READ ALSO: Exploring Job Opportunities in the Electric Utilities Central
Ensuring Safe Braking Performance
Congratulations, you’ve successfully adjusted your electric trailer brakes! But the journey isn’t quite over yet. To ensure that your efforts translate into a safer towing experience, it’s essential to thoroughly test and fine-tune the braking performance.
- Test Drive in a Controlled Area: Take your trailer for a test drive in a controlled environment, such as an empty parking lot or quiet road. Start at low speeds and gradually increase to assess how the brakes respond.
- Brake Balance: Pay attention to how evenly the trailer brakes engage. Ideally, both sides should provide a balanced braking force. If you notice any pulling to one side or uneven braking, further adjustments may be required.
- Emergency Braking Test: Perform an emergency braking test to gauge the trailer’s ability to stop quickly and safely. This test provides valuable insights into the effectiveness of your adjustments and the overall braking system.
- Listen and Feel: Listen for any unusual sounds while braking, such as excessive squealing or grinding. Additionally, pay attention to how the brakes feel through the brake pedal – they should engage smoothly and without excessive effort.
- Fine-Tuning: Based on your test drive observations, make minor adjustments as needed. Fine-tuning the brake adjustment ensures that the trailer responds predictably and stops efficiently.
- Regular Checks: Even after successful adjustment, continue to periodically check and maintain your electric trailer brakes. Regular inspections and adjustments help prevent wear and catch potential issues early, promoting long-term safety.
By thoroughly testing your adjusted electric trailer brakes and making necessary fine-tuning, you’ll be well-equipped for your next towing adventure. Remember, a responsive and balanced braking system is your key to confidently navigating various road conditions while ensuring the safety of both yourself and others on the road.
Mastering the art of adjusting electric trailer brakes is a valuable skill that empowers you to take control of your towing safety. Through this comprehensive guide, you’ve gained insight into the intricate workings of electric trailer brakes, the essential tools required, and the step-by-step process for fine-tuning their performance.
By following the outlined steps, you’ve taken a proactive step towards safer towing experiences. Properly adjusted electric trailer brakes provide the confidence and peace of mind needed to navigate challenging terrains, sudden stops, and unexpected road conditions. Remember that regular maintenance and adjustments are the cornerstones of a reliable braking system.
As you embark on your future journeys, apply the knowledge and techniques you’ve acquired here to ensure that your trailer’s braking system remains finely tuned. Your commitment to safety and diligence in maintaining your equipment not only enhances your towing experience but contributes to safer roads for everyone.
Feel free to share your experiences, ask questions, and engage with fellow readers in the comments section below. Together, we can continue to foster a community of informed and responsible trailer owners, dedicated to mastering the art of electric trailer brake adjustment. Safe travels, and may your towing adventures be both exhilarating and secure!
See the video below for more explanation
Frequently Asked Questions (FAQs)
Why do i need to adjust my electric trailer brakes.
Properly adjusted electric trailer brakes ensure balanced braking, even wear, and optimal performance. This is crucial for safe towing, especially on inclines and during sudden stops.
Can I adjust my trailer brakes myself, or do I need a professional?
You can adjust your electric trailer brakes yourself following our guide. However, if you’re unsure or uncomfortable, it’s always wise to consult a professional for assistance.
How often should I adjust my trailer brakes?
Regular checks are recommended, especially before long trips. Adjustments might be needed if you notice uneven braking, pulling to one side, or changes in braking performance.
What tools do I need to adjust electric trailer brakes?
Essential tools include an adjusting wrench, jack stands, safety gear, wheel chocks, cleaning supplies, penetrating oil, and measuring tape or calipers. Check our guide for a detailed list.
Can I adjust the brakes without lifting the trailer?
Lifting the trailer provides better access to the brake components. It’s recommended for a thorough adjustment, but you can attempt adjustments without lifting if necessary.
w hat should I do if my brakes are making a strange noise after adjustment?
Unusual noises might indicate issues with the adjustment or components. Revisit the adjustment process and consider seeking professional advice if the noise persists.
How do I know if my brakes are properly adjusted?
During the test drive, you should feel a slight drag caused by the brake shoes touching the brake drum. The trailer should come to a smooth and controlled stop without pulling to one side.
Are electric trailer brakes different from hydraulic brakes?
Yes, electric trailer brakes use an electrical current to engage the brakes, while hydraulic brakes rely on hydraulic fluid pressure. Our guide explains the differences in detail.
Can I adjust the brakes on a tandem axle trailer the same way?
The adjustment process is similar, but you’ll need to adjust each axle separately. Refer to your owner’s manual for specific instructions for your tandem axle trailer.
Is it possible to over-adjust the trailer brakes?
Yes, over-adjusting can lead to excessive brake wear and reduced performance. Follow the adjustment steps carefully, and make incremental changes to achieve the right balance.
How Do Electrical Fires Start?
Mastering the Art of Cleaning Your Electric Smoker: A Step-by-Step Guide

Ojoko Precious
You might be interested in ….

Harnessing the Power Within: How to Transmute Negative Energy into Positive

Is a Career in Electric Utilities Central a Good Path for You?

Is AC Gas or Electric? Exploring the Power Behind Air Conditioning Systems
Leave a reply cancel reply.
Your email address will not be published. Required fields are marked *
Save my name, email, and website in this browser for the next time I comment.
Latest Posts

Choosing the Right Boxing Gloves for Fighting: A Comprehensive Guide

Understanding Why Fossil Fuels are Non-Renewable Energy Sources

Harnessing the Power of Moving Water: The Role of Hydroelectric Energy

Exploring the Diversity of Renewable Energy Sources: A Comprehensive Guide to Sustainable Power Options”

Harnessing Nature’s Power: The Renewable Energy Potential of Seedless Plants

RV Zone is reader-supported. When you buy through links on our site, we may earn an affiliate commission. Learn more
How to Adjust the Trailer Brake Controller in Just 4 Steps

Writen by Tom Hank

Fact checked by Joseph Varney

Traveling with your rig can be a fun journey any time of the year, but a trailer can be very hard to control most of the time. That large vehicle connected to your car’s back may sway, swerve, or even have trouble with stopping. It’s a problem that all rig owners encounter, and it’s actually relatively easy to solve.
In this article, we will tell you everything you need to know about how to adjust the trailer brake controller. Continue reading to get more information about it.
Table of Contents
What You Will Need
You would only need a towing car, your RV, and a trailer brake controller that’s already installed in your rig for this process. It’s a reasonably straightforward task to do, and you don’t need a lot of tools to finish it. In addition, the trailer brake controller already has a lever that you can adjust to your heart’s content.
Step-by-step Instructions

As mentioned before, it’s a pretty straightforward process, since you would only need to adjust electric brakes on a trailer and test-drive the vehicle. But if you want a more specific dive into how you can adjust the trailer brake controller, here is the step-by-step instruction on how to do it.
Step 1: Connect your rig to the towing vehicle
To begin, attach your trailer to the towing vehicle. Position both vehicles in a straight line to make this step easier. Make sure the rig’s electrical connection is hooked into the rear receptacle of the tow vehicle.
Step 2: Warm up the trailer’s brake
The next step is to ensure that your trailer’s brake is warmed up. Doing this will help make it easier to adjust however you like. While the trailer brake controller is activated, run your vehicle at 45 mph for 1/4 mile before parking it on level ground. Your engine should still be running at this point.
Step 3: Take the rig out for a test drive.
Configure the trailer brake controller’s power control dial to its middle setting before taking the trailer out for a road test. Then, drive your rig at 25 mph while keeping your foot on the accelerator. If 25 mph is too fast, 5 or 10 mph is also okay. Next, switch the brake controller to its highest setting.
Observe the way your towing vehicle and your RV move.
Step 4: Make further adjustments
It may seem surprising, but we are in the final step of the process. In this part, turn up the brake power if your vehicle takes too long to stop. Often, heavier vehicles require more brake power.
On the other hand, reduce the brake power if there’s smoke or flat spots on your tires or wheel skidding.
Take note of the number on your controller and continue testing until you’ve found the ideal parameters for your equipment.
Helpful Tips in Adjusting Trailer Brake Controller

Now that you know how to adjust brake controller, we’ve added a few tips here to help make this process easier. So, without further ado, here is some advice to help you adjust electric trailer brake controller.
1. Have different settings for different trailers
There is a chance that most rig owners have more than one trailer they own and travel a lot with. If you’re one of them, there should be a difference in setting trailer brake controller from vehicle to vehicle, since they may differ in size and weight, which heavily affect the brakes.
2. Choose a vast space to do your test runs
You will need more than a few test runs to achieve towing perfection when it comes to brakes. To make testing easy, you will need a spacious parking lot or driveway to do test runs without any interruptions.
3. Consult your brake controller’s manual
Trailer brake controllers differ from one another. Even though two variations may be from the same brand, the chances are that they have different specifications, even in the most minor way possible.
Therefore, it’s always better to check the manufacturer’s manual first before doing anything else, so you will know what you’re working with.
4. Don’t be too forceful
Using too much force while stopping trailers can damage your tires and brakes, so be gentle with your brakes to make sure your vehicle will work properly no matter how many test runs you do.
What Is a Trailer Brake Controller
The trailer brake controller is a device that is used to gradually slow down a rig before stopping to prevent accidents. It will tell the RV when you step on the tow vehicle brake so that it will also stop. There are two types of trailer brake controllers: the Proportional brake controllers and the Time delay brake controllers.
To differentiate these two types, here is a simple explanation of how they work. First, a proportional brake controller will match the force on the trailer’s brake with the force on the tow vehicle’s brake.
On the other hand, the time delay brake controller applies a pre-set amount of force on the rig’s brake, and there’s a time delay that users can set. This controller type is more affordable than the proportional one.
Having a trailer brake controller for your RV is essential to have better control of your towed vehicle. Rig owners won’t need to worry about braking at stop lights or sudden stops with this equipment. With the proper adjustments, you’ll be able to enjoy traveling across the country with your trailer in tow.
We hope this article helped you figure out how to adjust the trailer brake controller. What do you think about the information here? Let us know in the comments below, and don’t forget to share this article!
Hi, I am Joseph. Carpe diem! Seize the day! That’s always been my life motto. If you haven’t seen some of the most beautiful places in the country, you are missing out on incredible adventures.
Breaking Down Trailer Brakes: Your Ultimate Guide to Trailer Brakes
- June 7, 2023
Choosing the right trailer brakes can be the difference between staying hitched or losing that precious load.
While some trailers are operable without brakes, there are many situations when they are far from optional. Our article ‘ Australian Small Trailer Brake Regulations: Trailers up to 4500kg ATM ‘ covers the legal requirements for brakes in Australia, but how do the different types of trailer brakes work and what are their advantages and disadvantages?
We’ve answered these questions and more to give you the ultimate lowdown on everything you need to know about the available trailer braking systems.
What trailer braking systems are available?
There are generally considered to be 3 types of trailer brakes:
The above three types of brakes work in conjunction with either a drum or disc hub mechanism. Both mechanical and hydraulic braking systems can use either a drum or disc hub, while electric brakes are confined to a drum hub (except in the case of electric-over hydraulic brakes).
Drum brakes
Drum brakes feature an enclosed cylindrical assembly which houses the brake shoe on the inside. When the brake is activated, forces move the brake shoe outward, creating friction on the drum and slowing the turn of the wheels. Note that the ‘drum’ of a brake drum system is the same for electric, mechanical, or hydraulic brakes. The difference is how the shoe (the part that contains the brake pads) is operated/actuated.

Disc brakes
Disc brakes, on the other hand, are composed of a rotor hub which is in part encased by the caliper and the brake pads. When activated, the inner brake pad is pushed towards the outer brake pad, creating a clamping motion on the rotor. The friction caused by the clamping of the rotor slows the trailer. With disc brakes you have mechanical or hydraulic. You can have electric disc brakes, though if you read on, you will see that this is a combination of braking systems.

Drum brakes vs disc brakes
Choosing to go with a drum or disc style mechanism will come down to the type of trailer you are building, legal requirements, how you would like to activate the brakes and the environment they will be used in. Below are the pros and cons of each.
Disk brakes
Note: Brake fade occurs when heat buildup from friction produces drum distortions, making brakes less effective.
1. Mechanical braking systems
Mechanical brakes, sometimes called cable, over-ride or over-run brakes, work by mounting a sliding spring mechanism to the trailer’s drawbar (within the tow coupler/hitch). This spring contracts as soon as the trailer’s speed attempts to overrun the vehicle. This occurs when the tow vehicle brakes. When you brake, the cable tightens and activates the braking mechanism. When the towing vehicle stops braking, the spring decompressors and the brake mechanism deactivates. The trailer than resumes normal towing.
If you have mechanical brake drums, the cable will pull a lever which will apply the brake shoes to the inside of the drum to slow the trailer.
If using mechanical disc brakes, the cable will pull a lever, which will clamp the brake pads against the rotor causing your trailer to stop.
While mechanical breaks are simple to install and operate, you don’t have any control over the amount of braking applied.
The main components are:
- Mechanical over-run coupler
- Brake cable
- Either drum or disc brake assembly
2. Hydraulic braking systems
Hydraulic brakes, or hydraulic over-ride / over-run brakes, operate like mechanical brakes where they use the motion of the tow vehicle to activate the system. When the tow vehicle brakes are applied, this decrease in momentum compresses an actuator (on your tow coupler), which causes the master cylinder to force brake fluid through hydraulic lines to the brakes.
If you have hydraulic drum brakes, the fluid will enter the wheel cylinder and push the servomechanism out to expand the brake shoe against the drum and slow the trailer.
If you have hydraulic disc brakes, the fluid is sent through the brake line to the caliper piston. This results in the extension of the piston, which pushes the backing plate of the inner brake pad and squeezes the rotor to slow the trailer.
Hydraulic brakes can be challenging to operate when it comes to reversing. The pressure of your reversing vehicle against the trailer sends brake fluid to the brakes and can cause them to lock on. To avoid this, you will need brakes which are considered free-locking, or an actuator with a reverse lockout (this can be manual or electric to save you from having to get out of the car).
- Hydraulic over-run coupler
- Master cylinder
- Brake lines
- Either drum or disc brake assembly
A downside to an over-run style of system is that they are reactive, meaning that there is a short delay between when your vehicle brakes and when your trailer brakes. Whereas with electric brakes, they are simultaneously activated when the brakes in the tow vehicle are applied. This is an issue in some countries like Australia, where there are requirements for your brakes to be applied simultaneously for trailers over a certain weight. This reduces the braking options suitable for use.
3. Electric braking systems
If you want full control over your trailer’s brakes, then electric brakes are for you.
Electric brakes work by operating a controller that is mounted inside your vehicle. The brake controller determines the power of braking and sends an electric signal via the standard brake wiring to the trailer brakes to activate them. In this sense, they convert an electrical current into mechanical force to apply the brakes.
The signal sent from the brake controller energises an electromagnet inside each brake assembly. This results in a lever being pulled to apply the brake shoes inside the drum. The stronger the current that is being sent to the brakes, the stronger the braking force.
- Electric brake controller
- Electric brake shoe and drum
Electric-over-hydraulic brakes
The oddball! This type of braking system is considered to be a variation of electric brakes – they are a combination of both electric and hydraulic, as the name implies.
If you have hydraulic brakes and want to achieve the same level of control as electric brakes, you can use an electric-over-hydraulic actuator along with your electric brake controller – giving you the best of both worlds!
Once you’ve decided whether you want a drum or disc setup, you need to purchase a special electric-over-hydraulic actuator. This actuator receives brake signals from the electric brake controller and sends brake fluid to the hydraulic brakes as required. Make sure the controller you purchase is compatible with electric-over-hydraulic braking systems.
What is a breakaway kit?
A breakaway kit enables the trailer brakes to be activated in the event of the trailer being disconnected while travelling. A breakaway kit includes a battery and switch that is wired to your electric brakes on the trailer. Then there is a cable that attaches to your vehicle and the other end to the breakaway unit.
If your trailer becomes disconnected, the cable is pulled out, triggering the switch. This causes power to be sent (from the battery) to the electric brakes to activate them and bring the trailer to a stop.
What sort of brake controller should I use?
Getting back to brake controllers, there are a few options to consider.
- Time delay brake controllers: These apply a fixed voltage which can be set on the brake controller dial inside your vehicle and can be adjusted for different road conditions.
- Proportional brake controllers: These are a motion sensing controller that sense how quickly the vehicle is stopping and applies an appropriate proportional voltage to the trailer brakes, with the goal of braking the trailer at the same rate as the vehicle. Nowadays, you can get both hardwired and Bluetooth proportional controllers. Proportional brake controllers are typically superior and a great option for heavy or precious loads like the family caravan.
Do I still need a handbrake for my trailer?
Fitting your trailer with a handbrake is an extra convenience, regardless of which trailer braking system you choose. They are cheap, easy to install and can help hold your trailer in position when not attached to a vehicle.
If you want full control of your braking, then electric brakes are for you. The in-cab brake controller allows you to adjust the braking power and perform manual overrides. Electric drum brakes are generally cheaper than electric disc brakes (electric-over-hydraulic). But there are certain cases where electric disc brakes are better that drum brakes. For example, large boat trailers.
Hydraulic or mechanical override systems are a good option if your trailer will be towed by different vehicles because you don’t have to worry about vehicles being fitted with a compatible brake controller. They aren’t as easy to install as electric brakes, however, they are more robust and less things can go wrong.

Regardless of the braking system you choose, regular checks and maintenance of your trailer brakes should be front of mind when using your trailer. Of particular importance are the brake lines because if these aren’t working, neither are your brakes!
Like this post? Follow, like or share on your favourite social platform. You can leave us a comment below!
Leave a Comment Cancel Reply
You must be logged in to post a comment.
related Posts

Essential Trailer Maintenance: What to Look For & How to Act

How to Check & Replace Trailer Bearings

The Art of Protection: Galvanised, Powder Coated & Painted Trailer Finishes Unpacked
Subscribe today, to stay up-to-date with the latest trailer plan releases.
What Should Trailer Brake Gain Be Set At: The Right Way
Adjusting your trailer brake gain can be one of those tasks that you feel you never get right. And to make things more confusing, it seems like everybody has a different theory on what the gain should be.
The thing to know with setting your trailer brake gain is that everyone has a different setup, and each situation is unique. Trailer load, tow vehicle, braking power, and trailer brake controller all vary from one rig setup to the next. So how can a rule thumb setting work for everyone? The real truth is that it can’t. To say to set your gain with a universal number and hope that it works for each rig is not possible.
However, there are some steps that we can go through that will help you set the trailer brake gain best for you. This post will cover those steps, including:
Trailer Load
Electric trailer brake.
- 3 Steps to Adjust Your Trailer Brake Controller
Whether you tow a travel, utility, or boat trailer, these steps will apply and help you correctly set the gain when towing any trailer.
Table of Contents
Step 1: adjust at a slow speed, step 2: adjust at a higher speed, final thoughts.
I remember the first time I had to adjust my trailer brake gain. The trailer dealer took me on the road and helped me set up the gain to where I was good a stop with no jerking. I thought I was set life! Once I loaded the trailer and my brakes wore down a little, that setting was useless, and I needed to adjust my trailer brake controller again. That’s when I realized that setting my trailer brake gain would be an ongoing task.
Your trailer load is the biggest factor in how you should set the trailer brake controller. So as we go through these steps, try to load your trailer to the typical weight. Your weight for travel and boat trailers is consistent, so this shouldn’t be a concern. This is more for utility trailers that may have a heavy trailer loaded with bricks one day and the other day just a sofa. Both extremes will need a different setting and adjustment to the trailer gain.
Now that you have the trailer load to the typical weight let’s look at the electric trailer brakes. When your trailer has electric brakes, you need a brake controller to transfer that braking force. And unlike surge brakes or hydraulics brakes, electric brakes need that signal the electric brake controller to work.
Before we get on the road to adjust the gain, check that your brakes are working well and adjusted. Many trailers now have self-adjusting brakes. So check that the drum brakes move freely and that they work when you press the brake pedal.

One time I had my ground wire disconnected at the axle. I thought it was a setting on my brake controller, but there was no power to the brakes. This taught me the lesson of always ensuring all brakes work properly before heading out on the road.
Setting Trailer Brake Controller
Now that your trailer is loaded and the brakes adjusted and functioning properly let’s get ready to get on the road. As we discussed above, all rigs are different, and no one size fits all when it comes to setting your gain. So the best way is to get on the road and follow these three steps for your gain adjustment.
Find a side street or residential street where you can stop and go slowly without any issues. Go about 25 MPH. Lightly press on the brake pedal. At this slow speed, with just the slightest tap of the brake pedal on your truck brake, you should feel the trailer brakes working and holding you back a little. If you don’t feel the trailer slowing down and the truck takes longer than usual to stop, then your gain needs to be adjusted.
Also, you want the gain adjustment where this is not jerking you back, either. Too much, and you come to a rough stop. You should come to a normal stop with a slight feeling that your trailer is slowing you down.
Since the trailer brakes are working and tested at a slower speed, it should be safe to take them at higher speeds to see how it feels. I would say try on a road that is around 45 MPH.
You usually don’t feel the trailer brakes holding you back at higher speeds as you did at the slower speed. The reason is that the trailer’s momentum pushes you and the tow vehicle, so slowing down is not as noticeable. That is why you always want to do it at slower speeds first to get the actual feel of the brakes and that the braking force is working.
Next, press the brake pedal down under normal pressure like you would any stop at this speed. You should feel at this speed that the truck is slowing down almost as it normally would without a trailer. I say almost as normally because there is some braking loss with the trailer, so there will be slower braking times, but not by much.

If you feel that your truck brake is doing all the work and you are not stopping like you normally would adjust the gain so you feel you are getting a safer stopping distance.
Step 3: Adjust at a slow speed (again)
Yes, this is a repeat of Step 1. When on the higher speed test, you likely needed to make an adjustment. With that, you want to make sure that the slower speed and stopping setting feel right and that you are stopping as we outlined in Step 1. Remember, at these lower speeds, and you want to feel the trailer pull you back a little once you barely push the tow vehicle pedal down.
Adjusting trailer brake gain is a task that doesn’t have a universal solution due to varying setups. Factors like trailer load, tow vehicle, braking power, and brake controller differ for each rig. However, there are steps to help you find the right gain setting. Start by loading your trailer to a typical weight and ensuring electric brakes are in good working condition. Then, follow a three-step process: test at a slow speed to feel the trailer brakes engage without jerking, assess braking performance at a higher speed, and retest at a slow speed to confirm adjustments. By following these steps, you can set the trailer brake gain for a safer and smoother towing experience.

Tony is an avid camper and RV traveler. He fell in love with camping on his first RV trip with his wife over 25 years ago. Tony loves sharing lessons learned and tips about RV maintenance and safe traveling.

How Do Travel Trailer Brakes Work (Full Breakdown)
Table of Contents
Importance Of Trailer Brakes
When you’re towing a heavy load, acceleration is not much of a concern, but rather slowing down to a stop or trying to avoid a mishap in front of you is much more important. You have a lot of weight and inertia that would be very difficult for your tow vehicle to manage on its own. This is why having good properly working travel trailer brakes is so important.
State Laws
According to rvia.org most states require brakes on trailers weighing 3,000 lbs or more. Some states may vary from this, but 3000 lbs seem to be pretty standard among the states. So, if you’re planning on purchasing a new travel trailer that is over 3000lbs or more, you will most likely have either an electric or surge brake system on the trailer.
Different Types Of Travel Trailer Brakes
Electric brakes.
Electric brakes are constructed with electronic components and a set of magnets that apply pressure to a wheel hub. This is controlled by a module that is located in the tow vehicle and is applied as you are pressing on the vehicle’s brake. This connection is made with a trailer harness that will be connected to the tow vehicle.
Brake Controller – The brake controller is the device located in your vehicle near the driver that will control the brakes electronically. Some vehicles will come equipped with the controller from the factory or they will need to be added from a third party manufacturer.
The brake controllers sensitivity can be changed helping your particular trailer slow down at a nice steady pace instead of locking up the brakes.
Also, the brake controller will unusually have a slider or button that can be applied by hand instead of the foot brake.
You may think whey in the world would you use that instead of applying the vehicle brakes?
Well, when I’m personally going down the road and notice my trailer swaying a bit, I will quickly apply the trailer brake to take the sway out (I call it taking the sway out ). Others will use it as they are going down a hill and don’t wish to hit the vehicle brake.
The key thing here is to apply it quickly and not aggressively.
Surge Brakes
Surge brakes…or sometimes referred to as “inertia brakes”, are controlled by the push and pull of the vehicle.
This engages the master cylinder that creates pressure in the brake lines by the use of fluid and puts pressure on the trailer drums or rotors depending on the trailer.
These brakes are typically found on lighter trailers and popular on pop up campers where electric brakes are not necessary.
Breakaway Brake Systems (Emergency Systems)
This is a system that automatically brakes your travel trailer if it ever detaches going down the road. The cable is attached to the tow vehicle from the travel trailer tongue area and will pull a pin if it detaches and apply the brakes on the trailer bringing it to a stop.
That’s the theory but as trailers age, this cable and pin can corrode and needs to be inspected regularly to ensure it will work properly if ever needed.
Brake Maintenance
- Electric Brakes- This setup has more parts that need to be inspected and maintained to ensure they are working at optimum capacity. You should check to see if any of your wheels are locking up which can sometimes happen if a magnet is not calibrated correctly and is pressing on the drum too tightly.
- Surge Brakes – This setup relies on the fluid that is pushed in the brake lines and will need to be checked to ensure that there is enough fluid in the reservoir and that there are no leaks that may be slowly leaking. If you find a leak from the lines or from the coupler, you should repair or replace the part and make sure to top off the fluid after the repair is made.
Brake Inspection: Key Signs That Your Travel Trailer Brakes Need Service
Regular brake inspections can help you identify potential issues before they become more significant problems. Be on the lookout for these key signs that your travel trailer brakes may need service:
- Squeaking or grinding noises : These sounds may indicate worn brake pads or shoes.
- Reduced braking performance : If your trailer takes longer to stop, the brakes may need attention.
- Vibration or pulsation : These sensations may be caused by warped rotors or drums.
- Brake warning light : This dashboard indicator signals a potential issue with your brake system.
Replacing Brake Pads and Shoes: A Step-by-Step Guide for Travel Trailer Brake Service
When your travel trailer’s brake pads or shoes wear down, it’s essential to replace them promptly. Follow these steps for a successful brake service:
- Raise the trailer : Use a jack to lift the trailer, supporting it with jack stands.
- Remove the wheel : Unscrew the lug nuts and remove the wheel, exposing the brake assembly.
- Remove the old brake pads or shoes : Follow the manufacturer’s instructions to remove the worn components.
- Install the new brake pads or shoes : Position the new components according to the manufacturer’s guidelines.
- Reassemble the brake assembly : Reinstall the caliper or drum, ensuring all components are properly aligned.
- Replace the wheel : Reattach the wheel and tighten the lug nuts securely.
Servicing Brake Rotors and Drums: Tips for Prolonging
To extend the lifespan of your travel trailer’s brake rotors and drums, follow these tips:
- Inspect for wear : Regularly check the condition of your rotors and drums, looking for signs of warping, grooves, or cracks.
- Resurface or replace : If your rotors or drums show signs of wear, have them resurfaced or replaced as needed to maintain optimal braking performance.
- Avoid overheating : Overheating can cause damage to your brake components. To prevent this, avoid overloading your trailer and maintain a safe following distance to reduce frequent hard braking.
How Long Do Electric Trailer Brakes Last?
Since this brake system uses magnets to put pressure on the wheels, these will eventually wear out. The average life expectancy of brakes can vary based on load, brand, and other factors.
Every 3000 miles you should inspect the performance of the brake and if you feel like they are not performing as they once were, you should take it into a shop and have them do an inspection. You want to be proactive here and not wait until you have a catastrophic failure while on the road.
Can I Tow A Trailer With Electric Brakes Without A Brake Controller?
You can tow a travel trailer that is equipped with electric brakes without a brake controller. The brakes will not engage without the power from the controller so you do not have to be concerned about the brake system locking up on you.
But I have to say that it is not advised to do this because of safety concerns.
I hope this article was helpful and as always…
Good luck and happy camping.
Check out our article on: Can You Ride In A Travel Trailer? (State Guide Included)
Please keep in mind that we may receive commissions when you click our links and make purchases. However, this does not impact our reviews and comparisons. We try our best to keep things fair and balanced, in order to help you make the best choice for you.
As an Amazon Associate, I earn from qualifying purchases.
WEIGH SAFE ADJUSTABLE BALL MOUNT
TRUE TOW WEIGHT DISTRIBUTION
Heavyweight, middleweight.
HEAVYWEIGHT - ORIGINAL
WEIGH SAFE HITCH PIN LOCK
WEIGH SAFE CLAMSHELL CONVERTER

WEIGH SAFE STORAGE CASE
WEIGH SAFE ANTI-RATTLE REDUCER
WEIGH SAFE ACCESSORIES & PARTS
- About Weigh Safe
- Brand Ambassador
- Social Media
- Frequently Asked Questions
- Return Policy
- Weigh Safe App
- Dealer Locator
- Authorized MAP Policy
- Become A Dealer
- Dealer Content
- Dealer Portal
- New Dealer Registration
- Unauthorized Dealers
- Search for:
No products in the cart.
Return to shop
Towing Safety
How to set up your trailer brakes.
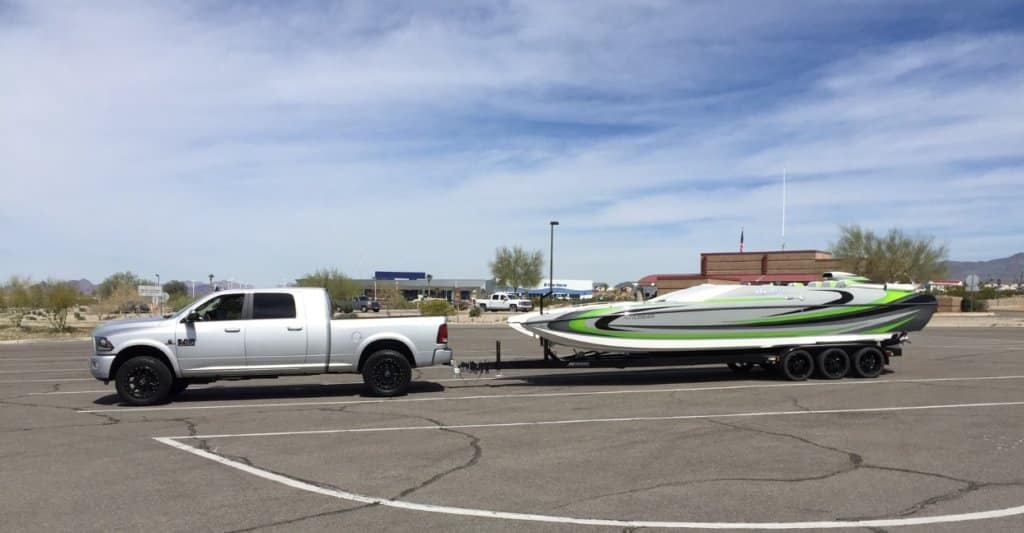
Setup Electric Trailer Brakes
Setup hydraulic brakes, weigh safe 180 ball mount.
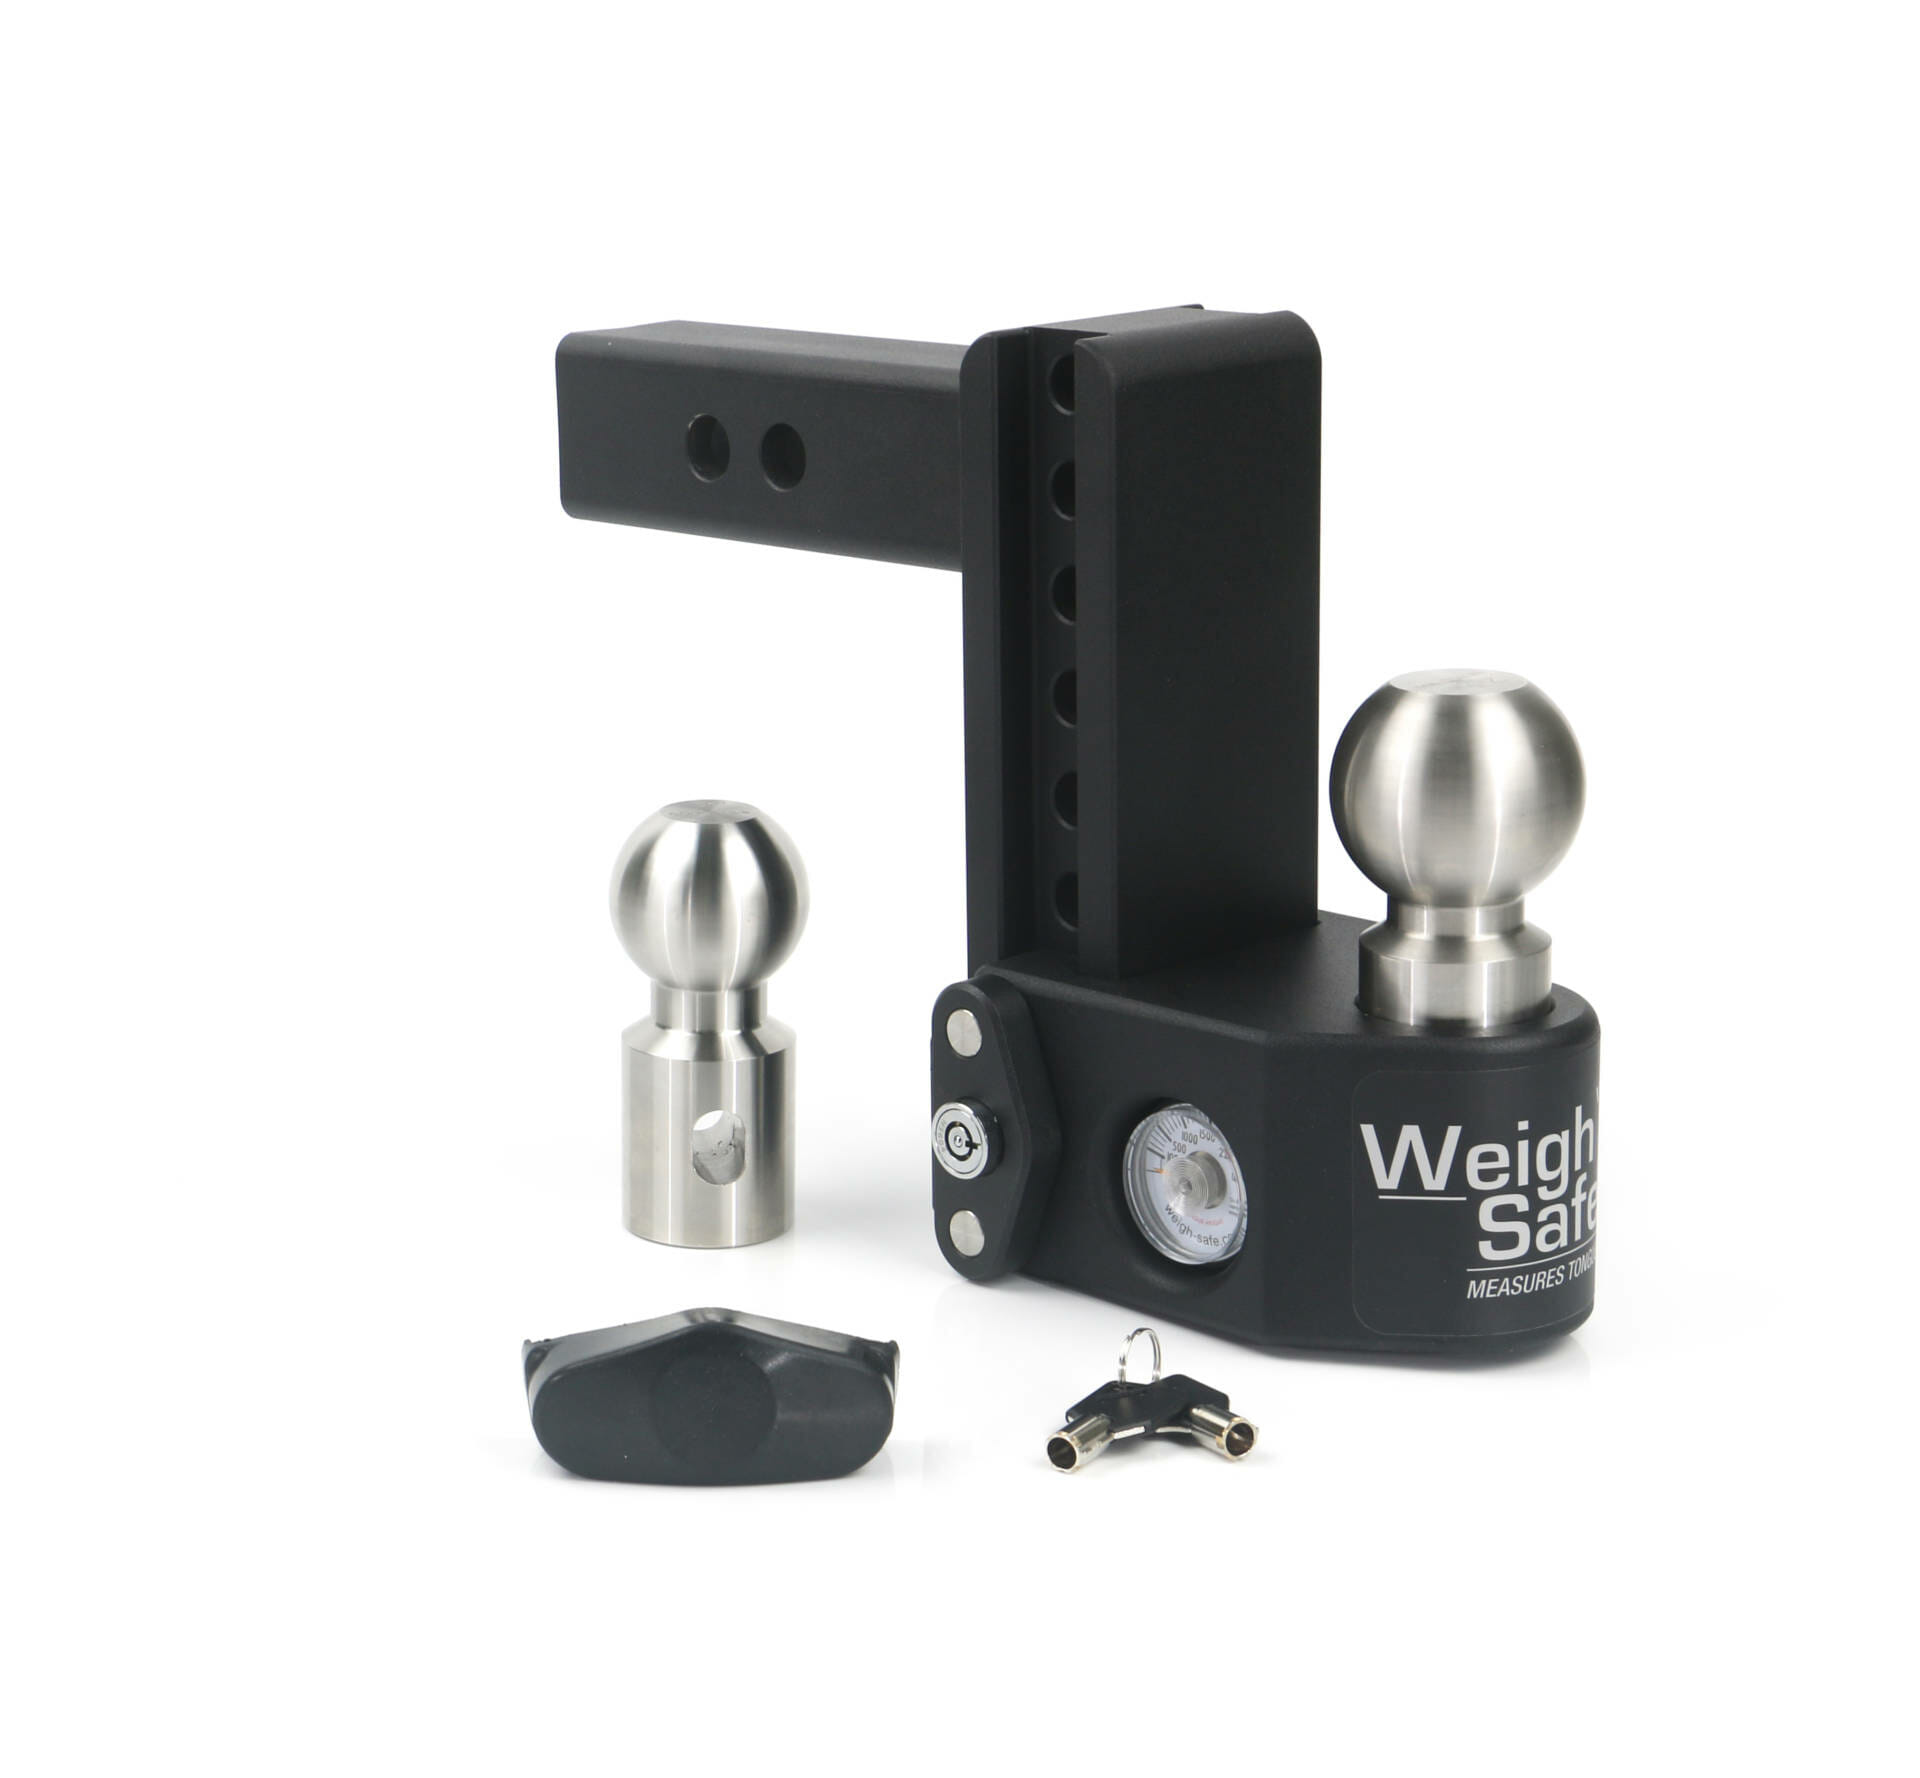
STEEL WEIGH SAFE ADJUSTABLE BALL MOUNT
Steel weigh safe 180 pro ball mount, weigh safe aero hitch, cerakote black weigh safe adjustable hitch, cerakote black weigh safe 180 ball mount, weigh safe fixed height ball mount.
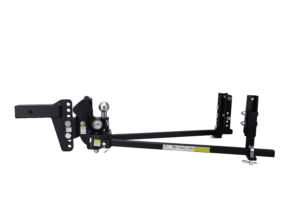
TRUE TOW HEAVYWEIGHT WEIGHT DISTRIBUTION - ORIGINAL
True tow middleweight weight distribution, weigh safe oem gooseneck, weigh safe b&w gooseneck, weigh safe in-bed rail gooseneck, weigh safe vehicle recovery hook, weigh safe soft shackle ring, weigh safe hard shackle, weigh safe cerakote recovery hook, weigh safe cerakote soft shackle, weigh safe ball coupler lock, weigh safe trailer coupler latch lock, weigh safe padlock, weigh safe 3pc lock set, weigh safe extra keys, weigh safe all locks & keys.
- WARRANTY/RETURNS
- ABOUT WEIGH SAFE
- NEW DEALER REGISTRATION
- DEALER RESOURCES
- DEALER LOCATOR
- BRAND AMBASSADORS
- SOCIAL MEDIA
Privacy Overview
Username or email address *
Password *
Remember me Log in
Lost your password?
Email address *
A link to set a new password will be sent to your email address.
Your personal data will be used to support your experience throughout this website, to manage access to your account, and for other purposes described in our privacy policy .
- You are here:
- Home »
- Blog »
- » Travel Trailer Set My Gain Higher: What Should It Be Set At?

Travel Trailer Set My Gain Higher: What Should It Be Set At?
- December 6, 2022 /
- RV Driving /
- By James V.
It is strange terminology. When you buy your first RV or trailer, you are entering a world with its own terminology and language. The gain is an important term that is used for trailer brakes. It may sound weird but you will get used to it and learn what the new words mean
The gain is how much power is being sent to your trailer brakes. The higher the gain setting, the more power they will have. But be careful, if you set the gain too high, you can easily wear out your brake pads and have to buy new ones sooner than you thought.
To learn more about this topic, just continue to read our article. It has the information you need to know about so you can set your trailer brakes to the right level for the best stopping power. Not every brake gain will be set the same.
What is Gain And Sync On Trailer Brakes?

The gain merely means the amount of braking power applied to the brakes. This is all electronic and the higher you set the gain the more electrical current flows through those brakes.
When you send more power to the brakes, the stronger they will be. Generally, the trailer brake gain is set higher than the tow vehicle’s brakes because the trailer does not have an engine to help slow it down.
The risk in setting the trailer gain too low is that the trailer will start pushing the tow vehicle once you step on the brake. Your setting needs to be set above that low setting and just below the point where your trailer brakes lock.
The sync is also referring to brake performance but it does not control the power that reaches the trailer brakes. Instead, its job is to set the aggressiveness on the brakes.
This brake feature needs to be set to the driver’s preference. There is no approved scale for the best settings for either the sync or the gain. That is because road and load conditions vary as do the weight of the trailers.
To set them just right you need to go to a large and empty parking lot and test the brakes at different settings. Once you find those levels, it may be different from other vehicle levels
What Does Trailer Gain Do?
All the gain does is tell the controller how much electric current to send to your trailer brakes. That number will determine the force your trailer brakes will use to stop the trailer wheels from spinning.
When you adjust the gain, you are adjusting your trailer’s stopping power. That tells you that you have to be careful when setting the gain. Even too much power can make the trailer unsafe to have on the roads.
It is important to adjust the gain on a regular basis and it would be best if you actually did this every time you took your trailer out on the road. This is not always done but at a very minimum, every time you adjust the weight in the trailer, you should adjust your brake gain.
The heavier the trailer, the more power it needs on the brakes to slow it down. When you add more weight, make sure to adjust the gain so that it proportionately adds more power. You do not want to over compensate in the adjustment as that can cause some dangerous towing situations.
The good news is that some newer brake controller models have an automatic adjustment system built in. That means you do not have to get out and reset the gain every time you take your trailer on the road.
Travel Trailer Set My Gain Higher

Technically, the trailer cannot set your gain on its own. There is nothing in your trailer that would send a command to the brake controller to adjust the gain. Unless your brake controller has an automatic function, this is something you have to do.
The gain is set according to the weight of the trailer and road conditions. Also, they need to be set for when your brakes heat up. They may need more power at that time to keep their grip on the wheels.
No matter the situation you are facing, the gain should not be set so high that your trailer wheels lock up or the trailer begins to skid. Nor should they be set so low that your trailer pushes your tow vehicle once you step on your tow vehicle’s brakes.
It may take some time to get the right setting but it will be a safer ride if you do take the time to make sure you got the gain set at the right level. Keep in mind, that there is no perfect number and what your friend sets his gain to may not be the best setting for your towing situation.
Once you learn how to do this, it shouldn’t take much to set your gain and have a safe towing experience.
What Should My Trailer Gain Be Set At?
There is no set number that will work for every towing situation. Sometimes the perfect number will be 4 and at other times it may be 7. Some people warn that going above 7 will be setting the gain too high and they are usually correct on that in most situations.
Your towing situation may have your perfect setting at 5 or 6. This is why it is so important to test your brake settings in a large empty parking lot. You will have room to work and find your perfect setting.
There are risks of going too high and too low in your setting. For example, if you go too low, your trailer may push your tow vehicle and you can lose control and have an accident.
If you go high, then the trailer can skid once the wheels lock and you can lose control and have an accident. Take your time setting the gain as you want to make sure you have the right setting for your towing situation.
If you have a very heavy trailer, then that may be the time when you can set the gain to above 7. With lighter trailers, your perfect gain may be around 3 or 4.
How do You Adjust a Travel Trailer Brake Controller?

Well, if you lucked out and bought a brake controller with an automatic gain setting feature, then you won’t have to do it at all. Those automatic options do get very close to the perfect setting for your towing situation.
Then they will automatically adjust when you change the weight in the trailer. That is very convenient when you have many things on your mind as you get ready to travel.
To set the gain, there are different situations when you do not have this automatic feature. Here are the instructions with some extra details to help with those different situations.
Step 1: Connect your trailer to your tow vehicle. Make sure your trailer is connected to your 5-7 point plug.
Step 2: Depending on your dial on the brake controller, you can either set it for 50%, or a number like 5 and if you have no numbers, then make sure the dial is set in the middle.
Each brake controller may have a different gain setting system. Look at the instruction manual for the controller if you are still not sure.
Step 3: Drive your towing setup onto the flattest stretch of road you can find. You do not want any type of slope in the road as that will throw off your measurements.
Step 4: Once on that stretch of road or parking lot, drive your vehicle and trailer at 20 mph. After hitting that speed mark, step on your brakes, but not too sharp and not too soft. What happens is as follows:
1. This is rare but the trailer brakes perfectly
2. The trailer brakes slowly
3. The trailer brakes lock the wheels
Depending on your result you will adjust the dial accordingly.
Ste p 5 . Stop your vehicle and adjust the gain according to your results. If the trailer brakes slowly, then you need to turn the dial higher to a stronger setting.
If the wheels lock up on your trailer, then turn the dial down to a weaker setting. Make your adjustments in small increments or you may be doing this all day
Step 6: Repeat these steps until you find the perfect setting for your gain. Also, record the setting that you finish at. This will help you set the gain the next time you tow a trailer of similar size and weight. You won’t have to repeat these steps if you record your findings and keep the record in a safe spot.
That record will save you a lot of time. That is time you can spend doing more fun things like driving to your next destination.
There Are Wireless Brake Controllers
As technology advances and new discoveries and inventions are applied to RV life, you may find that you can control some brake controllers through your mobile phone.
This may make setting your gain easier as those devices may be able to record the different gain settings for you. Then all you have to do is select the right gain level and the brake controller sets the mark for you.
We checked and there are some on the market now. They use Bluetooth to create a wireless connection so you can use your cell phone to change the gain, etc. You get about a 50-foot connection distance which should be more than enough when you are in your tow vehicle.
You will need to download the app to make everything work.
Some Wireless Brake Controller FAQs

1. What happens if my cell phone loses all of its power?
The downloaded app will remain on the previously saved setting and operate at that setting until you get your power back. You may lose your manual override option.
2 . What if I lose the Bluetooth connection?
The same response will happen here as it does in #1. The designers have foreseen this situation and have designed the device to maintain the last saved setting so nothing is lost and you are not put at risk.
3. What level of mobile phone will I need to download and use the app?
If you want to use this brake controller, you should upgrade to an Apple IOS 5 or higher and Android 4.3 or higher.
4 . What vehicles are these brake controllers compatible with?
Each wireless controller will have its own specifications and compatibility but some work with all types of vehicles including Ford, GM, Chevy, Dodge, RAM, Toyota, Jeep, and more with 2, 4, 6, and 8 brakes (1-4 axles).
The vehicle specific wiring harness is sold separately from most brake controllers.
5. Are these wireless systems compatible with Apple CarPlay or Android Auto?
No, they are not. But the good news is that the wireless braking controlling systems will not interfere with those features.
6 . Can anyone hack into my wireless system?
The makers of these devices have created a system where you need to connect to a specific system band and enter the pin under the cap before there is a connection.
This is supposed to make the devices hack proof but read the instructions to make sure.
Some Final Words
Setting the gain is just one step in having a safe towing experience. Not all gain settings will be the same so it is vital that you go out and do your road tests before hitting the road.
You want the right setting for your towing situation, not someone else’s. Take the time to check your settings when you change the weight in your trailer. That way your settings will be geared to work with your current load weight and you can drive with peace of mind
Setting your gain is not hard to do.
Related Posts
Route 81 From Connecticut To Florida (81 to 77 to 26 to 95)
RV Dinette With Seat Belts: Can You Add Seat belts To an RV?
Garden State Parkway Height Restrictions (Trucks and RVs)
Leave a Comment:

Aisha Trailer Previews Drama Starring Letitia Wright & Josh O'Connor
Samuel Goldwyn Films released a new trailer for Aisha , the Irish drama film starring Letitia Wright and Josh O’Connor.
Written and directed by Frank Berry, Aisha originally had its world premiere at the Tribeca Film Festival in 2022, before getting a release in the United Kingdom in the same year. Now, the film is set to release in theaters in the U.S.
The movie follows Aisha (Wright), a Nigerian woman seeking asylum in Ireland who develops a close friendship with a former prisoner (O’Connor).
Check out the Aisha trailer below (watch other clips and trailers):
What is Aisha about?
“While caught for years in the Republic of Ireland’s immigration system, Nigerian refugee Aisha Osagie develops a close friendship with former prisoner Conor Healy. This friendship soon looks to be short lived as Aisha’s visa comes under threat,” reads the film’s official synopsis.
Aisha is currently set to premiere in theaters on May 10, 2024.
The post Aisha Trailer Previews Drama Starring Letitia Wright & Josh O’Connor appeared first on ComingSoon.net - Movie Trailers, TV & Streaming News, and More .

- Get the Newsletter
Please support Game Informer. Print magazine subscriptions are less than $2 per issue

Star Wars Outlaws Release Date Set For August, New Story Trailer Shown
Today, Massive Entertainment and Ubisoft released a story trailer for their anticipated action title, Star Wars Outlaws. The game received a lot of hype when it was first revealed during last summer's Xbox Games Showcase and its subsequent gameplay footage during a Ubisoft Forward stream the next day. Today's story trailer not only gave us more to whet our appetite but also let us know when we'll finally be able to step into the role of Kay Vess as we navigate the Star Wars underworld.
Star Wars Outlaws puts you in the role of Kay Vess, a pickpocket turned thief who gets mixed up with Sliro, the leader of Zerek Besh, a new criminal syndicate. Sliro places a bounty on Kay's head, and Kay and Nix have one shot at freedom: pulling off the ultimate heist. Together, Kay and Nix must navigate the criminal underworld, managing their reputations with various criminal organizations, including the Pyke Syndicate, the Hutt Cartel, the Ashiga Clan (a new syndicate created for this game in collaboration with Lucasfilm Games), and Crimson Dawn.
Kay and Nix's adventure will take them to various planets and moons, including Tatooine, Akiva, Kijimi, Canto Bight, and the newly created moon, Toshara. These planets and moons house busy cities and cantinas, sprawling open-world areas to explore, and orbital areas Kay and Nix can explore using her ship, the Trailblazer . While in the Trailblazer , Kay can engage in chases, evasive maneuvers, and dogfights with the Empire or other enemies she makes along the way.
"In search of true freedom, the resourceful Kay and Nix will journey through the underworld across the Outer Rim, taking on jobs from syndicates, facing off against intimidating foes, avoiding oppressive Imperial rule, and recruiting a skilled outlaw crew in order to pull off one of the greatest heists the galaxy has ever seen," creative director Julian Gerighty said in a press release.
You can see the story trailer below.
"Star Wars Outlaws invites fans to experience a side of the galaxy that has a treasure trove yet to be explored, the exploits of the scoundrels taking advantage of the golden age of the underworld," vice president of Lucasfilm Games Douglas Reilly said in that same press release. We've been inspired by Massive Entertainment's dedication to bringing this aspect of Star Wars to life, including both iconic and new things for fans to explore in an open world."
The upcoming title features three different versions. The Standard Edition includes the base game for $70. Meanwhile, the Gold Edition adds the Season Pass, which consists of two pieces of DLC, the exclusive "Jabba's Gambit" mission at launch, the "Kessel Runner Character Pack" cosmetic pack, and up to three days of early access. The Ultimate Edition includes all that, plus the Sabacc Shark Bundle (cosmetics for Kay, her blaster, Nix, Kay's speeder, and Kay's ship), the Rogue Infiltrator Bundle (cosmetics for the same items as the Sabacc Shark Bundle), and a digital art book.
Star Wars Outlaws arrives on PlayStation 5, Xbox Series X/S, and PC on August 30. If you'd like to learn more, we've got you covered! We recently traveled to Malmö, Sweden, to spend several hours with the developers and get our hands on the game. You can read more in the cover story of our newest issue or by visiting our exclusive coverage hub through the banner below in the coming weeks.

Products In This Article

Star Wars Outlaws

Thanks for reading.
I’d like to ask you to support Game Informer ’s continued coverage of games with a subscription. For less than two dollars per issue , we mail you a full year of 10 print magazines, each with cover stories and preview features filled with exclusive details about the most exciting upcoming games. We profile and interview game creators. We look back on the rich history of gaming, and we celebrate what’s next.
Here on the website, we offer much of our content for free, including game reviews, daily news, videos, event coverage, and more – all with minimal ads.
We do so with a small editorial team, alongside contributing paid writers from around the world – over 65 individuals from 9 countries around the world, just in the last couple of years.
It’s not possible without support.
In a time when game makers and games coverage have faced hard struggles and layoffs, the future of this 30+ year magazine and community is at risk. Our new standalone magazine subscription is the number one way you can keep us alive – and we believe you’ll get a pretty fantastic gaming magazine in your mailbox every few weeks for your trouble.

Popular Content

All 8 Episodes Of Amazon's Fallout TV Series Now Dropping One Day Earlier

Update: Uh Oh, The Automatons Are Back In Helldivers 2

Bandai Namco Has Quietly Released Three Small 3D Platformers For Free

Why Moon Studios Made No Rest For The Wicked Instead Of A Third Ori Game

The Legend Of Zelda: Majora's Mask Part 10 | Super Replay

Cover Reveal – Star Wars Outlaws

Amazon’s Fallout Series Primed For Second Season Ahead Of Premiere

A New Star Wars Outlaws Story Trailer Is Coming Next Week
Avatar: The Last Airbender Skins Now Available In Fortnite

Sonic The Hedgehog Lead Reflects On SEGA's Road To The Dreamcast
View the discussion thread.
‘The Beach Boys’ Documentary Trailer Brings Never-Before-Seen Footage to Disney+
By Selena Kuznikov
Selena Kuznikov
- ‘Civil War’ Director Alex Garland Warns Mistrust of Journalists ‘Makes Life Dangerous For Everyone’ 16 hours ago
- ‘Evil’ Final Season Gets Premiere Date, Trailer at Paramount+ (TV News Roundup) 16 hours ago
- ‘The Beach Boys’ Documentary Trailer Brings Never-Before-Seen Footage to Disney+ 20 hours ago

Get ready for some fun, fun, fun! Disney+ has released the trailer for its “ The Beach Boys ” documentary, which is set to stream on the platform May 24.
“I’m super happy with the way the documentary turned out, they did an amazing job,” Wilson said in a statement. “It really brought me back to those days with the boys, the fun and the music. And of course those incredible harmonies.”
Produced by Kennedy/Marshall and White Horse Pictures, “The Beach Boys” is directed by Frank Marshall and Thom Zimny and written by Mark Monroe. The film is produced by Marshall, Irving Azoff, Nicholas Ferrall, Jeanne Elfant Festa and Aly Parker. Nigel Sinclair, Monroe, Tony Rosenthal, Cassidy Hartmann, Glen Zipper, Zimny, Beth Collins, Jimmy Edwards, Susan Genco, Marc Cimino, Jody Gerson, Bruce Resnikoff, and Ben J. Murphy serve as executive producers.
The official soundtrack, “The Beach Boys: Music From The Documentary,” will be available to stream and download on May 24 via Capitol/UMe.
Watch the trailer below.
More From Our Brands
Biden slams netanyahu over gaza: ‘i think what he’s doing is a mistake’, ponant just added a new 79-foot sailing catamaran to its fleet for more intimate cruises, goldin auctions acquired by ebay from collectors holdings, the best loofahs and body scrubbers, according to dermatologists, fallout review: walton goggins is the secret weapon in daunting, hilarious video game adaptation, verify it's you, please log in.
IMAGES
VIDEO
COMMENTS
Step 1: Secure and Jack Up Trailer. Chock your trailer wheels so the trailer doesn't roll out of place. Jack up the trailer/camper high enough so the wheel you're starting with can freely spin (it doesn't matter which wheel you start with). Chock wheels to secure trailer. Jack up trailer so wheel can spin freely.
Step 3: Tighten the adjustment wheel. Using a brake spoon, brake adjustment tool or flathead screwdriver, turn the star wheel adjuster inside the brake chamber. The adjuster is typically located below the brake drum. Push down on the brake spoon handle so the adjuster wheel is pried upward. This will tighten the brake pads or shoes.
Here are 10 ways to adjust electric trailer brakes. Later, air brakes and surge brakes will be addressed. Gather the right tools. Jack up wheel. Free the wheel. Remove adjusting hole cover. Insert a flat-head screwdriver or brake adjusting tool. Locate star wheel.
Thumbs up if you like the video👍🏼 A quick how to on adjusting trailer brakes. This is simple for most DIY folks who wanna do a quick seasonal adjustment. L...
Push up on the star wheel adjuster to tighten the brake pads, or press it down to loosen the pads. Rotate the tire slowly until it drags, as this signifies a tight, well-adjusted brake. Make sure to adjust each tire on your trailer evenly so the brakes work and stop cohesively. 1.
For smaller trailers, a lower gain setting should be used to avoid brake lockup. How to set trailer brake gain. To set trailer brake gain, start with the values specified by the manufacturer. Test your trailer brakes at 25mph. If the vehicle stops slowly, increase the trailer brake gain. If the brakes lock up, decrease the gain.
To loosen the brake adjustment, insert the screwdriver or brake spoon horizontally into the hole and pry upwards. Pay attention to how many clicks of the nut it takes to get your tire to a point where the tire spins freely with minimal drag. You can use that same number of clicks as a reference point when adjusting the other trailer brakes on ...
Knowing how to control your RV's electric braking system is critical when out on the road between destinations. In this video, I explain how your tow vehicl...
#thetrailersmith #adjusttrailerbrakes #trailerbrakes #trailerbrakesnotworkingTrailer brakes not working? Here are some simple steps you can take to manually...
Adjust the Brake Shoes: Using your adjusting wrench, make precise adjustments to the brake shoes. The goal is to achieve a balanced level of brake shoe-to-drum contact. Gradually tighten or loosen the adjuster as needed. Testing and Fine-Tuning: After adjusting the brake shoes, manually rotate the trailer's wheels.
Step 3: Take the rig out for a test drive. Configure the trailer brake controller's power control dial to its middle setting before taking the trailer out for a road test. Then, drive your rig at 25 mph while keeping your foot on the accelerator. If 25 mph is too fast, 5 or 10 mph is also okay. Next, switch the brake controller to its highest ...
In order to set a trailer brake gain, just follow the steps below: 1. Connect your travel trailer. 2. Set the dial for the trailer brake gain. 3. Get accurate measurement. 4. Drive the vehicle at around 20mph and brake.
Trailer brakes are a set of electrical brakes on larger trailers to assist a tow vehicle with stopping. The electric brakes use the tow vehicle's electrical system and activate when the driver presses their foot on the brake pedal. ... Most states require drivers to use electric brakes on trailers exceeding 1,500 pounds. All trailers over ...
You'll need to pre-warm your brakes prior to "dialing in" the right setting. Your manual will tell you how to do that. Then it gets dicey - you're often told to engage the manual brake lever on the controller while cruising down the road, one suggests, "at 25 miles per hour or less.".
1. Mechanical braking systems. Mechanical brakes, sometimes called cable, over-ride or over-run brakes, work by mounting a sliding spring mechanism to the trailer's drawbar (within the tow coupler/hitch). This spring contracts as soon as the trailer's speed attempts to overrun the vehicle.
Go about 25 MPH. Lightly press on the brake pedal. At this slow speed, with just the slightest tap of the brake pedal on your truck brake, you should feel the trailer brakes working and holding you back a little. If you don't feel the trailer slowing down and the truck takes longer than usual to stop, then your gain needs to be adjusted.
Different Types Of Travel Trailer Brakes Electric Brakes. Electric brakes are constructed with electronic components and a set of magnets that apply pressure to a wheel hub. This is controlled by a module that is located in the tow vehicle and is applied as you are pressing on the vehicle's brake. This connection is made with a trailer ...
I wanted to do a tutorial on how to set up and adjust electronic brakes for trailers.
The breakaway cable will need to be connected separately to the tow vehicle but not to the safety chains or ball mount. (Customer photo: Steve Platt) The purpose of the breakaway cable is to attach the trailer brake system to your tow vehicle. If for some reason your trailer comes unhitched from your truck, this cable will pull the breakaway ...
Step 1: Connect your trailer to your tow vehicle. Make sure your trailer is connected to your 5-7 point plug. Step 2: Depending on your dial on the brake controller, you can either set it for 50%, or a number like 5 and if you have no numbers, then make sure the dial is set in the middle.
Tekonsha P3 Model 90195: Best Full-Featured Controller. Curt 51110 Venturer: Best Budget Trailer Brake Controller. Tekonsha Prodigy P2: Easiest Installation. Reese Towpower Brakeman Model 74642 ...
Aisha is currently set to premiere in theaters on May 10, 2024. The post Aisha Trailer Previews Drama Starring Letitia Wright & Josh O'Connor appeared first on ComingSoon.net - Movie Trailers ...
You know you need something called a brake controller to tow your trailer, but if you're not quite sure how to use or adjust it once you've got one, you're i...
When her 11-year-old daughter is sent to a military school to serve the post-apocalyptic North American regime, Cree mother Niska decides to fight back. Watch trailers & learn more.
Watch The Hijacking of Flight 601 | Netflix Official Site. After a plane is hijacked, two flight attendants must outwit their assailants amid intense negotiations in the air and on the ground. Based on real events. Watch trailers & learn more.
Star Wars Outlaws arrives on PlayStation 5, Xbox Series X/S, and PC on August 30. If you'd like to learn more, we've got you covered! We recently traveled to Malmö, Sweden, to spend several hours with the developers and get our hands on the game. You can read more in the cover story of our newest issue or by visiting our exclusive coverage hub ...
How to adjust electric trailer brakes? This is something that is overlooked even more than packing wheel bearings. Here at Peak Mtn Camps it is quite obvious...
Disney+ has released the trailer for its " The Beach Boys " documentary, which is set to stream on the platform May 24. The trailer features clips from interviews with original band members ...
How to replace your electric trailer brakes. RV Maintenance that you shouldn't be putting off!I show you how to replace your trailer brakes on your Fifth Wh...