
- TATA Motors Manuals
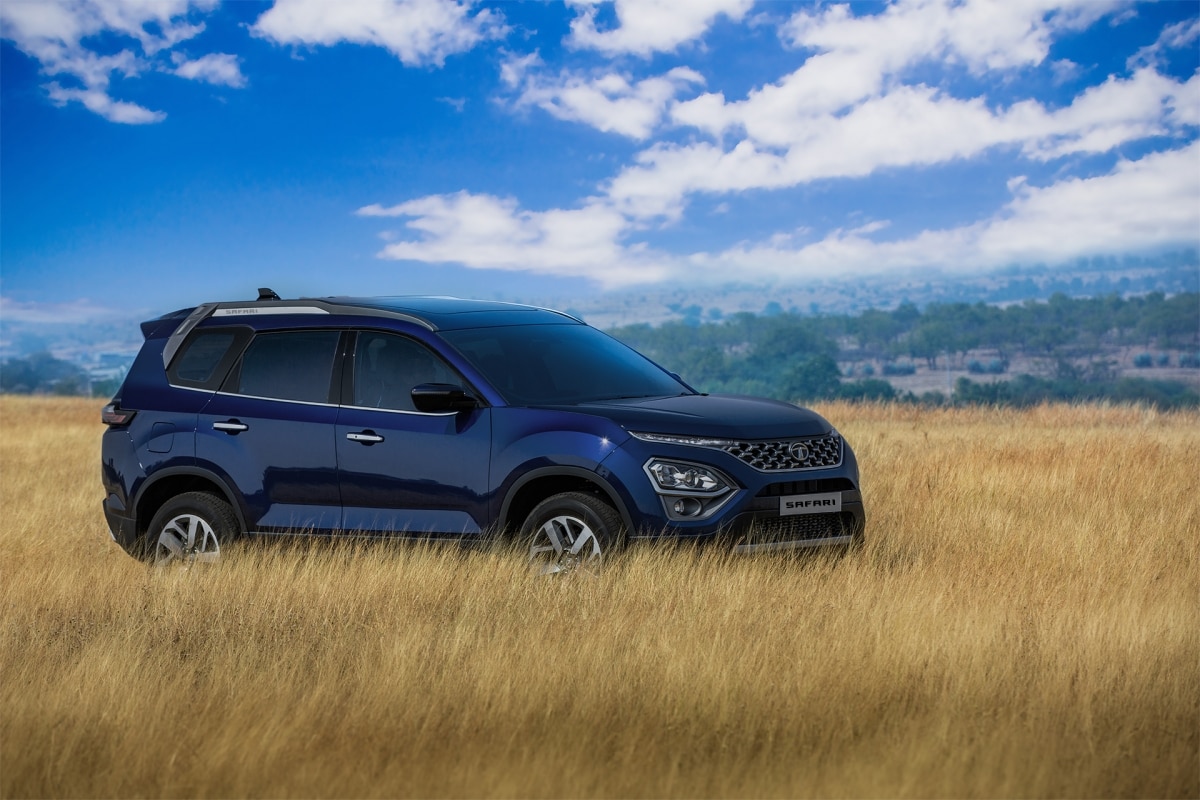
- Safari 2021
- Owner's manual

TATA Motors Safari 2021 Owner's Manual
- page of 308 Go / 308
Table of Contents
- Important Information
- Child Restraint System (CRS)
- Supplementary Restraint System (SRS - Airbags) (if Equipped)
- Child Lock (if Equipped)
- Anti-Theft Device Immobilizer / PEPS
- Anti-Lock Braking System (ABS) (if Equipped)
- Electronic Brake Force Distribution (EBD)
- Additional Safety Features (as Available)
- Opening and Closing
- Keys (as Available)
- Smart Key (PEPS)
- Smart Key Features
- Flip Key Features
- Tailgate Opening (as Available)
- Power Sunroof (if Available)
- Dashboard and Features
- Instrument Cluster (TFT Screen)
- Instrument Cluster (LCD Screen)
- Audio Reminders (if Available)
- Combi-Switch (RH Stalk)
- Combi-Switch (LH Stalk)
- Fascia Switches
- Steering Wheel Switches (LHS) (if Available)
- Steering Wheel Switches (RHS) (if Available)
- MIC (if Available)
- Infotainment System Display (if Available)
- Speakers & Tweeter (if Available)
- USB Charger (if Available)
- Power Socket
- Antenna (if Available)
- Shark Fin Antenna (if Available)
- Roof Grab Handle (if Available)
- Front Fog Lamps (if Available)
- Rear Fog Lamps (if Available)
- Puddle / Ajar Lamp
- Side Indicator Lamp on Orvm
- Ambient Lights (if Available)
- Assist) Connected
- Wireless Power Charging
- Stowage Areas
- Storage Compartment
- Climate Control
- Air Distribution
- HVAC Controls (if Available)
- Fully Automatic Temperature Control (FATC)
- Cabin Air Purification
- Starting and Driving
- Pre Driving Checks
- Driving Tips
- Seat Adjustments
- Rear View Mirrors
- Steering Wheel Adjustment (if Available)
- Steering Lock and Ignition Switch (if Available)
- Starting and Stopping (Without PEPS)
- Starting and Stopping (PEPS) (if Available)
- Engine Passive Start - Conditions
- Engine Passive Stop - Conditions
- Manual Transmission (MT)
- Stopping the Vehicle
- Parking Brake
- Automatic Vehicle Hold (if Equipped)
- Reverse Park Assist (if Available)
- Rear Park Assist with Camera (if Available)
- Drive Mode (if Available)
- Terrain Response Mode (if Available)
- Emergency and Breakdown Assistance
- Emergency Equipment
- Spare Wheel Removal Process
- In Case of Flat Tyre
- Puncture Repair Kit (if Available)
- Jump Lead Starting
- Bulb Specification
- 24 X 7 Road Assistance
- Maintenance and Services
- Maintenance and Service
- Engine Compartment
- Remote Key Battery Replacement (for Flip Key)
- Smart Key Battery Replacement (for PEPS Vari- Ant)
- On Board Diagnostic (OBD II) System
- Diesel Particulate Filter (DPF)
- Exhaust after Treatment System
- Regeneration Process
- Diesel Exhaust Fluid (DEF)
- Service Instructions
- Service Schedule
- Vehicle Parking for Long Duration
- Technical Information
- Fuel Specification
- Lubricant Specification
- Technical Specifications
- Vehicle Dimensions
- Aggregate Identification Numbers
- Value Care - AMC
- Extended Warranty
- Value Added Services
- Vehicle Exterior Enrichment
- Vehicle Interior Enrichment
- Warranty - Terms and Conditions
- Vehicle Warranty: Terms and Conditions
- Environment Safety
- Environmental Safety
Advertisement
Quick Links
- 1 Instrument Cluster (Tft Screen)
- Download this manual
Related Manuals for TATA Motors Safari 2021

Summary of Contents for TATA Motors Safari 2021
- Page 1 OWNER’S MANUAL Revision: Rev 01/AUG 2021...
- Page 2 In our constant endeavour to provide assistance and complete You can also approach nearest TATA MOTORS dealer. service backup, TATA MOTORS has established an all India cus- A separate Dealer network address booklet is provided with the tomer assistance centre.
- Page 3 Always carry out prescribed service / maintenance work as well as any required repairs at an authorized TATA MOTORS Dealers or Authorized Service Centre’s (TASCs). Use only genuine parts for continued reliability, safety and performance of your vehicle.
- Page 4 Please note that your vehicle may not be equipped with all features described. TATA MOTORS PASSENGER VEHICLE LIMITED reserves the right to introduce changes in the design, equipment and technical features without any obligation to install them on the vehicles previously sold. The equipment in your vehicle may therefore differ from that shown in the descriptions and illustrations.
Page 5: Table Of Contents
- Page 6 CONTENTS Power Socket 05. CLIMATE CONTROL Antenna (if available) Air Distribution Shark Fin Antenna (if available) Air Vents Roof Grab Handle (if available) HVAC Controls (if available) Front Fog Lamps (if available) Fully Automatic Temperature Control (FATC) (if available) Rear Fog Lamps (if available) Cabin Air Purification Puddle / Ajar Lamp Roof Lamp...
- Page 7 CONTENTS Manual Transmission (MT) 24 X 7 Road Assistance Driving 08. MAINTENANCE AND SERVICES Stopping The Vehicle Braking Maintenance And Service Parking Brake Engine Compartment Automatic Vehicle Hold (if equipped) Tyres Reverse Park Assist (if available) Remote Key Battery Replacement (for Flip key) Rear Park Assist With Camera (if available) Smart Key Battery Replacement (for PEPS vari- ant)
- Page 8 CONTENTS Lubricant Specification Technical Specifications Vehicle Dimensions Aggregate Identification Numbers 10. CAR CARE Car Care Fast Tag Value Care - AMC Extended Warranty Value Added Services Vehicle Exterior Enrichment Vehicle Interior Enrichment 11. WARRANTY - TERMS AND CONDITIONS Vehicle Warranty: Terms And Conditions 12.
Page 9: Safety
- Page 10 Tow the There is no hard and fast rule about aqua- vehicle to a safe place. Contact a near- planing. The best advice is to slow down est TATA MOTORS Authorised Service when the road is wet. Centre...
- Page 11 SAFETY Night Driving Driving on Gradients Driving on Highway • Ensure that all lights are working and When climbing gradient, the vehicle may Stopping distance progressively, windshield, window glasses are clean. begin to slow down and show a lack of creases with vehicle speed.
Page 12: Seat Belts
- Page 13 • If the seat belt webbing or hardware If the vehicle has been involved in a colli- is damaged, get it replaced immedi- sion, get it inspected immediately at au- ately at TATA Motors Authorized thorized TATA MOTORS SERVICE service centre.
- Page 14 SAFETY Seat Belt with Load Limiter (if Use of Seat Belts for Pregnant equipped) Woman You can use the load limiter seat belts in WARNING the same manner as ordinary seat belts. • Pregnant woman must wear a cor- The seat belt load limiter system works in rectly positioned seat belt.
- Page 15 If the driver does not fasten seat belt, cover may affect function of occupant seat belt reminder lamp will blink and sensor. TATA motors does not recom- a buzzer will sound for pre-defined du- mend any non-validated seat covers on ration until the driver’s seat belt is...
Page 16: Child Restraint System (Crs)
- Page 17 SAFETY Recommended CRS Position as Per Interme- the Vehicle Matrix Front Rear diate Out- Inter- Rear The suitability of seat position for carriage Mass Pas- Out- board medi- Group Age Group Cen- of children and recommended category of Group sen- board Second CRS is shown in the table below as per the...
- Page 18 (as may be applicable) inves- senger seat. If the PAB inflates, a child • Do not use pillows, books or towels tigated at TATA MOTORS Authorized serv- in a rear facing CRS could be seriously to boost your child’s height. ice center.
- Page 19 SRS warning indicator in the instrument cluster illuminates continuously, it means that there is malfunction in the system. Re- move the CRS from front passenger seat and contact your TATA MOTORS author- ized service center. NOTE The above images are for reference...
Page 20: Supplementary Restraint System (Srs - Airbags) (If Equipped)
- Page 21 SAFETY Side airbags (if equipped), are mounted in Curtain airbags (if equipped), are mounted NOTE front row seats for outboard occupants above the doors along the roof on both • Open your windows and doors as only. sides. soon as possible after collision to re- duce prolonged exposure to the smoke and powder released by the inflating airbag.
- Page 22 SAFETY until the vehicle is parked and the WARNING engine is turned off. • Even in vehicles with Airbags, you • If an occupant is out of position dur- and your passengers must always ing collision, the rapidly deploying wear the seat belts provided. In Airbag may forcefully contact the order to minimize the risk and sever- occupant causing serious or fatal in-...
- Page 23 SAFETY NOTE The above images are for reference purpose only.
- Page 24 Please be aware that any unse- We recommend the customer to imme- cured item in your vehicle, such as diately visit TATA MOTORS authorized your pet, unsecured CRS or a lap- service center and get the SRS system top, can become a potential hazard...
- Page 25 Authorized TATA MOTORS Dealer the use of rearward-facing child restraint Side airbags and side curtain airbags (if for necessary guidance.
Page 26: Child Lock (If Equipped)
- Page 27 SAFETY NOTE • Lift the lock lever upward to deacti- vate the childproof lock when not re- quired. • Child safety lever to be used for safety of child for preventing them to open rear door while seating in pas- senger seat to avoid accident while vehicle is running.
Page 28: Anti-Theft Device Immobilizer / Peps
Page 29: anti-lock braking system (abs) (if equipped), page 30: electronic brake force distribution (ebd).
- Page 31 SAFETY brake too soft. The HBA function detects Engine Drag Torque Control (EDTC) the critical situation and builds up addi- On slippery road conditions during in- gear tional brake pressure to reduce the brak- Braking or Shift down of gear or sudden ing distance.
Page 33: Opening And Closing
- Page 34 The engine will start only if all the codes also be drained due to frequent match. cranking. Loss of Keys If one of the key is lost, contact your near- est TATA MOTORS authorized dealer im- mediately.
Page 35: Smart Key (Peps)
- Page 36 OPENING AND CLOSING Unlocking Door with Emergency Key • Slot is provided below driver door han- dle. • Insert the key blade in slot and turn • Outer cover of door handle will be un- clockwise to unlock the door. lock first.
Page 37: Smart Key Features
Page 38: flip key, page 39: flip key features, page 40: door, page 41: windows.
- Page 42 OPENING AND CLOSING struction or resistance detected. Glasses are wound up by pulling the NOTE switch and are lowered by pressing. Thus, it gives full and reliable protection for Power windows can be operated for 30 hand, neck and any obstacles as well. WARNING sec.
Page 43: Bonnet
- Page 44 OPENING AND CLOSING Closing To close the bonnet, hold the bonnet by one hand, disengage the stay rod and clamp it back properly. Lower the bonnet close to the bumper, then let it drop down. WARNING Ensure that the bonnet is properly locked before driving or it can fly up un- expectedly during driving.
Page 45: Tailgate Opening (As Available)
- Page 46 OPENING AND CLOSING On closing the tail gate door, Tail gates key. WARNING gets locked. Open the rear door. Tail gate can’t be locked using mechan- Fold the rear seat. NOTE ical key/ flip key/ smart key. It can be And access the tailgate opening lever locked by slamming it.
Page 47: Fuel Lid
Page 48: power sunroof (if available).
- Page 49 OPENING AND CLOSING 2. Sunshade Close Position Push the switch (6) to close the Sun- shade. Express (one touch) close to close Sun- shade completely. Manual (long press) Close and stop at de- sired position 3. Sunroof Open Position Push the switch (5) to open the Sun- shade.
- Page 50 OPENING AND CLOSING Push the switch (1) to open the Sunroof. 5. Sunroof Tilt Open/close Position 4. Sunroof Close Position Express (one touch) open to open Sun- roof completely. Manual (long press) open and stop at de- sired position. NOTE During sliding sunroof Express (one touch) open operation, Sunshade will also open in synchronization with slid-...
- Page 51 Follow The Emergency Close Com- this 4th at-tempt. protection may not function properly. mand As Below: Visit an authorized TATA Motors dealer Once the sunroof or Sunshade is com- or an authorized TATA Motors Service Emergency close feature can be used, if pletely closed, release the switch.
- Page 52 OPENING AND CLOSING fuse, the sunroof/ Sunshade must be ini- lease the Switch to complete the pro- NOTE tialized. cedure. If the initializing procedure is not com- Otherwise Express (one touch) function The self-learning command is com- pletely performed, then it has to be run (open/close/tilt) and pinch protection func- plete.
- Page 53 See an authorized TATA ble to lock the vehicle, start the en- Motors dealer or an authorized gine, turn on the ignition and TATA Motors Service Facility. operate the sunroof. • The Sunshade can be opened and closed independently when the slid-...
Page 55: Dashboard And Features
Page 56: instrument cluster (tft screen).
- Page 57 DASHBOARD AND FEATURES Speedometer Tachometer Fuel Gauge When the ignition switch is in “ON” posi- tion, fuel gauge gives an approximate in- dication of the amount of fuel in the fuel tank. In indication window, “F” stands for full and “E” stands for empty. Speedometer indicates the vehicle speed Tachometer indicates engine speed in rev- in km/h.
- Page 58 ‘OFF’ the engine and TORS Authorized service centre. allow it to cool down for some time. Con- tact the nearest TATA MOTORS author- The Indicator should be within the accept- ized service center immediately for able range. i.e., between “E” and “F”.
- Page 59 DASHBOARD AND FEATURES Similarly for Low DEF Quality & SCR Fault suddenly. This is due to the move- there are featured text and warnings pres- ment of DEF in the tank. ent to alert the driver regarding condition • If SCR Fault issue comes the take of DEF System.
- Page 60 DASHBOARD AND FEATURES Driver Information System Driver Information System Image Description Indicates distance travelled by a vehicle. The odometer reading Odometer does not return to “0” when maximum value is reached, the dis- play will freeze to maximum value. The trip meter can be used to measure the distance travelled on Trip meter A &...
- Page 61 Current gear position NOTE: If “Fault” is displayed it means a ‘Fault’ condition. Contact (indicator) (for MT & AT- the TATA MOTORS authorized service centre. Manual Mode) In case of Manual Transmission, the gear number shall be dis- played when the clutch is fully released.
- Page 62 User has to drive the vehicle in recommended speed to change the gear. Electronic Brake Distribution (EBD) System Fault Electronic Brake Distribu- User has to take the vehicle to Authorized Tata motors service sta- tion Fault tion. This message displayed when transmission oil temperature is Transmission Oil Temper- higher than allowable limit.
- Page 63 This message displayed when transmission related failure is pres- Transmission Failure ent. Drive Cautiously Visit User has to take the vehicle to Authorized Tata motors service sta- Service Centre tion. This message displayed when transmission related failure is pres- Transmission failure Mal- ent.
- Page 64 DASHBOARD AND FEATURES Instantaneous Fuel Economy (IFE) Power and Torque Average Fuel Economy (AFE) Trip A It indicates fuel economy of current drive Indicates the amount of power and torque when Ignition is turned ‘ON’. delivered by engine in the particular driv- ing condition.
- Page 65 DASHBOARD AND FEATURES Distance To Empty (DTE) To see the Average fuel economy in the In- NOTE strument cluster. Press the switch • If DTE is displayed as ‘—-‘, then on the RHS of the steering switch. take your vehicle to the TATA MO- Trip time, Average speed and Trip distance TORS Authorized Service Centre.
- Page 66 DASHBOARD AND FEATURES Setting Screen To change the option from unit to service Service Reminder Reset You can select Service reminder reset reminder reset by pressing on the screen by scroll down & pressing set but- RHS of steering switch. ton in settings screen.
- Page 67 DASHBOARD AND FEATURES Outside Ambient Temperature About Screen NOTE You can select about option by scroll up or For an accurate temperature reading, down and pressing set button on make sure the vehicle speed is above RHS steering switches. It displays open 30 kmph.
- Page 68 DASHBOARD AND FEATURES TPMS screen with low tire pressure: TPMS screen with high tire pressure: warning message then take vehicle to service center. TPMS screen with no fault: NOTE NOTE If tyre pressure is low, then you will get If tyre pressure is high, then you will get to see the red hollow mark on that tyre to see the red filled mark on that tyre in in the Instrument Cluster.
- Page 69 DASHBOARD AND FEATURES TPMS screen with combination of failures TPMS screen with TPMS ECU Malfunc- in tires: tion: TPMS screen with Air leakage:...
- Page 70 DASHBOARD AND FEATURES Display Messages on Instrument Cluster Below messages can be displayed in the screen for 3 sec based on the priority. Warning Messages (messages displayed within the Red border) NOTE: All messages may not be applicable to your vehicle Warning / Information Title Warning Message Title Warning Message On Instrument Cluster...
- Page 71 DASHBOARD AND FEATURES Warning / Information Title Warning Message Title Warning Message On Instrument Cluster Fuel Level Low State Fuel Level Warning Fuel Level Low Fasten seat belt front passenger Seat Belt Reminder Fasten Front passenger Seat Belt Transmission Failure Limp home Acti- Transmission System Malfunction Detected Contact Service Center vated Visit Service Center...
- Page 72 DASHBOARD AND FEATURES Warning / Information Title Warning Message Title Warning Message On Instrument Cluster Engine Stops in “Value” Km DEF quality warning 4 DEF Quality Low Check DEF System Engine Stops in “Value” Km DEF quality warning 5 DEF Quality Low Check DEF System DEF quality warning 6 DEF Quality Low...
- Page 73 DASHBOARD AND FEATURES Alert Messages (messages displayed within Grey border) NOTE: All messages may not be applicable to your vehicle. Alert / Information Title Alert Message Title Action To Be Taken HDC Deactivation Due To Speed System Deactivated Speed Crossed Set Hill Decent Control Above Set Value Limit...
- Page 74 DASHBOARD AND FEATURES Alert / Information Title Alert Message Title Action To Be Taken Cruise Override Cruise Control Cruise Override Hill Descent Control Switched On Hill Descent Control HDC Turned ON Shift to Park (P/N) - vehicle Start Transmission Alert Shift to Park or Neutral to Start Engine function for AT vehicle Park Brake Alert...
- Page 75 DASHBOARD AND FEATURES Drive Alert NOTE • This alerts is for Manual Trans-mis- sion (MT) vehicle. • The warnings are generated post faulty drive event and is not the live event. • The fault is logged after the clutch pedal is fully released and gear in- formation received.
- Page 76 DASHBOARD AND FEATURES Interrupt Messages NOTE: All messages may not be applicable to your vehicle. Alert / Information Title Action To Be Taken Rotate steering wheel (In ESCL jam condition) Press Start Button while Turning Wheel Smart key out of range Smart Key Out of Range Drive Alert - Tea Break Take a Break...
- Page 77 DASHBOARD AND FEATURES Alert / Information Title Action To Be Taken TPMS High Pressure High Tire Pressure - Deflate Tire TPMS High Temperature Tire Overheated Slow Down Combination alerts Check Tires Malfunction TPMS Malfunction - Contact Service Centre Air Leak Leakage Detected Check Tires Fault TPMS Error - Check Tires...
Page 78: Instrument Cluster (Lcd Screen)
- Page 79 DASHBOARD AND FEATURES Speedometer Tachometer Fuel Gauge When the ignition switch is in “ON” posi- tion, fuel gauge gives an approximate in- dication of the amount of fuel in the fuel tank. “F” stands for full and “E” stands for empty.
- Page 80 ‘OFF’ the MODE button. engine and cool it down for some time. The display does not show actual value Contact the nearest TATA MOTORS Au- thorized Service Centre immediately for unless vehicle is moving. rectification.
- Page 81 • On getting defined text messages related to Quality and SCR Fault, take your vehicle to the nearest TATA MOTORS Authorized service center. The Indicator should be within the accept- able range. i.e., between “E” and “F”. When DEF in tank is near to empty posi-...
- Page 82 DASHBOARD AND FEATURES Driver Information System Driver Information System Image Description Indicates distance travelled by a vehicle. The Odometer reading Odometer does not return to “0” when maximum value is reached, the dis- play will freeze to maximum value. The trip meter can be used to measure the distance travelled on Trip meter A &...
- Page 83 Current gear position indi- NOTE: If “F” is displayed it means a ‘Fault’ condition. Contact cator (For MT) the TATA MOTORS authorized service centre. In case of Manual Transmission, the gear number shall be dis- played when the clutch is fully released.
- Page 84 DIS. Current gear position indi- NOTE: If “F” is displayed it means ‘Fault’ condition. Contact the cator (For AT) TATA MOTORS Authorised Service Centre. In case of Automatic Transmission, the Gear numbers shall be displayed as per automatic gear selected.
- Page 85 • Average Fuel Consumption will get If DTE is displayed as ‘—-‘, then take Reset to ‘0’ when Battery is re- your vehicle to the TATA MOTORS au- moved and refitted. thorized service centre. Distance To Empty (DTE) Instrument Cluster Illumination Trip time, Average speed and Trip distance will reset to ‘0’...
- Page 86 DASHBOARD AND FEATURES Outside Ambient Temperature TPMS Screens WARNING The clock and instrument cluster illumi- NOTE nation settings should be changed only When start the vehicle or make ignition when the vehicle is in stationary condi- ON it may happen Pressure & Temp tion for safety purposes.
- Page 87 DASHBOARD AND FEATURES TPMS screen with low tire pressure TPMS screen with combination of failures TPMS screen with Malfunction in tires TPMS screen with high tire pressure TPMS screen with leakage TPMS screen with Error...
- Page 88 DASHBOARD AND FEATURES Display Messages on Instrument Cluster Warning Messages On Sn Warning Title / Title Instrument Cluster Speed Limit Warning OVER SPEED HDC Deactivation Due To HDC DEACTIVE Speed Above Set Value Engine Is Locked ENGINE LOCKED Low Brake Fluid LOW BRAKE FLUID Electronic Stability Off ESP OFF...
- Page 89 DASHBOARD AND FEATURES Warning Messages On Warning Messages On Sn Warning Title/ Title Sn Warning Title/ Title Instrument Cluster Instrument Cluster Cruise is Resuming to set ENG NOT START AFTER CRUISE RESUMED DEF Level Low Level 3 speed “VALUE” KM Press Clutch for MT PRESS CLUTCH ENG NOT START AFTER...
- Page 90 DASHBOARD AND FEATURES Warning Messages On Sn Warning Title/ Title Instrument Cluster SCR Fault Level 1 SCR FAULT SCR FAULT ENG OFF SCR Fault Level 2 “VALUE” KM SCR FAULT ENG OFF SCR Fault Level 3 “VALUE” KM SCR FAULT ENG OFF SCR Fault Level 4 “VALUE”...
Page 91: Tell Tales
- Page 92 ‘IGN’ ‘ON’ and engine is running, it indicates a fault in the electrical circuit / lubrication system. Contact the TATA MOTORS Authorized service center. This lamp comes on when ignition is switched ‘ON’ however it will be switched OFF after pre check of 4sec.
- Page 93 DASHBOARD AND FEATURES Warning Lamps Color Indicator Remarks If seat belt is not fastened and vehicle speed goes above 15 Kmph, then final warning will start with telltale flashing and Audio chime for 90 seconds. After 90 seconds, telltale will be ON and Audio chime will be OFF. Note: •...
- Page 94 Illuminates when ignition is switched ‘ON’ and goes ‘OFF’ in approx. 4 sec- onds. If the engine is overheating, this indicator blinks along with an audible buzzer at this stage Contact the TATA MOTORS Authorized Service Centre immedi- High Coolant ately. This symbol blinks along with audible buzzer when engine coolant tem- Temperature perature is more than normal.
- Page 95 The lamp remains on continuously if excess water is accumulated in the fuel indicator Amber filter. Contact the TATA MOTORS Authorized service center to drain the water (Diesel) immediately to avoid serious damage to the fuel injection system. Daytime running...
- Page 96 DASHBOARD AND FEATURES Warning Lamps Color Indicator Remarks Rear Fog Lamp Amber The lamps comes on when the rear fog lamp is ‘ON’. (if available) Front Fog Lamp Green The lamps comes on when the front fog lamp is ‘ON’. (if available) This lamps comes on when the Valid Smart key is not detected inside the vehi- Key Not Detected...
- Page 97 DASHBOARD AND FEATURES Warning Lamps Color Indicator Remarks The Front passenger seatbelt warning indicator turns ON when ignition is turned ON. If front passenger seat is occupied by adult, the warning lamp remains ON as Front passenger long as the co-driver seatbelt is not fastened. Seat Belt Indicator If seatbelt remains unbuckled and vehicle goes above 15 kmph, then final audio warning will go on for 90 seconds.
- Page 98 DASHBOARD AND FEATURES Warning Lamps Color Indicator Remarks therefore does not indicate a malfunction. The lamp remains off during the en- tire DPF regeneration and it lamp up only when driving conditions require the driver to be notified. To switch off the lamp, keep the car running until regener- ation is complete (ideally at 3 gear, 60 kmph.
- Page 99 DASHBOARD AND FEATURES Warning Lamps Color Indicator Remarks This features monitors the catalyst health & warns the user if there is a mal- SCR Fault Amber function. TPMS Amber To give tire low pressure, high pressure & pressure leakage warnings to user. (If applicable) In case of malfunction in Electric Park brake this indicator will glow, it will re- Electric Park Brake...
Page 100: Audio Reminders (If Available)
Page 101: combi-switch (rh stalk).
- Page 102 DASHBOARD AND FEATURES within approximately three sec. 7. Head Lamp Levelling Rotary Switch Activation and deactivation of DRL can be done by DRL soft switch which is available on head unit display. Low Beam Rotate stalk to turn ‘ON’ the Low Beam function. Auto Light The headlights will be au- tomatically switched ON...
Page 103: Combi-Switch (Lh Stalk)
Page 104: fascia switches, page 105: steering wheel switches (lhs) (if available), page 106: steering wheel switches (rhs) (if available), page 107: mic (if available).
- Page 108 DASHBOARD AND FEATURES Reset Infotainment System NOTE • Prolonged use of vehicle sound sys- For your safety and convenience, the sys- tem at higher volume levels may • It is preferable to do one Ignition tem has self-healing process by self-re- overheat the electronics in-side.
Page 109: Speakers & Tweeter (If Available)
Page 110: power socket, page 111: antenna (if available), page 112: roof grab handle (if available), page 113: rear fog lamps (if available).
- Page 114 DASHBOARD AND FEATURES Option 2 DOOR Rear Roof Lamp (if available) In this position, the lamp turns ‘ON’ with dimming when either of the doors are opened. When the last door is closed, the lamp will turn ‘OFF’ with dim- ming.
Page 115: Boot Lamp
Page 116: front lamp, page 117: ambient lights (if available), page 118: wireless power charging.
- Page 119 DASHBOARD AND FEATURES played on infotainment in text and WPC system detects the presence of Do not use thicker phone cover or symbol form. phone and starts charging as per the Qi cover with metal parts to avoid charg- standard protocol. The charging status is ing interruption.
- Page 120 DASHBOARD AND FEATURES Do’s And Don’t to transfer energy from charging pad to Dos: phone. Please maintain safe distance Please ensure that the phone is com- WARNING from the charger most of the time as it patible to the charging standard “Qi”. may cause irritation to sensory organs 1.
- Page 121 DASHBOARD AND FEATURES of pad. skid mat. the interior temperature drops below set threshold, the wireless charging 11. Always use TATA MOTORS Do not cover the wireless charger with PASSENGER VEHICLE LIMITED function will resume. a cloth or other object while charging.
- Page 122 DASHBOARD AND FEATURES any/ every position as kept on charging to initiate charging. pad. If phone, having internal calibration, is The wireless charger may not operate placed along with metallic object and correctly when the vehicle is near a TV then, phone is removed from charging tower, electric power plant, gas station, pad then, FOD error message remains...
- Page 123 DASHBOARD AND FEATURES Foreign Object Detection Mode NOTE The charging gets interrupted/stopped due • Delay in restarting of mobile charg- to metal object placed on the charging ing will be observed if foreign ob- pad. The infotainment head unit displays jects are removed without lifting following message.
- Page 124 DASHBOARD AND FEATURES WPC System Error Mode Smart Phone Battery Is Full/ Charg- ing Completed The error in the WPC with fan system may cause the error message to get displayed The smart phone fully charged status is in- on the infotainment screen. dicated on the infotainment display screen with following message.
- Page 125 DASHBOARD AND FEATURES NOTE If error message is pop up on head unit then stop/ avoid charging the smart phone and visit the nearby service sta- tion.
Page 127: Stowage Areas
- Page 128 STOWAGE AREAS Cooling Facility (if available) Google Holder (if available) Utility Pockets on Front Doors Goggle holder is provided near the roof Utility pockets are provided on front doors On selected models cooling facility is pro- lamp. and it can be used to keep following items. vided below driver foldable arm rest.
- Page 129 STOWAGE AREAS Utility Pockets on 3 Mobile / Wallet Stowage Utility Pockets on Rear Doors Place for keeping wallet / mobile is pro- Utility pockets are provided on rear doors Utility pockets are provided on 3 row. It vided in front of Gear shifter lever. and it can be used to keep following items.
- Page 130 STOWAGE AREAS Cup Holder for Front Passenger Stowage for Rear Passenger (if avail- Stowage Below Arm Rest able) Stowage below front arm rest with chiller Space for cup holder are provided in cen- ter console. is provided on center console between the Stowage for rear passenger is provided on front passenger seats.
- Page 131 STOWAGE AREAS Foldable Arm Rest (if available) Tailgate Compartment WARNING • Distribute the items of luggage as evenly as possible. • Position heavy loads as far forwards as possible and as low down in the trunk as possible. • Never allow occupants to travel in the luggage compartment.
- Page 132 STOWAGE AREAS Hooks-coat Hanger (if available) Stowage Below Load Floor Front Seat Back Pockets (if available) Rear pockets are provided behind the front Coat hanger is provided for rear passen- Store the suitable luggage below the load seats for keeping small magazines /Note- ger near grab handle.
Page 133: Climate Control
Page 134: air vents, page 135: hvac controls (if available).
- Page 136 CLIMATE CONTROL Fresh / Recirculation Air Mode Fresh Air Mode Blower Speed Control (Indicator light ‘OFF’) Press the switch to activate / deactivate air recirculation mode. Fresh air is drawn into the vehicle. Always use when: • Discomfort is felt or windows are fog- ging up.
- Page 137 CLIMATE CONTROL AC ON/OFF NOTE • Start the vehicle with AC & Blower in OFF condition in idling • Condensation may drip from the un- for 2~3 minutes. derside of the vehicle when it is in • Then switch ON the AC & cooling mode.
- Page 138 CLIMATE CONTROL Directs air through the center and side air vents Directs air through the cen- ter, side and foot well vents Directs air through the foot well air vents Directs air through the de- froster & foot well vents (De- fault fresh air mode) Directs air through the de- froster vents (Default fresh...
- Page 139 CLIMATE CONTROL Functions and Settings Recommended basic settings of the control elements of air conditioning system for the respective operating modes. These may vary depending on individual requirements and weather conditions. Control Knob Position Button Position Fresh / Recirculation air Blower Speed Air Temperature AC ON/OFF...
Page 140: Fully Automatic Temperature Control (Fatc)
- Page 141 CLIMATE CONTROL button to select the desired airflow mode. speed. Temperature Control Knob Each time you press the MODE button, NOTE the display shows the mode selected. In ‘AUTO’ mode, the FATC system will Directs air through the center regulate the blower speed automati- and side air vents cally.
- Page 142 CLIMATE CONTROL Auto ON Selection Switch Semi-automatic Operation Fresh Air / Recirculation Switch You can manually select various functions When recirculation of the climate control system when it is in switch or LED is switched fully automatic mode. All other features re- ‘ON’, air from the vehicle’s main automatically controlled.
- Page 143 CLIMATE CONTROL NOTE When Reverse gear is selected, air in- take may switch to recirculation mode if previously in fresh mode to prevent ex- haust fumes from entering in the vehi- cle. AC ON/OFF Button Press compressor ON/OFF button to turn the air conditioning ON or OFF.
- Page 144 CLIMATE CONTROL Functions and Settings Control Knob Position Button Position Fresh/air Rear Maximum Air Distri- Blower Temperature Auto Blower Up Recircula- demister Defrost bution Down Button tion Functions Normal Desired Desired Desired No Change No Change heating Temperature Change Change Speed Speed Change...
- Page 145 CLIMATE CONTROL Control Knob Position Button Position To the right Defrosting up to the de- Max Speed Fresh change sired temper- ature Panel OFF change Change...
- Page 146 CLIMATE CONTROL Quick Cooling FATC Sensors Outside Ambient Temperature (OAT) Sensor If your vehicle is parked under the sun, HVAC system is fitted with three sensors. you can cool it down fast by following the It is located under the front bumper grill. Solar Sensor steps given below: A solar sensor is on top of the dashboard...
Page 147: Cabin Air Purification
- Page 148 CLIMATE CONTROL Air Quality Index : (If available) • If the AQI does not improve in some • Climate control system fitted with time get the sensor and Cabin filter FATC calculates Air Quality Index inspected. (AQI) of cabin using PM2.5 AQI Index. PM2.5 Dust Sensor : (If available) •...
Page 149: Starting And Driving
Page 150: driving tips.
- Page 151 STARTING AND DRIVING gears (for MT). ice schedule of the vehicle. really require. Consider using lower blower speeds rather than higher for • Make sure that vehicle is completely • Drive smart and smooth in an anticipa- cooling as at higher blower speeds it stationary before you attempt to shift in tory manner.
- Page 152 STARTING AND DRIVING mental and should be avoided. Running-in Period The more you look after the engine when NOTE it is new, the more satisfied you will be with Avoid excessive revving up of engine its performance in the future. rpm.
Page 153: Seat Adjustments
- Page 154 STARTING AND DRIVING Power Seat Adjustments (Option 2) could cause the driver to lose control of Avoid unnecessary operation of power the vehicle. seat adjustment buttons as it consumes Front seat adjustments: power from vehicle battery. Following seat adjustments can be carried Do not operate more than one opera- 1.
- Page 155 STARTING AND DRIVING is , as it will not allow ventilated seats The ventilated seat by default is set to Captain Seat Adjustment 2nd Row to function properly. whenever ENGINE (Option 3) START/STOP button is turned ON. Lumbar Support (if available) Following seat adjustments can be carried out manually.
- Page 156 STARTING AND DRIVING sired comfortable position. Make sure that • Avoid spillage of liquids on the venti- Captain Seat Child Seat Installation lever returns to its original position and lated seats surface this may lead to Captain seat contains Isofix with Top- seat is securely latched.
- Page 157 STARTING AND DRIVING Captain Seat Third Row Entry Adjustment for Co-driver Seat Adjustable Head Restraint Entry to third row seat to be done through To improve the Second Row occupant Front Seat gang way space (between two captain legroom (Space), Occupant Can adjust Adjust the head restraint so that it is as seats).
- Page 158 STARTING AND DRIVING Seat Backrest Angle Adjustment Rear Seats Adjustment (60 - 40%) • The content could otherwise spill. To change the seat back rest angle, lean Following seat adjustments can be carried forward slightly and pull backrest release Child Seat Installation out manually.
- Page 159 STARTING AND DRIVING Second Row Seat Folding (60 - 40% • Press the backrest release knob to fold the backrest seat forward. Split Seat) You can increase the luggage capacity by folding the respective rear seats as re- quired. To fold the seat:...
- Page 160 STARTING AND DRIVING • Fold the backrest seat forward. Move • Press the backrest release knob to fold • Fold the backrest seat forward. Move the driver and front passenger seat for- the backrest seat forward. the driver and front passenger seat for- ward if necessary.
- Page 161 STARTING AND DRIVING Rear Seat Folding (Complete Seat • Fold the backrest seat forward. Move the driver and front passenger seat for- 100%) ward if necessary. To fold the seat: • Simultaneously, press the backrest re- lease knobs provided on both side. WARNING •...
- Page 162 STARTING AND DRIVING Third Row Entry • The vehicle occupant would thereby be pushed into the seat belt by the To access to Third row seat rear bench seat or by the seat back- • The second row seat are designed as rest.
- Page 163 STARTING AND DRIVING Third Row Seat Folding • Headrest to be in full down condition to fold the seat back. • Adjust the second row seat if required. • Pull the plastic lever & after click sound of unlatching, hand push in the seat back to lean it forward.
- Page 164 STARTING AND DRIVING • Pull only the straps (2) to lift the seat back to original position and not the plastic lever. NOTE Lever to be only pulled for unlatch-ing. it cannot be used simultane-ously for pull and pushing the seat as well. WARNING •...
Page 165: Rear View Mirrors
- Page 166 STARTING AND DRIVING Rear View Mirrors with Joy Stick over your shoulder. NOTE Knob (if available) When vehicle is locked, mirrors will be Motorized Outer Rear View Mirrors (if folded automatically. When it is un- available) locked, mirrors will be unfolded auto- The switch to adjust the motorized mirrors matically.
Page 167: Sun Visors
Page 168: steering lock and ignition switch (if available), page 169: starting and stopping (without peps).
- Page 170 STARTING AND DRIVING Gear Shifting and Driving NOTE tion & wait for 30 secs. When shifting or starting off, do not race WARNING the engine. Racing the engine can shorten engine life and affect smooth The engine emits poisonous exhaust shifting.
- Page 171 If “F” is displayed in DIS of instru- • Slow down before shifting to a lower ment cluster, it means ‘Fault’ condi- gear. This will help avoid over- tion. Contact a TATA MOTORS revving the engine, which can cause Authorized Service Centre. damage. •...
- Page 172 STARTING AND DRIVING Park (P) verse while driving forward. Automatic Transmission (if available) Neutral (N) Use Park (P) position when starting the engine or parking The transmission is in Neu- the vehicle. Apply the park- tral position. ing brake whenever the vehi- It enables the engine to start cle is to be parked.
- Page 173 STARTING AND DRIVING Pressing the shift lever towards left side a time in the order of 1 > 2 > 3 > 4 > • In order to protect the engine, the while in Drive mode will put the transmis- >...
- Page 174 STARTING AND DRIVING Carefully insert the bellow lugs (4) & snap fit in console cutout (5) high- lighted as dotted area (shown in fig.2). Ensure the system is inspected by au- thorized dealer or service partner. Fig 2 When vehicle is in ON condition and shift lever is locked/cannot moved from P (park) mode to other mode with the brake pedal depressed, below steps to be fol-...
- Page 175 STARTING AND DRIVING Automatic Gear Shifter Lever Movement and Conditions Driver Intervention For Shift Lever Position Movement Brake Pedal Driver Shift P ->>R R->>N Not required Not required N->>D Not required D->>M/S Not required Not required M/S->>D Not required Not required...
- Page 176 STARTING AND DRIVING Driver Intervention For Shift Lever Position Movement Brake Pedal Driver Shift D->>N Not required Not required N->>R Not required R->>P Not required Brake Pedal Pressed Shifter Lever Knob Pressed...
- Page 177 STARTING AND DRIVING &hTab NOTE WARNING • Before engaging in any mode (P-R- • To avoid damage of transmission, N-D), Apply brake first then knob do not accelerate the engine in R button to be pressed for safety rea- (Reverse) or any for- ward gear po- son.
- Page 178 STARTING AND DRIVING Shift Lock System Shift GSL to P position and then only Igni- depressed. tion will be switched else vehicle will move For your safety, the automatic trans-mis- • Never move the shift lever into P to accessory on till GSL is moved to P po- sion has a shift lock system which pre- (Park) when the vehicle is in motion.
Page 179: Starting And Stopping (Peps) (If Available)
Page 180: engine passive start - conditions, page 181: engine passive stop - conditions.
- Page 182 STARTING AND DRIVING Stopping the Engine Starting Off WARNING Press the start stop switch to switch off the To start off, press the clutch pedal fully and The engine emits poisonous exhaust engine. Before switching off the engine, shift into first gear. gases such as carbon monoxide.
- Page 183 There is a risk of an accident. • If “F” is displayed in DIS of instru- ment cluster, it means ‘Fault’ condi- tion. Contact the TATA MOTORS Authorized Service Centre.
Page 184: Driving
Page 185: stopping the vehicle, page 186: parking brake.
- Page 187 STARTING AND DRIVING Parking Brake Applied To apply the parking brake, pull the lever Parking Brake Released up fully. The parking brakes tell-tale illumi- nates on the instrument cluster. To release it, pull the lever up slightly, press the re- lease knob and push the lever down.
- Page 188 STARTING AND DRIVING nition/Engine ON condition. Always ensure NOTE WARNING parking brake is released and parking brake warning lamp is OFF before start of During parking, Ensure that Vehicle When parking on a downhill gradient, the drive. Park brake warning lamp in clus- should not be keyed off in D mode.
- Page 189 STARTING AND DRIVING Ignition is on or engine is running. How to Apply Brake pedal is depressed. Depress the Brake pedal. Pull APB switch upward. NOTE NOTE Kindly ensure parking brake indication in instrument cluster is turned off after • Kindly ensure APB indication turns APB is released.
- Page 190 STARTING AND DRIVING APB Gets Released Automatically even when vehicle is in neutral gear nearest authorized TATA service and due care needs to be taken espe- center. For Automatic Transmission cially when the vehicle is parked in nose • Don’t drive your vehicle with APB In engine running condition shift the down condition.
- Page 191 STARTING AND DRIVING Emergency Braking APB Malfunction Indicator • For Smooth Automatic release of In the case of any failure in the service APB please depress accelerator Both the APB malfunction lamp and park- brake or during any other emergency situ- pedal slowly.
Page 192: Automatic Vehicle Hold (If Equipped)
- Page 193 STARTING AND DRIVING How to Disengage AVH Vehicle is standing on steep slope. Precautions During Vehicle Towing In above conditions AVH indication will with APB In Ignition ON Condition depress the Auto change from Green to white and APB in- hold switch the Auto Hold indication in Before towing please ensure APB is not dication will turn on in the cluster.
Page 194: Reverse Park Assist (If Available)
- Page 195 STARTING AND DRIVING Reverse Park Assist with Sensor Operation The reverse park assist system can also be activated manually through infotain- ment screen. Display will be seen on info- tainment screen. NOTE Turning the ignition ‘OFF’ ‘while the Park assist feature in running would dis- able the feature.
- Page 196 STARTING AND DRIVING Audio Warning Reverse Park Assist Limitations Audio warning may come from Infotainment system speaker or through Buzzer, depend- Reverse Park Assist system is not a colli- ing on vehicle model and configuration. sion avoiding system. It is solely the driver’s responsibility to park the vehicle Approx.
- Page 197 STARTING AND DRIVING • Objects close to the rear bumper can • Poles of square/rectangle cross sec- go undetected by the Reverse Park tion might not be detected at vehicle’s Assist field of detection. Driver should edge. use extreme caution while parking the WARNING vehicle.
- Page 198 STARTING AND DRIVING Reverse Park Assist System Preven- Park Assist Malfunction Indications which causes wrong visual informa- tive Maintenance/cleaning tion on display. In case of damage, In case of Reverse park assist system Regularly clean the Sensors and keep make sure that, Reverse Park Assist malfunctions, fault screen may appear on them free from dust, ice, mud, water, sensors are fitted properly at the in-...
Page 199: Rear Park Assist With Camera (If Available)
- Page 200 STARTING AND DRIVING Understanding Guidelines Indication Green Line Do’s And Don’t Indicates, if rear object is in this colored • As the camera is, IP protected, do not zone, you have to be cautious. Still you detach, disassemble or modify in any can go backward safely.
- Page 201 STARTING AND DRIVING Cleaning Camera WARNING tended location. Due to environmental reasons, dust, • In case of uneven road conditions or • The camera uses fish eye lens. So mud or fog may accumulate on the up-hill or downhill conditions, do not the size of the objects or in the dis- camera lens.
- Page 202 STARTING AND DRIVING conditions. not display objects that are close to • Objects, which are close to either cor- or below the bumper, underneath ner of the bumper or under the the vehicle, or objects out of the bumper, cannot be seen on the camera’s field of view.
- Page 203 STARTING AND DRIVING When the Ground Behind the Vehicle Slopes Down Sharply The distance guidelines will appear to be The distance guidelines will appear to be closer to the vehicle than the actual dis- further from the vehicle than the actual dis- tance.
- Page 204 STARTING AND DRIVING When Any Part of the Vehicle Sags When Approaching Three-dimensional Objects The distance guidelines are displayed ac- cording to flat surfaced objects (such as the road). It is not possible to determine the position of three-dimensional objects (such as vehicles) using the distance guidelines.
Page 205: Drive Mode (If Available)
Page 206: terrain response mode (if available).
- Page 207 STARTING AND DRIVING Electronic Stability Program 5. Hill Descent Control (HDC) (if avail- Maintain a greater distance from the ve- (ESP)(if available) able) hicle in front. ESP monitors driving stability While driving down on a hill 3. Rough Road Mode and traction.
- Page 208 STARTING AND DRIVING speed exceeds 60 kmph and Active state on HDC switch will go off automatically. HDC works in both Neutral and in Gear forward and reverse position. While driving down a hill, the engine brak- ing should be used by shifting into a lower gear.
Page 209: Emergency And Breakdown Assistance
- Page 210 EMERGENCY AND BREAKDOWN ASSISTANCE Hazard Warning Switch Advance Warning Triangle Keep the warning triangle at an approxi- mate distance of 50-150 m behind your Press the hazard warning switch to acti- An advance warning triangle is kept on the vehicle in the same lane of traffic. The re- vate the hazard warning.
Page 211: Spare Wheel Removal Process
- Page 212 EMERGENCY AND BREAKDOWN ASSISTANCE • As the retaining bolt gets loosened, the • Remove the holding bracket from the Spare Wheel Fitment Process spare wheel lowers down as shown. spare wheel and get the spare wheel • Engage the holding brackets in spare separated.
Page 213: In Case Of Flat Tyre
- Page 214 EMERGENCY AND BREAKDOWN ASSISTANCE Jacking Point Location on Vehicle the vehicle. not suited for performing mainte- The jacking points are indicated below the • Do not open or close a door or the nance work under the vehicle. door of the vehicle (Refer jacking point lo- tailgate when the vehicle is raised.
- Page 215 EMERGENCY AND BREAKDOWN ASSISTANCE WARNING If you do not position the jack correctly at the appropriate jacking point of the vehicle, the jack could tip over with the vehicle raised. There is a risk of injury. Jack may also get damage. Continue to raise the jack slowly and smoothly until the tyre clears the ground.
Page 216: Puncture Repair Kit (If Available)
- Page 217 EMERGENCY AND BREAKDOWN ASSISTANCE applicable) shall be checked by an ex- Location In Vehicle Puncture Repair Removal pert and replaced if necessary. Process In lugguage compartment These instructions provide a step-by-step • To access the puncture repair kit open explanation of how to use the Puncture re- the tailgate.
- Page 218 EMERGENCY AND BREAKDOWN ASSISTANCE Step...
- Page 219 EMERGENCY AND BREAKDOWN ASSISTANCE Instructions On How To Use The • Never leave the Puncture repair Kit un- Inform all other users of the vehicle that attended while in use. the tire has been temporarily sealed with Puncture Repair Kit Safely the Puncture repair Kit and make them •...
- Page 220 EMERGENCY AND BREAKDOWN ASSISTANCE WARNING WARNING NOTE Leave the bottle seal intact. Screwing Asphyxiation may occur if the engine is When pumping in the sealant through the bottle onto the bottle holder will allowed to run in a non-ventilated or the tire valve, the pressure may rise up pierce the seal of the bottle.
- Page 221 EMERGENCY AND BREAKDOWN ASSISTANCE 11, 12. Once a tire inflation pressure of at WARNING WARNING least 180 kPa (1.8 bar, 26 psi) has been If the tire check shows that the pressure reached. If heavy vibrations, unsteady steering of the sealant-filled tire is less than 130 behavior or noises should occur while •...
- Page 222 EMERGENCY AND BREAKDOWN ASSISTANCE tective cap of the hose. NOTE NOTE • Leave the bottle in the holder and store Compressor unit we can use for filling Remember that emergency roadside the Puncture repair Kit away safely in the air & checking the pressure of the tire repair kits only provide temporary the vehicle trunk.
Page 223: Jump Lead Starting
Page 224: towing.
- Page 225 EMERGENCY AND BREAKDOWN ASSISTANCE Access to Tow Hook WARNING • Unscrew the screws (1) & (2) with the • Never get under your vehicle after it help of screw driver which is provided has been lifted by a tow truck. in Tool kit.
- Page 226 EMERGENCY AND BREAKDOWN ASSISTANCE the automatic transaxle fluid is leaking, a Recommended Towing flatbed equipment or towing dolly must be In case of break down, we recommend used. that your vehicle be towed with the driving wheels off the ground or place the vehicle on a flatbed truck as shown.
Page 227: Fuses
- Page 228 EMERGENCY AND BREAKDOWN ASSISTANCE Engine Compartment Fuse Box WARNING • If you manipulate or bridge a faulty fuse or if you replace it with a fuse of higher amperage, the electric ca- bles could be overloaded. This could result in a fire. There is a risk of an accident and injury.
- Page 229 EMERGENCY AND BREAKDOWN ASSISTANCE NOTE The fuse box layout is for reference pur- pose only. Please refer the sticker pro- vided inside the fuse box cover. Fuse box located in Engine compartment near battery.
- Page 230 EMERGENCY AND BREAKDOWN ASSISTANCE Fuses - Engine Compartment (Diesel)
- Page 231 EMERGENCY AND BREAKDOWN ASSISTANCE &hTab Fuse Fuse Fuse Fuse Fuse Fuse Function Function Function Rating Rating Rating INTERIOR F/B BAT COOLING FAN EMS IGN ABS IGN EMS BATT STARTER MOTOR REVERSE LAMP COMPRESSOR (MT)/TCU (AT) BLOWER MOTOR FRONT WIPER COOLING FAN MOTOR HORN HIGH/LOW FAST...
- Page 232 EMERGENCY AND BREAKDOWN ASSISTANCE Relay Relay Relay Relay Relay Function Relay Function Rating Rating WIPER ON/OFF IGNITION MINI NO MICRO (NO-NC) RELAY RELAY COOLING FAN ATS MICRO NO LOW MINI NO REALY RELAY HEAD LAMP HIGH COOLING FAN BEAM MICRO NO HIGH MAXI NO REALY RELAY...
- Page 233 EMERGENCY AND BREAKDOWN ASSISTANCE Cabin Compartment Fuse Box Cover Removal Procedure Fuse box is located behind glove box. To access the fuse box, remove cover as per procedure given below: Remove snap fitted end-cover first. Open glove box and remove complete Disconnect glove box lamp connec- assembly by removing highlighted 4 tion.
- Page 234 EMERGENCY AND BREAKDOWN ASSISTANCE Disconnect glove box switch connec- tion. If fuse is blown, replace with same rat- Check the fuse of required function ing fuse from spare fuses in engine with help of fuse box sticker present at compartment fuse box. shown location.
- Page 235 EMERGENCY AND BREAKDOWN ASSISTANCE Fuses - Cabin Compartment...
- Page 236 EMERGENCY AND BREAKDOWN ASSISTANCE &hTab Fuse Rat- Fuse Rat- Fuse Rat- Fuse Function Fuse Function Fuse Function IGN SUPPLY I. CLUSTER VENTILATED SEAT 5A / 10A 7 SEATER/6 SEATER POWER SOCKET KEY-IN/ POWER SEAT 5A / 20A RESTRAINT CONTROL ACC RELAY COIL/ SUN- 5A / 20A MUDULE ROOF...
Page 237: Bulb Specification
- Page 238 EMERGENCY AND BREAKDOWN ASSISTANCE Sr. No. Description Rating Type Qty. Position Lamp Rear LED Module Reverse Lamp 12V, 16W W16W Rear Registration Plate Lamp LED Module Side Repeater Lamp on ORVM LED Module High Mounted Stop Lamp (Option I) 12V, 5W High Mounted Stop Lamp (Option II) LED Module Boot Lamp...
Page 239: 24 X 7 Road Assistance
- Page 240 • Toll or ferry charges paid by ASP in towing for non-accident cases up to reaching to the breakdown site to be the nearest TATA MOTORS authorized settled with ASP in actuals in cash. workshop. Towing charges at actual •...
- Page 241 You will be duly informed by the ASP & call • The Service is not available in Lak- • It is understood that TATA MOTORS center for the change applicable if any. shadweep. shall be under no liability whatsoever •...
- Page 242 ASP. • Vehicles will be handled, repaired & towed as per the customer’s risk & TATA MOTORS shall not be liable for any damages / claims as a result of the same. • Services entitled to the customers can...
Page 243: Maintenance And Services
Page 244: engine compartment.
- Page 245 MAINTENANCE AND SERVICES Oil / Fluid Level Engine Oil Quality Monitoring Indicator Engine Oil Level Checking Your vehicle is equipped with Warm up the engine to normal operating a feature in the engine man- temperature. agement system which will monitor the engine oil quality throughout Turn it ‘OFF’...
- Page 246 MAINTENANCE AND SERVICES ing this lamp, MIL, in addition to the above Brake/clutch Fluid Level NOTE lamp, will be turned ON. Depending on the • Under no circumstances oil change distance driven without oil change and oil intervals should exceed 15,000 km quality reset, the engine will go into a soft or 12 Months, whichever occurs or strong performance reduction mode.
- Page 247 NOTE Topping of the coolant should be done in the auxiliary tank only. Make sure that only TATA MOTORS rec- Remove the cap and check the level. Top ommended coolant is used. Mixing of dif- ferent coolants may harm your engine’s up if required.
- Page 248 MAINTENANCE AND SERVICES In case of leakage or hard steering, please container, please refer Engine Com- of injury. contact the nearest Authorized Service partment section. • Let the engine cool down before outlet. Windshield Washer Fluid Level opening the cap. Wear eye and Check that there is washer fluid in the hand protection when opening the WARNING...
- Page 249 MAINTENANCE AND SERVICES level against the marking on the bat- • Clean the battery terminals with a ter- shield, and can also damage your tery outer case. minal cleaning tool or wire brush. vehicle’s paint. • Examine the battery terminals for cor- •...
Page 250: Tyres
- Page 251 MAINTENANCE AND SERVICES Recommended Tyre Pressure in Cold Tyre Pressure Sticker Location Inflation Condition (laden / Unladen) Check for inflation and condition of your vehicle tyres periodically. Tyre Size Front Rear Check the pressure in the tyres when they 33 psi / 33 psi / 235/70 R16 are cold.
- Page 252 MAINTENANCE AND SERVICES Tyre Rotation For alloy wheel rims with spare wheel WARNING of steel wheel rim (if available) To increase tyre life rotate the tyre at spec- If the vehicle vibrates abnormally on a ified intervals or earlier depending on the smooth road, have the wheel balanced operation of vehicle.
Page 253: Remote Key Battery Replacement (For Flip Key)
Page 254: smart key battery replacement (for peps vari- ant), page 255: on board diagnostic (obd ii) system, page 256: diesel particulate filter (dpf), page 257: exhaust after treatment system, page 258: regeneration process, page 259: diesel exhaust fluid (def).
- Page 260 MAINTENANCE AND SERVICES cluster. Start the vehicle. Ensure that DEF DEF Filler Tank NOTE will be filled at room temperature. After DEF refilling through Nozzle OR Precautions while Refilling DEF container, in case of DEF is spill out dur- Refilling with Nozzles ing refilling.
- Page 261 (vehicle should be empty without passengers or luggage) • Fill Wait for 6 minutes after ignition off. Fill TATA MOTORS PASSENGER • VEHICLE LIMITED authorized DEF (minimum 8 liters) • Wait for 6 minutes after filling DEF.
- Page 262 After this, engine will not start in the next These messages will be indicated when ignition cycle. The vehicle has to be there is any problem in the SCR system brought to TATA MOTORS service center and SCR system fault is displayed. for rectification. •...
- Page 263 MAINTENANCE AND SERVICES DEF Level Messages in case of Poor • Messages may vary slightly de- Quality DEF pending on the vehicle variant. • In case of use of poor quality of DEF, message “DEF QUALITY LOW, EN- GINE STOPS IN XXX KM” will appear. In such cases, currently filled DEF has to be drained completely and proper good quality DEF needs to be filled...
Page 264: Service Instructions
Page 265: service schedule.
- Page 266 MAINTENANCE AND SERVICES Operation Months 0 6 12 18 24 30 36 42 48 54 60 66 72 78 84 90 96 102 108 114 120 Check & Replace if 30K/ found damaged -Ex- haust hanger. Check all door latch &...
- Page 267 MAINTENANCE AND SERVICES Operation Months 0 6 12 18 24 30 36 42 48 54 60 66 72 78 84 90 96 102 108 114 120 Drain water from 7.5K/ ● ● ● ● ● ● ● ● ● ● ●...
- Page 268 MAINTENANCE AND SERVICES Operation Months 0 6 12 18 24 30 36 42 48 54 60 66 72 78 84 90 96 102 108 114 120 TRANSAXLE Check oil level and top up if necessary - 15K / ● ● ●...
- Page 269 MAINTENANCE AND SERVICES Operation Months 0 6 12 18 24 30 36 42 48 54 60 66 72 78 84 90 96 102 108 114 120 Inspect & if neces- 15K/ sary adjust hand- ● ● ● ● ● ● ●...
- Page 270 MAINTENANCE AND SERVICES Operation Months 0 6 12 18 24 30 36 42 48 54 60 66 72 78 84 90 96 102 108 114 120 formance. Replace Pollen Fil- 15K/ ● ● ● ● ● ● ● ● ● ●...
- Page 271 MAINTENANCE AND SERVICES Additional Maintenance Schedule under Severe Driving Conditions Condition Sr. No. Operation Frequency Change every 7500 km or 6 months or whenever Engine oil and oil filter ● ● ● ● oil quantity lamp glows. Change at every 15,000 km or 18 months Air filter element ●...
Page 272: Vehicle Parking For Long Duration
Page 273: technical information, page 274: lubricant specification, page 275: technical specifications.
- Page 276 TECHNICAL INFORMATION Parameter Specifications Brakes Brakes Front (Disc); Rear (Disc) Parking Brakes Cable Operated mechanical Suspension Front: Independent lower wishbone MacPherson strut with coil spring Type Rear: Semi-independent Twist blade suspension with Panhard rod & coil spring Front: MacPherson strut Damper twin tube with gas filled Shock absorber Rear: Damper twin tube with gas filled Wheels &...
- Page 277 TECHNICAL INFORMATION Parameter Specifications Cab / body Type Monocoque Electrical system System voltage 12 Volts Alternator capacity 160 Amp Battery 12V, 78 Ah Main chassis dimension (in mm) Wheel base 2741 Track front 1616 Track rear 1630 Overall length 4661 Overall height 1786 Max.
- Page 278 TECHNICAL INFORMATION Parameter Specifications Weight (in kg) 1771 (XE) 1811 (XMA) 1779 (XM) 1808 (XTA) 1782 (XT) 1820 (XTA+) 1803 (XT+) Kerb weight (unladen) 1811 (XZA 7 Seat) 1789 (XZ 7 Seat) 1801 (XZA 6 Seat) 1779 (XZ 6 Seat) 1825 (XZA+ 7 Seat) 1810 (XZ+ 7 Seat) 1815 (XZA+ 6 Seat)
Page 279: Vehicle Dimensions
Page 280: aggregate identification numbers, page 281: car care.
- Page 282 CAR CARE damp cloth or sponge till it disappears. Polishing NOTE Do not use household detergents to Polishes and cleaners can restore shine to Avoid wiping of painted surface in dry clean the fabric. the painted surface that has oxidized and condition as it may leave scratches on become dull.
Page 283: Fast Tag
Page 284: value care - amc.
- Page 285 CAR CARE Available Offers (Types of AMC) • Silver AMC • Gold AMC • Promise to Protect (P2P) • Protect Plus Silver AMC Value Care Silver Plan covers the following: • Scheduled maintenance services at periodic interval of Km for Labor, Parts & Consumables. Change of Oil Filter, Fuel Filter, Air Filter &...
- Page 286 CAR CARE Brake Pads, Brake Liners, Wheel Cylinders. Clutch Disc, Clutch Cover, Cables, Mountings. Suspension Bush, Wiper Blades, Auxiliary Belt & other Wear & Tear Items. Washing of Vehicle, Wheel greasing as applicable. Promise to Protect (P2P) Value Care – Promise to protect (P2P) is a maintenance plan that guarantees protection against unexpected wear & tear repairs to provide substantial saving through protection against inflation &...
- Page 287 CAR CARE NOTE • AMC is available in the dealership from where you have purchased your vehicle. • We strongly recommend purchase of AMC at time of purchase of your vehicle to get benefit for coverage of Scheduled Services and Wear & Tear parts. •...
Page 288: Extended Warranty
- Page 289 • TATA MOTORS dealer shall either rep air or replace any part found to be defective with a new p art or an equivalent at no cost to the owner for p arts or labour. Such defective parts which have been replaced will become property of TATA MOTORS PASSENGER VEHICLE LIMITED.
Page 290: Value Added Services
- Page 291 CAR CARE TATA MOTORS has tied up with M/s Wurth, M/s Autokrom, M/s 3M India Lt d & M/s Bardahl for these world class treatment at af- fordable prices. These treatments are available in all authorized workshops. The Dealer Service Marketing Executive will explain to you the benefits and terms and conditions of this treatment.
Page 292: Vehicle Exterior Enrichment
Page 293: vehicle interior enrichment, page 295: warranty - terms and conditions.
- Page 296 WARRANTY - TERMS AND CONDITIONS regularities not recognized as affecting the function or quality owner. Only unexpired remaining period of warranty ap- of the vehicle or parts, such as slight noise or vibration, de- plies. fects appearing only under particular or irregular operations We reserve our rights to make any change or modification in are items considered characteristics of the vehicle.
Page 297: Environment Safety
- Page 298 Intake throttle Electrical connections. If the ‘Check Engine lamp’, ‘MIL’ , ‘SCR’ or ‘DPF’ lamp contin- uously glows, please take the vehicle to a TATA MOTORS Au- thorized Dealer/Service Center. Exhaust After Treatment System parts. EMS wiring harness i.e. electrical connections to all sensors and actuators.
- Page 299 ENVIRONMENT SAFETY...
- Page 300 ENVIRONMENT SAFETY...
- Page 301 Dealer’s copy PDI Coupon PDI Coupon Pre Delivery Inspection Pre Delivery Inspection AVAIL ALL SERVICES TO GET BENEFIT OF WARRANTY This Coupon entitles for free labour jobs.(Refer maintenance section) Owner’s Name: VIN No.: VIN No.: Engine / Motor No.: Engine / Motor No.: Reg.
- Page 303 Customer’s copy Dealer’s copy Free Service Coupon Free Service Coupon Valid for 1000 - 2000 kms. OR 2 months, whichever is earlier. Valid for 1000 - 2000 kms. OR 2 months, Whichever is earlier AVAIL ALL SERVICES TO GET BENEFIT OF WARRANTY This Coupon entitles for free labour jobs.(Refer maintenance section) Owner’s Name: Owner’s Name:...
- Page 305 Free Service Coupon Valid for 7000 - 8000 kms. OR 6 months, whichever is earlier. This Coupon entitles for free labour jobs.(Refer maintenance section) Owner’s Name: ODO Reading: Date of Service: Service Dealer code: (Free Service coupons are valid at all TATA Authorized Service Centers in India)
- Page 307 Customer’s copy Dealer’s copy Free Service Coupon Free Service Coupon Valid for 14,500 – 15,500 kms. OR 12 months, whichever is earlier. Valid for 14,500 – 15,500 kms. OR 12 months, whichever is earlier AVAIL ALL SERVICES TO GET BENEFIT OF WARRANTY This Coupon entitles for free labour jobs.(Refer maintenance section) Owner’s Name: VIN No.:...
This manual is also suitable for:
Rename the bookmark, delete bookmark, delete from my manuals, upload manual.
- India Today
- Business Today
- Reader’s Digest
- Harper's Bazaar
- Brides Today
- Cosmopolitan
- Aaj Tak Campus
- India Today Hindi
2021 Tata Safari unveiled, here are important details you should know
The new tata safari 2021 will take up the mantle of tata motors' flagship suv from the tata harrier following its expected launch in india in february..
Listen to Story

- The 2021 Tata Safari will challenge the MG Hector Plus and the Mahindra XUV500.
- The production of the new Tata Safari has already begun.
- The Tata Safari might be priced between Rs 15 lakh and Rs 22 lakh (ex-showroom).
Tata Motors today unveiled the 2021 Tata Safari that is expected to go on sale in India in February. Based on the OMEGA architecture, the new Tata Safari showcases the Impact 2.0 design language. The OMEGA architecture has been derived from Land Rover's legendary D8 platform and is used by the popular Tata Harrier as well.
Tata Safari
- Expert Opinion
- Similar Cars
- User Reviews
- Expert Reviews

Calculate your EMI
EMI Calculator
Tata Safari Price
Tata Safari price for the base model starts at Rs. 16.19 Lakh and the top model price goes upto Rs. 27.34 Lakh (Avg. ex-showroom). Safari price for 29 variants is listed below.
Tata Safari Car Specifications
Tata safari summary.
Tata Safari price ranges between Rs. 16.19 Lakh - Rs. 27.34 Lakh depending on the variant selected.
When was the Tata Safari facelift launched in India?
The Tata Safari facelift was launched in India on 17 October, 2023.
What variants does the Tata Safari facelift get?
The updated Tata Safari facelift is offered in 10 variants, namely, Smart (O), Pure (O), Adventure, Adventure+, Adventure+ Dark, Accomplished, Accomplished Dark, Accomplished+ Dark, Adventure+ A, and Accomplished+.
What features are available in the Tata Safari facelift?
The updated Safari gets a new close-patterned grille with bronze-coloured vertical slats, LED bar stretching across the bonnet with a welcome function, new pair of LED headlamps housed on the front bumpers, and a new exterior hue. At the rear, it sports a connected LED taillamp setup with a sequential function, rear wiper with a washer, and an LED strip running across the width of the tailgate with a goodbye function.
On the equipment front, the flagship SUV comes loaded with a large touchscreen infotainment screen with wireless mobile connectivity, digital instrument cluster with a new interface, ambient lighting, and a two-spoke steering wheel with an illuminated logo. Along with this, it also continues to get features like a panoramic sunroof, powered and ventilated front seats, 360-degree camera, air purifier, and an ADAS safety suite.
What are the engine, performance, and specifications of the Tata Safari facelift?
At its heart, the Safari facelift is powered by a BS6 Phase 2-compliant 2.0-litre diesel engine that is tuned to produce 168bhp and 350Nm of torque. This motor comes paired with a six-speed manual gearbox and a six-speed torque converter sending power to the front wheels.
Is the Tata Safari facelift a safe car?
The Tata Safari facelift has achieved a five-star safety rating in GNCAP crash test.
What are the rivals to the Tata Safari facelift?
The Safari facelift competes against the Mahindra XUV700, MG Hector Plus, Hyundai Alcazar, Toyota Innova Hycross, Toyota Innova Crysta, and the Mahindra Scorpio-N.
Last updated on 17 October, 2023
How is the Tata Safari car?
- The Global NCAP has given the Tata Safari five stars for its safety.
- Looks like a concept car and has a more modern stance than earlier.
- The interior design of the Safari has been heavily revamped.
- A long list of new-age features is available in the latest Safari.
- Its third row can seat adults in reasonable comfort.
- Touchscreen could do with haptic feedback for optimised usage.
- The ADAS functions are restricted to certain variants.
- The Safari does not have an AWD version on offer.
Tata Safari 2024 Verdict
The new Safari targets a wider audience. Tata Motors has stepped up the game by offering a feature-laden modern cabin with a sharply revised macho appearance. These, combined with the spacious cabin and an irresistible safety net, make the Safari hard to ignore.
Compare Safari with Similar Cars
Tata safari 2024 brochure, tata safari colours.
Tata Safari 2024 is available/sold in the following colours in India.

Tata Safari Mileage
Tata Safari mileage claimed by ARAI is 14.5 to 16.3 kmpl.
Tata Safari User Reviews
Performance
Fuel Economy
Value For Money
Tata Safari 2024 News

By Desirazu Venkat 30 Mar 2024

By Haji Chakralwale 04 Mar 2024
 – Features compared")
By Haji Chakralwale 26 Feb 2024

By Pawan Mudaliar 24 Feb 2024

By Pawan Mudaliar 05 Feb 2024
Tata Safari Expert Reviews

By Aditya Nadkarni 20 Apr 2024

By Ninad Ambre 15 Oct 2023

By Siddharth 17 Feb 2023
Tata Safari Videos

Safari Images

- View All Images (222)
FAQs About Tata Safari
Popular upcoming cars.

Rs. 24.00 - 28.00 Lakh Estimated Price
Get Launch Alert on WhatsApp

Rs. 16.00 - 22.00 Lakh Estimated Price

Rs. 6.50 - 10.00 Lakh Estimated Price

Rs. 7.00 - 10.00 Lakh Estimated Price

Rs. 17.00 - 22.00 Lakh Estimated Price

Rs. 40.00 - 45.00 Lakh Estimated Price

Rs. 16.00 - 20.00 Lakh Estimated Price

Rs. 25.00 - 30.00 Lakh Estimated Price

Rs. 22.00 - 26.00 Lakh Estimated Price
Popular SUV Cars

18002090230
Leave a missed call and we will call you back
Get in touch with Authorized Tata Dealership on call for best buying options like:
Doorstep Demo
Offers & Discounts
Exchange Benefits
Get The Best Deal
Tata Safari Price in India
Car buyer's tools.
Attention! Your ePaper is waiting for publication!
By publishing your document, the content will be optimally indexed by Google via AI and sorted into the right category for over 500 million ePaper readers on YUMPU.
This will ensure high visibility and many readers!

Your ePaper is now published and live on YUMPU!
You can find your publication here:
Share your interactive ePaper on all platforms and on your website with our embed function

TATA SAFARI (PETROL) - Tata Motors Customer Care
- customercare.tatamotors.com

Create successful ePaper yourself
Turn your PDF publications into a flip-book with our unique Google optimized e-Paper software.
<strong>TATA</strong> <strong>SAFARI</strong> (<strong>PETROL</strong>)<br />
(Exi / Vxi)<br />
4x2 and 4x4<br />
OWNER’S MANUAL<br />
&<br />
SERVICE BOOK<br />
This owner's manual is advised to be kept in the vehicle, at all times.<br />
MUMBAI PUNE<br />
2<br />
1800 209 6688
C O N T E N T S<br />
1. Foreword 5<br />
2. Important Information about this manual 6<br />
3. Environmental Protection 8<br />
4. Warranty 10<br />
5. Locations of Aggregate Identification Numbers 12<br />
6. Getting into the vehicle 13<br />
7. Your Safety 15<br />
8. Driving Controls 27<br />
9. Indicators and Instruments 43<br />
10. Comfort and Convenience 53<br />
11. Prior to driving 69<br />
12. Driving 75<br />
13. Fuel, Lubricants & Coolants 91<br />
14. Vehicle Specifications 95<br />
15. Maintenance 101<br />
16. Preliminary Trouble Shooting 139<br />
17. Service Schedule 147<br />
18. Vehicle Record Sheet 152<br />
19. Abbreviations 156<br />
19. Alphabetic Index 157<br />
20. <strong>Customer</strong> Support Network A-1<br />
<strong>Tata</strong> Safari<br />
F O R E W A R D<br />
Dear <strong>Customer</strong>,<br />
Thank you for choosing the <strong>Tata</strong> Safari Exi / Vxi.<br />
The petrol engined Safari packs enough power to deliver an exhilarating<br />
driving experience under all conditions. Its 4 valves/cylinder, Dual Overhead<br />
Camshaft (DOHC), Multi Point Fuel Injection (MPFI) technology enables it to<br />
deliver a superior level of performance benchmarked with the best in the<br />
segment. To balance performance with safety, your Safari comes equipped<br />
with twin front airbags and Anti-lock Brakes (ABS) as optional.<br />
Here's wishing you many miles of safe and happy driving.<br />
IMPORTANT INFORMATION FOR OWNERS<br />
We provide safe, high quality, high performance vehicles. In<br />
order to maintain the level of performance and reliability in<br />
the vehicle, it is important that any accessory that is fitted or<br />
modification that is carried out should be done with extreme<br />
caution and in consultation with our authorised dealer. Any<br />
improper installation can hamper the safety and performance<br />
of the vehicle besides depriving you of your warranty benefits.<br />
Use of genuine parts, designed and manufactured to our<br />
exacting standards, are the best way to maintain your vehicle<br />
in peak operating condition. Please do not use substitutes. They<br />
always prove costlier in the long run.<br />
Failure to use genuine parts can invalidate any future warranty<br />
claims.<br />
The information and specifications given in this book are valid<br />
as on the date of printing. <strong>Tata</strong> <strong>Motors</strong> Limited reserves the<br />
right to make changes in design and specifications and/or to<br />
make additions to or improvements in this product without<br />
obligation to install them on products previously sold.<br />
IMPORTANT INFORMATION ABOUT THIS MANUAL<br />
Safety and vehicle damage warnings<br />
Safety symbol<br />
In this manual, you will see CAUTION, NOTICE and WARNING.<br />
These are used in the following ways.<br />
CAUTION<br />
This is a warning against something which may cause<br />
injury to people if the warning is ignored. You are informed<br />
what you must or must not do in order to avoid or reduce<br />
the risk to yourself and other people.<br />
NOTICE<br />
damage to the vehicle or its equipment if the warning is<br />
ignored. You are informed what you must or must not do<br />
in order to avoid or reduce the risk of damage to your<br />
vehicle and its equipment.<br />
In this manual, you will also see a circle with a slash. This means<br />
"Do not", "Do not do this", or "Do not let this happen".<br />
WARNING<br />
Indicates a strong possibility of severe personal injury or<br />
death if the instructions are not followed.<br />
ENVIRONMENTAL<br />
PROTECTION<br />
<strong>TATA</strong> MOTORS is committed to produce the vehicles using<br />
environmentally sustainable technology. A number of features<br />
have been incorporated in our passenger cars which are<br />
specifically designed to ensure environmental compatibility<br />
throughout the life cycle of the car. We would like to inform<br />
you that your vehivle meets Emission norms and is being<br />
regularly validated at the manufacturing stages to keep up<br />
with the stringent emission norms.<br />
As a user you too can protect the environment by operating<br />
your car in a proactive manner. A lot depends on your driving<br />
style and the way you maintain your car. Listed below are few<br />
tips that will help you to do so.<br />
WHILE DRIVING :<br />
Avoid frequent and violent accelerations.<br />
Do not carry any unnecessary weight on the vehicle as<br />
it overloads the engine.<br />
Avoid using devices requiring high power consumption<br />
during slow city traffic condition.<br />
It is not advisable to warm up the engine during the first<br />
start of the day by idling, as cold temperatures within the<br />
engine could cause rise in the emission such as CO & HC<br />
particulate.<br />
Monitor the car's fuel consumption regularly. If it shows<br />
rising trend get the vehicle immediately attended at the<br />
<strong>TATA</strong> MOTORS Authorised Service Centre.<br />
Switch off the engine during long stops at traffic jams or<br />
signals. If you need to keep the engine running, avoid<br />
unnecessarily revving or stopping and starting.<br />
Use only unleaded fuel in petrol cars.<br />
It is not necessary to rev up the engine before turning<br />
it off as it unnecessarily burns the fuel.<br />
For petrol cars switch off the ignition only when engine<br />
is at idling and when the vehicle is stationary, not when<br />
the vehicle is running.<br />
Shift to higher gears as soon as it is possible. Use each<br />
gear upto 2/3rd of it's maximum engine speed. A chart<br />
indicating gear shifting speeds is given in this book.<br />
MAINTENANCE OF THE CAR :<br />
Ensure that recommended maintenance is carried out on<br />
the vehicle regularly at the <strong>TATA</strong> MOTORS Authorised<br />
Service Outlets.<br />
As soon as you notice any leakage of oil or fuel in the<br />
car we recommend that you get it attended immediately.<br />
Use only recommended brands and grades of lubricants<br />
& coolants and clean/uncontaminated fuels.<br />
Get your vehicle checked for emission periodically by our<br />
authorised dealer and regularly renew the P.U.C. certificate.<br />
Ensure that fuel filter, oil filter, breathers are periodically<br />
checked and if required, replace the same using only<br />
genuine recommended brands.<br />
Do not pour used oils or coolants into the sewage drains,<br />
garden soil or open streams. Dispose off the used filters<br />
and batteries in compliance with the current legislation.<br />
Do not allow any unauthorised person to tamper with the<br />
engine settings or to carry out modifications on the car.<br />
Never allow the vehicle to run out of fuel. This will result<br />
in misfiring of the engine and could cause harm to the<br />
catalytic converter.<br />
Parts like brake liners and clutch disc should be vacuum<br />
cleaned. Do not use compressed air for cleaning these<br />
parts which may spread the dust in the atmosphere.<br />
While carrying out the servicing or repairs of your vehicle, you<br />
should pay keen attention to some of the important engine<br />
aggregates which greatly affect emission. These components<br />
are :-<br />
1. Fuel pump, injectors<br />
2. Air intake & Exhaust system especially for leakage<br />
3. Cylinder head for valve leakage.<br />
4 All filters such as air, oil & fuel filters (check<br />
periodically)<br />
5. Catalytic convertor<br />
6. Ignition System - Spark Plug Gap<br />
This Owner's Manual & contains further information on driving<br />
precautions and maintenance care leading to environment<br />
protection. Please familliarise yourself with these aspects<br />
before driving.<br />
W A R R A N T Y<br />
TERMS AND CONDITIONS<br />
We WARRANT each <strong>TATA</strong> Safari Exi/Vxi<br />
4X2 and 4X4 vehicles & parts thereof<br />
manufactured by us to be free from<br />
defect in material and workmanship,<br />
subject to the following terms &<br />
conditions :<br />
1. This warranty shall be for 18 months<br />
from the date of sale of the vehicle,<br />
irrespective of the distance covered.<br />
However, for the vehicles used for<br />
commercial applications (including<br />
those used for hire or reward viz<br />
those operating with a yellow<br />
number plate), the warranty shall be<br />
limited to 18 months or 50,000 kms,<br />
whichever occurs earlier.<br />
2. Our obligation under this warranty<br />
shall be limited to repairing or<br />
replacing, free of charge, such parts<br />
of the vehicle which, in our opinion,<br />
are defective, on the vehicle being<br />
brought to us or to our dealers<br />
within the warranty period. The<br />
parts so repaired or replaced shall<br />
also be warranted for quality and<br />
workmanship but such warranty<br />
shall be co-terminus with this<br />
original warranty.<br />
10<br />
3. Any part which is found to be<br />
defective and is replaced by us<br />
under the warranty shall be our<br />
property.<br />
4. As for such parts as tyres, batteries,<br />
transfer case, rubber parts, electrical<br />
equipment and fuel injection<br />
equipment, power steering<br />
equipment, A.C. equipment not<br />
manufactured by us but supplied by<br />
other parties, this warranty shall not<br />
apply, but buyers of the vehicle shall<br />
be entitled to, so far as permissible<br />
by law, all such rights as we may<br />
have against such parties under their<br />
warranties in respect of such parts.<br />
Our Dealers/TASC’s will assist the<br />
purchaser in taking up the<br />
complaint with the respective<br />
manufacturers and their decision on<br />
the warranty will be final.<br />
5. This warranty shall not apply if the<br />
vehicle or any part thereof is<br />
repaired or altered otherwise than<br />
in accordance with our standard<br />
repair procedure, or by any person<br />
other than our sales or service<br />
establishments, our authorised<br />
dealers or service centres or service<br />
points in any way so as, in our<br />
judgement which shall be final and<br />
binding, to effect its reliability, nor<br />
shall it apply if, in our opinion which<br />
shall be final and binding the vehicle<br />
is subjected to misuse, negligence,<br />
improper or inadequate<br />
maintenance or accident or loading<br />
in excess of such carrying capacity<br />
as certified by us, or such services as<br />
prescribed in our Owner’s Manual<br />
and Service Book are not carried out<br />
by the buyer through our sales or<br />
service establishments, our<br />
authorised dealers or service centres<br />
or service points.<br />
6. This warranty shall not cover normal<br />
wear and tear or any inherent<br />
normal deterioration of the vehicle<br />
or any of its parts arising from the<br />
actual use of the vehicle or any<br />
damage due to negligent or<br />
improper operation or storage of<br />
the vehicle. This warranty shall not<br />
apply to normal maintenance
services viz. oils & fluid changes, head<br />
lamps focussing, fastener<br />
retightening, wheel balancing, tyre<br />
rotation, adjustment of valve<br />
clearance, fuel timing, ignition timing<br />
and consumables like bulbs, fuel<br />
filters and oil filters etc. This warranty<br />
shall not apply to any damage or<br />
deterioration caused by<br />
environmental pollution or bird<br />
droppings. This warranty shall not<br />
apply to V-belts, hoses and gas<br />
leaks in case of air conditioned<br />
vehicle. Slight irregularities not<br />
recognised as affecting the<br />
function or quality of the vehicle<br />
or parts such as slight noise or<br />
vibration and defects appearing<br />
only under particular or irregular<br />
operations or items considered<br />
characteristic of the vehicle.<br />
7. This warranty shall be null and<br />
void if the vehicle is subjected to<br />
abnormal use such as rallying,<br />
racing or participation in any<br />
other competitive sports. This<br />
warranty shall not apply to any<br />
repairs or replacement as a result<br />
of accident or collision.<br />
8. This warranty is expressly in lieu<br />
of all warranties, whether by law<br />
or otherwise, expressed or implied,<br />
and all other obligations or<br />
liabilities on our part and we<br />
neither assume nor authorise any<br />
person to assume on our behalf,<br />
any other liability arising from the<br />
sale of the vehicle or any<br />
agreement in relation thereto.<br />
9. The buyer shall have no other<br />
rights except those set out above<br />
and have, particular, no right to<br />
repudiate the sale, or any<br />
agreement or to claim any<br />
reduction in the purchase price<br />
of the vehicle, or to demand any<br />
damages or compensation for<br />
losses, incidental or indirect, or<br />
inconvenience or consequential<br />
damages, loss of vehicle, or loss<br />
of time, otherwise, incurred or<br />
accrued.<br />
10. Any claim arising from this<br />
warranty shall be recognised only<br />
if it is notified in writing to us or<br />
to our concerned dealer without<br />
any delay soon after such defect<br />
as covered and ascertained under<br />
this warranty.<br />
11. This warranty shall stand<br />
terminated if the vehicle is<br />
transferred or otherwise alienated<br />
by the buyer without our prior<br />
written consent.<br />
12. We reserve our rights to make any<br />
change or modification in the<br />
design of the vehicle or its parts<br />
or to introduce any improvement<br />
therein or to incorporate in the<br />
vehicle any additional part or<br />
accessory at any time without<br />
incurring any obligation to<br />
incorporate the same in the<br />
vehicles previously sold.<br />
LOCATION OF CHASSIS AND AGGREGATE IDENTIFICATION NUMBERS<br />
LOCATION OF AGGREGATE IDENTIFICATION NUMBERS<br />
1 2<br />
1. CHASSIS NUMBER PLATE<br />
2. CAB NUMBER PLATE<br />
CHASSIS NUMBER ON FRAME<br />
ENGINE NUMBER<br />
GEAR BOX NUMBER TRANSFER CASE NUMBER REAR AXLE NUMBER FRONT AXLE NUMBER<br />
G E T T I N G I N T O T H E V E H I C L E<br />
CENTRAL LOCKING SYSTEM<br />
Central Locking System<br />
Your <strong>Tata</strong> Safari has a single key for operating ignition, steering lock,<br />
glove box and doors.<br />
All the four doors and rear door have electrically operated central<br />
locking system.<br />
With central locking system all the doors can be locked or unlocked<br />
from driver side with the key.<br />
Door Lock - Outside<br />
Unlock<br />
Lock<br />
You can also lock the door from outside by closing the door with<br />
knob pushed in.<br />
While following the procedure, ensure that key is not left inside<br />
the vehicle.<br />
All the four doors can also be locked or unlocked from inside by<br />
pressing or pulling the knob near door opening lever.<br />
Door Opening<br />
Lever<br />
Locking / Unlocking<br />
Knob<br />
Door Lock - Inside<br />
Y O U R S A F E T Y<br />
This section gives you important information about<br />
safety features of the vehicle meant for occupant<br />
protection. It provides information on the use of seat,<br />
seat belts, headrest and seat adjustments.<br />
In addition to seat and seat belts, there are number<br />
of other features as listed alongside which are built<br />
in the design of the vehicle so as to take care of your<br />
safety.<br />
• Seat belt system<br />
• Wearing seat belt<br />
• Headrestraint<br />
• Door locks<br />
• Child lock<br />
• Audio warning<br />
•<br />
• Air Bag (if fitted)<br />
Collapsible steering column<br />
Anti-Lock Brake System (if fitted)<br />
SEAT BELT SYSTEM<br />
The safety of the occupants is of prime importance to us.<br />
Your ‘<strong>TATA</strong> <strong>SAFARI</strong> ‘ has many features that work together to protect<br />
the occupants.<br />
Seat Belts<br />
<strong>TATA</strong> <strong>SAFARI</strong> is equipped with seat belts as a part of occupant<br />
restraint system.<br />
Why Seat Belts<br />
Wearing seat belts properly can protect you from being thrown<br />
against the inside of the vehicle, against other occupants or out of<br />
the vehicle, in case of an accident or sudden braking. It will reduce the<br />
chances of severe injury.<br />
WEARING SEAT BELT<br />
System Components and Wearing Seat Belt<br />
Your ‘<strong>TATA</strong> <strong>SAFARI</strong>’ has three point inertia reel type front and rear seat<br />
belts in the out board positions and a lap belt for middle passenger<br />
on rear seat. In normal driving the belt lets you move freely in your<br />
seat. In case of an accident or sudden braking inertia reel automatically<br />
tightens the belt to help restrain your body.<br />
The anchor end of the shoulder belt is adjustable to suit the height of<br />
the passenger wearing it. The lap belt has one manually adjusted belt<br />
that fits across the hip bone. It is similar to safety belt used in<br />
aeroplanes.<br />
Make sure that your seat is adjusted to a good driving position and<br />
the back of the seat is upright.<br />
1. Pull the tongue across your body and insert it into the buckle.<br />
2. Check and ensure that the belt is not twisted.<br />
3. Position the lap portion of the belt as low as possible across your<br />
hip bone.<br />
4. Pull up the shoulder part of the belt to remove the slack. Make<br />
sure that the belt goes over your collar bones and across chest.<br />
5. To unlatch the belt, press the red button on the buckle. Guide the<br />
belt to the pillar as it retracts.<br />
1<br />
4<br />
3<br />
1. Seat Belt 2. Tongue 3. Lock Buckle 4. Lap Belt<br />
Anchor for height adjustment<br />
Button<br />
Front Seat Belt Arrangement<br />
ADJUSTABLE HEADRESTRAINT<br />
6. Each belt should be used by one occupant only . The belt must not<br />
be put round a child, seated on passengers lap.<br />
7. When the belt has been in use in a serious accident or shows signs<br />
of severe fraying or of having been cut, replace with an approved<br />
belt kit.<br />
8. The belt must not be altered or modified during use.<br />
9. The belts are meant (intended) for adult occupants only.<br />
10. The belts if required should be replaced, by Authorised personnel<br />
only.<br />
11. The belt should not be disassembled. If required, authorised<br />
personnel only should carry out disassembly and assembly.<br />
Rear Seat Belt Arrangement<br />
Adjustable Head restraint<br />
Head restraint can help to protect you from whiplash and other injuries.<br />
For best protection adjust the top of the head restraint as shown in the<br />
figure.<br />
Poor Adjustment Good Adjustment<br />
SEAT-BELT PRECAUTIONS<br />
Seat-belt precautions for Baby, small child, Pregnant<br />
woman and injured person :<br />
<strong>TATA</strong> MOTORS strongly urges that the driver and passengers<br />
in the vehicle be properly restrained at all times with the<br />
seat-belts. Failure to do so could increase the chance of injury<br />
and / or the severity of injury in accidents.<br />
Baby or Small Child :<br />
Use child restraint system appropriate for the child until the<br />
child becomes large enough to properly wear the vehicle’s<br />
seat-belts.<br />
If a child is too large for a child restraint system, the child should<br />
sit in the seat and must be restrained using the vehicle’s<br />
seat-belt.<br />
Also use the seat-belt while the child is in the rear seat. According<br />
to accident statistics, the child is safer when properly restrained<br />
in the rear seat than in the front seat.<br />
Child restraint systems are available. <strong>TATA</strong> MOTORS<br />
recommend the use of a type which fits to your vehicle. Before<br />
installation, always read the manufacturer’s instructions.<br />
Pregnant Woman :<br />
<strong>TATA</strong> MOTORS recommends the use of a seat-belt. Ask your<br />
doctor for specific recommendations. The lap belt should be<br />
worn securely and as low as possible over the hips and not to<br />
waist.<br />
Injured person :<br />
<strong>TATA</strong> MOTORS recommends the use of a seat-belt for injured<br />
person. Depending on the injury, first check with your doctor<br />
for specific recommendations.<br />
DOOR LOCKS<br />
Backrest Position<br />
To get the maximum protection from the seat belts, the back of the<br />
seat should be in an upright position. If you recline the backrest,<br />
you reduce the protective capability of the seat belt.<br />
Door Locks<br />
Lock the vehicle doors when in motion. Doors are designed to<br />
remain closed and stay unlocked in accident. This is to facilitate out<br />
siders to open doors and evacuate occupants in the event of an accident.<br />
Child Lock<br />
1. Seat backrest reclining lever<br />
2. Seat height adjustment lever<br />
3. Seat adjustment (forward/backward) lever<br />
This is provided on both rear doors and tailgate.<br />
Push down the lock tab before closing the door. Now the door can<br />
not be opened by the children from inside. Locked doors can be<br />
opened only by using the respective door outer handles.<br />
Childlock<br />
AUDIO WARNING AND COLLAPSIBLE STEERING<br />
Audio Warning :<br />
Seat Belt Reminder<br />
(Beeper and tell-tale indicator)<br />
When the key is in ignition position & driver's and co-driver's<br />
seat belt is not fastened, you get an audio warning as well<br />
as tell-tale indication in cluster, indicating seat belts are not<br />
fastened. The beeper will go off automatically after a few<br />
seconds, but the tell-tale indicator will remain on as long as<br />
seat belts is not fastened.<br />
Collapsible Steering Column<br />
The steering column of <strong>TATA</strong> <strong>SAFARI</strong> is of collapsible type. During<br />
normal operation it works as a solid one piece column and<br />
takes all the steering efforts effectively. In case of frontal impact,<br />
the intermediate tube connecting upper and lower part of the<br />
column will collapse. This will prevent the steering column from<br />
protruding in the driver cabin and avoid injury to the driver.<br />
Door Open Warning<br />
Prior to driving, ensure that all the doors are properly closed. If<br />
any one of the doors is partially open, the door open indicator<br />
will come on. In addition to this, in case driver side door is not<br />
properly closed an audio beep will come for few seconds, when<br />
the key is inserted.<br />
Head Lamps ‘ON’ Reminder<br />
While leaving the vehicle (key out), if the head lamps are left<br />
on and driver door is opened, you will get an audio warning to<br />
remind you to put off the head-lamps. This beeper will go off<br />
after a few seconds or immediately if the head lamps are<br />
switched off.<br />
AIR BAGS (IF FITTED)<br />
Air Bags (If Fitted)<br />
SRS (Supplementary Restraint System)<br />
Your vehicle is fitted with an air bag for the driver, located in the steering<br />
wheel, and a passenger air bag (if fitted) is located above the glove box<br />
compartment. Airbag(s) can be identified by the “SRS AIR BAG” label on<br />
the airbag cover.<br />
The airbag is a supplementary restraint system and is designed to provide<br />
effective protection to the belted occupants during frontal collisions.<br />
The air bag system is not visible until it is activated. The activation depends<br />
upon the severity and direction of frontal collisions. Airbags are not<br />
designed to activate in rollover, rear and side collisions.<br />
Operation<br />
Sensors in the ECU detect the frontal collision severity. The air bag(s) are<br />
designed to deploy only if the collision matches the criteria for<br />
deployment.<br />
• The sensor switches close the circuit and the propellant rapidly burns<br />
in a container producing gases, which fill the airbag.<br />
• The inflating airbag deploys out of the steering wheel in the front of<br />
the driver and passenger air bag (if fitted) deploys out of the dashboard<br />
in front of the passenger. This action takes place in a fraction of a<br />
second.<br />
• The bag(s) deflate as the gas escapes through the vent holes<br />
in the airbag cushion.<br />
• Airbag(s) will only deploy with the ignition switch in<br />
“ON” position. Immediately after air bag inflation, you may<br />
notice fairly loud noise, dust or smoke and smell of the burnt<br />
propellant. This is NORMAL.<br />
• Air bag system components get hot after inflation. Do not<br />
touch after inflation.<br />
• The smoke could cause breathing problems for people<br />
with a history of asthma or other breathing trouble. If such<br />
case occurs after deployment of air bag, get fresh air<br />
promptly.<br />
• Always wear seat belts. The wearing of seat belts is<br />
required even when the air bag is fitted. Air bags do not<br />
replace the seat belts.<br />
The importance of wearing seat-belts :<br />
• It will help to keep you in the proper position when the<br />
airbag inflates.<br />
Reduce the risk of injuries in any collision.<br />
• Reduce the risk of being thrown out from your vehicle in a<br />
collision.<br />
The importance of being properly seated :<br />
In a collision, the airbag inflates extremely quickly, faster than<br />
blink of an eye and with great force.<br />
• If you are too close to an inflating air bag, it could seriously<br />
injure you. Move your seat as far back as possible to allow<br />
room for air bag inflation. Never install any child restraint in<br />
the front seat where the passenger air bag is fitted, as serious<br />
injury or death may result from the force of the inflating<br />
front passenger air bag. The rear seat is safest place for the<br />
children.<br />
• Never place any object in front of you while you are seated<br />
in the front seat as it may result an injury from the object<br />
when it is forced towards you by the inflating air bag. Do not<br />
cover the steering wheel or instrument panel with an object<br />
which may prevent the proper deployment of the air bag.<br />
• Where a passenger air bag is fitted, front passenger should<br />
never sit on the edge of the seat, stand near the glove box<br />
compartment, rest feet or other parts of the body on the<br />
dash board or lean over near the glove compartment when<br />
the vehicle is moving. Passenger should also not recline the<br />
seat backwards such that the passenger goes beyond the<br />
protection range of airbags.<br />
Air bag warning light :<br />
SRS<br />
The diagnostic system continually monitors the readiness of the<br />
SRS AIR BAG while the vehicle is being driven. The air bag warning<br />
light on the instrument panel will illuminate for approximately<br />
5 seconds when the ignition is switched on. This is normal and<br />
indicates the system is performing a self check. The following<br />
components are monitored by the indicator.<br />
Airbag control module - ECU<br />
Driver airbag<br />
Passenger air bag (If fitted)<br />
Retractor Pre-tensioners.<br />
• All related wiring.<br />
If the warning light does not illuminate when ignition is switched<br />
on, or remains illuminated after the initial check period of 5<br />
seconds, or flashes, a indicates fault may exists with air bag and<br />
seat belt pre-tensioner and it should be checked by an authorized<br />
<strong>TATA</strong> MOTORS DEALER immediately.<br />
Air bag maintenance and servicing :<br />
seconds or flashes during driving, indicates fault with air bag<br />
and seat belt pre-tensioner and it should be checked by an<br />
authorized <strong>TATA</strong> MOTORS DEALER immediately.<br />
24<br />
• The air bag warning light does not illuminate when the<br />
ignition key is turned on.<br />
• The air bag warning light illuminates while driving.<br />
If the air bag system is not attended to when a warning is<br />
given, it will not function properly in the event of collision, or<br />
it may deploy unexpectedly. The air bag system fitted to<br />
your vehicle does not require regular maintenance.<br />
NOTE :<br />
1. Any maintenance on or near the SRS components must be<br />
performed only by an authorized <strong>TATA</strong> MOTORS dealer. Do<br />
not permit anyone else to do service, inspection,<br />
maintenance or repair on any SRS components or wiring.<br />
Similarly, no part of the SRS system should ever be handled<br />
or disposed of by anyone except an authorized <strong>TATA</strong><br />
MOTORS dealer. Improper work on the SRS system will result<br />
inadvertent deployment of the air bag or could render the<br />
SRS system inoperative. This could also lead to personal injury.<br />
2. Do not modify your steering wheel or any other SRS<br />
components, For example replacement of steering wheel<br />
or modifications to the steering column, front bumper, body<br />
or frame structure can adversely affect the SRS performance<br />
and lead to possible injury.
AIR BAGS & ANTI-LOCK BRAKING SYSTEM (IF FITTED)<br />
3. If your vehicle has received any front end damage, you should<br />
have the SRS system inspected by an authorized <strong>TATA</strong><br />
MOTORS dealer to ensure it is in proper working order.<br />
The air bag will inflate only once. The inflated air bag system will<br />
not function again and steering wheel with air bag module,<br />
steering column, seat belts and control module must be<br />
replaced immediately. If passenger airbag is fitted, air bag<br />
assembly, Air bag cover, Seat belts and dash panel must be<br />
replaced. If they are not replaced, the unrepaired area will increase<br />
the risk of injury in a collision.<br />
Do not attempt to service, repair, or modify the airbag system,<br />
tampering will result in activation of the system and increase<br />
the risk of personal injury. For servicing the air bag system,<br />
see your authorized <strong>Tata</strong> <strong>Motors</strong> dealer.<br />
Do not use chemical solvents or strong detergents when<br />
cleaning the steering wheel or instrument panel to avoid<br />
contamination of the air bag system. Wiping with a damp<br />
cloth only is recommended.<br />
Air bags and Bull bars:<br />
<strong>TATA</strong> <strong>Motors</strong> do not guarantee the design intent performance<br />
of the supplementary restraint system incase a bull bar is fitted<br />
to the vehicle or the front structure is modified in any way.<br />
• In case of vehicle ownership transfer, <strong>Tata</strong> <strong>Motors</strong><br />
recommends the owner to inform the new owner about<br />
the presence of Supplementary Restraint System in the<br />
vehicle and also advises for reading the relevant sections<br />
in the owner’s manual.<br />
• Prior to scrapping the vehicle, owner should bring the<br />
vehicle to the authorized <strong>Tata</strong> <strong>Motors</strong> dealer for safe<br />
dismantling of supplementary restraint system.<br />
Anti-lock braking system : (if fitted)<br />
The Anti-lock braking system is installed to avoid wheel locking<br />
during abnormal braking conditions. Please refer ABS in<br />
‘DRIVING’ chapter for detailed information.<br />
D R I V I N G C O N T R O L S<br />
This section provides information about various<br />
mechanical controls and electrical displays that<br />
help you while driving.<br />
Please read this section carefully and make<br />
yourself familiar with the functions of all the driving<br />
controls listed alongside, so that you can use<br />
them effectively while driving.<br />
• Driving Controls<br />
• Steering lock & Ignition switch<br />
• Immobiliser<br />
Parking brake<br />
• Gear shift lever<br />
• Combi switch<br />
• Transfer case gear selector<br />
• Steering wheel position adjustment<br />
• Operating switches<br />
D R I V I N G<br />
C O N T R O L S<br />
DRIVING CONTROLS<br />
11<br />
12<br />
9<br />
8<br />
7<br />
6<br />
5<br />
1. Air bag for driver and Horn Pad 2. Steering Wheel 3. Accelerator Pedal<br />
4. Brake Pedal 5. Clutch Pedal 6. Head Lamp leveling switch<br />
7. Gear lever 8. A.C. Control Switches 9. Operating Switches<br />
10. Glove Box 11. Air Bag for co-driver 12. Analog Clock<br />
STEERING LOCK & IGNITION SWITCH<br />
Steering Lock and Ignition Switch<br />
Key of ignition switch is common for door lock, steering lock and glove<br />
box lock.<br />
The ignition switch is on the right side of the steering column.<br />
It has four positions. Turn the key clockwise for further functions.<br />
LOCK - Steering Locked<br />
ACC - Accessories ‘ON’<br />
ON - All electricals ‘ON’<br />
START - Engine crank<br />
LOCK<br />
You can insert or remove the key only in this position. The steering<br />
column is locked when the key is removed.<br />
Do not remove the key while driving. It will lock the steering and<br />
can cause loss of control. Remove the key only when the vehicle is<br />
parked.<br />
ACC<br />
By turning key to ACC position power supply to accessories is switched<br />
ON.<br />
STEERING LOCK AND IGNITION SWITCH<br />
ON<br />
By turning key to this position all the remaining electrical systems<br />
become operative. The glow plug indicator lights up. After a few seconds<br />
depending on the ambient temperature it goes off. The engine is ready<br />
for cranking.<br />
START<br />
Turn the key further clockwise to the START position (spring loaded) to<br />
start the engine. As soon as the engine starts release the ignition key to<br />
ON position.<br />
Do not crank the engine more than 10 secs. continuously. If the<br />
engine does not start wait for 30 secs. before cranking it again.<br />
Release the key immediately after starting the engine otherwise<br />
starter motor/ flywheel ring may get damaged.<br />
By turning the ignition key from ON position to ACC or LOCK position,<br />
engine can be stopped.<br />
IMMOBILISER<br />
1. Anti-theft security system - Immobiliser (If fitted)<br />
This system disables the starter motor circuit, ignition supply<br />
and fuel cut-off solenoid supply. The vehicle can be started<br />
only if the key fitted with corresponding transponder is<br />
inserted in the ignition switch.<br />
A. Programming the keys of the vehicle equipped with<br />
transponder :<br />
1. Insert a key with transponder in the ignition switch<br />
and turn to "ON" and then to "OFF"<br />
2. Take away the key from the ignition switch : the LED<br />
starts flashing fast for 30 seconds, during this time<br />
move the transponder master card close to the ignition<br />
switch (where the antenna is located) and wait until<br />
the LED goes off.<br />
3. Move the transponder master card away: the LED starts<br />
flashing very fast for 30 seconds, during this time the<br />
system is set for the 1st transponder self-learning.<br />
4. Insert the 1st transponder key in the ignition switch :<br />
LED will go off; the 1st key is programmed.<br />
5. Take away the programmed key from the ignition<br />
switch: the LED starts again to flash very fast for<br />
another 30 seconds, during this time.<br />
6. Insert the 2nd transponder key in the ignition switch :<br />
Transponder Key<br />
Transponder Master Card<br />
Normal Key<br />
the LED will go off; the 2nd key is programmed. Take<br />
away the key from the ignition switch.<br />
7. If the vehicle is equipped with only 2 keys, wait for 30<br />
seconds : the LED will go off and then start to flash<br />
slowly. The programming cycle is finished.<br />
8. If the vehicle is equipped with a 3rd transponder key,<br />
don’t wait for 30 seconds, and insert the 3rd key in the<br />
ignition switch : the LED will go off and start to flash<br />
slowly. Take away the 3rd key from the ignition switch.<br />
The programming cycle is finished.<br />
- The operations have to be made in the right time;<br />
otherwise the function will finish.<br />
- In case of mistakes, repeat the programming<br />
procedure from the very beginning.<br />
B. Disabling / Enabling the immobilizer in the event<br />
of breaking or loosing the keys with transponder :<br />
1. Insert a key without transponder in the ignition switch<br />
and turn to "ON" : the LED goes off.<br />
Move the transponder master card close to the ignition<br />
switch : the LED remains switched off.<br />
The immobilizer is disabled. Move the transponder<br />
master card away : the vehicle normally runs.<br />
2. The immobilizer is automatically ENABLE after 30<br />
seconds turning the key to OFF.<br />
3. To switch on the vehicle again, using the key without<br />
transponder, proceed as indicated at point B1.<br />
C. Resetting immobilizer operations :<br />
1. In the event of the transponder keys being found,<br />
no additional operation is required because the<br />
keys keep programmed.<br />
2. In the event of replacement with new keys with new<br />
transponder, proceed as described at point A on<br />
previous page.<br />
2. Anti-theft Device -Remote (Keyless) Entry<br />
This is an electronic car security system with remote (keyless)<br />
operation for door Unlock/Lock. It immobilises the vehicle<br />
by disabling vital circuits related to engine.<br />
Please refer supplier’s instruction manual supplied along<br />
with the vehicle for further details of operations and<br />
features.<br />
PARKING BRAKE AND GEAR SHIFT LEVER<br />
Parking Brake<br />
To apply the parking brake, pull the parking brake lever fully up<br />
and leave it.<br />
To release it, lift the lever up slightly keeping the release button<br />
pressed and then push down the lever fully.<br />
2 1<br />
The parking brake indicator on the instrument panel will go ‘off’<br />
when the parking brake lever is fully released.<br />
Driving the vehicle with the parking brake ‘ON’ will cause damage<br />
to the rear brakes and the clutch.<br />
1. Parking Brake Lever 2. Release Button<br />
Gear Shift Lever<br />
It is console mounted. The different gear positions are marked on<br />
the knob.<br />
Gear Shifting Pattern<br />
COMBI SWITCH<br />
SCHEMATIC DIAGRAM OF COMBI SWITCH FUNCTIONS<br />
WIPER STALK<br />
LIGHTING STALK<br />
LEFT TURN<br />
LEFT LANE CHANGE<br />
SELECTOR<br />
NEUTRAL<br />
RIGHT LANE<br />
CHANGE<br />
FLICK WIPE SWITCH<br />
(AUTO RETURN)<br />
RIGHT TURN<br />
(SLOW)<br />
ROTARY POSITIONS OF LIGHTING SWITCH<br />
ROTARY POSITIONS OF WIPER SWITCH<br />
(FAST)<br />
ROTARY POSITIONS OF WIPER INT. VOLUME<br />
WIPER CONTROL COMBI-SWITCH LEVER - LEFT<br />
Selector<br />
Wiper ‘OFF’ Position Intermittent Wipe Rotate selector to set delay timing<br />
for intermittent wipe<br />
Slow Wipe Fast Wipe Pull upward for windshield wash and wipe.<br />
Pull towards driver for FLICK WIPE<br />
(Spring Return)<br />
HEADLAMP/INDICATOR COMBI-SWITCH LEVER - RIGHT<br />
Head Lamp ’OFF’ Position Position Lamp - ‘ON’ Position Lamps & Head Lamps - ‘ON’<br />
C<br />
B<br />
A<br />
36<br />
Toggling the lever in upward direction<br />
changes Low beam to High beam and<br />
vice versa. For High beam flash,<br />
pull up the lever halfway.<br />
A - Side indicator ‘OFF’<br />
B - Lane change left side indicator<br />
C - Left turn side indicator self<br />
Cancellation / Manual return<br />
B - Lane change right side indicator<br />
C - Right turn side indicator self<br />
Cancellation / Manual return
TRANSFER CASE GEAR SELECTOR<br />
Transfer Case Electric Shift Switch :<br />
It is electrically operated and mounted on dashboard below the<br />
instument cluster. It is a gear selector switch. It has 3 different gear<br />
positions 2H, 4H and 4L. They indicate -<br />
2H - 4 x 2<br />
4H - 4 x 4 High<br />
4L - 4 x 4 Low<br />
Shifting from 2H to 4H or 4H to 2H :<br />
Shifting can be done upto speeds 65 kmph.<br />
Shifting from 4H to 4L or 4L to 4H :<br />
Shifting to be done on stationary vehicle.<br />
Important : Do not march the vehicle till 4H/4L indicator lamp stops<br />
blinking.<br />
One lamp glows on when shifted from 2H to 4H<br />
Both lamps glows on when shifted from 4H to 4L<br />
For free wheeling of front hub - see page 83.<br />
Selector Switch<br />
STEERING WHEEL POSITION ADJUSTMENT<br />
Steering Wheel Position Adjustment<br />
You can adjust the steering wheel position to suit your convenience.<br />
Adjust the steering wheel position as follows before you start driving.<br />
1. Adjust the seat to a comfortable position.<br />
2. The lever to tilt the steering wheel is under steering column. Pull<br />
the lever up and hold in that position.<br />
3. Move the steering wheel up or down to the desired position.<br />
Position the wheel such a way that all the instrument panel gauges<br />
and warning lights are visible.<br />
4. Release the lever. Make sure that steering wheel is securely locked<br />
by moving up and down.<br />
Steering wheel should be adjusted only when the vehicle is<br />
stationary.<br />
Steering Position Adjustment<br />
OPERATING SWITCHES, FOG LAMPS AND FUEL TANK FLAP<br />
Operating Switches<br />
Eight numbers of operating switches are provided on the console.<br />
Front Fog Lamps ( if fitted )<br />
The fog lamps are provided on the front bumper to improve the visibility in<br />
Foggy weather. The front fog lamp can be switched on with the parking<br />
lamp on and can remain on till the parking lamp is switched off.<br />
The switch for the front fog lamp is an ‘ON / OFF’ spring return type switch.<br />
Rear Fog Lamps (if fitted)<br />
The rear fog lamp has the in-built tell tale indicating lamps for indicating the fog<br />
lamp operation.<br />
Fuel Tank Flap<br />
To open the fuel tank flap press the operating switch. The solenoid provided<br />
near the fuel tank flap releases the fuel tank flap open.<br />
To close the fuel tank flap just push the flap manually to its original position.<br />
Do not operate fuel flap switch repeatedly. Once the fuel tank flap facia<br />
switch is operated, wait for 15 sec. before you operate again.<br />
9 8<br />
1 2 3 4 5 6 7<br />
1. Rear fog lamp<br />
2. Front fog lamp<br />
3. Rear Windsheild & Outside Mirror<br />
Demister<br />
4. Hazard Warning<br />
5. Rear Windshield Washer<br />
6. Rear Windshield wiper<br />
7. Fuel flap opening<br />
8. Headlamp leveling switch<br />
9. Analog clock<br />
REAR WINDSHIELD DEMISTER AND REAR WINDSHIELD WASH & WIPE HAZARD WARNING<br />
Rear Windshield & Outside Rear View Mirror Demister (If fitted)<br />
Push the operating switch on the facia to turn the demister ‘ON’. The<br />
demister will switch off automatically after 15 minutes.<br />
40<br />
Clean the rear windshield glass carefully from inside to avoid any<br />
damage to demister heater element.<br />
Hazard Warning<br />
Push hazard warning switch on the facia switch. This will switch ‘ON’ all<br />
the outside turn signals and both indicators in instrument panel to flash<br />
simultaneously to warn the other road users about the hazardous<br />
condition of the vehicle.<br />
If lights do not blink or blink rapidly, it is an indication of problem in<br />
the blinker electrical system or the indicator bulb at front or rear has<br />
fused. Get it rectified immediately.<br />
Rear Windshield Wash & Wipe (Unlatched Switch)<br />
Push and hold the switch knob for the operation of the wash function<br />
for the desired duration for rear visibility through glass. The function<br />
indicator lights up when wash function is ‘ON’. Alongwith wash fluid<br />
getting sprayed, the wiper also operates with a delay to wipe the<br />
glass surface, through a timer control unit. On release of the switch,<br />
this function stops.
REAR WINDSHIELD WIPER AND HEAD LAMP LEVELLING SWITCH<br />
Rear Windshield Wiper (Latched Switch)<br />
Push to switch ‘ON’ - Push to switch ‘OFF’<br />
The function indicator lights up when the wiper function is ‘ON’.<br />
All the above switches have ‘ON’ indication except for hazard warning<br />
switch.<br />
Head lamp levelling Switch : (if fiited)<br />
A motorised head lamp levelling arrangement with the setting knob at<br />
the dash board is provided on the central console. As and when required,<br />
head lamp levelling. setting is done by rotating the knob to select one<br />
of the 3 levels marked on the knob depending upon the loading of the<br />
vehicle.<br />
Loading Condition<br />
Switch position<br />
Unladen / Driver / Driver + Co-driver 0<br />
Driver + Co-driver + All seats occupied 1<br />
Laden + All seats occupied 2<br />
Laden + All seats occupied + permissible 3<br />
luggage load<br />
Since the leveling switch takes care of headlamp focus pattern under<br />
different load conditions; it is advisable to select the correct position<br />
before starting a trip (depending on load)<br />
INDICATORS AND INSTRUMENTS<br />
This section gives you information on various<br />
indicators and gauges provided on the dash board and<br />
how to make use of these provisions while driving.<br />
• Instrument Cluster<br />
• Indicators<br />
• Gauges<br />
I N D I C A T O R S A N D I N S T R U M E N T S<br />
INSTRUMENT CLUSTER<br />
Speedometer Left Turn Indicators* Right Turn RPM Meter<br />
Indicator<br />
Indicators*<br />
Temperature<br />
Gauge<br />
Set Knob<br />
LCD<br />
Mode Knob<br />
Fuel<br />
* All indicators may not be provided on some cluster<br />
INDICATORS<br />
Turn Signals<br />
Indicators<br />
Turn signal lamps can be operated only when the ignition<br />
supply is 'ON' and by using the turn indicator switch on the<br />
combiswitch.<br />
The direction indicator arrow (LHS) & (RHS) on the<br />
instrument cluster flashes alongwith external indicator lights as<br />
selected.<br />
Parking Brake and<br />
P<br />
Low Brake Fluid Indicator<br />
When the parking brake is applied this indicator illuminates.<br />
Ensure that the parking brake is fully released and this<br />
indicator goes off while driving.<br />
When you turn the key to IGN position this indicator<br />
illuminates for few seconds and goes off automatically. It<br />
remains ‘ON’ when brake fluid level in the master cylinder<br />
container is low.<br />
Do not drive the vehicle if the brake fluid level indicator<br />
remains ‘ON’. Get the defect rectified.<br />
High Beam Indicator<br />
This light illuminates with the head lamps in high beam<br />
position.<br />
Low Oil Pressure Indicator<br />
This indicator light will glow when the oil pressure in the<br />
running engine drops low enough to cause damage to the<br />
engine.<br />
It should light when ignition is ‘ON’ and should go off when<br />
engine is running.<br />
If this light glows when engine is running, it indicates serious<br />
problem in engine lubrication system.<br />
Safely pull to the side of the road and shut off the engine as<br />
soon as possible.<br />
Continuously glowing of light indicates fault in lubrication<br />
system.<br />
Do not run the engine when low oil pressure, indicator<br />
light is ON. In such a case contact the nearest authorised<br />
workshop for rectification of fault.<br />
Battery Charging Indicator<br />
This light should come ON when<br />
ignition is ‘ON’ and should go off after the engine starts. If<br />
it remains ‘ON’ when engine is running, it indicates battery<br />
is not getting charged.<br />
In such a case, avoid using electrical loads and get the<br />
problem attended at an authorised workshop.<br />
4H, 4L Indicator *<br />
(* For 4WD model only)<br />
With ignition ‘ON’ and transfer case switch in 2H mode both 4H<br />
and 4L indicator lamps on instrument panel should glow for a<br />
few seconds only and go ‘OFF’.<br />
Continuous illumination indicates an electrical fault. Do not run<br />
the vehicle if both 4H and 4L lamps are ON.<br />
The 4H or 4L lamps will glow only when the transfer case is<br />
either in 4H or 4L mode.<br />
Low fuel Indication<br />
If the needle shows red mark on fuel gauge. it means there is a<br />
little fuel approximately 10 litres in the tank and you should fill<br />
the tank at the earliest.<br />
ABS Indicators<br />
(Where ABS is fitted)<br />
ABS<br />
ABS indicator light on instrument<br />
cluster illuminates approx. for 5 sec. when the ignition key is<br />
turned to ‘ON’ position. This is normal and indicates the system is<br />
performing a self check. If the light does not illuminate when<br />
ignition is ‘ON’ or remains illuminated after initial self check and<br />
while driving or flashes, fault may exist in the ABS system.<br />
In this case also the normal braking system is still effective and<br />
can able to provide normal stopping ability. Even though we<br />
recommend taking the vehicle to the nearest dealer and<br />
inspecting your car as soon as possible if the warning light<br />
stays on.<br />
Electronic Brake Distribution<br />
(EBD) indicator<br />
If the ABS and the brake system indicator light comes<br />
together even after the parking brake is fully released, then<br />
the Electronic Brake Distribution (EBD) i.e. the front to rear<br />
brake force distribution system is also not working. This<br />
will lead to the rear wheel lock while braking. Avoid sudden<br />
hard braking and take the car immediately to the nearest<br />
dealer to fix the system.<br />
‘CHECK ENGINE’ Indicator<br />
CHECK<br />
ENGINE<br />
This lamp indicates engine condition, when a malfunctioning<br />
occurs in Engine OR EMS. This lamp indicates as below :<br />
1. Comes ‘ON’ when key is in ‘IGN’ position and goes ‘OFF’<br />
when engine is running.<br />
2. remains ‘ON’ in engine running if malfunctioning occurs.<br />
SRS Indicator (Where air bag is fitted)<br />
SRS indicator light on instrument cluster illuminates approx.<br />
for 5 sec. when the ignition key is turned to ‘ON’ position.<br />
This is normal and indicates the system is performing a self<br />
check. If the light does not illuminate when ignition is ON<br />
or remains illuminated after initial self check and while<br />
driving or flashes, fault may exist in the system, get the<br />
defect rectified by authorised service outlet.<br />
GAUGES<br />
Speedometer, Main Odometer and Tripmeter (on LCD) :<br />
The speedometer indicates the car speed in km/hr. The odometer records<br />
the total distance the car has been driven. The tripmeter can be used to<br />
measure the distance travelled on each trip or between fuel fillings.<br />
Keep track of the odometer reading & follow the maintenance<br />
schedule regularly for meeting service requirements.<br />
Odometer, Tripmeter and Illumination intensity control on<br />
instrument panel (LCD) :<br />
The instrument panel has an LCD to display the following :<br />
Main Odometer (Non- resettable) - Counts upto 999999 kms<br />
Tripmeter A (Resettable)<br />
- Counts upto 1999.9 kms<br />
Tripmeter B (Resettable)<br />
Ambient display and Digital Clock display<br />
Intensity level of instrument panel illumination - selection among preset<br />
levels.<br />
LCD has two line display.The first line displays the Odometer count.The<br />
second line displays either of Tripmeter A, Tripmeter B, Intensity level of<br />
panel illumination, Ambient temperature and Digital clock display.<br />
The selection and control of functions are done through 'MODE' and 'SET'<br />
push buttons (knobs) provided on either side of the LCD.<br />
The 'MODE' knob is used to select one of Tripmeter A, Tripmeter B Ambient<br />
temperature , Digital clock display and Intensity level of panel illumination.<br />
48<br />
Display for Trip - A<br />
Set<br />
Speedometer<br />
Display for Trip - B<br />
Odometer<br />
Tripmeter<br />
or Intensity level of<br />
panel illumination<br />
Mode Selector<br />
Switching among the above three functions can be done by pressing<br />
The 'SET' knob is used to control the chosen function. Pressing the knob<br />
for a few seconds resets the chosen tripmeter and varies the intensity<br />
level of instrument panel illumination.<br />
The panel illumination intensity varies among preset levels as follows:<br />
= Min = = = = Max<br />
This display returns to Tripmeter A after a few seconds of intensity level<br />
selection, if left in this mode.<br />
Main odometer and tripmeter A indication will remain on display<br />
even if the ignition key is removed. Reduced contrast in display may<br />
occur at low and high temperatures.<br />
Ambient Temperature<br />
Intensity Level Indicator<br />
Digital Clock<br />
Display Mode Selector (Right side knob) Set(Control/Adjustment (Left side knob)<br />
Trip ‘A’ To change the display to Trip ’B’ Knob to reset Trip ‘A’<br />
Trip ‘B’ To change the display to Ambient temperature Knob to reset Trip ‘B’<br />
Ambient Temp. To change the display to Digital Clock Toggle between 0 C to 0 F conversion<br />
Digital Clock To change the display to Dimmer To set the clock (Hrs. & Min.)<br />
Dimmer To change the display to Trip ‘A’ Adjust illumination brightness 25%, 50%,<br />
75%, 100%, 75%, 50%, 25%<br />
Trip odometer count can be reset by pressing ‘SET’ knob for over 10 secs when display indicates Trip ‘A’ or Trip ‘B’<br />
Procedure for digital clock setting :<br />
1. The clock can be set using both the ‘SET’ and ‘MODE’ keys.<br />
2. Pressing the ‘SET’ knob for 5 secs. will cause the displayed time to<br />
flash i.e. clock setting mode.<br />
3. At entry into clock setting mode, Hours digit will flash first.<br />
4. While the Hours data is flashing, pressing and releasing the SET key<br />
will toggle between minutes and hours.<br />
5. While the numbers flashing, pressing the MODE the key will advance<br />
the displayed number.<br />
6. While the numbers are flashing, if no keys are pressed for 5 secs.<br />
Then the current value displayed are stored and the display stops<br />
flashing.<br />
RPM meter :<br />
The meter indicates engine speed in revolutions per minute (rpm)<br />
Change gears at appropriate engine rpm and car speed to get optimum<br />
fuel economy.<br />
The permitted engine rpm upper limit is the start of Red Zone on the<br />
dial.<br />
50<br />
Temperature Gauge<br />
The gauge indicates the temperature level of the engine coolant. The<br />
red zone at 'H' indicates temperatures higher than normal.<br />
Avoid driving, when the pointer is in the red zone. It indicates engine<br />
overheating, which may be due to insufficient coolant in the radiator or<br />
due to any other defect. Take the car to the nearest Authorised Service<br />
outlet for necessary attention.<br />
Never remove the cap from the coolant reservoir when the engine is<br />
hot. Do not restart the engine until the problem has been duly<br />
attended.<br />
Fuel Gauge<br />
High<br />
Warning<br />
The fuel gauge indicates the approximate fuel level in the tank. Refill<br />
the fuel tank at the earliest, when the needle touches the red band<br />
(indicating reserve capacity has been reached.), a visual warning<br />
indication (Amber coloured) comes 'ON' indicating the fuel level is low.<br />
Low<br />
Fuel Level<br />
COMFORT AND CONVENIENCE<br />
This section gives you information on the different comfort<br />
and convenience features provided in your vehicle.<br />
There are many features as listed alongside in <strong>TATA</strong> <strong>SAFARI</strong>.<br />
To get the maximum benefit from these features, please<br />
read information in this section.<br />
Air conditioning and heating<br />
Roof mounted A. C.<br />
Power windows<br />
Front seat<br />
Headrestraint<br />
Middle seat<br />
Armrest cum cup holder<br />
Jump seats<br />
Jack & tools<br />
Motorised rear view mirrors<br />
Cigarette lighter and ash tray<br />
Fuel filler flap<br />
Glove box<br />
Inside rear view mirror<br />
Sun visors<br />
Interior roof lights<br />
Reverse guiding system<br />
Analog Clock<br />
Music System<br />
MP3/DVD Player<br />
Tail lamp<br />
• High mounted stop lamp<br />
Front windshield and door glass demister<br />
Mechanically Operated Fuel Tank Flap<br />
C O M F O R T A N D C O N V E N I E N C E<br />
AIR CONDITIONING / HEATING<br />
Air Conditioning / Heating<br />
Your vehicle is fitted with heating and air conditioning system. The<br />
controls are provided on dash board. For rear seat A.C. comfort direct<br />
middle vents on the dash board to rear middle seat. The system controls<br />
can be adjusted to mix air into various combinations. The air flow for<br />
different locations is controlled by air flow direction control knob fitted<br />
on RH side of A.C. control panel. The air flow switch has five positions<br />
for air flow direction.<br />
Air Temperature<br />
switch<br />
Blower Switch<br />
Air flow Direction<br />
Face position -<br />
Air flows to upper parts of body<br />
Face / foot position -<br />
Air flows to body and foot<br />
Foot Position -<br />
Air flows to foot only<br />
Air to foot and windscreen -<br />
recommended for clearing mist on<br />
windscreen<br />
Air to windscreen -<br />
recommended for<br />
clearing heavy fog or snow<br />
A B<br />
A. Air recirculation switch B. Front A.C. ON/OFF Switch<br />
A.C. Control Switches on Central Console<br />
The air mix control switch is on the LH side of the panel. By rotating<br />
the control switch clockwise (towards red segment) the air temperature<br />
from vents will increase. Rotate anticlockwise (towards blue segment)<br />
to reduce the air temperature. The switch on the top centre is for the<br />
4 speed blower. Any of the blower speed could be chosen as per<br />
requirement. The 2 switches at the centre are for A.C. control as follows:<br />
Switch ‘A’ - Press for recirculation mode. Release for fresh air.<br />
Switch ‘B’ - For switching ‘ON’ or ‘OFF’ front cooling. It is marked by ‘F’<br />
When the A.C. is switched ON the engine low idling RPM increases<br />
marginally to adjust for A.C. compressor load. When the thermostat<br />
cuts off A.C., engine idling RPM decreases to lower adjusted value.<br />
F<br />
A. Air Recirculation Switch<br />
B. Front A.C. ON/OFF Switch<br />
ROOF MOUNTED A.C. AND FRONT WINDSHIELD, DOOR GLASS DEMISTER<br />
Roof Mounted A.C. Unit (if fitted)<br />
The roof mounted A.C. unit is installed on your vehicle. The blower<br />
switch has 4 positions - ‘HIGH’, ‘MEDIUM’, ‘LOW’ and ‘OFF’. The<br />
switch is located on LH side of roof A.C. console. Air flow direction<br />
can be adjusted by adjusting the air vents.<br />
The roof AC can be switched on provided the front AC is ‘ON’.<br />
However, the blower of the roof AC unit can be operated<br />
independently.<br />
Front Windshield and Door Glass Demister<br />
To remove frost or ice from the windshield and side windows, quickly.<br />
1. Start the engine & accelerate to warm up.<br />
2. Select defrost/demisit mode on air flow direction control.<br />
3. Set blower and air mix temperature control to maximum hot.<br />
These settings direct all air flow to the defroster vents at the base of<br />
windshield and side window defroster vents. The hot air flow clear the<br />
frost from windows.<br />
Make sure you have clear view through all windows before driving.<br />
You may turn back air mix and air flow control to desired position,<br />
while driving.<br />
HI<br />
LO<br />
OFF<br />
Roof A.C. Blower Switch<br />
POWER WINDOWS<br />
Power Windows<br />
The windows glasses of your Safari are electrically operated. Each<br />
door has a switch that controls its window. Turn the ignition key to<br />
‘ACC’ and operate the switch to raise or lower the window.<br />
To open the windows : Push the knob of the switch down. Release the<br />
switch when you want the window to stop.<br />
To close the window : Pull the front portion of the switch and hold it.<br />
Release the switch when you want the window to stop.<br />
Driver’s arm rest has a main power window control panel by which any<br />
of the passenger windows can be operated. When the lock switch on<br />
the Power Window Control Panel is at ‘ON’ position, rear windows can<br />
not be lowered or raised by rear door switch.<br />
Ensure that the driver controlled switch is in “LOCK” position when<br />
children are in the vehicle to prevent them from injuring by their<br />
hands / fingers getting pinched by inadvertent operation. It is the<br />
responsibility of the driver and the other occupants of the vehicle<br />
to ensure that the key is removed from the ignition lock before<br />
leaving the vehicle. Keep hands or any part of the body away from<br />
the windows while the window are being wound up/closed.<br />
Lock / Unlock Button<br />
Power Window Switch on Driver Door<br />
(RHD)<br />
Pull & Push Type Button<br />
FRONT SEAT AND SEAT ADJUSTMENTS<br />
58<br />
In case of frequent operations the window winding motor may get<br />
overheated and stop working due to the internal protection through<br />
thermal cut off. Wait for some time for the motor to cool & for the<br />
thermal cut off to reset and then operate power window.<br />
Front Seats<br />
Both driver and co-driver seats are provided with arm rest and Seat<br />
height can be adjusted by lifting up / pushing down the lever (2) to<br />
give you maximum driving comfort.<br />
The lumbar support is adjusted by using the lever provided at the side<br />
of the seat back rest.<br />
Seat Adjustment<br />
Adjust the seat before you start driving. To adjust the seat forward and<br />
backward, pull up the lever (3) below the seat cushions front edge.<br />
Move the seat to the desired position and release the lever. Try to move<br />
the seat to make sure it is locked in position. To change the angle of the<br />
seat backrest use the recliner leve(1). The recliner lever is located at the<br />
base of the seat on RH side for driver seat and LH side for co-driver seat.<br />
The seat back in rear will reduce the protection you get from your seat<br />
belt in a crash. Adjust the seat backrest to an upright position and sit<br />
well back in seat.<br />
HEADRESTRAINT AND MIDDLE SEAT<br />
The front seats have headrestraint. They protect front seat occupants<br />
from whiplash and other injuries in the event of impact. For best<br />
protection, adjust the centre of the headrestraint so that it is in the<br />
same level as your ears.<br />
Drivers seat occupant should not adjust headrestraint while driving.<br />
It is unsafe.<br />
To raise headrestraint, pull it upward.<br />
To lower, push the headrestraint down.<br />
Ensure headrestraint are adjusted before driving.<br />
Take care of electrical wiring for LCD monitor, while removing<br />
the headrestraint.<br />
Middle Seat (60:40)<br />
Middle seat is in 2 parts (60:40). Space for two occupants is at RH<br />
side and space for single occupant is at the LH side. These seats can<br />
be independently folded, as & when required for carrying long<br />
objects. The RH side seat backrest is provided with latch for folding<br />
at RH back and LH side seat back is provided with latch for folding at<br />
LH back. Pulling the latch to the front allows the seat back to fold.<br />
For keeping the seat back upright just push back the seat up till it<br />
gets locked in the latch pin.<br />
MIDDLE SEAT AND ARM REST CUM CUP HOLDER<br />
Folding of Middle Seat<br />
The seat base is provided with folding arrangement so that you can fold<br />
the rear seat forward. To fold the rear seat, first delatch seat back by<br />
pulling lever (1) and rest on the seat base.<br />
After rear seat backs are folded pull the lever (2) provided at the seat<br />
base sides and take the respective seat base up so that it is vertical.<br />
To keep seat base horizontal, simply push back the seat base.<br />
This folding feature gives additional space for keeping luggage.<br />
Arm Rest cum Cup Holder<br />
Arm rest cum cup holder is provided at the centre of middle passenger<br />
seat backrest.<br />
To use as an armrest - Pull out the strap at the top end and rest it on the<br />
seat in horizontal position.<br />
To open cup holder - Press the knob to open the arm rest lid and swing<br />
out the cup holders.<br />
Place back the cup holder into the arm rest box and close the lid,when<br />
it is not in use.<br />
Arm Rest<br />
Cup Holder<br />
JUMP SEAT, JACK AND TOOLS<br />
Jump Seat (if fitted)<br />
The jump seats with hinges are provided at the rear side of the<br />
vehicle. Jump seats can be folded to get increased luggage space<br />
when needed.<br />
Jack & Tools<br />
Jack and tools are placed in the cab floor below the rear seat (RHS).<br />
To access the jack and tools fold the rear seat forward, set aside the<br />
floor carpet and wooden plank.<br />
Rotate the pinion anticlockwise & take out the Jack. While keeping<br />
the jack after use, place the Jack as shown, rotate the pinion clockwise<br />
to fit firmly against the Jack seat.<br />
Jack<br />
MOTORISED REAR VIEW MIRROR AND CIGARETTE LIGHTER & ASH TRAY<br />
Motorised Rear View Mirror<br />
Motorised Rear View Mirrors are fitted on both front doors and can<br />
be adjusted to the desired position with the help of a switch provided<br />
on the driver side door.<br />
Motorised Rear View Mirrors allow the driver to adjust the mirrors<br />
without lowering the glasses and without moving from his position.<br />
1. Move the main switch to L (for left side) and R (for right side)<br />
2. Use the 4 positions of the knob to adjust the rear view mirrors to<br />
correct angles.<br />
These mirrors are provided with demister. The switch is commonised<br />
with Rear windshield demister.<br />
Cigarette Lighter and Ash Tray (Front)<br />
With ignition switch in ‘ACC’ position, press the cigarette lighter fully in.<br />
When heated to specified temperature it pops out. Take the lighter out and<br />
light your cigarette. After use place the lighter in its position.<br />
Do not insert any other part or accessory in cigarette lighter slot. It<br />
may damage cigarette lighter.<br />
Do not attempt to touch the hot coil. It may cause scalding.<br />
Ash tray is provided near cigarette lighter for occupants of front seats .<br />
To open ash tray press the lid gently.<br />
L R<br />
MIRROR<br />
1. Cigarette Lighter 2. Ashtray<br />
CIGARETTE LIGHTER & ASH TRAY AND FUEL TANK FLAP<br />
Cigarette Lighter and Ash Tray (Rear)<br />
The cigarette lighter is also provided on the console (below air vents).<br />
Ash tray is also provided near cigarette lighter for occupants of rear<br />
seats.<br />
To open ash tray pull it out by sliding.<br />
It is operated by the switch provided on the dash board centre panel.<br />
To open the fuel tank flap press the operating switch. The solenoid<br />
provided near the fuel tank flap releases the fuel tank flap open. To<br />
close the fuel tank flap just push the flap manually to its original position.<br />
In case of battery run down the fuel tank flap can be opened manually.<br />
First open the tail gate and pull the nylon rope to open the fuel flap.<br />
FUEL TANK FLAP AND GLOVE BOX<br />
Mechanically operated fuel tank flap (if fitted)<br />
Fuel tank flap opening lever is provided below driver seat on right hand<br />
side. To open flap, pull the lever up and to lock simply close the flap.<br />
Glove Box<br />
Glove box is located on the co-driver’s side of the dashboard. The<br />
glove box can be locked by the key common for ignition and door.<br />
The glove box lamp will glow when the glove box lid is opened and<br />
will go off as soon as the glove box lid is closed.<br />
Mechanical fuel tank flap<br />
opening lever<br />
64<br />
INSIDE REAR VIEW MIRROR AND INTERIOR ROOF LIGHTS<br />
Inside Rear View Mirror<br />
An additional antiglare rear view mirror is fitted inside the cab.<br />
Use antiglare position only when necessary because it reduces rear<br />
view clarity.<br />
Sun Visors<br />
Two adjustable sun visors are provided inside the cab to prevent<br />
sun glare.<br />
Lower the sun visor to protect the eyes from the bright sun light. The<br />
sun visor also moves side ways towards the door window.<br />
The back of co-driver sun visor is provided with a vanity mirror.<br />
Always return the sun visor to its original position when not required.<br />
It may block driver’s vision.<br />
Interior Roof Lights<br />
The roof lamp has three positions ON, OFF and DOOR. When the switch<br />
is in DOOR position and if you enter in the vehicle and close the door<br />
the roof lamp will not go off immediately. It will continue to glow for a<br />
few seconds and allow you to settle and insert the ignition key in the<br />
However if you switch on the ignition before 15 seconds, the roof lamp<br />
goes off immediately.<br />
Front reading lamps<br />
Rear View Mirror<br />
Sunvisors<br />
Reading lamp<br />
Push<br />
Buttons<br />
O - OFF I - DOOR II - ON<br />
Rear Roof lamp<br />
REVERSE GUIDING SYSTEM<br />
Reverse Guiding System (if fitted)<br />
This vehicle is fitted with reverse guiding system consisting of LCD<br />
monitor on rear view mirror and camera is mounted on the rear bumper.<br />
It helps the driver to see objects at rear side of vehicle while reversing.<br />
The LCD monitor is operated automatically when reverse gear is<br />
engaged and vehicle key is in ‘IGN’ position.<br />
To get clear view, monitor and camera lens should be kept clean. For<br />
cleaning the camera lens and LCD monitor, use moist and dry cotton<br />
cloth.<br />
LCD Monitor<br />
For more details, refer User’s Manual.<br />
Although camera installed at rear bumper are designed to assist<br />
reversing of vehicle by giving real image of rear view onto Rear View<br />
Video Display, its performance can be affected by dirty camera lens,<br />
insufficient light, improper display setting etc. Therefore the vehicle<br />
driver must take all necessary precautions while reversing the vehicle.<br />
Reverse Guiding Camera<br />
DIGITAL CLOCK & MUSIC SYSTEM (IF FITTED)<br />
This Vehicle is fitted with analog clock and powered by electrical<br />
system. It has knob at the bottom of dial for resetting time.<br />
Music System (if fitted)<br />
The head unit is fitted in the centre console, two speakers in front<br />
door, two tweeters in the inner cover of outside rear view mirrors<br />
and sub-woofer in the tailgate are provided.<br />
The antenna is located on the front windshield glass behind inside<br />
rear view mirror.<br />
There is a provision in the rear doors for mounting a pair of 158mm<br />
(PCD 142mm) speakers. These rear door speakers should be installed<br />
only in case of upgradation using an external amplifier. The fitment<br />
of the additional 2 speakers being directly driven from the head unit<br />
will cause harm to the system. This fitment needs to be carried out<br />
only at our Authorised Service Outlets in a recommended manner.<br />
In case this is not adhered to, the warranty on the audio system<br />
would be null and void.<br />
Please follow the music system manufacturer’s manual for operation<br />
possible on the music system<br />
Resetting<br />
knob<br />
VCD PLAYER, TAIL LAMP, REGISTRATION PLATE LAMPS & HIGH MOUNTED STOP LAMP<br />
MP3/DVD Player : (if fitted)<br />
Your vehicle comes installed with a MP3/DVD player with LCD colour<br />
monitors .<br />
To operate,handle and maintain the system, please refer the<br />
Manufacturer’s operator’s manual, given along with car.<br />
The LCD colour monitor is located on rear side of front seat headrest. The<br />
controls of the monitor are situated below the screen.<br />
Tail Lamp :<br />
The tail lamp assembly incorporates the following :<br />
1. Parking/Rear stop lamp<br />
2. Rear Direction indicator<br />
3. Reverse Light<br />
4. Only Reflector (Exi version)<br />
Rear fog lamp & Reflector ( Vxi version)<br />
Registration Plate Lamps :<br />
Two concealed lamps are provided for illumination of the rear<br />
registration numbar plate.<br />
High Mounted Stop Lamp :<br />
High mounted stop lamp is incorporated in rear spoiler at the rear and it<br />
glows whenever service brake is applied.<br />
LCD monitors<br />
High mounted stop lamp<br />
Registration plate lamps<br />
P R I O R T O D R I V I N G<br />
Before you start driving you should carry out important checks on<br />
your Safari. Please read this section carefully to know the procedure<br />
for carrying out important checks.<br />
• Opening bonnet<br />
• Fuel level check<br />
Engine oil level check<br />
Engine coolant check<br />
OPENING AND CLOSING THE BONNET<br />
Opening and Closing the Bonnet<br />
1. Ensure that the vehicle is in neutral gear and apply the parking<br />
brake. Pull the bonnet release lever located under extreme corner<br />
of the dash board on driver’s side. The bonnet will pop up slightly.<br />
2. Standing in front of the vehicle, lift the additional lock lever located<br />
under the bonnet centre with a finger and lift the bonnet up. The<br />
bonnet will rise slowly with assistance of the balancers fitted<br />
on both corners of the bonnet.<br />
3. To close the bonnet press down the bonnet till it is fully locked.<br />
Ensure that the bonnet is fully locked before driving off.<br />
Bonnet opening lever<br />
Additional lock lever under the bonnet centre<br />
CHECKS<br />
• Fuel level (Refer page No. 72)<br />
• Coolant level (Refer page No. 73)<br />
• Engine oil level (Refer page No. 72)<br />
• Tyre pressure (Refer page No. 123)<br />
• Brake & clutch fluid level<br />
(Refer page No. 114)<br />
ENSURE<br />
• Gear shift lever in neutral<br />
position<br />
• All switches & lamps working<br />
• SRS, ABS , Brake fluidlevel indicator<br />
and Engine lamp goes off<br />
• Parking brake released<br />
ADJUST<br />
• Driver Seat (Refer page No. 58 & 59)<br />
• Rear view mirrors (Refer page No. 62 & 65)<br />
• Steering column (Refer page No. 38)<br />
FUEL AND ENGINE OIL LEVEL CHECK<br />
Fuel Level Check<br />
1. Check fuel level in tank. The same is indicated on the instrument<br />
panel.<br />
2. If indicator is already in red zone remember to fill the fuel at<br />
nearest filling station.<br />
Engine Oil Level Check<br />
Check engine oil level before starting the engine.<br />
A. Open the bonnet.<br />
B. Pull out the dipstick and wipe it with a cloth or paper towel.<br />
C. Insert it all the way back in its tube.<br />
D. Pull out the dipstick and look at the oil level at the end of the<br />
dipstick.<br />
Top up oil if the oil level is below midway of min. & max.<br />
Oil level should not exceed the max mark. Check the oil level<br />
when vehicle is on level ground and wait for a few minutes after<br />
switching off the engine.<br />
1. Engine Oil Filling Neck 2. Dip Stick<br />
ENGINE COOLANT CHECK<br />
Engine Coolant Check<br />
Check the coolant level in the radiator auxiliary tank.<br />
It should be in between maximum & minimum lines.<br />
If the auxiliary tank is completely empty, please check the coolant<br />
level in radiator as follows -<br />
Do not remove radiator cap when engine is hot. It may spray hot<br />
coolant on you causing serious injuries.<br />
1. Ensure engine and radiator are cool.<br />
2. Turn the radiator cap anti clockwise (without pressing it) until it<br />
stops. This will relieve the pressure, if any in the cooling system.<br />
3. Remove the radiator cap by pushing down and turning anti<br />
clockwise.<br />
4. The level of coolant should be upto the base of the filler neck.<br />
Coolant should be added if it is low.<br />
5. Secure the radiator cap in its place.<br />
6. Add coolant into the auxiliary tank up to the high mark.<br />
7. Put the cap back, on the auxiliary tank.<br />
Topping of the coolant should be done in the auxiliary tank only.<br />
Radiator cap should not be removed, if coolant is present in the<br />
auxiliary tank.<br />
1. Auxiliary Tank<br />
2. Engine Coolant Filling Cap<br />
This section gives you important tips on how to start the engine, how<br />
to take care of turbo charger, operation of transmission and transfer<br />
case. It also includes important tips on safe driving in adverse<br />
conditions and difficult terrains.<br />
The information on topics listed above would certainly help you in<br />
safe and carefree driving.<br />
• Starting & stopping the engine<br />
• Preparing to drive<br />
• Running-in period<br />
• Gear change<br />
• Transfer case<br />
• Fuel economy<br />
• Four wheel driving system<br />
• Limited slip differential<br />
• Driving in adverse conditions<br />
• Driving Safety<br />
Brakes (Anti-lock brake system)<br />
STARTING AND STOPPING THE ENGINE<br />
Starting the engine :<br />
Before starting<br />
1. Apply parking brake<br />
2. Ensure gear lever is in neutral<br />
A. Insert the key in steering lock cum ignition switch and turn it to<br />
‘ON’ position.<br />
B. 'Engine Check' indicator on instrumental panel will glow.<br />
C. This will go off automatically after engine start. If this indicator<br />
continuously glows the vehicle can still be driven normally. Please<br />
get your vehicle attended at the earliest by Authorised<br />
Workshop.<br />
D. Press the clutch pedal fully.<br />
E. Now crank the engine.<br />
F. If the engine does not start turn the key to off position and try<br />
again after 30 seconds. Once the engine starts press the<br />
accelerator pedal gradually as the engine warms up.<br />
Stopping the engine :<br />
Do not switch off the engine immediately after long drive. Before stopping<br />
the engine let it idle for atleast 30 seconds to dissipate the excess heat.<br />
PREPARING TO DRIVE & RUNNING IN PERIOD<br />
Preparing to drive<br />
The following checks and adjustments should be done before<br />
you start driving the vehicle.<br />
1. Ensure all mirrors, windows and outside lights are clean and<br />
unobstructed. Remove dust frost, snow or ice if any, on these.<br />
2. Ensure bonnet is fully closed.<br />
3. Check that any items you may be carrying inside with you<br />
are stored properly or fastened down securely.<br />
4. Check adjustment of seat. If required adjust to your<br />
convenience.<br />
5. Check adjustment of all rear view mirrors.<br />
6. Check adjustment of steering wheel.<br />
7. If the doors are not properly closed you will get an audio<br />
warning as soon as you insert the ignition key in the switch.<br />
Make sure all doors are properly closed and locked.<br />
8. If the seat belt is not fastened you will get an audio warning<br />
as soon as you turn the ignition key to 'ON' position. Fasten<br />
your seat belt, ensure other passengers have fastened their<br />
seat belt (see‘Your Safety’)<br />
9. Check and ensure that all the gauges and indicator lights in<br />
the instrument panel are working.<br />
Running-in Period<br />
Avoid rapid acceleration and prolonged high speed running of<br />
the engine while using the new vehicle for the first 2000 km of<br />
operation.<br />
Do not exceed the following vehicle speed during running in<br />
period.<br />
Gear 2H/4H 4 L<br />
km/hr km/hr<br />
1st 25 10<br />
2nd 45 18<br />
3rd 75 30<br />
4th 105 42<br />
5th 140 56<br />
GEAR BOX AND GEAR CHANGE SPEEDS<br />
Gear box<br />
Gear box has all synchromesh gears including reverse. The 5th gear is<br />
an over drive.<br />
When shifting the gear up or down make sure you press the clutch<br />
pedal fully and shift to the next gear and then release the clutch pedal<br />
gradually.<br />
Do not rest your foot on the clutch pedal during driving. This can<br />
cause clutch wear and damage.<br />
Before shifting in to reverse gear bring your vehicle to a complete stop<br />
and depress the clutch pedal fully.<br />
Do not shift into reverse gear with vehicle moving forward. While<br />
shifting the gears it is recommended to shift at the speeds given in<br />
the table.<br />
You can get extra braking from the engine when slowing down by<br />
shifting to a lower gear.<br />
This can help you to maintain a safe speed and prevent your brakes<br />
from overheating while going down a steep hill.<br />
Avoid excessive revving up of engine rpm.<br />
Gear Change Speeds during upshift<br />
Vehicle Speed during Up Shift<br />
1-2 25 10<br />
2-3 45 18<br />
3-4 75 30<br />
4-5 100 40<br />
Vehicle Speed during Down Shift<br />
2-1 15 06<br />
3-2 25 10<br />
4-3 45 18<br />
5-4 60 24<br />
BRAKES AND ABS (IF FITTED)<br />
Brakes<br />
<strong>Tata</strong> Safari is equipped with ventilated disc brakes on front<br />
and drum brakes on rear wheels.<br />
Braking system is vacuum assisted to reduce effort needed<br />
on the brake pedal. It is a dual circuit service brake system<br />
designed in such a way that one circuit will always work, even<br />
if other circuit fails.<br />
If this happens you will immediately notice that the brake<br />
pedal goes down much farther and you need to press the<br />
pedal harder. In such an event the stopping distance may be<br />
longer.<br />
In case of failure of vacuum the vehicle can still be stopped<br />
with a higher pedal effort.<br />
In case of vacuum failure (Due to alternator/drive belt failure<br />
or pipe line damage) or brake circuit failure, slow down the<br />
vehicle by shifting to lower gear and lifting your foot from<br />
the accelerator pedal. Pull to the side of the road as soon<br />
as it is safe.<br />
Brake system failure is very hazardous. It is best to<br />
have your vehicle towed, but if you drive the vehicle in<br />
this condition, be extremely cautious.<br />
Have your vehicle attended immediately.<br />
Put your foot on brake pedal to apply brake. Do not ride the<br />
brakes as they may overheat and the performance may be<br />
impaired. The brake lights may confuse the drivers behind you.<br />
Use engine to assist the brakes by shifting to a lower gear and<br />
lifting your foot from accelerator pedal.<br />
Constant application of brakes while going down the hill builds<br />
heat and reduces braking efficiency.<br />
Check your brakes after driving through deep water. Apply<br />
the brakes moderately to feel that they are normal. If not,<br />
apply them gently and frequently until they do. With wet<br />
brakes you should be extra cautious and alert in your driving.<br />
Anti Lock Brake System (ABS) – if fitted<br />
ABS combined with the traditional hydraulic brake system prevents<br />
the wheel from locking while braking by make use of<br />
most of road to tyre grip. It also ensures better control and<br />
stability of car while braking.<br />
How ABS works<br />
ABS essentially consists of an Electronic Control Unit (ECU)<br />
which reads signals from the sensors fitted to each wheel and<br />
identifies the one which is likely to lock. ( Wheels will tend to<br />
lock when the speed of rotation of any one wheel becomes<br />
ANTI-LOCK BRAKE SYSTEM<br />
too low in relation to the vehicle speed.) It tells an Electro<br />
Hydraulic Control Unit (HU) to reduce, maintain or increase the<br />
pressure on the brake control cylinder in order to prevent the<br />
wheel from locking. The ABS comes into play when the car is<br />
braked heavily during emergency.<br />
The driver feels the effort of the ABS through the<br />
pulsating of the brake pedal and audible noise in the<br />
brake system.<br />
This is absolutely Normal. This should not be<br />
interpreted as a fault in the brakes. On the contrary it’s<br />
the indication that the ABS is working. This is an intentional<br />
warning to the driver that a wheel or wheels are tending to lock<br />
up due to the limit of tyre to road adhesion.<br />
In this situation it is important to keep the brake pedal<br />
depressed fully so that the ABS can regulate the brake<br />
application. On No account pump the brake pedal<br />
The ABS is addition to the basic brake system. It is activated<br />
automatically every time the engine is started. If there is a<br />
malfunction the system turns off automatically indicated by a<br />
‘(ABS)’ warning lamp on the dash board, still the ordinary brake<br />
system continues to work.<br />
ABS Activation<br />
ABS activation varies with various road surfaces i.e. the amount<br />
of traction your tyre have on a particular surface. On dry surface<br />
you will need more pedal effort to activate ABS. However you<br />
may feel ABS activates immediately if you try to stop on snow,<br />
ice or slippery surface.<br />
The ABS is self check. If any thing goes wrong the ABS warning<br />
indicator comes on the instrument panel. When you switch<br />
on the Ignition the ABS light turns ON but should go out<br />
after about 5 seconds. If the light fails to go or the lighting<br />
up of the warning light when the engine is running or<br />
the light comes at any other time, it indicates there is a<br />
fault in the ABS only. In this case also the normal braking<br />
system is still effective and is able to provide normal<br />
stopping ability.<br />
Even thought we recommend taking the vehicle to the nearest<br />
dealer and inspecting your car as soon as possible if the warning<br />
light stays on.<br />
ANTI LOCK BRAKING SYSTEM<br />
Electronic Brake Distribution (EBD)<br />
indicator<br />
together even after the parking brake is fully released,<br />
then the Electronic Brake Distribution (EBD) i.e. the<br />
front to rear brake force distribution system is also not<br />
working. This will lead to the rear wheel lock while braking.<br />
Avoid sudden hard braking and take the car immediately to<br />
the nearest dealer to fix the system.<br />
Safety tips while driving with ABS<br />
1) During a hard braking or when the road grip is poor, you<br />
will feel the brake pedal is pulsating and an audible noise<br />
in the system. This is absolutely Normal and it’s the<br />
indication that your ABS is rapidly pumping the brakes. Do<br />
not release the brake pedal, this defeats the purpose of<br />
ABS. Keep firm steady pressure on the brake pedal so as<br />
not to interrupt the braking action as long as you steer<br />
away from the hazard.<br />
2) ABS prevents the wheel from locking but it does not<br />
increase actual tyre to road grip. Hence even if your<br />
car is fitted with ABS, maintain a safe following distance.<br />
3) ABS does not reduce either time or stopping<br />
distance, It only helps steering control during braking. You<br />
should always keep a safe distance from other vehicles.<br />
4) ABS will not prevent skidding of a car that results<br />
from changing direction abruptly such as trying to<br />
take a corner too fast or making a sudden lane change.<br />
5) ABS cannot prevent a loss of stability due to severe<br />
or sharp steering wheel movement. Always steer<br />
moderately while braking hard.<br />
6) ABS requires a little longer stopping distance than<br />
a vehicle with conventional brake system on a loose<br />
or uneven surface, such as gravel or snow. Slow down<br />
and allow a safe following distance.<br />
7) ABS serves to increase your control over the car not<br />
to enable you to go faster.<br />
TRANSFER CASE, AUTOMATIC HUB LOCK & LIMITED SLIP DIFFERENTIAL<br />
Transfer Case and Transfer Case Selector Electric Switch<br />
(If fitted)<br />
On four wheel drive vehicles transfer case is fitted after the<br />
gear box for driving front live axle along with rear axle.<br />
The following 3 selector positions are provided on the knob.<br />
2H - Only two rear wheels are driven and transfer case<br />
operates at 1:1 ratio.<br />
4H - All four wheels are driven and transfer case operates<br />
at 1:1 ratio.<br />
4L - All four wheels are driven and transfer case operates<br />
at 2.48:1 speed reduction ratio.<br />
4X4 Selector Switch<br />
Automatic Hub Lock<br />
For driving in 2H mode keep the selector knob in 2H position.<br />
(*For 4 WD model only)<br />
Automatic Hub Locks<br />
While driving in 2H mode this mechanism on the front axle<br />
hub allows the hub to free wheel. This avoids the unnecessary<br />
spinning of front drive components and results in fuel saving,<br />
reduced noise and longer component life.<br />
As soon as 4H or 4L mode is selected the hub gets<br />
automatically connected to front drive line to increase the<br />
traction.<br />
Limited Slip Differential<br />
(Standard on 4x4 and optional on others)<br />
A standard differential delivers torque equally to each wheel.<br />
In case one wheel loses traction and begins to spin, the<br />
differential distributes the rotary speed unequally but with<br />
same torque. This can cause the wheel with good traction to<br />
slow down or stop while the wheel which lost traction rotates<br />
with increased speed. Such a situation can prevent the vehicle<br />
from moving.<br />
The limited slip differential provided in the rear axle takes<br />
care of such situations. The clutch lock arrangement provided<br />
internally, ensures that in case one wheel loses traction and<br />
begins to slip, a locking action takes place which prevents<br />
differential action and both wheels turn at the same speed.<br />
LIMITED SLIP DIFFERENTIAL AND FOUR WHEEL DRIVING<br />
Thus unnecessary spinning of one wheel is avoided and torque<br />
is transmitted to both wheels, thus assisting the vehicle to traverse<br />
loose terrain. However during normal driving, the differential<br />
action takes place in the same manner as in a standard differential.<br />
1. Four Wheel Drive Operation<br />
In 2-H mode, only the rear two wheels of the vehicle are<br />
powered by the engine and the front wheels are merely<br />
pushed. By shifting to four wheel drive mode (4H or 4L)<br />
the rear as well as the front axles get geared to the engine<br />
through transfer case and transmit the engine power to all<br />
four wheels. This gives the vehicle increased traction.<br />
In 4H mode, the transmitted engine torque and vehicle<br />
speed remain the same as in 2H. However, when you shift<br />
to 4L mode engine torque is multiplied and vehicle moves<br />
at low speed in the same gears with increased traction. 4L<br />
mode is provided for negotiating sharp gradients or driving<br />
through loose soil/sand.<br />
2. Shifting from 2H to 4H<br />
Turn the selector knob from 2H to 4H position. 4H indicator<br />
on instrument panel will light up. Changing from 2H to 4H<br />
can be done at any speed upto 65 km/h (40 mph). No<br />
pressing of clutch pedal is required.<br />
3. Shifting from 4H to 2H<br />
Turn the selector knob from 4H to 2H position. 4H indicator<br />
on instrument panel will go off. Changing from 4H to 2H<br />
Free Wheeling of Front Hub<br />
After shifting from 4H to 2H, for effecting free wheeling of front<br />
wheels, direction of vehicle motion needs to be changed. If<br />
the vehicle was moving forward in 4H then bring it to halt and<br />
engage reverse gear of main gear box. (If it was moving reverse<br />
in 4H mode then stop it, and then engage forward gear of<br />
main gear box.) After stopping and changing the gear the<br />
vehicle must travel in opposite direction for a minimum of three<br />
meters, before free wheeling takes place.<br />
4. Shifting from 4H to 4L<br />
Stop the vehicle. Press clutch pedal. Turn the selector knob<br />
from 4H to 4L position. 4L indicator light on instrument panel<br />
will blink few times and remain on.<br />
5. Shifting from 4L to 4H<br />
from 4L to 4H position. 4H indicator light on instrument panel<br />
will blink few times and will remain on.<br />
FUEL ECONOMY<br />
Do not engage four wheel drive mode (4H or 4L)<br />
continuously on dry and hard road surface. It can cause<br />
expensive damage to the vehicle transmission and the<br />
tyres.<br />
Four wheel drive facility is a powerful tool which enables the<br />
vehicle to traverse terrain which is otherwise inaccessible to<br />
two wheel drive vehicles. However, it must be used judiciously<br />
and carefully. Do not take unnecessary risks and attempt the<br />
impossible. Familiarise yourself thoroughly with the vehicle<br />
and its abilities before attempting serious off road driving.<br />
With ignition ‘ON’ 4H & 4L indicator lamp on panel should glow<br />
for a few seconds only & then go off. Continuous illumination<br />
of 4L & 4H lamps indicates electrical fault.<br />
Fuel Economy<br />
A. Drive smoothly, accelerate gradually and anticipate stops.<br />
B. Best fuel consumption is achieved at low engine speeds,<br />
the highest possible gear without labouring the engine.<br />
C. Driving with accelerator pedal fully depressed means<br />
using excessive fuel.<br />
D. Do not allow engine to labour. Change to lower gear<br />
when engine no longer runs smoothly.<br />
E. If possible, do not idle the engine for more than 5 minutes.<br />
Switch off the engine.<br />
F. Do not ride the clutch. Do not use clutch pedal as foot rest.<br />
G*.When changing from 4H/4L to 2H of transfer case, 2H free<br />
wheeling should be done.<br />
If 2H free wheeling is not done the hub locks of front hub<br />
remain locked causing unnecessary rotation of front drive<br />
components and this consumes more fuel and causes<br />
wear and tear of front axle components.<br />
H. Depending on traffic conditions, a constant speed should<br />
be maintained.<br />
The vehicle uses more fuel, every time you speed up or<br />
slow down.<br />
I. Hard braking, abrupt cornering and rapid acceleration<br />
use more fuel. Avoid these.<br />
(*For 4 WD model only.)<br />
DRIVING IN ADVERSE CONDITIONS<br />
Driving on Snowy or Icy Roads<br />
Set the selector knob to 4H position. Gently release the clutch<br />
and apply the accelerator for a smooth start and to avoid wheel<br />
spin.<br />
Use of snow tyres and / or tyre chain is recommended.<br />
Maintain a safe distance between vehicles to avoid sudden<br />
braking and slow down by shifting down the gears.<br />
Avoid sudden acceleration, braking or turning. Such sharp<br />
manoeuvers can cause loss of traction and thereby loss of vehicle<br />
control.<br />
Driving on Sandy or Muddy Roads<br />
In case the traction on the wheels is sufficient, you may be<br />
able to proceed in 4H mode. However in case change in<br />
road conditions are anticipated, it is better to select the 4L<br />
mode. Shift the selector knob to 4L position by following<br />
the correct procedure and proceed in the normal manner.<br />
Your vehicle will move at a slower pace with higher engine<br />
RPM in the same gear because of the 4L mode. To match<br />
your power and speed requirements, you can shift up in<br />
any of the 5 forward gears or the reverse gear.<br />
You may choose to reduce the tyre pressure marginally for<br />
additional grip on loose surfaces, though with a slight loss of<br />
ground clearance.<br />
• Try to maintain a constant engine speed and avoid sudden<br />
acceleration which can cause wheel spin and loss of traction,<br />
possibly leading to bogging down of the vehicle.<br />
• If the vehicle gets stuck in loose sand, do not keep on<br />
accelerating as the wheel spin will only result in the<br />
wheels sinking deeper.<br />
• The extent of muddy / sandy, conditions and the traction<br />
available is difficult to judge and the vehicle can get<br />
bogged down deeply. Operation should be done at slow<br />
speed only. If possible, get down and check the path<br />
conditions before proceeding.<br />
Driving Through Water<br />
86<br />
Never venture to drive through water when it flows over guard stones.<br />
Engine may get seriously damaged if attempted to cross over through deep water.<br />
If at all the situation demands that you have to drive through water then;<br />
- Keep engine in fast idling and crawl the vehicle in low gear.<br />
- After driving through water apply brakes several times to dry liners and to regain<br />
original braking.<br />
Do not attempt to start the engine if vehicle gets flooded due to water.<br />
Tow the vehicle to a safe place.<br />
• Get the starter and alternator checked.<br />
Driving on a Rainy Day<br />
Check brakes, steering and windows.<br />
Check tyres for wear and tyre pressure.<br />
Check wiper blades for proper functioning.<br />
Avoid harsh braking and sharp turns. It may cause loss of control and lead to a skid.<br />
For slowing down, shift to lower gears and brake gently.<br />
• Keep lights ON if visibility is poor.<br />
Take the vehicle to nearest AUTHORISED Workshop to check entry of water in cylinders.<br />
It will also be necessary to replace lubricants of engine, gearbox, transfer case, front<br />
axle and rear axle if water has entered.
Night Driving<br />
Dip the head lamp for oncoming traffic during night driving.<br />
Maintain a speed such that you can stop within illuminated distance of head lamps.<br />
Use head lamp main/dip beam to alert other road users on turns/cross roads etc.<br />
Use side indicators for lane change or turning.<br />
Put on hazard warning switch in case of hazardous parking or if your vehicle is disabled<br />
to warn the passing traffic.<br />
Climbing Sharp Gradients on Loose Surfaces<br />
• Select the 4L mode, start off smoothly in any suitable gear. Apply power smoothly so<br />
that there is no loss of traction by over-revving of the engine.<br />
• Choose as smooth a slope as possible and select the appropriate gear so that gear<br />
changing in the middle of the climb is not required.<br />
Changing gears in the middle of the climb can cause loss of momentum and engine<br />
stalling. Shifting to lower gear has to be done cautiously to avoid loss of traction.<br />
• Under no conditions should the vehicle be moved diagonally across a hill. The danger<br />
is in loss of traction and sideways slippage, possibly resulting in tipping over. If<br />
unavoidable, choose as mild an angle as possible and keep the vehicle moving.<br />
• If the wheels start to slip within few feet of the end of the climb, motion can be<br />
maintained by swinging the steered wheels left and right, thereby providing increased<br />
grip.<br />
• If the vehicle stalls or losses headway while climbing a steep hill, make a quick shift to<br />
reverse and allow the vehicle to move back with the control of engine compression.<br />
Descending Sharp Gradients<br />
Select the 4L mode and depending on the severity of the gradient, shift into<br />
appropriate gear. Use engine braking judiciously without over-revving the engine.<br />
Brake application under such situations should be done very smoothly to avoid loss of<br />
Select appropriate gear so that gear changing or clutch disengagement is not involved<br />
while descending the gradient.<br />
Towing the Vehicle<br />
For towing the vehicle, the best way is to use a recovery van.<br />
Alternatively use a rigid tow bar.<br />
• Avoid using flexible cable or rope as your vehicle may crash into towing vehicle when<br />
it stops suddenly.<br />
Switch ‘ON’ Hazard warning switch to warn the other road users.<br />
• Keep the engine in idling so that power steering assistance is available. This will also<br />
built the vacuum for the brakes.<br />
• In case of brake failure, use parking brake to control the vehicle.<br />
Roof Rail<br />
The provision for mounting roof racks is made on the vehicle. This can be done with<br />
the help of roof and roof header mouldings provided above the rear fixed glass. The<br />
max. load on this including roof rack load should not exceed 100 kg.<br />
88<br />
1. Front Tow Hook<br />
2. Rear Tow Hook
DRIVING SAFETY<br />
Side indicators / Hazard warning<br />
Ensure that all side indicators/<br />
hazard warning lights are always in<br />
working condition and they are used<br />
when required.<br />
Horn<br />
Ensure the horn is working properly.<br />
Horn provides safety to other road<br />
users by alerting your presence.<br />
Ensure brakes are working properly.<br />
Check brake fluid level in reservoir.<br />
Don not drive the car when brake<br />
warning lamp is 'ON'.<br />
Tyres<br />
Check the condition of tyres for any<br />
abnormalities. Maintain correct<br />
tyre pressure, it is very important<br />
particularly when subjected to<br />
extreme condition, such as high<br />
speed, high load and high outside<br />
temperature. Do not use worn or<br />
bald tyres on the front wheels.<br />
First Aid Kit<br />
First aid kit is provided in your<br />
vehicle. This is for use in case of<br />
minor injuries. It is to be regularly<br />
checked for any disintegration and<br />
should be updated regularly.<br />
Advance Warning Triangle<br />
There is an advanced warning<br />
triangle provided along with your<br />
vehicle. In case there is a<br />
breakdown and the vehicle is<br />
parked at the side of the road, then<br />
the triangle is to be kept as per<br />
instructions given below :<br />
Remove advance warning triangle<br />
from case and assemble.<br />
Place the triangle on the road<br />
behind the vehicle when it<br />
stranded on the road. The triangle<br />
must be at least 5 meters behind<br />
the vehicle in the same lane of<br />
traffic.<br />
Increase the distance to 150<br />
meters on a highway or if a bad/hill<br />
top obscures the view.<br />
FUEL, LUBRICANTS & COOLANTS<br />
This section give information regarding recommendations of fuel &<br />
oils to be used on <strong>TATA</strong> Safari Vehicles. Use only these fuel & oils on<br />
your vehicle to avoid damage to vital systems & components.<br />
• Fuel<br />
• Lubricants<br />
• Coolants<br />
• Recommended oils & lubricants<br />
F U E L , L U B R I C A N T S & C O O L A N T S<br />
FUEL<br />
Safari vehicles are fitted with catalytic convertor<br />
Unleaded regular grade petrol conforming to IS 2796 - 2000 (or<br />
equivalent) and RON not less than 87 is recommended to be<br />
used as fuel. (RON means Research Octane Number)<br />
Do not use leaded petrol. Even single use / fill of<br />
leaded fuel may permanently damage the catalytic<br />
converter.<br />
Lubricants<br />
Engine oil : Recommended grade of engine oil confirming<br />
to API-SF/CC or SG or CD specification and range of ambient<br />
temperature at which these can be used are given in table<br />
below.<br />
Ambient temp.<br />
Engine oil grade<br />
in deg. C<br />
-10 deg. & above SAE20W40 or SAE 20W50<br />
-15 deg. to 40 deg. SAE15W40 or SAE 15W50<br />
-20 deg. to 40 deg. SAE10W40 or SAE 10W50<br />
-35 deg. to 40 deg. SAE5W50<br />
In the initial operation (first 2000 km.) of new or reconditioned<br />
engine, also use the above recommended oils.<br />
Do not change to a different viscosity in the event of brief<br />
temperature fluctuations.<br />
LUBRICANTS<br />
Gearbox<br />
ATF type A<br />
Rear axle (with LSD*)<br />
APIGL 5 85W140 with friction modifier<br />
Rear axle (without LSD* )and Front Live Axle<br />
APIGL 5 85W140 without friction modifier<br />
*Limited Slip Differential only on (AWD Model)<br />
Transfer case Oil<br />
ATF Type A<br />
Grease for axle bearings<br />
Lithium base grease<br />
Brake and clutch fluid<br />
IS 8654/DOT 3<br />
Power Steering<br />
Propeller Shaft<br />
NLG-2 grade grease.<br />
Coolants<br />
Presence of dirt in coolant chokes up passages in<br />
radiator cylinder head and crankcase, thereby causing<br />
overheating of engine.<br />
To prevent rust formation and freezing of coolant inside<br />
the passages of radiator, crankcase and cylinder head<br />
use premixed coolant as recommended.<br />
It is recommended that the entire cooling system<br />
should be drained and filled with fresh premixed<br />
coolant. Coolant should be drained and replenished at<br />
specified intervals.<br />
BRANDED LUBRICANTS, COOLANTS & ADHESIVES<br />
94<br />
PLEASE USE ONLY FOLLOWING GENUINE OILS, COOLANTS , LUBRICANTS , ANTI RUST & SOUND DEADENING COATS,<br />
WINDSCREEN SEALANT, ADHESIVES & FUEL ADDITIVES<br />
BRANDED BY <strong>TATA</strong> MOTORS FOR OPTIMUM PERFORMANCE OF YOUR <strong>TATA</strong> Safari <strong>PETROL</strong>...<br />
ITEM COMPANY BRAND QTY<br />
ENGINE OIL CASTROL Castrol GTD 20W/40 6.0 Litres for 4X4<br />
HPCL HP Milcy Power 20 W/40 5.7 Litres for 4X2<br />
COOLANT SUNSTAR Golden Cruiser Premium 1400 M<br />
HENKEL TEROSON Frostox SFD 12 Approx 13 Litres<br />
HPCL<br />
HP Thanda Raja P<br />
GEAR BOX (G-76) HPCL HP-Automatic Transmission Fluid Type A 1.6 Litres<br />
CASTROL<br />
Castrol Transpower TQ<br />
TRANSFERCASE HPCL HP-Automatic Transmission Fluid Type A 1.2 Litres<br />
POWER STEERING OIL HPCL HP-ATF 1.4 Litres<br />
REAR AXLE, LIVE FRONT AXLE, HPCL HP Gear Oil XP 85W140 GL5 with 2.2 (Rear) 1.2 (Front)<br />
6%additive A99<br />
BRAKE / CLUTCH FLUID HP CL Super Duty Brake Fluid DOT - 3 As required<br />
WHEEL BEARING & CHASSIS HPCL HP Multipurpose Grease-2 As required<br />
ANTI RUST TREATMENT DINITROL Dinitrol —<br />
& SOUND DEADENING WUERTH Wuerth —<br />
WIND SCREEN SEALANT ANCHEMCO Terostat 8590 Kit Form —<br />
METAL & PLASTIC ADHESIVE ANCHEMCO Terostat 930 310 ml Cartridge
V E H I C L E<br />
S P E C I F I C A T I O N S<br />
This section give information on specification of various aggregates<br />
fitted on <strong>TATA</strong> <strong>SAFARI</strong> vehicles.<br />
• Engine<br />
• Clutch<br />
• Rear axle<br />
• Front axle<br />
• Steering<br />
• Brakes<br />
Frame<br />
• Suspension<br />
Wheels & Tyres<br />
• Fuel tank<br />
• Body<br />
Electrical system<br />
• Performance<br />
Dimensions<br />
Passenger capacity<br />
• Luggage space<br />
• Weights<br />
V E H I C L E S P E C I F I C A T I O N S<br />
1.0 ENGINE :<br />
Model : <strong>TATA</strong> 486 PL 07<br />
Type : Water cooled, gasoline<br />
multipoint sequential fuel<br />
injection,<br />
4 valves per cylinder.<br />
No of cylinders : 4 inline<br />
Bore/Stroke : 86 mm x 90mm<br />
Capacity : 2092 cc<br />
Max. engine : 93.1 kw at 5630 rpm as per<br />
output IS 14599 OR ISO 1585<br />
Max. Torque : 198 Nm at 3750 rpm as per<br />
IS 14599 OR ISO 1585<br />
Compression ratio : 9.60:1<br />
Firing order : 1-3-4-2<br />
Air filter : Dry (paper) type<br />
Oil filter : Spin - on full flow paper type<br />
Fuel filter : Single, full flow, fine filteration<br />
Engine oil capacity : Max. 6.0 litres for 4x4<br />
Max. 5.7 litres for 4x2<br />
Weight of engine : 195 kg (Dry)<br />
Radiator frontal area : 2890 cm 2 minimum<br />
Special items/features :<br />
1. Engine management system - Johnson Control<br />
Automotive Electronics (J.C.A.E.)<br />
2. MPSFI (multi point sequential fuel injection)<br />
3. Dual overhead camshaft (4 valves per cylinder)<br />
4. Automatic idle speed control<br />
5. Distributorless Electronic Ignition System<br />
6. Automatic cold start control<br />
7. Lash free hydraulic tappets<br />
8. Dynamic knock control<br />
9. Self diagnostic with Limp home capability<br />
10. Close loop lambda control<br />
11. Intank fuel pump 12V electrically operated<br />
12. Fuel circuit inertia switch for fuel cut off during<br />
sudden impact / accident for safety from fire<br />
hazard.<br />
CLUTCH, GEAR BOX, TRANSFER CASE, AXLE AND STEERING<br />
2.0 CLUTCH :<br />
Clutch<br />
Outside diameter of<br />
clutch lining<br />
Friction area<br />
3.0 GEAR BOX :<br />
: Single plate dry friction<br />
diaphragm type<br />
: 228 mm<br />
: 463 sq.cm. (approx.)<br />
Model<br />
: G-76-5/4.10 with overdrive<br />
Type<br />
: Synchromesh on all gears<br />
No. of gears<br />
: 5 Forward 1 Reverse<br />
Gear ratios : 1st 4.1<br />
2nd 2.22<br />
3rd 1.37<br />
4th 1.00<br />
5th 0.73<br />
Rev. 3.40<br />
4.0 TRANSFER CASE :<br />
(for 4x4 configuration) : From M/s Borg Warner ECU<br />
control Electrical shift shifting<br />
arrangement mounted on the<br />
gear box.<br />
Drive Options : 4X2 High Ratio 1:1<br />
4x4 High Ratio 1:1<br />
4x4 Low Ratio 1:2.48<br />
5.0 REAR AXLE :<br />
: Single reduction salisbury<br />
type rear axle with hypoid<br />
gears and semi-floating axle<br />
with limited slip differential<br />
for 4 x 4, without limited slip<br />
differential for 4 x 2<br />
Ratio : 5.375 (43/8)<br />
6.0 FRONT AXLE :<br />
a) For 4x4 : Independently suspended<br />
with automatic hub locks.<br />
Ratio 5.375 (43/8)<br />
b) For 4x2 : Independently suspended<br />
7.0 STEERING :<br />
: Power steering<br />
Ratio : 18.9 :1<br />
Steering Wheel : 380 mm dia with tiltmechanism<br />
for adjusting height and<br />
collapsible column.<br />
BRAKES, FRAME, SUSPENSION, WHEELS & TYRES, FUEL TANK AND BODY<br />
8.0 BRAKES :<br />
Service Brakes<br />
Front Brake<br />
Rear Brake<br />
Antilock braking<br />
system<br />
9.0 FRAME :<br />
Depth<br />
Width<br />
: Vacuum assisted independent<br />
hydraulic brakes on front and<br />
rear through tandem master<br />
cylinder & tandem booster.<br />
Bypass valve provided on rear<br />
brake circuit.<br />
: 281 mm dia ventilated<br />
disc brake<br />
: 282 mm dia drum brake<br />
with auto adjuster,<br />
: ABS 5.3 M/s BOSCH 3 channel<br />
: Lever type, Console mounted,<br />
Cable operated mechanical<br />
linkages acting on rear wheels.<br />
: Ladder type cranked frame<br />
with boxed section long<br />
members and welded cross<br />
members<br />
: 110 mm (max.)<br />
: 60mm<br />
10.0 SUSPENSION :<br />
Front<br />
: Double wishbone type<br />
with Torsion bar springs.<br />
Rear<br />
: Coil spring type 5 link<br />
suspension<br />
Shock Absorber : Hydraulic double acting<br />
telescopic type at front<br />
and rear.<br />
Antiroll bar<br />
: At both front & rear.<br />
11.0 WHEELS & TYRES :<br />
: 235/70 R 16 Radial with tube<br />
Wheels rims<br />
: 6.5 J x 16 Steel rims<br />
No. of wheels : Front 2, Rear 2, Spare -1<br />
12.0 FUEL TANK :<br />
Capacity<br />
: 60 Litres<br />
13.0 BODY :<br />
: Normal control all steel<br />
shell with five doors.<br />
ELECTRICAL,PERFORMANCE , DIMENSIONS, WEIGHTS AND PASSENGER<br />
14.0 ELECTRICAL SYSTEM :<br />
System Voltage : 12 Volts (-ve earth)<br />
Alternator Capacity : 135 Amps<br />
Battery<br />
: 12 V, MF 70 Z<br />
: 75 Ah, 20 Hr Rate<br />
15.0 PERFORMANCE :<br />
Max. speed at rated GVW : 145/140 kmph<br />
Max. speed with two : 146/141 kmph<br />
occupants (150 kg)<br />
Max. geared speed : 172/193 kmph<br />
Max. gradeability : 60% (4x4 mode)<br />
at rated GVW<br />
40% (4x2 mode)<br />
16.0 MAIN CHASSIS DIMENSIONS (in mm) :<br />
AS PER ISO : 612 IN MM (Nominal)<br />
Wheel base : 2650<br />
Track front : 1500<br />
Track rear : 1470<br />
Front Overhang : 945<br />
Rear Overhang : 1055 over rear bumper<br />
Overall length<br />
: 4650 over rear bumper<br />
Max. width : 1918<br />
overall height<br />
: 1925 (unladen)<br />
Min. turning circle dia : 12 m<br />
Min. clearance circle dia : 13 m<br />
Ground clearance : 195 mm (laden)<br />
19.0 WEIGHTS (KG) : 4X4 4X2<br />
Complete vehicle<br />
kerb weight 2055 1935<br />
as per ISO : 1176<br />
(with spare wheel and tools)<br />
Gross Vehicle Wt. 2670 2550<br />
Max. Permissible FAW 1180 1100<br />
Max. Permissible RAW 1580 1540<br />
Kerb Weight Front 1088 1008<br />
Rear 967 927<br />
17.0 PASSENGER :<br />
: 7 Seater (6 + Driver)<br />
Front seat : Driver + 1<br />
Middle seat : 3<br />
rear seat : 1+1 (Jump seats)<br />
M A I N T E N A N C E<br />
Your <strong>TATA</strong> <strong>SAFARI</strong> is designed to give you long trouble free service for<br />
thousands of kilometres/miles. However with proper maintenance<br />
care you can get optimum performance from your vehicle. We have<br />
indicated some of the important maintenance operations to be<br />
carried out on the vehicle. Please read the procedure carefully and<br />
get it attended at Authorised Workshop.<br />
• Engine Compartment<br />
• Air filter<br />
• Cooling system<br />
• Engine oil & oil filter<br />
• Changing gear box oil<br />
• Clutch & brake fluid<br />
• Power steering<br />
• LCRV (if fitted)<br />
Changing transfer case oil<br />
Changing front axle & rear axle oil<br />
Head lamp & head lamp focus adjustment<br />
• Battery<br />
• Starting the engine with jump leads<br />
• Wheels & tyres<br />
• Fuses & Relays<br />
• Fuel filter replacement<br />
• Spark plug<br />
• Catalytic Converter<br />
• Carbon Canister<br />
• Electronic controlled fuel injection system<br />
• Belts tension<br />
• Vehicle care<br />
ENGINE COMPARTMENT (BS-III)<br />
ENGINE COMPARTMENT - BS-III<br />
1 2 3 4 5<br />
1. Auxillary Tank - Coolant 2. Windshield Washer container 3. Brake Fluid container<br />
4. Clutch fluid container 5. Engine Oil filler cap 6. Fuses & Relays Box<br />
7. Air filter10. Air Filter 8. Modulator 9. Power Steering Fluid container<br />
10. Radiator Cap 11. Battery<br />
AIR FILTER<br />
Air Filter<br />
The air filter element should be periodically cleaned. Replace the air filter<br />
element with a new one when the service indicator shows red band<br />
even after cleaning.<br />
Always use genuine air filter element.<br />
Air filter for Safari with 486 petrol engine is located at LH side of engine<br />
compartment.<br />
Replacement of Air Filter Element<br />
a) Disconnect air filter from hose. Declamp and remove the air filter.<br />
b) Remove the cover of the air filter.<br />
c) Remove the air filter element.<br />
d) Clean it gently by tapping. Clean air filter cover and air ducting.<br />
e) Check element for puncture or pin holes by light source.<br />
f) If found OK install paper filter element. Fit the cover and tighten air<br />
filter screws at the place and fit the clamps back.<br />
Reset the indicator by pressing the rubber cap, red band will disappear<br />
from Service Indicator.<br />
On starting the engine, if red band continues to appear, replace the<br />
paper filter element.<br />
Do not operate the vehicle without air filter as this will lead to increased<br />
engine wear or permanent damage.<br />
COOLING SYSTEM<br />
Engine Cooling System<br />
If engine overheating occurs, there could be a fault in the cooling system<br />
which may be on account of :<br />
1. Less coolant in the cooling system or dirt/scale having accumulated<br />
inside cooling water passages especially in the radiator core.<br />
2. Choking of radiator passages due to foreign material or damages.<br />
3. Defective thermostat.<br />
4. Defective coolant temperature sensor.<br />
5. Non operation of electrically operated fans (Controlled by ECU).<br />
6. Coolant leakage.<br />
7. Radiator cap not sealing properly.<br />
8. A.C. condenser fan not working<br />
9. Excessive refrigerant charging in the A.C. system.<br />
Prevention of Rust Formation<br />
To prevent rust formation in the radiator use premixed recommended<br />
anti-freeze coolant.<br />
This is sufficient to operate the vehicle upto -40 o C.<br />
In case the engine water outlet temperature exceeds 115 0 C, the AC<br />
system will be suppressed temporarily by engine management<br />
system, till the engine outlet water temperature drops below 110 0 C.<br />
Please check the cause as indicated above.<br />
104<br />
1. Engine Coolant Container<br />
Radiator Cap
Replacing Engine Coolant<br />
The cooling system should be completely drained and refilled with<br />
new coolant at every 50,000 km. or 2 years whichever is earlier.<br />
1. Ensure engine and radiator are cool enough to touch.<br />
2. Remove the radiator cap.<br />
3. Loosen drain plug on the bottom of radiator. Remove cylinder block<br />
drain plug from engine block.<br />
4. Remove the auxiliary tank from its holder and drain the coolant.<br />
5. Flush radiator and block with clean water and close the drain plugs.<br />
6. Pour the premixed coolant into radiator until it is full.<br />
7. Fill the auxiliary tank upto high mark.<br />
8. Ensure no leakage in the system.<br />
Engine is equipped with twin electric fan.<br />
Radiator electric fan may start automatically depending on coolant<br />
temperature keep your hands/body away from the radiator fan.<br />
ENGINE OIL & OIL FILTER<br />
Changing of Engine Oil and Oil Filter<br />
Change the oil and oil filter at specified intervals. (Engine oil and oil<br />
filter may be changed earlier for sandy/dusty operating conditions)<br />
Changing of oil and oil filter requires access from underneath the<br />
Vehicle should be raised on a hydraulic lift of a service station or should<br />
be on a service pit.<br />
1. Run the engine until it reaches normal operating temperature. Then<br />
shut it off.<br />
2. Open the bonnet and remove engine oil filler cap. Remove the<br />
drain plug of the oil sump from the bottom of the engine. Drain the<br />
oil into an appropriate container.<br />
3. Remove the oil filter with the help of special wrench. The removed<br />
oil filter should not be reused and hence should be destroyed to<br />
avoid recycling of the same. Used filter and oil should be disposed<br />
in compliance with the current legislation.<br />
4. Smear a little fresh engine oil on rubber gasket of new engine oil<br />
filter. Hand tighten the engine oil filter fully and further half turn<br />
with special tool.<br />
Do not over tighten engine oil filter as this may damage oil filter and<br />
oil may leak out.<br />
5. Before filling in fresh oil in the engine, clean the drain plug and<br />
apply sealant on threads.<br />
Oil Sump Drain Plug<br />
Oil filter<br />
FUEL FILTER & FUEL SYSTEM<br />
6. Refit the drain plug using a new sealing washer. Tighten<br />
drain plug to 5 mkg. torque.<br />
7. Fill, recommended quantity of fresh engine oil in the crank<br />
case and secure the oil filler cap in its place.<br />
8. Start the engine and run for a few minutes. The engine oil<br />
pressure indicator lamp should go ‘off’ after starting the<br />
9. Check for engine oil leakages.<br />
10. Stop the engine and recheck engine oil level after a few<br />
minutes. If necessary add oil to bring the level to the upper<br />
mark on the dipstick.<br />
Use of reclaimed oil is not recommended<br />
GEAR BOX OIL<br />
Gear Box Oil<br />
Checking of Oil Level<br />
1. Clean the oil level plug and surrounding area.<br />
2. Remove the oil level plug and check whether oil is dripping out.<br />
Oil level must not be below the filler plug. Add oil to bring it to<br />
the level.<br />
3. Tighten oil level plug to 2-3 mkg. torque.<br />
Changing Oil in Gear Box<br />
1. Let the engine idle for about 5 min. in neutral, so that the gear box<br />
oil is warmed up.<br />
2. Clean the oil level plug, drain plug and surrounding area.<br />
3. Place a container under gear box to collect the oil.<br />
4. Remove the drain plug and let the oil drain out.<br />
5. Also remove the oil level plug.<br />
6. Tighten the oil drain plug and fill new recommended oil through oil<br />
level plug and tighten the oil drain plug oil level plug to 2-3 mkg.<br />
torque.<br />
1. Gear Box Oil Filler Plug / Level Plug<br />
2. Gear Box Drain Plug<br />
TRANSFER CASE OIL<br />
Checking Oil Level of Transfer Case<br />
Before checking or removing the oil, warming up of the transfer<br />
case is necessary. This should be done by driving the vehicle for<br />
some time in 4x4 mode.<br />
Checking of Oil levels<br />
3. If oil is not dripping out, oil level must be below the required<br />
level. Add oil to bring it to the level when it starts dripping out.<br />
4. Tighten oil level plug. Tightening torque of oil level plug is 2 to<br />
3 mkg.<br />
Changing of Transfer Case Oil<br />
1. Clean the oil level plug, drain plug and surrounding area.<br />
2. Place a container to collect oil, under transfer case.<br />
3. Remove the drain plug and let the oil drain out.<br />
4. Remove the oil level plug.<br />
5. Tighten oil drain plug and fill new recommended oil through oil<br />
level plug, till it begins to drip out.<br />
6. Tighten oil level plug. Tightening torque of oil drain plug is 2 to 3 mkg.<br />
1. Transfer case Oil Filler Plug / Level Plug<br />
2. Transfer case Oil Drain Plug<br />
FRONT AXLE AND REAR AXLE OIL<br />
Checking Oil Level in Front/Rear Axle<br />
Oil level must be below the required level. Add oil to bring it to<br />
the level, when it starts dripping out.<br />
3. Tighten oil level plug to 2 to 3 mkg. torque.<br />
Changing Oil in Front Axle/Rear Axle<br />
2. Place a container under Front/Rear axle to collect the oil.<br />
4. Also remove the oil level plug.<br />
5. Tighten the oil drain plug and fill new recommended oil through<br />
oil level plug till it begin to drip.<br />
6. Tighten oil drain and oil level plugs to 2 to 3 mkg. torque.<br />
1. Front Axle Oil Filler Plug / Level Plug<br />
2. Front Axle Oil Drain Plug<br />
HEAD LAMPS & HEAD LAMP FOCUS ADJUSTMENT<br />
Head Lamps<br />
The Head Lamp provides two types of light beams - a high beam to<br />
give max. light well ahead of vehicle and a low beam which is shorter<br />
and lower so that it should not dazzle the oncoming drivers and can<br />
be used in low visibility area.<br />
Head lamp also has parking lamp and a separate pencil beam for high<br />
visibility which comes on with high beam.<br />
The head lamps must be properly aligned in order to obtain max.,<br />
proper road illumination and reduced glare for oncoming traffic. It is<br />
recommended to check alignment of head lamp beams periodically.<br />
Adjusting Head Lamp Focus with the Help of Screen (RHD)<br />
Head Lamp<br />
The vehicle should be parked ten meters away from the screen on flat<br />
ground with its centre in-line with central vertical line on screen and<br />
screen at right angles to longitudinal axis of the vehicle. The vehicle<br />
should be in unloaded condition with no sag in suspension springs<br />
and all tyres inflated as per recommended tyre pressures.<br />
On the marked up screen as shown in figure, area above horizontal<br />
and inclined lines (shaded) is called ‘Dark Zone’ and the area below is<br />
called as the Illuminated Zone.<br />
Each head lamp is aligned individually by masking the other head lamp.<br />
Head lamp is first adjusted for proper height of low beam by inserting<br />
HEAD LAMP FOCUS ADJUSTMENT<br />
screw driver in the slot available in the levelling motor as shown in fig.<br />
Light from low beam should fall below horizontal and inclined lines. No<br />
light should fall i.e. in Dark Zone. Thereafter lateral adjustment is done<br />
by adjusting screw at the bottom refer fig. so that contour of low beam<br />
coincides with contour formed by horizontal and inclined lines below<br />
“Dark Zone”.<br />
When properly adjusted, most brightly illuminated area will be just below<br />
the inter section point ‘A’ of these two lines.<br />
Now switch ‘ON’ high beam. They will be symmetrical above points ‘A’ &<br />
‘B’ of intersection of vertical lines and horizontal lines.<br />
It is possible that high beam may not be exactly symmetrical but for this<br />
reason head lamp should not be realigned. Preferably alignment should<br />
be done in dark.<br />
Headlamp focusing (where headlamp leveling switch is fitted) should<br />
be carried out in the level ‘0’ position of the switch only.<br />
600 600<br />
1800 1800<br />
15 0 A<br />
100<br />
Y= -578 Y= 0 Y= 578<br />
851 (UNLADEN)<br />
Adjusting Head Lamp Focus with the Help of Screen<br />
HEAD LAMPS<br />
Head Lamp Bulb Replacement<br />
Raise the bonnet of the vehicle. Unscrew & pull out the rear<br />
protective cover. Pull out the cable socket from the bulb. Remove<br />
locking lever holding the bulb and remove the bulb.<br />
Install new bulb, properly locating it in the housing. Fit back the locking<br />
lever cable socket and rubber cap.<br />
Repeat the same procedure for pencil beam lamp.<br />
Realign Head Lamp after Replacing Bulb<br />
Do not clean or touch the reflector as it will damage the mirror finish<br />
of the surface.<br />
Your vehicle has halogen head lamp bulb and pencil beam bulb one<br />
each on each side. When replacing, handle it by steel base. Protect<br />
the glass from contact with your skin or hard object. If you touch glass,<br />
clean it with denatured alcohol and clean cloth.<br />
Levelling<br />
motor<br />
adjustment<br />
Halogen head lamp bulbs get very hot when lit. Oil, perspiration or a<br />
scratch on the glass can cause the bulb to overheat and shatter.<br />
Ajusting Screw<br />
CLUTCH, BRAKE, POWER STEERING<br />
Clutch Fluid<br />
The <strong>Tata</strong> Safari vehicle is equipped with a diaphragm type clutch Which is<br />
hydraulically actuated.<br />
The level of clutch fluid in clutch fluid container should be in between<br />
Min. and Max. marks. If it is below min. mark, then add clutch fluid.<br />
In case of spongy or hard clutch pedal, please contact the nearest<br />
Authorised Workshop and get the defect rectified.<br />
Brake Fluid<br />
Check the level of Brake fluid in Brake fluid container.<br />
It should be in between Min. and Mix. marks.<br />
If it is below min. mark, then add brake fluid.<br />
In case of spongy or hard pedal or low brake efficiency, please contact<br />
the nearest Authorised Workshop and get the defect rectified.<br />
Power Steering Fluid<br />
Power steering is fitted for lighter steering effect and easy<br />
manoeuverability. The system consists of steering gear box, hydraulic<br />
pump and hydraulic tank suitably connected by piping. Pump drive is<br />
though ‘V’ belt from engine. Power assistance is available during normal<br />
operating conditions. In case of failure in hydraulic system, the steering<br />
can be operated mechanically with increased steering effort for bringing<br />
the vehicle to Authorised Workshop.<br />
114<br />
1. Brake Fluid Container<br />
2. Clutch Fluid Container<br />
Power Steering Fluid Container
POWER STEERING<br />
Procedure for Oil Filling and Bleeding of Power<br />
Steering (Ensure that Power Steering fluid reservoir is totally<br />
clean before starting the work)<br />
1. Fill the reservoir nearly full. Crank the engine for 10<br />
seconds without allowing it to start (if possible). If engine<br />
does start, shut the engine immediately. Check & refill<br />
the reservoir repeat atleast three times, each time<br />
checking & refilling the reservoir.<br />
2. Check for leakage in the system and if noticed take<br />
corrective action.<br />
3. Start the engine and steer the vehicle from full left to full<br />
right turns 3-4 times.<br />
4 . Add fluid if necessary to maintain the level upto filter top.<br />
Do not force the wheel against lock position either<br />
extreme left or right. The power steering pump may get<br />
damaged. Hold it lightly.<br />
5. When the engine is at steady speed, check for bubble<br />
or foaming in the oil. If present it indicates that air is<br />
getting sucked into the systems. Check the suction<br />
line/fittings and correct if necessary.<br />
6. Once the system is bled properly and free from foaming<br />
there should not be any appreciable change in oil level<br />
in the reservoir, when the engine is started or stopped<br />
repeatedly.<br />
7. Now the system is ready for driving.<br />
Final oil level should be at ‘H’ mark on dip stick.<br />
* Do not allow fluid level to drop significantly or run out<br />
of the reservoir during the above operation. This may<br />
induce air to the system.<br />
* Do not start the engine without oil in the power steering<br />
system. This will result in serious damage to the<br />
pump. In case of emergency disconnect the pump belt<br />
and then start the engine.<br />
* Always use recommended oil from closed containers.<br />
Any dirty oil poured in the system will result in damage<br />
to pump and gear box.<br />
LOAD CONSCIOUS PRESSURE REDUCING VALVE (IF FITTED)<br />
Load Conscious Pressure Reducing Valve (If fitted)<br />
( Not applicable in ABS system)<br />
A load conscious pressure reducing valve eliminates the<br />
possibility of rear wheels from locking and achieves optimum<br />
braking in any load condition of the vehicle.<br />
The valve, is fitted on RH long member connecting it to rear<br />
axle through its link and control spring.<br />
If any, alteration is done in rear suspension, the performance<br />
of this valve will be impaired.<br />
Load Conscious Pressure<br />
Reducing Valve<br />
Coil Spring<br />
Remote By-pass Valve (If fitted)<br />
The by-pass valve is provided in the rear brake circuit between<br />
tandem master cylinder and LCRV. The by-pass valve bypasses<br />
the LCRV (Load Conscious Pressure Reducing Valve) in rear<br />
only braking (i.e. front brake failed) condition. The feedback of<br />
front line pressure is provided to the by-pass valve. in case of<br />
front brake failure, the low front line presure being sensed by<br />
the by-pass valve and the 100% brake line pressure from tandem<br />
master cylinder is applied on to the rear brakes without<br />
reduction in pressure.<br />
BATTERY<br />
Battery is placed in Engine compartment.<br />
Check the battery for proper electrolyte level and corrosion on<br />
terminals.<br />
* The battery gives off explosive gases during normal operation.<br />
A spark or open flame can cause the battery to explode causing<br />
very serious injuries.<br />
* Keep all sparks & open flames and smoking materials away from<br />
the battery.<br />
* Getting electrolyte in your eyes or skin can cause severe burns.<br />
Wear protective clothing and a face shield or let a skilled<br />
technician do the battery maintenance.<br />
* Battery contains sulphuric acid (electrolyte) which is poisonous<br />
and highly corrosive in nature.<br />
1. Check the battery for electrolyte level with marked lines on the<br />
battery outer case.<br />
2. Check Battery terminals for corrosion (a white or yellowish<br />
powder). To remove it, cover the terminals with solution of baking<br />
soda. It will bubble up and turn brown.<br />
When this stops, wash it off with plain water. Dry off the battery with<br />
a cloth or paper towel. Coat the terminal with Petroleum Jelly to<br />
prevent future corrosion.<br />
BATTERY, STARTING THE ENGINE WITH JUMP LEADS<br />
The use of a wrench to loosen and remove cables from the<br />
terminals should be made. Always disconnect the negative<br />
(-ve) cable first and reconnect it last. Clean the battery<br />
terminals with a terminal cleaning tool or wire brush.<br />
Reconnect and tighten the cables, coat the terminals with<br />
petroleum jelly. If you need to connect the battery to a<br />
charger, disconnect both cables to prevent damage to the<br />
vehicle’s electrical system.<br />
Charging the battery with the cables connected can<br />
seriously damage your vehicle’s electronic controls.<br />
Detach the battery cables before connecting battery to<br />
a charger.<br />
* Swallowing electrolyte can cause fatal poisoning if<br />
immediate action is not taken.<br />
Starting the Engine with Jump Leads<br />
Your Safari with a discharged battery may be started by<br />
transferring electrical power from a battery in another vehicle.<br />
This may be dangerous as any deviation from the following<br />
instructions could lead to personal injury or damage<br />
resulting from battery explosion, as well as the damage to<br />
the electrical systems in both vehicles.<br />
• Never expose the battery to open flames or sparks.<br />
• Do not allow battery electrolyte to come in contact with<br />
eyes, skins, fabrics or painted surfaces. The fluid<br />
contains sulphuric acid which can cause injuries and<br />
damage in the event of direct contact.<br />
• To lessen the risk of injury wear eye protection when<br />
working near any battery.<br />
• Make sure that battery providing the jump start has the<br />
same voltage as the battery in your vehicle (12 V). Its<br />
capacity must not be substantially lower than that of the<br />
discharged battery. The voltage and capacity are given<br />
on the batteries.<br />
• Do not disconnect the discharged battery from the vehicle.<br />
• Switch off all unnecessary electrical loads.<br />
• Do not lean over the battery during jump starting.<br />
• Do not allow the terminals of one lead to touch those of<br />
the other lead.<br />
• Apply hand brake. Place gear shift lever to neutral.<br />
Connect Leads in the Order as shown on next page<br />
• Do not connect lead to negative terminal of discharged<br />
battery.<br />
The connection point should be as far away from the<br />
discharged battery as possible.<br />
• Route the leads so that they cannot catch on rotating parts in the<br />
engine compartment.<br />
The engine of the vehicle providing the jump start can be allowed<br />
to run during starting.<br />
STARTING THE ENGINE WITH JUMP LEADS, WHEELS & TYRES<br />
Attempts to start the engine of the vehicle with the discharged battery<br />
should be made at intervals of one minute and should not last longer<br />
than 15 seconds. After starting, allow both engines to idle for<br />
approximately 3 minutes with the leads still connected.<br />
Always use only recommended size of wheel rims and tyres. Use of rims<br />
and tyres not recommended by us may have adverse effect on vehicle<br />
safety and further more could infringe on vehicle regulations.<br />
If you have flat tyres<br />
1) Reduce vehicle speed gradually keeping it is a straight line. Move<br />
cautiously off the road to safe place away from traffic. Park the<br />
vehicle on a level and firm ground. Apply parking brake & engage<br />
1st gear.<br />
2) Turn on Hazard warning switch. Keep advance-warning triangle at<br />
least 50 meters behind the vehicle as an indication of breakdown.<br />
3) Take out ‘Tool kit & Jack‘ from vehicle which is kept below rear<br />
passenger seat (RH side).<br />
JUMP START BATTERY<br />
OF ANOTHER CAR<br />
DISCHARGED BATTERY<br />
WHEELS & TYRES<br />
4) Pull lever ‘1’ to release back rest of passenger seat (RH side) and<br />
fold the back rest. Similarly pull lever ‘2’ and fold the seat towards<br />
driver side.<br />
5) Jack is located in luggage compartment below rear passenger seat<br />
(centre) as shown in fig. Remove carpet and wooden plank. Jack is<br />
kept inside cavity. Rotate jack lever and take out jack.<br />
6) Take out Spare wheel cover. Pull the cover from top side and then<br />
side way to remove from spare wheel.<br />
7) Remove the spare wheel-mounting nut by wheel spanner (provided<br />
in tool kit). Remove the spare wheel cover mounting bracket and<br />
then spare wheel.<br />
8) Block the wheel, which is diagonally opposite to the flat tyre.<br />
9) Take out wheel cover and loosen the wheel nut of flat tyre (Do not<br />
remove the nut at this stage).<br />
10) Set the jack properly at correct jack point as shown in fig. and<br />
slowly lift the vehicle with the help of jack handle.<br />
a) Do not lift the vehicle with someone inside.<br />
b) Raise the vehicle only high enough to remove and change tyre.<br />
c) Do not work under the vehicle when supported by jack otherwise<br />
personnel injury may occur.<br />
d) Do not start or run the vehicle while supported by jack.<br />
120<br />
Middle seat folding lever (Backrest)<br />
Middle seat folding lever
11) Remove wheel-mounting nuts and take out flat tyre.<br />
12) Roll the spare wheel into position and align the holes in the wheel<br />
with studs. Then reinstall the wheel nuts (taper end inward) and<br />
tighten them as much as you can by hand.<br />
13) Lower the jack completely then tighten the wheel nuts one by<br />
one. Put the wheel cover back.<br />
14) Restore all the tools and jack at their respective location.<br />
REAR JACKING POINT<br />
(Below Rear Axle Tube)<br />
15) Place the flat tyre at spare wheel location, put spare wheel cover<br />
mounting bracket and tighten the mounting nuts properly. For<br />
assembling spare wheel cover, push the cover on the tyre and then<br />
press at centre of cover to lock cover on to the bracket. Ensure that<br />
the cover is locked on to the spare wheel cover mounting bracket<br />
(the sound is heard during assembly).<br />
Check tyre pressure and nut tightness of change wheel at nearest<br />
Service station. Also, get the puncture tyre repaired.<br />
FRONT JACKING POINT<br />
(Below Long Member)<br />
WHEELS AND TYRES<br />
Wheel Alignment<br />
Correct wheel alignment helps to decrease tyre wear. You<br />
should get your vehicle’s wheel alignment checked regularly.<br />
In case uneven tyre wear is observed, vehicle’s wheel alignment<br />
should be checked as soon as possible.<br />
Wheel Balancing<br />
Wheels are balanced at the factory. They may need to be<br />
rebalanced at some time before they are worn out. The wheels<br />
should be checked for balance if tyre or tube is repaired.<br />
Whenever a tyre or wheel rim is changed tyre needs to be<br />
balanced.<br />
1. Permissible imbalance for tyre with rim = 250 gm-cm (max.)<br />
2. Total balance weight should be within 140 gms on each<br />
side.<br />
3. Relocate the tyre if the weight required to balance is more<br />
than 140 gm.<br />
4. Do not use more than one balance weight on one side.<br />
Tyre<br />
Check for the inflation and condition of your <strong>TATA</strong> <strong>SAFARI</strong> tyres<br />
periodically.<br />
Inflation<br />
Check the pressure in the tyres when they are cold.<br />
Refer to tyre information label fitted on fuel flap inside for<br />
correct cold tyre pressure.<br />
You should have your own tyre pressure gauge and use it<br />
all times. This makes easier for you to tell if pressure loss<br />
is caused by a tyre problem and not by variation between<br />
gauges.<br />
Keeping the tyres properly inflated gives you the best<br />
combination of riding comfort. handling and tyre life.<br />
Over inflation of tyres makes the vehicle ride bumpy and<br />
harsh. Tyres are more prone to uneven wear and damage<br />
from road hazards.<br />
Under inflated tyres reduce your comfort in vehicle handling<br />
and are prone to failures due to high temperature. They<br />
also cause uneven wear.<br />
FRONT RIGHT<br />
REAR RIGHT<br />
FRONT<br />
SPARE<br />
WHEEL<br />
FRONT LEFT<br />
REAR LEFT<br />
Spare Wheel<br />
Inspection<br />
Every time you check inflation pressure, you should also examine<br />
tyres for damage, foreign objects and wear.<br />
You should look for :<br />
• Bumps or bulges in the tread or the side of the tyre. Replace<br />
the tyre if you find either of these conditions.<br />
• Cuts, splits or cracks in the side of the tyre. Replace the tyre<br />
if you see the fabric or cord.<br />
• Excessive tread wear.<br />
Tyre Rotation<br />
To help increase tyre life and distribute wear more evenly you<br />
should have tyres rotated at specified intervals or earlier<br />
depending on the operation of vehicle.<br />
The illustrations shows how to rotate tyres when normal spare<br />
wheel is included in tyre rotation.<br />
Spare wheel is located at rear on the tail gate of the vehicle.<br />
Recommended tyre pressure with cold tyres.<br />
Laden<br />
Unladen<br />
Front - 32 PSI (2.2 bar) 30 PSI (2.1 bar)<br />
Rear - 35 PSI (2.4 bar) 35 PSI (2.4 bar)<br />
Repairing a Tyre<br />
• Mark suitability the tyre position (if original colour dot mark is<br />
not visible) with reference to valve stem hole to ensure that the<br />
tyre is refitted in original location.<br />
Ensure that balancing weights are not disturbed during removal<br />
of tyres.<br />
• Check the balance weight prior to removal of tyre if found loose,<br />
mark its location on rim & refit properly. Balance the wheel after<br />
every dismantling and assembly of tyre on wheel rim.<br />
• Tightening torque of wheel nut is 12-15 mkg.<br />
While fitting wheels on vehicle ensure that wheel bolts are free<br />
from dust, scratches, dirt, dents, etc.<br />
TYRES<br />
• Do not apply any oil on the wheel nut or bolt. Wipe off if present.<br />
VEHICLE CARE<br />
VEHICLE CARE :<br />
The car is subjected to many external influences such as climate,<br />
road conditions, industrial pollution and proximity to the sea.<br />
These conditions demand regular care of the car body. Dirt,<br />
insects, bird droppings, oil, grease, fuel and stone chippings should<br />
be removed as soon as possible.<br />
Washing :<br />
Do not wash the car in direct sunlight, wash in shade. Spray the<br />
car thoroughly with a cold water jet (car on a washing pit or<br />
hoist). Mix car shampoo in the wash water. No solvent (fuel,<br />
thinners) need be used.<br />
Avoid wiping of painted surface in dry condition as it may<br />
leave scratches on the painted surface.<br />
Use a soft bristle brush, sponge or soft cloth and rinse it<br />
frequently while washing. When you have washed the whole<br />
exterior, dry it with a chamois or soft cloth. After drying the car,<br />
inspect it for chips and scratches that could allow corrosion to<br />
start. Apply touch up paint where necessary.<br />
For vehicles with Rear View Camera : Use cover for camera<br />
during washing.<br />
Polishes :<br />
Polishes and cleaners can restore shine to the painted surface<br />
that has oxidised and become dull. They normally contain mild<br />
abrasives and solvents that remove the top layer of the finish<br />
coat. Polish your car if the finish does not regain its original shine<br />
after using wax.<br />
Cleaning of Carpets :<br />
Vacuum clean the carpet regularly to remove dirt. Dirt will make<br />
the carpet wear out faster. Periodically shampoo the carpet to<br />
keep it looking new.<br />
Use carpet cleaners (preferably foam type). Follow the<br />
instructions that come with the cleaner, applying it with a<br />
sponge or soft brush. Keep the carpeting as dry as possible<br />
by not adding water to the foam.<br />
Cleaning of Windows, Front & Rear Glasses :<br />
Clean the windows inside and outside with commercially<br />
available glass cleaners.<br />
This will remove the haze that builds up on the inside of<br />
windows. Use a soft cloth or paper towels to clean all glass and<br />
plastic surfaces.<br />
Maintaining the car when not in extended use :<br />
Park the car in covered, dry and if possible well-ventilated<br />
premises.<br />
Engage a gear.<br />
Remove the cables from the battery terminals (first remove<br />
the cable from the negative terminal).<br />
Make sure the handbrake is not engaged.<br />
Clean and protect the painted parts using protective wax.<br />
Clean and protect the shiny metal parts using commercially<br />
available special compounds.<br />
Sprinkle talcum powder on the rubber windscreen wiper and<br />
rear window wiper blades and lift them off the glass.<br />
Slightly open the windows.<br />
Cover the car with a cloth or perforated plastic sheet. Do<br />
not use sheets of imperforated plastic as they do not allow<br />
moisture on the car body to evaporate.<br />
Inflate the tyres to 0.5 bar above the normal specified<br />
pressure and check it at regular intervals.<br />
Check the battery charge every six weeks.<br />
Do not drain the engine cooling system.<br />
Wiper <strong>Care</strong> :<br />
FOR CHATTERING & NOISY PROBLEMS<br />
OK<br />
Windshield<br />
Glass<br />
NOT OK<br />
VIEW WITHOUT WIPER BLADE<br />
Wiper blade attack angle on windshield glass should be 90 0<br />
i.e. perpendicular.<br />
Remove wiper blade and root wiper arm on windshield glass<br />
in the centre position. Check the gap between arm strip<br />
and glass.<br />
Adjust by twisting wiper arm as shown in the figure.<br />
FOLLOWING GUIDELINES WILL HELP YOU TO BETTER<br />
PROTECT YOUR VEHICLE FROM CORROSION<br />
PROPER CLEANING :<br />
In order to protect your vehicle from corrosion it is recommended<br />
that you wash your vehicle thoroughly and frequently in case :<br />
1. There is an heavy accumulation of dirt and mud especially on<br />
the underbody.<br />
2. It is driven in areas having high atmosphere pollution due to<br />
smoke, soot, dust, iron dust & other chemical pollutants.<br />
3. It is driven in coastal areas.<br />
4. The underbody must be thoroughly pressure washed after<br />
every three months.<br />
In addition to regularly washing your vehicle, the following<br />
precautions need to be taken.<br />
PERIODIC INSPECTION :<br />
1 . Regularly inspect your vehicle for any damage in the paint<br />
film such as deep scratches and immediately get them<br />
repaired from an authorised service center, as these defects<br />
tend to accelerate corrosion.<br />
2 . Inspect mud liners for damages.<br />
3 . Keep all drain holes clear from clogging.<br />
PROPER PARKING :<br />
Always park your vehicle in shade to protect it from harsh sunlight<br />
or in a well-ventilated garage so that there is no dampness on<br />
any part of the vehicle.<br />
WASHING YOUR VEHICLE :<br />
Follow these tips while washing your vehicle.<br />
HAND WASH :<br />
1 . Always wash your vehicle in shade and when the surface<br />
is at room temperature.<br />
2. Wash with mild car wash soap like "Car Shampoo" and use<br />
a soft 100% cotton cloth to avoid scratches. Please take help<br />
of your dealer to buy the right products.<br />
3. Please be sure that you remove your wristwatch and wear<br />
soft gloves to avoid scratches due to finger rings or nails.<br />
4. To remove stubborn stains and contaminants like tar, use<br />
turpentine or cleaners like "Stain Remover" which is safe<br />
for painted surfaces. Again your dealer can help you in<br />
selecting the right product.<br />
5. Avoid substances like petrol, diesel, kerosene, benzene or<br />
other solvents that cause damage to paint.<br />
6. Dry your vehicle thoroughly to prevent any damp spots.<br />
7. Rinse all surfaces thoroughly to prevent any traces of soap<br />
and other cleaners as this may lead to the formation of<br />
stains on the painted surface later.<br />
WAXING :<br />
Waxing and polishing is recommended to maintain the gloss<br />
and wet-look appearance of your paint finish.<br />
1. Use a good quality polish and wax for your vehicle.<br />
2. Re-wax your vehicle when the water does not slip off the<br />
surface and collects over the surface in patches.<br />
Further tips for the care of your new vehicle finish :<br />
If your vehicle is washed in an automatic car wash, please<br />
remember that the paint can be scratched by type of brushes,<br />
unfiltered washing water or the washing process itself.<br />
Scratching reduces paint durability and gloss, especially on<br />
darker colours. It is suggested to wash the vehicle by hand with<br />
cool and clean water using a soft cloth or sponge. Please do not<br />
use soap but a car shampoo recommended by your dealer.<br />
Please take the following precautions :<br />
1. Always wash your vehicle in shade, avoiding direct exposure<br />
to sunlight during washing.<br />
2. Dry wiping your vehicle may lead to the formation of<br />
scratches and hence always use a soft cloth and clean water<br />
while wiping your vehicle.<br />
3. Always keep your vehicle parked in a well ventilated shade.<br />
Exposure to heat with entrapped moisture promotes corrosion.<br />
128<br />
4. Avoid driving on gravel roads, as the possibility of paint<br />
chip off due to the impact of stones is high. If you are<br />
driving on freshly tarred road, check immediately<br />
afterwards for any stains & clean them.<br />
5. External contamination in the form of sap or industrial<br />
fall-out may mar or develop spots on a new finish. Hence<br />
avoid parking your vehicle near trees, which are known<br />
to drop sap, or near factories, which give out heavy smoke.<br />
6. The acid content in bird droppings may damage the newly<br />
painted finish and hence any bird dropping must be<br />
immediately washed off.<br />
7. The paint finish is susceptible to damage in case petrol,<br />
brake fluid, liquid from car battery, oil, antifreeze,<br />
transmission fluid or windshield solvent spills onto the<br />
painted surface. In case of such a spillage immediately<br />
rinse the affected area with water. Avoid wiping the area<br />
far as possible, however if wiping is required, ensure that<br />
you wipe the area gently with soft cotton cloth.<br />
8. Avoid using sharp objects to scrap off tar or mud from a<br />
painted surface as it may develop scratches or may peel<br />
off the paint.
FUSES<br />
Fuses<br />
All the electrical circuits in your vehicle have fuses to protect them<br />
from a short circuit or overload. These fuses are located in 2 fuse boxes.<br />
The interior fuse box is below the dash board on driver’s side. Remove<br />
the fuse box lid by grabbing and pulling down the slot.<br />
The under bonnet fuse box is located in engine compartment on LHS.<br />
Checking and Replacing Fuses<br />
If any electrical unit in your vehicle has stopped functioning, the fuses<br />
should be checked first.<br />
1. Turn the ignition key to lock position.<br />
2. Remove the cover of the fuse box.<br />
3. Check each fuse and look for burnt wire inside the fuse. If it is burnt,<br />
replace it with one of the spare fuses of same rating or lower.<br />
4. If the replacement fuse of same rating burns out in short time, there<br />
is probably a serious electrical problem. Get the vehicle attended at<br />
nearest Authorised Workshop.<br />
Fuse Box - Cabin<br />
Ensure that the replaced fuses have the same rating as indicated on<br />
the sticker.<br />
Fuse Box - Engine Compartment<br />
FUSES & RELAYS<br />
Relays and Transfer Case ECU<br />
Relays are fitted to protect the voltage drawing units from low voltage.<br />
Relays are fitted in 4 locations :<br />
1. In the fuse box situated inside bonnet.<br />
2. Under driver’s seat.<br />
3. Under co-drivers seat.<br />
4. Behind glove box.<br />
ECU for transfer case is fitted under RH seat.<br />
Diagnostic Connector & Relays<br />
Under Co-driver’s Seat<br />
AIR CONDITIONING<br />
Air Conditioning<br />
The Air Conditioning is a sealed system. Any major maintenance<br />
should be done by Authorised Workshop.<br />
There are couple of things which can be done by you to ensure proper<br />
working of Air conditioning / Heating.<br />
Periodically check the engine’s radiator and air conditioning<br />
condensers for leaves, insects and dirt stuck in front surface.<br />
These block the air flow and reduce the cooling efficiency. Use a light<br />
water spray from a hose or a soft brush to remove them.<br />
Use only low pressure spray or soft bristle brush to clean condenser<br />
and radiator fins.<br />
Run the air conditioning at least once a week during winter season.<br />
Run it at least for ten minutes with vehicle at steady speed and engine<br />
at normal operating condition. This circulates lubrication oil in the<br />
compressor.<br />
For any complaint on A.C. and Heating get it attended at Authorised<br />
The system is charged with R 134 (a) - ‘Non C.F.C.’ refrigerant. Do<br />
not top up with any other refrigerant.<br />
FUEL FILTER AND SPARK PLUG<br />
Fuel Filter Replacement<br />
Fuel filter should be replaced every 20,000 kms or at 12 months whichever<br />
is earlier or any time you suspect contaminated petrol may have<br />
clogged it. Fuel filter is located on Rear LH side of vehicle near Petrol<br />
Tank.<br />
The Fuel Filter should be replaced at Authorised Workshop as fuel system<br />
is under pressure and petrol can spray out from fuel line connections and<br />
cause hazard.<br />
Spark Plug<br />
Spark plug should be inspected at regular intervals for carbon deposits<br />
and electrode gap. If carbon accumulates on the spark plug it may lead to<br />
malfunctioning of the spark plug, clean the electrodes with a fine brush<br />
and with due care scrape the carbon off the insulator. Then clean the<br />
spark plug with compressed air.<br />
Spark Plug Replacement :<br />
1. Clean up any dirt or oil that is collected around the spark plug caps.<br />
2. Pull out the spark plug cables by holding at the connector and pulling<br />
it out.<br />
3. Remove the spark plug with the help of special deep socket.<br />
4. Check the gap. It should be 0.7 to 1.0 mm. Do not adjust the<br />
spark plug gap.<br />
132<br />
Fuel filter<br />
SPARK PLUG<br />
5. Replace the spark plug if gap is found above 1.00 mm. Use only<br />
GENUINE spark plugs.<br />
6. Fit the spark plug and tighten it to the torque of 30Nm (dry)<br />
7. Fit the spark plug cables.<br />
Repeat the procedure for other spark plugs.<br />
Do not adjust the spark plug gap.<br />
Tighten the spark plugs carefully.<br />
Overtightening can cause damage to the threads in the cylinder<br />
head. Loose spark plug can affect the combustion in engine and<br />
leads to engine damage.<br />
Do not apply grease or oil on spark plug threads.<br />
CATALYTIC CONVERTER<br />
Catalytic Convertor : (If fitted)<br />
<strong>Tata</strong> Safari has a catalytic convertor in the exhaust system. It converts the<br />
hazardous pollutants to less harmful gases.<br />
The three way catalytic convertor has coating of precious metals which<br />
enables conversion of pollutants.<br />
<strong>Care</strong> of the catalytic convertor<br />
The catalytic convertor does not require any special maintenance however,<br />
following precautions should be taken for the effective function of<br />
convertor and to avoid damage to the convertor.<br />
It is mandatory to use Unleaded Petrol, since even a single use of Leaded<br />
Petrol will permanently damage (poison) the Catalytic Convertor.<br />
It is also imperative that the vehicle should be attended at the earliest<br />
when :<br />
Engine misfires or runs irregularly, following a cold start.<br />
A significant loss of power is noticed.<br />
In the event of above symptoms, vehicle should be driven at slow speed<br />
without rapid acceleration.<br />
Catalytic Converter<br />
The following operations should be AVOIDED.<br />
Push start or tow - starting the vehicle, instead use jump leads.<br />
Long (not more that 10 sec.) repeat (not more than 3 times)<br />
cranking of the engine.<br />
Investigate the cause for difficulty in starting and rectify the same.<br />
Long idling (to warm-up). If the engine is running rough, after a<br />
cold start.<br />
Switching "off" the ignition when driving down the hill.<br />
(This will not save fuel).<br />
Fuel tank getting almost empty.<br />
Idling the engine with any of the spark plug cable<br />
disconnected, manually, during diagnostic test (Use appropriate<br />
test equipment).<br />
Pre-coating / Painting of Catalytic Converter.<br />
Parking Warning :<br />
Avoid parking the vehicle over inflammable materials, such as dry<br />
leaves, grass etc., as the exhaust system is hot enough to initiate<br />
"FIRE".<br />
CARBON CANISTER<br />
Carbon Canister :<br />
As fuel evaporates in fuel tank fuel vapours/hydro carbons are discharged<br />
in the atmosphere. The carbon canister stores such the fuel vapours/hydro<br />
carbons from fuel tank.<br />
Air drawn through carbon canister into the engine is controlled to maintain<br />
exhaust emissions within desired limits as well as to ensure good driveability.<br />
Carbon canister should be replaced at Authorised Workshop only.<br />
Replace canister with new one at specified intervals.<br />
Electronic Controlled Fuel Injection System on 486 PL Engine :<br />
Your <strong>Tata</strong> Safari is fitted with the most modern Multipoint petrol Injection<br />
System. The advantages of this system are -<br />
* Increased engine power and torque.<br />
* Lower specific fuel consumption.<br />
* Better starting, accelaration and driveability.<br />
* Better emission control.<br />
* Less maintenance(system uses distributorless ignition system)<br />
The important components of the system are electronic sensors, actuators<br />
and ECU (Electronic Control Unit). The Sensors send the Signals of important<br />
engine parameters (engine speed, air quantity, temperature, camshaft<br />
position etc.) to ECU. The ECU decides optimum air fuel ratio and appropriate<br />
injection timing by analysing the signals. The various operating conditions<br />
CARBON CANISTER & ELECTRONIC CONTROLLED FUEL INJECTION SYSTEM<br />
such as starting, idling, A.C. control, warm up, load changes etc. are<br />
incorporated in a 16 bit high speed microprocessor inside the ECU.<br />
The other most important functions of ECU is Emission control for lambda<br />
sensor, canister purge valve, and catalytic convertor are incorporated in<br />
the system.<br />
A knock sensors is provided in order to retard ignition timing during<br />
knocking, which improves the life of the engine.<br />
Fault Diagnosis<br />
EMS has built in diagnostic system. In case of malfunctioning of any<br />
component in the electronic fuel injection system, it alerts the driver by<br />
means of a Malfunction Indication Lamp (MIL)on the dash board. In spite<br />
of problem in the system, the ECU allows you to operate the vehicle<br />
almost in normal manner, so that it can be taken to the Authorised<br />
Workshop for attending the problem.<br />
Do not allow untrained person to check or rectify the fault in the<br />
injection system by using conventional methods. A special diagnostic<br />
equipment is required to be coupled to the fault dignosis socket,<br />
which will display the defect, so that the defect can be rectified by<br />
authorised persons only.<br />
BELT TENSION<br />
Belt Tension<br />
Check the conditions of belts on the engine. Examine the<br />
edge of the belt for cracks or fraying.<br />
Check the tension of the belt by pushing on it with your thumb<br />
for Alternator belt and A.C. compressor belt and Power Steering<br />
belt as shown in schematic diagram.<br />
The belts should have deflection of 8 to 10 mm.<br />
If the belt tension is not proper, get it attended at the nearest<br />
Authorised Workshop.<br />
PRELIMINARY TROUBLE SHOOTING<br />
(These Tips are given for your guidence and preliminary jobs to be done in an emergency situation. In normal case, the problems should<br />
be attended in an Authorised Workshop by following the repair procedures given in Workshop Manual).<br />
Sr. No. PROBLEM OBSERVED CAUSE ACTION TO BE TAKEN<br />
1. Engine not cranking. Discharged battery Loose or dirty Get battery changed / charged.<br />
battery connections.<br />
Clean and tighten battery<br />
connections.<br />
2. Engine Cranks but does not start No fuel Get the unleaded fuel filled.<br />
Fuel filter chocked<br />
Get the fuel filter replaced.<br />
Check fuse for fuel pump & EMS.<br />
3. Engine Check lamp continuous Some faults are detected by Get the vehicle checked<br />
to glow, even after start. the fuel injection and rectified at Authorised<br />
and ignition system. Workshop.<br />
4. Engine overheats. Coolant level low. Top up coolant, Check and correct<br />
leakages, if any.<br />
Get belt tension adjusted.<br />
Get the belt replaced.<br />
Hose collapse/torn<br />
Get the hose replaced.<br />
Low engine oil level<br />
Add Oil, to recommended max.<br />
level.<br />
Radiator cap not sealing properly Fit the radiator cap correctly, or<br />
replace, if defective.<br />
P R E L I M I N A R Y T R O U B L E S H O O T I N G<br />
5. Charging indicator continuously Battery not getting charged due Get the belt tension adjusted.<br />
remains ON. to loose belt drive Replace if broken.<br />
6. Poor Pickup. Accelerator cable loose /too slack Get adjusted correctly.<br />
Air in the fuel system<br />
Crank the engine a few times.<br />
Blocked fuel filter<br />
Replace filter element.<br />
Clogged air filter.<br />
Clean/replace the element.<br />
Low fuel level<br />
Fill unleaded fuel in tank<br />
Air leakage in intake system<br />
Check for loose hoses/joints/<br />
gaskets.<br />
7. Does not accelrate Accelerator cable broke. Get cable replaced.<br />
8. Belt Squeal Loose belt. Get belt tension adjusted.<br />
Belt glazed.<br />
Get belt replaced.<br />
CLUTCH<br />
1. Clutch does not get disengaged. Air in the hydraulic system. Get the system air removed<br />
Less fluid in the Master cylinder. by bleeding.<br />
Get the clutch fluid filled.<br />
2. Clutch Pedal goes two low Air in the hydraulic system. Bleed the system.<br />
GEAR BOX<br />
1. Hard gear shifting / Clutch does not disengage Get the Clutch hydraulic system<br />
crash engagement properly. attended.<br />
REAR AXLE, LIVE FRONT AXLE<br />
1. Loss of Lubricant (Oil) Breather hole clogged. Clean the Breather hole on the<br />
axle housing<br />
Differential cover gasket torn.<br />
Get replaced.<br />
Pinion oil seal damaged.<br />
2. Differential housing overheating. Insufficient oil. Get the oil filled<br />
Incorrect lubricant used.<br />
Drain, flush and get correct<br />
lubricant filled.<br />
BRAKES<br />
1. Poor brakes Insufficient brake fluid. Get the brake fluid filled in the reservoir<br />
Air in the system<br />
Get the system air<br />
removed.<br />
Excessive shoe gap<br />
Check & rectify auto adjuster mechanism<br />
Vacuum leakage<br />
Rectify the leakage<br />
Brake oil (line) leaking<br />
Replace the leaking line.<br />
Oil on the drum/liners<br />
Get the liners cleaned./Replace seals if leaking.<br />
Worn brake lining<br />
Get the liners replaced<br />
2. Spongy Pedal Air in the system. Bleed the system.<br />
3. Brake pulling to one side One side brake too tight (less gap). Check & rectify auto adjuster<br />
Oil on the brake lining.<br />
Clean the brake lining.<br />
One side shoe (pad) worn.<br />
Get the shoe replaced.<br />
Loose brake anchor plate.<br />
Tighten the bolts.<br />
One side brake pipe clogged.<br />
Get the brake line cleaned.<br />
4. Brake grab Improperly adjusted parking brake. Get correctly adjusted.<br />
Brake fluid container breather hole Clean the hole on the container.<br />
clogged.<br />
No pedal free play/pedal<br />
Adjust brake pedal.<br />
not returning fully.<br />
Defective tandem master cylinder Replace tandem master cylinder.<br />
5. Brake Squeal. Defective brake lining. Replace.<br />
Glazed Lining.<br />
Clean or replace lining.<br />
Loose rivets.<br />
Install rivets properly.<br />
Wrong lining.<br />
Install correct lining.<br />
Shoe return spring broken.<br />
Replace.<br />
Front pads rubbing on the disc. Get corrected.<br />
6. ABS warning indicator stays on Fault in the ABS system Take the vehicle to the nearest dealer<br />
STEERING SYSTEM<br />
1. Hard steering. Less fluid in the power Get the Oil filled up to correct<br />
steering tank.<br />
Air in the system.<br />
Get the air. removed by bleeding<br />
Loose pump belt.<br />
Get the belt correctly adjusted.<br />
ELECTRICAL<br />
1. No lights on the dash board after Battery terminal got disconnected. Get the battery Properly<br />
turning on the ignition key. Battery completely dead. connected.<br />
Get the battery charged.<br />
Get the alternator & charging<br />
circuit checked.<br />
2. Non functioning of electrical . Check the fuse in the circuit. Replace the fuse if blown.<br />
accessories such as power Check for loose connectors. Get the connection properly<br />
windows, head lamps, fuel<br />
tightened.<br />
tank flap, wiper and washer etc Check the circuit relay for Tightened the relay correctly.<br />
looseness in the mounting.<br />
Defective components<br />
Get the defective components<br />
replaced from Authorised<br />
The following trouble shooting information is only for reference purposes. It is not intended for use as a strict guide to solving<br />
problems, as many malfunctions have similar symptoms and can only be effectively diagnosed by a skilled technician.<br />
A. Complaint : Fan motor does not operate<br />
Sr. No. Problem Observed Cause Action to be taken<br />
1. Blown fuse Check fuse in fuse box Replace fuse and correct any wiring short<br />
2. Faulty connection Inspect each wire. Inspect Properly connect poor connections.<br />
fan power wire.<br />
3. Faulty motor Check motor lead wires Replace motor if no conductance.<br />
With multi tester.<br />
4. Faulty or poor Measure the conductance Replace resistor block if defective.<br />
connection at resistor of the resistor checking for a<br />
break in circuit<br />
5. Faulty fan switch Operate all speeds of fan. Replace switch.<br />
If all other checks fail, switch<br />
is faulty.<br />
B. Complaint : Motor operates but air flow is minimum<br />
Sr No Possible Cause Evaluation Remedy<br />
1. Obstruction at Check for foreign object. Clean evaporator.<br />
evaporator inlet<br />
Check for dirty coil.<br />
2. Air leak Check seal of evaporator Correct seal.<br />
to fan.<br />
3. Faulty thermostat Check for frozen evaporator. Adjust or replace thermostat.<br />
Suction gauge reading slightly<br />
lower than normal.<br />
C. Complaint : Insufficient cooling, Air flow normal and compressor operating<br />
Sr No. Possible Cause Evaluation Remedy<br />
1. System overcharged. Higher than normal suction Discharge Refrigerant from system<br />
and discharge manifold<br />
until bubble appears in sight glass.<br />
gauge readings.<br />
Suction fitting warm.<br />
2. Insufficient charge Both the manifold gauge Repair leak and recharge.<br />
readings too low.<br />
SR. NO. PROBLEM OBSERVED PROBABLE CAUSE ACTION TO BE TAKEN<br />
ANTI-LOCK BRAKING SYSTEM<br />
1. ABS warning lamp stays ‘ON’ ABS unit faulty<br />
No supply to ABS unit Check wiring connections &<br />
battery condition.<br />
Electrical circuit problem : Check wiring harness<br />
Intermittent contact, Wiring<br />
connections<br />
connections / connections loose/<br />
faulty<br />
Component and sensor failure : Check gap between sensor &<br />
RPM sensors/toner rings fitting<br />
toner ring<br />
loose, gap disturbances, Sensor<br />
signal that deviates from the specified<br />
levels<br />
Circuit / bulb failure Replace bulb<br />
Leakage from hydraulic unit ports Eliminate leakage by tightening<br />
Hydraulic unit fluid level low Check reservoir fluid level and<br />
bleed properly.<br />
Unusual response and malfunction Check sensor condition &<br />
in the actuators<br />
replace if necessary.<br />
S E R V I C E S C H E D U L E<br />
SR.<br />
NO.<br />
OPERATION<br />
FREQUENCY<br />
IN KM<br />
PDI<br />
Periodically<br />
5000<br />
10000<br />
15000<br />
20000<br />
25000<br />
30000<br />
35000<br />
40000<br />
45000<br />
50000<br />
55000<br />
60000<br />
65000<br />
70000<br />
75000<br />
80000<br />
85000<br />
90000<br />
95000<br />
100000<br />
GENERAL<br />
1. Wash the vehicle 5,000 <br />
2. Check the tightness of the fastners 5,000 <br />
3. Check coolant level, top up if necessary Periodically <br />
4. Change Coolant in coolant system 50,000 or 2 years <br />
whichever is earlier<br />
5. Check oil level in sump, top up if necessary Periodically <br />
6. Change engine oil & oil filter 10, 000 or 1year <br />
7. Check gasket / hoses for leakages, 5,000 <br />
8. Rectify fuel leakages Periodically <br />
9. Change assy. fuel filter 20,000 or 1 year <br />
10. Clean air filter element. Periodically <br />
11. Replace air filter element 10, 000 or 1year <br />
12. Check timing belt, adjust tension if necessary, 20,000 <br />
replace if defective<br />
13. Replace timing belt 1,00000 <br />
14. Check AC, Power steering belt, adjust tension if 5,000 <br />
necessary, replace if defective.<br />
15. Check spark plug gap 10,000 <br />
16. Replace carbon Canister 50 ,000 or 2 years <br />
whichever is earlier.<br />
17. Replace all four spark plugs 30,000 <br />
18. Check/Inspect PCV valve, Replace if necessary 10,000 <br />
or earlier for vehicles operating under dusty / off road conditions.<br />
SERVICE SCHEDULE<br />
19. Check oil level in gear box, transfer case 5,000 <br />
Top up if necessary<br />
20. Change oil in gear First at 20,000<br />
& thereafter <br />
every 80,000<br />
21. Change oil in the transfer case 45,000 <br />
22. Clean breather on gear box 70,000 <br />
PROPELLER SHAFT<br />
23. Grease propeller shaft U.J. cross & sliding yoke 10,000 <br />
FRONT* AND REAR AXLE<br />
24. Check oil level in axle, top up if necessary 10,000 <br />
25. Change oil in axle (First at 20000 & there after every 40,000) <br />
SUSPENSION & STEERING<br />
26. Grease idler arm, 10,000 <br />
(where grease nipples are provided)<br />
27. Check wheel alignment , chassis height & 15,000 <br />
adjust if necessary<br />
28. Change grease in front hub & adjust bearing play 40,000 <br />
29. Check & adjust steering wheel free play 30,000 <br />
30. Check oil level in power steering tank 10,000 <br />
and top up if necessary<br />
148 *4x4 vehicle<br />
31. Change oil in power steering system and clean 80,000 <br />
strainer<br />
32. Check belt tension of power steering and adjust if 10,000 <br />
necessary<br />
33. Check condition of rubber bushes in the following, 30,000 <br />
replace if necessary, 1) Top wish bone<br />
2) Lower wishbone 3) Anti roll bars 4) Rear links<br />
5) Pan hard rod<br />
34. Check shock absorber, its bushes and steering 15,000 <br />
damper bushes,replace if necessary<br />
CLUTCH AND BRAKES<br />
35. Check level of clutch & brake fluid in containers, 10,000 <br />
top up if necessay<br />
36. Check service & parking brakes, adjust if necessary 10,000 <br />
37. Check front brake pads & rear brake linings, 15,000 <br />
Repalce if necessary<br />
38. Overhaul the following brake components and 30,000 <br />
change the brake fluid in the system 1) Tandem<br />
Master Cylinder 2) Front Caliper, 3) Rear Wheel<br />
Cylinders, 4) Clutch Master cylinder & Slave Cylinder<br />
39. Overhaul Vacuum booster & change the felt and 40,000 <br />
Polyurethane filters along with rubber bellow<br />
ELECTRICALS<br />
41. Check electrolyte level in battery, add distilled 15,000 <br />
water if necessary<br />
41. Check specific gravity of electrolyte and the 30,000 <br />
charge of battery<br />
42. Check headlamp focussing & functioning of other 15,000 <br />
electrical equipments<br />
43. check water level in windscreen washer Weekly <br />
container & top up if necessary for cold region<br />
applications use anti freeze mixture.<br />
44. Apply grease on door latches, door lock, 10,000 <br />
striker, bonnet opening lever & lock plate<br />
45. Oil tail gate hinges & door lock inner ratchet, 30,000 <br />
46. Tighten all fastners of front grill, oil sump, oil & 10,000 <br />
fuel filter & mtg. bracket, exhaust manifold &<br />
pipe, air filter, engine, clutch hsg, radiator mtg.<br />
prop. shaft centre brg., bracket mounting bolts,<br />
joints of pitman arm, idler arm, centre link, tie<br />
rods, ball joints of upper wishbone & lower<br />
wishbone, steering gear box and its mtg. bracket,<br />
vacuum & hudraulic line connections, head lamp<br />
mtg., wheel mtg. nuts, axle shaft mtg, and roll bar<br />
mtg, clutch master & slave cylinder mtg., fuel tank<br />
mtg. nuts, front suspension top rubber mtg nut.<br />
AIR CONDITIONING SYSTEM<br />
47. Check torque of bolts on brackets, and compressor, 15,000 <br />
48. Check compressor belt, adjust tension, Replace 5,000 <br />
if necessary<br />
49. Check for leak of gas/ oil from pipes joints, 5,000 <br />
compressor shaft seal & cylinder head<br />
50. Clean condensor with high pressure water 5,000 <br />
51. Check fan speeds for proper air flow 5,000 <br />
52. Check clutch operation 5,000 <br />
53. Check system pressure with gauges 15,000 <br />
54. Clean evaporator from its face to remove dust, 15,000 <br />
foreign objects etc.<br />
55. Tyre rotation 10,000 <br />
V E H I C L E R E C O R D S H E E T<br />
VEHICLE RECORD SHEET<br />
Km. reading Fuel filled Fuel consumption Remarks / complaints<br />
RECORD OF SERVICES PERFORMED Chassis No. .........................................<br />
Recommended Odometer Repair Servicing Dealer’s<br />
Service Date reading Order Signature and<br />
km. No. Stamp<br />
At km.<br />
50,000<br />
5,000<br />
55,000<br />
10,000<br />
60,000<br />
15,000<br />
65,000<br />
20,000<br />
70,000<br />
25,000<br />
75,000<br />
30,000<br />
80,000<br />
35,000<br />
85,000<br />
40,000<br />
90,000<br />
45,000<br />
95,000<br />
1,00,000<br />
1,50,000<br />
1,05,000<br />
1,55,000<br />
1,10,000<br />
1,60,000<br />
1,15,000<br />
1,65,000<br />
1,20,000<br />
1,70,000<br />
1,25,000<br />
1,75,000<br />
1,30,000<br />
1,80,000<br />
1,35,000<br />
1,85,000<br />
1,40,000<br />
1,90,000<br />
1,45,000<br />
A B B R I V I A T I O N S<br />
ABBREVIATIONS<br />
AC<br />
Amp<br />
Br<br />
Brg<br />
cc<br />
Cm<br />
Dia<br />
EGR<br />
Accessories<br />
Ampere<br />
Branch<br />
Bearing<br />
Cubic Centimeters<br />
Centimeter<br />
Diameter<br />
Exhaust Gas Recirculation<br />
MD<br />
Min<br />
mkg<br />
mm<br />
Mtg<br />
No<br />
PCBU<br />
PSI<br />
PUC<br />
Main Dealer<br />
Minimum<br />
Meter per Kilogram<br />
Millimeter<br />
Mounting<br />
Number<br />
Passenger Car Business Unit<br />
Pre-delivery Inspection<br />
Pounds per Square Inch<br />
Pollution Under Control<br />
FAW<br />
Fig<br />
FIP<br />
gm<br />
GVW<br />
IGN<br />
Kg<br />
Km<br />
Km/h<br />
LH<br />
Max<br />
Front Axle Weight<br />
Figure<br />
Fuel Injection Pump<br />
Gram<br />
Gross Vehicle Weight<br />
Ignition<br />
Kilogram<br />
Kilometer<br />
Kilometer per hour<br />
Left Hand<br />
Maximum<br />
RAW<br />
RCSM<br />
RH<br />
RM<br />
RPM<br />
Sec<br />
Sq.cm.<br />
TASC<br />
TASP<br />
V<br />
W<br />
Wt<br />
Rear Axle Weight<br />
Regional <strong>Customer</strong> Support Manager<br />
Right Hand<br />
Regional Manager<br />
Revolution Per Minute<br />
Seconds<br />
Square Centimeter<br />
<strong>Tata</strong> <strong>Motors</strong> Authorised Service Centre<br />
<strong>Tata</strong> <strong>Motors</strong> Authorised Service Point<br />
Volts<br />
Watts<br />
Weight<br />
A L P H A B E T I C A L I N D E X<br />
ALPHABETIC INDEX<br />
A.C. Maintenance 131<br />
Aggregate Numbers 12<br />
Air Bag 22<br />
Air Conditioning 54<br />
Air Filter 103<br />
Analog Clock 67<br />
Anti theft Security System 31<br />
Anti-lock Brake System 79<br />
Armrest cum Cup Holder 60<br />
Ashtray 62 & 63<br />
Audio Warning 21<br />
Automatic Hub Lock 82<br />
Battery 117<br />
Belt Tension 138<br />
Bonnet Opening & Closing 70<br />
Brake Fluid Check 114<br />
Brakes 79<br />
Branded Lubricants 94<br />
Carbon Canister 136<br />
Catalytic Converter 134<br />
Central Locking System 13<br />
Child Lock 20<br />
Cigarette Lighter 62 & 63<br />
Climbing Sharp Gradients 87<br />
Clutch Fluid Check 114<br />
Collapsible Steering 21<br />
Combi-switch 34<br />
Coolants 93<br />
D<br />
Descending Sharp Gradient 88<br />
Door Glass Demister 56<br />
Door Lock 20<br />
Driving Controls 28<br />
Driving on Rainy day 86<br />
Driving on Sandy/Muddy Roads 85<br />
Driving on Snowy/icy Roads 85<br />
Driving safety 89<br />
Driving through Water 86<br />
E<br />
Engine Coolant Check 73<br />
Engine Cooling System 104<br />
Engine Oil & Oil Filter Change 106<br />
Engine Oil Level Check 72<br />
Engine Starting & Stopping 76<br />
Environment Protection 8<br />
Fault Diagnosis 137<br />
Forward 5<br />
Front Axle Oil Change 110<br />
Front Fog Lamp 39<br />
Front Seats 58<br />
Front Windshield Demister 56<br />
Fuel 92<br />
Fuel Economy 84<br />
Fuel Filter replacement 132<br />
Fuel Gauge 51<br />
Fuel Level Check 72<br />
Fuel Tank Flap 63<br />
Fuel tank Flap Opening 39<br />
Fuses 129<br />
G<br />
Gauges 48<br />
Gear Box Oil Change 108<br />
Gear Box 78<br />
Gear Shift Lever 33<br />
Gear Shifting Speeds 78<br />
Glove Box 64<br />
H<br />
Hazard warning 40<br />
Head Lamps 111<br />
Headlamp Bulb Replacement 113<br />
Headlamp Focus Adjustment 111<br />
Headlamp Leveling Switch 41<br />
Headrestraint 18 & 59<br />
I<br />
Ignition Switch 29<br />
Important Information 6<br />
Indicators 45<br />
Instrument Cluster 44<br />
Interior Roof Lamp 65<br />
J<br />
Jack & Tools 61<br />
Jump Seat 61<br />
L<br />
Limited Slip Differential 82<br />
Load Conscious Pressure Reducing Valve 116<br />
Lubricants 90<br />
M<br />
Middle Seat 59<br />
Music System 67<br />
N<br />
Night Driving 87<br />
O<br />
Operating Switches 39<br />
Parking Brake 33<br />
Power Steering Fluid Check 114<br />
Power Windows 57<br />
Preliminary Trouble Shooting 139<br />
R<br />
Rear Air Conditioning 56<br />
Rear Axle Oil change 110<br />
Rear Fog Lamp 39<br />
Rear View Mirror 62 & 65<br />
Rear Windshield Demister 40<br />
Rear Windshield Wiper/Washer 40<br />
Relays 130<br />
Reverse Guiding System 66<br />
Roof A.C. 56<br />
Roof rail 88<br />
RPM meter 50<br />
Running in 77<br />
S<br />
Seat Adjustment 58<br />
Seat Belts 16<br />
Service Schedule 147<br />
Spare Wheel 123<br />
Spark Plug 132<br />
Speedometer 48<br />
Steering Lock 29<br />
Steering Wheel Positioning 38<br />
T<br />
Temperature Gauge 51<br />
Towing the vehicle 88<br />
Transfer case Electric Switch 37<br />
Transfer case Oil Change 109<br />
Tyre Rotation 123<br />
Vehicle <strong>Care</strong> 125<br />
Vehicle Record Sheet 152<br />
Vehicle Specification 96<br />
Warranty 10<br />
Wheel Alignment 122<br />
Wheel Balancing 122<br />
Wheels Tyres 119<br />
Chassis No. ......................................<br />
Engine No. .......................................<br />
Gear Box No. ...................................<br />
At 10,000-10,500 km please bring your<br />
vehicle for this service as per details given<br />
in the Service Schedule.<br />
FREE<br />
LABOUR<br />
L -<br />
At the time of delivery of vehicle please ensure<br />
pre-delivery inspection has been carried out as per details<br />
given in the Service Schedule.<br />
WORK DONE TO MY SATISFACTION<br />
<strong>Tata</strong> Safari (Petrol)<br />
Sign. of <strong>Customer</strong> ......................................<br />
Speedo Reading ........................................ Km. seal O.K. / Broken<br />
R.O. No. ..................................................... Date ............................<br />
Dealer's / Authorised Service Centre's<br />
Stamp & Signature .........................................................................<br />
Rear Axle No. ..................................<br />
At 15,000-15,500 km please bring your<br />
At 5,000-5,500 km please bring your<br />
At 20,000-20,500 km please bring your<br />
At 25,000-25,500 km please bring your<br />
160<br />
Stamp & Signature .........................................................................
VEHICLE IDENTIFICATION & VEHICLE RECORD<br />
Owner’s Name :<br />
Address :<br />
Selling Dealer Code :<br />
Date of Delivery :<br />
Date of Registration :<br />
Registration No.:<br />
Chassis No.:<br />
Engine No.:<br />
Gear Box No.:<br />
Transfercase No.:<br />
Rear Axle No.:<br />
Front Axle No.:<br />
THE WARRANTY ON THIS VEHICLE IS VALID ONLY WHEN ABOVE<br />
INFORMATION IS FILLED, SIGNED AND STAMPED BY THE SELLING DEALER<br />
DEALER’S SIGNATURE AND STAMP<br />
Following items are provided in your<br />
<strong>Tata</strong> Safari (EX / LX)<br />
1. Owner’s Manual & Service Book<br />
2. Battery Warranty Card<br />
3. First Aid Kit<br />
4. Advance Warning Triangle<br />
5. Jack and Handle<br />
6. Spare Headlamp bulbs - 2 Nos<br />
7. Spare Fuses - (Provided in fuse box)<br />
8. Tool Kit<br />
a. Wheel Spanner<br />
b. Screw Driver<br />
c. Ring spanner (8-9)<br />
d. Socket Handle<br />
(Part No. 2654 5890 35 24)<br />
9. Manufacturer’s manual for<br />
a. Music System (if fitted)<br />
b. Immobiliser (if fitted)<br />
- More documents
- Recommendations

<strong>TATA</strong> <strong>SAFARI</strong> (<strong>PETROL</strong>) (Exi / Vxi) 4x2 and 4x4 OWNER’S MANUAL & SERVICE BOOK This owner's manual is advised to be kept in the vehicle, at all times. MUMBAI PUNE MUMBAI PUNE 1
- Page 2 and 3: 2 1800 209 6688
- Page 5 and 6: F O R E W A R D Dear Customer, Than
- Page 7 and 8: IMPORTANT INFORMATION ABOUT THIS MA
- Page 9 and 10: ENVIRONMENTAL PROTECTION As soon a
- Page 11 and 12: W A R R A N T Y TERMS AND CONDITION
- Page 13: G E T T I N G I N T O T H E V E H I
- Page 16 and 17: Y O U R S A F E T Y SEAT BELT SYSTE
- Page 18 and 19: Y O U R S A F E T Y ADJUSTABLE HEAD
- Page 20 and 21: Y O U R S A F E T Y DOOR LOCKS Back
- Page 22 and 23: Y O U R S A F E T Y AIR BAGS (IF FI
- Page 24 and 25: Y O U R S A F E T Y AIR BAGS (IF FI
- Page 27 and 28: D R I V I N G C O N T R O L S This
- Page 29 and 30: D R I V I N G C O N T R O L S STEER
- Page 31 and 32: D R I V I N G C O N T R O L S IMMOB
- Page 33 and 34: D R I V I N G C O N T R O L S PARKI
- Page 35 and 36: D R I V I N G C O N T R O L S WIPER
- Page 37 and 38: D R I V I N G C O N T R O L S TRANS
- Page 39 and 40: D R I V I N G C O N T R O L S OPERA
- Page 41: D R I V I N G C O N T R O L S REAR
- Page 44 and 45: I N D I C A T O R S A N D I N S T R
- Page 46 and 47: I N D I C A T O R S A N D I N S T R
- Page 48 and 49: I N D I C A T O R S A N D I N S T R
- Page 50 and 51: I N D I C A T O R S A N D I N S T R
COMFORT AND CONVENIENCE This sectio
C O M F O R T A N D C O N V E N I E
P R I O R T O D R I V I N G Before
P R I O R T O D R I V I N G CHECKS
P R I O R T O D R I V I N G ENGINE
D R I V I N G STARTING AND STOPPING
D R I V I N G GEAR BOX AND GEAR CHA
D R I V I N G ANTI-LOCK BRAKE SYSTE
D R I V I N G TRANSFER CASE, AUTOMA
D R I V I N G FUEL ECONOMY NOTICE D
D R I V I N G DRIVING IN ADVERSE CO
FUEL, LUBRICANTS & COOLANTS This se
F U E L , L U B R I C A N T S & C O
V E H I C L E S P E C I F I C A T I
M A I N T E N A N C E Your TATA SAF
M A I N T E N A N C E AIR FILTER Ai
M A I N T E N A N C E COOLING SYSTE
M A I N T E N A N C E FUEL FILTER &
M A I N T E N A N C E TRANSFER CASE
M A I N T E N A N C E HEAD LAMPS &
M A I N T E N A N C E HEAD LAMPS He
M A I N T E N A N C E POWER STEERIN
M A I N T E N A N C E BATTERY Batte
M A I N T E N A N C E • Route the
M A I N T E N A N C E WHEELS & TYRE
M A I N T E N A N C E WHEELS AND TY
M A I N T E N A N C E VEHICLE CARE
M A I N T E N A N C E FUSES Fuses A
M A I N T E N A N C E AIR CONDITION
M A I N T E N A N C E SPARK PLUG 5.
M A I N T E N A N C E CATALYTIC CON
M A I N T E N A N C E CARBON CANIST
PRELIMINARY TROUBLE SHOOTING (These
P R E L I M I N A R Y T R O U B L E
S E R V I C E S C H E D U L E SR. N
S E R V I C E S C H E D U L E SERVI
V E H I C L E R E C O R D S H E E T
RECORD OF SERVICES PERFORMED Chassi
A L P H A B E T I C A L I N D E X A
Chassis No. .......................
VEHICLE IDENTIFICATION & VEHICLE RE
Extended embed settings
Inappropriate
You have already flagged this document. Thank you, for helping us keep this platform clean. The editors will have a look at it as soon as possible.
Mail this publication
Delete template.
Are you sure you want to delete your template?
DOWNLOAD ePAPER
This ePaper is currently not available for download. You can find similar magazines on this topic below under ‘Recommendations’.
Save as template?
- Help & Support
- tuxbrain.com
- ooomacros.org
- nubuntu.org
- Terms of service
- Privacy policy
- Cookie policy
- Cookie settings
Choose your language
Main languages
Further languages
- Bahasa Indonesia
Performing this action will revert the following features to their default settings:
Hooray! Your file is uploaded and ready to be published.
Saved successfully!
Ooh no, something went wrong!
- Car Comparison Reviews
Hyundai Alcazar Vs Tata Safari comparison
With three rows of seating and similar price tags, the Hyundai Alcazar and Tata Safari can be deemed natural rivals. But as we find out, each appeals for very different reasons.
Published on Aug 21, 2021 08:00:00 AM
78,952 Views

Alcazar can hold small suitcases.

Safari offers minimal luggage room.

If you’ve had your heart set on the Tata Safari but are having second thoughts on seeing the Hyundai Alcazar, this one’s for you. Yes, we will bring the entire three-row SUV gang together, including the MG Hector Plus, once the Mahindra XUV700 goes on sale, but the focus here is on the star performers of the year so far. At last count, Tata had produced its 10,000th Safari while Hyundai had received over 11,000 bookings for its new Alcazar.
The Safari and Alcazar promise to offer the same virtues as the Tata Harrier and Hyundai Creta that they’re respectively derived from, with the added practicality of a third row of seats. By extension, that means these are two very different takes on the three-row SUV formula.
You’ve seen the Tata Safari and Hyundai Alcazar in detail already, so we’ll focus on the key points of difference. And the one that’s most obvious is the difference in size. The Tata Safari, which is a full 161mm longer, 104mm wider and 111mm taller than the Alcazar, will immediately appeal to buyers who like their SUVs big and bold. The higher bonnet line, chunkier tyres and upright tail only add to the Tata’s road presence. The Alcazar might not have the visual mass of a Safari but it is quite sizeable in its own right and even boasts of the marginally longer wheelbase.

The Alcazar also has some show value, thanks to the Hyundai Palisade-like large, studded grille, but the tail-end styling is best described as anonymous.
The Cockpits
Shifting focus inside, there’s lots and lots to talk off so we’ll go row by row, starting with the Safari. The Tata’s cabin is really well turned out and has its stylish details. The dash is neat and you’ll like how the metal look works with the wood and the gloss plastics on the centre console. The defining factor in a Safari, however, is how large it is. You feel like you’re sitting in a big SUV and there’s a greater distance to your co-driver, which is a boon in our socially distanced times. But for all its space, the Safari has its share of lesser points. The 8.8-inch touchscreen looks small and isn’t the most responsive, and the interior colour scheme is a point of contention too – the light upholstery is a pain to keep clean.

You don’t get the same sense of space in an Alcazar, but its cabin immediately puts you at ease. The dash is very user-friendly, with everything in clear sight and easy to reach. The brown on black cabin theme looks premium too, though there aren’t any soft-touch materials. But what really makes the difference in the Alcazar’s cabin are the feel-good features. The Alcazar gets premium digital dials with three customisable displays, and the screen also relays feed from the very handy blind-view monitors positioned at the wing mirrors. Also slick is the 10.25-inch touchscreen and there’s also a 360-degree camera that comes really handy.

Front seat ventilation, an on-board air purifier, wireless charger, and paddleshifters are some of the other goodies exclusive to the Alcazar. The gadgets and gizmos add up to a lot and make the Hyundai’s interior look and feel a lot more advanced, which is telling given the Safari has only been around for a few months.

The Safari does pack in plenty too, like a panoramic sunroof and powered driver’s seat. It’s just that the Alcazar offers all that you get on the Tata and then a whole lot more. In terms of safety equipment, rear disc brakes are standard on both, while top-spec versions of both models get six airbags, electronic stability control and ISOFIX child-seat mounts.

People Movers
Before we talk middle-row comfort, it’s important to highlight that both SUVs can be had in 7-seat configurations that will appeal to large families. Notably, the Safari, with its wider cabin, is comfier when you have to sit three abreast. In focus here, however, are the 6-seat versions whose individual middle-row chairs will appeal to chauffeur-driven buyers.

There are some clear differences from the moment you open the rear doors. The Hyundai Alcazar doesn’t sit all that high off the ground, to begin with, and there’s a footboard, too, to ease the journey inside. Large windows, generous legroom (with the middle-row seats slid all the way back) and well padded seats with recline make this a comfortable place to be in. Unique to the Alcazar is a fixed centre console between the middle-row seats. While not an ideal armrest (your elbow will be unsupported at the seat’s rearmost position), the console features a useful wireless phone charging bay and offers some storage too. Other amenities to make life comfy at the back and unique to the Alcazar are retractable sunshades and fold-out trays with a recess for your iPad.

Shift from an Alcazar into a Safari and you’ll note how much higher the Tata sits. There’s no footboard, making it quite a bit of a step up into the Safari’s cabin. Once settled in, though, there’s lots to like.

For starters, the stadium seating, with the middle-row positioned slightly higher than the one up front, equals great side and frontal visibility. The Tata also offers that little bit more legroom as standard, and then there’s the option to free up even more space. Boss Mode allows you to slide forward a vacant co-driver’s seat from the back so you can really sprawl out in the Safari. It’s a pity that the Safari’s seats are not the widest in the business, which is something larger framed individuals will note. Also, the flip-up armrest isn’t all that well-positioned, so you can’t find that perfect seating position in the Safari. There’s no wireless charging at the back but what’s irritating is that the USB charging slots are positioned low down and out of sight.

Where the Safari has the clear advantage is when talking of third-row space. In a 6-seat Safari, last-row occupants will need to work their way through the narrow passage between the middle-row chairs, but that cumbersome journey in is worth it. It’s not hard to find a happy legroom compromise with the middle-row passenger and what’s really impressive is that, with a bit of slouching, even six-footers can sit here in reasonable comfort. The high-set vents do obstruct visibility a bit at the very back, but the rearmost windows are still larger than those in the Alcazar. Also, because the vents sit high up, air-con effectiveness is impressive.

The 6-seat Alcazar, with its tumble-fold middle-row seats, offers far better access to the back, but you’ll need to carefully plan who gets to sit there. Space is adequate for shorter occupants but large adults will be tight on space, even with the middle-row seats at a centre position. The knees-up seating isn’t great either, relegating the Alcazar’s third row for occasional use only.

Both SUVs miss out on a powered tailgate, but to the Alcazar’s credit, its tailgate is easy to open and also reveals a larger 180-litre luggage area with all seats up. The third-row backrest can also be folded absolutely flat to create more luggage room. Opening the Safari’s heavy tailgate requires effort and, disappointingly, the 73 litres of luggage room with all seats up is only sufficient for a few handbags. Also, the third-row backrests do fold but don’t sit absolutely flush with the floor.
Drive The Tribe
Before we get moving, it’s important to talk engines and gearboxes. The Tata Safari is available solely with a 2.0-litre diesel engine that makes 170hp and 350Nm. You can have the engine with a 6-speed manual, though it’s the far superior and, ironically, Hyundai-sourced, 6-speed automatic that’s worth spending extra for. You get more choice in the Alcazar range, including the option of a 2.0-litre petrol engine with manual and auto gearbox options. The petrol engine’s 159hp is impressive but the relatively low 14.2kpl official fuel-economy figure for the automatic could be a deterrent for buyers with lots of running. This set of buyers will find more appeal in the Alcazar diesel-auto and its 18.1kpl efficiency figure. For this comparison, we are considering the diesel-automatic versions of both models. The Alcazar’s 115hp and 250Nm, 1.5-litre diesel engine is no match for the Safari’s on power and torque, but then the Hyundai is also around 400kg lighter than the Tata.
Let’s move away from facts and figures to on-road feel. Scenario one is driving in town, where the Alcazar quickly establishes itself as the city slicker. You really won’t have an issue with power, and there’s sufficient performance for average city duties. The light steering, good manoeuvrability and great all-round visibility means you always feel very comfortable in your surroundings. The blind-view monitor helps further, and the 360-degree camera and front proximity sensors make tight parkings a whole lot easier. In the same city setting, the Safari will offer a very different experience at the wheel. If you like to tower over other road users, you’ll immediately take to the Safari that has this authoritative “don’t mess with me” vibe about it. On the flip side, the Safari also feels like the large vehicle that it is. You always have to be mindful of its size, particularly at narrow toll booths, the steering is heavier and U-turns require that much more effort. Parking a Safari isn’t as easy either, and when you do have to reverse in, you’ll wish the camera was of higher resolution. The Safari also has the busier low-speed ride, and there’s some side to side movement on speed breakers too. On the move, though, the Safari does feel nice and light on its feet.
Highway Star
Exiting city limits brings us to scenario two – outstation journeys. And it’s here that the Safari comes into its own. Our performance tests conducted with two passengers onboard reveal the Safari to be the marginally quicker SUV. What the numbers don’t tell you is just how effortless the Tata feels while at it. It feels like the larger-hearted SUV with more pulling power and the difference is most apparent when driving with a full house of passengers. You don’t have to press down any harder on the accelerator and there’s ready power when you need it. Sport driving mode only adds a spring in the Safari’s step.
If easy cruising ability is all that you want from your SUV, the Alcazar diesel does its job well enough. But ask any more of the engine and you’ll know that the Alcazar’s is slightly out of its depth. Quick overtakings, for one, are not its forte. Load the Alcazar up with passengers and you can also tell that the powertrain has suddenly got a lot more work to do. The engine sounds busier and the gearbox will keep going up and down the gears to keep it in the meat of the powerband. And given the nature of this engine, you won’t be reaching out to the paddleshifters all that often either.

Both SUVs have their highlights in the areas of ride and handling. You’ll like how obediently the Alcazar responds to steering inputs, and its predictable handling is likeable. There’s also less up and down movement in the lower Alcazar and this is something your second- and third-row passengers will particularly appreciate. But go over a bad patch of road in the Alcazar and you will feel a judder in the cabin. The shorter sidewalls on the Hyundai’s tyres are to blame here.
In the Safari, it’s the steering that takes getting used to. There is some road shock that filters through to the steering wheel, and at high speeds there’s also an inconsistency at the steering. It’s not the most responsive at the straight-ahead position but turn a bit more and it suddenly darts in; this can catch you off guard. On the plus side, you won’t need to make an evasive manoeuvre to avoid a bad patch of road. The Tata Safari feels absolutely unfazed by broken patches of road taken at high speeds. It drives with an authority and where you’d have to brace for impact in an Alcazar, you can just power through in a Safari.
And after a long journey when you find that the road leading to your farmhouse has disappeared, it’s the Safari you’d want to be in. It feels tough and built to take a lot of abuse. Those Land Rover genes come shining through in the rough. The Alcazar feels like an outsider in these settings and doesn’t give you the same confidence as the Safari. Interestingly, there’s not much difference in terms of ground clearance, with the Alcazar’s 200mm just a shade less than the Safari’s 205mm figure. Both SUVs get traction modes and hill start assist, and the Tata even features hill descent control; but don’t expect to or try to go too far off-road in either of these front-wheel-drive models.
Winner Takes All?
Which of these three row SUVs suits you better ultimately depends on your usage. If the bulk of your driving is in town and the third row will only be put to use on occasion and for short stints, the Hyundai Alcazar will fit your requirements better. Sure, the diesel engine isn’t punchy but the Alcazar’s light controls and smaller dimensions make it friendlier to drive on congested roads, the easier ingress and egress counts for a lot, and the goodies also make you feel your Rs 19.99 lakh (ex-showroom) have been well spent.

On the other hand, if your calendar is full of road trips with the entire family or a lot of your running will be out on the highway, the Safari that, in range-topping XZA+ form, costs Rs 21.81 lakh is the one for you. You’ll have to settle for fewer features but the Tata’s got the far better third row and the 2.0-litre diesel engine is up to the job of hauling six or seven passengers with ease. The general, tough demeanour also gives the Tata a very distinct personality.
Copyright (c) Autocar India. All rights reserved.
Member Login
Personal details.
No comments yet. Be the first to comment.
Change City
Pick from popular cities, need an expert opinion on your car and bike related queries, search by car price.
Cars between ₹ 5-10 lakhs
Cars between ₹ 10-15 Lakhs
Cars between ₹ 15-20 Lakhs
Cars between ₹ 20-40 Lakhs
Cars between ₹ 40-60 Lakhs
Cars between ₹ 60-80 Lakhs
Cars between ₹ 80 Lakhs - 1 Crore
Cars above ₹ 1 Crore
Poll of the month
At Rs 1.85 lakh, the Bajaj Pulsar NS400Z is the most affordable 40hp bike in India. Would you pick it over similarly priced bikes with less power and features?
Yes, 40hp at this price is unheard of!
No, it's a decade-old bike in a revamped suit.
Great value but doesn't look unique enough.
Sign up for our newsletter
Get all the latest updates from the automobile universe
- Hot Threads
- Spare Parts
- Buy Accessories
- Classifieds
This copy is for your personal, non-commercial use only. To order presentation-ready copies for distribution to your colleagues, clients or customers visit http://www.djreprints.com.
https://www.barrons.com/news/nine-die-in-care-home-fire-outside-moscow-01589180405
- FROM AFP NEWS
Nine Die In Care Home Fire Outside Moscow
- Order Reprints
- Print Article
The fire is the second such incident around Moscow in just over a month
A fire broke out in a retirement home in the Moscow region, killing at least nine people, local authorities said Monday.
The blaze in the privately-owned care home in the town of Krasnogorsk started at around midnight Sunday and was extinguished within an hour, emergencies services said.
"Nine people died on site and nine more were rushed to hospital in serious condition and are being treated in intensive care," the Krasnogorsk municipal government said in a statement.
Russian news agencies said 37 people were in the building at the time of the fire.
Investigators said the victims whose burnt bodies were recovered were aged between 66 and 90.
They said a faulty electrical wire was a possible cause of the incident and launched a probe into fire safety violations.
They later detained the care home's manager, treating him as a suspect, news agencies reported.
Kommersant newspaper said many of the care home residents were not mobile and the employees were unable to carry them out despite the fire being small.
The blaze is the second such incident around Moscow in just over a month: investigators are probing another fire in an upscale retirement home in Moscow in April, which caused the deaths of six people.
An error has occurred, please try again later.
This article has been sent to
- Cryptocurrencies
- Stock Picks
- Barron's Live
- Barron's Stock Screen
- Personal Finance
- Advisor Directory
Memberships
- Subscribe to Barron's
- Saved Articles
- Newsletters
- Video Center
Customer Service
- Customer Center
- The Wall Street Journal
- MarketWatch
- Investor's Business Daily
- Mansion Global
- Financial News London
For Business
- Corporate Subscriptions
For Education
- Investing in Education
For Advertisers
- Press & Media Inquiries
- Advertising
- Subscriber Benefits
- Manage Notifications
- Manage Alerts
About Barron's
- Live Events
Copyright ©2024 Dow Jones & Company, Inc. All Rights Reserved
This copy is for your personal, non-commercial use only. Distribution and use of this material are governed by our Subscriber Agreement and by copyright law. For non-personal use or to order multiple copies, please contact Dow Jones Reprints at 1-800-843-0008 or visit www.djreprints.com.
LLC "TFN"
- / BUSINESS DIRECTORY
- / RETAIL TRADE
- / SPORTING GOODS, HOBBY, MUSICAL INSTRUMENT, BOOK, AND MISCELLANEOUS RETAILERS
- / OTHER MISCELLANEOUS RETAILERS
- / RUSSIAN FEDERATION
- / MOSCOW REGION
- / ELEKTROSTAL
- / LLC "TFN"
- Ekaterina Yurevna Kazakova Director-General
Dynamic search and list-building capabilities
Real-time trigger alerts
Comprehensive company profiles
Valuable research and technology reports
- Digital Showroom
- Accessories
Service Products
Book a service, service connect app, owner's manual, bluetooth™ compatibility, general tips, fuel saving tips, recall information, android auto user guide, information on warranty.
- Exchange Car
- Dealer Locator
News and Events
Drive NEW FOREVER. A whole new range of cars from Tata Motors.

Specifications
- Unfound Variant
Safari Brochure
Safari Adas Brochure
Safari #Dark Brochure
Collapse All

Find Dealership
Find a Tata Motors car dealerships nearest to you, using the dealer locator.

Book a Test Drive
We know you will love our cars, which is why you can book a test drive online at the nearest dealership.
Build Your Own
Configure a your car as per your needs.
Use our compare tool to find the best model for you and your family.
Request a Test Drive
Thanks for providing your details,
our team will be in touch as soon as possible.
Request a call back
IMAGES
COMMENTS
For Example if Customer having Zest, Bolt, Tiago, Tigor , Nexon or Harrier models in which Engine oil replacement schedule is at 1 yr / 15000 Kms (whichever is earlier) is buying 2 year / 30000 Kms AMC then he is entitled for 2 oil change schedule services. ... Sumo Gold or Safari Storm models in which Engine oil repalcement schedule is at 1yr ...
View and Download TATA Motors Safari 2021 owner's manual online. Safari 2021 automobile pdf manual download. Also for: Harrier 2021. ... Page 291 CAR CARE TATA MOTORS has tied up with M/s Wurth, M/s Autokrom, M/s 3M India Lt d & M/s Bardahl for these world class treatment at af- fordable prices. These treatments are available in all authorized ...
The Tata Safari is an impressive SUV that suits for a family car. Its spacious interior offers ample room for passengers and luggage, making it perfect for long road trips. The comfortable seats ...
Punchy Performance. Under the hood of the new Safari is the same 2.0-litre four-cylinder Kryotec turbodiesel that does duties in the Harrier. Compliant to BS6, this motor puts out close to 170bhp ...
The 2021 Tata Safari doesn't get rear- or 4-wheel drive. This is a Tata Harrier that has been lengthened by 60mm to accommodate a third row of seats, forward facing and not the prison-cell jump seats of the past. The Safari will be available in 6- and 7-seater versions, the former with captain's seats in the middle row.
Published On Oct 15, 2023 04:03:00 PM. Tata Safari facelift video review. The Safari gets a new look, a lot more features and equipment and a crucial mechanical change as well.
The Tata Safari might be priced between Rs 15 lakh and Rs 22 lakh (ex-showroom). Tata Motors today unveiled the 2021 Tata Safari that is expected to go on sale in India in February. Based on the OMEGA architecture, the new Tata Safari showcases the Impact 2.0 design language. The OMEGA architecture has been derived from Land Rover's legendary ...
The price of Tata Safari, a 6 seater SUV, ranges from Rs. 16.19 - 27.34 Lakh. It is available in 29 variants, with an engine of 1956 cc and a choice of 2 transmissions: Manual and Automatic.
TATA SAFARI (PETROL) - Tata Motors Customer Care. EN. English Deutsch Français Español Português Italiano Român Nederlands Latina Dansk Svenska Norsk Magyar Bahasa Indonesia Türkçe Suomi Latvian Lithuanian česk ...
BHPian revved_up recently shared this with other enthusiasts.Hello All,I recently purchased a Tata Safari Dark Edition XZA+ and took delivery in the end of Feb 2022!I have been getting embarrassed for choosing this car from day 1 ... In the morning itself i emailed Tata customer care and Autovikas service manager about the new issue in the car ...
Prices are subject to change without prior information at discretion of Tata Motors. Contact your nearest Tata Motors dealer for exact prices. Discover the perfect Tata Safari for you! Explore our configuration options, personalize your car with colors, features, and accessories, and create your dream Safari with Tata Motors today.
The case with the above Tata Safari and many more on the forum clearly states that just for the sake of safety and Indian brand Indian car sentiment Tata motors is taking its customers for a ride. ... At the same time, I got a call from AutoVikas and she had Tata customer care spoc for NCR with her. He assured that he had made all arrangements ...
The Tata Safari, which is a full 161mm longer, 104mm wider and 111mm taller than the Alcazar, will immediately appeal to buyers who like their SUVs big and bold. The higher bonnet line, chunkier ...
I recently purchased a Tata Safari Dark Edition XZA+ and took delivery in the end of Feb 2022! I have been getting embarrassed for choosing this car from day 1(Literally). ... In the morning itself i emailed Tata customer care and Autovikas service manager about the new issue in the car. I got a call from Autovikas service manager and she said ...
A fire broke out in a retirement home in the Moscow region, killing at least nine people, local authorities said Monday.
See other industries within the Retail Trade sector: Automobile Dealers , Automotive Parts, Accessories, and Tire Retailers , Beer, Wine, and Liquor Retailers , Book Retailers and News Dealers , Building Material and Supplies Dealers , Clothing and Clothing Accessories Retailers , Department Stores , Electronics and Appliance Retailers View ...
Tata Safari Specification - Explore Tata Safari 2024 specifications, engine, dimensions, seating capacity, boot space, transmission & fuel tank capacity. Explore Tata Safari Specifications today!
How customer reviews and ratings work Customer Reviews, including Product Star Ratings help customers to learn more about the product and decide whether it is the right product for them. To calculate the overall star rating and percentage breakdown by star, we don't use a simple average.
Moscow Region, Elektrostal, Yuzhny prospekt, 6к1, postal code 144004 — plot a route to the address in Yandex Maps. Find places nearby, check businesses inside and service organizations.