- Request free trial
- Product Permit Management Incident Management Audit Management
- Why Safetymint
- Support Resources Help Docs
- About About Us Partners Careers Blog
- Request a Demo

Pre-Trip Inspection Checklist
Ensure safe journeys with our comprehensive Pre-Trip Inspection Checklist. This free PDF template covers all critical aspects of pre-trip inspections for vehicles, empowering drivers to identify potential issues, perform thorough inspections, and ensure the safety of passengers and cargo.

Digitize this Checklist on Safetymint
- Create unlimited, customized checklists
- Add Actions, with automated reminders
- Works seamlessly with or without internet
- Access via web browsers, mobile or tablets
Take a free trial

What is a Pre-Trip Inspection Checklist?
A Pre-Trip Inspection Checklist is a systematic tool used by drivers to assess the safety conditions of vehicles before embarking on a journey. It includes a series of checkpoints designed to inspect various aspects of the vehicle, such as brakes, tires, lights, fluids, and more. Regular pre-trip inspections are essential for preventing breakdowns, ensuring roadworthiness, and promoting safe travel.
Key Areas to Inspect in a Pre-Trip Inspection:
- Tires: Check tire condition, pressure, and tread depth.
- Brakes: Inspect brake functionality and fluid levels.
- Lights and Signals: Verify the proper operation of headlights, taillights, turn signals, and hazard lights.
- Fluid Levels: Check engine oil, coolant, brake fluid, and washer fluid levels.
- Belts and Hoses: Inspect belts and hoses for wear and damage.
- Windshield and Wipers: Ensure the windshield is free from cracks and that wipers function correctly.
- Safety Equipment: Verify the presence and condition of safety equipment, such as reflective triangles and fire extinguishers.
Common Pre-Trip Inspection Findings:
Frequent issues found during pre-trip inspections include:
- Underinflated Tires: Tires with insufficient air pressure, leading to reduced fuel efficiency and tire wear.
- Brake Wear: Worn-out brake pads or low brake fluid levels.
- Malfunctioning Lights: Inoperative or dim headlights, brake lights, or turn signals.
Pre-Trip Inspection Best Practices:
- Scheduled Inspections: Conduct pre-trip inspections before each journey and after long breaks.
- Checklist Adherence: Follow the pre-trip inspection checklist meticulously to avoid overlooking critical components.
- Driver Training: Train drivers on conducting thorough pre-trip inspections and reporting any issues.
- Documentation: Document pre-trip inspection results and any maintenance performed.
- Reporting Deficiencies: Promptly report any vehicle deficiencies to the appropriate maintenance personnel.
Safetymint for your Pre-Trip Inspections:
Streamline your pre-trip inspections with Safetymint, our advanced inspection software . Safetymint simplifies the inspection process, making it easy for drivers to conduct and document pre-trip inspections efficiently. Our cloud-based platform ensures data security and stability, making it the ideal solution for all your inspection needs. Try Safetymint free for 14 days and enhance your vehicle safety protocols.
Sign up for the 14-day free trial

Disclaimer: The Pre-Trip Inspection Checklist provided by Safetymint is intended for general informational purposes only. Each vehicle may have specific inspection requirements based on make, model, and regulations. Users of this template are encouraged to review and customize the checklist to align with their specific vehicles, environment, and safety regulations.
Related Checklists

GMP Audit Checklist

Pre-Startup Safety Review (PSSR) Checklist
Construction punch list checklist, project closeout checklist.
Daily Report Checklist

Safety Audit Checklist

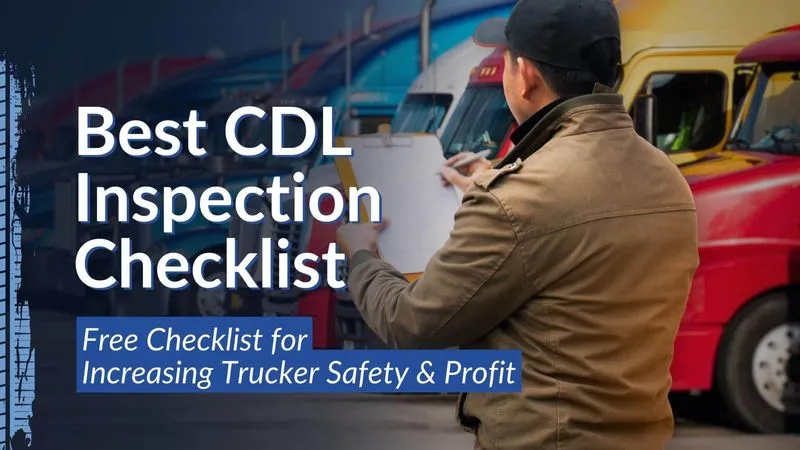
Best Free CDL Pre-Trip Inspection Checklist | Trucker Safety & Profit

Table of Contents
The indispensable CDL pre trip inspection checklist is one of the most important rituals of a driver's day. Industry veterans know this routine like the back of their hands—it's that vital to the trade— but new drivers struggle with how to remember their CDL pre trip inspections, especially for the exam.
Drivers are required to complete this walkthrough at least every 24 hours, after their mandatory 10-hour break. A detailed inspection can safeguard not only your safety but also that of everyone else on the road.
This article will walk you through an exhaustive checklist to follow before every trip, as well as the potential costs of not doing so. We've designed this list with YOU in mind, so we're throwing in some money-making tips that will help you avoid steep fines and costly repairs.
"Spotting and fixing vehicle defects early on keeps you safe and your truck in good shape."

Why Following the CDL Pre-Inspection Checklist is So Important
The price of a failed DOT inspection makes completing a thorough CDL pre trip inspection checklist even more pressing. Violations can cost carriers thousands each year in both penalties and out-of-service (OOS) trucks. According to the FMCSA, around 20% of vehicles are OOS due to failed inspections at any given time. For an owner-operator, this means you'd be paying thousands in vehicle payments on a truck that's not earning you any money.
The pre trip checklist is designed to avoid any possible accidents due to equipment failure and failed safety inspections. A few minutes of caution pays for itself ten-fold down the line.
DOT & Truck Inspection
- Steer Axle/ Rear Suspension
- Side of Cab
- Rear of Cab
Driver Shaft/Rear Frame
- Trailer Front/Side/Rear- Trailer Suspension
Gauges/Inner Truck
- DVIR form fill out
"Most pre-trip truck inspection lists cover safety. We go beyond that with time and money-saving tips in our pre-trip inspection checklist PDF." - Brian Smith, Director, Global Marketing of Cota Systems
- Get the Google Sheet
- Download the Printable PDF
General Tips Throughout Your Pre-Trip Inspection
Because you don't have access to a pre trip inspection checklist during the CDL exam, drivers have created a few tricks to pass this part of the test. The most common memorization tricks are:
BBC: Is any plastic or metal bent, broken, or cracked?
CDL: No hard materials should be cracked, damaged or loose.
ABC: Are there any abrasions, bulges, or cuts on the rubber?
PFL: Peak for leaks in fluid and air containers.
PMS: Are bolts properly mounted and secure?
ABCDF: Do you see abrasions, bulges, cuts, dry rot, or frays?
A bit of common sense will help you put these acronyms to good use. For example, there's no way BBC would apply to rubber, as rubber wouldn't be bent, cracked, or broken. Most drivers pick one for each material type and stick with it until they get more comfortable with the list.
What are the ABCS in a pre-trip inspection?
As mentioned above, the ABCs refer to Abrasions, Bulges, and Cuts to check for during the Class A CDL pre-trip inspection. This applies to rubber or soft surfaces - things like tires, hoses, and rubber bushings.
How Long Should a Proper CDL Checklist & Inspection Take?
Ideally, it takes 15-30 minutes to run through the CDL pre trip inspection checklist depending on experience level and whether or not any issues are found. If issues are found, they must be fixed right then, before taking any more loads.
The cost of preventative maintenance averages $15,000 per truck per year. This figure is a drop in the bucket compared to the cost of inoperable equipment. Breakdowns and crashes due to mechanical failure cost carriers billions industry-wide. Consider an owner-op paying $3,500 per month on insurance and loan payments. Those payments still have to be made regardless of whether the truck is in the shop or on the road. Adds up quickly right? Spending a bit of extra time and money on prevention keeps trucks on the road and earning money.

Get your Free CDL Pre-Trip Inspection checklist today!
Standard cdl pre trip inspection checklist.
Our pre-trip inspection Class A checklist serves two purposes: helping new drivers pass this portion of the CDL exam, and guiding CDL holders through the process with 100% accuracy every time.
A few exam tips before the pre-trip checklist:
- Point to or physically touch each area being inspected. This will help your memory and prove you know your stuff.
- Start with a big section and break it down into small sections from left to right like reading a book.
- During the test, make at least 2 checks for every item or area.
▢ Hoses: all hoses should be secured on both ends with no splits or cuts
▢ Fluids: engine oil, washer fluid, coolants, and power steering
▢ Belts: no more than 1/2"" to 3/4"" of give, securely mounted with no fraying ends
▢ Alternator: securely mounted, belt in good shape
▢ Water pump: properly mounted with no split or leaking hoses
▢ Air compressor: securely mounted, no visible or audible leaks
If Left Unchecked:
Oil leaks and coolant issues are two of the most common breakdown causes, both of which can be spotted during pre-trip. Scheduling dry maintenance every 10,000-25,000 miles and wet maintenance every 25,000-50,000 miles can prevent most engine issues. These regular services, ranging from $50-$450 , are nothing compared to the price of replacing or rebuilding an engine - $20,000 - $40,000 . Thorough pre-trip inspections are the best way to avoid engine breakdowns and escalated damage.

▢ Brake Pads: ¼ minimum brake pad thickness
▢ Slack Adjuster: 1” of play and at a 90' angle to the brake chamber
▢ Brake Chamber : no audible leaks or visible damage
▢ Brake Hose: securely mounted, no audible leaks, splits, or cuts
▢ Brake Drum: no bluing from excessive heat, securely mounted
Brake problems are the most common cause of semi-truck accidents . While over-breaking is a big player in this, a lack of maintenance and unnoticed airline damage usually play roles, too.
Brake pad replacement costs $150-$300 per axle ($750-$1,500 total) and $80-$160 per hour in labor. The consequences of brake failure are incalculable - body repairs, cargo damage, and strikes to your carrier safety rating will follow you. The last thing you want to deal with is higher insurance premiums or trouble getting placed on loads. Take this part of your pre-trip inspection extra seriously.

- Front: clearance lights, headlights, high beams, turn signals, flashers
- Sides: turn signals, flashers, clearance lights
- Rear: tail lights, brake lights, left turn, right turn, 4-way flashers
- Front: clearance lights
- Rear: clearance lights, tail lights, license plate lights, brake lights, turn signals, flashers
▢ Reflector Tape: clear, free of dirt
If Left Unchecked:
Fines for a headlight out vary from state to state, but the consequences of non-functioning brake lights or turn signals could confuse drivers and create unsafe situations. Both of these can be spotted and fixed during a pre-trip inspection. It's easy to run to the shop and change the light yourself if possible. License plate bulbs are just a few cents, and headlight kits range from $40-$250 . Don't add the price of a ticket on top from getting pulled over!
On the topic of lights, it's important to note that warning lights like the engine light or battery alert light should be addressed immediately to avoid developing into bigger issues down the road.

▢ Wheel inside: not broken, no illegal welds
▢ Wheel outside: no cracks or illegal welds
▢ Tires: no cuts or bulges, air gauge matches manufacturer recommendations, tread depth at least 4/32" and evenly worn
▢ Spacing: duals are properly spaced
▢ Valve Stem: not audibly leaking. metal cap in place and secure
▢ Lug Nuts: present, tight, no cracks
▢ Hub Seal: not cracked or loose
Tire problems cause 8,000 truck accidents per year. While flats are sometimes unpreventable, blowouts can be caused by improper inflation , which can also shorten the lifespan of your tires via irregular wear and tear. Timely alignments and rotations can also keep tires running longer; the price of new big rig tires is from $250 to $600 . A tire blowout mid-load can make you miss your appointment and waste precious driving hours - all the more reason to be thorough in your truck inspection.
Something to keep in mind is the way you conduct your pre-trip checklist is important. For example, there are a lot of videos and content showing truckers how to check their tires by kicking, beating, and even using a hammer. Hitting a tire with force like that, in the right spot (damaged) can lead to a blow-up and severely injure you and your truck. Even lugging around a damaged tire can lead to a blow-up . Stay safe and take all necessary precautions!

Steer Axle/Rear Suspension
▢ Steering Shaft: not BBC, securely mounted
▢ Steering Gear Box: not BBC, securely mounted, no visible leaks
▢ Hose: no visible leaks, properly mounted
▢ Pitman Arm: not BBC, securely mounted, nuts and pins are all hardware is present and secure
▢ Drag Link: rubber is in good shape, bushings are properly greased and not split or cut
▢ Upper/Lower Control Arms and Tie Rod: not BBC, securely mounted
▢ Spring Mounts: not BBC, securely mounted
▢ Leaf Springs: not BBC, securely mounted, not shifted or scissored
▢ U-bolts: not BBC, securely mounted, all accounted for
▢ Shock Absorber: not BBC, securely mounted, no visible leaks, rubber bushings aren't dry rotting
If Left Unchecked:
On their own, each of these parts isn't a huge deal to replace. For example,
- Steering Shafts: $100-$300
- Pitman Arms: $50-$200
- Steering Gear Box: $150-750
- Shock Absorber: $50 - $90
On the other end of the spectrum, neglect can lead to the truck leaning to one side, which can cause further damage. Blown shock absorbers will also make your truck hard to handle, steer, and control. Say it takes a mechanic 3-5 days to diagnose and fix a suspension issue. You could lose out on $1,000 - $3,000 in earnings that week, plus the several hundred it will cost in repairs. Spotting these issues during your 15-minute pre-trip inspection could save you thousands.

▢ Mirrors: mirrors adjusted properly and without cracks, free of dirt
▢ Foot Pedals: unobstructed
▢ Horns: functioning properly
▢ Windshield: no stickers, cracks, or excessive dirt
▢ Heater/defrost: both operate when the fan is set to max
▢ Wipers: arms move properly when turned on, and wiper fluid works
▢ Steps: mounted and secured
▢ DEF cap: secured
▢ Fuel cap: gasket and vent in place, chain secures cap to the tank
▢ Skirting: no damage, panels secure
To be mid-trip and discover your defrost or wipers don't work can be a scary feeling. A suddenly obstructed view with no way to clear it is what the in cab inspection is meant to avoid.
With the average truck eating up $15,000 per year in maintenance and repairs, it's the little things that add up to such a steep number. For example, fixing a windshield can cost anywhere from $500 - $2,000, depending on the truck type and severity of damage. Wiper blades cost $14 - $35 on average, and an AC compressor would cost around $200 to fix/replace . It's easy to see how these numbers add up fast, but waiting until something breaks on the road and taking on the cost of an OOS violation can quickly double and even triple those numbers.

▢ Frame: no illegal welds, not BBC, no rust
▢ Drive Shaft: not BBC, properly mounted, not twisted, and the U-joints are clean
▢ Universal joint: not BBC
▢ Differential: no leaks
Rusting frames and chassis can be prevented and stopped in their tracks with preventative protective sprays . To protect a drive shaft, keep it free of dirt and debris and make sure it's well lubricated. The price of a new driveshaft is around $1,200 . The cost of checking it during pre-trip is free. Remember, the purpose of a pre trip inspection Class A is to not only keep you safe but to spot mechanical issues before they get worse.

▢ Bolts/Bracket: all accounted for and secure, not broken or bent
▢ Locking pins: all accounted for and secure, not broken or bent
▢ Release Handle: releases freely and is in the locked position.
▢ Apron: no cracks, no gap between apron and 5th wheel plate, securely fastened
▢ Skid Plate: no cracks, properly greased, securely mounted
▢ Platform: securely mounted, not cracked or broken, no illegal welds
▢ Kingpin/Locking Jaws: locking jaws are wrapped around kingpin, which is straight with no chips or welds
▢ Air Lines: securely mounted at both ends. Lines are free of cuts, no audible leaks.
▢ Electrical line: secured at both ends. Lines are free of cuts, no audible leaks.
The consequence of worn brackets or pins is accidental uncoupling, otherwise known as dropping a trailer. Not only can this cause accidents, but it can damage the trailer and the cargo inside. In these cases, the carrier is almost always liable for any damages.

▢ Header Board: properly mounted and secured, not BBC, no missing rivets
▢ Clearance lights: not loose, cracked, or dirty
▢ Top rail: No cracks or collision damage.
▢ Rivets, holes: no holes, all rivets in place.
▢ Landing gear: properly mounted and secured, not BBC, shoes are present, handle moves freely
▢ DOT tape: covers at least 50%, not dirty or peeling
▢ Floor: no holes
▢ Cross members: none are damaged, missing, or twisting
▢ Tandem release: properly mounted and secured, not BBC
▢ Slide rail: properly mounted and secured, not BBC
▢ Pins: engaged
▢ Clearance lights: not cracked or dirty
▢ Doors: not broken, no holes, seal intact
▢ Hinges: securely mounted, not BBC
▢ Door handles and rods: securely mounted, functioning properly
▢ Lights: securely mounted, not cracked or dirty
▢ DOT tape: clean, covers 100% of the backside of the trailer
▢ Bumper: properly secured, not BBC
The trailer keeps your precious cargo safe. Issues with the cross members, flooring, or doors leave cargo unsecured and exposed to the elements. Of this list, the most expensive fix is replacing or repairing cross members. Just one broken cross member puts a truck OOS, and repair/replacement costs thousands , mostly in labor. How can they get damaged?
- sloppy hooking/unhooking
- exposure to the elements
- uneven loading
- punctures from inside the trailer
- blown tires
If you notice trailer damage during your Class A pre-trip inspection, you'll have to get it fixed before taking any more loads.

▢ Air pressure: set to proper operating range, no warning lights
▢ Temperature gauge: rising to proper operating range, no warnings
▢ Oil pressure: rising to proper operating range (25-50 PSI), no warnings
▢ Voltmeter: operational, 13 - 14 volts
▢ Dashboard light indicators: check the indicators for the high beams, turn signals, and flashers.
▢ Fuel: gauge matches visual compared to looking in the tank
▢ Tachometer: 1000-1500
▢ Water temperature: 180-205 degrees
▢ Def level: minimum of one light bar
If these gauges don't pass the pre trip inspection Class A checklist, it's likely due to faulty wiring or a fuse issue. You'll have to identify the source or take it to someone who can.
Simple electrical fixes can be done on your own. At a mechanic, a blown fuse costs around $100 to repair, and a full rewiring can cost anywhere from $1,000 - $2,000 .
Preventative maintenance includes replacing old connections with more modern technology and having circuit protectors checked during regular maintenance.

A DVIR, or Driver's Daily Vehicle Inspection Report, is the form that drivers fill out during the Class A pre-trip inspection and at the end of their day. It's designed to keep the company informed of any missing or damaged parts of the truck, keep maintenance costs as low as possible, and keep trucks on the road safely.
Drivers should keep their completed forms accessible and stored for up to 6 months, just in case they're asked to pull them for reference.

Most Common Issues Found During Pre Trip Inspection
Below are the most common issues found while running through a CDL pre trip inspection checklist. If left unchecked, these things can lead to getting pulled over and receiving a violation, or worse, causing a breakdown where you or others are hurt.
Here's a run-through of what to do if you run into these common issues and how to avoid them."
Broken Lights
What to Do:
The first of the three L's (lights, leaks, and leans), broken lights are an easy way to get pulled over and trigger a full-blown roadside inspection. If you notice an issue with one of the many lights during your truck inspection, you're required (and it's in your best interest) to get a replacement immediately.
How to Avoid This:
Obviously, there's no way to avoid lights going out. However, you can avoid faulty reflectors by getting regular washes, especially if you've driven somewhere rural or salted. Shippers appreciate a clean truck, too.
Maintenance as a Money Saver:
Lighting violations are known as ""gateway violations"" because they open the door to law enforcement noticing other things wrong with the truck. This makes staying on top of maintenance even more pressing. For example, most new reflectors cost around $5 each . If you get pulled over for missing or faulty reflectors, it could trigger an inspection that makes you A) sit still and waste hours, B) miss your appointments, C) end up OOS, and D) get in trouble with your company.
Leaning is the second of the three L's. A leaning truck could indicate
- tire problems
- faulty suspension
- worn spring bushings
- airbag issues
The first step is to check out the above mechanisms yourself for any noticeable worn springs or airbag problems. To avoid damaging any equipment even further, go to the shop after your pre-trip inspection and get it checked out.
Uneven loading puts excess strain on the truck and can cause leaning over time. You have every right to ask shippers to fix uneven or shoddy loading.
A new leaf spring is one common solution to fixing a leaning truck. Costing anywhere from $80 - $450 , it's a solid first step compared to full suspension repair which costs $1,000 - $2,000.
The last of the three L's are leaks. When you look on the ground near the engine, do you see any puddles or fluids? There are three common sources:
- power steering
- water leaks
- brake fluid
Identify the source. What type of liquid is it? Does it smell? How big is the puddle? Is the radiator cap secured and not broken? If you can identify the problem and fix it - great. If not, make a call to the nearest shop.
The reason you check every bolt and hose on the pre trip inspection Class A checklist is to avoid these mystery leaks. Preventative maintenance is key.
Maintenance as a Money Saver:
It's a lot cheaper to replace nuts and bolts than it is to replace an entire system that's been damaged due to ongoing leaking. Driving with a leaking radiator can damage engine bay components and require repairs to a chain of other parts. If the problem was the radiator gasket, for example, the cost of a replacement would only be around $40 .
The limit for tread depth is 4/32" on steer tires and 2/32" on others to pass a Class A pre trip inspection. Sometimes tires look good during inspection, but after a long haul, treads have worn down too low.
Tire replacement should be prompt - blowouts happen all the time and can do serious damage to the underside of the trailer. Check if the tire is still under warranty, and have it and any others replaced ASAP.
Make sure tires are always filled to the manufacturer's recommendation and ideally the same PSI in each tire. Note that tread loss accelerates in extreme heat. Tires gain about 1 pound of pressure every 10 degrees as the temperature increases. Asphalt can be 20-50 degrees hotter than the air; keep that in mind before thinking any bulges or worn tread will be fine.
New big rig tires cost $250 - $600 , or $0.04 per mile. Because of the high cost, many large fleets are opting for imported tires to keep costs down. Research reviews on the brand you have in mind first - many have bad reviews from truckers. Here's a video that shows how much time can be lost by blowing a steer tire.
Overheating
Pull over safely and legally. Give the truck some time to cool down in idle. Try turning the heat on to get some of that heat out of the engine - it will feel uncomfortable but protecting the engine is worth it. Check to see if the radiator is jammed with debris or has bent fins. An overheating truck could be difficult to diagnose, and you'll most likely have to have a mobile mechanic come to you. If you were going up a steep grade, it might have just been the way you were driving.
- Keep the radiator clean
- Check the muffler for soot build-up in older trucks
- Don't use cruise control in hilly areas
- Don't overload the trailer
Constant overheating can be hard to diagnose, and it can make you chronically late to appointments. Regular maintenance and a thorough CDL pre trip inspection Class A are where the little details can be spotted and nipped in the bud.

Cota Systems Make More Money Per Mile CDL Pre-Trip Checklist
We know the struggle of hauling empty or partially full trucks and deadheading between every load. Our solution? Seamlessly connecting truckers with available LTL loads that complement their route and trailer capacity. Free and easy to use, Cota Systems™ platform makes it simple to earn more money per mile. We'll send you available LTL truck loads on your preferred routes as soon as they're posted.
Simply sync all of your favorite load boards into Cota Systems™ for easy browsing and instant notifications.
COTA SYSTEMS™ Mobile App
Cota Systems™ mobile app connects drivers with new loads and their dispatchers no matter where they are.
- Extra loads on the road.
- Scan and send documents.
- Keep track of your earnings.
- Seamless dispatch integration.
- Real-time load notifications.
- Stay connected anywhere.
Staying efficient on the road makes the difference between staying profitable and staying afloat.
Our trucking dispatch software is completely free and feature-rich, saving teams time on paperwork and document sharing. The platform integrates seamlessly with the driver app simplifying everything from load finding to billing.
How Cota Systems™ helps drivers 10X their income:
- Eliminates wasted miles with convenient LTL and partial load boards
- Efficient document uploading and one-click billing
- Communicate with shippers in the same app
- Load board syncing cuts down the time it takes to book a load
Bypass Construction
The DOT 511 traffic app provides state-specific traffic and construction updates. Check for delays on your route to get ahead of detours and lane closures. Each state has their own app, so download it ahead of time.
Why does it matter? If you earn $0.60 per mile on a 400-mile trip, that's $240 earned in roughly 8 hours. Now, say traffic adds 1.5 hours to your trip. You still earn the same $240 AND you don't have the opportunity to pick up another load before you reset. Time is money!"
In 2016, truckers were delayed a total of 1.2 billion hours because of congestion on the road - that's in the billions! Truck bottlenecks are mostly common in major cities. Planning your route ahead of time to avoid traffic delays is crucial to your bottom line.

Weather Apps
Winter and summer storms can eat into income and create seriously dangerous roads. Depending on the weather, you might be able to plan a different route to avoid delays or change the time and place you stop to rest. The AccuWeather app is a popular choice among drivers.
The horror stories of drivers getting stuck at a rest stop for days or getting blown over by strong winds paint the ugly picture of the weather as a driver's biggest opponent.
Truck Parking
After finishing your Class A CDL pre trip inspection, take a few minutes to map out overnight parking spots along your route. American Truck Parking does a good job of showing truck stops and rest areas that offer overnight parking, as well as the pricing, pictures, and other amenities. You can filter out for gated parking spots, CAT scales, showers, truck washes, and much more. Compare pricing beforehand and save yourself the cash!
Dock Details
Headed to a new shed? Check them out on Dock 411 to confirm things like pallet restrictions and hours of operation. Not sure if you can fit? Most places have pictures that other drivers took or reviews about slow loading and yard hazards.
The benefit? This helps plan things like getting lunch, calculating hours, and knowing whether or not you even want to take a certain load. If you see reviews that a shed has an average 7-hour loading time (the standard is 2.5 hours ), you can have a conversation with dispatch early on to make a game plan regarding detention and/or layovers.

Gas Buddy helps truckers find the cheapest gas prices along their route. While you're looking, you can see what stops have showers, food, repairmen, and other amenities so you can save time at a 1-stop shop.
For reference, the average owner-operator spends $45,605 on fuel per year ( 2022 ). Company drivers don't usually have this problem since they have discounted fuel cards. (You can get fuel cards with Cota Systems , too).
Legally Bypass Inspection Sites
Did we mention that time is money? Another way to save time is with Drivewyze , an in-cab app for driver devices that provides inspection bypass opportunities at 884 weigh stations across the states. When bypass isn't allowed, they have an e-inspection system that speeds up the process and avoids long lines. It sounds too good to be true, but it's 100% legal and works 89% of the time. Prepass is another company that offers this service.
Weigh station stops can take anywhere from 30 minutes to a few hours if lines are long or they find something wrong with your truck. That 30-minute stop could have earned you $15 (at $0.60/mile for 25 miles). Doing so every day could cost you $300/month, and that's IF the stops only take 30 minutes!
Most drivers use a combination of navigation apps. Hammer and Google Maps are popular choices. Systems made specifically for truckers won't take you down prohibited roads - that's why Google Maps alone might not cut it.
Health Apps
Recent studies found that workers who take care of their mental health average 9.3 fewer sick days per year than workers who don't. The life expectancy of truck drivers is 61 years , partly due to their unhealthy lifestyle and work-related stress. Your health is just as important as any CDL pre-trip list. Obesity is one of the most prevalent health issues in the trucking industry for long-haul drivers. These healthy habits can save you down the line:
- Skip the fast food, sugary snacks, and sodas.
- Find a way to manage your stress. Talking to a friend while you drive or finding a podcast that you enjoy are two common solutions.
- Exercise during home days focusing on your back.
- Switch up your stimulants. Instead of Redbull every day, try green tea, coffee, or Yerba Mate a few days per week.
Try out some apps like MyFitnessPal for weight loss and nutrient tracking or Luminosity for mental health support.

OTR drivers can take advantage of toll services like Prepass (which also serves as a weigh station bypass) and Best Pass , a prepaid transponder system. If a toll company isn't covered, it's best to just use cash and keep your receipt. A few tips:
- Take a second to review toll prices on your trip. Any tolls should be factored in when dispatch discusses rates, especially in cities.
- Find and join any toll discount program you can find (take the New York toll reimbursement program, for example)
- Best Pass offers cash toll discounts, but you should verify that the transponder rate wouldn't have been the same (and much faster).
How to Remember Pre Trip Inspection CDL Checklist
Start with our printable CDL pre trip inspection cheat sheet and repeat, repeat, repeat. Use the same checklist every time so your brain can get into that rhythm. Remember the acronyms:
BBC: Bent, broken, or cracked
ABC: Abrasions, bruises, cuts
PFL: Peak for leaks
3 L's: Lights, leaks, leans
Understanding the mechanics of the truck and how everything works together will help your brain form stronger connections and remember more. Try explaining the process to your wife, kids, or friends (even if they won't remember) so you can spot areas you need to study the CDL pre trip inspection PDF more.
What is the item most commonly overlooked during a pre trip inspection?
A few items on the CDL pre trip inspection checklist trip up new drivers most often:
- Chocks: During your CDL class a pre trip inspection, you'll have the vehicle on and off, and be testing various brake systems. Chocks prevent the truck from moving around while you're underneath and walking around.
- Seatbelts: It's often the last thing on a new driver's mind on the long list of items to inspect. But, your life depends on it.
- Emergency Kit: Especially if you drive a shared truck, you don't know if the previous driver used up anything in the kit. Just because you see the kit doesn't mean everything is present and functional.
- Reflectors: Reflectors help other vehicles see you at night. Because there are so many, drivers rush through this check or give them a quick glance. These are another "gateway violation" that can get you pulled over and given a roadside inspection.
- Wheel Lug Nuts: Loose wheel fasteners could have your tires speeding down the freeway toward other cars and trucks. Double-check that all lug nuts are fastened and free of rust.
- Personal Health: Remember the figures we mentioned about truck driver life expectancy. Put your health first, and don't drive if you feel sick and feverish.
This is all about the safety of you and others. Keep your pre trip inspection Class A cheat sheet with you and go through the same, thorough motions every time.
CDL Class B Pre Trip Inspection
The CDL Class B pre trip inspection follows virtually the same guidelines as Class A, but they differ in terms of vehicle type.
Class B includes buses, straight trucks, and smaller commercial vehicles that are typically not designed to tow additional trailers. Items like the 5th wheel and coupling mechanisms are obviously left off. Drivers have to check passenger doors, wheelchair lifts, handrails, emergency exits, and seating for passenger safety.
New Truck Pre-Inspection Checklist Addition
Non owner-operators who are regularly assigned new trucks can't take for granted that everything was left as you might have left it. Add these to your pre-inspection checklist:
- Cab card & book: permits, registration, IFTA paperwork, and cab cards are present and up-to-date
- IFTA Sticker: current year is displayed on both sides of the truck
- Elog Device: present and functional
- Permits: in the cab card book and up to date
- License Plate: front and back plates match
- Medical Card: med card and CDL are on your person or in the truck
- Paper Logbook: backup if E-log stops working
- Inspection sticker: stuck to the side of the truck and up-to-date
- FMCSA Safety Book: within arms reach of the driver's seat
Additional Supplies: load securing equipment, extra coolant and oil, cable cutters, hammer and wrench, hard hat, and steel-toed boots.
Final Notes on Completing Your CDL Pre-Trip Inspection Checklist
So, you're armed with the ultimate CDL pre trip inspection checklist that will help you pass your exam and save on vehicle maintenance. Your truck is your money maker; our goal for this guide is to give drivers the tools to protect their biggest asset and keep the most money in their pockets as they can.
Learn more about how to earn more money and truck driver pay in our blog . Here's another link to the pre trip inspection Class A PDF . Good luck!
Join Our Newsletter
Discover tips, trick, and tools to grow your business faster than ever! Plus - exclusive giveaways, discounts, and new feature releases.
The Cota Systems Blog
Discover new tools, tips, and tricks to drive the growth of your business.
What is Consolidated Freight? Shipping Secrets

#1 Ultimate Freight Broker Guide: Results You’ll Love
Complete pre-trip inspection checklist for truck drivers

By The Schneider Guy
Estimated reading time: 4 minutes
As a truck driver, performing a CDL pre-trip inspection is one of the most common and repeated tasks you will complete. Pre-trip inspections help truck drivers ensure their tractor and trailer are safe to operat e before hitting the road.
Keep reading to learn what a p re -trip inspection is and what should be on a p re -trip inspection checklist .
What is a pre-trip inspection?
A pre-trip inspection includes checking over the tractor and trailer a truck driver will be operating . A pre-trip should be completed before the operation of a vehicle :
- At the beginning of a driver’s shift.
- Any time a new trailer is picked up.
- After a 10-hour break.
A thorough inspection usually takes anywhere from 30 minutes to one hour and should be logged as on-duty, not driving (line 4) .
How to complete a CDL pre-trip inspection
CDL pre-trip inspection checklist
1. passenger-side engine: .
- Air filter housing: Secure mounting, cover in place.
- Windshield washer fluid reservoir: No leaks, proper fluid level.
- Turbocharger: No oil or exhaust leaks.
- Engine air ductwork: No cuts, clamps secured.
- Alternator: Mounting secured, no broken or loose wire.
- Accessory drive belt: Not cracked or frayed.
- Air conditioner compressor: Secure m ounting .
2. Front brakes (covers all five brake components):
- Brake drum: No cracks.
- Brake lining: No cracks or damage.
- Slack adjuster: Proper angle to the brake chamber, clevis and cotter pin intact.
- Brake air line: No bulges or cuts, fitting tight .
- Brake chamber: Mounting bolts secured, band clamp secured.
3. Front wheel:
- Tire: ABCs (abrasions, bulges, cuts), pressure = 120 PSI, tread depth = 4/32 min ( DOT ) .
- Wheel: Not cracked or bent.
- Hub oil: Not leaking, at proper level – if it’s a sealed unit, can’t check level.
- Oil seal (outer): Not leaking.
- Valve cap: Not missing.
- Lug nuts: None missing, no streaks or shiny areas, none loose.
4. Driver side of engine:
- Radiator brace: No cracks or missing bolts.
- Radiator: Not leaking, secure mounting.
- Water pump: No cracks, not loose or leaking.
- Fuel water separator/filter: Not leaking, secure mounting.
- Pitman arm/drag link: Not cracked, castle nut secured with cotter pin.
- Steering gear box: Secure to frame, not leaking.
- Power steering reservoir: Secure mounting , no leaks, proper level.
- Dipstick: Right level, secured after check.
- Steering shaft: Secure, not loose or damaged.
- Fuel pump: No cracks, not loose or damaged.
- Oil filler cap: Secure, no cracks.
- Engine coolant reservoir: No leaks, proper fluid level.
5. Steer axle suspension:
- U-bolts: No cracks, no loose or missing nuts.
- Leak spring: No cracks, not loose or shifting.
- Tie rod: Secured with castle nuts and cotter pins.
- Shock absorber: Secure mounting, not leaking oil.
- Axle: Not cracked.
6. Rear suspension:
- Spring mount: No cracks, secure mounting.
- Tire: ABCs (abrasions, bulges, cuts), pressure = 110 PSI, tread depth = 2/32 min ( DOT ) .
- Airbag (bellows): Fully inflated, secure mounting, not ruptured.
7. Side of cab:
- Mirrors: Secure m ounting , no broken glass.
- Doors: No damage, glass not broken, hinges secured, opens and closes well.
- Lights and turn signals: Working, not cracked.
- Steps: Mounted, secured to skirting.
- Battery box: Secure m ounting , cover latched.
- DEF cap: Cap secured.
- Fuel cap/tank: Gasket in place, vent in place, chain secures the cap to the tank.
- Side skirting: No damage, panels secure.
- Side box: Secured, safety triangles present.
- Side of sleeper berth: No body damage.
- Sleeper berth window: No cracks.
8. Rear of cab:
- Electrical cord: No bare wire, no corrosion, check the plug at the end of the cord.
- Air line: Not tangled or worn, rubber grommets not worn, fittings tight.
- Cab shock absorber: Secure mounting, not leaking oil.
- Cab airbag (bellows): Not ruptured, securely mounted.
9. Driveshaft/rear frame:
- Driveshaft: Not cracked.
- Universal joint: Not cracked, not missing bolts, no shiny areas.
- Differential: Not leaking oil.
- Frame: Straight, no non-factory welds.
10. Fifth wheel area:
- Pivot pin: Keeper pin and cotter key intact.
- Slider lock pins: Fully engaged.
- Release arm: Not bent.
- Slider rail: No broken welds or missing bolts.
- Slider stop blocks: Welds not broken, not missing bolts.
- 5th wheel platform: Well-greased, tilted down.
11. Front of trailer:
- Top rail: No cracks or collision damage.
- Clearance lights: Not broken, working properly.
- Registration: Not missing, readable.
- Document box: Not missing or loose.
- Air line /glad hands: No bulges or cuts in air lines, rubber grommets not damaged on glad hands.
- Electric hook up: No broken pins, cover intact.
- PM sticker: Current, legible.
- Height sticker: Legible, legal for route.
- Placard holder: Not broken or missing rivets.
- Tracking device: No cracks or collision damage.
12. Side of trailer:
- Top rail: Not cracked, no collision damage.
- Clearance light: Not broken, operational.
- Bottom light: Not cracked, no collision damage, no missing bolts.
- Landing gear: Legs straight, no broken welds in bracing, sand pads secured and clean handle in cradle.
- Reflector tape: Clean.
- Side panels: No holes or cuts, no missing rivets.
13. Rear of trailer:
- Latches: Secured, not damaged.
- Lights: Not broken or missing, operational.
- Splash guard: Brackets and guard secured.
- License plate: Secure and clean, light is working.
- Bumper: Not damaged, no broken welds.
- Door hooks: Not loose, no missing bolts.
- Hinges: Not cracked, no missing bolts on both sides.
- Door seals: No separation, no rubber tubing sticking out.
14. Trailer suspension:
- Air line: No bulges or cuts, fittings are tight and not rubbing.
- Axle: Not bent or broken.
- Clevis pin/cotter key: Not missing.
- Slack adjuster: Proper angle, clevis pin and cotter pin intact.
- Brake linings: Minimum of ¼ inch thick, not cracked.
- Brake drum: Not cracked.
- Tire: (ABCs), tread depth = 2/32 , air pressure = 110 PSI.
- Spring: Not broken, not shifted.
- Spring mount: No broken welds.
- U bolts: Not loose, not cracked.
- Torque rod: Secure mounting, bushings intact.
- Spring brake chamber: Secure m ounting , band clamp secure.
15. Gauges/inside the truck:
- Fuel: Matches visual when looking in the tank.
- Def level: Maintain a minimum of one light bar.
- Oil pressure: 25-50 PSI.
- Speedometer: 0-60 MPH.
- Air pressure: 90-120 PSI.
Please note that the list above is just an example. It is important to remember the type of driver you are, the company you work for and the type of truck you drive can impact your CDL pre-trip inspection . Be sure to consult your company guidelines or speak with your leader for more information on your post-trip inspection requirements.
Get more great driving tips and guides.
Schneider Guy loves the "Big Orange." He's passionate about the trucking industry and connecting people to rewarding careers within it. He's been the eyes and ears of our company since our founding in 1935, and he's excited to interact with prospective and current Schneider associates through "A Slice of Orange."
Related posts

8 CDL Road Test tips to help you pass

How hard is it to get a CDL?

How to get your CDL – 7 simple steps for new truck drivers

COMMENTS
CDL Pre-Trip Inspection Checklist: Engine Compartment. Driver Door Fuel Area. Coupling Area. Trailer. Light Check. In-Cab Inspection and Brake Tests. Visit the complete pre trip inspection study guide: https://cdltrainingtoday.com/cdl-training-resources/cdl-study-guide/cdl-pre-trip-inspection/.
Ensure safe journeys with our comprehensive Pre-Trip Inspection Checklist. This free PDF template covers all critical aspects of pre-trip inspections for vehicles, empowering drivers to identify potential issues, perform thorough inspections, and ensure the safety of passengers and cargo.
Download our Free CDL Pre-trip Inspection Checklist! Get the ultimate guide to improve your safety each trip and earn more money every mile!
Class A Pre-Trip Inspection. Point to, or touch, every item that you are inspecting. Tell the tester how you know that the part you are inspecting is in good, safe working condition. Identify all defects or you may not receive credit.
Pre-trip inspections help truck drivers ensure their tractor and trailer are safe to operate before hitting the road. Keep reading to learn what a pre-trip inspection is and what should be on a pre-trip inspection checklist.