- Skip to primary navigation
- Skip to main content
- Skip to primary sidebar
- Skip to footer
Journey With Confidence

RV Plumbing: How To Fix Water Supply Lines

- Maintenance, Modifications and Repairs
When something goes wrong with plumbing in your house, the “fixer” can be at your door within a couple of hours. But when you discover a leak in your plumbing, it’s that not simple.
Not too many plumbers make RV house calls. Whether you’re on the road as a snowbird or find a problem while prepping your RV for spring , getting a repair done at a service facility could mean days, even weeks, just waiting for an appointment. That’s an untenable situation, especially for snowbirds.

There are a series of waterlines in an RV and ensuring quality tubing is recommended. Photo courtesy TG Twinkie, airforums.com member
In many cases, a break or leak in an RV water supply line is often a literal snap to repair. That’s because the water lines in most RVs are plastic “PEX” pipe. They are not buried inside walls and are usually accessible for easy repair. PEX stands for cross-linked polyethylene.
Typically, this pipe is connected using a special tool and metal fittings that can complicate the fixing procedure for RVers. The good news is you can skip the tool altogether. Instead, use a variety of plastic fittings, some of which snap the stuff together, making repairs quick, easy, and relatively inexpensive.

In RVs, manufacturers typically use translucent non-colored PEX for all runs.
What is PEX tubing for the plumbing in my RV?
PEX tubing in homes is color-coded for hot and cold. In RVs, manufacturers typically use translucent non-colored PEX for all plumbing runs.
Further, two sizes are used, 3/8-inch and ½-inch. These are the standard size because the outside diameter of the tubing is about 1/8-inch greater than the called-for size. Also, PEX is inexpensive. At one hardware store, bulk 3/8-inch may set you back 50 cents/foot.
Additionally, PEX is ideal for both cold and hot water (some up to 200 degrees) plumbing. Typically, the rating is on the tubing itself. Chlorinated water is not an issue in terms of tubing or health safety.
What tools do I need?
While working on water lines , you just need a tool to cut the PEX tubing itself. You can use a utility knife, but a tubing cutter designed for PEX ensures a clean, even edge.
This is also a requirement for a leak-proof connection. These cutters are less than $10. I usually go with a PVC pipe cutter, which makes a clean edge and can be used on PVC pipe as well.
Fittings that are required
When you need to change out your water lines , there are a variety of different fittings available. They range from simple couplers that allow you to fix a break to tees that are for jobs when adding a new run.

The partial assembly of the tubing in place over the flare. The next step is to tighten the nut.
Others include adapters that allow you to shift from one size of tubing to another. Want to add a shut-off valve to turn the water off to your toilet (or whatever) without shutting down the whole RV supply?
There are fittings for that, too. Here are a couple of styles particularly useful to RVers when it comes to plumbing:
- Plastic compression fittings: A brand found in many hardware stores is Flair-It. These are relatively inexpensive. We bought a 3/8-inch tee fitting in a small-town hardware store, but you can also find them on Amazon . Simply, cut the tubing squarely and ensure there aren’t any burrs on the tube. Unscrew the nut from the fitting, and slide it back over the tubing. Now, push the tubing over the fitting flare, rocking it back and forth until it comes to a full stop against the fitting. Then, tighten the nut by hand until secure. Need to take it apart? Just reverse the order of assembly instructions.

The assembled tubing inserted into the fitting. (*Note: The tube stiffener not visible as it’s inside the fitting)
So, what are advantages of this? They are less expensive than quick-connect fittings. However, the disadvantages are when you are working in a cramped area.
It can be a bit difficult to maneuver your hands in place to shove the tubing onto the fitting and to tighten the nut.
- Quick-Connect fittings: Made by Watts, these are a little more costly. A 3/8-inch coupler for joining two pieces of tubing is around $4.00. Using these fittings in a cramped area is much easier. Again, cut the tubing square and check for burrs. Slide the included “tube stiffener” into the end of the tubing until there’s resistance. Now, keep pushing until the tubing comes to a complete stop. Finish the job by inserting the included collet clip on the joint.
To take this connector apart, remove the collet clip. Then, push the collet firmly against the tubing face and pull the tubing out of the fitting.
Aside from an easier fix in a cramped space, there’s less water flow impediment in this design, as opposed to the plastic compression style. Both insert material into the flow, but the tube stiffener appears to block less water flow.
Additionally, the Watts fittings allow you to attach to a host of other plumbing materials, including copper and CPVC. What’s more is the quick-connect fittings and the plastic compression fittings will connect directly to polybutylene tubing.
You may find other brands of quick-connect fittings to meet your needs as well. Some of the larger stores sell other brands of fittings, and of course, price comparing is the order of the day.

RV Plumbing System Basics: Diagrams & How It All Works
RVs can be intimidating, especially if you’re brand new to them. They have so many different systems and it’s all so different from what we’re used to in our homes. Learning it all can feel overwhelming, but RVing Headquarters is here to help! If you want to learn RV plumbing system basics, you’re in the right place.
Not only do we cover the basics and include RV plumbing diagrams, we’ve also got several step-by-step “how-to” tutorials in this post!
This guide covers:
- RV plumbing system basics
- RV holding tanks
- How RV toilets work and how to use them
- How to sanitize your fresh water tank
- How to dump your waste water
- How to find RV dump stations
- Essential RV plumbing accessories
- And so, so much more!
This post contains affiliate links. This means if you make a purchase after clicking a link on our website, we may earn a small commission at no extra cost to you.
Table of Contents
RV Plumbing System Basics
Your RV plumbing system is made up of many of the same components as a house plumbing system, with a major difference: you store your fresh AND waste water on board.
Every self-contained RV will have at least 3 water holding tanks, and the size of the tanks is dependent on the size of the RV. The holding tanks on an RV are:
- Fresh water tank – stores fresh, potable* water for drinking, cleaning, and showering.
- Grey water tank – stores waste water from your sinks and shower.
- Black water tank – stores waste water from your toilets–aka sewage.
*Potable water is water that is safe for human consumption.
Some larger RVs and fifth wheels may have 4 tanks if they have two bathrooms.
These 3 tanks allow you to have all the comforts of home, no matter where you are.
You can use the toilet in your RV, shower in your RV , wash dishes, cook, and yes: you can even drink the water from your RV fresh water tank.
You can fill your RV with fresh water from home, campgrounds, or anywhere with a potable water spigot.
When it’s time to dump your waste water, you need to find an approved RV dump station and connect a sewer hose to dump your RV–we explain all of this later in this post.
RV waste water must always be dumped at an approved dump station. Never dump your RV waste water on the ground. It’s illegal and it’s a biohazard!
Your RV has holding tank sensors on each tank and a panel inside the RV that tells you how full your tanks are so you always know if you need water or if you need to find a dump station.
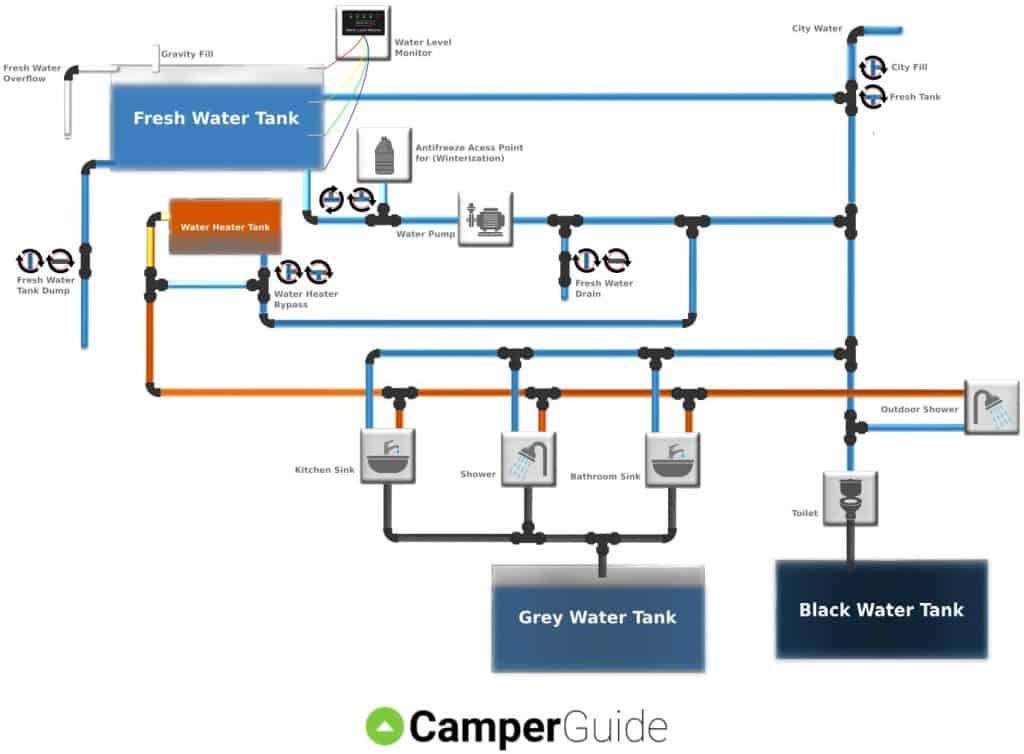
RV Plumbing System Diagram: An Overview
Water-Using Appliances and Fixtures in an RV
Every self contained RV will have these fixtures and appliances at minimum:
- Hot water heater
The bigger and more luxurious an RV you have, the more water-using appliances and fixtures you will have. These include:
- Shower(s) – indoor and outdoor
- Washing machine
RV Holding Tanks Explained
To understand RV plumbing system basics, you need to understand RV holding tanks. There are 3 types of holding tanks in every self-contained RV , and each type of tank holds a different kind of water.
Although larger RV types may have more than 3 tanks total, there are only 3 kinds.
Fresh Water Tank
The fresh water tank holds fresh, potable water. You can use this water for drinking, showering, cooking, and washing dishes.
The fresh water tank supplies water to every water-using appliance in your RV. This tank has a filling port on the RV exterior called the city water connection.
“City Water” can mean potable water from any potable source, like from your house spigot, a campground, etc.
Depending on the size of your RV, your fresh water holding tank may be able to hold anywhere from 12 – 100 gallons of fresh water.
Grey Water Tank
“Grey water” is the term used to describe waste water from your sinks, showering, dishwasher, and washing machines. This waste water contains soaps, washing chemicals, and even food particles from washing dishes. Grey water is not true sewage, but it can definitely develop a terrible odor!
Typically, the grey water tank on your RV is as big as (or bigger) than your RV fresh water tank. The grey water tank also fills up the fastest and needs dumped more often.
This tank is plumbed to the grey tank waste valve on the exterior of your RV for dumping.
Black Water Tank
“Black water” is the term used to describe sewage, so your black water tank is your sewage tank. The black tank holds waste and waste water from your toilets, and occasionally your bathroom sink.
If your RV has two bathrooms on either end of the RV, you will likely have 2 black tanks. This is because the black tank is always directly beneath the toilet. This allows solid waste and paper to drop straight from the toilet into the black tank, so you never have to worry about toilet clogs (unless you develop a poop pyramid).
The black tank is plumbed to the black tank waste valve on the exterior of your RV for dumping, located right next to the gray tank waste valve.
RV Holding Tank Diagram

The RV Toilet Explained & RV Toilet Diagram
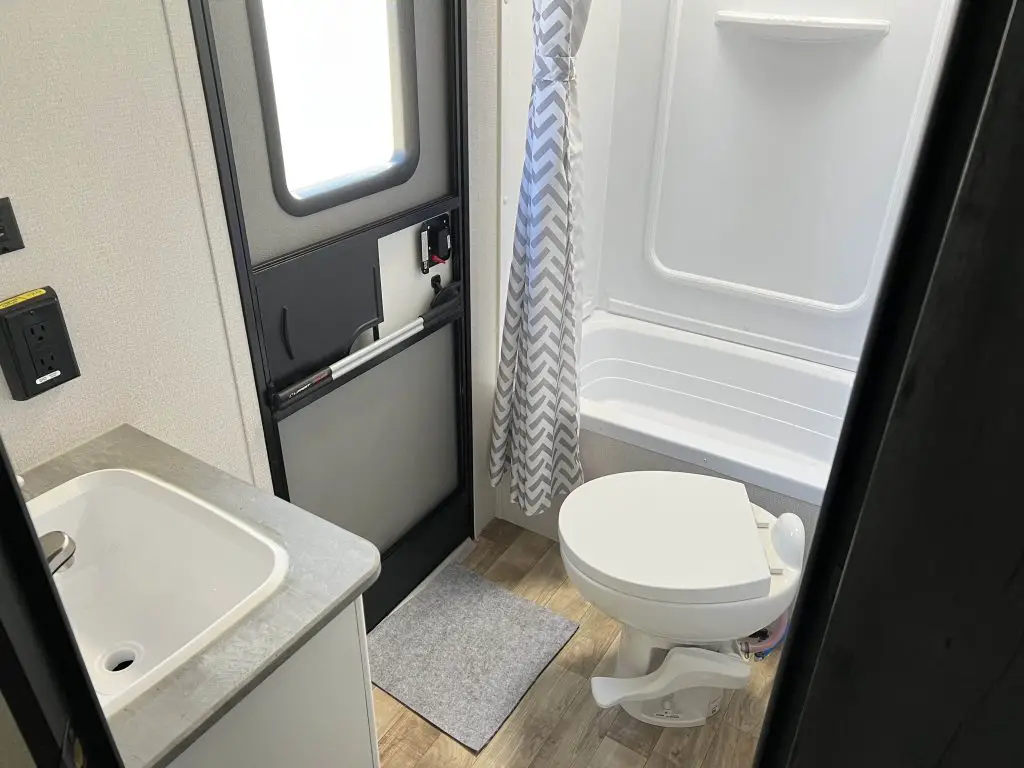
If you’ve ever stepped foot in an RV bathroom, you probably noticed that RV toilets are nothing like residential toilets .
They have a flap that closes the hole, and a pedal on the exterior of the toilet. They don’t have a fresh water holding tank and they also look quite a bit different from a residential toilet. Some RV toilets even have a sprayer or spraying wand for rinsing the bowl.
So how does an RV toilet work ?
How Your RV Toilet Works
There are 3 things that make the RV toilet work:
An RV toilet doesn’t have a freshwater tank, but it is hooked up to a water line which you can usually see on the back of the toilet.
The RV toilet pedal works to open the flap and flush the toilet, but it also serves two purposes.
If you hold the pedal down halfway, it fills the toilet bowl with water but doesn’t open the flap.
If you press the pedal all the way, it opens the flap AND activates the water.
The flap in the bottom of the toilet bowl is lined with a rubber gasket, called the flush seal. This rubber gasket serves two purposes: it holds water in the toilet bowl, and it also creates an air-tight seal to prevent odors from the black tank from entering the RV.
RV Toilet Diagram

How to Use an RV Toilet
You can use your RV toilet for both #1s and #2s, but the process is a little different for each.
To use an RV toilet, first hold down the pedal halfway to add some water to the toilet bowl. If you’re going #2, be sure there is plenty of water in the bowl.
To flush, depress the pedal all the way. Hold the pedal down long enough to flush all debris out of the toilet bowl and rinse it.
If you go #2 or you use toilet paper, hold the pedal down for several seconds to flush with plenty of water.
The key to preventing RV black tank clogs is making sure you always have plenty of water in the tank to help liquify solid waste.
This information is for a standard RV toilet which is the most common, but there are many other RV toilet types. Examples include the composting toilet , cassette toilet, macerating toilet, and more.
IMPORTANT RV TOILET TIP: How to Avoid RV Black Tank Clogs
RV black tank clogs are something no one wants to deal with, but they happen often. One of them is the dreaded RV poop pyramid that happens when solid waste and paper build up and create a literal pyramid in the tank.
Here are 4 important tips to prevent RV black tank clogs (essential RV plumbing system basics tips).
- Always flush with plenty of water.
- Use RV-specific toilet paper in your RV toilet, or don’t flush your paper and put it in a trash can instead.
- NEVER leave your black tank waste valve open, even at a full hook-up campground. This causes poop pyramids by allowing liquids to drain and solids will build up. Leave it closed until the tank is full and ready to dump.
- Use a black tank treatment like RV Digest-It to help dissolve solid waste. 2oz treats a 40 gallon tank, add it in after you dump and rinse your tank. This will prevent dried waste from accumulating in your black tank.
RV Plumbing System Inputs and Outputs
So how does fresh water go IN your RV, and waste water go OUT?
City Water Connection/Fresh Water Fill
Fresh water goes into your RV via the city water connection, which is a port on the exterior of your RV that you hook a hose up to.
Never use a regular garden hose to add fresh water to your RV–you need a potable water hose. Potable water hoses are made specifically for clean drinking water and are free of the chemicals that can leach into the water that you find in garden hoses.
Never use your potable water hose for anything other than drinking water. You can use a utility hose for everything else! Store your potable water hose in its own separate and SANITARY container. You never want to risk cross-contaminating!
RV Waste Valves
RV waste valves are exactly what they sound like: valves that open to dump your RV waste water.
Your RV fresh water fill and RV waste valves are both located on the driver’s side exterior of your RV.
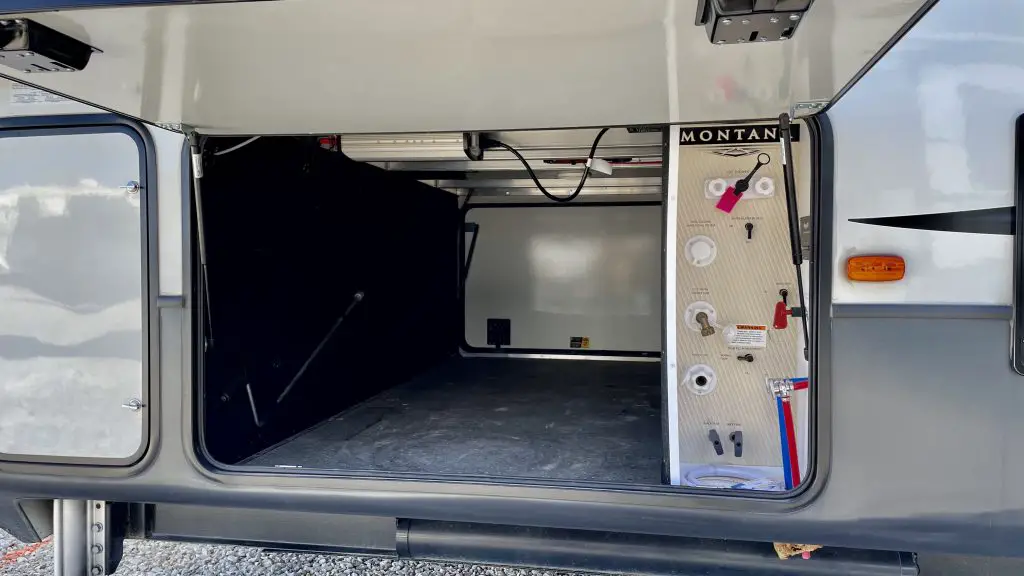
In many cases, they are all located in the same general area. Some RVs have a sanitation-station area located in a storage bay, but others have them exposed.
The gray water and black water waste valves will usually look just like handles attached to a metal rod. Pulling these handles will open a valve, called a gate valve, that dumps your RV waste water tanks.
These valves have a rubber gasket, similar to the one on your toilet flap. This keeps them closed and watertight, but they can fail from time to time. If you notice waste water dripping from this area, you may need to replace your gate valve.
Never pull your gate valve handle until you are absolutely sure that your RV sewer hose is tightly connected and securely attached to a dump station.
Once you pull the valve to dump your tanks, water comes out with such force that the hose can easily pop off or come out of the sewer port on the ground.
Editor’s Note: The sewer hose popping off mid-dump has happened to me more than once and it’s a disgusting mess! Now I am always sure to tug on my sewer hose at the connection after I hook it up to make sure it’s secure.
How to Fill Your RV Fresh Water Tank
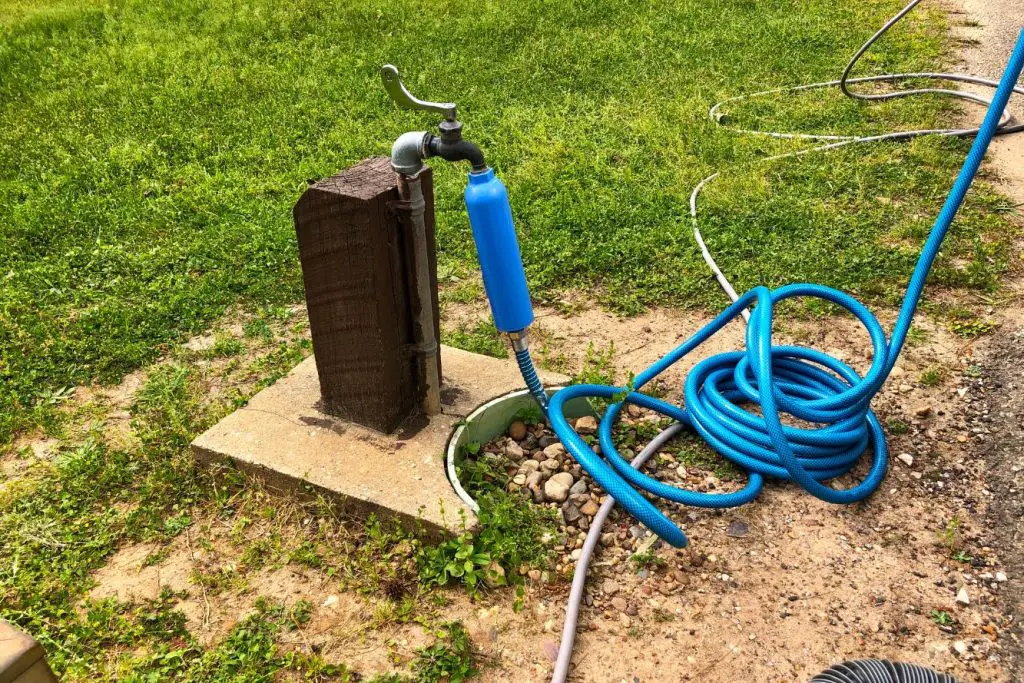
One of the easiest RV plumbing system basics is filling your fresh water tank. Filling your fresh water tank is as simple as hooking up your potable water hose to a spigot, connecting it to your RV, and turning on your “Fresh Tank Fill”.
The fresh tank fill may be labeled differently on different RVs, but it should say something similar.
On most RVs, it’s a knob that can point in one of two directions: city water or fresh tank fill.
Leaving the knob on “City Water” does not fill your fresh water tank. This simply allows the water from the spigot to go directly to your taps and appliances any time you use them. This is a good option if you are staying in one spot for a long period of time, as long as the temps are above freezing.
Turning the knob to “Fresh Water Fill” will allow the water to go through your RV plumbing and fill up your fresh tank. Be sure to constantly monitor your tank monitoring panel so you can turn the water off before your fresh water tank overflows.
Can You Drink Water From Your RV?
Yes! You can drink water from your RV, as long as you keep up on your fresh water tank sanitization maintenance. Your RV is meant to be a home-away-from-home, and it’s meant to have every creature comfort as a house.
If you regularly sanitize your fresh water tank, the water in your RV can be used for drinking, bathing, washing dishes, and cooking!
Sanitizing Your RV Fresh Water Tank – RV Plumbing System Basics
You should sanitize your RV fresh water tank every 6 months if you’re a full-time RVer, or before every camping season if you’re a part-time RVer.
Sanitizing your RV water tank is a pretty simple procedure. It involves adding chlorinated water to your fresh water tank and running it through all your faucets. Then, let it sit for several hours, drain it out, and run fresh water through your system.
Important: Never add undiluted bleach to your RV plumbing system. This will damage your tank and pipes! Always be sure to mix bleach with plenty of water and have a few gallons of water already in your tank before adding the bleach mixture.
You’ll need about ½ cup of bleach for every 25 gallons of fresh water. Mix your required amount of bleach with several gallons of fresh water before adding to your RV tank.
- Drain your RV fresh water system including all faucets, toilet, shower, etc.
- Turn off and bypass your hot water heater and any other appliance you don’t want bleach to get in. There are knobs to do this, refer to your owners manual if necessary.
- Mix your bleach with several gallons of fresh water.
- Add bleach water to your RV fresh water system.
- Fill fresh water tank.
- Turn on your water pump and open all faucets one by one until you smell the bleach water mixture.
- Let sit for 6-12 hours.
- Drain your fresh water tank and refill.
- Run fresh water through all your faucets (one-by-one) until you no longer smell bleach, and you’re done!
How and Where to Dump Your RV Waste Water

To dump your RV waste water, you need:
- An RV sewer hose kit with a clear attachment
- Clorox wipes
- Utility hose
- A dump station!
The quality of your accessories will make all the difference when doing this dirty job.
Not all RV sewer hoses are made the same, and some can make the job a lot harder, messier, and more disgusting than others.
Editor’s Note: I tried the cheap, flimsy RV sewer hoses ONE TIME and vowed I would never go back! It was an awful experience, the sewer hose slithered around like a snake and the attachments were impossible to screw on.
Now, I use the Rhino Extreme sewer hose kit (shown in photo above) because it’s rigid and stays in place. It’s a bit pricey, but I promise you it’s worth it… I’ll never use another brand!
Most RVers recommend having a clear attachment so you can see the color of the water draining as you rinse out your tanks. It might seem gross, but it’s a fact of life and it’s the only way you can know if your tanks are actually clean! (The Rhino kit comes with one, so no worries on that.)
How to Dump Your RV Waste Tanks – RV Plumbing System Basics
RVHQ Tip: always dump your black tank first. Dumping your grey tank after your black tank helps rinse out the sewer hose and remove any remaining sewage or debris.
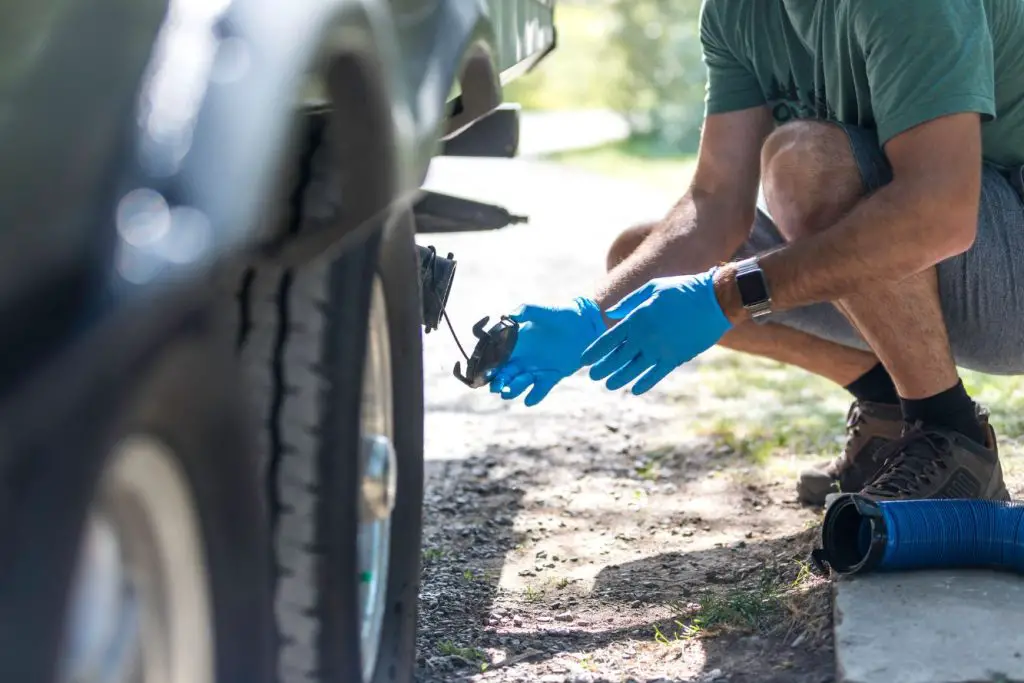
- Put on gloves.
- Hook up your RV sewer hose to your RV sewer hose hookup, and give it a good tug or jiggle to make sure it’s locked in place.
- Put the other end of the sewer hose into the dump port on the ground. Be sure this is secure in the hole. Sometimes there will be a large rock or cement block to put on the top of the hose to hold it in place.
- Once you’re sure everything is tight and secure, slowly start to open the black tank valve. If the hose is remaining tight and secure, you can open the waste valve all the way.
- Once the black tank is empty, close the valve.
- Hook up your utility hose to your black tank flush (if applicable) and flush your black tank for 10-15 minutes, then drain again and close the valve.
- Repeat the process with your grey tank, then close the grey tank valve.
- Remove your sewer hose from your RV but leave it in the dump port.
- Use your utility hose to rinse out your RV sewer hose.
- Put your sewer hose and utility hose away.
- Use sanitizing wipes to wipe down the spigot and all valves and handles on your RV that you touched during the process.
How to Find RV Dump Stations Near You
Dumping RV waste water is just a fact of life, and you can find RV dump stations all over the place.
By law, you cannot dump RV waste water on the ground. Both grey water and black water should only ever be disposed of in an approved RV dump station.
RV dump stations can be found:
- At your campsite if you have full hook-ups.
- At campgrounds, RV parks, state parks, etc.
- At RV dealerships.
- At RV service centers.
- At some gas stations.
- At some rest stops.
Apps and Websites to Find RV Dump Stations:
- Allstays RV Dumps App
- FreeRoam App
- RV Dump Stations App
Essential RV Plumbing System Accessories
We say “essential” because these accessories really are essential in some way or another. For example, you can’t dump your RV waste water without a sewer hose.
And, in some campgrounds, you’re not allowed to hookup to the sewer unless you have a sewer donut and/or a sewer hose support.
Each of these essential accessories has a link to a recommended product on Amazon and a brief description of why you need it.
Important: RVers should carry two hoses. You need a potable water hose AND a utility hose. Your utility hose can be a garden hose, and you can use this hose for everything from rinsing your feet to washing your RV or rinsing your sewer accessories. NEVER store your utility hose and potable hose together.
- Water Filter – A water filter is essential for filtering out sediment from varying water sources. Some campgrounds have a lot of sediment in the water that can damage your RV plumbing.
- Water Pressure Regulator – Campgrounds do not regulate their water pressure, but your RV can only handle 40-60 PSI. Some campgrounds have 100+ PSI and can rupture your RV pipes.
- RV Sewer Hose and Clear Attachment – This is essential for dumping your tanks.
- RV Sewer Donut – This is a sewer port attachment that helps your sewer hose stay in securely. Some campgrounds require this.
- RV Sewer Hose Support – This keeps your RV up off the ground and provides a slope for draining. Required by some campgrounds and RV parks.
- Extra RV Waste Valves – Essential to have if one of your waste valves fails and starts leaking.
- Potable Water Hose – For drinking water only. Be sure to get a potable hose that’s rated specifically for drinking water.
- Utility Hose – For everything else.
Storing Your RV Plumbing Accessories
Always store your fresh water supplies in a sanitary container that’s watertight and never cross-contaminated with other things.
Editor’s Note: I like to use clear plastic totes to organize my sewer accessories and I label the exterior so I never mix them up.
All of my fresh water supplies like fresh water hose, water filters, and water pressure regulator all go in one tote. I keep this tote clean and dry and I clean it with a bleach water spray bottle mixture every few months to keep it sanitized.
All my sewer supplies go in a designated sewer tote that I store away from my fresh water tote. If you have to store them together, store your sewer tote on the bottom.
Wrapping Up RV Plumbing System Basics
This RV Plumbing System Basics is a beast of a guide, and I hope by now you have a solid understanding of how the RV plumbing system works. And how to actually use it, clean it, and dump it!
The RVHQ editors are constantly adding to this post and updating it to keep the information fresh, and adding additional insight when we find it.
RVing Headquarters Team
RVing Headquarters is operated by long-time RV enthusiasts with over 8 years of RV industry expertise and full-time and part-time RV ownership experience. From motorhomes to trailers and campervans, we've done it all. Our Mission: to inspire, educate, and entertain anyone who is interested in the RV lifestyle.
Recent Posts
Should I Leave My Black Tank Open or Closed? Waste Tank Tips
Full hookup RV parks and campsites are the creme-de-la-creme of campsites, providing all the convenience of a sticks-and-bricks house in nature, with an ever-changing backyard. If you’re on full...
Why Are Campers 5th Wheel and Not Gooseneck Hitches?
Fifth wheel RVs are the largest towable campers with the most amenities and features. As you’re RV shopping or researching, you may be wondering: why are campers 5th wheel and not...

A Guide to RV Plumbing – Everything You Need To Know
- Latest Posts

When it comes to RV life, one of the most important things to understand is how the plumbing works. If you’ve bought an RV with the plumbing already installed, you may think that you’re all set. However, it’s good to know what each part does and how the system works, in case something goes wrong somewhere along the line so that’s why we created this guide to RV plumbing. If you are an RV owner, it’s essential to know where everything is because you’ll need to maintain the plumbing system as you go along and maybe even learn a little RV plumbing repair .
You may be renovating an RV and rebuilding it from scratch. In which case, installing the RV’s plumbing system is going to be one of the biggest and most time-consuming tasks.
If it seems a bit overwhelming, then don’t worry – we’re here to help. We’ll explain everything you need to know about RV plumbing – it may not be the most glamorous subject, but you’ll be glad to know about it if something goes wrong!
- 1 Bottomline Upfront
- 2 Basement Area
- 3.1 So how do you decide which size to buy?
- 3.2 Filling Your Fresh Water Tank
- 3.3 Emptying Your Fresh Water Tank
- 3.4 Maintaining Your Fresh Water Tank
- 4.1 Installing a Water Pump
- 4.2 Maintaining Your Water Pump
- 5.2 Electric/Liquid Propane
- 5.3 Motor Aid
- 5.4 Tankless
- 6 Drains and Pipes
- 7.1 Gray Tank
- 7.2 Black Water Tank
- 7.3 Tank Size
- 7.4 Emptying Your Tanks
- 7.5 Maintaining Your Tanks
- 7.6 To Macerate or Not to Macerate?
- 8.1 Kitchen Sink
- 8.2 Bathroom Sink
- 9 Water Pressure Regulator and Water Pressure Gauge
- 10.1 Water Tank Filter
- 10.2 Drinking-Water Freshener
- 10.3 Jug and Funnel
- 10.4 Baking Soda
- 11 Water-Saving Ideas
- 12 Winterizing Your RV
- 13 Frequently Asked Questions
- 14 Conclusion
- 15 RV Rental Services We Recommend:
Bottomline Upfront
The most important thing you can do for your RV plumbing is to keep your gray and blank tank cleaned. The blank tank can be extra annoying, however, you shouldn’t ignore it. Keep treatments going and keep things flowing if you want to save yourself a lot of heartaches.
Basement Area
The basement area of your RV is a great storage space. You can usually access it from the side of your RV by opening a series of doors. This tends to be where your water tanks are stored – so this is where you’ll go to empty them.

Fresh Water Tank
Your fresh water tank is going to be one of the most important purchases you make. As the name suggests, the tank holds fresh water and will give you a supply of safe drinking water as you travel. Although it isn’t wise to rely entirely on your fresh water tank to supply you with drinking water, it’s still vital to have. If you’re traveling away from a camping site and you don’t have access to a fresh water supply for a while, you’ll have to rely on your water tank supply to keep you hydrated.
It’s the first of three water tanks you’ll require for your RV (we’ll explain about the other two a little later).
They come in different sizes. Which size you need depends on the class of the vehicle that you have:
- Class A – This is the largest size, about the size of the bus. Obviously, if you’re traveling with a vehicle this size, you might have more passengers, and will, therefore, need access to more water. The usual size of fresh water tank for a Class A vehicle is around 75-100 gallons.
- Class B – This is actually the smallest size. Class B vehicles are usually the size of a van. Therefore, they require a much smaller tank – around 20-40 gallons.
- Class C – The size of a Class C vehicle sits neatly between a Class A and a Class B. The size of the tank you’ll require is around 35-60 gallons.
You can also get a fresh water tank for a travel trailer – these are usually around 30-50 gallons, although some are much smaller.
So how do you decide which size to buy?
It will really depend on the size of your RV and where you plan to store the tank. Most RVs have a dedicated space for the water tank, so you’ll need to measure the area and then check the measurements of the tank you’re looking at.
It’s tempting to get the smallest tank possible to make more room – however, you may end up relying on that fresh water, so it’s best to make sure you have plenty to go around.
On the flip side, you might decide that buying the largest tank is the best idea – but the only downside of that is the weight it will add to your RV, which will have an impact on the amount of fuel you have to use.
The average person on a camping trip will use about six gallons of water a day. This should help you to work out how much water you’ll use a day if there are more of you. You won’t be able to rely on your fresh water tank for extended periods of time – you’ll have to use your inlet hose to connect you to a water supply.
Technically, the water stored in your tank will stay safe for up to six months – however, most people advise replacing it after 2-4 weeks.

Filling Your Fresh Water Tank
You’ll need to fill your fresh water tank before you go, and you’ll need to top it up periodically as you travel. There will be a connection on your tank, which will allow you to connect a hose and fill it up from a water source. Campsites and parks will have fresh water sources that you can connect to. You may also have a city water connection on your tank for connecting to a city water source. It’s important not to run your water pump at the same time, as this could damage your plumbing.
It goes without saying, but make sure you use clean water hoses that are never used for your gray or black water tanks, and make sure that the source of water you choose is safe for drinking.
Emptying Your Fresh Water Tank
What goes in must come out, right? You will need to empty your fresh water tank from time to time – you may need to clean it, or you might want to replace it with fresh water, or you may have arrived home after a long trip and wish to empty your water tank before it goes stale.
Whatever the reason: emptying your tank is pretty simple. The drain will be on the bottom of your RV – and you can simply empty it out onto the ground.
Maintaining Your Fresh Water Tank
You need to sanitize your fresh water tank – this is very important for your health. Mix water and bleach at a ratio of one cup of bleach to a gallon of water. Using a funnel, pour in the bleach and water solution and then fill your tank with water. Then, you have to switch on your water pump and turn on every tap and shower until you start to smell chlorine.
At this stage, you can let that water sit there for 8-24 hours. You can agitate the water in the tank by driving around a little bit during this time (if you can find a bumpy road, that will help). Then you have to drain your tank, filling it with fresh water and flushing it out multiple times until the bleach smell has completely gone.
Finally, you’ll have to switch on the water pump again, running all the taps until there is absolutely no trace of a chlorine smell. If you’re unsure, keep rinsing – and you’ll have a nice, clean, and safe tank.

RV Water Pump
The next vital piece of equipment you’ll need is a water pump. A 12-volt water pump creates pressure, which distributes water through the system. If you’ve ever had issues with water pressure, you’ll know how annoying it is when you’re trying to have a shower under a dribble of water, or if you’re running the tap and it bursts out at full throttle. A water pump will prevent these situations from happening.
You can buy solar-powered water pumps – however, by far the most common is the electric 12-volt kind. They can vary quite a lot in their power and pressure, however. You can measure this using ‘gallons per minute’. The higher the number, the faster it can push water through the pipes where it needs to go.
Some of the most popular brands include Shurflo, Seaflo, and Flojet.
Installing a Water Pump
It may look complicated, but installing a water pump can be pretty straightforward. They’re usually stored neatly out of the way, like under the bed, under the sinks, or in the basement area. Attaching them will involve switching off the power to your RV, and then following the manufacturer’s instructions, and it’s normally simple to figure out.
Maintaining Your Water Pump
You can take a few simple steps to maintain your water pump. One key thing to do is to check your water pump strainer. Usually located to a hose that runs into the pump, the strainer can get clogged and grimy over time, which will impact your water supply.
Make sure this is clear and free from debris. You can also check it every now and then to make sure the vibrations from driving haven’t loosened any of the components.

RV Water Heater
As the name suggests, this is essential if you want hot water in your RV. A hot water heater usually has a cold-water inlet on the side and a hot water outlet on the top. They have to be safety approved and usually come with a pressure-relief valve and temperature control. There are a few different kinds:
A gas-powered water heater will use liquid propane and a spark ignition system.
Electric/Liquid Propane
These use a combination of electricity and liquid propane to run. These work pretty quickly, heating up the water fast when you need it.
This allows you to heat water using the heat produced by the engine as you drive. This is great for making use of a resource that would otherwise be wasted. However, it quickly cools down once you’ve stopped traveling, so you’ll have to make the most of your hot water while you have it.
You can also get tankless water heating systems for an RV. This is obviously great for space-saving, as a water heater can take up a good chunk of space in your RV. They do tend to be more expensive than the traditional models, however.
Water heaters vary in how quickly they can heat your water – the faster they work, the more expensive they tend to be.

Drains and Pipes
Pipes allow water to flow through your RV to the correct outlets. Drains, obviously, allow the used water to drain away to the correct place (which will either be your gray water tank or your black tank). These are vital but pretty self-explanatory.
You may find yourself coming across clogged drains from time to time. Don’t be tempted to use the same cleaners that you would at home – these are far too harsh for an RV plumbing system. Instead, you’ll need to use RV-safe cleaning solutions (and a pair of gloves, and a bit of elbow grease to remove that tangle of hair from your shower drain).
Gray and Black Tanks
These are essentials, and they serve slightly different purposes.
A vital component of an RV plumbing system, your gray tank (otherwise known as a holding tank) is the final destination for any water that doesn’t come from the toilet. Anything from showering to washing the dishes will create wastewater, which, of course, has to go somewhere.
You need to make sure that you don’t allow small particles of food, like rice, to go down the drain too often. Obviously, mistakes happen, but the gray tank drain can become clogged quite quickly, so it’s best to keep it free from food if you can.
Black Water Tank
Your black tank, meanwhile, stores all the waste from the toilet. This is the least glamorous part of camping life – but it’s so important that you get this part right. For water-safety reasons, it’s important not to mix up your hoses – keep your freshwater tank hose and your waste tank hose separate (and clearly marked).

When it comes to tank size, again, it will depend on the amount of space you have and the number of people staying in your RV. The bigger the tank, the greater the capacity – but as it fills up, it will become heavier and heavier, impacting the amount of gas you’ll use when you’re driving.
If you’re planning on traveling for long distances between campgrounds, then a larger tank has obvious advantages. Similarly, if there are a lot of you staying in your RV, you’ll have to get a bigger tank, as even three or four people can produce a surprising amount of wastewater. If there is just one or two of you, you can probably get away with a slightly smaller tank.
Emptying Your Tanks
It’s best to wait until your tanks are around two thirds full before you empty them. This prevents the tanks from getting clogged, allowing everything to flow out properly. Some tanks have a sensor that can tell you when your tank is getting full – these can fail, however.
It’s always best to remember when you last emptied your tank, so you can predict when it will need emptying again. Campsites have dumping stations, and they should be clearly marked so you can empty your waste into the appropriate places.
A word of caution – always wears gloves during this process! (This sounds obvious, but you do not want to be without gloves in this situation).
The valves should be clearly marked on the outside of your RV. Attach one end of the sewer hose to the valve, and the other end to the valve on the dumping station.
Starting with the black tank, pull the valve and allow the tank to drain. Eventually, the noise of liquid flowing through the hose will stop – that is the point at which you close the valve. Make sure it is completely shut! If you don’t close it, the liquid will flow out, and the solids will have no way of draining out.hen you can empty your gray tank valve in the same way.
It is important to do it in this order to allow the water from the gray tank to flush away any solids from the black tank that may be stuck in the hose.
Be careful when you detach the hose, in case anything is still stuck in there. It’s better to store the hose in some kind of box with a lid for hygiene reasons.

Maintaining Your Tanks
Your tanks will need maintenance to keep them working correctly. You will have to purchase black tank chemicals – these remove odors from the tank as well as helping to break down the solid waste. They are an essential item – so make sure you always have some to hand, following the instructions on the packaging.
Sometimes they will require deep cleaning. Your gray tank can be cleaned in the same way as your freshwater tank – by mixing bleach and water (about two cups of bleach for about a three-quarter-full gray tank). You can then let this sit for ten minutes or so before flushing the whole thing through until the bleach smell has completely gone. This is a great way of removing any food debris.
The black tank, meanwhile, can be cleaned using the rinse valve – this is a simple process of flushing the tank through with water, removing any clogged tissue or solids that may be accumulating in the tank. If your tank does not have a rinse valve, you can buy an aftermarket flush valve – but you’ll have to be sure it matches your tank.
To Macerate or Not to Macerate?
You can buy a macerator (although some models of toilets will come with a macerator pre-installed). They’re normally electric-powered, and they turn anything that goes into your black tank into a slurry, making the draining process a bit neater. They can be expensive to buy, and some people find that the use of a macerator actually increases blockages – so it’s really a personal decision.
The next important thing to consider is your fixtures, and this is the part that people tend to enjoy shopping for the most.

Kitchen Sink
The kind of sink you buy depends on the space you have available in your RV. You can buy them in different shapes, sizes, and colors. They come at different price points – so you should be able to find something, even if you’re on a very tight budget.
You could go for a shiny chrome sink if the modern look is what you’re after. Or, if you have a vintage RV, you might prefer something that will blend in a little more. They’re usually made from stainless steel or plastic – stainless steel will last a little longer, but plastic fittings tends to be a bit cheaper.
Obviously, you’ll have to measure the space in your RV to decide what kind of sink you want to buy. You can buy a round sink with a lid – this can be closed to create more workspace when you’re not using the faucets. Or, you can go for a more traditional sink that looks like the kind you’d have at home. If there are a few of you traveling together, you may want a bigger sink, as you’ll be producing more dishes to wash!
You can also buy sinks that have hob burners attached to them – again, if space is tight, this could be a neat solution.
Bathroom Sink
The bathroom sink is another essential. You can buy them in different shapes and sizes – space tends to be at a premium in RV bathrooms, so you’ll want something pretty small to ensure you can fit comfortably in your bathroom.
Depending on your budget, you can create a bathroom in your RV that looks just like the one you have at home. Porcelain toilets and sinks create that true ‘home comfort’ feel. However, these obviously add to the weight of your RV.
You may be tempted to have just one bathroom sink in your RV. However, it’s far more hygienic to have a sink in your bathroom as it saves you walking through your RV with unwashed hands after using the toilet. Also, it’s easier and neater to have your toothbrushes in the bathroom, keeping your toiletries and the kitchen area separate.
You can buy corner sinks, pedestal sinks, or sinks that are wall-mounted. Really, this is down to personal preference.
When it comes to toilets , you’ve got a decision to make! A toilet may not seem like a glamorous purchase, but it’s a vital one. Again, they vary in sizes, heights, and price – you could find yourself spending as little as a couple of hundred dollars on a toilet, or as much as a thousand dollars.
There are a few different types of toilet you can buy for an RV:
Traditional RV Toilet: These look just like the kind you have at home. You can even buy a porcelain one if you want a bit of extra luxury. The waste goes from the toilet into a black tank and is flushed away using a button or a foot pedal.
Cassette Toilet: A cassette toilet looks very similar to a traditional RV toilet, but instead of a black tank at the bottom, the waste goes into a small tank which has to be emptied by hand.
Porta Potti/Chemical Toilet: a chemical toilet is self-contained, with its own RV chemical tank at the bottom. The bottom half can be easily removed so you can empty the waste. They’re great for smaller campers or RVs, as they take up little room, and they’re a bit more portable than the other kinds, meaning you can move it to a different location if you need to.
Composting Toilet: these are quite different from the other types on this list. Liquid and solid waste are separated into different places – the liquid waste goes into a small tank which can be emptied by hand, and the solid waste goes into a container, to which you add composting material. You can then empty the solids into your regular trash.
A word of note – it’s best not to use regular toilet paper in an RV toilet. You’ll want to use quick-dissolving toilet paper instead, as this is much kinder on your black tank, and a blockage is the last thing you want to be dealing with
It goes without saying that you’ll need a shower in your RV. It’s really important to conserve water – the type of shower that you choose can prevent you from wasting too much of it.

The shower will consist of the shower enclosure (the place where you stand), and the showerhead itself (which usually come with a shower hose included in the price). Showerheads can vary greatly in how powerful they are and how much they cost. They can come with different pulse settings – so if you want a power shower after a long hike, you can change the settings to reflect that.
Make sure you lookout for a shower head with a rubber grip, enabling you to keep hold of it if you need to move it around. You also might consider whether you need an adjustable arm – this is great if you have family members of varying heights.
Some companies are great at improving efficiency when it comes to water use. They utilize devices which mix oxygen with water – this helps to create strong pressure without wasting a lot of water. This is important for environmental reasons, but it’s also important if you’re away from a water supply and have to rely on your freshwater tank.
You’ll have to get used to showering differently in your RV – it’s best to shower quickly if you can, to prevent wasting water.

Water Pressure Regulator and Water Pressure Gauge
To help your pump to distribute water effectively, you may consider buying a water pressure regulator.
When you connect your RV to a water supply, like at a campground, you may not be expecting how high the water pressure is. If you don’t try and regulate the water pressure, it can damage the RV plumbing systems.
A water pressure gauge helps you to measure the campground’s PSI (pounds per square inch). If it’s higher than the recommended water pressure for your RV, then you know you need an RV water pressure regulator.
A pressure regulator looks like a small pipe, and it acts as a kind of filter between the campground water supply and your RV’s water hose. They will either be adjustable or non-adjustable.
Adjustable models allow you to change the water depending on your needs. You may need a little more pressure in the shower than you would when washing the dishes, for instance.
Non-adjustable models set the water pressure at one level. They also don’t come with a gauge attached. Many people prefer the adjustable kind, although they do tend to be more expensive.
Other Items You’ll Need
There are a few other items that you may consider buying:
Water Tank Filter
You may consider installing a filtration system for your drinking water. This can purify your water, giving you extra peace of mind. You could buy a water filter for your kitchen tap – this is a small piece of equipment that will help you to keep your drinking water extra clean.
However, if you want to filter all the water in your RV, you could buy a filter that is attached to the hose. They use carbon filtration to filter the water. They don’t tend to last that long, so are perhaps better suited to those who occasionally use their RV.

If you want something a bit more powerful, a canister system can work really well. They work by attaching one or more canisters to the side of your RV – these can be used to remove strong odors or tastes from your water and can effectively remove any sediment present in your water supply.
Drinking-Water Freshener
In a pinch, drinking water freshener can be a handy thing to have around. You can add it to your water tank to remove odors and keep the water tasting ‘fresh.’
Jug and Funnel
It sounds simple enough, but a plastic water jug with a lid is a great thing to have around (you can buy a water filter jug too if you’d like). When you’re at a campground, you can refill it and take it on the road with you, thus giving you an extra supply of fresh drinking water.
A funnel is also very useful for a variety of tasks, including cleaning drains and sinks.
Baking Soda
This sounds like a strange thing to include, but baking soda is an RV essential! You can’t use regular cleaning products in an RV, so baking soda is a great gentle alternative. You can use it to clear your drain of blockages, keep your sinks smelling fresh, and deodorize your water tanks.

Water-Saving Ideas
As we mentioned earlier, it’s incredibly important to save water when you’re in an RV, especially if you’re relying on your freshwater tank for a while. Here are a few ideas to cut down on your water consumption:
- Adapt to your lifestyle. This is the first, and most simple, step. You could take quicker showers, for example. Or get used to reusing your cups and glasses instead of using them once and washing them. You can also make sure you never waste water by running it down the drain. If, for example, you’re waiting for the water to heat up, then you can collect the spare water in a container to use later.
- Choose your faucets and showerhead wisely. Some models are more efficient than others when it comes to wasting water. Simply upgrading your showerhead could save you a lot of water.
- Upgrade your water pump. If you have an old and inefficient water pump, you could be wasting a tremendous amount of water. Buying a newer, smarter version could make a huge difference to your water consumption.
- Install a graywater system. If you really want to be environmentally friendly, you could consider installing a graywater system. It allows you to use water from sinks and the shower to flush your toilet.
- Choose a composting toilet. A composting toilet is a ‘dry’ toilet, requiring no water at all for flushing. Over time, this will save you from using a lot of water.
Winterizing Your RV
One final thing to consider is how you will protect your RV plumbing from the elements. If you’ve come to the end of the camping season, there are a few things you need to do.
Firstly, you’ll need to drain your water tank. You should also drain and flush your gray and black tanks. Then you’ll need to open all the water faucets in your RV and flush the toilet, to ensure all the water is gone. If you wish, you can use a compressed air adaptor to blow out any remaining water from the water lines – check online to see an in-depth tutorial on this.
Once you’re sure all the water is gone, you can add antifreeze. This is a lengthy process that will require a bit of practice. However, it’s necessary in order to protect your tanks and pipes from freezing. You will then be able to empty your water heater, too.
This may take a little while, but it’s essential to protect your RV from the cold weather .
Frequently Asked Questions
Question: Is dumping your gray tank and blank tank easy?
Answer: Once you get the hang of dumping your tanks, it is super easy to do—even though it is still stinky.
Question: Should you close your black and gray tanks between dumps?
Answer: Yes. You should close your black and gray tanks between dump station visits.
Question: Can you use baking soda to clean out your sink?
Answer: Yes. Baking soda is a gentle cleaner and is recommended for cleaning out sink blockages.
We hope this has helped you to figure out the essentials of RV plumbing. Emptying and cleaning tanks and dealing with clogged drains is probably the least exciting part of camping. However, by understanding how it all works and maintaining it properly, you shouldn’t run into too many problems. If you do, at least you know how to deal with it – and it’s all part of the adventure!
RV Rental Services We Recommend:

Save up to 25% on your 2021 travel costs by booking an RV through RVshare (Valid until December 31st 2021). RVshare is the world’s first and largest peer-to-peer RV rental marketplace, serving more than 60,000 RV owners across the US.

Outdoorsy is safe, easy, fully insured, and has a great local selection. They're free to join and have no membership fees of any kind. Discover amazing RVs to travel in - or rent out your own!
Motor Homes

Turn the World into Your Back Yard Explore everything from the wilderness to the big city; enjoy everything from a campfire to HDTV, all with the confidence that comes from our commitment to quality, value, and innovation.
View All Products
Travel Trailers

Where Experience and Innovation Come Together Our Travel Trailers are the core of our production, featuring time-tested construction, the latest technology, advanced materials, and stylish interiors.
Light Weight Trailers

Take more stuff, have more fun in our Light Weight Trailers By minimizing weight, we give you more capacity for people, toys, cargo, and fun - Our lightweights save money and fuel when you're towing, and are available in all price ranges, sizes, and styles.
Destination Trailers

The vacation home you've always dreamed of Love the great outdoors? Stay as long as you want! Our Destination Trailers provide your whole family with the accommodations you need for a full season of fun.
Fifth Wheels

The Ultimate Towables Our Fifth Wheels are easy to maneuver, tow like a dream, and give you great living space. No wonder they're the perfect choice for people with pickups!
- Find A Product
- Get a Price
- 360Tours, Videos
- Owner Reviews
- Construction
- Shows, Sales & Events
- Dealer Locator
- Our History
- Download Center
- Suggestions
- "Camp Gulf Stream" Handbook
- Owner's Manuals
- Your Reviews & Stories
- Brochure Archives
RV Plumbing Basics
(Back to Table of Contents) Your RV provides running hot and cold water and drainage systems for your convenience. The system is self-contained, and while similar to the plumbing in your home, there are differences.
The first part of the system is a tank of fresh, clean potable (drinkable) water stored in an onboard tank. Tank sizes vary, but are typically 20 to 40 gallons in size. While it would seem convenient to have much more fresh water on hand, there are very good reasons to limit the size of the fresh water tank. Water is HEAVY, impacting the handling and efficiency of your RV and reducing the carrying capacity available for other cargo. Water is readily available and quite inexpensive too, so it usually makes more sense to get what you need when you need it, instead of carrying a heavy load everywhere. Also, fresh water has to ‘go somewhere’ after you’ve used it, so the amount of fresh water you carry also impacts the size and weight of the waste tanks you need.
You’ll find a water fill inlet somewhere on the outside of your RV. Use a hose designed for potable water and a source of high-quality drinking water to fill the tank. Take care that no foreign material enters the fresh water tank, and keep the water fill inlet closed whenever possible
The fresh water tank is connected to a water heater. Two types of water heaters are in use in RVs: Tank-style water heaters are similar to standard residential gas water heaters, using a gas flame to keep a quantity of water at a pre-determined temperature. The gas burns when needed to heat the water in the tank. This type of water heater limits the amount of hot water available to users by the capacity of the hot water tank - typically 6 to 10 gallons. Tankless water heaters heat water as the water passes through a heat exchanger that is heated by a gas flame. Tankless water heaters are instantly heating water as it is used, and are designed to maintain the pre-set temperature regardless of how much water is sent through the exchanger. (Learn more about Tankless water heaters here)
- Cold water from the fresh water tank and hot water from the water heater are supplied by flexible plastic tubing to each of the faucets in your trailer. There are other important components in the RV plumbing system, including:
- P-Trap(s) - These shaped portions of drain hardware use a small column of water to keep odors from rising up through the plumbing and drain into the living space. This barrier is not functional when drains and tubing are dry.
- Hepvo Valve(s) - These specialized valves installed under the drain use a flexible membrane to keep waste tank odors from rising through the drain and into the living space. Hepvo valves function whether wet or dry.
- Water Heater Bypass - This system of tubing and valves provides a path for water that bypasses the hot water heater. This is important when winterizing the system, because it keeps anti-freeze out of the water heater.
- Low-Point Drains - As the name suggests, these are small valves in the plumbing located at the lowest point of the system, to allow water lines to be drained as completely as possible.
- Pressure Regulator - A specialized valve that protects RV plumbing from damage due to too much pressure from an outside source, such as a campground connection or city water line.
- Backflow Preventer - A valve that keeps water from the RV system and supply from backing up into the city/campground water supply.
- In-line Pre-Pump Filter - This filter, placed between the fresh water tank and the 12V pressure pump uses a screen and other filter media to remove particulate contamination from the water before it reaches the pump.
- The tanks and tubing in the fresh water system are pressurized by a small 12-volt pump; that pump must be connected to a 12V power source like the RV “house battery” to work. A sensor detects any loss of pressure in the system and turns the water pump on to restore it. That means it is typical to hear the pump turn on to restore pressure as soon as you begin to use water from any faucet. It’s not unusual to hear the pump cycle briefly at other times due to minor water and air leaks in the system.
Once water in the fresh water tank is filtered by the Pre-Pump filter, pumped through tubing by the 12V pump, with one line passing through the water heater, the water is directed to the various faucets.
As an alternative to the onboard water system pressure pump, many campgrounds and other recreational facilities provide pressurized connections to drinking water for RV campsites. You can connect your RV to the supply of fresh water using a hose designed for potable water, and use the campground supply instead of the water in your fresh water tank.
Typical RV systems have two waste tanks: A ‘black tank’ for sewage from toilets, and a ‘grey tank’ for the drains in sinks, showers, and tubs. Both of the waste tanks are of limited capacity, typically 20 to 40 gallons each. Most RVs are equipped with gauges that use floats to monitor the fluid levels in the tanks.
Unlike the fresh water side of RV plumbing, the sink, shower, and tub drains use gravity instead of a pump to move water to the grey tank.
The fresh water system provides water to toilets. The toilets then use a sealed, self-contained pressurized system to evacuate waste and reduce odors. The vacuum pressure sends these black water wastes to the black tank. Seals need to be working properly for the system to perform well. The nature of the system also makes it important to keep anything that may clog pipes or drains out of the toilet. This includes the requirement that toilet paper formulated for use in RV toilets be used in place of ordinary TP.
RV plumbing is somewhat similar to residential plumbing but the differences are important to note:
- To minimize weight, simplify installation, and reduce costs, RV systems use flexible plastic tubing in place of of copper or PVC.
- Some fittings, valves, joints, and connections use molded plastic, not metal.
- Due to the constant on-the-road vibration and temperature extremes, RV plumbing fittings and connections can loosen over time, and should be checked and finger-tightened regularly. Regular inspection and adjustments are considered owner routine maintenance.
- Specially formulated chemicals are available to help eliminate odors and break down sewage components in RV toilets.
- Many household cleaners, polishes, and abrasives should not be used on plastic plumbing fixtures. Mild detergents and cleaners designed for RVs should be used instead.
- Household toilet paper should not be used in an RV toilet. Toilet paper formulated to decompose quickly is readily available for use in RVs.
- RV water heater tanks use a special metal rod to displace dissolved solids from fresh water so they don’t contaminate the rest of the system. The metal rod, called an anode, has to be checked and replaced over time.
- The entire water system should be drained, flushed, and winterized whenever the RV is likely to encounter freezing temperatures for an extended length of time. Winterizing is the subject of a separate article where it is discussed in detail.
Grey and black tanks should be emptied when they near capacity. In some RVs a single drain line connects the grey and black tanks so they can be emptied at the same time; in other installations, two drains are used and tanks are emptied separately. All RV waste must be dumped in compliance with local regulations. Check to make sure you know and follow these regulations. Provisions for dumping RV waste are available at most public and private campgrounds, many RV dealerships, and certain rest areas and travel facilities.
Typically the dumping process involves connecting one end of a lightweight, collapsible, large-diameter tube to the RV drain line, and the other end of the tube to the sewer opening. Tubing designed for this purpose are readily available from any RV supplier. The tube used to drain sewage should be free of kinks, and provide a down-stream path for the flow from the tank to the sewer. With the hose in proper position, it is safe to open the valves on the RV drain line so fluids can drain from the tank. Some RVs include a special port that allows a hose to be connected so fresh water can be used to flush out the waste tank to complete the process.
Because of the way it is used, the sewage hose should be dedicated solely to the task for which it was designed. Disposable gloves are also useful.
For all the details of the Dump Station/tank draining process, see our article on Dump Station Basics.

The RV Plumbing System: How it Works Step-by-Step
*** This post may contain affiliate links or direct you to other posts that contain affiliate links*** This means if you click through our link and make a purchase, we will receive a small commission at no extra cost to you – we so appreciate your support to keep this site going!
The RV plumbing system brings functioning sinks, showers, and toilets to your home on wheels … which is one of the biggest conveniences to RVing!
Learning how it all works, however, can be intimidating.
The dealers throw an overwhelming amount of info at you in a short time at pick up before sending you on your way.
Or maybe you bought through a private sale and didn’t get any information at all …
Don’t worry, you are NOT on your own!
We are going to illustrate how the plumbing in an RV works and what you need to know in order to use it to your advantage.
Also be sure to grab a copy of the printable below so you can take it along for reference on the road!

A Quick Overview of Your RV Plumbing System
Download the printable here.
Follow along more easily and keep a copy in your RV for reference until you get the hang of things

An RV plumbing system first consumes fresh water from either the onboard fresh tank or an exterior city water connection depending on what is available. This water is heated and fed to various fixtures (sinks, showers, toilets, etc.) throughout your RV.
After use at the fixtures the waste water is deposited into either the black or grey tank to be stored in the waste water system until dumped.
The black tank collects anything flushed down the toilet and the grey tank collects everything else coming from any drain other than the toilet. You will then dump the waste water from these tanks at the dump station utilizing the sewer connection and black tank flush (if equiped), completing the process.
Below is a our trailer’s setup for reference along with an outline for the rest of this post. Let’s dive a little deeper into each component of the RV plumbing system so you really know what’s going on behind the scenes:

The Fresh Water System (Input Side) Fresh Water Supply

This is a gravity fed tube leading into the fresh tank and does not have threads on the exterior port to screw the hose into.
There is an overflow on the fresh tank that allows water to spill out of the tank if overfilled.
Position the end of your hose into the tank port on your RV and fill it up!
A hose specifically approved for drinking water use is needed to provide fresh water to the RV. Your average garden hose can leach chemicals into the water passing through it and shouldn’t be used for drinking water. Hoses that are approved for drinking use are typically white or blue in color and are clearly marked on the packaging.
If the water in your fresh tank will go unused for some time, then it’s best to empty it out. You don’t want stagnant water in your fresh tank.
Just open the drain valve on the bottom of the fresh tank allowing the water to empty in an appropriate spot. Be considerate of your location when dumping water.
If your fresh water ever develops a funny taste or smell, you should drain and sanitize the fresh system.

In order to use water from your RV’s fresh tank the water pump must be used. That water is just sitting there in your fresh tank un-pressurized. It will not flow to your fixtures at a higher elevation without the assistance of a pump.
There is a switch in your RV to turn on the water pump. Most are located on the same panel as the holding tank monitor gauges.
When initially turn on the switch, it will immediately activate and start pumping to build pressure. The pump can be a little loud, so don’t be alarmed by the noise. It will stop once the initial pressure has built up and remain silent until you turn on a fixture. The pump will run the entire time the water is running when you turn something on.
Your pump is powered by the DC (Direct Current) power, which is battery power from your 12V system. It’s important to know this, because if you are boondocking without any power hookups and your battery dies – you will not have water available to your fixtures until you can restore power to the pump.

City Water Connection

>>IMPORTANT<< A pressure regulator is needed to safely make this connection to protect the plumbing in your RV
A water “hookup” is a source of water at your site to be used in place of the fresh tank and pump to supply fresh water to the RV. Connect your fresh drinking hose from the water hookup to the “City Water Connection” on your RV. This is a threaded connection and refers to any outside source of POTABLE pressurized water being connected into the RV. It can be city supplied or from a well; don’t let the name confuse you.
When connected via the city water connection, the pressure from that source feeds your RV plumbing system and pushes the water to your fixtures. Your pump is not needed in this case and will remain off.
The Fresh Water System (Input Side) Hot Water & Valves
Your RV plumbing system is now supplied with fresh water either from the fresh tank or from a city water connection. A line of this water will head to the cold handles of your fixtures and to the toilet.
Another line from the fresh water supply will continue towards your water heater to be heated. This heated water supplies the hot handles of your fixtures.

Water Heater
")
The appliance itself is basically a water tank. The water is warmed by a heating element and maintained at that set temperature by a thermostat at all times while the appliance is turned on.
When you need hot water at a fixture, the already-hot water from your tank is pushed to the fixture. More fresh water will replace what is used topping off the tank. The burner will then kick on again to bring the tank as a whole up to temperature.
>> IMPORTANT << Never turn on your water heater without water in the reservoir. You can completely destroy the appliance by allowing it to heat the empty tank.
Standard Size
If you completely empty the hot water tank, it takes about an hour to heat up new tank full. Keep in mind that your RV’s water heater tank is SIGNIFICANTLY SMALLER than the one in your home. A 50-60 gallon water heater in a home is considered to be on the small side, but the one in your RV is probably 6-12 gallons. RVs typically come with a 6 gallon tank standard and 10-12 gallon tanks are available as an upgrade.
Some RVers choose to upgrade their water heater to a tankless model that only heats the water as needed or “on demand”. These units supply “endless” hot water, but come with their own set of pros and cons – they may not be right for everyone.
Most water heaters in RVs are made to warm your water using 2 different fuels: Electric and/or Liquid Propane (LP).
Some models are dual fuel meaning they can run from either source and some are single fuel and will run only from Propane or only on electric.

Water Heater Bypass Valves
")
This brings us to the water heater bypass valves. Your RV plumbing system is piped in a way that allows the flow of fresh water to bypass the water heater by turning a combination of valves.
The configuration for your individual model should be available in your owners manual. This is mainly done when winterizing your RV. In the winterizing process (which we will cover in its entirety in another post), the valves are closed to divert all water around the water heater. The water in the appliance is then completely drained, so it can’t freeze and burst the tank.
When you pull the RV out in the spring this tank will still be empty and flow still diverted around it. Be sure that you correct the bypass valves allowing flow back into the water heater, and fill it with water before turning it on for the first time

Low Point Drain Valves
Your RV plumbing system will also have a low point drain valve. Many RVs have multiple due to one way flow valves incorporated into the plumbing, so be sure to check your specific model. Ours has one for both the cold water line and the hot water line. These drains allow the water to be completely emptied out of the system for winterization. If any water is left in the system during the colder months it will freeze and burst your plumbing! No good…
The Waste Water System (Output Side) Holding Tanks
At this point the hot and cold water have reached the various fixtures were it is used. The used water goes down the associated drains entering the wastewater side of your RV plumbing system. First stop, the holding tanks…

Grey water is the water that goes down your sink and shower drains. The grey tank is what holds everything collected from any drain that isn’t a toilet. Most newer RVs collect the dirty water from these sources separately from the black; however, some older models collect all waste together into a single black tank only.
This water is soapy and dirty, but not actually a sanitation concern. The grey tank is typically the first tank to fill up and limit your capacity when boondocking, because you can always bring along more fresh water and add it to your fresh tank, but you only have so much room before the grey tank fills up.
The grey tank is equipped with a vent that goes up to the roof for odors to escape. It also has a drain with a gate valve to your sewer connection in order to empty the grey tank.
Some people dump their grey water on the ground if they are in a rural area and have filled up their grey tank prior to needing to dump their black tank. If you choose to do this be sure to use only biodegradable soaps – lets keep nature beautiful! There is a special cap available for your sewer connection that adapts it to a garden hose. If you choose to do so, use this adapter cap and a hose hose to dump the grey water away from your RV.

Black water is the nice term for anything that goes down your toilet(s).
Your RV toilet is basically a dry bowl that is flushed with water. There is usually a step flush pedal that opens the bottom of your RV toilet bowl and allows the contents to fall directly into your black tank. A a fresh water line runs to your RV toilet that is used to flush the toilet clean. It will automatically spray when you hit this foot pedal.
Just like the grey tank, the black tank has a vent that runs from the tank up to the roof allowing odors to escape. It also has a drain that connects to the sewer connections through a gate valve. Unlike the grey, the black tank should NEVER be dumped anywhere other than an approved dumping station.
The Waste Water System (Output Side) Dumping Components

Sewer Connections
The sewer connection on your RV is the spot on the exterior where you will hook up the sewer hose to dump the contents of your black and grey tanks. Some larger RVs will have this connection contained within a basement bay. The gate valve holding back the contents of both the black tank and the grey tank will feed into a singular pipe so that the same sewer hose connection is used to empty both tanks. There is a cap on this connection and they use bayonet fittings to connect.

Black Tank Flush
Let’s start by saying that not all RVs will have this option. It’s typically an upgrade from the dealer, but will save you so much time and headache with cleaning out your black tank come dumping time. We have this option, so I wanted to touch on it.
This is another port on the exterior of your RV similar to the city water connection. It’s a threaded connection meant for your black hose (NON-POTABLE). When you feed water into this connection it goes to a spray nozzle on the inside of your black tank and helps to rinse down the walls by spraying in all directions and filling your black tank to flush it clean. This is done after you dump the tank to rinse any residuals and prevent build up over time.
What comes next?
Now you know how fresh water enters your RV. You also know how the fresh water and waste water flow through your RV plumbing system … the next piece of this puzzle is how to go about dumping the holding tanks when they fill up.
First, check out this post on preparing to dump the tanks and then visit the step-by-step guide post on the actual dumping process.
Follow us on social media to keep up with new posts:
Submit a Comment Cancel reply
Your email address will not be published. Required fields are marked *
Pin It on Pinterest
RV Exterior Plumbing
- Exterior Parts
- Exterior Plumbing
In an RV, the plumbing system doesn't exist only on the inside. While your sink, shower, and toilet might be on the inside, the drains and tubes for it are accessible through the outside. In addition to these pieces, you might want to consider adding an exterior water outlet to your rig, especially if you want to be able to keep things clean outside. For your exterior water supply needs, you're in the right place.

RV Exterior Shower Hose 15' Coiled Blue Water Hose with Locking Hatch Door

RV Exterior Faucet Hot / Cold Metal High Pressure Sprayer with Locking Hatch Door

90 Degree Water Faucet - Extra Outside Water Source by Connecting to Your RV's Fresh Water Inlet Spigot

RV Extendable Waste Hose Carrier Super Slider Storage Tube in White

RV Extendable Waste Hose Carrier Super Slider Storage Tube

RV 12" Replacement Flex Spout Hose for Exterior Spray Port Faucet

RV Replacement End Caps for 4 5/8" Sewer Hose Holder, Black or White

RV Exterior Spray Port Hook-Up Connector

RV Exterior Faucet Hot / Cold Metal High Pressure Sprayer

RV Exterior Shower Hose 15' Coiled Blue Water Hose
While the interior plumbing for your RV is important, the exterior RV plumbing is just as vital. From your black and gray water tanks to your spray ports and hoses, exterior plumbing is an important part of not only keeping things clean but making sure things work as they should. With an out-of-the-way place to put your sewer hose, you can keep your cabin smelling and feeling hygienic while keeping the hose within reach when it's time to empty the tanks. And as for keeping your RV exterior clean, whether it be through a spray port, a hose, or a faucet, having the ability to access water without going into your rig can be a real lifesaver for cleaning off sandy feet from a beach day, cleaning the dog for his bath without making a mess of your RV bathroom, or simply having a way to clean the dishes outside, having the right tools is essential.
For all of your water and plumbing needs, whether inside or outside, stop by RecPro.com.
Your Guide to RV Bathrooms and Plumbing

JUSTIN AND MICHELLE RUSSELL
Justin Russell is a disabled veteran who served in the US Army and completed three tours in Afghanistan. After his service, he worked for the US government’s Counterdrug Program and fought wildfires for the US Forest Service. After many years apart from his family, he now enjoys traveling in his Thor Motor Coach Hurricane with his wife Michelle, their kids, Jude and Jade, and the family pups, Dude and Belle.
Featured RV: Thor Motor Coach Hurricane
- Follow Thor Industries on Facebook
- Share this story on Pinterest
Having an RV is an amazing way to explore, adventure and find some freedom. And while this type of travel can be glamorous and convenient, there are some messier elements you’ll need to be aware of—specifically when it comes to your RV’s bathroom and plumbing systems.
Here we’ve prepared a list of important details and crucial steps to help avoid common RV bathroom mishaps and to keep your plumbing system flowing properly. It may not be the most exciting part of RV life, but it’s vital to ensure that you have a safe and successful trip.
Let’s Talk About Tanks
In an RV, you don’t have the luxury of being able to flush the toilet and never thinking about where the waste will go. A hugely important part of RVing is knowing your tank capacity. The size of your holding tank will vary depending on the size of your RV, but most tanks can hold anywhere from 20 to 100 gallons. Not sure what size your tank is? Sometimes the holding capacity will be listed directly on the tank itself. If not, you can usually find it in your owner’s manual.
Most RVs have three different tanks:
Also called clean water or potable water, this tank will supply water to your sink, shower and toilet.
This tank will gather all of the dirty water that drains from your sink and shower.
This tank collects all of the waste and sewage from your toilet. *In some RVs, all of the water from your bathroom (including the sink and shower) will drain into the black water tank as well.

Toilets, Showers and the Lines That Connect Them
Transitioning to a RV toilet can take some getting used to. There’s the toilet itself, the foot pedal to flush and, of course, the actual draining of the tanks. Below is a list of simple steps and considerations to help prevent any major bathroom issues.
Your RV toilet and plumbing systems are sensitive, so the 2-ply toilet paper that you use at home won’t work in your rig. To decrease your chances of clogged toilets and malfunctioning tank sensors, we recommend using 1-ply toilet paper. Scott® 1000 toilet paper is a great option and safe on septic tanks. And remember—never, ever flush sanitary products or wet wipes down your RV’s toilet.
To help prevent buildup, we highly recommend letting your grey tank get at least two-thirds of the way full before emptying it. Additionally, never let your black water tank get completely empty, as sewage can collect on the bottom and create some bad odors. There are septic-safe cleaning solutions and treatments you can add to your black and grey tanks to help with odor as well (see below).
It’s important to remember that your RV toilet should not be cleaned like a regular toilet. Using harsh chemicals can actually break down the seals within your plumbing system, leading to costly damages. One of my favorite ways to keep our RV toilet clean is simply using a mixture of hot water and Dawn dish soap. Before every trip, we fill our toilet through the external flush system and add a safe, gentle cleaning solution to our black water tank. Thetford is a great brand for both deodorizing and cleaning RV holding tanks.
If you’re like us, then you like to take your RV to warm, sunny climates. But sometimes, you’ll find yourself in colder temperatures, so it’s imperative that you take the necessary precautions to ensure that your water lines don’t freeze. If you find yourself in an area with cold temperatures, here are some tips:
Skirt Your RV. Putting a skirt around the outside of your unit is a great way to keep the underbelly warm—including the pipes and hoses—and protected from the elements.
Heated Hoses. Some plumbing and bathroom hoses come equipped with a heat strip that runs along the side of the hose. This strip can be plugged into a standard 110-volt electrical connection and will prevent the water and fluids from freezing.
Water Drain-Down System. These systems help your RV’s pipes drain faster and more conveniently. We highly recommend Lippert’s Floë Integrated Drain-Down System .
Disconnect and Drain. This might sound simple but it’s absolutely mandatory—when the temperature drops below freezing, disconnect your outdoor hoses and drain all sitting water.

Bathroom Maintenance
Fixing things that are broken is important, but there are plenty of preventative measures you can take to help eliminate potential issues, especially when it comes to your RV’s bathroom and plumbing systems. Proper cleaning and maintenance is key here, so we’ve included a list of preventative measures to add to your check-list.
Make a point to regularly check all of the seals in your shower, toilet and sinks. If you notice any cracks or damage, replace the seals immediately. You can also use a flexible kitchen and bath silicone gel (available at most hardware stores) to help fill and patch any cracks.
Your RV tanks are built to help keep water and waste flowing in one direction. But if you fill your black tank to the maximum capacity, there’s a good chance the sewage will start to back-up, causing breaks and leaks between the tank’s seals.
Do you know how much water weighs? If you’re driving around with a full, 40-gallon freshwater tank, that’s an additional 334 pounds in your RV! If you’re not mindful of your RV’s total weight, the added weight from water and fluids can cause a slew of issues, including detached tanks and extra swaying if you’re towing.
You’d be amazed at how quickly things like rust and calcium deposits can build up in your pipes and water lines. Regularly check the end of your water systems by detaching the end of your faucets. This will allow you to clean the screens and improve water pressure.
There are two critical bathroom maintenance items we suggest adding to your RV: a water filtration system and a water pressure regulator. These two items will help ensure that you have clean, safe water and that you maximize the amount of water you’re using. The filtration system will also help keep harmful sediments out of your lines, and the pressure regulator will monitor the amount of water flowing through your pipes to prevent any bursting.
Try to keep your bathroom clean while you’re using it. This includes wiping things down and keeping your vents open to prevent mold and mildew. After every trip, we also recommend giving your bathroom a nice, deep clean, including the sinks, faucets, floors, and shower walls. Many RV owners actually use dryer sheets to clean their showers—they are strong enough to scrub soap scum and build up but won’t damage any of your bathroom surfaces.

Regardless if you’re a full-time RVer or a weekend warrior, the reality is that you have to get comfortable with your RV’s systems—both inside and out. A well-maintained bathroom and plumbing system will help ensure that you have a fun, easy and clean RV experience.
The Russells RV in a Thor Motor Coach Hurricane.
Related Stories

On The Road
RVing as a Disabled Veteran
After retiring from the military with injuries, towing a trailer took a lot out of Justin Russell. Here’s how he and his family optimize their RV living and take advantage of veteran perks on the road.

Our First Black Water Mistake
When the Griffins first hit the road, they had a lot to learn about black water.

Meal Prepping for an RV Trip with Kids
When you travel with kids, there’s no vacation from making meals. But with a little planning and prep, cooking for a crowd doesn’t have to dominate your down time.
Find Your Perfect RV
Whether you're new to the world of RVing or you're ready to narrow your search, we're here to help you sort through it all and find the RV that's right for you. Explore RVs based off of your lifestyle and the features important to you.


How to Replace (and Improve!) an RV Plumbing Vent

The design of an RV must have sufficient air circulation. The majority of RVs feature many rooftop holes and things dedicated to proper airflow. An RV plumbing vent is located in at least one of these apertures.
That’s correct, not all of the vents on an RV’s roof are designed to keep you, the passengers, cool and comfortable while inside the vehicle. Sure, some of them are… like the kitchen or bathroom vent. Others, on the other hand, are solely dedicated to venting your RV’s plumbing. Yes, your RV’s plumbing requires air as well.
So, in today’s post, we’ll look at what the modest RV plumbing vent performs, why it’s important, and how to repair (and even improve) it!

Table of Contents
What is the purpose of an RV plumbing vent?
Anyone who’s ever stepped into an RV that’s been closed up for a while knows the importance of RV plumbing vents. These are the RV plumbing vent pipes, and their purpose is to allow tank odors to be vented to the outside and to help ensure that air can enter/exit the tanks when the volume of their contents changes (like when flushing the toilet, taking a shower, or dumping the waste holding tanks). In other words, they’re there to keep your RV from smelling like, well, an RV. So next time you’re wondering what that pipe sticking out of the roof is for, now you know!
RV plumbing vents play an important role in regulating the air pressure within your RV’s plumbing system. They work to remove the gas and odor from your RV, as well as allow fresh air into the system. This not only improves pipe drainage and water flow, but it also helps to keep your RV smelling fresh and free of harmful gases.
RV plumbing vents are an essential part of the RV plumbing system. They allow air to enter the RV plumbing system. RV plumbing vents also help to keep the RV plumbing system from freezing in cold weather. The vents are located on the roof of the RV, and they are usually made of plastic or metal. RV plumbing vents come in a variety of sizes, and they can be installed by a qualified RV technician.
Most RVs have at least one pipe running through the ceiling from the top of the grey and black waste tanks. The function of the RV plumbing vent pipes is to allow tank odors to be vented to the outside while also ensuring that air can enter and exit the tanks when the volume of their contents varies (like when flushing the toilet, taking a shower, or dumping the waste holding tanks). The odors from your grey and black tanks might gather inside the RV without these vent pipes, producing an uncomfortable environment.
Your RV may have a single plumbing vent, where a single aperture through the roof connects the vent pipes that come from both the black and grey tanks, depending on how your RV builder plumbed it.
Alternatively, as we do, you might have many RV plumbing vents penetrating your roof, with one line running from each tank to its own dedicated vent.
RV plumbing vent pipes are essential for the proper operation of your RV’s plumbing and waste tanks in either case. Even more importantly, an RV plumbing vent cap is attached to the roof and sealed at the top of each vent pipe.
Are there many types of RV plumbing vents?
Yes, different types of RV plumbing vents exist. And they aren’t all created equal. For example, our RV came from the factory with the usual type of vent cap used on the most, if not all, RVs. The typical RV plumbing vent cover looks like this:
However, standard plumbing vent covers do not allow any ventilation. They simply cover the vent pipes to keep leaves and other debris from entering (and blocking) the line.
In some cases, normal RV plumbing vent caps can actually pose a problem by directing airflow (for example, when driving) DOWN into the vent pipe rather than up and out. When this happens, odours from your black/gray waste tanks might be driven back through the plumbing system and into your RV’s living space.
As a result, the 360 Siphon vent is our personal favourite RV plumbing vent cap – the one that has performed best for us since we updated to this style of vent in 2014. They come in black and white, and we’ve put them through their paces with (many) full waste tanks, and they’ve performed admirably. We’ll go through this in further detail later, but for now, here’s the most recent version of vents:

Lippert Components 389381 360 Siphon Roof Vent Cap – White (Gen 2)
- ELIMINATES ODOR - Exhausts odors out the roof vent before they have a chance to invade your RV
- COMPATIBILITY - Engineered for a universal fit, the 360 Siphon is compatible with all RV vent caps

Lippert 360 Siphon RV Roof Vent Cap
Is it necessary to vent the plumbing in my RV?
RV plumbing vents are one of those RV features that you don’t really think about until you need them. And when you do need them, you’re glad they’re there! RV plumbing vents allow air to enter the RV plumbing system, which prevents a vacuum from forming and making it difficult for water to flow. They also help to prevent odors from building up in the pipes. So, while RV plumbing vents may not be the most exciting RV feature, they perform an important function and are definitely worth having.
If your RV has a plumbing system, it will definitely require at least one plumbing vent. The vents allow sewage gases and odors to escape to the outside of the RV. These vents are placed just above the roofline to allow any breeze or wind to carry the gases and aromas away. This is true not only for the black tank, but also for the grey tank.
The contents of the grey tank are a concentrated (particularly after a long boondocking journey) mixture of water, soaps, food particles, and body oils that when mixed together make a stinky liquid.
It’s normal for an RVer to assume that a bad stench within the RV is coming from the black tank. But it’s usually an odour from the grey tank that they’re noticing. And believe us when we say that the high ratio of particles and substances other than water that make up this unpleasant brew can make grey water smell worse than black water after a long period off the grid.
After a long time of boondocking, a foul odor coming from our grey tank caused us to replace our RV plumbing vents. The stink was obvious, especially when driving down the road with the driver’s window open, because our grey tank was nearly full. Because of this, we decided to replace our RV plumbing vents with 360 Siphon vents.
Why Should My RV Plumbing Vent Be Replaced?
Even though RV plumbing vents don’t need to be replaced very often, there are a few times when they do.
The first is chronological age. Wear and tear, as well as damage from the sun or low-hanging tree branches, happens with age. RV plumbing vents deteriorate with time and may fracture or break. The Dicor lap sealant around the vent can also become old and fracture, allowing water to seep inside the RV and cause concealed (but serious) water damage problems.
The second reason to replace your RV plumbing vent is if you’re experiencing unpleasant odours inside your RV, whether you’re parked or driving. Again, the 360 Siphon vent is the best product we’ve found for addressing odour issues related to the RV plumbing vent.
The 360 Siphon’s design generates a negative pressure zone above the vent pipe, drawing air up and out of the vents so that even when the RV is parked, the slightest wind may carry tank odours up and out. They’re also composed of polycarbonate, which makes them extremely sturdy and long-lasting.
How to Replace a Plumbing Vent in an RV
RV sewer vents are an essential part of the RV plumbing system, but they can sometimes become damaged or blocked. If you find yourself in need of a replacement, follow these six easy steps. First, gather your tools and materials. You’ll need a new RV sewer vent, screws, sealant, and a drill. Next, remove the old vent cover. Be careful not to damage the roof as you do this. Once the old vent is removed, clean the area thoroughly. This will help ensure that the new vent will bond properly. Fit the new cap to the sewer vent pipe and then use sealant to bond it to the roof. Finish by securing the vent cover with screws. That’s it! In no time at all, you’ll have your RV sewer vent replaced and be back on the road.
If you need (or want) to repair the plumbing vents in your RV, you’ll generally need up to an hour and a few tools to execute this simple DIY project:
- Screwdriver or cordless drill
- Small hacksaw
- Putty knife (or a plastic putty knife for a rubber/EPDM/TPO roof)
- Mineral spirits (to be used sparingly if you have a rubber roof)
- Paper towels or an old rag
- Dicor self-leveling lap sealant
If you haven’t heard of Dicor self-leveling lap sealant, it’s something that every RVer should have on hand. For this project, you’ll need Dicor self-leveling lap sealant:

Dicor 501LSW-1 Epdm Self-Leveling Lap Sealant-10.3 Oz. Tube, White, 10.3 Fluid_Ounces (Packaging May Vary)
- Creates a secure, secondary seal along the roof’s edges, air vents, vent pipes and screw heads
- Adheres firmly to aluminum, mortar, wood, vinyl, galvanized metal, fiberglass and concrete
FOLLOW THESE DIRECTIONS:
Please note that the instructions below are from our first installation of the 360 Siphon Vent, which used the first generation. Different instructions are included in the new version, which involves less disassembly of the previous, existing vent (i.e. it’s easier!). If you want to get rid of the old vent for a cleaner installation, you can still follow these steps:
- Remove the old vent cap, which is typically secured with a single Phillips-head screw.
- Cut through the old Dicor with a putty knife to reveal the screw heads.
- Use your screwdriver or cordless drill to take out all of the screws. Old-fashioned vent caps usually have six screws.
- Lift and cut the old Dicor away from the roof with your putty knife. Note that your RV roof, like ours, might be made of fiberglass, making it virtually indestructible. But be careful not to cut into the roof material with your putty knife if you have an EDPM or TPO roof, also known as “rubber roofs.” To be safe, use a plastic putty knife.
- After manually removing as much Dicor as possible, disinfect the remaining Dicor with mineral spirits. Use mineral spirits sparingly if you have any sort of rubber roof… Mineral spirits can break down or loosen the glue that holds EDPM or TPO to the roof. This could cause the rubber to come off the roof.
- If necessary, use your hacksaw to trim the vent pipe down to 5/8-inch or less above the roof surface if you’re upgrading to a 360 Siphon Vent. If you’re conducting a direct replacement of your old, conventional RV plumbing vent with the same old design (which you won’t be, right? ), skip this step.
- Remove the backing from the little roll of sealing tape included in the 360 Siphon box. It should be pressed all the way around the new vent’s base.
- Place the 360 Siphon flush with the ceiling by inserting the provided circular collar far enough into the vent pipe.
- Reattach your new vent with the screws you removed from the old one. There are only five screw holes on the 360 Siphon. If the old screws were self-tapping, drilling them into place should be simple, even if the holes will most likely not line up with the original screw holes (which isn’t a problem!). If your old vent cap didn’t have self-tapping screws, you’ll need to go to your local hardware store and get some. Make sure the screws aren’t overtightened.
- Apply a thick bead of Dicor around the base of the vent, making sure to thoroughly cover the screw heads to prevent leaks.
We recommend watching the video of our 360 Siphon vents being installed. The details of our testing process are included in this video, which verifies that the vents worked as claimed. Our 360s have been operating successfully for us since 2014, as evidenced by the video embedded here. The new version of the 360 Siphon vent looks a little bit different, but it still installs and works the same.
What Are My RV Roof’s Other Vents?
Other vents on your roof, in addition to the vents for your RV plumbing, are likely to help provide adequate air circulation throughout your RV.
You may have many air vents that open and close, some with a fan, depending on the size of your RV. For example, you may have a vent in your bathroom (unrelated to the plumbing vent) that opens to allow air in and out, assisting in the control of moisture/humidity buildup while showering, etc. (If you don’t already have one, we urge that you get one.)
Similarly, a vent in the galley/kitchen area may be used to help remove smoked aromas from cooking.
A powered fan, such as our Fantastic Vent Fans, might be installed in any of these vents. They can extract fresh air through open windows/doors and vent out humidity and odors at various user-controlled rates, helping to maintain a comfortable temperature in the RV without operating the air conditioning.
Some vent fans are reversible, allowing you to bring fresh air in or pull air out of the RV. Others have a remote control, allowing you to control them from wherever you are. When a vent fan is running and a window is open, it usually creates a nice breeze that cools the whole living area of an RV.
RV plumbing vents aren’t commonly considered, but if you ever have an odor problem in your RV, they’ll be the first thing that comes to mind.
RV plumbing vents play an important role in keeping your RV’s plumbing system running smoothly. However, RV plumbing vents can also be a major source of frustration, as they are often located in awkward places and can be difficult to reach. 360 Siphon vents are a great alternative to RV plumbing vents, as they can be easily installed in any location. In addition, 360 Siphon vents are designed to prevent clogs and backups, making them an ideal choice for RVers who want to keep their plumbing system running smoothly.
Consider replacing your RV plumbing vents with 360 Siphon vents if you have odor issues when your RV is parked or traveling down the road. Check everything on your RV roof on a regular basis to make sure nothing is cracked or damaged, and that the Dicor sealant around all vents and other items hasn’t worn out its usefulness for preventing leaks.
You might also want to read these RV Tips and Guides:
- How to Properly Level a Travel Trailer
- The Top 10 Motorhome Accessories That Won’t Let You Down
- Is the Chevy Spark the lightest Vehicle For Towing A Motorhome?
- Where Can You Find RV Parts?
- What Are the Benefits of RV Electric Steps?
Top RV Air Conditioners in 2023

An RV is all about seeing the country in comfort. This necessitates the use of a good air conditioner to keep the interior cool and comfortable on warm, warm, and…
How to Determine the Best Used RV Price

How to Determine the Best Used RV Price It’s that time of year again, and the weather forecast looks promising for camping and RV activities. Looking for a new RV…
How to Purchase an RV

Before you pull the trigger on one of the larger purchases of your life, consider some of these finer points on how to efficiently purchase an RV. Let’s take a…
Best RV Air Conditioner: Top Models for Efficient Cooling on the Go

Traveling in an RV offers the perfect blend of adventure and comfort, but extreme temperatures can compromise the latter. An efficient air conditioner becomes a vital feature, pivotal in maintaining…
All You Need To Know About RV TVs

Because there are so many factors to think about, shopping for an RV TV might be overwhelming. You must first decide on the kind of television technology you want, the…
The Top 5 12 Volt TVs for Your Campervan or RV

What Should a 12V TV for Campervan or RV Contain? (6 Items) You are aware that your campervan or RV needs a TV, but what should you seek for? I’ve…
FAQ: Can RV Air Conditioning Run Continuously?

Can I operate my RV’s air conditioner continuously? Without creating a problem, you can leave the air conditioner on continually in your RV. Set your thermostat a little lower if…
How do you choose an RV air conditioner?

Regardless of the kind of RV air conditioner you pick, make sure to do your homework and read reviews from other RVers before making a purchase. No matter where the…
6 Tips for Making Your RV Air Conditioner Quieter

One of the reasons you travel on vacation to the vast outdoors is to escape the city sounds. Nature is tranquil and calm, and you appreciate the times when there…
Best of Micro Camper Necessities 2023

Best of Micro Camper Necessities 2023 Are you going on your first Micro Camper vacation? Let’s speak about getting ready for an early season adventure in your Micro Camper. It’s…
The Top 5 RV Air Conditioners Units for 2023 (15,000 BTU Rooftop)

In the summer, Vs can become extremely hot. An RV is essentially a metal cage with no inside. The metal box will quickly become warm when left in the sun,…
The Winnebago Micro Minnie: Seven Things You Should Know

One of the most well-known lightweight campers on the road today is the Winnebago Micro Minnie. Thanks to its high-quality building, market-leading features, and a variety of well-designed floorplans. But…
How Long Can You Keep an RV Air Conditioner Running?

A Complete Guide on How Long an RV Air Conditioner Can Run The best time of year to travel in an RV is during the summer. However, you must make…
- Shopping Cart 0
RV Plumbing

Featured Products

If you have municipal water and sewer connections at your home, water and waste flow are pretty simple: water under pressure flows out of faucets, and gravity conveys water and waste from the drains and toilet out through the sewer line. There is nothing to worry about as long as there are no leaks and the toilet flushes. However, because they are self-contained, RV plumbing systems are far more complicated. While you’ll still find familiar fixtures like sinks and faucets, RV systems also require unique components like holding tanks, pumps, filters, macerators (waste pumps), special toilets, and even special toilet paper. What isn’t complicated is getting the plumbing parts you want to upgrade or repair the system in your RV. From water inlet to waste dump we have everything you need to keep your RV’s plumbing system in top shape, and it’s all just a phone call away.
The city water connection that provides pressurized water to your RV’s faucets and shower head, and the water fill for the fresh water tank, are located on the exterior of the RV and sometimes inside a compartment. This connection may be the same for both and use a valve to change between the water supply and tank fill or they may be separate connections. We offer a variety of water fills including units that are protected from tampering by a lockable hatch, as well as water fill diverter valves. And since high city water pressure levels can damage the plumbing system in an RV, we offer fixed and adjustable pressure regulators, and some of our water fills incorporate a regulator.
We have the drinking water hose that should always be used for city water and fresh water tank filling. These hoses do not contain harmful chemicals that could be hazardous to your health and give the water an unpleasant taste, and some are available with integral heating elements that prevent freezing in cold weather. We also offer filters to reduce odor, chlorine, lead, and sediments, and ensure good taste. Our fresh water tanks are available in capacities to suit every need, and each is made from food-grade plastic that will not impart an unpleasant taste or odor to the water. Plus, we have holding tank heaters to prevent fresh water, as well as gray and black water tanks, from freezing. To ensure you always have adequate water pressure we have 12V and 120V electric pumps in a variety of GPM (Gallons Per Minute) ratings, and we have water softeners to prevent deposits, soap scum and other negative effects of hard water. We also have the hand pump and antifreeze you’ll need when winterizing your motor home’s plumbing system.
Whether you’re using city water or drawing water from your fresh water tank, we have the plumbing fixtures that will allow you to put it to good use, for drinking, cooking, cleaning, and bathing. Our selection of faucets and shower fixtures is so extensive it rivals what you’ll find for residential use at the local home center. We offer many styles, shapes, and sizes of acrylic and stainless-steel bathroom and kitchen sinks, and faucets in many designs and finishes including kitchen faucets with pull out sprayers. And since space is at a premium in an RV we have sink covers that will give you more counter space. Our selection of bathtubs, shower pans, and surrounds is equally diverse, with sizes and styles to suit every taste and RV, and we offer folding and sliding shower doors. Here you’ll also find many types of fixed and hand-held shower heads including exterior shower boxes and shower head flex hoses in a range of lengths.
No one wants to bathe or wash in cold water, so if your hot water heater needs repair or you want to upgrade from your existing unit, we have a large selection to choose from. We offer heaters in several different gallon capacities including propane units, heaters that can operate on gas or 120V electric mode, and propane heated tankless, on-demand heaters that can deliver a continuous supply of hot water. All water that’s not consumed has to have a place to exit from the sink, tub, or shower and for that we can supply you with drains, strainers, and stoppers. Waste water from sinks and showers is called “gray water” and stored in a separate gray water tank. In addition to water inlet hose, we also have drain hose to connect sinks, tub and shower to the gray water tank, sewer hose, a huge assortment of fittings, adapters, valves, and more that are necessary to make connections, and gray tanks in a range of capacities.
For many folks, convenient access to clean sanitary facilities is the best thing about traveling by RV. There is no need for frequent restroom stops while on the road, and no need to use port-a-cans or dig a latrine when camping. The permanent toilets we offer are comfortable, easy to use and clean, and use minimal water. The toilet empties into the black water tank. Chemicals are used in this tank to control odors and break down solids and toilet paper. We also carry RV-specific toilet paper that breaks down quickly, so it won’t clog your black water tank or sewage system. We can also supply you with sanitary, odorless, and leak proof portable toilets. These feature a hand pump or battery powered flushing system, removable seat and cover for easy cleaning, and a sealed valve that keeps odors in the holding tank.
Black water and gray water tanks have a dump port where a sewer hose is attached so the tank can be drained at an approved RV dump site. The gray water tank should always be drained after the black water tank at the dumping station as the gray water helps to flush any solids from the sewer hose. An alternative method for the black water tank is to use a macerator, or waste pump. The macerator attaches to the dump port and pumps the waste from the tank. It actually grinds the waste, so it can be pumped through a much smaller diameter hose. The smaller hose is much more compact than the traditional sewer hose, so more can be carried, enabling you to empty the tank from further away. On our digital shelves you’ll find black water tanks in an assortment of shapes and capacities, sewer hose in various dimensions, and hose components including hose supports, nozzles, end caps, and hose carriers.
Featured Brands

Plumbing Reviews
- Tour Account ›
- Travel Forum ›
- Travel Forum
- Independent Trave...
Independent Travel to Moscow and St. Petersburg
My wife and I have traveled independently to many European countries and, after reading many of the comments in this forum, feel like we may be able to do so in Moscow and St. Petersburg as well, although we feel somewhat less comfortable than the other countries where we have traveled in Europe.
My biggest question is how much we will miss by visiting the main sites without a tour guide. In the other European countries we have visited on our own we have been comfortable and satisfied with the level of knowledge we have gained by studying and visiting on our own, although we believe a tour guide or tour company in any country would normally be able to provide greater insight than visiting a site on our own, but about in Moscow and St. Petersburg?
Any thoughts would be appreciated.
Unless you speak at least some Russian and read the alphabet it would be difficult without a guide. Very few signs in English especially in Moscow. Also not too many people speak English there.
I visited St Petersburg last Autumn for a protracted period , and did not find it anymore daunting than any other European city . As Ilja says , learning the Cyrillic alphabet is a big plus . I also found that it was fairly easy to grasp . It will , among other things , enable you to read signs with relative ease . I would answer the main part or your question ( about tour guides ) thus - I am not enamored of tour guides or tours. While I only use a tour under duress ( A sites rules prohibiting an independent visit - ie Glasgow School of Art , Municipal House in Prague , etc ) . Doing your own preparation and homework is the best way , in my opinion . My wife and I ventured through St Petersburg with nary a concern ,and made two day trips outside of the central district ( one was twenty five miles away , and no English speakers in sight ) Figuring out the logistical details , did not present any difficulties . While I never use tours , I am an inveterate eavesdropper , have done so many times , and find , that on balance , the information that they impart is fairly elementary . If you want greater detail , they are unlikely to supply it . I also prefer to go at my own pace , not being rushed and being able to dwell on things that most other visitors barely give a passing glance . If you are interested , let me know . I would be happy to provide you with information that will enable you to travel independently
Thank you, Steven. I am encouraged by your comments and feel the same way you do about tour groups. We are very much willing to prepare in advance and learn the basics of the Cyrillic alphabet to help us have a better experience.
I would be very interested in learning more about your experience in Russia and receiving any additional information you can provide on independent travel there, starting perhaps with obtaining the visa.
I am not opposed to hiring a private or small group guide for a specific site or for a day trip outside St Petersburg and Moscow, but, like you said, I much prefer the freedom of staying at places as long or short as I want and seeing the sites that interest me most. For example, neither my wife nor I are big into shopping, yet most tour itineraries leave afternoon time for just that. Not interested!
Please provide whatever you may feel would be helpful for us.
Russ , I see you are quite near San Francisco - you can start by looking at the VISA procedure , it's fairly straightforward . Since there is a consulate in San Francisco - look here http://www.consulrussia.org/eng/visa-sub1.html
And here - http://ils-usa.com/main.php
Having always traveled independently, we thought we could do a better job than any tour. How misguided (pun intended) we were. Now that we have had the experience of having someone native to the area walk us around and explain things through a personal perspective we realize how much we missed. For St. Petersburg I highly recommend http://www.peterswalk.com/tours.html . This is not a traditional guided tour, but an opportunity to receive some orientation to the area as well as insight into the "Russian soul". I think if you did this upon arrival the rest of your time would be much more meaningful. We really liked the http://www.pushka-inn.com . The location is superb (just around the corner from the Hermitage square), the rooms lovely, the included breakfast at the restaurant next door ample and overall an excellent value. We used this company to get our visa: https://www.passportvisasexpress.com/site/san_francisco_customer_service Note that it costs about the same for a 3-year visa as a one-year, and you never know if you might want to return within that more extended window of time. It is not cheap, so factor that into your planning.
If you like traveling without a guide in other countries and find this satisfying, the same will be true in Moscow and St. Petersburg. Of course it's not either/or - you can certainly take a guided walk or boat tour, for instance.
I cannot emphasize enough the importance of learning Cyrillic if you're going on your own. The book I used was Teach Yourself Beginner's Russian Script, which was great. It breaks down the alphabet into letters that are the same as English, letters that look the same but are pronounced differently, etc. It's out of print, but you can get used copies on Amazon: http://www.amazon.com/Teach-Yourself-Beginners-Russian-Script/dp/0071419861/ref=sr_1_2?ie=UTF8&qid=1459701143&sr=8-2&keywords=teach+yourself+russian+script
Russia is indeed a bit more "foreign" than say, Italy. However, in Moscow and St. Petersburg, I found enough English to be able to get by. Many restaurants had English menus and/or English speaking staff, for instance. This was most emphatically not true in Vladimir and Suzdal (two cities in the Golden Ring outside Moscow). I went with my sister, a Russian speaker, and if she hadn't been there, I would have been in big trouble. So, if you want to see places outside these two big cities, use a guided tour (even if just for that part). Also, Moscow and St. Petersburg are huge cities. Coming from New York, I wasn't intimidated, but those not used to a megacity may not be so cavalier (even I found them overwhelming at times, especially Moscow).
I found both Lonely Planet and Rough Guide to be helpful, and both to have various errors. Look at both, buy whichever one has a more recent edition, and then be prepared to have to discard some of the advice therein. Also, these places change more quickly than places in Western Europe. Be very careful of outdated advice. For instance, I was there in 2001 and 2010, so I won't give you any specifics on getting a visa - that changes constantly.
Just as a teaser, two things I saw and loved that I doubt would be included in any escorted tour are the Gorky House in Moscow (an Art Nouveau wonder) and the Sheremyetov Palace in St. Petersburg (it's now a museum of musical instruments, and the decor is amazing, particularly in the Etruscan Room).
Thanks for all the good advice. Any additional thoughts are welcomed.
One of history's seminal works pertaining to Russian history and culture and a MUST for anyone contemplating a visit or simply interested , is this fine work from 1980 - http://www.amazon.com/Land-Firebird-The-Beauty-Russia/dp/096441841X
This is about you and not about Petersburg. Do you like guided tours? We don't and didn't find that a guide added to our experience in China where we did hire private guides mostly for the logistics; it was easy to have someone drive us places. But once at a site, we didn't need the guide. I felt the same way about our 9 nights in Petersburg. We did hire a guide for the trip to the Catherine Palace again for the ease of logistics for us Olds. Here is our visit: https://janettravels.wordpress.com/2016/01/23/an-easy-trip-to-the-catherine-palace/ There are also snapshots of the Church on Spilled Blood in this photo journal. Having someone pick us up at the apartment and get us in without line ups and shepherd us through the palace steering clear of the tour groups was lovely. But we didn't need commentary because we can read and prepare.
You certainly don't need a guide for the Hermitage (we spent 4 days there), the Russian Museum, the Kazan Cathedral or Church on Spilled Blood or the Faberge Museum. We enjoyed a number of self guided walking tours including a couple from Rick Steves guidebooks. We took the canal cruise suggested by RS that had an English commentator. I would not take one without that as you will be totally clueless. The commentator was not all that good but at least we had some idea what we were seeing. So for people like us who like to do our own thing and can read a guidebook and don't particularly like to be led about, a tour is not needed. If you enjoy tour groups, then go for it. Petersburg is easy to negotiate. It helps if you can read the cyrillic alphabet and it is also useful to have the google translate ap on your phone. We found ourselves translating packages in grocery stores with it and the occasional museum sign or menu. I have one food I need to avoid and so it was handy to have the translator to talk with waiters (I could either show them the sentence, or play it for them or play it to myself and then repeat it to the waiter -- that all worked well)
Dear Russ, I cannot help you with Moscow, but about four years ago, my husband and I went to St Petersburg on our own. But, we did use a private guide for 4 half days. We both feel that our guide absolutely made our trip (we stayed 6 or 7 nights). We used a company owned by Tatyana Chiurikova, www.tour-stpetersburg.com I cannot say enough good things about her and our experience. I emailed her and we worked out a schedule/ sights that was tailored to our interests. She also offered some recommendations, which we took. The guide will meet you at your hotel. And frequently, at certain places, with the guide, we were able to skip the long entrance lines. We had an half day driving tour of the city (car, driver, & guide). You are taken to & go in places such as Peter & Paul Fortress, some of the cathedrals, etc. We had a half day with the guide at the Hermitage which ensured that we would see the major sights there. And, of course, you can stay after your guide leaves or return another day. Also, we had the guide for Peterhof (a must & go by boat) and Catherine's Palace. I hope that you will go to the website. As I said, our guide made our trip. I am positive that we would have missed quite a bit on our own everyday. And I'm sure we would have wasted a lot of time trying to get to various place.This was the best of both worlds, a guide where needed and plenty of time on our own. Whatever you do, I'm sure that you will love St Petersburg! Ashley
I am curious about the lines as we encountered no lines on our trip -- but it was in September. We got tickets for the Hermitage at machines and skipped those lines and our guide for the Catherine Palace which was our only guided experience (as noted before, chosen for the logistics of getting there) had arranged tickets and we didn't have a line, but then we also didn't see lines. We did not find lines at any other site.
Both Moscow and St Petersburg I've done on my own, that is together with the Dear Partner. I can't remember any problem getting where we wanted to go. The Metro systems are well signed, and with a little exercise and patience you can recognize the station names. With a good map and a good guide - we had the Rough Guides - that part of the logistics is solved. The language is a major problem, but the usual tricks of pointing, looking helpless, and making a joke of it all do wonders. I would hate to be led by a guide, but for others it is a comfortable thought.
We also did both cities on our own. I found the DK Eyewitness guide for Moscow has the best map. I used the one from our library (kept the book at home). Took the smaller RS book for St. Petersburg ( his book on northern cities). His map and restaurant ideas were all good. We also downloaded the Google maps in our Android Samsung tablets/phones for both cities and then could get directions to any place we typed in. The blue ball guided us everywhere. I'm sure we missed somethings by not having a guide, but we just enjoy walking around and getting a sense of a place. If you like art, The Hermitage is great. We went 3 times and still missed alot. In St. Peterburg we stayed at the 3 Mosta which we loved (quite and not far from the Church of Spilled Blood.) We also loved the Georgian food in both cities. There's a great Georgian restaurant near the 3 Mosta hotel. We're now in Belarus- very scenic. Enjoy your trip!!
This topic has been automatically closed due to a period of inactivity.
IMAGES
VIDEO
COMMENTS
Once you turn on the valve on the spigot, water will pressurize your RV's plumbing system, providing you with water on demand, but this time it will be entering your RV directly from the city water supply. It's fed by the pressure in the park's plumbing system, exactly the same as the water in a sticks & bricks house.
Simply, cut the tubing squarely and ensure there aren't any burrs on the tube. Unscrew the nut from the fitting, and slide it back over the tubing. Now, push the tubing over the fitting flare, rocking it back and forth until it comes to a full stop against the fitting. Then, tighten the nut by hand until secure.
RV Plumbing System Basics. Your RV plumbing system is made up of many of the same components as a house plumbing system, with a major difference: you store your fresh AND waste water on board. Every self-contained RV will have at least 3 water holding tanks, and the size of the tanks is dependent on the size of the RV.
Attach one end of the sewer hose to the valve, and the other end to the valve on the dumping station. Starting with the black tank, pull the valve and allow the tank to drain. Eventually, the noise of liquid flowing through the hose will stop - that is the point at which you close the valve.
How an RV Water System Works You'll hear three common terms when discussing RV plumbing: fresh water, gray water, and black water. Fresh water is the water that goes into your camper. The waste water that comes out is called gray and black water. Gray water is the waste water from your sinks and shower. Black water is the waste from your toilet.
Fresh Water Parts and Accessories for all your RV Needs. Check out our huge selection of RV Showers, RV Bath Tubs and RV Water Pumps by Shurflo. With our selection of RV Fresh Water and Plumbing products your sure to keep your next RV trip fresh and clean. Don't forget to check out our RV Winterizing products and supplies as well.
RV Plumbing Basics. (Back to Table of Contents) Your RV provides running hot and cold water and drainage systems for your convenience. The system is self-contained, and while similar to the plumbing in your home, there are differences. The first part of the system is a tank of fresh, clean potable (drinkable) water stored in an onboard tank.
An RV plumbing system first consumes fresh water from either the onboard fresh tank or an exterior city water connection depending on what is available. This water is heated and fed to various fixtures (sinks, showers, toilets, etc.) throughout your RV. After use at the fixtures the waste water is deposited into either the black or grey tank to ...
In an RV, the plumbing system doesn't exist only on the inside. While your sink, shower, and toilet might be on the inside, the drains and tubes for it are accessible through the outside. ... For all of your water and plumbing needs, whether inside or outside, stop by RecPro.com. Subscribe to our newsletter. Email Address. 806 S. Division St ...
The RV Water System is pretty easy to understand, once you know what goes where and why. This is an in-depth overview. Hooking Up RV Water or Filling the Ta...
In addition to a general description of an RV's on-board water system and an overview of how it works, this video will explain in detail how to successfully complete important tasks related to your RV's fresh water tank. Important RV plumbing topics included: Filling Fresh Water Tank. Turning on Water Pump. Connecting to Campground Water.
Clogged Pipes. Your RV toilet and plumbing systems are sensitive, so the 2-ply toilet paper that you use at home won't work in your rig. To decrease your chances of clogged toilets and malfunctioning tank sensors, we recommend using 1-ply toilet paper. Scott® 1000 toilet paper is a great option and safe on septic tanks.
RV Plumbing Parts. The specific plumbing fittings in your rig will vary depending on your model's specific set-up and size, but many are the same kinds of plumbing parts you'd find in your household system. However, in an RV, the plumbing system is generally composed of PVC as opposed to metal, so make sure you purchase RV-specific parts if ...
Don't go on your next RV trip without proper equipment. Check out our MEGA line of RV plumbing fittings. We carry over 300 products and accessories to keep your plumbing flowing smoothly. Get all you need today from RVpartscountry.com to get all your RV plumbing needs. Also, check out our wide variety of Rv Bath tubs, Rv showers and tub surrounds.
We have sewer plumbing parts such as hoses, waste valves, hose supports, and water treatments. For your fresh water plumbing systems, we have adapters and fittings, water tanks, drinking hoses, valves, water pressure regulators, water filters, pumps, and inlets. If you're looking to replace a faulty faucet or just upgrade to a new style, we ...
RV sewer vents are an essential part of the RV plumbing system, but they can sometimes become damaged or blocked. If you find yourself in need of a replacement, follow these six easy steps. First, gather your tools and materials. You'll need a new RV sewer vent, screws, sealant, and a drill.
Culligan® Sediment GAC 1 GPM Water Filter with 12" Hose. 0. $63.58. Flow Pur® RV-Pro 10000 Water Softener. 0. $357.16. See More. If you have municipal water and sewer connections at your home, water and waste flow are pretty simple: water under pressure flows out of faucets, and gravity conveys water and waste from the drains and toilet out ...
slowly open the hot and then cold valves until the red-colored RV antifreeze appears. Replace the RV antifreeze gallon before it is emptied as often as needed to complete this step for each faucet. Repeat on all faucets from the closest to the farthest away. Don't forget the outside shower if equipped. 6. Flush the toilet until RV antifreeze ...
9. Today, I want to share some tips on how to remove and replace an RV roof plumbing vent and reseal it properly. First, you'll want to remove the old vent by carefully unscrewing it from the roof. Once it's removed, clean the area around the opening and make sure it's free of any debris or old sealant. Next, you'll want to apply a new ...
Europe - Need help traveling outside of Moscow - We plan to spend a few days in Moscow in July and would like to travel outside the city. We are considering the Golden Ring and need help.
So, if you want to see places outside these two big cities, use a guided tour (even if just for that part). Also, Moscow and St. Petersburg are huge cities. Coming from New York, I wasn't intimidated, but those not used to a megacity may not be so cavalier (even I found them overwhelming at times, especially Moscow).
You cannot resist our Two Hearts of Russia (7 Days &6 Nights), Golden Moscow (4 Days &3 Nights), Sochi (3 Days & 2 Nights), Golden Ring (1 Day & 2 Days), and many more. As a leading travel agency specializing in the tour to Russia and Former Soviet Republics, we are connecting the travellers from every part of the world for more than 10 years.
In this vlog we explore the incredible city of Moscow, Russia! There is SO much to see and do in this city and we tried to pick out the highlights to share w...