- Gameumentary
- Review in 3 Minutes
- Design Delve
- Extra Punctuation
- Zero Punctuation
- Area of Effect
- Escape the Law
- In the Frame
- New Narrative
- Out of Focus
- Slightly Something Else
- Terms of Service
- Privacy Policy

Unlock Powerful White Robes in Journey With Every Symbol Location
Now that Journey is out on Playstation 4, take a return trip and collect every glowing symbol with our locations guide, helping your mysterious pilgrim unlock the powerful white robes outfit.
Finding these rare glowing symbols upgrades the wanderer’s scarf power, allowing them to glide and leap further across the desolate landscape of Journey . Collect them all, and there’s a bonus costume in your future — the white robes instantly refill your scarf after a landing, making exploration easier than ever before.
Check out the entries below for tips, showing you how to find every glowing symbol and where to collect your reward, the white robes, when you’re done.
Symbol Locations – How to Unlock White Robes
To unlock the powerful White Robe outfit, you’ll need to collect every symbol. Glowing symbols upgrade your scarf.
Once every symbol is collected, return to the Hub and go up the steps to the area that shows how many symbols you’ve collected. Travel to the glowing white thread and press [Circle] to change into the white robes. Change back into your normal robes by returning to this location and pressing [Circle].
The white robes, when worn, instantly regenerate scarf jumping energy after landing.
Locations Guide
- Symbol #1 : The first glowing symbol is right in front of your starting point.
- Symbol #2 : After crossing the sands in the lower area, you’ll reach a three-story platform that you circle to reach the top. On the second level, continue past the partially-crumbled top to find a symbol to the left.
- Symbol #3 : There’s a small platform sticking out of the sand to the right of the three-story platform, between it and the building with stairs. Jump and glide to it or run across the valley.
Broken Bridge Area
- Symbol #1 : The first symbol is near the starting point of this area. It’s found on a ledge to the right where there’s a sandfall, before reaching the broken bridge in the distance.
- Symbol #2 : Return to the starting point and travel northwest. Watch the rock wall for a cave hidden behind another sandfall, partially obscuring the glowing symbol inside.
- Symbol #3 : At the start of the area, travel left and look next to a rocky outcropping between the staggered broken bridges.
Desert Area
- Symbol #1 : Travel right from the starting point through the dunes to find a small ruin of pillars with the glowing symbol sitting on top of a column.
- Symbol #2 : From the start, move toward the mountain in the far, far distance. Eventually, beams of light will shoot out from the mountain’s direction and land in the desert. The first leads straight to a small ruin with a symbol glowing above a wrecked wall.
- Symbol #3 : Leave the start of the desert, moving left until you come across flying clothe creatures near ruins buried deep in the sand. Move toward the mountain to spot another ruin with an Ancient Glyph. Moving toward the mountain again, across one more dune, there’s a tall tower with stairs containing the next symbol at the top.
- Symbol #4 : Inside the massive sandstorm, travel up to the top of the tower. Before going up the steps to the shrine, check out the ledge to the left.
Sunken City Area
- Symbol #1 : Just as you start sliding through the city, follow the arches on the left path. Once you pass through five, move right to a ruined hallway in the center of the path. There’s a glowing symbol inside.
- Symbol #2 : After jumping through a sandfall and appearing over a massive canyon, look to the right. There’s a platform jutting out from the rock wall with an easily visible glowing symbol.
- Symbol #3 : During the second sliding sequence, stick to the center of the desert and move through the three arches. After ramping off a rock, you should see a large rock mountain sticking out of the sand ahead with a building on top. Move slightly left and use the rock ramp to leap to a narrow canyon in the central rock formation ahead.
Underground Passage Area
- Symbol #1 : At the start of the underground passage, you’ll find square-ish tubes stuck in the sand. Eventually, you’ll find one tube on the left sticking up. Look inside it to get the symbol.
- Symbol #2 : Past the previous symbol, you’ll enter a larger area with arches holding up more tubes. Follow the flowing clothe to a tube suspended over the sand on the right with an opening pointing toward the entrance. Glide into the tube to see it.
- Symbol #3 : In the following room, you’ll find strange jellyfish-shaped floating clothe creatures. Midway across the chamber, you’ll find a series of these jellyfish positioned straight upward, allowing you to continue leaping up to a very high glowing symbol.
- Symbol #4 : Entering the dark area near the end, stick to the left wall and explore toward the last slope. There’s a wall of archways, with the glowing symbol right behind it.
Temple Area
- Symbol #1 : After activating the glowing mural, raising the lights on the central tower, look on a ledge attached to the middle tower, on the left.
- Symbol #2 : Using more murals to raise the glowing energy, you’ll eventually reveal a clothe dragon. Ride it up and watch the central tower. There’s a hidden opening in one of the walls on the way up containing your next symbol.
- Symbol #3 : Enter the clothe dragon’s mysterious chamber filled with hanging clothe flags along the exterior edge. There’s a narrow area behind these flags, glide behind them to find a hidden symbol.
- Symbol #4 : Once the glowing energy has reached the top level of the temple, search the exterior temple walls parallel with the clothe jellyfish. There’s a small room directly above the temple entrance hall, high up from the starting point.
Trophies Unlocked
Transcendence (Gold): Collect all unique glowing symbols across one or more journeys.
Source: [ 1 ]
Kevin Thielenhaus is a freelance writer for The Escapist. Find him on Twitter here.
- Baldur's Gate 3
- Dreamlight Valley
- Lethal Company
- Monopoly Go
- Jujutsu Chronicles
- UGC Limited
- Call of Duty
- Legend of Zelda
- Ethics Policy
- Privacy Policy
- Review Policy
Journey: How to Get the White Robe and Cloak Embroideries
There is much more to enjoy in Journey than just its awe-inspiring levels and fantastic music. The game is riddled with collectibles to discover and nothing is more desirable than the White Robe and Cloak Embroideries.
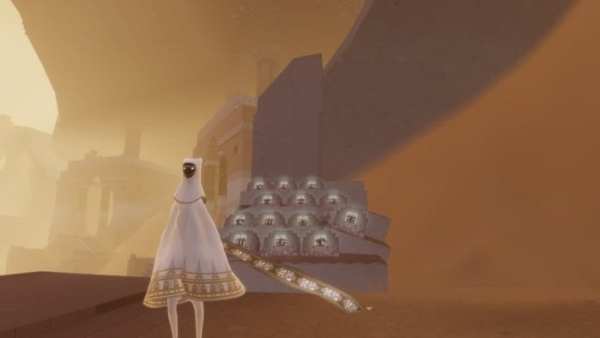
The White Robe is the most sought after upgrade in Journey. The reason for this is that the White Robe can be obtained at the beginning of each new game and provides a longer scarf right at the start. Even better than that, the robe will automatically recover scarf energy while the player remains on the ground which lets you float your way throughout the game with relative ease. Obtaining the White Robe isn’t very difficult, but it does require a bit of time. By acquiring each Glowing Symbol scarf upgrade in the game, you’ll get the Transcendence trophy and the robe will become available at the entrance to the hub in the first area. Simply step onto the glowing platform of dangling cloth and you’ll step out with a shiny new cloak. Keep in mind that you don’t have to get each scarf upgrade in a single playthrough, so you can spread it out or even abuse Chapter Select to gather the ones you don’t already have.
Cloak Embroideries are special designs that will appear on the bottom of your cloak. They don’t give the player any special attributes, but they do look really, really cool. They are gained in sections by completing the game multiple times through. A new embroidery will be added to your cloak each time you beat the game up to three times. You have to completely beat the game from the introduction level all the way to the end in order to get the new design. The embroideries will appear on both the regular cloak as well as the White Robe and will also glow when charged by floating cloth or another player.
- PlayStation 3
- PlayStation 4
- PlayStation 5
- Xbox Series
- More Systems
- Official Journey White Robe Tour Guides
PlayStation 3 iOS (iPhone/iPad) PC PlayStation 4
- Topic Archived
More Topics from this Board
- Milkman Playeth: Journey. 8 posts, 7/16/2021
- Game music survey - Journey 2 posts, 7/27/2022
GameFAQs Q&A
- Can you play with a friend or only anonymous? General 4 Answers
- Will you be able to play Journey offline instead of just only online? General 7 Answers
- About how many hours is this game? General 5 Answers
- How do you quickly sit down? Tech Support 2 Answers
- Can you die / get a game over? *Spoilers, but probably not* General 4 Answers
Unlock Powerful White Robes in Journey With Every Symbol Location

Now that Journey is out on Playstation 4, take a return trip and collect every glowing symbol with our locations guide, helping your mysterious pilgrim unlock the powerful white robes outfit.
Finding these rare glowing symbols upgrades the wanderer’s scarf power, allowing them to glide and leap further across the desolate landscape of Journey . Collect them all, and there’s a bonus costume in your future — the white robes instantly refill your scarf after a landing, making exploration easier than ever before.
Check out the entries below for tips, showing you how to find every glowing symbol and where to collect your reward, the white robes, when you’re done.
Symbol Locations – How to Unlock White Robes
To unlock the powerful White Robe outfit, you’ll need to collect every symbol. Glowing symbols upgrade your scarf.
Once every symbol is collected, return to the Hub and go up the steps to the area that shows how many symbols you’ve collected. Travel to the glowing white thread and press [Circle] to change into the white robes. Change back into your normal robes by returning to this location and pressing [Circle].
The white robes, when worn, instantly regenerate scarf jumping energy after landing.
Locations Guide
- Symbol #1 : The first glowing symbol is right in front of your starting point.
- Symbol #2 : After crossing the sands in the lower area, you’ll reach a three-story platform that you circle to reach the top. On the second level, continue past the partially-crumbled top to find a symbol to the left.
- Symbol #3 : There’s a small platform sticking out of the sand to the right of the three-story platform, between it and the building with stairs. Jump and glide to it or run across the valley.
Broken Bridge Area
- Symbol #1 : The first symbol is near the starting point of this area. It’s found on a ledge to the right where there’s a sandfall, before reaching the broken bridge in the distance.
- Symbol #2 : Return to the starting point and travel northwest. Watch the rock wall for a cave hidden behind another sandfall, partially obscuring the glowing symbol inside.
- Symbol #3 : At the start of the area, travel left and look next to a rocky outcropping between the staggered broken bridges.
Desert Area
- Symbol #1 : Travel right from the starting point through the dunes to find a small ruin of pillars with the glowing symbol sitting on top of a column.
- Symbol #2 : From the start, move toward the mountain in the far, far distance. Eventually, beams of light will shoot out from the mountain’s direction and land in the desert. The first leads straight to a small ruin with a symbol glowing above a wrecked wall.
- Symbol #3 : Leave the start of the desert, moving left until you come across flying clothe creatures near ruins buried deep in the sand. Move toward the mountain to spot another ruin with an Ancient Glyph. Moving toward the mountain again, across one more dune, there’s a tall tower with stairs containing the next symbol at the top.
- Symbol #4 : Inside the massive sandstorm, travel up to the top of the tower. Before going up the steps to the shrine, check out the ledge to the left.
Sunken City Area
- Symbol #1 : Just as you start sliding through the city, follow the arches on the left path. Once you pass through five, move right to a ruined hallway in the center of the path. There’s a glowing symbol inside.
- Symbol #2 : After jumping through a sandfall and appearing over a massive canyon, look to the right. There’s a platform jutting out from the rock wall with an easily visible glowing symbol.
- Symbol #3 : During the second sliding sequence, stick to the center of the desert and move through the three arches. After ramping off a rock, you should see a large rock mountain sticking out of the sand ahead with a building on top. Move slightly left and use the rock ramp to leap to a narrow canyon in the central rock formation ahead.
Underground Passage Area
- Symbol #1 : At the start of the underground passage, you’ll find square-ish tubes stuck in the sand. Eventually, you’ll find one tube on the left sticking up. Look inside it to get the symbol.
- Symbol #2 : Past the previous symbol, you’ll enter a larger area with arches holding up more tubes. Follow the flowing clothe to a tube suspended over the sand on the right with an opening pointing toward the entrance. Glide into the tube to see it.
- Symbol #3 : In the following room, you’ll find strange jellyfish-shaped floating clothe creatures. Midway across the chamber, you’ll find a series of these jellyfish positioned straight upward, allowing you to continue leaping up to a very high glowing symbol.
- Symbol #4 : Entering the dark area near the end, stick to the left wall and explore toward the last slope. There’s a wall of archways, with the glowing symbol right behind it.
Temple Area
- Symbol #1 : After activating the glowing mural, raising the lights on the central tower, look on a ledge attached to the middle tower, on the left.
- Symbol #2 : Using more murals to raise the glowing energy, you’ll eventually reveal a clothe dragon. Ride it up and watch the central tower. There’s a hidden opening in one of the walls on the way up containing your next symbol.
- Symbol #3 : Enter the clothe dragon’s mysterious chamber filled with hanging clothe flags along the exterior edge. There’s a narrow area behind these flags, glide behind them to find a hidden symbol.
- Symbol #4 : Once the glowing energy has reached the top level of the temple, search the exterior temple walls parallel with the clothe jellyfish. There’s a small room directly above the temple entrance hall, high up from the starting point.
Trophies Unlocked
Transcendence (Gold): Collect all unique glowing symbols across one or more journeys.
Source: [ 1 ]
Kevin Thielenhaus is a freelance writer for The Escapist. Find him on Twitter here.
About the author
More Stories by Kevin Thielenhaus Legacy Author
Female game characters photoshopped to average american proportions, 8 disappointing videogame endings, the escapist.
- Documentaries
- Review in 3 Minutes
- Design Delve
- Extra Punctuation
- Zero Punctuation
- Area of Effect
- Escape the Law
- In the Frame
- New Narrative
- Out of Focus
- Slightly Something Else
Journey Wiki
Journey's 12th Anniversary Poster Winner! Congratulations Kbak! Join players around the world in celebration of Journey's 12th Anniversary fan event on March 13th!
- Expert Mode Glossary
- Expert Mode
Fancy Flying
- View history
This is our gateway article to all the advanced flying techniques that the community found out.
- 1.1 About using a Controller, Keyboard, Mouse...
- 1.2 Fancy Flying and interaction with other players
- 2 How do you Fancy Fly?
- 3 Terminology
- 4.1 So Many Boosts!
- 4.2 Companion Needed
- 4.3.1 Dive Boost and variations (air)
- 4.3.2 Dropshoot and variations (ground)
- 4.3.3 Charge Boost and variations (wall)
- 4.3.4 Boost comparison with images and tables
- 5.1 Important basic knowledge
- 5.2 Slightly more advanced knowledge
- 6.1 YouTube channel recommendations
- 6.2 With a Controller Shown
- 6.3 Without a Controller Shown
- 7 Notes About Controls
- 10 See also
- 11 References
What is Fancy Flying? [ ]
Fancy Flying ( FF ) is when you control your camera in addition to your character to gather energy with a dive and release it in the form of a boost .
Some techniques are simple and don't need much practice ; others require immense precision and dedication. They all involve methods to gain height, distance and/or speed in ways you might not have imagined, and can help you explore all sorts of new areas!
A player who is skilled in fancy flying is often called a Fancy Flyer . For a fancy flyer, FF is a whole different gameplay and approach to Journey which delivers lots of fun and fulfilment.
Fancy Flying is mostly used as a white robe for its ability to recharge upon touching the ground, but red robes can also perform many flying techniques (not all of them, or only for a short amount of time depending on the scarf length). It's recommended to start learning them as a white robe.
About using a Controller, Keyboard, Mouse... [ ]
Most Fancy Flyers play with a controller because of early PS3 and PS4 releases of the game, but also, a controller allows the user to perform every Fancy Flying techniques discovered so far. Most tutorials on youtube are also intended for controller users because of it.
Fancy Flying and interaction with other players [ ]
- One needs to be able to identify what the Companion is able to and willing to do.
- Respect other players when "only training" / not wanting a newcomer Companion.
Hints for training Fancy Flying in BB :
You do not want to meet anyone
You don't mind meeting others, you want to play coop.
- On Steam you can launch Steam in offline mode for this.
- Epic Games version , no problem: You do not meet Companions anyway (bug).
- Do not activate bridge banners, do not go through the vision.
- Activate one or all bridge banners.
- Upon meeting, try to figure out quickly if you would like to travel with them (sometimes two Fancy Flyers meet and just enjoy flying around too).
- Even a Red Robe can do many Fancy Flying things, some people enjoy the extra difficulty.
- If you feel like you cannot "handle" the player: either disconnect, open menu and "chapter select", or enter the vision without them to cause a disconnect.
Always keep in mind that the range of things to do in Journey is very wide, not everyone digs into Fancy Flying , or they just learn the most basic boosts . It also depends on curiosity, since if one does not research about Journey or get help from a Companion met, they might never get to know about FF.
How do you Fancy Fly? [ ]
As many things in Expert Mode , FF knowledge also builds up over time.
The first thing to understand is how the angle of the camera affects the angle of your flight during the dive or boosting phase, as well as learning to not use the jump button when attempting to boost up (it would slow you down for a second at every jump).
Assuming you had the chance to Tandem Fly with Companions (or even Coasting ), the next recommended steps are:
- Dive Boost : this is a normal in-game mechanic, but with experience it could be seen as exploit (diving is only allowed in "glitched" categories for speedruns ).
- Once you get a feeling for this and how walls or the ground can affect the camera, the path is open for Dropshoot and Charge Boost .
If you ask a Fancy Flyer player for hints, they often will say "It's best if I observe your training, to see where the problems lie". Video tutorials can help to get the idea, but trying the thing over and over again and eventually getting in-game help from a player might be needed to learn the harder boosts.
Angling the camera less toward the ground during a dive (or less toward the sky during a boost) can help you gain more distance and speed over height, possibly at the cost of a weaker boost, depending on the fancy flying technique used. However, the primary key to fancy flying, is that flying downward will create a dive .
It's this mechanic that players use - and often abuse - in order to fancy fly.
We try to provide video instructions WITH a visible controller (or representation thereof) to better help aid in learning.
Considering that people all use different kind of settings (Example: for PlayStation version, Fancy Flying with a sixaxis controller can make a big difference and greatly enhance the difficulty), it's hard to explain every details on a Wiki.
Terminology [ ]
is when you aim your camera to the ground while in the air, and move forward in order to move fast towards it, much like a bird of prey. Allows one to gain speed while building up boost power (also called the charging phase), and is the base of every Fancy Flying techniques. Even doing so on the ground or against a wall (see dropshoot or charge boost ) is still considered a dive because you trick the game into thinking you actually dive on the ground itself.
A boost example: here Charge Boost. Notice how the wayfarer "dives" into the wall and "flaps" their robe a few times before the boost.
is when you are able to rise up very high and fast in the air, without pressing the jump button . To get a boost, some kind of "charging up / building up energy" is needed beforehand with a dive.
Can also refer to any specific flying technique.
Boost Power
A hidden value expressed in seconds that tells you for how long you can boost. Could be seen as "energy" or "boost strength" as well, and is sometimes called (incorrectly ?) "momentum" on this wiki.
The more a camera is placed vertically when charging, the higher the max boost power value gets . This boost value almost only depends on how long you dive with the associated camera angle , although a very light left stick pressure and sideways orientation of it on a controller can also reduce it. Regardless of the camera angle, you always build up boost at a constant rate during the dive (until you reach the max value).
Here is a very detailed article about boosting power and how to Fancy Fly more efficiently.
"Slow" <boostname>
Most boosts have some variations. "Slow" boosts are variants of the standard techniques they are named after, characterized by their slow pace and the increased height they provide after boosting, when diving in the air .
They don't actually help in providing a stronger boost, but instead, make you fall more slowly during the dive, and therefore losing less altitude / charging longer before hitting the ground. When performed on the ground ( slow dropshoot ), they can help with precision in the movements. "Slow" charge boosting however is not only useless, it can also make you fly off the wall more easily when charging, and destroy the boost.
"Slow" boosts are performed with a light left stick pressure on a controller , and some require immense precision. Not suitable for keyboard / keyboard and mouse .
"Reverse" <boostname>
Reversed Fancy Flying techniques are performed with a camera facing the sky instead of the ground during a dive. They often give very powerful boosts because of a more vertical camera angle than normally possible (higher max boost power value), but they tend to be harder to perform than the regular ones: to initiate a dive in reverse you need to use some boost from a previous dive, to help with the transition. Otherwise you will only slowly fall with a camera to the sky (no dive). It also gets hard to know where you are headed to during the reverse dive part.
"Slow" reverse Fancy Flying techniques can be performed as well, although very hard to do well and with few practical use, other than for fun ? However, it seems complicated to keep on diving in reverse with a light left stick pressure (on a controller) when touching the ground ( dropshoot and variations ). Hence why slow reverse FF could be an idea for aerial boosts mostly, for those willing to give it a try (slow reverse dive boost, slow reverse level boost, reverse flap boost, and maybe even reverse infinite boost !?)
is when your robe spreads like the wings of a bird , often when applying only very little or no pressure on the left/movement stick in the air, and jumping in this position.
This is especially used for Flap Boost (a rather advanced FF technique). See also Charge Boosting , where you fly against a wall and can count the times your robe moves that way, to keep track of the charge: this word can often be a little abused into describing how often you press on the fly button, or how long you keep on pressing it . It could be used to describe distances, etc.
is when your character spins in the air during a dive, usually when applying a medium or full pressure on the movement stick and jumping (or simply pressing the forward key from a keyboard + jump). It can happen while charge boosting too sometimes.
is when you press the fly/jump button at regular intervals, instead of holding it down during the dive. Both can be used depending on the circumstances, FF technique, and your preference.
While jumping during a dive doesn't help with increasing the boost power faster, it slows your falling speed down for a second in the air, and can help gaining better height after boosting because of it (similar effect to using "slow" boosting techniques).
You have to press and hold the jump button down continuously for Fancy Flying techniques performed on the ground or against a wall, to stick to it.
List of Boosts [ ]
For more information about the icons and how difficulty is applied to articles.
So Many Boosts! [ ]
The following list of boosts might be a bit overwhelming.
Some boosts do look almost the same, but the outcome is different and use a different technique to achieve it. The difference between them might be a precision thing (example: Flap Boost, Slow Boost and Ainshent Boost which are related in many ways).
It's about what you want to achieve with the boost, choosing the right one based on experience, situation, environment, Companion, and what you like.
Some boosts are:
- Used to quickly travel long distances
- Used to dive in narrow places (if pillars or walls inhibit other techniques), let's say to boost high, not far
- Used to be able to "charge" in a small circle on the ground, when there is only one little place to charge
- Can be combined to achieve a better boost, but some combination of boosts might just give a small boost only
This article is more to present ALL the techniques there are, even though you might not recognize the differences at first.
You will feel it, once you master these boosts (the most basic boosts - dive boost, dropshoot, charge boost - will bring you far).
Companion Needed [ ]
Solo possible [ ].
Note: Even a Red Robe can perform most of these boosts as long as they have some scarf power (it helps having a Companion or cloth to recharge).
Dive Boost and variations (air) [ ]
Flyer Boost (associated with Flap Boost before the chirp and then Ainshent/Slow Boost)
Dropshoot and variations (ground) [ ]
For now, some videos of these boosts are presented on the main Dropshoot page with potential short video clips. Pages will be created later with more info.
Charge Boost and variations (wall) [ ]
Chargeboost
Boost comparison with images and tables [ ]
Here is a graphic displaying most of the Fancy Flying techniques depending on their associated diving camera angle . This may help you better picture the overall existing fancy flying techniques.
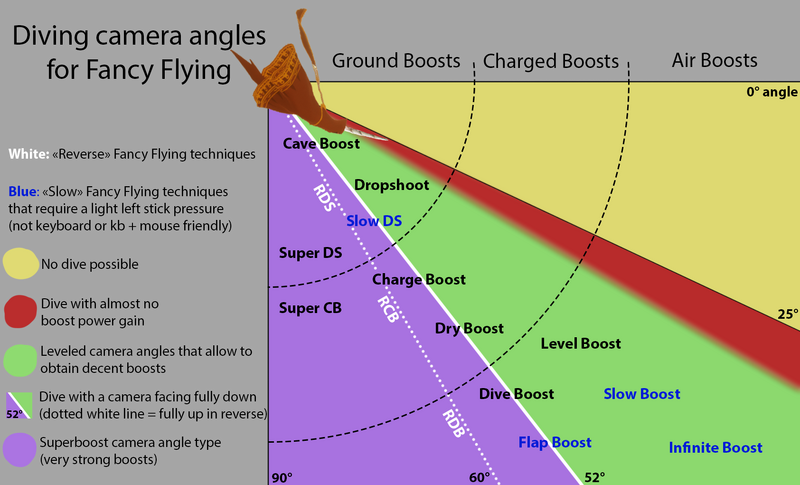
Concerning the FF techniques written in the middle of the green zone on this graphic, it means they can most likely be performed with a camera facing either fully to the ground, and up to a leveled camera angle of about 26° under the horizon at best. Depending on the technique and what you want to achieve (speed/distance versus boost power most of the time), you may want to adjust this diving angle accordingly upon using these techniques. More info on the concerned individual FF pages.
There is another way of representing almost every fancy flying techniques based on the maximum height they can provide once mastered ! (no coop techniques, nor Goo Boost which don't provide any boost):
The difference of possible height gained between two rows on this chart can be minimal or rather big.
This is why a "Boost Power" column was added, to better sort them together.
The "weaker boosts" category can still be very useful and provide decent height when done under the right situations and with a good execution, so don't forget about them ! (especially the Level Boost, which combines really well with Dropshooting upon travelling long distances fast)
Here is another chart that compares the left stick pressure (movements) with the associated camera angle for aerial boosts.

Note that it doesn't show a Slow Boost can also be performed with a leveled camera angle, while remaining different to Infinite boosting (no scarf usage for IB and extremely high precision required).
General Fancy Flying advices [ ]
See the notes below , about why a controller is recommended.
It’s worth repeating that many guides assume you’re using the default, controller-based camera controls. Be sure to know what the guide is asking you to do (right-stick up / = camera to the sky; right-stick down = camera to the ground), and try to adjust accordingly, if needed, and as much as possible.

Important basic knowledge [ ]
- The max boost power value is reached faster the flatter the camera angle gets, and the boost will be weak no matter how long you dive.
- Though this doesn't mean having a camera aiming fully to the ground is always the best solution depending on the fancy flying technique and what you want to achieve (especially considering having a camera fully to the ground also makes you fall faster when in the air, and therefore loose more altitude before boosting).
- Not always possible (ex: top of a dune of sand).
- Eventually release the pressure on this left stick for "slow" boost variations shortly after.
- This helps initiating a dive fast and with choosing the best camera angle later. This advice is probably also relevant for keyboard or keyboard and mouse players.
- So be sure to have the left stick fully forward as much as possible at any moment during a dive (On PC without a controller: press only the w key when diving on a qwerty keyboard).
- The opposite is also very much true for reverse techniques, although due to a more vertically placed camera in reverse, the margin of error does allow the left stick to be turned a little more sideways without ruining the boost ! (when turning sharply for RDS) Though please still pay attention, as it is easy to turn too much in reverse as well and start losing boost instead !
- You should take the habit of turning with the camera only during a dive.
- Some more advanced Fancy Flyers may choose to dive with a camera placed sideways to the character and a left stick pushing a bit sideways on purpose however (especially for Infinite Boosting or circle dropshoot techniques, but it tends to be risky for charging nicely).
- During a dive in the air, in most cases rather than holding the jump button down you may want to pump it about every second , for a longer dive and better boost efficiency (with the possible exception of when flyers are involved: see Flyer Boosting where you can either hold jump, pump it or don't jump at all as they carry you ! You can also hold jump down if you are in a hurry to boost.)
- See the Dive Boosting article for a video example with controller shown.
- Boosting with a camera to the sky helps aiming better at your destination and can be faster to travel long distances (dropshoot and level boosting). However if you empty your boost camera fully up, the camera will move very slowly and it will take long to start another dive after.
- To boost this way and in the same direction as the one you are diving towards initially, think about turning the camera sideways during the end of the dive, before boosting.
- When boosting with a camera to the sky the camera angle is slightly more vertical (60° vs 52°), meaning you gain very slightly more height, and a little bit quicker (subtle difference).
Slightly more advanced knowledge [ ]
- See the Video tutorials section of this page for a video on common boosting mistakes when diving in the air (and how to avoid them).
- You can try to boost before this happens, or modify your trajectory and avoid them. However, as explained in the video linked just above, a way to help preventing camera troubles in these situations is not giving any up or down input to the camera when close to these objects, and instead leave the camera stick position neutral (or stop moving with your mouse/keyboard arrows on pc).
- It's also possible to give strictly right or left camera inputs when close to such objects or the ground and even flicking the camera stick if needed (See the Dropshoot page for info on the flicking technique and how to keep a camera to the ground with a controller, or keyboard only).
- Note nearby platforms (or a companion standing behind you !) can also prevent aiming a camera fully to the sky, when boosting this way , rather than when facing the ground.
- Reverse dives are hard to achieve, because simply putting the camera to the sky and moving towards it won't make you dive (you will only walk or fall slowly).
- A reverse dive needs to firsthand build up some boost power with any fancy flying technique and use it to force the reverse dive afterward. See the Reverse Dive Boost article for a technique that can theoretically provide better boosts than the regular Dive Boost (if diving long enough), and see how to do it.
- Maybe flick it left and right if needed, but only push it down after about two seconds to avoid having the camera flatten during the start of the boost, and therefore loose a little bit of height in the end.
- This camera flattening phenomenon is very commonly observed upon lifting off a Charge Boost or Dry Boost point, or after a Dropshoot .
- It doesn't matter much if you hold it to the ground right away anyway, but it can be something to keep in mind for better control and boosting abilities.
- Get familiar with how the Boost Power behaves in the game .
Video Tutorials [ ]
While many tutorials are specific to certain kinds of tricks, here are some that cover boosting in general, or a variety of basic techniques.
If not explicitly mentioned, the video covers on both PS3 and PS4 consoles (and possibly PC). The video description just says where, in the game, the video was recorded.
YouTube channel recommendations [ ]
Often you will find some additional hints or links to other videos in the video description .
Some YouTubers cover different topics about Journey, but also flying (list to be expanded):
- aravshetikolava
- seki albatross
- Tara's Sky Journey
With a Controller Shown [ ]
This video explains the three basic boost methods. CAPTIONS REQUIRED (EN + JP + auto translate).
How to fancy fly, a tutorial with controller that shows several different flying techniques (Dropshoot at 0:36):
Without a Controller Shown [ ]
Boosting mistakes and how to avoid them (English and Russian subtitles) . This video concentrates especially on advanced "aerial" boosts such as Flap Boost , Slow Boost and Ainshent Boost , but some tips in it are helpful even for dive boost, level boost and so on.
- (00:30) hint to slow or flap boosting (the two are often mixed in this video, and flap boost is many times called slow boost in it)
- Camera movements
- (03:28) Jumping before the dive boost (better)
- About combining boost techniques (leads sometimes to less boost, because Flap Boost has a lower max boost power value)
- (06:25) flap boost and then "ainshent boost" gives amazing height
Notes About Controls [ ]
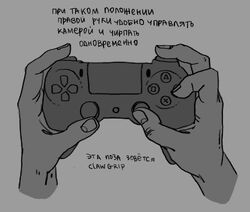
Many players use the claw or similar handling for fancy flying and other tricks
Basic information about controls: How to play guide for Journey, Controls .
Use a controller
Highly recommended.
- You can not only "half" press a button on your keyboard.
- Control the wayfarer
- Fly (Jump button)
- Control the camera
By using the shoulder buttons instead, you can dedicate the right thumb to controlling the camera and chirp, or camera only. However, depending on your situation (controller, hand size, etc.), you might find it easier to use the ‘claw method’ (shown to the right), or something similar.
- For example putting the chirp button on a shoulder button , could make things easier. [2] The boosts are still doable by just using the claw.
- It had been reported by multiple users to make the game crash when collecting symbols, flying into banners, approaching glyphs,...
- This can make fancy flying very hard , because you need to hold your controller perfectly still while charging in order to not mess up the camera angle.
- Some very advanced players though, said they can make good use out of sixaxis.
- It might be possible to emulate it somehow, but it not working has an advantage.
- "right-stick up" / look up means "camera to the sky,"
- "right-stick down" / look down means "camera to the ground",
- same for the left stick / movement forward or backwards (towards the camera).
- Be sure to adjust for whatever control scheme you use, as much as you can, but remember that the Wiki will call things differently than your settings.
- If you use a different controller, which has different sensitivity, then it can really mess with your muscle memory and you may need time to readjust again.
- While this is usually not very important, it can make a big difference when doing more complicated boosts that require precise control.
Secret flying techniques called " Swooping " were added by the developers late during the development. [3] They eventually became what we call today Fancy Flying.
Swooping hasn't been tested much and this is probably the reason why we can do so much with it today! It wasn't intended to be as diversified as all the techniques figured out by the Journey community over the years.
We can assume the "swooping" intended by the developers possibly included dive boost, level boost, slow boost and maybe even reverse dive boost (without jumping during the dive?). It is hard to know whether they imagined Tandem Flying, Coasting or Beaming Down being a thing.
See also [ ]
- Out of Bounds (OOB)
References [ ]
- ↑ More details here https://thatgamecompanyfan.boards.net/thread/565/story-boosting-power
- ↑ Rebi 05-27-2020, on discord: "biggest reason i have seen is to map O to L1 or R1 so you dont have to use Claw grip". O being the Chirp button.
- ↑ Source: https://twitter.com/matt_nava/status/1426804904396394497
- 2 How to play guide for Journey
Walkthrough
- View history
- 1 The Beginning
- 2 The Bridge
- 3 The Desert
- 4 The Descent
- 5 The Tunnels
- 6 The Temple
- 7 The Mountain
- 8 The Summit
- 9 Detail walkthrough
The following is a very brief summary walkthrough of Journey .
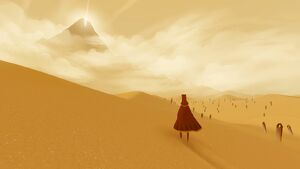
The easiest way to play the game is to merely 'walk towards the mountain'; the mountain is the only goal, and aside from the glyphs and symbols there really isn't much else to do (unless you wish to run around aimlessly and explore). This walkthrough is a possible route one could take in Journey, although it's much more beneficial to go along on your own.
Aside from the walkthrough, you may want to collect the PS3 Trophies , Ancient Glyphs , or Glowing Symbols .
The Beginning [ ]
Walk up the sand dune to begin the game. Walk toward the first pile of rubble to pick up your first glowing symbol . Head toward the mountain and you will enter "The Hub" where you can pick up two more symbols. Climb/jump/fly up to the top of the middle tower and fly across to the glowing area.
The Bridge [ ]
The Desert [ ]
Note: You can find the Hidden Desert Flower in this area for a trophy.
The Descent [ ]
The tunnels [ ].
In the tunnels you will have to evade Guardians with spotlights -- if you are in the spotlight when it turns red, the Guardian will tear your scarf . You will also encounter new types of cloth -- long seaweed like cloth that allows you to seemingly swim through the air and jellyfish-like cloths that boost you up to their tops.
Continue through the tunnels, evading the monsters. At the end, the monsters will chase after you until you surf through a magical barrier, which concludes the level.
The Temple [ ]
It is possible to get through the temple without raising the water at all, but you must have gained most, if not all the symbols up until this point. Zigzag upwards to higher and higher platforms/roofs. There is no achievement for this, but if you make it to the side room without raising the water from 2nd level to 3rd level, you can see the whale swimming in a circle on the ceiling and even go up there and play on its back.
The Mountain [ ]
There are no glowing scarf pieces in The Mountain. The Mountain is the most difficult level and is very emotionally draining. The snow will drain your scarf's energy. You will have to battle through strong winds, so hide behind some stones during the slow winds. You will also have to evade some more flying spotlight monsters by veering far to the side or hiding under blocks. You will get weaker and weaker but must walk along a cliff up through an entryway. Avoid more wind gusts as you walk through a broken building. The final section is a windy, snowy section. You will continue to get weaker and weaker until you finally sink into the snow.
The Summit [ ]
A being will wake you up and send you flying to the summit of the mountain. You will have a full scarf and seemingly unlimited energy. Fly to the top of the mountain where you will reach your final destination.
Detail walkthrough [ ]
- http://www.gamefaqs.com/ps3/997885-journey/faqs/63951
- 1 White Robe
- 2 Glowing symbols
- 3 The Traveler

Originally posted by raving_madness : hi there rebbi! :) being red - not really limited - counts mostly for in the levels though. but with a good companion everything is possible. i had journeys in red, travelling with another red and we had long oob tours and other funny things. i forgot my robe color even. chargeboosting in red is possible with a companion too ^^ skill in the sense of "i really want to learn this". all is training imo. there are people that do that one thing, for hours... i am not that person, so all i know took me years to learn :D in my opinion, being able to use the flyers well (aiming and chirping), dive boosting and knowledge of some CB points is quite enough for most things in journey. although i wouldnt say someone has to learn the cb its all up to them... that BB journey with you was epic!! :)
Originally posted by raving_madness : sometimes experienced players are trying to actually show how to do things. like flying, first they make you stand somewhere, then they show (observe how the figure moves, when they press fly button), then its your turn to repeat :) if you want to progress quicker, come to the journey discord and arrange a journey with one of those super-sonic-flyers :D or.. well. spoil everything and get it served.. on the journey gamepedia wiki under fancy flying (feedback would be welcomed, this section was rather recently filled and still might need some teweaks).
Report this post
How the Cat King in ‘Dead Boy Detectives’ captures a familiar queer dynamic

- Show more sharing options
- Copy Link URL Copied!
This article contains spoilers for Netflix’s “ Dead Boy Detectives .”
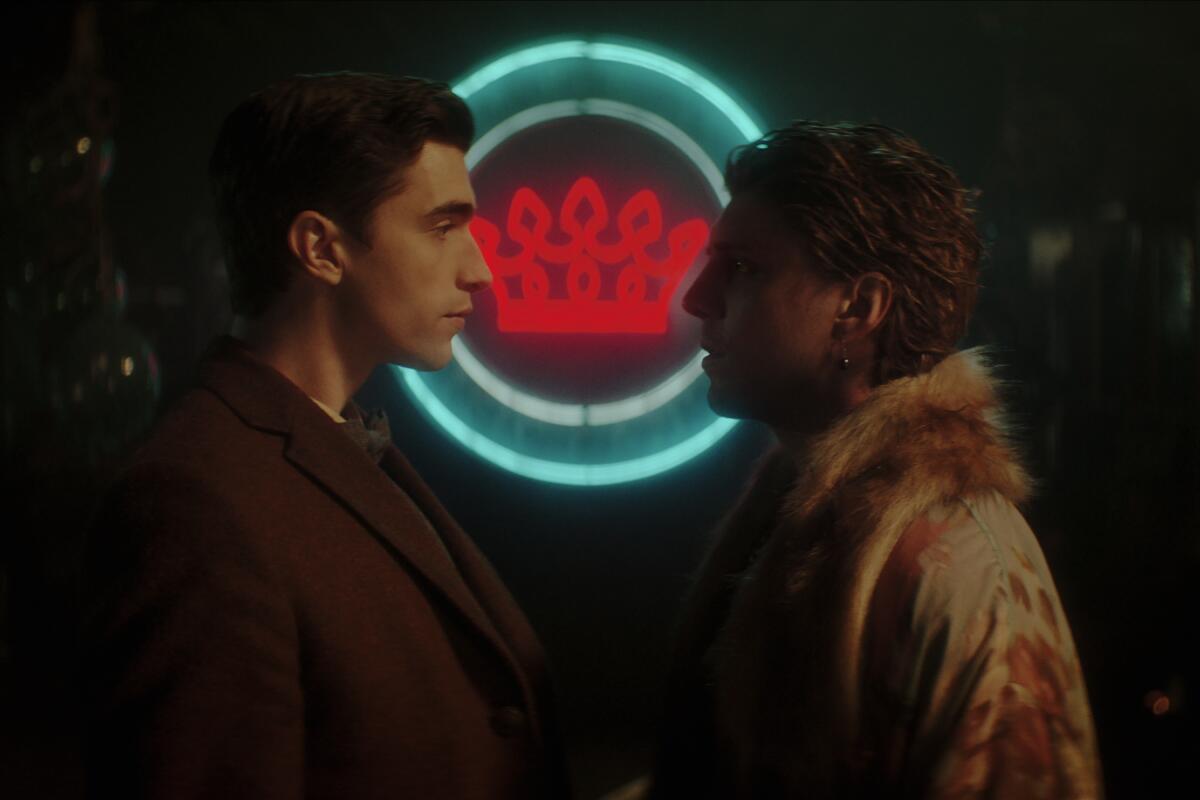
When the Dead Boy Detectives Edwin Paine and Charles Rowland are first summoned by the Cat King, the shape-shifting feline just wants retribution after they break his rules.
But after whisking Edwin away to privately discuss his crime and potential punishment, the Cat King is quick to admit that the handsome teen ghost fascinates him. He turns up his seductive charm — while shirtless in a fur robe — and then magically traps Edwin in his small town.
“Because Edwin has his walls up so much, it’s suddenly a game to him,” said Lukas Gage, the out actor who portrays the Cat King in the supernatural drama. “Edwin is very guarded and well put together so that entices the Cat King. He wants to rough him up a little bit and see him get angry and get kind of messy.”
‘Dead Boy Detectives’ cleverly brings Neil Gaiman’s comic book sleuths to life
Netflix’s ‘Sandman’ spinoff, based on Neil Gaiman and Matt Wagner’s comic books, is centered on a pair of teenage ghost sleuths who work with London’s troubled dead.
April 24, 2024
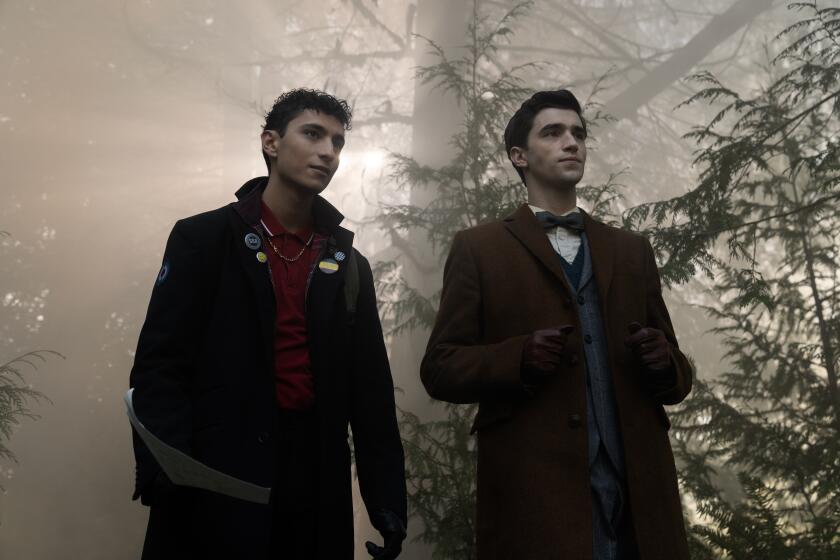
Based on the comic book characters created by Neil Gaiman and Matt Wagner, “Dead Boy Detectives,” now streaming on Netflix, follows Edwin (George Rexstrew) and Charles (Jayden Revri), the show’s solvers of supernatural mysteries.
Edwin and Charles’ longstanding routine and dynamic are shaken up after they meet Crystal (Kassius Nelson), a very much living teenager with a demon ex-boyfriend and no memories of her past.
“We always knew that part of the Season 1 journey for all three of our core characters was going to be an exploration of identity,” said Steve Yockey, who developed the series.
“All of our characters are trying to figure out who they are,” added Beth Schwartz, who served as co-showrunner with Yockey. “They’re teenagers and they’re having a coming-of-age story, just in a nontraditional way because two of our main characters are dead.”
For Charles, who died in the 1980s after being attacked by school bullies, this involves confronting why he is so outwardly happy and positive all of the time. While Crystal, with no memory of herself, has to both figure out her actual identity and who she wants to be in the aftermath of a toxic relationship.
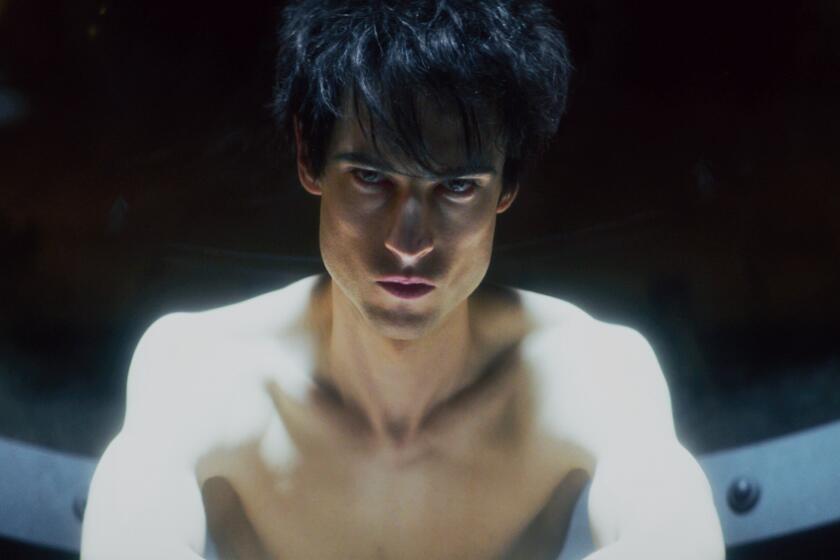
Netflix’s lively, unusual adaptation makes the most of Neil Gaiman’s ‘The Sandman’
Neil Gaiman’s 20th century comic about the King of Dreams becomes a 21st century TV series — and even the changes are true to the author’s vision.
Aug. 5, 2022
“For Edwin, we wanted to hit him from all sides,” said Yockey. “The Cat King is that older experienced man that maybe doesn’t have the best intentions, but is also charming and seductive. Monty [a younger supernatural suitor], who you think has nefarious intentions, really just tries to honestly be affectionate with Edwin. We’re just giving him all of these different eye-opener experiences and context as he slowly realizes, ‘Oh, wait, this is something that I am and it’s OK.’”
In addition to realizing he is attracted to men, Edwin has to sort through his feelings for his best friend over the course of the season. According to Yockey, the relationship between Cat King and Edwin was of particular interest for the gay writers on the show because it was a dynamic many of them were familiar with.
“When you first are starting to come out, you always find a more experienced gay man who’s happy to hold your hand and walk you into that world and not always with the best intentions,” said Yockey. Their aim was “capturing that in a supernatural way.”
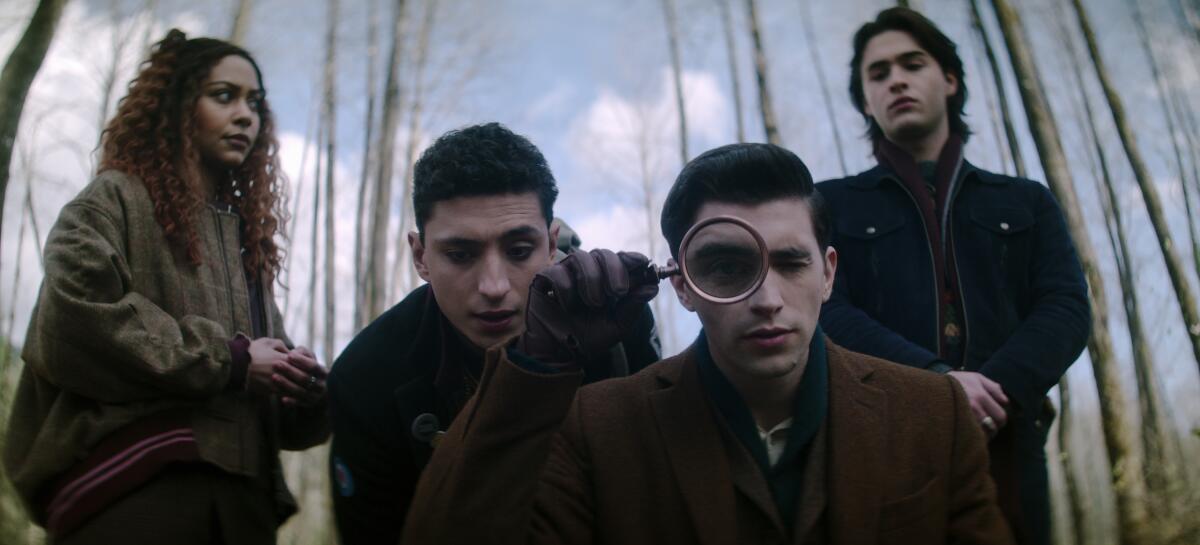
While “Dead Boy Detectives” is set within the broader “ Sandman ” universe (as played up by a couple of cameos), the Cat King is an original character Yockey created for the series. A longtime fan of the “Dead Boy Detectives” comic books, “ The Flight Attendant ” showrunner explained that they wanted the Cat King “to be as fun as possible.”
“And then we got Lukas and that fun was realized,” said Yockey.
Gage, who has played a string of memorable roles in buzzy shows like “ The White Lotus ,” “ You ” and “ Fargo ,” said he didn’t have much time to really prepare for the Cat King since it immediately followed his wrap on this year’s remake of “ Road House .” It wasn’t until he put on the Cat King’s robe and makeup for the wardrobe test that he figured out the character.
“He has a bunch of fur on and I remember [thinking] there’s a bit of a sensuality to this character,” said Gage. “He feels very comfortable in a robe and seducing this ghost in his lair.”
Gage admits he was primarily drawn to the project for the opportunity to work with Yockey, though he does describe himself as an animal person who loves both cats and dogs.
“I’ve been fascinated by cats and how they kind of just play hard to get and give you a little bit [of affection] and then they’re like ‘OK, I’m done with you, leave me alone,’” said Gage, who says his time as the Cat King was a joy. “I always love to play these kind of complicated characters that you can’t tell if you hate them or like them.”
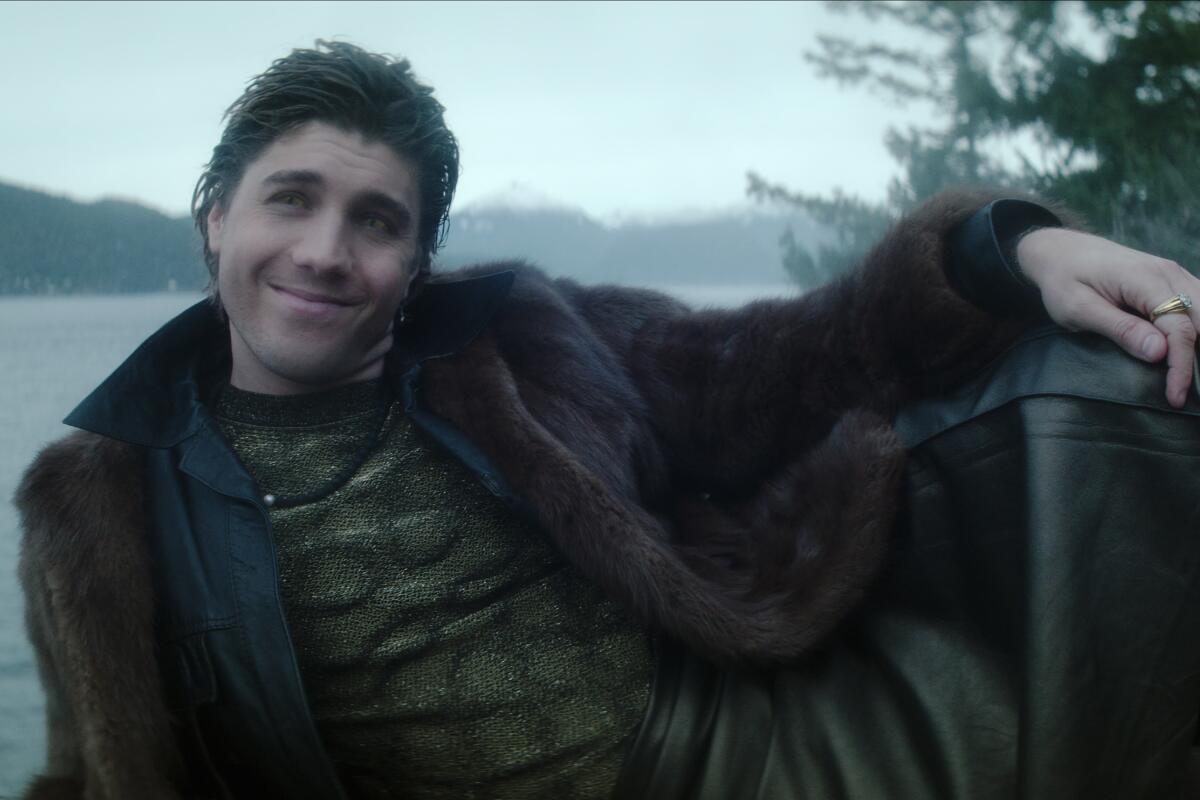
For Gage, part of the excitement in playing characters like the Cat King where his backstory is a mystery is “the creative freedom to fill in the blanks for yourself.” So although he describes the Cat King as a brat, he believes it stems from past heartbreak.
The Cat King “clearly has a lot of wisdom and has been around for a long time, but there was a lot of idiosyncrasies with him,” said Gage. “He came off so cold and heartless, but I think it came from a place of getting his heart broken for hundreds of years.”
What made the Cat King particularly fun for Gage is that he is untrustworthy and a liar, even to himself. So in crafting the character, Gage was interested in exploring the Cat King’s rage as well as his narcissism.
“He loves hearing the sound of his own voice,” said Gage. “He loves the way he looks. He loves his body. I wanted to get in touch with that and [explore] how much of that was actually a lie, how much of that was a mask, how much of that was a front.”
For Gage, the Cat King’s thirst for attention, at least, was something he could relate to as an actor.
“I can connect to that as a kid who didn’t feel like he got enough attention growing up and [chose] this career where he essentially was going to have the world give him attention,” said Gage, with a laugh. The role also brought new challenges, such as acting opposite tennis balls that were stand-ins for cats that would be digitally added later. (Yockey and Schwartz said only two real cats were used during the production.)
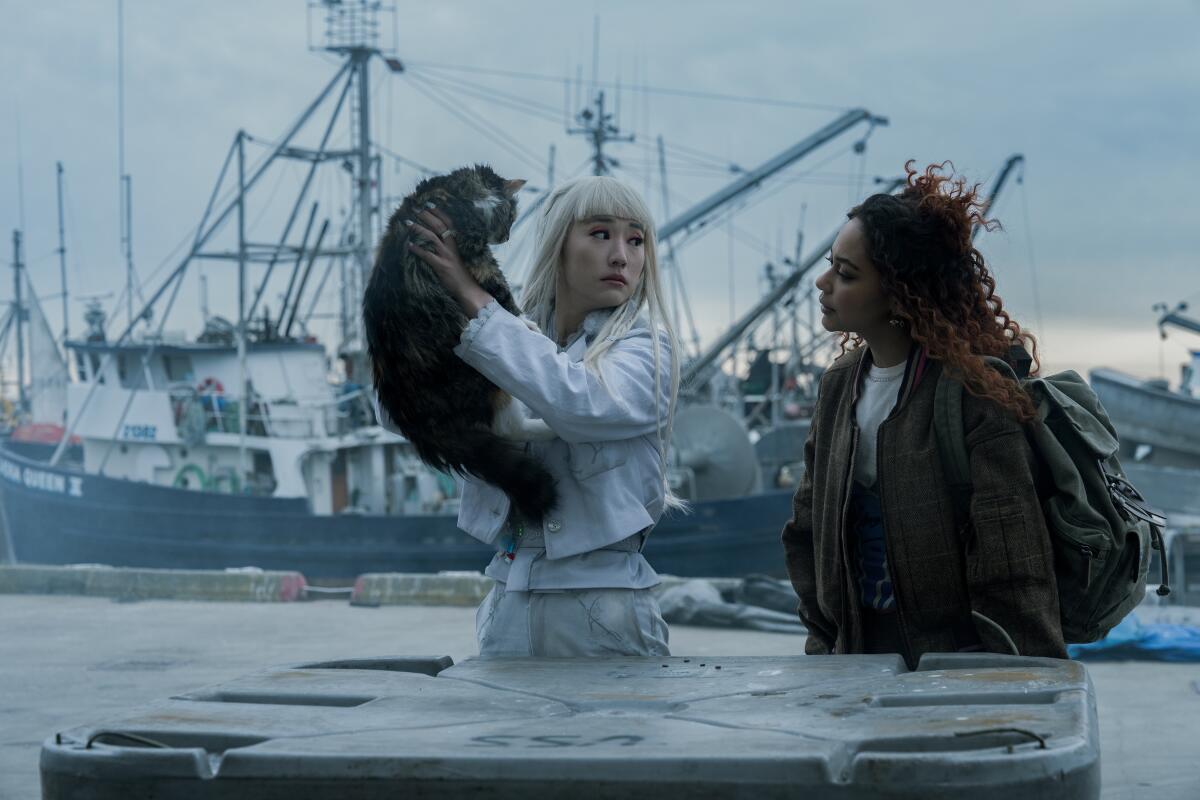
And although he starts off just toying with Edwin, “there’s something kind of beautiful about this person that’s been around for hundreds of years but still has the giddiness and the butterflies of having a crush and falling in love again,” said Gage.
The showrunners credit Gage’s performance for the Cat King’s unique appeal.
“Lukas brought this fully realized performance,” said Yockey. “He has this sort of wink in what he does, and I think it’s really fun to see a character be playful about sexuality in a show that can be very serious on the topic sometimes.”
“Even though it’s this nefarious character that is a full-on predator, people come away from the show loving him because of Lukas’ charm,” said Schwartz. “He brought a different side to the Cat King, where the Cat King does start to really learn something about himself as well.”
Gage describes the Cat King’s arc as going from “jaded to open to possibilities.”
He also recognizes that “aspiring to be a supernatural creature is cornerstone queer culture in a way,” said Gage, who was so obsessed with “ True Blood ” in middle school that he wanted to be a vampire. “From my experience in the queer community, we love a form of expression other than dialogue. There’s something akin to drag in supernatural things.”
“There’s a part of my emo punk preteen [and] teen self that would have just devoured this show and the queerness of it all.”
More to Read
Review: Generic from its title onward, ‘Boy Kills World’ does little to differentiate its gore
April 25, 2024

‘Alienist’ author Caleb Carr — grieving his late cat — reflects on his life amid battle with cancer
April 15, 2024

Philip Marlowe perfume, anyone? Raymond Chandler’s estate revives its hero, for better or worse
Feb. 15, 2024
The complete guide to home viewing
Get Screen Gab for everything about the TV shows and streaming movies everyone’s talking about.
You may occasionally receive promotional content from the Los Angeles Times.

Tracy Brown is a reporter for the Los Angeles Times covering television, film and other pop culture.
More From the Los Angeles Times
Travel & Experiences
The unmissable addition to Disneyland’s Star Tours ride? Space whales
April 9, 2024
A stairwell at Cartoon Network Studios captured 20 years of history. Now you can see it, too
April 8, 2024
Entertainment & Arts
Jonathan Majors avoids jail time in assault of ex-girlfriend, must attend domestic violence program
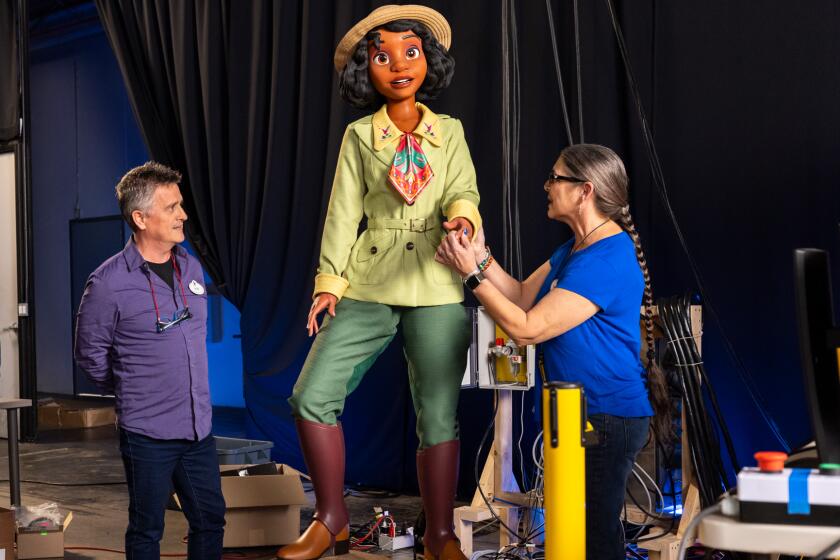
Want to see Disneyland’s most advanced animatronics? Visit Tiana’s Bayou Adventure
April 4, 2024

IMAGES
VIDEO
COMMENTS
The white robe is a secret object that you can obtain by obtaining the Transcendence trophy, which is to acquire all Scarf upgrades hidden in the game. You can do this over multiple playthroughs. Once you acquire the trophy, head to the start of the game via "Chapter Select". From the center of the area, look to the right and you will see several large cloths sticking out from the ground. Go ...
The white robe is a secret object that you can obtain AFTER obtaining the Transcendence achievement, which is to acquire all Scarf upgrades hidden in the game. You can get the Transcendence achievement over multiple playthroughs (you don't have to find all Scarfs in the same playthrough). Here is a guide on how to get all of the Journey ...
Raw footage was about a hour before editing, here are the locations to get all 21 symbols to unlock the white robes set, which gives recharging jump.
Now that Journey is out on Playstation 4, take a return trip and collect every glowing symbol with our locations guide, helping your mysterious pilgrim unlock the powerful white robes outfit ...
For timestamps of the glowing symbols, check the description.A full walkthrough of Journey to show the locations of all the glowing symbols and where to find...
If you find this video useful then please like, subscribe and comment! Thank you for watching! :-)This is a video of me showing where to find the White Robe ...
The White Robe is the most sought after upgrade in Journey. The reason for this is that the White Robe can be obtained at the beginning of each new game and provides a longer scarf right at the start.
For Journey on the PlayStation 3, a GameFAQs message board topic titled "Official Journey White Robe Tour Guides".
Skip the ribbon at the base of the first pillar, but the other long ribbons to build the longest bridge sections. Now, fly up the first ribbon, using it to recharge as you go, and you have enough height to get to the top of the first pillar. Alternatively, once you earn the white robe, it gives you a long scarf that can recharge.
Finding all of the Symbols hidden throughout Journey will not only reward you with the Transcendence Trophy, but will give you access to an incredibly powerful white robe with a regenerating scarf.
A White Robe Journeyer would usually have a fully embroidered Robe, but it is possible to get a White Robe with lower tiers if you manage to collect all the Symbols within one Journey. Wayfarer Comparison [] Red Robe has no mouth-line. White Robe shows a V-shaped yellow line below the eyes. White Robe's Scarf charges when touching the ground.
Let's play of Journey on Pc (Steam)This playthrough can serve as a guide to unlocking the white robes andgetting the flower/Ancestors achievementExplore the ...
Symbol 1. From the start, head straight towards the mountain for quite a bit of time. Before you reach the sandstorm, keep your eye on the mountain until you spot a pair of lights shoot out into ...
Now that Journey is out on Playstation 4, take a return trip and collect every glowing symbol with our locations guide, helping your mysterious pilgrim unlock the powerful white robes outfit. Finding these rare glowing symbols upgrades the wanderer's scarf power, allowing them to glide and leap further across the desolate landscape of Journey ...
Btw I noticed that progressing the robe is just finishing the game once again. So there is no way to get white robe level 1 (with default picture), because you have to finish the game at least once (i.e. to get level 2). Otherwise you won't have access to Chapter Select and white robe.
Guide: 6th journey and onwards; Gameplay Basics; To connect or to disconnect! Companions Met Along the Way (CMATW) Levels; Objects; Wildlife, Entities; Gameplay Basics. Wayfarers+Robes; ... Fancy Flying is mostly used as a white robe for its ability to recharge upon touching the ground, but red robes can also perform many flying techniques (not ...
Robe Embroideries. An embroidered robe. Your robe can be embroidered to show your experience at Journey. Each time you fully complete the game, your robe has a new pattern added to it. You must not skip any levels to reach the next pattern. Embroided Hem—Completed the game once. Second Embroidery—Completed the game twice.
This walkthrough of Journey on PS4 will show you how to find all the glowing symbols to extend your scarf and unlock the white robe.If you found it useful, l...
The following is a very brief summary walkthrough of Journey. The easiest way to play the game is to merely 'walk towards the mountain'; the mountain is the only goal, and aside from the glyphs and symbols there really isn't much else to do (unless you wish to run around aimlessly and explore). This walkthrough is a possible route one could take in Journey, although it's much more beneficial ...
White Robe or Red Robe. I purchased the pc game back in June 2020 and got a WR fairly quickly. Now because I was very good but because an awful lot of people had come in and helped show me where all the glyphs were to get the robe. I ended up with full embroidered robe within a few short weeks because I didn't have a lot of responsibilities ...
Journey is an interactive parable, an anonymous online adventure to experience a person's life passage and their intersections with other's.
Based on the comic book characters created by Neil Gaiman and Matt Wagner, "Dead Boy Detectives," now streaming on Netflix, follows Edwin (George Rexstrew) and Charles (Jayden Revri), the show ...