Safari Photography Guide
Embarking on an African safari promises an exhilarating and memorable adventure, and ensuring you have the appropriate camera gear is crucial for immortalizing those rare and exceptional moments. Canon stands out as a top choice among camera brands for safari photography, renowned for its superior image quality and robust build. This article delves into the optimal Canon cameras and lenses to seize breathtaking photos during an African safari. This safari photography guide focuses on Canon as it is the brand that I use for all my photography and I have found the bodies and lenses robust and able to withstand whatever nature chooses to throw at you while on safari.

Behind the Lens: A Peek into My Camera Bag Essentials
In the dynamic world of photography, having the right gear can make all the difference in capturing those picture-perfect moments. Here’s an in-depth look into what’s in my camera bag, a carefully curated selection of equipment that empowers me to unleash my creativity.
- Lowepro ProTactic BP 350 AW II (Camera Backpack)
The backbone of my photography setup is the Lowepro ProTactic BP 350 AW II. Crafted with precision, this camera backpack is a perfect blend of durability and functionality. Its customizable interior ensures a snug fit for my gear, while the all-weather cover provides protection against the elements. With its versatile design, this backpack is a reliable companion for photographers on the move.
- Canon R7 Camera
At the heart of my kit is the Canon R7 Camera. Boasting advanced features and a mirrorless design, it delivers outstanding performance and portability and with its crop sensor is perfect for safari photography. With a high-resolution sensor and rapid autofocus, the Canon R7 empowers me to capture crisp and vibrant images, making it an indispensable tool for both amateurs and professionals.
- Canon Mount Adapter EF-EOS R
Enhancing the versatility of my setup, the Canon Mount Adapter EF-EOS R allows seamless integration of my EF lenses with the Canon R7. This adapter ensures compatibility across the Canon lens ecosystem, giving me the flexibility to explore various shooting styles and perspectives.
- CANON EF 100-400MM F/4.5-5.6L IS II USM (Telephoto Lens)
When it comes to capturing distant subjects with precision, the CANON EF 100-400MM F/4.5-5.6L IS II USM is my go-to telephoto lens. Its impressive focal range and image stabilization technology enable me to achieve sharp, detailed shots, making it an essential tool for wildlife photography.
- SanDisk Extreme Portable SSD 2TB (Storage Solution)
Storage is never a concern with the SanDisk Extreme Portable SSD 2TB. This high-speed, compact storage solution ensures that I have ample space for my extensive collection of photos and videos. Its rugged design adds an extra layer of security, making it the perfect companion for on-the-go photographers.
- Lexar SILVER Series Professional 1667x 128GB UHS-II SDXC Memory Card
The Lexar SILVER Series Professional 1667x 128GB UHS-II SDXC Memory Card complements my camera’s capabilities with its high-speed performance. With rapid read and write speeds, this memory card ensures smooth data transfer, a crucial factor in capturing high-resolution images and recording 4K videos.
- CANON EF 24-105MM F/4L IS II USM (Versatile Zoom Lens)
The CANON EF 24-105MM F/4L IS II USM is a versatile workhorse in my kit. Its wide focal range and constant aperture make it suitable for a variety of shooting scenarios, from landscapes to portraits. The built-in image stabilization ensures sharp results even in challenging lighting conditions.
- MacBook Air 13-inch Apple M2 (Editing Powerhouse)
For on-the-go editing and organization, the MacBook Air 13-inch with the Apple M2 chip is my trusty companion. Its lightweight design and powerful processing capabilities allow me to review and edit photos with efficiency, ensuring a seamless workflow during and after photo sessions.
- Bose QuietComfort Ultra Headphones (Immersive Audio Experience)
These headphones provide an unparalleled audio experience with exceptional noise cancellation, perfect for long flights and allowing me to focus entirely on my work, whether I’m editing photos or reviewing footage, or listening to music.
- Manfrotto Element Travel Tripod (Stability on the Go)
Stability is paramount in photography, and the Manfrotto Element Travel Tripod delivers just that. With its lightweight design and quick setup, this tripod provides a steady platform for capturing long-exposure shots, group portraits, or any scenario where stability is key.
- Spare Canon LP-E6NH Lithium-Ion Battery
To ensure uninterrupted shooting, I always carry a spare Canon LP-E6NH Lithium-Ion Battery. With extended battery life, I have the peace of mind that I won’t miss a crucial moment, especially during extended photo sessions or while exploring remote locations.
- iPhone 15 Pro Max (Smartphone Camera)
Lastly, the iPhone 15 Pro Max serves as a versatile tool for quick captures and behind-the-scenes moments. With its advanced camera capabilities, it complements my professional gear and allows me to document scenes spontaneously, ensuring no moment goes uncaptured.
Photography Tips
Engaging in safari photography offers a rare chance to capture breathtaking wildlife images in their native surroundings. Yet, achieving these moments can be daunting without a grasp of the optimal camera settings. Armed with the right configuration, you can produce sharp, well-exposed photographs with vibrant colors. This section will explore the most effective camera settings and offer tips for successful safari photography.
Shutter Spee d
Capturing the essence of movement is crucial in safari photography, making shutter speed a vital setting. Opting for a faster shutter speed proves effective in freezing the motion of swift-moving animals. Typically, a recommended shutter speed of 1/1000th of a second or faster is advised for wildlife photography. Adjustments to the shutter speed may be necessary depending on the animal’s movement and the prevailing lighting conditions.
Slow shutter speed can also play a crucial role in enhancing the artistic and dynamic elements of safari photography. While a faster shutter speed freezes fast-paced movement, a slower shutter speed introduces intentional blur, imparting a sense of motion to the image. This effect can be particularly useful when capturing the graceful movements of animals, such as a herd of wildebeests or a bird in flight.
By deliberately slowing down the shutter speed, you allow more light to enter the camera, contributing to a longer exposure time. This can result in visually striking photographs, showcasing the ambient light and creating a sense of drama in the scene. It’s important to note that using a slow shutter speed requires a steady hand or, preferably, a tripod to avoid unwanted camera shake.
Experimenting with slow shutter speeds in safari photography opens up creative possibilities, offering a unique perspective that goes beyond simply freezing action. Consider incorporating this technique when the opportunity arises, and adapt your settings based on the specific conditions and subjects encountered during your safari adventure.
In safari photography, mastering the relationship between aperture and depth of field is key to creating compelling and visually striking images. The aperture, the opening in the camera lens that controls the amount of light entering, plays a dual role by significantly influencing the depth of field in your photographs.
A wide aperture, represented by a smaller f-number (e.g., f/2.8 or f/4), is advantageous for safari shots. This setting allows more light to reach the camera sensor and creates a shallow depth of field. This shallow depth of field results in the main subject, such as a magnificent lion or an elegant giraffe, being sharply focused, while the background is beautifully blurred. This technique not only isolates the subject but also adds a pleasing aesthetic element to the image.
On the other hand, a narrow aperture, represented by a larger f-number (e.g., f/11 or f/16), increases the depth of field. This is useful when you want to keep both the foreground and background in focus, capturing the broader context of the scene. It’s essential to strike a balance between aperture and depth of field based on your creative vision and the specific composition you aim to achieve.
Understanding how to manipulate the aperture for optimal depth of field empowers you to adapt to different safari scenarios and improve your safari photography. Whether you’re highlighting a single animal against a dreamy backdrop or capturing the expansive landscape with various subjects in sharp focus, mastering aperture settings enhances the storytelling potential of your safari photography.
ISO is a measure of your camera’s sensitivity to light. A higher ISO can help you achieve a faster shutter speed in low-light conditions. However, a high ISO can also introduce noise or grain in your images. You should try to use the lowest ISO possible to achieve the desired shutter speed and aperture. A good starting point for ISO is 400, but you may need to adjust it based on the lighting conditions.
When capturing animal photographs on a safari, selecting the right focus mode is crucial to ensure that you achieve sharp and well-focused shots, especially considering the unpredictability of wildlife behavior. Here are some focus modes and considerations for taking animal photographs on safari:
- Continuous Autofocus (AI Servo or equivalent): This focus mode is essential for photographing moving subjects, such as animals in action. Continuous autofocus allows the camera to track the subject and adjust focus continuously, ensuring that your shots remain sharp even as the animal moves within the frame. It’s particularly useful for dynamic scenes like animals in motion or engaged in activities. This is the mode in which I normally have my camera set.
- Single Autofocus (One-Shot AF): When photographing stationary animals or capturing portraits, using the Single Autofocus mode can be effective. This mode locks focus on a specific point, and it’s suitable when your subject is relatively still. It allows you to achieve precise focus on the animal, especially when capturing detailed shots or portraits.
- Face and Eye Detection: Many modern cameras, including those used for safari photography, come equipped with advanced face and eye detection technology. When photographing animals, especially those with distinct facial features, enabling face and eye detection can help the camera automatically focus on the eyes or faces of the animals, resulting in compelling and engaging images. This needs to be set in your camera menu.
- Zone or Expanded Area Autofocus: For situations where your subject may move unpredictably within a certain area of the frame, using a zone or expanded area autofocus mode can be beneficial. This allows the camera to focus on a broader region, making it more forgiving if the animal moves slightly within the selected zone.
- Manual Focus: In certain scenarios, such as when dealing with challenging lighting conditions or when the camera’s autofocus might struggle, switching to manual focus gives you full control over focusing. This can be particularly useful for capturing shots where the autofocus system might have difficulty, such as in dense vegetation or low-light environments.
When on a safari, it’s essential to be ready for various shooting conditions and animal behaviors. Experimenting with different focus modes and being familiar with your camera’s autofocus capabilities will help you adapt to different situations, ensuring that you can capture stunning and well-focused animal photographs on your safari adventure.
Exposure mode
When on safari, selecting the appropriate exposure mode on your Canon camera is crucial for capturing well-exposed and visually appealing photographs in a variety of lighting conditions. Canon cameras typically offer several exposure modes, and the choice depends on the specific shooting scenario. Here are some exposure modes to consider:
- Aperture Priority (Av): This mode allows you to set the desired aperture while the camera automatically adjusts the shutter speed to achieve a proper exposure. Aperture Priority is useful when you want to control the depth of field, especially in wildlife photography where isolating the subject with a blurred background might be desirable.
- Shutter Priority (TV): Shutter Priority lets you choose the shutter speed while the camera adjusts the aperture accordingly. This mode is beneficial for capturing fast-moving animals or freezing motion in dynamic scenes. For example, when photographing wildlife in action, a faster shutter speed can help avoid motion blur.
- Program (P) Mode: In Program mode, the camera automatically sets both the aperture and shutter speed based on the scene’s lighting conditions. This mode is convenient when you want a balance between control and automation, suitable for situations where lighting is relatively consistent.
- Manual (M) Mode: Manual mode provides full control over both aperture and shutter speed. This mode is beneficial when dealing with challenging lighting situations or when you want precise control over exposure settings. It’s particularly useful for capturing diverse safari scenes where lighting conditions may vary.
- Auto (Green Square or Scene Modes): The Auto mode is suitable for beginners or situations where you want the camera to handle most of the exposure settings. Many Canon cameras also offer scene modes, allowing you to select a specific scenario (e.g., landscape, portrait, sports) for optimized settings.
- Exposure Compensation: Regardless of the exposure mode you choose, exposure compensation is a valuable tool. It allows you to adjust the exposure up or down in increments to compensate for challenging lighting conditions. This can be crucial when dealing with backlit subjects or scenes with high contrast.
When on safari, be prepared to encounter a variety of lighting situations, from bright sunlight to low-light conditions during sunrise or sunset. Familiarizing yourself with the different exposure modes on your Canon camera and understanding how they affect aperture, shutter speed, and ISO will help you adapt to the diverse and dynamic environments of a safari, ensuring you capture stunning images with optimal exposure.
RAW VS JPEG
When embarking on a safari adventure with your Canon camera, the choice between shooting in RAW or JPEG format becomes a crucial decision, each with its own set of advantages and considerations. My safari photography is done solely in RAW.
RAW Format:
- Maximum Image Quality: RAW files contain uncompressed and unprocessed data captured by the camera’s sensor. This results in the highest image quality and provides more flexibility in post-processing.
- Greater Dynamic Range: RAW files retain more information in highlights and shadows, allowing for better recovery of details in post-production. This is particularly useful in challenging lighting conditions often encountered on safaris.
- Extensive Editing Options: RAW files offer a broader range of editing possibilities, enabling adjustments to exposure, color balance, and sharpness without significant loss of quality.
- White Balance Flexibility: RAW allows you to fine-tune white balance settings during post-processing, providing greater control over the final appearance of your images.
- Optimal for Print and Large Prints: RAW files are well-suited for large prints due to their higher resolution and superior image quality.
JPEG Format:
- Smaller File Sizes: JPEG files are compressed, resulting in smaller file sizes. This can be advantageous for conserving storage space on memory cards and hard drives.
- In-Camera Processing: JPEG files undergo in-camera processing, applying settings like white balance, sharpness, and color saturation at the time of capture. This can be convenient if you prefer minimal post-processing.
- Quick Sharing: JPEGs are easily shareable as they are ready to be uploaded or sent without the need for extensive post-production. This can be beneficial when sharing images promptly, such as on social media.
- Faster Burst Rates: Shooting in JPEG allows for faster burst rates and longer continuous shooting, beneficial when capturing rapid sequences of wildlife action.
Considerations:
Storage Capacity: RAW files consume more storage space than JPEGs. Ensure you have sufficient memory cards and storage devices, especially if you plan to shoot extensively.
Post-Processing Skill: If you are comfortable with post-processing and desire maximum control over your images, shooting in RAW is recommended. However, if you prefer minimal editing and quicker workflows, JPEG may be suitable.
Backup: Given the larger file sizes of RAW, having a robust backup strategy is essential to avoid the loss of valuable images.
Ultimately, the choice between RAW and JPEG depends on your preferences, post-processing workflow, and the level of control you seek over your safari photographs. Many photographers opt for shooting in RAW for the superior image quality and flexibility it provides during post-production, especially when capturing the diverse and challenging conditions of a safari environment.
Familiarize Yourself with Your Camera Settings
Before embarking on your safari, take the time to acquaint yourself with the settings of your Canon camera. Knowing how to manipulate factors like aperture, shutter speed, and ISO is crucial for capturing captivating photos of wildlife and landscapes. Opting for manual mode grants you complete control over your camera settings, enabling adjustments tailored to the specific shooting conditions. For beginners, Aperture Priority mode serves as a viable option, providing control over depth of field while the camera automatically adjusts other settings.
Use a Telephoto Lens
When embarking on a safari adventure in Africa, having the right telephoto lens can significantly enhance your wildlife photography. Canon, a renowned camera and lens manufacturer, offers a variety of telephoto lenses designed to capture the beauty and essence of African wildlife.
To explore these lenses further and make an informed decision, you can check out real reviews from experienced photographers by clicking on the respective links. These firsthand experiences will give you valuable insights into the capabilities of each lens and help you choose the perfect companion for your safari photography journey.
Canon RF 100-400mm f/5.6-8 IS USM Lens
- Compact, lightweight, and high-image quality RF Tele zoom lens
- Optical Image Stabilizer with up to 5.5 Stops of shake correction
- High speed, smooth, and quiet autofocus with Canon’s Nano USM
- 9-blade circular aperture for beautiful bokeh
- Control Ring for direct setting changes
Canon EF 100-400mm f/4.5-5.6L IS II USM :
- Versatile zoom range for flexibility in framing distant subjects.
- Advanced Image Stabilization (IS) for sharp handheld shots.
- Excellent image quality with fluorite and super UD glass elements.
- Fast and accurate autofocus for capturing fast-moving wildlife.
Canon EF 70-200mm f/2.8L IS III USM :
- A professional-grade telephoto zoom lens with a wide aperture.
- Ideal for capturing wildlife portraits and details.
- Superior image stabilization for handheld shooting.
- Durable build suitable for rugged safari conditions.
Canon EF 400mm f/2.8L IS III USM :
- Exceptional image quality with a wide aperture for low-light conditions.
- Super telephoto reach for capturing distant subjects.
- Advanced IS technology for stable handheld shooting.
- Lightweight design for easier portability during safari excursions.
Canon RF 100-500mm f/4.5-7.1L IS USM :
- Designed for Canon’s RF mount, offering compatibility with mirrorless cameras.
- Impressive zoom range for versatile composition.
- Image Stabilization for sharp images at longer focal lengths.
- Compact and lightweight design for travel and safari use.
Canon EF 600mm f/4L IS III USM :
- Super telephoto lens with an ultra-wide aperture for exceptional light gathering.
- Ideal for capturing distant or elusive wildlife with incredible detail.
- Advanced IS system for handheld stability.
- Robust build with magnesium alloy construction.
Canon EF 200-400mm f/4L IS USM Extender 1.4x :
- Unique built-in extender for increased focal length flexibility.
- Versatile zoom range suitable for a variety of safari scenarios.
- Advanced optical design for high-quality images.
- Durable construction for challenging environmental conditions.
When selecting a telephoto lens for safari photography, consider factors such as focal length, aperture, and image stabilization. The choice depends on your specific preferences, the type of wildlife you plan to capture, and the shooting conditions you expect to encounter during your African safari.
Consider using a Wide-Angle Lens
When embarking on a safari adventure in Africa, a wide-angle lens can be a valuable addition to your camera gear. While telephoto lenses are often associated with wildlife photography, wide-angle lenses offer unique opportunities to capture the vast landscapes, stunning scenery, and the broader context of the safari experience. Here are some Canon wide-angle lenses to consider and why you might use them on a safari:
Canon EF 16-35mm f/2.8L III USM :
- Versatile Wide-Angle Zoom: This lens covers a broad range of focal lengths, making it versatile for capturing both expansive landscapes and closer subjects.
- Large Aperture: The wide f/2.8 aperture allows for excellent low-light performance and creative control over depth of field.
- Durable Construction: With weather-sealing and robust build quality, it’s suitable for varied safari conditions.
Canon RF 15-35mm f/2.8L IS USM :
- Designed for Mirrorless Cameras: This lens is part of Canon’s RF series, providing compatibility with their mirrorless cameras.
- Image Stabilization: The inclusion of image stabilization is beneficial for handheld shooting, especially in low-light situations.
- High Optical Performance: Offers sharpness and clarity across the frame, capturing the vibrant details of African landscapes.
Canon EF 24mm f/1.4L II USM :
- Wide Aperture: With a wide f/1.4 aperture, this lens excels in low-light conditions, allowing you to capture the magical moments of sunrise or sunset on the safari.
- Prime Lens Quality: As a prime lens, it delivers exceptional optical performance and is well-suited for capturing wide-angle scenes with stunning clarity.
Canon RF 14-35mm f/4L IS USM :
- Ultra-Wide Angle: This lens offers an ultra-wide focal length, ideal for capturing dramatic landscapes and immersive safari scenes.
- Image Stabilization: Equipped with image stabilization for handheld stability, even at wider angles.
- Compact and Lightweight: Designed for portability, making it a practical choice for travel and safari expeditions.
Why Use a Wide-Angle Lens on Safari:
Landscape Photography: Wide-angle lenses are perfect for capturing the vastness of African landscapes, showcasing the sweeping plains, majestic mountains, and expansive skies.
Environmental Context: Wide-angle lenses help tell a more comprehensive story by including the surroundings, and providing context to the wildlife and their habitat.
Creative Perspectives: Wide-angle lenses allow for creative compositions, emphasizing foreground elements and creating a sense of depth in your images.
Group Shots: When photographing groups of animals or scenes with multiple subjects, a wide-angle lens ensures you can fit more into the frame.
In summary, incorporating a wide-angle lens into your camera kit for an African safari enables you to capture breathtaking landscapes and diverse environments, providing a well-rounded photographic narrative of your safari experience.
Best Canon Cameras For Safari
Choosing the right Canon camera for an African safari involves considering factors such as budget, features, and the level of photographic expertise. Here are recommendations for affordable, mid-range, and professional-level Canon cameras that are well-suited for capturing the diverse and dynamic scenes encountered during an African safari:
Affordable Cameras:
Canon EOS Rebel T7i (EOS 800D):
- Budget-Friendly: The Rebel T7i offers an affordable entry point for those on a budget.
- 24.2MP APS-C Sensor: Provides decent image quality for capturing wildlife and landscapes.
- Dual Pixel CMOS AF: Ensures quick and accurate autofocus, handy for spontaneous wildlife moments.
Affordable RF Canon Cameras
Canon EOS R100
- Entry-Level Mirrorless: A budget-friendly mirrorless option24.1 Megapixel (APS-C) CMOS Sensor with ISO 10025600 (H: 51200
- Built-in Wi-Fi and NFC Technology.
- 9-point AF System and AI Servo AF
- Optical Viewfinder with Approx. 95% Viewing Coverage
- 3.0-inch LCD with 920,000 Dots
- Scene Intelligent Auto Mode – Full HD 30p
- Canon EOS Rebel SL3 DSLR Camera
- Lightest, Smallest EOS DSLR camera.
- High Image Quality with 24.1 Megapixel CMOS (APS-C) Sensor
- Fast and Accurate Dual Pixel CMOS AF with Eye Detection AF
- 4K Video, 4K Time-lapse Movie
- Vari-angle Touchscreen, 3.0-inch LCD.
- Built-in Wi-Fi and Bluetooth Technology with Auto Image Transfer.
Mid-Range Canon Cameras :
- Canon EOS 90D
- Fast continuous shooting, Capture the action at up to 10fps
- 32.5 megapixel APS-C CMOS sensor, For exquisite detail
- Intelligent optical viewfinder, Comfortable to use even over long periods
- 45 cross type AF points with multi-controller, Focus quickly and accurately even in low light
- iTR focus tracking, Keep even fast-moving subjects in focus
- 4K filmmaking and Dual Pixel CMOS AF, Superb quality video and audio
- Canon EOS 6D Mark II
- Full-Frame Power: A mid-range full-frame option.26.2 Megapixel Full-frame CMOS Sensor
- Optical Viewfinder with a 45-point All Cross-type AF System
- Dual Pixel CMOS AF with Phase-detection & Full HD 60p
- DIGIC 7 Image Processor, ISO 100-40000
- Vari-angle Touch Screen, 3.0-inch LCD
- Built-in Wi-Fi, NFC, Bluetooth and GPS
- Canon EOS R7
- High Image Quality with a 32.5 Megapixel (APS-C) CMOS Sensor
- High-Speed Shooting
- Blazing Fast Autofocus
- 5-axis In-body Image Stabilization with auto-level technology
- Record each clip over 30 minutes
- Get professional quality video with Smart Shoe integration for audio and HQ 4K
.
Pro Canon Cameras
- Canon EOS R3 Mirrorless Camera
- High Image Quality with a Back-illuminated Stacked 24.1 Megapixel Full-frame CMOS Sensor
- DIGIC X Image Processor with an ISO range of 100-102400; Expandable to 204800
- The First EOS Digital camera to feature Eye Control AF
- 5.76-million-dot & 120fps blackout-free EVF with quick response, as well as a Vari-Angle Touchscreen
- Capable of recording 6K 60P RAW or 4K 120p 10-bit (uncropped) with Canon Log 3
- Dual Card Slots for CFexpress and UHS-II SD Memory Cards
- Canon EOS 1DX Mark III
- A new era in autofocus speed and accuracy
- Outstanding stills and video
- High speed camera communications
- Always ready to perform, whatever the situation
- Enhanced DIGIC Processor
- New CMOS Sensor
Considerations When Buying a Canon Camera for Your African Safari:
Focal Length and Lens Compatibility: Ensure the camera is compatible with the lenses you need for wildlife and landscape photography, considering both EF and RF lenses.
Autofocus Performance: Wildlife photography demands reliable autofocus, so look for advanced autofocus systems like Dual Pixel CMOS AF for quick and accurate focusing.
Weather Sealing: Given the varied conditions on safari, having a camera with weather-sealed construction is crucial for durability and protection against the elements.
Portability and Weight: Consider the size and weight of the camera, especially if you plan to carry it for extended periods during safari excursions.
Battery Life: Longer battery life is beneficial for extended periods in the field. Consider having spare batteries for backup.
Video Capabilities: If you plan to document your safari in video format, consider cameras with advanced video features, such as 4K recording and high frame rates.
Low-Light Performance: Given the early morning and late evening safari excursions, good low-light performance is essential for capturing wildlife in natural lighting conditions.
Budget: Determine your budget range and choose a camera that offers the best features within that range. Consider investing in good lenses as well.
- It Is Important To Pay Attention To The Lighting.
Lighting is a crucial aspect of photography, and when on safari, capturing the vibrant colors, textures, and details of wildlife and landscapes depends significantly on understanding and utilizing available light conditions. Here are considerations and tips for handling lighting while on a safari photography expedition:
- Golden Hours:
- Early Morning and Late Afternoon: The golden hours around sunrise and sunset provide soft, warm, and directional light. This lighting not only enhances the natural colors of the environment but also creates long shadows, adding depth and dimension to your photographs.
- Harsh Daylight:
- Use Shadows Creatively: Embrace the challenges of harsh midday sunlight by incorporating shadows creatively. These shadows can add contrast and drama to your images, especially when capturing textured landscapes or wildlife features.
- Cloudy Days:
- Even and Soft Lighting: Overcast or cloudy days can provide even and soft lighting. This diffuse light reduces harsh shadows and can be advantageous for capturing details and colors without the distraction of strong contrasts.
- Backlighting:
- Silhouettes and Rim Lighting: Experiment with backlighting, especially during sunrise or sunset. This technique can create silhouettes and add a beautiful rim light to your subjects, highlighting their contours against the backdrop.
- Adapt to Changing Conditions:
- Be Flexible: Safari conditions can change rapidly, from bright sunlight to overcast skies. Be prepared to adapt your settings and compositions accordingly. Stay alert to the changing atmosphere and adjust your approach as needed.
- Use Natural Frames:
- Utilize Trees and Vegetation: Take advantage of natural elements like trees or bushes to create frames within your composition. These frames can add interest to your photos and also help control the intensity of sunlight.
- Consider the Animal’s Perspective:
- Capture Catchlights: When photographing animals, pay attention to the catchlights in their eyes. Position yourself so that the light enhances the catchlights, bringing life and sparkle to the subject’s eyes.
- White Balance:
- Adjust for Conditions: Set your camera’s white balance according to the prevailing conditions. Different lighting situations may require adjustments to maintain accurate and natural color tones.
- Avoid Direct Flash:
- Opt for Natural Light: While flash can be useful in certain situations, especially for fill-in light, try to rely on natural light as much as possible. It provides a more authentic and visually appealing look to your safari photographs.
- Patience and Observation:
- Wait for the Right Moments: Patience is key in wildlife photography. Observe the behavior of animals and be ready to capture those magical moments when the lighting is just perfect.
- Silent and Respectful Approach:
- Minimize Disturbance: Approach animals silently and respectfully to avoid disturbing their natural behavior. This not only ensures ethical photography but also allows you to capture them in their most relaxed and authentic state.
- Lens Hoods and Filters:
- Minimize Lens Flare: Use lens hoods to minimize lens flare caused by direct sunlight. Consider using polarizing filters to manage reflections and enhance colors.
Conclusion:
Lighting is a dynamic element in safari photography, and understanding how to adapt to different conditions will significantly impact the quality of your images. Whether you’re capturing the warmth of a sunrise, the drama of a storm, or the soft glow of an overcast day, being attuned to the nuances of lighting will help you create stunning and evocative safari photographs.
Best Software To Edit Safari Photos
Editing safari photographs requires software that can handle various aspects such as color correction, exposure adjustments, and fine-tuning details to bring out the beauty of wildlife and landscapes. Here, I’ll discuss three popular software options for editing safari photographs: Adobe Lightroom, Adobe Photoshop, and Luminar Neo.
- Adobe Lightroom:
- User-friendly interface: Lightroom’s intuitive interface makes it accessible for both beginners and experienced photographers.
- Non-destructive editing: Lightroom preserves the original image, allowing you to experiment with edits without altering the original file.
- Efficient organization: The software offers robust cataloging and organizational tools, helping users manage large collections of safari photographs.
- Synchronization: Edits made in Lightroom can be synchronized across multiple devices, facilitating a seamless editing workflow.
- Key Features: Global and local adjustments: Lightroom enables users to make overall adjustments to the entire image or target specific areas using the Graduated Filter, Radial Filter, and Adjustment Brush tools.
- Presets and profiles: The software includes a variety of presets and profiles, allowing users to apply predefined settings or create their own for consistent editing.
Advanced editing capabilities: Photoshop is a powerful software for intricate and detailed edits, making it suitable for tasks like retouching and compositing.
Layers and masks: The ability to work with layers and masks provides a high level of control over specific elements in the image, enhancing flexibility in editing.
- Key Features:
- Retouching tools: Photoshop offers advanced retouching tools, such as the Healing Brush and Clone Stamp, which are useful for removing distractions or imperfections in safari photographs.Advanced color correction: Photoshop provides extensive color correction tools, allowing photographers to fine-tune the color balance and enhance the vibrancy of safari images.
Luminar Neo:
- AI-powered editing: Luminar Neo leverages artificial intelligence to streamline the editing process, making it easier for photographers to achieve impressive results quickly.
One-click enhancements: The software includes AI-driven features like Accent AI, which automatically enhances images with a single click, saving time in the editing workflow.
- Sky replacement and AI filters: Luminar Neo offers creative tools like AI Sky Replacement, allowing photographers to change the sky in their safari photographs easily. Additionally, AI filters enhance specific aspects of the image, such as details and colors.
In conclusion, Adobe Lightroom, Adobe Photoshop, and Luminar Neo are all excellent choices for editing safari photographs, each offering unique features and strengths. Lightroom is ideal for efficient organization and global adjustments, Photoshop excels in detailed editing and retouching, while Luminar Neo stands out with its AI-powered enhancements and creative tools. Choosing the best software depends on the specific needs and preferences of the photographer.
Patient, Observant Wildlife Photography
Wildlife photography is a fascinating and challenging genre of photography. It requires a lot of patience and observation, as well as technical skill and knowledge of animal behavior. In this article, we will discuss some tips for being patient and observant in wildlife photography.
Research and Plan
Before heading out to photograph wildlife, it’s important to research and plan your trip. Research the animal behavior and habitat, as well as the best time of day and season to photograph them. Knowing where and when to find your subject will save you time and increase your chances of getting the shot you want. Planning also involves choosing the right gear, clothing, and accessories for your trip.
Be Quiet and Still
Wild animals are sensitive to noise and movement, so it’s important to be quiet and still while photographing them. Avoid making sudden movements, rustling leaves, or loud noises that could startle or scare the animal away. Move slowly and deliberately, and keep a low profile. Wildlife is more likely to approach you if you look and act non-threatening.
Observe the Animal Behavior
Observing animal behavior is essential to capturing great wildlife photos. Pay attention to their movements, body language, and interactions with other animals. This will give you insight into their behavior and help you anticipate their next move. Knowing when and where to point your camera will increase your chances of getting the shot you want.
Wait for the Right Moment
Wildlife photography requires patience, and waiting for the right moment is key to getting a great shot. Observe the animal and wait for it to do something interesting or unique. Be prepared to wait for hours or even days to get the shot you want. The key is to be patient and ready for when the animal does something interesting.
Be Respectful of the Animals
Respect for the animals and their habitat is crucial in wildlife photography. Avoid disturbing the animal or its environment by keeping a safe distance and avoiding feeding or touching them. Respect their space and be mindful of their safety and well-being. Remember, the animal’s welfare comes first, and photography comes second.
Patience and observation are essential to capturing great wildlife photos. Research and planning, being quiet and still, using a telephoto lens, observing animal behavior, waiting for the right moment, being respectful of the animals, using natural light, and shooting in continuous mode are all important techniques to master. With practice, skill, and a lot of patience, you can capture stunning wildlife photos that will inspire and delight others. Remember, the key to great wildlife photography is to be patient, observant, and have fun with creativity.
Related Posts

CemAir: My Last Flight – Here’s Why
- Feb 26, 2024

Slow Lounge Cape Town: A Haven of Comfort and Luxury
- Feb 15, 2024

Safari Snapshots: Mastering iPhone Photography in the Wild
- Jan 30, 2024
WhatsApp John Finch Travel
Finding the Universe
Travel tales, photography and a dash of humor

Safari Photography Tips – How to Get Great Photos on Safari
Last updated: August 30, 2023 . Written by Laurence Norah - 4 Comments
A safari is a fantastic way to see a wide range of wildlife in its natural habitat. It’s also an opportunity to take lovely photos of that wildlife! However, there are some unique challenges to taking photos on safari. In this post, I’m going to share some safari photography tips to help ensure you get the best photos when you go on safari.
As a professional travel photographer, I’ve been lucky enough to take photos in a wide range of scenarios, including on a number of safaris in both Africa and Asia. Based on my experiences, I’m going to share with you everything you need to know to get great photos on safari.
Most of my examples used in the post are from taking photos while on safari in Africa; however, these tips will work for most safari destinations. as well as for wildlife photography in general. Many of these tips can help anyone looking to improve their wildlife photography and also for anyone wanting to take photos from a vehicle.
I’ll cover a few things in this post. I’m going to talk about some general tips and things to think about when going on safari from a photography perspective. I’ll also include ideas on suggested cameras and camera accessories for safari so you know what is important to bring along.
A safari is a big investment for many of us, and is often a once in a lifetime trip. So getting great photos to remember our experiences is important. Let’s get started with the tips!
Tips for Taking Better Photos on Safari
Plan where you want to go.
The first thing you are going to have to do is decide where you want to go on safari. It’s likely that you already have an idea as to what you want to see and photograph on your safari, be it specific animals or birds, or maybe you are interested in certain landscapes.
The main thing is that you pick a destination that will give you a good chance of seeing the things you really want to see and photograph. This is particularly the case with animals or birds that are rarer, like rhinos.
On a recent trip across East Africa, we knew that we wanted to see and photograph things like gorillas, chimpanzees, rhinos, and spoonbill storks. We picked the countries we visited as well as the time of year we travelled to ensure that we would have a good chance of seeing these particular animals.
We also wanted to see the Great Wildebeest Migration on that trip. This is always taking place, so it was just a question of researching where it would be at the time of year we would be visiting to ensure we would have the best chance to see and photograph it.
Planning your destination properly is definitely the first step to getting the photos you want to get on your safari.
Research Your Chosen Safari Location
Once you have chosen your safari destination, do some research to better understand your trip itinerary and the wildlife, landscape, and climate of the destination.
All of these things can affect how you will want to prepare for your safari and the type of camera equipment you might need.
For instance, if your main photography goal of the trip is take photos of lions, you will want to try to make sure that you spend a sufficient amount of time in places with healthy populations of lions to increase your chances of seeing and photographing them. Lions are often best seen in savanna areas.
However, if you are interested in malachite kingfishers, you’ll want to make sure that you spend enough time in wetland areas for a good chance to see these birds. These little birds are best spotted and photographed either from a boat or on foot.
This research will also help you decide on the equipment you will need to take with you. For photography of smaller birds for example, you’re likely going to need a longer lens. If you are more interested in landscapes, then a wide-angle lens will be an essential item.
Finally, check out the climate for the country you are visiting and the time of year you plan to visit. Having an idea of what to expect will ensure you bring the right clothing as well as any protective equipment like camera rain covers on your trip.

Choose the Right Camera for Safari
One of the main decisions you’ll have to make when planning your safari trip is what camera to take with you on your trip. This decision will have you weighing various factors, from your budget through to the size and weight of the camera.
When you are deciding how much to spend and how much you are willing to carry with you, consider what sort of images you want to get. If you are looking for amazing wildlife shots of fast action or in low light, then you will want to invest more money in a high-end set-up.
As an example, compare these two shots of a leopard taken in low light at the end of the day. Both are uncropped.

Both images are obviously of a leopard. However, the compact camera struggles to get a close up shot due to the maximum 70mm focal length, and even at ISO 800 the image ends up being quite noisy. The slow shutter speed, even with image stabilization, also means the shot is not too sharp.
The larger and more professional Canon EOS R5 mirrorless camera paired with a 100-400mm lens is still able to get a very usable image, even at 10,000 ISO.
If you are just happy to capture memories of your trip, then a compact camera or smartphone will likely do the job.
A good compromise for many users is a bridge camera , which offers a good balance between a long zoom, affordability, and image quality.
However, if you want the most flexibility and opportunity to get the best shots from your trip, then a higher end mirrorless camera would be my recommendation.
If money and size are no object, my recommended camera for safari would be a high-end mirrorless system. The latest mirrorless models feature excellent auto-tracking autofocus which can recognise and lock onto a subject very quickly, which can really help with fast moving subjects.
In this situation, I’d probably pick a Canon EOS R5, Sony Alpha a7r IV or a Nikon Z9. I’d pair it with a telephoto zoom in the range of 100-500 with stabilization and as wide an aperture as I could afford.
If you want something that offers a good balance between affordability, image quality, and zoom, then my suggestion would be a bridge camera.
I have a whole post on the best camera for safari which I would suggest reading if you don’t already have a camera you want to bring with you. It’s definitely important to choose the right camera for you.
In summary though, here are some recommended cameras that I suggest you take a look at, depending on the type of camera you would like to take on safari:
- Smartphone: either a Pixel 6 Pro or iPhone 13 .
- Compact camera Panasonic Lumix ZS70 or Sony RX100 VII
- Bridge camera: Panasonic Lumix DC-FZ80 / FZ82 or Sony RX10 IV .
- Mirrorless camera: Sony a6100, Sony Alpha 7c , Canon EOS R6 Mark II , Nikon Z7II , Canon EOS R5 , or Sony Alpha a7 IV
- DSLR camera: Nikon D3500 or Canon EOS 6D Mark II
For more on choosing a camera in general, we also have guides to the best travel camera , best compact camera , best bridge camera , best mirrorless camera and best DSLR cameras .
If you have, or plan to buy, a mirrorless camera or DSLR camera, you may be wondering what kind of lens would be best for safari. It depends of course on your photography goals and what you want to photograph, but I would generally recommend a lens with a focal range of 100-400mm. See my safari camera post for lens recommendations.

Learn How to Use Your Camera
Once you have decided on which camera to take with you, it’s important that you learn how to use it properly. This applies to whatever kind of camera you are using, be it a smartphone camera or a high-end DSLR or mirrorless camera.
A camera is ultimately just a tool to help you take great photos, and like any tool, it will only do what you ask of it. Understanding the various features of your camera and how to access and adjust key settings is vital to ensure you don’t miss a shot.
When you are on safari, great photography opportunities can arise very quickly and be gone just as quickly. For example, for the shot of the leopard at the start of this post I had just a couple of seconds to frame the shot and ensure all the settings were correct before he decided to sit up and slink away out of sight.
Had I not been able to nail the focus or adjust ISO, aperture, and shutter speed appropriately in time, I would have missed the shot. I would recommend checking out my guide to the exposure triangle , as well as how to use a mirrorless camera for detailed advice.
Understanding how to adjust the settings and set up your camera properly means you’ll have more control over the final look of your shots. For example, you could learn how to manually change the shutter speed so as to capture movement in different ways.
Here are a couple of examples of different shutter speeds to show the difference.

In the first shot, even though the fighting zebra are moving quickly, the fast shutter speed freezes the action. In the second shot of the wildebeest crossing, they are just walking over the road. But in 1/5th of a second, they cover a small amount of ground, and so they become blurry. The single stationary wildebeest remains sharp as it isn’t moving.
There are many features of a camera which can be used to adjust how the final shot looks, and understanding how to control them will help ensure you get the shots you want.
If you feel you need help with using your camera and would like to improve your photography, there are a lot of photography courses, books, and workshops out there. I run an online photography course that teaches all the basics as well as more advanced skills, and have proudly helped thousands of people improve their photography skills.
Understand the Limitations of Your Camera
Every camera has limitations as to what it can do. These limitations will vary, and even high-end cameras will have some sort of limitation.
Examples of limitations are:
- The zoom isn’t very big, meaning you can’t capture animals which are far away and will have limitations capturing smaller animals like birds
- The camera sensor is small, and so will produce noisier images when there is less light
- The lens is big and heavy, so you need to use a fast shutter speed to avoid getting blurry images due to your hand motion when hand holding it
- Big and heavy equipment is more difficult to pack and travel with
The important thing is to understand the limitations of your camera so you can work around them, or at least, know what to expect before you go on safari.
The most common issue is probably not being able to take photos of animals that are further away. We saw a number of travelers frustrated by this on our recent trip in East Africa. All cameras will have their distance limitations, just be sure to have a good idea of yours so you can have realistic expectations of what kinds of photos you will be able to take. You can simply go outside and take photos of local animals or birds to get a good sense of this.
Another common issue I see from safari photos and wildlife photos in general are images that are not as sharp as they could be.
This is usually because the shutter speed is too low, and the user is hand holding a larger lens. A slow shutter speed means that any movement in your hand is translated into motion blur as you take the picture. You can fix this by increasing the shutter speed and/or resting the lens on a steady surface.
Some limitations can’t be overcome though, and are usually down to the actual hardware inside the camera. For example, the maximum zoom, the sensor size and maximum aperture size will be fixed.
However, if you know what the limitations of your equipment are, then you will be able to either accept them and work around them, or decide on upgrading to a different camera for your trip.
I’d also add at this point that you shouldn’t compare your photos to those you’ve seen on TV, online, and in wildlife magazines. You have no doubt seen some amazing wildlife photos and videos on sites like National Geographic or the BBC , and might wonder why you aren’t able to get the same sorts of shots.
Whilst it is of course possible to get images like those photographers do, they often have a lot of advantages over the average tourist. Not only do they typically travel as a crew with tons of high-end equipment, but they often take photos in locations that are hard to get to with limited public access.
They also often have paid for special press / filming permits to get off-road access or shoot in private areas outside of national parks. They also often spend weeks planning and trying to get the right shots, and only share the best shots with the public.
So don’t be too hard on your gear or yourself. Just be aware of the limitations of your photography equipment and know how to get the most out of it.

Understand What Causes Blurry Wildlife Images
It’s important that your images are sharp. Two things can cause an image not to be sharp. The first is using too slow of a shutter speed for the situation you are shooting. The second is not focusing correctly.
A slow shutter speed can result in blurry images for a number of reasons. If you are hand holding your camera, then any movements in your hands can translate to blurry images. Movement of the subject can also translate to blur, as can movement due to you taking photos from a moving vehicle or boat.
You can resolve the slow shutter speed blur problem by using a faster shutter speed, and ensuring you are as still as possible when shooting. Ideally, you’ll want to rest your camera on something totally stable when shooting. Then all you have to think about is the motion blur that might result from the animal moving.
For focus, the main issue is likely to come about as a result of the camera’s autofocus system picking the wrong part of the scene to focus on, leaving your subject out of focus. I’ll cover that in my next tip.
Master Your Camera’s Focus System
An important aspect of wildlife photography is knowing how to use your camera’s focus system.
It is important to be able to focus on the animal or thing that you want the viewers’ eyes to go to in the image. This means that you will want to be able to use your camera’s manual focus system (if it has one) and/or learn how to change the focus if your cameras autofocus gets it wrong.
A shot can technically be in focus and sharp, but if you have focused on the wrong part of the scene your actual subject will be out of focus and so you won’t end up with the image you want.
Nearly every camera on the market today has an automatic focus, or autofocus system. As the name suggests this system automatically focuses for you when you point the camera at a scene.
There is however quite a difference in the capabilities of these systems. At the more basic end, an autofocus system will allow you to select an area of the scene to focus on, and then focus appropriately.
More advanced autofocus system will be able to identify specific types of subject like animals or people, and track them as they move so you can keep focus.
Many cameras and lenses also feature manual override, so you can manually adjust the focus if you need.
For the main camera I use for wildlife photography, the Canon EOS R5 , this has a very sophisticated autofocus system which is able to recognised and lock onto a wide range of subjects. If it can find an eye, it will lock focus on that. Otherwise it will try to track a torso or head. Additionally, it can continue to track the subject as it moves, switch between subjects, and I can override the focus selection if necessary.
It took me quite a while to get to grips with this system, and also to get used to its quirks and limitations. For example, on some occasions it would prefer to focus on the grass in front of the subject rather than the subject. Other times it might focus on a marking on an animal’s hide, rather than the eye.

Results like this are why it is so important to both understand the various focus modes of your camera, but also understand how to override them.
For example, on my Canon EOS R5 I have a separate button set up for centre spot focus. This allows me to point the centre of the frame at the area I want to focus on, and know I’ll get sharp focus in that area when I press the focus button. I can also entirely override the focus with the manual focus ring on the lens.
Whilst I can rely on the autofocus subject tracking 90% of the time, it also means I don’t miss focus in those edge cases where the camera doesn’t get it right. Technology can be smart, but it can’t read minds quite yet, so it’s usually working off a best guess as to what you want to take a photo of.
Whatever your camera is, my recommendation is to spend some time learning the various focus modes, what they are, and how to quickly override the focus if necessary, either manually or by selecting a different focus area.
Ideally you’ll want the camera to be in a continuous focus mode so it keeps tracking a moving subject. Try to find some subjects like wildlife in your garden or a moving pet that you can practice on before you go on safari to master your camera’s focus features.
Try Shooting in Burst Mode
Most cameras have a range of shooting modes, which may also be called drive modes. The choices normally vary, and will include single shot and burst shot modes. The drive mode menu on your camera is also where you’ll often find the camera’s self-timer mode.
For wildlife photography, a lot can happen in a short sequence of time. For this reason, shooting in burst mode is usually the way to go when you have a moving subject. This means that as you hold down the shutter button the camera will keep taking images.
Alternatively, in single shot mode, you have to keep pressing and depressing the shutter button. This loses you time and you may miss the shot.
Shooting in burst mode will let you take a sequence of images and then pick the best one. For example, here’s a sequence to show a yellow-billed stork landing.

The number of images the burst mode will take will depend on two main factors.
First, the camera’s burst speed, which is the number of images per second your camera can take. For instance, a camera with a burst speed of 10fps (frames per second) can take up to 10 photos per second.
Second, the speed that your camera can write to the memory card inside the camera as it takes pictures.
Most cameras will be able to take a certain number of images at the maximum burst speed for a few seconds, and then as the memory buffer fills up, this rate will slow down or even stop until the images have been written to your memory card. These details should be made clear on the specification sheet for your camera.
When you shoot in burst mode you will definitely also want to have continuous autofocus enabled. This will mean that if your subject moves as you are shooting it will hopefully stay in focus.
The main disadvantage of shooting in burst mode is that you will end up taking a lot more photos and using more memory card space. However, memory cards and memory in general are relatively inexpensive these days, so this shouldn’t be too much of an issue. Just be sure to always have an extra memory card with you.
Try to Shoot at the Best Times of Day
If you’ve ever read a photography guide, it will normally advise you that shooting in the earlier morning and later afternoon will give you better results. This is because the light at the start of the day and in the evening is softer and has that nice warm yellow glow.
In addition, the lower angle of the sun in the morning and evening produces shadows, resulting in images that have better contrast and depth compared to images shot in the overhead midday sun which can produce more flat images.
When it comes to safari, this advice is also true, but there are additional reasons to shoot earlier in the morning and later in the evening.

To start with, the majority of animals are going to be more active earlier in the morning and then towards the evening. The middle of the day tends to be hotter, and is a time when many animals are likely to be resting in a nice shady spot.
You will tend to see fewer animals in the hottest part of the day and those you see will tend to be less active during this time.
If you are looking for nocturnal species like genets, bushbabies, or aardvarks, your best chances to see them are on night drives or night walks, or to try to go as early in the morning as you can for a chance to spot them before they have gone off to sleep.
Just note nocturnal animals can be pretty tricky to see in most national parks given the hours that you are allowed to do a game drive. Getting good photos of them can be very difficult given they are often spotted at night.
We recommend trying to start your game drives as early as the park will allow. This will give you a better chance of seeing more wildlife, and also getting better images of that wildlife.
Another reason to avoid the middle of the day is that as the air heats up it gets more hazy. Think of the heat shimmer you see on a hot day—this is a real issue when shooting during hotter days and can negatively impact your images.
The haze will result in less sharp images, especially of further away subjects. In addition, as the day progresses, there will often be more dust in the air from vehicles driving around, which also reduces the clarity in the air.
Of course, I appreciate that I am talking about ideals. It isn’t always possible to pick the ideal time. Sometimes you will be out in the middle of the day. In these situations. Try to get as close as possible to your subject, which will let you avoid more of the heat haze. Where possible, shoot your subject so the sun is behind you rather than behind your subject.
The below two images are of the same black rhino mother and calf in Kenya. Both were shot in the middle of the day. In the first shot, the pair were quite far away and there was quite a lot of heat haze, meaning the shot ended up not being as sharp as I would have liked.

In the second shot, the pair moved much closer to us and the light was slightly improved, so there is some depth from the light and dark. It’s still not the ideal setup, but it’s definitely improved compared to the flat and slightly hazy look of the first shot.
See more on heat haze in photography here , including more tips for identifying and avoiding it.

This brings me on to my next tip for getting great photos on safari.
Any wildlife photographer will likely tell you that their most useful skill is patience. When doing landscape photography , I am certainly used to waiting for the right light, but wildlife photography definitely takes the need for patience to a new level.
Wild animals tend not to move to our schedules. They go where they want when they want. Being patient and quiet can reap huge rewards when it comes to photographing them in their natural habitat.
An example is of this leopard in a tree. When we arrived, it was asleep in the tree by its kill. However, we waited for around an hour and it decided to get up, eat more of its kill, descend from the tree and wander off. All these moments provided better photography opportunities than the initial one, and just required patience.

Another example would be a group of lion cubs we encountered in Tanzania. There were eight of them playing near the road, and as we watched two of them climbed up a tree. Shortly afterwards, one of their mothers returned, and we were rewarded by the sight of baby lions bounding across the grass to be reunited.

This is a story I could repeat multiple times across many wildlife encounters, but the overall message should be clear. Try to remember that a safari game drive is not an exercise in getting somewhere.
When you find an animal or bird you want to see, you will probably be rewarded if you spend some time just sitting and watching it rather than rushing on to try to find something else.
Prepare Your Equipment
If you already have a camera that you plan to take with you on safari, you want to make sure it’s in great working order before heading on safari. This is especially the case if you have older gear or gear that gets a lot of use.
Before you go, I recommend testing and cleaning the camera yourself to make sure it’s working. You’ll also want to make sure all the gear from your lenses to your camera straps are in good shape before your trip. Your trip is not a good time to learn about a preexisting scratch in your lens, a corrupted memory card, a fraying strap or a battery that doesn’t hold its charge!
You might also consider taking your camera to have a professional clean and check before your safari. Often you can do this at a local authorised dealer or repair shop for your camera brand, as they will have servicing options. Alternatively, your manufacturer might offer mail-in servicing options.
I try to get my cameras serviced every year or two, especially if I know I’ve been hard on them. As well as cleaning the sensor professionally, they check the camera over and make sure things like seals and screws are all in good working order. In my opinion this is well worth the investment, especially on high-end equipment.
Protect your Equipment on Safari
Safaris can be really hard on camera equipment. From dusty conditions to bumpy roads, there are all sorts of hazards that can either damage your equipment or cause it to function less effectively. In this section, I’m going to talk about common issues you can expect to encounter and how to overcome them.
Dust or Sand
When it’s hot and dry, the roads will be dusty. As your vehicle and other vehicles travel on the roads they kick the dust up, and it gets everywhere. If you have the top down or windows open, expect dust to get on your camera equipment.
If you are traveling to a place where sand is a concern, such as a desert or beach, be careful as blowing sand can get into your gear and can also leave scratches on your lens if you accidentally wipe them. Never put your camera down in the sand as it can easily work its way inside.
Cameras contain a lot of sensitive electronics as well as some moving parts, neither of which appreciate dust or sand. In addition, if dust gets onto your camera’s sensor it can cause unsightly spots to appear in your images.
There are a few things you can do to minimize the impact of dust or sand. First, a good camera bag that you can put your camera in between uses will help to prevent general dust getting in. So when you are not using your camera, I’d recommend securing it in a case or bag.
Also be careful about where you set your camera. Don’t place it on the ground or other dirty surfaces, and don’t leave it outside for any longer than it needs to be outside.
Next, remember to use a lens cap if your camera lens supports them as this will help to keep the front element dust free. Just keep the lens cap in your pocket and place it on the camera whenever you are not using it. If your lens supports it, then a lens hood and a UV filter can also provide much needed protection.
If you are using a camera where you can change lenses, try to change the lens in a dust-free location if possible, such as in your hotel or when stopped in a sheltered place. Try not to change your lenses more than you need to when in dusty situations.
In addition, I’d recommend packing a small camera cleaning kit so you can get accumulated dust off your gear as you travel. I’d particularly recommend having a lens cloth, a brush, and a blower with you.
Once you are done with your safari and you have gotten all the amazing photos you wanted, you might consider getting your camera professionally serviced and cleaned to get rid of any errant dust and to ensure it’s back to full working order for your next adventure.
Not all safaris take place whilst in a closed vehicle. Sometimes you might be on foot or trekking, or in an open top vehicle. In these situations, even when visiting a country in the dry season, there’s always a possibility of rain.
Whilst some cameras do offer a level of weather-proofing or rain resistance, the majority are not fully waterproof. So having a camera rain cover to keep your gear dry like this is a good option.
I’d also recommend having a good camera bag or backpack with a rain cover where you can put your camera in between shots.
If you have a smaller camera like a compact camera or smartphone, something like a resealable freezer bag or clear dry bag can also work well to keep it dry.
Bumpy Roads
As well as dust and rain, another issue you will have to contend with will be bumpy roads. Most roads in safari parks are unpaved, and some of them can be very bumpy.
You definitely don’t want your camera equipment flying around the inside of a vehicle as this can damage it, and could even cause injury to the other occupants. I have a few suggestions to help avoid this scenario.
First, I recommend bringing along a good camera bag or case. Camera bags are specially designed to provide padding and protection for your gear, and many of them also come with rain covers. This means that you have somewhere safe, protected, and padded to put your gear in between shoots.
Personally I use Vanguard photography bags and I’ve been an ambassador for Vanguard for many years now. If you see something on their store that works for your equipment, you can save money using our exclusive Vanguard discount code. This will give you 20% off everything in the Vanguard store.
Just use the code FindingTheUniverse for your discount! This code works in the Vanguard USA, UK, Australia, Spain, and Germany stores.
When you are actually using your equipment, I recommend having a strong and comfortable strap to keep it secure around your neck or shoulders. I use the Peak Design strap system which has reliably kept my camera gear comfortably slung at my hip for many years now. You’ll want to find one that is comfortable for you.
I left my DSLR camera on the seat of our Land Cruiser on a trip and it fell on the floor after hitting an unexpected bumpy patch in the road. I was lucky that nothing was damaged but it sure made me more careful about either putting gear away in my bag or keeping it around my neck.
I also recommend that if you are someone like me who enjoys standing up in a safari vehicle, that you sit down or at least put your camera in a camera bag when the roads gets really bumpy. If your guide tells you to hold on or you see that you are going to be crossing a river, it is probably best for both you and your gear to sit down. This way you’ll have a better grip on your gear and avoid banging your gear on something or falling.
Dress Appropriately
Packing appropriate clothing is going to ensure you are comfortable and ready for the weather during your trip. Whilst it might not directly help you get better photos, comfort is a really important factor. When you are comfortable you will be able to focus on getting great photos rather than the temperature or the insects.
When choosing clothes for your trip, consider the climate, weather, and insects of where you are going as well as the activities you plan to do. You are going to pack very differently for a cool weather destination than a tropical one. You also need to pack differently if visiting a country during its rainy season versus its dry season.
In terms of photography specific clothing, you might want to consider having lots of pockets so that you have plenty of places to store things when standing in a vehicle and when hiking. This will give you quick access to things like extra batteries, lens wipes, and your lens caps.
There are a range of different vests you can get, including specialised photography vests . I personally prefer something a bit more versatile that I can use in a variety in situations, and I like the Scottevest products which have a lot of pockets and are great for travel in general. I find them particularly useful for airport travel as they have so many handy pockets.
Generally though, on safari I wear the NosiLife long-sleeve shirts from Craghoppers . These have lots of pockets and also come with built in insect protection and sun protection. They also dry very quickly.
Jess and I mainly wore Craghoppers tops and bottoms throughout the days where we were either in the vehicles on safari or were doing treks. This is the most common brand we’ve seen people wearing for proper safari clothing throughout our travels. You can shop for them on their official store here , as well as on REI in the US here , and on Amazon here .
Depending on where you are going, you will probably also want to consider packing a hat, sunglasses, insect repellent , sunscreen, good practical shoes (we generally wear Scarpa or Merrell ), layers for warmth, and a rain jacket or poncho .
For more tips, check out our detailed guide to what to pack for safari , which has lots more tips and suggestions for your trip.

Pack a Photography Bean Bag
If you are traveling with a longer lens, I’d consider getting a photography bean bag or two for your safari trip.
For wildlife photography on safari, I find that a photography bean bag like this is one of the most useful photography accessories I have packed. Generally, I find I get a lot more use out of a bean bag on safari compared to a tripod or monopod.
This is because on safari you are often shooting from a vehicle, either from the window or via the pop-up top. And in both cases, setting up a tripod or even a monopod isn’t always going to be possible.
On the other hand, a bean bag can rest on the top of the vehicle or over a window, where you can then rest your lens or camera on it. If you are shooting with a larger camera and lens setup, you will definitely be thankful of having somewhere to steady it, as it’s unlikely to be practical to hold it up for prolonged periods of time. It also keeps you from putting your camera or lens directly on the metal edges of windows and roofs which could lead to damage.
Using a bean bag means you’ll be able to use slower shutter speeds for more stationary animals as well, so you don’t have to worry about camera shake so much. This is especially helpful when shooting with very big telephoto lenses from around 400mm and up.
Jess also found the bean bags useful for just using as armrests and for placing her elbows when using binoculars.
Bean bags are very light to travel with, and you can usually find inexpensive materials like dried beans to fill them with at your destination. My only tip is not to fill them with anything obviously edible, as some animals in some parks might sniff out the tasty treats within and decide to give them a nibble! Dried (obviously uncooked!) beans are a good option for this reason.

Be Specific About What You Want with your Guide
If you are doing a safari with a driver and/or guide, then being able to communicate about your goals and what you want to see is really important. It is also important for you to listen to your driver/guide for feedback and understand what is realistic based on their expertise. Doing this as early in the trip as possible is best.
If there’s a certain shot or composition that you want, it’s a good idea to let your guide know so you have a better chance of seeing it. Whilst there’s never a guarantee of seeing any wildlife on safari, if you specify that you want a shot of an elephant bathing for example, then your guide should have an idea of where the best places to get that shot might be on your trip.
If you aren’t clear on your interests, then you’ll be on more of a general safari and taken on the common safari drive circuits within the parks. Guides will almost always drive you to see things like lions or cheetahs if spotted, even without asking you. However, if you’d rather photograph elephants, eagles, or zebras, then you need to speak up so that you guide know what your wildlife sightseeing priorities are for the trip.
Whilst you will still likely get great photo opportunities (your guide is there to take you to see wildlife after all!), it might not be exactly the shot you want. So being specific will definitely help improve your chances of getting the shots you want if you have something specific in mind.
Another thing we discussed with our guide from the beginning was to have signals about stopping and when to leave after stopping for a wildlife sighting. So we asked our guide to just ask to make sure we wanted to leave an animal or we’d tell him, or he’d give us a head’s up if we needed to leave.
This not only helped make sure we felt we had enough time to get the photos we wanted, but it also made sure we were prepared for any sudden jerks from stopping and starting the vehicle.

Communicate with your Fellow Travelers
If you are traveling solo, then you will of course have a lot of autonomy in where you go and what you see on your trip. If you have a driver/guide then the two of you can set times and itineraries each day and be in sync about your wildlife spotting goals.
But, if like most safari goers, you are traveling with a partner, your family, friends, or as part of a group safari with other travelers, then you will likely have to be willing to compromise at times.
Common things you will likely need to decide on together will be what time to leave, how long to spend on game drives, whether to eat a hot lunch or a picnic lunch, and how long to spend watching each animal.
This can also affect your ability to get the photos you may want in terms of timing and views from the vehicle. With just one or two people in a vehicle, it is generally easy to find a good view, but once you have 4 or more people, it often becomes difficult for everyone to have a great view all at the same time, especially if an animal is not in an open area.
Generally, in these circumstances everyone will politely take turns and give everyone a bit of time and space to view the animal and take photos. But this does mean you will need to compromise and will sometimes miss the “best” view.
However, group safaris by far offer better value in terms of money compared to a private safari. But just note that they do come with some compromises.
I definitely recommend traveling with family or friends if that is an option, as sharing these experiences is probably worth more than taking a good photo. But it is worth talking about everyone’s goals and travel style before booking your trip to make sure everyone is likely to have a good trip.

Consider the Composition
As with any kind of photography, composition is key. Composition refers to how you place the various elements in your shot to create the final image.
It can be easy to get caught up in the moment when you see something exciting, and just to start shooting in an effort to get something shot. This excitement is very understandable!
However, if you are able to calm yourself down a bit and spend a fraction of time properly composing your shot, you will likely get better results.
There are a range of general composition rules in this post that you can read about, so I won’t rehash that. The main things I’d suggest just keeping in mind are the following.
- What’s in shot . When framing your shot, glance around the whole frame to see what is and what isn’t in the shot. For example, it can be very easy to frame an animal’s head, but accidentally crop out parts of their body or a tail. Whilst this might be the composition you are after, it might also end up looking a bit odd. Sometimes, zooming out a fraction and ensuring the whole animal is in the frame might be a better composition
- Eye contact . There are many different wildlife poses you can capture, but one of my favourites is when the animal is looking directly into the camera. In this pose, it will appear to be directly staring at the viewer. This is not always easy as animals tend to look all over the place. In these scenarios, burst mode and patience can be your friends.
- Animal Placement . When shooting from a vehicle, especially from the pop-up roof area, we can often end up above the animal. However, often animals look better when shot from eye level. So repositioning yourself to shoot from an open window lower down in the vehicle might give you a better shot, depending on the distance to the subject.
- Background and skyline . When putting your shot together, don’t forget to consider the background. For example, a deer against a brown rock face or tree will not stand out as well as one against a skyline. It’s not always possible to reposition yourself, but if there is the opportunity to wait for a better composition, or move the vehicle to a different location, take it.
Here are a couple of shots to illustrate my points above.

Don’t Forget the Landscapes
One of the main reasons people go on safari is to see the incredible wildlife of an area. However, it’s also very likely that you are going to be passing through some amazing natural landscapes.
Whilst it can be easy to get a bit single-minded about what we’re photographing, it’s important to step back and capture the landscapes as well as the wildlife.
If nothing else, this will serve as a reminder for you in the future as to where you were when you got the shots, and also the lovely scenery you witnessed. Capturing the wildlife with the landscape is also a good option, as it will give some depth and scale to your compositions.

Pack Spare Memory Cards and Batteries
The chances are that you are going to be taking a lot of photos when on safari. If you are shooting with anything other than a smartphone, your camera will likely have a battery you can change and a memory card slot.
It is definitely worth bringing at least one spare battery for your camera, and ideally two. In addition, bringing plenty of memory is also a good idea.
You don’t want to be half way through a busy day and run out of battery or memory card space, and then potentially miss some great shots. Modern mirrorless cameras in particular can eat through batteries, so a spare or two is definitely a must in my opinion.
Consider bringing a USB Powered Battery Charger and Power Pack
Accommodation options on safari can vary greatly, from simple campsites to high end luxury safari lodges. One thing we have found is that not every accommodation, especially the more remote and basic ones, will have AC power outlets. Or at least not one in your room (there is usually at least one public shared power outlet somewhere in a lodge or campsite).
If they have wall outlets, they will likely be 220V-240V, so you will want to check that all your equipment supports this if you are coming from a country like the USA, Japan, or Canada which has 110V-120V power. Many people will also need a travel adaptor to adapt your plugs, depending on where you are coming from and your travel destination.
However, rather than full power outlets, many locations offer USB outlets. These don’t use so much electricity, and are often powered by solar panels.
What this means is that if your camera only has a standard wall outlet charger for its batteries, you might not be able to charge them. Note that some cameras do charge via USB, so do check if that is the case.
So we recommend making sure that you are able to charge your batteries using both the local AC power outlets and via USB so you can take advantage of either charging option. We also recommend considering packing a power pack.
We personally travel with a USB battery charger for our Canon camera batteries. This is better than our standard charger in some respects, as it can charge two batteries at once, and charges over standard USB. There are a number of different models available , the main thing is to find the one that matches your camera battery.
As well as the USB battery charger, we also travel with a USB power pack . We can use this to charge all our USB powered devices, including our phones and the USB camera battery charger. This is helpful when we have periods of time without power.
Ask About Your Safari Vehicle
Before you go on safari, it’s a good idea to check with your safari company about the type of vehicle you will be in. There are a number of different models that companies use in different locations around the world, with Toyota Land Cruisers being the 4X4 vehicle of choice for many companies. However, there are many different models of Land Cruisers used for safaris so knowing the specific model can be very helpful.
The same vehicle model’s features can also be different across companies depending on the specific conversion. Probably the most important thing for most people is the number of seats, luggage space, and the configuration of the top.
We highly recommend a vehicle with a pop top. This means the top of the vehicle will pop up, allowing you to stand up inside the vehicle and get a better view, as well as better photos.
For the majority of these vehicles, the top pops up and remains over your head, providing much needed shade. However, in some vehicles, the tops actually come off completely, so you won’t have any shade.
We highly recommend a vehicle where the top doesn’t come off completely, as otherwise you are going to be in the sun a lot.
It’s also a good idea to check on the height. In some of the vehicles we have found that even when standing up, the lip is a little high for Jess to get a good view. So if you are shorter (or very tall) you should definitely check about this if you really want to be able to stand up for game viewing.
Another thing to check is whether or not the vehicle has charging points (some have standard wall outlets whilst others might have USB outlets). Some of our vehicles have had this, some didn’t, but it is becoming more common.
If you are planning a very photography focused safari, you can also ask if the vehicle has any photography specific features. Some of the vehicles we’ve travelled in came with photography bean bags for our use for example, which was very helpful.
Other special features might include special camera mounts, tripod mounts, the ability to fully open or remove windows, and even the ability to remove a door or two. I wouldn’t expect most of these features unless you are paying extra for a special photography trip.

Consider Doing Boat and Walking Safaris
Whilst most safaris are done from a 4×4 vehicle, there are other options depending on where you are travelling.
For example, in some locations you might be able to do a walking safari or a boat-based safari. These will give you some variety as well as present the opportunity to see different wildlife.
For instance, if you are interested in birds and small creatures (e.g., dung beetles, lizards), then walking safaris are often going to be better for getting close to these animals. Boat safaris are going to obviously be the best way to get closer to aquatic wildlife.
Of course, this isn’t always going to be possible depending on where you travel, but we definitely recommend signing up for at least a couple of these experiences if you have the option.

Shoot in RAW
If your camera supports it, and nearly all do these days, I highly recommend setting it up so it saves your image files in RAW format. Whilst this takes up more memory, and does require you to edit your photos, you will get a lot more latitude when it comes to editing your final image.
I go into a lot more detail in why to shoot in RAW in my guide to RAW in photography . For now, I recommend enabling it. Most cameras have the option to shoot in both RAW and JPG if you need a stepping stone, although this will take up more memory card space.
However, if you want to be able to share your photos instantly online during your trip, then you will probably want to also shoot in JPG/JPEG because you don’t need to edit them prior to uploading them.

Learn to Edit Your Photos
Photography involves a number of skills. The first two are in the field when you’re getting the shot, and require you to know how to compose a great photo and how to use your camera.
The third skill is photo editing. Photo editing is where you can get the most from the images you have captured. This doesn’t have to take a long time, even minor edits can make a big difference to an image.
Judicious cropping, adjustment of shadows and highlights, tweaks to saturation—these can all add up to really improve an image.
Of course, you can go a lot further with photo editing software. But as a starting point, loading up one of our favourite photo editors and learning how to use it can really help you get the most from your shots.

Keep Your Eyes Open
When you are on safari, the chances are that you will have a guide. Your guide will normally know what sort of wildlife you are likely to see in the areas you’re visiting, and they will of course be looking out for it as you drive or walk around.
However, the thing about wildlife is that you never know what you are going to see. And the more eyes that are looking for wildlife, the higher your chance that you will spot something. Your guide can’t look everywhere at once, and if they are driving, they are going to be at least a little distracted by operating the vehicle and keeping you safe.
In our most recent safari experience, we would often maximize what we could all see while on a game drive. So, generally our guide was seated in front in the driver’s seat, Jess would sit on the opposite side of vehicle from the driver, and I would stand at the back and scan for a different viewpoint. This way we were looking in many directions and had a better chance of spotting things. Although our guide was by far much better at spotting wildlife than we were, we still occasionally made some great spots that our driver had missed.
In my opinion, a safari should definitely not be a passive experience where you sit back and wait for something interesting to be pointed out to you. However, I have been surprised by the number of Land Cruises and Land Rovers full of bored-looking people who seemed to be spending more time on their phones or talking to one another than looking outside. They seem to simply wait for their driver to stop and point something out, take a photo, and then go back to their phones.
If you actively participate and spend your time searching for wildlife as well, you’re going to improve the chances of sightings and find more photo opportunities. You are also going to learn a lot more about the natural environment around you. And you are going to enjoy your trip a whole lot more!

Enjoy Yourself!
This might seem a bit counter intuitive in a guide to getting great photos on safari, but it’s important to remember. When on safari, it can be easy to become caught up in the need to capture every moment with our cameras, and not to miss a shot.
Whilst of course I want you to get those amazing shots, don’t forget that you came on safari also to witness wildlife in its natural habitat. So don’t forget to just step back from the camera every now and again and just take it all in. A safari is an incredible experience and you definitely want to try and enjoy it rather than being stressed over getting every shot on your memory card.
On our recent trip, Jess generally only took photos when animals came close, otherwise, she was content just watching them, either with a pair of binoculars (I definitely recommend packing a good pair of binoculars) or her naked eyes. She said she got much more enjoyment just watching them than when she was trying hard to get a good photo as she had in prior trips.
We highly recommend just sitting back and letting some moments go by unrecorded. I find you can often learn a lot more about animals if you just sit and watch them sometimes. Not every moment needs to be photographed!

Further Reading
That’s it for my guide to getting better photos on safari! If you found this useful, you might enjoy some of my other photography content. Here are some articles to get you started.
- We have a guide to the best safari camera , to help you choose the right gear for you and your budget. We also have a guide to photography bean bags for safari you might consider checking out.
- We have a detailed overview of gorilla trekking in Uganda as well as chimpanzee trekking in Uganda , both of which are an incredible experience
- We have a detailed guide to what to pack for safari , to help ensure you bring the right gear for your trip
- I have a guide to my favourite photo editing applications , as well as the best alternatives to Lightroom
- Wildlife photography can often result in noisy images. See my guide to the best noise reduction software for some ideas on how to get the best out of your photos even when they might be a bit noisy
- We have a guide to how to use a compact camera , how to use a DSLR camera , and how to use a mirrorless camera . We also have a guide to how a DSLR works
- Knowing how to compose a great photo is a key photography skill. See our guide to composition in photography for lots of tips on this subject
- We have a guide to what depth of field is and when you would want to use it.
- We are big fans of getting the most out of your digital photo files, and do to that you will need to shoot in RAW. See our guide to RAW in photography to understand what RAW is, and why you should switch to RAW as soon as you can if your camera supports it.
- You’re going to need something to run your photo editing software on. See our guide to the best laptops for photo editing for some tips on what to look for.
- If you’re looking for more advice on specific tips for different scenarios, we also have you covered. See our guide to Northern Lights photography , long exposure photography , fireworks photography , tips for taking photos of stars , and cold weather photography .
- Color accuracy is important for photography – see our guide to monitor calibration to ensure your screen is set up correctly.
- If you’re looking for a great gift for a photography loving friend or family member (or yourself!), take a look at our photography gift guide ,
- If you’re in the market for a new camera, we have a detailed guide to the best travel cameras , as well as specific guides for the best cameras for hiking and backpacking , the best compact camera , best bridge camera , best mirrorless camera and best DSLR camera . We also have a guide to the best camera lenses .
- If you want a camera or lens, but the prices are a bit high, see our guide to where to buy used cameras and camera gear for some budget savings options.
- We have a guide to why you need a tripod , a guide to choosing a travel tripod , and a round-up of our favourite travel tripods
Looking to Improve Your Photography?
If you found this post helpful, and you want to improve your photography overall, you might want to check out my online travel photography course .
Since launching the course in 2016, I’ve already helped over 2,000 students learn how to take better photos. The course covers pretty much everything you need to know, from the basics of how a camera works, through to composition, light, and photo editing.
It also covers more advanced topics, including astrophotography, long exposure photography, flash photography, and HDR photography.
You get feedback from me as you progress, access to webinars, interviews and videos, as well as exclusive membership of a Facebook group where you can get feedback on your work and take part in regular challenges.
It’s available for an amazing one-off price for lifetime access, and I think you should check it out. Which you can do by clicking here .
And that’s it! I’d love to hear about your thoughts on wildlife photography on safari, and am happy to answer any questions you have. Just pop them in the comments below and I’ll get back to you as soon as I can.

Enjoyed this post? Why not share it!
There are 4 comments on this post
Please scroll to the end to leave a comment
Towab Muhammad Yusuf says
2nd April 2022 at 12:27 pm
Zebras is looking awesome, so natural looking
Laurence Norah says
3rd April 2022 at 10:28 am
Thanks Towab!
D. Hernandez says
26th March 2022 at 1:36 am
Hello Laurence,
Thanks for these wonderful photography tips and advice! I am not much of a photographer but found these tips very useful and will be keeping this page bookmarked to read again before my safari. My wife and I have a 2-week trip planned to South Africa in in the fall and about a week of that will be spent on safari.
I was given a Canon EOS Rebel T7 DSLR camera (used but barely used) last year but without any lenses. So my question for you would be what lens would you recommend I invest in if I was to choose to take just one for this trip? I would also of course want to use it around home and for taking photos of family events and future trips, but the main focus for now is getting some decent wildlife photos on our safari in South Africa. Would like to purchase it soon so can start practicing (as you recommend) now!
Thanks for all your time & help! D
26th March 2022 at 9:42 am
I’m glad you found the post helpful and I am sure you will have an amazing trip! So if you are looking at just one lens then you will want a lens that can go from quite wide to quite zoomed in. A lens like this is known as a walk around lens. I would probably recommend either the Tamron 18-400 f/3.5-6.3 or the Tamron 16-300 f/3.5-6.3 . These would both give you the versatility you would want in terms of range, from wide to zoomed in. The 16-300 gives you a slightly lighter lens that can take slightly wider angle shots, whilst the 18-400 is a bit heavier but you get more reach.
It is worth noting that of course if you zoom in at 100% and peer at the images produced by these lenses they won’t compare to a high-end lens costing thousands of dollars. However I think that for standard size prints and general use they are a good option at a reasonable price point.
Let me know if you need any further input, I’m happy to help. Otherwise, have a fantastic trip!
Leave a Reply Cancel reply
Your email address will not be published. Required fields are marked *
Let me know when there's a reply to my comment (just replies to your comment, no other e-mails, we promise!)
Subscribe to our monthly Newsletter where we share our latest travel news and tips. This also makes you eligible to enter our monthly giveaways!
We only ask for your e-mail so we can verify you are human and if requested notify you of a reply. To do this, we store your data as outlined in our privacy policy . Your e-mail will not be published or used for any other reason other than those outlined above.
Diana Miaus
Female Travel & Instagram Tips
No products in the basket.
African Safari Photo Gear: a Beginners Guide
I remember vividly when I went on my first safari in Africa: I couldn’t hide my excitement! My biggest travel dream was about to come true: an African Safari .
If you’re planning your very first wildlife safari in Africa I bet you are already daydreaming with those gorgeous sabana sunsets, spotting the big 5 and of course, snapping a million pictures to remember this once-in-a-lifetime adventure.
Keep reading to find all you need for your first trip!
My African Safari Trip
Game drives, baggage allowance, a light camera, the right lenses, extra batteries, memory cards, iphone/smartphone, plug adapters, travel insurance.
- Travel Dates: Mid August
- Location: remote areas in Tanzania: Katavi and Mahale
- Safari company: Bespoke Getaway

What to expect
If you haven’t been to a safari before, there’s a few things you need to know::
Safaris are known as “game drives” in Africa and they happen twice a day: during sunrise and right before sunset.
In these light conditions the ideal equipment would be a full frame camera and lenses with a bright maximum aperture. As a beginner, however, you still can get pretty decent results with a non-professional photo gear.
Beware that even with the best equipment, it’s not likely that you will end up with a National Geographic perfect portrait of a lion, but you can still take beautiful pictures you’ll be proud of. Animals are often closer than you expected!
If you have to take a charter flight to get to the reserve, check your luggage restrictions and baggage allowance as they usually allow only 15kg including hand luggage. Your camera gear, clothes, toiletries… all has to fit those 15kg with no exceptions.
Besides, you need to carry a soft shell bag that can be squeezed into the plane and on the jeep after. Duffel bags are a great alternative.
Remember: double check your baggage allowance and carry a soft duffel bag.
Essential Photo Gear
If you wanted to invest on a new camera or upgrade your photo gear, a safari can be the best excuse for doing it. Don’t get too excited and remember that you will need to pack light for the trip and more importantly, don’t buy anything you’re not likely to use anymore.
10 things you need to add to your safari photo gear:
For this trip I’m testing the Olympus OM-D E-M10 Mark III , a solid Micro 4/3 Mirrorless camera.
Why to choose this camera:
- Clear, blur-free images
- Crisp handheld 4k videos
- Compact and beautiful vintage design
- 5 axis image stabilisation
- Easy to use
- Light weight: only 362g
- High speed focus: an essential!
- WiFi, allowing using the smartphone as a remote and quick editing.
- You can buy it here.
A zoom lens is a safari essential. If you don’t have one yet, this is a great opportunity to invest on it. However, if you don’t think you’ll ever use it again then the most convenient option should be renting it for the trip.
The lenses I’ve chosen for my safari are versatile and more importantly, light and small enough to fit on my favorite camera bag .
- 40-150 mm a versatile zoom lens for all types of shooting
- 75-300 mm a zoom lens for shooting further animals
Do not rely in just one battery. You will probably need extra, especially if due to electricity cuts you’re unable to fully charge your battery.
Olympus extra batteries.
I bet you’ll take thousands of pictures in burst mode as I love to do. My recommendation is always using a SD card with enough space to shoot thousands of pictures in RAW. That’s why I always travel with this 128GB SD card that I can totally recommend.
iPhone makes taking photos always easier, and I love it especially for shooting slo-mo videos with my gimbal. Upgrade to iPhone’s latest version to get outstanding photos and videos even in low-light conditions – one of the main reasons why iPhones are that expensive!
If you’re planning to upgrade your phone, do it before the trip – it’ll be totally worth it.
The lodges and camps are usually off the grid, using only solar power and battery inverters. Weather related interruptions are common so expect electricity cuts.
I’ve been using this power bank for more than 1 year and I can’t recommend it enough. It lasts for days!
If you’re planning to shoot video with your phone a gimbal is essential for avoiding bumpy footage during game drives.
Before the trip I upgraded to the newest version of DJI Osmo gimbal , whose battery lasts for longer and it makes it easier to shoot vertical videos for social media.
Click here to buy the new version: DJI Osmo Mobile 6 .
In Tanzania the electrical outlet used is the UK standard 3 pins 220-240 V known as Type G.
I packed this plug adapter that allowed me to charge up to 4 gadgets via USB.
Some people would say that a safari can’t be fully enjoyed without binoculars. Truth is you may not need to actually use them if you already have zoom lenses, but they can be handy in certain moments and also as a photography prop!
Click here to shop my recommended binoculars.
Highly recommend a professional camera backpack to fit the camera, all lenses and extra gadgets you may need.
Click here to shop my recommended backpack.
Don’t forget to add your photo gear to your travel insurance!
And if you liked this post, pin it for later!
I’ve been on a safari in Africa last year and it was a mesmerizing experience. Hence, I can say with certainty that this is the best guide everyone planning to undergo this adventure should read!
Oh Agness thank you so much! My wish is to help anyone getting ready for this big trip. I’m glad to see that you found it useful!
Leave a Reply Cancel reply
Your email address will not be published. Required fields are marked *
Save my name, email, and website in this browser for the next time I comment.
By using this form you agree with the storage and handling of your data by this website. *
This site uses Akismet to reduce spam. Learn how your comment data is processed .
Related posts
6 islands in croatia you need to visit , 10 places to visit in colombo, 15 best apps for perfect instagram photos, india on a luxury train: palace on wheels, latest travel blog, how to celebrate holi in nandgaon, where to stay in porto: best areas and hotels, 5 days in tokyo itinerary, browse categories.
- Australia 1
- Czech Republic 1
- Destinations 143
- Instagram 9
- Instagram Spots 23
- Netherlands 3
- No Category 1
- Photography 7
- Portugal 19
- Sri Lanka 4
- Student Successes
- My Learning
How to Capture Stunning Safari Photography on Your Next Trip

You can also select your interests for free access to our premium training:
If you’re planning a safari trip in the near future, you’ll want to make sure your camera is packed and ready to go. Safari photography can be some of the most rewarding and beautiful photos you’ll ever take, but it takes a little bit of know-how to capture those perfect shots. Here are seven tips to help you get started.
Safari Photography: What to Expect on an African Safari

Equipment for Safari Photography

Heat and Light

Seasons and Weather

Landscapes and Perspectives

Finding Your Own Composition

Popular Content

Planning a photo safari in Africa: 7 essential tips
Planning a photo safari in Africa ? Based on my knowledge and experience as a photographer, responsible traveler , and wildlife enthusiast, I share 7 essential tips that help you plan and prepare a photo-focused safari trip , where it's all about capturing beautiful and high-quality images of your safari adventure and wildlife sightings.
If you have been on an African safari before, you will be aware of the conflict that can occur when traveling with people with different interests. For people with a special interest in (learning) wildlife photography in Africa, I would recommend looking into a photography safari trip, rather than a regular safari. I wrote an article about the difference between a photo safari and a regular safari .
What is a photo safari?
On a photo safari all circumstances that can be influenced, are created in a way to get the best out of your photography. It’s all about going to the right place at the right times, in different lights, getting the best position to photograph from the right (and different) angles, and spending more time at one sighting to observe and get that perfect shot. The more time you spend with the animals, who are telling their story, the better your photos. On a photographic journey, you will not be rushing to tick off the ' Big 5 ' game animals. You will also be out during the ‘magic golden hours’ around sunset and sunrise.

Apart from that, you will learn from a professional photographer who helps to improve your photography skills. If you are traveling in a group, you can also learn from other wildlife photography enthusiasts. Another plus of photography safaris is that many game drive vehicles are designed and configured specifically for wildlife photography with more space to maneuver.
Joining a photo safari doesn't mean you have to be an experienced photographer. On most photography trips it doesn't matter if you're a beginner, intermediate or professional photographer. Having an interest in photography is the basis of what you need for most of these photo trips.

Planning a photo safari group tour or private tour
Whether you love to travel in a group or with a private company, there are always a few important things to consider before you book your trip. If you have never been to Africa, I wouldn't recommend planning your safari trip on your own. Feel free to reach out for advice to help you create a personalized travel plan, or to join me on one of my upcoming photo safari tours .
Now you know what to expect from a photographic safari in Africa, it’s time to dig into the most important things to know and consider for planning and preparing your photo-focused safari. Here are my 7 valuable tips for planning your African photography safari .

1. Create an overview of your wishes
As a traveler, you are the only one that can decide what’s important to you, and how you want to spend your money.
To make that clear, you need to d o research and create an overview of your wishes . From there, you can start making choices. Consider which aspects are most essential for you. Keep in mind that every aspect can influence the price.
You can make a start by answering the following questions:
- Where do I want to go? (Country, safari destinations, number of places)
- When do I want to go? (high-, low-, rain-, dry-season)
- Do I like to travel in a group or private?
- What’s my budget?
- What accommodation can I afford (Budget, comfort, luxury)
- How long will I be traveling?
- Do I want to organize it all by myself or book an organized trip?
- What would I like to see and do?

2. Choose the right time to travel
As you might know, Africa has a wet and dry season and offers variations of climates and weather in different countries and areas. The dry season in Africa is the most popular as well as the most crowded season. The best advantage of traveling in the dry season is that animals are frequently found around water pools because of the scarcity of water. In the dry season, the temperatures are high and landscapes are usually dry.
However, some photographers find the wet season in Africa the best time to photograph because of the dramatic skies, green scenery, better light (because of clouds), and less dust. This is also a great period for capturing newborns.

I’ve traveled to Africa in both seasons and in different months. I always try to go in the shoulder seasons , in between dry and wet seasons. Choosing the best time to travel also depends on your personal wishes, budget, and safari destination. Kenya is for example an all-year-round safari destination, while other countries, for example, Uganda , are harder to travel during certain times of the year because of heavy rains.

3. Choose a reliable and qualified photo safari operator
After you defined your wishes, it’s time to select the right tour operator or organization to travel with and choose destinations and accommodations to stay in. I always attach great importance to organizations with a focus on conservation efforts, sustainability, and responsible travel choices . I personally do my best to select and collaborate with local organizations and try to look for unique, more private experiences, where they also give back to nature and the surrounding communities.
Do your research to ensure that your trip will meet, or even exceed your expectations. Always search for valuable reviews, ask specific questions in advance to know what to expect to check the reliability, and follow your gut. If you are planning your first African safari trip, feel free to contact me for help or simply join me on one of my group safari trips to Africa . You can even form your own group of max 6 people to accommodate greater flexibility in addressing your preferences regarding the travel period and dates.
Good photography focussed safari companies will offer a 4x4 vehicle with enough space inside, large windows, and a pop-up roof. The luxury photographic companies usually offer a specially-equipped photographic vehicle with sliding gimbals, removable doors, and photography equipment to borrow. Some companies also have the permission to enter National Parks and Game Reserves after opening hours, which is great for an evening game drive or night photography.

4. Find a guide with an eye for photography
Normally you cannot choose your guide for your safari, but by doing detailed research, like searching for reviews and references, you can increase your chances of finding a guide with an eye for photography.
Guides with an interest and eye for photography will understand how to get you in the right position for a perfect shot. They will anticipate the lights and movements of the animals, and they will always find the best positioning for the vehicle. To get the best out of your photography, your guide has to be committed to leaving in the early morning and staying out for a longer amount of time than on a regular game drive.
Use your guide’s knowledge to capture the best photos. Local guides perfectly know the animal’s habits, territories, and behavior. Tell your guide what’s important for you and what kind of photos you would like to capture. Take advantage of their knowledge and advice!
If you come on a photo safari with me , I can assure you that I work with highly knowledgeable and qualified driver/guides . And as a qualified guide myself with an expertise in photography, we form a great team to give you the best possible safari experience.

5. The right photography gear for a photo safari
If you are an advanced photographer, I would definitely recommend bringing one, or preferably two, DSLR (Digital Single Lens Reflex) cameras with exchangeable lenses .
With two cameras (bodies) and different lenses, you can easily switch cameras. For example, when wildlife comes closer, or you want to capture an animal in different contexts, like a wide shot to capture wildlife in its environment and close-ups. In the worst case, when anything happens to one camera, you have a second to continue photographing.
Zoom lens and wide-angle lens
The best zoom lenses for wildlife photography are in the range of 200-600 mm. Zoom lenses with a focal length of 300+ mm are great for capturing wild animals or birds, while more wide-angled lenses are great to capture the beautiful environment or stunning African sunsets. For a crop camera, a zoom lens of 300mm should be ideal. If you’re using a full-frame camera, I would suggest a lens that can reach 400mm zoom. If you are a keen birder, then the more zoom your lens has, the better. For example, 600mm is perfect for bird photography .
Keep in mind that Africa’s wildlife is most active in the early morning and late evening, which means the lights can be challenging. For that reason, it will be better to bring lenses with larger apertures (f/2.8) and to use a camera that can increase the ISO without getting too much noise in your photo.
Other photography accessories
Apart from the camera and lenses, it's advisable to bring photography accessories like an external hard drive to secure your photos, plenty of memory cards, extra batteries, cleaning wipes, a charger, a camera bag, and a rain cover. To provide stability for your camera, you can also bring a beanbag, monopod, and/or tripod on safari.

In the above image captured in Uganda, I carry a 16-35mm wide-angle lens for landscape photography as part of my photography gear
6. Know your camera
Having the most expensive camera doesn’t mean you’ll shoot the best images because whatever camera you bring, it’s extremely important to know how to use it. You will be disappointed if you invested a lot of money in camera gear and your pictures are too dark or blurry.
To practice and learn how to use your camera, you can read the instruction manual, watch some tutorials on YouTube, and most importantly practice with different settings and conditions before you're going on a photo safari to Africa. Practice on your dog, take photos in a park or forest, and do whatever you can to get more familiar with your camera and its features. It’s essential to understand the different settings to adjust to different conditions.
If you don’t have the time, motivation, skills, or if there’s any other reason why it’s not possible to learn how to make good photos, please save your money and enjoy the experience. You can try to take photos with your smartphone or a compact (zoom) camera because nowadays, the cameras on smartphones and compact cameras are pretty good. The most important thing is that you have an interest in (learning) photography.

7. Make a suitable itinerary
Photographic safaris often manage a slow and sustainable travel approach to spend enough time at the right places at the right times. The less time you spend in transit, the more time you’ll have for spending on your destination, being in the moment, and encountering and capturing incredible wildlife. On regular safaris, you usually visit more destinations, which means more time in transit. Another big advantage of slow travel is minimizing your impact on the environment and maximizing your appreciation and connection with the local community and their environment . I would always recommend spending at least three nights at each safari accommodation.
For photography, it’s extremely important to have time and patience. Wildlife is unpredictable and not always active.
When planning your trip, find a good balance between the number of destinations and the time you want to spend photographing wildlife on game drives .

Customized Photo Safari Experience
Do you want to improve your photography skills and travel with like-minded people? You might want to consider joining my upcoming photo safari in Africa ! Contact me if you are interested.

Like what I do? Follow me on my social media channels and help me grow by sharing or pinning this article and leaving a comment.

- Photo Safaris
- Stay With Us
- Destinations
- Pangolin Photo Challenge
- Meet the Team
- Conservation

Gear for wildlife photography on safari in Africa.
Bags and carry on weights.
The topic of hand luggage allowances when it comes to camera bags has filled plenty of forums and we’re afraid to say that the answer as to what is the protocol or allowance (as well as leniency) varies from airline to airline. The prospect of checking very expensive gear for wildlife photography into the hold of a commercial airline is not very enticing so here are a few tips from us on how to ensure that you travel with your gear in the cabin and not in the hold. These tips do not guarantee success but they should ease your passage through the process.

Rucksack camera bags aren’t noticed as much. Wearing your camera gear on your back rather than lugging around hard cases like Pelicans and the case in which your big prime lens was delivered to you is always a good idea.
When asked whether you have any hand luggage simply pointing to the strap on your shoulder and saying “just a rucksack” works in your favour. Once you have your ticket then a brisk stroll away from the counter deters anyone from questioning its dimensions. We think that the fact you are wearing it also implies that it’s not very heavy!

The hand luggage spaces on board vary immensely from plane to plane and even within the planes themselves. In our experience having a very deep rucksack or camera bag can make squeezing it into the overhead compartment a bit of a challenge. Obviously, the height of the bag will be dictated by the diameter of your largest lens (and the padding around it) but bear in mind that a flatter profile bag slips into the overhead bins easier.
If needs be, place it under the seat in front…ok for short hops.

If you are taking lots of short flights in small aircraft weight really does make a difference and the smaller charter airlines are very strict about weight as well they should. One way to avoid the issue is to book an extra seat and share the cost with any other photographers you are travelling with.
This will allow you to take more camera gear with you each without risking the ire of the bush pilot flying you around.
Batteries and charging
Battery technology has come on leaps and bound and a decent Lithium Ion battery should last even the most trigger happy photographer more than one game drive. That said there is no worse feeling than missing a shot because you have no more juice and no spare battery. We recommend taking one spare battery per camera body.
Batteries are heavily affected by temperature so if you are working in very cold conditions its best to keep your spare batteries as close to your body as possible (a shirt pocket for example) to maximise their charge when you insert it.
Wherever we go we make sure that there are facilities to charge batteries and laptops etc. Even in the tented camps deep in the bush and miles from the mains supply, we have solar panels, inverters and plug points so travelling with more than two batteries per camera body really isn’t necessary.
What to bring on a photography safari in Africa?
Well this is the $64,000 question, isn’t it? This is obviously very much down to personal choice at the end of the day and what it is that you are looking to photograph. We decided to ask Guts what gear for wildlife photography he would put in one camera bag (a rucksack like we mentioned above) to go on safari to Africa and here is what he said:
We know that plenty of our clients are just getting into photography and the words in the section may appear to absolute gobbledegook but for those who have a bit more experience we hope this will help.
Guts travel with two camera bodies so that he doesn’t have to change lenses when changing from a zoom (or indeed fixed focal length) lens to a wider-angle lens. This saves time, especially at a crucial moment. In his camera bag he travels with a longer lens with a focal length up to 500mm or 600mm or more recently he has taken a 200-400 with a teleconverter along with a wide-angle lens with a lower focal length of around 10mm. As to a third lens he will often take his 70-200 mm lens which gives him plenty of options for composing his shots along with the longer lenses. This range gives him a whole spectrum of photographic options when in the field and if not restricted too much on weight he may even add a third body to the mix so as to huge all three lens variants mounted and ready to go. If you are not travelling with a camera don’t forget that we have plenty for you to use in the Chobe.
We have various camera bodies we supply from Canon as well as zoom lenses from 150mm to 600mm that are more than adequate for photographing from the boats and vehicles. One solid piece of advice is to place all your smaller gear for wildlife photography i.e. chargers, lens hoods, cables, card readers and other bulky items into your main checked-in luggage to make room for more valuable and breakable items in your camera bag/hand luggage.
Even if your luggage is delayed with a few full batteries and some extra memory cards you will be good for a few days of photography before your bags catch up. This is also a very rare occurrence but just another tip from the pros.
Inspiration
The Pangolin photo hosts each have their own dedicated social media channels and regularly post their latest images which are sure to inspire you. They mainly use Facebook and Instagram and you can find them using the links below:
Keeping your gear for wildlife photography clean.
Wildlife photography is not a “neat and tidy” hobby by any stretch of the imagination and certainly not when on safari. Taking care of your camera and lenses on a daily basis will hopefully mitigate the risk of having a malfunction in the middle of your trip so here are a couple of tips to help you stay shooting. Janine made an excellent video explaining how to keep your gear for wildlife photography clean on safari .

At the end of the day wipe down the exterior of your camera with a VERY slightly damp cloth or towel to get rid of any unwanted dust or sand that it might have attracted. There is no worse sound than that of a grinding zoom or focus ring on a lens due to grit getting into the mechanism. Once wiped down leave the camera to dry completely in the open in your room, cabin or tent before placing it back in the camera bag.

We advise you to travel with not only a lens cloth that you should keep to hand when in game drives and boat cruises at all times but we suggest you get a blower too. This will be incredibly useful and should be used to get between the nooks and crannies of your camera and lens before you wipe them down as per above.

Bin bags. Just your common or garden large plastic bag. If all else fails and its raining or kicking up a dust storm a trusty old bin bag not only packs away into a minute space and weighs next to nothing but is easily deployed and if it stays un-torn and intact acts as a perfect shield against foreign matter that can harm your gear.
Laptop or not?
We always advise travelling with a laptop. Access to computers in lodges and hotels (like the Pangolin Chobe Hotel ) is very limited in Africa and reviewing your images just on your camera screen is ok but you won’t be able to see the levels of sharpness or exposure until you get it onto a bigger screen.
If you are joining a workshop that we highly recommend you travel with a laptop with the latest version of Adobe Lightroom loaded (or indeed your post-production suite of choice). Whatever you use take the time to load the latest version as bandwidth is also limited in the bush and doing an update in the field will be nigh on impossible.
Another tip to consider when choosing your camera bag is to have your laptop section detachable so that should the airlines require you to shed some weight from your carry on you can utilise the standard policy of having one carry on piece and a laptop. This usually appeases grumpy ground staff.
This is a debate that has raged on since the advent of digital photography. Do you take lots of smaller memory cards in case one corrupts or one is lost? That way you have only lost a few of the photos if one card breaks, gets damaged or is lost.
Or on the flipside do you take a couple of larger capacity cards so that you have to change fewer times. It’s our general consensus that a card getting corrupted these days is incredibly rare and more often than not when trying to manage several smaller cards during a trip one always gets lost.
If you are travelling with a laptop, then this is a bit of a mute point as you will process your images regularly on the laptop and probably download all the files to either the laptops onboard hard drive or as we tend to do onto an external hard drive that we travel with. An external drive does add extra weight but with the average capacity of such devices sitting at 1 or 2 Terabytes they are a worthwhile investment.
For more gear advice, join the Pangolin Wildlife Community here .
Other things to consider
Always take a few with you as there is nothing more frustrating than getting to a border and having to fill in a pesky arrival or departure form to realise that you don’t have a pen. Having got yourself to the front of the queue you will not have to wait to borrow one from a fellow traveller and return to the back of the line.
Headlight Torch
An essential piece of kit when going on safari. Small, lightweight and increasingly powerful we suggest getting one that has the option to turn the light to red which seems less attractive to nocturnal flying insects.
Multi-tool (Leatherman etc.)
Always useful but do remember to place it into your checked in luggage and not in your hand luggage whenever you are flying on a commercial airline or you will lose it at the security checkpoint along with any liquids over 100ml.
Download your guide today!
Share this pangolin story:.
20 Easy Tips for Better Safari Photos
I hate to break it to you, but it’s impossible to get good safari photos with your phone’s camera . Yes, even with the latest iPhone or Pixel, what good safari photos require is physically impossible to fit into a phone. I mean, if we didn’t need to lug around big lenses, I’m pretty sure no one would do it?
So if you need to bring a “real camera” on safari, exactly what camera equipment do you need for safari? Which equipment is optional? And how can you make the most out of the camera equipment that you already have?
Here are the essential photography equipment for going on safari, including my personal recommendations for gear, ideas for how to save money on your safari photography setup, as well as safari photography tips to help you make the most of any gear you get your hands on.
Bring the right photography gear for safari
You don’t need to spend a fortune to get great photos, but you do need more than an iPhone to snag great photos. If this list sounds daunting and you don’t already have a suitable camera, consider renting a camera or lens if you are certain you won’t use it again. You can also buy gear used on eBay or Amazon to save some money.
- Camera – I used the Fujifilm X-T2 with great success.
- Zoom lens – For the Fuji system, I can recommend the Fujinon XF 50-140mm f2.8 + Fujinon 2x Teleconverter .
- Wide angle / mid-range lens – I took the Fujinon XF 16mm f1.4 + Fujinon XF 35mm f1.4 + Fujinon 56mm f1.2 .
- Lens cleaning equipment (lens pen, lens wipes) – I recommend this lens pen and these lens cleaning wipes .
- Spare batteries – Choose whatever fits the camera you have, fully charged! I usually bring two spares.
- Spare memory cards – You want something with a fast write speed, like this 64GB UHS-II 300MB/s SD card
- Camera bag – Bring anything with easy access. You’ll be sitting on safari so size and weight is not a big deal.
It might look silly, but you can bet I got the best photos!
Use the burst shooting mode
Burst shooting mode allows you to hold down the shutter, and take between 5 10 photos in a single second! This can be extremely useful on safari, when animals are moving quickly or simply when you know the animals are likely to disappear into the bush or an area you cannot drive to. That’s why it’s super useful to get a camera that supports this setting!
For example, here there are two water bucks, sparing with one another in the morning sun. Since they’re moving around quite a lot, there weren’t a lot of photos where I could see their antlers interlock. But since I could take a bunch of pictures, I could just pick the best one.
Here, the rhinos are not moving very fast, but it’s a super special moment to capture a baby rhino on camera! Owing to the vegetation, I knew I wouldn’t have a view of both the mother and baby for long, but burst mode saved me and I had a number of pictures to choose from. Thanks burst mode 🙏
Learn to use your camera in advance
Nothing is worse than trying to figure out how your freaking camera works while you’re already ON safari! You’ll just be frustrated trying to get the settings right, while an amazing wildlife moment just passes right by. Spend time practicing with your new camera. You’ll want to learn a few things like:
- How to make the shutter speed faster
- How to turn on burst mode
- How to change the focus point
That’s just for beginners, but these are really important things to have down second-nature before your safari 🍃
Enjoying the photos? Follow along on Instagram!
Follow @notanomadblog for beautiful travel photography and stories of our journeys

Follow on Instagram
Bring equipment for dealing with dust or fingerprints
When you’re driving out in the bush, there’s a good chance you’ll need to deal with some dust. How much dush depends a lot on where you’re driving and recent weather conditions (has it rained recently?). In any case, don’t forget to bring along a lens pen for cleaning smudges off your lenses (which can make your photos blurry!) and some lens cleaning wipes for more serious dirt or water droplets 💦
Bring back up memory cards
When you’re using burst mode, it’s easy for your memory card to fill up fast . Don’t get caught on safari having to delete photos just to free up space on your memory card. I personally filled up THREE memory cards during my two-week trip to South Africa, and about half of that was just safari photos. Be prepared, buy extra.

Bring a telephoto lens
If your goal is to take wildlife photos, then a telephoto lens (also called “zoom lens”) is the one piece of equipment you can’t leave behind. The question is always, how much zoom do you need for safari? For many systems, the most common zoom lenth is somewhere between 50-150mm and 100-400mm. In general, you won’t regret having plenty of zoom – it doesn’t go as far as you’d think. That said, be sure to complement your zoom lens with a wide-angle or mid-range lens because there will be times where you need to capture a landscape, a whole herd of animals, or a complete scene with multiple animals in it.
This crocodile was super far away, but I could capture him with my zoom!
Support your zoom lens to avoid camera shake
An interesting caveat to having a big zoom lens is that the more you zoom, the more likely you are to get blurry photos . That’s because more zoom means less light coming in, and your camera needs to compensate for it. If you already have the aperature (also called “f stop”) as open as possible, the next step for the camera is probably to slow down the shutter speed.
That’s why you need to be as still as possible and support your lens with your hand to keep camera shake down. You can also hold your breath during a shot, to avoid introducing shake, or balance your lens on a bag or something soft on the edge of the safari vehicle or hand rail. Anything to help the lens keep still!
Many zoom lenses also come with OIS (optical image stabilization), so look for that when you are picking a zoom lens!

This two-week South Africa itinerary can show you some of the best of the country, from wine regions to urban life, from safari to city, and from the sparkling Indian Ocean to the deserts of the Karoo. Here is how to spend two weeks traveling South Africa.
Bring a tripod for long exposures at night
Even though this isn’t strictly a safari tip, the fact is that if you’re staying in a private safari lodge , you’re going to have incredible views of the stars . Bring along a tripod for some very special photos at night!
Include the environment
Sometimes the environment with the animal in it is way more interesting than the animal itself! Here’s an example of that, with the hippo yawning as the sun sets over his favorite watering hole. These guys were so loud with their howling, it was a really memorable moment on safari while the sun was going down.

Your privacy is important to us. Unsubscribe at anytime.
Be prepared for low light photos
When choosing lenses for safari, make sure you find one that has the lowest f-stop number (meaning, the widest aperature) that you can find. For example, the lens I used was f2.8. That’s pretty good for a zoom lens. Many wildlife lenses will be f4, but that can also mean you get less light for the evening drives. Strive for a balance between zoomm power and f-stop.
At night, our tracker scans the landscape for the gleam in the eyes of nocturnal animals. On one night, we spotted this beautiful African barn owl who was patient enough to let me take his photo!
You can hover over any photo on this blog to see the camera and lens that the photo was taken with. Click on the information to see reviews on Amazon.
Don’t forget about the details
It can be really easy just to focus on animals, but safari is also about the overall experience, not just the so-called “Big Five”. On safari you’ll learn about the plants that animals feed on, and how it affects where they move to, as well as the smaller creatures that drive the ecosystem in the bush, like the venerable Dung Beetle!
Above: Mopane trees are a favorite food of elephants, and one of the reasons they come to the Timbavati Game Reserve. Below: A Dung Beetle crafts its ball of dung, intended to attract a mate.
Include people or other objects for scale
It can be incredible how big animals are on safari! But usually in photos it’s hard to convey how big they really are. By including people or other objects for scale, it can be easier to communicate visually how big something really is. For example, this Giraffe is totally huge standing next to a fully grown tree! No trouble getting to those leaves, eh?
Go to where the animals are
In most parks, this means watering holes! Especially during high sun, you’ll see animals coming to watering holes for a drink or to take a mud bath. Even if you don’t see animals right away, you can stay and sit at a watering hole for a while and there’s a pretty good chance that some animals will swing by in no time.
Watering holes are also a great place to see herds of animals. At Addo Elephant Park we saw herds of zebras and especially elephants congregating at the watering holes. The best part is watching the elephants chase the zebras away! 🐘

Going on safari is the number one item on top of many tourists' lists when visiting Africa. No matter what your budget is, there is a safari option that will fit your budget. Here are different ways you can get the safari experience and their pros and cons!
Wear neutral colors
There’s a reason why safari-goers tend to dress in neutral colors! That’s because animals are less likely to see it and run away. In most areas that are popular for safari, the animals know that safari vehicles are not to be feared, but plenty of prey animals are likely to run anyways. Dress neutral and keep your visibility to a minimum.
Dressing neutral usually means tan and olive-colored clothing. You’re meant to avoid white or neon colors in particular.
Join a bush walk
One of the best ways to experience the African bush is going through a bush walk! You’ll get a chance to see smaller animals and get up close to plants and insects you typically don’t get to take your time with when driving through. Check that your safari lodge offers a bush walk.
WARNING – You should never go on a bush walk on your own, or leave the safari vehicle without your guide telling you it’s fine. On a self-drive you should not get out of the vehicle at all. Only walk through the bush on guided tours, with guides who are usually armed.
Travel early in the morning or around sunset
Not only do you get some of the best photos possible during the “golden hours”, but it’s also the time when animals are the most active. Although we saw animals at all times of the day, you’ll see different animals active at each time during the day. Most private safari lodges will take you on early morning and late afternoon game drives, but be sure to verify that before you book!
Above: Hyenas venture away from their den for a late afternoon drink near our safari lodge. Below: A bull elephant eating his leafy breakfast 🍃
Talk to other safari-goers for tips on sightings
If you’re doing a private safari, there’s a good chance your guide and tracker are communicating with other guides and trackers about their sightings. That’s one of the big benefits of going on private game drives. But even if you don’t have the budget for that, don’t be afraid to slow down your car on a self-drive and roll the window down to talk to people! That’s how we got a tip about one of the best elephant herd sightings we had.

It can be really hard to pick a safari lodge in South Africa with so many great options. Here is my incredible experience at Motswari, a private game reserve in part of the Greater Kruger National Park.
Don’t just zoom in all the way
Sometimes the best photos include the full body of the animal, or even some of the environment. It can be so so so tempting just to use your zoom for animal portraits, but make sure you’re also getting some of the landscape in the picture too!
Focus on the eyes
Whether you’re photographing animals on safari, or you’re taking portraits of people, the principle is the same: set your focus point on the eyes! This is what makes the photo look sharp and feel engaging.
Make sure the settings on your camera are correct
Before heading out for the day, check that your camera settings didn’t get changed, or that they’re not the same settings you used when you were out at night! Nothing’s worse than having an awesome early morning sighting and screwing it up because you still had your ISO too high.
Don’t forget to enjoy the safari!
Photography is supposed to help you remember your safari experience, not to BE the experience in and of itself. Bring some binoculars to inspect the animals more closely, and enjoy whatever gifts nature has brought you that day!

Have you ever been on safari? What animal did you think was the most photogenic? What was the best spot you’ve been for viewing animals?
Share your experiences in the comments! I’d love to get your safari tips.

About the author
Hi there! I'm Monica, an American expat living in Germany for over six years and using every opportunity to explore the world from my homebase in Berlin. My goal is to capture my memories in photos and posts that show how easy it is to start from scratch and travel the world by working abroad.
Follow along on Instagram , Twitter , Bloglovin , & Facebook .
You might also like...

How to go on an African safari on any budget

Staying at Motswari Private Game Reserve in South Africa

The Best Photography Locations in Venice
Buying Guide: Essential Safari Photo Gear

Shutterstock
Whether it’s your first safari or your fiftieth, you may be wondering how to get the most compelling photos of all the wildlife you’re going to see. You also might have missed some shots in the past by being too far away or having a shaky camera. While technique plays a large part in whether or not you get a great shot, having the proper gear can also go a long way.
Here is some essential safari photo gear you should consider getting before heading out to capture Africa’s amazing wildlife on camera. And if you see something here you simply must have right away, click the “buy” button and it’s yours in an instant.
Nikon D7100
You’ll never get a good shot without a proper camera body. But there are a lot of models to choose from, so selecting the right one for you can initially seem daunting. So let’s try to narrow it down: our first pick is a great DX midrange body from Nikon that has been on the market since 2013. The Nikon D7100 sports 24 megapixels, has a solid build and offers multiple control wheels for quick adjustments. Shooting with a DX lens will also add to the telephoto range you’ll get out of your camera, as it shoots at a 1.5X crop factor (equivalent to turning a 300m lens into a 450mm lens).
Canon EOS 70D
Don’t worry Canon fans — we didn’t forget about you. Canon’s direct competitor to the D7100 is the 70D. This crop camera offers 20 megapixels and 19 cross-type focus points for quick captures. For those shooting video, this is probably a better bet than the D7100, as you can adjust aperture while filming.
Grizzly Camera Bean Bag
A safari vehicle isn’t the best place to break out your large tripod. Instead, pick up one of these bean bags for on-the-go stabilization while riding on bumpy roads.
If you’re a pro, you probably won’t settle for anything less than the best money can buy. The Nikon D810 gives you all the goodies that come with a full FX body, including better depth of field than the DX bodies. While this camera comes in around US$3,000, you can still do better with something like the D3X, though a new one will set you back around US$7,000.
Canon 5D Mark III
This body is Canon’s direct rival to the Nikon D810 and puts up a great fight. It still comes up a tad short in megapixels for the pixel peepers out there, but with great a 61-point high density auto focus, it’s not likely to matter. Just remember with both of the FX cameras, you’ll also need to invest in a more expensive lens setup, so make sure you have the budget before sinking a lot of dough into a bigger body.
Nikon 70-300mm VR
Now on to the most important part of your safari setup. If you don’t have a telephoto lens, you’re probably not going to get the shot. The Nikon 70-300mm VR is about the minimum lens you’ll need to get in the game in the Nikon world. And even at 300m, you still need a bit more. But it’s a great under-$500 lens to get you up to speed quickly. Skip the non-VR budget version of this one, as you’ll get shaky shots when the lens is fully extended. The VR (Vibration Reduction) is extra helpful in a moving vehicle.
Canon 70-300mm f/4.5-5.6 IS USM
Once again, Canon has a direct competitor for Nikon in this category. The IS (Image Stabilization) is Canon’s version of VR and works just as well. The lens is more expensive than the Nikon, but it’s also sharper, especially in the 200mm-300mm focal length range. If you’re just starting out, this is definitely something to consider.
B+W 77mm XS-Pro Kaesemann Circular Polarizer with Multi-Resistant Nano Coating
If you’re going to be shooting in direct sunlight, a circular polarizer can make your photos pop. It works similar to a pair of sunglasses and reduces the F-stop by one stop. It is also particularly useful if you are shooting near water, and will make water look much clearer in your photos than it is to the naked eye.
Nikon 200-400mm
If you’re on an FX frame such as the D810, you’ll want something like this lens as a minimum in your camera kit. The 70-300mm will cause vignetting, while the popular 70-200mm, though great for portraits, is just too short for shooting wildlife. You can also use this lens on a DX frame for more reach — at a higher cost of course.
Feisol CM 1471 Monopod
As mentioned, setting up a tripod is going to be pretty difficult in a safari vehicle, but a monopod is easier to carry and quicker to set up. This model provides a four-section camera support to get rock-steady images. It collapses to 21 inches and weighs only 1.5 lb. At the price, it’s a must have.
Canon 100-400mm
Canon doesn’t offer a direct competitor to Nikon’s 200-400mm, but this version will give you much better range, albeit at a higher cost. Again, this is about the minimal lens you would want for capturing great images on a safari.
Nikon 500mm f/4.0G ED VR AF-S SWM
Safari pros who know what they want to shoot and don’t need zoom capability will want this lens. And if you put this on a DX body, you’re getting equivalent to 750mm — that’s serious range. If you’re willing to spend a bit more, Nikon also makes a 600mm and an 800mm lens — but we think the money is better spent on booking another safari package.
Canon EF 500mm f/4L IS II USM
Like Nikon, Canon also makes models in the 600mm and 800mm range, but this 500mm lens is in the sweet spot for price. Again, it’s a bit more expensive than Nikon’s lens, but according to the DxOMark score, it is slightly sharper, has less distortion, along with less chromatic aberration.
Sigma 150-500mm
For something off-brand that will get you great range and into the game quicker, check out the Sigma 150-500mm. At under US$1,000, it’s an excellent lens for a cheap budget and is available for both Canon and Nikon bodies.
Opteka GH1 Pro Heavy Duty Metal Gimbal Head
Another great accessory you should consider on a safari is this gimbal head. It’s super rugged, supports up to 30 lbs, and will allow you the possibility of mounting the camera to the frame of the vehicle or a monopod. It’s a great addition for keeping images stable with heavy camera equipment.
Want to discover the finer side of Africa? Sign up for our weekly newsletter .
Leave a Comment
You must be logged in to post a comment.
Or fill out this form...
Username or Email:
Remember Me
Forgot your password?
(A password will be e-mailed to you.)
Search Keywords:
Accueil - Travailler avec nous - Pensées de voyage - Voyage famille - Envie d'écrire ? - A propos
Home - Travel resources - Family trip - Contact - About - Media Kit
Inicio - Contacto - Quiénes somos
- DESTINATIONS
- PHOTOGRAPHY
- LEARN PHOTOGRAPHY
- TRAVEL TIPS
- DREAM DESTINATIONS
How to choose your photo equipment for a safari?
Last update : 04/05/2024
Our blog continues to grow thanks to you, our readers. This blog may contain affiliate links, which means we can earn a small commission if you make a purchase through them, at no extra cost to you. This helps us to continue to bring you more and support our work !
Everyone who wants to go on a photo safari will ask themselves this question before they leave, w hat is the best camera gear for a safari ? How can I make the perfect safari picture, you know the one of the cheetah or leopard against the light on a tree – the one of the herds of zebras or wildebeest with Kilimanjaro in the background, in short the kind of travel pictures that will blow your mind!? For many of us, it is a dream to make this kind of trip and it is out of the question during a photo trip in Tanzania, a safari in Kenya or in the Kalahari to miss the beauty offered by this wildlife. So bringing back great images of these wild animals is on all of our minds. In this article the latter will be explained with the elements below.
Check out my practical photography packs. It's a simple, fun and entertaining way to learn and improve in photography, especially in the field!
Offer end date: 03/20/2023
- Budget and photography practice
- Tips for choosing the right photo equipment for a safari
- What equipment to choose for a photography safari?
- The photography equipment that I had personally

This article will cover almost only digital photography with a DSLR. Indeed, for this type of trip that is in difficult conditions (sun, dust, movements, distant animals), I strongly recommend the use of a DSLR with a telephoto lens. So, yes, it is possible to shoot safari pictures with a bridge, a mirrorless camera, or even a compact camera, but in my opinion, you will not match (for this type of trip) the DSLR performance. If you are interested in making beautiful pictures on your safari, I invite you to read the article on the essential photo accessories for a safari !

1 - Budget and photography practice: two elements to consider for a safari trip
Before talking about choosing your safari photography equipment, I wanted to mention two elements that I think should be taken into account, which work together: the budget and your usual and upcoming photography practice .
Because in reality, it will be difficult to consider all possible situations. Some will be beginners and will have very little financial means, others will be beginners but will have a much larger budget to afford great lenses and so on.
- The budget : this is surely the main element to take into account for many people when choosing their camera equipment for a safari. Try to keep in mind a price range. How much are you actually willing to pay for your photography equipment. Indeed, it is important to know that taking beautiful pictures on safari can be expensive if you invest in a good camera, a couple of lenses and other accessories. The budget can quickly escalate! I’m not even going into if you have to invest in post-processing software.

The Canon 7D Mark II, a high-end APS-C camera, perfect for safari – More details on Amazon
If you don’t have the budget to afford good quality lenses to capture wildlife, there is always the possibility of renting (or borrowing) them. Clearly, not many people can afford a 600mm, so renting it is much more economical. On the contrary, if you have the budget to enjoy yourself, you will have the choice, in all brands, for very good bodies and lenses.
In addition to your budget, you have to consider your photography practice. Concretely, will you use the equipment after the safari? Would you like to learn photography afterwards? Do you want to understand the notions of framing, ultra wide angle, or other barbaric terms in photography?
- Your photography practice : Buying good equipment is fine, but if you never use it again after the safari, it would be a shame to go broke for nothing. My advice is to think carefully about whether you will use your equipment afterwards or not. If you like photography and traveling, it’s a good bet that a 70-200mm or 70-300mm zoom will come in handy during your travels (if you haven’t already bought it!). If you think you’re going to get involved in photography in the near future, it’s probably worth the investment! Buying a camera is something you should think about.
Take some time to think about this: your current and future photography practice .
2 - Tips for choosing your photography equipment for a safari
Here is my more technical advice on how to choose your safari gear. I’m talking about DSLR cameras and lenses. I deliberately left aside mirrorless cameras, expert compact cameras and all the associated lenses. I illustrate the precise items according to the different brands in the following paragraph.

Choose a camera that is solid, dust and moisture resistant
On safari, you’re going to be in “pretty extreme” conditions and believe me when I say you’re going to be eating dust all day long. Whether you are on safari in Tanzania , Zambia or in the southern African countries (Namibia, Botswana or South Africa), the humidity level is very high. After all, it is the tropics.
I therefore advise you, if you can afford to go for tropicalized cameras and lenses, which will often mean switching to the “Pro” range from Canon or Nikon for example.
Some cameras are protected with gaskets against dust and humidity. Be sure to check before buying, but a good DSLR camera will already be a good start.
Start with at least a 300 mm
That’s what everyone agrees on when it comes to a safari in national parks. A 300mm will allow you to take a large majority of the scenes on safari, except for birds, where a 400mm to 500mm is recommended as a minimum. It all depends then on the type of body you have and the distance the wildlife are from your lens. If you see an elephant that is less than 10m away, you won’t need to get close and you’ll be fine with a 300mm! We’ll talk about it more below.
Choosing a zoom lens rather than a fixed focal length
Again, it’s not a universal reality, but it’s better to choose a zoom lens rather than a prime, knowing that you don’t normally get out of your car and that you mostly take pictures from your vehicle’s sunroof. So you’ll have no way to get closer to the beast except to zoom in and out (or wait for them to get closer which doesn’t always happen). Although, sometimes, at camp, you will be able to get very close to the animals.
The optical quality of fixed lenses is most often better than zooms. However, if you choose to leave with a fixed lens, it will be necessary to have several of them to be able to capture a variety of shots. With only one fixed lens, you will be dependent on the animal and the distance to the car.
If you are interested in a safari, but also in photography in general, the article explaining how to choose your camera lens will surely be useful.

The Sigma 150-600mm, a long focal length perfect for capturing every moment on your safari – More details on Amazon
Choose large-aperture lenses
If you don’t know what aperture is, it is the small number that is indicated on your lens after the letter “f”. In concrete terms, the aperture is the aperture of the diaphragm of your lens. The smaller the number is, the brighter your lens is said to be (e.g. f/1.4 is brighter than f/1.8). Don’t hesitate to read the basics of photography on my website.
So why should you choose a lens with a large aperture? The aperture has a direct influence on the shutter speed and on the depth of field. This is not a teaching lesson here (but photography tips…) but to make it simple, the brighter your lens will be (f/ smaller number), the faster you can take pictures (in terms of shutter speed) and the more you can blur your background . How do you think the superb close-up photos of lionesses, hyenas and others in the bush are made?
This is particularly important on a safari where, in most cases, you will want to have blurred backgrounds and sharp images. This point is also to be considered with the choice of the camera body according to its ISO sensitivity (see below).
The choice between Full Frame and APS-C sensor for a safari
There are two main types of DSLR cameras: Full Frame and APS-C. I won’t talk here about the difference between the two in detail, as this could be the subject of an entire article. To summarize, the Full Frame is the equivalent of the 24 x 36 mm and has a large sensor, larger than an APS-C body, which has a medium size sensor, and has a multiplying coefficient x 1.6.
To make it simple and in relation to what we are interested in when choosing our safari gear, the size of the sensor is important to take into account since it directly influences the quality of the pictures (less noise and better light capture on a Full Frame camera).
However, APS-C formats have a multiplying coefficient of x 1.6 (at Canon for example). In concrete terms, if you buy a 70-200 mm lens and place it on an APS-C body , you get the equivalent of a 320 mm (24×36 format).
So an APS-C can be a very good solution for a safari since you will be looking (usually) for zoomed shots. On a Full Frame camera, you will need longer (and therefore more expensive) lenses to zoom at the same level as an APS-C camera.

The number and quality of autofocus point on your body
The AF points are the “little squares” you see when you look through the viewfinder of your DSLR! So you’re going to tell me why think about these kinds of detail?
In reality, these AF points are there to focus on your subject correctly. Obviously, the more autofocus points you have, the more possibilities you will have to easily capture your subject and compose your picture the way you want it to be.
I won’t go into details, but be aware that the number of autofocus points vary greatly dependent on the camera, and the quality of those too (understand their capacity in low light to focus on your subject).
For example, my 6D has only 11 autofocus points. They are also too centered for my taste, which limits the possibilities of composition, especially for wildlife photography (even if the central focus point is very good in low light). My images would have been sometimes better with better-placed focus points.

Before choosing your camera, make sure to check the number of AF point and the quality of those. This is a very important aspect, especially for wildlife photographers, as you will need a fast auto-focus that will lock onto your subject quickly.
The new 7D Mark II camera has 65 AF points spread over almost the entire screen! A big advantage for composing the way you want to and lock onto your subjects more easily!

The burst mode
Very often on safari, wildlife will be on the move (and yes an animal moves in the wild!). If you want to capture beautiful scenes of hunting for example, it will be necessary to take pictures quickly. What better than a high performance burst mode on your camera for that? I am referring in particular to antelopes, buffalo and gazelles.
Try to use a camera with a fast burst mode. For example, the 6D provides 4.5 frames per second, which is still low compared to the 10 frames per second of the 7 D Mark II.
Raising your ISO on your camera
Last technical advice, if you have the money, consider using a body that manages high ISO well. Indeed, the better your camera will manage the noise, the more you will be able to raise the ISO, and thus shoot faster, without having to sacrifice the quality of the image. The 6D is perfect for that, with the possibility to take beautiful pictures at ISO 6400, which are still good qualities!
3 - What photography equipment should I choose for my safari?
I try in this paragraph to summarize my recommendations for the choice of your equipment according to your level of photography and your budget too! I focus here mainly on telephoto lenses above 200/300mm. I also give some recommendations for the choice of a lens for landscape photography on safari. Depending on the location of your safari, imagine taking a herd in the bush, an isolated tree in the middle of the savannah or the Victoria Falls!
This information is current as of September 2017. I will try to update the list of recommended lenses when new ones are released.
Beginner Photographers
If you’re a beginner in photography, and you don’t yet perfectly handle your camera, I advise you to stick to entry-level or mid-range cameras, mainly APS-C (which will remain cheaper overall). Here are my recommendations for the 2 main brands (Canon and Nikon), in order from the cheapest to the most expensive.
- At Canon : 4000 D (Beginner), 800 D or 77 D (Amateur). If you have a larger budget: 90 D (Expert)
- At Nikon : D 3500 , D 5600 or D 7500 (Expert).
These bodies are all entry-level or mid-range. Once you’ve chosen a camera, you’ll have to choose a lens (or several) to place on it.
Telephoto lenses
If you’re new to photography or don’t have an expandable budget, I recommend you look at small aperture telephoto lenses. Unfortunately, you may be limited by the small amount of light in some situations or by the rapidity of animals, and you will have to quickly raise the ISO to avoid blurry pictures. Very often, these lenses have small apertures, in the range of f/4-5.6 or even up to f/6.3. To get large aperture lenses (e.g. f/2.8), you will have to pay a lot more money and look at the table below.
However, here are a few selected recommendations to help you choose the right equipment for your safari (not everything is there on purpose).
Nikonists will be able to choose between two 70-300mm type lenses. One has a maximum aperture of f/6.3 (the cheapest) and the other has a maximum aperture of f/5.6, which explains the price difference. Tamron’s alternative could also be interesting being at a lower price (and stabilized).
If you are a beginner, but have a rather large budget, you can look for the camera bodies and lenses of experienced photographers (see below).
Lenses for landscape photography
On safari you won’t just take pictures of wildlife either. For small budgets (<500 €), I therefore recommend the following lenses.
For a personal opinion on the matter, at Canon you have two possibilities of wide-angle lenses useful for landscape photography in safari. These two lenses will be helpful in everyday life anyway for landscape, architecture or street photography.
Both Canon lenses are almost similar, but I especially recommend the Canon EF-S 10-22 mm f/3.5-4.5 USM that has a larger aperture (f/3.5) and is really well known. At Nikon, this lens remains a reference in wide angle for APS-C sensor.
Finally, both Canonists and Nikonists should also, in my opinion, consider looking at two quality third-party brands: Sigma and Tokina. I owned the Tokina wide-angle lens mentioned in the table above, which is superb in every way and also has a very large f/2.8 aperture, which is rare in this price range. The Sigma remains a very good reference also with a large aperture, very often better than the Canon and Nikon. If you compare the prices, the Tokina remains in my opinion THE best reference of the table.
For those who wish to go further, I invite you to read the articles about the best Canon and Nikon wide-angle lenses .

Experienced photographers
For more experienced photographers and/or for those with a larger budget, here are my recommended camera body and lenses, both telephoto (wildlife) and wide angle lenses (landscape photography for savannah for example).
For bodies, if you can stay on a high-end APS-C format and you have the budget, I recommend the excellent 7D Mark II with eyes closed. You can take advantage of the Canon crop x1.6 and a 300mm on this body will “become” a 450mm equivalent (24×36 format). For those who are looking for excellent ISO management on full frame, you can upgrade to the 6D Mark II or 5D Mark IV (at Canon). At Nikon, the D850 or D500 remains a reference as well.
Concerning telephoto lenses, here are a few that stand out and that will clearly be perfect for safari photography. It will cost a lot for most of them, but these are clearly quality photo lenses that you will keep for years anyway and will be able to use them in everyday life as well.
Regarding the choice, you will have to decide whether to stay with Canon/Nikon or go with third party brands. I own and have personally shot during my safari with my Canon EF 70-300mm f/4-5.6L IS USM , which is perfect in my opinion. The 100-400 (last generation) is however much more expensive to reach the famous “400mm”. At Nikon, the 200-500mm remains in my opinion a very good lens for a safari, even if some may complain about a fixed f/5.6 aperture.
Third party brands also have some nice lenses that are perfect for a safari. I am thinking in particular of the Sigma 150-600mm F/5-6.3 DG OS HSM , particularly well known, or the Tamron 150-600mm also quite well known. This way you get a 600mm at “lower cost” compared to what you would have to pay for a native brand. On an APS-C sensor, these telephoto lenses will be impressive, offering access to very long focal lengths. Because of the lack of light, you will often have to raise the ISO at sunrise/sunset, and the importance of having a body that manages high ISOs will then be important.
For landscape photography, there is also a choice. I personally had the Tokina 11-16mm at the time being in APS-C. So be careful with your body (FF or APS-C). The lenses recommended below are for FF cameras. For a nice APS-C lens, check the table above (Tokina 11-16 f/2.8 or Canon 10-22 mm f/3.5-4.5).
To tell you a few words about it, it is essentially about quality lenses, both in native brands (Canon/Nikon) and third party brands (Sigma/Tamron). Please note in the table that some of these lenses can’t accommodate conventional screw-on filters, because of their curved front element. I personally bought the Canon 16-35mm f/4 during the summer 2019, which I find perfect and which allows the use of standard filters. The equivalent at Nikon (16-35mm f/4G VR) remains in the same idea, a nice lens with a wide viewing angle, relatively “light” and which allows the use of a simple CPL filter for example.
4 - The photo equipment I selected during my safari
You’re wondering what equipment I used on my safari? Below is the list of my partner’s and my own photography equipment.
My partner: Canon 60 D (APS-C) + Canon 70-200mm f/2.8 L
Me: Canon 6D (Full Frame) + Canon 70-300 mm f/4-5.6 L .
For your information, the results at almost identical (APS-C with a 200 mm equal (more or less) to Full Frame at 300 mm.
I didn’t write a specific article on safari equipment, but I could consider it. At the very least, ask yourself the question if it is relevant for you to bring:
- A pair of binoculars (to see wildlife),
- Lightweight shirts and long-sleeved shirt for the evening (it can get chilly in the evening),
- Mosquito repellent,
- A good pair of sunglasses.
Here, I hope this article on how to choose your safari gear will help you. In any case, don’t hesitate to leave me comments at the bottom of the article if you have specific questions! Do you want to know which camera to choose to travel ?
If you liked the article or if you know someone going on safari soon, don’t hesitate to share it on your social media! Do you feel ready to bring back the most beautiful pictures of the group! My pictures may not be perfect and may not be as good as those of a professional photographer. The most important thing is also to enjoy and try to immortalize your trip in the best possible way.
To learn more on the subject, I invite you to read my guide/advice to choose your lens for wildlife photography .
See you soon,

Written by Sylvain PONS
I've been passionate about photography since 2010, learning as I went along. Today, I dedicate myself to guiding others in their choice of camera gear and sharing a variety of tips to improve their photography skills.
Despite our care, a mistake may have slipped into this article. If you find any, please don't hesitate to let us know so we can correct it as soon as possible and keep our information up-to-date!
Did you liked the post? Follow us!

You may also like

Leave a Reply Cancel reply
Your email address will not be published. Required fields are marked *
Post comment
This site uses Akismet to reduce spam. Learn how your comment data is processed .
The Best Photo Safari Gear Plus Planning Tips
A photo safari takes more planning than almost any other type of vacation. You have much more than just gear to worry about and sometimes conditions are not ideal. Safaris include a lot of time in a vehicle and sharing shooting space with other photographers. You will likely see animals only surrounded by other tour vehicles. It’s dusty, bumpy, and sometimes muddy. Your vehicle might be a closed-sided, open-top style where monopods and tripods are difficult to use but allow for window resting with your super telephoto lens. Or they might be open-sided, which are roomier but don’t have anywhere you can rest your arms. Here you’ll find the best photo safari gear and advice that considers these conditions.

Some vehicles have tent tops, which affect visibility but will protect you from random bouts of rain or from sun exposure. These are all things you have to consider when venturing out on your first safari photography vacation.
Prepare for Your Photo Safari Mission
You need to start with a checklist so that you can pack only the most efficient equipment for your photo safari goals. Here are some important questions to ask:
• Will I be shooting just along the way during safari or making photography the primary goal of my safari? The former allows for a shorter trip with more varied days and activities. The latter requires patience and timing to get the kind of game scenes you’re hoping for.

• Will I share a car with other photographers or just game tourists? Photographers and tourists have different motivations and different tolerances for how long they want to stay out in the field in one location. You may also want to consider springing for a private tour if you have a special species interest.
• Do I want to rely on myself or use a porter? This will help determine how much gear you can bring. Porters can usually be hired by the day and will help you with loading equipment.
• Do I have access to a reliable power source? Some accommodations have capped power that can only be used for a certain number of hours a day. Find out if yours is one of these places. It will help you decide how much spare power to bring for your camera bodies.

• Am I photographing animals exclusively or do I also want to do some street photography and landscapes? If you’re not interested in anything but game shots, you are able to limit your load to super telephotos and maybe 1 wide for those moments when animals walk up to your car. If you’re interested in vistas on a level more serious than a casual phone photo, then you’ll want to consider other lenses and support gear to use in the mornings and evenings outside the car.
What to Take on Your Photo Safari

#1: Filters
Filters are an oft-forgotten essential tool that weigh nothing and can greatly improve the quality of your shot. They’re an easy way to darken overly bright conditions, saturate colors, or fight reflective surfaces. There are many kinds of filters but the two kinds you’ll want to consider are:
A) Circular Polarizing Filters B) Neutral Density Filters
Circular polarizers reduce glare and reflections from water surfaces and other shiny environments as well as help to define clouds and skies. While polarizers help saturate the colors of your scene, you also lose about 3 stops of light – great for bright conditions but worth keeping in mind when adjusting for exposure in the mornings and evenings.
ND filters absorb light that comes in through the lens so they, in short, will darken your overall scene. This is especially useful when wanting to shoot at very wide apertures in the bright sunlight and it’s also ideal for slowing your shutter down to blur water or express motion without overexposing.
Most filters screw onto the front of your lens but super telephoto lenses have front elements with diameters that are much too large for that. They instead use “drop-in” filters (here’s an example of one ) that slide into a slot at the back of the lens.

#2: LCD Viewfinder Loupes
Reviewing images in the bright sun can be an act of suffering. Screen covers, sun shades, or loops help you better see what you’re working with. They are often just a simple tube that can be placed over your screen, like the snap-on Hoodman or the mountable Z-Finder Pro 2.5x. They are easy to pack and make reviewing images more comfortable.
#3: Fast Cameras and Big Cards
Use a camera that shoots at least 4 frames per second, ideally 6 or above. Shoot in AI-Servo (Canon) or AF-C (Nikon) modes so that your autofocus is constantly tracking your subject. Also, set your shooting drive to “continuous” so that you can get a lot of shots in 1 shutter press hold. Most DSLRs and mirrorless cameras have these shooting drive features.
Fast cameras to consider (as of this writing – anything over 7 frames per second is suitable for wildlife):
Canon 7D Mark II – Up to 10 FPS Nikon D500 – Up to 10 FPS Olympus OM-D E-M5 II – Up to 10 FPS Sony Alpha a77II – Up to 12 FPS Nikon D5 – Up to 14 FPS Canon 1D X Mark II – Up to 16 FPS Sony a9 II – Up to 20 FPS
See more fast cameras on our special High FPS Cameras page.
Anything that shoots over 4 frames per second is going to eat up memory fast. Be sure to pack several cards with high-speed classifications – Class 10 for SDXC or SDHC cards and UDMA 7 for CompactFlash cards. Pay attention to the write speed spec on your cards. Write speeds describe how fast images can be saved onto a card and is important when shooting fast-moving wildlife with a burst of images while in continuous shooting mode. High-speed cards will help you to squeeze in more shots in short succession and the absolute bare minimum write speed you’ll want is 10MB/s. Learn more about this in Memory Card Basics: Choosing the Right Memory Card for Video and Time-Lapse.
Remember, very fast cameras can take images faster than they can write them to your memory cards. There is an internal buffer that stores this data while you’re shooting and the faster your card is, the less of this buffer you have to rely on. Fast memory cards help reduce this delay between when your camera writes to memory and the next shot – you don’t want to miss any fleeting action!
#4: Smaller Aperture Telephotos and Extenders
Telephoto zooms are a must out on any photo safari. A popular lens in several brands is the 70-200mm f/2.8 but if you aren’t shooting wide open or in dark environments, you can save yourself a little back pain by going with the f/4 versions. You get the same reach and quality in a smaller package thanks to the smaller maximum aperture, which requires less glass in the build. Check out the Canon 70-200mm f/4 IS II or the Nikon 70-200mm f/4 VR if you want the reach but can’t carry too much weight.
Consider also lens extenders (or teleconverters) , which can up to double the reach of compatible lenses. Keep in mind that extenders reduce your maximum aperture so they are more suitable for use in bright conditions. You can also spring for a super telephoto with its own built-in extender. The Canon 200-400mm f/4 IS becomes a 280-560mm with just the flip of a switch!

#5: Support Equipment
Most game drives don’t allow a lot of outside-of-car experiences so tripods won’t help you much. Monopods provide relief from handling super telephotos and are usually small enough to store next to you. Choose a monopod with the shortest possible folded height. For example, the Induro CM34 monopod goes down to about 20” but the Manfrotto Bogen 681 only goes down to about 26”. They both reach about 63” so you save a lot of space with the Induro without sacrificing a lot (if any) height. See all our monopods here .

For closed-sided vehicles, a bean bag cushion will help support you and your lens while smaller camera setups can get away with a Gorillapod , especially for an occasional long exposure shots with wide angle lenses.
Bring an international power strip with socket adapters. Most camera batteries will automatically switch from between 100V-250V, so as long as your power strip is no more than 125V your batteries will adapt to the source.
How Much is Too Much for a Photo Safari?
The checklist of questions to ask yourself at the beginning of this post will do a lot in helping you determine how much gear to bring. Here are three more things to consider:

#1: Bringing Multiple Cameras
You don’t want to switch out lenses in the field. It will bring dust into the rear element of your lens, into the body of your camera, and you’ll never switch out lenses quickly enough anyway to go from super telephoto to wide when an animal approaches the vehicle. Many photographers have their “long setup” and their “wide setup” and there are special straps for two-camera shooting.
#2: Taking an ISO-Sensitive Camera
The best light is in the early mornings and in the evenings but those times of day can take a hit on exposure latitude. You’ll need to consider camera bodies with high ISO capability so that you can still shoot with small apertures and high shutter speeds if you want to.
#3: Carrying Lenses in the Three Major Length Types
The typical focal lengths for each subject matter break down into the following major ranges:
• 200-500mm for animals, birds • 24-105mm for people, candids, close encounters • 11-35mm for landscapes, night sky, vistas
If you’re really interested in all of those things, then the bare minimum for you might be 3 lenses. Most people can get away with 1 telephoto and 1 wide/normal zoom but if this is a once-in-a-lifetime trip then you may want 3-4 lenses ranging between 11-500mms and beyond.

Go With Your Natural Instincts
You will exhaust yourself trying to create the perfect photo safari equipment pack. These tips will get you started on the right path but follow your gut in the end after gathering all of the facts about your trip.
• Bring filters and know whether or not your super telephoto uses drop-in filters. • Consider smaller-aperture zooms for a lighter load. • Choose a camera with high maximum ISO and FPS of 7 and above. • Pack plenty of Class 10 SD and/or UDMA 7 (or higher) CF cards. • Pack a lot of extra batteries with a strip at 125V. • Bring 2 cameras to protect against dust – a “long set” and a “wide/normal set”. • Consider a monopod instead of a tripod.
I hope you get the most out of your first safari photography vacation!

Alexandria Huff
Alexandria Huff's photography and lighting tutorials can be found on 500px and her blog. See her lighting tutorials here. She is a Marketing Associate Manager at BorrowLenses.com. She learned about lighting and teaching while modeling for photographers such as Joe McNally and has since gone on to teach lighting workshops of her own in San Francisco. Before focusing on studio portraiture, she shot motorsports for X-Games, World Rally Cross, and Formula Drift. See her chiaroscuro-style painterly portraits on her website.

Good point. When we went to Kenya we were limited to a max of 30lbs (that’s photo gear, clothes and everything else) due to a flight that was part of the Safari. You could however buy an extra seat if you wanted to carry more stuff. I found two bodies, one with a 24-70 and one with an 80-400 adequate. You don’t want to be changing lenses in your vehicle.

Nik Simpson
You forgot to mention one big issue with some Safari locations, total weight. For example, most of the camps in Botswana are only reached by light aircraft operating from dirt strips. As a result, your total baggage allowance for camera gear, clothes etc is ~20Kilos (44lbs). I also think a longer lens is needed to get really dramatic shots, I use a Canon 70D + 100-400mm L-series zoom lens. With the crop factor of the body, that means I’ve got a 160-640mm lens. If you are interested, you can find pictures from my last trip to Botswana here:
https://www.flickr.com/photos/niksimpson/collections/72157651667989875/
Post a comment
Your email address will not be published. Required fields are marked *
Notify me of follow-up comments by email.
Notify me of new posts by email.
You may also like

How to Visualize and Shoot in B&W
Learn how to see your images in black and white in-camera without losing the ability to also shoot i

Understanding Sensor Crop Factors
Learn the differences between crop frame sensor cameras and full frame ones and what this crop facto

Using a Tilt-Shift Lens for Panoramic Photos
There are a bunch of approaches to creating your own panoramic photos but using a tilt-shift lens ma
Get 20% your first rental with promo code BLOG20

Cameras Mirrorless, Medium Format and more.

Lenses Anamorphic, Cinema, Wide Angle and more.

Lighting Aputure, Manfrotto, Profoto and more.

BorrowLenses is an online camera gear rental service that started in the San Francisco Bay Area in 2007. We offer a wide selection of camera gear ranging from camera bodies, lenses, lighting and accessories. We make it easy to rent gear by shipping your order straight to you.
- Safari Diaries
Safari Photography Equipment
What equipment do you need?
Any modern digital camera manufactured in the last several years is capable of taking excellent photos of wildlife and you do not need to buy the most expensive camera in order to take good pictures of your African safari holiday. Getting good pictures is far more about thinking carefully about composition and using some of the techniques outlined below, than spending a small fortune on the latest top of the range camera.
In general terms, a dSLR (digital Single Lens Reflex) camera with interchangeable lenses is the best option for a safari trip. The best lenses for wildlife photography are in the range of 200-400mm, while those wishing to take close ups (eg of insects), landscapes or shots of animals in their environment should if possible also bring wide angle lenses in the range of 24-100mm. We do not advise you to bring cumbersome flash units or tripods but we do advise that at least one member of your group has a video camera available, although many dSLRs now have these built in. Bring plenty of batteries and a charger so you don’t run out of power! Cameras get dirty easily on dusty safari drives, so bring plenty of cleaning equipment like cleaning cloths and a blower brush. Finally bring plenty of memory cards – you will be surprised how many shots you may end up taking.
Each person should ideally have their own pair of binoculars as they are essential to see the birds and animals in the distance. The best size is 8/10 x 40 and, again, they don’t need to be the most expensive top of the range binoculars.
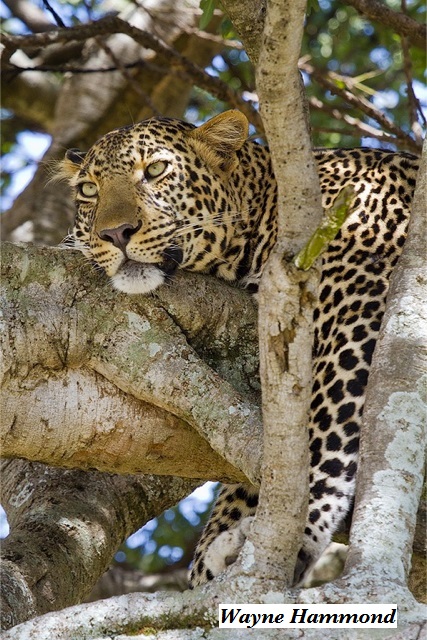
Equipment List for Safari Holidays
- Telephoto lenses (ideally covering 24-100mm and 200-400mm range)
- Lens cleaning equipment
- Extra batteries
- Battery charger
- Memory cards
- Zip lock bags (to protect equipment from dust) but note plastic bags are banned in Kenya so use a cloth alternative!
- Beanbag (to provide stability for your camera)
- A notebook to record your day’s adventures while it’s still fresh!
Before your Safari Holiday – Practice!
Particularly if you have a new camera, or if you don’t use your camera frequently, try to spend some time before you depart for your African safari holiday familiarising yourself with the camera, and taking some practice shots. Any subject matter will do, such as birds in your garden, your pets, or anything else that moves.
Also, have you read the manual? They are not great reads admittedly, but when you get on a safari drive, it helps to quickly know how to operate the camera. You will not have time to read the manual as animal behaviour unfolds in front of you – the action will be over by the time you have found the right page and read it!
Ideally you want to be able to make key adjustments to your camera (eg. Exposure settings) without lifting your eye from the viewfinder.
Be patient!
When it comes to observing wildlife on a safari trip, no two days are the same. Some days you will see very little while others there will appear to be animals everywhere. Some people rush around trying to ‘tick off’ as many different animals as possible, taking a quick picture or two before asking to move on. But unfortunately animals will not pose for you on demand, and professional photographers will spend many hours with a subject waiting to get a great shot. On a typical safari this isn’t really possible but you will often find that if you show a little patience and stay with a subject a little longer, something more interesting might happen that you can get a shot of. This advice is equally true for general game viewing not just photography. Try and be patient, spend some time with and get to know your subject, and often you will be rewarded. If nothing else it makes for a more relaxing safari!
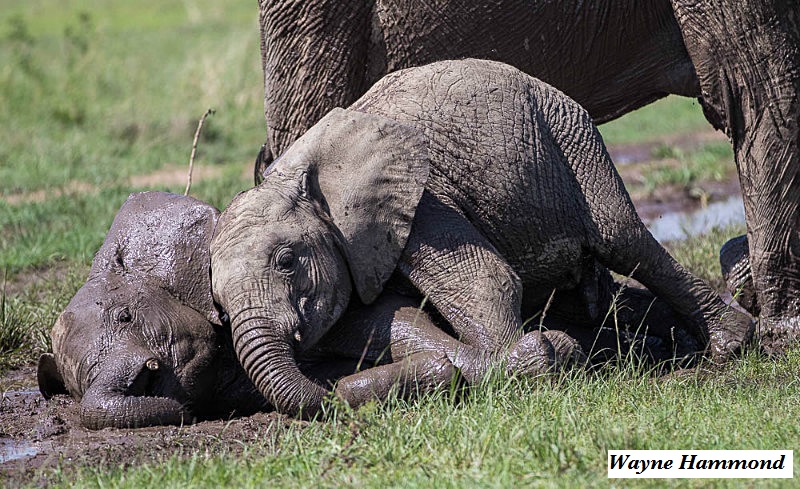
The most atmospheric and inspiring nature photography tends to benefit from great light. This is often referred to as the ‘golden light’ that occurs in the early morning or late afternoon when the sun is lower in the sky. At this time your photos will benefit from a softer warmer ‘golden’ light. During the middle of the day the sun is overhead and tends to result in harsh shadows that rarely provide for flattering pictures. During the ‘golden hours’ animals also tend to be more active as it is cooler, increasing the chances of not only seeing wildlife but catching them doing something more interesting than sleeping in the shade! Now you know why we get you up so early on a morning!
Composition – the “Rule of thirds”
A really important aspect of good wildlife photography is composition. This relates to the position of the subject(s) within the frame. The “rule of thirds” is a well known compositional technique that can make a big difference to the impact of your photos and require little if any technical skills.
If you think about your picture frame being broken down into thirds (both horizontally and vertically) so that you have 9 parts, the best wildlife photographers often deliberately place the subject at the points where the lines cross, or along the lines themselves. Most of the time your photos become more aesthetically pleasing to the human eye by applying the rule of thirds.
Don’t forget your environment
Often when you have long telephoto lens the temptation is to fill the frame with your subject at every opportunity. This can provide for great portrait photos and you will see some wonderful wildlife photographs that use this approach. But sometimes, it is good to pull back a little on your telephoto lens and try to take in some of your subject’s environment. The African bush has some wonderful landscapes and trying to incorporate some of this into your photographs will enhance your photo collection and give your friends and family a sense of what the African bush actually looks like. If you always fill the frame with your subject they will never know!
You can also be creative in the opposite sense, by getting really close up shots of a lion’s eye, or an elephant’s trunk, for example.
Try to capture some action.
In addition to capturing portraits of your favourite safari animals try and add some variety to your photo collection by capturing some action. Most African wildlife are social creatures and will spend some of their time playing, grooming each other or interacting in other ways. Capturing these moments will make your photographs more interesting as you will be capturing their behaviour. As explained above, while this often requires a bit of patience (particularly with sleepy lions!) the rewards can be well worth it.
One of the most underrated techniques for capturing great wildlife photography is to position yourself for a low angle of view. Many safari vehicles are fitted with pop up or removable roofs to allow people to stand up and see wildlife from a higher position. This can be advantageous, for example when an animal is in longer grass. But taking a picture of an animal that is close by to your vehicle and sat down, while you are stood shooting downwards is generally not the most flattering. You will get a much more impactful picture by photographing sat down to get a lower angle of view – by getting eye level to your subject.
Portraiture and depth of field
If you’re trying to capture a close up view of a single subject focus on getting the eyes pin sharp, and try and get a diffused (blurred) background. This requires careful use of depth of field – a shallower depth of field (helped by using a lower ‘f’ stop) will help blur the back ground and make your subject stand out in the photo. The downside is that the shallower depth of field that helped blur the background will also narrow the area of sharpness often to just a few inches – hence be careful to focus on the eyes as they may be the only ‘pin sharp’ element of the picture.
On a related point, when looking at your subject through the viewfinder often we forget to look at distractions above, below and to the side of the subject. Odd looking twigs, other safari vehicles in the background and other ‘clutter’ can often weaken a picture but can often be avoided by moving very slightly the position from which you take the picture. Try and get as clean and uncluttered surrounding to your subject as possible so it stands out in the frame.
Shutter speed
To freeze the movement of a moving animal you will need to keep the shutter speed high, ideally around 1/1000 of a second or higher depending on the speed of movement and the actual subject. For example, trying to freeze a bird in flight will require much higher shutter speeds. An alternative approach is to use the panning technique where you try to follow the movement of the animal so it stays sharp in the picture but the background is blurred. For this try somewhere between 1/8 to 1/30 second shutter speed.
And finally – try to take pictures in both portrait and horizontal orientation. And to give the appearance of the animal moving, don’t centre your shots. Leave space left, right, above or below for the animal to move into.
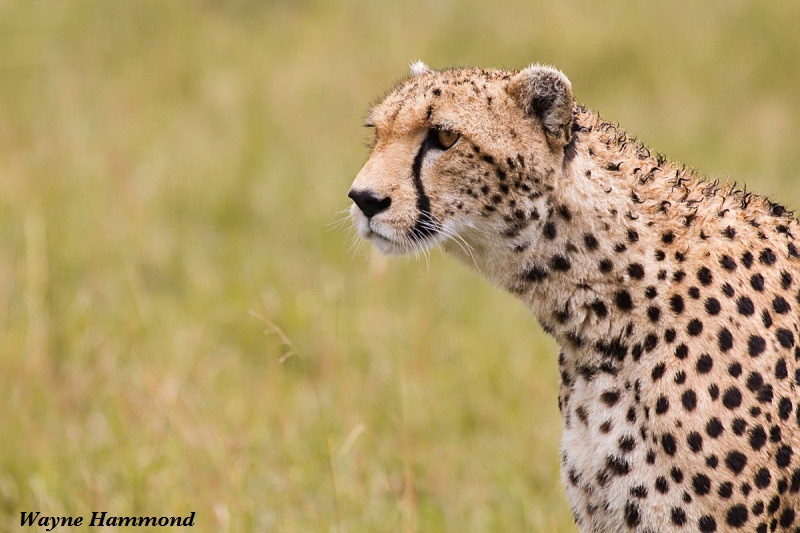
Our Recommended Safari Travel Essentials:
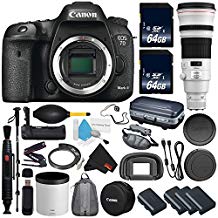
- Packing List
- Photography
- Recommended Travel Products
- World Travel Guide
Concerned about the security of your booking and your own safety while on safari?
We fully appreciate your concerns when it comes to booking a safari in Africa and you can rest assured that your financial security when booking and your own personal safety when on safari is our highest priority. Gamewatchers Safaris is a member of the Kenya Association of Tour Operators bonding scheme, backed by a leading insurance company, to ensure your payments are fully protected if a bonded KATO member ceases trading.
- Recommended Kenya Safaris
- Specialist Safaris
- Kenya Safari Camps & Lodges
- Kenya Parks & Game Reserves
- Tanzania Safaris
- Rwanda Safaris
- South Africa Safaris
- Botswana Safaris
- Zambia Safaris
- Uganda Safaris
- Republic of the Congo Safaris
- Madagascar Tours
- Namibia Safaris
- Zimbabwe Safaris
- Kenya Beach Resorts
- Mozambique Beach Resorts
- Madagascar Beach Resorts
- Seychelles Holidays
- Mauritius Holidays
- Zanzibar Holidays
- Safari Honeymoon Packages
- Travel Information
- Frequently Asked Questions
- Customer Comments
Gamewatchers Safaris Ltd P.O. Box 388 - 00621 Village Market Nairobi Kenya
Tel UK: 07986 978985 Tel USA: 1-877-710-3014 Tel Kenya: +254-774-136523
- Privacy Policy
- About Cookies

Planning Your Easter Jeep Safari Adventure
Is it spring yet the easter jeep safari in moab is calling.
T owards the end of March, adrenaline junkies and thrill-seeking off-roaders will hit the rocky terrain of Moab, Utah, for the annual event known as the Easter Jeep Safari . My dad and brother are a couple of those thrill seekers.
For as long as I can remember, the two of them have been missing in action the week prior to Easter. It’s obviously a fun-filled week as they both come home telling the tales of the trails. My dad mentions the camaraderie of Jeep owners from all over the country, and instantly, you realize there’s something special shared among those who have passed through Hell’s Gate .
At its founding, the Moab Chamber of Commerce organized a single-day adventure where participants would navigate the “Behind the Rocks Trail” in 1967.
In the early 1980s, the event changed hands and was placed in the care of the Red Rock 4-Wheelers organization. Last year, approximately 20,000 Jeep enthusiasts were in attendance, an astounding comeback since the Safari was canceled in 2020.
Now that it is back, it’s the perfect time to share some ways to make your off-road Easter adventure a smooth one.
Related: I Went Off-Roading in the 2024 Jeep Wrangler, and It Blew My Mind
Traverse all the trails at the Easter Jeep Safari in Moab. Photo: Tabatha Chovanetz
Easter Jeep Safari Trail Rules
There are plenty of trails to explore, suitable for both inexperienced and veteran drivers. Each route is rated on a 1-10 numerical scale (1 being the easiest and 10 being the hardest). Depending on which trail you take, mandatory vehicle guidelines (regarding things like tire inches and traction devices) have been set and must be followed at all times.
Upon arrival, participants will be instructed to remain in compliance with the Bureau of Land Management’s (or the BLM) rules and guidelines. It is not recommended that you go off-roading alone, a basic rule of thumb for any 4×4 owner who attends such trips.
In such groups, spotters can direct you where to go to help ensure that each vehicle manages the more challenging obstacles safely and efficiently. In addition, traversing the rocky landscape with more than one Jeep ensures that at least one individual can go and retrieve help if an unfortunate circumstance occurs on the road.
Related: What the Heck is Trail Rated? This Is Where Jeep Gets its Off-Road Chops!
Always plan to be safe while off-roading at the Easter Jeep Safari event. Photo: Tabatha Chovanetz
The Skinny on Safety at the Easter Jeep Safari
While safety should be your number one priority, I would like to tell you about the necessary equipment to bring on the 2024 Easter Jeep Safari.
Being prepared and bringing along the essential recovery gear will go a long way in helping you to recover from trail-related incidents. Most of these kits can be found on Amazon for a couple hundred dollars. However, plenty of small businesses sell them as well. The gear is often made up of a variety of tools, such as recovery straps, winches, gloves, and shackles, which are best equipped to help Jeeps traverse the rough environment.
Related: Your Car Emergency Kit: 100 Things You Should Always Keep in Your Car
Easter Jeep Safari drivers prioritize safety to prevent trail fails. Photo: Tabatha Chovanetz
Gear We Recommend
Everyone who off-roads will at some point have a ‘trail failure,’ which will result in a ‘trail repair.’ While being prepared helps, new parts can sometimes fail; mishaps in general can and will occur.
Ratchet straps will help with simple tasks or more sophisticated tasks like aligning springs or axles. A winch will help should you become stuck at any point. There are different types of shackles, but for off-roading purposes, you would want heavy-duty shackles .
In addition, an investment in a high-lift or off-road jack is a good idea. Using nearby rocks or small pry bars will only get you so far; a high-lift jack can usually be purchased for around a hundred dollars.
Portable air compressors for Jeeps can be found online and can be used in multiple ways, including tire inflation and powering tools.
Make sure you are able to communicate with others if you get in a jam at Easter Jeep Safari. Photo: Tabatha Chovanetz
No Cell Service? No Problem
In addition to the equipment listed above, a sound communication system will be necessary for communicating with your group. It shouldn’t come as a shock to say that cell phone service is spotty and practically nonexistent on the Jeep Safari trails. While walkie-talkies and satellite phones may be used, your best bet will be a CB (Citizen Band) or VHF/UHF (Very High Frequency/Ultra High Frequency) radio system. The difference resides in CB radios being prone to more interference and having a smaller range with fewer obstacles while VHF/UHF radios typically have less interference but are subjected to obstructions limiting their communication range.
It should go without saying that bringing a good tool kit, spare parts, and extra fuel is vital for your off-roading journey. Durable tool kits can be found at your local AutoZone or O’Reilly’s; more options are sold online on Amazon and on many off-roading websites.
The recommended list for spare parts includes (but is not limited to): a spare tire, plug kit, u-joints, fuel filter, engine oil, gearbox oil, coolant, axle shaft, hose clamp, chain, driveshaft, valve stem and core, and spark plugs. Carrying an extra five to ten gallons of gas (or as much that can ensure your return to civilization) on the trails is often standard. If you get in a real pinch, there is always Clark’s Carquest Auto Parts in town; these guys know about Jeeps.
On the Red Rock 4-Wheelers website, it’s strongly advised that you carry water (a gallon per individual) and other non-alcoholic beverages, extra clothing, nutritious food, and blankets. If you find yourself stuck on the trails overnight, the weather in Moab often turns cooler once the sun sets. In other words, always be prepared for the unexpected and plan ahead for whatever path you’re taking on the Safari.
ATVs are a no-no at Easter Jeep Safari. Photo: Tabatha Chovanetz
Max Out Your Easter Jeep Safari Safety
In addition to the recommended items listed above, you should also think about taking these:
- In case of an emergency, take a fire extinguisher (like the H3R Performance MX100C , which is lightweight and portable).
- A cooler is a great way to store snacks and drinks when you’re navigating the heat of Utah.
- Speaking of heat, you should wear sunscreen on the trails for your face and body (use sunscreen labeled SPF 30 or more).
- Due to sudden weather changes like temperature drops, extra layers of clothing (sweatshirts and hoodies) cover all your bases.
- Lastly, carry a first aid kit . Accidents do happen, especially when off-roading.
With all that said in explaining what to bring with you on the Easter Jeep Safari, there are a few items that are not permitted: drones, ATVs , and UTVs . There is plenty of opportunity to test your skills on rides like these and check those communities out, too; just not here.
Moab is magical. It’s easy to see why Jeep lovers return year after year here. What started out as a yearly trek with my dad’s childhood friends has now turned into a group of more than a dozen jeeps in their group alone. So it’s not just about building connections in the Jeep community; it’s also about the bonding that takes place when friends can gather and make memories by doing something they all enjoy.
Registration for the event is open on the Red Rock 4-Wheelers website, located here .
You may or may not scrape a fender while attending this event, but with a little preparation, your Jeep will still be drivable for the return trip home. Have a fun off-roading experience; pack accordingly, stay safe, and let us know if you decide to take on the rocks in Utah this year!
Have a thought or comment? Share it with us on social media! You can find us on Instagram , Facebook , Twitter and LinkedIn . And be sure to sign up for our email newsletter ! Additionally, A Girls Guide to Cars may earn a commission from affiliate links in this story.

THE 5 BEST Moscow Safaris
Safaris in moscow.
- Adrenaline & Extreme Tours
- Gear Rentals
- Nature & Wildlife Tours
- 5.0 of 5 bubbles
- District Central (TsAO)
- 3rd Transport Ring (TTK)
- District North-Eastern (SVAO)
- District Eastern (VAO)
- District South-Western (YuZAO)
- Lomonosovskiy
- Ostankinskiy
- Meshchanskiy
- Krasnoselskiy
- Maryina Roshcha (Jewish Quarter)
- Good for Couples
- Good for Kids
- Good for Big Groups
- Adventurous
- Budget-friendly
- Good for a Rainy Day
- Hidden Gems
- Honeymoon spot
- Good for Adrenaline Seekers
- Things to do ranked using Tripadvisor data including reviews, ratings, photos, and popularity.
1. Easy Russia Tour Guide
2. Rybokhotsoyuz
3. 365AltaiMongolia

4. Aviashop.Ru

5. UTS GROUP
6. BASK TOUR
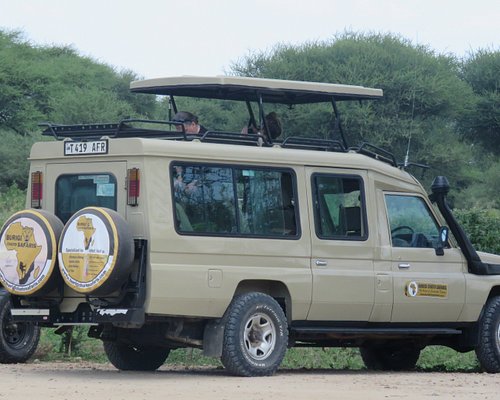
7. #1 Russia -Tanzania | Zanzibar, Serengeti Safari & Kilimanjaro Agency | BURIGI CHATO SAFARIS CO LTD
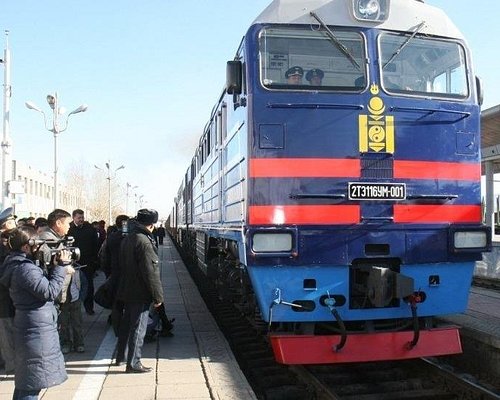
8. Transsib Moscow
- Easy Russia Tour Guide
- #1 Russia -Tanzania | Zanzibar, Serengeti Safari & Kilimanjaro Agency | BURIGI CHATO SAFARIS CO LTD
- 365AltaiMongolia
2018 Primetime Emmy & James Beard Award Winner
In Transit: Notes from the Underground
Jun 06 2018.
Spend some time in one of Moscow’s finest museums.
Subterranean commuting might not be anyone’s idea of a good time, but even in a city packing the war-games treasures and priceless bejeweled eggs of the Kremlin Armoury and the colossal Soviet pavilions of the VDNKh , the Metro holds up as one of Moscow’s finest museums. Just avoid rush hour.
The Metro is stunning and provides an unrivaled insight into the city’s psyche, past and present, but it also happens to be the best way to get around. Moscow has Uber, and the Russian version called Yandex Taxi , but also some nasty traffic. Metro trains come around every 90 seconds or so, at a more than 99 percent on-time rate. It’s also reasonably priced, with a single ride at 55 cents (and cheaper in bulk). From history to tickets to rules — official and not — here’s what you need to know to get started.
A Brief Introduction Buying Tickets Know Before You Go (Down) Rules An Easy Tour
A Brief Introduction
Moscow’s Metro was a long time coming. Plans for rapid transit to relieve the city’s beleaguered tram system date back to the Imperial era, but a couple of wars and a revolution held up its development. Stalin revived it as part of his grand plan to modernize the Soviet Union in the 1920s and 30s. The first lines and tunnels were constructed with help from engineers from the London Underground, although Stalin’s secret police decided that they had learned too much about Moscow’s layout and had them arrested on espionage charges and deported.
The beauty of its stations (if not its trains) is well-documented, and certainly no accident. In its illustrious first phases and particularly after the Second World War, the greatest architects of Soviet era were recruited to create gleaming temples celebrating the Revolution, the USSR, and the war triumph. No two stations are exactly alike, and each of the classic showpieces has a theme. There are world-famous shrines to Futurist architecture, a celebration of electricity, tributes to individuals and regions of the former Soviet Union. Each marble slab, mosaic tile, or light fixture was placed with intent, all in service to a station’s aesthetic; each element, f rom the smallest brass ear of corn to a large blood-spattered sword on a World War II mural, is an essential part of the whole.
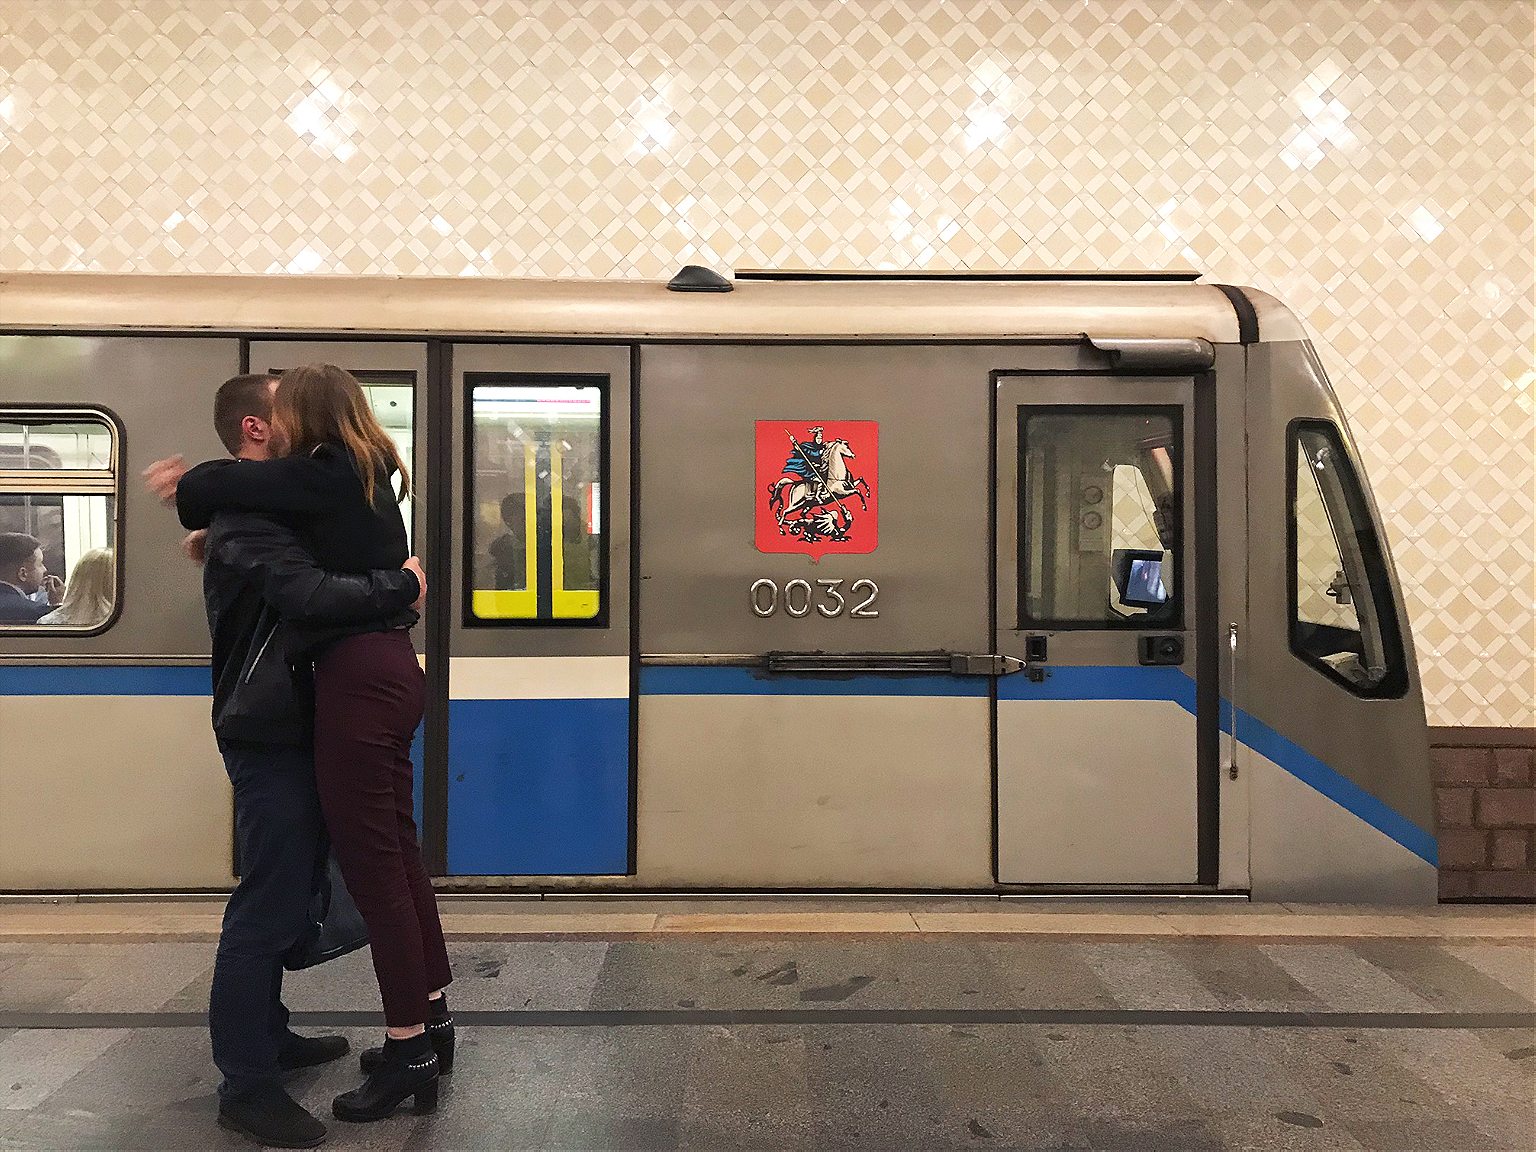
The Metro is a monument to the Soviet propaganda project it was intended to be when it opened in 1935 with the slogan “Building a Palace for the People”. It brought the grand interiors of Imperial Russia to ordinary Muscovites, celebrated the Soviet Union’s past achievements while promising its citizens a bright Soviet future, and of course, it was a show-piece for the world to witness the might and sophistication of life in the Soviet Union.
It may be a museum, but it’s no relic. U p to nine million people use it daily, more than the London Underground and New York Subway combined. (Along with, at one time, about 20 stray dogs that learned to commute on the Metro.)
In its 80+ year history, the Metro has expanded in phases and fits and starts, in step with the fortunes of Moscow and Russia. Now, partly in preparation for the World Cup 2018, it’s also modernizing. New trains allow passengers to walk the entire length of the train without having to change carriages. The system is becoming more visitor-friendly. (There are helpful stickers on the floor marking out the best selfie spots .) But there’s a price to modernity: it’s phasing out one of its beloved institutions, the escalator attendants. Often they are middle-aged or elderly women—“ escalator grandmas ” in news accounts—who have held the post for decades, sitting in their tiny kiosks, scolding commuters for bad escalator etiquette or even bad posture, or telling jokes . They are slated to be replaced, when at all, by members of the escalator maintenance staff.
For all its achievements, the Metro lags behind Moscow’s above-ground growth, as Russia’s capital sprawls ever outwards, generating some of the world’s worst traffic jams . But since 2011, the Metro has been in the middle of an ambitious and long-overdue enlargement; 60 new stations are opening by 2020. If all goes to plan, the 2011-2020 period will have brought 125 miles of new tracks and over 100 new stations — a 40 percent increase — the fastest and largest expansion phase in any period in the Metro’s history.
Facts: 14 lines Opening hours: 5 a.m-1 a.m. Rush hour(s): 8-10 a.m, 4-8 p.m. Single ride: 55₽ (about 85 cents) Wi-Fi network-wide
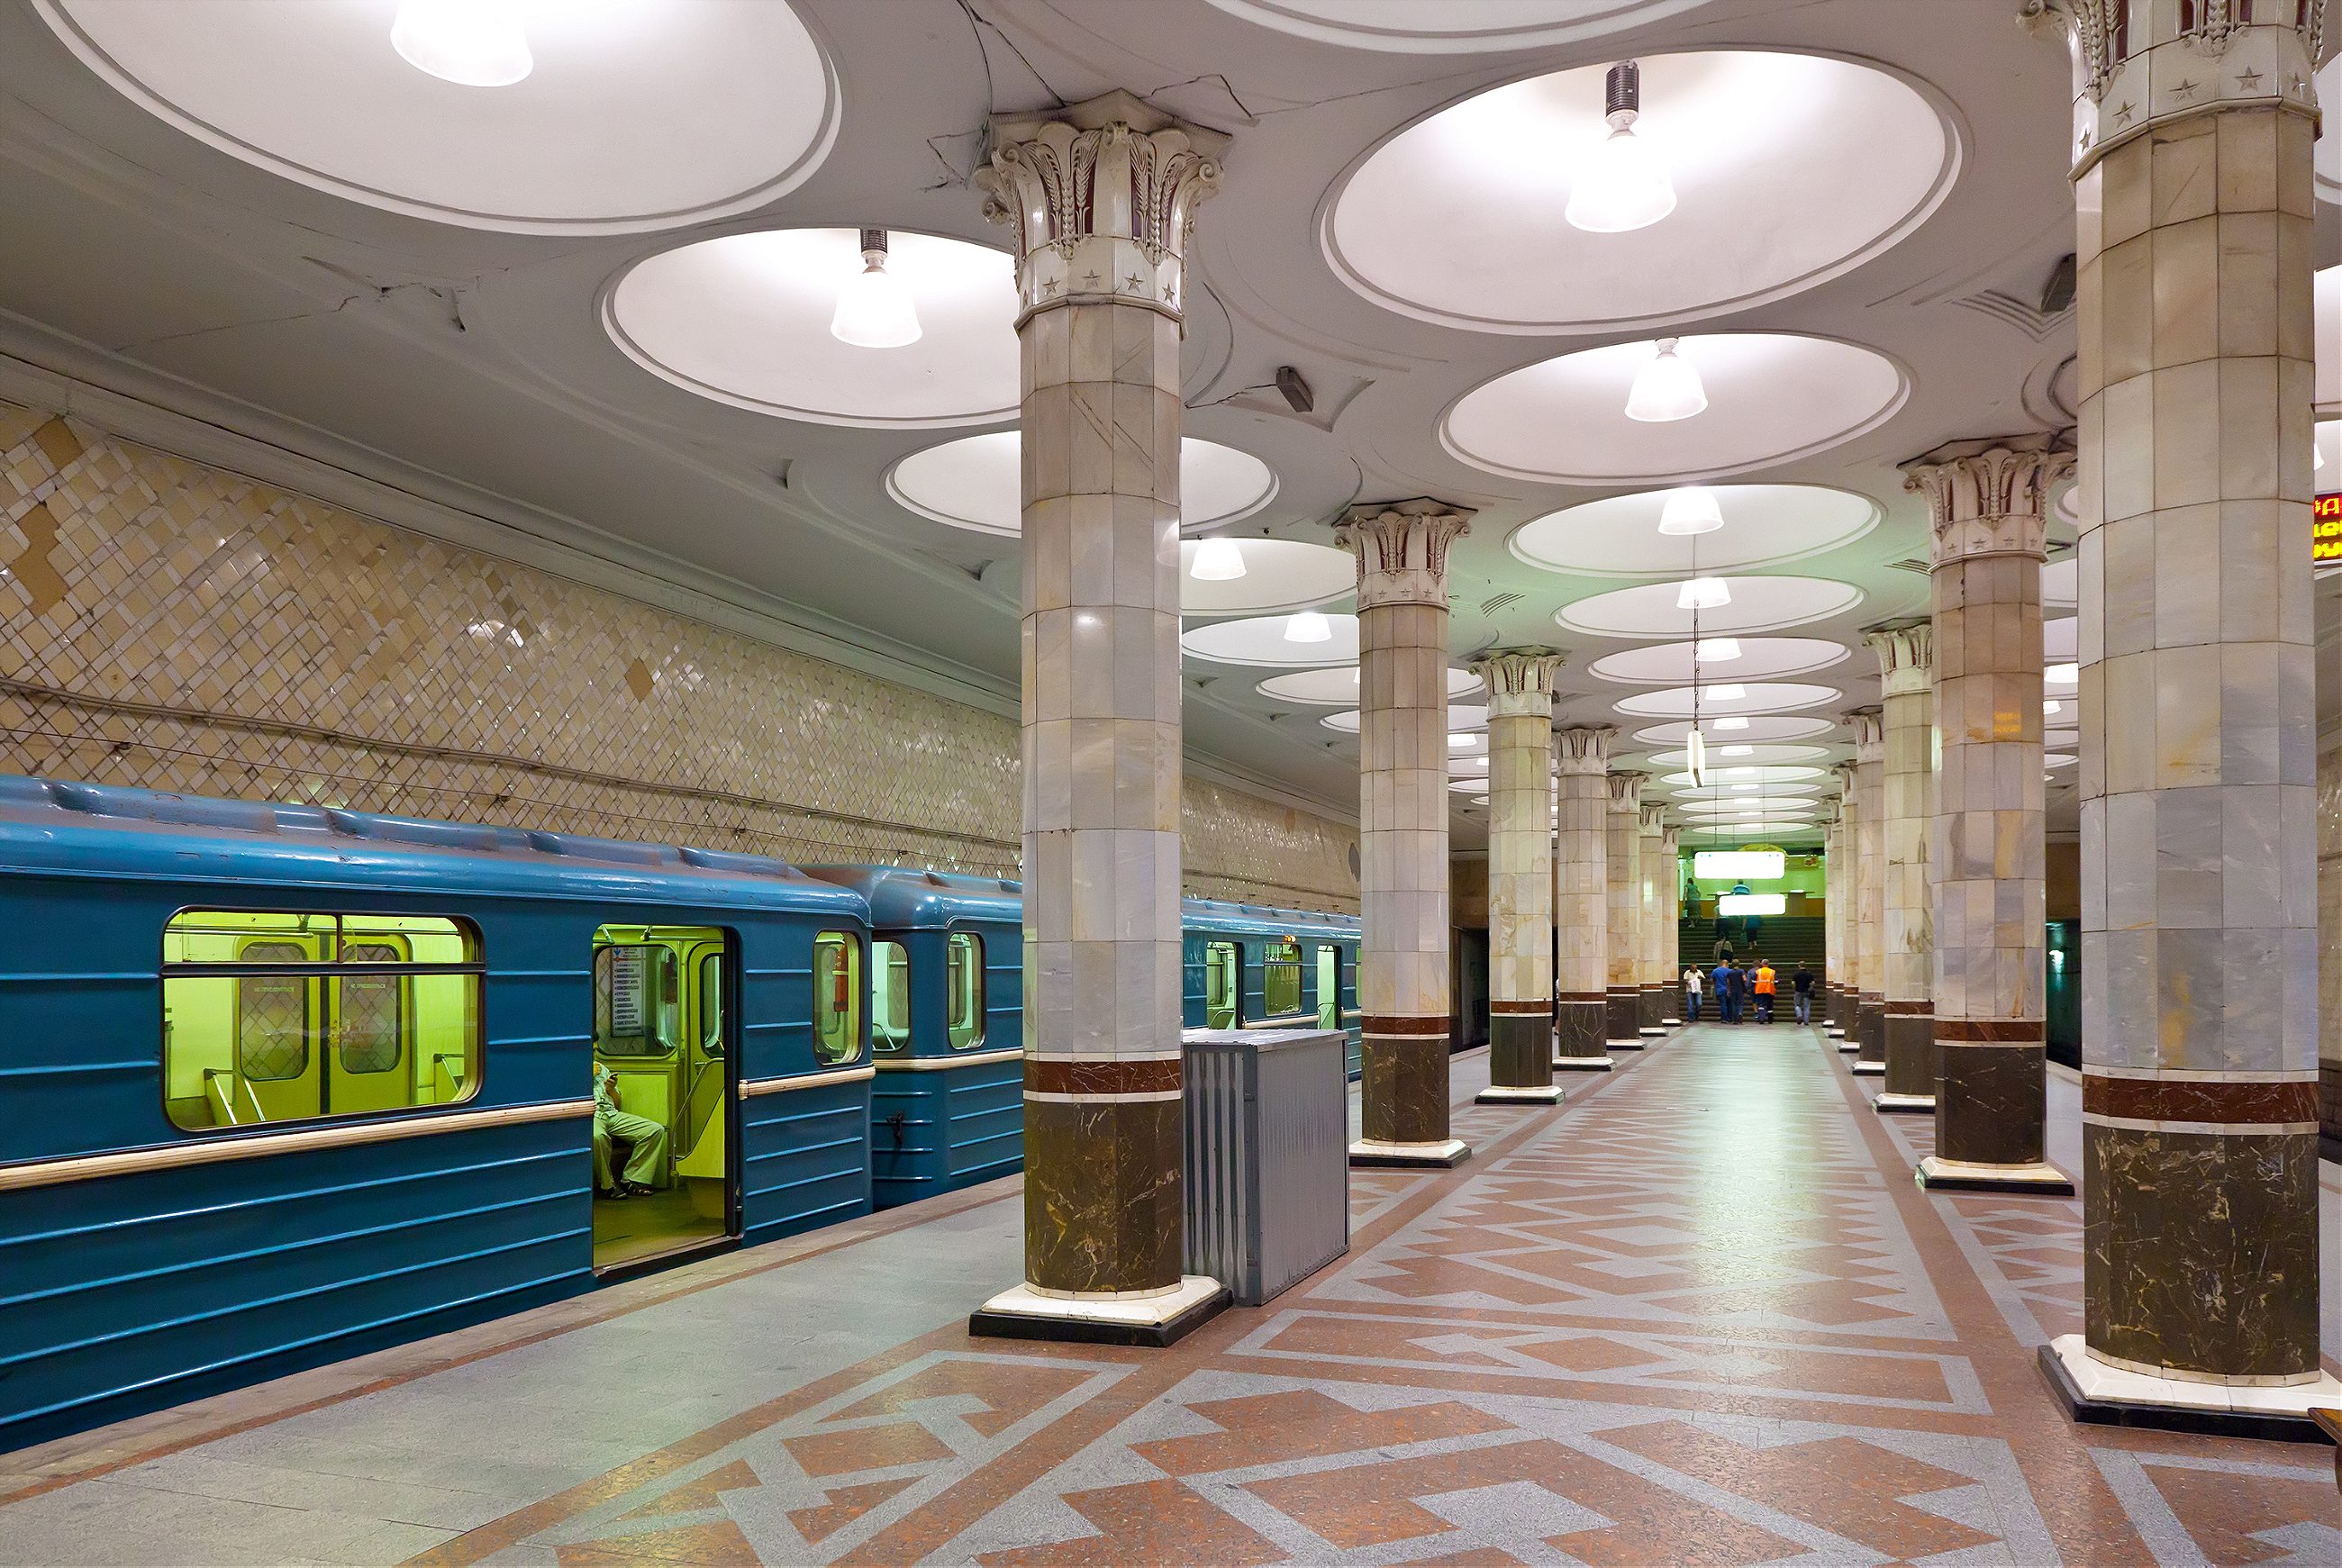
Buying Tickets
- Ticket machines have a button to switch to English.
- You can buy specific numbers of rides: 1, 2, 5, 11, 20, or 60. Hold up fingers to show how many rides you want to buy.
- There is also a 90-minute ticket , which gets you 1 trip on the metro plus an unlimited number of transfers on other transport (bus, tram, etc) within 90 minutes.
- Or, you can buy day tickets with unlimited rides: one day (218₽/ US$4), three days (415₽/US$7) or seven days (830₽/US$15). Check the rates here to stay up-to-date.
- If you’re going to be using the Metro regularly over a few days, it’s worth getting a Troika card , a contactless, refillable card you can use on all public transport. Using the Metro is cheaper with one of these: a single ride is 36₽, not 55₽. Buy them and refill them in the Metro stations, and they’re valid for 5 years, so you can keep it for next time. Or, if you have a lot of cash left on it when you leave, you can get it refunded at the Metro Service Centers at Ulitsa 1905 Goda, 25 or at Staraya Basmannaya 20, Building 1.
- You can also buy silicone bracelets and keychains with built-in transport chips that you can use as a Troika card. (A Moscow Metro Fitbit!) So far, you can only get these at the Pushkinskaya metro station Live Helpdesk and souvenir shops in the Mayakovskaya and Trubnaya metro stations. The fare is the same as for the Troika card.
- You can also use Apple Pay and Samsung Pay.
Rules, spoken and unspoken
No smoking, no drinking, no filming, no littering. Photography is allowed, although it used to be banned.
Stand to the right on the escalator. Break this rule and you risk the wrath of the legendary escalator attendants. (No shenanigans on the escalators in general.)
Get out of the way. Find an empty corner to hide in when you get off a train and need to stare at your phone. Watch out getting out of the train in general; when your train doors open, people tend to appear from nowhere or from behind ornate marble columns, walking full-speed.
Always offer your seat to elderly ladies (what are you, a monster?).
An Easy Tour
This is no Metro Marathon ( 199 stations in 20 hours ). It’s an easy tour, taking in most—though not all—of the notable stations, the bulk of it going clockwise along the Circle line, with a couple of short detours. These stations are within minutes of one another, and the whole tour should take about 1-2 hours.
Start at Mayakovskaya Metro station , at the corner of Tverskaya and Garden Ring, Triumfalnaya Square, Moskva, Russia, 125047.
1. Mayakovskaya. Named for Russian Futurist Movement poet Vladimir Mayakovsky and an attempt to bring to life the future he imagined in his poems. (The Futurist Movement, natch, was all about a rejecting the past and celebrating all things speed, industry, modern machines, youth, modernity.) The result: an Art Deco masterpiece that won the National Grand Prix for architecture at the New York World’s Fair in 1939. It’s all smooth, rounded shine and light, and gentle arches supported by columns of dark pink marble and stainless aircraft steel. Each of its 34 ceiling niches has a mosaic. During World War II, the station was used as an air-raid shelter and, at one point, a bunker for Stalin. He gave a subdued but rousing speech here in Nov. 6, 1941 as the Nazis bombed the city above.
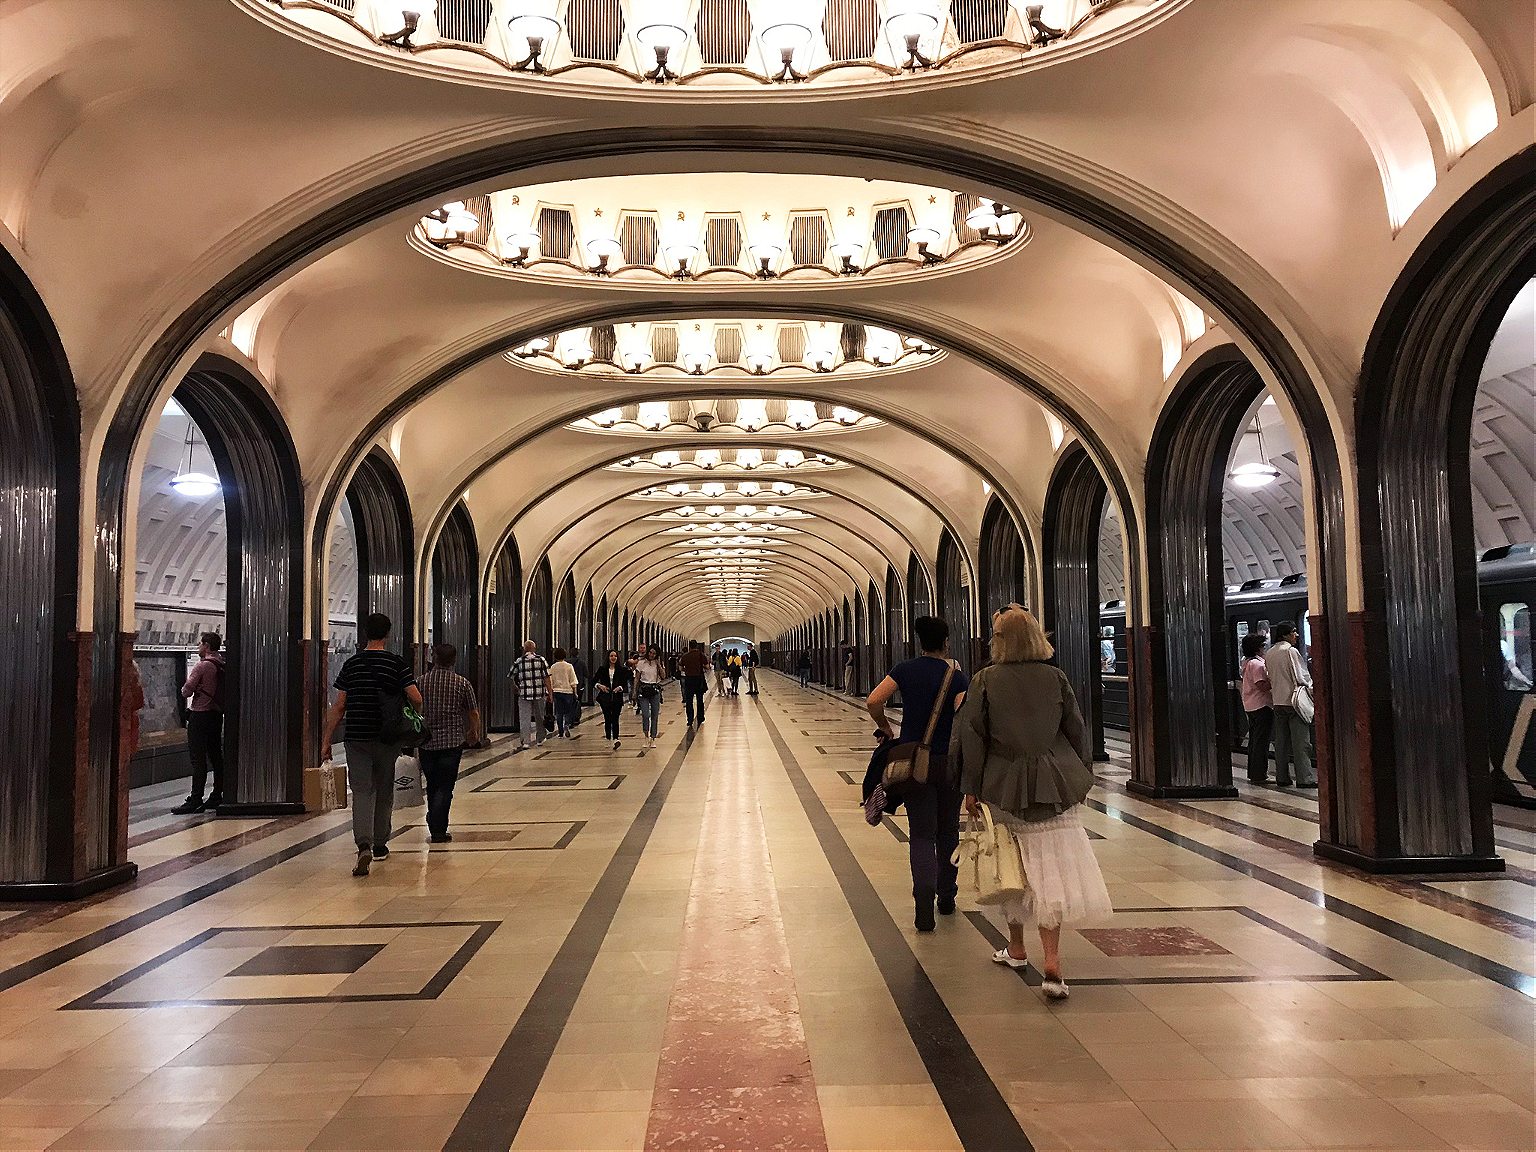
Take the 3/Green line one station to:
2. Belorusskaya. Opened in 1952, named after the connected Belarussky Rail Terminal, which runs trains between Moscow and Belarus. This is a light marble affair with a white, cake-like ceiling, lined with Belorussian patterns and 12 Florentine ceiling mosaics depicting life in Belarussia when it was built.
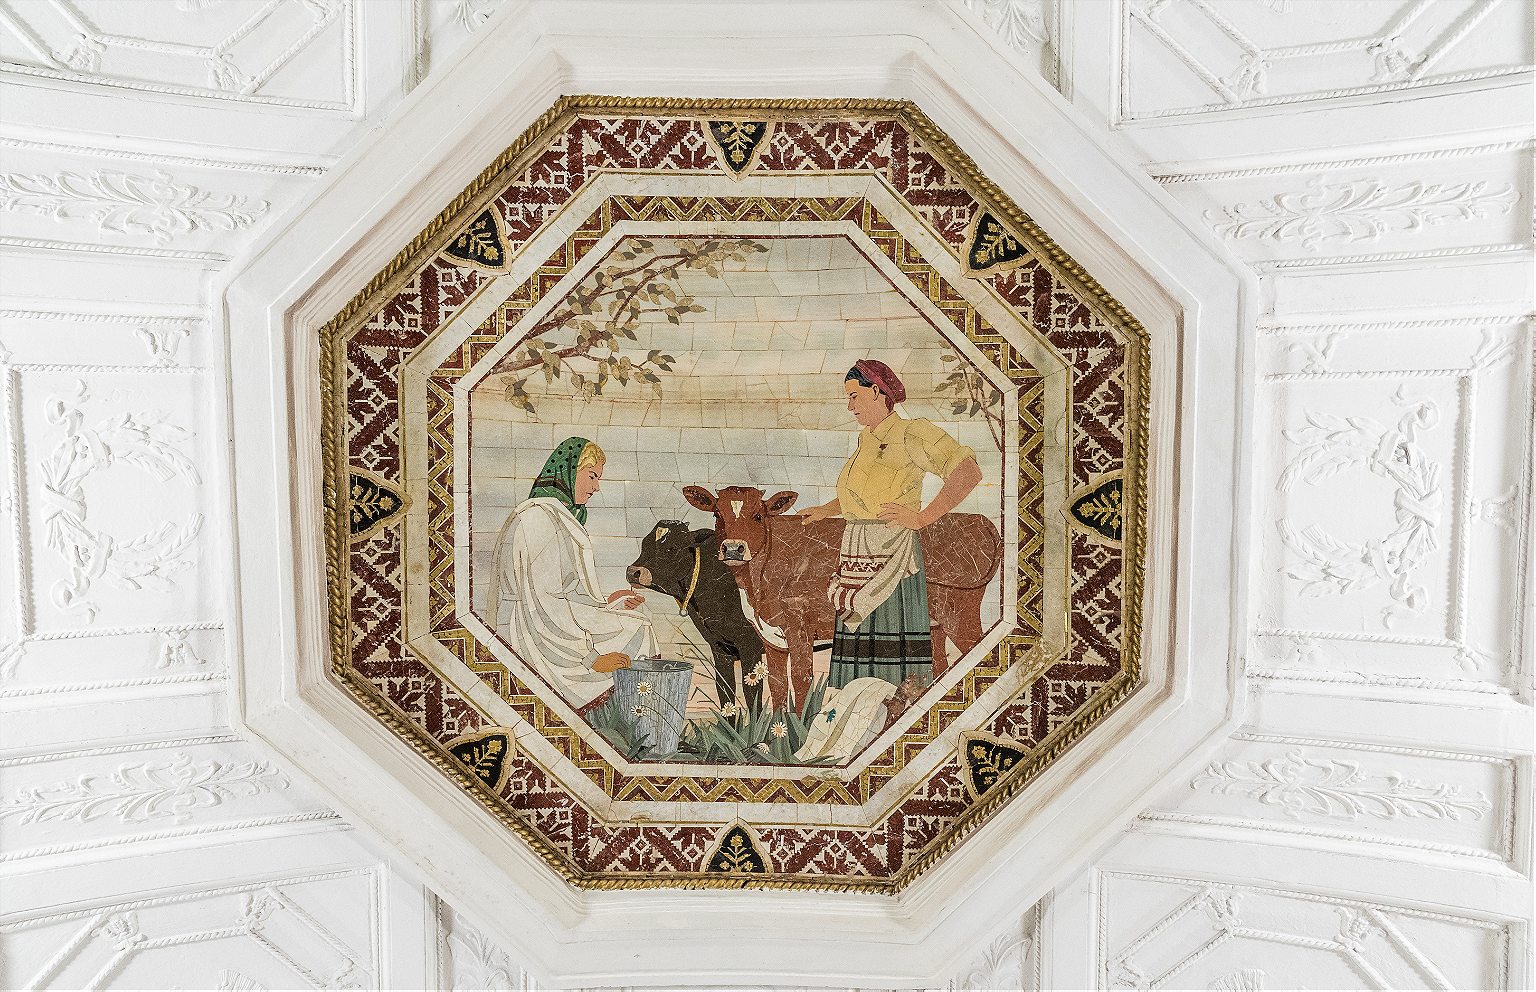
Transfer onto the 1/Brown line. Then, one stop (clockwise) t o:
3. Novoslobodskaya. This station was designed around the stained-glass panels, which were made in Latvia, because Alexey Dushkin, the Soviet starchitect who dreamed it up (and also designed Mayakovskaya station) couldn’t find the glass and craft locally. The stained glass is the same used for Riga’s Cathedral, and the panels feature plants, flowers, members of the Soviet intelligentsia (musician, artist, architect) and geometric shapes.
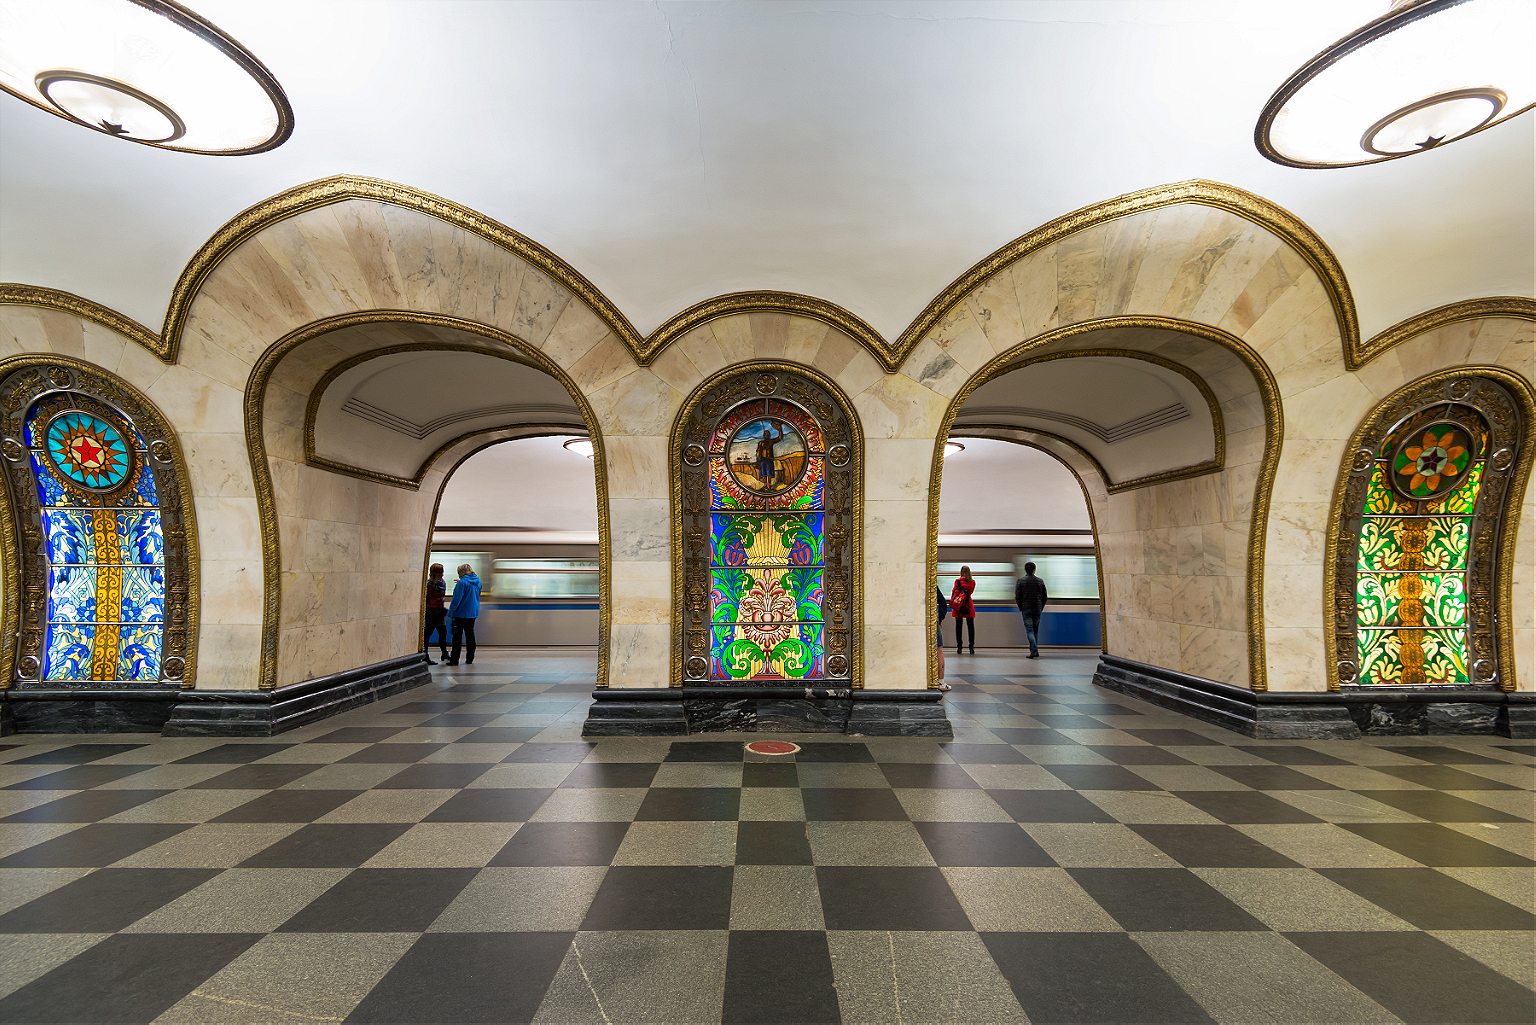
Go two stops east on the 1/Circle line to:
4. Komsomolskaya. Named after the Komsomol, or the Young Communist League, this might just be peak Stalin Metro style. Underneath the hub for three regional railways, it was intended to be a grand gateway to Moscow and is today its busiest station. It has chandeliers; a yellow ceiling with Baroque embellishments; and in the main hall, a colossal red star overlaid on golden, shimmering tiles. Designer Alexey Shchusev designed it as an homage to the speech Stalin gave at Red Square on Nov. 7, 1941, in which he invoked Russia’s illustrious military leaders as a pep talk to Soviet soldiers through the first catastrophic year of the war. The station’s eight large mosaics are of the leaders referenced in the speech, such as Alexander Nevsky, a 13th-century prince and military commander who bested German and Swedish invading armies.
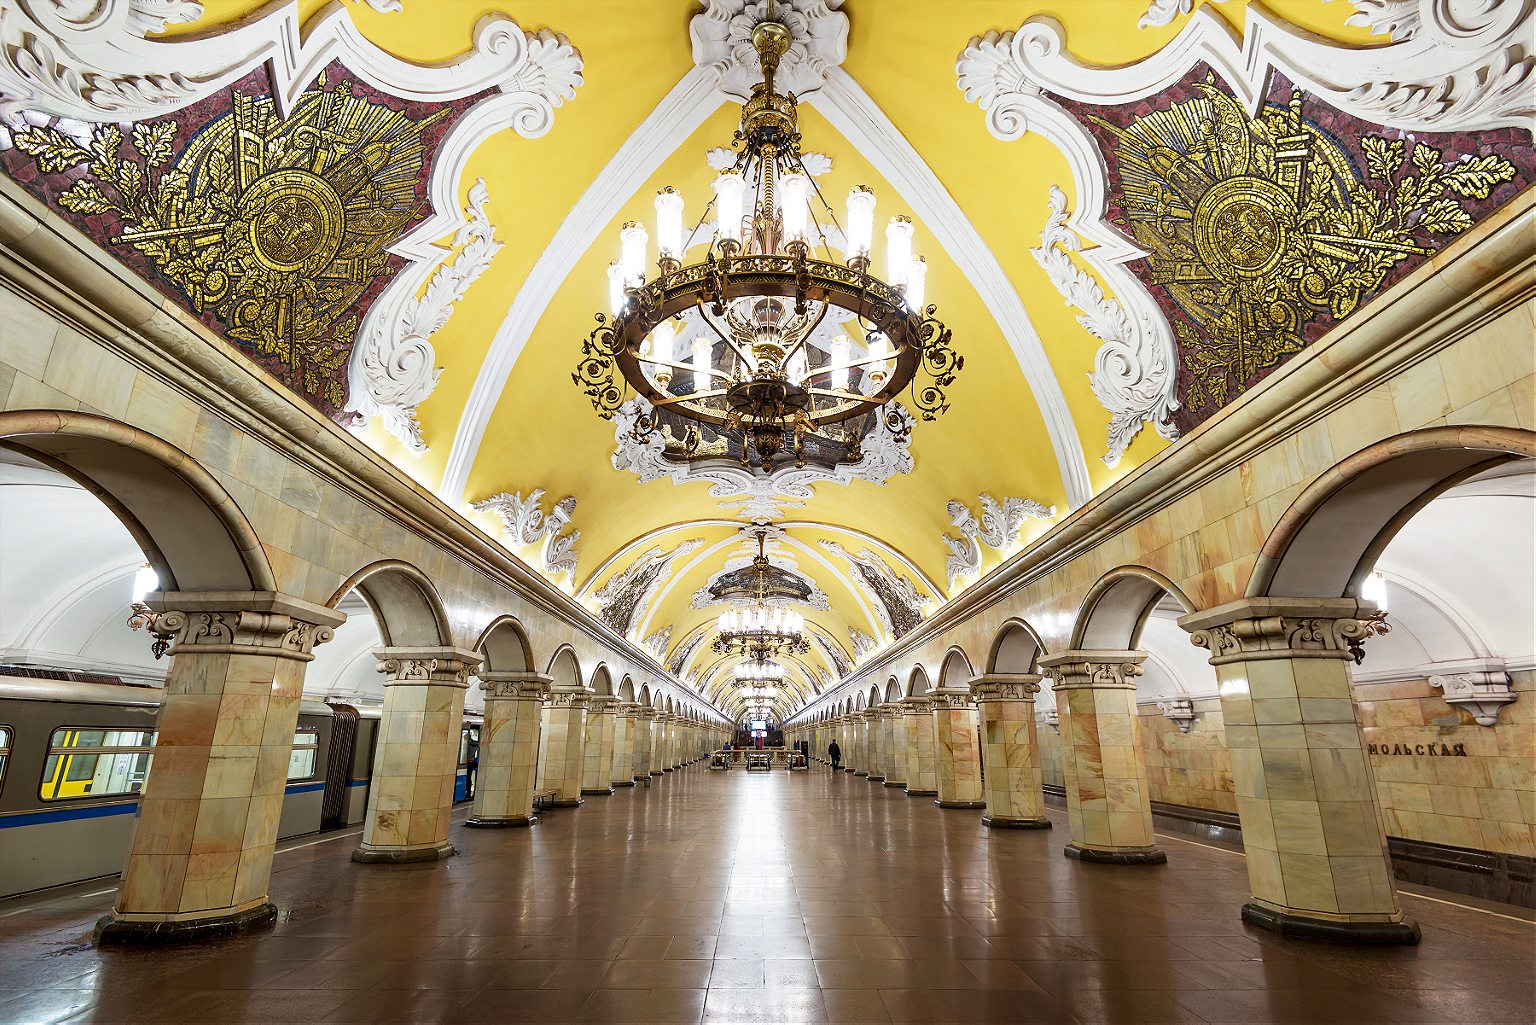
One more stop clockwise to Kurskaya station, and change onto the 3/Blue line, and go one stop to:
5. Baumanskaya. Opened in 1944. Named for the Bolshevik Revolutionary Nikolai Bauman , whose monument and namesake district are aboveground here. Though he seemed like a nasty piece of work (he apparently once publicly mocked a woman he had impregnated, who later hung herself), he became a Revolutionary martyr when he was killed in 1905 in a skirmish with a monarchist, who hit him on the head with part of a steel pipe. The station is in Art Deco style with atmospherically dim lighting, and a series of bronze sculptures of soldiers and homefront heroes during the War. At one end, there is a large mosaic portrait of Lenin.
Stay on that train direction one more east to:
6. Elektrozavodskaya. As you may have guessed from the name, this station is the Metro’s tribute to all thing electrical, built in 1944 and named after a nearby lightbulb factory. It has marble bas-relief sculptures of important figures in electrical engineering, and others illustrating the Soviet Union’s war-time struggles at home. The ceiling’s recurring rows of circular lamps give the station’s main tunnel a comforting glow, and a pleasing visual effect.
Double back two stops to Kurskaya station , and change back to the 1/Circle line. Sit tight for six stations to:
7. Kiyevskaya. This was the last station on the Circle line to be built, in 1954, completed under Nikita Khrushchev’ s guidance, as a tribute to his homeland, Ukraine. Its three large station halls feature images celebrating Ukraine’s contributions to the Soviet Union and Russo-Ukrainian unity, depicting musicians, textile-working, soldiers, farmers. (One hall has frescoes, one mosaics, and the third murals.) Shortly after it was completed, Khrushchev condemned the architectural excesses and unnecessary luxury of the Stalin era, which ushered in an epoch of more austere Metro stations. According to the legend at least, he timed the policy in part to ensure no Metro station built after could outshine Kiyevskaya.

Change to the 3/Blue line and go one stop west.
8. Park Pobedy. This is the deepest station on the Metro, with one of the world’s longest escalators, at 413 feet. If you stand still, the escalator ride to the surface takes about three minutes .) Opened in 2003 at Victory Park, the station celebrates two of Russia’s great military victories. Each end has a mural by Georgian artist Zurab Tsereteli, who also designed the “ Good Defeats Evil ” statue at the UN headquarters in New York. One mural depicts the Russian generals’ victory over the French in 1812 and the other, the German surrender of 1945. The latter is particularly striking; equal parts dramatic, triumphant, and gruesome. To the side, Red Army soldiers trample Nazi flags, and if you look closely there’s some blood spatter among the detail. Still, the biggest impressions here are the marble shine of the chessboard floor pattern and the pleasingly geometric effect if you view from one end to the other.
Keep going one more stop west to:
9. Slavyansky Bulvar. One of the Metro’s youngest stations, it opened in 2008. With far higher ceilings than many other stations—which tend to have covered central tunnels on the platforms—it has an “open-air” feel (or as close to it as you can get, one hundred feet under). It’s an homage to French architect Hector Guimard, he of the Art Nouveau entrances for the Paris M é tro, and that’s precisely what this looks like: A Moscow homage to the Paris M é tro, with an additional forest theme. A Cyrillic twist on Guimard’s Metro-style lettering over the benches, furnished with t rees and branch motifs, including creeping vines as towering lamp-posts.
Stay on the 3/Blue line and double back four stations to:
10. Arbatskaya. Its first iteration, Arbatskaya-Smolenskaya station, was damaged by German bombs in 1941. It was rebuilt in 1953, and designed to double as a bomb shelter in the event of nuclear war, although unusually for stations built in the post-war phase, this one doesn’t have a war theme. It may also be one of the system’s most elegant: Baroque, but toned down a little, with red marble floors and white ceilings with gilded bronze c handeliers.
Jump back on the 3/Blue line in the same direction and take it one more stop:
11. Ploshchad Revolyutsii (Revolution Square). Opened in 1938, and serving Red Square and the Kremlin . Its renowned central hall has marble columns flanked by 76 bronze statues of Soviet heroes: soldiers, students, farmers, athletes, writers, parents. Some of these statues’ appendages have a yellow sheen from decades of Moscow’s commuters rubbing them for good luck. Among the most popular for a superstitious walk-by rub: the snout of a frontier guard’s dog, a soldier’s gun (where the touch of millions of human hands have tapered the gun barrel into a fine, pointy blade), a baby’s foot, and a woman’s knee. (A brass rooster also sports the telltale gold sheen, though I am told that rubbing the rooster is thought to bring bad luck. )
Now take the escalator up, and get some fresh air.
R&K Insider
Join our newsletter to get exclusives on where our correspondents travel, what they eat, where they stay. Free to sign up.
21 Things to Know Before You Go to Moscow
Featured city guides.
Moscow in Winter: Weather, What to Pack, and What to See
:max_bytes(150000):strip_icc():format(webp)/RussianKerry2-56a39e8d5f9b58b7d0d2ca8c.jpg "safari photo gear")
WITGOAWAY / Getty Images
Travelers who enjoy bundling up for a snowy climate will appreciate all that Moscow has to offer, come winter. This ornamental Russian city shows its vibrant cultural heritage when temperatures plummet and the snow starts falling on Red Square. Unlike other cities, whose residents scurry away to hibernate in December, the people of Moscow embrace their sub-zero climate in style. They don their furs and ushanka hats (traditional hats with earflaps) to peruse Christmas markets, dine out at restaurants, and attend the opera.
In winter, Moscow's scenery looks awe-inspiring under a dusting of snow. There's something undeniably charming about seeing historic sites like the colorful, tented rooftops of Saint Basil's Cathedral capped with a layer of icy frost. The food here is warm and comforting, and the cultural winter events are not to be missed. Plus, it's cheaper to visit Moscow during the winter and it's far less crowded with tourists.
Moscow is not where you go to get a suntan over the holidays. In fact, the Moscow winter is enough to chill any hearty tourist to the bone—but that's all part of the fun. The average high for December, according to the National Oceanic and Atmospheric Administration (NOAA), is 27 degrees Fahrenheit (minus 2.7 degrees Celsius); for January, it's 23 degrees Fahrenheit (minus 5 degrees Celsius); and for February, it's 26 degrees Fahrenheit (minus 3.3 degrees Celsius). Take these average temperatures with a grain of salt, however, as it certainly isn't abnormal for the air to dip into the teens.
The Moscow cold is often accompanied by generous amounts of ice and snow deposited by frequent winter storms. The city goes unfazed by these storms—cars still drive around and people in boots trod through the snowpack. You'll see thick icicles growing on roof overhangs, so be sure not to linger underneath them while you're out touring the area's magnificent cathedrals.
Lastly, don't be surprised if your flights in or out get canceled or delayed. This can be one of the drawbacks to traveling in the winter, in general.
What to Pack
Stuffing your suitcase with bulky (and heavy) winter clothing can be frustrating and expensive, which tends to deter Moscow winter travel altogether. A trip to the city between early December and late February requires enough accessories to cover the extremities: wooly hats, cold-weather socks, knit scarves, and a good pair of gloves. Also pack a coat that falls below the hips, weatherproof boots, and ski pants, if you have them. Remember, fashion is second only to avoiding hypothermia in this polar city.
The Moscow winter calendar is brimming with cultural events for travelers to attend each winter. Many events take place during the Christmas holiday; then, the city caps off the winter with a farewell festival, come February.
- The annual Russian Winter Festival , which spans an entire month starting mid-December, takes place in several locations throughout the city. Head to Izmailovo Park or Revolution Square to see everything from over-the-top ice sculptures to traditional dance performances. Watch the professional ice skaters and visit food trucks that serve traditional fare.
- Moscow's New Year’s Eve celebration is one of the city's biggest events of the year. Tens of thousands of people spend it in Kremlin—Moscow's central complex—watching the Kremlin tower strike midnight, while fireworks crack in the background. Others attend the Christmas tree light show at Red Square.
- Christmas in Russia falls on January 7, and the week between New Year’s Eve and Christmas Day is a time for Russians to relax. Families focus on spending time together at home, preparing traditional foods like ukha (fish soup) and sauerkraut. Tourists can use this uncrowded time wisely by seeking out the city's culinary gems. Make sure to check the hours of operations on restaurants, shops, and other businesses before visiting them during this week. While much of the city's businesses might be closed, you might get special treatment at the places that stay open.
- Maslenitsa , Russia’s farewell-to-winter festival, occurs in late February or early March. This pagan celebration is marked by games, contests, and cultural traditions. It’s held in the Red Square area every year and draws crowds of Muscovites and visitors alike.
Winter Travel Tips
- In order to obtain a Russian travel visa, you'll need to be invited by a relative or friend who is a citizen or a hosting tour company.
- Traveling to Moscow in the winter helps you avoid the summer crowds; however, flight delays due to weather are common. Plan an extra day on either end of your trip in case you get held up.
- If you plan to visit a Russian banya, a Slavic steam bathhouse, take note that most people bathe in the buff. However, most bathhouses are separated by sex.
- Plan alternating indoor and outdoor activities so that you don't get too cold. A visit to the Tretyakov Gallery, the State Armory Museum, or the Pushkin Museum of Fine Arts provides a nice respite from the frigid temperatures.
January in Moscow: Weather, What to Pack, and What to See
February in Prague: Weather, What to Pack, and What to See
February in Moscow: Weather, What to Pack, and What to See
Moscow - Russian Rivers and Waterways Port of Call
Winter in Niagara Falls: Weather, What to Pack, and What to See
Weather in Iceland: Climate, Seasons, and Average Monthly Temperature
February in New York City: Weather, What to Pack, and What to See
January in New York City: Weather, What to Pack, and What to See
February in the United States: Weather, What to Pack, and What to See
Moscow's Russian Winter Festival
December in Moscow: Weather, What to Pack, and What to See
25 Best Things to Do in Moscow
March in Moscow: Weather, What to Pack, and What to See
April in Moscow: Weather, What to Pack, and What to See
Moscow in September: Weather, What to Pack, and What to See
Things to Do in Moscow During the Winter
Advertisement
What Solar Eclipse-Gazing Has Looked Like for the Past 2 Centuries
Millions of people on Monday will continue the tradition of experiencing and capturing solar eclipses, a pursuit that has spawned a lot of unusual gear.
- Share full article

By Sarah Eckinger
- April 8, 2024
For centuries, people have been clamoring to glimpse solar eclipses. From astronomers with custom-built photographic equipment to groups huddled together with special glasses, this spectacle has captivated the human imagination.
Creating a Permanent Record
In 1860, Warren de la Rue captured what many sources describe as the first photograph of a total solar eclipse . He took it in Rivabellosa, Spain, with an instrument known as the Kew Photoheliograph . This combination of a telescope and camera was specifically built to photograph the sun.
Forty years later, Nevil Maskelyne, a magician and an astronomy enthusiast, filmed a total solar eclipse in North Carolina. The footage was lost, however, and only released in 2019 after it was rediscovered in the Royal Astronomical Society’s archives.

Telescopic Vision
For scientists and astronomers, eclipses provide an opportunity not only to view the moon’s umbra and gaze at the sun’s corona, but also to make observations that further their studies. Many observatories, or friendly neighbors with a telescope, also make their instruments available to the public during eclipses.
Fredrik Hjalmar Johansen, Fridtjof Nansen and Sigurd Scott Hansen observing a solar eclipse while on a polar expedition in 1894 .
Women from Wellesley College in Massachusetts and their professor tested out equipment ahead of their eclipse trip (to “catch old Sol in the act,” as the original New York Times article phrased it) to New London, Conn., in 1922.
A group from Swarthmore College in Pennsylvania traveled to Yerbaniz, Mexico, in 1923, with telescopes and a 65-foot camera to observe the sun’s corona .
Dr. J.J. Nassau, director of the Warner and Swasey Observatory at Case School of Applied Science in Cleveland, prepared to head to Douglas Hill, Maine, to study an eclipse in 1932. An entire freight car was required to transport the institution’s equipment.
Visitors viewed a solar eclipse at an observatory in Berlin in the mid-1930s.
A family set up two telescopes in Bar Harbor, Maine, in 1963. The two children placed stones on the base to help steady them.
An astronomer examined equipment for an eclipse in a desert in Mauritania in June 1973. We credit the hot climate for his choice in outfit.
Indirect Light
If you see people on Monday sprinting to your local park clutching pieces of paper, or with a cardboard box of their head, they are probably planning to reflect or project images of the solar eclipse onto a surface.
Cynthia Goulakos demonstrated a safe way to view a solar eclipse , with two pieces of cardboard to create a reflection of the shadowed sun, in Lowell, Mass., in 1970.
Another popular option is to create a pinhole camera. This woman did so in Central Park in 1963 by using a paper cup with a small hole in the bottom and a twin-lens reflex camera.
Amateur astronomers viewed a partial eclipse, projected from a telescope onto a screen, from atop the Empire State Building in 1967 .
Back in Central Park, in 1970, Irving Schwartz and his wife reflected an eclipse onto a piece of paper by holding binoculars on the edge of a garbage basket.
Children in Denver in 1979 used cardboard viewing boxes and pieces of paper with small pinholes to view projections of a partial eclipse.
A crowd gathered around a basin of water dyed with dark ink, waiting for the reflection of a solar eclipse to appear, in Hanoi, Vietnam, in 1995.
Staring at the Sun (or, How Not to Burn Your Retinas)
Eclipse-gazers have used different methods to protect their eyes throughout the years, some safer than others .
In 1927, women gathered at a window in a building in London to watch a total eclipse through smoked glass. This was popularized in France in the 1700s , but fell out of favor when physicians began writing papers on children whose vision was damaged.
Another trend was to use a strip of exposed photographic film, as seen below in Sydney, Australia, in 1948 and in Turkana, Kenya, in 1963. This method, which was even suggested by The Times in 1979 , has since been declared unsafe.
Solar eclipse glasses are a popular and safe way to view the event ( if you use models compliant with international safety standards ). Over the years there have been various styles, including these large hand-held options found in West Palm Beach, Fla., in 1979.
Parents and children watched a partial eclipse through their eclipse glasses in Tokyo in 1981.
Slimmer, more colorful options were used in Nabusimake, Colombia, in 1998.
In France in 1999.
And in Iran and England in 1999.
And the best way to see the eclipse? With family and friends at a watch party, like this one in Isalo National Park in Madagascar in 2001.
Safari Wilderness Ranch is piece of old Florida that offers unique adventures
Safari wilderness ranch in lakeland.
Safari Wilderness Ranch has about 800 animals. All the experiences offered put visitors in the heart of where the herds of animals live and thrive.
LAKELAND, Fla. - Nestled next to the Green Swamp is a ranch that is more like stepping into the wilds of Africa.
Safari Wilderness Ranch is not a zoo, but it does have animals most people associate with one. It's not a ranch like a farmer's ranch, but is more like a range where wild animals live.
READ: Robinson Preserve in Bradenton offers one of Florida's premier birding destinations
"We have about 800 animals here," Shared CEO and resident owner Lex Salisbury. "They're all animals that do well in this climate and they thrive here, and you'll see them in big herds."
The here is a piece of old Florida, still wild and untamed like it used to be.

"We're at Safari Wilderness now which is 260 acres in the Green Swamp in Florida," shared Salisbury. "And the Green Swamp is the second-largest wilderness area after the Florida Everglades and this is the heart of the Florida Aquifer."
"There are five different ways you can see the place," shared Salisbury. "You can see 'em on ATVs, you can see 'em on camel back safaris, you can go on vehicle tours, you can do drive-thru tours, and you can can go on kayak tours."
READ: Jet cars can be driven on the water in Clearwater
All of the experiences put the visitor in the heart of the open land where the herds of animals live and thrive.
"It's a different experience than going to a zoo," admitted Salisbury. "I think it's a more real, richer thing."

And he knows a bit about zoos, having worked in the business professionally before opening this adventure.
"Experiential learning is far more superior than lecturing people in school," said Salisbury of this ranch. "If you can let people ride a camel, smell a camel, and feel a camel [then] the sense of smell and the sense of touch are emotional triggers that allow you to commit the experience to memory."

Those memories are what keep people coming back. They are what inspire the next generation of animal lovers to support the conservation efforts of ventures like this.
Safari Wilderness is located at 10850 Moore Road in Lakeland . To learn more about them and book your own visit, click here .
SIGN UP: Click here to sign up for the FOX 13 daily newsletter
WATCH FOX 13 NEWS
- a. Send us an email
- b. Anonymous form
- Buyer's Guide
- Upcoming Products
- Tips / Contact Us
- Podcast Instagram Facebook Twitter Mastodon YouTube Notifications RSS Newsletter
Google Pixel 8's Flagship AI Photo Editing Feature Coming to iPhones
Google next month will make its latest AI-powered photo editing feature available to all users of Google Photos on iOS, the company has announced .

The edits mimic the kind of possibilities afforded by more professional editing tools like Photoshop, except Magic Editor achieves its automated results via AI, rather than the user having to do them manually.
The editing tool debuted as one of the headline AI features on the company's flagship phone when it launched six months ago, and has since been exclusive to Google Pixel 8 owners and Google One subscribers. The tool will become available to all users of Google Photos starting May 15.
Google Photos for iOS and Android will include 10 Magic Editor saves per month. To use more than that, users will need to buy a Premium Google One plan, which starts at 2TB of storage for $10 per month or $100 annually.
In addition to Magic Editor, Google is bringing several more editing tools to Google Photos, including Photo Unblur, Sky suggestions, Color pop, HDR effect for photos and videos, Portrait Blur, Portrait Light (plus its add light/balance light features), Cinematic Photos, Styles in the Collage Editor, and Video Effects.
To use the AI features, Apple devices must be running iOS 15 or later. Google Photos is a free download for iPhone and iPad available on the App Store .
Get weekly top MacRumors stories in your inbox.
Top Rated Comments
Every digital photo is a fake though and every edit just another addition to the lie. AI is just another log for the fire.
Popular Stories

iOS 18 Will Add These New Features to Your iPhone

iPhone 16 Plus Rumored to Come in These 7 Colors

Macs to Get AI-Focused M4 Chips Starting in Late 2024

Top Stories: M4 Mac Roadmap Leaked, New iPads in Second Week of May, and More

Best Buy Opens Up Sitewide Sale With Record Low Prices on M3 MacBook Air, iPad, and Much More
Next article.

Our comprehensive guide highlighting every major new addition in iOS 17, plus how-tos that walk you through using the new features.

App Store changes for the EU, new emoji, Podcasts transcripts, and more.

Get the most out your iPhone 15 with our complete guide to all the new features.
A deep dive into new features in macOS Sonoma, big and small.

Revamped models with OLED displays, M3 chip, and redesigned Magic Keyboard accessory.

Updated 10.9-inch model and new 12.9-inch model, M2 chip expected.

Apple's annual Worldwide Developers Conference will kick off with a keynote on June 10.

Expected to see new AI-focused features and more. Preview coming at WWDC in June with public release in September.
Other Stories

2 days ago by MacRumors Staff

2 days ago by Joe Rossignol

2 days ago by Tim Hardwick

3 days ago by MacRumors Staff

3 days ago by Tim Hardwick
IMAGES
VIDEO
COMMENTS
Shutter Spee d. Capturing the essence of movement is crucial in safari photography, making shutter speed a vital setting. Opting for a faster shutter speed proves effective in freezing the motion of swift-moving animals. Typically, a recommended shutter speed of 1/1000th of a second or faster is advised for wildlife photography.
In this third portion of a four-part series, South African photographer Isak Pretorius shares his knowledge about optimizing your photo gear, and gives you shooting tips to consider, to help make the most of the variety of picture-making opportunities that await you during an African safari. Above Image: The sea of dunes in Namibia's ...
Expensive Bridge Camera. The Sony RX10 IV is a bridge camera. It fills the gap between old-school point-and-shoot cameras and interchangeable lens systems. A bridge camera with a fixed lens offers shooters a versatile zoom lens. It provides the simplicity of point and shoots with superior image quality.
First, the camera's burst speed, which is the number of images per second your camera can take. For instance, a camera with a burst speed of 10fps (frames per second) can take up to 10 photos per second. Second, the speed that your camera can write to the memory card inside the camera as it takes pictures.
Essential Photo Gear. If you wanted to invest on a new camera or upgrade your photo gear, a safari can be the best excuse for doing it. Don't get too excited and remember that you will need to pack light for the trip and more importantly, don't buy anything you're not likely to use anymore.. 10 things you need to add to your safari photo gear:
15. Consider bringing a tripod and/or beanbag. Bringing a tripod and/or beanbag on safari is a crucial photography tip for the following reasons: Stability for Clear Shots: A tripod or beanbag provides stability, reducing camera shake and ensuring clear shots, especially when using longer lenses.
Layers work best on safari. Most mornings (any time of year) and evenings are cool and riding in an open vehicle is downright cold. Clothing with pockets are great because you can use them for extra camera batteries, memory cards, glasses, etc. while out in the field and not have to fumble about in your camera bag. 17.
I'll start right here: take two cameras. Africa is a dusty place, particularly during the dry season. Since most of your time will be spent in the back of an open safari vehicle, that dust is a double-whammy. Every time you change lenses, you'll be opening up your camera to intrusion by the ever-present dust.
The right photography gear for a photo safari. If you are an advanced photographer, I would definitely recommend bringing one, or preferably two, DSLR (Digital Single Lens Reflex) cameras with exchangeable lenses. With two cameras (bodies) and different lenses, you can easily switch cameras. For example, when wildlife comes closer, or you want ...
Just returned from 2 week safari in East Africa with 3,000+ photos. Primary gear was Canon EF 70-300 f/4-5.6L IS on 7D body. Was light limited more than focal length limited for the most part, particularly on late afternoon drives.
One solid piece of advice is to place all your smaller gear for wildlife photography i.e. chargers, lens hoods, cables, card readers and other bulky items into your main checked-in luggage to make room for more valuable and breakable items in your camera bag/hand luggage. Even if your luggage is delayed with a few full batteries and some extra ...
Spare batteries - Choose whatever fits the camera you have, fully charged! I usually bring two spares. Spare memory cards - You want something with a fast write speed, like this 64GB UHS-II 300MB/s SD card. Camera bag - Bring anything with easy access. You'll be sitting on safari so size and weight is not a big deal.
Here is some essential safari photo gear you should consider getting before heading out to capture Africa's amazing wildlife on camera. And if you see something here you simply must have right away, click the "buy" button and it's yours in an instant. Nikon D7100.
That's what everyone agrees on when it comes to a safari in national parks. A 300mm will allow you to take a large majority of the scenes on safari, except for birds, where a 400mm to 500mm is recommended as a minimum. It all depends then on the type of body you have and the distance the wildlife are from your lens.
For each day's photo safari, we used the shoulder bags to carry extra gear, batteries, charging cables, snacks, or layers into the vehicles, and then carried at least one of our two cameras with lenses over our shoulders. A second camera body with a shorter lens could then usually fit into our bags. A large water bottle was also part of the ...
There are many types of African safaris, in numerous locations, ranging from simple camping to ultra-luxury. This particular safari is in Tanzania, focused (no pun intended) on photography. It's definitely on the luxury end of the spectrum. An intense 9 day trip, with daily photo excursions and daily mentoring classes will, I hope, extend my ...
The Best Photo Safari Gear Plus Planning Tips A photo safari takes more planning than almost any other type of vacation. You have much more than just gear to worry about and sometimes conditions are not ideal. Safaris include a lot of time in a vehicle and sharing shooting space with other photographers. You will likely see animals only ...
Download our FREE Gear Guide & Exposure CHEAT SHEET https://www.viewfindermastery.com/resourcesIn this video we discuss all we've learned about packing for ...
Equipment List for Safari Holidays. Camera. Telephoto lenses (ideally covering 24-100mm and 200-400mm range) Lens cleaning equipment. Extra batteries. Battery charger. Memory cards. Camera bag. Zip lock bags (to protect equipment from dust) but note plastic bags are banned in Kenya so use a cloth alternative!
Walking tour around Moscow-City.Thanks for watching!MY GEAR THAT I USEMinimalist Handheld SetupiPhone 11 128GB https://amzn.to/3zfqbboMic for Street https://...
Easter Jeep Safari Trail Rules. There are plenty of trails to explore, suitable for both inexperienced and veteran drivers. Each route is rated on a 1-10 numerical scale (1 being the easiest and ...
0 Followers, 0 Following, 1 Posts - See Instagram photos and videos from GearGraffiti (@geargraffiti2024)
These places are best for safaris in Moscow: Easy Russia Tour Guide; UTS GROUP #1 Russia -Tanzania | Zanzibar, Serengeti Safari & Kilimanjaro Agency | BURIGI CHATO SAFARIS CO LTD; 365AltaiMongolia; BASK TOUR; See more safaris in Moscow on Tripadvisor
Just avoid rush hour. The Metro is stunning andprovides an unrivaled insight into the city's psyche, past and present, but it also happens to be the best way to get around. Moscow has Uber, and the Russian version called Yandex Taxi,butalso some nasty traffic. Metro trains come around every 90 seconds or so, at a more than 99 percent on-time ...
In fact, the Moscow winter is enough to chill any hearty tourist to the bone—but that's all part of the fun. The average high for December, according to the National Oceanic and Atmospheric Administration (NOAA), is 27 degrees Fahrenheit (minus 2.7 degrees Celsius); for January, it's 23 degrees Fahrenheit (minus 5 degrees Celsius); and for ...
Millions of people on Monday will continue the tradition of experiencing and capturing solar eclipses, a pursuit that has spawned a lot of unusual gear. Share full article Viewing the total ...
See Damian Priest, Jade Cargill, Becky Lynch and more WWE Superstars show off their attire for WrestleMania XL weekend.
LAKELAND, Fla. - Nestled next to the Green Swamp is a ranch that is more like stepping into the wilds of Africa. Safari Wilderness Ranch is not a zoo, but it does have animals most people associate with one. It's not a ranch like a farmer's ranch, but is more like a range where wild animals live.
Google next month will make its latest AI-powered photo editing feature available to all users of Google Photos on iOS, the company has announced.. Magic Editor, which featured heavily in last ...