Here’s how you can make a 360 VR app in 10 minutes with Unity

by Adriana Vecchioli
Virtual Reality (VR) is exciting. It’s also the New Frontier of app development.
VR is poised to give birth to new forms of storytelling and emotionally powerful experiences. Yet making VR is perceived as intimidating: it’s expensive and requires both special hardware and skills.
But that’s changing, as intuitive tools and affordable hardware are making VR development accessible. This tutorial will show you how to build a 360 video app on Android and Google Cardboard in just a few minutes. And barely any coding required ;)
VR development should not be a barrier to bringing your ideas to life. Let’s get started:

What you need
Here’s our grocery list:
? An A ndroid phone w ith a gyroscope to sense head movements, running on KitKat or newer OS.
? A C ardboard headset. If you don’t own one, you can find many on Amazon for less than 10 dollars. T his one is my favorite.
? U nity3D, a cross-platform game engine, that you need to install on your computer, version 5.6 or newer. We will use this software to build our whole project.
? The G oogleVR SDK for Unity, which you can download beforehand.
? A 3 60 video. Shoot one with a 360 camera (h ere’s one you can plug into your phone) or find one online.
How are we building this app?
Unlike regular video that has a rectangular frame, 360 video has the shape of a sphere. So, we first need to create a spherical screen to project our 360 video onto. The player (or viewer) will be located inside this sphere and will be able to watch the video in any direction.
The steps below should make you feel empowered to make your own changes, by explaining how it all works under the hood. For step-by-step instructions, refer to the video
Step 1: Build a Sphere ?

First, let’s open a new Unity Project if you are starting from scratch (or a new Scene if you want to integrate the 360 video player in an existing project.) Think of a Scene as one level of a video game, and a Project as a full game.
Afterwards, add a sphere object in the Scene, placed at its center ( Position = 0, 0, 0 ), with a radius of 50 ( Scale = 50, 50, 50 ). The Camera’s position should also be set to 0, 0, 0. The Camera is the player/viewer’s eyes so we want it at the center of the Sphere. Placing it elsewhere would make the video look distorted.
Once the Camera is placed inside the Sphere, the latter is no longer visible in the Scene. Don’t worry, there is an explanation for that! Indeed, most game engines do not, by default, render by default the inner side of 3D objects. This is because we rarely need to see them, it would be a waste of resource to render them. We’ll fix that next.
Step 2: Flip the Sphere’s Normals ?

In our case, we do need to see our Sphere from the inside. That’s the whole point of the app, so we are going to turn it inside-out.
In Unity, spheres are not actually spheres (what? We’ve been lied to all along!), they are polygons made with thousands of teeny, tiny facets. The external sides of the facets are visible, but not the internal ones. For that reason, we are going to make a program to flip these little facets like pancakes.
In 3D geometry, we call this transformation « reversing normals » or « flipping normals ».
We’ll use a program called a Shader , that we’ll apply to the Material of the Sphere. Materials control the appearance of objects in Unity. Shaders are small scripts that calculate the color of each pixel rendered, based on lighting and information pulled from their Materials.
Hence create a new Material for the Sphere, then a new Shader applied to this Material. We need to write custom code for the Shader… but have no fear, you can copy-paste the code below:
This little Shader is going to turn each pixel of the sphere inside out. Now our Sphere appears like a big white ball, viewed from inside, within our Scene. The next step is to turn this white sphere into a video player.
Step 3: Project your 360 video inside the Sphere ?
Here you need to have a 360 mp4 video on hand. Import it in the project, then drag it onto the Sphere. And that’s when the magic happens: a ‘Video Player’ component appears and boom, the video is ready to play.
You can play with the settings like loops and audio. It also supports streaming!
Step 4: Set up Google Cardboard ?

In this step, we’ll make the experience really feel immersive. That’s why we want to view it in a VR headset, here a Google Cardboard.
We are going to create a “stereoscopic” view (the screen will be split in two, with some fisheye effects on both sides — one side for each eye), using the GoogleVR SDK. The fisheye effect on each eye, combined with the distortion of the Cardboard’s plastic lenses, is what gives you the illusion of depth and immersion.
To add the GoogleVR SDK to our project, download and import the plugin, then we’ll adjust a bunch of Android settings:
- Go to top bar menu > File > Build Se ttings. Add your open scene if it isn’t already added, then select Android in the list of supported platforms.
- Click on Switch Platform . It should take a little while the first time you make the switch.
- Click on Player Settings . Components appear in the Instructor panel.
In the Player Settings’ Instructor, under the ‘Other Settings’ section:
- Check Virtual Reality Supported . Under Virtual Reality SDKs , select the + icon, then select Cardboard to add it to the list.
- Enter a package name into the Bundle Identifier field (for example, com.yourdomain.demo360 ). It has to be unique and is used to distinguish our app from others in the Google Play store.
- Set the Minimum API Level drop-down menu to “ Android 4.4 ‘Kit Kat’ (API level 19) ”.
Afterwards, take the ‘ GvrViewerMain ’ element from the GoogleVR\Prefabs folder in the Project Browser, and drag it into the scene. In the Inspector, give it the same Position as the center of the Sphere — ( 0, 0, 0 ).
The GvrViewerMain prefab controls all VR Mode settings, such as adapting the screen to the Cardboard’s lenses. It also communicates with your phone’s gyroscope to track your head movements. When you turn your head, the Camera and what you see also turn inside the 360 video player.
Now you can look in all directions when the video is on and the screen is split in two, to accommodate both lenses of the Cardboard.
Step 5: Run the app on Android ?

For our final step, we’ll run the app on an Android phone and share it with friends!
There are two ways to do that:
- Go back to File > Build Setti ngs. You can plug an Android phone with a USB cable to your computer and click on Build & Run. This installs the app straight to your phone.
- The other option is to click on Build only . This does not install it on a phone, but instead generates an APK file. You can share the APK by email with anyone who wants to try the masterpiece you just built. They have to double-tap on the APK attachment to install it on their phones.
During the build process, you may be asked to select the root Android SDK folder. If that’s the case, download the Android SDK then select its folder location.
Launch the app, pop your phone into a Cardboard headset, you’re good to go! You can replace the video with anything in 360 format and experience VR 360 immersion at home.
Going further
Congratulations, you made a 360 video app, and you are one step away from creating a VR video app! While the terms are often used alike, 360 and VR define two different experiences:
- 360 video is recorded from all angles, with a special camera or an assembly of multiple ones. The user can watch in any direction desired, but there’s no interactivity to the experience.
- VR usually refers to a computer-generated environment in which the user is immersed. It is an interactive experience: the player can move around and control objects, in addition to looking in all directions.
Your new app can serve as a starting point to build a richer VR experience. Unity has plenty of features you can leverage, such as adding 3D elements or cool particle effects ✨ to overlay and enhance your video, or throwing in some interactive elements.
You can also place a full 3D environment inside the 360 video player and use the latter as a skybox. The user can navigate in the scenery, using this nifty walking script .
Let your imagination run wild and show me your creations: tweet me @AdrianaVecc or leave a comment.
Crafting beautiful VR stories is hard. Building them shouldn’t be.

If you liked this article, please press the ? below so other people will see it.
Adriana is an artist & product designer who makes VR experiences that build empathy. If you want to bring your VR ideas to life, shoot us an email: [email protected] ?
If this article was helpful, share it .
Learn to code for free. freeCodeCamp's open source curriculum has helped more than 40,000 people get jobs as developers. Get started
Create a Virtual Tour app with Hotspots for Oculus Go and Oculus Quest VR using Unity
In a previous tutorial, we used Unity to create a Virtual Tour experience for Gear VR. Since then Unity has changed quite a bit with more VR devices like the Oculus Go and the Quest coming out and have become mainstream. Today we will build the updated version of the app using Unity 2019.2 which can run on both the Go and the Quest (On Rift too).
Although the previous app worked only with 360 Panoramas, with this app and very slight and easy modifications we could accommodate playing 360 Videos as well!
Also, with the previous app some people were not able to set up the panoramas properly but this time we have a much simpler and easier way to achieve the same result.
We’ll be using an example of a house interior that has a Living Room, Dining Hall, and a kitchen. This is how the app is going to work, once loaded we’ll be able to see a panorama with a couple of hotspots placed around us. When we point to and select a hotspot we’ll be teleported to the panorama that it represents.
We’ll learn the following with respect to Unity and the Oculus Go device. Any additional notes for Quest support will also be presented when required. The Tutorial will be separated into these parts.
- Creating and Setting up our Unity App for Oculus VR.
- Importing and configuring the Cubemaps from our Panoramas.
- Creating Hotspots and interacting with them.
- Teleporting to the Hotspots.
- Building and deploying the app to the device.
Creating and Setting up Unity Application for VR
First of all, let’s start off by creating a new Application. I’m using Unity 2019.2.4f1 with Unity Hub.

We’ll be greeted with an empty new scene. We want to structure our project properly and hence will create separate folders for our Scenes, Scripts, etc., For now, let’s create a folder called Scenes and save the new scene as “MainScene”.

Let’s set our platform to Android by going to File -> Build Settings -> Android under Platform and click on Switch Platform. The scene we created should already be in the Scenes In the Build tab, if not, then click on “Add Open Scenes” which will add it there. This is so that Unity knows which scene to include when we compile and build the application.

Next, we enable VR Support for our app. Go to Edit -> Project Settings -> Player. Under XR Settings, check Virtual Reality Supported.

To enable Oculus support, the necessary SDK has to be selected as well. Under Virtual Reality SDK’s on selecting the + icon, select Oculus from the list. Unity will then load the SDK and compile it, it should take a few seconds.

We now have full Oculus support within our app. But we take this a step further by downloading and importing Oculus Integration for Unity – which is an extra SDK package with additional functionality that makes building for Oculus much easier. It can be downloaded from here . Once downloaded open the file and it should open with unity and prompt the Import package window. Select All and click on Import. Note that the package contains much more functionality than what we need and we can pick and choose from the package exactly what we require, but for the simplicity of this tutorial we import everything. Once unity is done importing it will create all the necessary folders containing the package.

Setting up Camera, Controller, and Events
Once we have all the SDK related stuff imported and all setup, it’s time to start configuring our scene. The Scene will have a MainCamera, delete this and anything else currently in the hierarchy panel. We will be replacing it with the Oculus Camera. In the project panel, search for “OVRCameraRig”, select it and drag and drop it into the hierarchy panel. This is the prefab that is already configured for everything camera related.

Once it’s in the Hierarchy panel, select the prefab and in its Inspector panel under “OVRManager” there will be a property called “TargetDevices”. Enter its size as 2 and from the dropdown select the first element as Go and the second element as Quest.

Click on “Add Component” at the bottom of the inspector panel and search for “OVR Physics Raycaster” and select it. This is used for interacting with the 3D objects in the scene with our Camera. You can read more about it here . In this case, the OVR Physics Raycaster is made to work with Oculus Input and Event System which we’ll be adding next.

In the hierarchy panel, right-click -> UI -> Event System. This will add a new EventSystem gameobject into the scene. Select it and delete the “Standalone Input Module” that it comes with by clicking on the gear icon of component and “Remove Component”. Select “Add Component” and search for “OVR Input Module” and add it. Once added, select the OVRCameraRig gameobject and expand it, you will find “RightHandAnchor” gameobject. Select it and drag it onto the “RayTransform” field of the OVR Input Module of the EventSystem gameobject. This basically tells the Input Module that all the rays will be cast from the transform of the RightHandAchor which in case of Oculus Go will be our hand controller or the Right Controller in case of Quest.

Next is to create our cursor, Search for OVRGazePointer and drag and drop it into the Scene. Select the same and assign it to the Cursor property of the OVR Input Module. The cursor will now move with our hand controller.

But we don’t want just a cursor. Let’s create our very own custom laser pointer that will come out of the hand controller. We can point it at the hotspots and click on them directly.
Under the Scripts folder create a new C# script by right-clicking in the project view -> Create -> C# Script. Name it CustomLaserPointer.cs.
This is the whole script.
We have two color properties that we’ll use to apply a fading gradient to our Laser pointer. This will basically work using the Line Renderer where we draw a line using the specified gradient.
And in the Update() method which gets called every frame, we will ray cast against any colliders in the scene like our hotspots. We can then make the laser pointer stop at the collider by settings its end up to the hit.point.
Now, let’s add this laser pointer into the scene. This will be controlled with our right hand. Hence, go the OVRCameraRig gameobject and under its child gameobjects select RightHandController -> OVRControllerPrefab and add the script by Add Component -> Search for CustomLaserPointer. If you notice a Line Renderer will also be added automatically as we mentioned this dependency in the script using the RequireComponent Tag.

Importing and Creating Cubemaps from Panoramas.
You can find the panoramas used in the project source. Copy your panoramas into your project under a new folder called Panoramas.

Select all of them and in the Inspector Change their texture type to Default and shape to 2D with the following settings.

To use these Panorama Textures in our scene. We have to create a material and assign these textures to them.
To create a new material, under the Materials folder create new by right-clicking -> Create -> Material.

Name it according to the source texture name. For the Dining room texture, I’m naming it DiningRoomMat.

Before we assign a texture to our material, let’s create a panorama shader that will map the equirectangular format into a cube map.
Create a new folder called shaders in the project and inside it create a new shader by right-clicking -> Create -> Shader -> Standard Surface Shader.

Now, here the type of shader we create doesn’t matter because we’ll be clearing the shader file and writing everything from scratch. Name the shader Equirectangular.

Open the shader by double-clicking on it. It should open your favorite code editor.
Delete everything in the file and copy this. This is the whole shader script.
Save the file and head back into Unity.
Select the material you just created and assign the shader by clicking on the Shader dropdown property -> Custom -> Equirectangular.

Finally, assign the texture for this cubemap by dragging in the texture file into the Diffuse (RGB) Alpha (A) property of the material.

Do the same for the rest of the cubemaps and assign the created equirectangular shader.
Creating Hotspots and Interaction
Now that we have our Materials. We can create our Hotspots from them.
Cubemaps in the Scene
To see our Panorama in our scene, we’ll create a sphere gameobject and assign our materials created before to them.
Create a new sphere gameobject by right-clicking in the Hierarchy -> 3D Object -> Sphere.

Rename it to the material or panorama it will represent.

Under its material property of the Mesh Renderer, set the size to 1 and drag and drop its corresponding material. First will be the DiningRoomMat.

Do the same for the Hall and Kitchen Panorama and Materials.

Also, place and size them accordingly. Set all of the gameobjects Transform -> Scale -> 100 on all axis. Spread them apart so that they don’t overlap by changing the X position of the transform. Find the full transform values for each Hotspot Panorama in the images above.
Hotspots and Interaction
Now that we have all the panoramas in the Scene, we can start creating hotspots. These are nothing but sphere gameobjects.
Let’s create and place them accordingly.
For example, from the Dining Room which is the default and starting point of our Virtual Tour, we can go into the Hall or the kitchen.
Hence, I want two spheres or hotspots that will be placed in that relative direction from the Dining Room.
The same goes for Hall and the Kitchen. From the Hall, I can go into the Dining room. And from the Kitchen, I can go back into the Dining room.
You want to place these spheres so that when you’re in the center of the panorama gameobject these spheres are in the relative direction of the target panorama. Essentially. you will have to eyeball their placement as only you will know where to navigate.
Before we actually create the spheres lets create a Hotspot script to handle the behavior on tapping them. This script will be assigned to each hotspot sphere with a collider component on it.
Create a new script called Hotspot.cs. This is the whole script.
We implement the IPointerEnterHandler, Exit and Click Handlers. When the Gaze Pointer falls on the sphere with a collider on it, the Script then can receive those events using Callbacks. We can animate the sphere on enter, exit and when clicked we will call the VirtualTourManager class -> JumpToTargetHotspot() to teleport the camera to the specific panorama that we configure this hotspot with.
Once you’ve created a sphere, add a Sphere Collider -> Add Component -> search for sphere collider.

Next, add the Hotspot script and assign the thisparnoama variable to its own gameobject and the targetPanorama to the target Panorama’s gameobject.

And Finally the VirtualTourManager.cs
Add this script to any gameobject in the scene and assign the OVRCameraRig as the Camera property.

Building and Deploying
Now finally onto build a .apk file and testing it onto your device. First, let’s set up our Player Settings by Edit -> Project Settings -> Player.
Under other settings, set the Package Name and Version.

Next, go to file –> Build Settings -> Add Open Scenes. It should add the mainscene.
Click on build and run and enter the apk file name.
Unity will now start building the .apk file. Once done, simply install the file onto your Oculus Quest or Go.
Please read this article on how to install .apks onto the devices.
Join the Secret VIP List
Get exclusive VIP contents directly to your inbox
Leave a Reply Cancel reply

Get your Free Lesson now.


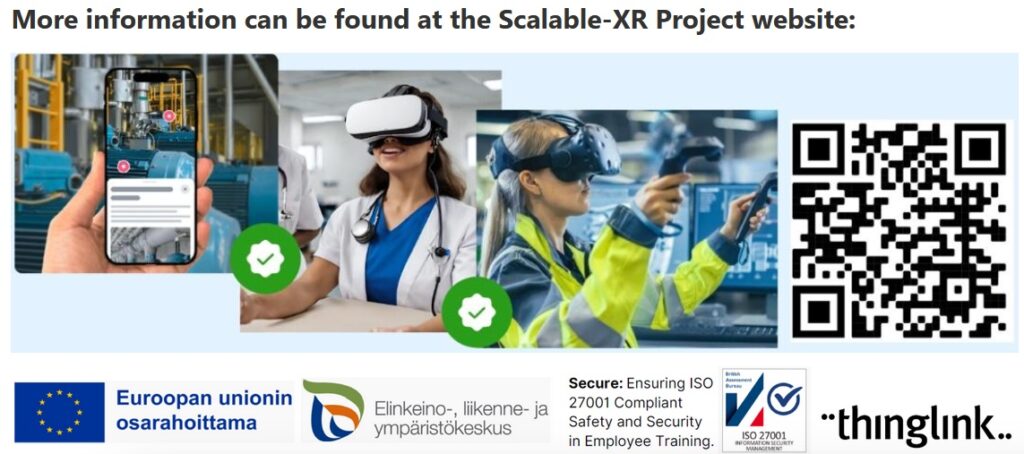
How to Create a 3d Virtual Tour to Share Easily: The ThingLink Unity Plugin
With its stunning visualizations and user-friendly features, Unity has moved beyond its original scope of game design to become a popular tool in architecture, engineering and construction. Industry leaders are embracing Unity’s real-time 3D technology to change the way buildings are designed and created. But until now, sharing Unity projects with wider project team members who don’t have access to Unity (or to the same version of Unity) has sometimes proved tricky and time-consuming.
This changed with the arrival of the ThingLink Unity plugin . In this blog we will show you the benefits of using the plugin, as well as providing a tutorial on how you can use it to quickly and easily share and collaborate on Unity visuals – saving you valuable time and expense.
Meet a product expert
If you’d like to learn more about what ThingLink can offer to your organization, schedule an online meeting with one of our product experts below.
How Unity is used in AEC (architecture, engineering and construction)
Although it was designed for game development, Unity 3D is increasingly used in the property industry to create realistic 3D environments that simulate the look and feel of a project. This allows architects and designers to see how a building or development will look before it’s even constructed. By using Unity’s advanced lighting and shading techniques, property professionals can create lifelike environments that accurately represent the colors, textures, and materials of their projects. This is particularly useful when presenting concepts to clients, who can then get a clear picture of the final product.
Unity walkthroughs allow clients to explore a property in real-time and get a feel for its layout, design, and functionality. Walkthroughs can be used for anything from commercial real estate to residential properties, and can even be customized to show different design options or furniture layouts.
The benefits of using the ThingLink Unity Plugin
Working time optimization .
You may need to make many iterations of your Unity project in a short timeframe and receive feedback as part of the workflow. This is where you can use ThingLink with your Unity project to save several hours of waiting for files to compress and upload. Importantly, the plugin allows you to share your new projects with users who have no access to the Unity Hub or the Unity Editor .
Accessibility
The ThingLink Unity plugin also allows collaborators to see your Unity project from any device – with no need to download project folders and project files to their local machine and without any special configuration. The plugin allows you to export a scene from Unity as a 2D or 360 degree image from any part of your project. In ThingLink, you can then add annotations, questions and comments, or export multiple 360° images and turn them into a lightweight virtual tour. You can then use these to share work-in-progress with clients which can be accessed on any device, including Android or iOS mobile.
An example of the ThingLink Unity plugin in action
In this example below, a Unity user has used the plugin to add more information to the 360 image.
Step-by-step guide to using the ThingLink Unity plugin
Please note: If you are new to ThingLink, please create an account first, which you will need to use the plugin.
First, create a ThingLink account
If you are new to ThingLink, please create your account here to use the Unity plugin. Or just start exploring ThingLink to see what else you can create!
Step 1: Install ThingLink Unity Plugin
- Download the plugi n from the Unity Asset Store .
- Open your project in the Unity Editor.
- Choose Assets > Import Package > Custom Package. Select the ThingLinkUnityPlugin_1-0.unitypackage file you’ve downloaded and click Open.
All items in the package should be installed; we recommend using the demo scene to explore the plugin.
Step 2: Adding to ThingLink
- Add the package to your project, then click the ThingLink icon in the upper-right corner
- Log in to your ThingLink account
- Move the camera to the desired location and click Upload
- Go to https://www.thinglink.com/ to view, edit and share the image on ThingLink.
Before clicking the upload button, you have two options:
- Export as 360°: By default, the plugin will export your current view as a 360 image. Uncheck this box if you would prefer to export a 2D image instead.
- Open ThingLink editor: if checked, ThingLink will open in your default browser once the image is uploaded. Note that if you are logged out of your ThingLink account in your browser, you’ll need to sign back in.
Step 3: Sharing Your Virtual Tour
The final step is to share your virtual tour with your team members. The easiest way is via direct link which can be shared via email.
- Do I need to be using particular operating systems with the ThingLink Unity plug in?
No – it works with all common operating systems including Windows and Mac (iOS).
- Does my collaborator need to know how to use Unity to use the plugin?
No – anyone can view the project in ThingLink – one of the most intuitive and easy to learn platforms available. There is no sharing of source code required.
Sharing Unity projects with team members who already use Unity
Of course if you already use Unity across your team – even easier! Just follow the steps below.
Sharing with Unity Collaborate
The easiest method to share your Unity project is by adding another user as collaborator to enable you to share a workspace. Unity Teams’ free tier includes 1GB of Cloud Storage for using with Unity Collaborate. For every team member you want to collaborate with, you need to assign a Unity Teams seat for them within your organization. These handy links show how you can: enable Collaborate for a team membe r; allow collaboration on individual projects ; activation and management of Unity Teams member access .
Zipping and sharing files using OneDrive or email
An alternative approach to sharing your project is sharing the folders using a cloud service or email. If you choose this option, always zip your files beforehand. This doesn’t just make the folders smaller, it’s also best practice to reduce the likelihood of file corruption. Do all files need to be zipped and shared? Not necessarily. the key files are the Assets and ProjectSettings folders. Once you have zipped and transferred them to your cloud service, your colleague or team member can access the folder and download it. Read more about exporting your project into another version control system. You can also send some/all files by using Unity Package Manager: read more about how to do this on the Unity website here .
New to ThingLink?
For an introduction to our super simple editor and interface, including step by step tutorials, take a look at our handy Support Pages . For Unity support please visit their support pages , or connect with their community which brings together Unity Answers, Unity Forum and other useful resources.
If you want to discuss activation of a team or enterprise ThingLink account, please contact us here.
Get started with ThingLink today!
Why not start a free trial account and see what you can create today? Join almost 10 million content creators in the worldwide ThingLink community!
Other posts
With its stunning visualizations and user-friendly features, Unity has moved beyond its original scope of game design to become a popular tool in architecture, ...

How to Share Your Unity Projects the Easy Way
Sharing Unity projects at the development stage for feedback and advice can sometimes be a complicated undertaking – particularly when the parties involved have...

ThingLink Launches a Unity Plugin for Easily Documenting and Sharing 3D Virtual Environments
The ThingLink Unity Plugin makes it easy for developers to annotate and share their Unity projects on any platform or device with just a couple of clicks. Thousands...

3 Ways to Share Unity Projects with Customers, Colleagues or Friends
If you are a developer working on a Unity project, at some point you most likely want to share it with another user for feedback. If the other user has the same...

Meet ThingLink Experts
If you’d like to learn more about what ThingLink can offer to your company, you can schedule an online meeting with one of our product experts below.
Navigation Menu
Search code, repositories, users, issues, pull requests..., provide feedback.
We read every piece of feedback, and take your input very seriously.
Saved searches
Use saved searches to filter your results more quickly.
To see all available qualifiers, see our documentation .
- Notifications
Creating virtual tours using hotspots in Unity3D
realitypipe/virtual-tour-app-unity
Folders and files, repository files navigation.
- ShaderLab 2.5%
Over 11,000 five-star assets
Rated by 85,000+ customers
Supported by 100,000+ forum members
Every asset moderated by Unity
WVtour - 360 Virtual Tour

- Case Studies
- Support & Services
- Asset Store
Search Unity
A Unity ID allows you to buy and/or subscribe to Unity products and services, shop in the Asset Store and participate in the Unity community.
- Discussions
- Evangelists
- User Groups
- Beta Program
- Advisory Panel
You are using an out of date browser. It may not display this or other websites correctly. You should upgrade or use an alternative browser .
- If you have experience with import & exporting custom (.unitypackage) packages, please help complete a survey (open until May 15, 2024). Dismiss Notice
- Unity 6 Preview is now available. To find out what's new, have a look at our Unity 6 Preview blog post . Dismiss Notice
- Search titles only
Separate names with a comma.
- Search this thread only
- Display results as threads
Useful Searches
- Recent Posts
Let users create their own virtual tours
Discussion in ' Getting Started ' started by mike158 , Jan 28, 2019 .
Hey, I'm pretty new to Unity and I'm working on Virtual Tour using Oculus SDK. I want to create an application that allows users to view any virtual tour. So I want users to create the tour by placing objects representing the view at some point, let them specify a transition effect, put control objects into the view for transitions between views and somehow let them connect all views together. The user should be able to export the tour into some file and then view the tour by loading this file in an application. What would be the best approach to achieve this behaviour? My thoughts are to create 2 applications. One for viewing tours and the second one for creating tours and exporting them. I don't want to create an extension for Unity editor because I would force users to install whole Unity. Thanks for your replies!
Schneider21

This is kind of a big undertaking. It sounds doable, but you'll want to be familiar with working with Unity before we can go into any meaningful detail about what you'd need to do. Additionally, being the Getting Started sub, this might not be the best sub for help on your advanced use app. We have lots of topic-specific forums for help with specialized parts of your app once you get there, and you'll have better luck finding people who can help you with those parts there, if that makes sense. As far as actually how to get started, you should definitely do the official tutorials . Once you get through the basics, like the Interface and can work with 3D objects in a scene, learn how to work with the Unity API . If you like more of a project-based approach, start with Roll-A-Ball and go from there. It doesn't matter if the subject material of a tutorial doesn't seem to be related to what exactly you want to do. If you're learning how Unity works, you're making progress towards that goal. Finally, when you're ready to dive into the VR portion, there are a number of XR-specific tutorials you should check out. Good luck!
Schneider21 said: ↑ This is kind of a big undertaking. It sounds doable, but you'll want to be familiar with working with Unity before we can go into any meaningful detail about what you'd need to do. Additionally, being the Getting Started sub, this might not be the best sub for help on your advanced use app. We have lots of topic-specific forums for help with specialized parts of your app once you get there, and you'll have better luck finding people who can help you with those parts there, if that makes sense. As far as actually how to get started, you should definitely do the official tutorials . Once you get through the basics, like the Interface and can work with 3D objects in a scene, learn how to work with the Unity API . If you like more of a project-based approach, start with Roll-A-Ball and go from there. It doesn't matter if the subject material of a tutorial doesn't seem to be related to what exactly you want to do. If you're learning how Unity works, you're making progress towards that goal. Finally, when you're ready to dive into the VR portion, there are a number of XR-specific tutorials you should check out. Good luck! Click to expand...
mike158 said: ↑ The thing is that I want anyone to be able to make their virtual tour. So I'm asking about the right approach to this. Is there any better solution than I described above? Click to expand...
Schneider21 said: ↑ There's so much about your idea and your business need I'm not aware of that I'm probably not qualified to say for sure. Who are your users that will create tours? Who are your consumers of those tours? Will this be something either are trained to do, or does the app need to be intuitive enough for them to use without guidance? Is it a paid app in the marketplace, or something used for public or educational purposes? Will the tours be viewed on the same computer they're being created, or do they need to be distributed over the Internet? I'm sure it could work either way -- as separate apps or as a unified one -- and the challenge is on how you handle it from a UI and distribution approach. I don't think either is necessarily easier, either, as both approaches have their benefits and drawbacks. I'm not an expert, but if you give more information, I'd be happy to offer my input for what it's worth. Click to expand...

mike158 said: ↑ It is my master's thesis project. Click to expand...
Ryiah said: ↑ How much time do you have to work on it? Click to expand...

i worked on a similar project while ago, it had web based "editor", you could create tours with 360 images or videos, place hotspots or doors to next images, so user could jump between 360 views.. and mobile cardboard vr app to view them (by entering room # to load contents) vr app itself is quite simple to do, i mean you load 360 image, display it, and user can look around. then for hotspots and doors, it loads json file for the locations in sphere, with information that which image is loaded next if clicked here. web editor, bit more work, since you need to create editor to drag n drop things around, save and load those datas, and then some backend service to serve data to connected clients.. (but i mean, they just need to load some contents.json, get list of 360 images, and hotspots.. then build scene in client with that data)
mgear said: ↑ i worked on a similar project while ago, it had web based "editor", you could create tours with 360 images or videos, place hotspots or doors to next images, so user could jump between 360 views.. and mobile cardboard vr app to view them (by entering room # to load contents) vr app itself is quite simple to do, i mean you load 360 image, display it, and user can look around. then for hotspots and doors, it loads json file for the locations in sphere, with information that which image is loaded next if clicked here. web editor, bit more work, since you need to create editor to drag n drop things around, save and load those datas, and then some backend service to serve data to connected clients.. (but i mean, they just need to load some contents.json, get list of 360 images, and hotspots.. then build scene in client with that data) Click to expand...
editor was more like powerpoint, list of image thumbnails, could press + to add more from existing 360 images (or upload new 360 images) 360 web editor was just a flat image. There are 360 javascript viewers, but bit too complicated for "normal people".. so it was simple to get UV position from the mouseclick on that equirectangular image. in unity the hotspots were regular gameobjects with collider, i think invisible sphere was used for regular spots, and with cardboard sdk you can then easily click those objects. so if you loaded room123.json it had list of 360 images, and each image had list of hotspots/doors, their info and UV coordinates, there were some posts online how to then get 3d vector coordinate, since you know the sphere size. (spherical UV to 3d position or something) So those were instantiated there, and some helper scripts were attached to them to run when clicked. transition, yes, added simple fading (with regular transparent shader), after new image was loaded on a 2nd 360 sphere, the old one faded out. and added basic caching also, so if you went back to previous image, it was already loaded in memory.. just an list/array of images, too old ones were removed..
mike158 said: ↑ I thought it would be more complicated, but didn't realize that the difference would be so huge. Click to expand...
Minister Nkosazana Dlamini-Zuma to Deliver GU-Q’s 2024 Commencement Address

Georgetown University in Qatar (GU-Q) is honored to announce that South African Minister Nkosazana Dlamini-Zuma will deliver the commencement address to the Class of 2024. Currently serving as the Minister in the South African Presidency for Women, Youth and Persons with Disabilities, she is a distinguished leader and advocate for global cooperation, development and regional unity. With her extensive record of governance and steadfast championing of racial and gender justice, Minister Dlamini-Zuma personifies the values of leadership and commitment to service that GU-Q fosters in all of its students.
Her career in public service includes pivotal roles as Chairperson of the African Union Commission, and South Africa’s Minister of Health, Minister of Foreign Affairs, and Minister of Home Affairs. Her leadership has significantly impacted global health policies, governance reform, women’s empowerment initiatives, and social justice, aligning with GU-Q’s mission to develop ethical and knowledgeable future leaders.
Dr. Safwan Masri, Dean of GU-Q, expressed his excitement about South Africa’s Minister Dlamini-Zuma’s participation in the Commencement event, saying, “Hosting Minister Dlamini-Zuma is more than an honor; it’s an extraordinary opportunity for our graduates to encounter and listen to a fearless advocate for justice and equal rights, who is also a seasoned politician and diplomat. Her incredible life journey exemplifies the kind of leadership our students should aspire to: a leadership combining lofty goals with practical efficiency and excellence, and bringing in meaningful changes for its people.”
GU-Q is proud to celebrate this special day with Minister Dlamini-Zuma and the talented, versatile graduates of the Class of 2024. As they step into the world, GU-Q is confident in their ability to harness their education to lead and drive change worldwide.
- Car Rentals
- Airport Transfers
- Attractions & Tours
- Flight + Hotel
- Destinations
- Trip.com Rewards
 | Moody Center ATX")
Santana and Counting Crows: Oneness Tour 2024 2024 (Austin) | Moody Center ATX
Get ready to experience the magic of Santana and Counting Crows: Oneness Tour 2024, set to take place at Moody Center ATX on August 18, 2024. Located at 2001 Robert Dedman Drive, Austin, TX, 78712, this concert promises to be a night to remember. The event will showcase an electrifying blend of rock and Latin music, with iconic songs that will have the audience on their feet. From smooth guitar riffs to soulful lyrics, Santana and Counting Crows will deliver a performance that resonates with fans of all ages. Tickets for Santana and Counting Crows: Oneness Tour 2024 will go on sale starting from February 16, 2024, at 16:00, until August 19, 2024, at 00:00. Don't miss out on this opportunity to witness two legendary bands coming together for an unforgettable evening of music and unity. Mark your calendars and secure your tickets for Santana and Counting Crows: Oneness Tour 2024 before they sell out!
Provided by Sani | Published May 7, 2024
Are you interested in Santana and Counting Crows: Oneness Tour 2024 2024 (Austin)?
More contents about aus.
- Customer Support
- Service Guarantee
- More Service Info
- Website Feedback
- About Trip.com
- Terms & Conditions
- Privacy Statement
- About Trip.com Group
Other Services
- Investor Relations
- Affiliate Program
- List My Property
- Become a Supplier
IMAGES
VIDEO
COMMENTS
This tutorial series teaches you how to take 360 images and make a virtual tour with points of interest in unity. Download assets here: https://gum.co/GRcUpH...
Getting started to create virtual tour app in Unity. I'm using Unity 5.6 for this tutorial with a Galaxy S7 Edge for the Gear VR. But the project itself should run on almost any VR platform given that the project is setup for the target platform. You need to setup Gear VR for Unity development first. Now let's begin.
how to make virtual tour using unity , build 360 degree experience here is the link to script of vrcamera :https://github.com/safeee/VRtour/blob/master/VRCam...
WVtour is Unity plug-in for creating interactive 360 virtual tours. It's a fast and easy way to build your own virtual tours through 360-degree videos. Downl...
Check Virtual Reality Supported. Under Virtual Reality SDKs, select the + icon, then select Cardboard to add it to the list. Enter a package name into the Bundle Identifier field (for example, com.yourdomain.demo360). It has to be unique and is used to distinguish our app from others in the Google Play store.
1. . WVtour is a Unity asset for creating interactive 360 virtual tours for VR. It's a fast and easy way to build your own virtual tours through 360-degree videos. It's compatible with different type of VR headset (Oculus Quest, Oculus Go Oculus Rift, Google Cardboard, Samsung Gear VR) with videos from most of 360 DSLR cameras (GoPro Fusion ...
The High Definition Render Pipeline (HDRP) is a Scriptable Render Pipeline that lets you create cutting-edge, high-fidelity graphics on high-end platforms. Immerse360: Virtual Tour Toolkit. Recommended for individuals and small businesses. Recommended for large enterprises working across multiple locations. See details.
In a previous tutorial, we used Unity to create a Virtual Tour experience for Gear VR. Since then Unity has changed quite a bit with more VR devices like the Oculus Go and the Quest coming out and have become mainstream. Today we will build the updated version of the app using Unity 2019.2 which can run on both the Go and the Quest (On Rift too).
The High Definition Render Pipeline (HDRP) is a Scriptable Render Pipeline that lets you create cutting-edge, high-fidelity graphics on high-end platforms. Vour - Virtual Tour Creation Tool. This asset is covered by the Unity Asset Store Refund Policy. Please see section 2.9.3 of the EULA for details.
This project is build in Unity 3D, it's a world tour theme showing different photospheres of various places in the world, it also uses 3D models that are placed in the environment. virtual-reality unity-3d photosphere virtual-tour android-ios-application lmntrix
Step 3: Sharing Your Virtual Tour. The final step is to share your virtual tour with your team members. The easiest way is via direct link which can be shared via email. FAQs. Do I need to be using particular operating systems with the ThingLink Unity plug in? No - it works with all common operating systems including Windows and Mac (iOS).
in the Software without restriction, including without limitation the rights. to use, copy, modify, merge, publish, distribute, sublicense, and/or sell. copies of the Software, and to permit persons to whom the Software is. furnished to do so, subject to the following conditions:
Join the LTV Community. Take a virtual tour of the Unity Class C RV by Leisure Travel Vans. See photos, videos, floorplans and more of the luxurious Unity, built on the Mercedes Sprinter Cab Chassis.
Immerse yourself in the Unity by LTV by taking a virtual tour of the interior or explore the Unity's European-inspired contoured exterior in full 360°. Take a Virtual Tour. Watch our guided video tours Unity Videos. Personalize your Unity. From high-end Ultrafabrics® upholstery to modern cabinetry finishes, the Unity is finished in the ...
This tutorial series teaches you how to take 360 images and make a virtual tour with points of interest in unity. Follow me on twitter https://twitter.com/Ja...
So, we planned to design the 3D assets with a few key points in mind. All the materials will only have a base map/albedo. No other maps will be added. All the textures we import for the project ...
WVtour - 360 Virtual Tour. Recommended for individuals and small businesses. Recommended for large enterprises working across multiple locations. See details. This asset is covered by the Unity Asset Store Refund Policy. Please see section 2.9.3 of the EULA for details. Use WVtour - 360 Virtual Tour from WearView to elevate your next project.
11. Hey, I'm pretty new to Unity and I'm working on Virtual Tour using Oculus SDK. I want to create an application that allows users to view any virtual tour. So I want users to create the tour by placing objects representing the view at some point, let them specify a transition effect, put control objects into the view for transitions between ...
Software tool: Unity 3D is a software tool used to process the images. 360 images of college (K. K. Wagh Institute of Engineering and Research Education) is given as input to Unity 3D software tool to create scenes of different areas of college. User Interface: It consists of two modules, one is Virtual Tour and another is Search Module.
Use Unity to build high-quality 3D and 2D games and experiences. Deploy them across mobile, desktop, VR/AR, consoles or the Web and connect with people globally. This community is here to help users of all levels gain access to resources, information, and support from others in regards to anything related to Unity.
In this course, we build a core Multiplayer VR game from scratch step-by-step. First we will learn what is Photon Fusion, and the basics. Then we learn how to create a multiplayer session. When we understand the basics of Fusion, we will implement VR System in our project. After that we will develop our game mechanics.
How to make virtual tour using unity , build 360 degree experience and switch places just by click here is the link to script of :VRCamera.cs : https://gith...
The listing broker's offer of compensation is made only to participants of the MLS where the listing is filed. 606 W North St, West Unity, OH 43570 is pending. Zillow has 7 photos of this 3 beds, 1 bath, 1,242 Square Feet single family home with a list price of $--.
Event Description. Our virtual maternity tours are done via Zoom and are lead by one of our prenatal educators. The tour will provide you with valuable information including tips related to our current hospital policies and what to expect during your stay. Partners are encouraged to attend. (Please DO NOT register partners) ** Register the ...
Georgetown University in Qatar (GU-Q) is honored to announce that South African Minister Nkosazana Dlamini-Zuma will deliver the commencement address to the Class of 2024. Currently serving as the Minister…
Unity3d - Setup for Google Cardboard Virtual Reality: https://www.youtube.com/watch?v=txx_WSxLL-4Unity3d - Making a 360 Movie: https://www.youtube.com/watch?...
Tickets for Santana and Counting Crows: Oneness Tour 2024 will go on sale starting from February 16, 2024, at 16:00, until August 19, 2024, at 00:00. Don't miss out on this opportunity to witness two legendary bands coming together for an unforgettable evening of music and unity.
To learn more about the Databricks Data Intelligence Platform, visit our website and check out our sessions and in-depth content at our Data and AI Summit and our Data Warehousing in the Era of AI virtual event. Also, follow us @Databricks for the latest news and updates. Read the 2024 Forrester Wave for Data Lakehouses here.
Make a virtual tour in a website with unity3d and webgl-----unity 3d virtual tour tutoria...