
- Pantheon Rewards
- Luna’s Howl
- Blast Furnace
- Forbearance
- Midnight Coup
- The Mountaintop
- The Recluse
- Elsie’s Rifle
- Hung Jury SR4
- Edge Transit
- Falling Guillotine
- Indebted Kindness God Rolls
- Buried Bloodline Exotic
- Hunter Builds
- Warlock Builds
- Titan Builds
- Warlords Ruin
- Crota’s End
- Ghosts of the Deep
- Root of Nightmares
- Spire of the Watcher
- King’s Fall
- Vow of the Disciple
- Vault of Glass
- Dares of Eternity
- Trials of Osiris
- Lost Sector Today
- Featured Raid & Dungeon
- Exotic Mission Rotator
- Nightfall Weapon
- Where is Xur today
- Max Light Level
Select Page

How to get Xenophage in Destiny 2: The Journey Quest
by Ryan Schilling | Apr 24, 2024
The Journey is an exotic quest that begins near Sorrow’s Harbor on the Moon. From the transmat point, head towards the central Hive fortress in the area. Inside the main entrance, look for a hallway to your left and follow it until you reach the area called the Enduring Abyss. Continue down the path and keep an eye out for a ledge on the right side of the hallway. Jump up here to find yourself in a place you may find familiar from the Shadowkeep campaign. This is the balcony overlooking the first pyramid ship that we discovered.
Around this balcony, you will notice four Hive statues. You need to activate these statues in the correct order to begin your quest. The order is as follows:
- The right statue nearest the pyramid ship
- The left statue furthest from the pyramid ship
- The left statue nearest the pyramid ship
- The right statue furthest from the pyramid ship
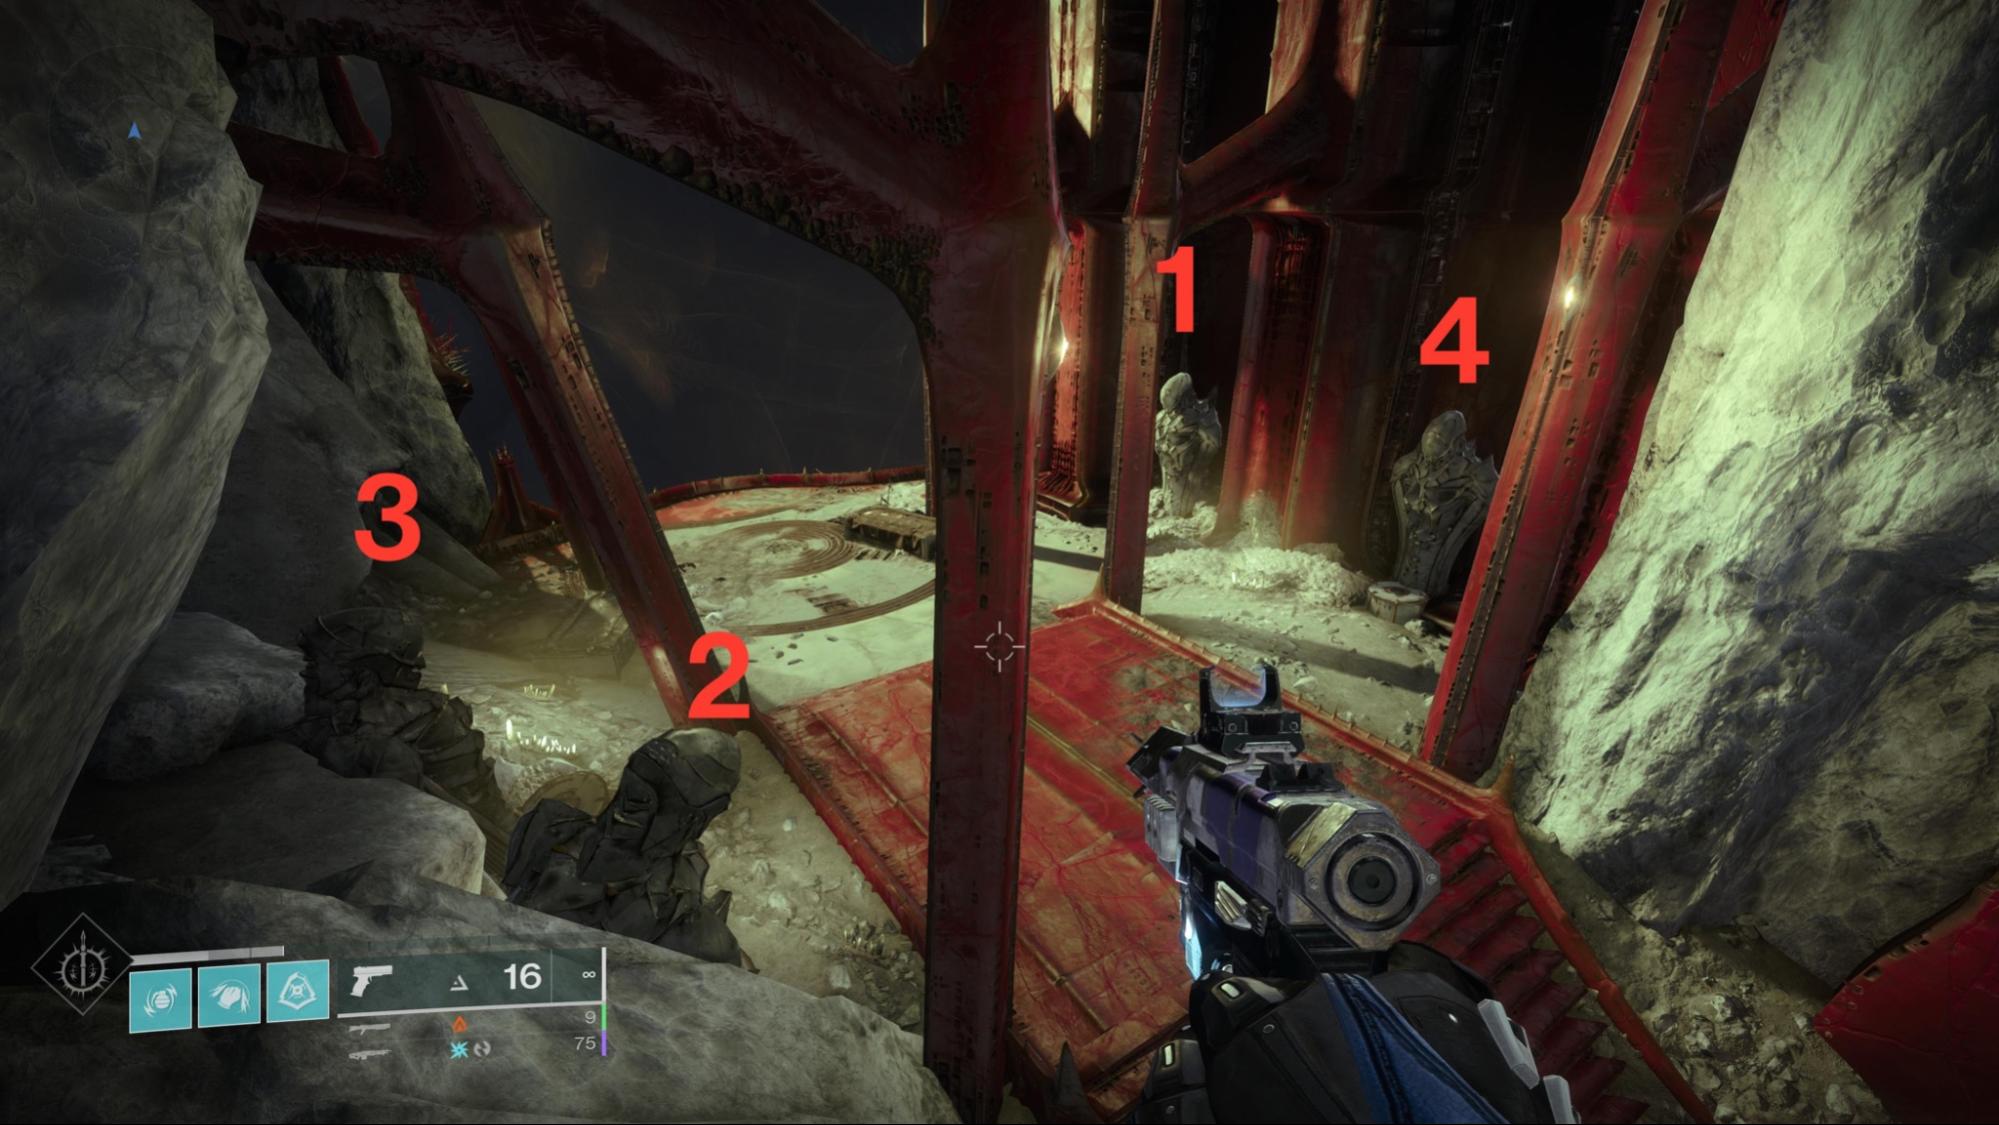
Hive Statues, Xenophage Quest
Once you activate the statues in the correct order, a chest will appear containing the beginning of your quest for the exotic heavy machine gun Xenophage.
Xenophage Exotic Quest Requirements
The Xenophage exotic quest does have one pre-requisite – you must own Destiny 2’s expansion Shadowkeep which grants access to The Journey exotic quest.
How To Unlock Xenophage, Step-By-Step
Step 1: emerge from the darkness.
After you have successfully begun your quest, fast-travel to the Sanctuary transmat location on The Moon, mount your Sparrow, and immediately head down the right path toward Anchor of Light. Once you reach Anchor of Light, head left toward the Fallen outpost built on the cliffside.
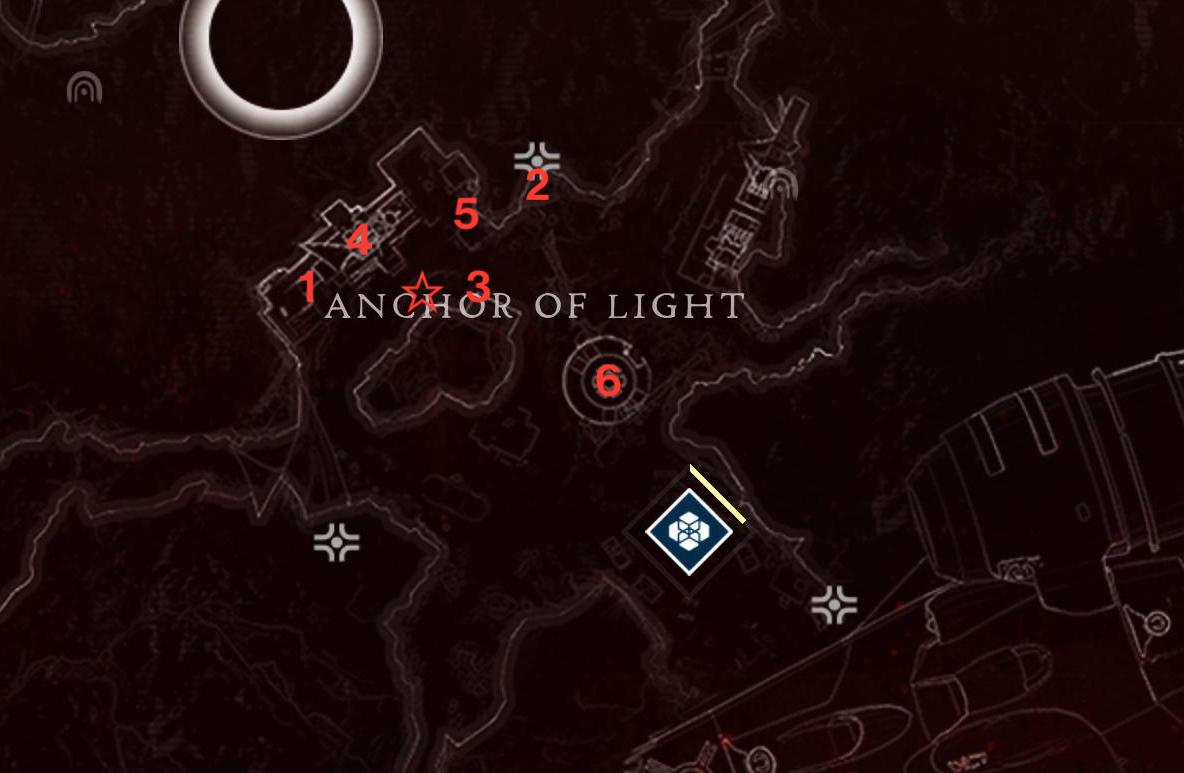
Inside this outpost, you will find a mount of what appears to be Hive growth. Interact with this mount to pick up the Light and you will receive the buff Torch Bearer which will begin a countdown timer. Your objective now is to seek out braziers located in the area and light them. The first one can be found in the very same room where you picked up the ball of Light.
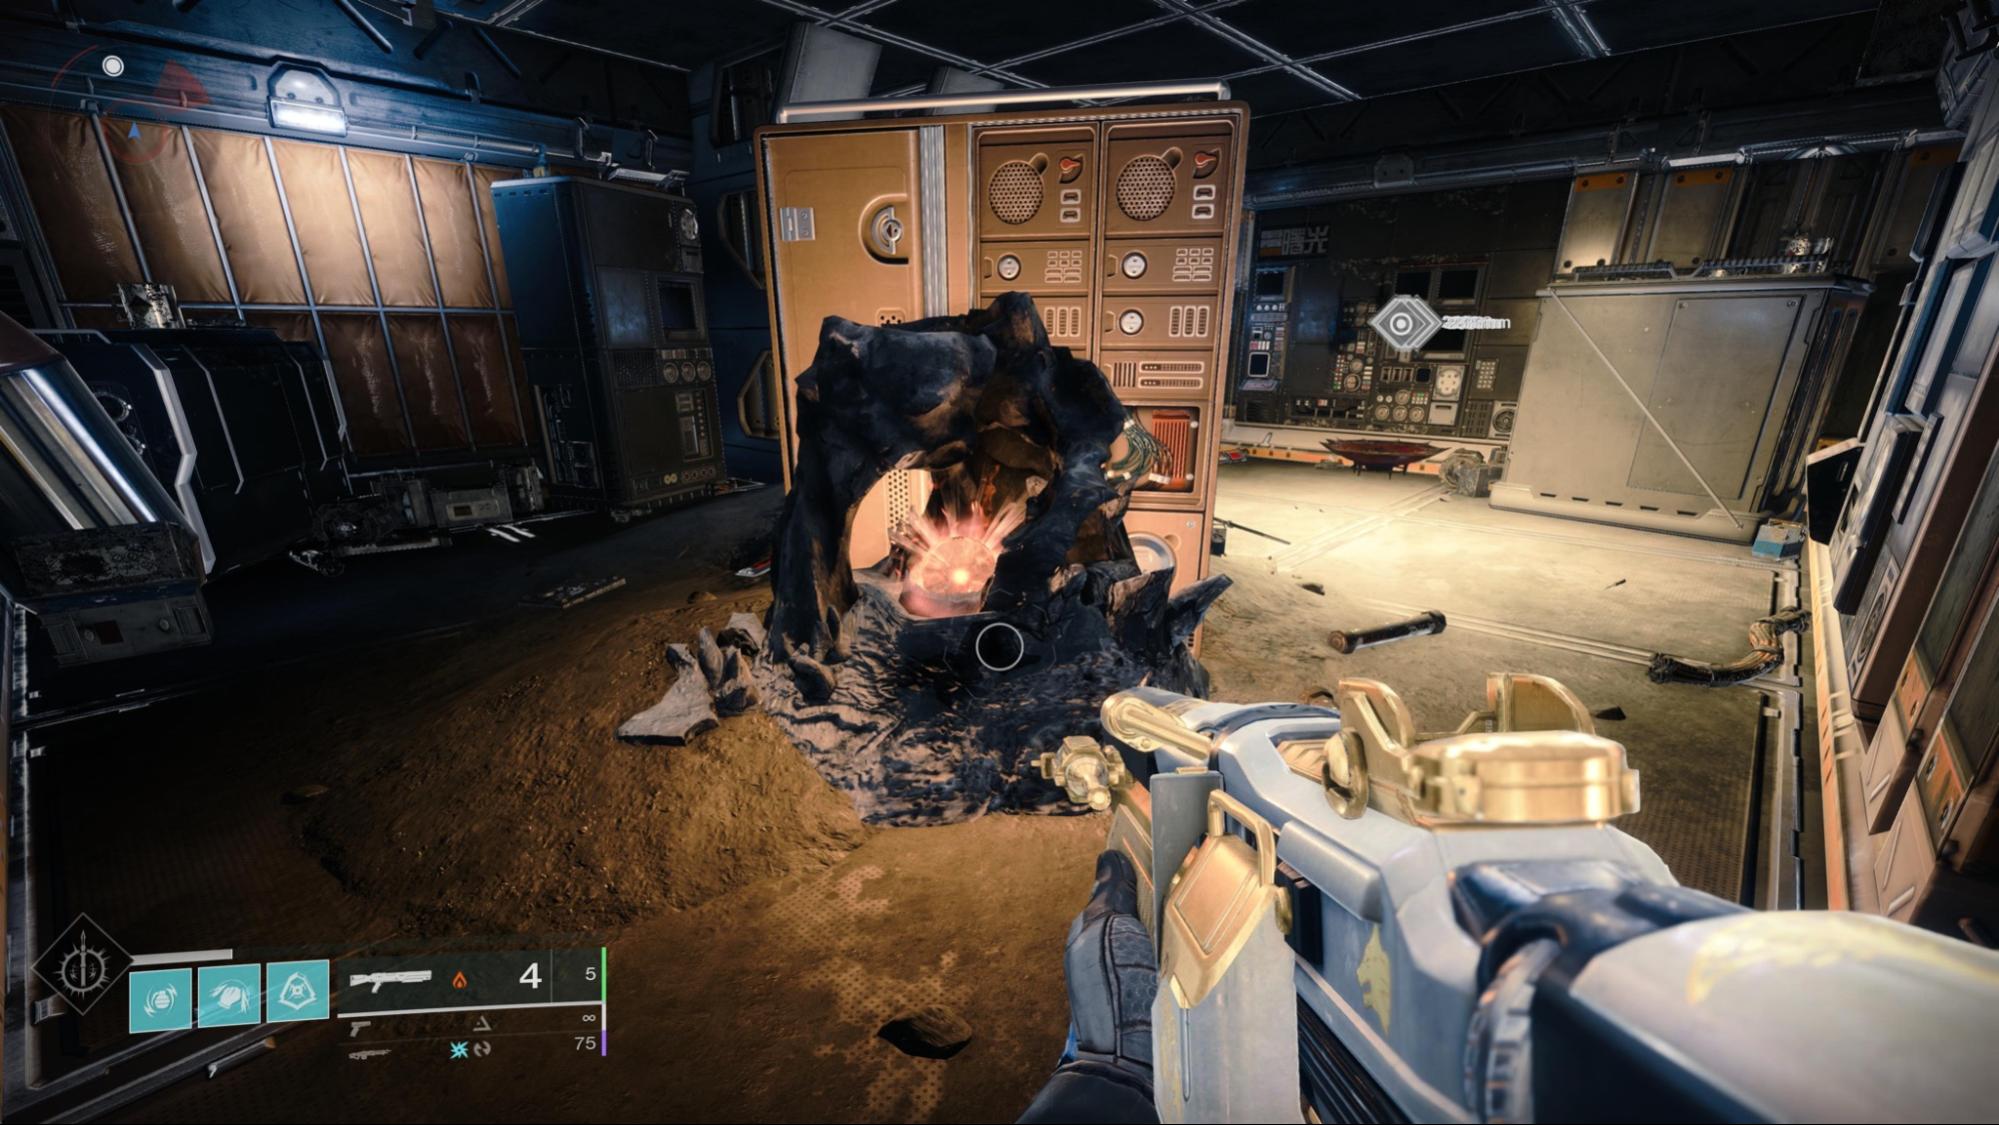
How to get Xenophage, Destiny 2
From the first brazier, head north and take the path toward the center of the Anchor of Light area. Before you reach the triangle-shaped Fallen outpost draped in purple tarps, turn left to find an alcove that drops into a pit. On the ledge near this pit is your second brazier to light.
From the second brazier, head back towards the initial outpost, but look for a small building quickly to your left. Inside this room, you will find your third brazier to continue lighting your path.
The next brazier is tucked away in the upper levels and criss-crossing bars of the initial outpost. Head back to that outpost, jump your way up to the fourth brazier, and light it.
Next, follow the cliffside of the initial outpost until you notice a short ramp half-buried in the sand to the top of a cubic structure. At the top of the ramp will be your fifth brazier.
The sixth brazier is fairly simple to find. Jump onto the top of the central circular building in Anchor of Light and it can be found right in the middle of the roof. Lighting this sixth brazier should grant you the new buff Torch Bearer.
With the Torch Bearer buff in hand, head back towards the initial outpost where your path began, but before you reach it, look for a small Hive pylon with an opening on it. Here is where you will deposit your ball of light and “emerge from the dark”. Congratulations on completing the first step of your quest towards obtaining Xenophage!
Step 2: Find the Fragments
The next step in your quest will have you navigating to four Lost Sectors around The Moon. After you complete each Lost Sector, you will find a set of Hive runes laid out in 3 rows and 3 columns that will be the key to securing these fragments. You need to shoot these runes in a particular order. Wait for the flame animation over the runes to complete after each shot to ensure your selection is locked in. Once you correctly shoot the sequence of runes, a chest will spawn containing the required Path Fragments for completing this quest step.
In the K1 Communion Lost Sector , you will need to complete the Lost Sector and shoot the runes found here in the following order:
- Bottom Left
- Bottom Right
In K1 Crew Quarters , your sequence of runes is a bit longer. Complete the Lost Sector and shoot the runes in the following order:
- Middle Left
- Middle Middle
- Bottom Middle
In K1 Revelation , the order for shooting the Hive runes is as follows:
- Middle Right
If you are following this guide in order, only K1 Logistics remains. The sequence is as follows:
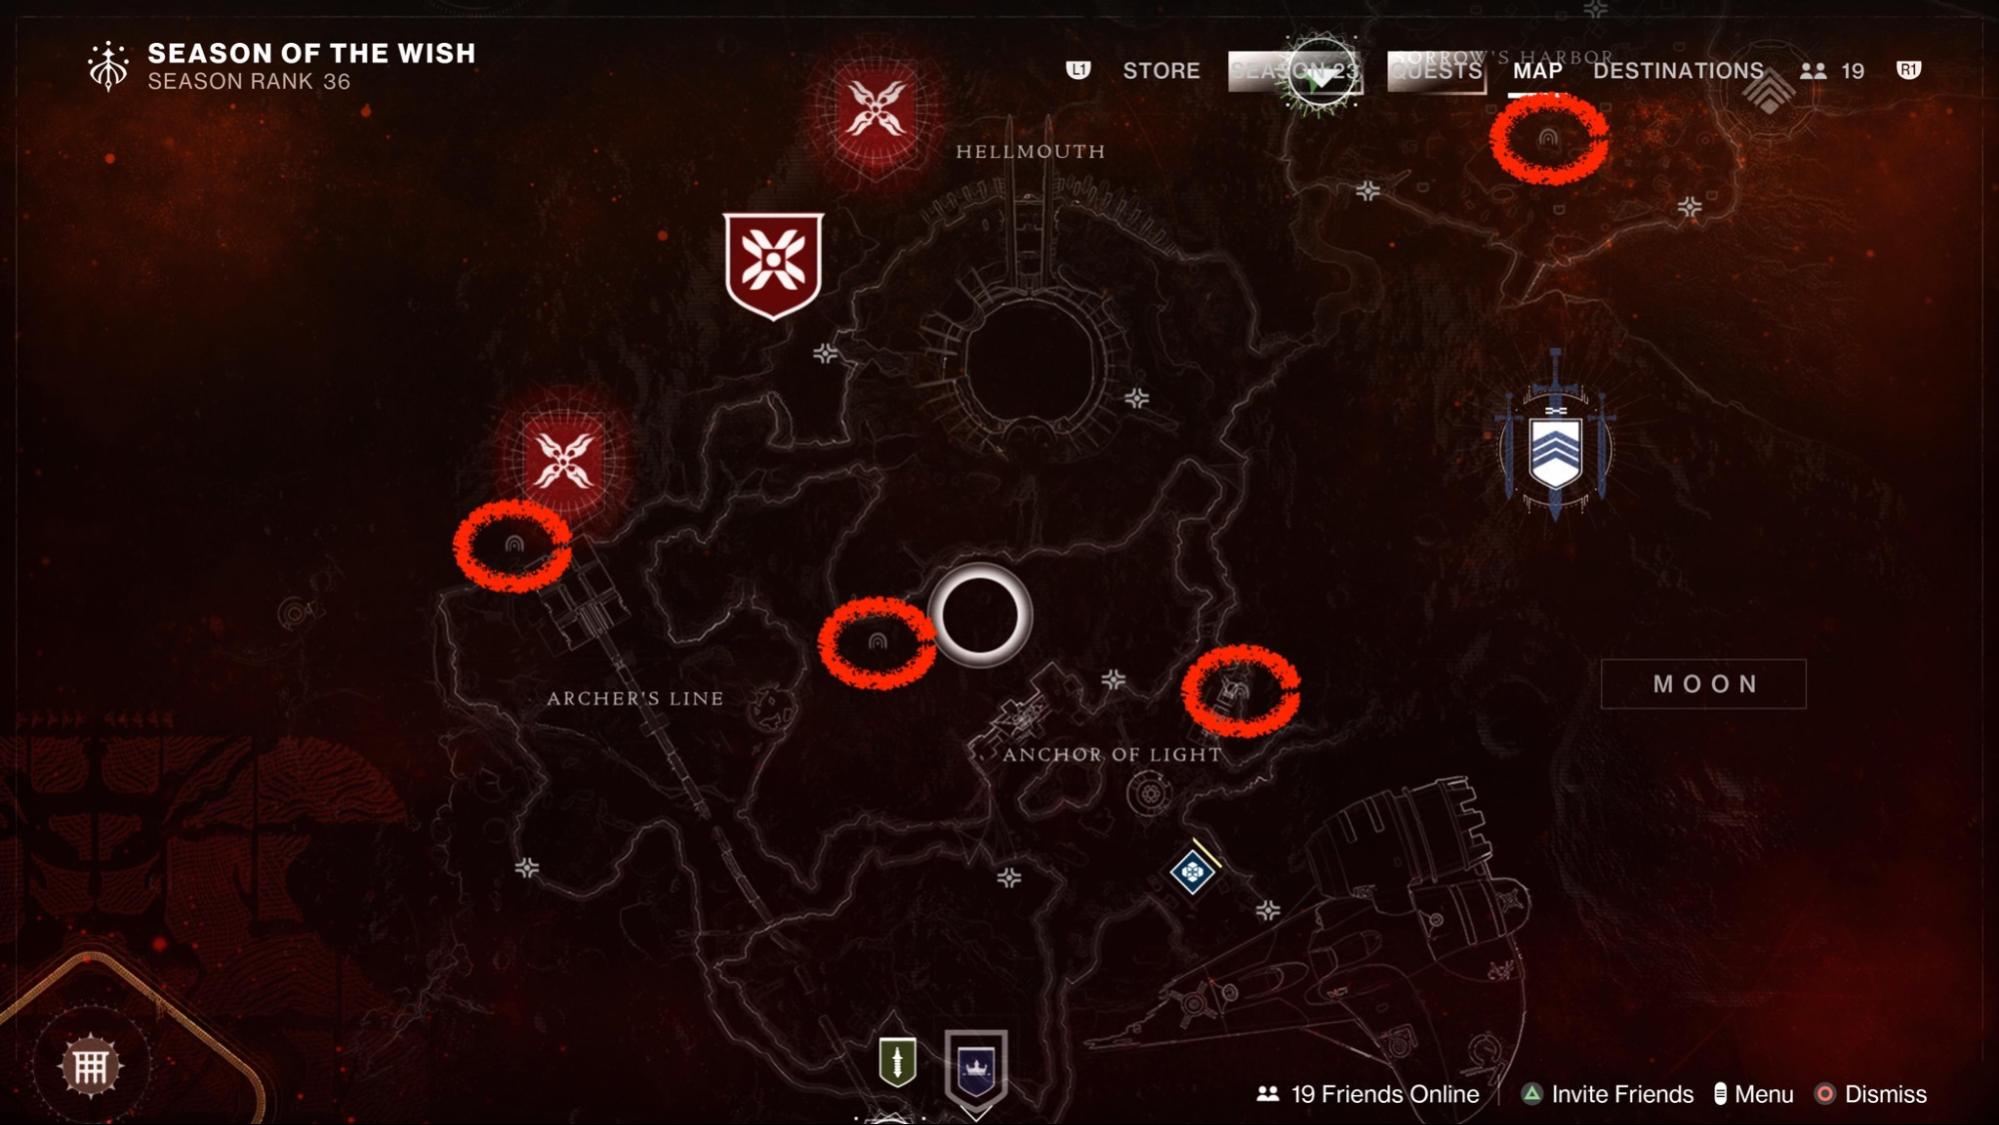
Step 3: The Pit of Heresy
The next quest step will require you to jump into the Pit of Heresy Dungeon . Progress through the dungeon as normal until you reach the infamous crevasse with many doors on the other side. With Fireteam Finder, you should find a fireteam to help you complete the initial parts of the dungeon while more skilled players are likely to be able to navigate to this part of the dungeon solo.
Jump to the ledge just to the upper left of the doorway directly across the abyss. You will need to jump straight up to the next ledge directly above you. Continue repeating this to scale the wall. Once you get some good height and reach the next level of doors, begin heading further left hugging the wall. There will be an open door with some rubble inside. Near the rubble will be one Hive rune you can interact with to “Reveal Path’s End.”
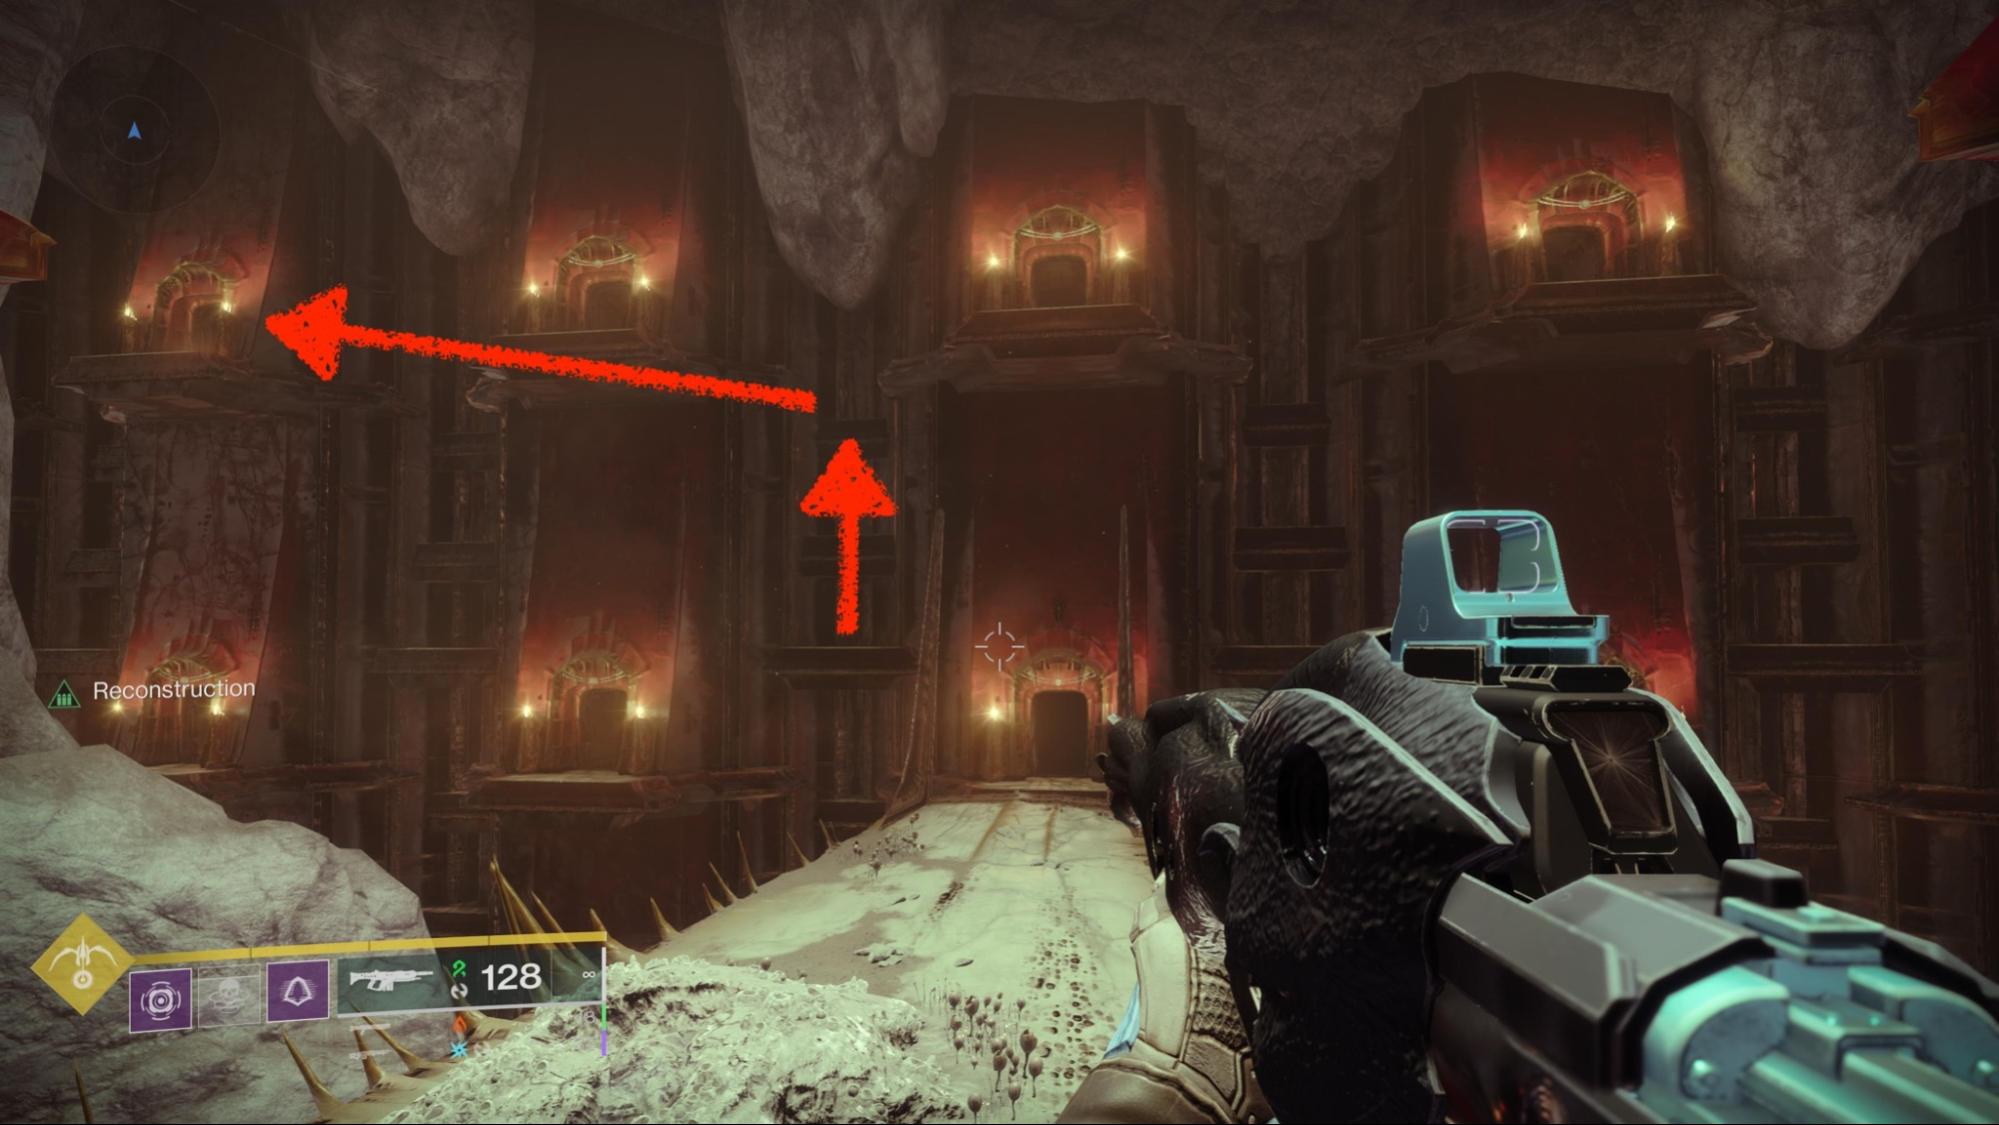
Step 4: The Pit of Heresy Continued
After securing the next step of the quest from the room of many doors, continue through the dungeon as normal until you reach the encounter where you must hide and avoid the Hive Ogres. Head towards the cliffside and drop down to the lower level found there. Near the cliff’s edge on this lowest level, you will find a plate covered in Hive runes. Interact with this plate to reveal the path forward.
Platforms will rise out of the abyss below. Carefully begin platforming across them to pick up the Light ball from the furthest platform. Once you have the ball of Light, head back towards where you entered the Ogre encounter. From the point where you entered the encounter, turn right and look for the second door on the right and deposit your ball of light there.
This door will open the path to a secret boss, Volmar, The Tempted, who is the obstacle between you and your precious Xenophage. To defeat this boss you will need to leverage various damage types. Ensure you or your fireteam have weapons or subclasses that generate Solar, Arc, Void, and Kinetic damage.
Before you enter the boss room, you’ll encounter a group of Thrall. Dispatch them and then take a look around the room. You’ll see Hive runes and below them, an elemental type. You’ll also notice you have a buff such as “Fiery Dread”, “Thunderous Dread”, “Neutral Dread”, or “Abyssal Dread”. The core mechanic in this encounter is to pay attention to the buff that you have in the bottom left and dunk the Light ball at the rune that corresponds with the buff that you have active. Memorize the runes and elements in the room before the boss and you should be golden. Upon depositing the Light ball, you will receive a damage buff and you should quickly switch to your weapon of the same element and begin dealing damage to the boss.
Defeating Volmar, The Tempted will grant you the final step in your quest for Xenophage. Whether you complete the rest of the dungeon is up to you as the final step only requires us to return to Eris Morn via the Sanctuary transmat location and pick up your glorious new Exotic Heavy Machine Gun!
Divine Fragmentation Reward
Congratulations on securing one of the best damage-dealing weapons in Destiny 2! This Exotic Machine Gun not only deals great boss damage but also provides unique utility in encounters such as the Oracles in The Vault of Glass.
That is all you need to know to complete the Xenophage exotic quest, The Journey. We hope this guide helped you in growing your exotic collection. For more Destiny 2 guides like this one, keep that Xenophage locked to Blueberries.gg! We cover the Hunters’ Remembrance quest and Starcrossed quest here.
About The Author
Ryan Schilling
Submit a comment cancel reply.
Your email address will not be published. Required fields are marked *
Save my name, email, and website in this browser for the next time I comment.
Submit Comment
Most Popular
Legend Lost Sector Today
Destiny 2 Where is Xur
Destiny 2 Weapon God Rolls

Destiny 2 Eververse Calendar

Best Destiny 2 Builds Today
Essential Tools
Destiny 2 Discord LFG
Long read: How TikTok's most intriguing geolocator makes a story out of a game
Where in the world is Josemonkey?
Destiny 2 Xenophage quest: How to complete The Journey and Pathfinder puzzle steps
How to get the Shadowkeep exotic machine gun.
Destiny 2's Xenophage is an Exotic quest for those who have purchased Year 3 expansion Shadowkeep.
Released on weekly reset on October 29th, 2019 alongside Festival of the Lost, starting this machine gun works a little differently to most quests - so you might need a pointer of where to look.
However, like the recent Season of the Undying exclusive Leviathan's Breath , earning the Xenophage is shorter than most Exotic quests, and the bulk of it can be completed solo before having to delve into the Moon's Pit of Heresy dungeon.
On this page:
How to get Xenophage in Destiny 2 in brief
How to get start the xenophage quest in destiny 2, how to complete the journey's emergence step in destiny 2, how to solve pathfinder's four path fragment puzzles, where to find the descent 'path uncovered' and 'path's end' step in the xenophage quest, how to defeat volar, the tempted to finish the xenophage quest.

Here's a quick rundown of the steps needed to obtain Xenophage :
- Interact with the statues near the Pyramid to start the quest
- Light the six plates in Anchor of Light
- Complete the four puzzles at the end of the K1 Lost Sectors on the Moon
- Find the hidden switch within the Pit of Heresy dungeon
- Find the hidden orb later in the Pit of Heresy dungeon to open a secret room
- Defeat the secret boss, Volmar, the Tempted
- Return to Eris
Once the above steps have been completed, Xenophage is all yours.

To begin the Xenophage quest, head to Shadowkeep's Moon destination. You'll want to head to the area next to the Pyramid, except the portal by Eris isn't around to take you there - so you have to get there on foot.
To do this, head to the Sorrow's Harbour area, then go north through the gates of the keep.
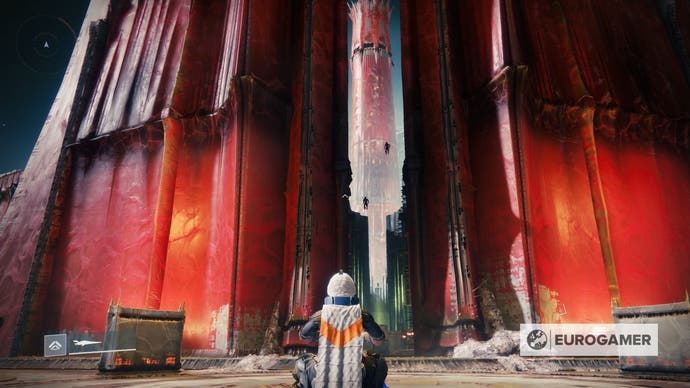
There is a path on the left at the end of this area - take it.
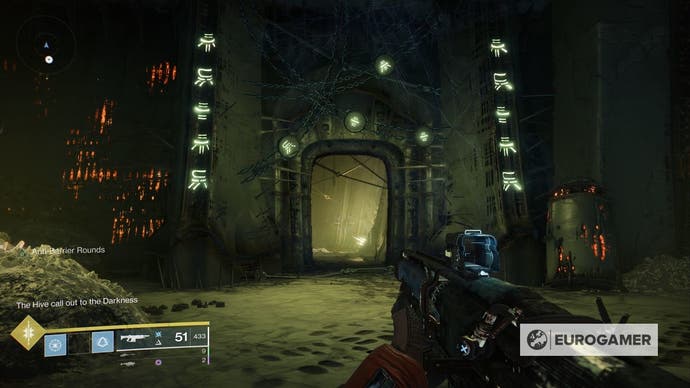
Continue along it until you reach the Enduring Abyss area.
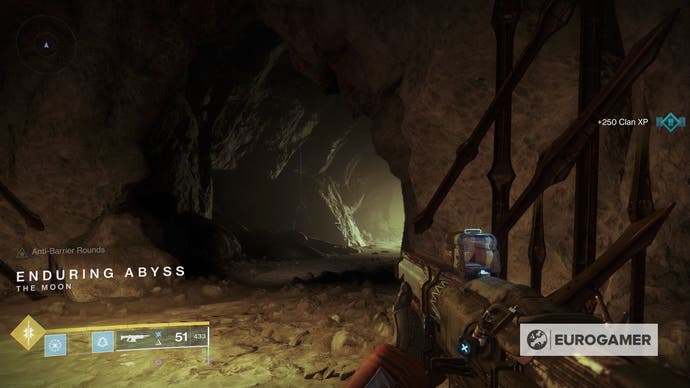
Now go just a little further down the corridor, until you see a lantern of sorts on the ground.
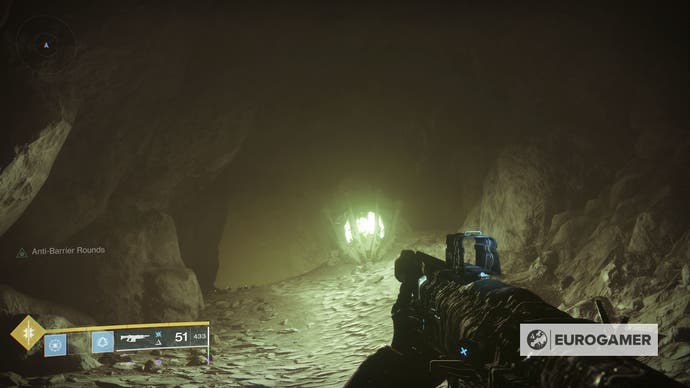
Just beyond it, and up and right in the wall, is a path you can take. Leap up and take it.
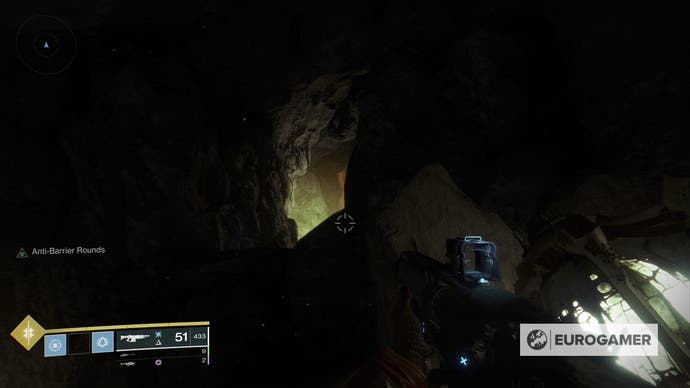
Continue going and you'll reach the area the portal would take you to.
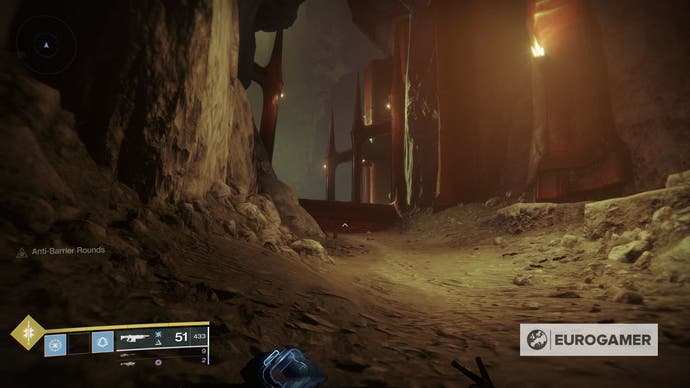
Now, to start the Xenophage quest, locate the four statues to the sides - two on the left and two on the right.
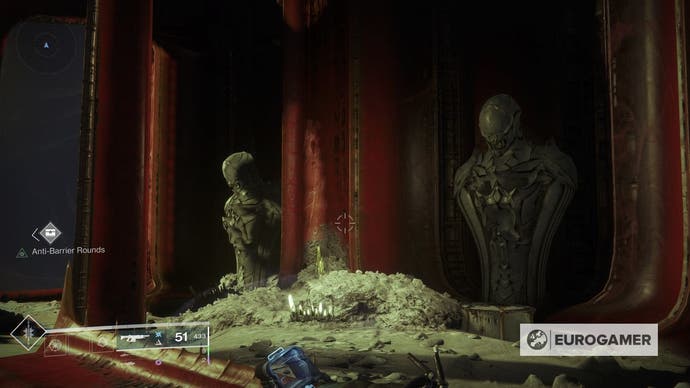
You can now interact with them with the 'Emerge from the Dark' prompt, lighting it up. The aim is to light all four.
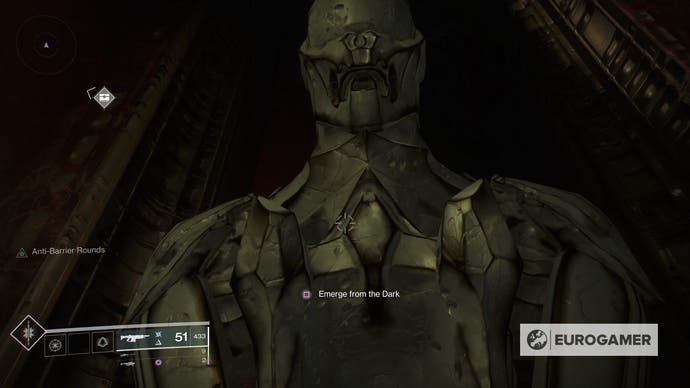
Though it could be random, we interacted with them in an anti-clockwise fashion, the closest one right first, then furthest right, then round furthest left then closest left.
Whether it works for you or not, continue interacting with them until all four light up. Doing so will see a message saying 'You have emerged from the dark - claim your path!' appear on screen, and cause a chest to spawn.
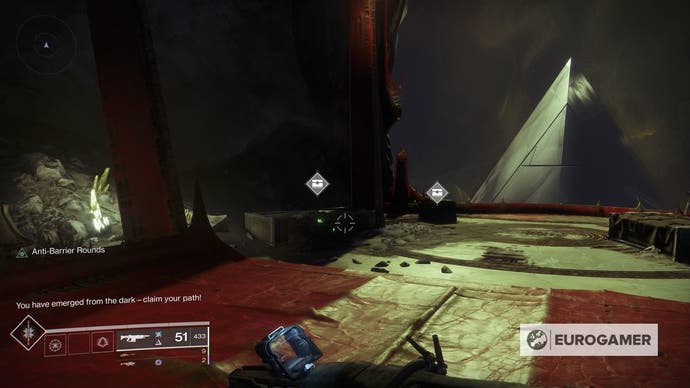
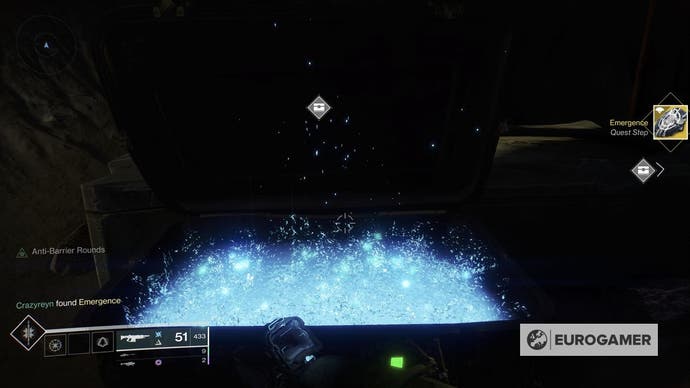
Open the chest to receive the start of the Xenophage quest The Journey, the first step of which is named Emergence.
Head to the Anchor of Light on the Moon, then head to the north-west where you'll find some yellow buildings, including one with a large radio tower:
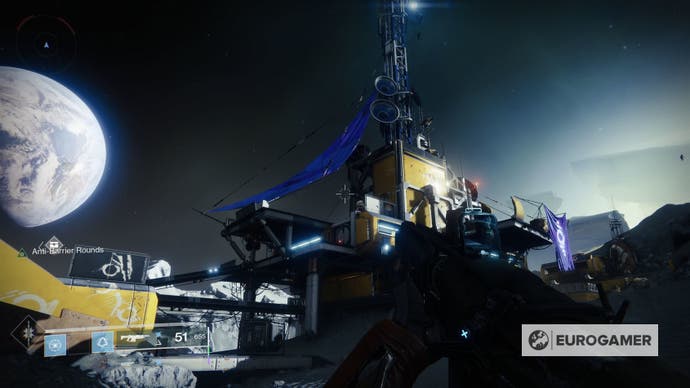
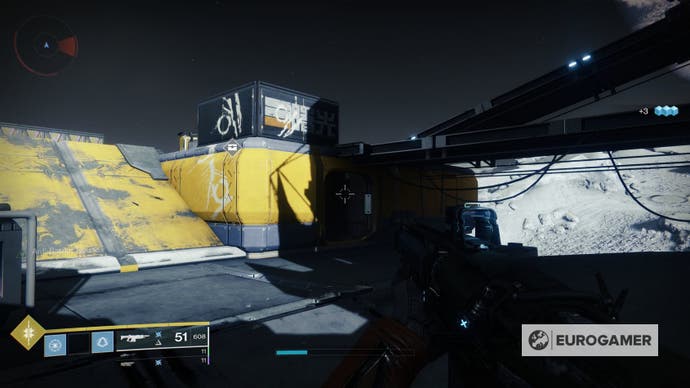
Directly south of that is a smaller one with a doorway facing it:
Inside, you'll find the following orb location:
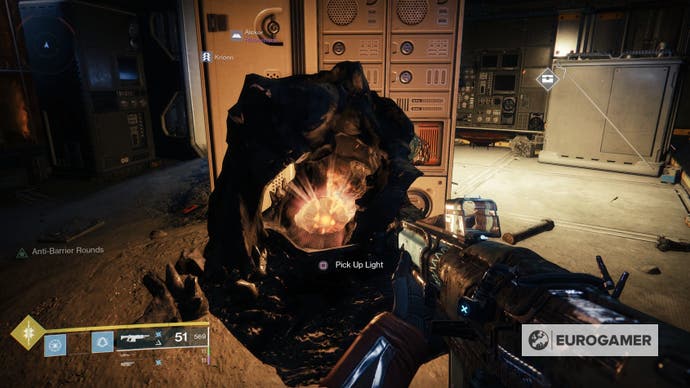
You need to dunk this in six locations in the surrounding area, one after another. You have one minute between each dunk before the orb disappears. We recommend scoping out the locations before hand, so you know exactly where to go. You should have plenty of time if you know where you're going first!
The locations are as follows:
1. In the same room as you pick up the orb:
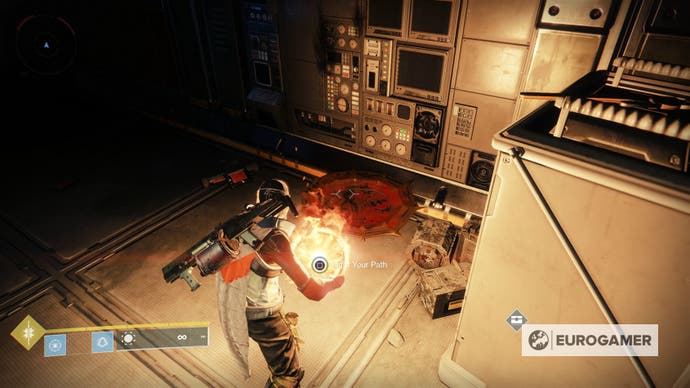
2. Leave this building and head north, following the path round to the more open area, where there's the orange building in the distance. On the hill directly to the left, you'll a large fallen radio tower leaning against the hill. Underneath where it leans is the next orb deposit point.

3. Look south so you are facing the large saucer-like building in the middle of the area. Opposite that on the ground is a small yellow building. The next location is inside.
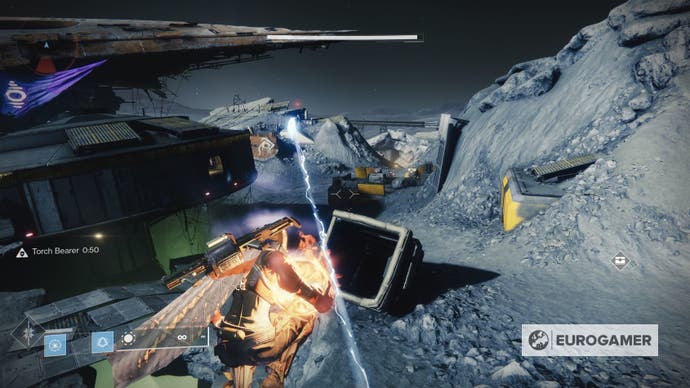
4. Head back to the north-west part of Anchor of Light to where the large radio tower is. You need to climb up the tower (approach from the south / facing the building where you found the orb) and when you go one level up, it's on the north side, on the outer edge.
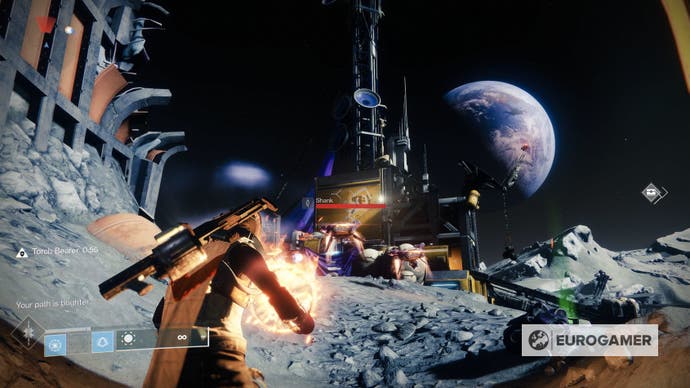
5. Look north to see more yellow buildings on the ground. There's a ramp leading up to the one on the right. At the top of that is the next location.
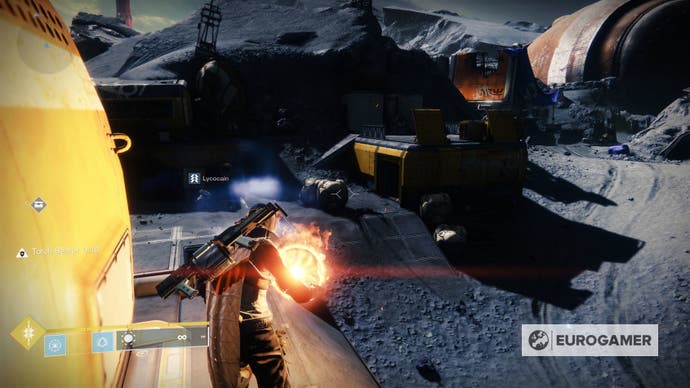
6. Head back to the other area where the giant saucer building is, and the location is right on top.
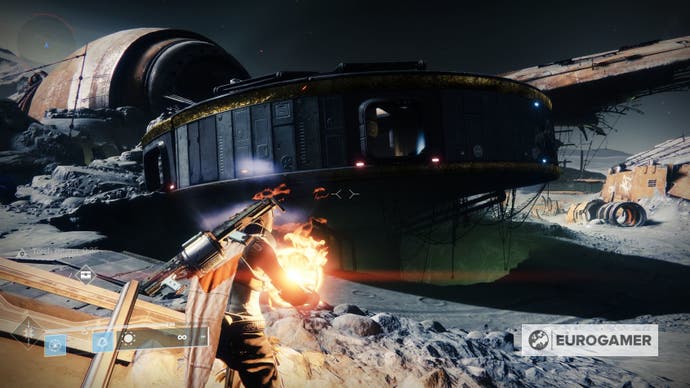
Now to finish, you need to head back one final time towards the radio tower. There will be a waypoint on your screen at the edge of a raised path when you get close.
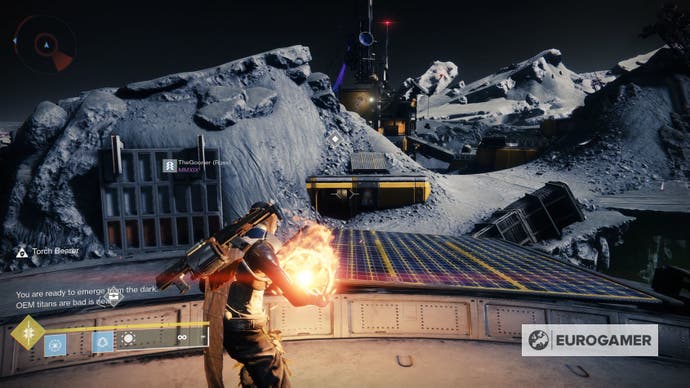
Activating this will then give you the Pathfinder quest step.
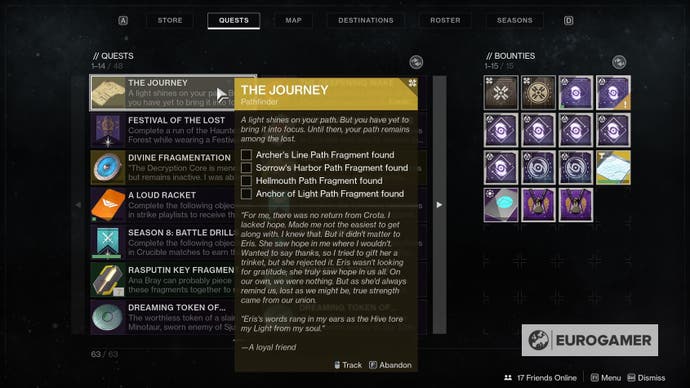
Next, you have to visit all four Moon K1 Lost Sectors and solve a puzzle. These appear at the end, so complete the Lost Sector as usual, then find the puzzle as you take the route leading out.
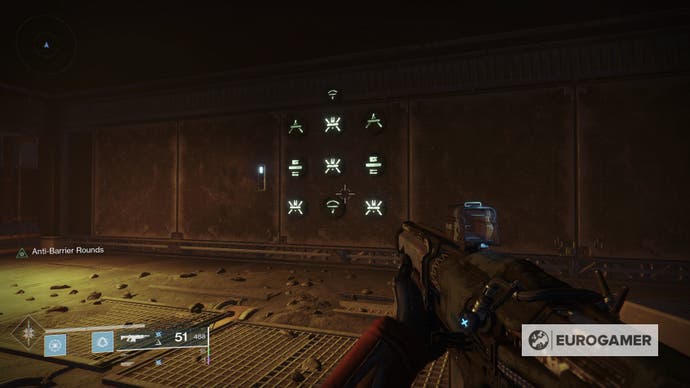
To solve it, shooting a panel will change those around it, and you have to keep going until they all match the standalone icon above the grid.
There are multiple ways to do these, but these should work for you (thanks Sipder on reddit for helping with some of the following solutions):
K1 Communion (Anchor of Light)
- Bottom left
- Bottom right

K1 Logistics (Archer's Line)
- Centre right
Swapping the last two round (Centre then Centre right) also works.

K1 Revelation (Sorrow's Harbour)
- Centre left
- Centre bottom

K1 Crew Quarters (Hellmouth)

If you get any wrong as you input, you can try and work out the solution yourself from where you left off. That said, these are tough puzzles, so it might be easier to re-run the Lost Sector to reset the puzzle and try again.
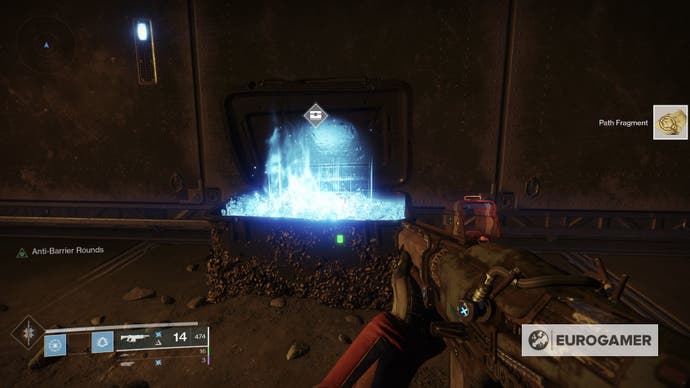
Complete each one - giving you a Path Fragment each time - so you then receive the Descent quest, with the 'Path Uncovered' step.
Once that's done, it's time to take a trip to the Year 3 dungeon Pit of Heresy. If you haven't already, you need to unlock it first before you can start exploring.
First, you need to find a hidden switch. Complete the first encounter to come to an area with a wall of doors on either side of a path. You have to travel to an upper left door that's different to the others, where you'll find the switch inside.
Here is Fuzzy Bearbarian on YouTube showing the 'Path Uncovered' location:

Once you have done the 'Path Uncovered' step, continue Pit of Heresy until you reach the second encounter, then travel down the left side to come to a giant cavern on your left, glowing green with a giant rib cage below.
Continue along the edge of this path, down the lower path, to find a plate. Activating it reveals platforms to the side, with an orb you can collect it.
Take it back the way you came until you find a route on your right. There is a door here, which you can dunk the orb in. This will lead you to a hidden room with a secret boss.
Here is WoW Quests on YouTube to show where you need to go:

The Season of the Deep is here alongside the Into the Depths quest. You can know go fishing too! Don't forget to keep an eye on the Lost Sector and King's Fall challenge rotation schedule!
To defeat Volmar, The Tempted, you have to grab orbs and dunk them in locations related to the buff you have been given.
It's worth scoping out the room first to find their locations, but it's easy to work out where each goes, as there's an elemental effect relating to the buff - Thunderous is Arc, Abyss is Void, Fiery is Solar and Neutral is Kinetic (which is the only dunking spot with no real effect).
Once you have done that, you can then damage the boss. The buff you have also relates to the damage you can then dish out at this point.
Repeat this until the boss is done for. Here is Esoterickk with how the boss goes down (performed as a solo encounter):

Once the boss is complete, visit Eris to receive the Xenophage Exotic. You don't need to complete Pit of Heresy, so if you get stuck from here, the good news is at least you have done everything needed for this quest!
Read this next
- Destiny 2 giving all PlayStation and PC players free access to three expansions ahead of The Final Shape
- Destiny 2 completes U-turn on sunsetting legacy weapons, although too late for many players' dismantled guns
- Destiny 3 discussion swirls, following accurate expansion leak
Honkai Star Rail next Banner and current Banner, list of all Banners in Honkai Star Rail
Today's Strands hints and answers for Wednesday 8th May
Today's Wordle hint and answer on Wednesday 8th May for 1054
Stellar Blade guides, tips and tricks
Should you take Adam's hand in Stellar Blade?
Anime Fighters codes
How to unlock Aaron's Locker in Stellar Blade
Anime Champions Simulator codes
Destiny 2: how to get the Xenophage exotic machine gun
How to get the Xenophage in Destiny 2—our complete quest guide.

With the launch of the Festival of the Lost, Bungie has also released its latest exotic weapon quest: The Journey.
Through completing The Journey, players will be able to unlock the new exotic machine gun, Xenophage.
As Destiny 2’s second exotic machine gun, Xenophage offers a unique and powerful set of perks. Its slow rate of fire makes it feel more like a single-shot anti-artillery weapon, but holding the trigger proves it is an automatic.
Each shot fired from this 13 round magazine provides a devastating punch with a small explosive radius that can tear through waves of enemies. In total the weapon can hold two magazines of ammo and its inability to deal crit damage seems a little odd, but it was able to tear through Nightmares with ease so it’s definitely worth getting.
Here’s how to pick up Xenophage.
Step 1: Embrace the Light
To start this quest you’ll need to go to the Moon and enter the portal next to Eris (you can also get here through Sorrow’s Harbor). While in the room where Eris usually sits after completing a memory you will see four statues. Each statue can be interacted with and will light one of the other four statues around the room.
To successfully light all four at once, interact with the statues in the following order (taken from the perspective of entering the room): front right, back left, front left. Upon lighting the final statue, a chest will appear and reward you with The Journey.
Comic deals, prizes and latest news
Sign up to get the best content of the week, and great gaming deals, as picked by the editors.
Step 2: Lighting the way
After acquiring The Journey you will be given some very cryptic steps that allude to the Anchor of Light on the Moon. Head to the Anchor of Light and move towards the large tower on the left side. Within the small building under the tower to the left when you enter there will be a fire. Interacting with this fire will give you a buff.
When in possession of the buff you will need to run around the Anchor of Light and activate six lecterns in a specific order. If you fail to interact with these lecterns in the right order, you will lose your buff and will need to start over. You can see the correct path below, with help from our pals at GamesRadar+ .
Step 3: Solve the Lost Sector puzzles
After lighting the fires in the previous step you’ll be treated to another series of rather ambiguous clues. What these clues really mean is that you need to venture into the Lost Sectors on the Moon, all four of them, and complete a puzzle that can be found on the wall at the end of each past the final chest.
These puzzles are all based on rotating tiles. Shooting a tile will alter the 3x3 grid in different ways. Your goal is to rotate all the objects in the correct order until the entire puzzle matches the symbol placed above it. To save you the heartache of completing several mini Rubik’s Cubes, here are the solutions to each puzzle from their starting position below. The notation below matches up with a standard computer number pad.
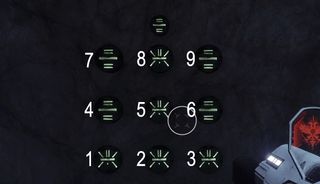
K1 Communion: 1, 3 ,8, 8
K1 Revelation: 6, 4, 5, 5, 4, 8, 2, 5
K1 Logistics: 7, 1, 6, 5
K1 Crew: 9, 4, 5, 2, 3, 3, 2
After completing all four of the puzzles and obtain four map fragments, you will unlock the next step in unlocking Xenophage.
Step 4: Journey to the Depths
Now that you’ve got a full map you will need to complete the first phase of the Pit of Heresy. Directly after you complete this section and unlock the chest you will be faced with a wall of doors. Look for the door that does not have a rune hanging over its awning and jump inside. While you are inside you will want to interact with another rune and proceed to the next encounter.
Step 5: Light more torches
Within the second encounter, while the invulnerable ogres are chasing you, there will be a series of Hive runes on the floor at a cliff at the far side from where you dropped down. As you interact with the runes, a series of platforms will appear in the chasm in front of you.
Jump over these platforms and acquire the fire. With the fire in hand, continue back the way you came from and stick to the right-hand side. This might prove tricky due to the ogres, but your end goal is to locate a door with two lecterns outside and light them (similar to those you lit in step 2.) When you light them, the doors will open and you can progress to the final step in the quest.
Step 6: Defeat the Hive Witch
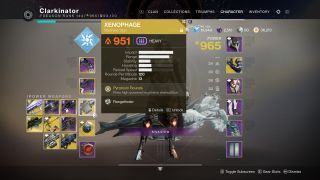
As the doors open you will enter a room with four different runes in each corner. Each of these runes corresponds to an energy type indicated by the glowing orb below it. Blue represents arc, red represents solar, purple represents void, and white/colourless represents neutral. In the next room there will be a boss roaming the area, an object that contains a glowing orb of light, and four different places to deposit this light.
To damage the boss you will first need to look at the debuff you are currently affected by at the bottom left of your screen (void, solar, arc, or neutral), match it with a rune in the first room, and then find the matching rune within the second room where you should then deposit the light you’ve picked up. After depositing the light you will receive a buff for 30 seconds that will allow you to damage the boss using attacks of that specific energy type and only that specific energy type. So make sure you have a varied loadout.
Continue to follow the process of matching your debuff with the correct rune and following up with the correct damage until the boss is defeated. As the boss slowly falls you’ll be awarded with one final item that should be returned to Eris, and in exchange for this item you will receive the Xenophage.
Now it’s time to rip through some enemies like cheap toilet paper. Have a look at the Xenophage in action below:
Check out the trailer for this big, cooperative Halo campaign mod
Gray Zone Warfare players can now change factions so they can team up with their friends
Sony backs down on demand that Helldivers 2 players log into a PSN account
Most Popular
- 2 Best ultrawide monitor for gaming in 2024: the expansive panels I recommend for PC gamers
- 3 Best wireless gaming keyboard in 2024
- 4 Best gaming laptops in 2024: I've had my pick of portable powerhouses and these are the best
- 5 Best gaming chairs in 2024: the seats I'd suggest for any gamer
- 2 Gigabyte G6X (2024) review
- 3 Flexispot E7L adjustable standing desk review
- 4 Starforge Systems Navigator Pro review
- 5 Indika review
New to Shacknews? Signup for a Free Account
Already have an account? Login Now
- Subscribe
- Latest Pets
- Forum: Posts today 2
Xenophage Exotic Machine Gun - Destiny 2
Unlock Xenophage in Destiny 2 by completing The Journey steps on the Moon for Eris Morn.

Xenophage is one of Destiny 2’s most powerful Exotic Machine Guns. What it lacks in ammo capacity and speed it makes up for in raw, overwhelming power. To unlock Xenophage, players will need to complete a quest called The Journey for Eris Morn, which starts on the Moon.
Xenophage, Exotic Machine Gun
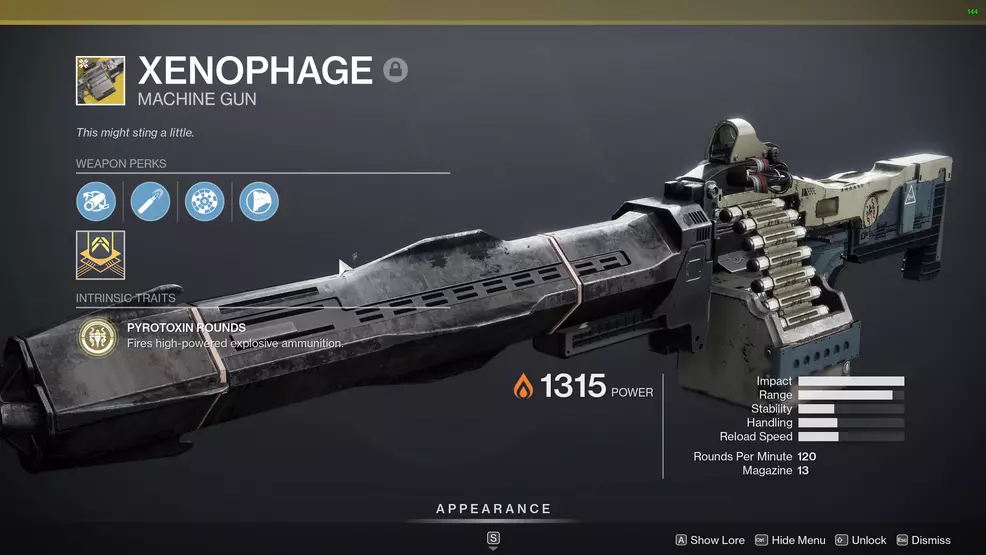
The Xenophage Exotic Machine Gun is a Solar Power weapon that uses Heavy ammo – which surprises no one. The gun was originally introduced during Season 8 , Shadowkeep and Season of the Undying, and has seen continual use since then.
Players that unlock Xenophage will be treated to one of the slowest firing Machine Guns in Destiny 2, featuring a 120 PRM. But, more on its perks and stats below.
The Journey Exotic quest
Unlocking Xenophage will require a bit of footwork, some puzzle solving, and venturing into the Pit of Heresy dungeon . Here are the steps to unlock Xenophage:
- Go to the Enduring Abyss below the Moon
- Use a ball of light in the Anchor of Light to light up six locations
- Solve puzzles in the Moon Lost Sectors
- Enter the Pit of Heresy and find the hidden item after the first encounter
- Collect a charge during the Pariah Ogre section and use it to light two brazier to open a door
- Slay Volmar, the Tempted
Step 1: Go to the Enduring Abyss
To get The Journey quest for Xenophage, you will need to reach the Enduring Abyss area beneath the Moon. Begin by loading in at the Sanctuary fast-travel point on the Moon. Head through the portal near Eris (if it's there) and follow to the point where you can see the pyramid. If the portal is not there, you'll have to take the long way. Use the embedded video below to help you find the Enduring Abyss location.
When you reach Enduring Abyss you'll find four statues, two on either side from where you look out towards the pyramid. Do not touch any statues until you're ready to begin. They should not be lit at all.
You will need to light them in the correct order. To do this, approach the statues in a clockwise direction and press the interact button when the message “Emerge from the Dark” appears. When all four are lit, a chest will spawn which contains The Journey, the Exotic quest for the Xenophage Exotic Machine Gun in Destiny 2.
Step 2: Emergence
The actual first step of The Journey will take Guardians to the Anchor of Light region on the Moon. Once there, an orb (ball of light, if you will) can be picked up. This light can then be taken to six nearby locations. At each one, Guardians will have to hold the interact button to Light Your Path. The six locations must be hit in the correct order, which is why we have a video of this step embedded below.
Step 3: Pathfinder - Lost Sector puzzles
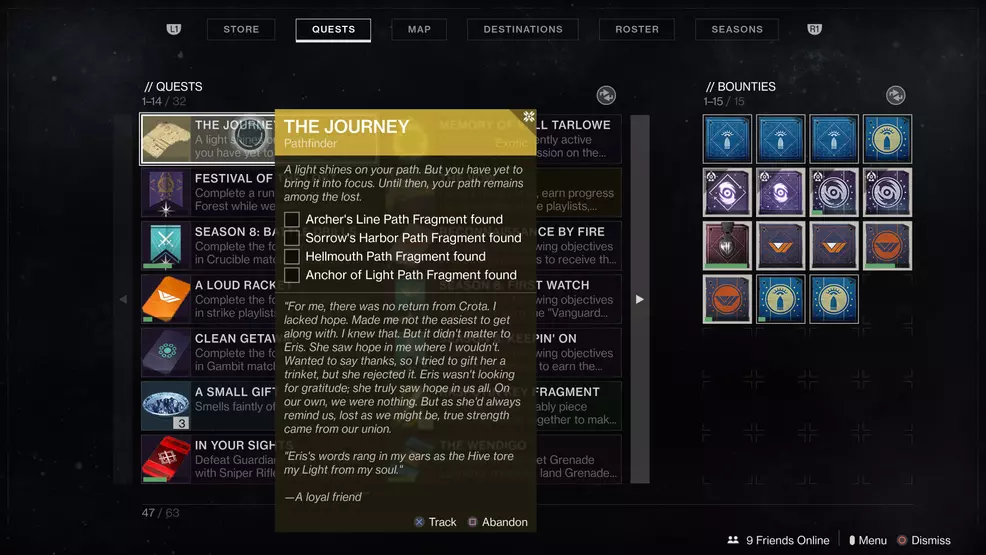
The Pathfinder section of The Journey tasks players with solving puzzles in Lost Sectors. These are flip puzzles, where shooting a symbol flips all the symbols on its cardinal plane to the next icon. The puzzles are all found at the very end of the Lost Sector, after defeating the boss and going through a locked door.
You will need to complete all four puzzles in each of the Moon’s Lost Sectors to find the path fragments. Credit to the Raid Secrets community for the solution to some of these puzzles.
K1 Revelation
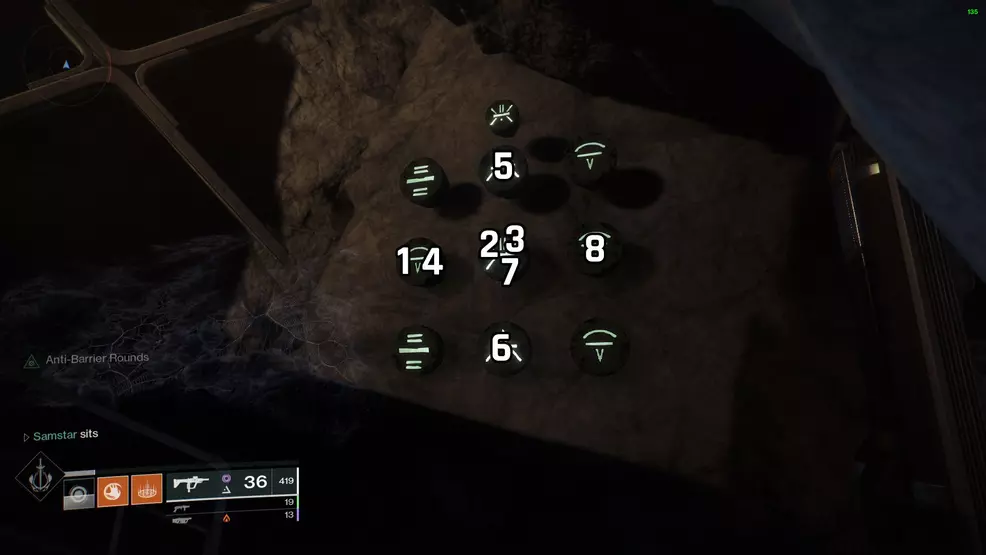
- Left middle
- Bottom middle
- Right middle
K1 Logisitcs
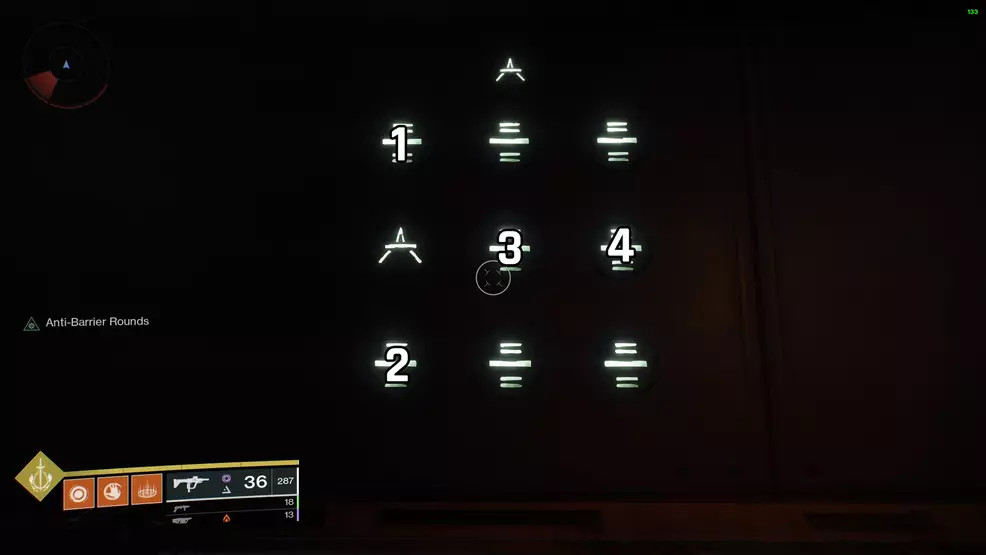
- Bottom left
K1 Communion
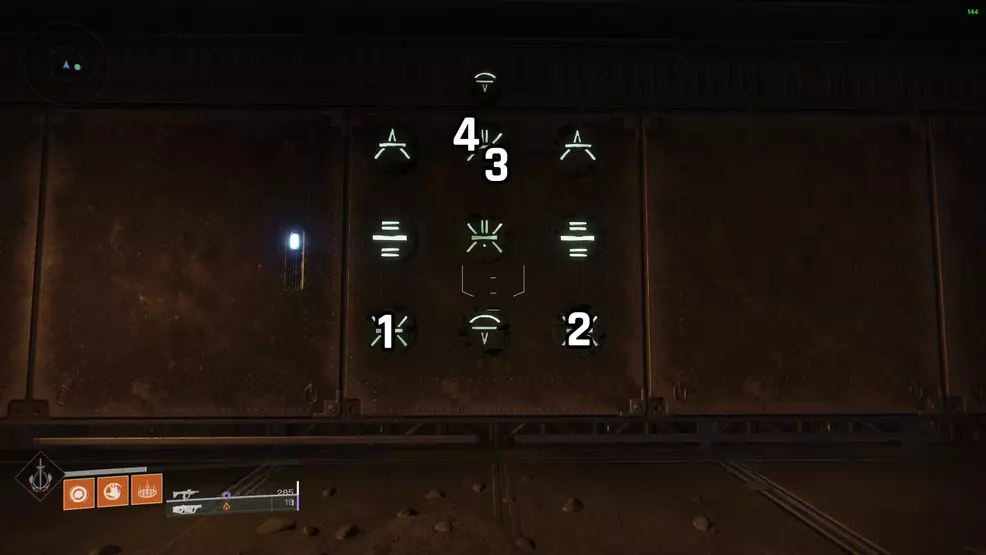
- Left bottom
- Right bottom
K1 Crew Quarters
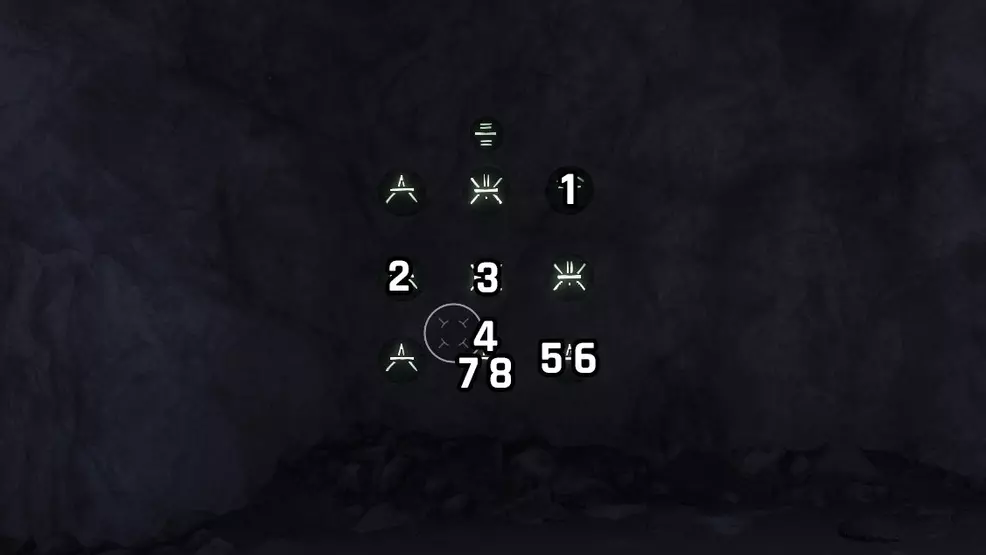
- Middle bottom
Step 4: Descent
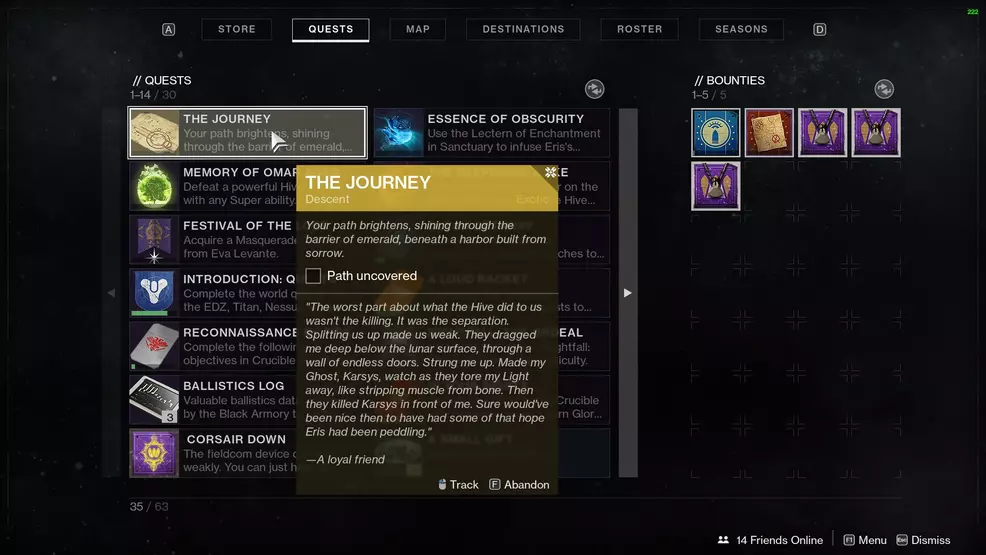
The next step to unlock Xenophage is to dive into the Pit of Heresy dungeon. Depending on your experience level, you can either do this solo or as a fireteam of three.
Clear the first encounter, collect your reward from the chest, and then press onwards. When you reach the wall covered in doors, look up to the left to spot one without a chain hanging over it. Use the wall to climb up to this door. Inside you will find a stone you can interact with that reads "Reveal Path's End". Interact with the stone and move on to the next step.
Step 5: Discovery
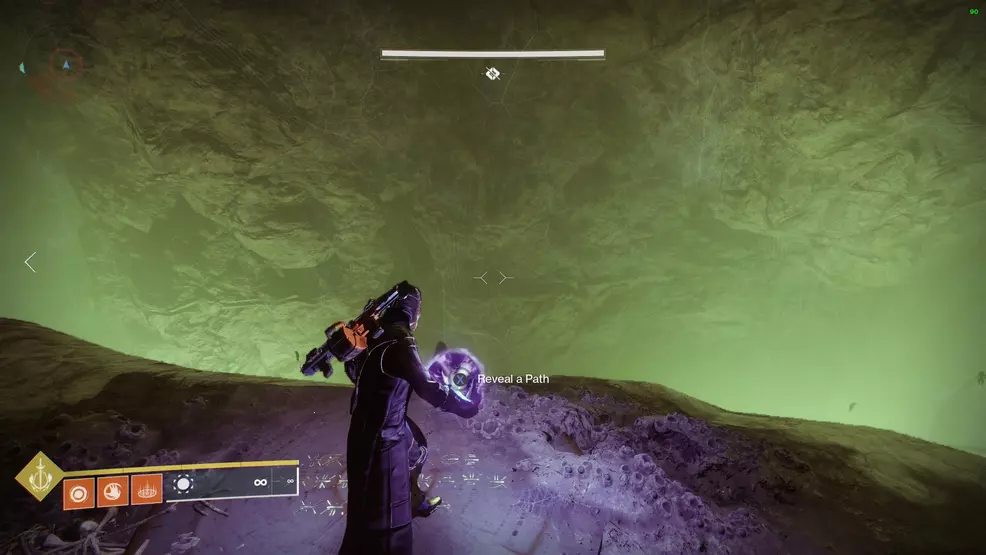
The next step also takes place in the Pit of Heresy dungeon, in the second encounter with the invincible Pariah Ogres. Along the left-hand side of the area is an abyss, but there's a ledge just over the edge. Drop down to it and stand on the plate while holding the appropriate button to "reveal a path". Jump across the floating platforms and collect the charge.
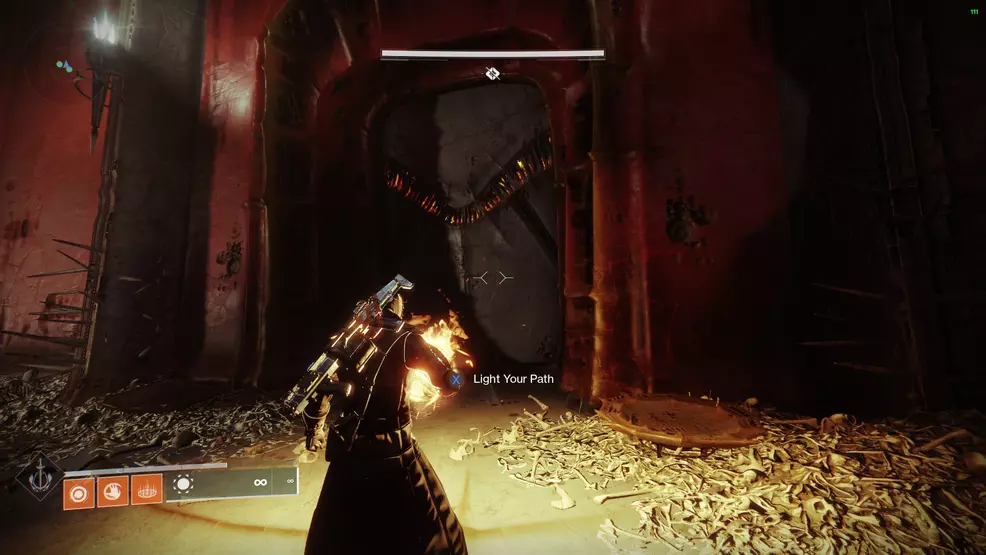
Take it back the way you came, sticking to the right-hand wall. You will need to use the charge to light two plates near a small door. This causes the door to open, granting you access to a hidden boss and the last step. This whole step is best attempted when the ogres disappear after clearing the encounter.
Step 6: Slay Volmar, the Tempted
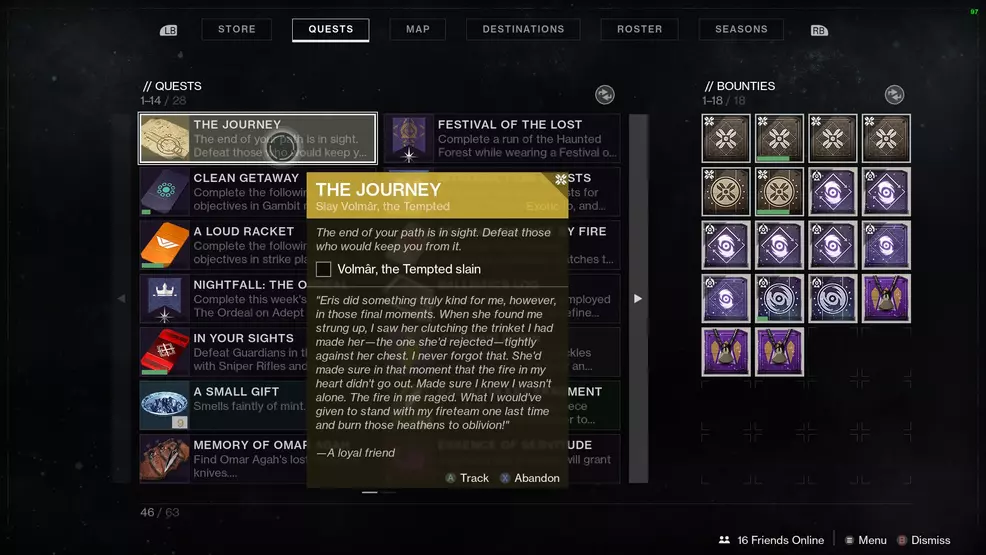
The final step in unlocking Xenophage is to defeat a hidden boss in the Pit of Heresy dungeon, Volmar, the Tempted. This boss fight requires you to use specific elemental damage against Volmar.
When you enter the first room, look at the bottom left of your screen to see what elemental charge you have. Find this element type in the corners of the first room. You will need to memorize the symbol as you must now find that symbol in the boss room. Go into the boss room and search for the symbol. When you find it, activate it. This will give you a short timer allowing you to deal damage of that specific element type. When the time is up, you will need to repeat the process of finding the matching symbol.
Repeat this until Volmar, the Tempted dies. At this point, you can return to Eris Morn to unlock the Xenophage Exotic Machine Gun.
Xenophage perks
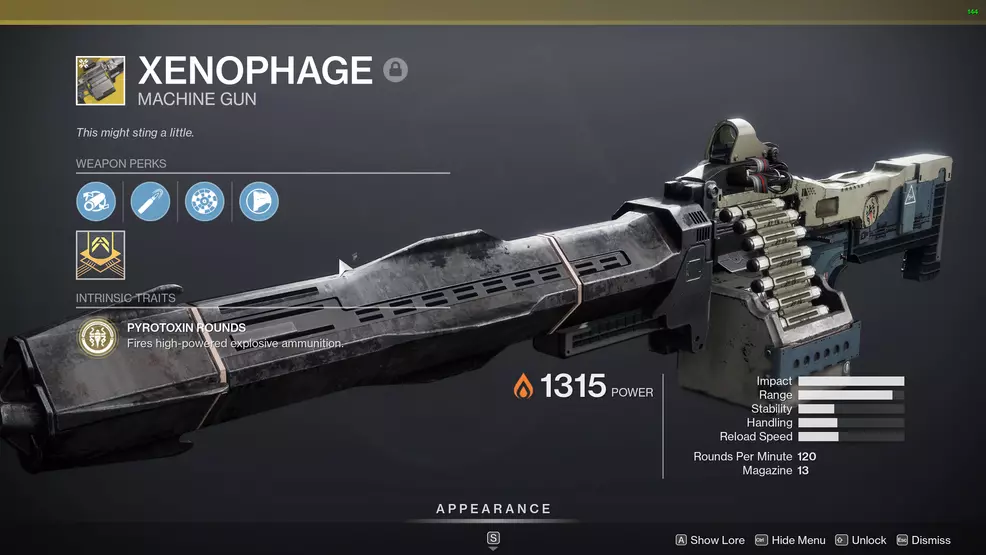
The majority of Xenophage’s perks are rather average and even unassuming. However, they work together to make this thing hit like a truck.
- Full Bore – Barrel optimized for distance. Greatly increases range, decreases stability, and slightly decreases handling speed.
- High-Caliber Rounds – Shots from this weapon knock the target back farther. Slightly increases range.
- Rangefinder – Aiming this weapon increases its effective range and zoom magnification. Increased projectile velocity while aiming Rocket Launchers and Grenade Launchers.
- Composite Stock – This weapon has a versatile dual-purpose stock. Slightly increases stability and handling speed.
Xenophage’s Exotic perk is Pyrotoxin Rounds. This is what makes it so powerful.
- Pyrotoxin Rounds – Fires high-powered explosive ammunition.
This unassuming perk ensures that Xenophage deals ludicrous damage. In fact, if you’re not using Anarchy, you’re likely going to want to use Xenophage as your boss damage tool. It’s even great at knocking down Champions and Wyverns.
Xenophage lore
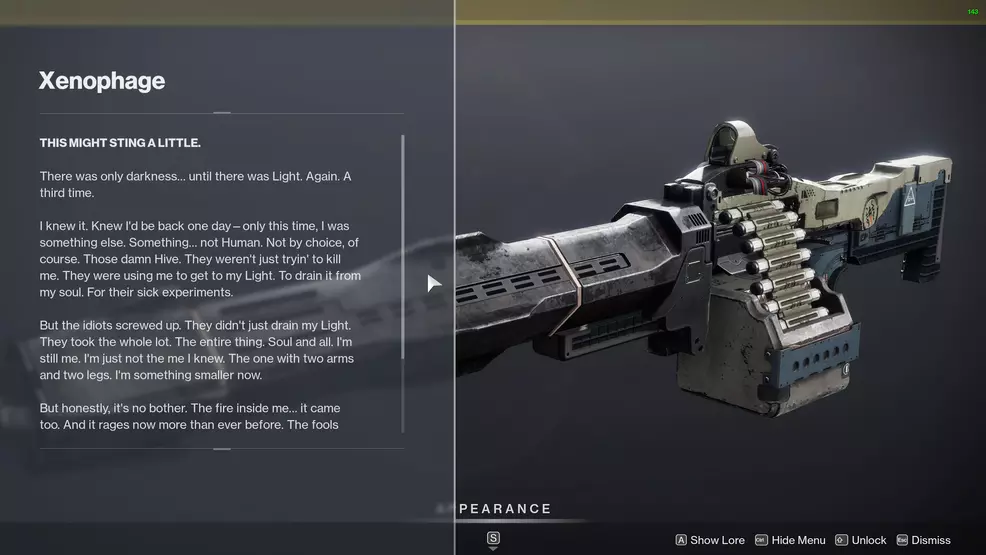
This might sting a little.
There was only darkness… until there was Light. Again. A third time. I knew it. Knew I'd be back one day—only this time, I was something else. Something… not Human. Not by choice, of course. Those damn Hive. They weren't just tryin' to kill me. They were using me to get to my Light. To drain it from my soul. For their sick experiments. But the idiots screwed up. They didn't just drain my Light. They took the whole lot. The entire thing. Soul and all. I'm still me. I'm just not the me I knew. The one with two arms and two legs. I'm something smaller now. But honestly, it's no bother. The fire inside me… it came too. And it rages now more than ever before. The fools have no clue what they've done. No idea the price they'll pay. I'll have my vengeance. In this life, not the next. —Omar Agah
Unlocking Xenophage in Destiny 2 is a lengthy process that requires fighting through the Pit of Heresy dungeon as part of the quest, The Journey. As with all dungeon runs, it's best to take a fireteam with you. Check out our Shacknews Destiny 2 complete strategy guide for more Exotic weapon walkthroughs.

Bill and Sam are the two Shacknews writers who handle the bulk of the Destiny 2 content. As a Hunter and Warlock main respectively, they can cover a great deal of ground with whatever is happening in Destiny 2 today. What they don't know they can find out thanks to their all-star lineup of Destiny 2 friends.
- Destiny 2: Shadowkeep
- Destiny 2: Season of the Undying
Bill Lavoy and Sam Chandler posted a new article, Get the Xenophage Exotic Machine Gun in Destiny 2
The fragments are in each of the four lost sectors on the Moon, the will have hive puzzles at the end of the lost sectors you are to solve.

- Call of Duty
- Apex Legends
- Dead By Daylight
- Attachments
- Field Upgrades
- Killstreaks
- Action and Adventure Games
- Battle Royale
- Gangs of Sherwood
- Indie Games
- Like a Dragon Gaiden: The Man Who Erased His Name
- Only Mobile Gaming
- Role Playing Games
- Shooter Games
- Sports Games
- Strategy and Simulation Games
- The Day Before
- shooter games
Destiny 2 Xenophage Exotic Guide: The Journey Quest and Volar The Tempted Guide
Going through a 'phage.

Published: 08 Jan 2021 10:41 AM +00:00 Updated: 22 Mar 2021 9:32 AM +00:00
Shadowkeep may have landed over a year ago, but collectors will want to get their hands on Xenophage.
Obtaining it will require heading into the Pit of Heresy dungeon, as well as defeating a hidden boss.
Here's what it does, and how to get it.
- Xenophage Guide
Start The Quest
Deposit orbs in anchor of light, k1 revelation, k1 crew quarters, k1 logistics, k1 communion, pit of heresy path uncovered, pit of heresy path's end and secret boss.
Read More: Destiny 2 Penguin Souvenir Locations: ALL Europa Penguin Toys Found In D2 Beyond Light
Destiny 2 Xenophage Guide
Xenophage is an exotic machine gun that uses heavy ammo.
It deals Solar Damage, and its intrinsic perk is "Pyrotoxin Rounds" – allowing it to fire high-powered explosive ammunition.
That makes it ideal for ripping through mobs or bosses.
Destiny 2 Xenophage Quest
Up first – obtaining the quest.
For this, you'll want to head to the Moon, specifically Sorrow's Harbor.
Head through the path to the North of the area, through the Enduring Abyss. Push through to the Pyramid, and look for four very creepy statues on the left and right.
Interact with all four to cause a chest to spawn containing The Journey – the Xenophage quest.
Head to Anchor of Light and look for a building with an Orb inside that you can interact with and pick up.
There are six locations where the orb needs to be deposited nearby:
- in the same room
- Next to a radio tower against a slope
- Small yellow building
- Atop the radio tower in Anchor of Light
- On top of a ramp to the North
- Atop the raised circular building
Head back to where this step started to receive a waypoint that'll kick off the next phase.
Pathfinder Puzzle Solutions
You'll now need to solve a puzzle in each of the Moon's four lost sectors.
You'll need a bunch of symbols on the wall to match the ones above, which is done by shooting specific icons.
Here are the solutions:
- Centre right
- Centre left
- Centre bottom
- Bottom right
- Bottom left
Head to the Pit of Heresy dungeon and complete the first encounter.
Afterwards, you'll find a series of doors on either side of the pathway ahead, with one looking different.
Get through that one, and you'll find a switch to start the next phase.
When you reach the dungeon's second encounter, head to your left into a glowing cavern.
Push on until you find a plate. Activate it by standing on it, grab the orb that appears and head back the way you came – keeping an eye to your right.
Go through the path on the right, dunk the orb, and you'll be tasked with fighting Volmar, The Tempted Slain.
You'll need to grab orbs and dunk them based on the corresponding buff:
- Arc Orb - Thunderous
- Kinetic - Neutral
- Solar Orb - Fiery
- Void Orb - Abyss
After each dunk, damage the boss as much as you can. Once he's dead, you can return to Eris to claim Xenophage!
Explore new topics and discover content that's right for you!
- Ethics Policy
- Ownership Policy
- Corrections Policy
Destiny 2 – The Journey – How To Emerge From The Dark – Lectern Lighting Order
The Journey quest in Destiny 2 can be a bit confusing, so in this guide, we will show you how to emerge from the dark for the Emergence step.
As part of the Xenophage quest, you will need to figure out how to emerge from the dark as part of The Journey exotic quest. The first step, Emergence, talks a lot about Crota, but this is a bit of a red herring. You need to head to the Anchor of Light, to light some Lecterns.
Head for the Anchor of Light, then go the point shown on the map above. This is where you will begin this part of the quest. You need to grab the Light from the strange relic in the small building shown in the header image above. The exact location can be found on the map. Once you have it, you need to light six lecterns, in the correct order.
There was a lot of trial and error done by the community for this one, but eventually, the good folks over at Raid Secrets on Reddit got it all worked out. My hat is off to them, and their amazing ability to expose Destiny 2’s secrets. The easiest way to show you the correct order to light them in is via a video. As such, I have recorded where to go, where the Light is, and what order you need to light the lecterns in. Just check the embedded video above.
Once you have them all, you need to go to an area that will be marked on the map, and interact with an item there. This will move you on to the next part of the quest, called Pathfinder! We are also working on a full guide for The Journey quest here if you need help with other steps.
The Journey
From Destinypedia, the Destiny wiki
The Journey is an exotic quest in Destiny 2 that was introduced in the Shadowkeep expansion, which rewards players with the Xenophage Machine Gun . [1] To obtain this quest, players must complete a puzzle in the Enduring Abyss on the Moon . Right before Eris Morn 's station overlooking the Lunar Pyramid there are four Hive statues, which players have to interact with them to make all of them light up. Solving it spawns a chest with the first quest step.
- 1.1.1 Notes
- 1.2.1 Notes
- 1.3.1 Notes
- 1.4.1 Notes
- 1.5.1 Notes
- 1.6.1 Notes
- 1.6.2 Transcript
- 2 List of appearances
- 3 References
Steps [ edit ]
Step 1: Emergence [ edit ]
Around you... darkness. If you are to discover your path, you must anchor yourself to light.
- Emerged from the dark
Notes [ edit ]
To complete this step, the player has to travel to the Anchor of Light and locate an orb of captive Solar Light in one of the buildings. They have a limited amount of time to light seven saucers scattered around the area with this orb.
Step 2: Pathfinder [ edit ]
A light shines on your path. But you have yet to bring it into focus. Until then, your path remains among the lost.
- Archer's Line Path Fragment found
- Sorrow's Harbor Path Fragment found
- Hellmouth Path Fragment found
- Anchor of Light Path Fragment found
This quest step is completed by solving a puzzle at the end of each Lost Sector on the Moon. There is a grid with Hive symbols on a wall, and a symbol above it. The player has to change all of the symbols on the grid into the symbol above by shooting them. Shooting a symbol changes all symbols on the vertical and horizontal lines where it is located. Once a wall is solved, it spawns a chest with the path fragment.
Step 3: Descent [ edit ]
Your path brightens, shining through the barrier of emerald, beneath a harbor built from sorrow.
- Path uncovered
This quest step is completed in the Pit of Heresy dungeon . The player has to proceed past the Necropolis encounter to the walls with many doors and interact with a hidden switch in one of them. The correct doorway is the only one without a chained symbol on it.
Step 4: Discovery [ edit ]
The Pariahs stand guard over far more than just despair, for within these tunnels lie many secrets.
- Path's end located
This quest step is completed by opening the doorway to the hidden boss in the Pit of Heresy during the Tunnels of Despair encounter. At the leftmost area upon interacting with a prompt on the cliff underside, the player has to cross several floating platforms above the pit to obtain a shiny orb of Solar Light, and light the two saucers by the doorway in the opposite section of the encounter.
Step 5: Slay Volmâr, the Tempted [ edit ]
The end of your path is in sight. Defeat those who would keep you from it.
- Volmâr, the Tempted slain
- This quest step is completed by defeating the hidden boss in the Pit of Heresy. When in Volmâr's room, the player receives a " Dread " buff, which determines what element of damage they will be able to deal to the boss. Each corner of the entrance room contains an orb with a Hive rune above it, the color of the orb corresponds with a certain damage type. There are four saucers with Hive runes above them, and a shiny orb in the middle of the room. The player has to memorize the rune for the orb which matches their Dread in the entrance room, then carry the shiny orb and light the saucer with this rune in the main room. Doing so changes their buff to its " Vengeance " version, which lasts 30 seconds and allows them to damage Volmâr with the buff's element.
- The Dread and Vengeance buffs refer to the elements as Neutral ( Kinetic ), Thunderous ( Arc ), Fiery ( Solar ), and Abyssal ( Void ).
Step 6: Finality [ edit ]
Return to Eris Morn with the Hive bug.
- Talk to Eris Morn
Visit Eris Morn with the now-transformed Omar Agah . She will insert Omar’s Hive bug form into his prized machine gun Xenophage , which is then given as your reward.
Transcript [ edit ]
"This… communes with me. And I know it… I know him. This is what remains of dear Omar. Tortured by the Hive. I knew not that he would be transformed by Crota's twisted experiments…"
"I am sorry I couldn't save you, friend. In life, you may have been unable to escape their grasp. But you will have your vengeance yet."
Eris has kept in her possession one of Omar's greatest assets: his beloved Machine Gun. Eris empowers it with the spirit of Omar, and grants it to you.
List of appearances [ edit ]
- Destiny 2 : Shadowkeep
References [ edit ]
- ^ Bungie (2019/10/1) , Destiny 2 : Shadowkeep , Playstation 4
- Articles with verbatim transcripts of official documents
- Privacy Policy
- Corrections Policy
- Ethics Policy
- Fact-checking Policy
- Ownership Policy
- Looking for Eguides?
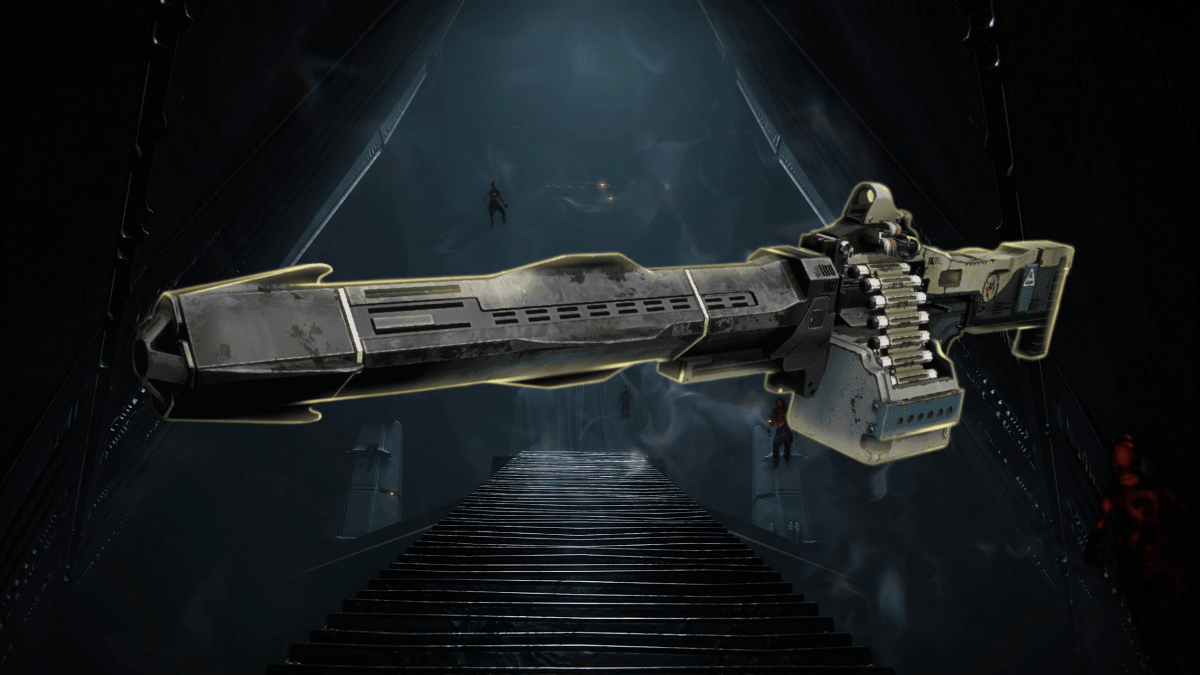
How to Complete The Journey Quest in Destiny 2
If you have the Shadowkeep Expansion, you might find yourself in possession of the coveted quest, The Journey . If you find yourself in possession of this quest and you don’t have Shadowkeep, be aware that you’ll need that expansion to finish this quest!! So, let’s get into it. Here’s how to complete The Journey quest in Destiny 2.
How to Complete the Journey Quest in Destiny 2
If you don’t have the quest yet, head first to the Moon, then to Sorrow’s Harbor. From here, you’ll want to head towards the Scarlet Keep. Once you enter it, take the first left door, and descend and keep left until you reach the Enduring Abyss . Once you hit the lantern, stop and look up to the right. There will be a lighted corridor you can jump up to.
Do so, then follow this path until you see a Pyramid. You’ll be in a small balcony area with four statues, two on the left, two on the right. By interacting with them, one or more will light up. Our goal is to light all four. This puzzle is random, so experiment by interacting with the statues until all four are lit. I found that working from the bottom left in a counter-clockwise fashion worked perfectly.
Related: How to Complete the Memory Alembic Quest in Destiny 2
Once the statues are lit, you’ll get a notification, and a chest will spawn. Open it, and you’ll get the quest, The Journey. Now, to the entrée:
Step 1: Emerged from the dark.
“Around you… darkness. If you are to discover your path, you much anchor yourself to light.”
It’d be easy to be stumped by this quest description. But it’s actually given us precisely where we need to go: the Anchor of Light . Head there from Sanctuary, then keep left until you see the bright yellow radio tower.
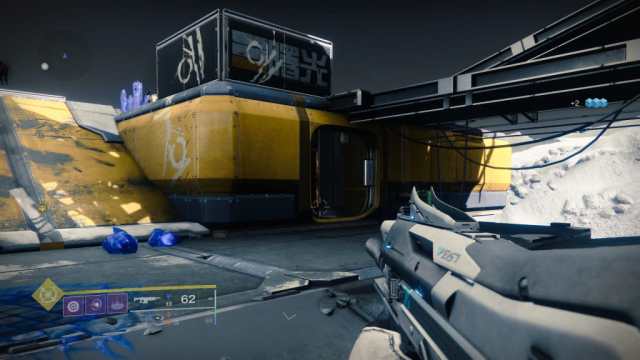
But we don’t want this large tower – we want the small room attached to it. Head inside, and you’ll find behind an ancient server a strange, Hive-like structure with a glowing orb within. Approach it, and it will prompt you to “Pick Up Light”. Do so, and you’ll find there’s a counter on the left side of your screen called “Torch Bearer”. You’ll have one minute to deposit the ball of light into six different locations.
This light has to be deposited in a precise order, so I really recommend finding each of the six locations and their scarlet plates beforehand. Once you have an idea of where to go, you’ll be able to complete this easily.
I’ve provided a short video of my run below (and as you can see, you can make a hiccup here or there and be perfectly fine on time). But here’s how to find each one:
Location 1 : Same Room
In the corner of the same room, you found the ball of light will be a scarlet plate. Interact with it, and your path will burn brighter.
Location 2: Within the chasm
Leave the room and keep heading straight until you see an orange wall in the distance with some Fallen graffiti. Head towards that wall and you’ll reach a stone bridge that goes over a green chasm. Turn left while on this bridge and you’ll see some broken scaffolding. Within this scaffolding is the second plate.
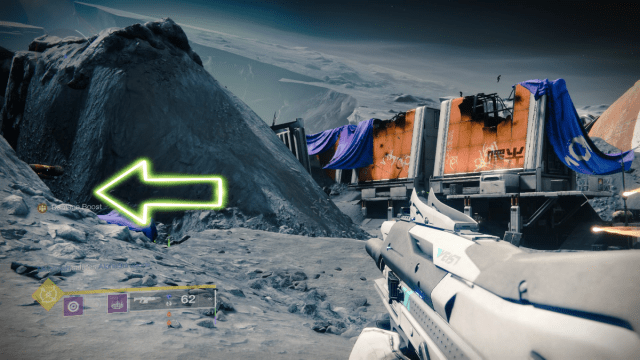
Location 3: Another small room
From your perch on the scaffolding, turn around until you see the saucer building. Head a little to the right of this saucer building and you’ll see a small yellow building with only one room. Behind the console in the center of this room will be another plate.
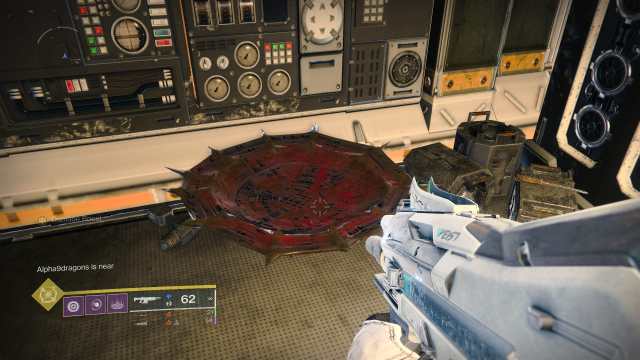
Location 4: Second floor of the radio tower
Return to the radio tower, but this time we’ll be ascending to the second floor. Once you’re on the second floor, you’ll see some crates covered with purple tarp. Jump on top of them, then look up. If you peer carefully, you’ll be able to see the dark, round shape of another plate on a girder above you. Jump up to it.
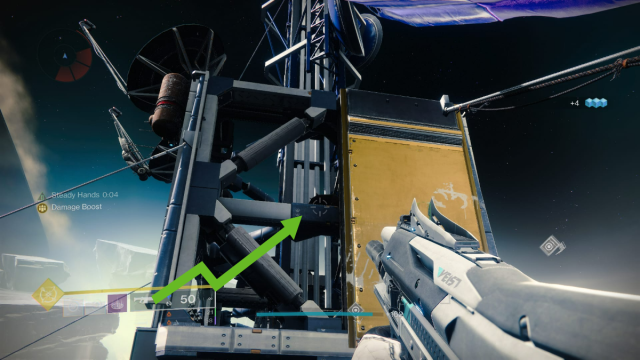
Location 5 : Cement ramp
Heading directly north of where the plate on the girder is, we’ll see another set of buildings, connected with a variety of cement ramps. Climb the highest ramp on the right side, and there will be a bowl on top.
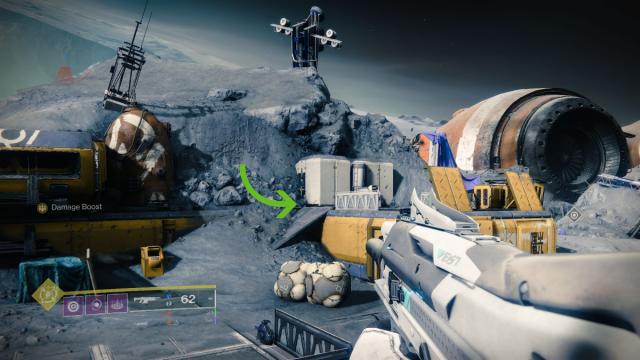
Location 6: Saucer/Round Building
From the top of the cement ramp, head forward until you see the UFO/Saucer shaped building that was our landmark for Location 2. We want to climb on top of that. Do so, and you’ll find the plate on top.
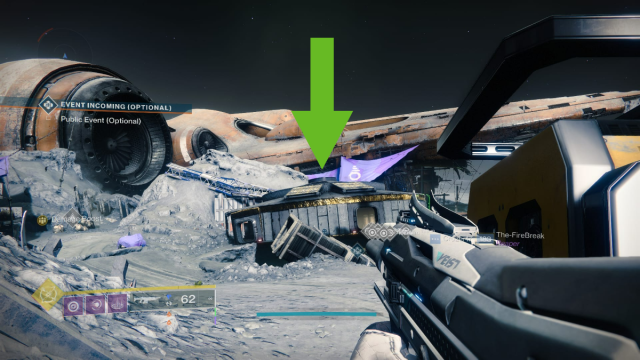
Once you find all 6, you’ll be directed towards a steel tower. There’s no time limit for this one, and you’ll get a clear map marker for it to boot.
Step 2: Pathfinder
Okay! We have quite a few more steps to go. We’ll need to find the following fragments:
- Archer’s Line Path Fragment
- Sorrow’s Harbor Path Fragment
- Hellmouth Path Fragment
- Anchor of Light Path Fragment
For this step, we’ll need to visit all the K1 Lost Sectors. Naturally, the easiest one to go to is Anchor of Light’s Lost Sector, K1 Communion, which is North East of the UFO building.
Fragment 1: Anchor of Light, K1 Communion
Complete the Lost Sector like usual, then claim the Lost Sector chest. Jump up towards the Lost Sector exit, and you’ll find a Hive puzzle on the wall. Your goal is to make all the symbols match the symbol at the very top (which I call the ice cream cone). You do this, of course, by shooting a tile which then flips over a series of others. Here’s the easy way to do it:
- Shoot bottom left
- Shoot bottom right
- Shoot top middle
Do that, and you’ll get a grid full of ice cream cones and a hive treasure chest will spawn. Open it, and you’ll get a Path Fragment. Now, to the next lost sector.
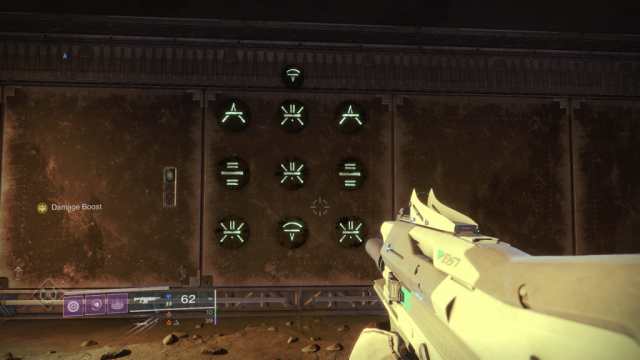
Fragment 2: Archer’s Line, K1 Logistics
This Lost Sector is always a pain to find. Head into Archer’s Line from Sanctuary, then keeping heading straight until you reach the large building at the end of the path. Enter the building but try to keep left until you find a room full of spooky scarlet ghosts. Follow the ghosties until you descend into the Lost Sector.
Related: Destiny’s Latest Teaser Reveals New Details about the Strand Subclass
Once you’re in K1 Logistics, continue as normal and grab the Lost Sector chest. Enter the corridor after the chest to find the next puzzle. Like K1 Communion, we’re going to want to shoot some tiles and get it to match the triangle on top.
The easy solution:
- Shoot top left
- Shoot middle right
- Shoot middle center
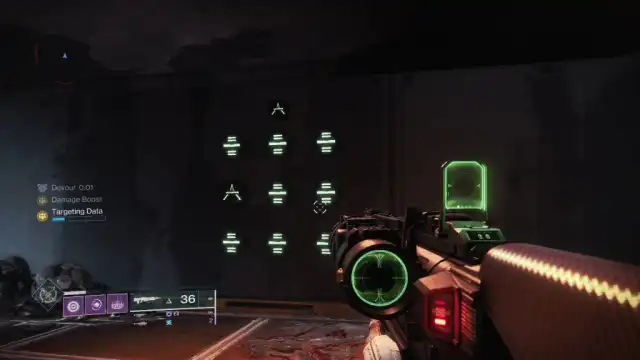
Claim your path fragment!
Next up: Sorrow’s Harbor.
Fragment 3: Sorrow’s Harbor, K1 Revelation
Another annoying Lost Sector to track down! Use your map to get practically on top of it. Once you are, look around. The Lost Sector is inside a cave that winds beneath your feet. And if you find that the final door won’t open once you complete the Lost Sector, it’s probably because you 1) Missed an acolyte somewhere or 2) You finished the final boss too quickly and you need to leave the area slightly then come back to trigger the next few waves of grunts.
Go through the final doors and you’ll see a new puzzle. To complete it, hit the following tiles:
- Shoot middle left
- Shoot bottom middle
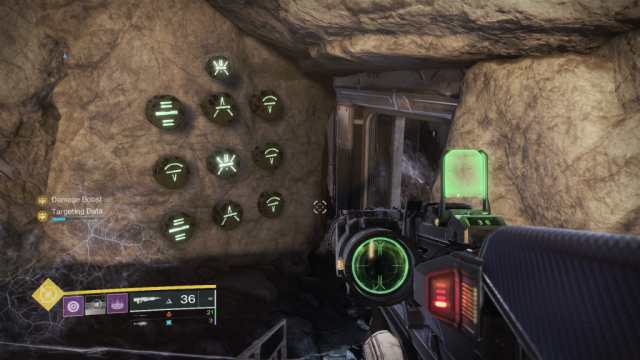
Yeah… that’s a lot of middle. Now, let’s head into the Hellmouth.
Fragment 4: Sorrow’s Harbor, K1 Revelation
Get into the Hellmouth whichever way you prefer, heading towards the crew community at the bottom of this section of the map. There’s nothing tricky about this Lost Sector, except you might miss the puzzle. It’s just past the Lost Sector cache on a rock balcony. Jump over to it then hit the following tiles:
- Shoot top right
- Shoot bottom middle
That’s a lot of bottoms.
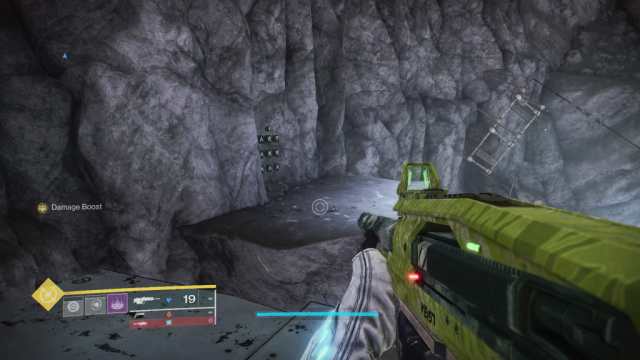
… Moving right along. We finally have our last fragment, and we’re onto our next step.
Step 3: Path Uncovered
Again, we get a bit of a location-based hint. We’ll need to head to Sorrow’s Harbor and begin the Pit of Heresy , a Dungeon you can see on your map. To access this dungeon, you’ll need the Shadowkeep Expansion. If you can’t access the Pit of Heresy and you do have the Shadowkeep Expansion, check to see if you’ve completed Eris’ “The Deepening Wake Quest”.
Now that you’re in the Pit, complete the first encounter. Head forward until you hit the wall puzzle with dozens of doors.
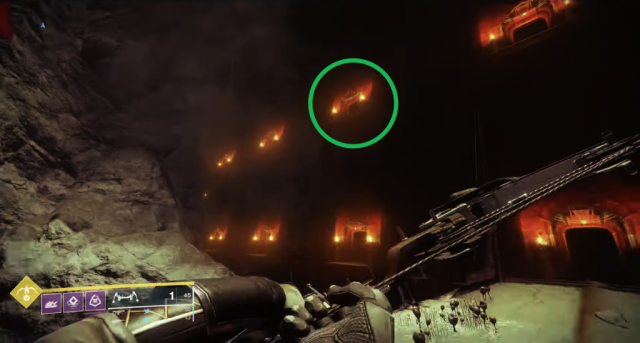
There are two rows of lit doors. Look left. Your goal is to get to the second door from the end on the top row. Climb up there and enter the room, and you’ll find a ruin on the ground. It will have the interaction prompt “Reveal Path’s End”. Interact with it, and you’ll get a new step.
Step 4: Discovery
Welp! We’ll need to find the Pariahs, and they’re luckily right in the Pits of Heresy with us. Continue through the Dungeon as normal, heading into the terrible awful maze portion where you’ll need to avoid the Ogres. It’s important to note that you MUST NOT get to the Chamber of Suffering checkpoint, as it will lock you out of backtracking!!
Is that enough exclamation points? !!!! Here are a few extra. I’m giving these to you because I know how tedious it was to get to this point, and it’d be awful to have to complete the Dungeon or wait for reset just to finish this step.
This area is meant to trip you up, but the next set of hidden runes are hidden on a path on a ledge. Search every edge you come across, and if you see a massive set of ribs and a few scarlet ghosts, you’ll know you’re in the right place. There will be a path that will lead downward, terminating at a set of runes on the ground. And, yes, it’s beside an ogre patrol point.
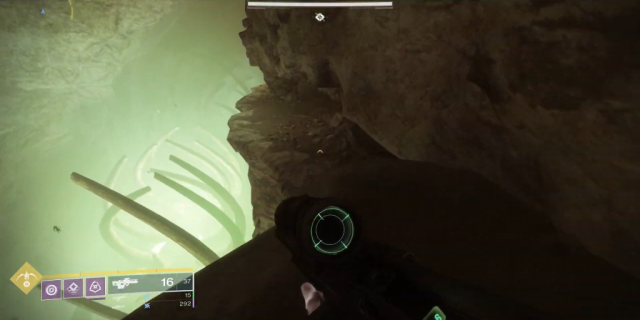
Once you interact with the runes on the ground, a set of platforms will spawn. Jump across them, and you’ll see something familiar: a hive bone structure with a ball of light in the middle. But don’t worry: this time the torch buff won’t run out.
Take this ball of light all the way back where you first entered this section. There, you’ll find two scarlet plates next to a door. Light both, and the door will open. Oh, and be careful of the Ogres. They still want to kill you.
Step 5: Slay Volmar, the Tempted
The door you deposited the light into will now open. Enter and breathe a sigh of relief because the Ogres can’t follow you here. Work your way through the spiderweb-choked corridors. There, at the very end will be a Hive Wizard gold bar – Volmar the Tempted.
I’m very sorry to say that killing Volmar isn’t as easy as chucking a Nova Bomb at his head. This boss can be difficult to solo and there’s a puzzle attached. Around Volmar’s arena are a variety of Hive Ruins, each of which are connected to an element: Void, Netural, Arc, and Solar.
Related: How to Get Riptide in Destiny 2
It’s best to try and memorize where each of these Runes are. In Volmar’s room, there is a ball at the center that he guards. You’ll be given a debuff with an element associated with it. Fiery Dread for Solar, Abyssal Dread for Void, Neutral Dread for kinetic, Thunderous Dread for Arc.
You’ll need to steal the ball he’s guarding then dunk it next to the Rune that represents the element you’re being affected by. Once you’ve dunked the ball, return to Volmar to try to get in as much damage as possible.
If you’re struggling and need to recover, try to hide near the kinetic altar. If you can’t get the ball, exit the room, and get the entrance ball. And once the wizard goes down? You’ll get the next step.
Step 6: Finality
What a journey. I guess that’s why they named this quest what they did. They could have also named it “suffering” and that would have worked, too.
Now, all you need to do is return to Eris Morn in Sanctuary, and she’ll hand you the Exotic Machine Gun, Xenophage! Congratulations, Guardian.
Home > Game Guides
- Game Guides
Destiny 2: Shadowkeep The Journey Guide
by enricofairme · Published October 29, 2019 5:50 PM · Updated October 29, 2019 7:44 PM

In Destiny 2 there is an Exotic Quest called The Journey. This Exotic Quest takes you around the Moon as you attempt to find the Exotic weapon. To help you complete this quest, use our The Journey Guide.
Note : Guide is still updating.
Reaching Enduring Abyss
To start you want to make your way to the area you meet Eris Morn overlooking the Pyramid. This area is in Enduring Abyss which can be accessed through a Memory portal, or by travelling through Sorrow’s Harbor to the Scarlet Keep. The portal way is rather straightforward, but requires having a Memory quest to turn in.

If you don’t have a Memory quest to turn in, fast travel to Sorrow’s Harbor and make your way inside the Scarlet Keep (located in the north). Inside the keep head forward until you see some glowing green rocks. Take a left here and head forward through the hallway.

As you walk through the hallway you will reach a new area called Enduring Abyss. After the text for this area walk forward until you need to drop down. Don’t drop down. Instead look along the right wall for a hole. Jump to the hole then walk through the corridor to reach the area overlooking the Pyramid.
Interact With the Four Statues to Get Quest

In the area overlooking the Pyramid you will find four statues. Go up to each statue and interact with it (“emerge from the dark”). Once you’ve done this with all four statues a chest will appear. Interact with the chest to receive the quest step Emergence, which is part of The Journey Exotic Quest.
Emergence: Anchor of Light
Once you have the Quest make your way to the Anchor of Light area. I found the the video from YouTuber Spider above to be useful in guiding you where you need to go. To complete this portion of the Exotic Quest you need to pick up a light source then light torches in a specific sequence. Once you’ve lit all the torches you will earn the Pathfinder mission step.
Pathfinder: Find the Path Fragments
The Pathfinder mission step is split into four objectives. You need to find Path Fragments in Anchor of Light, Sorrow’s Harbor, Hellmouth, and Archer’s Line. All of the Path Fragments can be found in the exits of each areas Lost Sector so you will need to complete each one. To help you find the exact locations, consult the the more indepth locations below.
Anchor of Light Path Fragment

Go to the Lost Sector in Anchor of Light. Make your way through the Lost Sector and exit via the door next to the Chest (elevated above the chest ledge). Go up the stairs and you will see some symbols on the wall in front of you. To solve this puzzle complete match all nine symbols to the one show on top of the puzzle. You can change the symbol by shooting. Once you match the symbols a chest appears with the Path Fragment inside it.
Solution (Puzzle Spawn) : Bottom Left, Bottom Right, 2x Top Middle.
Sorrow’s Harbor Path Fragment

Go to the Lost Sector in Sorrow’s Harbor. Make your way through the Lost Sector and exit via the door next to the Chest (on the catwalk by the Chest). Go up the stairs and you will see some symbols on the wall to the right of you. To solve this puzzle complete match all nine symbols to the one show on top of the puzzle. You can change the symbol by shooting. Once you match the symbols a chest appears with the Path Fragment inside it.
Solution (Puzzle Spawn) : Right Middle, Left Middle, 2x Middle, Left Middle, Top Middle, Bottom Middle, Middle.
Hellmouth Path Fragment

Go to the Lost Sector in Hellmouth. Make your way through the Lost Sector and exit using the stone platform near the Chest. On this stone platform is the puzzle. To solve this puzzle complete match all nine symbols to the one show on top of the puzzle. You can change the symbol by shooting. Once you match the symbols a chest appears with the Path Fragment inside it.
Solution (Puzzle Spawn) : Top Right, Left Middle, Middle, Bottom Middle, 2x Right Bottom, 2x Bottom Middle.

Archer’s Landing Path Fragment

Go to the Lost Sector in Archer’s Landing. Make your way through the Lost Sector and exit using the building behind the chest that opens when you defeat the boss. On your way out of this building you will see the puzzle on the wall to your right. To solve this puzzle complete match all nine symbols to the one show on top of the puzzle. You can change the symbol by shooting. Once you match the symbols a chest appears with the Path Fragment inside it.
Solution (Puzzle Spawn) : Top Left, Bottom Left, Middle, Middle Right.
Once you’ve collected all the Path Fragments from the puzzles above you will unlock the Descent objective. This objective takes you to into the Dungeon on the Moon.
Path Uncovered: Pit of Heresy
For this next portion of the quest make your way into the Pit of Heresy Dungeon. In this Dungeon you want to complete the first encounter. You then need to find a hidden pathway. Use the video by WoW Quests above to find the exact location. You will probably need a second or even third to get this far in the Dungeon. Once you reveal Path’s End you unlock the Discovery quest step.
Thoughts on our The Journey Guide? Drop a comment in The Pit below.
Tags: Destiny 2 Destiny 2: Shadowkeep
enricofairme
A lifelong gamer who has devoted the last six years to the creation and development of "Hold To Reset," a website tailored by gamers for gamers. Yell your hot takes at him on X .
You may also like...

Destiny 2 Season of the Splicer Release Date is Today
May 11, 2021 10:14 AM
by enricofairme · Published May 11, 2021 10:14 AM · Last modified October 4, 2023 10:13 PM

Destiny 2 Season of the Splicer Roadmap and Details Revealed
May 10, 2021 3:48 PM
by enricofairme · Published May 10, 2021 3:48 PM · Last modified October 4, 2023 10:14 PM
Hawkmoon Exotic Guide – Destiny 2
December 8, 2020 5:30 PM
by enricofairme · Published December 8, 2020 5:30 PM · Last modified October 6, 2023 2:19 PM
3 responses
- Pingbacks 0
Had to leave the quest at step 4. Quest card shows i am on step 4. How do i get back in to start at 4 and not do all of pit of heresy again? This is the exotic quest the journey.
How do you reset the puzzle? I started the puzzle before I saw the walkthrough.
easy just reset the hidden sector and you’ll reset the puzzle
Leave a Reply Cancel reply
Your email address will not be published. Required fields are marked *
Save my name, email, and website in this browser for the next time I comment.
This site uses Akismet to reduce spam. Learn how your comment data is processed .
- Narutodle Answers Today: Classic, Jutsu, Quote, and Eye
- Pet Simulator 99 Backrooms Event Details
- NBA 2K24 2KTV Episode 35 Answers
- Stardew Valley Divorce System Explained
- Mimic Search Achievements Guide
Destiny 2: How to Complete the Xenophage Exotic Quest
The newest exotic quest for Destiny 2: Shadowkeep is a long journey to earn the very unique semi-automatic machinegun Xenophage.
Destiny 2: Shadowkeep received a big update and shot in the arm this week with the arrival of Festival of the Lost, a new Crucible mode , a dungeon, and an exotic quest. The quest is for the exotic machinegun Xenophage, which is a slow-firing machinegun that fires heavy, explosive rounds. Earning it is a lengthy, multi-step quest that takes players across the Moon and into the new dungeon.
The first thing players may want to do is make sure they complete the quest from Eris that unlocks the Pit of Heresy dungeon , as the quest will ultimately lead players there. This involves playing and completing the new Altars of Sorrow event in Sorrow's Harbor. This step can be done later down the line in the quest for Xenophage if players choose to, but it might be better to get it done first.
RELATED: Destiny 2: How to Get the Xenophage Exotic Heavy Machine Gun
1. How to start the Xenophage quest
To start the Xenophage quest, Destiny 2 players need to head to the Enduring Abyss, where the pyramid ship is located. Either players can go through an active portal in Sanctuary where Eris is located to warp almost directly there, but if players do not have a Memory Fragment to open the portal themselves or luck into instancing into the area when the portal is active, players can get there on patrol.
Head to Sorrow's Harbor and go into the keep and head left through a doorway and into some tunnels. Eventually there will be a path to the right and above that will take players to the room where they can see the pyramid ship . There are the four statues in this room that players may have noticed before, but now they can be interacted with. Players need to get all four statues glowing at the same time to open the chest and start the quest.
While players can solve it and even luck into getting the statues activated, one sure-fire way to get them activated is top right, bottom right, top left, bottom right, bottom left, bottom right.
2. Activate plates in Anchor of Light
Next, players should head to and Anchor of Light area of the Moon . In one of the small buildings near the larger building the north of the area, players will find a glowing orb. Many players have found this place previously but they were unable to pick up the orb. Now, once players have the quest, they can pick it up. Players need to take the orb to six different Hive bowls/plates around the area to activate them. Players have to be quick as they have one minute between each plate to get to the next one. Check out this video to see the correct path to take (via Esoterickk):
3. Solve puzzles in Lost Sectors
Next, players will need to head into each of the Moon 's Lost Sectors and solve a Hive rune puzzle that works kind of like a Rubik's Cube. Players need to shoot at the grid of symbols to switch up the row and column connected to the symbol that is shot. The goal is to get every single symbol to match the symbol above the grid. It is possible for players to figure this out on their own and there are numerous combinations that can work, but here are combinations that work (via Datto):
- K1 Logistics (Archer's Line): Top left, bottom left, middle, middle right.
- K1 Communion (Anchor of Light): Bottom left, bottom right, top middle, top middle.
- K1 Crew Quarters (Hellmouth): Top right, middle left, middle, bottom middle, bottom right, bottom right, bottom middle, bottom middle.
- K1 Revelation (Sorrow's Harbor): Middle left, middle, middle, middle left, middle top, middle bottom, middle, middle right.
These symbols can be found after clearing each Lost Sector in the exit route out of the Lost Sector.
4. Enter the Pit of Heresy Dungeon and Clear the First Encounter
Players need to go into the Pit of Heresy dungeon next and get through the first encounter. The first encounter involves taking down three bosses with a Hive sword. There is a great walkthrough of that here (via KackisHD):
After getting through the first encounter, players will find themselves in front of a wall of numerous doors. Each one has a chain and rune hanging above it, except for one in the top left part of the wall. Players need to jump up to that door, watching out for the bumpers that will come out of the other doors to knock players off the ledge. Inside that door is a symbol that players can interact with to "Reveal Path's End."
RELATED: Destiny 2 Shadowkeep: How to Prepare for the Dungeon
5. Continue on in the dungeon
Players then need to head to the next encounter down in a maze of caves and roaming ogres. Head down to the left side of the area and drop down to a ledge. Ahead is a Hive plate that can be activated, which brings up platforms that players need to jump across and grab another orb of light as they did in Anchor of Light earlier. Head to the right side of the caves to find a door where players can put in the orb and open the door.
6. Defeat the secret boss, Volmar the Tempted
Players will enter the next area where there is a secret boss, a Hive Wizard named Volmar the Tempted. In this boss fight, players will be given one of four debuffs: Abyssal Dread, Thunderous Dread, Firey Dread, and Neutral Dread. Abyssal is related to void energy, Thunderous to arc, Firey to solar, and neutral to kinetic. Players can see in the room just outside the boss room that there are symbols associated with each of these elements.
Once players enter the room, they need to jump to the center platform and pick up an orb of light and then slam it in one of the corners of the room that has their matching symbol based on their Dread debuff. Doing so will allow players to damage the boss with the matching element of their debuff for a short time. Use weapons and abilities with that matching debuff and then repeat the process until the boss is dead.
7. Return to Eris
Players do not need to complete the dungeon once the boss has been defeated. Players can transmat straight back to Eris Morn and they will be rewarded with the Xenophage machinegun.
Destiny 2: Shadowkeep is available now for PC, PS4, and Xbox One, with a Stadia version also in development.
MORE: Destiny 2: The Best PvE Weapons to Farm from Season of the Undying
Source: Datto , KackisHD , Esoterickk
Follow Polygon online:
- Follow Polygon on Facebook
- Follow Polygon on Youtube
- Follow Polygon on Instagram
Site search
- Manor Lords
- Dragon’s Dogma 2
- FF7 Rebirth
- Zelda: Tears of the Kingdom
- Baldur’s Gate 3
- GTA 5 cheats
- PlayStation
- Dungeons & Dragons
- Magic: The Gathering
- Board Games
- All Tabletop
- All Entertainment
- What to Watch
- What to Play
- Buyer’s Guides
- Really Bad Chess
- All Puzzles
Filed under:
- Destiny 2 guide
Destiny 2 guide: How to get the Xenophage Exotic machine gun
It’s all about The Journey
Share this story
- Share this on Facebook
- Share this on Reddit
- Share All sharing options
Share All sharing options for: Destiny 2 guide: How to get the Xenophage Exotic machine gun
/cdn.vox-cdn.com/uploads/chorus_image/image/65578076/Destiny_2_Shadowkeep_05.0.png)
Destiny 2: Shadowkeep ’s Festival of the Lost has arrived, and it brought a secret Exotic quest. The weapon at the center of the quest is the Xenophage Exotic machine gun. But before you can get the gun , you’ll have to venture on a few complicated quests to find it.
Here’s how to get the Xenophage Exotic machine gun.
Note : Players are still working through this largely hidden quest. As we and the community learn more, we’ll update this guide with screenshots and tips on how to complete it.
Step 1: The Journey
This first step is all about finding the quest to get you started. The quest is hidden on the moon, inside Sorrow’s Harbor . Once you land at the harbor, enter the tower and follow the tunnels. You’ll reach a light in the middle of the cave.
:no_upscale()/cdn.vox-cdn.com/uploads/chorus_asset/file/19329546/Destiny_2_10.29.2019___15.14.12.17.png)
Once you reach this light, walk past it and jump into the hidden hole in the wall to the right. Follow the tunnel inside the hole until you reach a platform overlooking the pyramid, with two statues on either side.
:no_upscale()/cdn.vox-cdn.com/uploads/chorus_asset/file/19329564/Destiny_2_xenophage_statues_step_1.png)
You’ll need to interact with each of the four statues .
We started with the statue closest to the entrance on the right side, then the far right statue, then the far left statue and finally the close left statue. While this code worked for us, there have been reports of several other codes on the Destiny 2 subreddit .
Once you’ve entered the code correctly, a new chest will appear on the balcony. Open the chest, and you’ll get a new quest that sends you onto the next step of the quest.
:no_upscale()/cdn.vox-cdn.com/uploads/chorus_asset/file/19329575/Destiny_2_10.29.2019___15.12.37.16.png)
Step 2: Anchor of Light
The second step of the Xenophage quest sends you to the Anchor of Light. From there, you’ll need to find a small ball of light and use it to light some of the lecterns hidden around the area. You can see the location of the ball of light on the map below where the green arrow is on the map below.
:no_upscale()/cdn.vox-cdn.com/uploads/chorus_asset/file/19329656/Destiny_2_10.29.2019___15.49.20.20.png)
The first lectern you’ll need to activate is right next to where the light spawns. Pick the light up, and walk it over the lectern. Here’s what the first one looks like:
:no_upscale()/cdn.vox-cdn.com/uploads/chorus_asset/file/19329663/Destiny_2_10.29.2019___15.50.03.22.png)
All the lecterns look identical, but you’ll need to light them in a specific order. Here’s a map with the locations and orders of the lecterns:
:no_upscale()/cdn.vox-cdn.com/uploads/chorus_asset/file/19329666/Lectern_order.jpg)
Once you light the first one, you’ll have 60 seconds to make it to the next. This timer will reset every time you light a new lectern. Most of them are easy to find, but the fourth one could be tricky. It’s up on the third floor of the tower in the Anchor of Light.
After you light all six lecterns, you’ll get a message that says “You are ready to emerge from the dark.” Once you see that, you’ll get an objective indicator leading to the final location for this step.
Deposit the light where the game tells you to, and you’ll get the next step in the Xenophage quest.
:no_upscale()/cdn.vox-cdn.com/uploads/chorus_asset/file/19329673/Destiny_2_10.29.2019___15.56.03.31.png)
Step 3: The four fragments
This section of the quest sends you to collect fragments from each Lost Sector on the moon. To get these fragments, you’ll need to play through the Lost Sectors just like you normally would. Once you reach the end you’ll find a puzzle along the wall near the exit of each Lost Sector.
These puzzles have a variety of symbols and you’ll need to make them all match to get the fragment.
:no_upscale()/cdn.vox-cdn.com/uploads/chorus_asset/file/19329990/Destiny_2_10.29.2019___18.00.23.33.png)
Each one has a complicated solution, and thankfully a Discord user named “Haiku” has helpfully put them all together.
:no_upscale()/cdn.vox-cdn.com/uploads/chorus_asset/file/19329913/I7OVrit.png)
Step 4: Enter the Dungeon
For the next section of the quest, you’ll need to head into the game’s new Pit of Heresy dungeon. To get access to the dungeon talk to Eris and complete her short quest line. Once you’ve done that you’ll need to find a hidden symbol-less door inside the dungeon. The door is on a wall full of doors and symbols.
:no_upscale()/cdn.vox-cdn.com/uploads/chorus_asset/file/19329933/zJgbh0m.png)
Find that specific door and interact with it and you’ll have completed this section of the quest.
Step 5: The Pariah
The next step will take you to the room near the fight with the Pariah Ogre inside the dungeon. On the cliffs near the encounter, you’ll need to drop down until you see a ledge with a small plate on it. Stand on the plate and three platforms will appear. Jump on these platforms — you can take as much time as you need, they shouldn’t disappear — and you’ll ultimately come to a light on the third platform. Grab the light and take it to a door with fire pits that you should fight in the side of on the nearby tunnels. The door should open and lead you to the final boss.
When you fight the boss you’ll be assigned a “dread.” Your dread will correspond to one of four different elements: Arc, Solar, Void, or Neutral. Once you know which dread you have you can pick up the ball at the center of the chamber and dunk it near the symbol for the dread you have. After you do this you’ll get a buff and be able to damage the boss with the elemental weapon that lines up with your dread, with Neutral being Kinetic.
Once the boss is dead you can return to Eris and she’ll give you your shiny new Xenophage.
The next level of puzzles.
Take a break from your day by playing a puzzle or two! We’ve got SpellTower, Typeshift, crosswords, and more.
Sign up for the newsletter Patch Notes
A weekly roundup of the best things from Polygon
Just one more thing!
Please check your email to find a confirmation email, and follow the steps to confirm your humanity.
Oops. Something went wrong. Please enter a valid email and try again.

Everything we know about Wednesday season 2

Marvel Snap Spotlight Cache schedule for May 2024

R. Talsorian Games announces a Cyberpunk Edgerunners-themed TTPRG starter kit

Save $56 on an annual Game Pass Ultimate subscription through Woot

Round out your D&D collection with these Amazon deals

Hades 2 is all about witches and feminine power
- Entertainment
- PlayStation
- Elden Ring Guides
- Roblox Codes
- Pokemon Legends Arceus
- Privacy Policy
- Terms of Service
How to Reach Max Guardian Rank in Destiny 2: All Steps and Challenges
Guardian Ranks in Destiny 2 provide a path for new players to follow and veteran players with complex challenges that separate them from the crowd. Whether you’re a New Light looking to rank up or a Destiny expert wanting to differentiate yourself from the swarm of players with the number six above their head — this guide contains all steps and challenges for every Guardian Rank in Destiny 2 and how to achieve the highest rank.
What are Guardian Ranks?
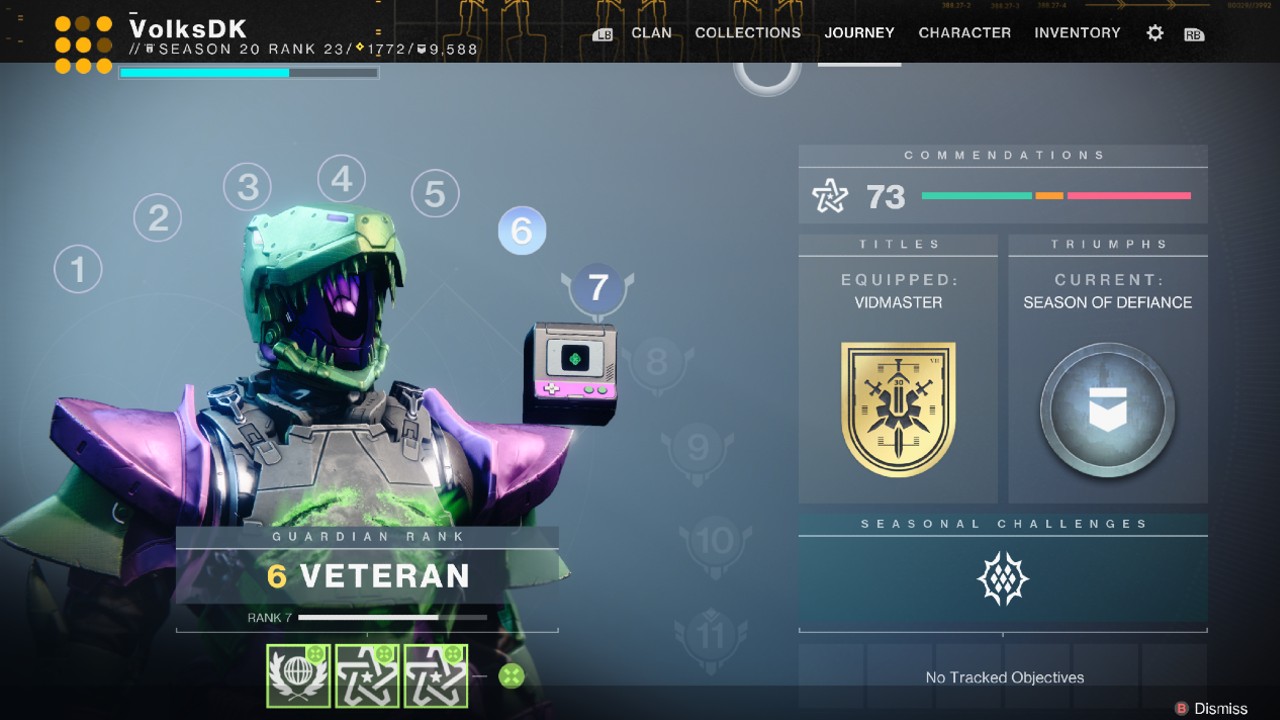
Guardian Ranks are a way to showcase your expertise in Destiny 2 . The first six Guardian Ranks serve as a tool to guide new players and introduce them to the game. Rank Seven and above are known as Advanced Ranks and reset every Season, featuring challenges tied to new and current content.
To access Guardian Ranks , open the Journey section of the menu. Like Triumphs , your Guardian Rank is tied to your account and is not character specific.
How to Achieve Max Guardian Rank in Destiny 2
The maximum Guardian Rank in Destiny 2 is currently Rank 11: Paragon. You must complete every challenge in the previous rank to access the next. Below, you can find every challenge for every Guardian Rank in Season of Defiance .
Guardian Rank 1: New Light
All players will begin at Rank 1; no steps are required to obtain your first rank.
All Guardian Rank 2: Explorer Challenges
- Complete the New Light quest, “A Guardian Rises.”
Completing the first quest in Destiny 2 , which is automatically started when you load into the game for the first time, will earn you Rank 2: Explorer .
All Guardian Rank 3: Initiate Challenges
The Rank 3: Initiate steps are designed to familiarize you with Destiny 2 ‘s planets and the activities you can complete on them. From here on out, ranks will feature multiple sections with individual tasks.
Explore Nepture
- Complete “First Contact.”
- Meet the destination vendor on Neptune.
“ First Contract ” is the first mission in the Lightfall expansion , but don’t worry; you don’t need to own the expansion to complete it. After you meet Nimbus , Neptune’s destination vendor, this section will be complete.
Explore EDZ
- Land in Earth’s European Dead Zone, otherwise known as the EDZ, and speak with Devrim Kay.
- Complete three Public Events in the EDZ.
Like all planets, the EDZ ( E uropean D ead Zone) can be accessed through the Destinations tab. Select the Trostland Landing Zone , enter the church, and reach the top to talk to Devrim Kay .
To participate in Public Events , look for blue diamonds on the map — set a waypoint, and walk over to the event to participate. A complete orange border means a Public Event is currently in progress, while an incomplete one shows how long it takes before the event begins.
Related: Destiny 2 Lightfall Review
Explore Nessus
- Land on Nessus and meet the eccentric AI, Failsafe.
- Complete a Patrol on Nessus.
- Complete 2 Lost Sectors on Nessus.
Failsafe can be found north of the Exodus Black Landing Zone on Nessus , inside the remains of the crashed ship.
Patrols can be found by whipping out your Ghost and looking for the grey diamond icon. Approach a beacon and interact with it to begin.
Lost Sectors are hidden areas filled with enemies and a boss guarding a chest at the end. You can find Lost Sectors by looking for an icon with two arches above a circle on the map and out in the world.
All Guardian Rank 4: Scout Challenges
Light subclasses.
- Complete the “Learning Light” quest.
- Purchase 2 Aspects from Ikora Rey.
- Purchase 3 Fragments from Ikora Rey.
- Complete a Light subclass quest from Ikora Rey.
The Learning Light quest can be obtained or continued in the Cosmodrome and will unlock the ability to customize your Light subclasses.
Ikora Rey can be found in the Bazaar section of the Tower . Purchase two Aspects and three Fragments for any subclass here, and pick up her subclass quests. While you only need to complete one to earn Rank 4 , you’ll need all subclasses later.
- Talk to Banshee-44.
- Collect Glimmer.
- Collect 9 Legendary Shards.
- Complete Gunsmith bounties to earn Enhancement Cores.
- Purchase weapons from Banshee-44.
Banshee-44 can be found in the main section of the Tower , working behind a counter located to the right as soon as you spawn in. Purchase any weapon you like the look of and pick up a suitable Bounty from him.
Legendary Shards are obtained by dismantling Legendary gear , which are items with purple backgrounds. You can also receive them by dismantling Exotic (yellow) gear, though you should generally keep all Exotics as a new player.
Glimmer is Destiny 2 ‘s primary currency and the closest thing to money. You can earn Glimmer by doing almost anything, including defeating enemies, completing bounties, looting chests, dismantling gear, and participating in Public Events .
Gear Modification
- Apply shaders to your gear.
- Equip an Economic or Tracking mod on your Ghost.
Shaders can be applied by selecting Details on a piece of gear, going down to the Armor Cosmetics section, and hovering over the first option to choose a Shader. You can also apply Shaders to all your gear in the Appearance Customization section of the Character menu.
To attach a mod to your Ghost , open the character menu, hover over your Ghost, and select Details . Tracking mods are equipped in the second section, while Economic mods can be attached in the third.
Related: Best Lightfall PvE Weapons in Destiny 2
All Guardian Rank 5: Adventurer Challenges
Exotic quests.
- Complete the Exotic weapon mission “Spark of Hope” to obtain Riskrunner.
- Once the Riskrunner catalyst has been obtained, open Riskrunner’s weapon details and apply the catalyst to the weapon.
The “Spark of Hope” quest can be obtained from Shaw Han in the Cosmodrome or reacquired from the Terminal in the Tower .
Once you’ve completed Spark of Hope , you’ll be rewarded with the Riskrunner Exotic Weapon and its catalyst. To attach its catalyst, view its Details and select the second option under Weapon Mods .
- Acquire 4 Vanguard Bounties from Commander Zavala.
- Complete Vanguard Ops.
- Complete 2 Vanguard bounties in Vanguard Ops.
- Commend 2 other players in Vanguard Ops.
- Learn about the Crucible from Lord Shaxx.
- Learn about Gambit from the Drifter.
Whether you wanted it or not, you’ve likely met Zavala already, but in case you haven’t, he’s the big bald blue dude pondering over the edge of the Tower . Pick up at least four Bounties from him and complete them in Vanguard Ops , accessed through the Vanguard section of the Destinations tab.
At the end of a Vanguard Ops and most other activities, you can commend the people you’ve played with by selecting them on the Commendation screen and choosing a card. You cannot commend friends as lovely as they may be.
Lord Shaxx stands valiantly behind the Vault in the Tower Courtyard while Drifter hides in his shady nook near the Annex Landing Zone .
Collections
- Increase the number of Legendary weapons in your collection to 9.
- Increase the number of Legendary armor pieces in your collection to 10 .
Legendary weapons and armor have purple backgrounds and are the highest quality gear behind Exotics . These can be obtained as random drops, rewards from activities, or can be purchased from vendors. To complete these two Rank 5 steps, you must collect nine unique weapons and ten unique armor pieces.
Guardian Rank 6: Veteran
Gear progression.
- Equip slot-specific mods on armor.
- Increase the energy level of a piece of armor twice.
- Increase the Masterwork level of a weapon twice.
- Acquire Enhancement Prisms.
To equip mods on armor pieces, select the desired piece in the Character menu, select Details , and choose a mod under Armor Mods . The first mod slot is General and won’t count toward this task.
Increasing the energy level of a piece of armor is also done in the Details section via the Infuse feature found in the Armor Mods section.
To Masterwork a weapon, select a Legendary weapon and then Details . Hover over the Tier X Weapon box in the Weapon Mods section and upgrade your gun to the maximum level. Masterworked weapons will have a golden border.
Enhancement Prisms can be obtained from Nightfalls , the Season Pass , as Reputation rank-up rewards, purchased from Rahool , or occasionally when dismantling gear.
- Increase your Power to the soft cap of 1750.
- Complete 2 weekly vendor challenges to acquire powerful rewards.
Any gear you obtain may increase your Power level until you reach the soft cap . Ensure to equip or Infuse your most powerful gear until you hit 1750 Power . You can read more about Soft, Powerful, and Pinnacle caps in our guide.
Vendor Challenges can be found by hovering over a vendor on the Map . Most of these require completing several Bounties from that particular vendor and rewards Powerful gear.
- Talk to Saint-14 to learn about Trials of Osiris.
The headstrong pigeon-loving Titan, Saint-14, is located in the Hangar section of the Tower —the furthest icon on the right when opening the Map .
All Guardian Rank 7: Elite Challenges
Rank 7 and above are considered Advanced Ranks and will reset at the beginning of every Season . Strap in, as you’ll absolutely have to earn your stripes to stand out among the sea of Rank 6 blueberries.
Due to other challenges currently being impossible to complete until the Season progresses, Rank 7 is the highest obtainable Guardian Rank .
- Complete the Lightfall campaign.
- Increase your vendor reputation with Nimbus in Neomuna to ‘3’.
- Complete the weekly Lightfall campaign mission in Neomuna.
The Lightfall campaign requires the Lightfall expansion — who would’ve thought it? By the time you’ve completed this campaign, your vendor reputation with Nimbus will already be at three or above.
The “weekly Lightfall campaign mission” by opening Neomuna ‘s map after completing the campaign. The mission rotates every week and features Modifiers and three different difficulties.
Season of Defiance
- Increase your Season Rank to ‘7’.
- Complete 4 Seasonal Challenges from the current Season.
- Increase your reputation level with the War Table.
- Purchase upgrades from the War Table.
- Defeat 50 targets with the Exotic bow Verglas Curve.
- Increase your reputation 4 times with the Vanguard Ops, Crucible, or Gambit vendors.
Your Season Rank is found in the Season 20 tab and is raised by earning XP. Completing the four Seasonal Challenges needed for this section will get you there in no time.
Reputation can be increased with the War Table inside the H.E.L.M. by completing its bounties and relevant seasonal activities and quests. War Table Upgrades can be purchased with Upgrade Tokens , obtained through specific Seasonal Challenges and the “ Awaken, Queensguard ” quest , which we highly recommend completing.
Verglas Curve is earned instantly for Season Pass holders or at Season Rank 35 on the free track. Any enemies can be killed to progress this challenge — go nuts!
Reputation with Zavala , Shaxx , or Drifter will all contribute toward your challenge; no need to play favorites.
Seasonal Artifact
- Obtain the current Seasonal Artifact.
- Activate 5 perks from your Seasonal Artifact.
- Increase your Power bonus from the Seasonal Artifact.
The Seasonal Artifact , the Ascendant Scepter , is obtained early in the Lightfall campaign. Earning XP will unlock new Artifact Perks , which can be equipped in the Character menu. Your Power bonus will also automatically increase.
- Complete 3 Nightfalls while using a subclass that matches the current surge.
- Complete Nightfalls and earn two Platinum rewards.
Nightfall can be accessed in the Vanguard section of the Destinations tab. The current surge can be found by selecting Nightfall and hovering over its Modifiers .
Platinum is earned when every single Champ ion is successfully defeated during a Nightfall .
- Stun 6 Unstoppable Champions.
- Stun 6 Barrier Champions .
- Stun 6 Overload Champions .
Champions can be stunned by damaging them with certain weapon traits or by afflicting them with certain conditions. To learn more about stunning Champions , visit our guide on All Champion Weaknesses in Destiny 2 .
Commendations
- Commend five other players in a Nightfall activity.
- Increase your commendation score to 460.
At the end of a Nightfall , enter the Commendation screen and commend the other members of your Fireteam . The more you are commended, the higher your commendation score — so make sure to stick around at the end of every activity.
Lost Sectors
- Complete Legend Lost Sectors solo.
- Complete a Legend Lost Sector solo without dying.
Legend Lost Sectors are difficult Lost Sectors that feature Champions and more formidable enemies. The featured Legend Lost Sector changes daily and has a recommended power of 1830 . Don’t forget to turn your Fireteam to private when attempting these challenges.
- Increase your Power to the powerful cap of 1800.
- Earn 2 pinnacle rewards from Gambit, Nightfall, or Crucible weekly challenges .
After achieving the soft cap, earning Powerful and Pinnacle rewards is the only way to get to 1800 Power . Check each Destination weekly to find activities and challenges with these rewards.
Gambit , Crucible, and Nightfall Pinnacle rewards are in the Destinations tab and reset every Tuesday.
Related: Destiny 2 Lightfall Power Leveling Guide: How to Reach 1810 Fast
All Guardian Rank 8: Justicar Challenges
You must visit the Ironwood Tree in the Tower to claim Rank 7 and begin Rank 8 ‘s challenges. You’ll also receive a sparkly yellow glow for your efforts.
- Complete the Lightfall campaign on Legendary (split into two parts).
- Claim 6 reputation rewards from Nimbus .
- Complete 3 weekly campaign missions from the Lightfall campaign on Legend difficulty and acquire a team score of 100k .
Lightfall ‘s campaign can be replayed on Legendary difficulty on Neomuna’s Map , and this challenge can be completed solo or with other players.
Nimbus ‘ reputation can be increased by completing their Bounties sold on Neomuna .
Weekly campaign missions are also accessed on Neomuna ‘s map, with increased difficulties offering a better chance to earn a high score.
- Acquire twenty Seasonal ranks.
- Complete ten Seasonal Challenges.
- Complete the current Seasonal activity or Exotic quest on the highest difficulty.
Seasonal ranks are gained by earning XP, though you’ll likely be well over Seasonal Rank 20 by the time you’ve earned Guardian Rank 6 .
There are ten Seasonal Challenges introduced every week, with any week’s challenges contributing towards this challenge.
You can complete ‘The Variable’ (Vexcalibur) mission on Legendary difficulty to complete the final objective.
- Complete a Nightfall on Legend difficulty.
- Complete a Nightfall on Legend difficulty with Platinum rewards.
- Complete a Nightfall on Legend with a score of 130000 or better.
Nightfall on Legendary difficulty has a recommended Power level of 1830 . You’ll also need to earn a score of 13000 and defeat every Champion in the featured Nightfall to complete every challenge in this section.
- Complete the “King’s Fall” raid.
- Complete the “Duality” dungeon.
- Complete the “Spire of the Watcher” dungeon.
- Complete the “Root of Nightmares” raid.
The King’s Fall raid can be accessed in the Legends section of the Destinations tab and has a recommended Power level of 1600 .
Duality can be accessed on the Moon ‘s map in the Derelict Leviathan section and has a recommended Power level of 1600 .
Spire of the Watcher can be accessed on Savathun’s Throne World’s map in the Mars section and has a recommended Power level of 1600.
Root of Nightmares is Destiny 2’s newest raid and can be accessed on Neomura’s map. It has a recommended Power level of 1700 .
- Increase the number of Exotic weapons in your collection to 15.
- Collect 15 pieces of Exotic armor.
- Claim a Title.
Exotic weapons and Exotic armor can be obtained through random drops, Legend Lost Sectors , activity rewards, and through special quests, such as “ Unfinished Business .”
Titles can be earned by completing a set of Triumphs viewable in the Journey section. Vidmaster and Deadeye are arguably the easiest obtainable titles.
- Give or receive 10 commendations in raids, dungeons, or non-matchmade Nightfalls.
- Acquire a commendation score of 790 .
Giving or receiving commendations is, unfortunately, not retroactive like most other Guardian Rank challenges.
All Guardian Rank 9: Vanquisher Challenges
- Acquire 50 Seasonal Ranks .
- Purchase 8 upgrades from the War Table.
- Complete 20 Seasonal Challenges.
- Complete a Nightfall on Master difficulty or higher .
- Complete a Nightfall on Master difficulty or higher, with a score of 200000 or more .
- Complete five Master Lost Sectors solo .
- Complete a Master Lost Sector solo without dying .
- Complete the “Shattered Throne” dungeon.
- Complete the “Pit of Heresy” dungeon.
- Complete the “Prophecy” dungeon.
- Complete the “Grasp of Avarice” dungeon.
- Complete the “Lash Wish” Raid.
- Complete the “Garden of Salvation” Raid.
- Complete the “Deep Stone Crypt ” Raid.
- Complete the “Vow of Disciple” Raid.
- Complete the “King’s Fall” Raid.
- Complete the “ Root of Nightmares ” Raid.
- Complete the “Vault of Glass” Raid.
- Increase your Power to the pinnacle cap of 1810.
- Increase your seasonal Artifact Power bonus to +12 or above.
- Increase your commendation score to 1290 or higher.
- Commend 50 players in a raid or dungeon.
- Collect twenty pieces of Exotic armor.
- Collect 85 Exotic weapons.
- Claim2 Titles.
All Guardian Rank 10: Exemplar Challenges
- Acquire 80 Seasonal ranks.
- Complete 30 Seasonal Challenges.
Grandmaster
- Complete the featured Nightfall on Grandmaster difficulty.
- Complete a Grandmaster Nightfall with a high score.
- Unlock all Darkness subclasses.
- Collect 5 Stasis Fragments.
- Collect 5 Stand Fragments for a single character.
- Complete a Grandmaster Nightfall with a Darkness subclass equipped.
- Achieve a commendation score of 1,530 or above.
- Receive 100 Ally and Leadership commendations.
- Fully Masterwork 25 Exotic weapons.
- Collect 30 pieces of Exotic armor.
- Claim 5 Titles.
All Guardian Rank 11: Paragon Challenges (Max Rank)
Rank 11 is the maximum Guardian Rank in Season of Defiance .
- Complete the most recently released dungeon on Master difficulty.
- [Redacted challenge]
- Complete Triumphs needed to acquire the Conqueror Title.
- Complete Triumphs needed to gild the Conqueror Title.
- Achieve a commendation score of 1,800
- Receive 200 Ally and Leadership commendations
- Claim 7 Titles.

Destiny 2 Update 7.3.6.3
Apr 30, 2024 - destiny 2 dev team, activities , crucible .
- Unified all respawn mode ammo point reward values under the previous 3v3 respawn mode point values. (On average, it now requires less actions to earn the same amount of ammo.)
- Ammo transmats (including the initial one at the start of the game) will now reward one kill’s worth of ammo, but the meter will charge slightly more than twice as fast.
- Removed the ability for ability kills to contribute to the ammo meter.
- Primary weapon kills: 50
- Actions (includes assists, deaths, control zone captures, and Heavy ammo pulls): 25
- Primary weapon kills: 70
- Actions (includes assists, deaths, and Heavy ammo pulls): 35
- An ammo transmat is rewarded when a player has accrued 100 points.
- Increased preference for spawning near allies in Clash 3v3 for Competitive and Quickplay playlists.
Onslaught
- Fixed an issue where Extinguish was not being cleared properly during a Tormentor heatwave.
- Fixed an issue where larger enemies teleported behind the ADU.
- Additionally, healing functionality when thrown at defenses has been increased at the cost of consuming the ADU battery.
- No more cheese for you.
- Fixed an issue in Legend difficulty where the portal to the boss room would not appear after wave 50.
Exotic Mission
The Whisper
- Fixed an issue with the spawning visual effect of Taken bosses.
- Fixed an issue where players would not be kicked to orbit after the timer runs out.
- Fixed some out-of-bounds spots.
Gameplay and Investment
Weapons .
- Removed the red dot from the Tusk of the Boar Grenade Launcher when aiming down sights, as it was not supposed to have one.
- Fixed a bug that prevented The Mountaintop's projectiles from piercing barrier Champion shields.
- The BRAVE versions of The Recluse and Hammerhead sights now correctly highlight enemies.
Bounties and Pursuits
- The Shaxx bounty to complete a pathway in Riven’s Lair will now correctly count The Coil.
- Edited description for Breaking the Charge Triumph to make its requirement clearer.
General
- Fixed an issue where the Pyramidic Vessel ship showed bright flashing lights in Orbit.
You need a javascript enabled browser to watch videos.
No Rest For The Wicked Is Brutal And Ambitious, But A Little Confused | Early Access Impressions
Rocket knight re-sparked collection | pre-order trailer, five nights at freddy's: help wanted 2 | announce trailer | meta quest.
SERUM | Official Cinematic Trailer
Solo Leveling: Arise - Character Gameplay Teaser #16 Lee Bora
Honkai: Star Rail - Official Robin Cinematic Trailer | "Sway to My Beat"
Diablo Immortal - Official Tempest Character Class Gameplay Reveal Trailer
Hades II - Early Access Floor 2 Gameplay
Modern Warfare III & Warzone - Knight Recon Tracer Pack Gameplay Trailer
Hades II - Official Early Access Release Gameplay Showcase Trailer
Wizard With A Gun | Four-Player Co-Op Update On May 13 Trailer
Apex Legends: Official Into The Void Trailer
Want us to remember this setting for all your devices?
Sign up or Sign in now!
Please enter your date of birth to view this video
By clicking 'enter', you agree to GameSpot's Terms of Use and Privacy Policy
Popular Videos

Destiny 2 | Expansion Open Access Trailer

repare for The Final Shape with three epic campaigns and earn an arsenal of exotic and legendary gear. Experience Destiny 2: Shadowkeep, Destiny 2: Beyond Light, and Destiny 2: The Witch Queen expansions, now in Open Access and available to all players May 7 – June 3, 2024.
By Ben Janca on May 7, 2024 at 10:13AM PDT
Dive into the free-to-play world of Destiny 2 to experience responsive first-person shooter combat, explore the mysteries of our solar system, and unleash elemental abilities against powerful enemies. Create your Guardian and collect unique weapons, armor, and gear to customize your look and playstyle. Experience Destiny 2’s cinematic story alone or with friends, join other Guardians for challenging co-op missions, or compete against them in a variety of PvP modes.
- Leave Blank

IMAGES
VIDEO
COMMENTS
Step 1: Begin The Journey. You'll need to head to Eris' little hideout inside Sorrow's Harbour to start this quest. To get there, spawn at Sorrow's Harbour and head up towards the large set of stairs, taking the door on the left. Follow the path until you reach the Enduring Abyss and then look for a glowing orb on the ground.
How to get Xenophage, Destiny 2. From the first brazier, head north and take the path toward the center of the Anchor of Light area. Before you reach the triangle-shaped Fallen outpost draped in purple tarps, turn left to find an alcove that drops into a pit. On the ledge near this pit is your second brazier to light.
Pick up The Journey quest. First up, head to the part of the Moon where Eris Morn dwells and walk over to the portal that sits to her right. You will have been through this portal a few times so ...
Destiny 2 The Journey Exotic Quest Full Guide - Xenophage Exotic Machine Gun - Step by Step GuideThis guide shows you the Journey exotic quest in Destiny 2. ...
Here's a quick rundown of the steps needed to obtain Xenophage : Interact with the statues near the Pyramid to start the quest. Light the six plates in Anchor of Light. Complete the four puzzles ...
Hey guys here's a guide for the 3rd quest step for Xenophage. How to complete all puzzlesHeres the number sequences I used:Anchor of Light - 79255525 Archers...
Destiny 2 Path uncovered / Paths end located The Journey Final Exotic Quest Steps Guide (Xenophage)All gameplay recorded with - http://e.lga.to/360gametvThis...
K1 Crew: 9, 4, 5, 2, 3, 3, 2 After completing all four of the puzzles and obtain four map fragments, you will unlock the next step in unlocking Xenophage. Step 4: Journey to the Depths
Unlocking Xenophage in Destiny 2 is a lengthy process that requires fighting through the Pit of Heresy dungeon as part of the quest, The Journey. As with all dungeon runs, it's best to take a ...
Destiny 2 Xenophage Guide. Xenophage is an exotic machine gun that uses heavy ammo. It deals Solar Damage, and its intrinsic perk is "Pyrotoxin Rounds" - allowing it to fire high-powered explosive ammunition. That makes it ideal for ripping through mobs or bosses. Destiny 2 Xenophage Quest Start The Quest. Up first - obtaining the quest.
The Journey quest in Destiny 2 can be a bit confusing, so in this guide, we will show you how to emerge from the dark for the Emergence step. As part of.
The Journey is an exotic quest in Destiny 2 that was introduced in the Shadowkeep expansion, which rewards players with the Xenophage Machine Gun. To obtain this quest, players must complete a puzzle in the Enduring Abyss on the Moon.Right before Eris Morn's station overlooking the Lunar Pyramid there are four Hive statues, which players have to interact with them to make all of them light up.
1. The Journey. Around you… darkness. If you are to discover your path, you must anchor yourself to light. 2. The Journey. A light shines on your path. But you have yet to bring it into focus. Until then, your path remains among the lost.
How to Complete the Memory Alembic Quest in Destiny 2. Step 1: Emerged from the dark. the Anchor of Light. one minute to deposit the ball of light into six different locations. Location 1. Same Room. Location 2: Within the chasm. Location 3: Another small room.
In Destiny 2 there is an Exotic Quest called The Journey. This Exotic Quest takes you around the Moon as you attempt to find the Exotic weapon. To help you complete this quest, use our The Journey Guide. Note: Guide is still updating. Reaching Enduring Abyss. To start you want to make your way to the area you meet Eris Morn overlooking the Pyramid.
The newest exotic quest for Destiny 2: Shadowkeep is a long journey to earn the very unique semi-automatic machinegun Xenophage. Game Rant. ... except for one in the top left part of the wall ...
Devotion. Bravery. Sacrifice. We were chosen for a greater purpose—forged and sharpened into a defender of humanity. Our vigil stands.Become Legend.🔺 bung.i...
Step 1: The Journey. This first step is all about finding the quest to get you started. The quest is hidden on the moon, inside Sorrow's Harbor. Once you land at the harbor, enter the tower and ...
To access Guardian Ranks, open the Journey section of the menu. Like Triumphs, your Guardian Rank is tied to your account and is not character specific.. How to Achieve Max Guardian Rank in Destiny 2. The maximum Guardian Rank in Destiny 2 is currently Rank 11: Paragon. You must complete every challenge in the previous rank to access the next.
Journey into The Pale Heart of the Traveler, where paradise has been twisted into corruption. Stop the Witness before it's too late. The Final Shape // June 4, 2024. By Ben Janca on April 23, 2024 ...
Destiny 2: The Final Shape marks the final installment in the Destiny story kicked off in 2014 developed by Bungie. Take a look at the latest trailer as the Pale Heart of the Traveler has become ...
Help us help you. Bungie.net is the Internet home for Bungie, the developer of Destiny, Halo, Myth, Oni, and Marathon, and the only place with official Bungie info straight from the developers.
Here's is the location of "The Journey - Descent" quest step "Path Uncovered". To get to it, you must complete the first encounter of the "Pit of Heresy" as ...
Destiny 2 Update 7.3.6.3 Apr 30, 2024 - Destiny 2 Dev Team. Activities Crucible . Special ammo meter system changes: Unified all respawn mode ammo point reward values under the previous 3v3 respawn mode point values. (On average, it now requires less actions to earn the same amount of ammo.)
Experience Destiny 2: Shadowkeep, Destiny 2: Beyond Light, and Destiny 2: The Witch Queen expansions, now in Open Access and available to all players May 7 - June 3, 2024.
1. The Journey. Around you… darkness. If you are to discover your path, you must anchor yourself to light. 2. The Journey. A light shines on your path. But you have yet to bring it into focus. Until then, your path remains among the lost.