Halo 2 is a 2004 video game released for the Microsoft Xbox and is the second game in the Halo franchise .
- 1 Prophet of Truth
- 2 Sesa 'Refumee
- 3 Sergeant Major Avery Johnson
- 8 External links

Prophet of Truth [ edit ]
- There are those that said this day would never come...What are they to say now?
- No enemy has ever withstood our might. The Flood too shall fail.
- [Abandoning the Prophet of Mercy to the infection form attacking him] The Great Journey waits for no one, brother... not even you.
Sesa 'Refumee [ edit ]
- [from a recorded message] Our Prophets are false! Open your eyes, my brothers! They would use the faith of our forefathers to bring ruin to us all! The Great Journey is a -- [the message is paused]
- Ask the Oracle about Halo. How they would sacrifice us all for nothing.
- The Elites are blind, Arbiter! But I will make them see.
Sergeant Major Avery Johnson [ edit ]
- [The Master Chief lands on the In Amber Clad with a thud ] For a brick, he flew pretty good!
- Don't they teach you kids how to swear in basic anymore?
- Dear humanity, we regret bein' alien bastards, we regret comin' to Earth. And we most definitely regret that the Corps just blew up our raggedy-ass fleet! Ooh-rah!
Marines [ edit ]
- I need a nurse! No...no! A female nurse.
- [If the Chief stares at a Marine for a while] Hey, maybe we should hold hands.
- Hey, if I get shot, be sure to give me lots of drugs.
- Yeah, I crapped myself. So what?
- [Random line] This one time, I threw my lunch instead of a grenade. True story.
- [Upon spotting some Grunts] Hey, hey, let's catch one and ride it!
Others [ edit ]
Dialogue [ edit ], cast [ edit ].
- Steve Downes as Master Chief John 117
- Jen Taylor as Cortana
- David Scully as Sergeant Major Avery Johnson
- Keith David as Thel' Vadam/Arbiter
- Ron Perlman as Admiral Terrence Hood
- Michael Wincott as Prophet of Truth
- Kevin Michael Richardson as Tartarus
- Dee Bradley Baker as Gravemind
- Miguel Ferrer as Sesa' Refumee
- Tim Dadabo as 343 Guilty Spark
- John Michael Higgins as 2401 Penitent Tangent
- Robin Atkin Downes as Prophet of Regret
- Michelle Rodriguez as Female Marine
- David Cross as Marine
- Mike Colter as Jameson Locke (Anniversary Edition)
External links [ edit ]
- 2004 video games
Navigation menu
Screen Rant
Halo covenant explained: prophets, high charity & the great journey.
Ruled by the monstrous Prophets, Halo's alien Covenant are obsessed with the Great Journey. Here's everything you need to know about the aliens.
Paramount+'s Halo series is inspired by a classic series of Xbox games, in which the heroic Master Chief is Earth's last defense against an alien group known as the Covenant - whose religious zeal for what's called the Great Journey threatens to extinguish all life in the galaxy. Set in the 26th century, Halo imagines a future where humanity's reach has spread across the stars. When first contact finally happened, though, the human race learned it shared the galaxy with hostile alien forces.
The Covenant is an alliance involving multiple alien races bound together by a religious belief in the guidance of their Prophets and the so-called " Great Journey. " Humanity's very existence poses a threat to the Covenant's doctrines, and so the Prophet have called the Covenant to commit a genocidal war against the human race. The Covenant's advanced technology gives them a devastating advantage in fleet warfare, while many of their member races possess biological advantages over humans in ground combat. Fortunately the UNSC has developed the Spartan program, a group of genetically engineered warriors who wear powerful exo-armor. These Spartans - led by John-117, the Master Chief - are humanity's last effective weapon against the Covenant.
Related: Halo Already Revealed Master Chief's Perfect TV Show Story
Seemingly, Paramount+'s Halo series will be faithful to the original games. Given this, it's possible for viewers to go in with a lot more knowledge about the Covenant than even the show's Master Chief himself. Here's everything viewers need to know about the Covenant, based on their already established lore.
Alien Species In Halo's Covenant
The leaders of the Covenant are a race known as the Prophets. They are few in number, and as a result it's very unusual for humans to encounter a Prophet. Rather, they're more likely to come across the other member races of the Covenant , who include:
- The Unggoy , nicknamed " Grunts " by the UNSC. These diminutive creatures are short, angry, and rather clumsy. They make up for their size and lack of skill in sheer numbers, and capable leaders can force them to advance in devastating waves. The Grunts may not be the most intelligent members of the Covenant, but they're capable of handling heavy artillery such as the Fuel Rod Cannon or piloting Covenant Ghosts, land-speeders with powerful weapons.
- The Yanme'e , nicknamed " Drones " by the UNSC. Winged insect-creatures, Drones tend to swoop down out of the heavens. They're rarely heavily-armed - the weight of Fuel Rod Cannons and the like would slow them down - but they can still overwhelm enemies beneath a fusillade of plasma. Spartans rarely worry about individual Drones, but where there is one there will probably be more.
- The Huragok , referred to as the " Engineers. " Most Covenant races are warlike, but the Engineers are obsessed only with technology. They're able to interface with pretty much any computer system - ranging from human to Forerunner - and they don't care who they're working for so long as they get to play with tech.
- The Kig-Yar , often called " Jackals " by the UNSC because of their jackal-like physical appearance. More intelligent than the Grunts, Jackals also tend to focus more on defense, hiding behind shimmering energy-shields and using plasma weapons to chip away at enemy armor. In the timeline of the Halo games, the Human-Covenant War first began when a Jackal ship stumbled on a human vessel that had fallen out of slipspace due to a malfunction.
- The Mgalekgolo , or the " Hunters, " are among the most dangerous Covenant races. These aliens are actually serpentine creatures who come together to create a single Hunter, and they're noted for being heavily-armored and well-armed. Hunters tend to work in bond pairs, with one Hunter protecting the other while it charges its plasma weapon and the monsters alternating in fire.
- The Jiralhanae , who are commonly called " Brutes, " for understandable reasons. These vicious and animalistic killers take a sadistic pleasure in combat. They're ruthlessly intelligent, and their allegiance to the doctrines of the Covenant is far more questionable than with other members. A cornered or injured Brute will lose all tactical sense, tearing at everything around it in a frenzy - even allies.
- The Sangheili , nicknamed " Elites " by the UNSC. The Elites are the backbone of the Covenant, committed to the Great Journey with a religious zeal that borders on the fanatical. The best Elites are almost as formidable as Spartans, and they use cloaking fields and energy blades to devastating effect.
Halo's Prophets Explained - Purpose & Names
The San'Shyuum, nicknamed the " Prophets " by the UNSC, are the leaders of the Covenant. The Prophets are responsible for studying ancient artifacts to divine what they believe to be the will of the gods, and the Elites serve as their honorary protectors and champions. According to the Prophets, their original homeworld was destroyed long ago, and they have claimed a mobile base in the city of High Charity. At any one time the Covenant is led by a triumvirate known as the Hierarchs, and in the games the three in command were the Prophets of Regret, Mercy, and Truth. Other High Prophets have included the Prophets of Restraint, Tolerance, and Obligation.
Related: Halo's TV Show Is Repeating Boba Fett's Fatal Mistake
What Is High Charity?
High Charity is essentially the Covenant's capital . It's a mobile planetoid with an artificial star at its apex that generates light and heat to sustain life. At its center is an ancient dreadnought known as the Anodyne Spirit, a Forerunner vessel that powers the entirety of High Charity - and even allows High Charity to jump through slipspace. The Prophets tend to reside on High Charity, and they are protected by a vast fleet whose sole purpose is to ensure no enemy ever sets foot on High Charity and no Prophet's life is ever at risk - for to threaten a Prophet is an act of the gravest heresy. These fleets failed in the Halo games, with the Master Chief himself managing to infiltrate High Charity to take down a Prophet.
The Great Journey & Halo Rings Explained
The Great Journey lies at the center of the Covenant religion. The Prophets teach that an earlier race, known as the " Forerunners, " learned how to transcend the physical world and become spiritual beings through use of the sacred Halo Rings . In line with this belief, the overriding goal of the Covenant is to discover sacred Forerunner relics that will lead them to the Halo Rings, which they intend to use to ascend. It's all a garbled version of reality, of course, as the Halo Rings are actually a weapon designed to extinguish the galaxy of life forms that otherwise nourish a parasitic infection called "The Flood." Should the Covenant succeed in firing the Halo Rings, they could potentially wipe out all life in the galaxy. The very existence of human beings challenges the Covenant doctrines, because Forerunner technology recognizes humans as " Reclaimers " - a title that implies it is possible to be left behind when the Halo Rings are triggered. This is the true reason for the Human-Covenant War and the driving force for the entire Halo narrative.
More: Why Is There A Human In The Halo TV Show's Covenant?
Iris Video Transcripts
LEVEL 15 : "The Great Journey"
CHAPTER 01: "The Great Journey"
The scene opens with the Arbiter and Spec-Ops Leader in the foreground, both of them standing on a low cliff near a beach. The Spec-Ops Leader is halfway out of the cockpit of his Wraith; the Arbiter is standing on the ground. In the background the Delta Halo control room can be seen a short ways out from the shore, built to appear as if it is growing out of a small island.
ARBITER (referring to the control room):
What is that place?
SPEC-OPS LEADER:
Where the Councilors were meant to watch the consecration of the Icon - the start of the Great Journey.
The camera cuts to a close up of the Leader as he talks, then cuts to the Arbiter after the Leader finishes. The Arbiter remembers the Gravemind's words from their earlier encounter.
There is still time to stop the key from turning.
I must get inside.
Then mount-up, Arbiter. I know a way to break those doors.
END CINEMATIC
CHAPTER 02 : "Your Ass, My Size-24 Hoof"
With the help of the Spec-Ops Leader, you fight your way through a small canyon past a number of Brute-piloted vehicles. You emerge on the edge of a significantly higher cliff overlooking the sea, a Covenant ship floating in the sky far away. On your right there is a Scarab docked on a Forerunner structure.
SPEC-OPS LEADER (Radio):
There, Arbiter. That Scarab's main gun can break the control room doors.
On the far end of the beach, there's a passage into the cliffs. It should take you up to the Scarab.
That cruiser is controlled by Brutes. I'll remain here; make sure no reinforcements get in behind you. Then, I'm going to take the cruiser back.
When you pass through the doors, you are met by a Spec-Ops Elite and two Hunters barricaded behind a handful of Covenant weapons crates.
SPEC-OPS ELITE:
The Arbiter? I thought he was dead! Hold your fire!
The Elite jumps up onto one of the crates.
The Hunters have come to our aid, Arbiter. They will fight by our side.
After more fighting, you emerge onto the platform where the Scarab is docked. There are several Brutes standing guard. A transmission from Tartarus is overheard.
TARTARUS (radio):
Mine will do... Kill the others.
BRUTE (radio):
Yes, Chieftain.
If you do not reveal your presence to the Brutes for a moment, they will begin to talk.
BRUTE 1 (referring to the execution of the human prisoners):
A day's ration says I do this in one cut.
Two cuts at least!
Wait! Movement!
SGT. JOHNSON (after time elapses or once you approach the first Brute):
Go! Go! Go!
Johnson climbs aboard the Scarab, and the other Marines attack the Brutes.
As the cinematic begins, the Arbiter turns to face the Scarab, which has begun to stir. The machine rises until it looms over the Arbiter, and Johnson speaks through the radio.
SGT. JOHNSON (Radio):
Listen. You don't like me, and I sure as hell don't like you.
The camera cuts to the Scarab control room, showing Johnson at the controls, the machine's view screen showing the Arbiter looking up at the Scarab.
SGT. JOHNSON:
But if we don't do something, Mr. Mohawk's gonna activate this ring...
The camera cuts to a close-up of Johnson's face for emphasis.
And we're all gonna die.
The camera cuts back to the Arbiter standing in front of the Scarab.
Tartarus has locked himself inside the control room.
Well I just happen to have a key.
The camera shows an over-the-shoulder view from the Arbiter, the revealing the Scarab's eye opening, showing the machine's main gun.
Come on, grab a Banshee and give me some cover.
The camera cuts back to Johnson inside the Scarab.
He's gonna know we're coming.
CHAPTER 03 : "Backseat Driver"
As the screen fades in, the Scarab is backing away form the docking platform, and three Banshees fly in from beyond the cliff wall on the right. They land, and the pilots exit their crafts.
ELITE (first to land):
Take my Banshee, Arbiter!
After boarding your flyer and joining Johnson's Scarab on the trip back toward the control room, a group of Wraiths attacks. Johnson fires the Scarab's main cannon at one of the Wraiths; it is destroyed in a single blast.
Hah! How do you like it?!?
After escorting the Scarab to the beach, Johnson positions the vehicle to fire at the control room door. After his machine is lined up with the Forerunner installation, Johnson prepares to fire.
Stay clear of the door. Hey, bastards! Knock-knock!
After several blasts from the Scarab's main gun, the door explodes, revealing a path to the control room through the rubble from the door.
CHAPTER 04 : "Delusions and Grandeur"
After making your way through the remains of the control room's doors, you reach a chamber where, upon arriving at the far side, a group of Brutes comes in to impede your progress.
Do not let the Arbiter enter the chamber! The Chieftain must complete his holy work!
(alternate)
Do not let them enter the chamber!
After killing the Brutes, you enter the hallway that leads to the control room itself
The cinematic begins with the camera approaching Tartarus and his brutes from behind. They are gathered around the control panel. Tartarus holds the Index and Commander Keyes, and one of his Brutes has 343 Guilty Spark.
Come, human, it is easy.
The camera cuts to show Tartarus from the front. He holds the Index in his right hand, and Commander Keyes in his left.
Take the Icon in your hands...
He now makes a quick series of angry barking noises, and yanks the commander sharply in front of him. He then bangs the fist with the Icon on the control panel.
...and do as you are told!
The Monitor pipes up from under the arm of the Brute carrying him.
343 GUILTY SPARK:
Please! Use caution! This reclaimer is delicate!
One more word, Oracle, and I'll rip your eye from its socket!
He turns back to Commander Keyes, and tightens his grip on her so as to make her exhale painfully.
TARTARUS (referring to Commander Keyes):
Which is nothing compared to what I'll do to you.
Tartarus, stop!
The camera returns to a view of the Brutes from behind, showing the Arbiter enter the control room and approach the Brutes.
Impossible!
Put down the Icon.
Tartarus and the Brutes turn to face the Arbiter.
Put it down? And disobey the Hierarchs?
There are some things about Halo even the Hierarchs do not understand.
The Brutes around Tartarus growl with anger and step forward as if to attack, but Tartarus stops them by raising his arms.
Take care, Arbiter. What you say is heresy.
Is it? Oracle! What is Halo's purpose?
Collectively, the seven-
Tartarus takes the Monitor in both hands, growling angrily, and brings the construct inches from his face.
Not-another-word!
The camera cuts to reveal Johnson standing behind the Arbiter, Beam Rifle at the ready.
Don't shake the light-bulb.
The Brutes flanking Tartarus step forward to attack, but Johnson stops them.
If you want to keep your brain inside your head, I'd tell those boys to chill.
The camera gives a close-up of Tartarus' face as he issues a command to his Brutes in his own language. It then cuts back to Johnson and the Arbiter as Johnson speaks to the Elite.
Go ahead. Do your thing.
ARBITER (to the Monitor):
The sacred rings... what are they?
Weapons of last resort, built by the Forerunners to eliminate potential Flood hosts, thereby rendering the parasite harmless.
And those who made the rings? What happened to the Forerunners?
After exhausting every other strategic option, my creators activated the rings. They, and all additional sentient life in three radii of the galactic center, died ...as planned.
The camera cuts to the Arbiter, a look of sadness on his face.
343 GUILTY SPARK (After a pause):
Would you like to see the relevant data?
Tartarus. The Prophets have betrayed us.
The camera cuts to Tartarus, who is looking at the Monitor as if making a decision. He then hurls 343 Guilty Spark at the Sergeant, causing him to grunt in pain and fall back onto the floor. Tartarus then puts the Index in the Commander's hands, and forces her to place it into the receptacle on the control panel.
No, Arbiter! The Great Journey has begun! And the Brutes, not the Elites, shall be the Prophets' escort!
Hefting his massive hammer, Tartarus turns to face the Arbiter and Johnson. His energy shield begins to glow as if engulfed in a purple-white flame.
The large disc-shaped structure beyond the control panel opens vertically to create three smaller circular platforms. There is a hole in the center of all three, and from somewhere below the camera's view from the top tier of the platform, a white beam of light surrounded by blue-purple tendrils of energy begins to flow skyward.
You start on the control room walkway, surrounded by Elites. The Elites attack the Brutes at the end of the walkway. After they are dead, Tartarus jumps down onto the second tier of the structure in the center of the room, the Elites following him. 343 Guilty Spark and Commander Keyes are on one of the platforms orbiting around the central structure.
If you stay away from Tartarus (on a different tier of the center structure), he will taunt you.
What's the matter, Arbiter? Afraid of my little hammer?
What? Is the mighty Arbiter afraid?
Just like the rest of your race: cowardly and weak!
After you score your first successful hit on Tartarus, he will comment.
A lucky hit. You shall not land another...
Each time Johnson takes down Tartarus' shields, he will comment.
Hey, Mohawk! How'd that feel?
His shield is down! Let 'im have it!
There goes his shield!
Got his shield! Hit 'im now!
Quick! While his shield is down!
I can keep his shield down, but you're gonna have to finish the job!
Charging sequence initiated. Primary generators coming on-line.
COMMANDER KEYES:
Well shut them down!
Apologies. Protocol does not allow me to interfere with any aspect of the sequence.
Then how do I stop it?
Well, it will take some time to go over the proper procedures... I-
Quit stalling!
Under more controlled circumstances, I would suggest the reclaimer simply remove the index.
That's it? Johnson! I'm on it!
Hang tight, ma'am! Not until that Brute is dead!
343 GUILTY SPARK (after a small amount of time has elapsed):
Secondary generators charging. All systems are performing well within operational parameters.
343 GUILTY SPARK (after more time has elapsed):
Power generation phase complete. The installation is ready to fire. Starting final countdown...
Come on, Arbiter! Kick that guy's ass!
And may I say, reclaimers, it has been a pleasure to serve you both. Good bye...
After you kill Tartarus, the level ends.
The cinema begins with Commander Keyes on a platform revolving around the central structure of the room. She jumps from platform to platform, finally arriving on the central pad. She takes the Index from the pillar of light, which immediately disappears. The room begins to shake, and the Commander looks skyward holding the Index to her chest in fear.
The control room is shown from the outside, energy building between the spires at its top. The energy is then launched skyward in a blue comet. The section of the ring that holds the control room is shown from space, the blue energy moving towards the center of the space inside the ring. It meets with the energy already building there, and the entire mass implodes upon itself, then explodes outward, creating a fantastic light show, but causing no harm to the ring.
Cut back to a darkened control room, the Commander studying a hologram in its center. The Sergeant floats down with the Monitor, and takes a place at the Commander's side.
COMMANDER KEYES (referring to hologram):
What's that?
What's it doing?
Communicating at superluminal speeds with a frequency of-
Communicating with what?
The other installations.
The hologram expands to show the seven Halo rings, including the one that the Master Chief destroyed, which is tagged with a red marker.
Fail-safe protocol: in the event of unexpected shut-down, the entire system will move to standby status. All platforms are now ready for remote activation.
Remote activation? From here?
Don't be ridiculous.
Johnson gestures at the Monitor.
Listen, tinker-bell, don't make me-
The Commander puts her hand on his shoulder.
Then where? Where would someone go to activate the other rings?
Why... the Ark, of course.
The Arbiter approaches the trio from the shadows behind them to stand between Miranda and Johnson. Both humans look up at the Arbiter.
And, where, Oracle, is that?
Cut to the Forerunner ship from High Charity emerging from slipspace into the space battle above Earth.
NAV OFFICER (radio):
We've got a new contact, unknown classification!
Cut to the Master Chief, braced against the side of the ship.
LORD HOOD (radio):
It isn't one of ours. Take it out!
MASTER CHIEF:
This is Spartan one-one-seven!
Cut to the control room of a damaged Cairo Station.
MASTER CHIEF (radio):
Can anyone hear me, over?!
LORD HOOD (to crewman off screen):
Isolate that signal!
Cut back to the Master Chief.
Master Chief! You mind telling me what you're doing on that ship?!
Sir. Finishing this fight.
The camera follows a small Flood Spore floating in the atmosphere of High Charity. The camera focuses on a broken door. Tentacles ooze out of the cracks.
Silence fills the empty grave, now that I have gone. But my mind is not at rest, for questions linger one. Now I will ask, and you will answer.
Gravemind's tentacles move towards a holopanel with Cortana on it.
Alright, shoot.
- Gameumentary
- Review in 3 Minutes
- Design Delve
- Extra Punctuation
- Zero Punctuation
- Area of Effect
- Escape the Law
- In the Frame
- New Narrative
- Out of Focus
- Slightly Something Else
- Terms of Service
- Privacy Policy

Halo Season 2: What Is the Covenant’s Great Journey, Explained
A key talking point among Halo Season 2’s Covenant characters is the so-called “Great Journey,” but what is it? And how will it impact future episodes of the Paramount+ series?
What Is the Covenant’s Great Journey in Halo Season 2?
The Great Journey is the core belief of the Covenant religion. Given the Covenant’s focus on finding Halo in Halo Season 2, you’d be forgiven for thinking the term refers to their search for the legendary space ring. That’s not the case, though — or at least not entirely. Locating all seven Halos (including the one that lends the streaming series its name) is just the start of the Great Journey.
Related: Halo Season 2: Onyx, Explained
Once the Covenant has tracked down all seven “sacred rings,” they plan to trigger them all. According to their faith, this will initiate the Great Journey by generating a “divine wind” that will usher true believers to paradise. This belief is based on the Covenant’s interpretation of what happened when the Halo Array’s creators, the Forerunners, originally activated it.
Unfortunately for both the Covenant and everyone else in the galaxy, the Great Journey doctrine doesn’t jibe with real-life history. The Forerunners didn’t fire the Halo Array as part of a magical mystery tour to a higher plane of existence; they did it to wipe out the parasitic Flood. It was a last resort, not a holy ritual — and without proper planning, would’ve eradicated all life in the galaxy.
Related: Halo Season 2: Why Does the Arbiter Brand Himself, Explained
It also drastically thinned out the Forerunner population, many of whom were caught in the Halo Array’s blast radius. In short? Activating one or more Halo installations would wreak untold havoc on the galaxy, making the Covenant’s belief in the Great Journey a major threat to everyone (including the Covenant themselves).
Does the Covenant’s Great Journey Happen in the Halo Video Games?
So, should you expect to see the Covenant’s Great Journey come to fruition, either in Halo Season 2 or beyond? Nope — not if the Halo video games are any guide, anyway. While there are several attempts to fire all or part of the Halo Array across the six core installments in the franchise, none succeed. As a result, the Covenant never gets to embark on their long-awaited spiritual voyage, either by their own hand or someone else’s.
Related: Halo Season 2: Who Is The Mother, Explained
Heck, some of Covenant’s member species — notably, a sizeable chunk of the Sangheili, or Elites — even come to accept that the Great Journey was a load of bunk and renounce the belief. Whether any of this will happen in the Halo show is unclear at this stage, and the show’s alternate timeline setting means nothing is preordained. But considering what a successful Great Journey scenario would mean for the series’ story and characters, don’t hold your breath waiting for it to arrive!
Halo Season 2 is currently streaming on Paramount+ , with new episodes dropping Thursdays.


Please disable your ad blocker to support our website.
Halo 2 (Mission 15) The Great Journey Walkthrough

Video Walkthrough: Halo 2 (Mission 15) The Great Journey Walkthrough Skull Location: Black Eye Skull Location Terminal Location: The Great Journey Terminal Location
You begin The Great Journey, the final mission of Halo 2, as The Arbiter. This was a big deal back in the day because you didn't even finish the game as Master Chief, the main character. Anyway, the first part of this mission has you in a Wraith dealing with about a dozen different enemies in vehicles. Follow the linear route to reach a large Covenant structure which will have some Wraiths and Brutes outside of it.
Take out all of the enemies then go inside of the building. You'll get some allies (including Hunters) that join you in the building and fight with you through the next few rooms. All of the upcoming areas are very linear battle arenas - figuring out where to go isn't the hard part, dealing with the enemies is.
Note: The Didact Toy is the Toy that you can get on this mission. Getting it requires you to go out of your way by a large margin and it also requires you to do some setup at the start of the mission. Check out my The Didact Toy Youtube Video for more information about this.
After clearing a few rooms and hallways you will come across a prison (pictured below). You can make the fight in this area significantly easier by shooting the power supplies for the shields that are holding the Covenant captive. When you free these Covenant they'll join the fight and help you. There is a sword Elite you can free as well as some Hunters; more Brutes will charge into the room once you free some allies but the Hunters can deal with them pretty easily.

If you're interested in getting the Terminal on this mission you can find it in one of these prison cells as well. Check out my The Great Journey Terminal Location Youtube Video for details of exactly where it can be found. Any surviving allies that you freed will charge through the door once the Brutes are dead and will continue to the next area (as you should too). You'll eventually come to an outside area with a large Scarab and a bunch of Covenant that you'll have to kill in order to trigger a cutscene.
When the cutscene is over some Elites will drop off a Banshee for you which you'll need for the next part of this mission. This next part is one long scripted event - you need to fly the Banshee around and take out all of the Covenant Wraiths on the ground so that the Scarab can proceed through the canyon. You need to kill all of the Wraiths on this part of the mission, missing one of them will result in the Scarab sitting in place waiting for you to clear the way.
Eventually you will reach the beach and the Scarab will need you to protect it from all of the Banshees flying around in the air. Once you clear out all of the enemies the Scarab will blast a giant hole in the door of the building in the distance (pictured below). You will need to fly the Banshee over to this door, disembark and go inside to proceed with the mission.

There will be a large room filled with Brutes that you'll have to deal with once you're inside. If you're having trouble with this pack of enemies I recommend using the hole in the floor to hide from them long enough to deploy your Active Camo. You can also use this hole to recharge your shields since enemies don't seem to ever follow you down here. After they're dead go through the next hallway to trigger a cutscene.
All that's left of this mission is a boss fight against Tartarus. When you regain control of your character there will be a group of Brutes in front of you that you need to take out - then you'll have to jump to the nearby platform where Tartarus is. He's a pretty easy boss once you get used to how he moves around and how the platform you're on works.
Use the grav lift in the middle of the platform to move between the floors and use the terrain nearby to make Tartarus take longer to get to you. Remember, NPCs always have to run around objects that block their path - whereas we can jump over them!
So, for this fight you will want to use a Covenant Carbine which you can find on every level of this platform. You also do not want to shoot Tartarus when his shield is active; you can tell if his shield is active because he'll have the blue glow/smoke trail around him (pictured below).

When his shield is active you will need to wait for Sergeant Johnson to hit him 3 times with a Beam Rifle to make it go down. Pay attention to the sound of the Beam Rifle shots and you should be able to see the streak the shots leave in the air too. Once Tartarus' shield is down unload on him with your weapon aiming for his head.
It will take awhile because Tartarus has a ton of HP but you'll eventually whittle him down and kill him. Congrats you've now completed Halo 2!
Continue to Halo 2 Walkthrough Index
Return to Mission 14: Uprising Walkthrough
The Great Journey/Walkthrough
- View history
- 3.1 Part 1: Your Ass, My Size-24 Hoof
- 3.2 Part 2: Backseat Driver
- 3.3 Part 3: Delusions and Grandeur
Weapons [ ]
- Plasma Pistol
- Plasma Rifle
- Brute Plasma Rifle
- Covenant Carbine
- Particle Beam Rifle
- Energy Sword
- Plasma Grenade
- Fragmentation Grenade
- Black Eye Skull (Legendary Only)
Vehicles [ ]
- Scarab (non-drivable, can ride)
- Phantom (non-drivable)
- Covenant Assault Carrier (non-drivable)
Legendary Walkthrough [ ]
Part 1: your ass, my size-24 hoof [ ].
Although you start out on foot a Spectre will soon arrive to pick you up. Since the spec-ops commander stubbornly refuses to give up his Wraith, the Spectre is the best we can do for the moment. (In lower difficulties, he will leave the Wraith and you can choose which vehicle you want).
Interestingly, the level starts you out very close to your ultimate destination. Any attempts to head right for the control room, though, will likely be foiled by the cheap instant death barrier down below the cliff.
Your first priority is to upgrade your vehicle to something a bit more robust, as you'll be wading through quite a few enemy Ghosts, as well as a couple of Wraiths. Thus, rather than jumping right into the combat at the beginning, I'd recommend boosting ahead a bit and boarding the first available Wraith, as shown in the next video.
QuickTime (3.9 mb) | WMP9 (5.9 mb)
Right-click (option-click on a Mac) and "Save As" to save to disk.
The biggest danger associated with this tactic is probably being shot apart by Ghosts while you're boarding the Wraith. However, if you don't waste any time, you should usually be able to make it to the Wraith and complete the boarding before you really get swarmed. Using grenades to kill the driver can help speed up the process, though you run the risk of destroying the Wraith along with him. As your allies don't let little considerations like, say, the fact that you're clinging to the vehicle that they're firing on slow them down, there's also the danger of friendly fire. Partly for this reason (and partly to avoid getting caught in the explosion if it gets destroyed), I'd suggest parking your Spectre behind the rock before boarding the Wraith.
Once you've safely gained control of the wraith, you can relax a bit. Obliterate any Ghosts that may be pestering you and move ahead to engage the two enemy Wraiths near the door. I'd recommend attacking them more or less head-on, as shown in the next video.
QuickTime (3.4 mb) | WMP9 (3.4 mb)
The small tree on the right can actually help provide a bit of cover, intercepting some of their shots. You could try flanking them from around the little hill on the right, but the narrow path severely restricts your movement, making you an easy target. Note that there's also a Phantom out past the cliff to the left who may fire on you at some point. From this distance, though, he's not really much of a threat, so you should just ignore him and focus on the Wraiths. Take a moment to savor vaporizing the Brutes running around on foot with the Wraith's cannon.
When the area is clear, it is suggested to exchange your useless Plasma Rifle for a Brute Shot and as much ammo as you can find before heading inside. Unfortunately, you won't run across an Energy Sword for a while, so the Brute Shot is the best you can do for melee attacks.
Once inside, proceed through the hallways, making sure to exchange your equally useless Plasma Pistol for a Beam Rifle along the way, until you enter a two-level room guarded by a phalanx of five Brutes on the upper level. A couple of additional Brutes will also enter through the upper door after you've killed off a few members of the initial group.
You might be inclined to sit back in the hallway and use your newly-acquired Beam Rifle to pick off the Brutes from a distance. The problem with that tactic is that not only is it tedious (with all of the grenades bouncing around, it can be hard to get a clear shot unless you're cloaked), but your Hunters will take a tremendous pounding, and at least one of them will most likely die. The Hunters can be a valuable distraction in the next battle, and so it really pays to keep both of them alive. Thus, I'd recommend moving in on the Brutes right away, before they can deal out too much damage. Although there are quite a few of them, they tend to focus their attention on the Hunters, which makes it much easier to sneak up the ramp and kill several of them from behind before they even know you're there, as shown in the next video.
QuickTime (2.1 mb) | WMP9 (2.1 mb)
Make sure not to use your cloak too early, as you'll want to save it for when the Brutes arrive through the door. If necessary, you can also drop down to the lower level after taking out the first group. Note that, for some reason, the Brutes in the second group (even those that have gone berserk) have a tendency to retreat back the way they came when they're losing the battle, so if you don't finish them off here you'll have to deal with them in the next room. As usual, collect Plasma Grenades and Brute Shot ammo after the battle.
As you proceed through the next door into the large cavern, you'll find yourself on one arm of a U-shaped platform that curves around to the right, while five Brutes occupy the other. Another group of two Brutes, two regular Jackals, and two Jackal Snipers will arrive from the cave on the opposite side after you either kill off most of the original Brutes or you approach the exit.
The easiest way to survive this room is probably to run right through, as shown in the next video.
QuickTime (1.7 mb) | WMP9 (1.6 mb)
Jumping the chasm at a couple of points helps to speed things up and bypass the brute in the turret, though sometimes you may end up taking quite a bit of fire from the main group. Be sure to save your cloak for the end, as you'll need it to avoid the snipers.
Despite the effectiveness of this tactic, I'd recommend fighting this battle merely because it can be rather fun. If you've been following my advice, you should be carrying a full sniper rifle, and so it's certainly possible to sit back and snipe everything. However, closing in on the enemies right away can work just as well for killing them all as it does for avoiding them. If you're quick enough, you can manage to get around behind the second group while they're still mostly bunched up, as shown in the next video.
QuickTime (3.1 mb) | WMP9 (3.0 mb)
Otherwise, if the second group manages to disperse, you'll just have to take out the first group and then approach the remaining enemies in whatever way seems best, as shown in the next video.
QuickTime (3.5 mb) | WMP9 (3.5 mb)
Note that you can always crouch jump over the low wall in order to flank the enemies, when necessary. Whatever you do, I'd advise against standing around in the vicinity of the turret brute. There are several exploding objects nearby that are easily detonated by brute shots and possess a dangerously wide kill radius.
Continuing onward, you'll reach a short bridge defended by several nearby jackals, as well as a jackal sniper and several drones at the far end. The next video shows how I usually approach this battle.
Note that a phantom will appear on your left to complicate matters when you're about halfway across, so once you start moving I wouldn't stop until you're safely out the other side. In my view, there's not much to be gained from fighting the drones except pain, so I'd recommend running right past them. The timing of your cloak is very important here, as the drones will send a barrage of plasma fire your way if you wait too long, which will usually cancel your invisibility.
Continue up the hallway and into the prison.
Once again you'll have to deal with two large contingents of brutes, with the second group showing up, as usual, when enough members of the original group have fallen. Three jackals also lurk up on the walkway around the center of the room. Despite the large number of enemies, though, a relatively mindless tactic is all that's really necessary to clear the room, as the next video shows.
QuickTime (7.3 mb) | WMP9 (7.0 mb)
It's very easy to die if you take too long to fire a burst of needles, as the brutes will quickly start launching grenades and shooting carbines your way. The Needlers tracking is pretty forgiving, though, so you won't have to aim too carefully; but don't forget to use your cloak when it's available. It's possible to free your captured allies from prison during the battle (just shoot the little force field emitters in front of the cell doors). However, they won't last very long with all of the brutes around, so I usually don't bother. Sometimes, there will be a prison cell that holds two Hunters. If you really want to finish this quickly, free your elite allies and the hunters. It may buy you some time. Note that the door by the brutes will stay locked until the second group arrives, so even if you're planning on just running through the prison, you'll still have to kill at least a few of the enemies.
When the battle is over, you should pick up the energy sword if you haven't already and exchanging your Needler for the beam rifle. Fill up on grenades, and free your allies as well, though they won't be able to help you for very long.
Continue through the next hallway, which eventually leads you to a large platform outside.
Part 2: Backseat Driver [ ]
When the cutscene ends grab a banshee to begin a fairly long sequence of vehicular battles. Make sure that you have at least one plasma grenade left before you leave, as it will become very useful the next time you're fighting on foot. The terrain should look rather familiar from the beginning of the level. Regardless of what your objective says, the scarab is just as indestructible as it looks and you don't have to worry about protecting it. In fact, you can skip as much of the combat this chapter as you desire, as the scarab will eventually kill the three wraiths and then lumber onward to its ultimate destination.
Still, as long as you're waiting you might as well make yourself useful and speed things up. The safest way to destroy the wraiths is probably with the banshee, as it's quick enough to dodge their slow shots with relative ease. However, if you intend to keep fighting after the Wraiths are gone, you'll also have to face two Spectres and four banshees around the next bend. To make matters worse, several enemy turrets line the canyon walls. Surviving this gauntlet in the banshee can be fairly challenging, and so you'll be better off in the long run if you can take control of one of the Wraiths. I'd suggest boarding the one on the right and using it to take out the other two, as shown in the next video.
QuickTime (4.0 mb) | WMP9 (3.9 mb)
You should receive a checkpoint after this battle, and I'd recommend that you save and quit before proceeding.
The two Spectres will arrive as you move a bit farther along the canyon. They can be fairly annoying, gradually picking you apart with their little cannons, so I'd suggest taking the proactive approach and going right after them, as you'll be less likely to miss at close range. When the Spectres are gone, four Banshees will fly over the cliff ahead of you one at a time. The next video shows how I approach this battle, using the Wraith.
QuickTime (9.5 mb) | WMP9 (9.2 mb)
Staying near the corner along the side of the cliff forces the Banshees to begin their attack runs closer to you, making them somewhat easier to hit. As you can see, their tendency to fly straight at you does not exactly help their cause, either.
By the time you finish with the Banshees, the scarab will most likely have reached its destination. If you're really out for blood, you could take the time to destroy the two wraiths and four banshees in the next area, but I generally just head for the door at this point. I'd also recommend that you save and quit before proceeding if you received a checkpoint after destroying the banshees. I'll note once again that it's possible to skip this whole section simply by hopping back into a banshee after clearing out the first three wraiths and flying right to the control room. You can wait there out of harm's way until the scarab shows up. You'll have to fly toward the scarab close enough that Sarge begins firing on the control room door.
Part 3: Delusions and Grandeur [ ]
After the door is destroyed, the intended path for you to take is clearly to land outside and proceed on foot. You'd then have to fight through a large group of brutes before finally arriving at the control room.
However, it's actually possible to squeeze your banshee through the tunnel and fly over the brutes and into the control room. This approach has the advantage of not only bypassing the difficult battle with the brutes (though they can still potentially shoot you down), but also allowing you to employ the banshee in the final battle with Tartarus. In order to get the banshee through the tunnel you'll have to squeeze it up and over the rubble once you're past the doorway. You can make this task somewhat easier by destroying one or both of the banshee's "wings."
There's an even more interesting way into the control room, though, that involves exploiting a glitch whereby you can trigger the cutscene that precedes the final battle from outside the control room structure (thanks, Kyle Barr!), as shown in the next video.
QuickTime (4.9 mb) | WMP9 (4.5 mb)
As you can see, not only is this method quicker, but it also allows you to skip the brutes entirely and, surprisingly, even warps the banshee inside with you. Well, most of the time, at least. It's been my experience that the banshee doesn't always make it through in working condition (for example, I've run back to find it stuck in the floor). It's for this reason that I encouraged you to save and quit at the nearest checkpoint before you entered the control room structure. Be aware that you can't enter the control room in this manner until Sarge breaks down the door and the final chapter transition occurs, so there's no sneaking in early. Also, if you don't already have a beam rifle I'd recommend stopping by the bridge and picking one up before you proceed. You may not even end up using it if you have the banshee inside, but it gives you more flexibility for deciding how you want to deal with the brutes in the final battle. Anyway, it's not like you have anything else to do while Sarge is breaking down the door.
And so we come at last to the final battle of our epic, galaxy-spanning quest.
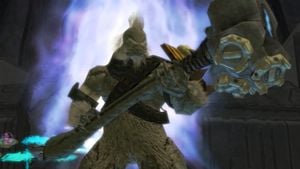
The Arbiter vs. Tartarus
In light of this momentous occasion, Bungie added an entirely new weapon never before seen in the Halo universe, the gravity hammer . Tartarus wields this formidable weapon against the Arbiter in their final encounter.
Unfortunately, Tartarus is one of the easier of the three bosses (assuming that you don't use the fuel rod gun tactic on the Heretic Leader, at least). In contrast the other two bosses, Tartarus doesn't have a ranged attack, and so he can't hurt you as long as you don't let him get to close to you. His henchmen, meanwhile, attack only from one direction and only at fairly specific times during the battle. Thus, you can see them coming a mile away and there's little chance of being surrounded or taken by surprise.
The structure of the battle is fairly simple. Like the other boss fights, I tend to think of it in terms of several rounds, with each round ending when Sarge knocks out his shield and you damage Tartarus. Depending on your weapon choice, you'll probably need somewhere in the vicinity of 8-10 rounds to kill him. So, as far as Tartarus himself goes, the battle basically amounts to maneuvering to keep him at a distance until Sarge gets his shots in and you can do a bit of damage. Remember, Tartarus' shield only stays down for about 2–3 seconds at a time, so you have to be quick.
The only breaks in this pattern occur when the brute reinforcements show up. Although the time of their appearance does not appear to be absolutely fixed, it's at least consistent to a pretty high degree. The first group almost always appears after you first damage Tartarus (he'll say "A lucky hit. You'll not land another"). Expect the second group to arrive about 2-3 rounds after that, and the third group after another two rounds or so. As long as you keep an eye on their platform, you should be able to see them coming long before they actually get close enough to present a threat.
Given an understanding of the basic structure of the battle, the issue then becomes the specific tactics for damaging Tartarus and eliminating his brutes before they can cause you trouble. As I mentioned earlier, potentially clever shortcuts like pushing him off the platform into the abyss or smashing him with the banshee won't work, so you'll have to do it the old-fashioned way.
First and foremost, I should point out that the easiest and quickest method is to rely exclusively on the banshee. In that case, all you need to do is hover around Tartarus until Sarge takes out his shields and then blast him with the fuel rod cannon, flying off to interdict the other brutes as necessary. As Tartarus won't even be able to reach you, victory is almost assured, as long as one of the other brutes doesn't get in a lucky shot with a grenade or something.
Of course, the battle is quite manageable even without the banshee. Personally, I prefer to fight Tartarus on foot simply because I think it's more fun, and use the banshee only to take on the rest of the brutes.
Perhaps the most important observation if you intend to forget the banshee at any point is that although the battleground consists of three platforms, virtually none of the action will occur anywhere but the middle platform. Tartarus may fall down to the lower level or use the beam in the middle to ascend to the top, but given a bit of time he'll always return to the middle. Likewise, both the brutes and your useless elite allies will jump to the middle level and stay there. Thus, the top or bottom levels (I always choose the top) can serve as a safe refuge and an ideal drop-off point for weapons and your banshee where nothing is likely to disturb them.
As far as weapons go, I'd recommend dual brute plasma rifles. They'll do a tremendous amount of damage in a short period of time, and you'll never have to worry about running out of ammo. The shotgun works well, provided that you have enough ammo. The sword, for a change, is highly ineffective and puts you at great risk every time you get close to Tartarus. The carbine and brute shot, for their part, suffer from ammo limitations and just don't seem to deal as much damage as the plasma rifles or shotgun. As for plasma grenades, his shield is usually back up by the time they explode. You may be inclined to try knocking out his shield yourself with the beam rifle in order to speed things up. While it's certainly possible to do so, I've never really found it to be worth the trouble, as you'll quickly run out of ammo and you won't have much time left to damage him after switching weapons. In my experience, you're better off just sticking with the plasma rifles. However, the beam rifle can be very useful if you don't have the banshee (or are choosing not to use it), as you can often snipe several of the brutes before they even make it to the central platform.
Since you'll need to wait for Sarge to dispel his shield in each round, I'd recommend maneuvering Tartarus into a location where Sarge can get a clear shot, without any obstructions. Your best bet, perhaps not surprisingly, is around the outside of the middle platform right in front of Sarge's position.
As an alternative method to avoid Tartarus' hammer, take the Needlers off one of the elites that spawn (if he doesn't spawn then revert to saved until you get one). Then jump on the platform with Miranda and 343 GS on and attack Miranda with the Needler until she has taken enough rounds for them to explode, she will then run forwards and hold an imaginary gun. As she is invincible she wont die when Tartarus attacks her and he wont leave until she is dead (which is impossible). Hey presto the battle is easier.
With these considerations in mind, the next video shows an example of such a battle.
QuickTime (19.8 mb) | WMP9 (19.2 mb)
As you can see, nothing really fancy is required. Just be patient and deliberate in your movement, taking care to keep Tartarus in an advantageous location and to watch for approaching brutes. Keep in mind that he can strike both forward and backward (like the hunters), so be sure to stay a safe distance away from both sides of him. I'd also discourage you from trying to jump over his head. One move you can use to fake him out, though, is to hesitate slightly when backing away from him (much like you could do with the hunters in Halo 1 to trick them into lunging and exposing their midsections). This feint will trigger his melee attack and allow you to put a bit more distance between yourselves.
- Note*: An alternate method of bringing Tartarus down is to wait for Johnson to take out his shield, and then sword him. Right as Tartarus first jumps onto the platform, several Elites follow, all carrying energy swords. Once they are taken out, take one of their energy swords and lunge at Tartarus with the sword once his shield is down. In my experience, if you're playing multiplayer, have one person distract him so that the one with the sword can get at him from behind.
- Another alternative is to use the sword in conjunction with Active Camouflage. Since shots from the Beam Rifle generally stun him, if you lunge at him from behind you can easily move out of the way before he retaliates. This may be hard to pull off, but is highly effective when done correctly.
- Yet another strategy is to use dual Needlers. This usually requires more luck than anything else, but if you unload your Needlers into him, and then Johnson brings down his shield before the shards explode, Tartarus would take a tremendous amount of damage from the explosions. When done correctly on lower difficulties, his shield won't even need to be brought down a second time. This strategy is made easier with 2 players, where one carries the Beam Rifle.
That's what he gets for bringing a hammer to a gunfight.
Be aware that you won't get a checkpoint at any time during the fight, so don't let up and get careless at the end.
When you're done, sit back, enjoy the ending cutscene, and revel in your legendary victory.
Congratulations!
- 2 SPARTAN-B312
The Great Journey

- Game: Halo 2
Beginner Goals: Easy: ~x:xx; Legendary: sub-10:00
Intermediate Goals: {{{time2}}}
World Class Goals: {{{time3}}}
IL Records: {{{time4}}}
Segmented Times: {{{time5}}}
High Charity - The Great Journey - -
The Great Journey is the fourteenth playable level in Halo 2 . See The Great Journey (level) for general information.
If the cutscene at the Scarab doesn't trigger, check if a Brute fell off the ledge and survived. All the Brutes must be dead.
Kill the Elite who brings forth the Spectre. Drive ahead and park it behind the rock up ahead, hijack a Ghost. Or leave the Spectre where the Elite parked it, which will guarantee that it doesn't get destroyed when you leave it behind.
At the door guarded by 2 Wraiths and several Brutes, you can get rid of them by making the game deload them. Basically drive up to the door, get to cover, face away from the enemies and wait.
Easiest way to ensure the deload is to backtrack and then come back. You can delay the CP to get it closer; on your way back to the Wraiths by looking downward and shooting at the ground. Another way to do the deload is to take cover near the Scarab platform and wait 10 seconds while looking away from the Wraiths. You can fire the Ghost's turrets to delay a CP.
Drive into the building and past the enemies. When you've reached the garden room, drive the Ghost across the gap. Hold A to lift the front of the Ghost up. You don't want to hit the Ghost's wings on anything and Brutes can be very annoying when they get in your way. It helps a lot to get out and cloak before attempting this jump. If you carried over a sword from Uprising, you can sword fly off of a Brute to the other side.
For the bridge, killing Jackals risks spawning more Drones. Park the Ghost on the left side of the bridge, get out and cloak. Drive across carefully, shooting the Jackal sniper with the Ghost. You can snipe the Jackal sniper before attempting this. If you carried over sword, you can cloak and sword fly to the Jackal sniper.
Driving the Ghost: Release the Hunters, kill 3 Brutes to open the door and drive past the reinforcements. Sword strat: sword fly to the Brute closest to the Hunters, stick the left Brute, cloak and backsmack a third Brute.
Outside Scarab: Shoot all the Brutes down with the Ghost. Sword strat: sword fly to the closest Brute, stick a second Brute, and backsmack the Brute shot Brute to make the last one berserk. Do not move or shoot so the ending cutscene happens faster.
Deloading Wraiths: Immediately after the cutscene ends, go back to the previous room. If done correctly, the 3 Wraiths should have their drivers removed from the game, allowing the Scarab to proceed. Make sure you have at least 2 plasmas.
Spectre Drop: Drive the Spectre to the spot that allows you to enter the control room early. Wait for Scarab to blow up the door, then park the Spectre near the edge, facing the structure, and get out. Time it so you trigger the cutscene as the Spectre is about to fall off. If done correctly, it should be waiting for you in the backroom.
Tartarus: The start isn't very hard, but it's possible to be killed by the 4 Brutes flanking Tartarus. If you have a spare plasma, you can toss one at them, cloak, and jump back. It will usually help you get out of that situation.
Get Johnson on the Spectre. Make sure to kill non-gold Elites so they don't get in. Park the Spectre at the edge of the platform where Johnson runs to. Johnson should respawn at the same time as Miranda, look at where Keyes will spawn. When you have 2 or 3 Johnsons in your Spectre, just drive down to Tartarus, stick it with a plasma, and enjoy the carnage. Dual wield plasma rifles and shoot Tartarus.
Sometimes Johnson will not clone and reverting will not change this. A good backup strat is to get Miranda Keyes on the turret, drive to Tartarus, destroy the Spectre, and allow her to distract him. It will take longer to kill him but it will still be an easy fight, if nothing goes wrong.
Individual Level / Segmented
Navigation menu, personal tools.
- View source
- View history
- Recent changes
- Random page
- What links here
- Related changes
- Special pages
- Printable version
- Permanent link
- Page information
- This page was last edited on 1 February 2015, at 18:02.
- Privacy policy
- About HaloRuns Wiki
- Disclaimers
The Great Journey Walkthrough
From Halopedia, the Halo wiki
This page is a walkthrough for the 15th and last campaign level in Halo 2 , The Great Journey . It is written to be played on Legendary difficulty. The player's initial loadout is a Okarda'phaa -pattern plasma rifle and Type-25 plasma pistol and four Anskum -pattern plasma grenades . Upon beginning the level, there is a Wuzum -pattern Spectre piloted by an Elite that will approach from behind and is drivable by the player, or the player can man the plasma turret mounted on the back and the Elite pilot will drive.
- 3.1 Part 1: Your Ass, My Size-24 Hoof
- 3.2 Part 2: Backseat Driver
- 3.3 Part 3: Delusions and Grandeur
- 4 Video Walkthrough
Weapons [ edit ]
- Plasma Pistol
- Okarda'phaa -pattern plasma rifle
- Brute Plasma Rifle
- Covenant Carbine
- Particle Beam Rifle
- Energy Sword
- Plasma Grenade
- Fragmentation Grenade
- Black Eye Skull (Legendary Only)
Vehicles [ edit ]
- Wuzum -pattern Spectre
- Scarab (non-drivable, can ride)
- Phantom (non-drivable)
- Covenant Assault Carrier (non-drivable)
Legendary Walkthrough [ edit ]
Part 1: your ass, my size-24 hoof [ edit ].
Although you start out on foot a Spectre will soon arrive to pick you up. Since the spec-ops commander stubbornly refuses to give up his Wraith, the Spectre is the best we can do for the moment. (In lower difficulties, he will leave the Wraith and you can choose which vehicle you want).
Interestingly, the level starts you out very close to your ultimate destination. Any attempts to head right for the control room, though, will likely be foiled by the cheap instant death barrier down below the cliff.
Your first priority is to upgrade your vehicle to something a bit more robust, as you'll be wading through quite a few enemy Ghosts, as well as a couple of Wraiths. Thus, rather than jumping right into the combat at the beginning, boosting ahead a bit and boarding the first available Wraith is recommended, as shown in the next video.
QuickTime (3.9 mb) | WMP9 (5.9 mb)
Right-click (option-click on a Mac) and "Save As" to save to disk.
The biggest danger associated with this tactic is probably being shot apart by Ghosts while you're boarding the Wraith. However, if you don't waste any time, you should usually be able to make it to the Wraith and complete the boarding before you really get swarmed. Using grenades to kill the driver can help speed up the process, though you run the risk of destroying the Wraith along with him. As your allies don't let little considerations like, say, the fact that you're clinging to the vehicle that they're firing on slow them down, there's also the danger of friendly fire. Partly for this reason (and partly to avoid getting caught in the explosion if it gets destroyed), I'd suggest parking your Spectre behind the rock before boarding the Wraith.
Once you've safely gained control of the wraith, you can relax a bit. Obliterate any Ghosts that may be pestering you and move ahead to engage the two enemy Wraiths near the door. I'd recommend attacking them more or less head-on, as shown in the next video.
QuickTime (3.4 mb) | WMP9 (3.4 mb)
The small tree on the right can actually help provide a bit of cover, intercepting some of their shots. You could try flanking them from around the little hill on the right, but the narrow path severely restricts your movement, making you an easy target. Note that there's also a Phantom out past the cliff to the left who may fire on you at some point. From this distance, though, he's not really much of a threat, so you should just ignore him and focus on the Wraiths. Take a moment to savor vaporizing the Brutes running around on foot with the Wraith's cannon.
When the area is clear, it is suggested to exchange your useless Plasma Rifle for a Brute Shot and as much ammo as you can find before heading inside. Unfortunately, you won't run across an Energy Sword for a while, so the Brute Shot is the best you can do for melee attacks.
Once inside, proceed through the hallways, making sure to exchange your equally useless Plasma Pistol for a Beam Rifle along the way, until you enter a two-level room guarded by a phalanx of five Brutes on the upper level. A couple of additional Brutes will also enter through the upper door after you've killed off a few members of the initial group.
You might be inclined to sit back in the hallway and use your newly-acquired Beam Rifle to pick off the Brutes from a distance. The problem with that tactic is that not only is it tedious (with all of the grenades bouncing around, it can be hard to get a clear shot unless you're cloaked), but your Hunters will take a tremendous pounding, and at least one of them will most likely die. The Hunters can be a valuable distraction in the next battle, and so it really pays to keep both of them alive. Thus, I'd recommend moving in on the Brutes right away, before they can deal out too much damage. Although there are quite a few of them, they tend to focus their attention on the Hunters, which makes it much easier to sneak up the ramp and kill several of them from behind before they even know you're there, as shown in the next video.
QuickTime (2.1 mb) | WMP9 (2.1 mb)
Make sure not to use your cloak too early, as you'll want to save it for when the Brutes arrive through the door. If necessary, you can also drop down to the lower level after taking out the first group. Note that, for some reason, the Brutes in the second group (even those that have gone berserk) have a tendency to retreat back the way they came when they're losing the battle, so if you don't finish them off here you'll have to deal with them in the next room. As usual, collect Plasma Grenades and Brute Shot ammo after the battle.
As you proceed through the next door into the large cavern, you'll find yourself on one arm of a U-shaped platform that curves around to the right, while five Brutes occupy the other. Another group of two Brutes, two regular Jackals, and two Jackal Snipers will arrive from the cave on the opposite side after you either kill off most of the original Brutes or you approach the exit.
The easiest way to survive this room is probably to run right through, as shown in the next video.
QuickTime (1.7 mb) | WMP9 (1.6 mb)
Jumping the chasm at a couple of points helps to speed things up and bypass the brute in the turret, though sometimes you may end up taking quite a bit of fire from the main group. Be sure to save your cloak for the end, as you'll need it to avoid the snipers.
Despite the effectiveness of this tactic, I'd recommend fighting this battle merely because it can be rather fun. If you've been following my advice, you should be carrying a full sniper rifle, and so it's certainly possible to sit back and snipe everything. However, closing in on the enemies right away can work just as well for killing them all as it does for avoiding them. If you're quick enough, you can manage to get around behind the second group while they're still mostly bunched up, as shown in the next video.
QuickTime (3.1 mb) | WMP9 (3.0 mb)
Otherwise, if the second group manages to disperse, you'll just have to take out the first group and then approach the remaining enemies in whatever way seems best, as shown in the next video.
QuickTime (3.5 mb) | WMP9 (3.5 mb)
Note that you can always crouch jump over the low wall in order to flank the enemies, when necessary. Whatever you do, I'd advise against standing around in the vicinity of the turret brute. There are several exploding objects nearby that are easily detonated by brute shots and possess a dangerously wide kill radius.
Continuing onward, you'll reach a short bridge defended by several nearby jackals, as well as a jackal sniper and several drones at the far end. The next video shows how I usually approach this battle.
Note that a phantom will appear on your left to complicate matters when you're about halfway across, so once you start moving I wouldn't stop until you're safely out the other side. In my view, there's not much to be gained from fighting the drones except pain, so I'd recommend running right past them. The timing of your cloak is very important here, as the drones will send a barrage of plasma fire your way if you wait too long, which will usually cancel your invisibility.
Continue up the hallway and into the prison.
Once again you'll have to deal with two large contingents of brutes, with the second group showing up, as usual, when enough members of the original group have fallen. Three jackals also lurk up on the walkway around the center of the room. Despite the large number of enemies, though, a relatively mindless tactic is all that's really necessary to clear the room, as the next video shows.
QuickTime (7.3 mb) | WMP9 (7.0 mb)
It's very easy to die if you take too long to fire a burst of needles, as the brutes will quickly start launching grenades and shooting carbines your way. The Needlers tracking is pretty forgiving, though, so you won't have to aim too carefully; but don't forget to use your cloak when it's available. It's possible to free your captured allies from prison during the battle (just shoot the little force field emitters in front of the cell doors). However, they won't last very long with all of the brutes around, so I usually don't bother. Sometimes, there will be a prison cell that holds two Hunters. If you really want to finish this quickly, free your elite allies and the hunters. It may buy you some time. Note that the door by the brutes will stay locked until the second group arrives, so even if you're planning on just running through the prison, you'll still have to kill at least a few of the enemies.
When the battle is over, you should pick up the energy sword if you haven't already and exchanging your Needler for the beam rifle. Fill up on grenades, and free your allies as well, though they won't be able to help you for very long.
Continue through the next hallway, which eventually leads you to a large platform outside.
Part 2: Backseat Driver [ edit ]
When the cutscene ends grab a banshee to begin a fairly long sequence of vehicular battles. Make sure that you have at least one plasma grenade left before you leave, as it will become very useful the next time you're fighting on foot. The terrain should look rather familiar from the beginning of the level. Regardless of what your objective says, the scarab is just as indestructible as it looks and you don't have to worry about protecting it. In fact, you can skip as much of the combat this chapter as you desire, as the scarab will eventually kill the three wraiths and then lumber onward to its ultimate destination.
Still, as long as you're waiting you might as well make yourself useful and speed things up. The safest way to destroy the wraiths is probably with the banshee, as it's quick enough to dodge their slow shots with relative ease. However, if you intend to keep fighting after the Wraiths are gone, you'll also have to face two Spectres and four banshees around the next bend. To make matters worse, several enemy turrets line the canyon walls. Surviving this gauntlet in the banshee can be fairly challenging, and so you'll be better off in the long run if you can take control of one of the Wraiths. I'd suggest boarding the one on the right and using it to take out the other two, as shown in the next video.
QuickTime (4.0 mb) | WMP9 (3.9 mb)
You should receive a checkpoint after this battle, and I'd recommend that you save and quit before proceeding.
The two Spectres will arrive as you move a bit farther along the canyon. They can be fairly annoying, gradually picking you apart with their little cannons, so I'd suggest taking the proactive approach and going right after them, as you'll be less likely to miss at close range. When the Spectres are gone, four Banshees will fly over the cliff ahead of you one at a time. The next video shows how I approach this battle, using the Wraith.
QuickTime (9.5 mb) | WMP9 (9.2 mb)
Staying near the corner along the side of the cliff forces the Banshees to begin their attack runs closer to you, making them somewhat easier to hit. As you can see, their tendency to fly straight at you does not exactly help their cause, either.
By the time you finish with the Banshees, the scarab will most likely have reached its destination. If you're really out for blood, you could take the time to destroy the two wraiths and four banshees in the next area, but I generally just head for the door at this point. I'd also recommend that you save and quit before proceeding if you received a checkpoint after destroying the banshees. I'll note once again that it's possible to skip this whole section simply by hopping back into a banshee after clearing out the first three wraiths and flying right to the control room. You can wait there out of harm's way until the scarab shows up. You'll have to fly toward the scarab close enough that Sarge begins firing on the control room door.
Part 3: Delusions and Grandeur [ edit ]
After the door is destroyed, the intended path for you to take is clearly to land outside and proceed on foot. You'd then have to fight through a large group of brutes before finally arriving at the control room.
However, it's actually possible to squeeze your banshee through the tunnel and fly over the brutes and into the control room. This approach has the advantage of not only bypassing the difficult battle with the brutes (though they can still potentially shoot you down), but also allowing you to employ the banshee in the final battle with Tartarus. In order to get the banshee through the tunnel you'll have to squeeze it up and over the rubble once you're past the doorway. You can make this task somewhat easier by destroying one or both of the banshee's "wings".
There's an even more interesting way into the control room, though, that involves exploiting a glitch whereby you can trigger the cutscene that precedes the final battle from outside the control room structure (thanks, Kyle Barr!), as shown in the next video.
QuickTime (4.9 mb) | WMP9 (4.5 mb)
As you can see, not only is this method quicker, but it also allows you to skip the brutes entirely and, surprisingly, even warps the banshee inside with you. Well, most of the time, at least. It's been my experience that the banshee doesn't always make it through in working condition (for example, I've run back to find it stuck in the floor). It's for this reason that I encouraged you to save and quit at the nearest checkpoint before you entered the control room structure. Be aware that you can't enter the control room in this manner until Sarge breaks down the door and the final chapter transition occurs, so there's no sneaking in early. Also, if you don't already have a beam rifle I'd recommend stopping by the bridge and picking one up before you proceed. You may not even end up using it if you have the banshee inside, but it gives you more flexibility for deciding how you want to deal with the brutes in the final battle. Anyway, it's not like you have anything else to do while Sarge is breaking down the door.
And so we come at last to the final battle of our epic, galaxy-spanning quest.
In light of this momentous occasion, Bungie added a entirely new weapon never before seen in the Halo universe, the gravity hammer . Tartarus wields this formidable weapon against the Arbiter in their final encounter.
Unfortunately, Tartarus is one of the easier of the three bosses (assuming that you don't use the fuel rod gun tactic on the Heretic Leader, at least). In contrast the other two bosses, Tartarus doesn't have a ranged attack, and so he can't hurt you as long as you don't let him get to close to you. His henchmen, meanwhile, attack only from one direction and only at fairly specific times during the battle. Thus, you can see them coming a mile away and there's little chance of being surrounded or taken by surprise.
The structure of the battle is fairly simple. Like the other boss fights, I tend to think of it in terms of several rounds, with each round ending when Sarge knocks out his shield and you damage Tartarus. Depending on your weapon choice, you'll probably need somewhere in the vicinity of 8-10 rounds to kill him. So, as far as Tartarus himself goes, the battle basically amounts to maneuvering to keep him at a distance until Sarge gets his shots in and you can do a bit of damage. Remember, Tartarus' shield only stays down for about 2–3 seconds at a time, so you have to be quick.
The only breaks in this pattern occur when the brute reinforcements show up. Although the time of their appearance does not appear to be absolutely fixed, it's at least consistent to a pretty high degree. The first group almost always appears after you first damage Tartarus (he'll say "A lucky hit. You'll not land another"). Expect the second group to arrive about 2-3 rounds after that, and the third group after another two rounds or so. As long as you keep an eye on their platform, you should be able to see them coming long before they actually get close enough to present a threat.
Given an understanding of the basic structure of the battle, the issue then becomes the specific tactics for damaging Tartarus and eliminating his brutes before they can cause you trouble. As I mentioned earlier, potentially clever shortcuts like pushing him off the platform into the abyss or smashing him with the banshee won't work, so you'll have to do it the old-fashioned way.
First and foremost, I should point out that the easiest and quickest method is to rely exclusively on the banshee. In that case, all you need to do is hover around Tartarus until Sarge takes out his shields and then blast him with the fuel rod cannon, flying off to interdict the other brutes as necessary. As Tartarus won't even be able to reach you, victory is almost assured, as long as one of the other brutes doesn't get in a lucky shot with a grenade or something.
Of course, the battle is quite manageable even without the banshee. Personally, I prefer to fight Tartarus on foot simply because I think it's more fun, and use the banshee only to take on the rest of the brutes.
Perhaps the most important observation if you intend to forget the banshee at any point is that although the battleground consists of three platforms, virtually none of the action will occur anywhere but the middle platform. Tartarus may fall down to the lower level or use the beam in the middle to ascend to the top, but given a bit of time he'll always return to the middle. Likewise, both the brutes and your useless elite allies will jump to the middle level and stay there. Thus, the top or bottom levels (I always choose the top) can serve as a safe refuge and an ideal drop-off point for weapons and your banshee where nothing is likely to disturb them.
As far as weapons go, I'd recommend dual brute plasma rifles. They'll do a tremendous amount of damage in a short period of time, and you'll never have to worry about running out of ammo. The shotgun works well, provided that you have enough ammo. The sword, for a change, is highly ineffective and puts you at great risk every time you get close to Tartarus. The carbine and brute shot, for their part, suffer from ammo limitations and just don't seem to deal as much damage as the plasma rifles or shotgun. As for plasma grenades, his shield is usually back up by the time they explode. You may be inclined to try knocking out his shield yourself with the beam rifle in order to speed things up. While it's certainly possible to do so, I've never really found it to be worth the trouble, as you'll quickly run out of ammo and you won't have much time left to damage him after switching weapons. In my experience, you're better off just sticking with the plasma rifles. However, the beam rifle can be very useful if you don't have the banshee (or are choosing not to use it), as you can often snipe several of the brutes before they even make it to the central platform.
Since you'll need to wait for Sarge to dispel his shield in each round, I'd recommend maneuvering Tartarus into a location where Sarge can get a clear shot, without any obstructions. Your best bet, perhaps not surprisingly, is around the outside of the middle platform right in front of Sarge's position.
As an alternative method to avoid Tartarus' hammer, take the Needlers off one of the elites that spawn (if he doesn't spawn then revert to saved until you get one). Then jump on the platform with Miranda and 343 GS on and attack Miranda with the Needler until she has taken enough rounds for them to explode, she will then run forwards and hold an imaginary gun. As she is invincible she wont die when Tartarus attacks her and he wont leave until she is dead (which is impossible). Hey presto the battle is easier.
With these considerations in mind, the next video shows an example of such a battle.
QuickTime (19.8 mb) | WMP9 (19.2 mb)
As you can see, nothing really fancy is required. Just be patient and deliberate in your movement, taking care to keep Tartarus in an advantageous location and to watch for approaching brutes. Keep in mind that he can strike both forward and backward (like the hunters), so be sure to stay a safe distance away from both sides of him. I'd also discourage you from trying to jump over his head. One move you can use to fake him out, though, is to hesitate slightly when backing away from him (much like you could do with the hunters in Halo 1 to trick them into lunging and exposing their midsections). This feint will trigger his melee attack and allow you to put a bit more distance between yourselves.
- Note*: An alternate method of bringing Tartarus down is to wait for Johnson to take out his shield, and then sword him. Right as Tartarus first jumps onto the platform, several Elites follow, all carrying energy swords. Once they are taken out, take one of their energy swords and lunge at Tartarus with the sword once his shield is down. In my experience, if you're playing multiplayer, have one person distract him so that the one with the sword can get at him from behind.
- Another alternative is to use the sword in conjunction with Active Camouflage. Since shots from the Beam Rifle generally stun him, if you lunge at him from behind you can easily move out of the way before he retaliates. This may be hard to pull off, but is highly effective when done correctly.
- Yet another strategy is to use dual Needlers. This usually requires more luck than anything else, but if you unload your Needlers into him, and then Johnson brings down his shield before the shards explode, Tartarus would take a tremendous amount of damage from the explosions. When done correctly on lower difficulties, his shield won't even need to be brought down a second time. This strategy is made easier with 2 players, where one carries the Beam Rifle.
That's what he gets for bringing a hammer to a gunfight.
Be aware that you won't get a checkpoint at any time during the fight, so don't let up and get careless at the end.
When you're done, sit back, enjoy the ending cutscene, and revel in your legendary victory.
Congratulations!
Video Walkthrough [ edit ]
- Halo 2 walkthroughs
- Articles with broken file links
Recent contributors to this article

COMMENTS
Prophet of Truth: "The Great Journey waits for no one, brother. Not even you." (Truth boards the Phantom and the Honor Guard Brutes follow immediately, but Tartarus hesitates at the dying Prophet of Mercy. ... The majority of the Prophet of Truth's quotes in Halo 3 are spoken through Holo-Pedestals. Only in the seventh level, The Covenant, ...
Prophet of Truth: "Be glad! A reward for all your toil and all your sacrifices in the year at hand." Prophet of Truth: "At this moment, the Council is gathered on Halo, to see the Icon secured." - Truth reveals that the Sangheili Councilors have been sent to Instilation 05 to oversee The Great Jounrney.
A symbol associated with the Path to the Great Journey. According to the Covenant religion, the Forerunners, a race of enlightened beings regarded as nearly omniscient and all-powerful, discovered a way to transcend the physical world and became divine gods by activating the Halos, or "Sacred Rings" as referred to by members of the Covenant. [4 ...
Arbiter: That makes two of us. Grunt #1: Me have bad feeling about this. Grunt #2: You always have bad feeling! You had bad feeling about morning food nipple! [reference to a Halo: Combat Evolved easter egg] Elite: Close your damn jaws or I shall bind them shut! Grunt #2: I would like to see you try Nipple manager.
None will be left behind when our Great Journey begins. That is the Prophet's age-old promise, and it shall be fulfilled!" - Giving a sermon, promising the Covenant inside the Covenant Empire. ... Yelling angrily, talking to the Arbiter Thel 'Vadamee and John-117 about Penitent Tangent's remark about firing Halo. Gameplay Quotes
The Great Journey lies at the center of the Covenant religion. The Prophets teach that an earlier race, known as the "Forerunners," learned how to transcend the physical world and become spiritual beings through use of the sacred Halo Rings.In line with this belief, the overriding goal of the Covenant is to discover sacred Forerunner relics that will lead them to the Halo Rings, which they ...
LEVEL 15: "The Great Journey". CHAPTER 01: "The Great Journey". CINEMATIC. The scene opens with the Arbiter and Spec-Ops Leader in the foreground, both of them standing on a low cliff near a beach. The Spec-Ops Leader is halfway out of the cockpit of his Wraith; the Arbiter is standing on the ground. In the background the Delta Halo control ...
The Great Journey is the Covenant equivalent of some western religion's journey to "the promised land." Primarily led by the Prophets and discovered by Cortana, the Covenant believe that the Great Journey will lead them to a more powerful throne on the Universe. The Great Journey was originally used by the Prophets as an excuse to invade Reach, but after the discovery of the Halos they ...
"No Arbiter! The Great Journey has begun. And the Brutes, NOT the Elites, shall be the Prophets' escort!" - Tartarus (Deceased) "Then it is an even fight. All ships fire at will! Burn their mongrel hides!" - Shipmaster (Active) "Though our enemies crowd around us, we tread the blessed path.
The Great Journey is the core belief of the Covenant religion. Given the Covenant's focus on finding Halo in Halo Season 2, you'd be forgiven for thinking the term refers to their search for ...
The Great Journey is the twelfth mission in Halo 2. There is one Skull and one Terminal to find. Immediately hop into the Wraith behind you and begin trekking through the hills, destroying any ...
High Charity is quickly succumbing to the Flood, Truth knows the Great Journey is a lie (according to Contact Harvest, but Halo 3 retcons[?] him as a true-believer so you decide) and he is still claiming the acquiring of the Index is a victory for the covenant. It's such an amazing piece of story-telling in one line.
Great Journey may refer to the following: . In-universe []. Great Journey (religion) - The central belief and ultimate goal of the Covenant to activate the Halo Array. Real world []. Great Journey (medal) - The Halo Infinite multiplayer medal for stealing an enemy power seed and securing it without dropping it in Stockpile. The Great Journey - The fifteenth and final campaign level in Halo 2 ...
Part 1: Your Ass, My Size-24 Hoof. Although you start out on foot, a spectre will soon arrive to pick you up. Since the spec-ops commander stubbornly refuses to give up his wraith, the spectre is the best we can do for the moment. Interestingly, the level starts you out very close to your ultimate destination.
Corporal Locklear: "So's a mercy killing." "You better get it together, Marine, or the Chief'll reach down and pull you inside out by your corn hole. And that'll be a sweet, sweet mercy... compared to what I'm gonna do to you." To Corporal Locklear after insulting Spartan 117. Category: Quotes.
Halo 2 (Mission 15) The Great Journey Walkthrough. You begin The Great Journey, the final mission of Halo 2, as The Arbiter. This was a big deal back in the day because you didn't even finish the game as Master Chief, the main character. Anyway, the first part of this mission has you in a Wraith dealing with about a dozen different enemies in ...
The Great Journey. Immediately hop into the Wraith behind you and begin trekking through the hills, destroying any enemy Ghosts that come your way. You'll have a couple of partners in a Spectre ...
The next video shows how I approach this battle, using the Wraith. QuickTime (9.5 mb) | WMP9 (9.2 mb) Right-click (option-click on a Mac) and "Save As" to save to disk. Staying near the corner along the side of the cliff forces the Banshees to begin their attack runs closer to you, making them somewhat easier to hit.
The Great Journey is the fourteenth playable level in Halo 2. See The Great Journey (level) for general information. Easy. If the cutscene at the Scarab doesn't trigger, check if a Brute fell off the ledge and survived. All the Brutes must be dead. Legendary. Kill the Elite who brings forth the Spectre.
Form an unexpected alliance, keep Tartarus from activating the ring. The Great Journey is the fifteenth and final campaign level of Halo 2. In Halo 2 for Windows Vista, upon completing this level on Normal or higher will reward the player "The Great Journey" Achievement and 30 Gamerscore .
The Great Journey. File:TheGreatJourneyAchievementArt.jpeg. This page is a walkthrough for the 15th and last campaign level in Halo 2, The Great Journey. It is written to be played on Legendary difficulty. The player's initial loadout is a Okarda'phaa -pattern plasma rifle and Type-25 plasma pistol and four Anskum -pattern plasma grenades.