Voyages are thematic collections of Quests that players can choose to embark upon. Voyages can be purchased from Trading Companies at all Outposts . To begin a Voyage, players must put purchased Voyages up for a vote on the ship's Captain's Table . Each Company provides different types of Voyages of varying difficulties.
- 1.2 Gameplay
- 2.1.1 Treasure Map Voyage
- 2.1.2 Wayfinder Voyage
- 2.1.3 Onboarding Voyage
- 2.2.1 Merchant Contract
- 2.2.2 Cargo Run
- 2.2.3 Lost Shipments
- 2.3.1 Bounty Voyage
- 2.3.2 Ghost Ship Voyage
- 2.4.1 Voyage of Legends
- 2.4.2 Legend of the Veil
- 2.5.1.1 Stash Voyages
- 2.5.2 Athena's Run of Thieves' Haven
- 2.6 Gilded Voyages
- 2.7 Captain's Voyages
- 4 Patch history

Mechanics [ ]
In order to begin a Voyage, a crew member must interact with the ship's Captain's Table to select the Voyage they wish to go on. If the crew has only one player, the Voyage will begin immediately. If not, the Voyage has to receive a majority vote to begin. Once voted for, the Voyage will become active, indicated with a title card for the Voyage.
Crews can vote to cancel any active Voyage by voting at the Captain's Table.
Gameplay [ ]
A single Voyage is usually composed of a variable number of quests and chapters. The difficulty, number of objectives and the overall length of Voyages purchased from the Gold Hoarders , Order of Souls and Merchant Alliance increases with the player's purchased promotions with the respective companies.
Each Trading Company Voyage consists of unique quest types, varying from classic treasure maps to engaging combat or cargo shipping, as well as many more.
A multi-chapter Voyage is indicated by "Chapter One" appearing on the title card of the activated Voyage. These Voyages present quests in chapters, with following chapters appearing only when all the quests of the previous chapter are completed. The completion of a chapter is always indicated with another title card, with the last chapter always being introduced as the "Final Chapter". Once a Voyage is complete, a final title card will be presented to indicate its completion.
Types of Voyages [ ]
Voyages are generally themed around the Trading Company that provides them, sending players in search of treasure , locations or NPCs relevant to the company. Most Voyages take part in the three main regions of the Sea of Thieves , although Devil's Roar Voyages, focused in that region but with higher rewards, can be purchased from Morrow's Peak Outpost.
Gold Hoarders Voyages [ ]
Purchased from Gold Hoarder NPCs at any Outpost .
These Voyages are themed around retrieving stashed riches and gold, buried on islands or hidden in vaults.
Rewards Treasure Chests and Artefacts .
Treasure Map Voyage [ ]
Treasure Map Voyages include a mix of X Marks the Spot Maps and Riddle Maps . X Marks the Spot Maps require players to identify a number of islands from an illustrated map, and use a shovel to dig in multiple X marked locations from the map. Riddle Maps require players to solve 2-4 clues and puzzles, which leads to buried treasure . The Voyage is considered complete once every item has been dug up.
Wayfinder Voyage [ ]
Wayfinder Voyages can be purchased by players who have the rank 25 promotion with the Gold Hoarders. This Voyage gives players access to a Wayfinder Compass that leads them to the burial location of a Treasure Vault Key . These keys can be sold or used to unlock a Gold Hoarder Treasure Vault .
Onboarding Voyage [ ]
The Onboarding Voyage is an introductory Voyage offered by the Gold Hoarders . This Voyage can only be bought and placed on a Voyage Table by new players who have just completed the Maiden Voyage . The Onboarding Voyage teaches players how to buy, vote for and complete a Voyage.
Merchant Alliance Voyages [ ]
Purchased from Merchant Alliance NPCs at any Outpost .
These Voyages are themed around retrieving, collecting and delivering goods, in the form of crates or caged animals.
Rewards Trade Good Crates and Cargo Crates .
Merchant Contract [ ]
Merchant Contracts require players to find and return animals and/or Gunpowder Barrels to a specific Outpost by a set time. Animals cabe captured inside animal crates provided by any Merchant Alliance NPCs, and kept alive until delivery.
Cargo Run [ ]
Cargo Runs requires players to pick-up and deliver a number of Cargo Crates from one specific NPC to another. The crates will be requested to be picked up from a nearby tavern , shopkeeper , Merchant Alliance or island NPC . The recipient NPC and delivery date are marked on the crates. The condition of these crates can degrade and must be taken care of to increase gold reward on delivery.
Lost Shipments [ ]
Lost Shipments provide players with a single trade route map, which shows the route of a previous merchant ship. Players will need to follow the route in search of birds circling debris where clues can be found. One of these debris piles will contain the Captain's Key which, after following clues to the shipwreck, can be used to unlock the captain's cabin full of Trade Good Crates .
Order of Souls Voyages [ ]
Purchased from Order of Souls NPCs at any Outpost .
These Voyages are themed around combat, either hand-to-hand or naval.
Rewards Bounty Skulls .
Bounty Voyage [ ]
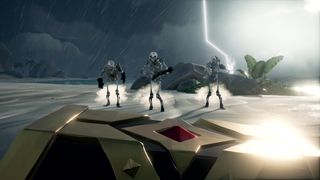
Bounty Voyages require players to go to specific islands to destroy Skeleton Captains and their skeleton crews to retrieve their Bounty Skulls . Players are given Bounty Maps with 1-4 crews per island . The Voyage is considered complete once all Skeleton Captains have been defeated.
Ghost Ship Voyage [ ]
Ghost Ship Voyages require players to go to a specific large island surrounded by Ghost Ships . Players will need to use their ship's cannons to defeat a number of Ghost Ships , followed by a wave of Ghost Flagships and a Ghost Captain Ship . The Voyage is considered complete once the Ghost Captain Ship has been destroyed.
Athena's Fortune Voyages [ ]
While these Voyages can only be purchased by Pirate Legends from the Athena's Fortune Hideout , non-Pirate Legends can also complete this Voyage when it has been placed for voting on a ship's Voyage Table .
Voyage of Legends [ ]
The Voyage of Legends consists of two chapters, with the first composed of Quests from each of the three Trading Companies . This includes 2 X Marks the Spot Maps , 2 Riddle Maps , 2 Bounty Voyages and 2 Cargo Runs . The final chapter provides a single map leading to a Chest of Legends .
Legend of the Veil [ ]
Legend of the Veil is a three-chapter voyage in which players will meet with the Pirate Lord and help him uncover the Veil Stones that belong to the Veil of the Ancients .
The first two chapters of the will always be random, with some chapters being puzzle-oriented whereas others are combat-oriented. The third and final chapter will always be the same, with players sieging a Sea Fort defended by multiple Ghost Ships and a large, green tornado. Completing this chapter will reward the bulk of the Voyage's treasure , including Athena's Fortune Treasure exclusive to the Legend of the Veil.
Bilge Rats Voyages [ ]
Purchased from Larinna outside any Outpost tavern .
Mercenary Voyages [ ]
Mercenary Voyages encapsulate a varied collection of Voyages with mixed Quests and objectives. Mercenary Voyages are mostly time-limited for the duration of a Content Update or event , costing Doubloons instead of gold to purchase. These Voyages vary in Quest types, locations, chapter numbers and treasure to match the current event. While Mercenary Voyages reward treasure, many also count for various Commendations , which can unlock time-limited titles or cosmetics when completed.
Stash Voyages [ ]
Stash Voyages are Mercenary Voyages that are permanently available for purchase from Larinna for a high Doubloons cost. These Voyages consist of a single Treasure Map for the closest Outpost , which rewards players with a single one of their chosen Bilge Rat Treasure items, necessary for interacting with other features in-game.
Athena's Run of Thieves' Haven [ ]
Gilded Voyages [ ]
Gilded Voyages are special, lucrative Voyages that are offered by the Bilge Rats for a limited time, usually during the holiday season. Gilded variations of Voyages from each Trading Company provides players with larger numbers of valuable treasures . Players can only obtain one Gilded Voyage per event.
Captain's Voyages [ ]
Captain's Voyages are more compact versions of regular Trading Company Voyages, but are only available to Captains and their crews. They can be purchased from the Shipwright Shop at any Outpost and allow players to choose from a variety of quest types, and a mix of shorter or more time-consuming Voyages. 50 of each can be stored in a Captained ship's on-board Voyage Storage, and can be voted upon from the ship's Voyage Table .
Gallery [ ]

A Gold Hoarder Voyage on a Captain's Table .

A Bounty Voyage on a Captain's Table.

A Merchant Voyage on a Captain's Table.

An Athena's Fortune Voyage on a Captain's Table.

A Mercenary Voyage on a Captain's Table.
Patch history [ ]
- Added Captain's Voyages .
- On to the Next! - Players can now discard unwanted voyages within the Quick Menu. No more having to propose them on the Captain's Table and cancel them!
- Company icons in the voyage pop-up UI are now the correct size.
- Voyage description text has been increased in size, and should now be easier to read from a distance.
- Introduced.
- Sea of Thieves
- 1 Commendations
Personal tools
- Create account
Navigation menu
- Sign up to edit
- View source
- View history
- Purge cache
- Recent changes
- Random page
- Community portal
- Admin noticeboard
- Wiki Discord
- Official Website
- Official Forums
- Official Discord
- Official Twitter
- Official YouTube
- Official Twitch
- Official Facebook
- Official Instagram
- Official TikTok
- Official Support
- Official Player's Guide
- Community Subreddit
- Community Discord
- SoT Interactive Map
- What links here
- Related changes
- Special pages
- Printable version
- Permanent link
- Page information
- Cite this page
In other languages
Voyages are thematic collections of Quests that players can choose to embark upon. To begin a Voyage, players must chose a Voyage for a vote on the ship's Captain's Table . Many Trading Companies provide different types of Voyages of varying difficulties.
- 1.1 Purchasing
- 1.3 Gameplay
- 2.1 Quest Table: Company Voyages
- 2.2 Quest Table: Special Voyages
- 2.3 Other voyages
- 3.1 Bilge Rats Voyages
- 3.2 Captain's Voyages
- 4 Commendations
- 6 Patch history
Before the launch of Season 11 , Voyages had to be purchased from Trading Company representatives or from the Black Market at any Outpost . Alternatively, Captains could purchase Captain's Voyages which were more compact versions of regular Trading Company Voyages.
Voyages are now available at any time and without any costs at the Captain's Tables Voyages Menu, as long as they have been unlocked.
In order to begin a Voyage, a crew or alliance member must interact with the ship's Captain's Table to chose a Voyage from the Voyages Menu for voting. If the crew has only one player, the Voyage will begin immediately. If not, the Voyage has to receive a majority vote to begin. Once voted for, the Voyage will become active, indicated with a title card for the Voyage. A Captain's Table can have up to four Voyages put up for a vote, but only one currently active Voyage and one Tall Tale . Once selected, the type of a Voyage is visible on the Captain's Table for all crews to see.
Crews can cancel any active Voyage by voting for it at the Captain's Table.
A single Voyage is usually composed of a variable number of quests and chapters. The difficulty, number of objectives and the overall length of Voyages purchased from the Gold Hoarders , Order of Souls and Merchant Alliance increases with the player's purchased promotions with the respective companies.
Each Trading Company Voyage consists of unique quest types, varying from classic treasure maps to engaging combat or cargo shipping, as well as many more.
A multi-chapter Voyage is indicated by "Chapter One" appearing on the title card of the activated Voyage. These Voyages present quests in chapters, with following chapters appearing only when all the quests of the previous chapter are completed. The completion of a chapter is always indicated with another title card, with the last chapter always being introduced as the "Final Chapter". Once a Voyage is complete, a final title card will be presented to indicate its completion.
List of Voyage types
Voyages are generally themed around the Trading Company that provides them, sending players in search of treasure , locations or NPCs relevant to the company. Destinations from regular Voyages are typically in the three main regions of the Sea of Thieves , while Ashen Voyages, marked by the singed red edges, will be focused in The Devil's Roar .
Quest Table: Company Voyages
Quest table: special voyages.
Other voyages
List of legacy voyage types.
These are voyages that had been previously available in Sea of Thieves but have since been removed or replaced.
Bilge Rats Voyages
Purchased from Larinna outside any Outpost tavern .
Captain's Voyages
Captain's Voyages were more compact versions of regular Trading Company Voyages, but were only available to Captains and their captained shipcrews. They can be purchased from the Shipwright Shop at any Outpost and allow players to choose from a variety of quest types, and a mix of shorter or more time-consuming Voyages. 50 of each can be stored in a Captained ship's on-board Voyage Storage, and can be voted upon from the ship's Voyage Table .
Commendations

A Gold Hoarder Voyage on a Captain's Table .

A Bounty Voyage on a Captain's Table.

A Merchant Voyage on a Captain's Table.

An Athena's Fortune Voyage on a Captain's Table.

A Mercenary Voyage on a Captain's Table.
Patch history
- Overhauled Voyages.
- Removed Captain's Voyages .
- Added Captain's Voyages .
- On to the Next! - Players can now discard unwanted voyages within the Quick Menu. No more having to propose them on the Captain's Table and cancel them!
- Company icons in the voyage pop-up UI are now the correct size.
- Voyage description text has been increased in size, and should now be easier to read from a distance.
- Introduced.
- Outdated articles

Sea of Thieves (SoT) Walkthrough & Guides Wiki
- Edition Bonuses
- PS5 Crossplay
- Beginner's Guide
- World Events
- Commendations
Maiden Voyage Tall Tale Guide - All Secrets and Journal Locations
★ SoT PS5 Version and Season 12 are Now Live! ★New Pre-Order and Edition Bonuses for the PS5! ★Check out our Beginner's Guide for new players. ★ Tall Tales | World Events | Trading Companies

A walkthrough guide for the Maiden Voyage Tall Tale in Sea of Thieves. Read on to see a complete Tall Tale walkthrough and guide for Maiden Voyage, including info on how to find all secrets, Commendations, journal locations, and a list of its completion rewards.
List of Contents
- Overview and Location
- Walkthrough
- How to Find All Secrets
- Journal Locations
- Commendations and Rewards
- Related Guides
Maiden Voyage Overview and Location
Tall tale overview, access maiden voyage from the main menu.

You can directly access Maiden Voyage from the main menu. Head over to the Play tab to find the Maiden Voyage on the right side of the screen. Select it and choose Set Sail to start the Tall Tale.
Maiden Voyage Walkthrough
Open the equipment radial menu.

After talking to the Pirate Lord, press and hold the Equipment Radial button. Hover over to the Banana and press the Left Mouse Button on PC or the RT button on the Xbox to eat it and recover health.
Get the Cutlass from the Tree

Head over to the tree on the right side of the Pirate Lord and use the Interact button to take the cutlass.
Defeat the Skeleton on the Tree

Taking the cutlass initiates a battle with the skeleton. Press the Left Mouse Button on PC or the RT button to attack the skeleton with your cutlass to defeat it.
Press the X button on PC or B button on the Xbox to put away the cutlass to proceed to the next objective.
Talk to the Pirate Lord on the Beach

Head to the beach and press the F button or X button on the Xbox to talk to the Pirate Lord. Take the shovel from the Pirate Lord to proceed to the next objective.
Use the Map to Find the Red X on the Island

To open the map, press and hold the Equipment Radial button. Press the Quest button to switch the wheel to show the Quest Items. Select the map from the wheel to equip it.
Find the Treasure Chest Northwest of the Shore

The treasure chest is located northwest of the beach beside the shipwreck on the shoreline.
Use the Shovel to Dig the Treasure Chest

Once you reach the area, use the shovel to uncover the buried treasure chest.
Return the Treasure Chest to the Pirate Lord

Head back to the beach and give the Old Sailor's Chest to the Pirate Lord.
Open the Old Sailor's Chest and take the equipment inside. Use the Mouse Wheel on PC or Y button on Xbox to equip your Flintlock.
After equipping the Flintlock, the Pirate Lord will allow you to explore the island. Use this time to complete all the Maiden Voyage Commendations before setting sail.
View Commendations on the Pirate Log

You can access the Maiden Voyage Commendations on the Pirate Log. Press the Tab key on the PC or the Menu button on Xbox to open the Resources menu and navigate to the Pirate Log tab .
Select Reputation -> Tall Tales -> Maiden Voyage to see the Commendations that you can complete for this Tall Tale.
Catch a Fish to Get A Fine Catch Commendation

Equip the Fishing Pole from the Equipment Radial. Press and hold the Left Mouse button or RT button on the Xbox to cast your rod.
Wait for a fish to bite and reel it in to earn the A Fine Catch commendation .
Cook a Chicken to Get A Hearty Meal Commendation

Find a chicken on the island and kill it to obtain its meat. Head over to the campfire and use it to cook the chicken to get A Hearty Meal commendation .
Use the Cannon to Get Saluting the Pirate Lord Commendation
Find the shipwreck on the island and climb to the third level on the left side of the wreck to pick up some cannonballs from the barrel on the dark corner near the ladder.
Find the Cannon on the Top Floor

Climb to the top floor to find the cannon. Load it with a canonball and use it to get the Saluting the Pirate Lord commendation .
Get the Old Sailor's Key from the Pond
From the cannon, turn around south from it to find a pond with two trees. Use the fallen mast to head over to the pond and swim down to the northeastern side of it to find the Old Sailor's Key .
Open the Secret Hold on the Shipwreck

Head to the ground floor on the right side of the shipwreck. Look on the ground to find the Secret Hold on the floor and use the Old Sailor's Key to unlock the hatch and get the Hidden Secrets Commendation .
Head inside the secret hold and take the gold from the two treasure chests. You should get at least 25,000 Gold and 200 Doubloons from the chests.
Find the Rowboat to Get the Yer Boat Commendation
Head southeast from the secret hold and dive down into the water. You can use the compass to orient yourself to find the rowboat.
Swim East to Find the Cave with the Rowboat

After diving down, swim east around the island until you can find a waterfall and a cave. Swim towards the cave to find the rowboat inside.
Climb the rowboat and use the oars to get the Yer Boat Commendation .
Talk to the Pirate Lord to Set Sail

Once you have found all the journals and completed the commendations, talk to the Pirate Lord at the beach to set sail.
Board the Ship and Repair the Damages

Swim towards the ship and use the ladder to board it. Interact with the sail length to raise the mast.
Use Wood to Repair the Mast

Head to the ship's blottom deck to find the barrels containing wood. Move the wood to your inventory to equip it. Interact with the cracked parts of the mast while holding the wood to repair it. Do this three times to complete the objective
Use the Bucket to Throw Water Overboard

Equip the bucket from the Equipment Radial menu and head to the flooded bottom deck. Use the bucket to scoop the water and head to the side of the ship to throw it overboard.
Use the Capstan to Raise the Anchor

Use the Capstan behind the ship wheel to raise the anchor. Use the Sail Length rope at the back of the ship to lower the sails to start sailing.
Use the ship wheel to move your ship. Follow the green flames as you navigate the fog.
An enemy ship will spawn on your left to serve as a combat tutorial, though the Kraken will automatically defeat it regardless if you fight back or run away from the ship. The game's logo will appear as the fog disappears, serving as the end of the Maiden Voyage Tall Tale.
How to Find All Maiden Voyage Secrets
Find the old sailor's key to unlock the treasure room.
There is a secret hold at the shipwreck in the middle of the island that holds 25,000 Gold , 200 Doubloons , and the My Secret Plan journal . Make sure to search for it before leaving the island in order to have starting funds when you enter the High Seas.
Head southeast from the shipwreck in the middle of the island and dive down into the water. You can use the compass to orient yourself to find the rowboat.
Fire the Cannon to Get Saluting the Pirate Lord Commendation
Find the shipwreck in the middle of the island and climb to the third level on the left side of the wreck to pick up some cannonballs from the barrel on the dark corner near the ladder.
All Maiden Voyage Journal Locations
My secret plan journal.

Head to the left side of the secret hold of the shipwreck in the middle of the island to find the My Secret Plan journal next to the chair. You will need to find all 10 journals in the island to get the A Storied Crossing commendation .
Regarding Merfolk Journal
Head back to the beach where you dug up the Old Sailor's Chest. Head next to the shipwreck lying on the shallow water and look on the ground to find the Regarding Merfolk journal.
The Sea of the Damned Journal
Go back to the Pirate Lord at the beach and equip your compass. Walk south from him until you reach a waterfall on the right side.
Swim towards the waterfall to find a small cave inside that contains the The Sea of the Damned journal.
They Gave It A Name Journal
Climb up to the top floor on the left side of the shipwreck on the island. Find the ship wheel and turn right from it to find the They Gave It A Name journal on the small table.
Lost Secrets Journal
South from the ship wheel is the shipwreck's mast. Climb to the top to find the Lost Secrets journal.
So Near and Yet... Journal
Head to the ground floor of the shipwreck and move towards the eastern side of the wreck. Find the two barrels on the corner after crossing the bridge and find the journal next to it on the floor.
Lords of the Sea Journal
Head to the small opening under the large shipwreck in the middle of the island and follow the path until you reach a bridge that connnects the two parts of the island.
Look at the bottom right from the bridge to find a ladder. Descend the ladder and find the Lords of the Sea journal on the left.
Paintings from the Past Journal
Find the large mountain southeast of the island and follow the path leading to the top to find the journal next to a small chair.
Making Camp Journal
Find the large mountain southeast of the island and follow the path until you find the wooden door on the southwest side. aa Use the lever on the left side to open the door and find the Making Camp Journal on a destroyed wooden crate.
A Ship That Fits Journal
Start from the Making Camp journal location and head down the path on the northwestern side until you come across a blocked path.
Use the capstan to lower the bridge on the left side to lower the bridge. Proceed to the next area and use the pulley near the torch to raise the door.
Head towards the door to find a cave with a rowboat. Head west from the rowboat to find a ladder that leads to a small area with iron bars. Find the A Ship That Fits journal near the rock wall.
Maiden Voyage Commendations and Rewards
Sea of thieves related guides.

- List of All Tall Tales
All Tall Tales
We at Game8 thank you for your support.
In order for us to make the best articles possible, share your corrections, opinions, and thoughts about 「Maiden Voyage Tall Tale Guide - All Secrets and Journal Locations | Sea of Thieves」 with us!
When reporting a problem, please be as specific as possible in providing details such as what conditions the problem occurred under and what kind of effects it had.
This site is protected by reCAPTCHA and the Google
Do you want to send this information?
Walkthrough Menu
- Sea of Thieves Wiki
Latest News
- News and Game Info
- SoT PS5 Release Date
- All PS5 Editions
- Is PS5 Crossplay Available?
- Do You Need PS Plus?
- Is an MS Account Required?
- Season 12 Release Date
- How to Check Server Status
- Maiden Voyage
- Shores of Gold
- The Shroudbreaker
- The Cursed Rogue
- The Legendary Storyteller
- Stars of a Thief
- The Art of the Trickster
- The Fate of the Morningstar
- Revenge of the Morningstar
- The Seabound Soul
- Heart of Fire
A Pirate's Life
- A Pirate's Life
- The Sunken Pearl
- Captains of the Damned
- Lords of the Sea
The Legend of Monkey Island
- The Journey to Melee Island
- The Quest for Guybrush
- The Lair of LeChuck
Tips and Tricks
- Beginner's Guide
- High Seas vs. Safer Seas
- How to Invite Friends
- How to Use the Brig
- How to Use Voice Chat
- How to Sail Your Ship
- How to Return to Your Ship
- How to Repair Your Ship
- How to Sword Lunge
- How to Become a Pirate Legend
- Best Keybinds and Settings
- How to Start a Player Alliance
- Best Ways to Farm Gold
- How to Buy a Ship
- How to Get Ashen Keys
- How to Get Ashen Chests
- How to Raise Trading Company Reputation
- How to Catch Fish
- How to Use Instruments and Play Shanties
- How to Get Ancient Coins
- How to Get and Start Quests
- How to Unlock Tall Tales
- Can You Play in 3rd Person?
- How to Create and Customize Character
- How to Join a Random Crew
- How to Save Your Game
- How to Get the Dark Warsmith Set
Season 12 Content
- Horn of Fair Winds
- Bone Caller
- Throwing Knife
- Double Barrel Pistol
Trading Companies
- All Trading Companies
- Gold Hoarders
- Order of Souls
- Merchant Alliance
- Hunter's Call
- Reaper's Bones
- Athena's Fortune
- List of All Commendations
- List of All World Events
- Skeleton Fort
- Ashen Winds
- Fort of Fortune
- Skeleton Fleet
- Ghost Fleet
- Skeleton Ship
- 1 List of All Tall Tales
- We could not find the message board you were looking for.
Gaming News

Genshin Backlash Cause Devs to Feel Defeated and "Useless"

GUNDAM BREAKER 4 Review (Switch)

Emio Review
![SMITE 2 Review (Closed Alpha) [PC] | A Demigod-like Second Coming](https://img.game8.co/3970001/a6977672451b0af7a7161442982d3a33.png/thumb "sea of thieves voyages guide")
SMITE 2 Review (Closed Alpha) [PC]
More Gaming News
Popular Games

Genshin Impact Walkthrough & Guides Wiki

Honkai: Star Rail Walkthrough & Guides Wiki

Black Myth: Wukong Walkthrough & Guides Wiki

Zenless Zone Zero Walkthrough & Guides Wiki

Pokemon Scarlet and Violet (SV) Walkthrough & Guides Wiki

Monster Hunter Rise: Sunbreak Walkthrough & Guides Wiki

Diablo 4 (D4) Walkthrough & Guides Wiki

Wuthering Waves Walkthrough & Guides Wiki

Once Human Walkthrough & Guides Wiki

Palworld Walkthrough & Guides Wiki
Recommended Games

Elden Ring Shadow of the Erdtree Walkthrough & Guides Wiki

Super Smash Bros. Ultimate Walkthrough & Guides Wiki

FF7 Remake Walkthrough & Guides Wiki

The Legend of Zelda: Breath of the Wild Walkthrough & Guides Wiki

Pokemon Legends: Arceus Walkthrough & Guides Wiki

New Pokemon Snap Walkthrough & Guides Wiki

Hyrule Warriors: Age of Calamity Walkthrough & Guides Wiki
All rights reserved
©Microsoft 2024. Microsoft, Rare, the Rare logo, Sea of Thieves are trademarks of the Microsoft group of companies. ©Disney. All trademarks and copyrights are property of their respective owners. MONKEY ISLAND © & ™ 2024 Lucasfilm Ltd. All rights reserved. The copyrights of videos of games used in our content and other intellectual property rights belong to the provider of the game. The contents we provide on this site were created personally by members of the Game8 editorial department. We refuse the right to reuse or repost content taken without our permission such as data or images to other sites.
- Popular Articles
- Minecraft Seeds
- Minecraft Guides
- Fortnite Guides
- Roblox Guides
- GameSkinny Staff
- Terms of Service
- Privacy Policy

Sea of Thieves Legend of the Sunken Kingdom Voyage Guide
You’ve done it, you’ve found and read all thirty journals hidden within the Siren Shrines of Sea of Thieves . Now it’s time to take on the Legend of the Sunken Kingdom Voyage, and earn yourself the Curse of Sunken Sorrow. This is long, multi-part quest. Put the kettle on, settle in, and let’s get started.
But first, a word of caution. There is only one chest in this voyage, and no checkpoints . Whatever you do, don’t lose it, or let another ship of scallywags scurry it from you. Ye be warned!
Sea of Thieves Legend of the Sunken Kingdom Voyage Walkthrough
When you initially log in to Sea of Thieves , and awaken from your stupor in the Tavern (as any pirate should), proceed outside and locate Larinna . She’s usually leaning against a post near the tavern door.
Ask to browse her stock and purchase the voyage called “The Legend of the Sunken Kingdom”. Drop that on the voyage table on your ship, and vote with your crew to launch it.

Two items will drop into your quest inventory once you launch the voyage.
First is the Golden Wayfinder compass which, similar to how it operates in vault voyages, points towards your next destination. Next is Humphry’s Note , addressed for “Gold Hoarder Eyes Only”, explaining that the chest has been buried, and is only to be dug up with good reason.
Set sail when you are ready, aiming where the compass compels you. Eventually it will guide you to a small island.
Disembark your vessel and follow the compass until the needle begins to spin uncontrollably . That’s your clue that you are standing on the spot. Dig, and you will expose the Forbidden Coral Chest, and drop another of Humphry’s notes in your inventory.
Ocean Crawlers will spawn around you. Deal with them, then finish uncovering the chest. Take it back to your ship, pull out your Golden Wayfinder, and set sail for the next destination.

The second island visit works the same as the first. Make landfall, and follow where the Golden Wayfinder points. Once it spins, dig.
This time you will uncover the Scholar’s Notes. In the first note Humphry explains that there the three keys that open the chest are hidden. The second note is a riddle, telling you to seek the shrine of hungering.
Sea of Thieves: How to Get The Shrine of Hungering Key
Sail to the Shrine of Hungering. You can either locate it in on the map aboard your ship, or follow the needle of the Golden Wayfinder. Once you arrive at the telltale glow indicating the shrine, dive beneath the waves. You are looking for the first of the keys, hidden behind a sealed door.
The Shrine of Hungering, you may recall, is filled with sharks and Siren Statue Puzzles. The puzzles are simple, find the three statues holding various objects, and strike them until their arms match their poses on a nearby cave painting.
Completing two of these grants you access to the upper area. Ascend up the shrine, and look for the sealed door to the left of the megalodon jaw.

To open the door, you need to find a special Gold Hoarder’s Medallion . It is easy to find, there is a trail of gold coins leading back down the shrine.
Descend across the broken mast and a bridge made of large vertebrae. At the bottom of these bones is a large ribcage . The medallion is atop these, nestled on the spine , and emitting the same eye-catching twinkle as other treasure.
Take the medallion back up, place it in a pedestal by the sealed door , and retrieve the Forbidden Key. Doing so places the next Scholar’s Riddle in your quest inventory.

These keys cannot be passed to the surface through mermaid statues. Your best option is to proceed to the top of the shrine, and shoot the glowing red coral creating a barrier over the windows. Once you do that you are free to swim back to your ship. Put the key into the chest to release the first of the three locks.
Sea of Thieves: How to Get The Shrine of Ocean’s Fortune Key
The new Scholar’s Riddle will send you to the Shrine of Ocean’s Fortune. This shrine is a vertical climb through a series of platforming puzzles. There is a large initial room, a small enclosed arena for a skirmish above it, and a smaller top most chamber. The Sealed Door and Gold Hoarders Medallion are in this highest chamber.
Spin the various ship wheels to rotate masts, allowing you to cross the room and climb higher. The medallion can be found after you spin the third ship’s wheel, and cross that third mast. It’s on a coral platform to your right, as you ascend.

Pick up the medallion, and cross the mast towards a mermaid statue . Continue climbing until you reach the crow’s nest .
From here, with medallion in hand, jump across a small gap to a platform . The sealed door is on the wall straight ahead, slightly to the left. Place the medallion in the pedestal, and take the key and riddle.
Escape by shooting another coral sealed window, and return the key to your ship.

Sea of Thieves: How to Get The Shrine of Ancient Tears Key
Use the key to open the second lock on the chest. The last Scholar’s Riddle points you toward your final destination, the Shrine of Ancient Tears.
This time, make sure to take the Forbidden Coral Chest with you . Descend into the shrine, and drop into the large hole in the floor until you reach the room with the large well at the center.
This central room is surrounded by a pair of joined staircases. There are four pressure plates spread along this path that you’ll need to step on in succession.
Sprint all the way around the room, making sure to cross the plates , and a door at the top center, where the staircases meet, will open. Inside is a red throne. The medallion is sitting on one of the arms.

Pick up the medallion, and walk straight out of this room the way you came in. As soon as you drop down to the lower level the sealed door will be to your left. Open it to find the final key. Place it in the Forbidden Coral Chest, and open the chest to find… another key !
Ok, that’s anticlimactic. Take the key to the alter near the sealed door you just opened. Place it in the triangular indent to open a set of doors to your left.

Inside is a coral encrusted skeleton, and a journal. Reading all of this journal completes the voyage and, if you’ve read the other thirty Siren Shrine Journals, grants you the Curse of Sunken Sorrow.

You’ve reached the end of a long journey, uncovering secrets aplenty in the lost journals, and opening Forbidden Coral Chest. Rest up, toss back a grog, and get ready for the next adventure.
Whether it be unlocking the crossbow , or finding a coin for Poor Dougie , there are mysteries aplenty to plunder, and adventures to be had.
Check out some of our other Sea of Thieves guides here on GameSkinny:
- SoT Shrine of Ancient Tears Journals Walkthrough
- SoT Shrine of Hungering Journals Walkthrough
- SoT Shrine of the Coral Tomb Journals Walkthrough
- SoT Shrine of Ocean’s Fortunes Journals Walkthrough
- SoT Shrine of Tribute Journals Walkthrough
- SoT Secret Waters Commendation Guide
- Where to Find the Kraken in Sea of Thieves
- SoT Dark Desires Commendation Guide
- SoT Strike Your Colours Commendation Guide
- SoT Lost Shipments Voyage Guide

- Login / Sign Up
- Sea of Thieves guide
Get started in Sea of Thieves with this beginner’s guide
Make the most of your free week
by Cass Marshall

Sailing the Sea of Thieves can be a little tricky at first, especially with the ongoing releases of expansions. We’ve assembled this guide to help you with your very starting steps as a pirate, from getting into the game to starting your first voyage and finally spending your hard earned currency on some booty.
Starting the game
When the Arena expansion hits, you’ll choose between The Arena — a fast paced PvP mode — or Adventure. This guide will handle starting in Adventure. You pick your ship — the two-person sloop, the three-person brigantine, or the four-person galleon — and your crew type. An open crew matches you with strangers, and a closed crew allows you to sail with only friends you invite.
Players can spawn at any random outpost in the three regions of the world: The Wilds, The Shores of Plenty, and the Ancient Isles. There is a fourth region, the Devil’s Roar, to the east. Players must manually sail there to adventure in that region, and you cannot begin at Morrow’s Peak Outpost.
The tavern, voyages, and outposts
Once you start the game, you enter the tavern. The tavern contains Duke , who gives weekly event and expansion dialogue, gear, and quests. He distributes special voyages, like the Christmas Golden Voyages or the Mercenary Voyages for the free week. If there isn’t an event running, leave the tavern and enter the outpost.
Outposts are full of supplies. Get in the habit of checking the barrels around you — you can often find useful things, including ship supplies, cursed cannonballs you can use as weapons, and even voyages. Down by the docks will be your ship , waiting for you to climb aboard when you’re ready.

Outposts contain vendors, who sell cosmetic skins for your equipment. There is no “leveling up” or better gear. The goal is to acquire gold to trade for cosmetic items — and have fun on the seas while you do so. You’ll need to earn some gold to spend first. To do that, you’ll need to acquire a voyage .
Voyages and tools
You can hold three voyages at a time, and they do not start until you activate them upon your ship. To activate a voyage, go to your ship’s voyage table . Every member of the party can propose a voyage by pressing F on PC, or X on Xbox and selecting their voyage. Crew members can then vote by pressing F (or X) on their voyage of choice. Once the majority of a crew decides, a voyage is activated. You can check your voyage requirements by holding E on PC or right bumper on Xbox, and checking the icons in the circle.
Completing voyages often requires you to use tools. Hold Q on PC or left bumper on Xbox to use the weapon wheel. The use of each item is pretty straightforward — a shovel allows you to dig, the lantern provides light, and so on. The musical instruments are briefly used in some quests, but mostly they’re just there for you to play shanties upon the sea. Nice!

Voyages primarily come from three factions on each outpost.
The Merchant Alliance
The first is the Merchant Alliance. The Merchant Alliance representative is on the dock of each outpost, with a tarp over her head. She will distribute voyages for you. Press F or X to interact with her, and you can choose a Cargo Run or a Shipment .
A Cargo Run asks you to pick up some silk, rum, and/or plants and transport them to a destination. You must keep the silk dry, protect the rum from shattering, and water the plants before they wither on the way to your destination. The better shape you keep your cargo in, the more gold you acquire. Pick up the shipment from the specific person that the manifest requires, check the labels on the goods, and then deliver them to the appropriate character.
When activated, shipments allow you to take crates from the Merchant Alliance vendor. You travel to islands, find animals, put them in crates, and bring them to the noted destination. We have a more in-depth guide to finding Sea of Thieves animals , but here’s a few quick facts:
- There are three kinds of animals: chickens, snakes, and pigs.
- Small islands will only have one kind of animal on them, but large islands can have two.
- Players have to feed captured pigs with bananas upon capturing them, or they will eventually starve to death. Players charm hissing snakes using music, and charmed snakes dance and stop spitting poison.

Order of Souls
The Order of Souls are in purple tents with an eye motif. They sell voyages to hunt down skeletons on specific islands.
Up to four skeleton captains will spawn on each island that the voyage tells you to go to. You can check which islands to travel to and how many skeleton captains there are by holding E or right bumper and checking your voyage icons.
In addition to skeleton captains, you’ll have to deal with their goons:
- Regular skeletons who wear bandanas
- Plant skeletons who take extra damage from cutlasses but become stronger in the water
- Shadow skeletons who are weak in the sun and must have a lantern shone on them in the night
- Golden skeletons who rust in water and take more damage from guns.
Once you kill skeleton captains, they drop skulls. You can sell those skulls to any Order of Souls merchant at any outpost for gold.

Gold Hoarders
The Gold Hoarders sell maps to treasure, and ask that you bring the chests you find to any Gold Hoarder at any outpost for gold.
Sometimes, these maps are literal X marks the spot treasure maps. Other times, they are multi-step puzzles. Either way, you’ll need to hold E or right bumper, check your voyages, and head to specific islands. Once you’re on the island, you’ll need to either track the X or solve the puzzle, and then dig up a chest using your shovel.
Here’s where the handy dandy map table comes in. This table shows the entire map. You can zoom in to see individual islands and names , or you can scroll out to see regions. Other ships can mark themselves with the Reaper’s Mark , a symbol that identifies them on the map and allows you to see them from a far distance.

Sailing, dying, healing, and fighting
Once you identify where you need to go, it’s time to start sailing. Lift your anchors, drop your sails, and use the wheel to steer. Practice makes perfect when it comes to sailing. For more information and help, check out our Sea of Thieves sailing guide to pick up the basics.
You have a health bar belonging to your pirate, which you can see in the lower left of your screen. If you die, you find yourself on the Ferry of Souls for a brief period of time. You can then return to your ship. Find the banana barrel on your ship and eat up from the equipment wheel to restore health.
Your ship also has its own health system. Taking damage will rip holes in the hull. The wood barrel gives you wooden planks. Use these to repair the damage in your ship by holding F or X near the hole.
Finally, you have cannonballs. Each ship has cannons and cannonballs. (You can also find cursed cannonballs in the world, which have special powers like making your opponent’s ship drop its anchor or making its crew vomit.) This is your way of defending yourself upon the seas.
This should be enough knowledge to get you set off on our first journey over the seas. Before long, you’ll be yar harring and plundering with the best of them.
Most Popular
- Everything announced at Nintendo Direct August 2024
- Civilization 7 is making bold changes to a familiar formula
- One of the best turn-based games of all time has a new home
- Get the Scott Pilgrim box sets for their lowest price ever
- Fields of Mistria is pure magic
Patch Notes
The best of Polygon in your inbox, every Friday.
This is the title for the native ad
More in Sea of Thieves guide

The Latest ⚡️
Sea of Thieves Maiden Voyage tutorial: Key and journal locations, and how to complete all other Maiden Voyage commendations
How to earn every commendation in Maiden Voyage.
Maiden Voyage is the Sea of Thieves tutorial quest, known as a Tall Tale in-game, which is designed to teach you the basics of being a pirate.
If you take the time to explore the island, known as Old Sailor's Isle, in Maiden Voyage you'll discover that there's far more to this location than a simple tutorial. Hidden in the ruins of a pirate you'll uncover a collection of journals and a key , which will lead you to lost treasure.
Completing all ten commendations for Maiden Voyage will also reward you with cosmetic items for both your pirate and ship.
On this page:
How to access tutorial quest Maiden Voyage in Sea of Thieves
Maiden voyage quest walkthrough in sea of thieves, where to find the key during tutorial maiden voyage in sea of thieves, journal locations during the maiden voyage quest in sea of thieves, other commendations and secrets in maiden voyage in sea of thieves.
If you're looking to learn the essentials of Sea of Thieves , read up on sailing , ship battles , and how to survive fights with skeletons and the kraken .
If this is the first time you've played Sea of Thieves, then, after you've selected a pirate to play as, you'll have to play at least some of the Maiden Voyage quest to access the rest of the game.

If you're a returning player, then you can still play the Maiden Voyage quest to either to refresh your Sea of Thieves skills or to earn the special items available from earning all the Maiden Voyage commendations.

Maiden Voyage can be played at any time by selecting from the bottom right-hand corner of the Sea of Thieves Experience menu, which is the first menu you access upon starting the game.

Maiden Voyage begins with you awakening on an island and the ghostly Pirate Lord appearing in front of you. You need to eat, however, to properly talk to the Pirate Lord.
To do this open your Equipment Radial and then select the food you stored there. Once it's in hand, you can eat it and then talk to the Pirate Lord.

He'll instruct you to retrieve the cutlass that is sticking out of the remains of a skeleton tied to a nearby tree. When you do retrieve this cutlass, the skeleton won't be too happy, so quickly destroy it with a few swipes of your blade.

Blade in hand, meet the Pirate Lord on the shore and he'll give you a shovel, which you should immediately put away. The Pirate Lord will then ask you to retrieve some treasure for him.
To do this open up your maps and select the only one you currently have available. You can now look at this map whenever you like and continue to move about the island as you do so. Keep in mind though, you won't be able to tell where you personally are by looking at the map.

To find the treasure head west along the beach, until you reach the area where it curves out into the sea.

Next, follow the curved beach out towards the ruined ship at its end and stop when you reach the plant with red leaves - it's here that you'll find the buried treasure.

With your shovel, dig up the Old Sailor's Chest and then bring it back to the Pirate Lord.

He'll allow you to open the chest and take the equipment inside, which includes a flintlock pistol, compass, telescope, bucket and lantern.
You can now spend some time experimenting with your new weapons and equipment if you like.
This is also the time to explore Old Sailor's Isle, the island where Maiden Voyage is set, and uncover its various secrets, including a collection of hidden journals.
Once you've found every secret or simply want to continue playing the game, talk once more to the Pirate Lord and he'll open the path to the Sea of Thieves. First, however, you have to get your ship ready for the open seas.

Swim out to your ship and board via the ladder on the side.

Your first task is to raise the mast, which can be done by interacting with the sail length rope that is to the right-hand side of the ladder you used to board the ship with.

Now head to the bottom deck via your cabin and collect some planks from the wood barrel you find down there.

You can use these planks to repair the cracks around the base of the mast. You'll need to do this three times for this task to be complete.
Next, select your bucket and head back back to the bottom deck. Here you need to scoop up some of the water into your bucket and then throw it overboard, until your ship is water free.

With that task completed, head to the topmost deck and use the capstan to raise the anchor, before returning to the sail length rope to lower the sails.

Now you can finally head out into the open seas, using the wheel to steer the ship, so that you can follow the trail of green torches to the Sea of Thieves.
Don't let your guard down as your journey though. There will be a shark that you must avoid and, at some point, you'll encounter a skeleton ship.
To deal with this ship, you must load one of your cannons using the cannonball barrel on the deck and fire it towards your enemy. Don't worry if you miss - a kraken will take care of the ship for you.

Eventually you'll receive the Unto the Horizons commendation, bringing Maiden Voyage and the tutorial to an end.

If you want to access the hull of the destroyed ship in the middle of Old Sailor's Isle in the Maiden Voyage quest, you're going to need to find the key.
To do this head to the pool of water that lies in-between both ships and, once you're there, look to your left to see a pathway. This path will lead you around the left-hand side of the broken ship and up onto the hilltop where one of the broken masts rests.

You will also find a small spring at the top of this hilltop that descends to the ground below as a waterfall.

To find the key you need to dive underwater in this pool and swim to the rocks that form the top of the waterfall.Just in front of these rocks, you'll find the key sticking out of the dirt.

This key may take some time to find due to it being a similar colour to the dirt that lies the base of the pool, but if you take your time, ensuring you swim slowly, you'll be able to find it.
Key in hand, return to the area that sits in-between the two broken halves of the ship. You'll want to head towards the steps that led up to the first level of the right-hand side of the ship, but don't climb these steps. Instead, look at the ground to the right hand side of this ship to see a hatch in the dirt.

Use the key on this hatch to open the hull for the broken ship, so that you climb inside and help yourself to a selection of lost treasure like a true pirate.
Inside the hull, you'll find 25,000 Gold, 200 Doubloons and the 'My Secret Plan' journal, which you need to read as part of the A Storied Crossing commendation.

Entering the hull will also complete the Hidden Secrets commendation.

As you explore Old Sailor's Isle during the Maiden Voyage quest in Sea of Thieves you might come across a journal or two. There are ten journals for you to find in total during the quest and, if you find them, you'll earn the A Storied Crossing commendation.
Remember - you need to read each journal once you've found them to complete this commendation.
Below you'll find out how to find all ten journals in Maiden Voyage:
The Sea of the Damned
Just beyond the campfire where you begin Maiden Voyage, you'll find a small pool with a waterfall.

If you swim towards this waterfall, you'll discover that there's a cave hidden behind it.

Venture to the back of this cave and you'll find 'The Sea of the Damned.'

Regarding Merfolk
Beyond where you dig up the Old Sailor's Chest, you'll see a sunken ship; the hull is at the very tip of the sand dune, while the cabin is on the right-hand side.

To find this book you need to dive into the cabin, entering through the doorway underwater and pay close attention to the sea-bed.

In one of the topmost corners you'll find 'Regarding Merfolk.'

They Gave It A Name
In the middle of Old Sailor's Isle you'll find the remains of a great ship broken in half. Before you reach this ship, however, there is a path leading to the right, following this will bring you to a ladder and, once you've climbed it, you'll find yourself in the remains of a bedroom.

Next, head up the stairs within this room to reach the top deck of the ruined ship and, by the ship's wheel, you'll find 'They Gave It A Name.'

Lost Secret's
After reading 'They Gave It A Name,' walk around the mast until you find the ladder attached to its side.

Climbing this ladder will take you to the crows-nest where you'll find 'Lost Secret's.'

So Near and Yet...
To find this journal, climb the set of steps at the base of the right-hand side of the broken ship and then cross the bridge that connects the two halves together.

Once you reach the other side of the boat, look to your left and you'll see a pair of barrels surrounded by leaves. At the foot of the upright barrel you'll find 'So Near and Yet...'

My Secret Plan
'My Secret Plan' is located in the hull of the broken ship, which is unlocked with the key you'll find as part of earning the Hidden Secrets commendation.

Lord of the Sea
Head down the path that goes through the tunnel in-between the two halves of the broken ship and continue following it until you reach a bridge.
Rather than crossing this bridge, go to the cliffedge to your right where you'll find a ladder.

Head down this ladder and search through the leaves to your left; amongst the ivy, you'll find the 'Lord of the Sea' journal.

Painting from the Past
Following the path that begins in-between the two halves of the broken ship to its end will bring you to the top of the second island and there you'll find a campsite.

Amongst the items that make up this little camp, you'll find the 'Painting from the Past' journal.
Making Camp
You'll walk past a wooden door on your journey to the top of the second island. Situated to the left of this door is a lever, which, when you pull it, will open the door.

Beyond the doorway, you'll find another small camp and, on the floor to the left of the campfire, you'll find the 'Making Camp' journal.

A Ship That Fits
After reading 'Making Camp' follow the pathway into the depths of the mountain, until you reach a raised bridge.
Opposite this raised bridge, you'll find a capstan, which you can use to lower the bridge and continue down the path.

Eventually, you'll reach another closed door. This time you can raise the door using the pulley next to it.

This will bring you into a cavern containing the rowing boat used for the Yer Boat commendation. Rather than climbing into the boat, head to your left where you'll see a ladder leading to a small ledge.

Once you've climbed the ladder, look on at the right-hand side of the ledge and, on the ground, you'll find the last journal - 'A Ship That Fits.'

The first season has arrived! Learn about all Season 1 Battle Pass rewards and everything else added in the Sea of Thieves patch notes . New to the game? Learn what to do in Sea of Thieves and take take part in the Maiden Voyage tutorial , which teaches you the essentials of sailing and ship battles . It's also useful for beginners to know how to survive fights with skeletons and the kraken . Elsewhere we have advice on how to get easy gold and doubloons , complete skeleton forts and The Shroudbreaker , take part in fishing in Sea of Thieves and Sea of Thieves island maps .
There are four other commendations for you to complete in Maiden Voyage, the tutorial for Sea of Thieves, and completing these commendations, along with the ones outlined above, will unlock the Magpie's Fortune Sails for your ship.
You can check to see how many commendations you've completed for the Maiden Voyage quest by going to the Reputation tab in the in-game menu.

From there select Tall Tales and then cycling to the next screen, where you'll find the option for Maiden Voyage. Here you'll find a full list of commendations available for this quest and the rewards you'll receive for completing them.

A Fine Catch
To earn this commendation, you have to do a spot of fishing . First, grab your fishing rod from the Equipment Reel, which is located in the second section of the reel.
Once you've got your fishing rod in hand, head to the nearest patch of water and cast out into the sea.
You'll have to wait a short while for a fish to appear, but, when you see a fish swimming and jumping around the end of your line, you'll know it's nearly time to start reeling in a fish.

When a fish does take the bait, you need to angle your rod in the opposite direction to the one it's swimming in. This would be right if the fish is swimming left, upwards if it's fishing directly away from you or left if it's heading to the right.

When the fish gets tired, you'll have the chance to reel it in.
You will have to repeat this process a number of times to catch a fish, but once you do so you'll receive the 'A Fine Catch' commendation.

Just make sure you don't reel the fish in when it's moving or point the rod in the wrong direction - if you do you'll break the line and lose the fish.

A Hearty Meal
This commendation begins with you killing one of the chickens that can be found near the campfire that you awaken by at the beginning of Maiden Voyage. You can do this by using either your cutlass or flintlock pistol.

Once you've committed chickenide, pick up the chicken meat left behind and take it to the nearby campfire.
Now all you have to do is cook it and you'll receive the commendation.

Saluting the Pirate Lord
For this commendation, you need to climb up the left of the broken ship, until you reach the level with the destroyed brig where you'll find a barrel of cannonballs.

Take these cannonballs and then head up the stairs to the top floor of this part of the ship. Here you'll find a cannon and all you have to do now is load, then fire, the cannon.

The best time to complete this commendation is just after you've read the final book, 'A Ship That Fits.'
In the same cavern where you find this book, you'll find a rowing boat. Once you've read the book, climb into the rowing boat, pick up the oars and take it for a spin.

After a couple of minutes of rowing, you'll receive this commendation.
Read this next
- Xbox published Sea of Thieves reportedly surpasses 1m sales on PlayStation 5
- Sea of Thieves' fire-belching, 10-cannon warship sets sail next week
- PlayStation Store's Summer Sale is now live, featuring over 4500 discounts
- CD Projekt says The Witcher 4 will enter full production "soon"
- Warhammer 40K: Space Marine 2 post-launch roadmap promises free new modes, missions, and more
- Persona and Italian horror-inspired tactical RPG Demonschool gets last minute delay
- Legacy of Kain: Soul Reaver graphic novel Kickstarter smashes through $1m milestone
- Dead by Daylight spin-off The Casting of Frank Stone has a demo available now
- Call of Duty: Black Ops 6's PC requirements revealed ahead of early access beta
- Call of Duty studio Raven Software alleges "bad faith bargaining" in complaint against Microsoft and Activision
- Today's Wordle hint and answer on Thursday 29th August for 1167
- Today’s Connections hint and answer on 29th August for 445
- How to unlock Tona's Flame in Genshin Impact, all Tona's Flame rewards
- Best abilities in Star Wars Outlaws
- How to clear Wanted level in Star Wars Outlaws
- Best Star Wars Outlaws blaster upgrades
- How to get the Smoke Bomb Compressor in Star Wars Outlaws
- 90s platformer Croc: Legend of the Gobbos is being remastered by resurrected Argonaut Games 42
- "No chance" of Astro Bot coming to PS VR2, says creative director 42
- Here are your PlayStation Plus monthly games for September 39
- The Castlevania Dominus Collection re-releases Nintendo DS classics 36
- Bungie's former Marathon reboot director Chris Barrett reportedly ousted following inappropriate behaviour 31
- Star Wars Outlaws PS5 players asked to start all new save to avoid progression blocking bugs 27
- Metaphor: ReFantazio is far more than just Persona in fantasy clothing, it could be a new high bar for the genre 24
How to complete your first Sea of Thieves voyage
Here's how to start your first Sea of Thieves mission and make a name for yourself in the pirate world.
Sea of Thieves drops players straight into its tropical world with little guidance on what lies ahead. To climb the ranks and make a name for your pirate-self, you'll need to embark on "voyages" – the game's structured quests to hunt down coveted treasure. Here's how to get started with Sea of Thieves' voyages and bring back your haul of loot on Xbox One and Windows 10 .
- See at Amazon
- See at Microsoft Store
1. Finding your first voyage

To get started on your Sea of Thieves adventure, you'll need to collect your first formal voyage. Obtainable from various vendors across the game's world, these provide specific objectives to complete for rewards. Vendors are based at "outposts," found on set islands across the game's map. Players always spawn in outposts after launching the game, while those at sea can find outposts through their ship's map.
When at an outpost, you'll need to find the representative of the "Gold Hoarders" - the faction offering your first Sea of Thieves quest. These vendors are situated in dark cylindrical tents with gold paint on their faces. To initiate a conversation and browse the Gold Hoarders' offerings, players with a controller can press X, while keyboard users can press F.
Browsing the vendor's stock, a voyage will be purchasable for zero gold. When hovering over this quest, press A on your controller, or left-click with your mouse to add it to your inventory. New pirates can start voyages for free, although most quests require you to part with hard-earned gold.
2. Starting your first voyage

After collecting a voyage, you'll need to initiate it before setting sail. Your crew should return to your ship's captain's table, where voyages can be proposed and voted on. This can be found on the rear lower deck of sloops and in the captain's room of galleons.
Walk up to the captain's table, pressing X on your controller or F on your keyboard once prompted. This will open your inventory of purchased voyages, with the option to propose one among allies. Fellow pirates can put voyages down on the table at the same time, too.
To kick off the journey, your crew must place votes among the available quests. Once a majority of players have voted for a voyage, black borders appear at the top and bottom of the screen, indicating the voted voyage is underway.
Get the Windows Central Newsletter
All the latest news, reviews, and guides for Windows and Xbox diehards.
3. Using maps to find islands

It's now time to embark on your Sea of Thieves adventure. But before setting sail, you'll need to know where you're going and how to get there. To find your destination, reference the cryptic treasure map added to your inventory. Hold RB on a controller or E on a keyboard to open a radial menu and select the map. With the map in-hand, press RT on a controller or left-click on your mouse to view it in full.
To find the island's location, cross reference your handheld treasure map with your ship's map table. Found on the rear lower deck of sloops or on the middle deck of galleons, this provides greater context for surrounding islands in relation to your ship's current location. Find the island that matches the one on your treasure map, which should be within the islands neighboring your ship.
It's now time to travel the seas! Lower the sails, raise the anchor and get on the way. Use the compass to keep on course, while referencing the map table for a real-time indicator of your position. For more tips on getting the most out of your ship, don't forget to check out our beginner's guide to sailing in Sea of Thieves .
- Sea of Thieves ships guide: Tips and tricks for sails, combat, repairs and more
4. Tracking down the treasure

After hitting land, you're closer to treasure than ever before – but you still need to know where to find it. Once on the island, raise your treasure map and look for the "X" that marks the spot.
Referencing the map and surveying your surroundings, figure out your location on the island. Using key landmarks, coastline shapes and your compass, find the location of the treasure.
Once above the treasure, switch to your shovel and begin digging. An audible "clunk" of hitting a chest will sound, unless you're off the mark. The game allows a few meters of leeway to account for minor inaccuracies, but try to keep as close to the mapped location. Keep digging until the chest is entirely surfaced.
5. The risky return

You've now got your first taste of pirate treasure but the journey's not over. To complete a voyage you need to return the chest to a Gold Hoarder at an outpost.
Hold X on a controller or F on a keyboard to carry the chest back to your ship. Carrying a chest, you'll move slowly and be defenseless, so get your crew protecting you from skeletons. Also be wary of other nearby players hoping to steal your booty.
Using your ship's map table, find the nearest outpost and make the return journey. At the outpost, find the Gold Hoarders vendor and redeem your chest. Gold will be provided to all crewmates in return for your efforts.
- Buy Xbox Game Pass
Your journey
Have any other tips for new pirates on their early adventures? Make sure to drop into the comments and share your findings.
- Sea of Thieves on Windows Central
- Sea of Thieves buyer's guide: Release date, editions, preorder bonuses and more
- Sea of Thieves gameplay tips for new players and budding pirates
- Your Sea of Thieves items explained: Tools, weapons, consumables and more
- Sea of Thieves skins list: Clothing, weapons, and items
- How to get new weapons in Sea of Thieves
Matt Brown was formerly a Windows Central's Senior Editor, Xbox & PC, at Future. Following over seven years of professional consumer technology and gaming coverage, he’s focused on the world of Microsoft's gaming efforts. You can follow him on Twitter @mattjbrown .
- 2 Razer launches new wireless Xbox controller, and Microsoft should hide in shame
- 3 Microsoft Forms fixes one of the biggest issues with syncing data to Excel
- 4 Razer's first wireless Xbox controller is the closest thing we have to perfection right now
- 5 The release date for the upcoming remasters of two classic JRPGs from the 1990s has been revealed
Sea of Thieves

- Vote: Reader’s Choice
- Meta Quest 4
- Google Pixel 9
- Google Pixel 8a
- Apple Vision Pro 2
- Nintendo Switch 2
- Samsung Galaxy Ring
- Yellowstone Season 6
- Recall an Email in Outlook
- Stranger Things Season 5
Sea of Thieves beginner’s guide: 16 tips for new pirates
Cooperative piracy simulator Sea of Thieves is a game that drops players right off the plank and into the deep end of the ocean as soon as they start it up. You’re left to figure out how to do almost everything alone or with a crew of friends. All of it is picked up through experience as you play, which is part of what makes Sea of Thieves interesting. There are tons of little nuances and best practices, however, that you need to become an effective pirate.
Start with the tutorial mission
Sail on safer seas, follow your compass, raise the right flag, check-in with the seasonal content, beware random events, choose your weapons carefully, manage your stores.
- Don’t start Tall Tales until you have time set aside
Take on a Raid
Remember that some chests need babysitting, the more stuff you have, the more vulnerable you are.
- Don’t skip shipwrecks
Your life (and your ship) are kind of expendable
Fire yourself from the cannon to save time when you land, yes, you can kill sea monsters for loot.
If you want to win sea battles, escape plunderers, gather treasure, and generally be the best pirate on the Sea of Thieves , there is a lot to learn. Luckily, these tips will make you an effective sailor, a deft brawler, and a smart privateer when you join up with a crew. Going it alone has its perks as well, so check out our tips for your lone pirate voyages .
Sea of Thieves found time to add a tutorial mission for pirates first starting out, called Maiden Voyage. It’s difficult to overstate just how useful this tutorial is: It’s a safe spot without marauding PvP players that walk you through how to sail your ship and gets new players better acquainted with the world as it is. There’s also a chance to get some exclusive loot to wear! Since Thieves can be a little intimidating to first pick up and master all the controls for various activities, we highly suggest you don’t skip this mode.
It took a couple of years of updates for Rare to add this option, but Safer Seas is a private server option that allows you to get your sea legs without the threat of other, more experienced, players ruining your fun. Your progression will be limited in this mode, but it’s the perfect place to practice all the mechanics available before heading into the more dangerous waters.
A huge aspect of Sea of Thieves is solving riddles and puzzles. In true pirate fashion, many of these ask you to take “X paces” in one direction or another. Counting your steps isn’t so easy in a game, but if you hold up your compass while walking you can get a much clearer signal for every pace your character takes.
As mentioned numerous times, teamwork is what makes Sea of Thieves special, so make sure you’re teaming up with fellow pirates. By raising a specific flag on your ship, you’re signaling to other players that you want to cooperate. If one ship raises the “Offer Alliance” flag any other close enough can join an alliance with them to work together to complete quests and go on adventures. It also marks your fellow members on your map, lets you set voyages together, and revive each other. That said, some people will use this as an opportunity to lure
Sea of Thieves is a live-service game and is deep into its seasonal model. Each season has its own progression system where you can go through 100 Renown Levels for rewards all along the way. You earn Renown by doing almost anything during a season, but Trials, Events, and Adventures tend to have the biggest payouts. Trials come in three types: green, blue, and purple, with each giving bigger Renown boosts. Seasons all last different lengths of time but typically go for at least three months.
Events should be high on your to-do list whenever they appear. Aside from speeding up your seasonal progression, they also reward players with unique cosmetics, titles, and currency. Events can run for a single day or a few weeks so make sure not to miss out!
Sailing around is already a dangerous time due to other players, but the game itself can turn on you at a moment’s notice. There are storms to be weary of, sure, but that’s just the tip of the iceberg waiting to sink your plans. World Events include stumbling upon Skeleton Forts and Fort of Fortune locations with tough enemies and bosses, as well as Skeleton and Ghost Fleets that will engage you in naval combat. There are rewards to be gained from completing all of these, but are quite risky. Since you never know when they could appear, running into one while you’re low on supplies and desperately attempting to get back to shore could be cause for alarm.
When you start Sea of Thieves , you pack a cutlass and a flintlock pistol, but you have some additional weapon options waiting for you in the hold of your ship. On the galleon, you’ll find the weapons locker on the mid-deck at the front of the ship, where you can restock ammo and switch your weapon complement.
There are three options for guns to carry into battle: The pistol, a decently strong, accurate mid-range weapon; the blunderbuss, a devastating close-range shotgun; and the “eye of reach” sniper rifle, which obviously packs a longer range. The pistol will get you by in most situations but don’t be afraid to change things up, carry two guns, or diversify what your whole crew is carrying. Blunderbusses, for instance, are great for stopping boarders with a single close-up shot, and the eye of reach might help you kill gunners on a nearby ship. The pistol can drop skeletons in a single shot, keeping you from getting surrounded. Experiment with all the weapons to find out what you’re good with and what the situation demands. Having the right tool for the job can save your life — and your ship.
Before going off on any voyage or trial, make sure your ship is adequately stocked for the adventure ahead. You will want to be stocked up on food, wood for repairs, and cannonballs at a minimum. Even the most basic of adventure can go sideways and not having your supplies in order is a recipe for failure. While you’re out exploring, you can also find more supplies on the various islands to restock your reserves for the return trip. Keep an eye out for potentially life-saving materials besides just treasure.
Don’t start Tall Tales until you have time set aside
Tall Tales are longer quests in Thieves that help expand the story of the world and set a crew off to explore a famous legend of some kind. You can generally find them by talking to unique characters you may meet at various outposts.
A Tall Tale is significantly longer than any normal quest in Sea of Thieves , involving multiple steps and a number of voyages to piece everything together. While there are periodic checkpoints in the quest that will hold your progress until you return, even these can take a while to get to. Don’t start a Tall Tale until you have a willing crew that’s able to spend some time on it.
Raids in Sea of Thieves aren’t quite as intimidating as some other games, but just as exciting. These are epic, large-scale events that require mastery of all the systems in the game on top of excellent teamwork to succeed. There are three currently in the game, but the last one is locked until you reach the Pirate Legend rank. Once you think you’re ready for a true test of your skills or are eyeing some of the biggest payouts in the game, give a Raid a try with your crew.
Finding a rare treasure chest is an awesome experience, but some chests are more dangerous than others. There is a set of “cursed” chests that cause various negative effects while they are aboard your ship. Sorrow chests will weep and slowly fill the hold with water. Rage chests can catch ablaze and set the whole ship on fire without warning. Other various cursed chests may appear in future updates as well. If you find an unusual chest, check the name and be ready if it’s going to cause any trouble aboard your ship. It’s also a good idea to get rid of these chests ASAP.
While it can be tempting to hit multiple islands and pick up a ton of treasure, especially as you progress through the game and voyages get more complex, resist the urge to pick up a whole bunch of stuff before turning it in. The more stuff you have on your ship, the harder it will be when you lose it — and you will definitely lose stuff from time to time, due to mishaps like storms or attacks from other players. How much you carry around spells the difference between whether being sunk is a minor inconvenience or a massive letdown.
For that reason, it’s always good to plan voyages ahead of time and to have a good sense of where the nearest outposts are. If you get into an emergency situation, you can head for an outpost and drop crew members off while you sail by, so they can swim onto the shore and turn stuff in, even while the rest of you are fighting. Try to keep your voyages manageable and your routes clear so that if plunderers come, you won’t be cursing the developers at Rare for all your precious booty that wound up at the bottom of the sea.
Don’t skip shipwrecks
While you will constantly be getting new voyages from outpost islands all over the Sea of Thieves , especially in the early going, the rewards will be fairly minimal. There are a few ways to pick up additional rewards while you’re out on voyages, though, and the biggest one is stopping to investigate shipwrecks. You’ll know them by the flock of birds circling a spot in the water, which indicates a sunk ship just below the surface (and sometimes sticking out of it). Swim down and check the holds and captain’s quarters, and you will often find high-level treasure chests and bounties, as well as items you can sell, like spices and tea. Shipwrecks will often yield better rewards than the things you find on the missions you’re trying to complete.
There are a few things you need to be cautious about when diving, though. Shipwrecks always attract sharks within a few moments of your arrival, so the best approach is to dive down with a few crew members to get everything they have quickly. Once sharks are in the water, you’re pretty much too vulnerable to continue your salvage, so go fast. Investigating shipwrecks also leaves you highly vulnerable to attack because they have good rewards and leave you anchored in the middle of nowhere — so make sure you keep someone watching the horizon for anyone coming to steal your plunder.
It’s a bit counterintuitive, but if you die or lose your ship in Sea of Thieves , it’s only a few moments before you’re back in the game and at full strength. The only thing that is a pain to replace if you lose it is your cargo — once you sell treasure chests, bounty skulls, or merchant items, the money is yours to keep, and nobody can take it from you. For that reason, you shouldn’t always be afraid to sacrifice your life for the good of your crew or your ship for the good of ruining someone else’s day. If you’re not carrying any cargo, the worst you will suffer is a minor inconvenience. That doesn’t mean you should be reckless, but it does mean that if sending one person as a boarder to slow down an enemy ship could be useful, go for it. Even if they fail or die, they will respawn on your ship within a few moments.
A trick that sometimes gets overlooked is the fact that you can shoot yourself out of a cannon as well as cannonballs. To do that, make sure the cannon is empty, then look at the end of the barrel while standing on the deck to get the option to climb in. If you’re alone, you have to aim the cannon first, since you can’t do it from inside, but if you have a crew, they can do the shooting for you. Firing yourself from the cannon is a quick way to get onto islands you need to search and is also handy in a fight, allowing you to attempt to board a distant ship. You need to practice to get the hang of the distance and arc of how you fly through the air, though, so don’t sleep on trying the cannon out until you absolutely need it.
Two dangerous oceanic monsters call the Sea of Thieves their home; these include the Kraken and the Megalodon. As you continue playing, you’ll quickly catch on to when they are about to strike. Specific music and other environmental warning signs will alert you that they are on your tail.
Gamers who come across these creatures have only two options. If you are fortunate enough to have plenty of cannonballs and muskets, you’ll be able to battle it out. However, keep in mind that these beast battles take a decent amount of time and effort. If you’re not feeling up for it or you simply don’t have enough weaponry, you can retreat if the winds are on your side.
Battling sea monsters is exhausting and time-consuming. If you’re not ready for the double beast showdown, we advise fighting Megalodon first. This encounter is usually easier to manage, and you have an improved chance at winning even if you don’t have a lot of experience. The Kraken, on the other hand, is a more intense battle, especially if you only have a small ship. Once you triumph over one of the monsters, remember to jump overboard after their bodies. This is usually where you can find precious treasure.
Editors’ Recommendations
- Concord beginners guide: 5 tips to get started
- Xbox’s multiplatform strategy is already paying off
- The most common Sea of Thieves problems and how to fix them
- The best Sea of Thieves Easter eggs and secrets
- Is Sea of Thieves cross-platform?

The city-building genre has served a niche audience for the decades since the original Sim City popularized the idea of allowing players to design and manage their own little utopias. With that original franchise on ice, it fell to a newcomer, Cities: Skylines, to take up the mantle as the major player in the genre, and it managed to be a well-received replacement. That title got tons of support from the developers and community, but it finally came time for a sequel to freshen things up. Cities: Skylines II is building on the same foundation as city builders of the past, but it also brings in new features and mechanics that even seasoned city planners will need to wrap their heads around. Whether this is your first time raising a city from scratch or you've poured hundreds of hours into urban design, these are the essential tips and tricks you need to know when starting out in Cities: Skylines II. Picking your plot
The first major choice you will need to make in Cities: Skylines II is where you want to actually go about building your dream society. At launch, the game comes with six maps to pick between, but this decision carries more weight than just aesthetic differences. Yes, each map has its own look that will determine how your buildings, homes, and even vehicles look, but there are deeper mechanical changes you want to plan for.
The PlayStation 5 features a totally unique UI and controller design, unlike the Xbox Series X. Although the change is for the better, Sony doesn't explain many of the features hidden within the depths of the settings menu. From automatically setting your difficulty in games to taking advantage of activity cards, our guide to the top PS5 tips and tricks will help you get the most out of your new console.
Get the most out of your PS5
There's no better feeling than booting up a new console and experiencing all the cool features and options available to you. On the flip side, some of the best parts of a console like the Xbox Series X are not automatically presented to you. You could just accept the system as it is and get used to it, but why ignore all the customization options and enhancements you could be enjoying with just a few tweaks?
We get that navigating a console's systems, especially if you're new to the ecosystem, can feel backwards and unintuitive to say the least. Rather than try and dig through layers of menus on your own, we've compiled a list of the best tips and tricks you should know about to get the most enjoyment out of your new Xbox Series X console.
Sea Of Thieves: Treasure Vault Voyage Guide

Your changes have been saved
Email is sent
Email has already been sent
Please verify your email address.
You’ve reached your account maximum for followed topics.
“I Had To Reverse Engineer Isildur” Says The Rings Of Power’s Maxim Baldry
Civilization 7, despite all its risky changes, is gorgeous, chinese landmarks are offering free entry to players who beat black myth: wukong.
An all new pirate adventure awaits you in Sea of Thieves as part of the latest monthly update. If you and your crew are itching to complete the new Treasure Vault Voyage , we'll make sure your ship sails true.
As part of the September update to Sea of Thieves , a new type of voyage has been introduced called the Treasure Vault Voyage. This quest will task you and your crew with locating a special vault key you can use to plunder a massive stockpile of treasures from the Gold Hoarders. While it sounds like a piece of cake on paper, this new voyage will be the ultimate test of your crew's teamwork. Here's everything you need to know about the Treasure Vault Voyage so you and your mates can sail off safe and sound with the loot.
Sea Of Thieves Treasure Vault Voyage Guide
To pick up this voyage you and your crew will first need to speak to the founder of the Salty Dogs Lorenna. She has replaced Duke as your quest giver for all black market missions - which includes the Treasure Vault Voyage - while he's gone. Gather your crew, vote on the mission, and you're ready to begin.
Related: Sea Of Thieves Is Adding Dogs To The Pack In Next Update
Find The Treasure Map Pieces
The first step of this quest is to gather up all the missing pieces of a treasure map using the Golden Wayfinder compass. This will point you to where the scraps of map are buried on the island. This first step is fairly simple, and shouldn't take you and your team too long to put the full map together.
Retrieve The Key
Once the full map has been restored, you can set sail to this island and easily dig up the key. At this point your quest is technically complete if you decide to take the key back to the Gold Hoarders in exchange for a somewhat decent reward of gold. Or, if you would rather play the role of a pirate and go for the big score, you can take the key and attempt to find the vault for yourselves.
Find The Vault
There isn't just one vault in Sea of Thieves, but six. Each key only corresponds to one of them, so you'll need to read the inscription on your specific key to figure out which vault you need to take it to based on the name. Also note which kind of vault key you find. Gold keys will open vaults packed with the most gold, silver slightly less, and stone the least.
Once you have found the correct vault, the real challenge begins. The moment you use the key and open the door a timer of around three minutes will start, and when it runs out the doors will seal shut and the chamber will fill with water. Anyone stuck inside will find themselves in a watery grave. While the entire place is jam packed with gold and loot, the best reward is locked away behind a devious puzzle. Just remember you're on a strict time limit.
How To Get The Chest Of Ancient Tributes
Once the doors open up, you and your crew need to immediately begin looking for the three glowing medallions among the treasure. They shine brighter than normal loot, but can be anywhere from laying on the floor, to stuck in a pile of gold. Once one is found, take it back to the center alter and slot it inside.
Once the first medallion is placed in the alter an object will appear in the pool when you interact with it. You then need to go to the pillar on the far left and rotate it until it matches that object. Repeat the process for the second and third medallions. However, you may notice that there are four pillars but only three medallions. This final pillar only needs to match the symbol on the medallions themselves.
If you've done everything right, a new door will open up revealing the Chest of Ancient Tributes. Grab whatever you and your crew can and get out of there while you still can. Not only will you get all the treasure you managed to drag out, but a new commendation and set of sails for your trouble. Plus, you get a bonus commendation and sails if you got out with the Chest of the Ancient tributes.
Next: 15 Million Pirates Have Set Sail in Sea Of Thieves
- Sea Of Thieves
Sea of Thieves Shroudbreaker: how to complete Sea of Thieves Tall Tale for the Mysterious Stranger
Follow our Shroudbreaker walkthrough to fight skeletons, solve puzzles and more in Sea of Thieves Shroudbreaker voyage
While some Tall Tales can be played out of order, every pirate's quest for the story mode begins with the Sea of Thieves Shroudbreaker chapter. This introductory act sets the stage for the magical world in Sea of Thieves that is soon to unfold. If you're wondering how to complete the quest, we've got a complete guide to the Sea of Thieves Shroudbreaker for you right here.
Starting the Shroudbreaker quest

To begin ‘The Shroudbreaker’ questline, you’ll want to head over to one of the Mysterious Strangers, who are located inside the Outpost Taverns across the Sea of Thieves. At their side, you will find a book and a voyage for you to vote on. Vote on the voyage and a book will then appear in your map radial for you to look at.

You’re not done here yet though. Before you leave, listen to what the Mysterious Stranger is saying. They will tell you about a lost island beyond the Devil’s Shroud, an artefact known as the Shroudbreaker that can part the deadly mists, and The Wreck of the Magpie’s Wing, a ship that perished in search of this device. After they’ve finished talking to you, leave the tavern and return to your ship.
Where to next?

To find out where the Magpie’s Wing is located, you’ll need to read the book in your map radial. Select the book, and flick through the pages. It will tell you that the Magpie’s Wing sank somewhere between Crooked Masts and Crook’s Hollow, taking the ship’s log book down with it.

Mark the midway point between the two islands on the map (N13) and sail over to the spot to discover an uncharted island. A little off the north west coast of this island, you’ll find the remains of the Magpie’s Wing. Locate the Captain’s Quarters and pick up the ship’s log to add some more pages to your book.
Sunken treasure

These new pages will recount the last days of the ship. Use it to retrace its movements. You don’t need to go to each individual island listed here. Instead, simply use your ship map to follow the path it describes. The book will mention that they dumped a chest somewhere off the coast of an island. The specific island you need to go to will change from pirate to pirate, with our book taking us to Lookout Point.

Sail to the island on your map and swim below the surface of the water in the direction outlined in the book (north for Lookout Point). You should see a flashing item in the water. Swim to it and you’ll discover a chest. Take this chest back to your ship and open it up in order to grab some new pages and a totem. Store the totem safely, as if you should lose it you’ll have to start this quest all over again. Depending on what totem you have, the next steps in the quest will differ slightly.
Finding where to use the totem

Open your book up and there should be an outline of an island in between a bunch of other shapes on the brand-new page. Use your ship map to identify the island from its shape and sail there. If you’re having trouble, here is the complete list of possibilities in order to help you out:
- Boar Totem – Devil’s Ridge
- Scarab Totem – Crook’s Hollow
- Snake Totem – Mermaid’s Hideaway
- Shark Totem – Kraken’s Fall
- Moon Totem – Crescent Isle
- Crab Totem – The uncharted island at N13
Once you arrive at your island, what you will then need to do is identify where to place your totem. This will be next to an area painted with a symbol that matches your totem. Place the totem in the slot and a hidden passageway will open to a secret chamber.

Shroudbreaker water puzzle

Upon entering the secret chamber, you’ll encounter a table with four unlit braziers and some totem poles along the back walls with symbols painted on them. Don’t touch anything just yet though. Instead, take out your book and look at the symbols on the remaining page. There should be three rows of four to reference.

Once you’ve got them memorized, light the braziers and rotate the middle section of each totem along the back wall to recreate the lines from the book. Once you’ve finished each line, enter it into the table, then quickly start on the next one. As soon as you begin solving the puzzle, water will come flooding into the room, so you need to be fast when doing this. Finish them all and the water level should subside.
Finding the Shroudbreaker medallions

After completing the water puzzle, observant players will notice that are three empty spaces on the front of the table, where it looks like some medallions needs to be placed.
Head over to the table and look at the image being projected on top. This is a clue to the location of the first medallion. Each clue will usually display two or more identifying traits to help you locate them. Though we recommend taking a picture of the image on your phone, so that you have something to reference.

Head over to the first medallion location and dig in the spot that is illuminated on the image. If you’re successful, you should uncover a medallion in the sand and a bunch of coral skeletons will emerge. Defeat these skeletons, and then head back to the table to place the medallion, and look at the next image. After repeating this step three times, a door should open, revealing the Shroudbreaker on a pedestal.
Run for your life

To finish the quest, you will need to return the Shroudbreaker to one of the Mysterious Stranger’s at an outpost. Upon leaving the island, however, a wave of coral skeletons will emerge from the ground and attempt to swarm you. Run away and return to your ship, then set a course for the nearest outpost.
Once you arrive at the outpost, hand over the Shroudbreaker to the Mysterious Stranger and they’ll tell you that something is wrong. They’ll then ask you visit Madame Olivia on Plunder Outpost for more information. A prompt should appear telling you you’ve completed the voyage and as a reward you’ll receive the Pirate Lord’s hat and ‘The Shroudbreaker’ commendation. If you want to obtain Magpie’s Wings cannon cosmetic, you’ll need to repeat the voyage 5 times to complete the ‘Footsteps of the Pirate Lord’ commendation as well as unlock the ‘Mercia’s Lost Memories’ commendation.
Completing the ‘Mercia’s Lost Memories’ quest
In order to unlock the ‘Mercia’s Lost Memories’ commendation, you will have to visit 5 islands and interact with the journals that can be found there. Also, as a word of warning, you can only complete this quest while ‘The Shroudbreaker’ Tall Tale is still active. The locations of these journals are as follows:
N13 uncharted island - On the north west beach in the sand.
Ancient Spire Outpost - Climb the north spire of the Outpost. The book is in a cave in the middle of two burning dishes.
Devil’s Ridge - Next to the north cannon on a cliff. The book is to the left.
Thieves’ Haven - The book is inside of a crate, in an abandoned hut on one of the interior beaches.
Plunder Outpost - The last journal is on Plunder Outpost, next to the Gold Hoarder’s tent. Look for the makeshift shelter made out of a rowboat and the book is nearby.
Sea of Thieves tips | How to fish in Sea of Thieves | Sea of Thieves Sea Dogs | Sea of Thieves Tall Tales | Sea of Thieves animal locations | Sea of Thieves pirate legend guide | Sea of Thieves gold guide | How to defeat a Sea of Thieves kraken | Sea of Thieves Gold Hoarders guide | Sea of Thieves Merchant Alliance guide | Sea of Thieves Order of Souls mission guide | Sea of Thieves skeleton fort guide
Sign up to the GamesRadar+ Newsletter
Weekly digests, tales from the communities you love, and more
Jack Yarwood is an experienced freelance writer and investigative journalist, with bylines on a variety of publications which include GamesRadar+, PC Gamer, Polygon, IGN, Fanbyte, and more. Jack specializes in reporting around the tech, arts, and entertainment sectors.
How to play Sabacc in Star Wars Outlaws
Indiana Jones and the Great Circle devs are "thrilled" to bring the game to PS5, which won't be too hard because it was made with multiplatform tech anyway
How get your Star Wars Outlaws pre-order bonus and Ultimate edition outfits
Most Popular
- 2 Star Wars Outlaws review: "An exceedingly fun Star Wars game that's hindered by poor stealth systems"
- 3 Madden 25 review: "A good game, but not a great one"
- 4 Black Myth: Wukong review – "A great action RPG that feels like God of War for Chinese mythology"
- 5 Dustborn review: "Almost lives up to its promise as an epic, political road trip saga"
- 3 Kneecap review: "This fictional hip-hop biopic is an unruly mosh-pit of humor and energy"
- 4 The Outrun review: "Saoirse Ronan is exceptional in this affecting drama about addiction and hope"
- 5 The Union review: "Halle Berry and Mark Wahlberg elevate a nonsensical Netflix action caper"
- 2 The Umbrella Academy season 4 review: "Like any good family reunion, most frustrations can be waved away, at least in the moment"
- 3 House of the Dragon season 2 episode 8 review: "Excellent sequences can’t save a finale that’s all set-up and no conclusion"
- 4 Batman: Caped Crusader review: "A reinvention of a classic"
- 5 House of the Dragon season 2 episode 7 review: "Brutal, bloody spectacle and a chills-inducing ending, but a victim of the season's odd pacing"

Sea Of Thieves: How To Complete A Sea Fort
Quick links, how to complete a sea fort encounter, what to do with a sea fort.
Sea Of Thieves has so many destinations for pirates to sail to, and each one comes with new opportunities for adventure and plunder. Much like the Skeleton Forts that are scattered across the world, Sea Forts are full of treasure and violent, sword-slashing, trigger-happy phantoms.
Sea Of Thieves: How To Obtain Every Curse
So, what's the deal with these Sea Forts? How do you clear them out and get all the treasure that's stashed away inside their various nooks and crannies? Well, we're going to tell you everything that we know about Sea Forts so you can maximize your haul of ghostly gold.
Updated December 25, 2023, by Sean Murray: The Ancient Gold Fortress in Sea of Thieves is calling to adventurous captains just waiting to plunder it. That's why we've updated this guide with improved formatting, more breakout tips, and links to other helpful Sea of Thieves topics. Arr.
As of this writing, there are currently 6 Sea Forts with the Ancient Isles , Shores Of Plenty , and Wilds regions of the map each containing 2 apiece. This is the full list of them so far:
- Ancient Gold Fortress
- Old Brinestone Fortress
- Imperial Crown Fortress
- Royal Crest Fortress
- Mercy's End Fortress
- Traitor's Fate Fortress
The key difference between Sea Forts and Skeleton Forts is that Sea Forts don't require a world event to be active . When you sail to a Sea Fort, it will always be full of enemies to fight and treasure to loot unless another crew gets to it first.
When you arrive at a Sea Fort, you'll immediately be shot at by multiple cannons . Their aim is usually pretty terrible, but be ready to repair your ship's hull and bail out some water just in case. Once you get into the fort you'll be attacked by mobs of phantoms . Shooting them with a Blunderbuss or slashing them with your sword are effective ways of dealing with them.
There's a good chance that they'll drop ammo pouches when they're defeated, so you shouldn't have difficulty keeping your guns loaded.
You'll have to fight multiple waves of phantoms before the Captain Of The Fortress - which is the Sea Fort boss - will show up. There doesn't seem to be much difference between a regular phantom and the Captain other than it has more health and is slightly stronger . Continue to blast it with guns or wail on it with your sword, and you should eventually beat it and hear the triumphant music indicating that you've captured the fort.
Sea Of Thieves: How Captaincy Works
Upon defeat, the Captain Of The Fortress should drop the Fortress Treasury Key that you can use to open the treasury full of phantom treasures. Inside you should find multiple Chests Of The Damned, Skulls Of The Damned, and Ashes Of The Damned that can be sold to their corresponding trading companies. There will also be various regular chests, skulls, crates, and artifacts along with piles of gold that you can pick up.
In addition to the treasury, the top floor of these Sea Forts will have a store room with extra treasures that can only be opened if you have the Fortress Store Room Key . To find this, you need to rummage through the fort and locate it . There will be many cupboards, storage chests, and other hidden compartments that you can open that may contain stashed away treasures or gold pouches. The Store Room Key will either be in one of these or will be lying on a table.
Once it was even found just sitting on the ground .
You'll also notice a prison cell near the treasury that's currently locked. It'll tell you that it requires the Prison Cell Key to open, but as of right now, no one has been able to find that particular key at any of the Sea Forts. Sea Of Thieves is due to have a pirate legend voyage added sometime later, so we're assuming that that voyage may be related to these jail cells. For now, there doesn't seem to be a way to get inside .
After you've cleared all the phantoms and looted all the treasure, Sea Forts can be used as a makeshift base for your crew . Here you can cook multiple pieces of meat on the grill, refill your tankards with grog, fire at other ships using the fort's cannons, sleep in one of the beds, and use the map that's located on the wall. Several barrels are filled to the brim with food, cannonballs, and wood.
It's a good idea to have a storage crate handy , so you can fill it up with everything that the Sea Fort has to offer.
Finally, as with most activities in Sea Of Thieves, there are commendations that you can receive for completing certain tasks . Here's the list of commendations that you can get that are related to these Sea Forts:
Sea Of Thieves: Safer Seas, Explained

IMAGES
COMMENTS
Treasure Map Voyages include a mix of X Marks the Spot Maps and Riddle Maps.X Marks the Spot Maps require players to identify a number of islands from an illustrated map, and use a shovel to dig in multiple X marked locations from the map. Riddle Maps require players to solve 2-4 clues and puzzles, which leads to buried treasure.The Voyage is considered complete once every item has been dug up.
Maiden Voyage Guide. In the past, pirates new to the Sea of Thieves awake in a tavern—having used a grog-infused table for a pillow. Ah, this harkens to where Larinna's story begins in the novel "Sea of Thieves: Athena's Fortune.". Yet, we've never quite known how pirates came to the Sea of Thieves. Even in the novel, not much light ...
Voyages. In Sea of Thieves, your main quests that you can choose from take the form of Voyages. Voyages are undertaken from each of the three Trading Companies, and are how you progress in the ...
Voyages are generally themed around the Trading Company that provides them, sending players in search of treasure, locations or NPCs relevant to the company. Destinations from regular Voyages are typically in the three main regions of the Sea of Thieves, while Ashen Voyages, marked by the singed red edges, will be focused in The Devil's Roar .
A single Voyage might provide you with multiple clues - checking how long a Voyage is expected take before you select it on the Quest Table will give you some idea of how many Items to expect! The Quest Table isn't the only way to get maps, bounties and the like, mind you. They can also be found bobbing about as a Message in a Bottle ...
When purchasing the Captain's Voyages, pay attention to the name, description, and cost. If the voyage has the word 'Commission' in its name, it contains eight quests. If the voyage has the word 'Prized' in its name, it will lead you to more valuable loot. These voyages cost 800 to 1,500 gold. If the voyage's description mentions ...
The end of the Sea of Thieves as we know it is fast approaching! Captain Flameheart's second-in-command, the Servant of the Flame, has hatched a sinister plot to acquire an ancient and powerful relic, the Veil of the Ancients. Once armed with three Veil Stones, the Veil of the Ancients can create a permanent doorway […]
Here are the steps to starting your first Voyage, and every voyage thereafter: Buy a voyage from one of the three factions at an outpost. Enter the captain's quarters on the ship. Find the voyage ...
The big prize in the Sea of Thieves tutorial is a hidden treasure that requires the Old Sailor's Key to open. If you're doing the maiden voyage and haven't found it, you can discover the key to ...
Sea of Thieves doesn't feature a linear progression system, with you picking out voyages from one of the game's three guilds before embarking on them to acquire items that will earn you more ...
Creating Your Character. First things first, you'll need a decent looking mug if you want to be roving the seas. While the game is primarily first person (except when emoting), your character is ...
A Captain's Voyage is similar to the traditional Voyages you can perform with trading in Sea of Thieves. Captain's Voyages are a great way to do a variety of missions all at once. If you have a ...
Maiden Voyage Secret Treasure. 1. Head to the pond next to the shipwreck at the top of the island where you can find the Old Sailor's Key hidden underwater. 2. Head back to the ground level of the shipwreck and look for a hatch (on the right half of the wreck when coming from the beach).
When you initially log in to Sea of Thieves, and awaken from your stupor in the Tavern (as any pirate should), proceed outside and locate Larinna. She's usually leaning against a post near the tavern door. Ask to browse her stock and purchase the voyage called "The Legend of the Sunken Kingdom".
This guide explains how to play Sea of Thieves. We've got all the info you need about the tavern, outposts, voyages, sailing, dying, healing, and fighting.
Maiden Voyage is the Sea of Thieves tutorial quest, known as a Tall Tale in-game, which is designed to teach you the basics of being a pirate.. If you take the time to explore the island, known as ...
1. Finding your first voyage. To get started on your Sea of Thieves adventure, you'll need to collect your first formal voyage. Obtainable from various vendors across the game's world, these ...
The Steps. 1. Log into both accounts on each system. 2. Have your alternate account with no promotions start up a server on a brig. (brigs are fast and easy to manage) 3. Buy as many voyages as you can of the faction you want to do and put down voyages until you get one that sends you to one single island. (for the merchant alliance you will ...
Sea of Thieves found time to add a tutorial mission for pirates first starting out, called Maiden Voyage. It's difficult to overstate just how useful this tutorial is: It's a safe spot without ...
As part of the September update to Sea of Thieves, a new type of voyage has been introduced called the Treasure Vault Voyage. This quest will task you and your crew with locating a special vault key you can use to plunder a massive stockpile of treasures from the Gold Hoarders. While it sounds like a piece of cake on paper, this new voyage will ...
Follow our Shroudbreaker walkthrough to fight skeletons, solve puzzles and more in Sea of Thieves Shroudbreaker voyage Comments When you purchase through links on our site, we may earn an ...
Captain. Insider. 2. The Mercenary Voyage gives you 4 Voyages, A Gold Horder X Marks the Spot, Gold Hoarder Riddle, Order of Souls and a Cargo Run for the Merchant. Depending on which outpost you are on when you vote for the Mercenary Voyage, you always get the same Islands, for example, if you are on plunder outpost, you will get Snake Island ...
Sea Of Thieves is due to have a pirate legend voyage added sometime later, so we're assuming that that voyage may be related to these jail cells. For now, there doesn't seem to be a way to get ...
Sea of Thieves Guide. Sea of Thieves is an Xbox One console exclusive multiplayer "shared world" pirate adventure game with supernatural elements, created by Rare. It's also available on PC. The ...
Well then, the Sea of Thieves is calling! Inspired by the hit video game, Sea of Thieves: Voyage of Legends is a competitive seafaring game of piracy for 2-4 players. Explore the high seas with your friends in voyages packed with danger and excitement, but don't forget - only one of you can be crowned a Pirate Legend...